

ggrieco
-
Posts
276 -
Joined
-
Last visited
Content Type
Profiles
Forums
Gallery
Events
Posts posted by ggrieco
-
-
Thanks Patrick, Albert, John and David,
David, good question. I will be leaving the paddle wheels natural. They have already been oiled but now you have me wondering. I assumed that they were bare wood but I never confirmed it with Kevin. A large section of one paddle wheel was recovered and conserved. It was pretty worn -- the strong currents and the sand in the river scoured everything pretty thoroughly but there is a chance that some finish remained. I'll check with Kevin to see if any evidence of paint may have been found on the original.
-
Beautiful Greg,
Incredible precision! I agree with Tom, I'd love to see some full hull photos as well.
-
Thanks everybody,
I can't tell you how much I appreciate the comments and likes. The building I work in has been abandoned for the summer -- everyone off working on summer projects. This last week I did not see a single person in the building. Great for progress but it is nice to have contact with individuals with the same interests. Thanks again.
Frank, it is your work that has inspired me to strive for clean joinery. Every time I check in on your build I am impressed with your attention to detail and precision.
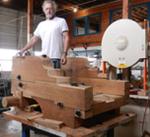
Greg, I was able to do all the planking in two days. I am alternating between this model and the second model. I would glue on one strake with Titebond, clamp it, work on the boiler deck framing for model two, return for the next strake etc. I think I'm wearing a circular trench in the floor of the shop. I watched the This Old House that you mentioned with the pre-fab house. My wife and I were so impressed that we ordered the catalog from O'Conner Homes. I actually mentioned to my wife as we were watching it that working there would be my dream job.
Mark, yes, the machinery is complete except for the chimneys, breaching and steam scrape pipe but those will go in after the boiler deck planking. I still need to and the deck bollards, tiller rope, hatch coatings and capstan. Hopefully, I can finish these up next week.
Cathead, shaping the planking was not necessary. The sheer is so slight that the planks sit nicely with very little bending. The shape is so simple that I feel a little guilty. Bertrand must have been much more of a challenge. I feel like I'm just planking a box.
Once again, thanks everybody.
-
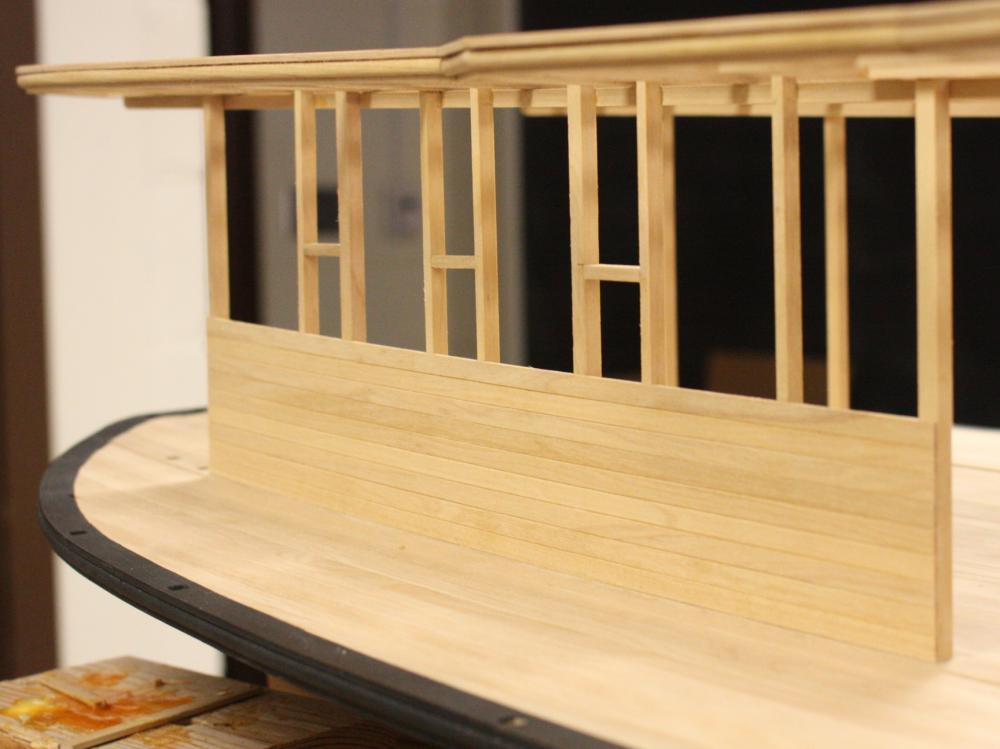
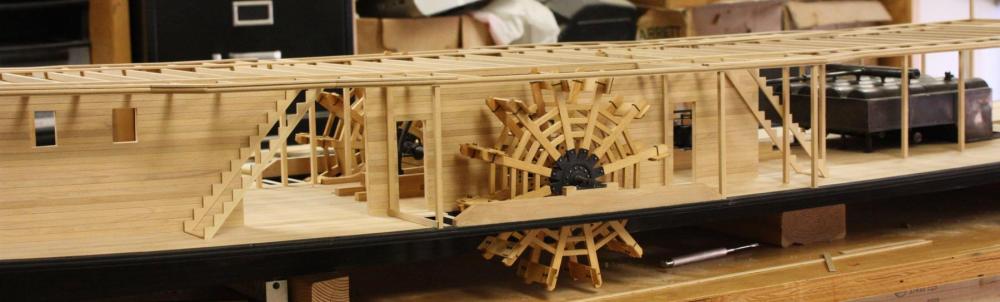
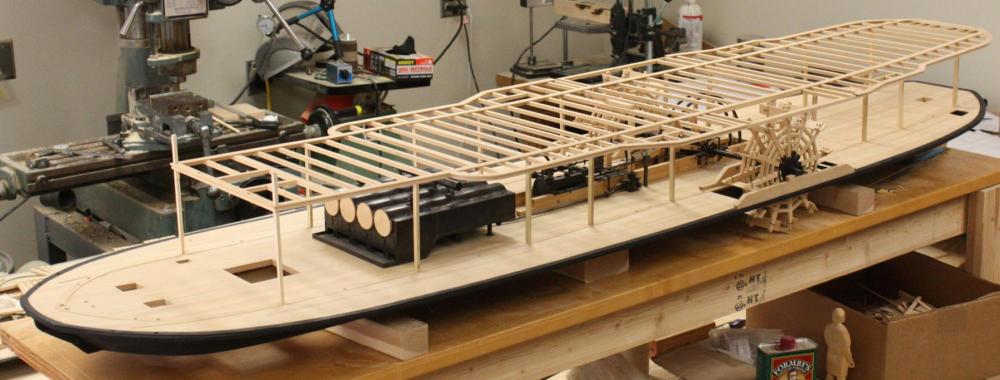
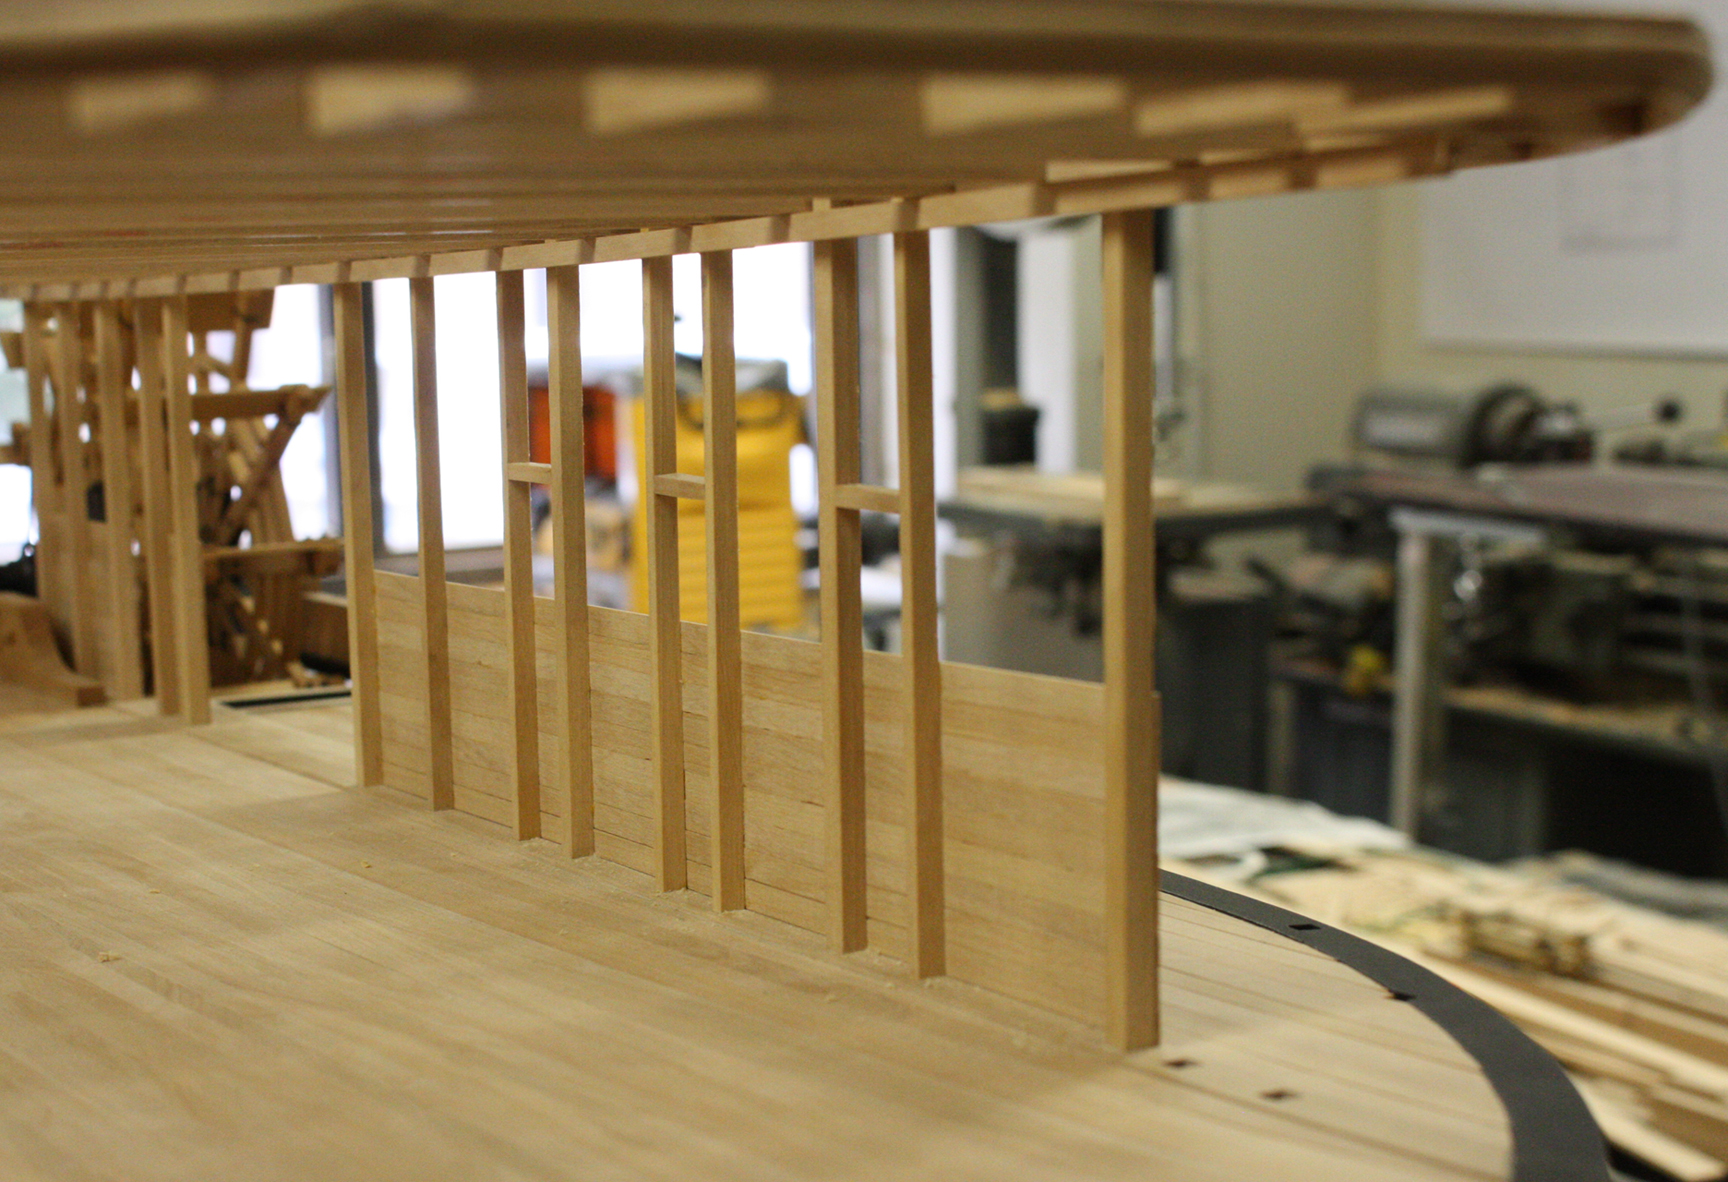
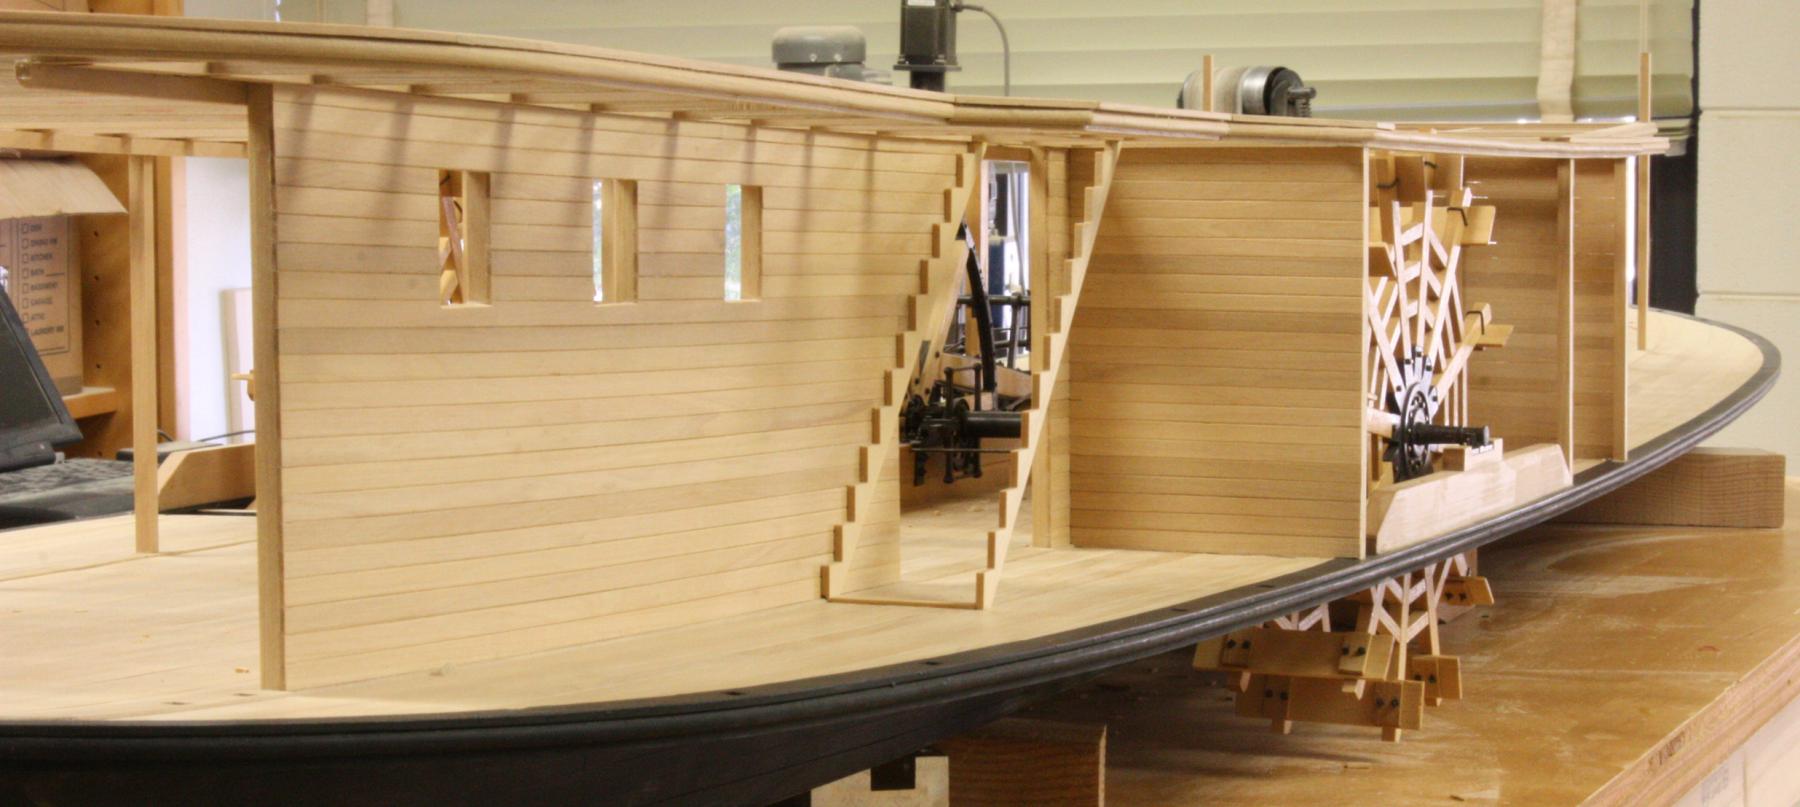
This week I started tying the two decks together with the side planking but, first I had to finish framing out the paddlebox.
Lighter vertical timbers were added between the main posts to frame out the windows and add support to the planking.

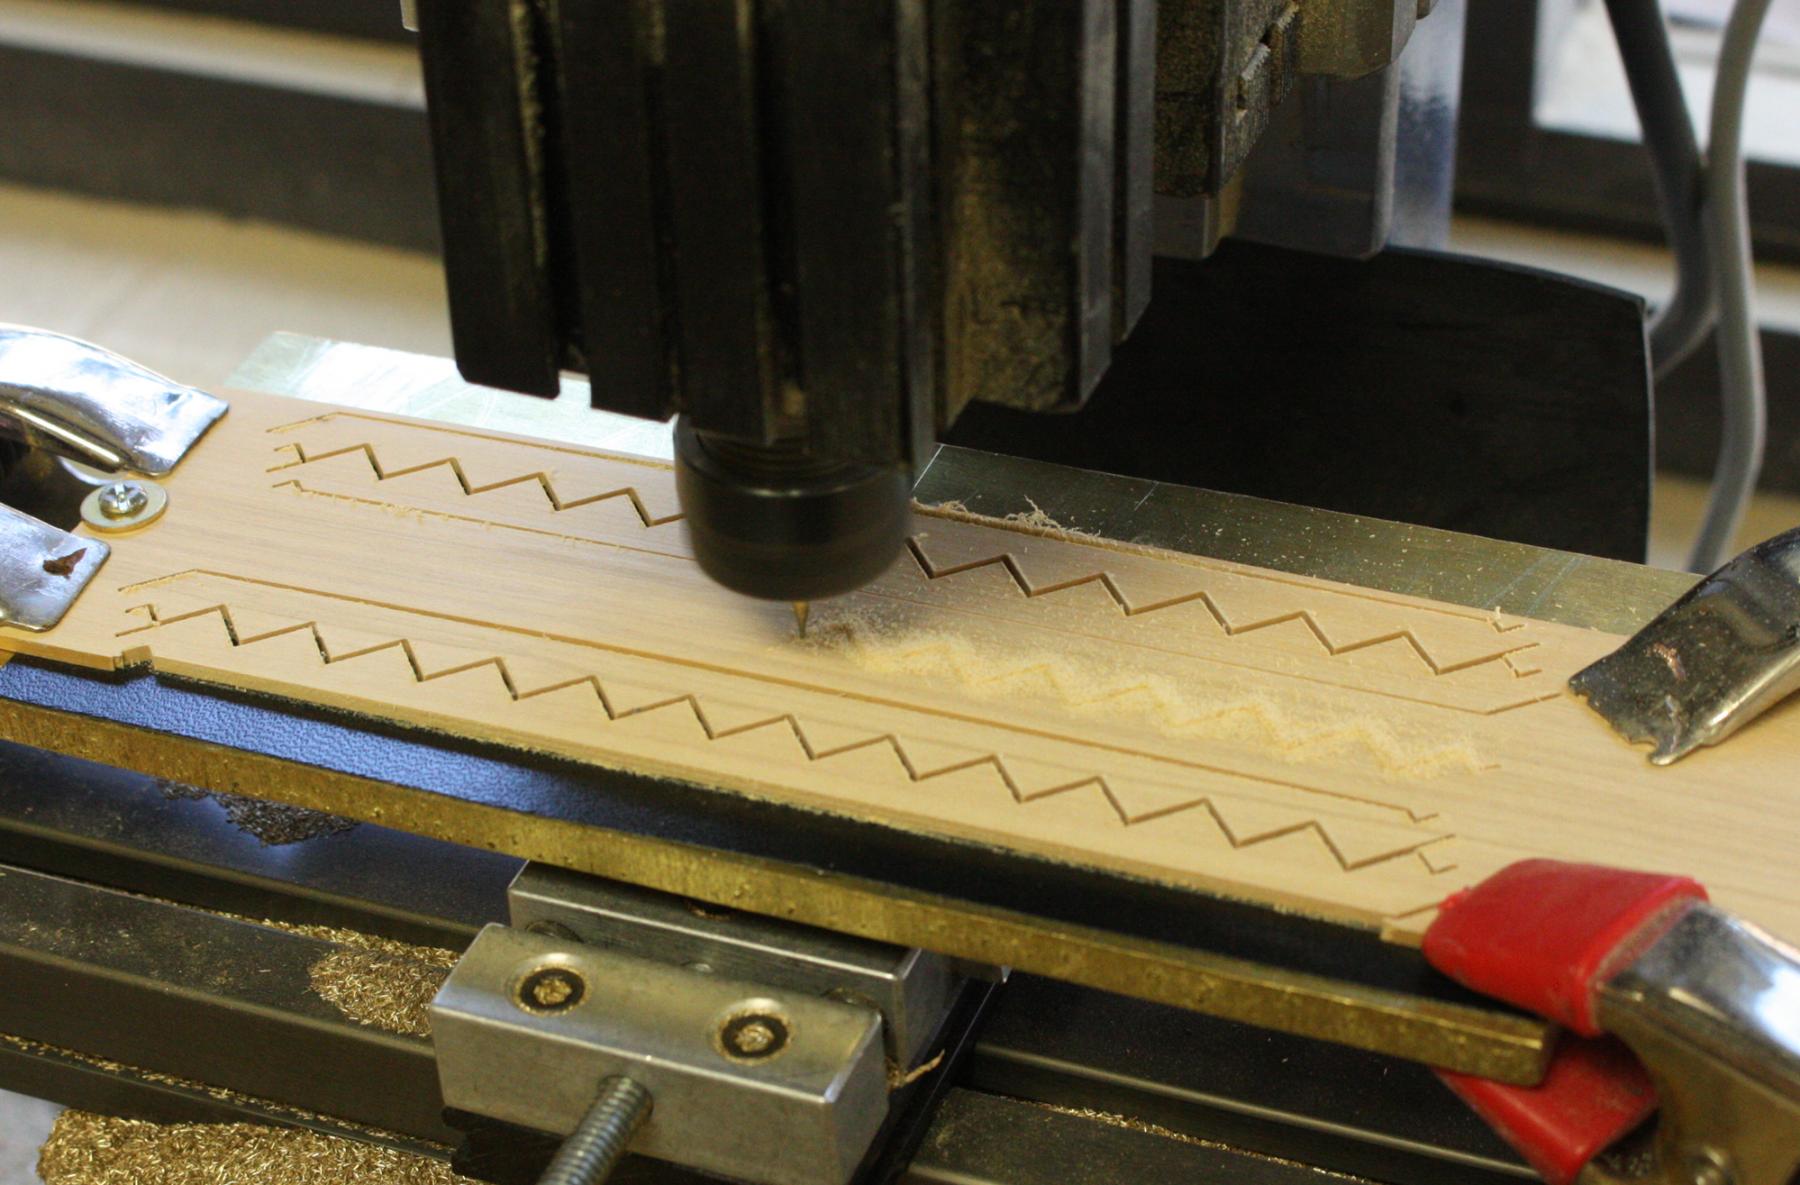
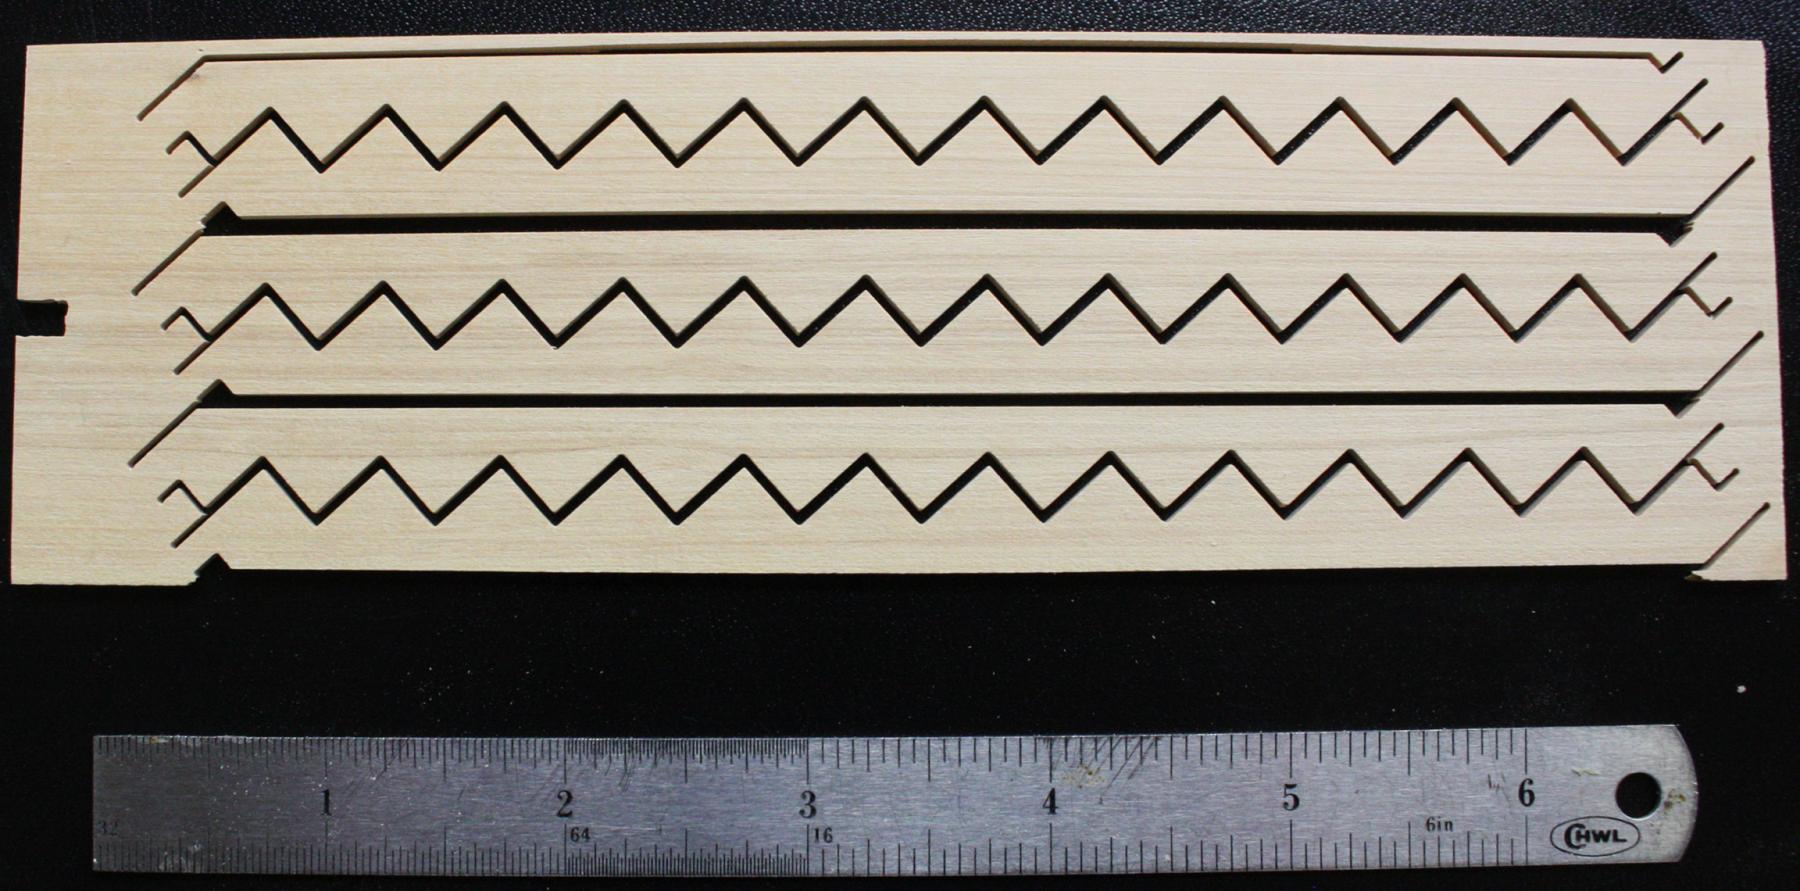
Before I could continue, I had to frame in the stairs. Since all the stringers were exactly the same, I decided to let the mill do the work.


First stringers going in.

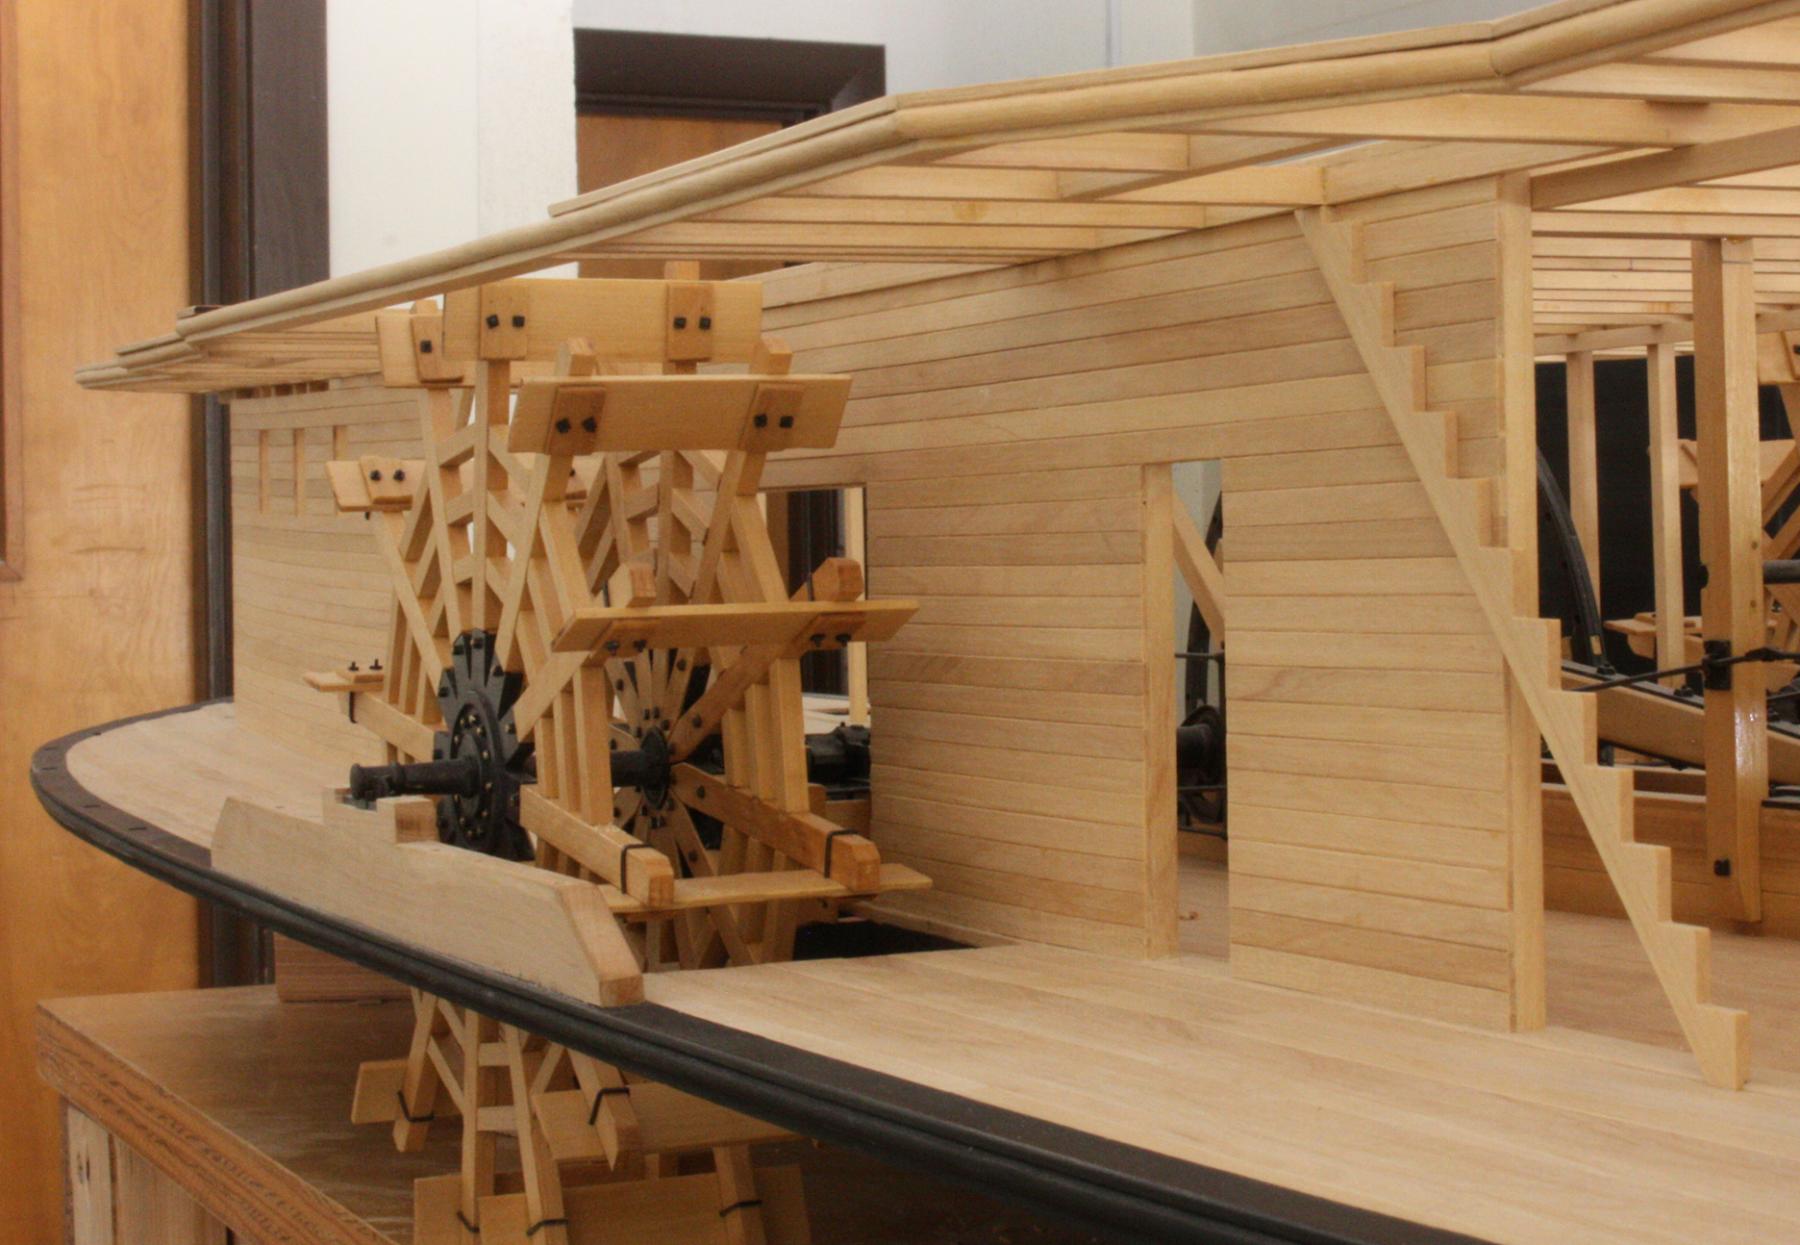
Second stringers and starting to frame the paddlebox and forward deckhouse.

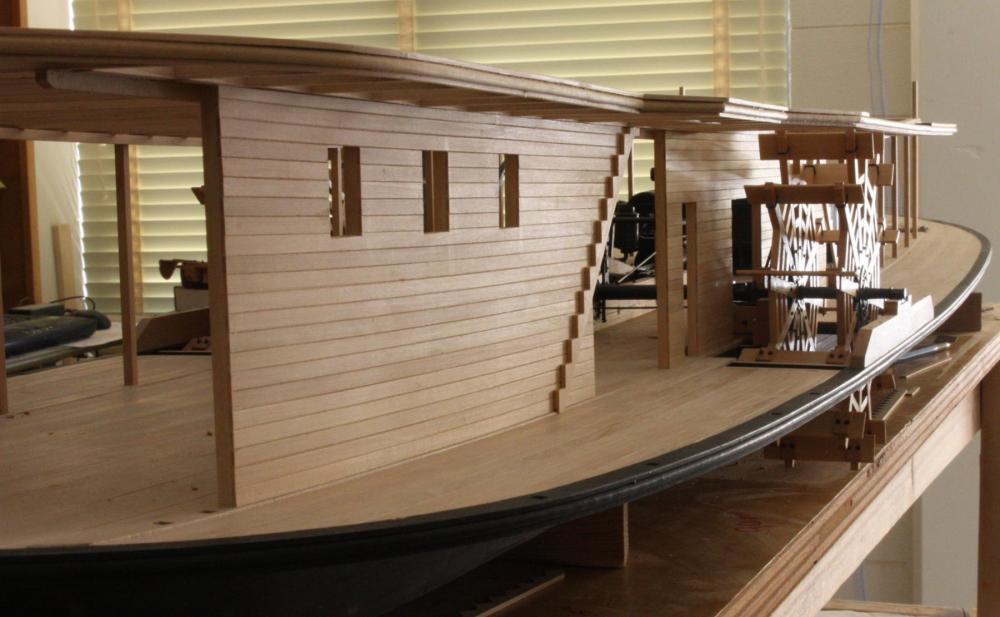
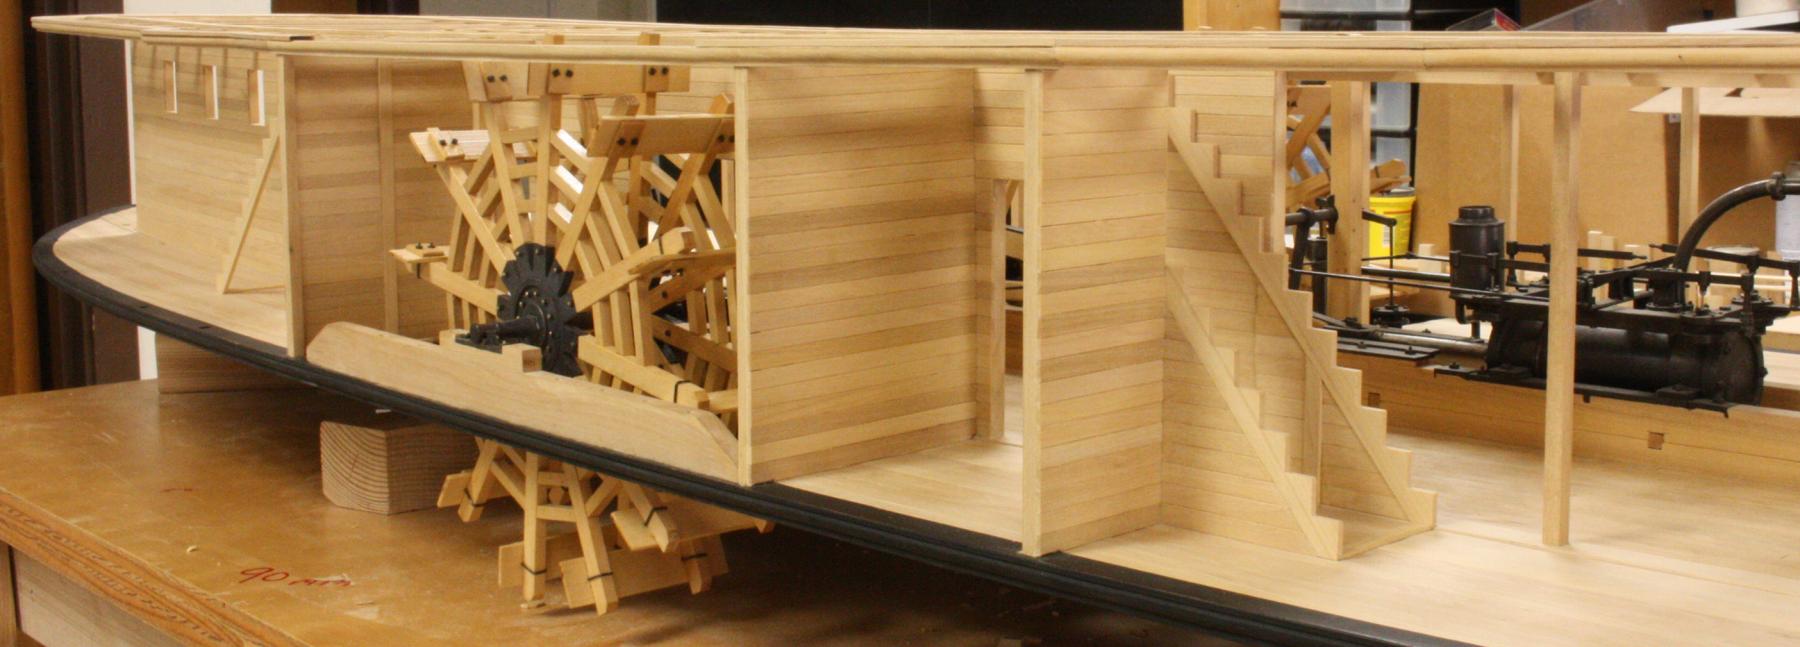
Planking the paddlebox and deckhouse.

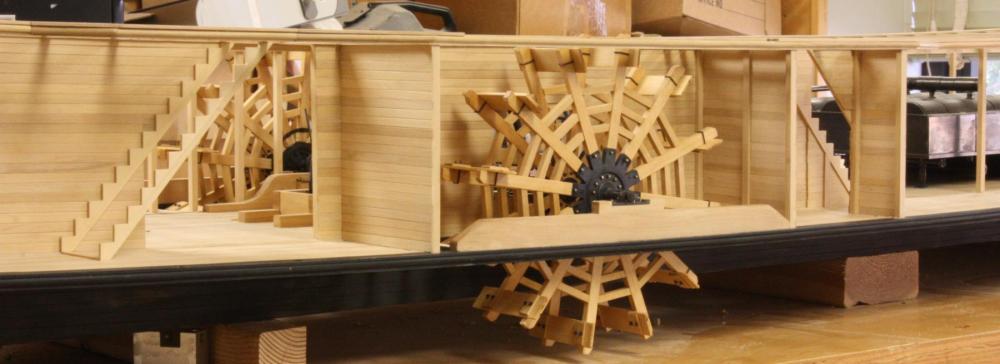
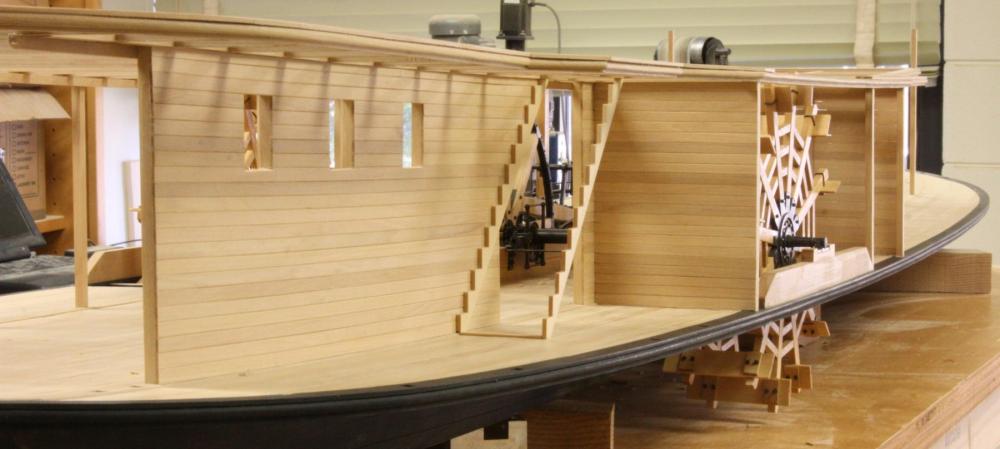

Adding the stair risers and starting to plank the paddlebox.

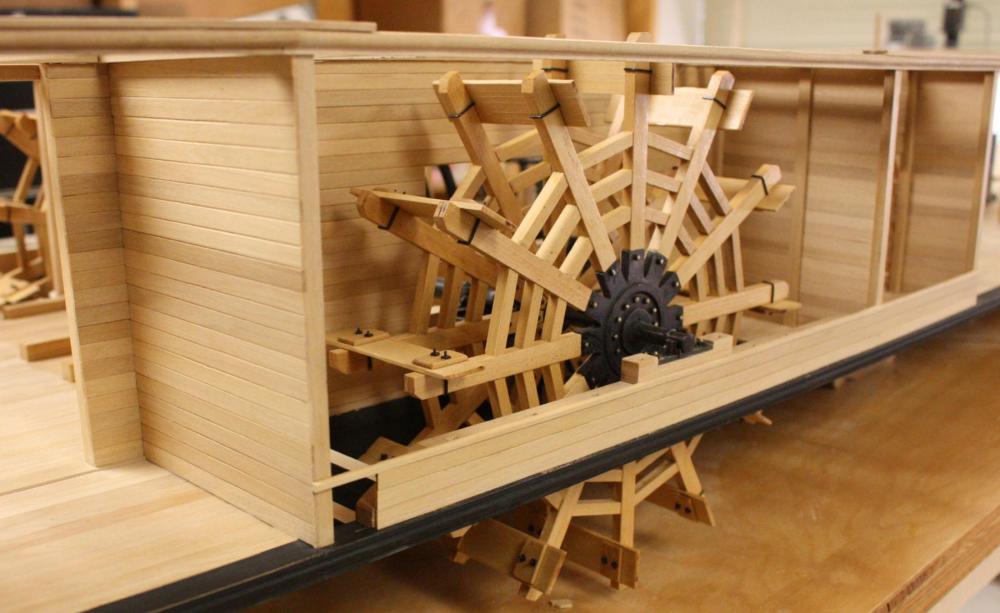
Detail of the paddlebox planking. There were three strakes and then a moulding that continued the run of a short rail that ran the circumference of the deck. The rail, moulding and lower three planks were painted black. All the planking above was painted white.
-
-
Hello Steven,
I've been looking forward to your return. It's good to see you back at it. Looking good!
- Canute, mtaylor, Louie da fly and 1 other
-
 4
4
-
Thanks Albert, Steven and Bob.
I really appreciate the kind comments and likes.
- slow2cool, mtaylor, kees de mol and 2 others
-
5
-
-
-
Thanks Everybody,
Cathead, none of the structure above the main deck survived except the post holes and a piece of the very short rail that ran around the deck. Judging from the framing of the main deck, I'm assuming that the boiler deck clamp was bolted to the posts and the deck beams were bolted through the clamp. Good question about how it was fastened to the longitudinal timbers. If I was going to leave the deck unplanked, I would probably notch them into the deck beams with a shelf half the depth of the timber but, I would just be guessing. Yellowstones contract called for 1 1/2" thick tongue and groove pine for the boiler deck, I think this would have distributed the load on the deck better than the non-grooved planking placing less reliance on the individual supporting timbers. As for fastening the deck planking, Since Heroine's main deck was fastened with nails, I'm sure the boiler deck and side planking were as well. I forgot to mention that the side planking was only on a inch thick. I though about attempting the tongue and groove on the port side where sections would be cutaway just to show exposed edges but changed my mind after milling a piece and realizing how thin the tongue would be.
Frank, for the mounding cutter, l just drilled a 1/8 inch hole in a piece of mild steel and ground to the center line. I milled some strips of boxwood 1/8 x 1/16 inch and dragged the cutter along the strip. The profile was so simple and small that it only took 4 or 5 passes to get a clean shape. As for the hole, I just slowly worked the hole with a square needle file until a test piece of the post fit tightly. I love my Grobet needle files, they really do a great job.
Greg, the planking is Castillo Boxwood as well although, it does look a little more grainy in the photo.
Thanks again to everyone for your comments and likes!
-
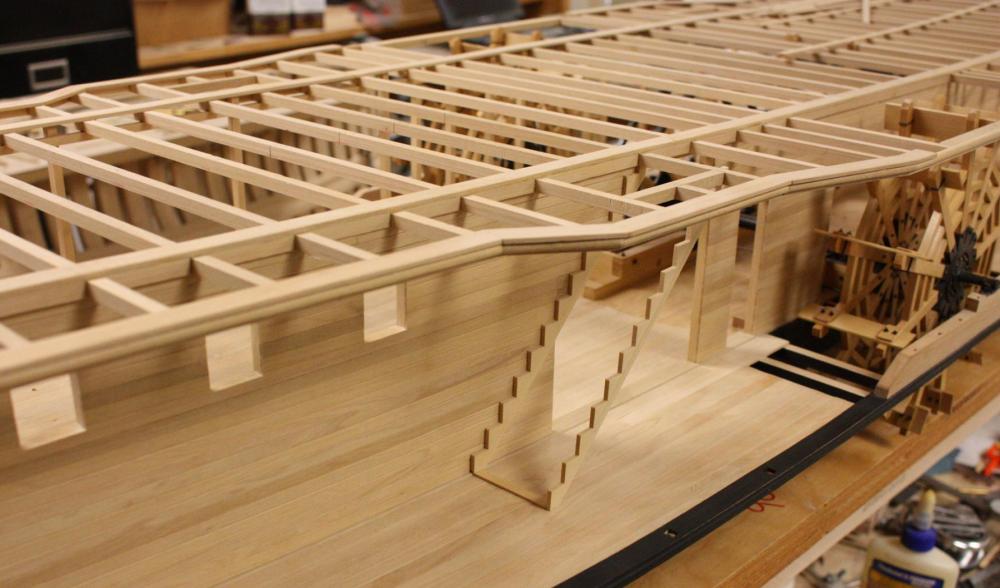
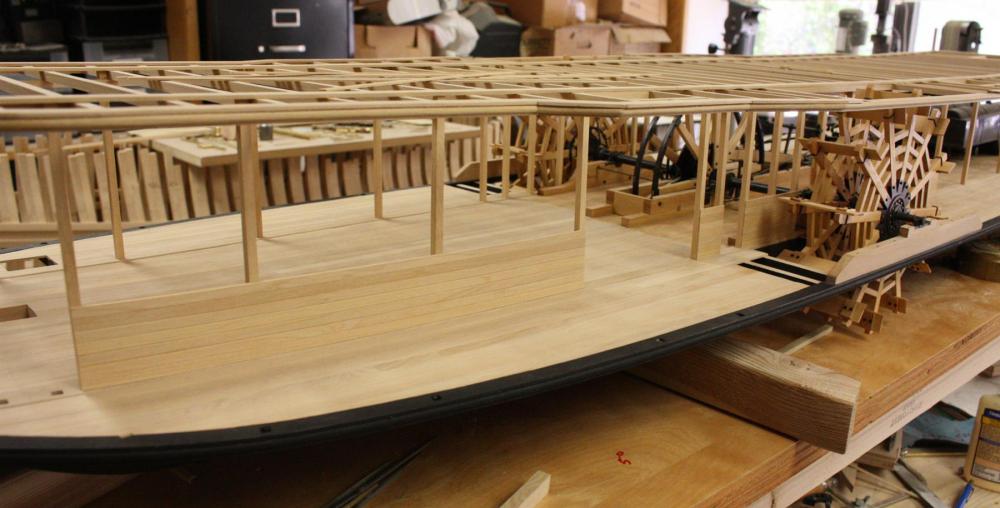
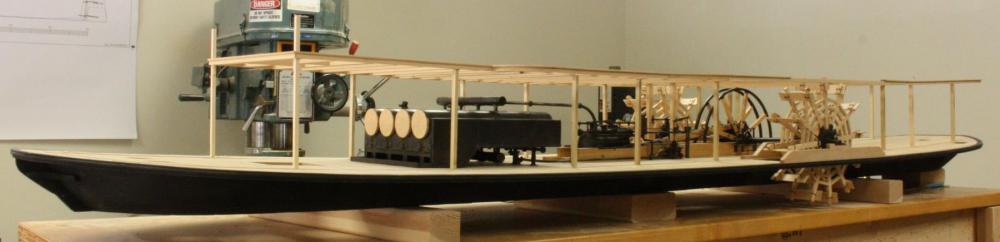
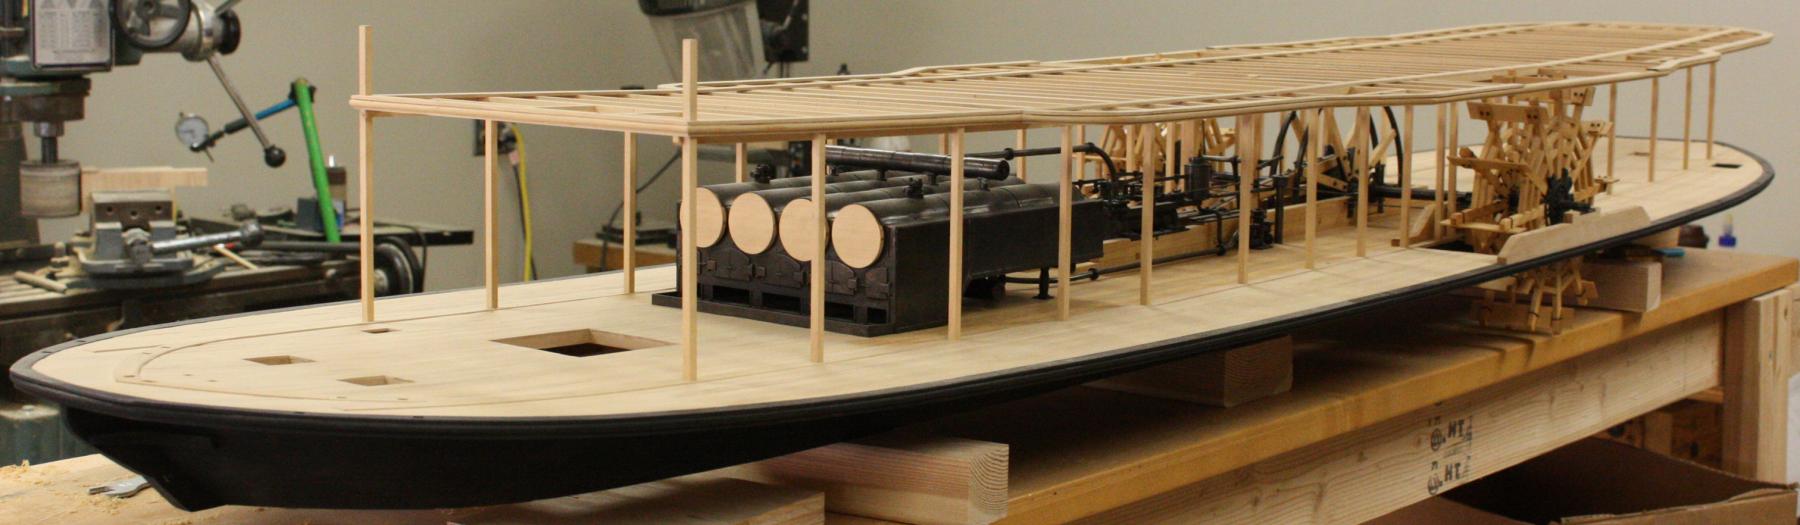
This week I completed the posts for the boiler deck and started planing the planking for the sides. Luckily, unlike the deck, the side planking is of a uniform width and it should go on quickly.
All the posts finally in supporting the boiler deck

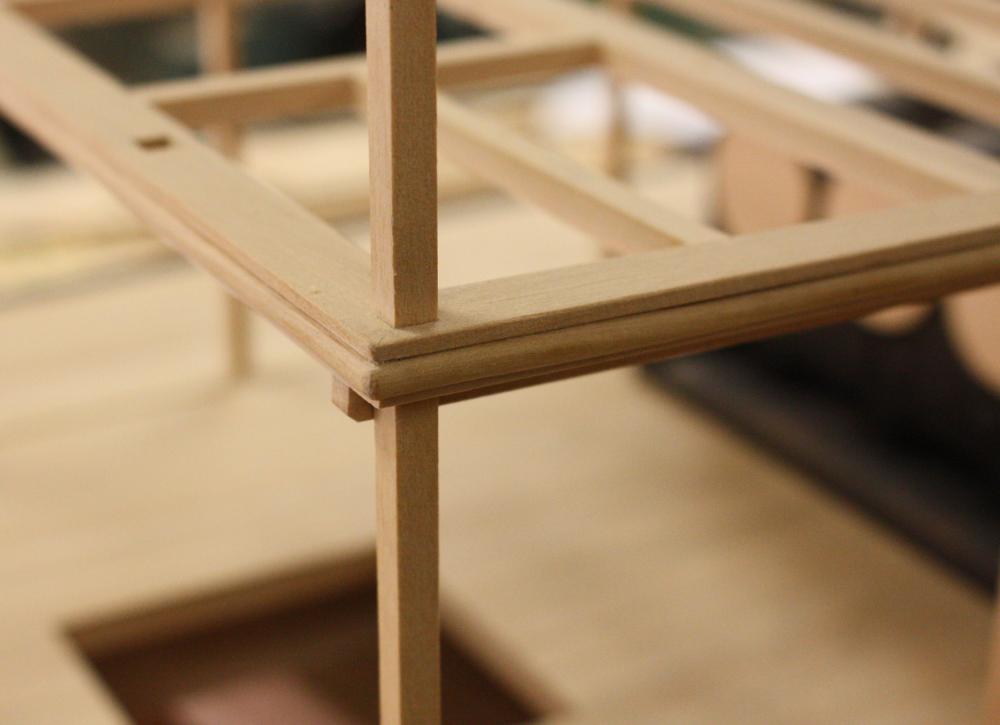
We know for the main deck, there was a nosing that covered the ends of the deck beams that consisted of a one inch thick plank the depth of the beam ends with a three inch diameter half round moulding on the face. I continued with that profile on the boiler deck
The post were more numerous adjacent to the paddlebox.

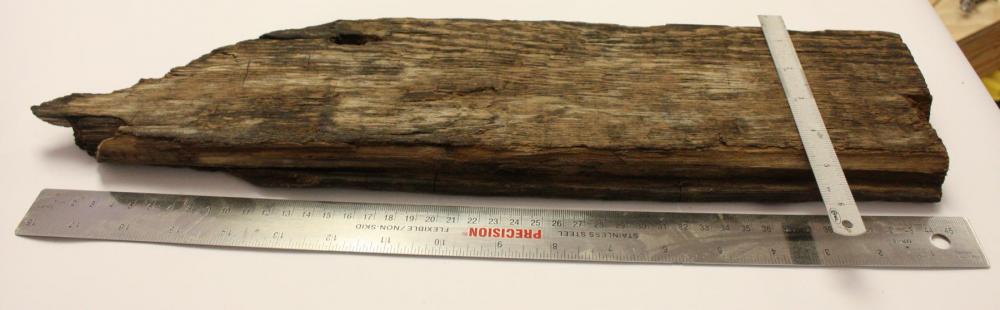
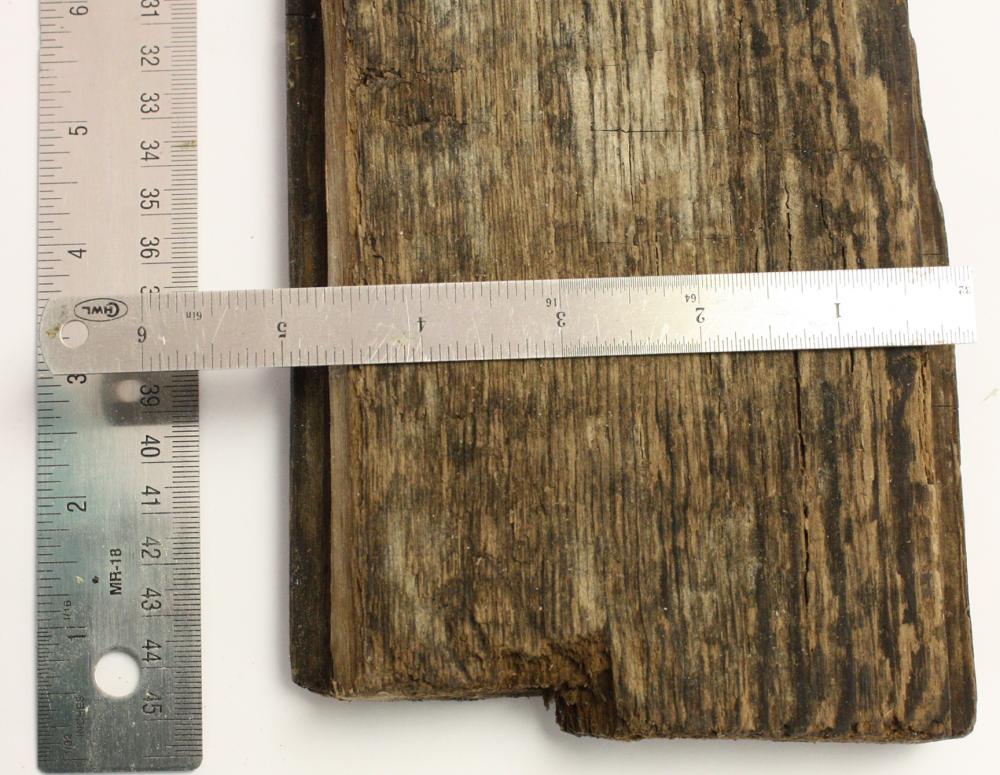
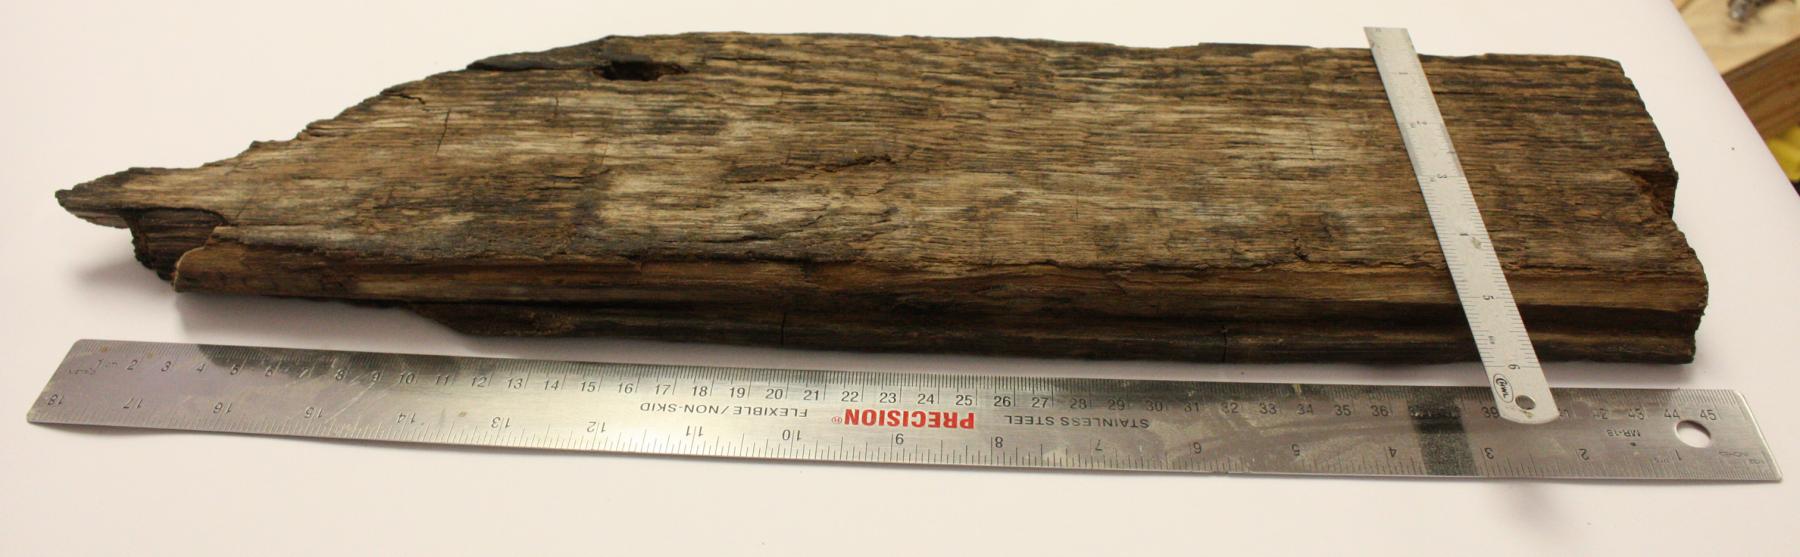
One of the surviving pieces of side planking. This 5 inch wide piece of tongue and groove planking was recovered from the lowere edge of the port paddlebox. It still has the remain of black paint on it.
Starting to plank the sides.
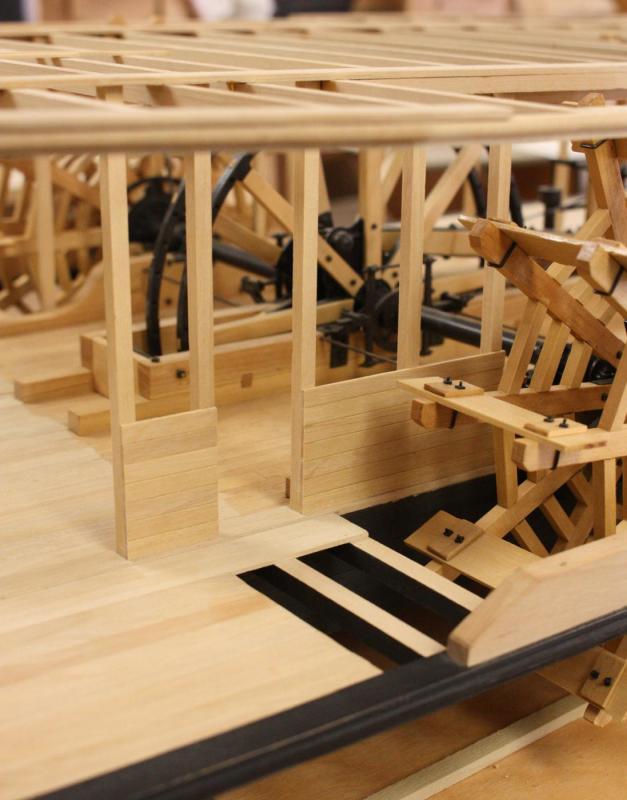
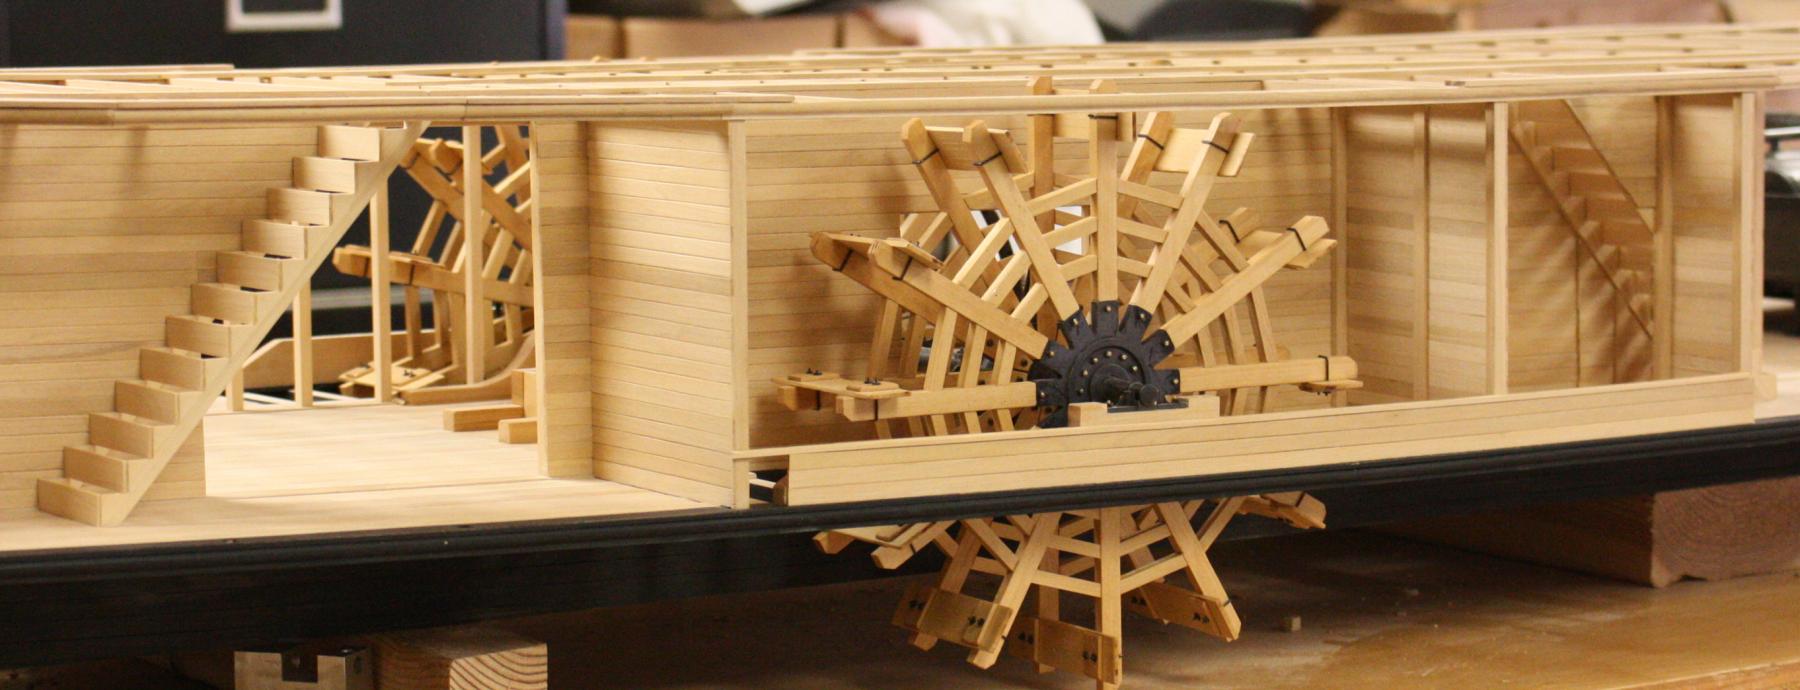
Detail of the doorway into the paddlebox. The posts and nailers for the aft end of the box haven't been added yet. We know the builder intentionally left two planks longer at the foot of the door the rest of the area inside the box was left unplanked to allow water to spill off the buckets.
-
-
Thanks everybody, I've gotten some good advice and a couple different paints to try. I'm definitely going with a flat finish and I've been happy with pigment based Japan colors. Pat, I'll give the Admiralty white a try.
Cathead, sorry, looking back my question was a little vague. I had so many questions that I didn't ask any of them correctly. You were right though, one of my questions was about the proper shade of white for the era. You phrased it much better than I. I've seen flake white, zinc white etc. and have no clue as to which would best represent the period finish. I have a can of Ronan flake white. It is flat and pigment based, goes on opaque with one coat, doesn't raise the grain but is thin enough to show the texture. I love the finish but am not sure if the color is correct. I do like your idea about pastels. I'll test it out on some scrap and see how it works. This should be interesting, I have a few different products and techniques to try. I only wish I had a nice color photograph of Heroine to copy.
Druxey, I wish I had an example. Unfortunately, I don't even have a clear picture of what I need in my mind. Testing out the different options mentioned, I'm hoping that maybe I'll know it when I see it. I'm afraid that, short of actually seeing the Heroine as she was, I'm going to just have to go with my gut.
-
Thanks Mark,
I've enjoyed checking in on Mehmet's builds. I've spent some time on the Turkish coast and his models bring back memories. I'll PM him about what he uses for white.
The techniques page is a good idea as well. I'll take a look. I still have a little time to experiment and I don't mind playing around with different ideas.
-
-
Mark,
I think I'm going to go with slightly weathered. The black I use doesn't penetrate so I can rough it up a bit and the wood shows through. It goes on flat but I can burnish it to a slightly glossy sheen in the less weathered areas. I wouldn't mind if I could get the same effect from the white. I don't like shiney finishes and definitely would prefer flat.
-
Thanks chborgm, druxey, Carl, Kees and Tom. I really appreciate your kind comments and advice.
I was hoping I could get some advice on color. I'm not color blind, just color ignorant. Most of my models are just oiled and if I do use paint it is usually just black. I was hoping someone could give me an idea for an appropriate white that would have been used on boats in the early 19th century. For black I always use Ronan Japan colors and was wondering if one of their whites might have the correct appearance. I am totally at a loss when it comes to color and any help you could offer would be greatly appreciated.
-
Thanks Cathead,
Wonderful reference! These really were interesting vessels. I'm so happy that you have started a discussion about them.
- Cathead, Gerhardvienna, mtaylor and 3 others
-
6
-
Neal,
I have been watching this build for some time and I am amazed how you have made the vessel come alive! A true artist as well as a craftsman.
-
Thanks Frank,
It seems like I learn a new technique each time I check in. Your posts are always very informative!
-
Thanks Frank, Patrick, Nils, Neal, Kurt, Bob, Druxey, Gerhard, Mark, Grant, Greg, Pat and John for your comments and everyone else for your likes. Your comments and feedback are the most rewarding part of this project.
I've been away in Houston all day and haven't had a chance yet to catch up on everyone else's builds but, I look forward to catching up today and tomorrow.
Gerhard, good question about steering in close turns. Few contemporary accounts of the operation of early western river machinery exist and I have never seen a good description of the possible different uses of the clutch mechanism. It does seem that engaging only one paddle wheel would work very effectively for turning the vessel. I would love to know if it was possible to engage a paddle wheel while the main shaft is already in motion or if the forces involved would damage the mechanism. It seems that the wheels could be disengaged while in motion but could only be engaged when the main shaft was stationary. I would really be interested if anyone has any information on the subject.
-
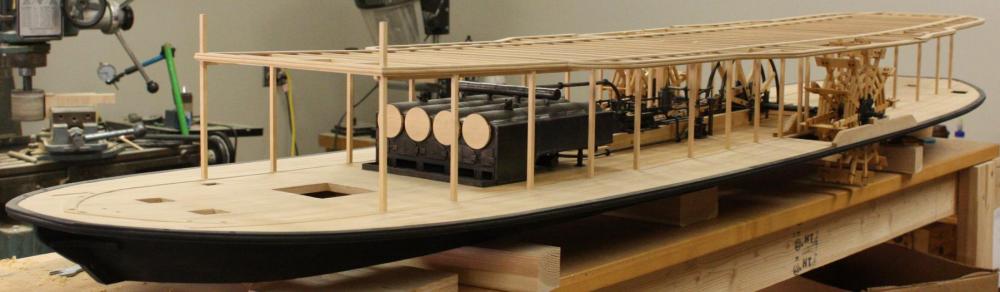
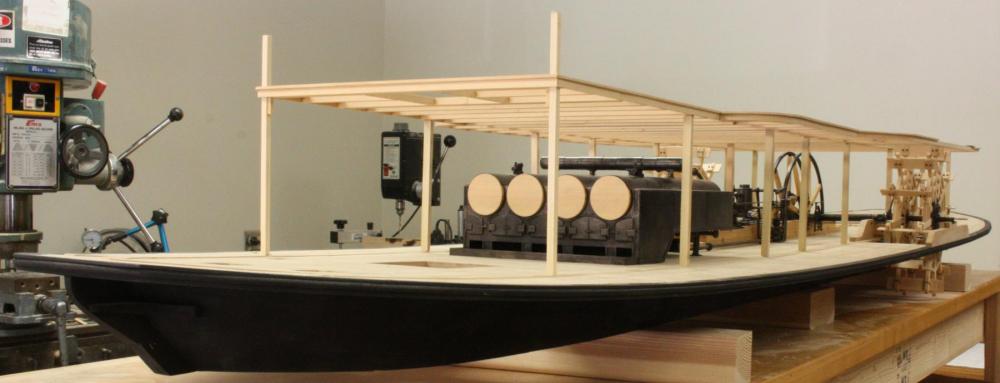
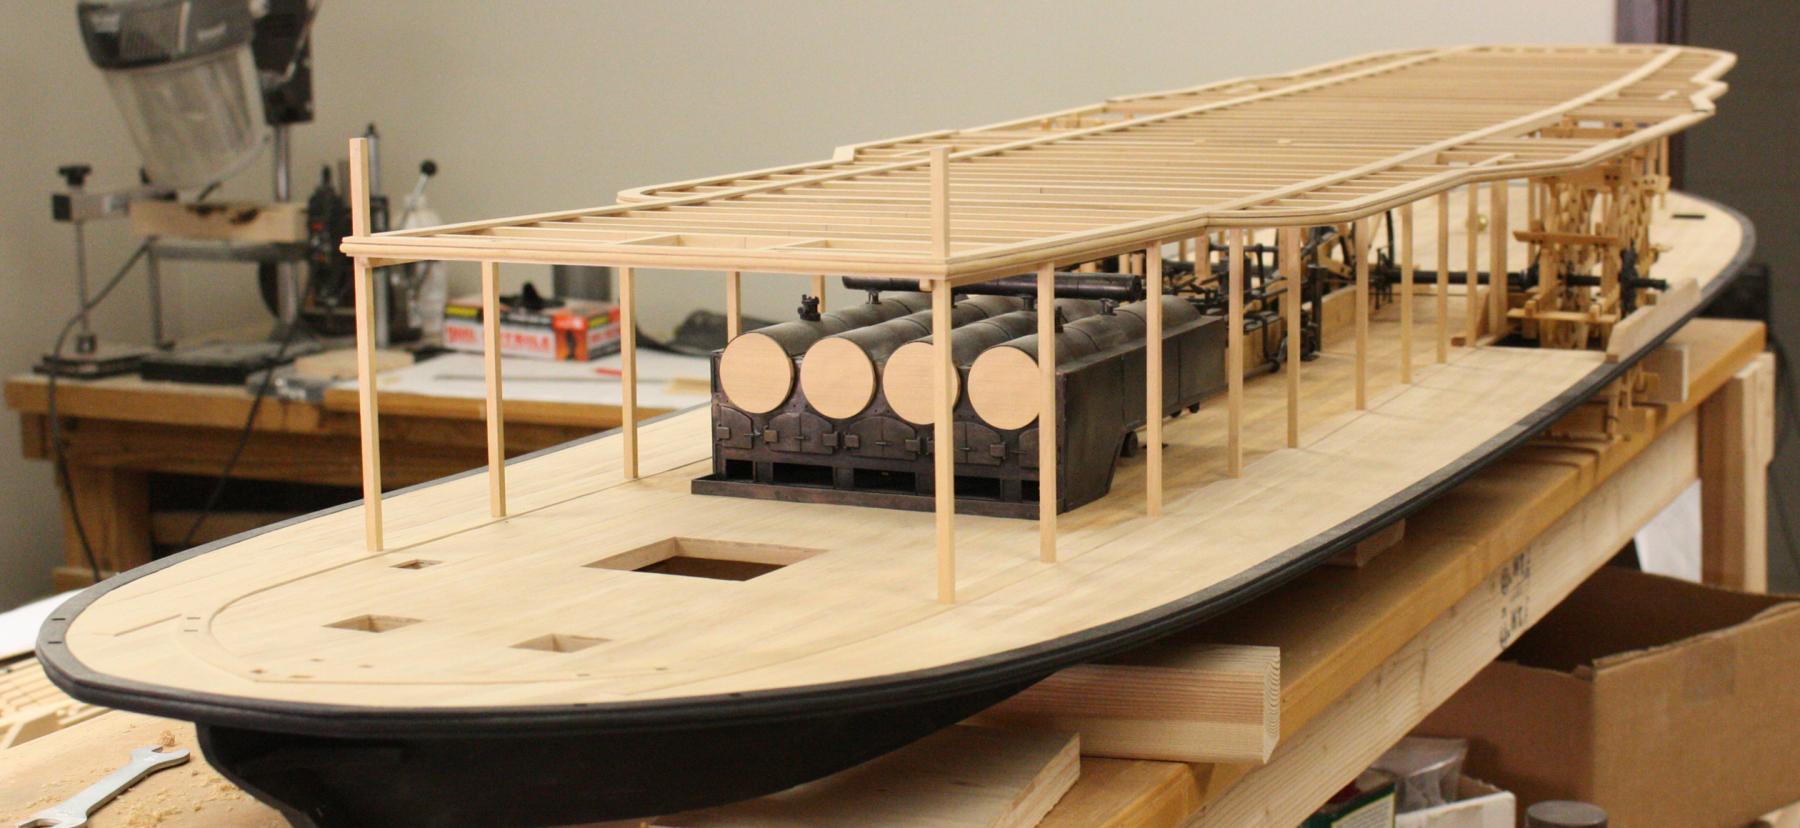
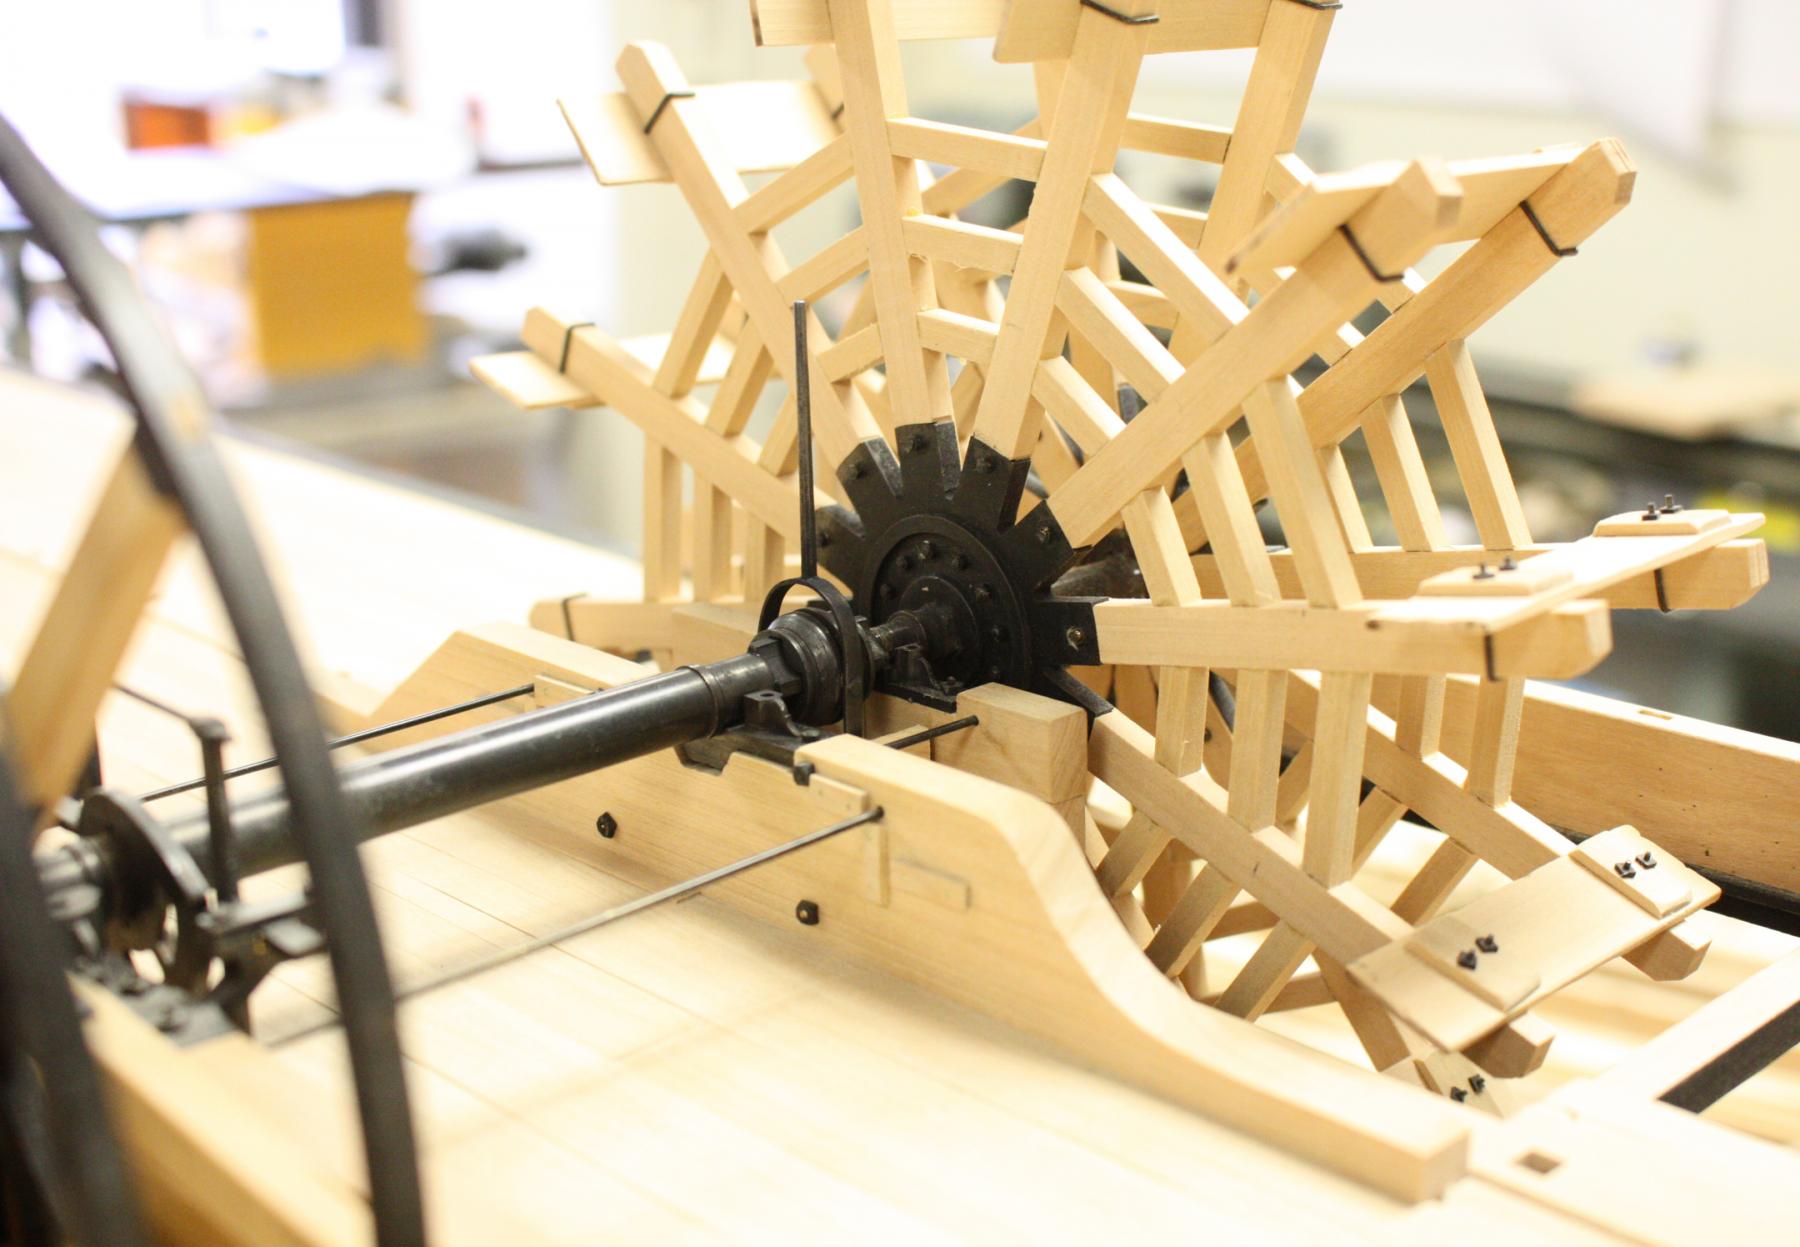
This week I was finally able to finish the last major piece of the machinery. With the paddle wheel clutch mechanism in place I can drop the boiler deck in place. I will miss all the metalwork but, I'm really looking forward to the woodwork.
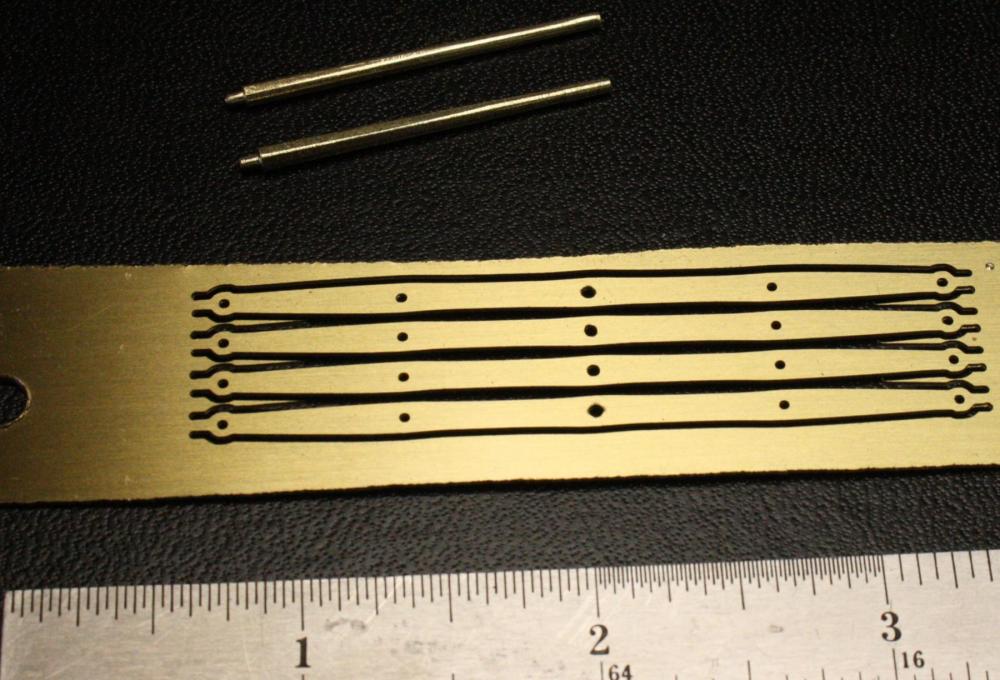
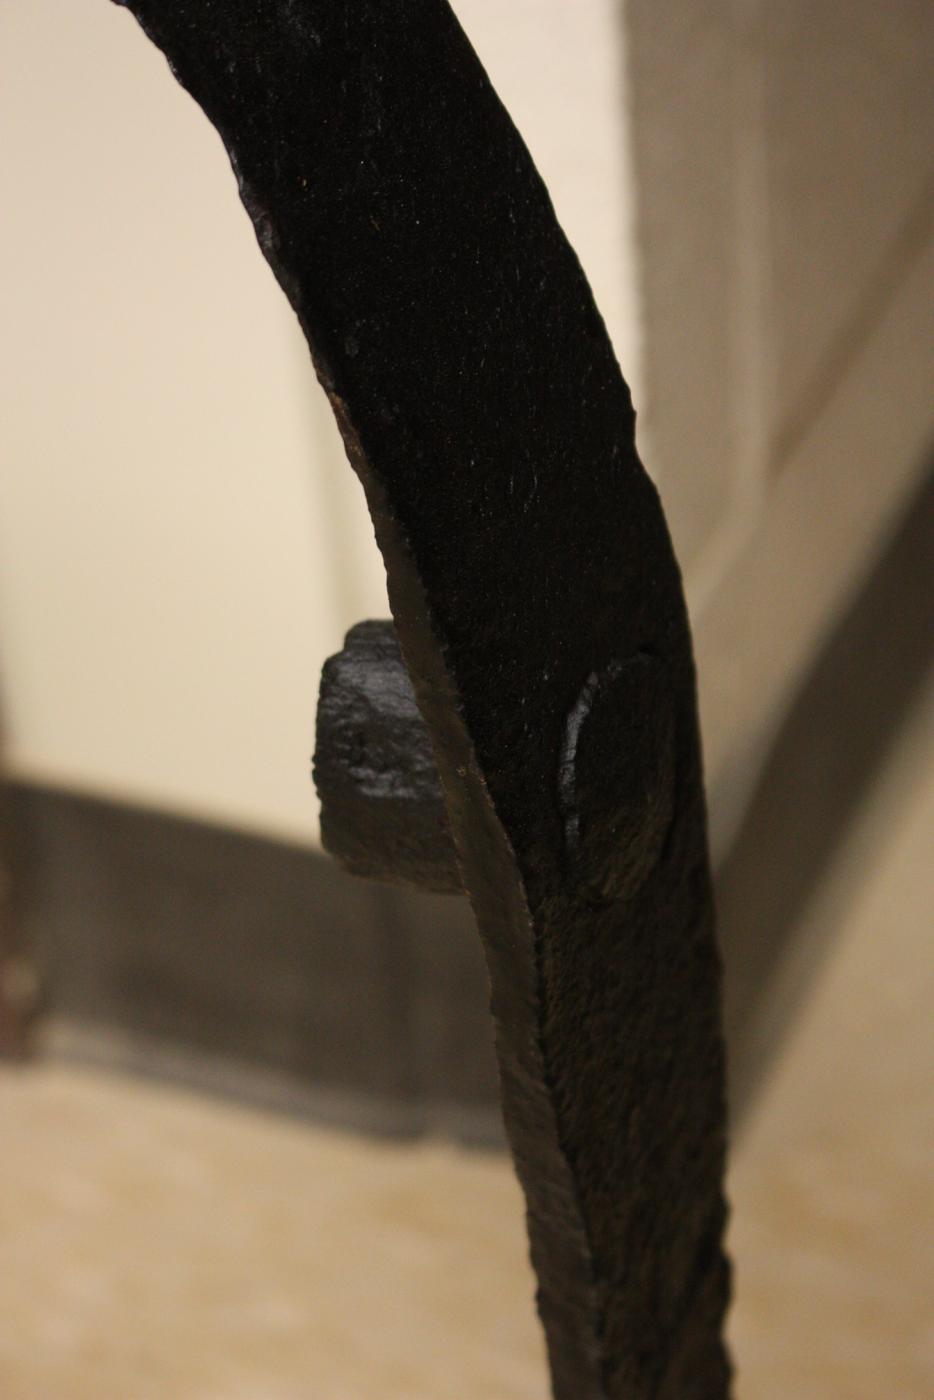
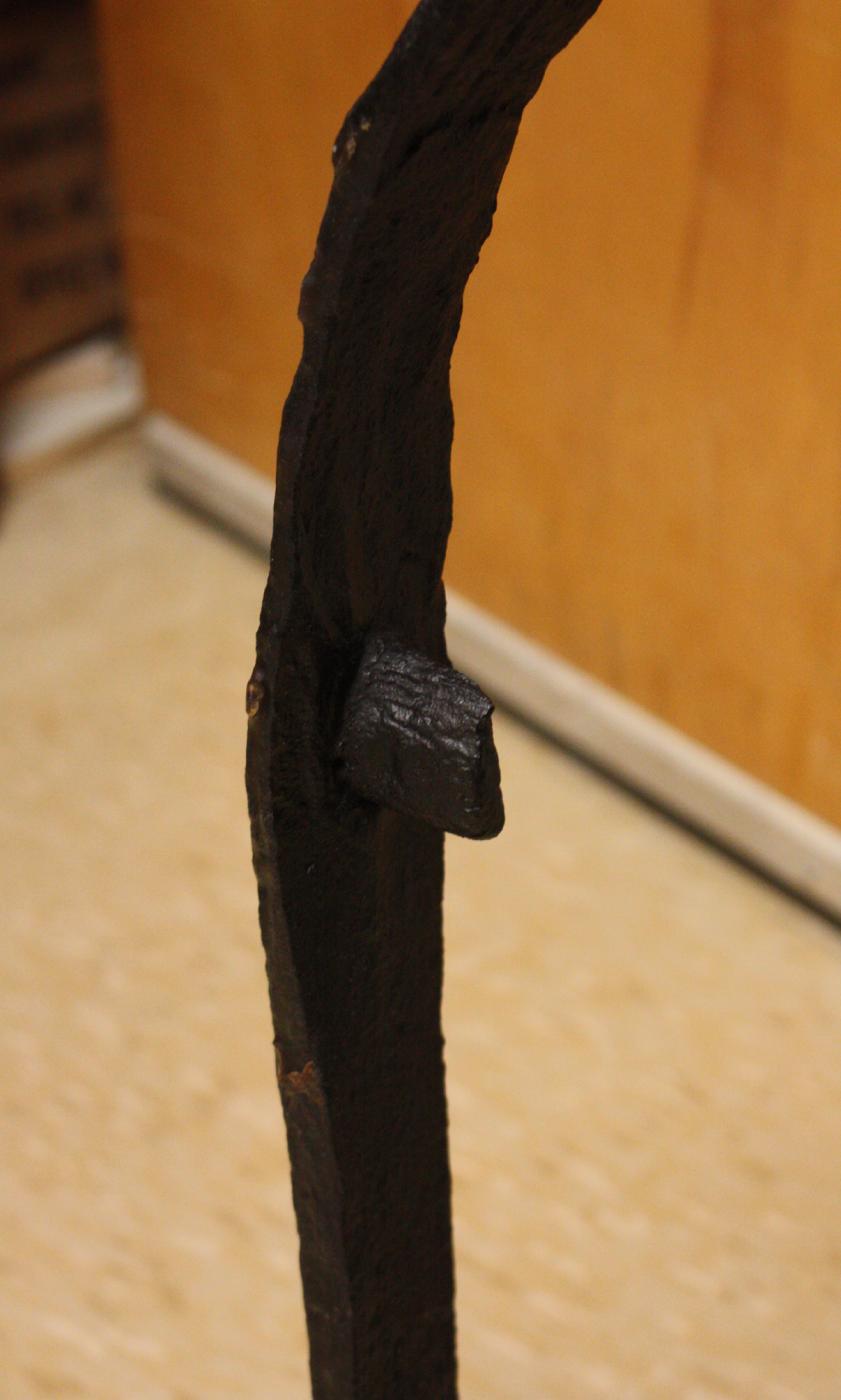
Heroine's port throw out lever. roughly forged from 3/8 inch strap. The handle is roughly octagonal at the strap and tapers to round.
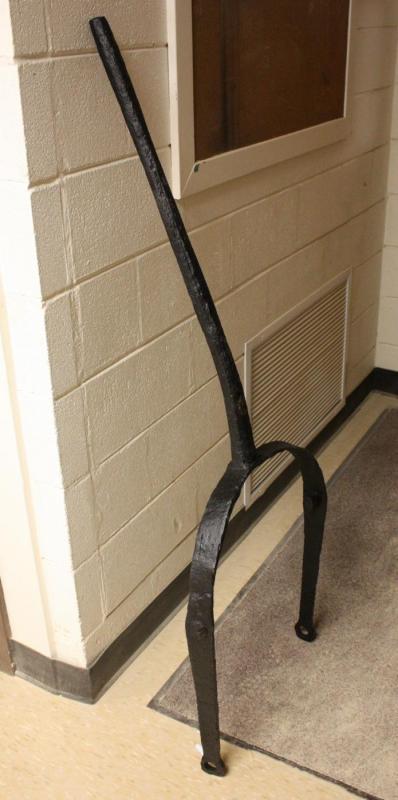
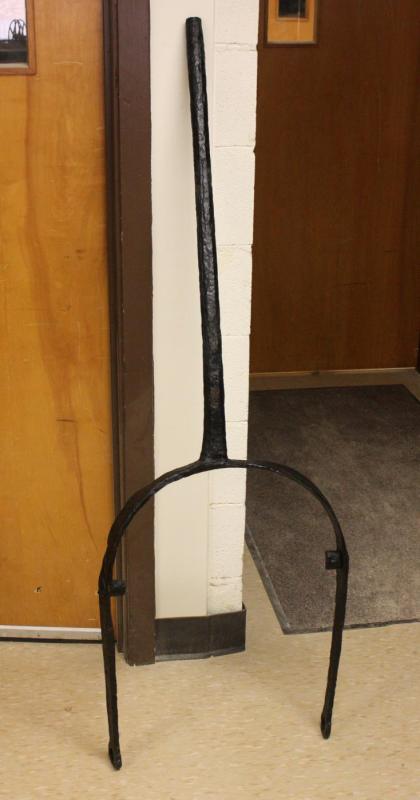
The pins that engage the bearing are about one inch in diameter with a two inch head. Inserted through holes in the strap, the protruding ends were then hammered flat. The pins show a lot of wear from rubbing against the bearing.


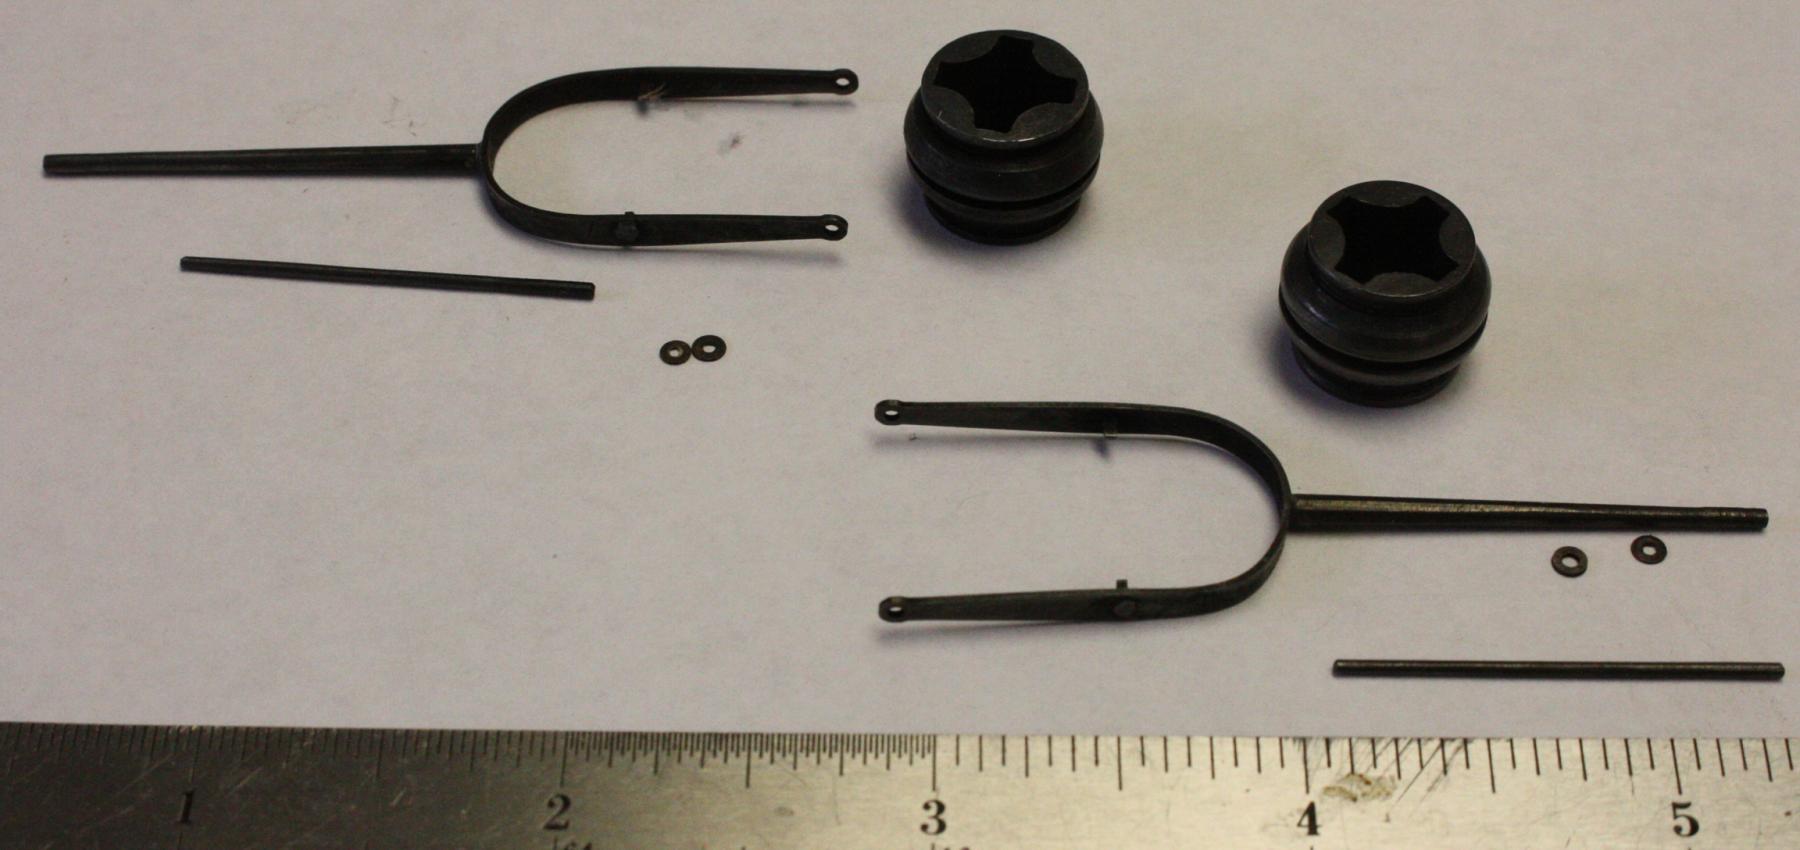
Straps fresh from the mill.
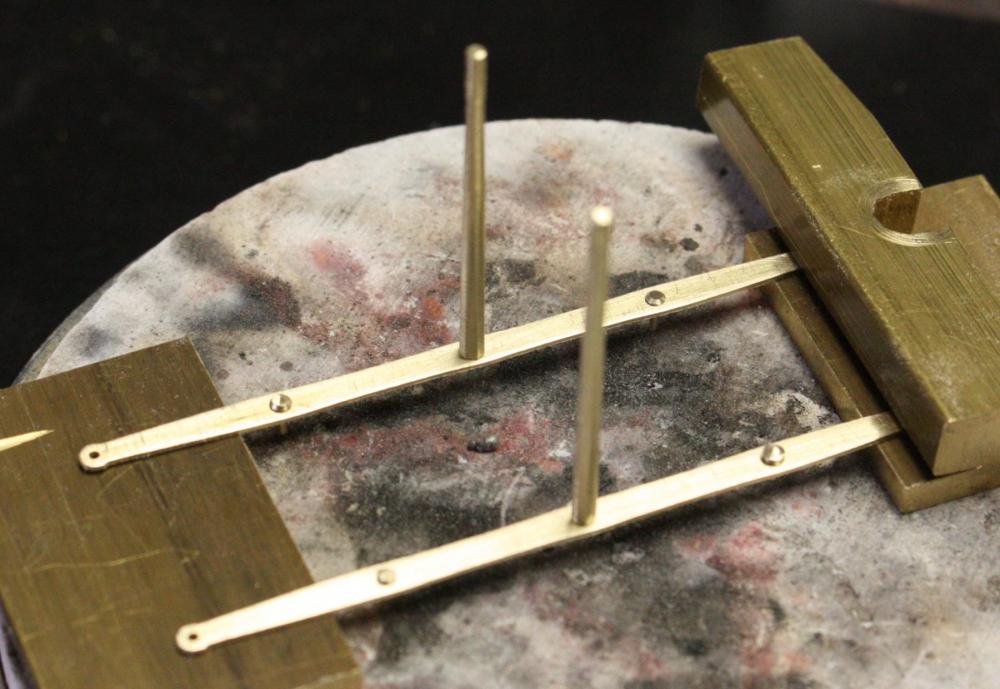
Soldering the handles and pins to the straps.
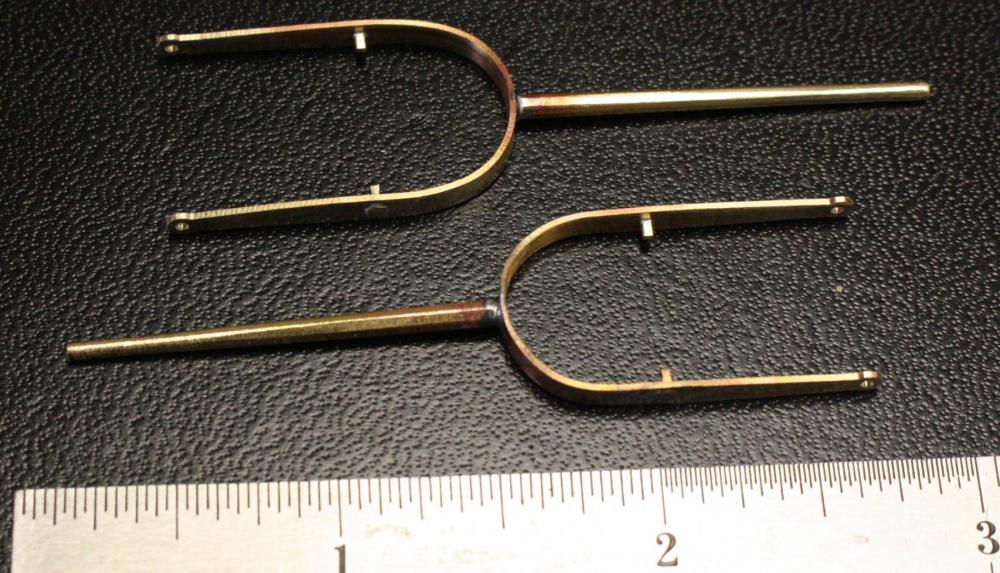
Finished throw out parts.

Clutch mechanism installed. I decided to show the starboard side with the bearing engaged and the port side disengaged.


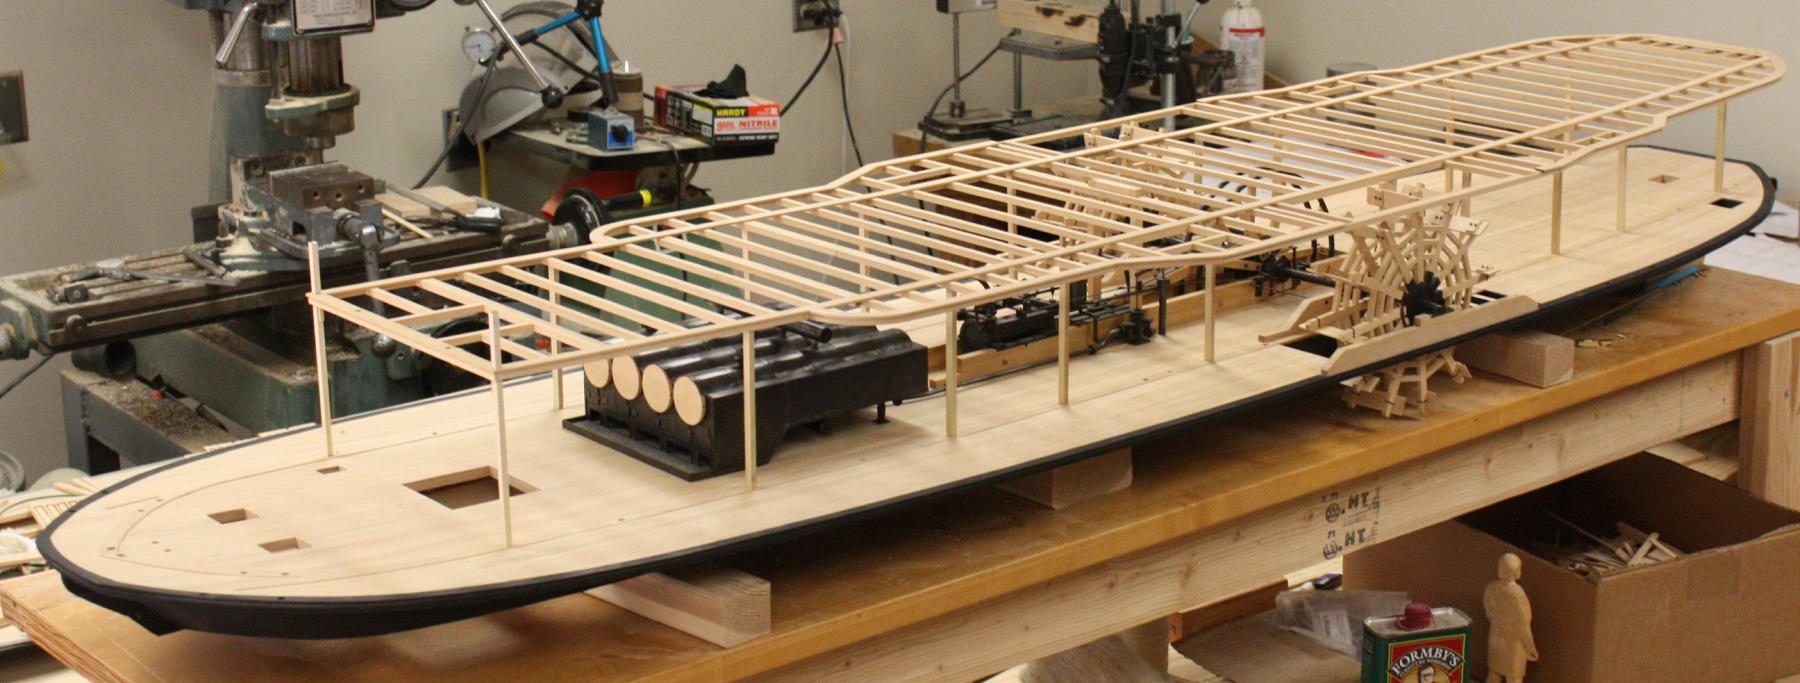
On to the boiler deck.
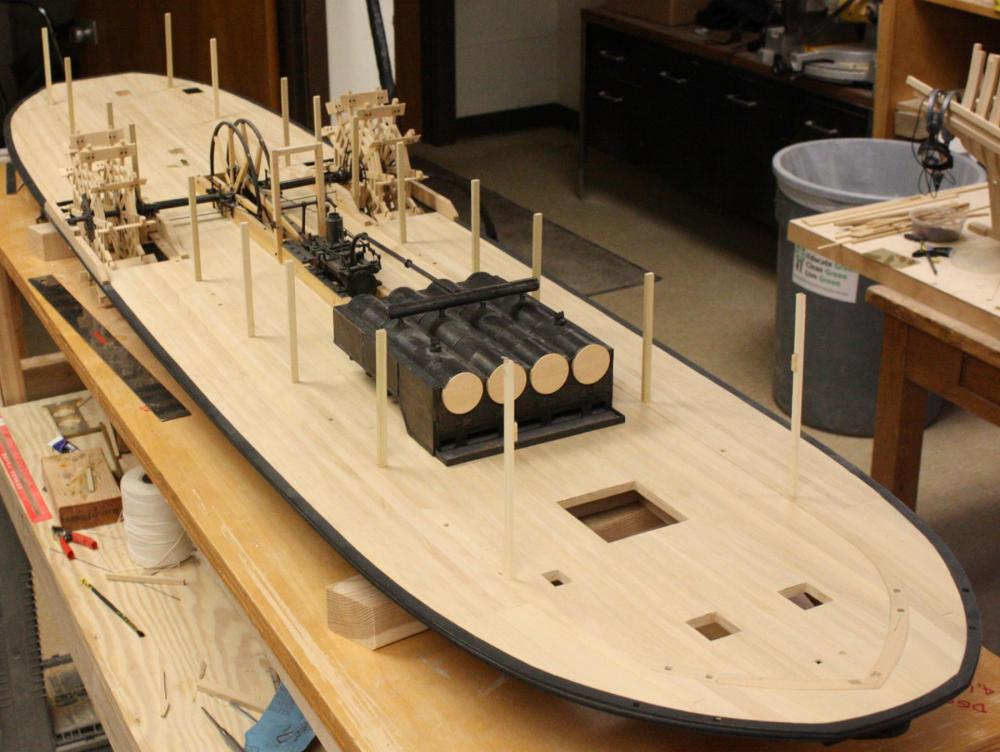
I have temporarily installed the boiler deck on poplar posts in about half of the post holes. Next week I'll replace them one by one with boxwood posts, aligning and plumbing them as necessary.
-
Thanks Patrick and Pat,
Cathead, yes the trusses and camber would have made things a lot more difficult. I wonder how much problem Heroine would have had with water on deck with the flat beams. Although, we have evidence that her beam ends were sagging outboard -- would have shed a little water. I'm also amazed at how her upper structure was supported only by rows of 5 or 6 inch square posts. I can't wait to put them in place. It is going to look like it is supported with toothpicks. Thanks for the good luck wishes!
-


Heroine 1838 by ggrieco - FINISHED - Scale 1:24 - Western River Steamboat as she appeared before hitting a snag in the Red River
in - Build logs for subjects built 1801 - 1850
Posted
With a three day weekend coming up, I had hoped to finish the starboard side planking and painting this week. I didn't quite make it. I kept finding new details that I had forgotten about - like the doors.
Kevin's drawing shows external four paneled doors. I went with something simpler for the internal doors that would not be seen from outside.
Cutting grooves in the door rails. The rails are .08 inch thick with a .031 inch groove.
Assembling the door.
Hardware for the door.
Completed door.
The port side will be left open with only the lowest three strakes installed. I still have a little more framing to do for the paddle box, deckhouse and outhouse.
Planking the starboard side.