gjdale
-
Posts
4,894 -
Joined
-
Last visited
Content Type
Profiles
Forums
Gallery
Events
Everything posted by gjdale
-
 Enjoying the tear out Robbyn. Looking forward to seeing the new version.
 -
Ben, Re the chocks, I thought I remembered Greg posting something with pictures on this. Failing all else, I suggest you PM Greg - I'm sure he'll answer in a flash, and more than likely will post something for other Echo builders.
-
Thanks everyone for looking in and for your kind words - there seems to be a bit of extra interest in this little side project Sjors - yes, a complete scratch build project is on the books - just have to finish this one first! Ben - yes, they are delicate but I am finding that the little building board provides good support and allows me to handle the whole thing without fear of damage. Plus, once the planking starts going on, it gains strength (or at least rigidity) very quickly. Mark - you have much to look forward to! A small update then: Commenced the planking today. Followed Chuck's advice in his Longboat instructions by first of all attaching the sheer plank and one extra, then "lined off" the remainder of the hull. I decided not to attach string, tape or temporary battens with the lining off - it's just too small! Pencil marks will have to do as a guide. Then it was on to the garboard strake, which seemed to take forever, and I'm still not convinced I got it right. It will have to do though. Have attached one more plank next to the garboard as shown in the pics below. I'm using Holly for the planking at 1/64" x 1/16", which is about right for scale. The Holly is beaut to work with - a short soak in tepid water and you can almost tie pretzels with it. For the lower strakes (ie garboard and the next few), because they will be covered on the inside by the footboards and therefore won't be seen, I've coated the entire inside of the planks with PVA glue as they've been layed. This will add a bit of extra strength to them. The hardest part of the planking so far has been finding clamps small enough to fit around the frames, and light enough (pressure wise) not to destroy the whole thing. For the most part, I've resorted to the Mk 1 finger clamp. While it's fairly slow, the adjustable pressure of this clamp makes it worthwhile! Here's a few pics to keep "you know who" happy:
-
Nice work John. This will be an interesting build - a little different from the usual suspects. And Augie's right about repetition being part of the territory, but then again practice makes perfect as the saying goes.
-
Yep, I've got to agree with others Mobbsie. Going with your gut seems to be giving you the right result. Great start! At your usual rate of progress I expect we'll see the coppering finished in a day or two at most.
- 1,279 replies
-
- 1
-

-
- agamemnon
- caldercraft
- (and 1 more)
-
Nice work Ben. Gotta love those power tools!
-
Looks terrific Timmo
-
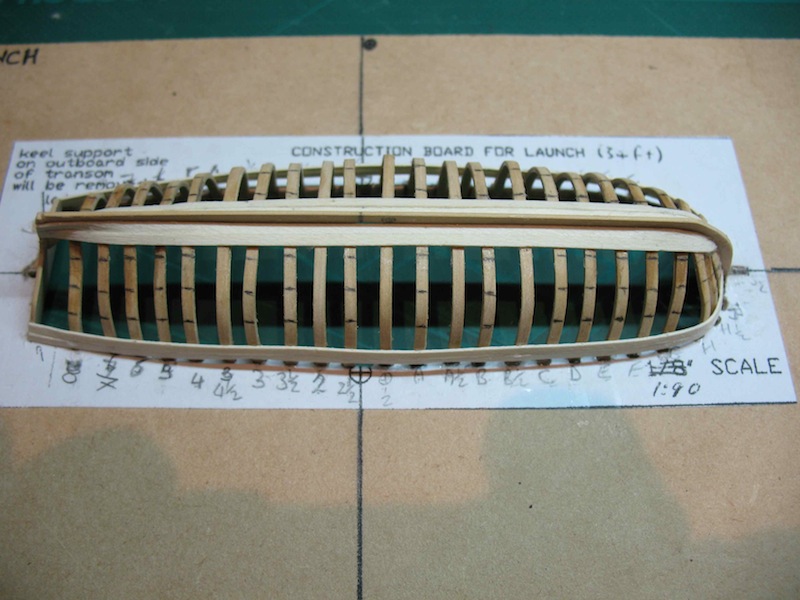
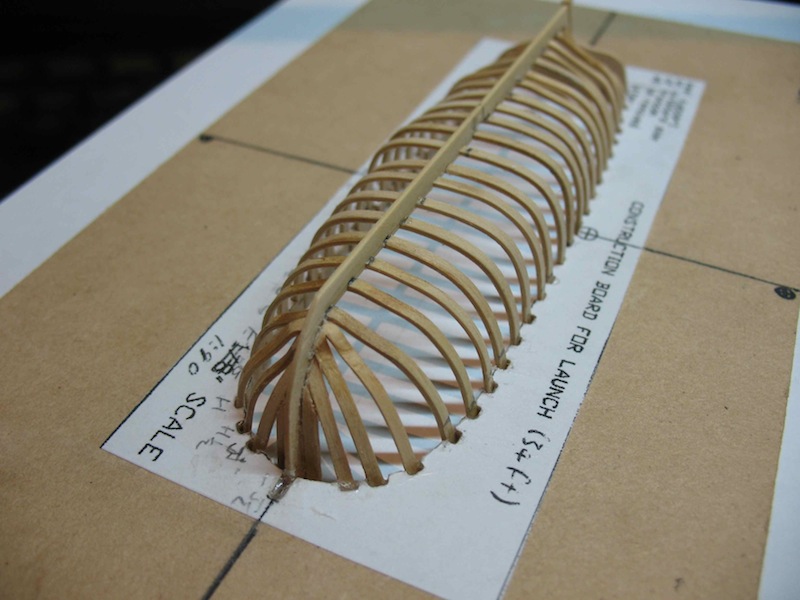
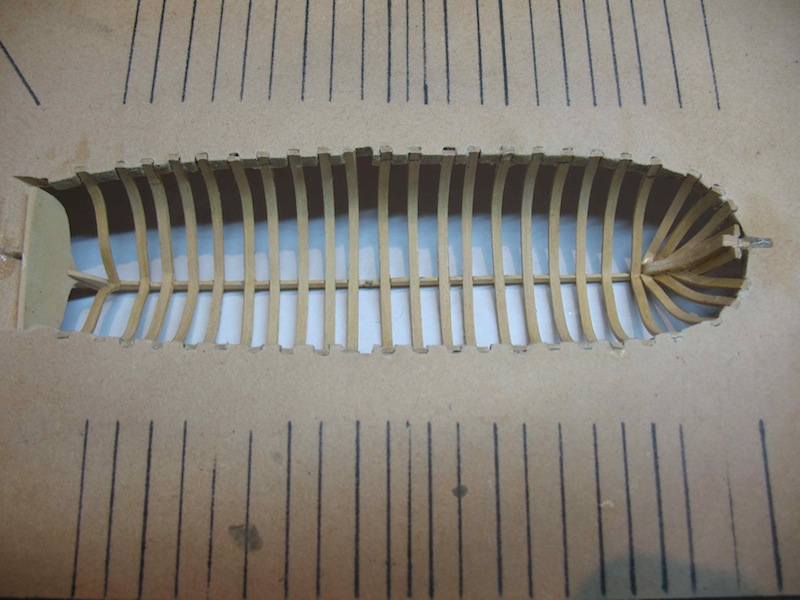
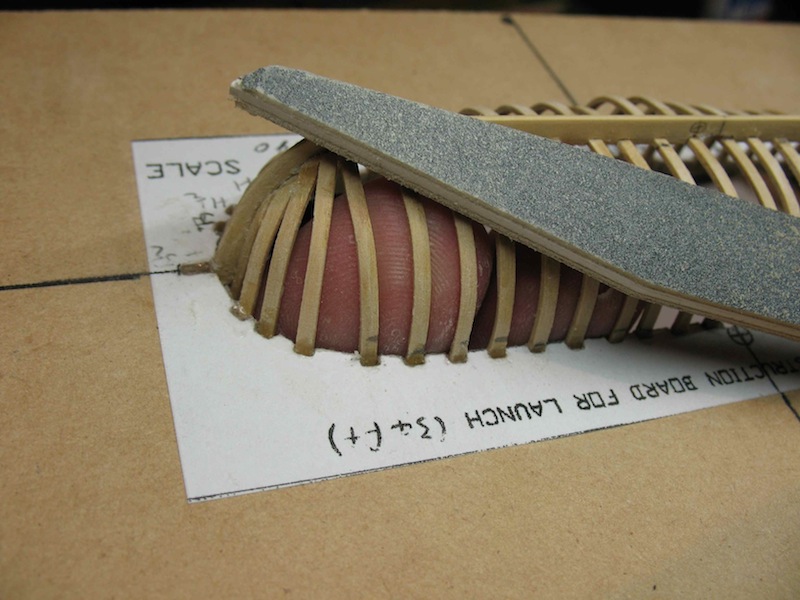
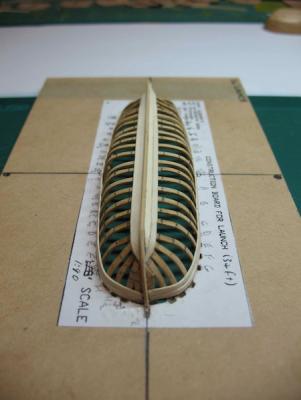
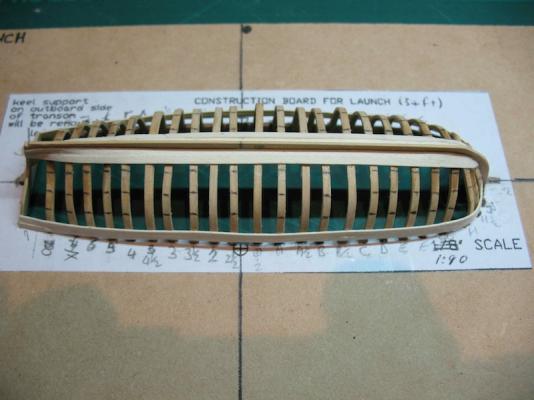
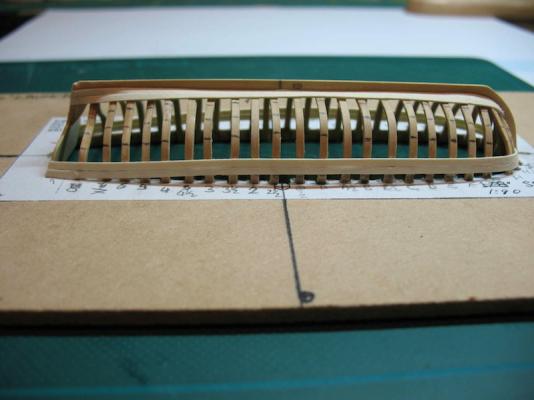
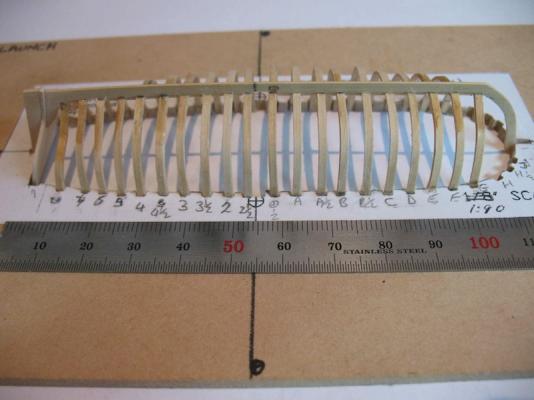
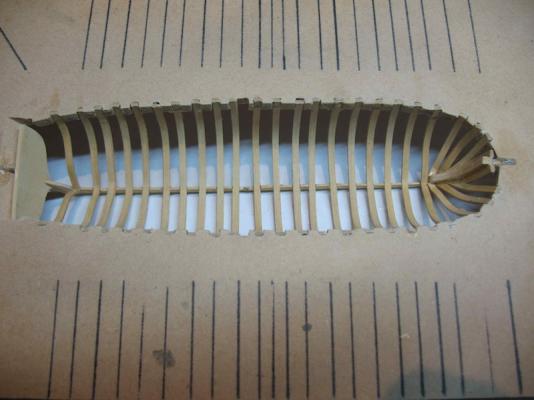
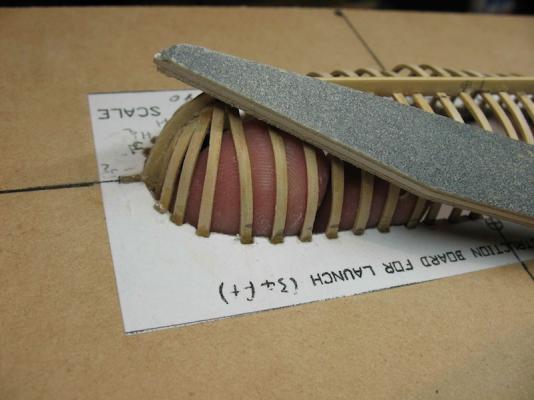
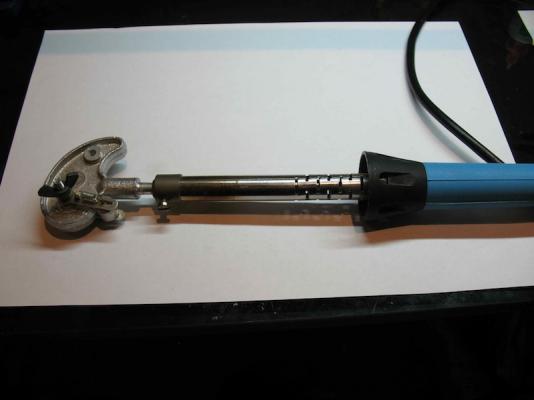
Hi all, A small update to provide Augie his fix and some pictures to keep "you know who" happy. I completed the framing of the launch today. The technique of soaking two strips, laminating them and clamping around the formers seems to have worked very well and was quite quick once I got into a rhythm. For those with a tighter bend I employed some heat from an old electric plank bender: Funny, I must have had this thing for 20 years and never got on with it for general planking (I prefer to use a steam iron generally), but for this job it was exactly the right tool. Here's a view of all the whole frames completed: And then the addition of the four cant frames per side in the bows: Here's a view from the other side. Here you can clearly see the apron. I had to remove this earlier to fit the whole frames as it interfered with the plug. However, I needed to reinstall it in order to install the cant frames. Fairing these frames is a somewhat delicate matter as you can imagine. Here is shot showing how I used the fingers of one hand to support the frames from the other side while fairing: And this is the weapon of choice for fairing (and all other sanding on this little project to date). It is a flexible sanding stick with a tapered end. They are available in a number of grades, but this is the coarse shown here. A very useful little tool. Tomorrow, I will commence the exterior planking.


-
Mobbsie, I have no idea if I'm correct or not, but my take on what I read and saw in Longridge, was that the upper belt started at the waterline and basically ran parallel to it for 12 strakes (rows), while the lower belt curved upwards, particularly at the fwd end as if to follow how a row of planks would follow the curve of the hull. Plan No2 from Longridge (the one I posted for you last week) gives a reasonably good indication of this. As I understand it, the "gore line" is simply the line where the two belts of plating meet. As always, I stand ready to be corrected by those more knowledgeable than I. Hope this helps my friend.
-
Augie, If you started this build in Nov 2011, I think this would officially classify you as a "speed builder". In comparison, mine started in Jun 1996.......
-
.....and why you'll find me propping up the bar! Nice photos by the way Augie. The finish line draws ever so slowly but undeniably closer!
- 1,668 replies
-
- 1
-
-
- syren
- model shipways
- (and 1 more)
-
Nice job Mark. Of course the re-dos were really just an excuse to play with the power tools some more!!!
-
Congratulations on reaching this milestone David. Your work is a credit to you - well done! I hope you enjoy the next phase of the build as much.
-
Nice to see you still at it Chris. Don't be afraid to have a go at anything - being wood, most things can be undone and re-done if necessary. Looking forward to your next update.
-
Well done Mobbsie. Looks great. Good luck with the coppering, though I know you won't need it!
- 1,279 replies
-
- 1
-
-
- agamemnon
- caldercraft
- (and 1 more)
-
Very nicely done Rusty, as always. Love the personalised touch with the gallows.
-
Yes, you should be very happy with that Robbyn - you've done an excellent job on that planking.
-
More lovely work there Colin. She really is looking beautiful.
-
Hey, that's neat Danny! Very clever technique.
-
Kevin, The P&P hurts, but trust me - its worth it!!! (Especially for the Byrnes machines). Postage from the US to Downunda adds about 50% to the price. I'd rather not have to pay it, but pay it I will for machines of this quality. Convinced yet?
-
Nick, That's a very neat set-up and looks like it works really well. I'd like to see the finished nets in situ - I bet they look fabulous! I'm afraid I cheated on mine - used nylon Tulle, painted black. Thanks for sharing your technique.
-
That's a very kind gesture Jim, and another example of your excellent customer service. It won't be long before I'll be coming back to you to expand my "Byrnes Collection".
-
Nice work David. Looking very sharp!
-
Thanks Augie, Mick and Keith, Augie - hang in there mate, I hope to make up for lost time over the long weekend! Mick - have you tried the Tamiya brand masking tape? I hear from others here that it is the best going, so might be worth a try. Keith - recovery is pretty much complete, thanks for asking - enough to flog myself senseless with work again anyway! I'm glad my little side projects have helped you - though judging from your work to date, you don't seem to need much inspiration!!! Good to hear that you're feeling better now - that sounded like a pretty tough few weeks.