gjdale
-
Posts
4,891 -
Joined
-
Last visited
Content Type
Profiles
Forums
Gallery
Events
Everything posted by gjdale
-
 Fantastic work Mobbise - just as we all expected of you!
- 1,279 replies
-
- 1
-

-
- agamemnon
- caldercraft
- (and 1 more)
-
Just for the heck of it, I'll throw in my AUD 0.02! I too really enjoy the banter and friendly leg pulling that goes on within these logs. Real friendships seem to develop in this way, even with those we've never met or even spoken too. To share a sense of humour as well as a common interest, and a genuine care for our fellow modellers, is what makes this forum quite special. Let's not lose that.
- 1,668 replies
-
- 5
-
-
- syren
- model shipways
- (and 1 more)
-
Nice looking frames Ben - a great start.
-
Wow! That's all - just WOW!
-
Thanks Mick, Ben and Keith for looking in and your kind comments. Keith - the Holly is excellent to work with. It is very pliable - a light soak in tepid water and you can make pretzels from it. That was one of the main reasons for using it. I could have used box, but the stock I had was slightly wider and the Holly seemed just right for the purpose. I used box for the frames and it also was very good to work with. I get all my timber from Jeff Hayes at Hobby Mill - it's worth the extra cost of postage to have such wonderful material to work with. And don't worry, even with painting, it still looks pretty good (to me anyway!).
-
I've been thinking the same as others above - add some wood to the bottom of the arches to raise the whole transom piece up to cover the cabins.
- 1,873 replies
-
- 1
-
-
- occre
- san ildefonso
- (and 1 more)
-
Wow Aldo, You've really been bitten bad haven't you? I'm sure your attention to detail here will pay off in the long run. Looking forward to seeing more updates - with sawdust!
-
Just lovely John. Enjoy your holiday to God's own country!
-
Hi Robbyn, Glad to hear that the alcohol worked. Presumably you remembered to apply some to the parts as well as to yourself :P Although, reading what you said about ratlines, we could all be forgiven for thinking otherwise.............. Anyway, good on you for taking this bold step - I'm sure you will be well satisfied once the re-do is complete.
-
Thank you everyone for all of your very kind comments - I really do appreciate them and they inspire me to try even harder. Much as it pained me to cover up that lovely Holly, I put the first coat of paint on her tonight and am pleased to say that I don't think it detracts from the looks. Of course, this is only the first step - the exterior planking. There is still a lot of work to do before she is finished. I'll post further updates when there is something new to see.
-
Thanks again guys. You're making me blush. Paint it shall be. (And no coppering Augie! ) I've got several more of these little suckers to build yet - think I'll go with the Pinnace next.........once this one is finished, and a little more work on the rigging is done!
-
Thanks guys, Augie - I've been debating that very point with myself. Although I really like the look of the Holly, I think I've decided to paint for two reasons: one, the rest of the model is painted, so to be consistent the boats should be painted in the appropriate colour scheme; and two, there are many imperfections in that little planking job that a nice coat of paint just might let me get away with!
-
The new paint job looks great Sjors - well worth the effort (and the expense)! Now, when are you buying the Aggy?
-
Very nice Colin. More clean and crisp work.
-
Nice plane John - that's another one I've got stashed in the cupboard, waiting patiently for me.
-
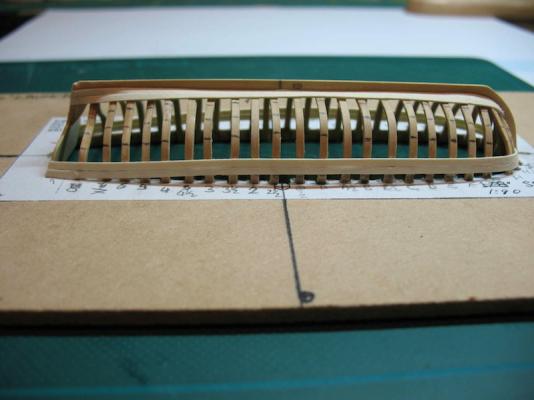
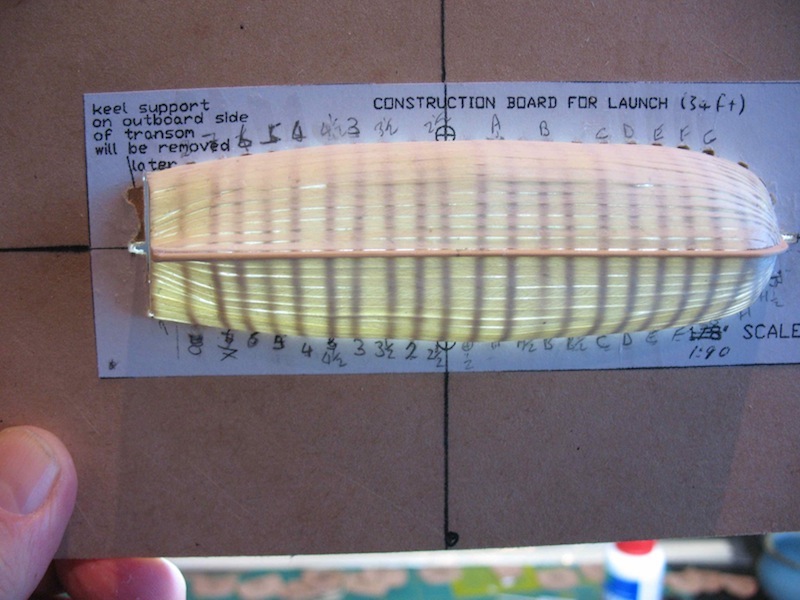
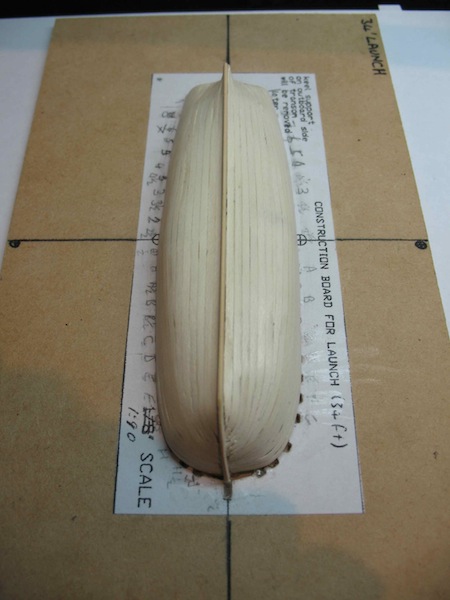
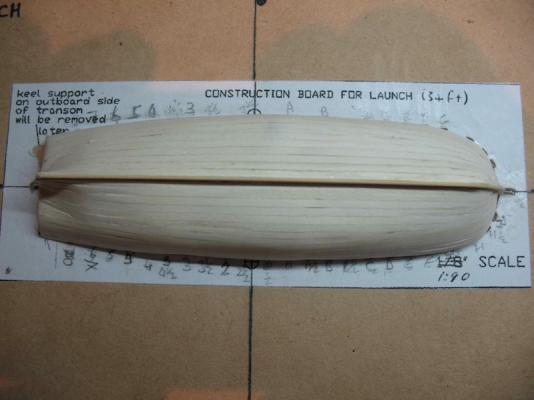
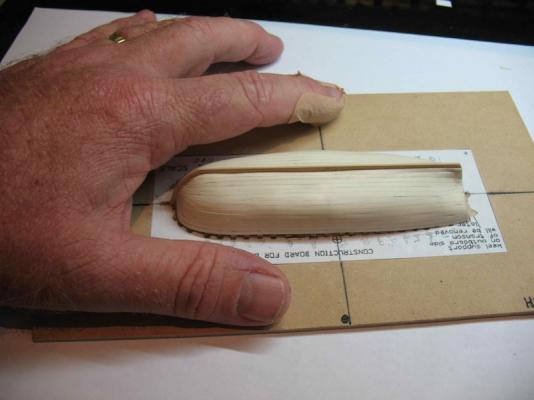
Thanks everyone for your kind comments. ZyXuz - welcome to my log. Grab a seat and help yourself to some popcorn from Sjors. If you need a drink, Mark is tending the bar tonight. Marc - not too sure about the skills thing, but I'm trying and I'm learning at the same time. Sjors - you'll have to wait and see what the new scratch project will be, but I guarantee you're gonna love it! A further small update to keep "you know who" happy: Finished the exterior planking today. That's one good thing about these miniatures - they may be fiddly, but there isn't much of them! I noticed that when I held the boat up to the light, I could see right through the planking: That pic was before any sanding. Here's a few following some sanding/polishing. No finish has been applied yet - what you see is just the natural timber (Holly) sanded and polished: And just to remind you all of the scale of this little thing, here it is next to my ham fist. (Note the bandaid on the finger - managed to stab myself with the Exacto, but fortunately kept it from bleeding all over my lovely Holly). That's it for today. After a productive long weekend, it's back to W@#$ tomorrow . Oh well, at least it pays the bills and allows me to indulge in my Hobby.


-
We say that here too Augie - but for us it's only about Melbourne! (with apologies to my Melbournian colleagues)
-
Nice progress there David. Very neat work.
-
Hi Robbyn, If it's PVA glue you're trying to de-bond, then using some isopropyl alcohol (rubbing alcohol) will help things along. If you used CA (bad girl!), then acetone (nail polish remover) will do the job.
-
Nice deck Kevin, but that skinny guy in the photo needs to buy some new clothes that actually fit him - he's almost swimming in that T-shirt! And what is it with all you Northern Hemisphere folk anyway? Seems like just a couple of weeks ago you were all complaining about snow and blizzards. Now you're all complaining that summer is keeping you from your shipyards. Anybody spot the common feature here? :D
- 1,319 replies
-
- 1
-
-
- caldercraft
- Victory
- (and 1 more)
-
Nice work there John - very even too. Augie - sounds to me like you shouldn't go buying any Long Playing records!!!! :P
- 2,250 replies
-
- 1
-
-
- model shipways
- Charles W Morgan
- (and 1 more)
-
Don't listen to that ....S named person Robbyn. Take your time and do it to your own satisfaction. The other S will wait patiently for your attention, unlike some who shall remain nameless!
- 773 replies
-
- 1
-
-
- san francisco ii
- artesania latina
- (and 1 more)
-
Enjoying the tear out Robbyn. Looking forward to seeing the new version.
-
Ben, Re the chocks, I thought I remembered Greg posting something with pictures on this. Failing all else, I suggest you PM Greg - I'm sure he'll answer in a flash, and more than likely will post something for other Echo builders.
-
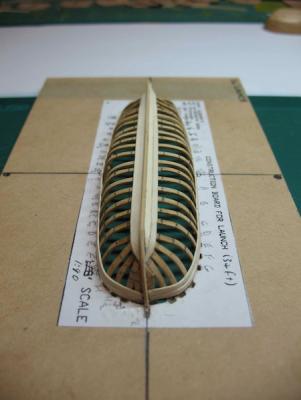
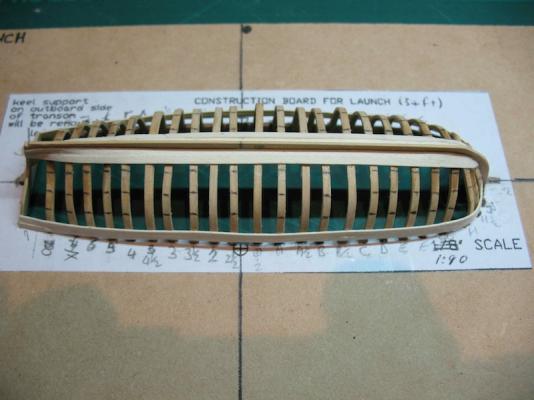
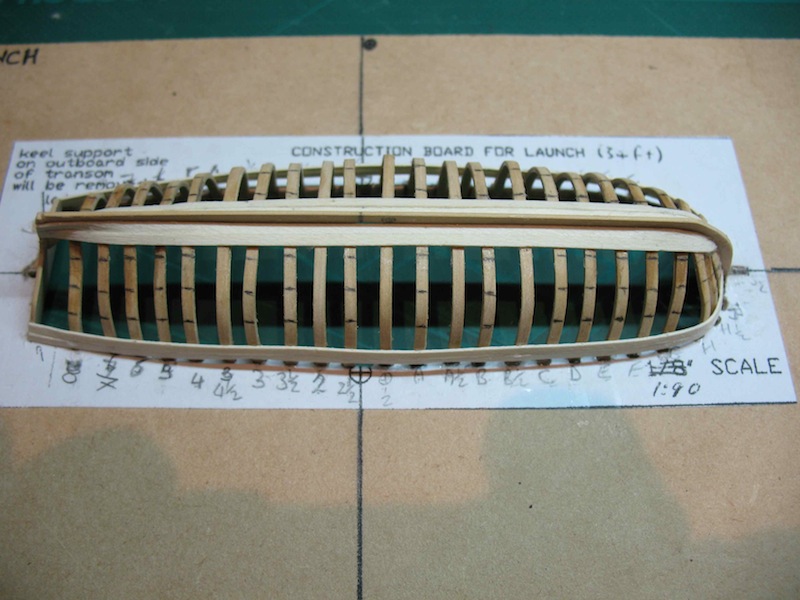
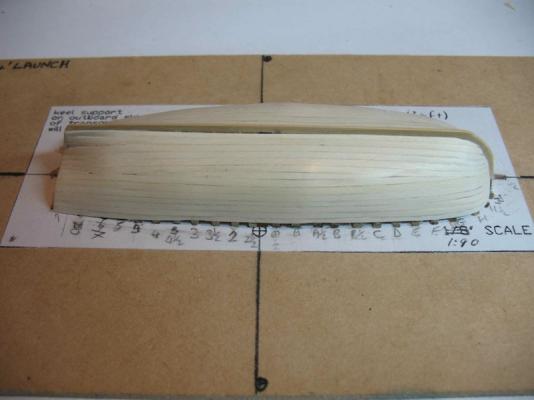
Thanks everyone for looking in and for your kind words - there seems to be a bit of extra interest in this little side project Sjors - yes, a complete scratch build project is on the books - just have to finish this one first! Ben - yes, they are delicate but I am finding that the little building board provides good support and allows me to handle the whole thing without fear of damage. Plus, once the planking starts going on, it gains strength (or at least rigidity) very quickly. Mark - you have much to look forward to! A small update then: Commenced the planking today. Followed Chuck's advice in his Longboat instructions by first of all attaching the sheer plank and one extra, then "lined off" the remainder of the hull. I decided not to attach string, tape or temporary battens with the lining off - it's just too small! Pencil marks will have to do as a guide. Then it was on to the garboard strake, which seemed to take forever, and I'm still not convinced I got it right. It will have to do though. Have attached one more plank next to the garboard as shown in the pics below. I'm using Holly for the planking at 1/64" x 1/16", which is about right for scale. The Holly is beaut to work with - a short soak in tepid water and you can almost tie pretzels with it. For the lower strakes (ie garboard and the next few), because they will be covered on the inside by the footboards and therefore won't be seen, I've coated the entire inside of the planks with PVA glue as they've been layed. This will add a bit of extra strength to them. The hardest part of the planking so far has been finding clamps small enough to fit around the frames, and light enough (pressure wise) not to destroy the whole thing. For the most part, I've resorted to the Mk 1 finger clamp. While it's fairly slow, the adjustable pressure of this clamp makes it worthwhile! Here's a few pics to keep "you know who" happy: