HOLIDAY DONATION DRIVE - SUPPORT MSW - DO YOUR PART TO KEEP THIS GREAT FORUM GOING!
×


gjdale
-
Posts
4,888 -
Joined
-
Last visited
Content Type
Profiles
Forums
Gallery
Events
Everything posted by gjdale
-
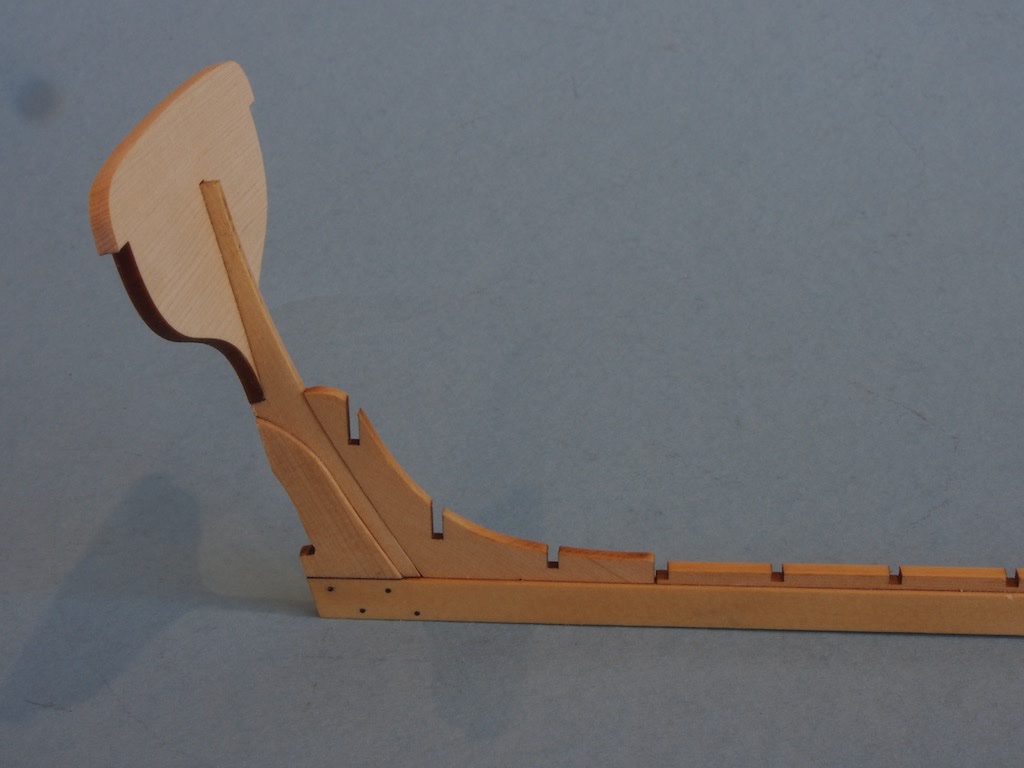
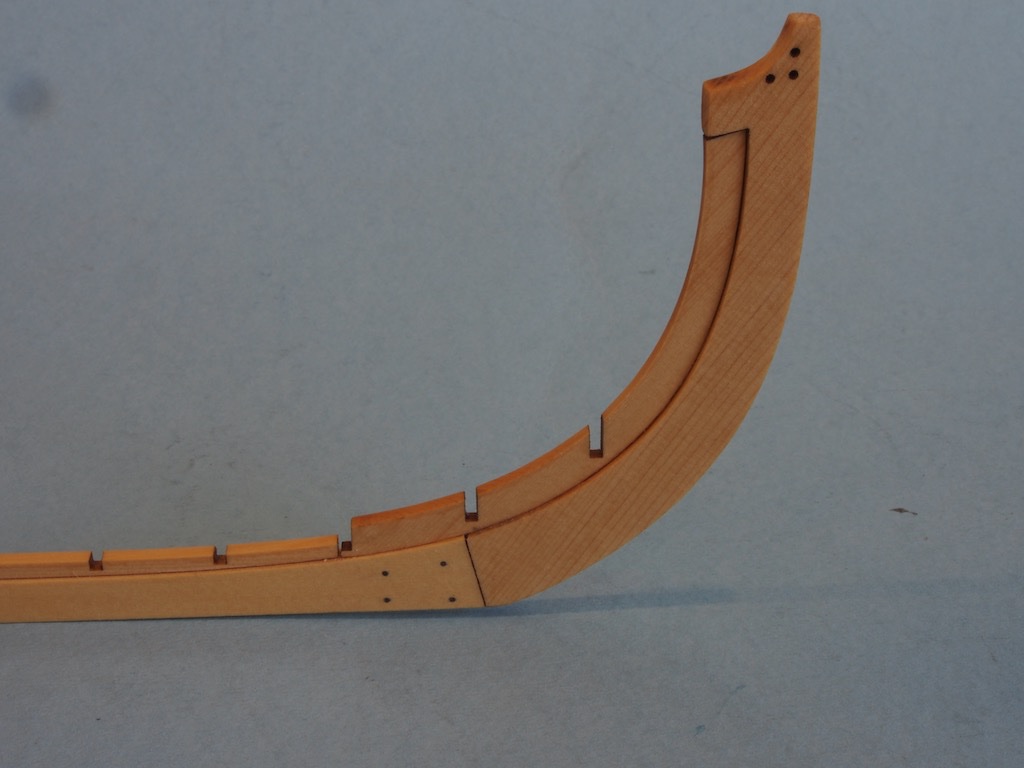
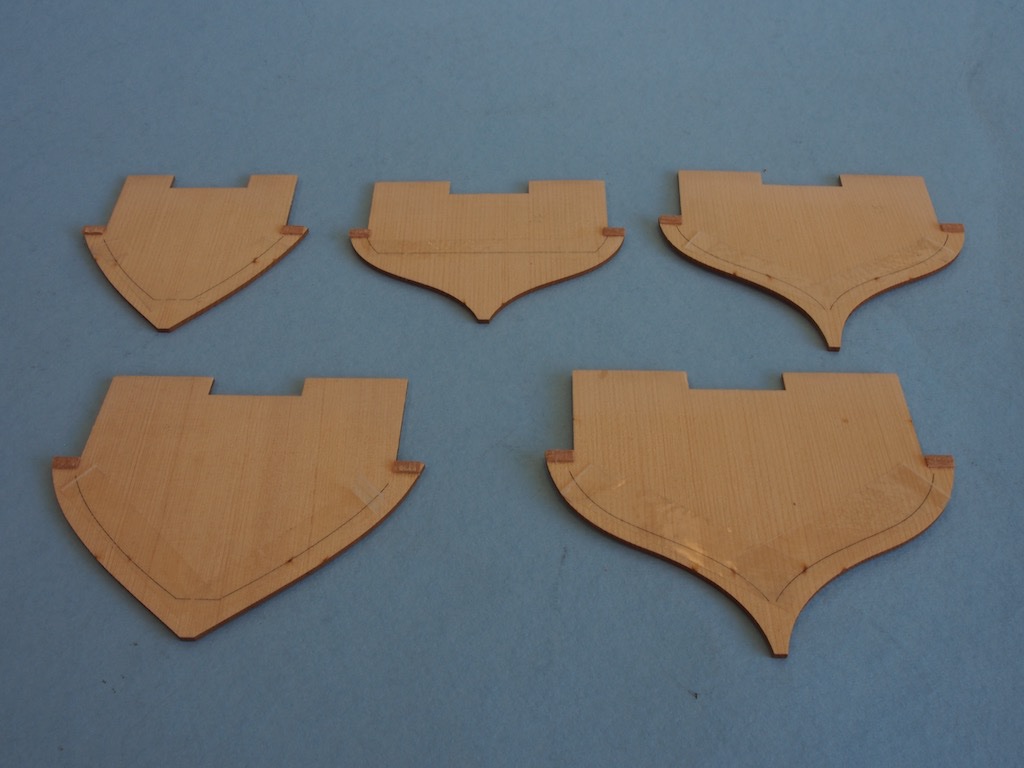
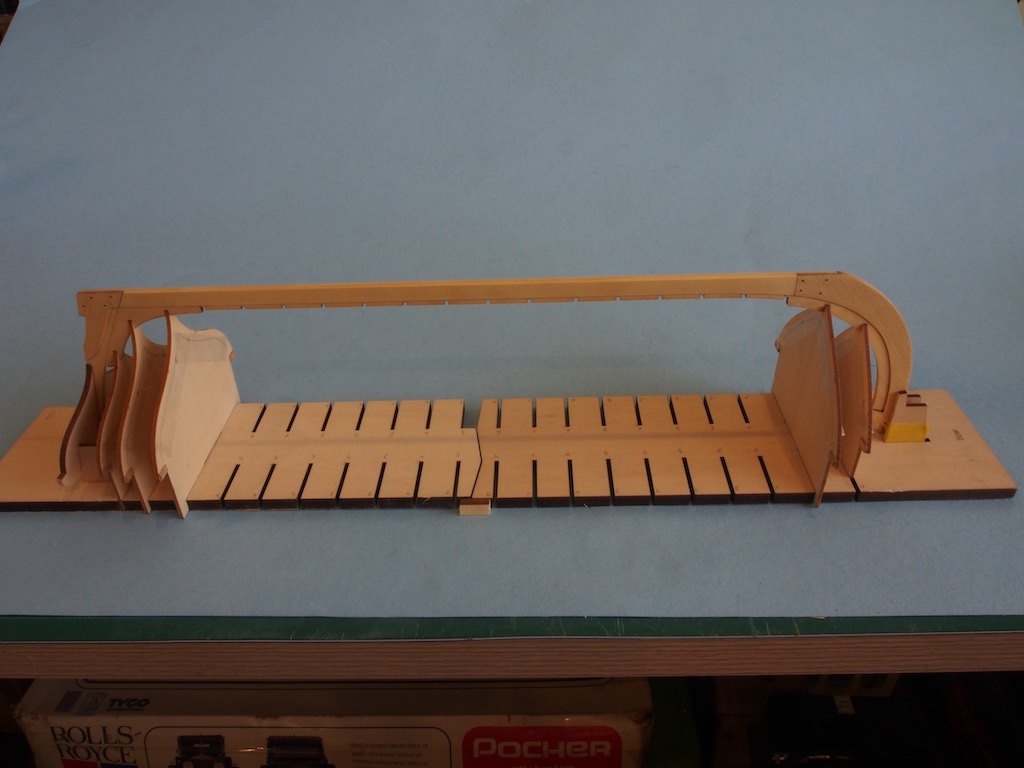
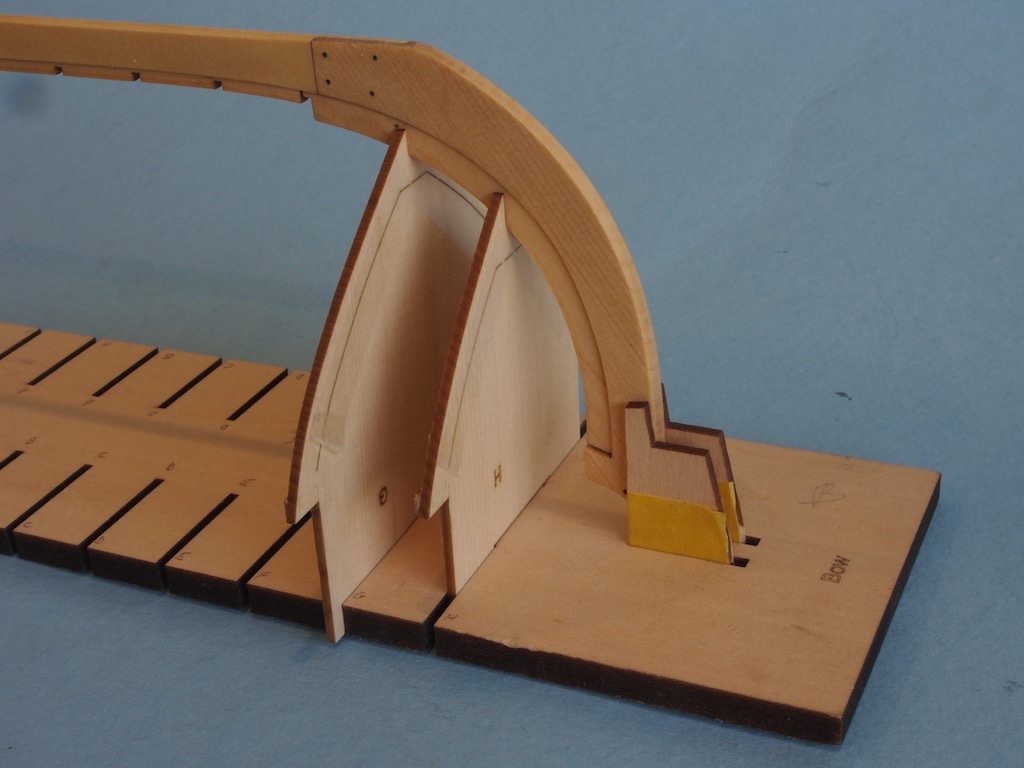
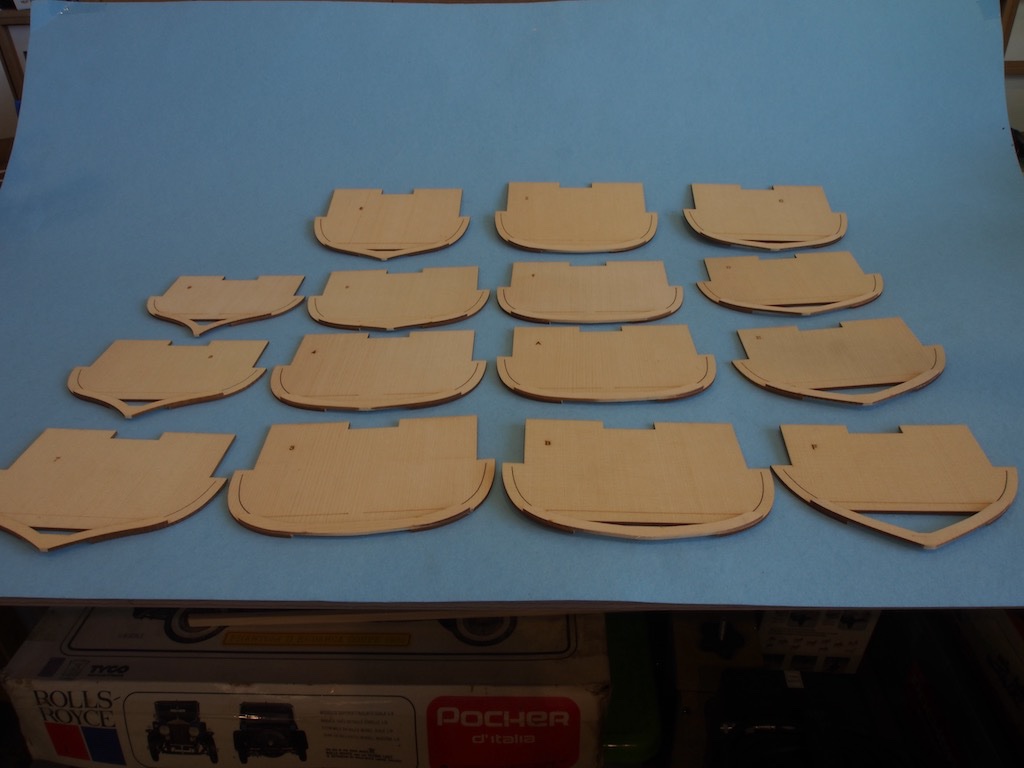
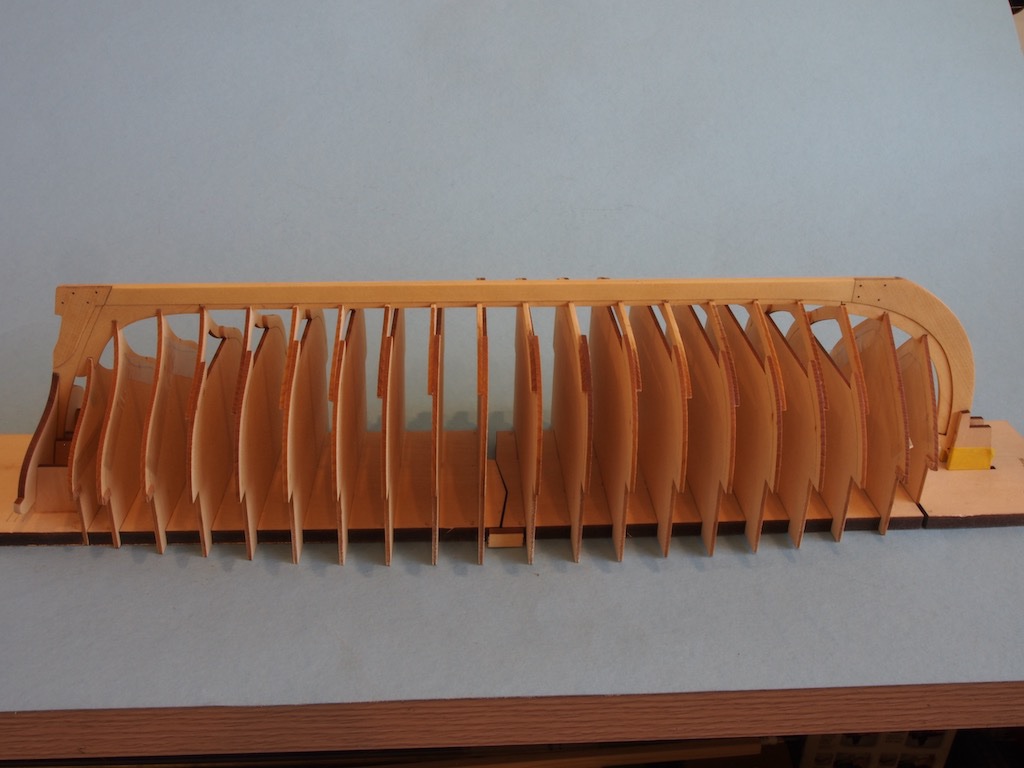
 Grant's Medway Longboat Ver 2.0 At long last I have returned to this build, starting afresh. A few months of working on a completely different project, along with a little extra time for building, has allowed my mojo to return for this build. I again opted for the more complex keel design; however, my approach to the keel assembly this time was to use the Byrnes saw to hog out most of the waste and then fine tune with a miniature chisel and a sanding block. I then went ahead and glued the four additional 3/32” keel pieces following the advice in Chuck’s instructions again. I made a couple of 1/32” spacers, as others have done, to help centre the parts on the keel. I then marked the locations for the keel bolts from the plans, drilled using a #70 drill bit and inserted the provided 25lb monofilament fishing line to simulate the bolts. These were trimmed and sanded flush and the whole assemble given a coat of Wipe-on Poly. Finally, the transom piece was fitted, taking care not to repeat my mistake of the first time around! No in-progress pics of this work as it simply repeats work from earlier in the log. Here is the finished keel assembly. The single frames were prepared as per Chuck’s instructions, with some packing tape and some reinforcing strips. These were then test fit along with the keel in the building board. The two additional bolsters were also added to the build board at the stern as per the instructions. The double frames were then prepared following the instructions. The way Chuck has designed this kit makes this a particularly easy task. The frames were then all test fit into both the build board and the keel slots. To adjust the fit in the build board required only a few light passes with some 240 grit sandpaper. The keel notches all needed a light pass with a file to provide a snug fit. The frames are now ready for gluing.

- 109 replies
-
- 8
-

-
- medway longboat
- Syren Ship Model Company
- (and 1 more)
-
Thanks Johan, I recommend you start your own build log. It doesn’t matter that you’re already well into the build. A build log is the best way of seeking advice from others and to show us your progress. You will find no judgement here, only helpful advice and encouragement. I look forward to following your progress when you do.
- 339 replies
-
- 1
-
-
- dumas
- Chris-Craft
- (and 3 more)
-
Nicely done Jeff!
-
Johan, This was my first foray into fibreglass. A detailed explanation of my experience and the process I followed starts on page 5 of this log. I also made references there to an excellent “how to” guide written by Pat Tritle over on the RC groups forum. The actual process you use may vary slightly depending on the type/brand of resin you are using. I used West Systems. To answer your specific questions: 1. I did not have to do any specific was removal process - I just sanded. 2. Yes, you will need a clear finish - many coats - over the resin if you want a highly polished finish. I used three coats of resin over the fibreglass and then four coats of spar marine varnish on top of that. I applied graphics after the first coat of clear and then sealed them in under the following three coats. I used a spar marine varnish as it has UV protection to stop it yellowing. You need many coats to allow the sanding/polishing process, which essentially is removing layers to get to a very even final finish. Is it tedious? Yes. Is it worth the effort? Absolutely. My advice is, take your time, be patient, and trust the process. Oh, and make sure you do some test pieces first......
- 339 replies
-
- 1
-
-
- dumas
- Chris-Craft
- (and 3 more)
-
I’ve just found your build John. As I have this kit in my “stash”, I’ll follow along with interest as you tackle the various challenges. Looks like you’re doing a great job so far.
-
Sorry to hear about all the fires over there Bob. As you know, we experienced a similar thing here in Australia during our last summer. The smoke rolled in here at the beginning of December and pretty much put a stop to all outdoor activity for a couple of months. The fires here got close enough that we actually evacuated one night - fortunately that scare didn’t eventuate into anything more serious but we had quite a nervous few weeks. I think the smoke finally left when we received an almighty hailstorm that did record damage across the city - narrowly missed our house though. And it seemed we were just getting on top of that when COIVD joined us. What a year! I’ll certainly be continuing to follow your excellent build as and when you have time for it.
-
1930 BENTLEY 4.5 LITRE by MadDogMcQ - AIRFIX 1:12th Scale
gjdale replied to MadDogMcQ's topic in Non-ship/categorised builds
Don’t know why you’d say that Tom. You did an excellent job on this model - what’s not to like! 😊 -
That’s possibly true Kevin, but keep in mind when these kits were made in the first place - about 50 years ago...
-
Thanks Denis, The chassis stands are an after market part from Model Motorcars. Quite expensive for what they are and I’m sure they could be made quite easily by most builders. I wasn’t sure how useful they would be but they are proving to be worthwhile. For my next one, I’ll probably make my own (if these don’t fit the other chassis).
-
Thanks Kevin, Yes they do take a lot of work - but that’s half the fun! 😊
-
Thanks guys, Bob - yes, the Model Motorcars stuff is very expensive and one could easily spend waaay to much on “upgrades”. I think there are a few that are really worthwhile (like the steering wheel) and then there are a lot that one might question whether they are really necessary. And there will be differences between the various kits as to which fall into which category. Paul Koo advises making these decisions at the start of the build. Good advice - but if you have no previous experience, it can be difficult to know where to draw the line. It’s compounded for me because of the additional cost of postage each time I decide I want that extra $5 part, or you do as I did - buy the steering wheel and only realise later that you really need the hub to go with it! I might do a summary of “lessons learned” at the end of this build, including a summary of the “upgrades” I’ve done. I look forward to seeing the start of your build Bob. If your other work so far is anything to go by, it will be an outstanding build to follow.
-
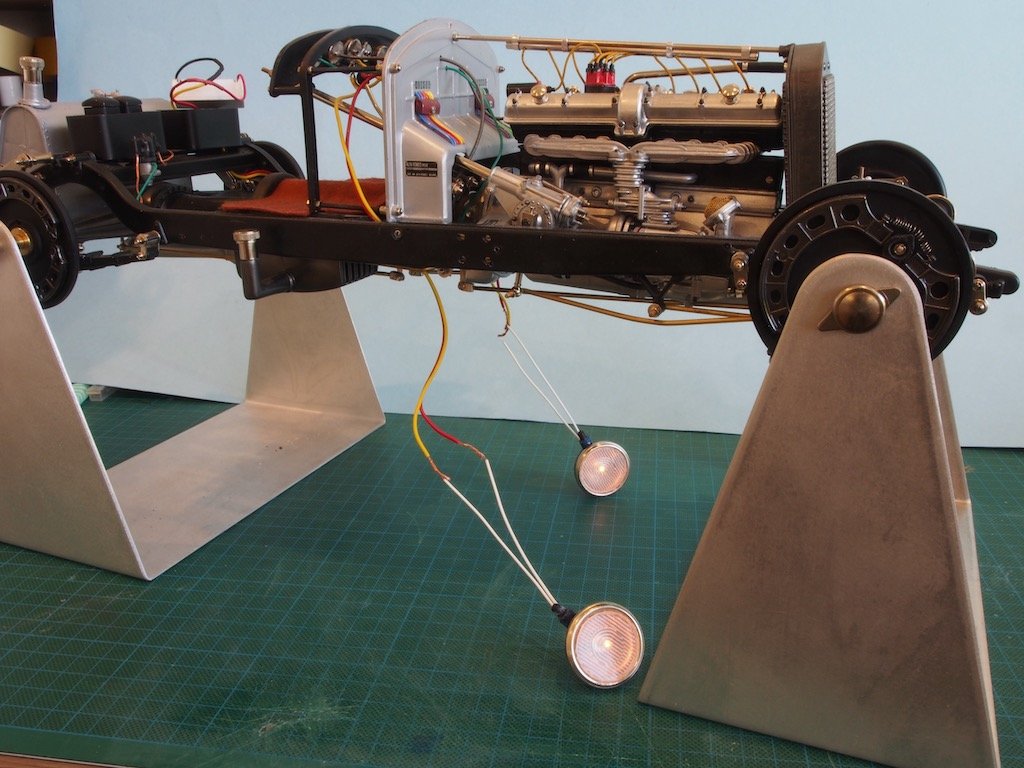
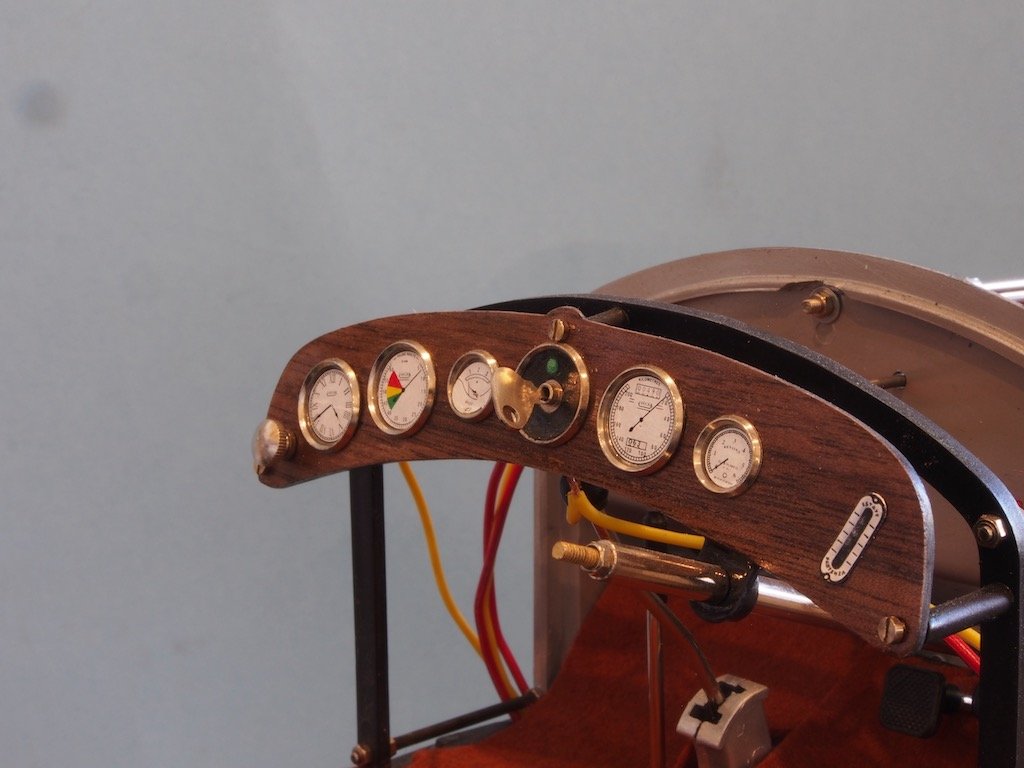
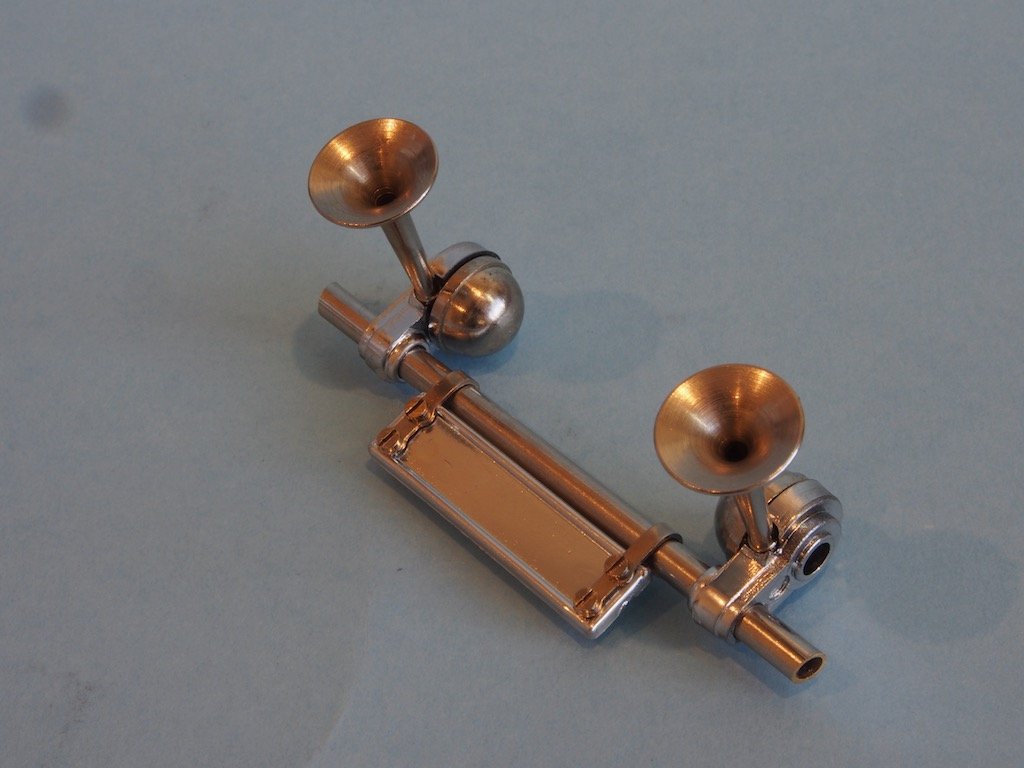
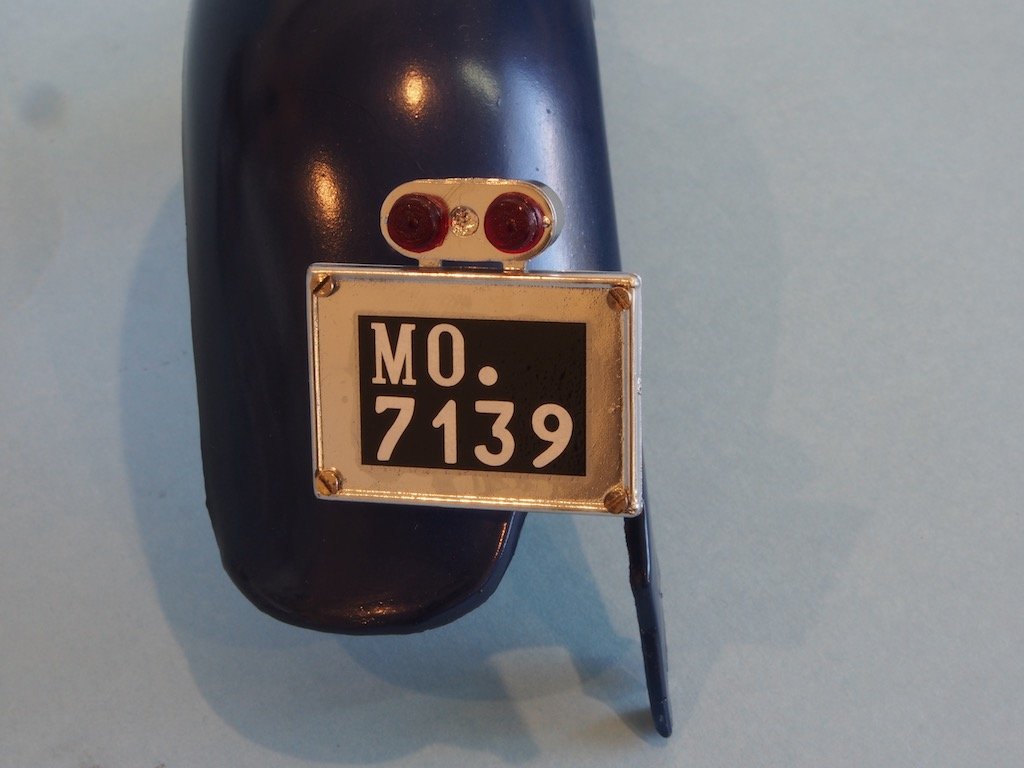
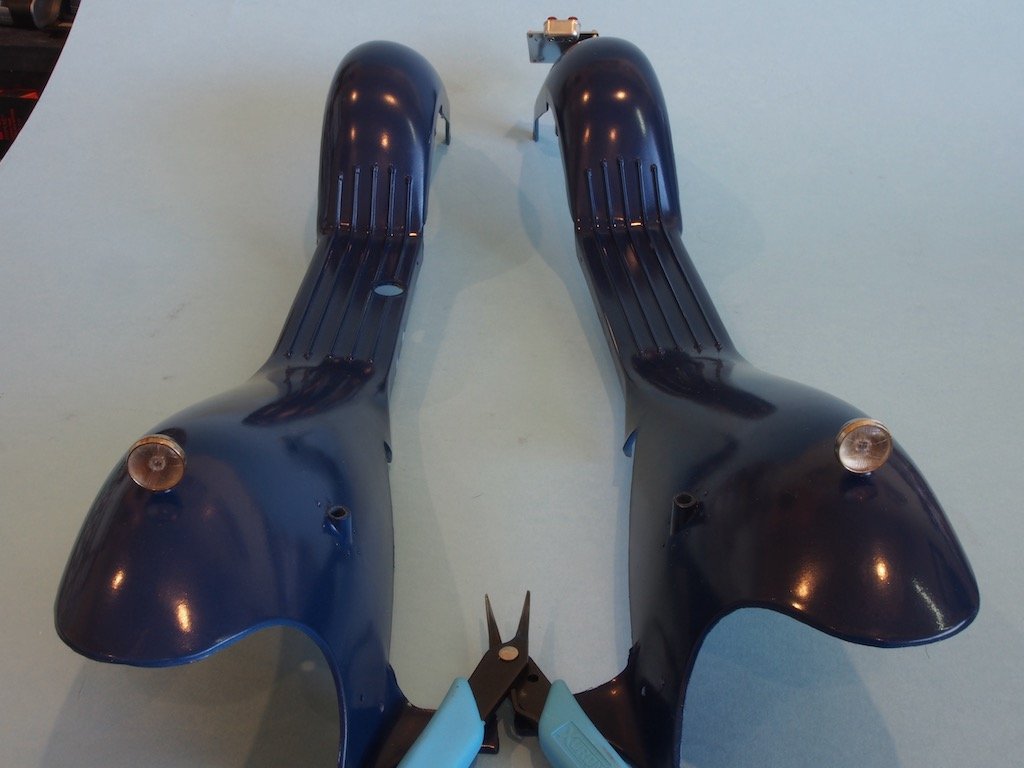
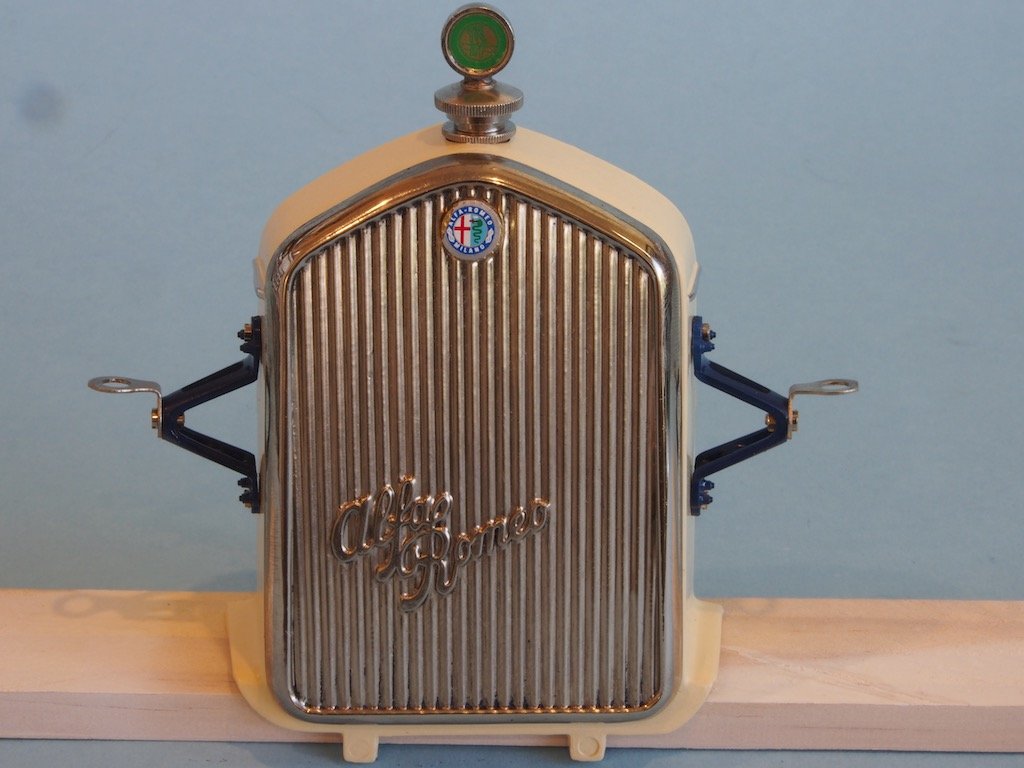
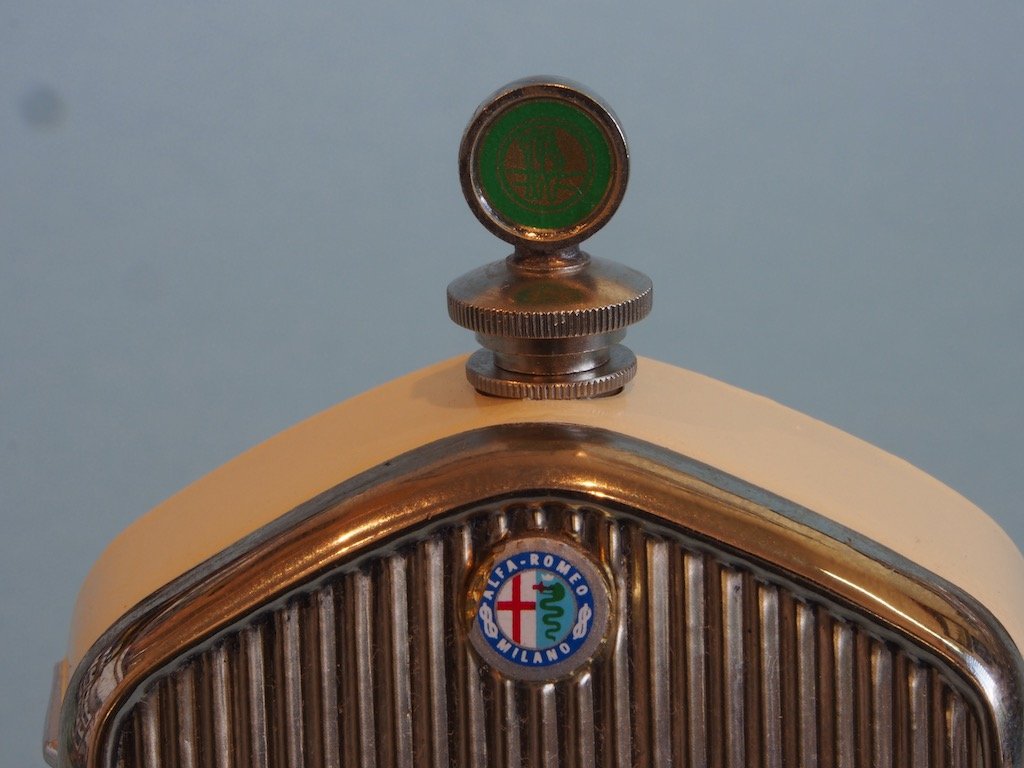
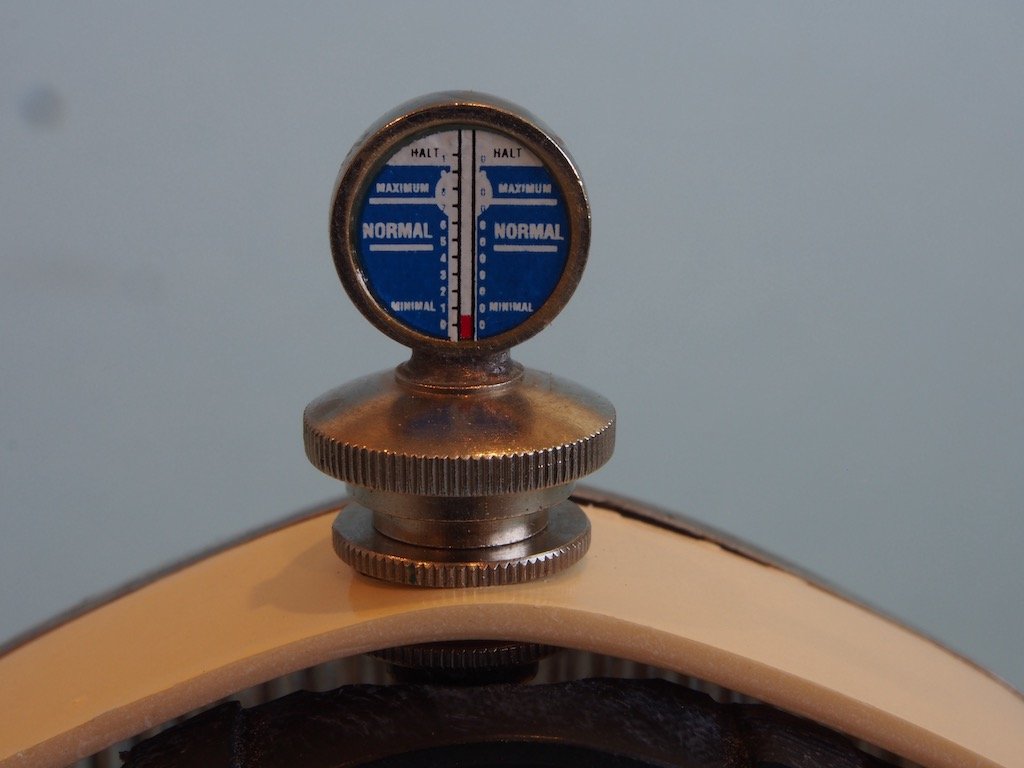
A Minor Update I have decided not to install the body work until the steering wheel is in place, and I can’t do that until the centre hub arrives. This was ordered on Sep 08 and made it as far as Miami FL by Sep 09. There has been no tracking movement since, so I’m kinda stuck until the postal system works itself out. In the meantime, I’ve finished off all the remaining small bits of work that I could. First up, I decided to temporarily connect the Headlight wiring to test that to see if it works. As you can see in the picture below, it does! The headlights are turned on by inserting the key in the dash as seen in the next photo. The front horn assembly was next. This actually required the temporary installation of the main body panels and fender panels so that the cross brace could be fitted, and the ends angled to match the fenders. In the photo below, you can see the mixture of plastic and metal parts. It is nigh on impossible to discern a colour difference between the two materials. The rear licence plate was then assembled, using an aftermarket decal from Model Motorcars for the rego number. It is held onto the fender with only two screws – the other two are dummies. The front of the fenders are also fitted with small lights. While these parts look simple, there is once again a fit issue that requires some delicate work to rectify. Here they are installed: The front nose was then assembled. Three additional decals from Model Motorcars were used here – one for the Alfa Romeo emblem and two for the radiator cap. This close up shows that there has been some damage to the Alfa Romeo emblem. Fortunately, two were provided on the decal sheet from Model Motorcars, so I should be able to replace this one. The front side of the radiator cap has a St Christopher medal – a bit hard to see in the photo, but it’s there: The back of the radiator cap has a temperature gauge, again in the form of a decal from Model Motorcars: And that is as far as I can go until the Steering Wheel hub arrives…
- 224 replies
-
- 16
-
-
1930 BENTLEY 4.5 LITRE by MadDogMcQ - AIRFIX 1:12th Scale
gjdale replied to MadDogMcQ's topic in Non-ship/categorised builds
Great job Tom - she really does look superb. -
Ric - no primer/base is required at all. This was sprayed on bare plastic. Tests I’ve watched on YouTube show basically no difference if a black base is used first. I know that with the Vallejo Metal Colours, they call for a gloss black base primer, but this stuff just doesn’t seem to need it.
-
BUYING A "PAINT SET"
gjdale replied to MadDogMcQ's topic in Painting, finishing and weathering products and techniques
Tom, Those paint sets always look attractive but may prove to be a false economy. I’d be more inclined to buy the individual paints that you need at the time, or for a given project. You’ll soon end up with a large selection anyway, but they will all be colours that you will actually use. You may also find that you use different brands for different purposes too.- 21 replies
-
- 12
-
-
Bob, This is the stuff: https://www.tamiya.com/english/products/87203/index.htm
-
Very nice progress Sea Hoss.
-
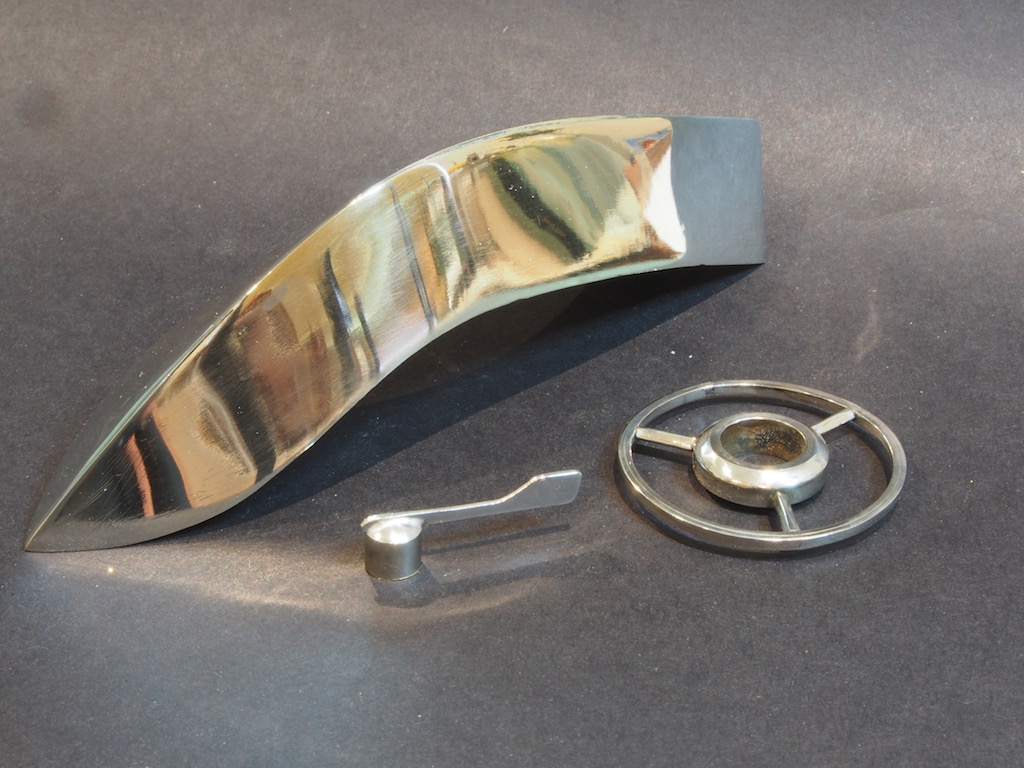
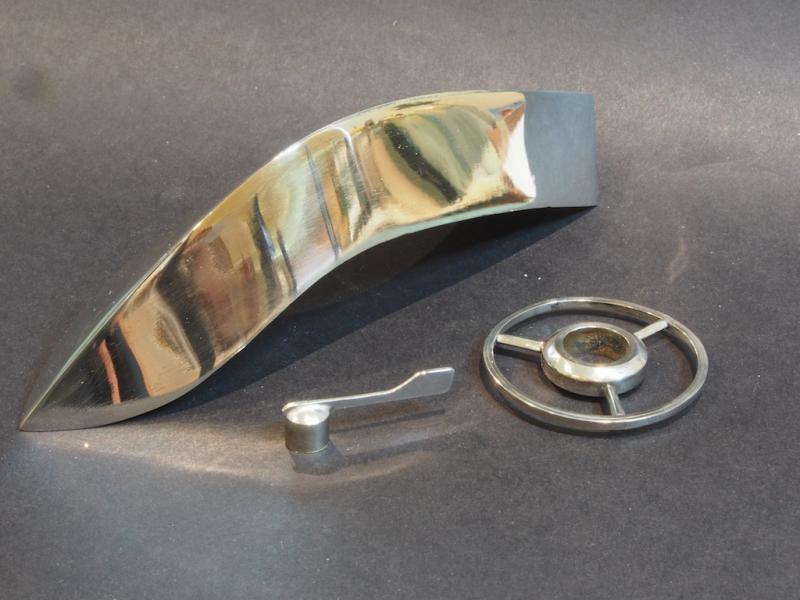
Alan, You could also try some chrome plating yourself using a relatively inexpenisve kit. Here’s a snippet from my experience doing this on my Chris Craft runabout: Chrome Plating - First Adventures To complete both the Wheel assembly and the Cutwater, some chrome plating was called for. Following the lead of others over on the RC Groups forum, I acquired a Caswell Chrome Plating Kit. It was relatively inexpensive and, as it turned out, quite easy to use. The kit consists of a small transformer with two leads extending from it. The black lead has an alligator clip attached and this gets attached to the part being plated. The red lead plugs into a small wand that has its end wrapped in a bandage, and this is soaked in the plating solution and then rubbed onto the part. And then the magic happens. It’s as easy as that. Not much to show, as I didn’t take photos of the process. Here is the end result though (the camera is not kind – it looks a whole lot better at “normal” viewing distance). Mmmmmmm……shiny…….
-
I somehow missed the start of this log Sjors. It’s good to see you back and building again. Your Flirt is coming along very nicely indeed.
- 164 replies
-
- 3
-
-
- vanguard models
- flirt
- (and 1 more)
-
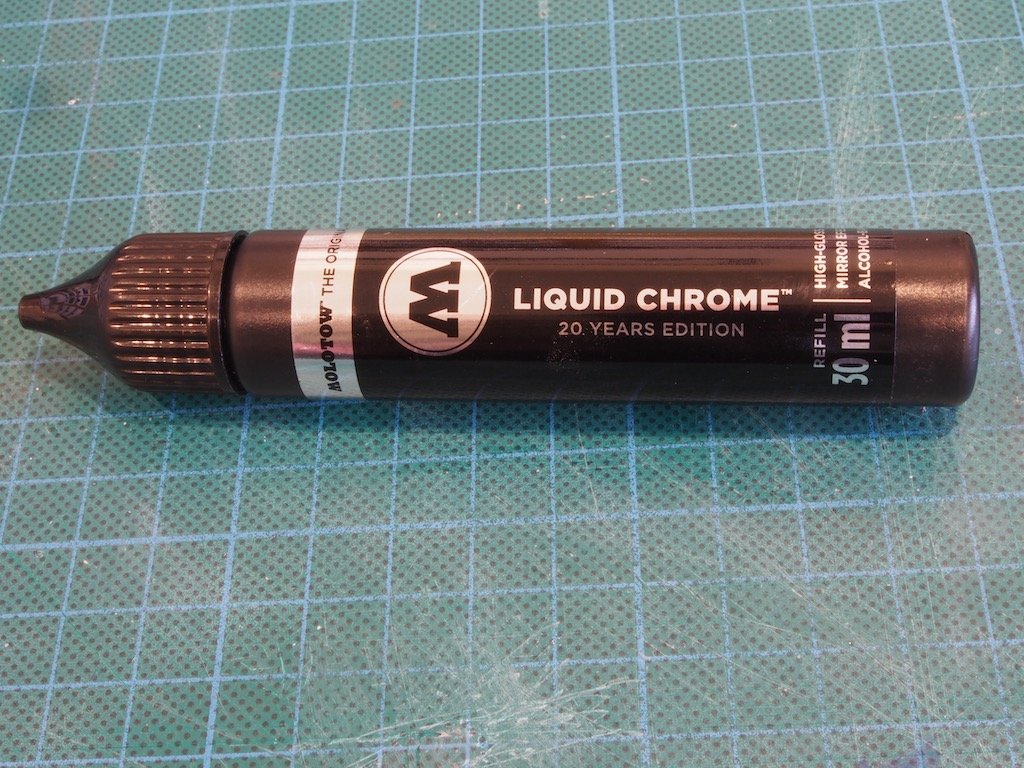
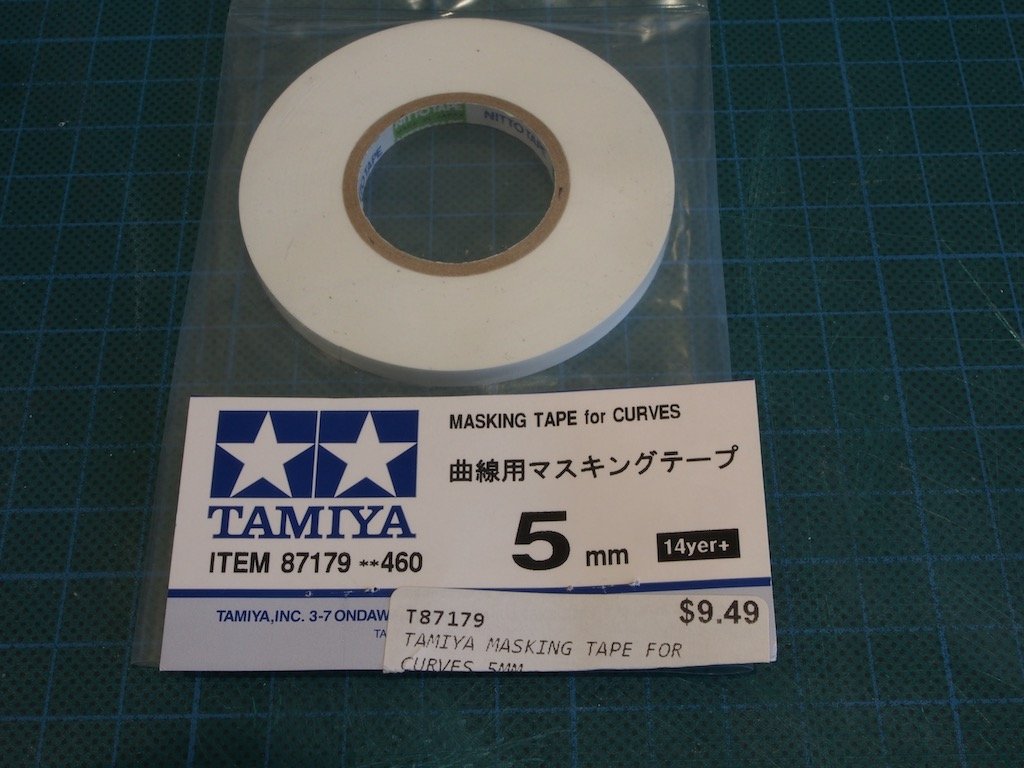
Thanks Bob. The Molotov comes in 3 sizes of paint pen (1mm, 2mm and 4mm) and then there is the Refill, which is what I have used here (in the photo). The refill has a screw cap over a fine hole/spout. After shaking well, simply unscrew the cap and pour directly into the airbrush cup. Some people dismantle the paint pens to access the paint but why bother going to the extra expense and trouble when the refill is available and so easy to use? It is more expensive to buy but holds a lot more paint (30ml), so more economical in the long run. The Tamiya masking sheet comes in a roll with masking tape pre-attached to one edge. I can’t remember the exact product name as it’s a while since I bought it.
-
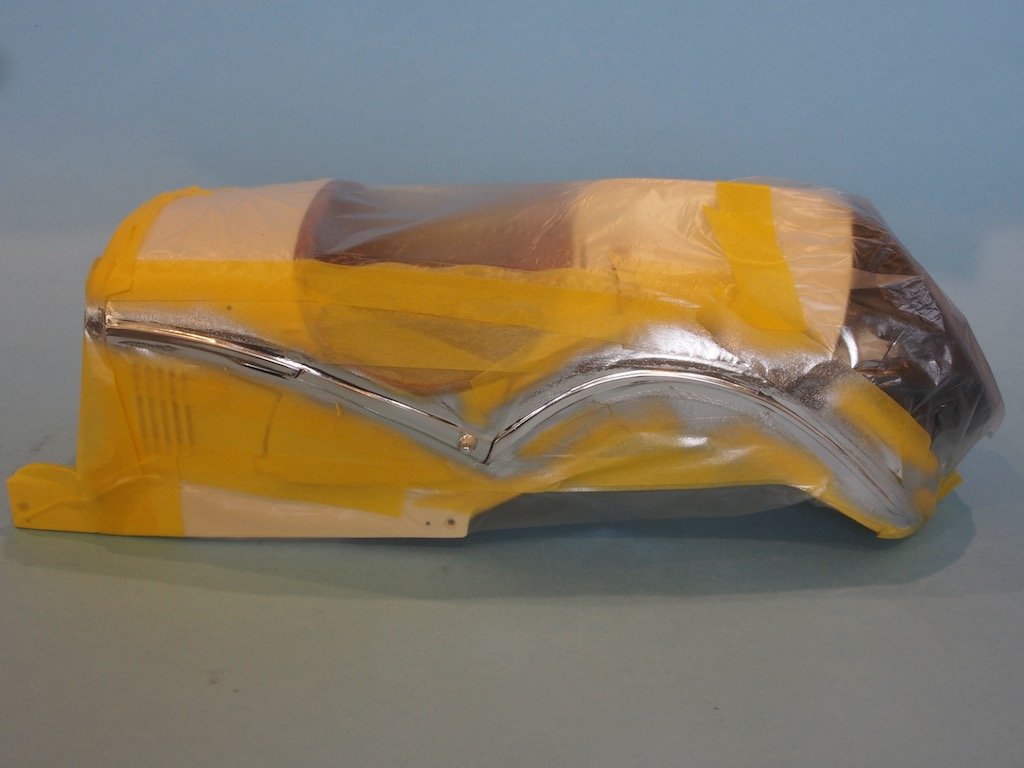
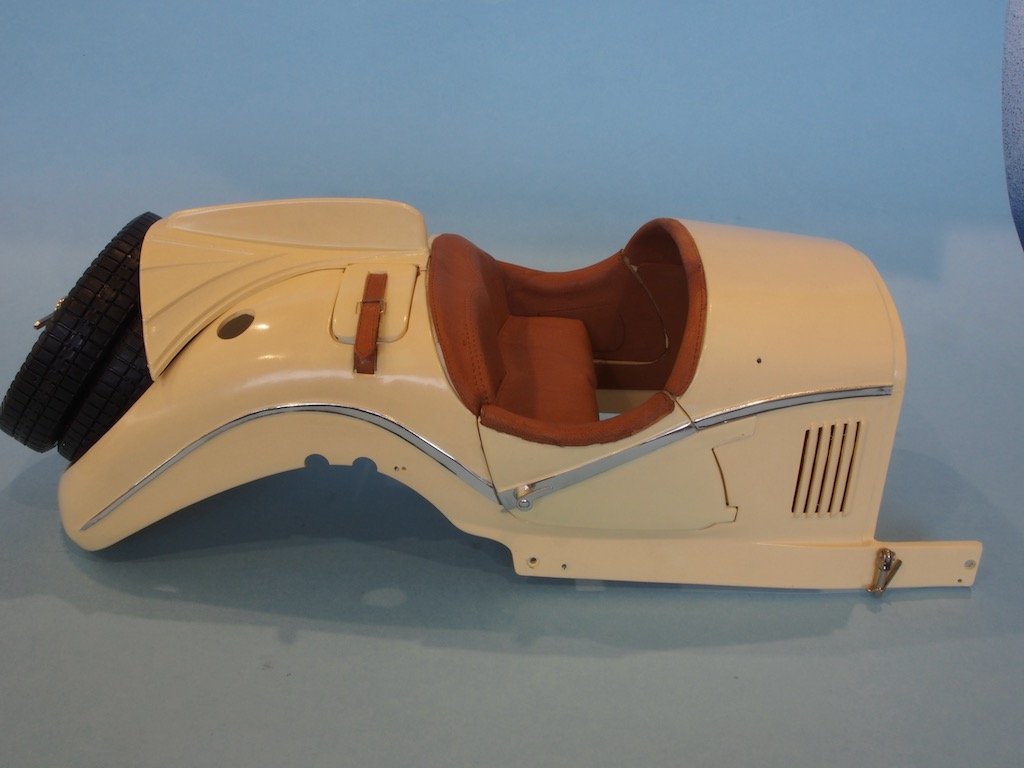
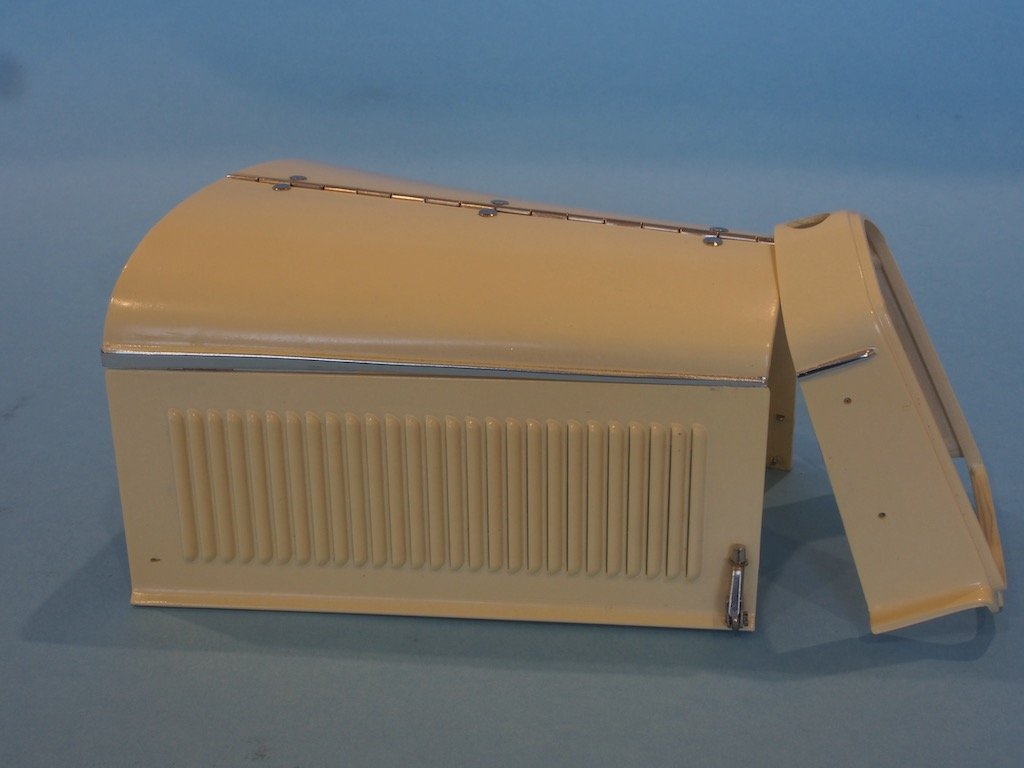
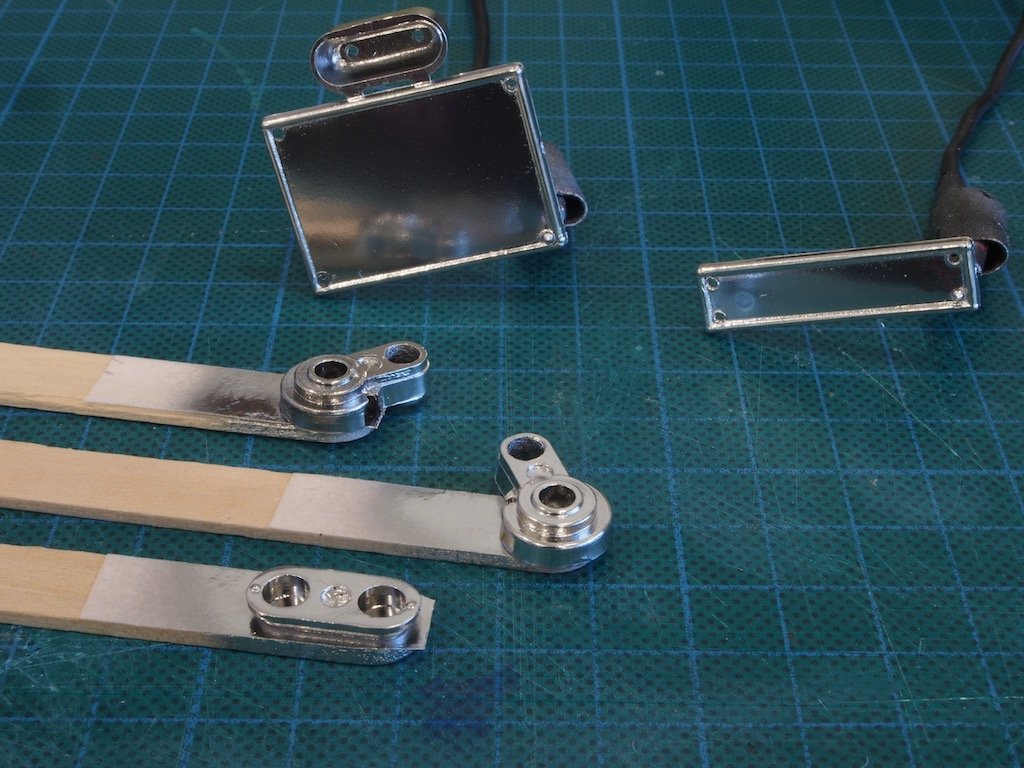
Painting the Chrome Trim The Molotow Liquid Chrome paint arrived the other day, along with another essential supply – masking tape designed to go around curves: The most difficult part of this job was probably the masking up. I needed to make sure that the Chrome was going to go only where I wanted it and nowhere else. The curved masking tape is brilliant stuff – it feels like a plastic tape (a little like electricians’ tape) and really does allow you to conform to curves. I used this as an initial mask close up against the curves, then overlaid regular painters’ tape and some Tamiya masking sheet to wrap the car body. This may have been overkill, but I was taking no chances! Once the masking was in place, I then carefully applied Isopropyl Alcohol to remove the existing paint down to bare plastic. Here is the main body masked, after I had sprayed Liquid Chrome. This stuff sprays beautifully, straight up – no need for thinning, and no need for priming of any sort. The only downside to the Molotow product is that it takes quite a while to cure. It needs to be left several days at least prior to handling. I didn’t want to leave the masking tapes in contact with the other painted surfaces any longer than necessary, so I gave it 24 hours before very carefully removing the masking. Here is the result. The eagle eyed will notice that there is a tiny spot at the bottom left of the door where the chrome snuck through, but the masking was otherwise successful. You might notice also that the painted trim is the same colour as the door handle, which did not get painted. I think I’m calling this a success! The hood and front nose were a little easier to mask. Here are their results: There were a few other parts that needed a chrome finish, including the front and rear licence plate holders. In the picture below, you can see just how much of a mirror finish this stuff gives as you can see the reflection of the other parts in the large rear licence plate holder. From all the accounts I’ve read to date, there is no clear coat that will not dull this finish. However, if left to cure properly, the final result is quite durable. So, I’m going to leave all of these parts for about a week to ensure they are fully cured before I start handling them again. In the meantime, I realised that when I ordered my replacement steering wheel from Model Motorcars, I forgot to order the centre hub to go with it (a $6 part). So I bit the bullet the other day and ordered the hub. To spread the hurt for the $16 postage charge, I also ordered a pair of buckles to replace the kit parts on the luggage straps. By the time they get here, the chrome paint should be ready to go.
- 224 replies
-
- 15
-
-
AIRBRUSH OPINIONS PLEASE...
gjdale replied to MadDogMcQ's topic in Painting, finishing and weathering products and techniques
Harder and Steenbeck Airbrushes are very nice (probably at the upper end of the price range). I have the H&S Infinity CR+ and it is an absolute joy to use, as well as being a work of art in itself. Mine came with two needle/nozzle sets - a 0.4mm and a 0.15mm. I’ve only used the 0.4mm to date. It also came with two different sized colour cups - 2mm and 5mm - and I do use both of these.- 40 replies
-
- 3
-
-
- best airbrush
- compressor
- (and 1 more)