
HOLIDAY DONATION DRIVE - SUPPORT MSW - DO YOUR PART TO KEEP THIS GREAT FORUM GOING! (Only 13 donations so far - C'mon guys!)
×


gjdale
-
Posts
4,890 -
Joined
-
Last visited
Content Type
Profiles
Forums
Gallery
Events
Everything posted by gjdale
-
 Looking very smart Sjors!
 -
I think we’ve all “been there, done that!” OC. We’ll just have to look forward to seeing updated pics next time.
-
Thanks for the explanation Egilman - good words of caution.
-
Thanks for the heads-up and sorry to hear of your experience Egilman. I’m confused though - why would you want to mask the varnish? I would have thought that was your final coat? Same for IPA - why would you be taking IPA near a finished surface? I’m sure you had reason to do so - I’m curious to understand better. Bob - I think you’ve been waiting for me to do trials, and I’ve been waiting to see how you went with yours! I’ve just read in your Pen Duick thread how the polishing didn’t work - good to know, but sorry that it was at your expense.
-
Thanks for the kind comment Mike. To try and answer your question - the problem I have with the gloss black primer is getting it to the right consistency to spray through the airbrush without clogging. Finding the right “formula” of paint, thinner, and flow improver has been quite challenging and I don’t think I’ve yet hit on the “ideal” mix. Once it is on the model, it’s fine - though if you use a little too much flow improver it will take quite a long time to dry (naturally, since that is the function of flow improver - to slow down the drying time). The varnish is a similar problem only worse and can end up staying tacky for days. The one thing I haven’t tried Yet with the varnish is thinning it with water (the website says it can be thinned with water). Maybe I should give that a go. I’m also trialling the Liquitex permanent high gloss acrylic varnish. It sprays perfectly straight out of the bottle. It may need several coats - I’ve only done one so far, so am reserving judgement. I can’t comment on other products as I’ve no direct experience with them.
-
Yes Sjors, you can tell Anja that the mug still drinks well - and its almost 7 years now (we were over there in Sep 2013)!
-
Bob, For most of the engine I’ve used paints from the Vallejo Metal Colour range. The engine block etc is painted with Dull Aluminium, with Gun Metal for the highlighted bolt heads. I’ve also used Steel for some of the underside, like the Oil Cooler and drive shaft/rear axle, and also the radiator. I also used Model Air Black for the black parts. The Metal Colour range recommends a Gloss Black primer and also the Metal Varnish as a top coat. I’ve had a lot of issues with both the primer and with the varnish - getting the right consistency for the airbrush has been quite challenging. ... and a little birdie told me that you might have already pulled the trigger....😎 Your secret is safe with me ....... and the 35,000 members of MSW. 😉
-
That’s some really nice progress there Sjors. I think Jan may have been referring to the funnels. As for paint scheme, I always reckon it’s “Captain’s Choice” - so whatever colour Anja wants is the right colour!😉 Oh - and tell Anja that I’m still using her (and your) little gift from our visit to Victory all those years ago. 😊
-
Nice to hear that both you and Anja are doing well Sjors. Would be great to see you back building again too.😊
-
Thanks very much Lou. 😊
-
I haven’t been able to find it Bob. It’s possible that he either took the log down, or it may be that he just posted a few photos in one of his ship build logs. He hasn’t been active here for a while now, so not sure that even a PM would be answered, though you could try. But stick around long enough and you’ll see one from me! 😉 (I’ll have to do a ship or two first though.....) Edit: I did manage to find some pics on his website here: http://lehmanshipyard.blogspot.com/p/1932-rolls-royce.html and some more pics here (click on the photo and it will take you to the link):
- 224 replies
-
- 13
-

-
Thanks Ken 😊
-
Thanks Bob 😊
-
Great start to the second planking Chris!
-
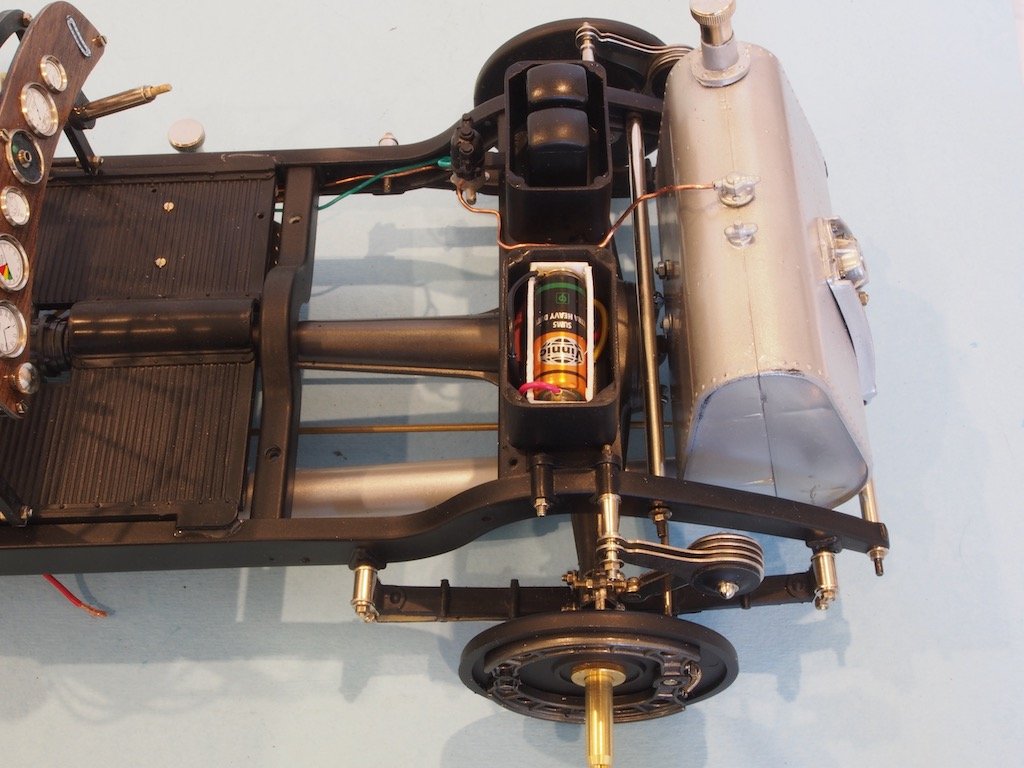
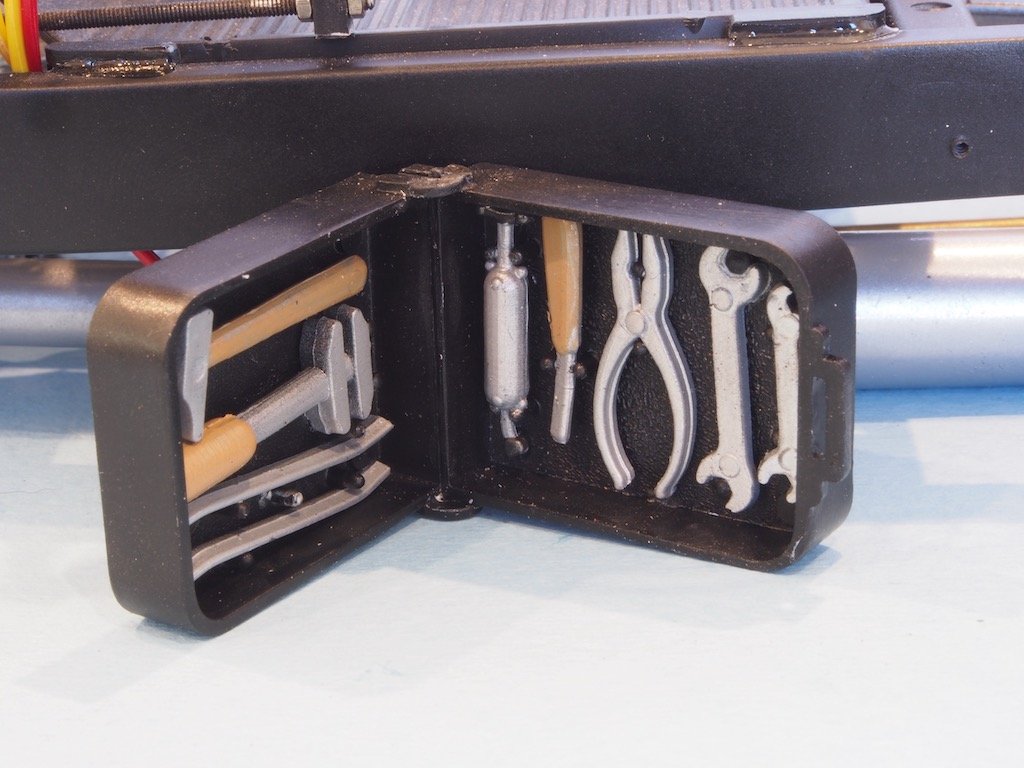
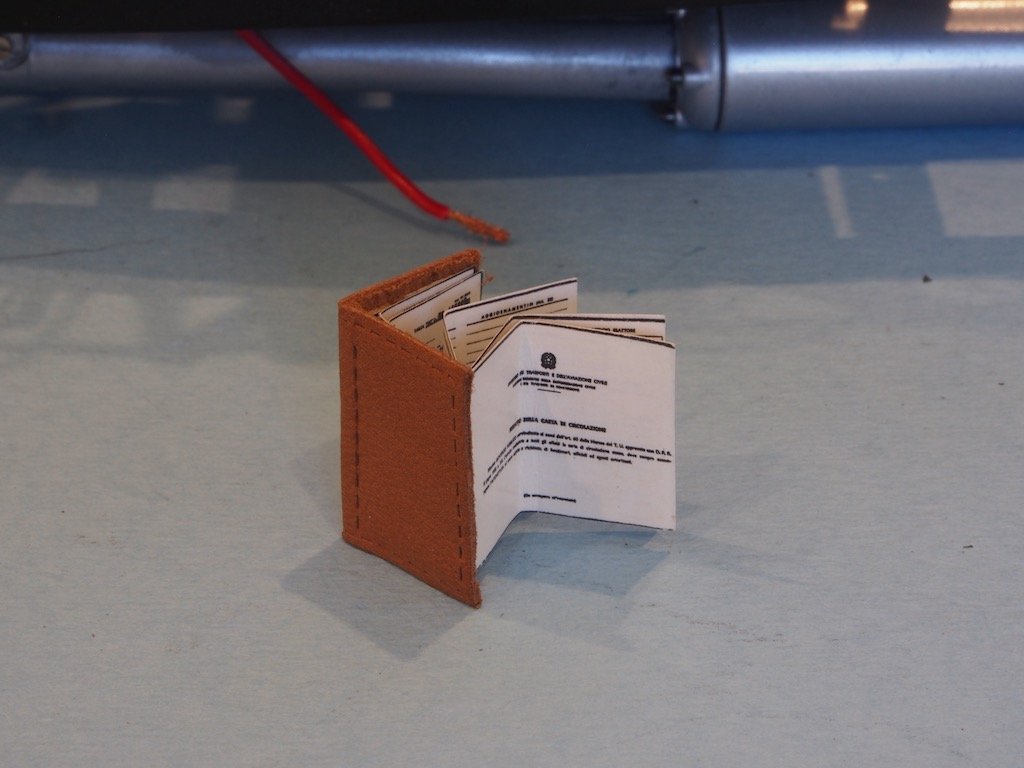
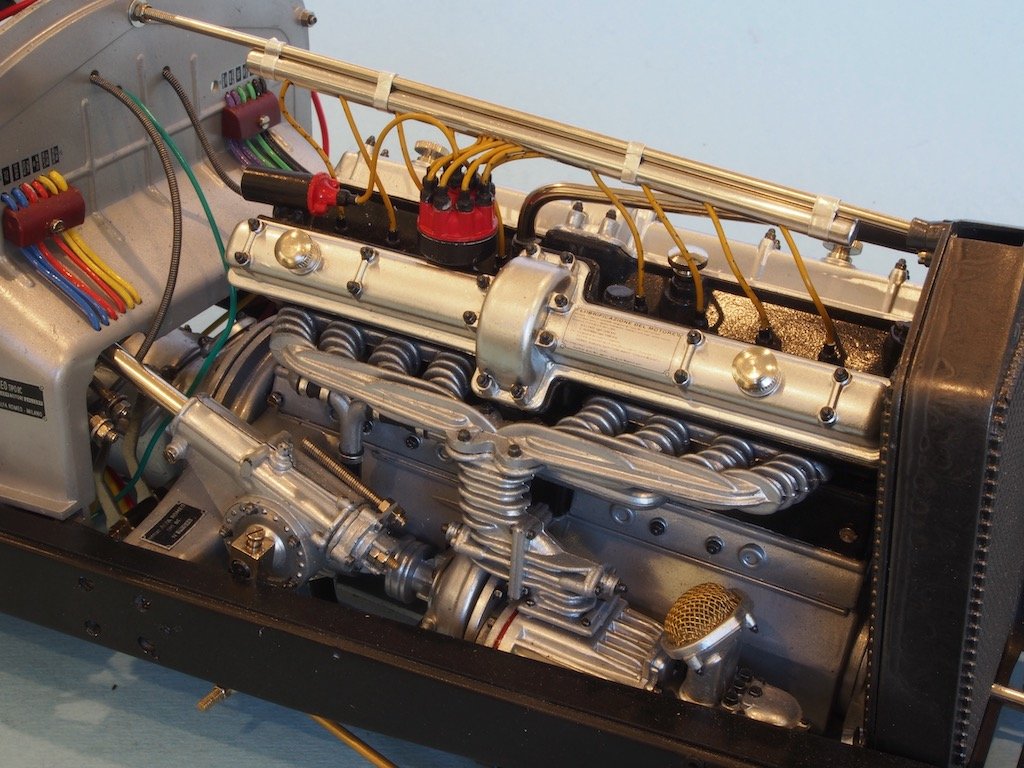
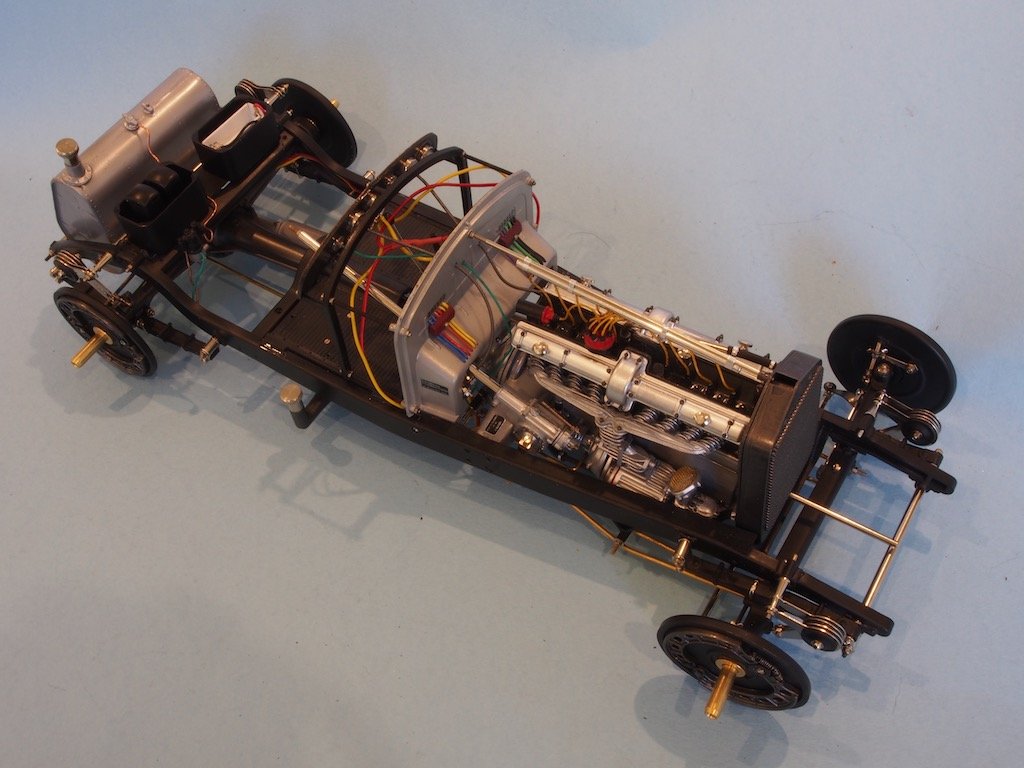
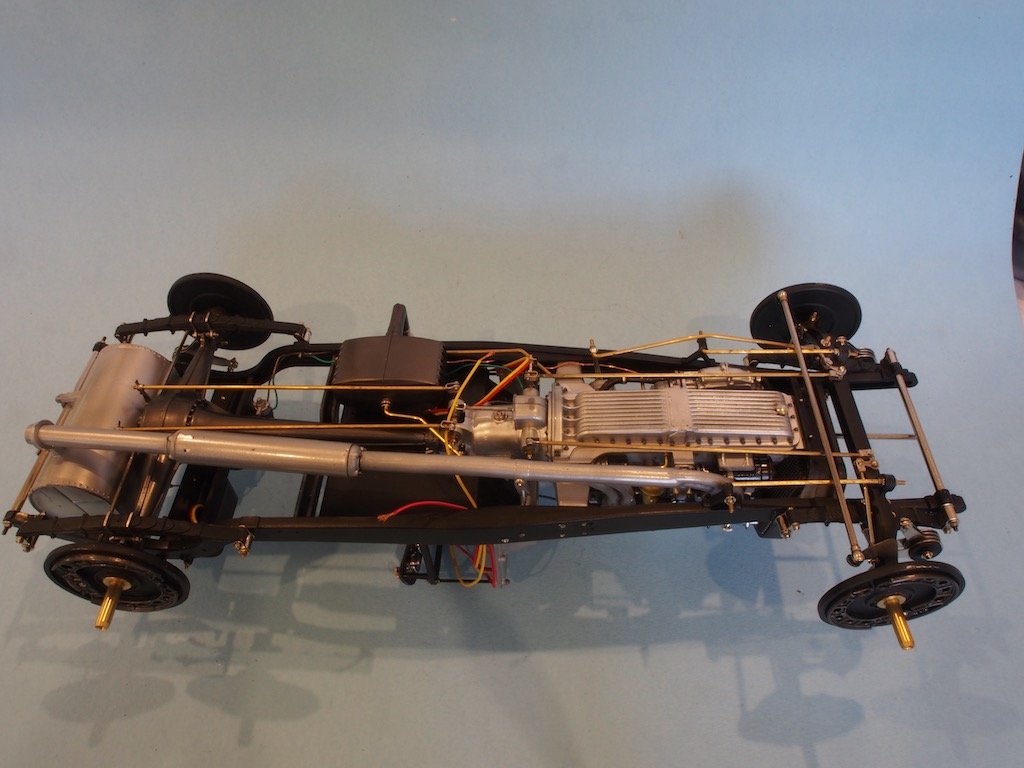
Miscellaneous Items There are a few extra bits and pieces that I completed under the heading of “miscellaneous” items. The first of these was the battery box. Although the luggage compartments make an ideal hiding place for a battery box, I discovered that even a AAA battery size is too large for the space. Paul Koo showed using an ‘N’ size battery here. While I was able to find ‘N’ size batteries at my local electronics store, I could not find a battery holder to match. So I made my own by cannibalising the connectors from a AAA battery box and making a new box from 1.5mm styrene. It’s a snug fit even so, but we got there in the end. Pocher provides a neat little set of tools that simply require painting and gluing in place in the tool box, and a leather log book, the pages of which are cut from the pages of the instruction manual. They are a nice touch to add a little extra interest to the model. With all of the chassis work completed, I was able to go back and install my scratch-built ignition wiring loom along with all the spark plug leads. The leads themselves are an after-market part from Model Motorcars. And finally, here is a ‘glam shot’ of overall progress to date. Next up, the wire wheels......stay tuned.

- 224 replies
-
- 22
-
-
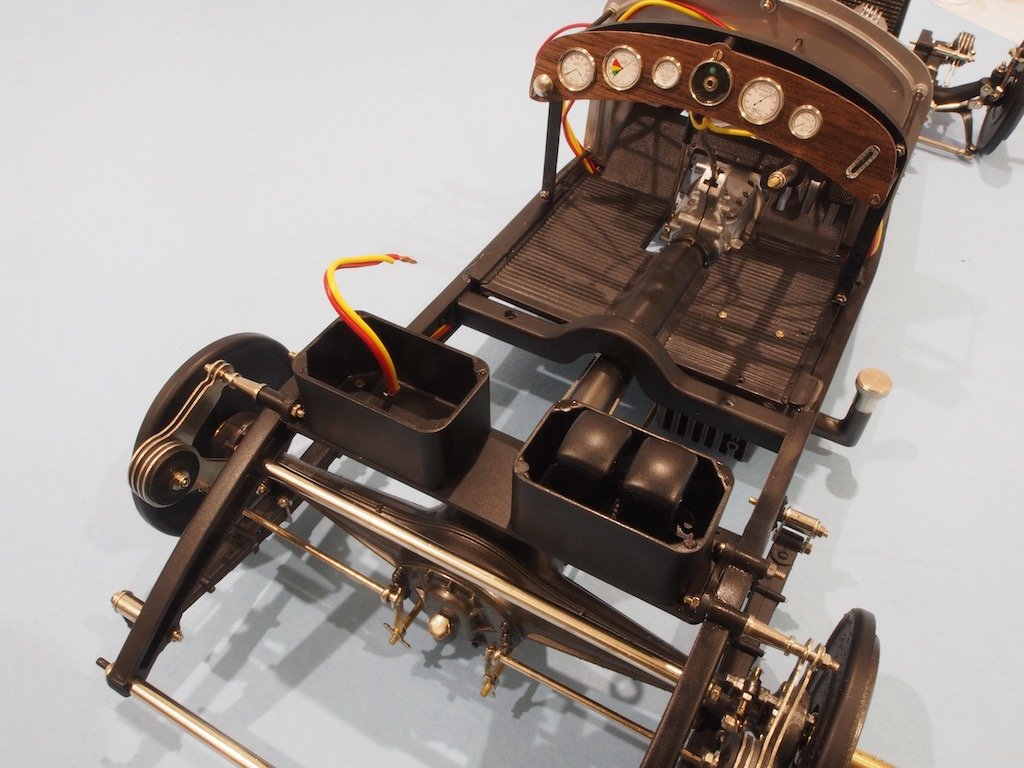
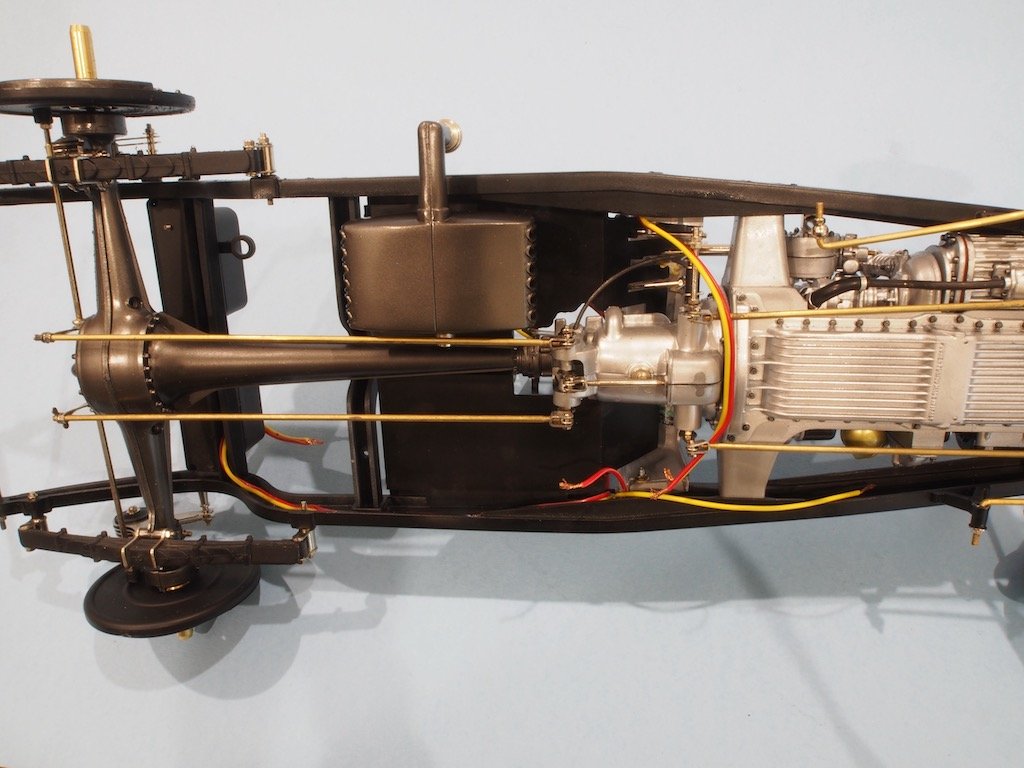
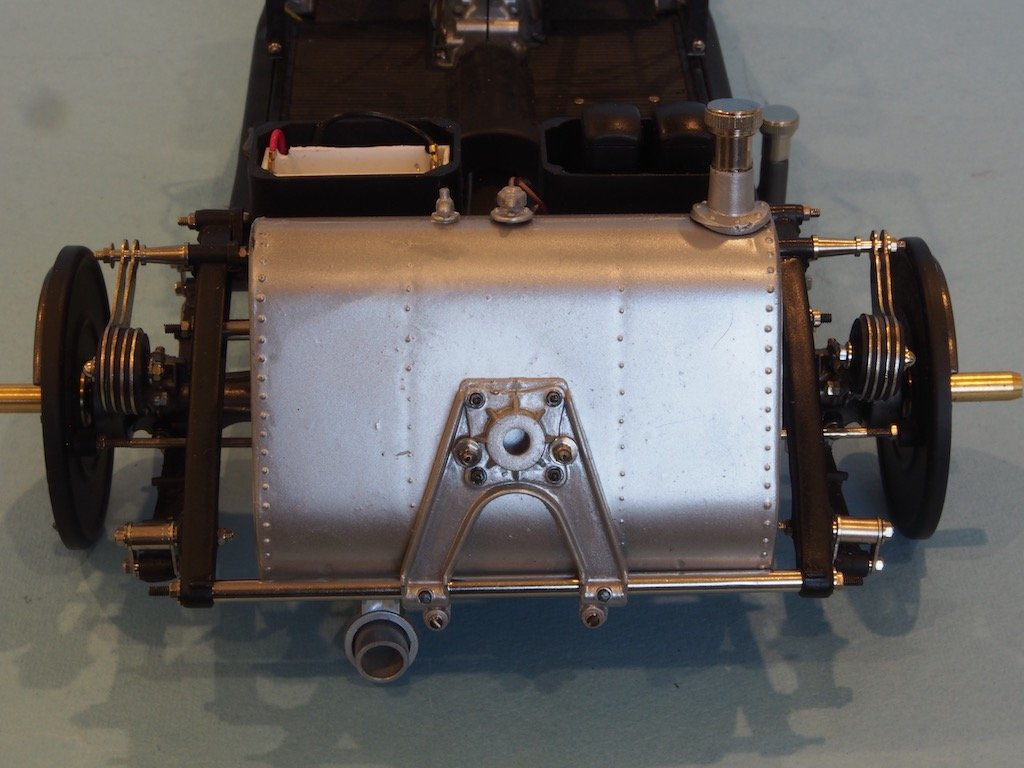
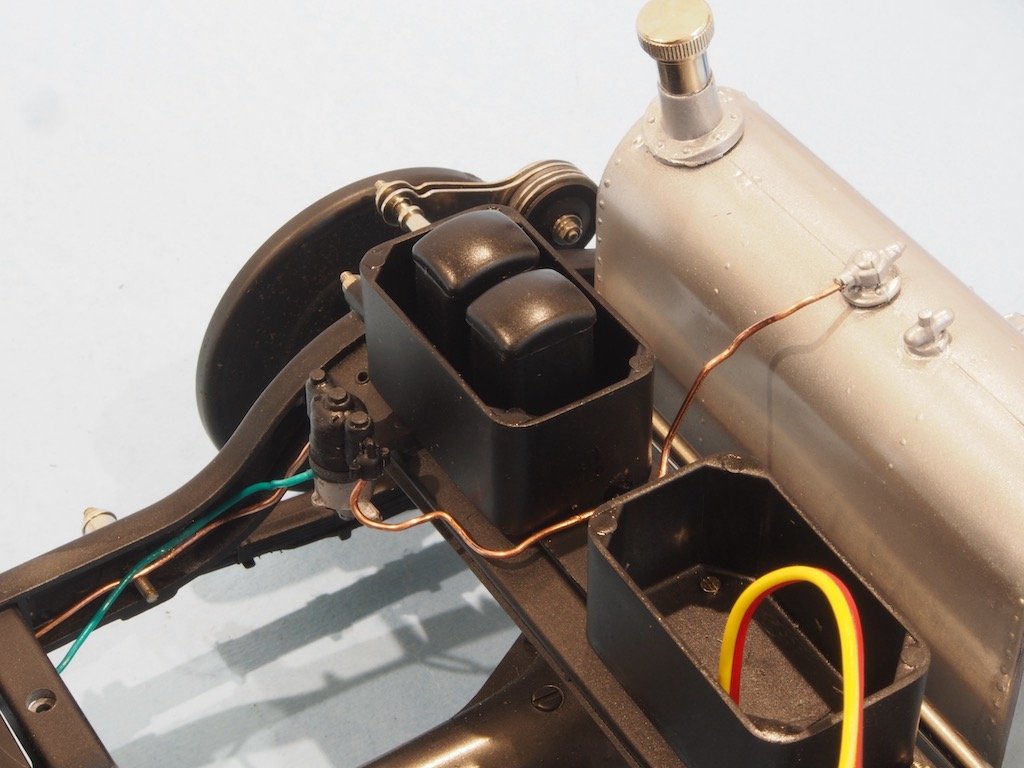
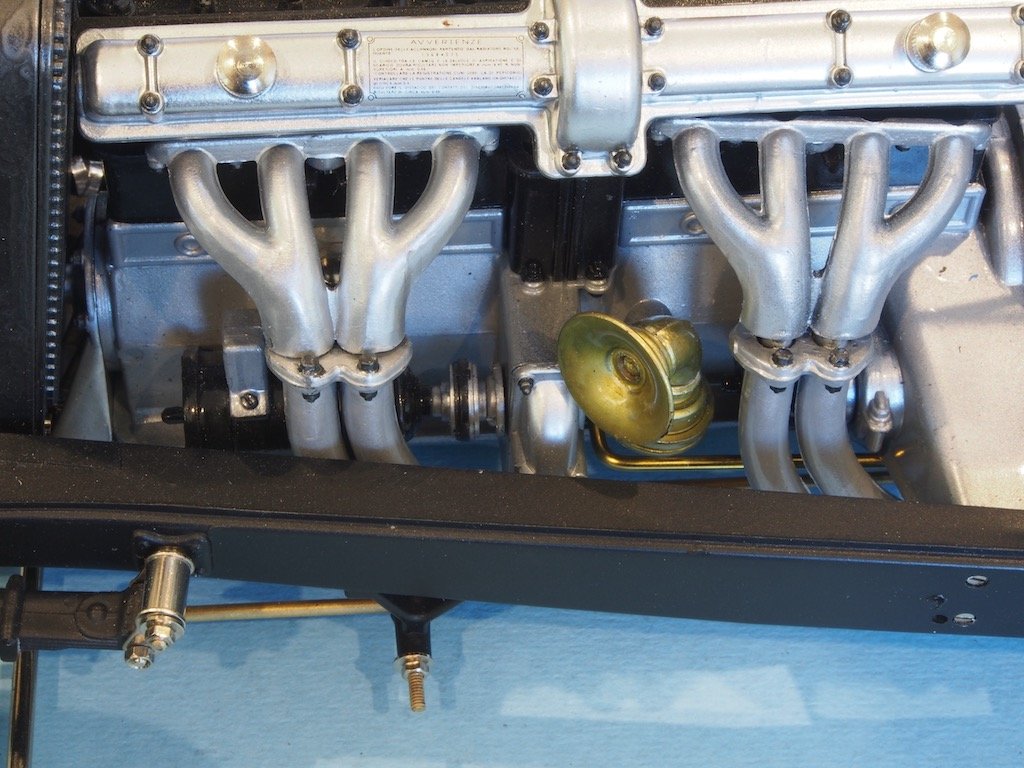
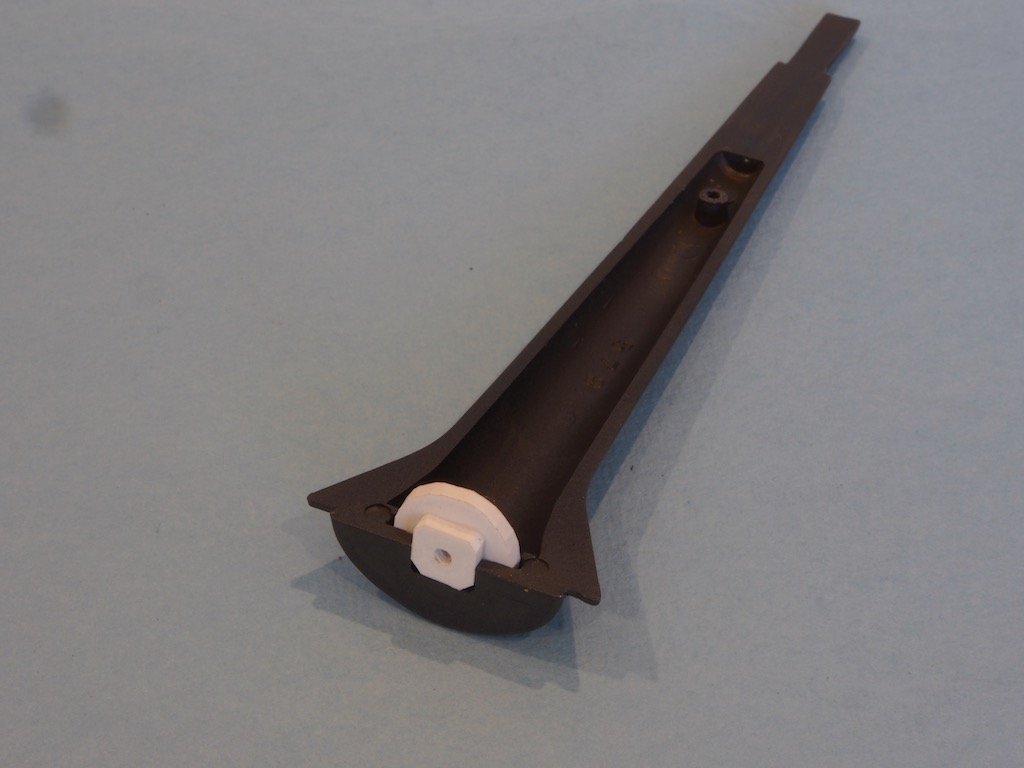
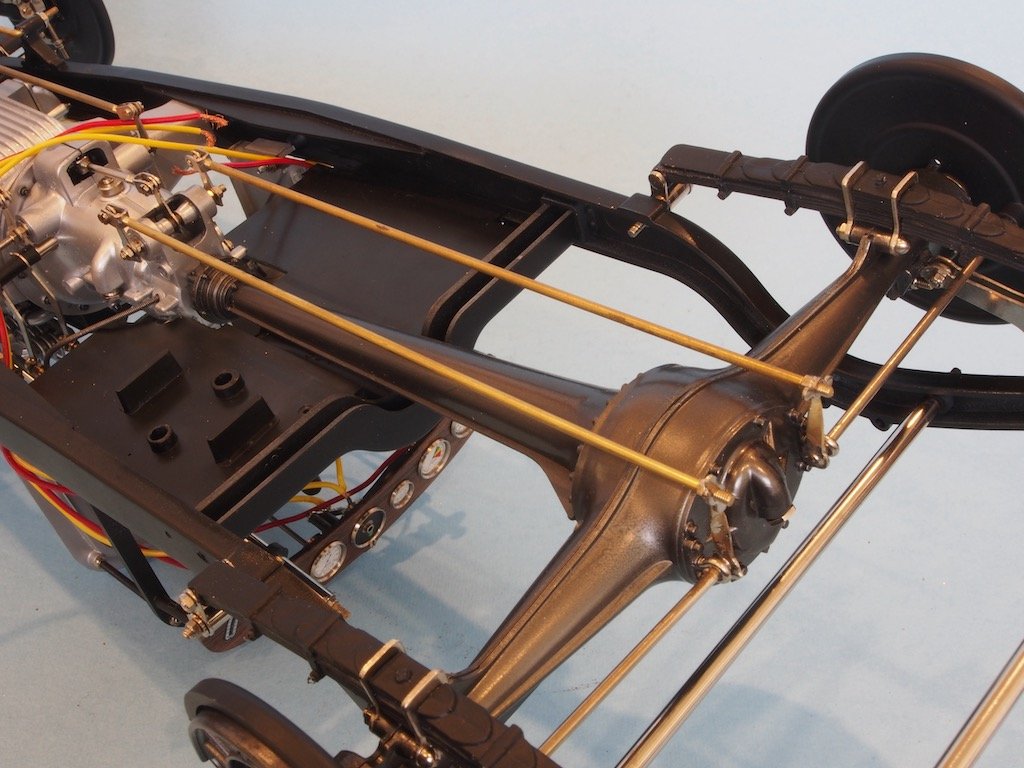
The Rear Axle (continued) The rear axle mounts to the frame via two bolts through the rear floorboard, which first had to be adjusted in shape to enable it to sit horizontally once fitted. The rear bolt is used to also mount the rear dampers, however this part is incorrect to allow proper fitting of the dampers. Apparently in some variations of this kit a correct part was included but for the majority of the kit variations Pocher continued to supply the wrong part. Two options are available to correct this. One option is to replace the incorrect part with a custom machined part. A simpler, though still incorrect option is to mount the damper to the axle using the inner two damper plates and then mount the damper to the chassis using the outer two plates. While this is technically incorrect, it still looks okay, so this is the option I chose. The two luggage boxes are also mounted on top of the rear floorboard, with the left-hand luggage box being drilled through for the wiring to the battery box. This completes the Rear Axle assembly. Chassis Bottom The next item to address is the Oil Cooler and its plumbing. The usual adjustment of the plastic parts and subsequent painting precedes installation. The Oil Cooler is attached to the chassis bottom via two screws in the main floorboard. The position of the floorboard was previously adjusted during the body test fitting to ensure that the Cooler Filler pipe would correctly align with the appropriate hole in the fender. The pipework for the oil cooler consists of two brass rods that must be bent to shape according to some patterns provided in the manual. The right-side pattern is fine, although some of the bends are quite tricky to get just right. This line runs from the rear of the oil cooler along the chassis side and eventually into the engine. It’s the top line in the photo below. The pattern for the left side pipe however is incorrect. Fortunately, Paul Koo warns of this and advises how to go about shaping the line for a correct fit. It runs from the middle left side of the oil cooler around the transmission and into the engine. Fuel Tank The Fuel Tank is another item that requires a departure from the standard instructions. If fitted according to the manual, it will be too upright and the filler cap will not align with the hole in the bodywork. The fix is fairly simple in that it only requires leaving off the upper/forward mounting blocks. This allows the fuel tank to lean forward, which will then align the filler cap. Pocher addressed this in later versions of the kit by providing a differently shaped filler cap. The fuel pump is also attached to the chassis via a mounting point on the rear floorboard and two copper lines are run connecting the pump to the fuel tank and carburettor respectively. An electrical wire (green wire in the photo below) is also run all the way forward along the chassis, then up through the firewall to connect to the back of the fuel gauge on the dashboard. Exhaust System The Exhaust system presents no particular problems other than the usual parts fit problems. To remedy this, the exhaust parts are not glued into the exhaust manifolds on the engine, thereby allowing the parts to self-adjust as they are fitted. In the photo below, the rear manifold appears to have shifted slightly during subsequent operations and will need to be readjusted in due course. Continued next post...


- 224 replies
-
- 15
-
-
Looks like the repairs are going well Kevin - well done.
- 273 replies
-
- 4
-
-
- panart
- amerigo vespucci
- (and 1 more)
-
Fantastic outcome on the paint job Bob! Good luck with the clear coat. After doing some research myself, I’m going to do some trials using Liquitex high gloss acrylic varnish. It can be thinned with the Liquitex Airbrush medium. It can also be dulled down by adding some of their Matte varnish, so you can make your own recipe for how much gloss you want. I’m also going to put it through the mini spray gun rather than the airbrush. Not sure how it will go, but if it works the Liquitex is a heck of lot cheaper than the standard model paints/varnishes. I’ll be very interested to see how your clear coat turns out. I’ll be cheering for you!
-
That looks to be a more than fair interpretation to me BE - well done!
- 195 replies
-
- 1
-
-
- lady eleanor
- vanguard models
- (and 1 more)
-
If you haven't found them already Bob, there are some great little tutorials on airbrushing and airbrush equipment by Paul Budzik, who is also a member here at MSW. Occasionally he posts a link to one of his videos here, but they are easily found on YouTube. He covers a lot more modelling techniques than just Airbrushing, and his tutorials are really well done - his explanations are easy to follow and he knows what he is talking about (more than can be said for a lot of YouTube content out there!!!). Worth a look if you really want to understand airbrushing. I think he would probably say that for a hull the size of your Pen Duick, you really should be using a small spray gun, rather than an airbrush. Again, his videos do a great job of explaining why.
-
Yes I am Bob. Vallejo recommend using the gloss black primer for the Metal Colour range. I’ve had a few issues with the Vallejo primers generally in terms of finding the right “recipe” with thinner and/or flow improver, as well as air pressure to prevent the airbrush clogging. Reading on the internet, it seems I’m not the only one. A few people say they have no problems shooting it straight from the bottle, many more say they just can’t get it to spray properly at all. The gloss black primer seems to be more temperamental than the grey (which is my otherwise ‘go-to’ primer). I’m still experimenting....and have stripped and re-started on more than one occasion - including last night when I stripped the fuel tank back and started over.
-
Thanks for all the likes folks. Bob, to answer your questions: I’m using Vallejo Metal Colour paints, sprayed with my airbrush (Harder and Steenbeck Infinity with 0.4mm needle). I used Dull Aluminium for most of the engine and associated parts. I used Steel for the radiator and for the drive shaft and rear axle. And I use Gun Metal for hand painting the highlighted bolts where appropriate. I used thin CA for this. It forms a pretty much instant bond between brass and the rubber, so it needs to be done carefully. I applied a small amount in the mid section, then worked outwards a little at a time.
-
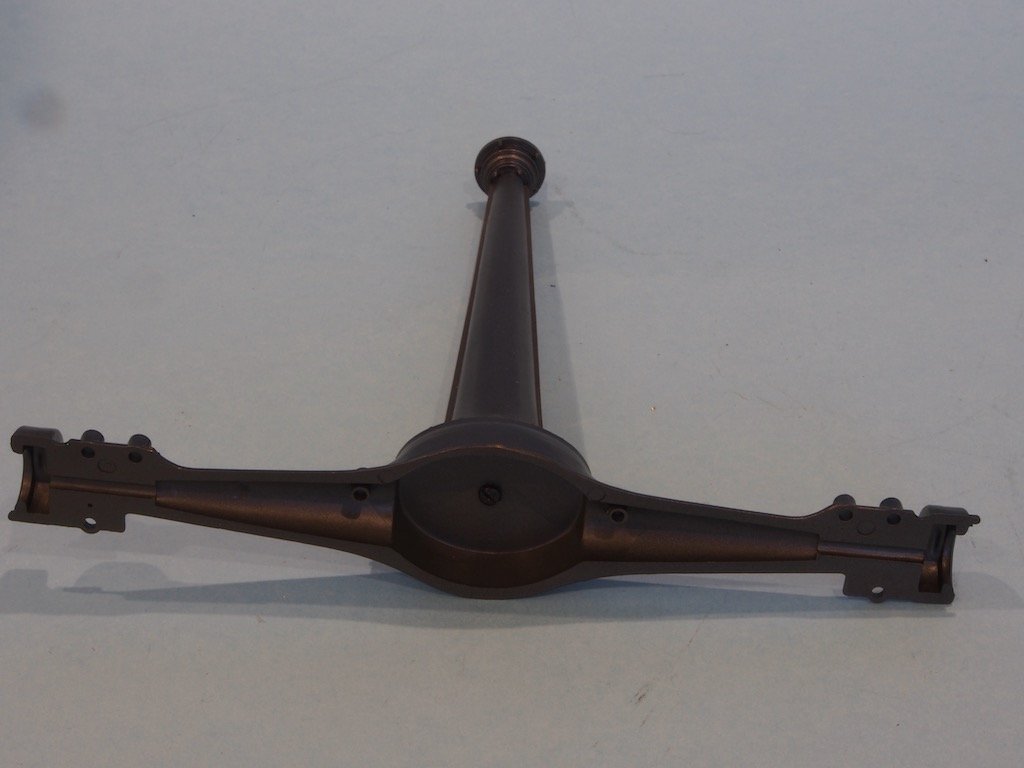
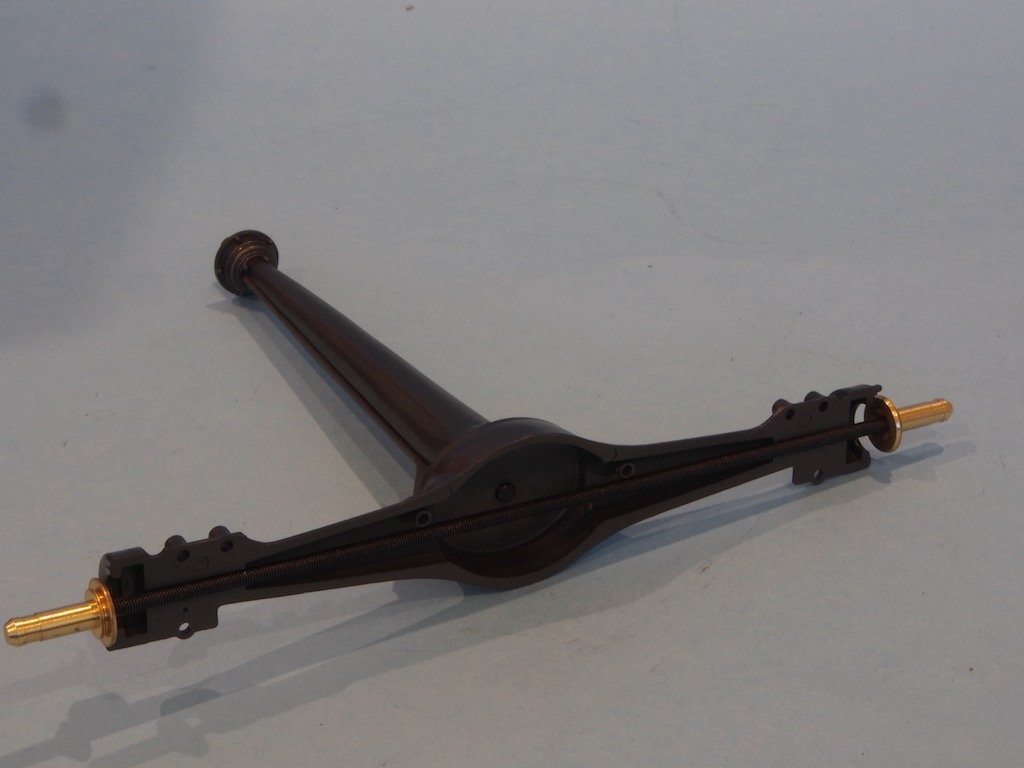
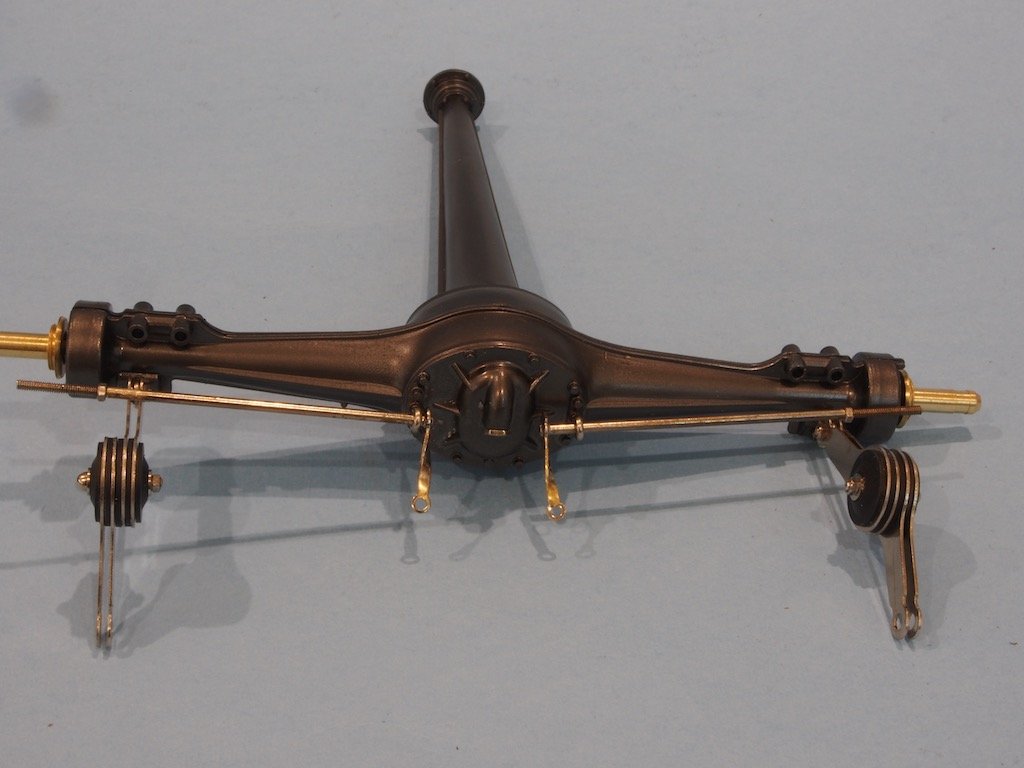
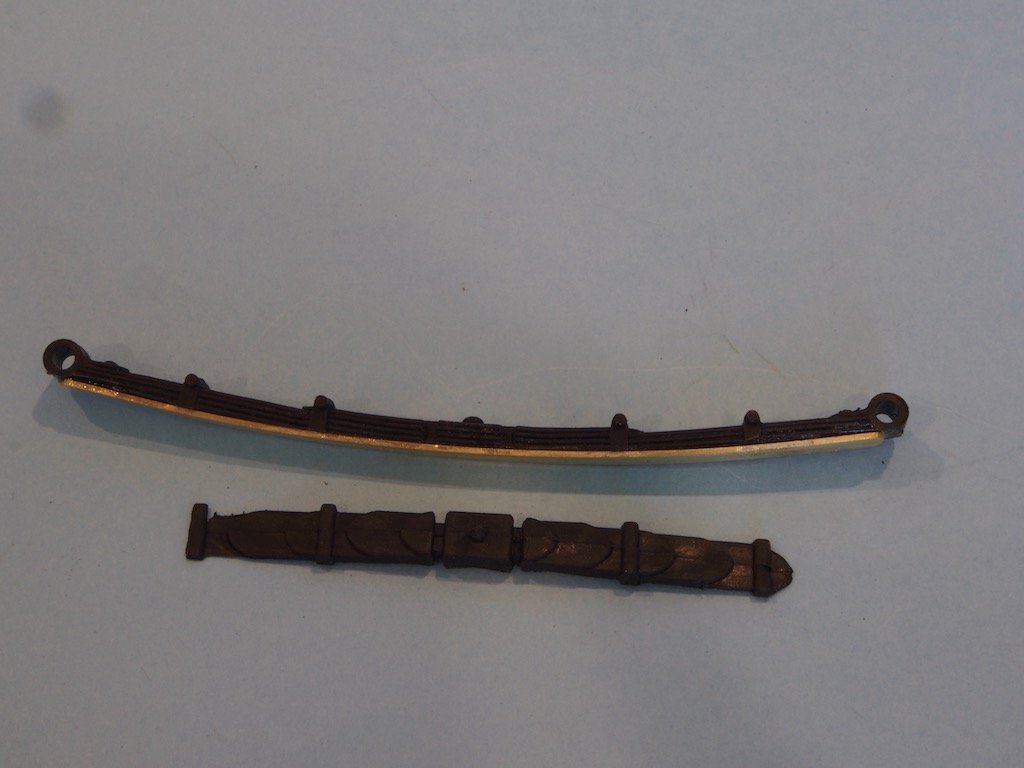
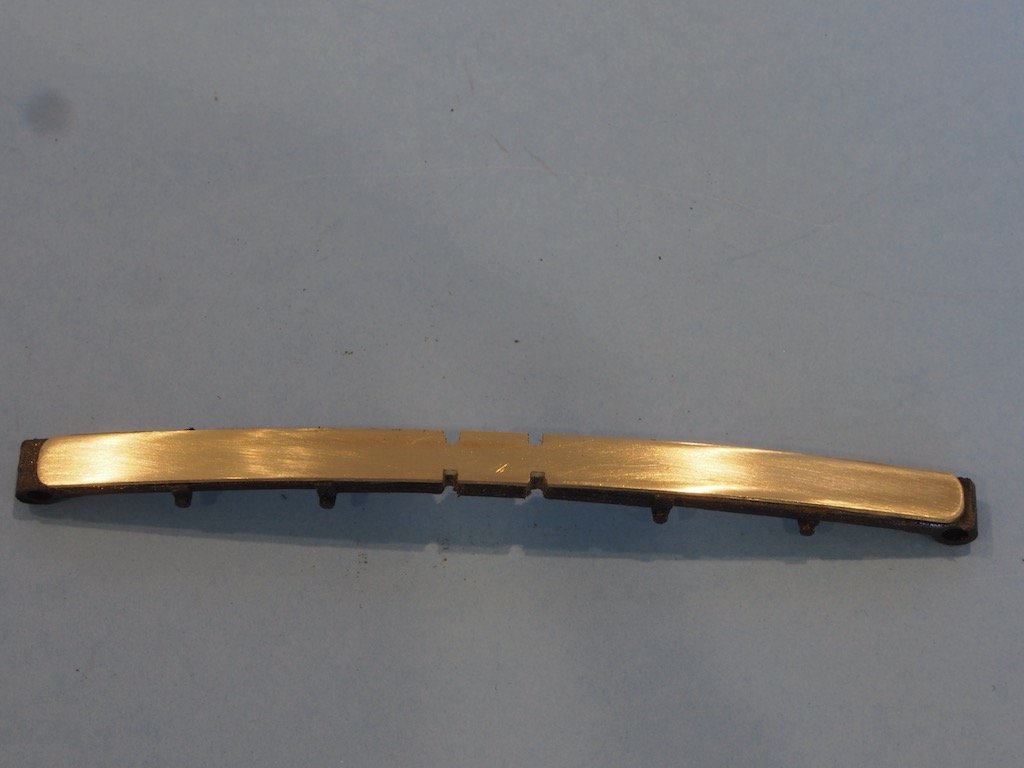
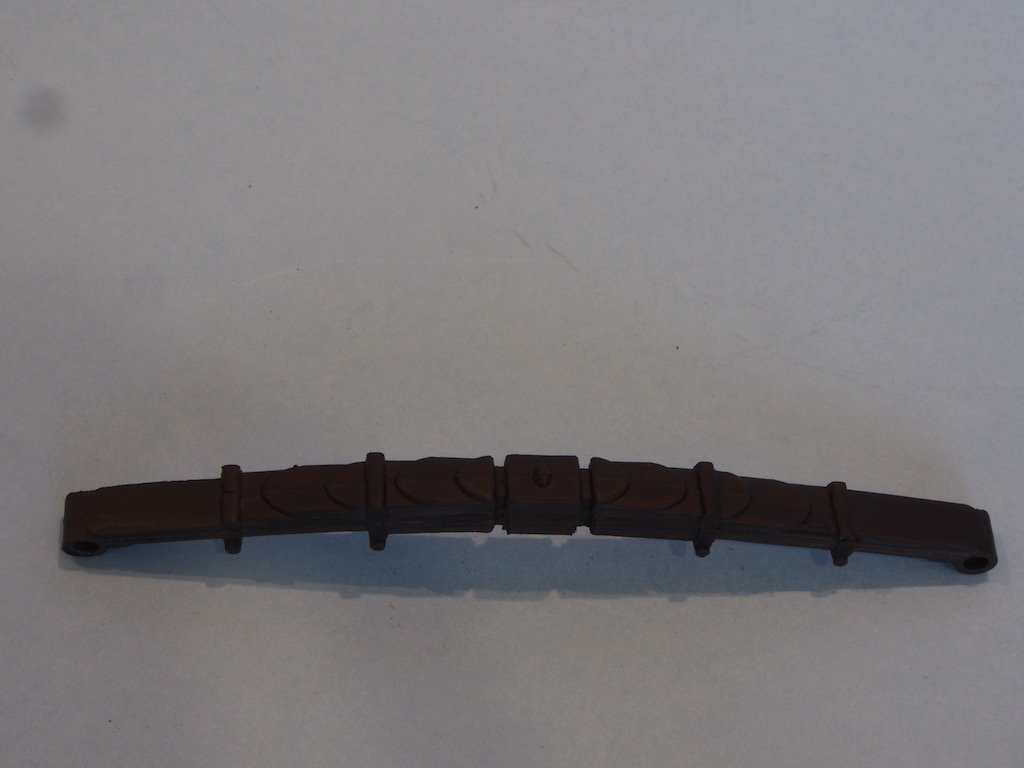
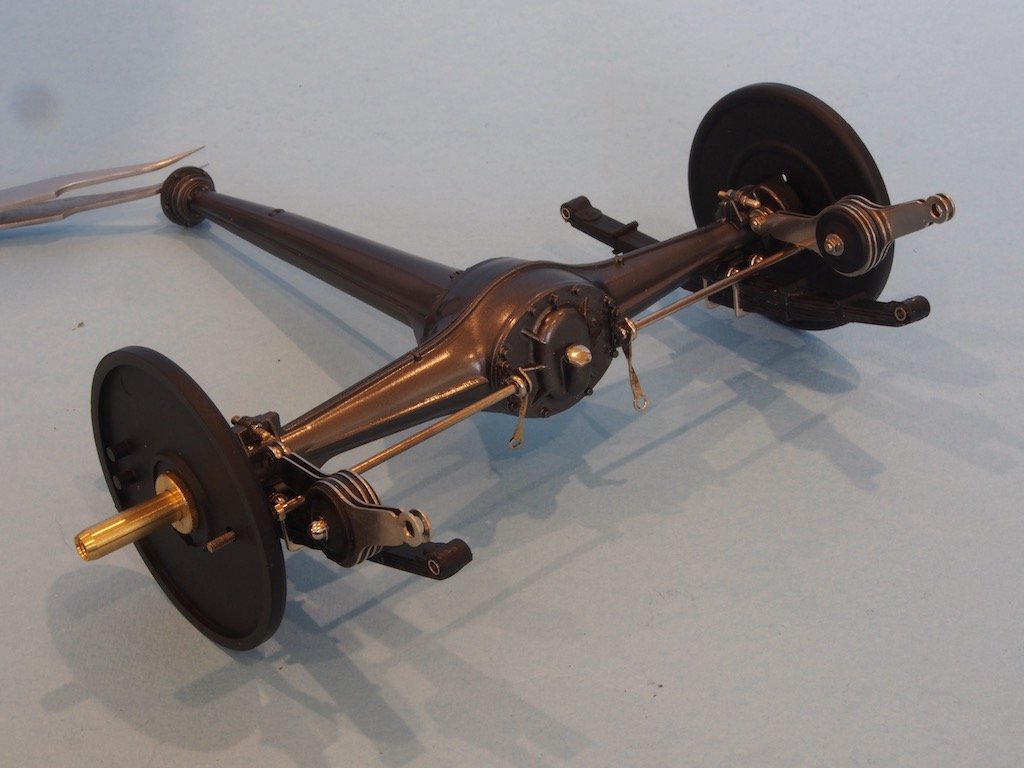
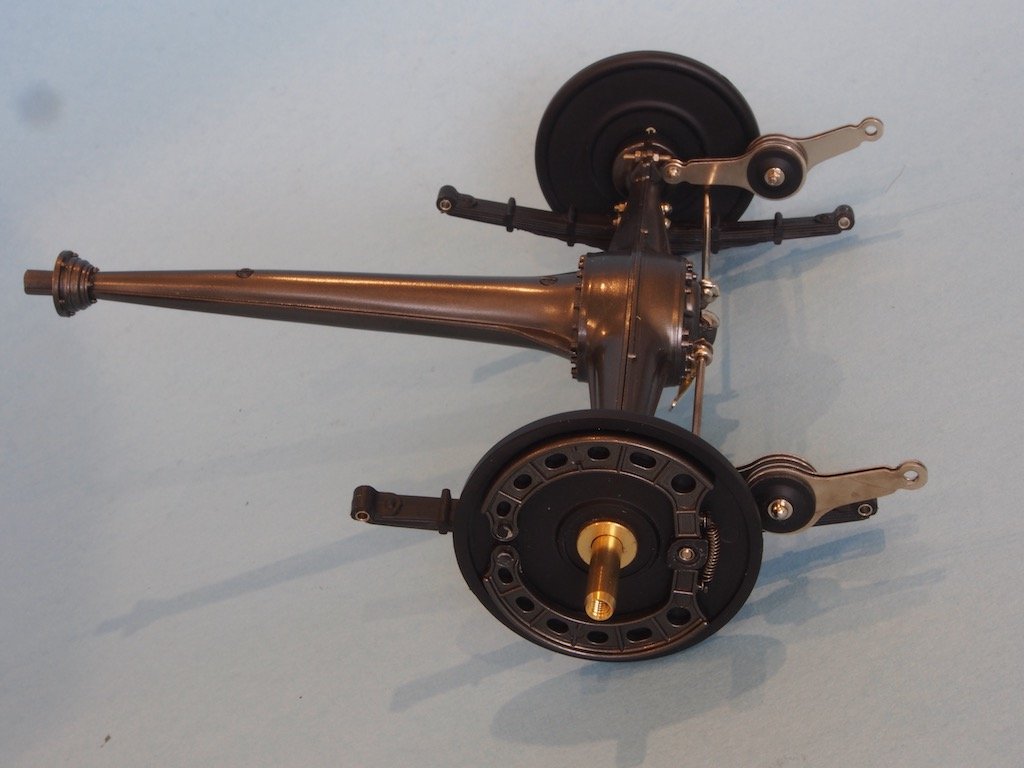
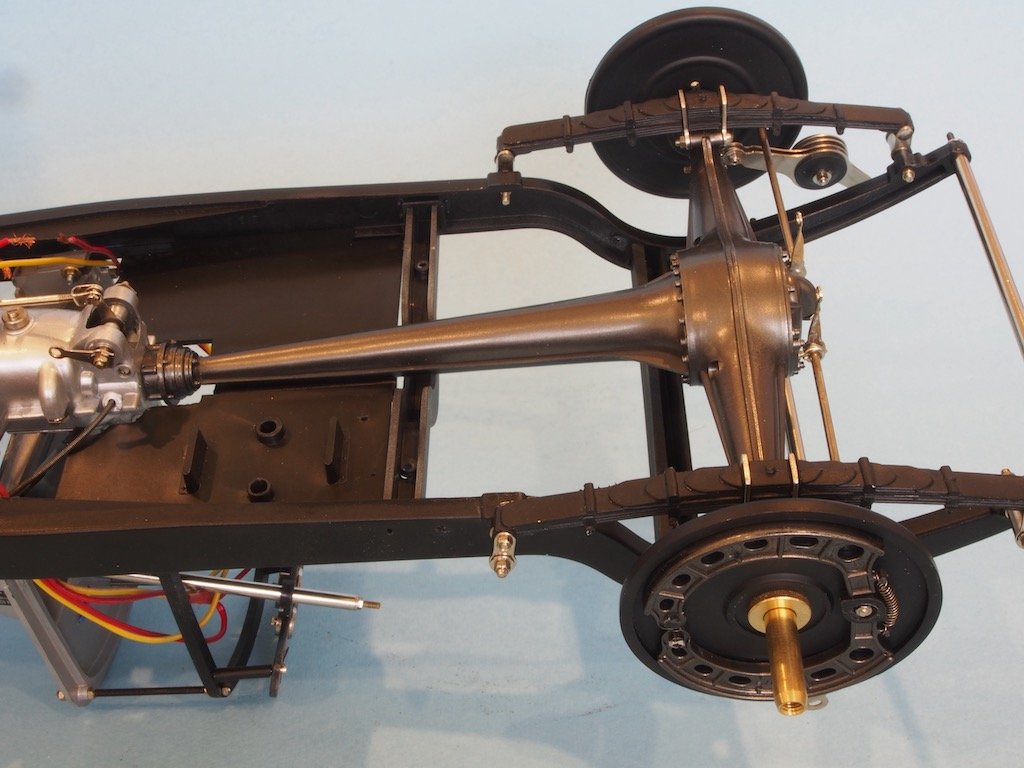
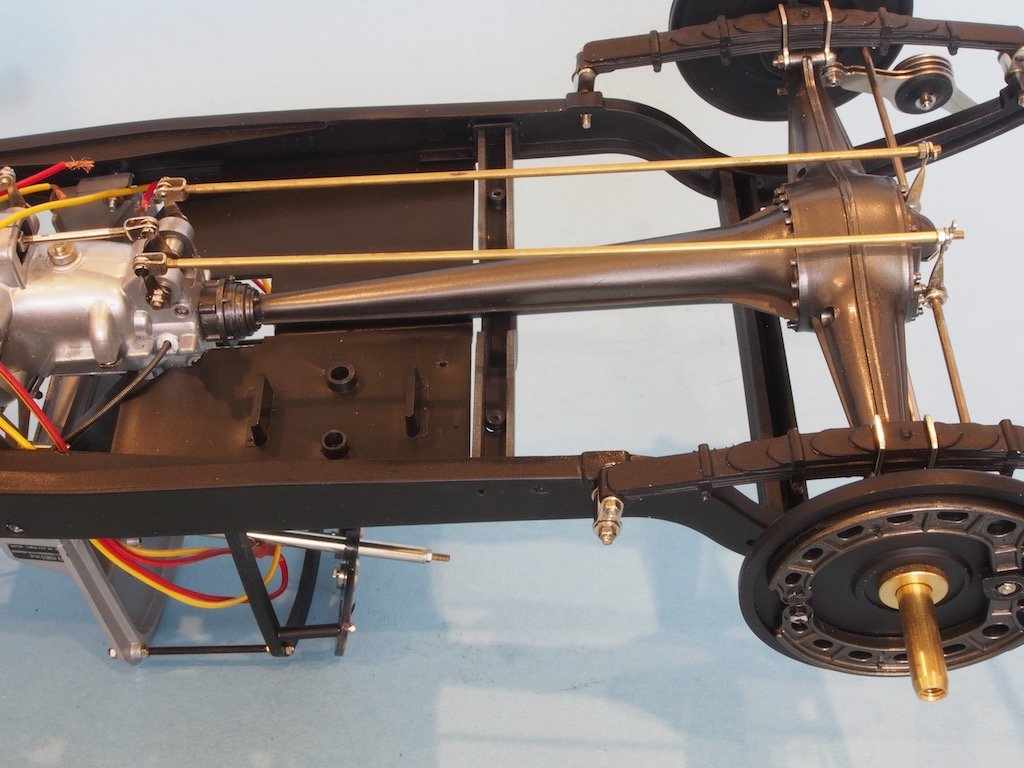
The Rear Axle Once again, some test fitting, modification, disassembly and re-assembly are required. Another 88-page photo essay from Paul supplements the one-page Pocher diagram. Assembly commences with the drive shaft. It comprises two main components, two rear spacers, and an internal part that receives a screw for attaching the rear axle to the drive shaft. As the internal part did not require painting, it was set aside while other parts were painted. Of course, when I went to commence assembly, it was nowhere to be found! Fortunately, it is not a complicated part and I was able to manufacture a scratch-built replacement from a couple of pieces of 2mm styrene sheet. The photo below shows the new part glued in place in one half of the drive shaft. The other half of the drive shaft was then put in place (held in place by two screws) and the first half of the rear axle housing was screwed in place using the new part to receive the screw. The actual rear axle is then put in place with its two wheel hubs. The front half of the axle housing was then attached and the rear dampers assembled and added in much the same way as for the front axle. The rear brake linkages were also added at this stage. At this point the rear leaf springs are required. All of the leaf springs are made of a soft rubber compound rather than hard plastic. Paul notes that while these are okay for the front axle, they are too soft for the longer rear leaf springs and suggests modifying them. Although Model Motorcars does offer some very nice after-market photo-etch leaf spring assemblies, at USD $130 per set plus the exorbitant postage rates from US to Australia, plus the eight week plus current postal delay, this was not really an option. Paul’s second option is to modify the rear leaf springs by cutting them in half length-wise and inserting a piece of 1/32” x 1/4” brass strip to act as a stiffener. I chose to go with this option. The hardest part was cutting the original leaf springs in half. I did this using by Byrnes table saw and very dodgy holding jig. Here is the leaf spring cut in half and the pre-bent brass inserted. Matching notches were cut in the brass using a cut-off wheel in my Dremel-type tool. Then the top half was reattached and the entire assembly re-painted. The completed leaf spring was then attached to the rear axle. The wheel plates had the brake cams installed and these two were then attached to the rear axle. Brake shoes and springs were then inserted as per the front wheels. The entire assembly was then test fitted with only one of the two rear spacers fitted. The gap between this and the transmission was then measured and the second spacer sanded down to this thickness prior to final fitting. The brake linkages were then fitted between the brake connecting rods and the transmission levers. Another view. Final attachment of the rear axle requires the dampers to be attached to the chassis. However, a couple of extra parts need to be in place prior this. These parts are now in the paint shop and will be fitted during the next phase of construction.
- 224 replies
-
- 15
-
-
Hi Damian, Today is your lucky day! I happen to have a spare copy of the lithograph wing plan that I’m happy to send you. If you’d like to PM me with your postal details, I’ll get it in the post for you on Monday.