


gjdale
-
Posts
4,894 -
Joined
-
Last visited
Content Type
Profiles
Forums
Gallery
Events
Everything posted by gjdale
-
 Nice to see you back Slog and making progress on this interesting build.
- 244 replies
-
- 2
-

-
- borodino
- dom bumagi
- (and 1 more)
-
Very nice work Yves, she’s looking great!
-
I’m very interested to see how this one comes together Bruce so I’ll pull up a seat and follow along. You seem to be making great progress so far, despite some minor setbacks along the way. Some neat solutions and advice for others too.
-
Welcome home (to MSW) Remco. Very sorry to hear that life has thrown you a few curve balls, but glad to see you back on the forum. I look forward to the day that progress can resume on your magnificent Kingfisher.
- 1,215 replies
-
- 3
-
-
- sloop
- kingfisher
- (and 1 more)
-
Sorry to hear that Mark - but I think we’ve all done that or something very similar at some point. A day off and a stiff drink to clear the mind is a good remedy
-
Good to see you back at the Longboat Jeff.
-
Jim Byrnes Thickness Sander
gjdale replied to Roger Pellett's topic in Modeling tools and Workshop Equipment
Roger, Like all of Jim’s tools, the thickness sander is a superbly designed, easy to use tool. I have had one for several years now and have never had an issue of it wanting to tip during use. It may have something to do with the slight upward angle of the feed table. Regardless, I guess the key would be to not try to take too much off in one pass, but you’ll quickly get a feel for what is “about right” for the particular species and thickness you’re using at the time. Not sure if it’s included with the base package, but there is a separate 6” retainer bar iavailable n addition to the two 3” ones. The two 3” ones allows you to load two different grades of sandpaper onto the machine so you have a “coarse” and a “fine” without having to change paper. If you’ve got slight wider stock, you may want to replace these with the single 6” retainer bar and a single grade of sandpaper. I have found this to be a useful addition. -
Great job on the planking Chris. I bet you’ll be glad to see the other side of this task!
-
Looking great BE. Are you saying here that you solder the two ends together with the block in place (within the wire)? If so, how do you avoid burning (or disintegrating) the block? Or have I misunderstood you altogether (wouldn’t be the first time!)?
- 261 replies
-
- 1
-
-
- muirneag
- vanguard models
- (and 2 more)
-
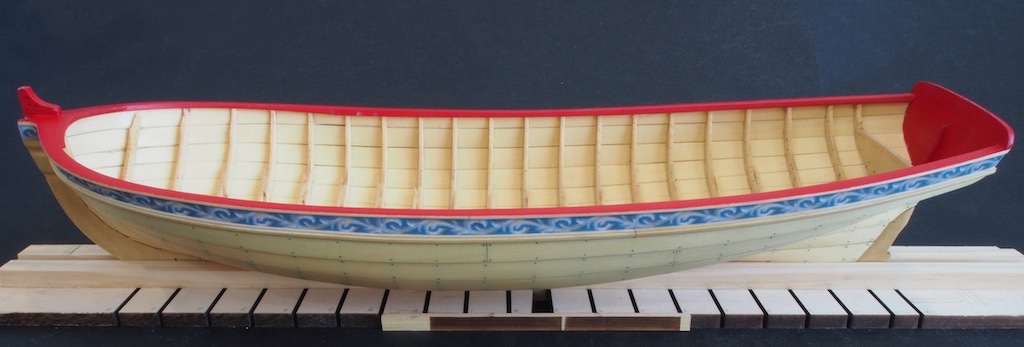
Thanks again for the kind comments and likes folks. Some more small progress: The thwarts have been built and fitted to the model, though not glued in yet. The cockpit seats have also been built, fitted and glued in place. I followed the example of Ryland and others in adding small tabs to the underside of the aft thwart and the aft end of the cockpit seats to provide additional landing places to help keep everything aligned. More work to do yet on the thwarts, and lots of painting in the cockpit…
- 109 replies
-
- 10
-
-
- medway longboat
- Syren Ship Model Company
- (and 1 more)
-
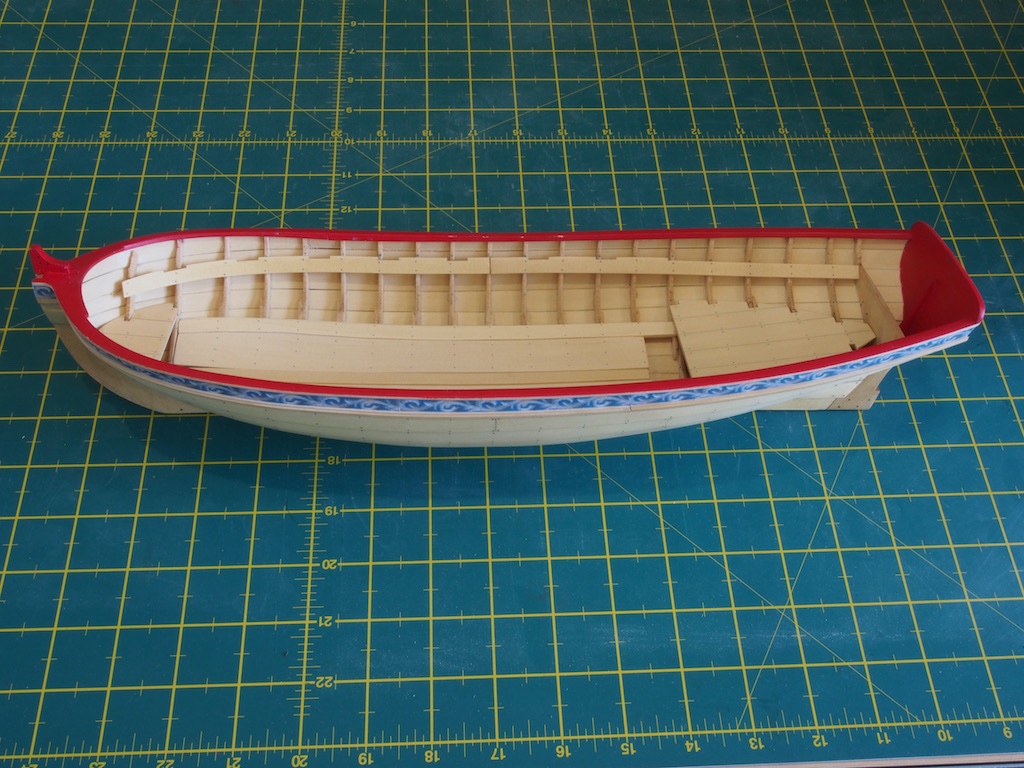
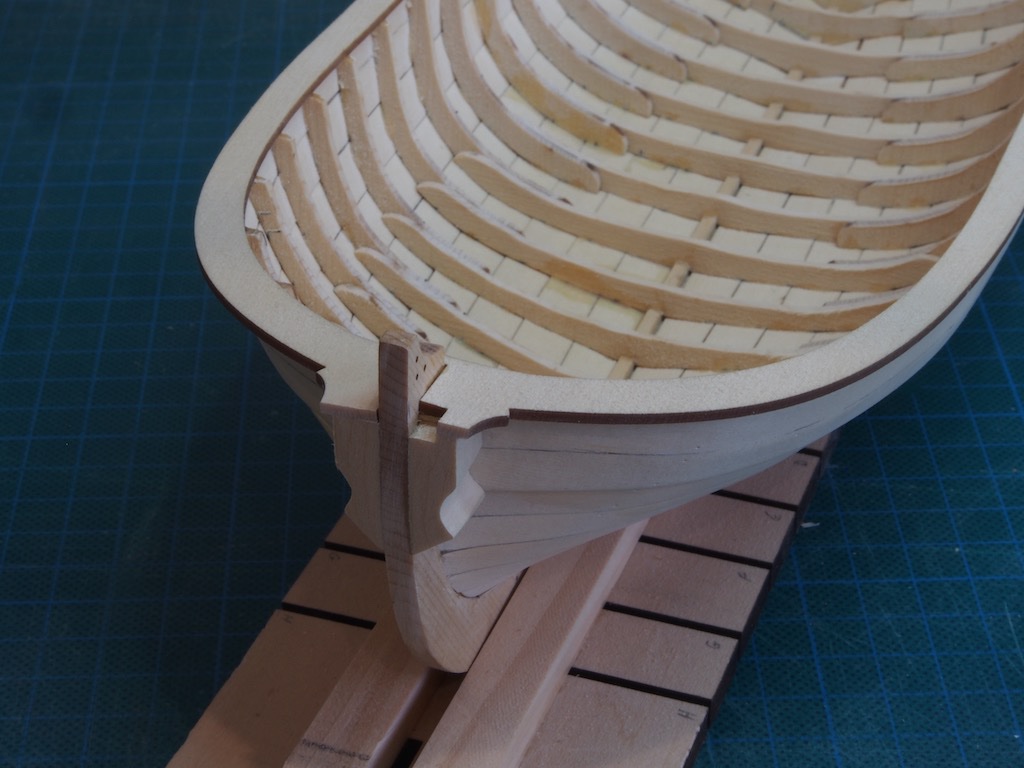
Slow progress, but progress nonetheless. I have completed preparing and installing the risers. Using the heat/hair-dryer method to pre-bend the risers makes attaching them much easier. I picked up a tip from a couple of other logs about using a small T-square jig to position the risers at the correct height at each frame. Rusty’s log is a good demonstration of this jig and its use, so I’ll not repeat it here. The method is also described and demonstrated quite nicely in the Queen Anne Barge instructions. Note for Chuck – it might be worth copying and pasting that section into the Longboat instruction manual next time you revise it. It’s a great tip/trick and worth repeating in both instruction manuals. Onto the thwarts next...
- 109 replies
-
- 13
-
-
- medway longboat
- Syren Ship Model Company
- (and 1 more)
-
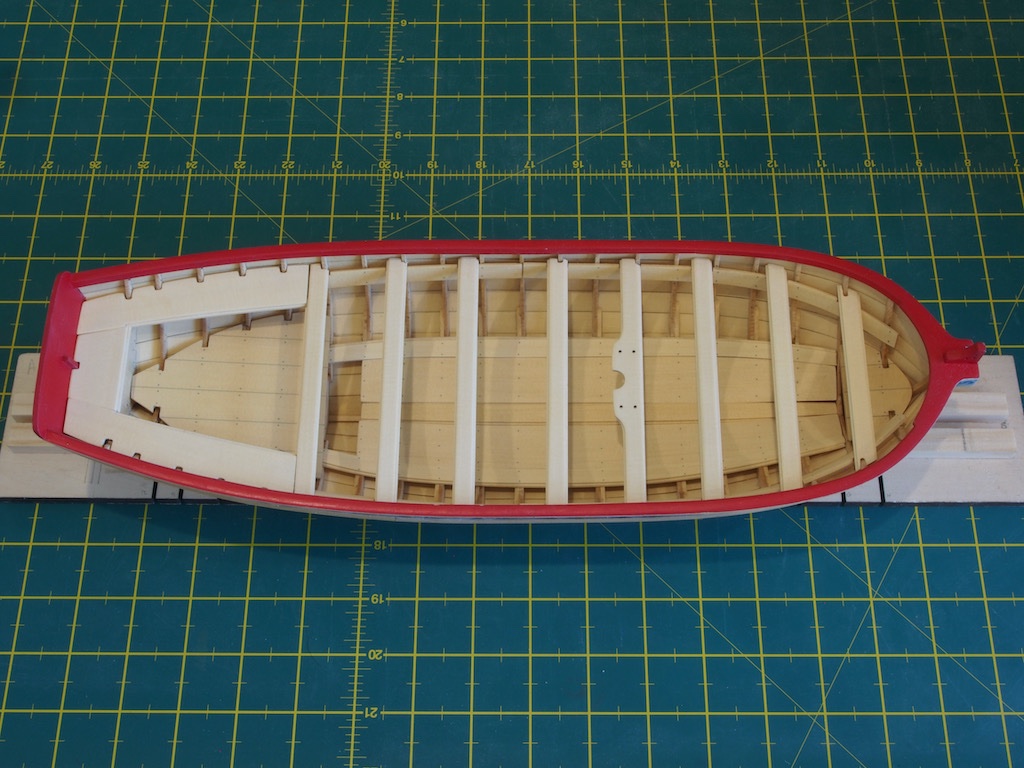
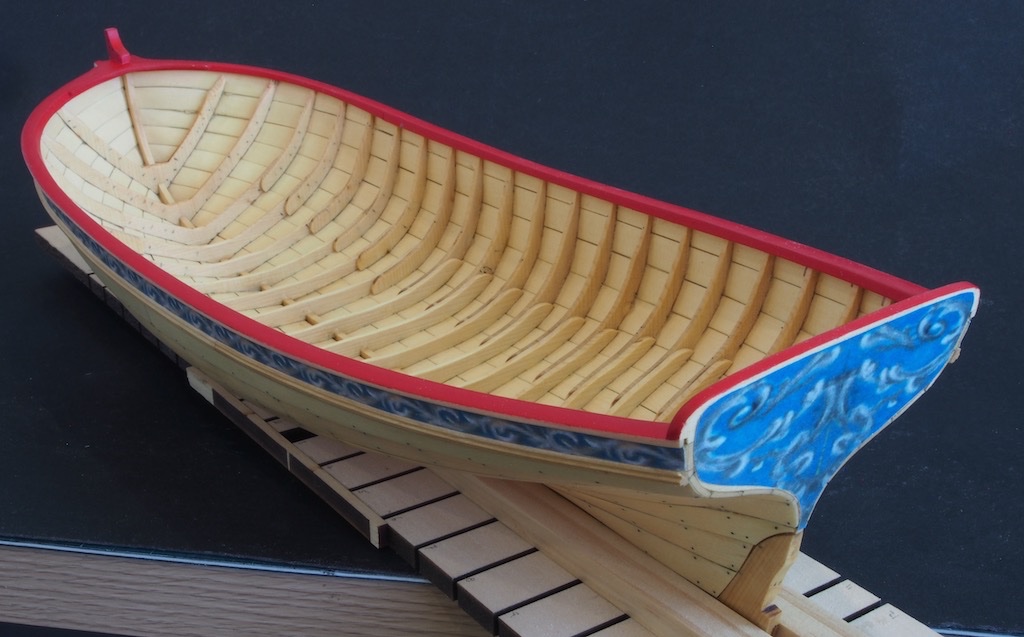
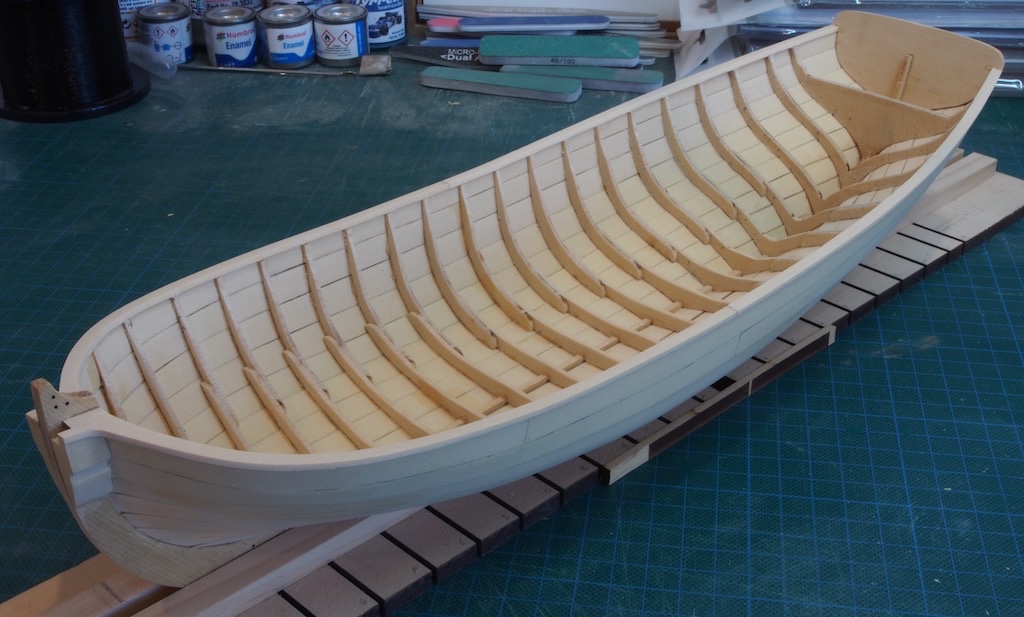
Thanks for all the kind comments and also for the "likes". Progress seems to have been slow of late, but I have completed the floorboards and platforms. The only problem I ran into with the floorboards was that when I went to fit the outer floorboards, I somehow got them mixed up and fitted them to the wrong sides, requiring quite a lot of additional shaping that resulted in quite narrow extensions at the aft end. Fortunately, I realised my mistake before gluing them. I was then able to re-cut these parts from some spare kit material, using the original laser cut sheet as a template. The platforms were a little tricky to fit, and the bow platform required significant shaping to fit. All “nailing” was done off the model prior to fitting of both floorboards and platforms. Unfortunately, the cap rail took a little bit of scuffing during all of this and will require some touch up. I’ll wait until I’ve installed the risers before doing that. Progress shot of the internals.

- 109 replies
-
- 7
-
-
- medway longboat
- Syren Ship Model Company
- (and 1 more)
-
Glenn, 1:64 is a ratio - it is independent of unit of measure. So yes, 1 inch equals 64 inches AND 1mm equals 64mm. It gets confusing when scales are expressed in inches, eg 1/4”. In this case we are saying how many inches equals one foot, so in this example, we are saying that 1/4” equals one foot. This is the same as expressing the scale as a ratio of 1:48 (ie 1/4” x 48 equals 12” (or one foot), or put another way, 12” divided by 1/4” equals 48). If we were to express the ratio scale of 1:64 in the inch format, it would be 3/16” (ie 3/16” equals one foot) - you can do the math.
- 261 replies
-
- 4
-
-
- muirneag
- vanguard models
- (and 2 more)
-
Looking great Sea Hoss. She really does have elegant lines doesn’t she?
-
1:8 1965 Shelby Cobra 427 S/C - Agora Models
gjdale replied to James H's topic in Non-ship/categorised builds
Wow! That’s a really nice build James. Looks like the modern equivalent of a Pocher model, only the parts actually fit properly! Now where’s the challenge in that?😉🤣 It also looks like there’s no painting required - is that correct? All in all, a very, VERY nice model....... -
Thanks Ryland, It feels good to have reached this point after so long. By the way, your own excellent build log is serving as a key point of reference for me - invaluable!
- 109 replies
-
- 3
-
-

-
- medway longboat
- Syren Ship Model Company
- (and 1 more)
-
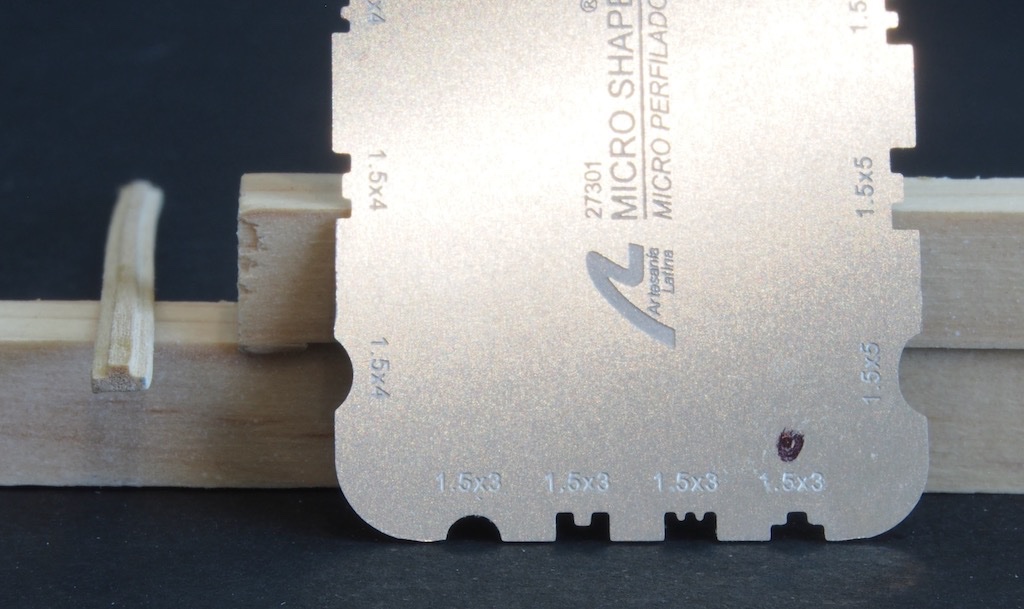
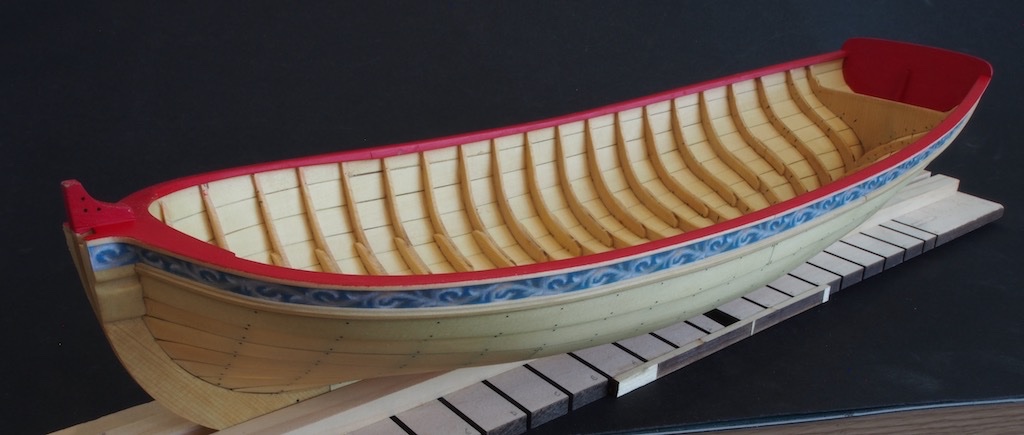
Thank you for your kind comment Merriann and welcome to MSW. As Bob has said above, the most valuable tool in your toolbox will be your build log. I would encourage you to start one for your current build - it doesn't matter that you are already well into the build. A small update... Having decided to go ahead with the Naphthol Red colour, many very thin layers were applied to the top of the cap rail and the inboard sheer strake. Having not used this painting method before, I was somewhat apprehensive to begin with but quickly overcame that as I saw the colour building up with a very smooth finish, free of brush strokes. I lost track of the number of coats, but it was somewhere between 12 and 20-ish, with light sanding every third or fourth coat. Special thanks to Chuck and others who have described this painting method in some detail in various logs. While waiting for the paint to dry, I prepared the molding strips. To create the profile, I used a set of profile scrapers that I purchased some time ago from Artesania Latina. They come in a set and cover a range of sizes of stock material and profile shapes. I found the 1.5 x 3mm fitted the supplied boxwood strip quite nicely and in no time at all produced the desired molding profile. Picture below shows the scraper and the end result. Once the paint had dried, I applied the friezes along the sides and bow. I cheated a little here by printing them on sticky label paper on my laser printer so that I could just peel and stick. This worked well. The molding strips were then applied, the hull given another coat of WOP and the transom frieze applied. The only tricky bit here was choosing and then tailoring one of the five options to fit my transom. To assist in this, I used some tracing paper to trace the outline of my transom and then transfer this shape to the closest fitting of the supplied options. A little further trimming and a good fit with a relatively even border was achieved. That completes Chapter 3. Here are a few photos of the current state of play as I start work on the floorboards and platforms.
- 109 replies
-
- 12
-
-
- medway longboat
- Syren Ship Model Company
- (and 1 more)
-
Thanks very much Ryland. The paint is looking quite nice as is, so I'm reluctant to do anything to it that might change that! I'd been thinking along the same lines regarding the friezes. I just did a test on them with WOP and found that it did smudge the colour. Then I found a can of spray matte finish in the cupboard - the can says it is specifically designed for "all papers & boards, drawings, layouts, artwork, prints, photographs and maps". That will be my next test.
- 109 replies
-
- 4
-
-
- medway longboat
- Syren Ship Model Company
- (and 1 more)
-
Thanks for the kind comments and opinions on colour choice. I've almost finished painting the cap rail - lost count of the number of coats, but it's somewhere between 12 and 20..... I would never have thought of this painting technique before but it certainly works well and is not at all hard to do once you get going. I've been using a "wet palette", which I think really helps as well. I have a quick question (actually two questions) for Chuck and/or any of you who have been down this path already. 1. Once the cap rail painting is completed (using acrylic paint), is it necessary to use a clear finish over the top of it (for protection)? If so, what do you recommend for this clear coat? 2. In applying WOP to the exterior of the hull, is it advisable to put this over the printed frieze (again for protection), or will the WOP likely destroy the frieze? Thanks in advance for any and all advice.
- 109 replies
-
- 2
-
-
- medway longboat
- Syren Ship Model Company
- (and 1 more)
-
Sorry to hear about the health issues Bob - particularly with the whole COIVD thing happening in the background around you as well. Take your time coming back - we'll be waiting when you're ready, some of us more patiently than others.....😉 Glad to hear you've picked up your guitar again in the meantime. One should always have music in one's life.
-
Looking good. And you're quite right about enjoying the build rather than chasing perfection - that way madness lies!
-
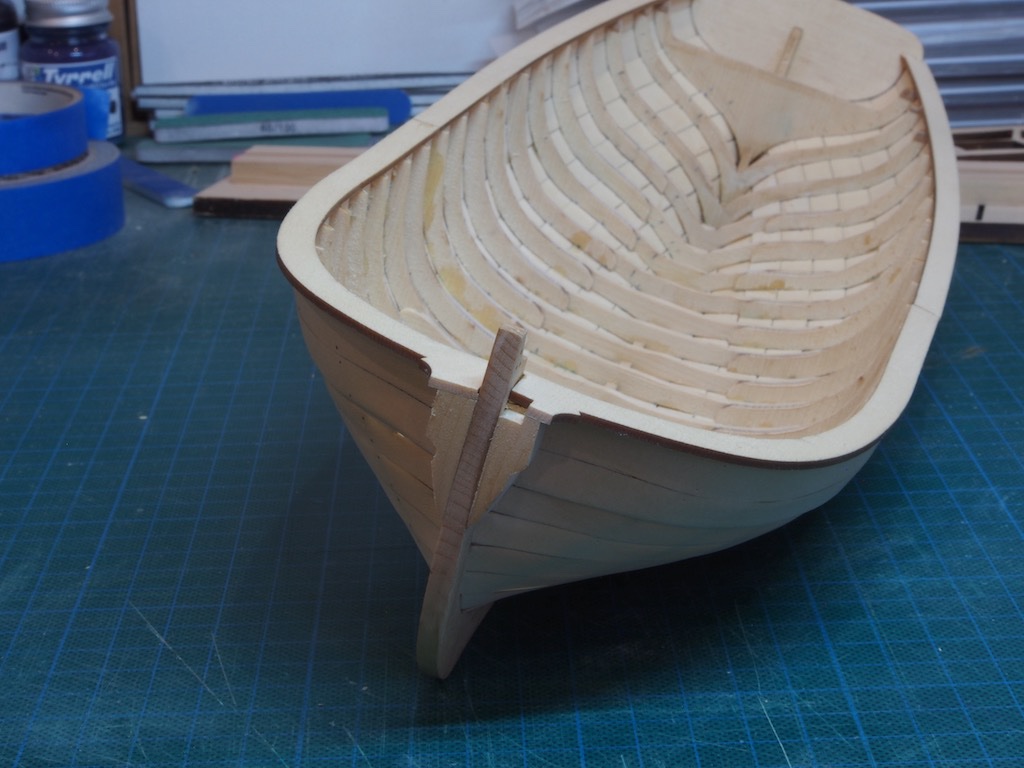
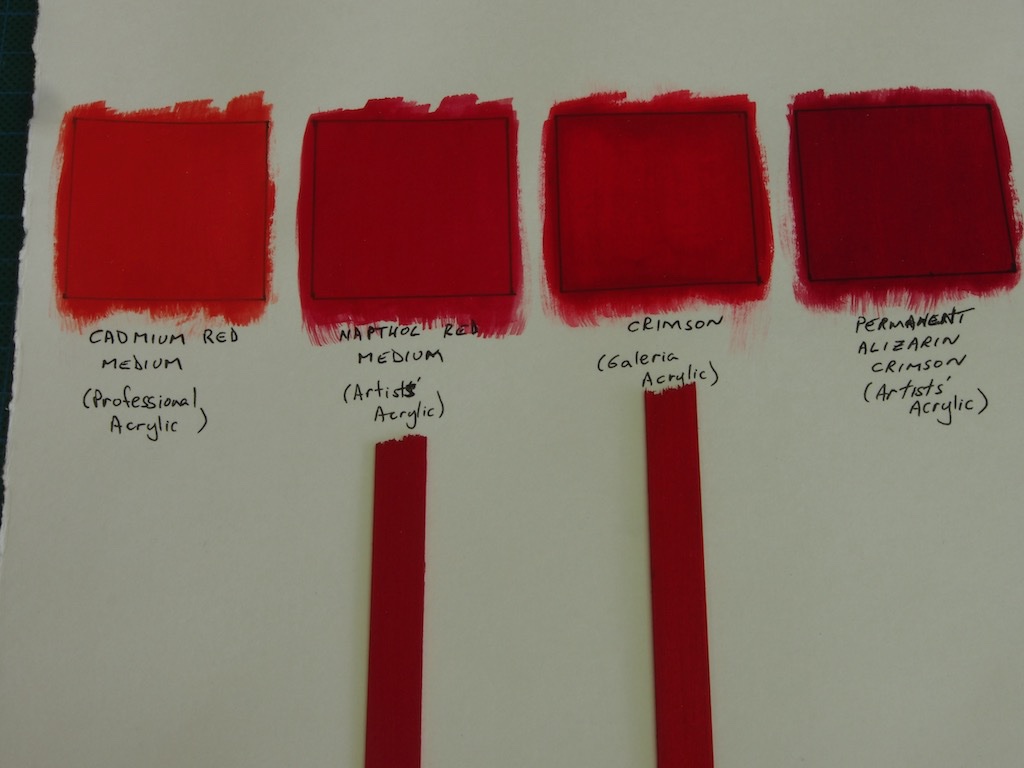
Thanks Rusty and Bob, and also all of the likes. The new stock of monofilament fishing line has finally arrived, so I’ll now be able to complete the “nailing” of the hull. While I was waiting for the post to arrive, I went ahead and completed the bolsters and the thinning of the cap rail and frames. The bolsters were quite tricky, as anyone who has reached this point before me will attest. Chuck even went so far as to provide six blanks in the kit to make the two bolsters required – and it’s just as well that he did. I started on the starboard side and blew two attempts before getting the third to a point that I was satisfied with. The port side only took two attempts, so learning clearly took place! I even had one blank to spare!!!😁 Here’s what they looked like after I glued them in place initially. I then realised that the lower edge should have been tapered/bevelled considerably, so was faced with the challenge of achieving this with the bolsters in situ. Fortunately, with the assistance of Mikhail’s wonderful micro chisels and some sandpaper, this actually turned out to be easier to achieve than I’d first expected. Here’s the subsequently modified bolsters. With the bolsters in place, I was then able to go ahead and thin the cap rails. Using the technique described by Rusty in his log, I used a scrap of 1/32” material to guide the formation of the outboard edge to a uniform overhang, then using a pair of compasses marked a line 5/32” from the outboard edge to guide the thinning of the inboard side. At this point, I had to wait for the fishing line to turn up before going further, so my final task here was to decide on the paint colour for the cap rail etc. I had remembered reading somewhere what brand/colour Chuck had used but couldn’t find it again, so I PM’d Chuck and asked him directly. Chuck said that he used the Winsor and Newton Galeria Acrylic range of paints and the colour was Crimson (for anyone else wondering). I also noted that some others had chosen slightly different variations. For example, someone (can’t remember who) used Cadmium Red. There is an art supply store nearby, so I popped out and bought some of the Galeria Acrylic Crimson, and some Cadmium Red (Winsor and Newton Professional Acrylic range). I also had a couple of other reds in my existing range, including Naphthol Red (medium hue) and Permanent Alizarin Crimson – both from the Winsor and Newton Artists’ Acrylic range. I then did some test swatches on some art paper for comparison. The results are below, and I’d appreciate any thoughts from others on my eventual choice. What I noticed straight away was that the Artists’ Acrylic / Professional Acrylic range behaved very differently from the Galeria range – they mixed with water on the wet palette in a very different way that is hard to describe, and also laid down on the surface material quite differently, going on with much more even coverage and also seeming to dry more quickly. I guess there’s a reason this range is double the cost of the Galeria range. I quickly discarded both the Cadmium Red (too orange) and the Permanent Alizarin Crimson (too purple) from the choices and was left with the Crimson (Galeria) or the Naphthol Red (Artist’s Acrylic). The Naphthol Red appears slightly darker and more subdued than the Crimson and I think I like that colour tone slightly better, though it’s a very close race in my mind. Being much nicer to work with tipped the balance for me in the end, so my current choice is the Naphthol Red. I know that photography and computer monitors will impact the way things appear on screen, but I’d appreciate any thoughts on my colour choice. Now I’m off to finish the “nailing” and prepare the inboard sheer strake…
- 109 replies
-
- 8
-
-
- medway longboat
- Syren Ship Model Company
- (and 1 more)
-
Very nice job on the planking Yves.