
HOLIDAY DONATION DRIVE - SUPPORT MSW - DO YOUR PART TO KEEP THIS GREAT FORUM GOING!
×


gjdale
-
Posts
4,888 -
Joined
-
Last visited
Content Type
Profiles
Forums
Gallery
Events
Everything posted by gjdale
-
 Sorry to hear of your personal troubles Tom - hope things get sorted soon for you. On the CA glue side of things, try using a respirator with an organic vapour filter - it’s about the only way I can use the stuff without making myself seriously ill for several days.
 -
My guess would be until the first afternoon...........😉
- 382 replies
-
- 5
-

-

-
- Vanguard Models
- Duchess of Kingston
- (and 1 more)
-
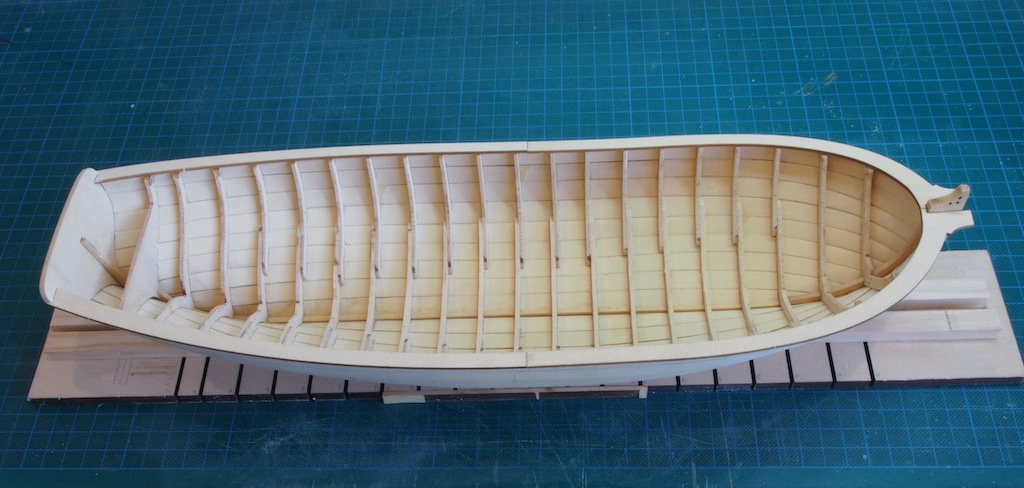
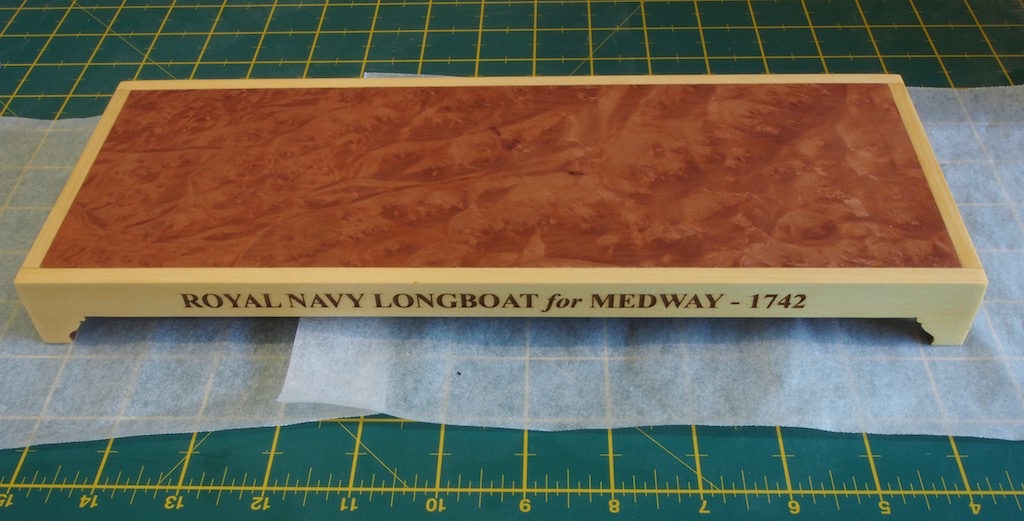
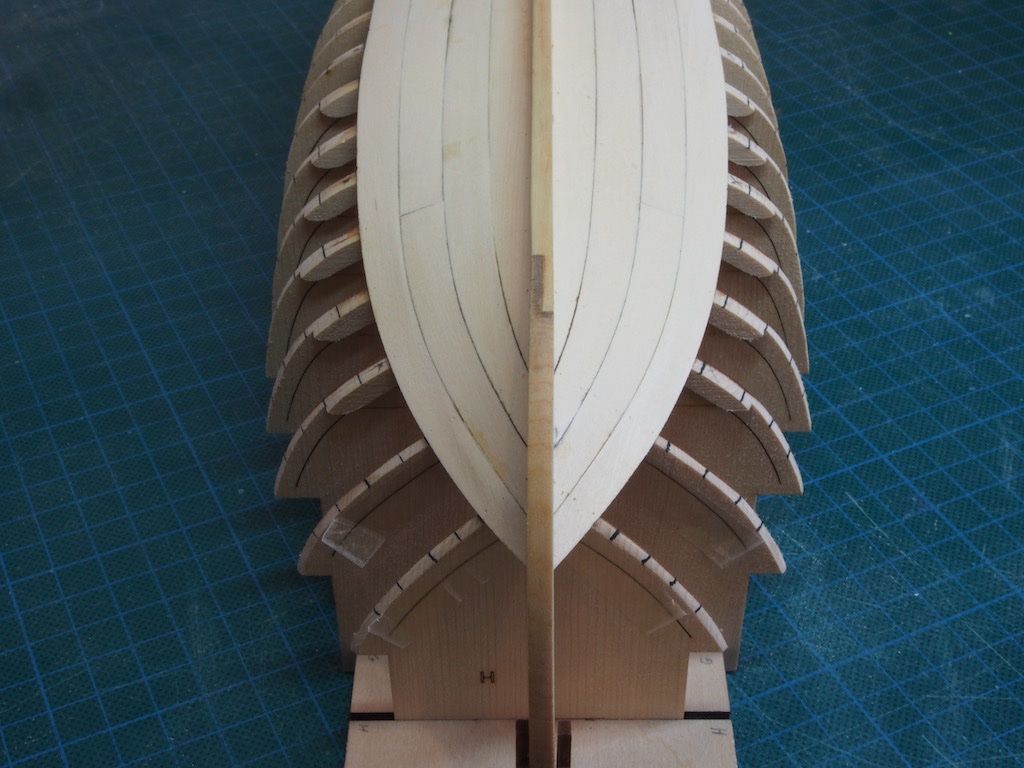
The best laid plans.... Having intended to complete the monofilament nails prior to removing the hull from the build board, I found I only had enough monofilament to complete one side. Perhaps I drilled the holes waaaay to deep…. I thought I had previously tracked down some more monofilament but what I had in the drawer turned out to be a braided line and of no use at all. For some reason, black fishing line does not appear to be a popular choice in Australia as I could not find a single supplier of it within Australia. I did, however, manage to find a shop in New Zealand with an online presence, who happened to stock exactly the right stuff. I’ve ordered that, so hopefully I won’t be faced with the two-month delay I’ve been experiencing with other international orders lately. So here’s where I got to before exhausting my kit supply: A quick re-think of the strategy and I decided to go ahead and remove the hull form the build board. This I did following Chuck’s instructions and encountered no problems. Similarly, I removed the frame centres following the instructions and again encountered no problems. Next up was to install the cap rail. The only issue I ran into here was that according to the instructions, I should have been left with a 1/16” gap between the upper strake of planking and the “ears” on the transom. For some reason my planking went all the way up to the ears on both sides. After fairing the sheer, I simply cut a notch out of the lower part of the ear to make room for the cap rail. The cap rail then went on easily. While I was fairing the sheer, I also did an initial clean-up of the frames – really just removing the laser char. Ryland kindly gave me a tip to fit the pedestals to the hull at around this point as well, noting that this would be much easier at an early stage of the build – a point well made. So, I decided to make up the display base this weekend. I initially thought the substrate for the burl veneer was undersized, but after a quick PM exchange with Chuck realised that I was over-thinking things and there was no problem at all – in fact, it’s designed this way. Makes perfect sense when you actually put it together…. Anyway, here’s the display base completed with just one coat of satin WOP at the moment. Will apply further coats in due course. The pedestals have also been assembled and coated. I’ll fit them properly to the hull once the finish is dry. I’m now officially past the point where I canned my first attempt. While this one is not perfect, it is so much better at this stage than the first one, that I’m really pleased I decided to bite the bullet and start over. Next up will be the challenge of the bolsters…next weekend….
- 109 replies
-
- 13
-
-
- medway longboat
- Syren Ship Model Company
- (and 1 more)
-
I’ll follow along with this one too Glenn.
- 382 replies
-
- 1
-

-
- Vanguard Models
- Duchess of Kingston
- (and 1 more)
-
Another interesting subject James - I’m in for the ride.
-
Thanks Ryland, and thanks for the tip re the display pedestals - I hadn’t even considered that aspect!
- 109 replies
-
- 2
-
-
- medway longboat
- Syren Ship Model Company
- (and 1 more)
-
Thanks Mike, I'd be very interested to hear/see how you go with the Zero paints and 2k clear.
-
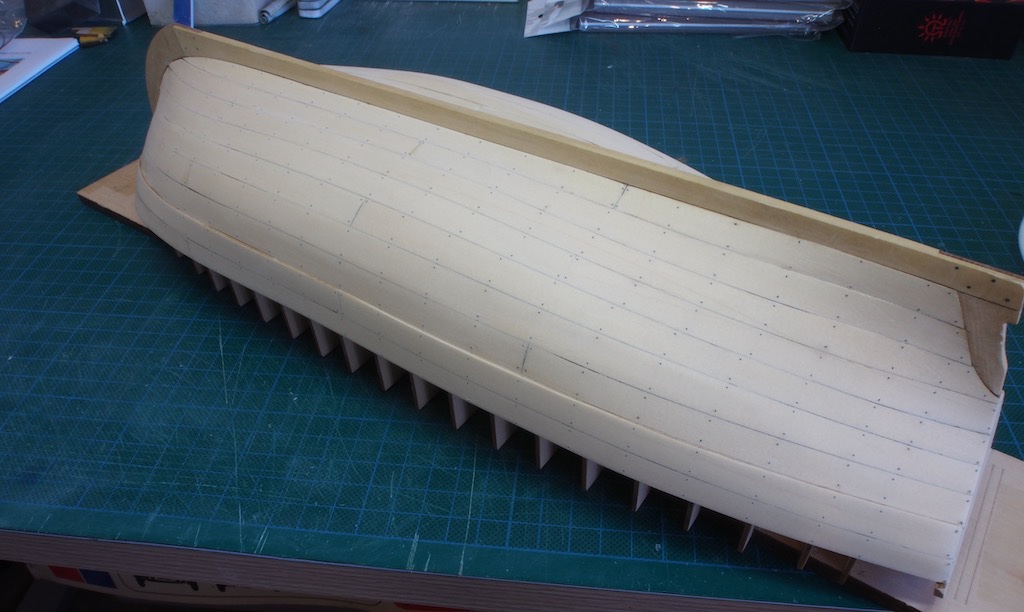
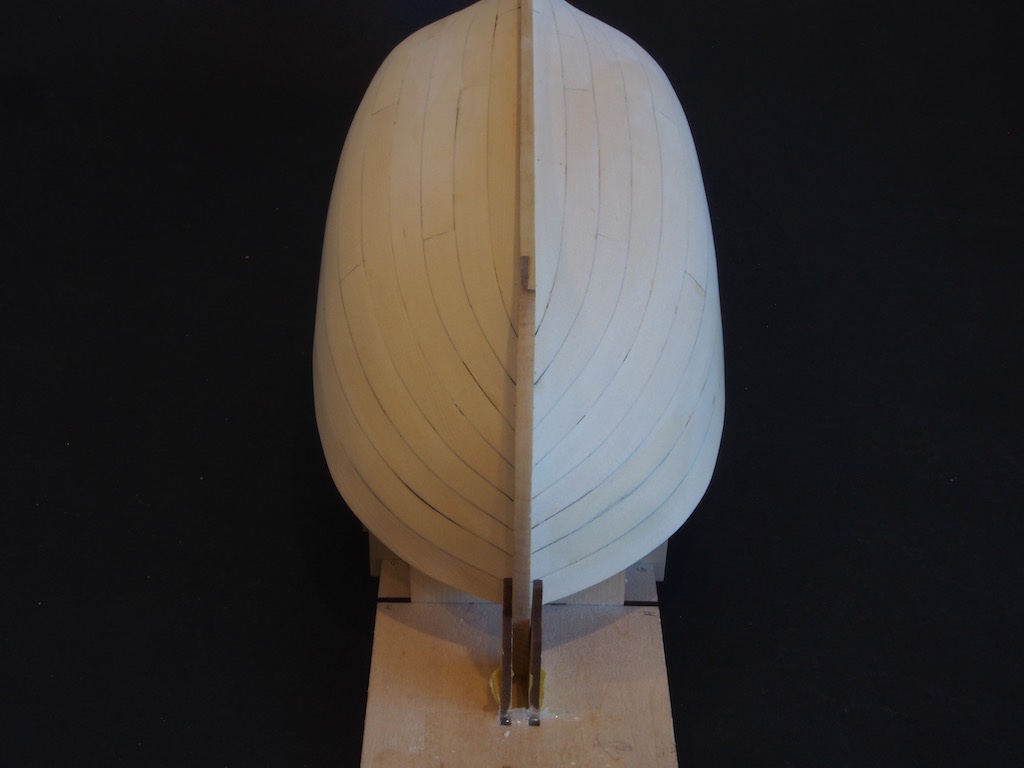
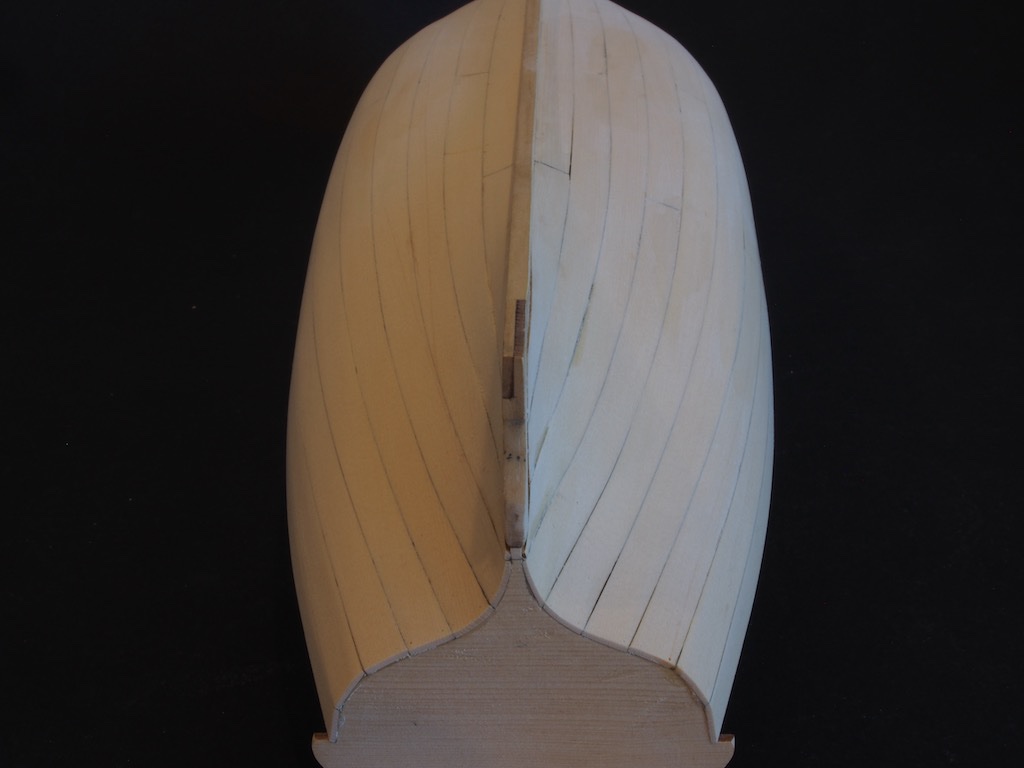
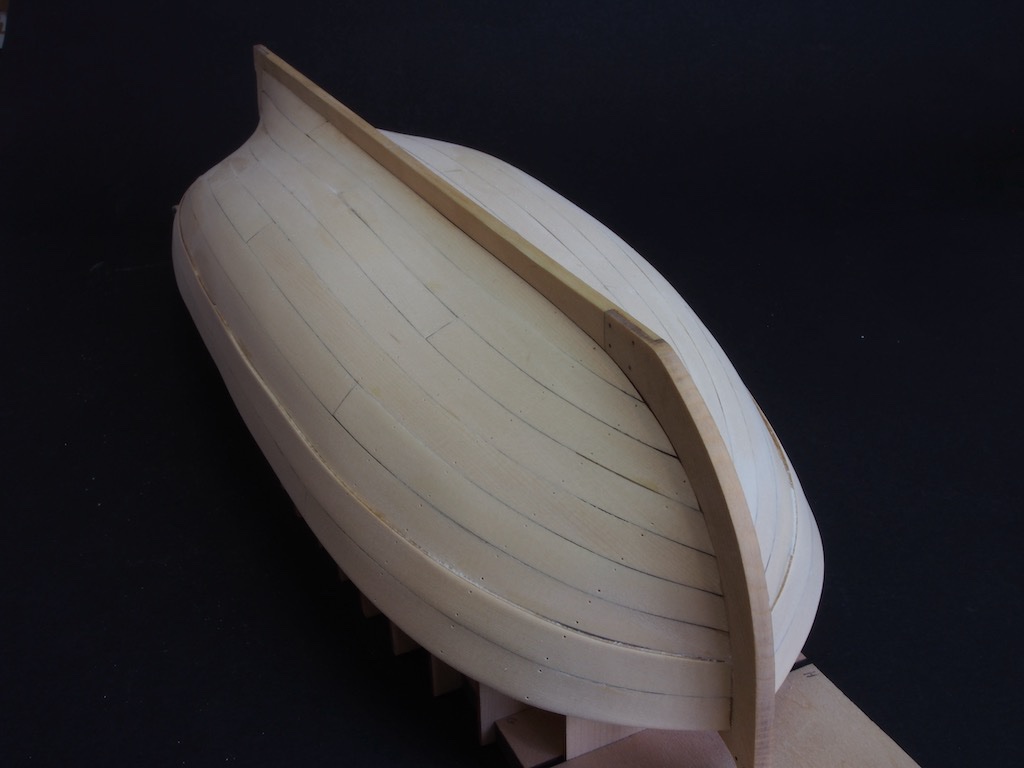
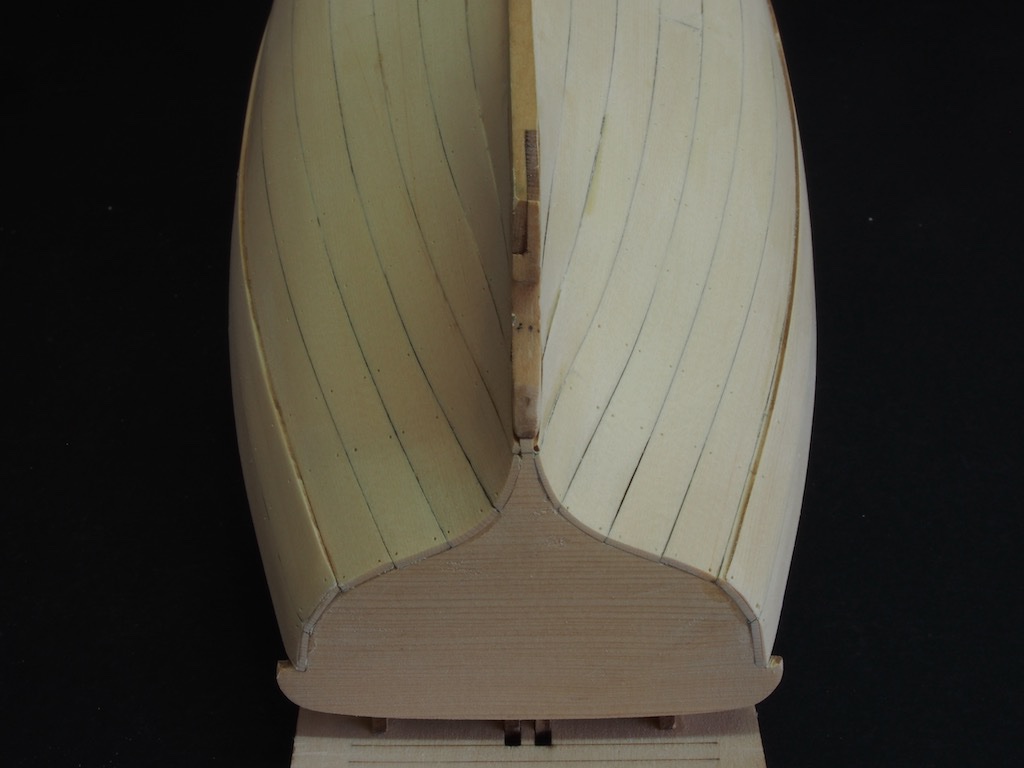
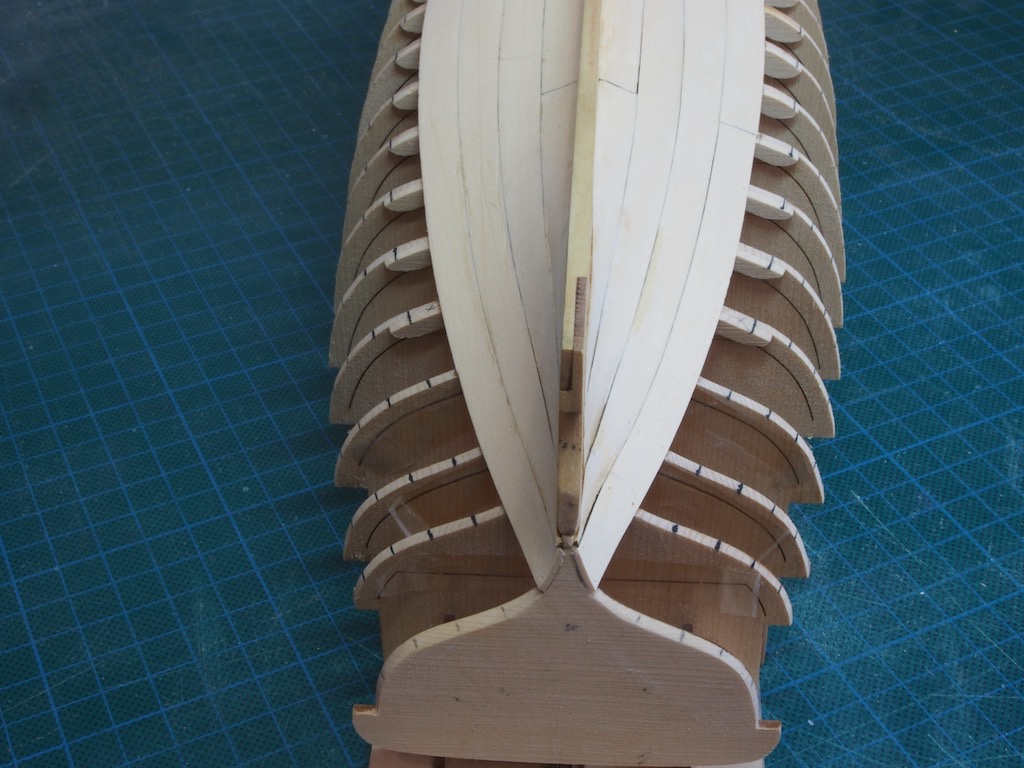
Planking has been completed. Although this was much easier using Chuck’s methods for bending and gluing, I still had some very minor “staircasing” at the bow, although this was nowhere near as bad as on my first attempt. Here is the first layer completed after an initial light sanding: The whales were then added. I did these in reverse order, working down from the gunwhale in order to correct any minor misalignment at the bow. Following Chuck’s advice, I used a sharp chisel to pare down the forward end as it approached the rabbet. The aft end was simply sanded thinner for the last half inch or so. All of the holes have been drilled in preparation for the monofilament “nails”. I think I will complete this task and do a final sanding before removing the hull from the build board.
- 109 replies
-
- 12
-
-
- medway longboat
- Syren Ship Model Company
- (and 1 more)
-
Thanks for all the kind comments folks. Mike - yes, the bodywork is painted. I chose colours as close as possible to the kit parts as I liked the colour combination. I wasn’t entirely satisfied with the paintwork in the end. I used Vallejo acrylics with Pledge/Future as the gloss clear coat. I think for the next one I will use enamel paints instead of acrylics as I believe these can be polished, whereas the acrylics just came off if I even showed them the polish! Current thinking is enamel paint with a 2K clear (probably Zero Diamond finish 2K clear). I’ll certainly be doing a lot of testing anyway. I’ll likely be doing a few more boat builds before the next Pocher though....
- 224 replies
-
- 10
-
-
Some very nice progress there Sea Hoss.
-
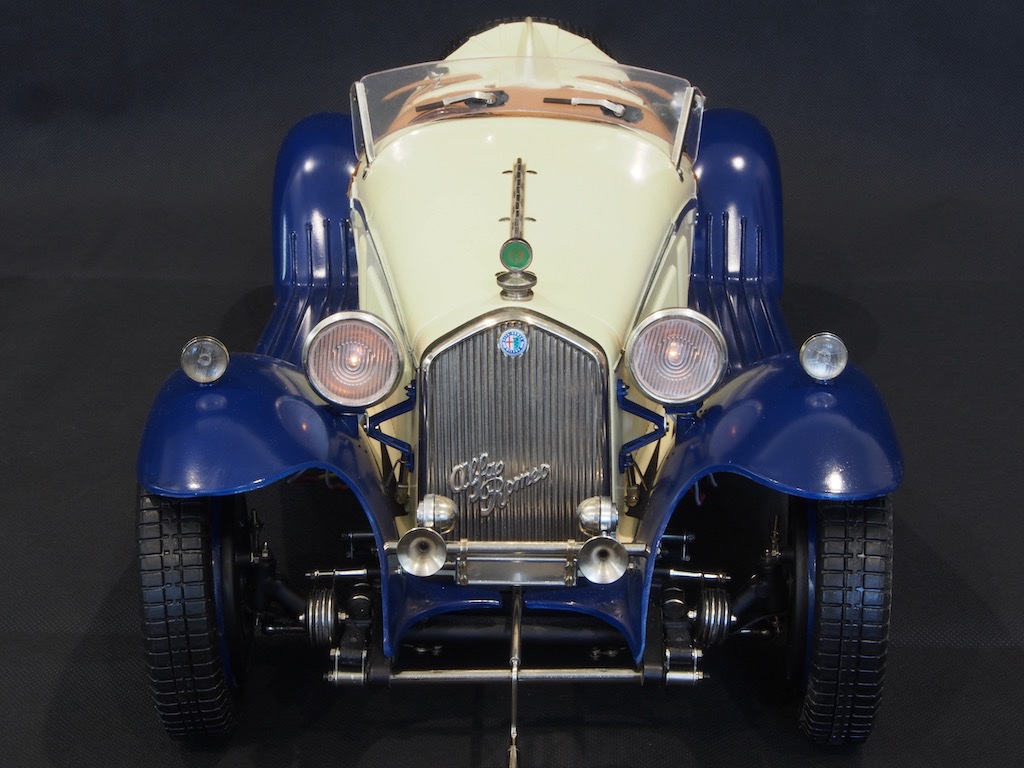
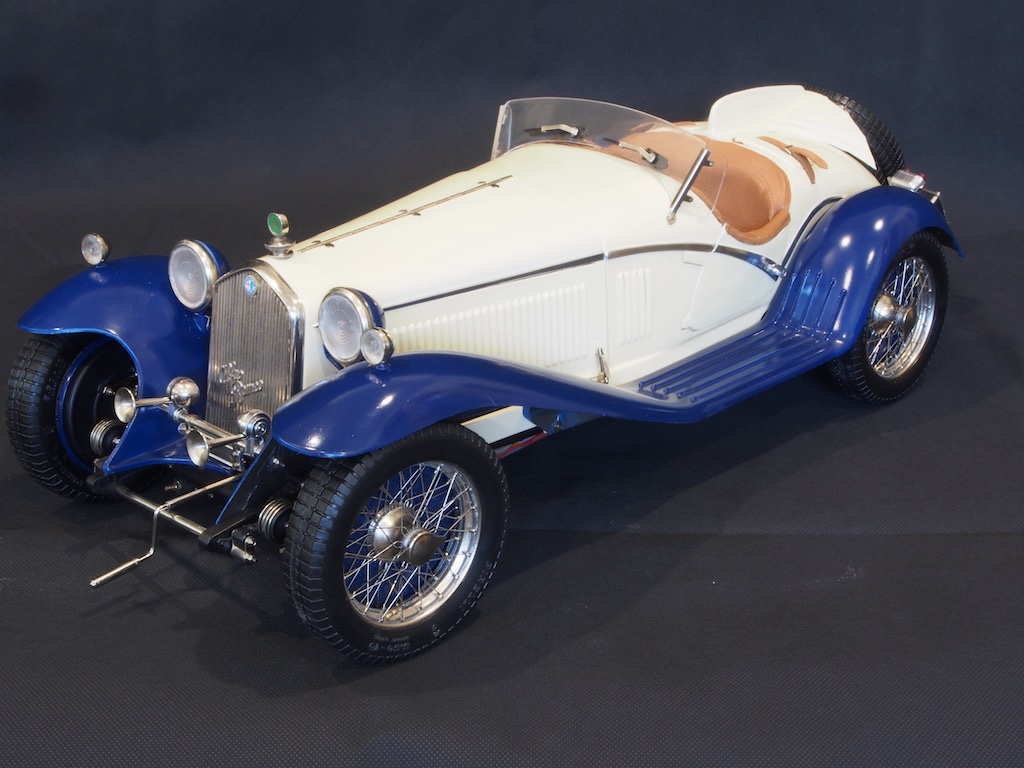
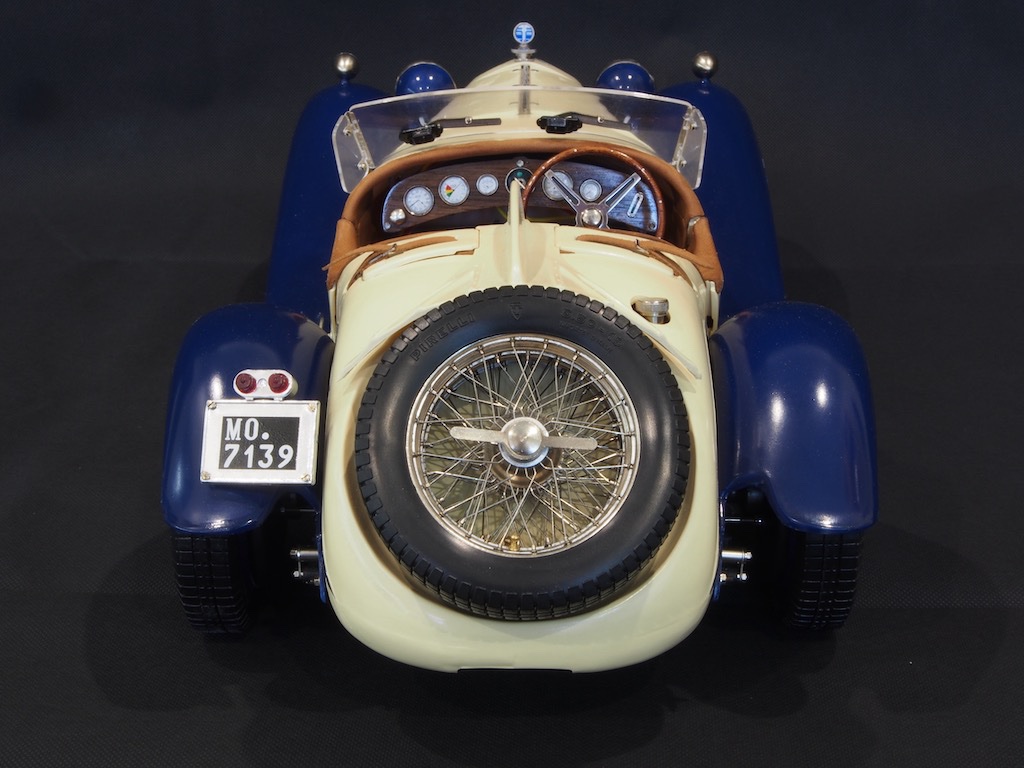
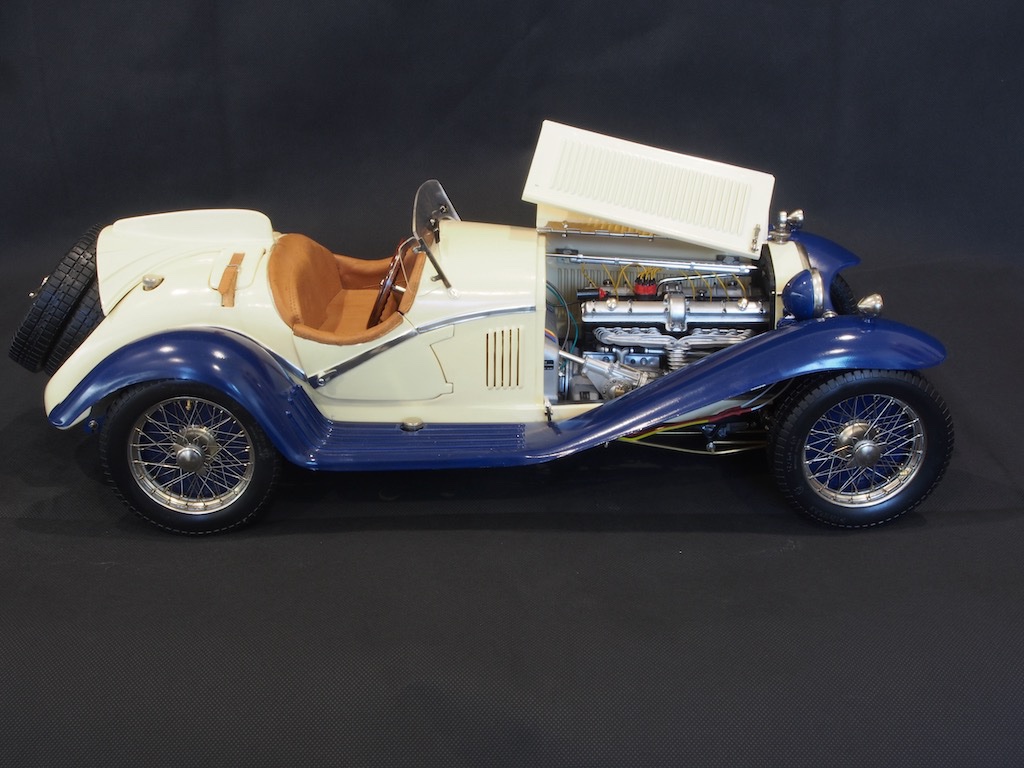
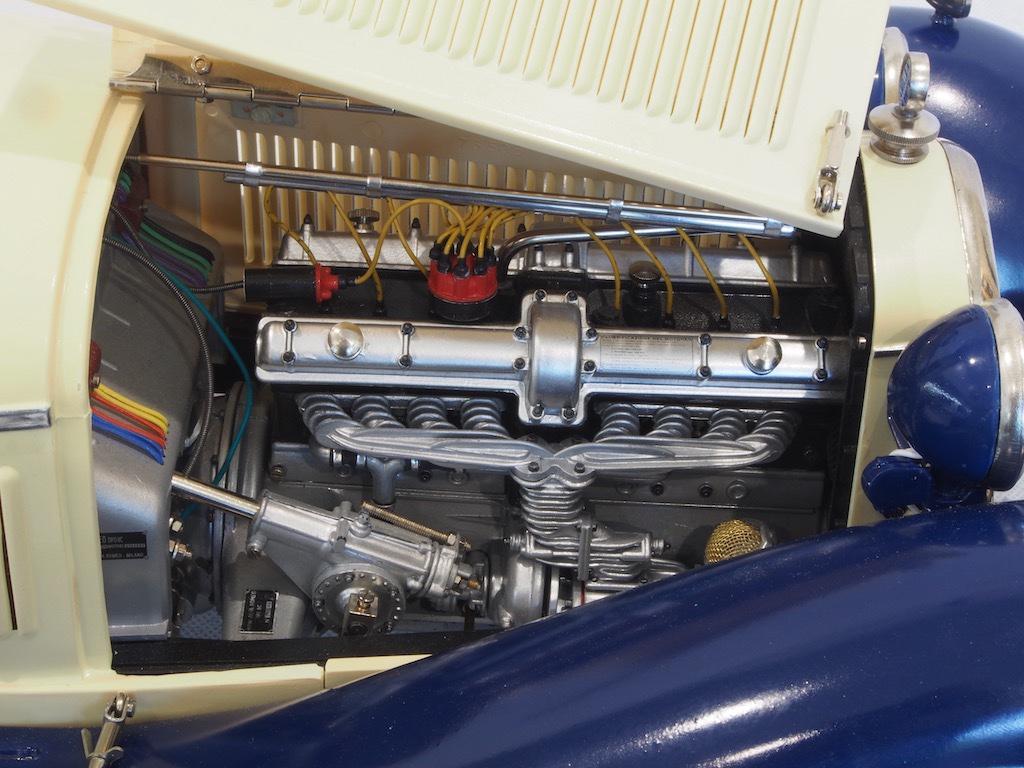
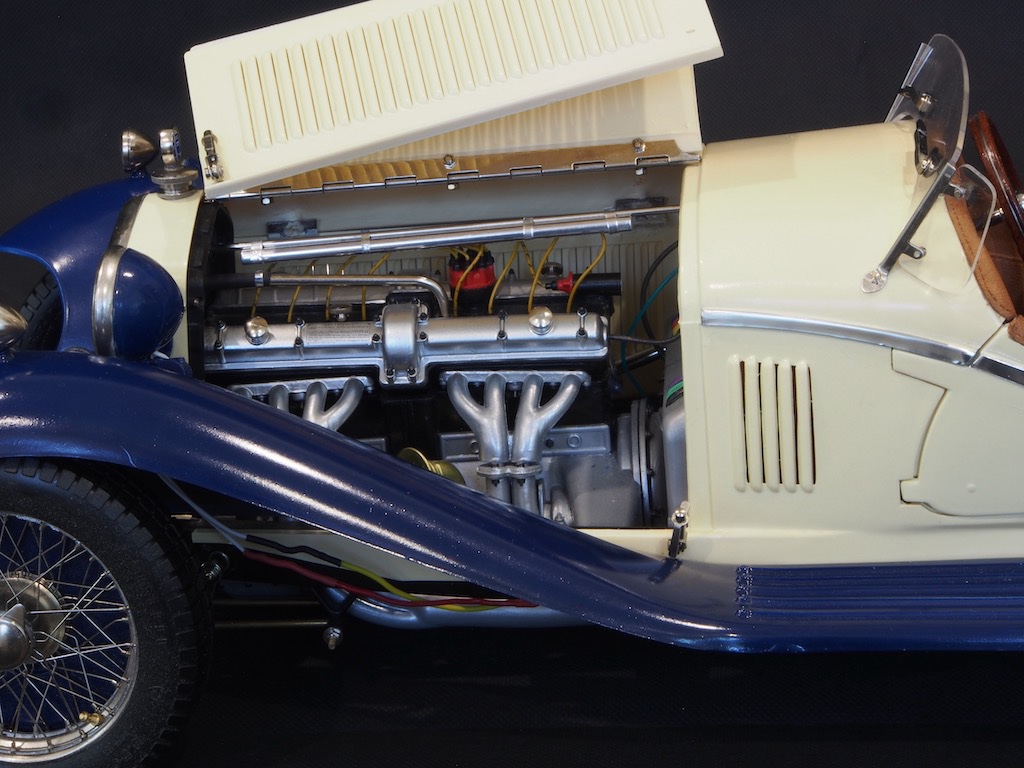
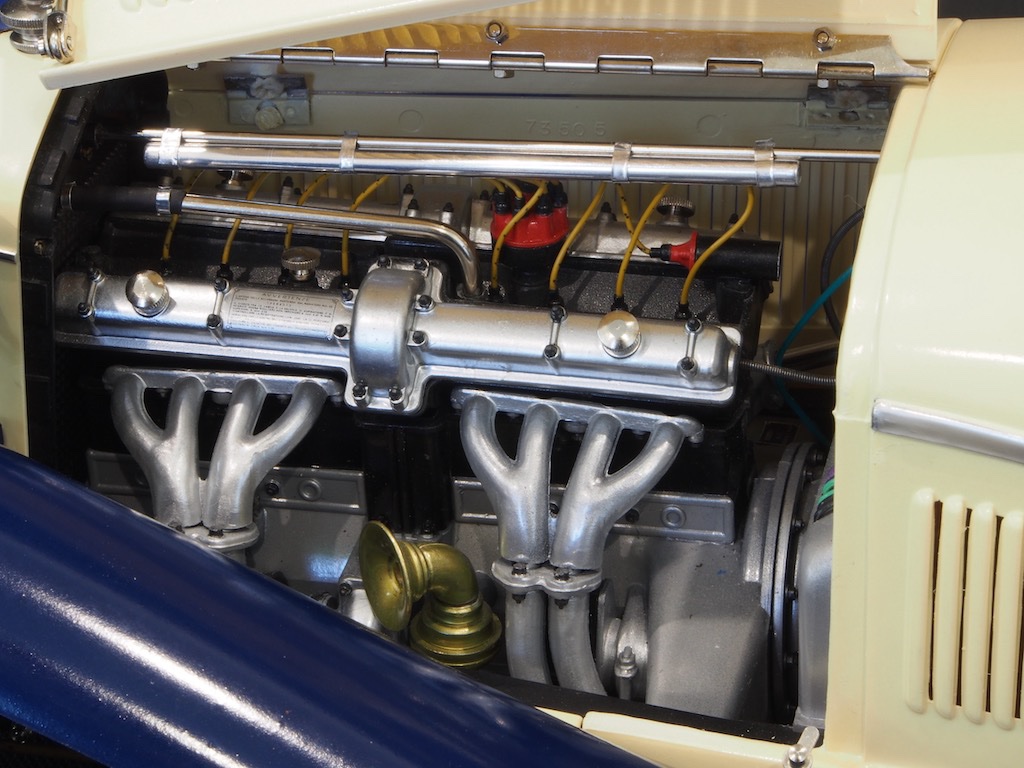
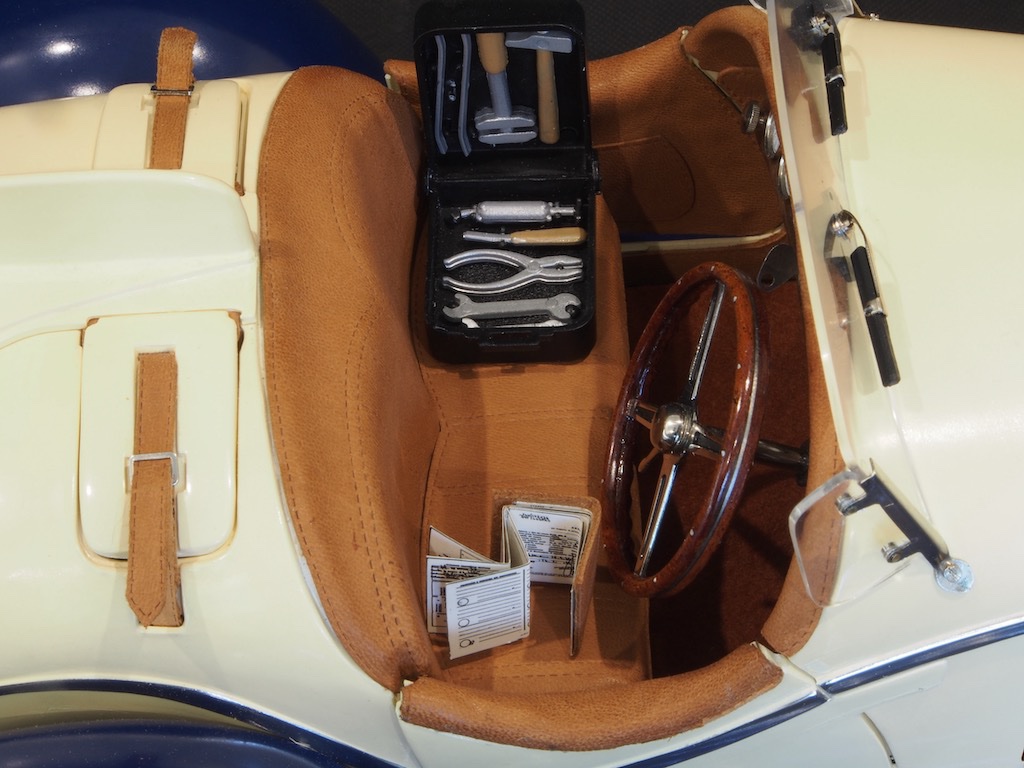
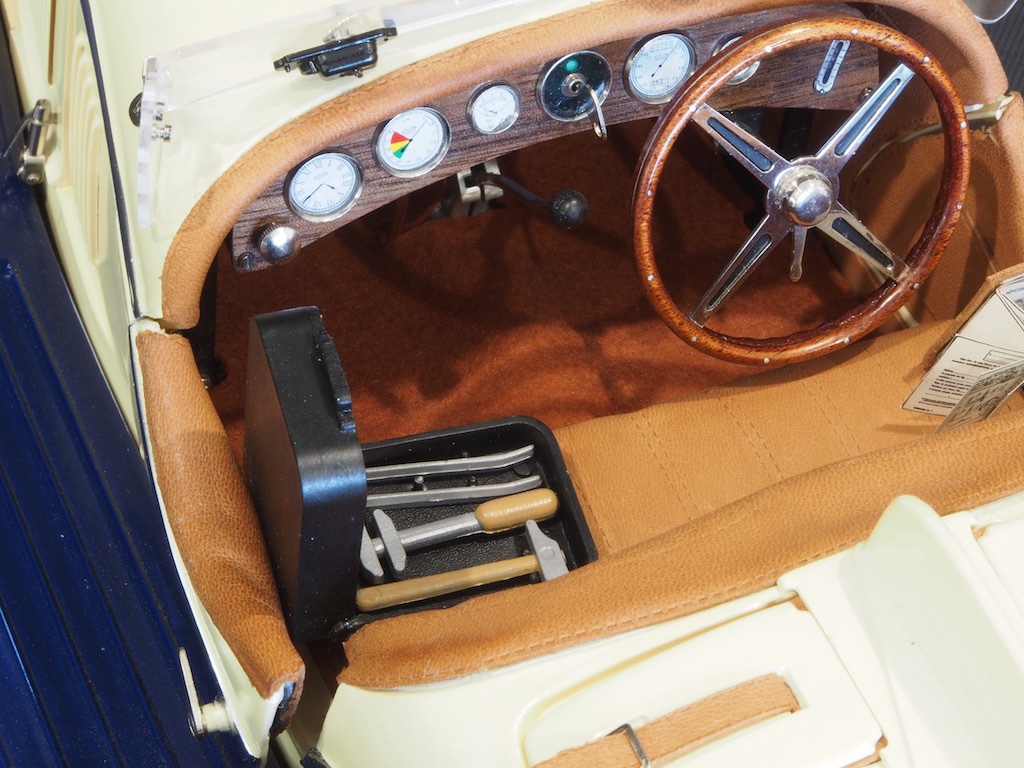
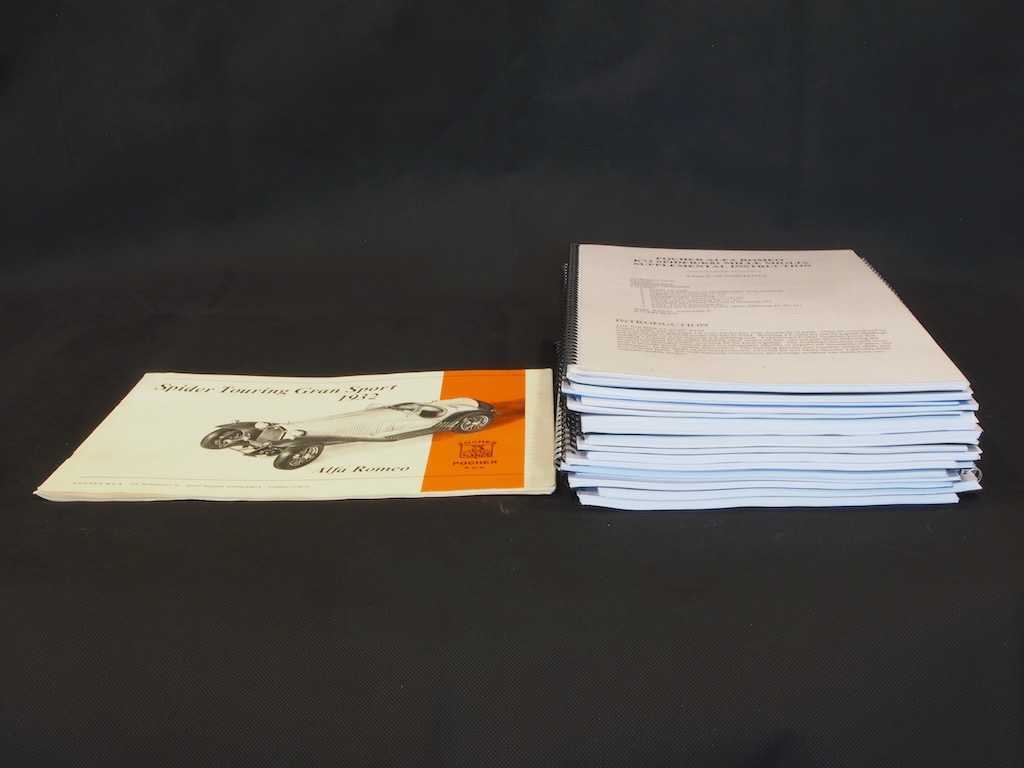
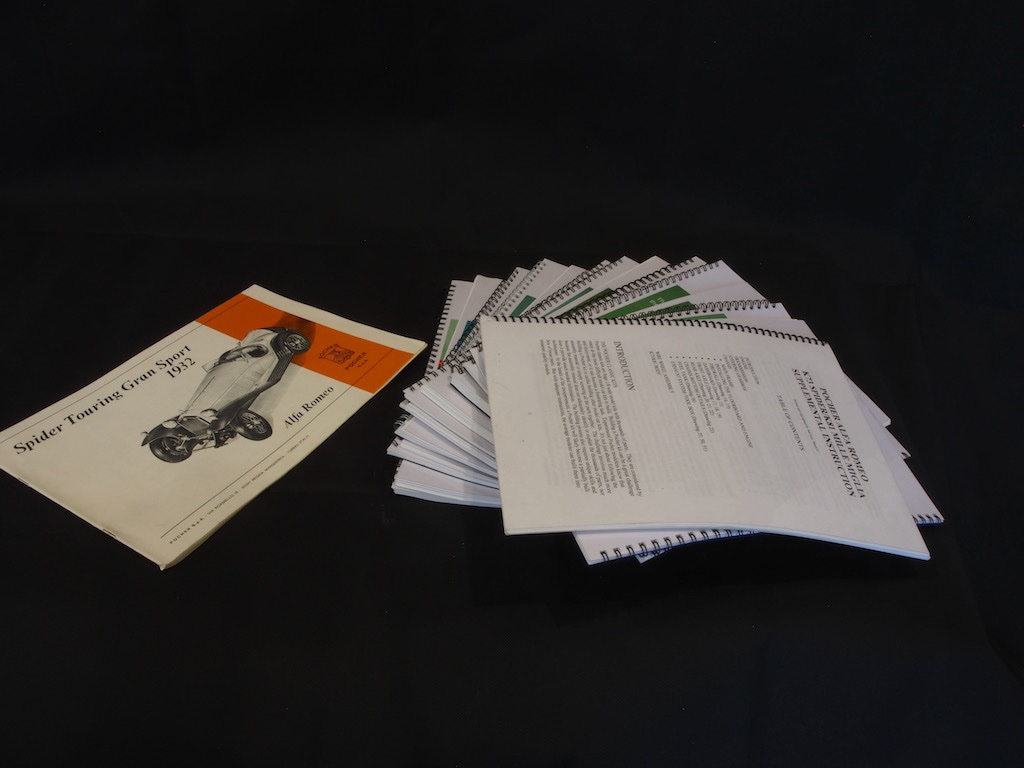
The long-awaited steering hub has finally arrived, almost two months after ordering! All that was required for completion was to install the steering wheel, and then re-install the coachwork and complete the headlight wiring. I also replaced the damaged Alfa decal on the front nose. That took me no more than a few hours yesterday afternoon. Today I did a final glam photo shoot. I would have taken the model outside for this, but it’s been raining here for the last two weeks and showing no sign of easing up. Had to settle for an indoor shoot instead. Here are the final results. One final comment. This build would not have been possible without the guidance of the wonderful supplementary instructions and photos from Paul Koo. Here is a couple of photos to show the difference. The Pocher instruction manual is on the left: 26 pages, mainly of exploded diagrams. On the right, the 16 booklets of instructions and photo essays from Paul Koo, and that’s not counting the hundreds more photos of inventory parts, completed models, and reference photos. Thanks to all who have followed along and provided encouragement and support. I hope you have enjoyed following the build as much as I have in doing it. Now I can focus on completing my Medway Longboat for a while.


- 224 replies
-
- 28
-
-
-

-
Excellent results on the steam capstan BE - though we expect nothing less from you! She’s looking fabulous.
- 261 replies
-
- 3
-
-
- muirneag
- vanguard models
- (and 2 more)
-
Thanks Tony. I just received notification from Australia Post that the parts I ordered from Model Motor Cars back on 08 Sep are due to be delivered today. I should be able to finally finish off this build on the weekend. 😃
- 224 replies
-
- 11
-
-
I think it would be worthwhile doing it again with the correct number of planks Floyd. Even if you don’t do that, at least use Chuck’s templates for the bow and stern - they provide a really good guide as to how you’re going as you progress with planking as they are based on his pre-cut planks. Chuck mentions in the instructions that he used a #77 drill for the 10 lb monofilament on planks. He also notes that these represent iron nails in this boat, rather than treenails.
-
I’m really interested to see how this kit comes together, so I’ve grabbed a front row seat too!
-
Nice progress Sea Hoss - looking good.
-
Thanks Bob - yes, the pre-spiled planks sure do make it a lot easier. There's still plenty of challenge there though - especially if you're as ham-fisted as I am!
- 109 replies
-
- 2
-
-
- medway longboat
- Syren Ship Model Company
- (and 1 more)
-
Thanks Ryland. Yes, I'm conscious of that point too. Tight edges is certainly the aim.
- 109 replies
-
- 2
-
-
- medway longboat
- Syren Ship Model Company
- (and 1 more)
-
Yes I am Floyd, to the minimum amount I can though, as per Chuck’s instructions.
- 109 replies
-
- 1
-
-
- medway longboat
- Syren Ship Model Company
- (and 1 more)
-
Nice job on the repair Floyd. Fairing also looks great. Looking forward to seeing you tackle the planking now.
-
Thanks for the likes folks. Bob - I did consider adding the monofilament as you suggested, but decided that might cause more headaches with handling the model while placing planks, so will defer that until the planking is all in place. Minor update today. Planking progresses cautiously with the first four strakes now complete. Using Chuck’s methods for both bending and gluing is paying dividends. Nevertheless, I have not been afraid to debond planks that I have not been satisfied with. One plank came off three times before I was happy. The last plank on the starboard side (Plank #8 ) went on late one evening. I didn’t trim it because I wasn’t sure about it. Having slept on it overnight, it came off again the next day. I took some extra care with bending it to make it fit properly at the last frame and transom, then reglued. Was much happier with the result. So far the strakes are all aligning nicely port/starboard at both bow and stern. It’s not perfect – there are some very minor gaps along some seams, but overall I’m happy with progress so far: I'll be back when once the planking is complete...
- 109 replies
-
- 8
-
-
- medway longboat
- Syren Ship Model Company
- (and 1 more)
-
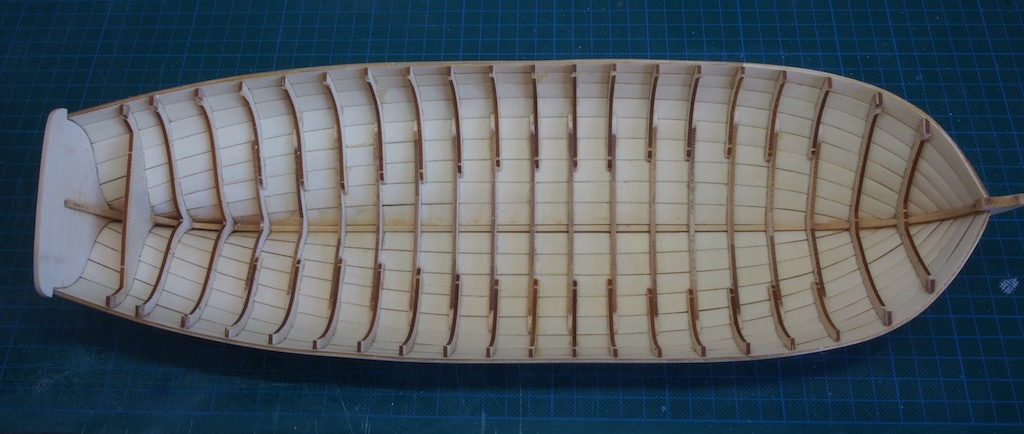
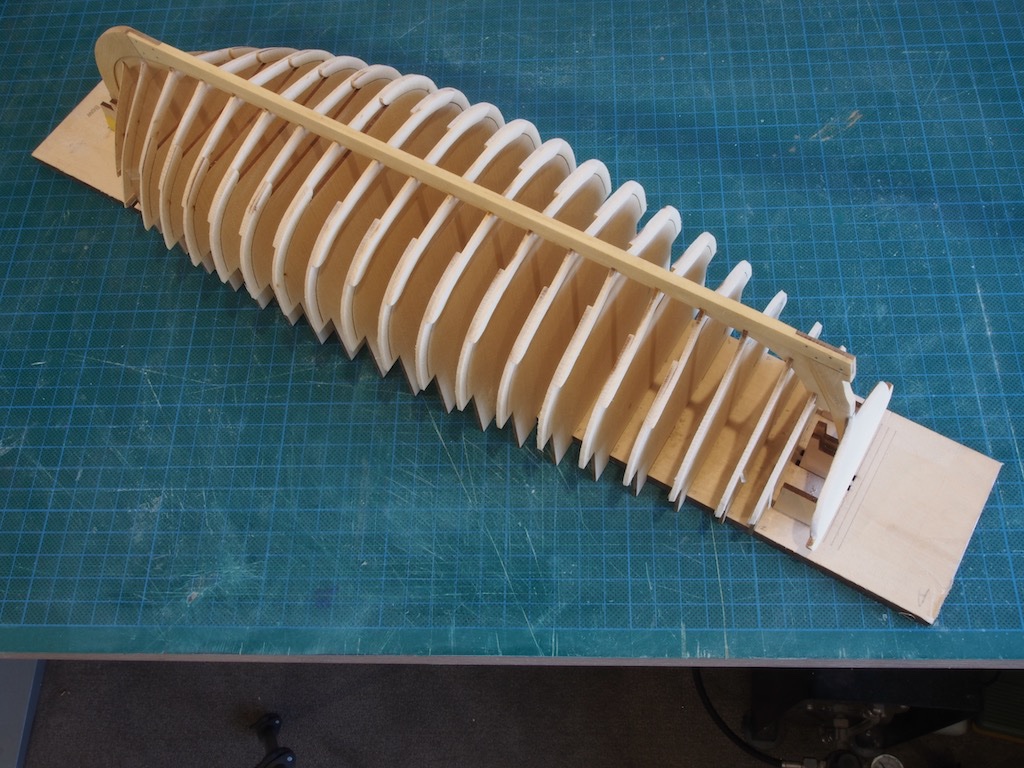
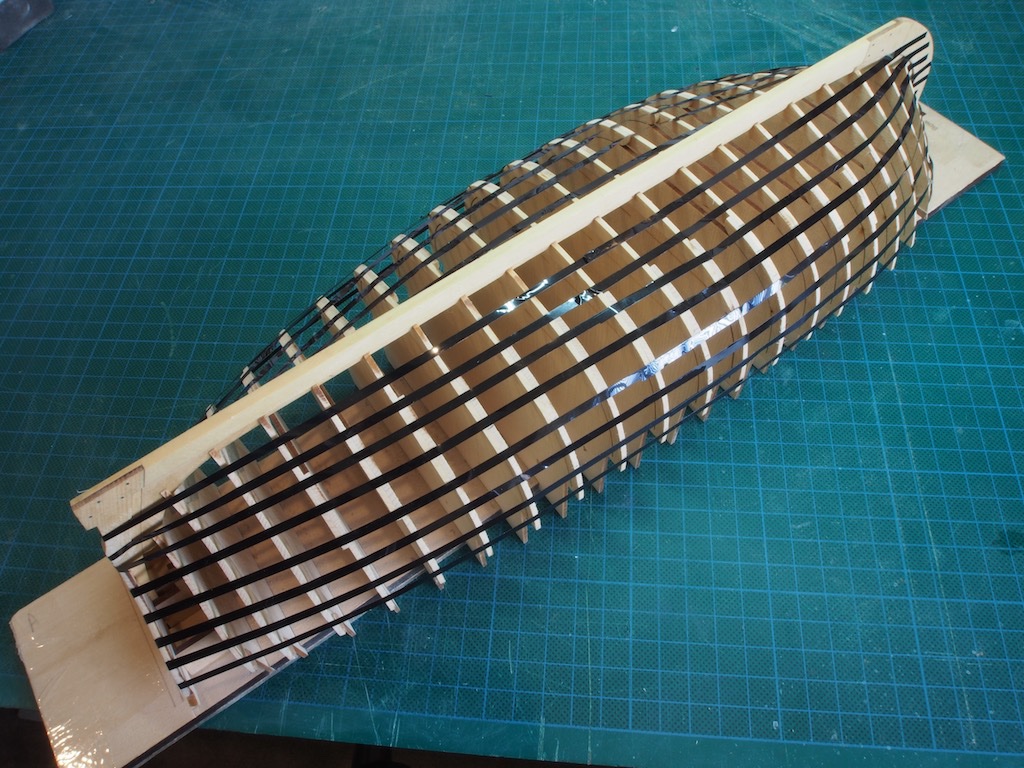
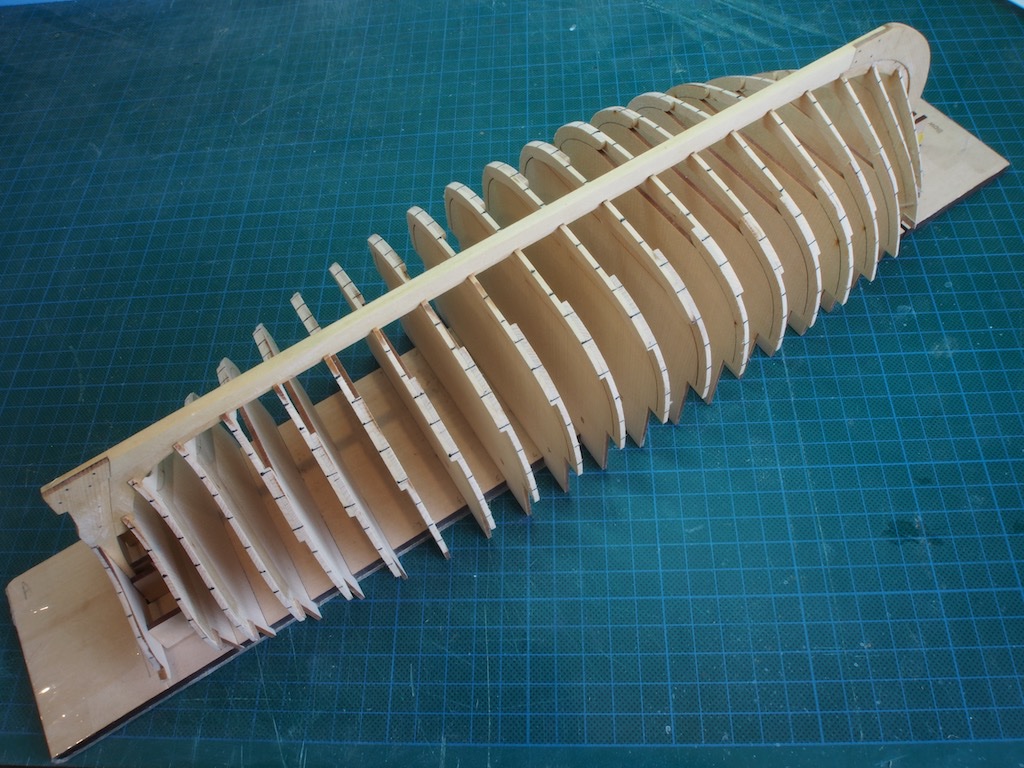
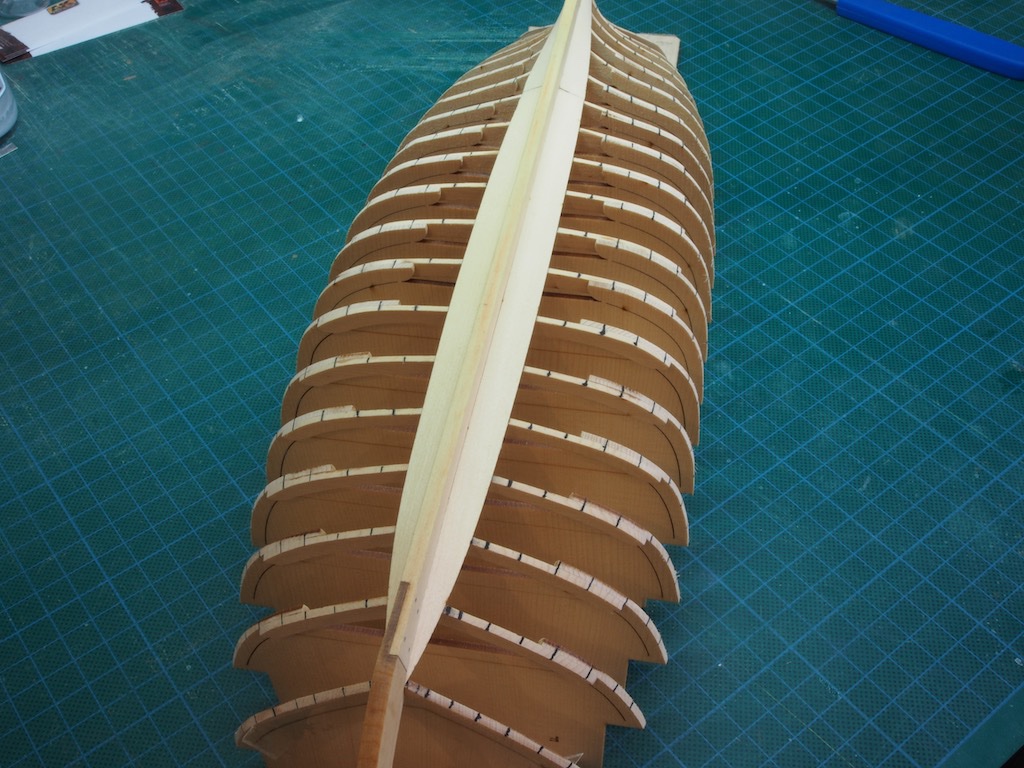
The frames were glued in place per the instructions and left to cure for a few days. The frames were then gently faired using 240 grit sandpaper on a variety of foam backing blocks. The hull was then lined off using tick strips and the bow/stern templates provided by Chuck to place a pencil mark on each frame with the exception of the first and last three frames. Thin strips of tape were then used to adjust the line. The frames were then marked again along the edges of the tape, this time using a thin black pen. Once the tape was removed, the original pencil lines were erased to avoid confusion. Then it was time to gird the loins and commence the planking. This time around, I decided to use Chuck’s method for bending planks, only instead of a hairdryer I used my Proxxon heat gun (on the low setting). I was pleasantly surprised at how easy this was to do compared to my previous method of using a small steam iron. I also followed Chuck’s advice and used CA glue for attaching the planks and again following his advice, just placing a small amount on each frame. I used a gel CA for this. I was again pleasantly surprised at how easy the process was compared to using PVA and trying to clamp things in place. OK Chuck, I’m a convert on using CA for planking! I’ve decided to depart from the instructions slightly and follow the lead of some others by drilling holes for the “nails” as I go, rather than waiting until all planking is completed. Figure I might stand a reasonable chance of actually hitting the frames this way! I'll be back when planking has progressed some more.
- 109 replies
-
- 7
-
-
- medway longboat
- Syren Ship Model Company
- (and 1 more)
-
Those trail boards look great Jeff- well worth the time and effort.
-
Nice to see you back at this model Yves. This is another that I have in my way too big stash. I’ll enjoy following along with your build.
-
This is a fun build Dave and Jeff's plans are first class. I'll follow along for the ride and the memories!