


Baker
-
Posts
4,134 -
Joined
-
Last visited
Content Type
Profiles
Forums
Gallery
Events
Posts posted by Baker
-
-
10 hours ago, rkwz said:
Maybe you should have a model to demonstrate the operation of the thrones you just made?
I did not find any volunteers 🤣
1 hour ago, G.L. said:Your forecastle looks like a cosy corner for lots of interesting conversations provided that there is not too much overcoming water.
I can always add a few news papers.
Long ago, on the farm of my grandparents, there was a box of old newspapers on the seat of ease.
And they were not only for reading ... 😳 -
12 hours ago, luponero said:
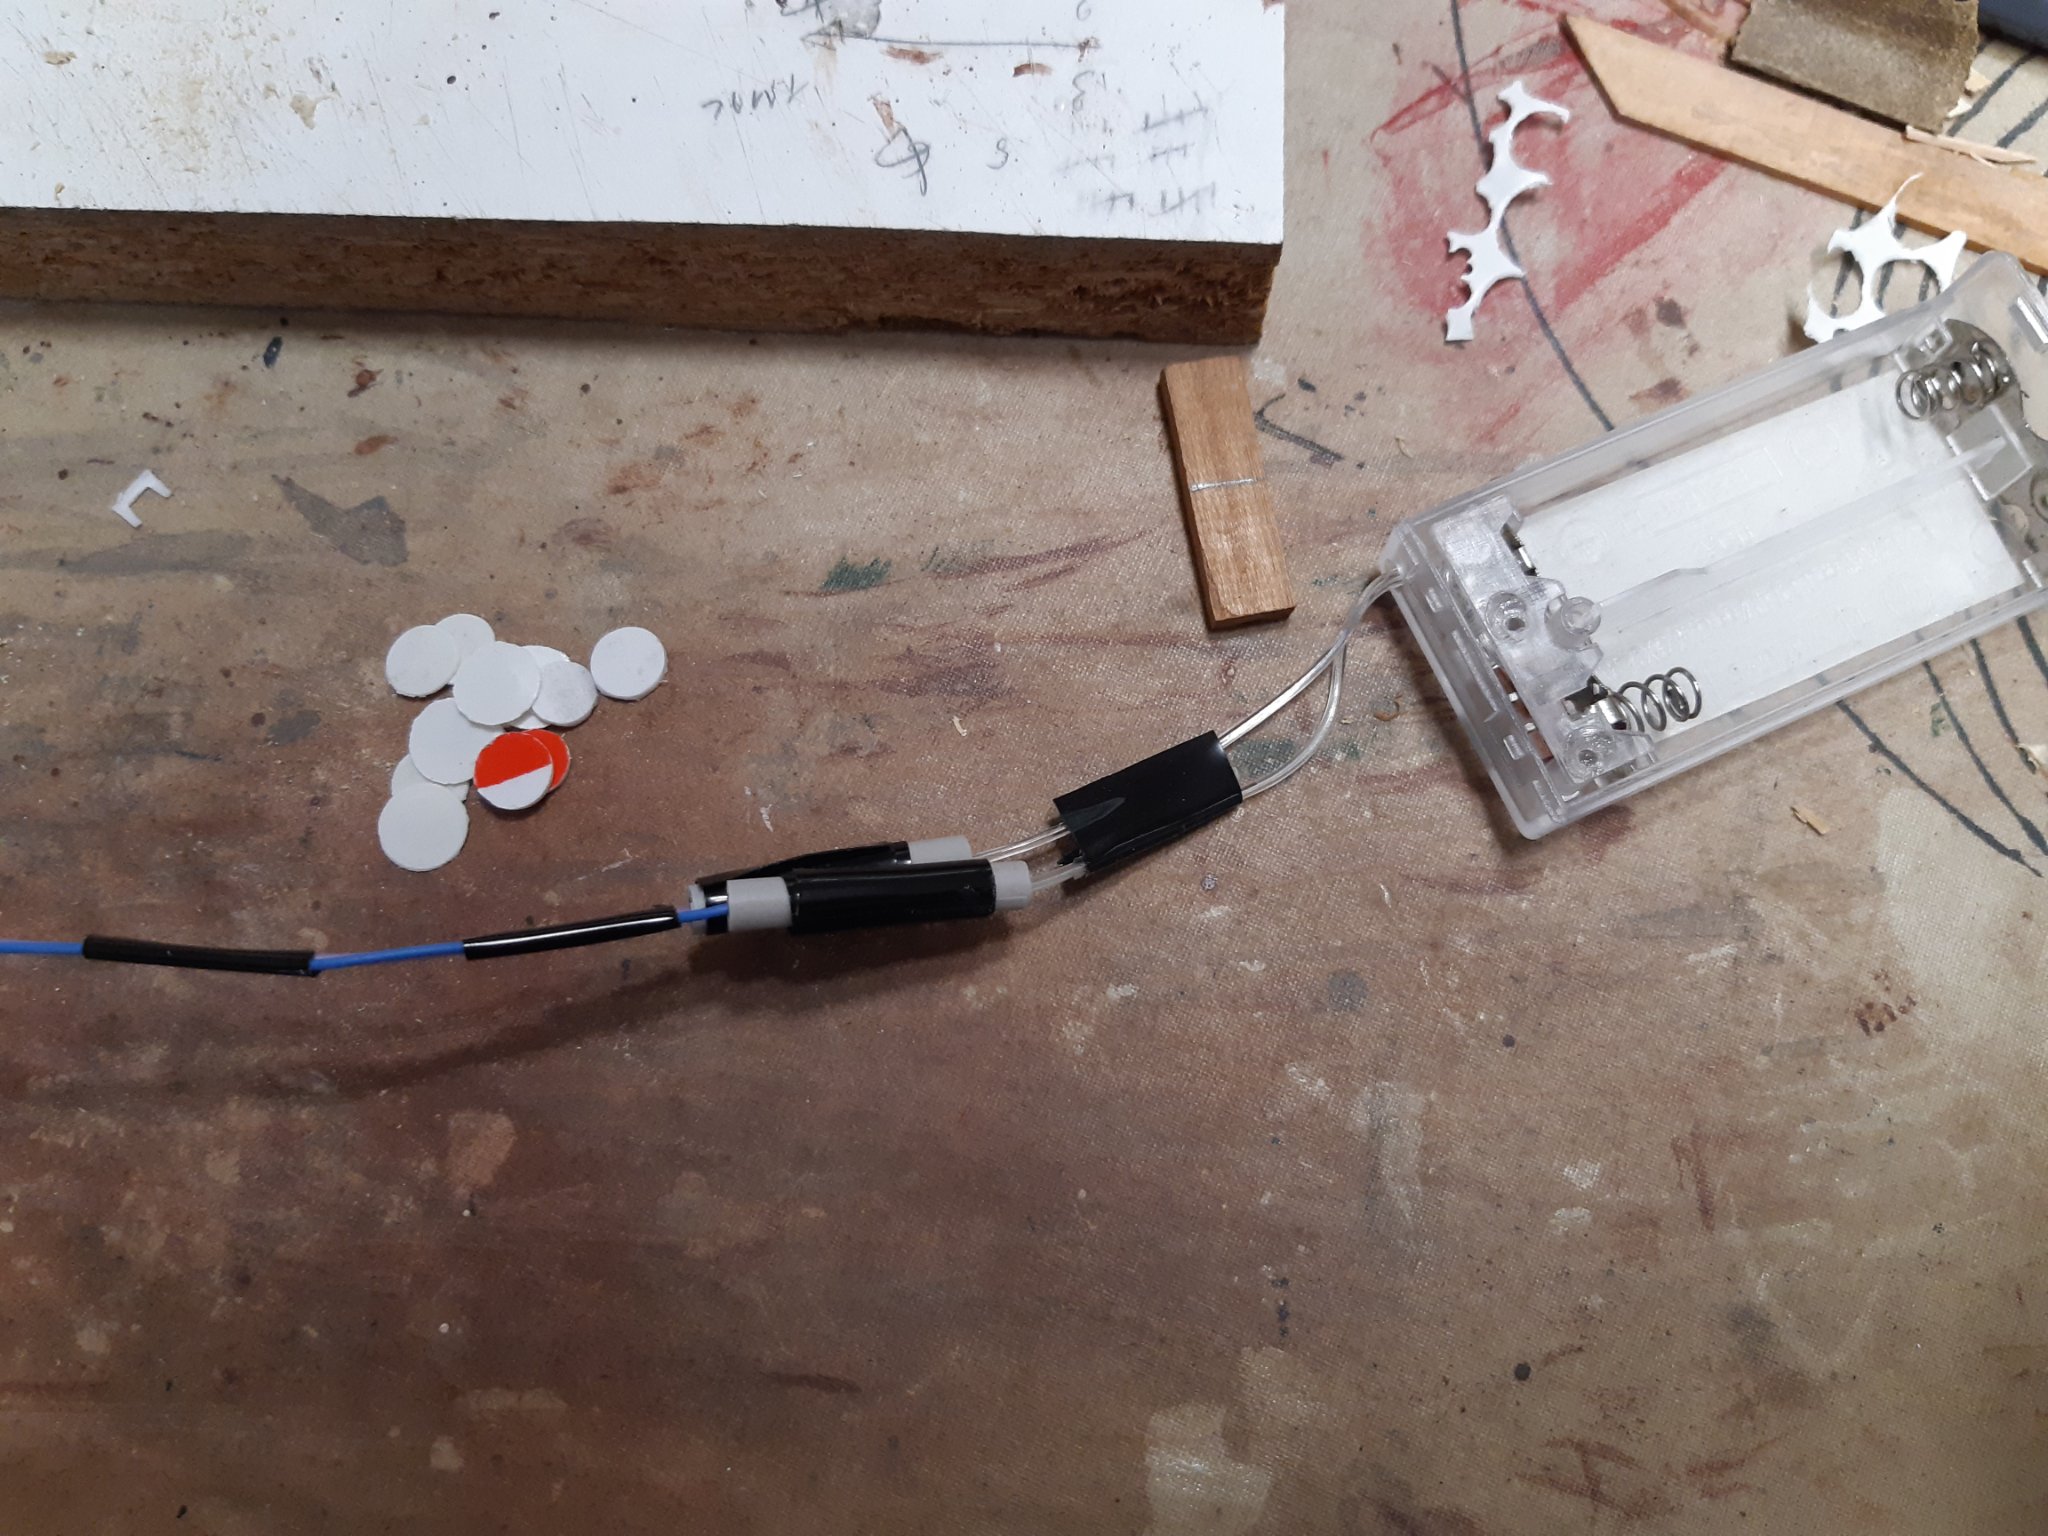
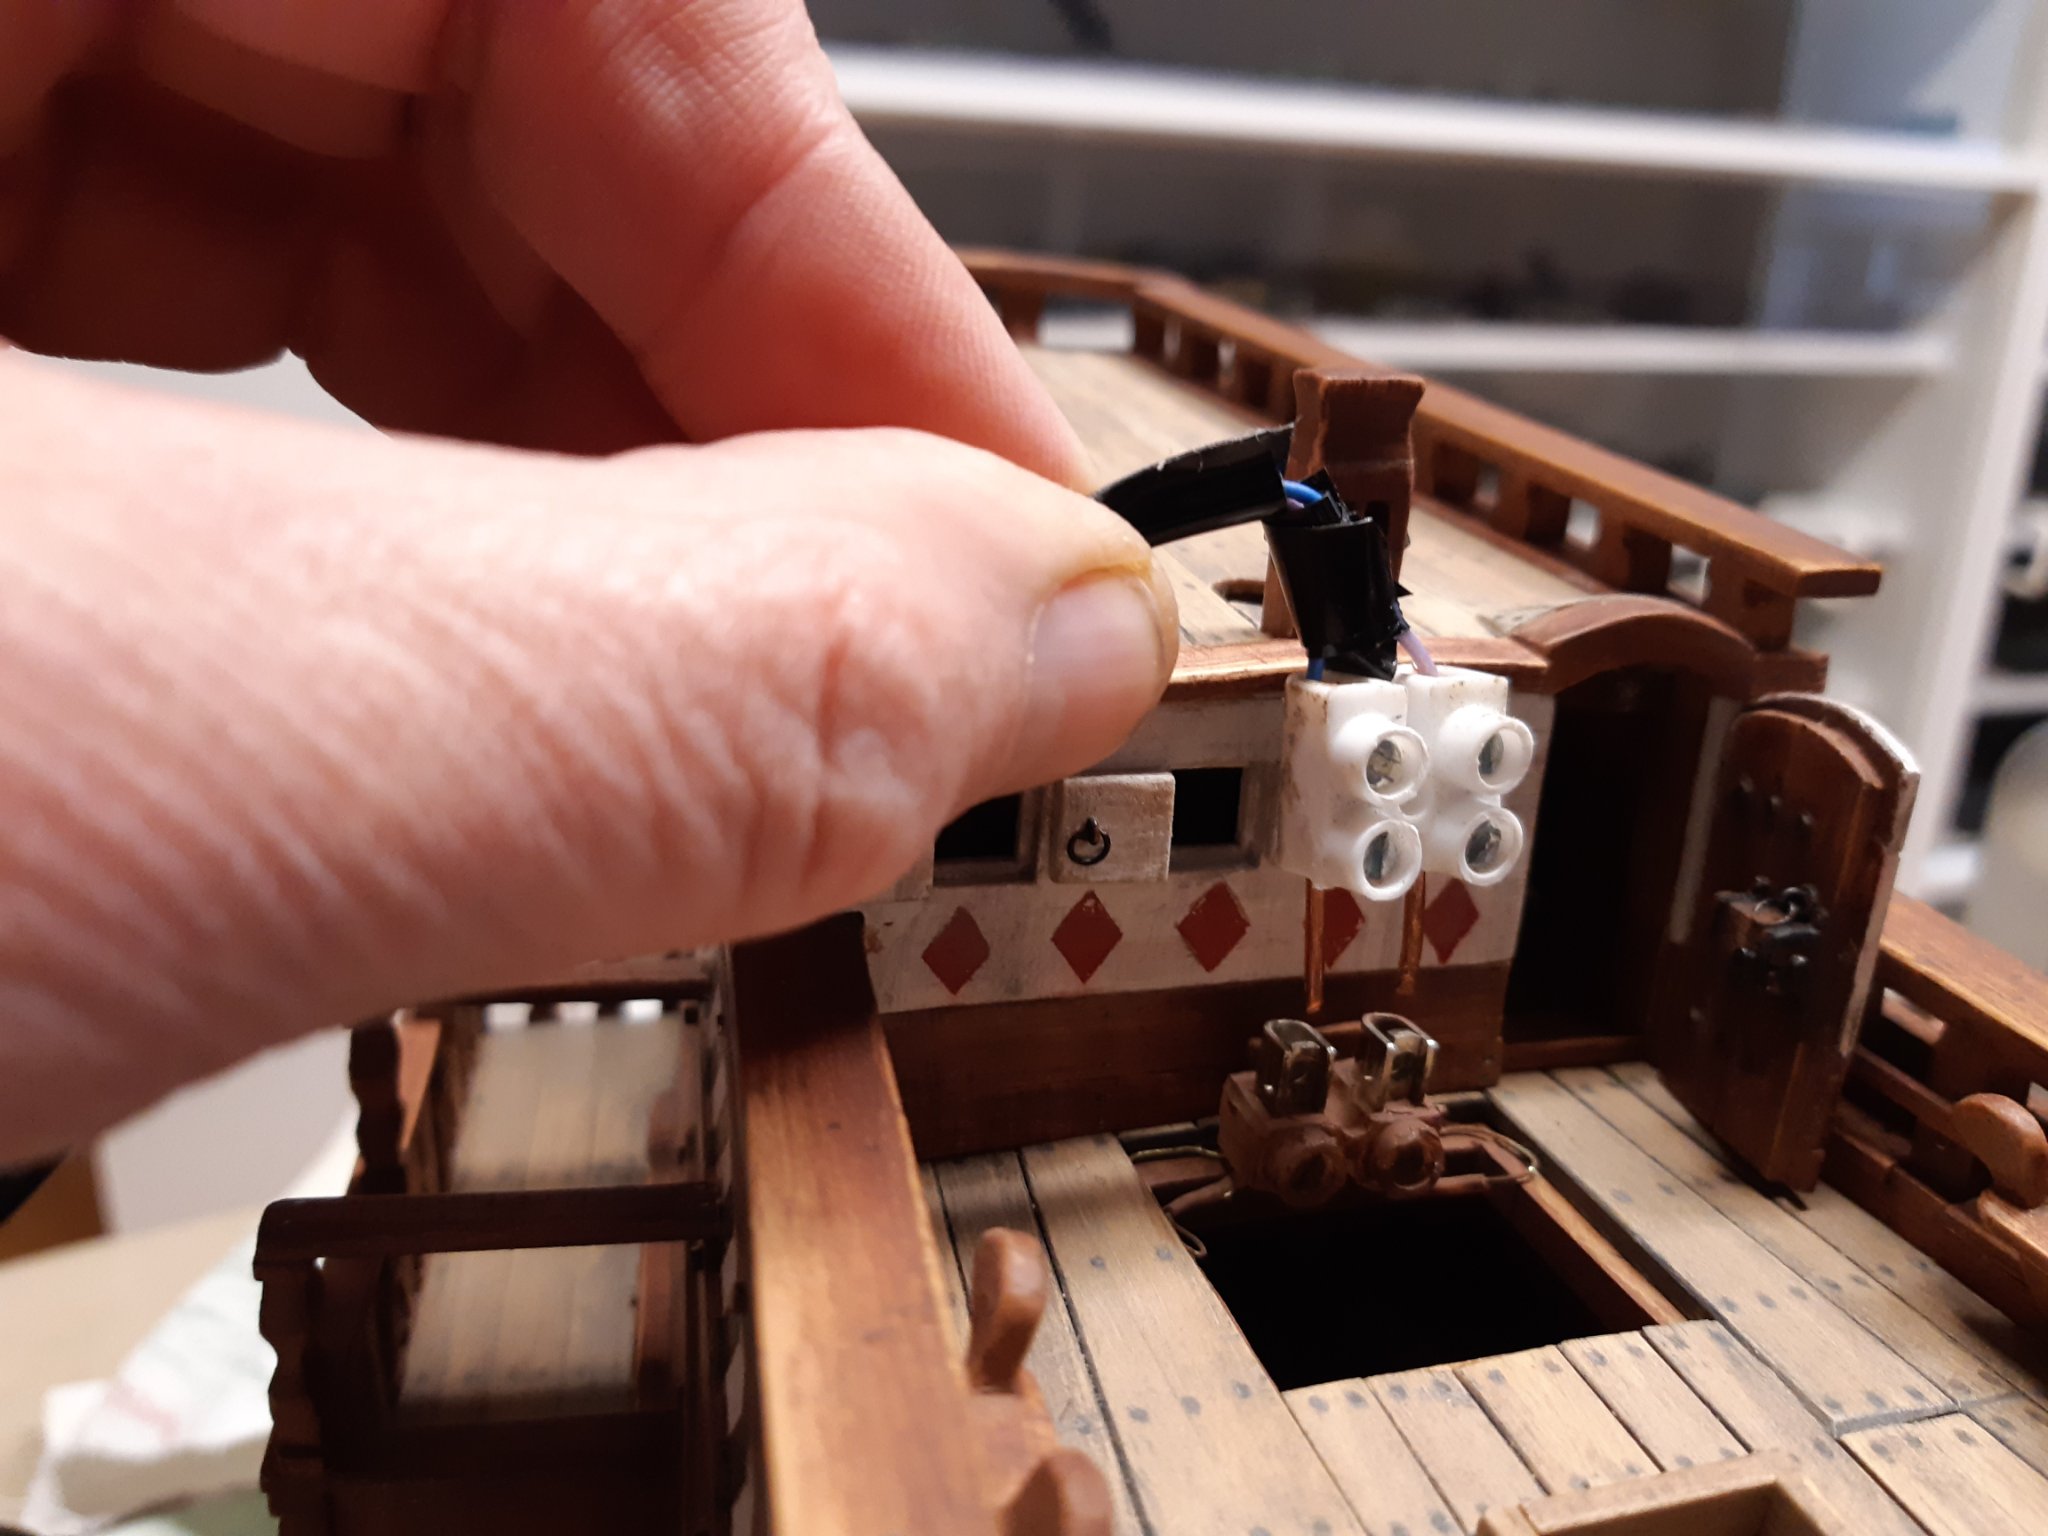
but from the "lusterklem" to the switch where the batteries are, do you go outside?
If I understand the question correctly
battery holder with extended wire, The wire is soldered

The wire ends in the clamp together with the copper wires of 1.5 diameter
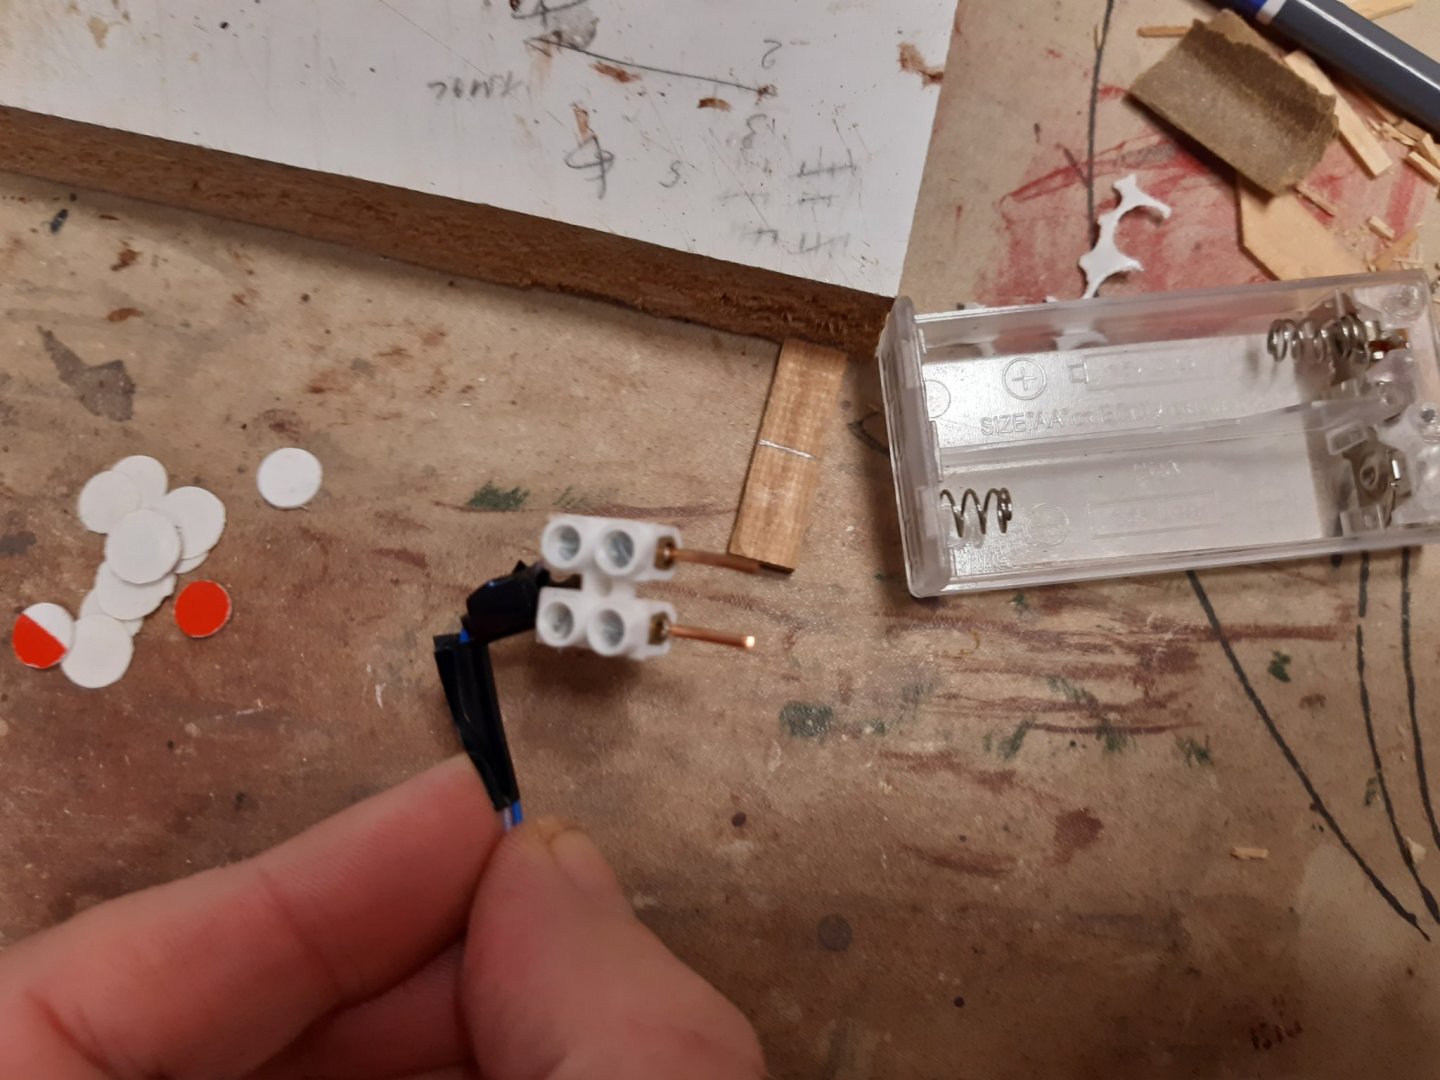
Need light ? Open the helmsman's housing and insert the clamp
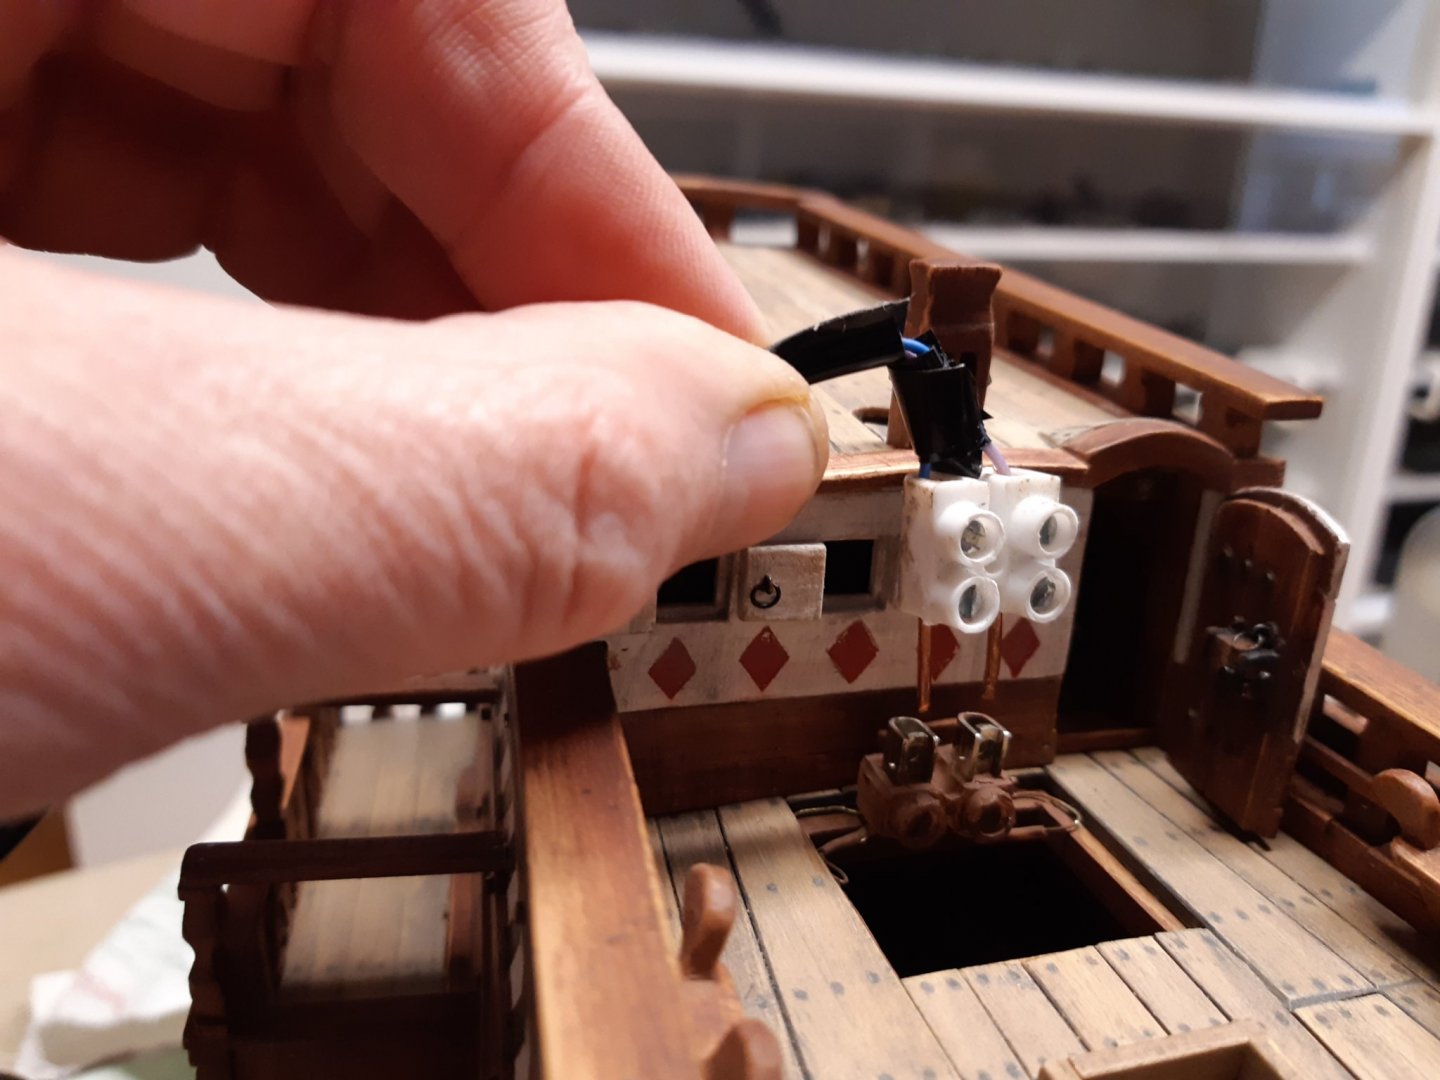
simple and effective
")
- Jeff T, mtaylor, GrandpaPhil and 3 others
-
 6
6
-
Beautiful model.
Congrats 👍

-
-
-
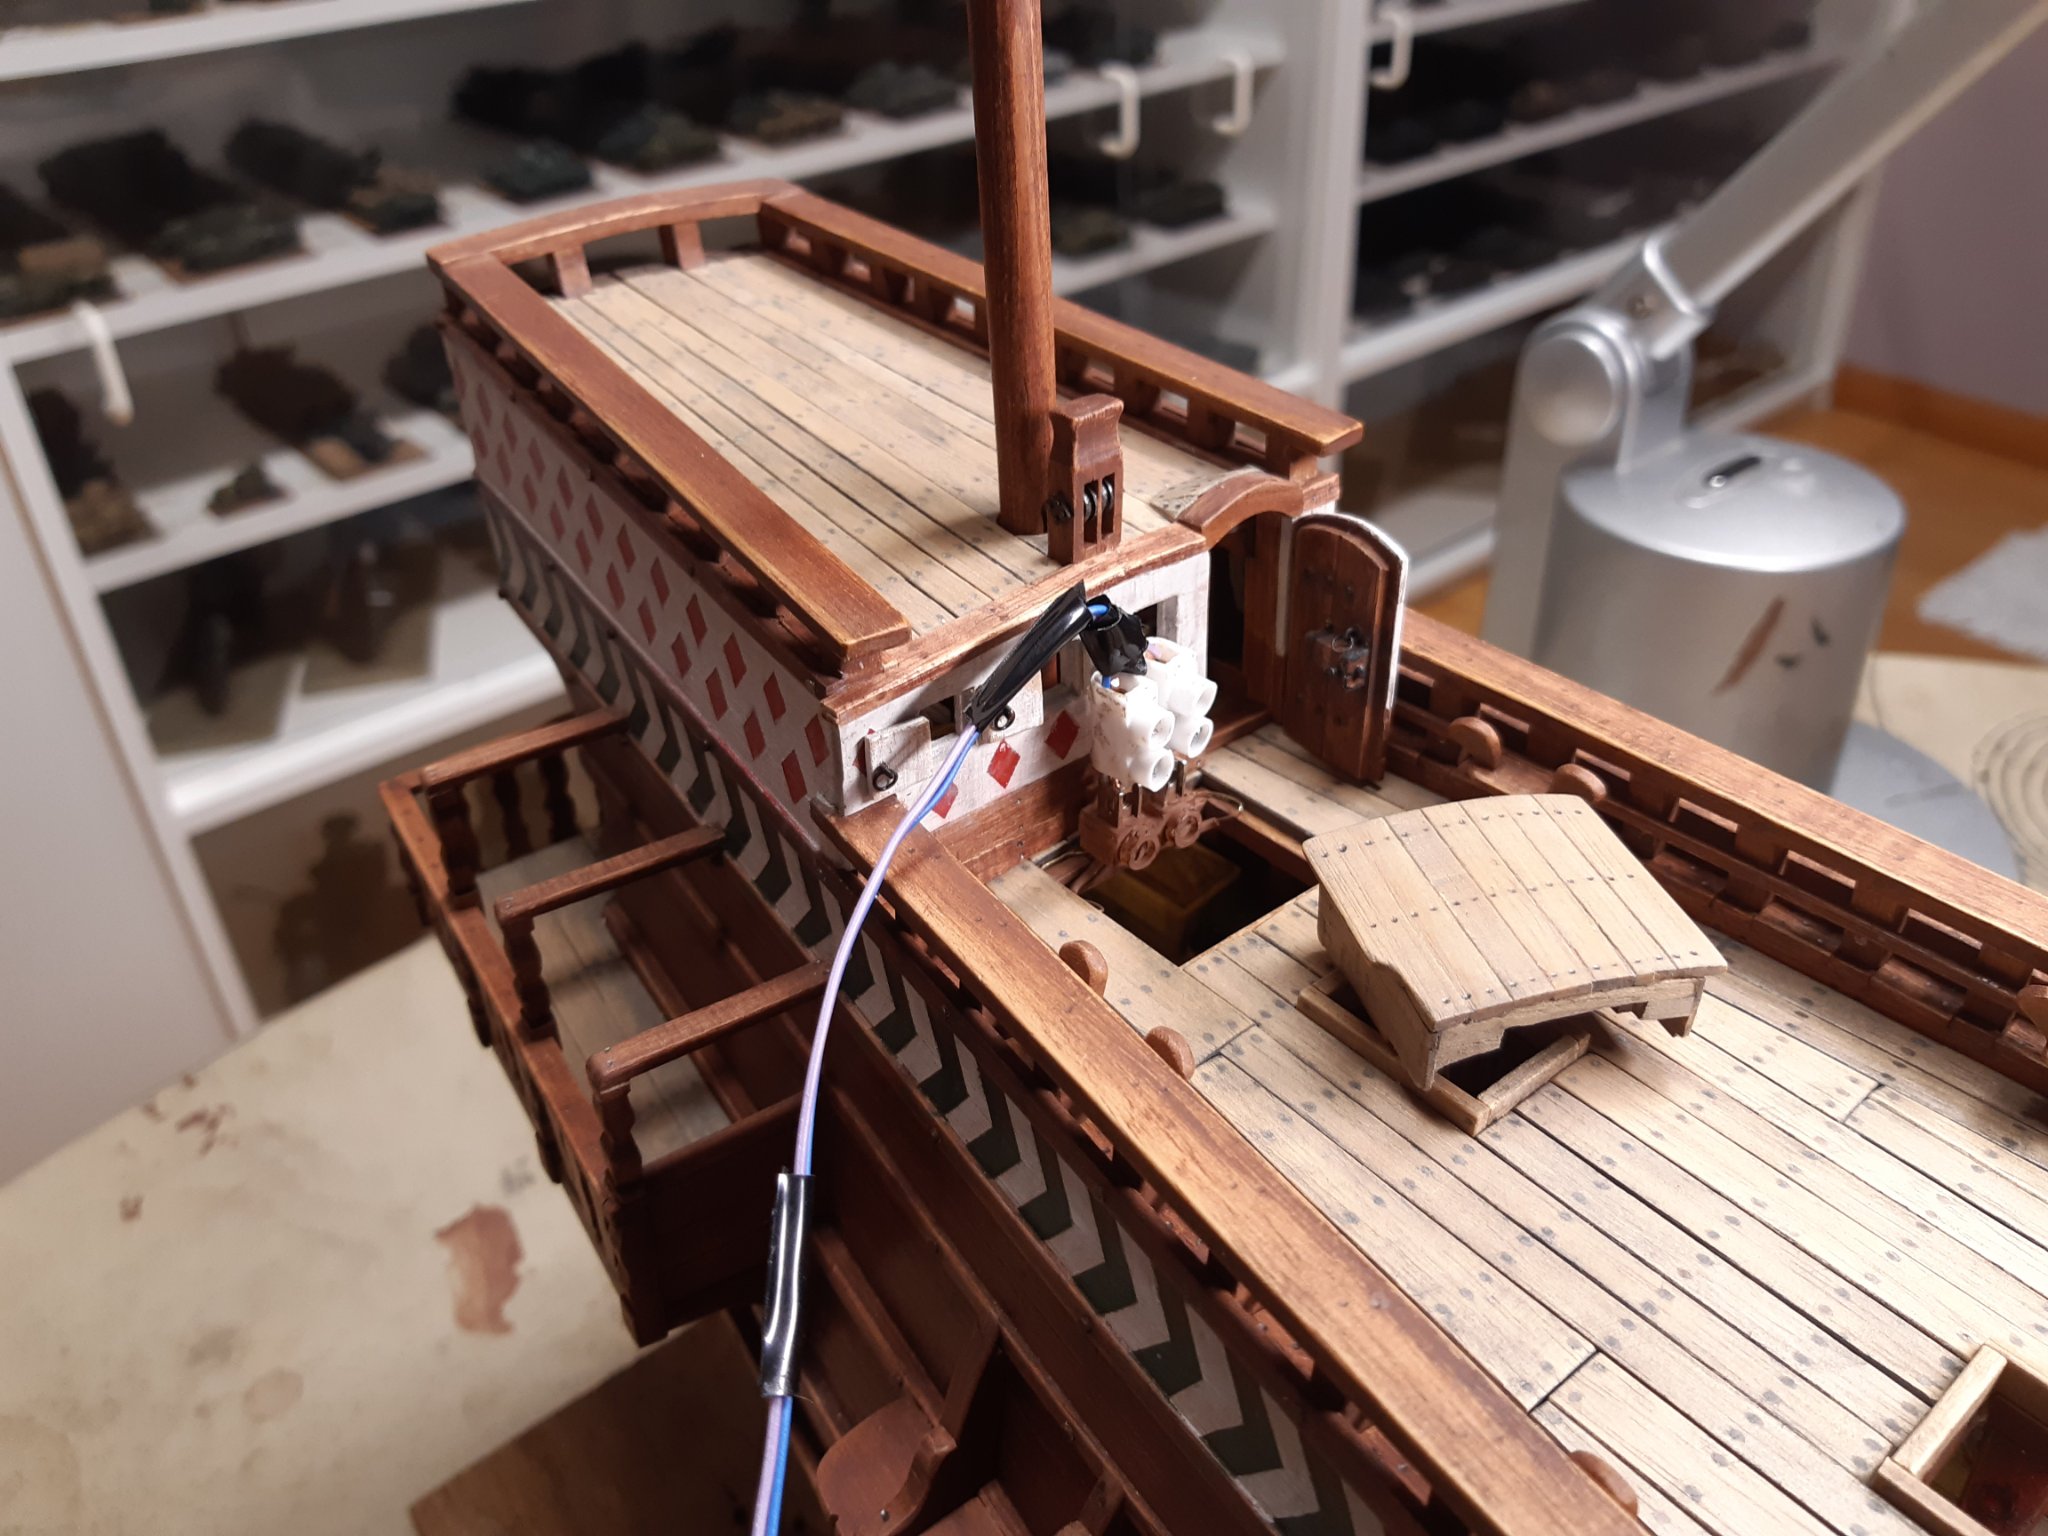
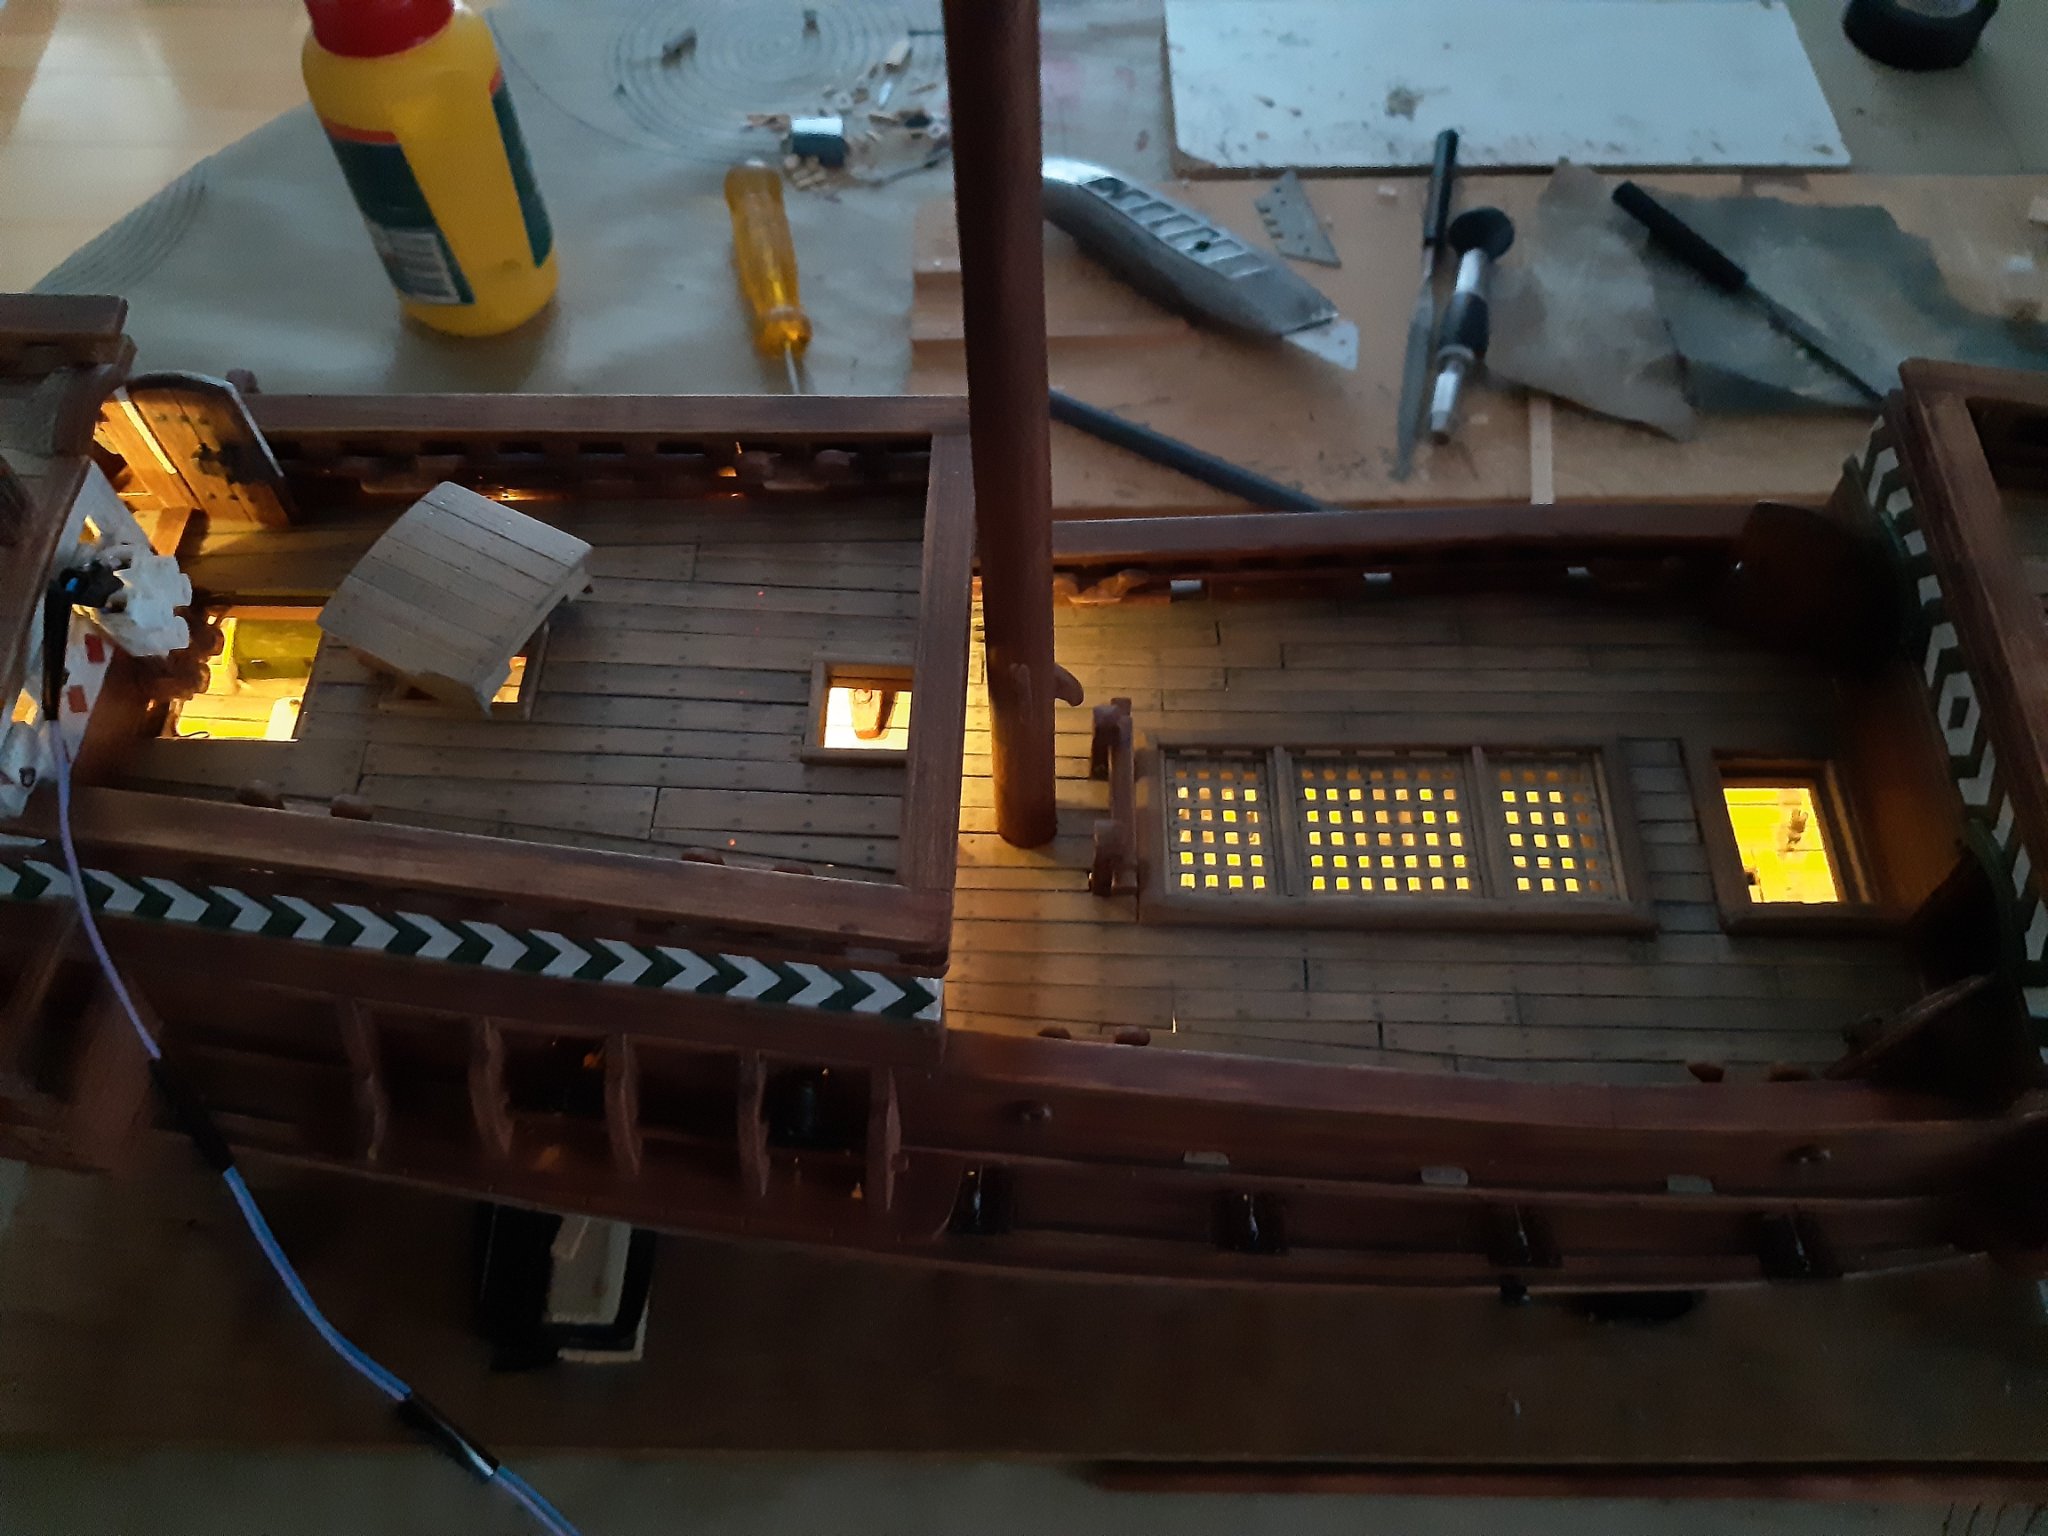
The LEDs are actually Christmas lights (very cheap and easy to use)
The wire is concealed against the ceiling on the decks.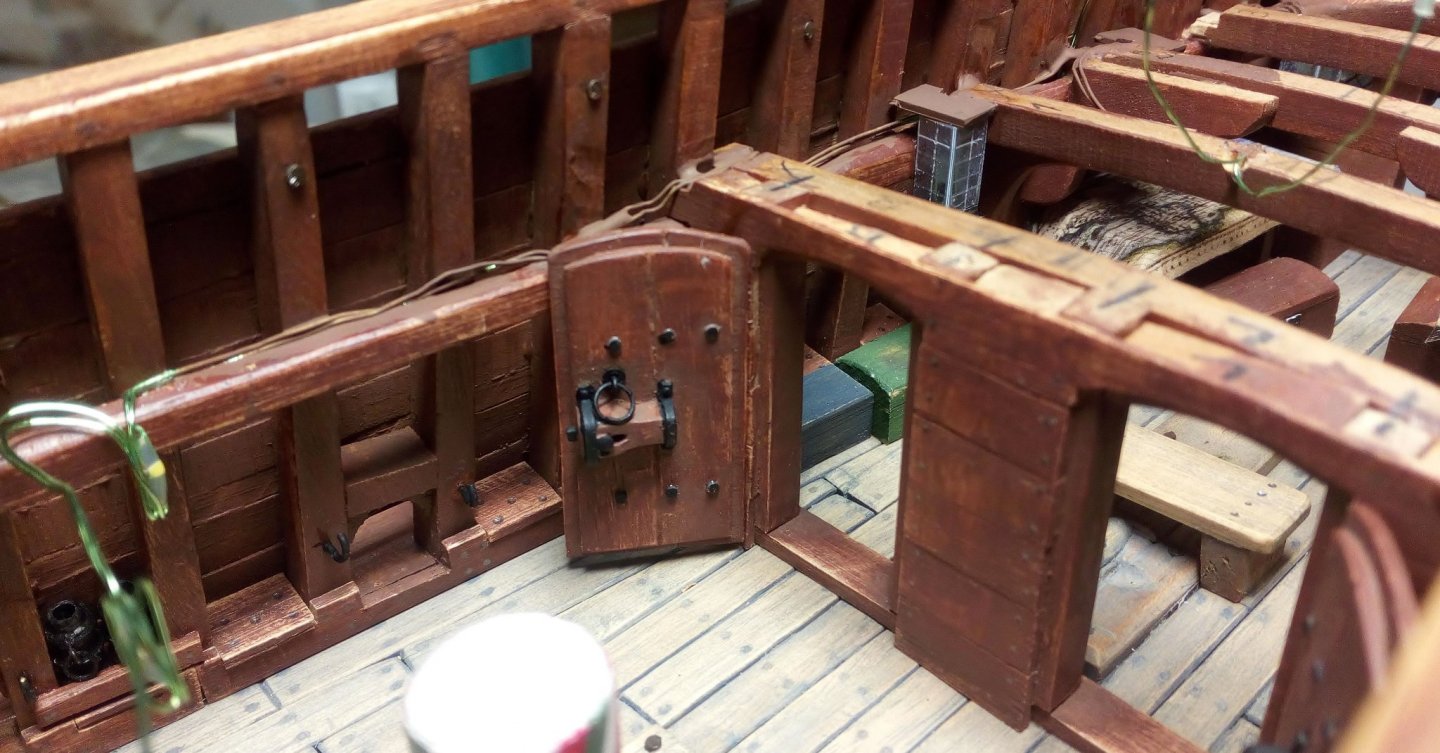
And ends in the removable helmsman's house on an adapted "lusterklem" (in English ??)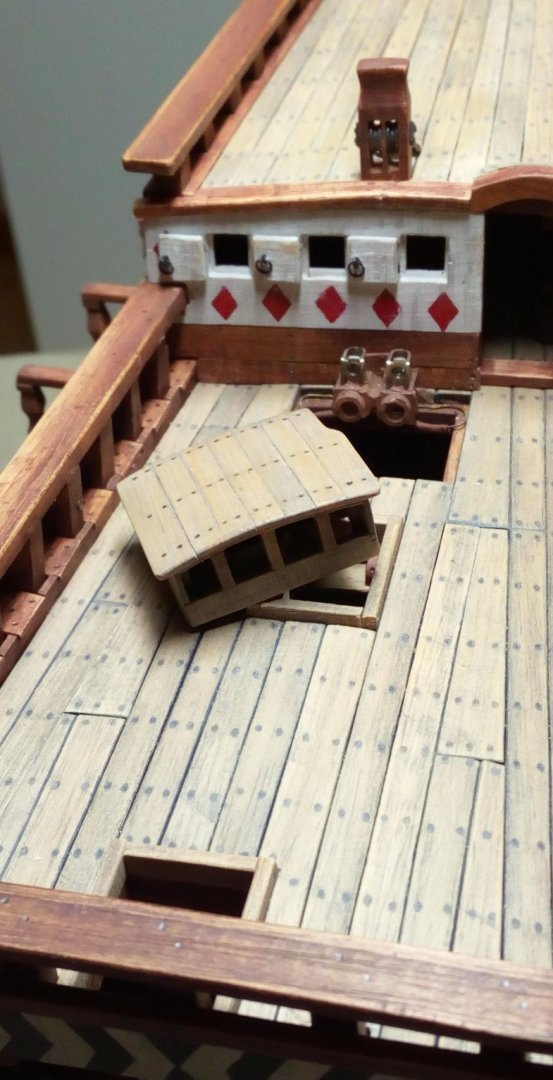
-
I don't think that's a good idea. The width of the planks can vary, that of the wale probably not.
Have a look at the pdf page 32
Or check out my Pelican / Golden Hind build somewhere from post 40 -
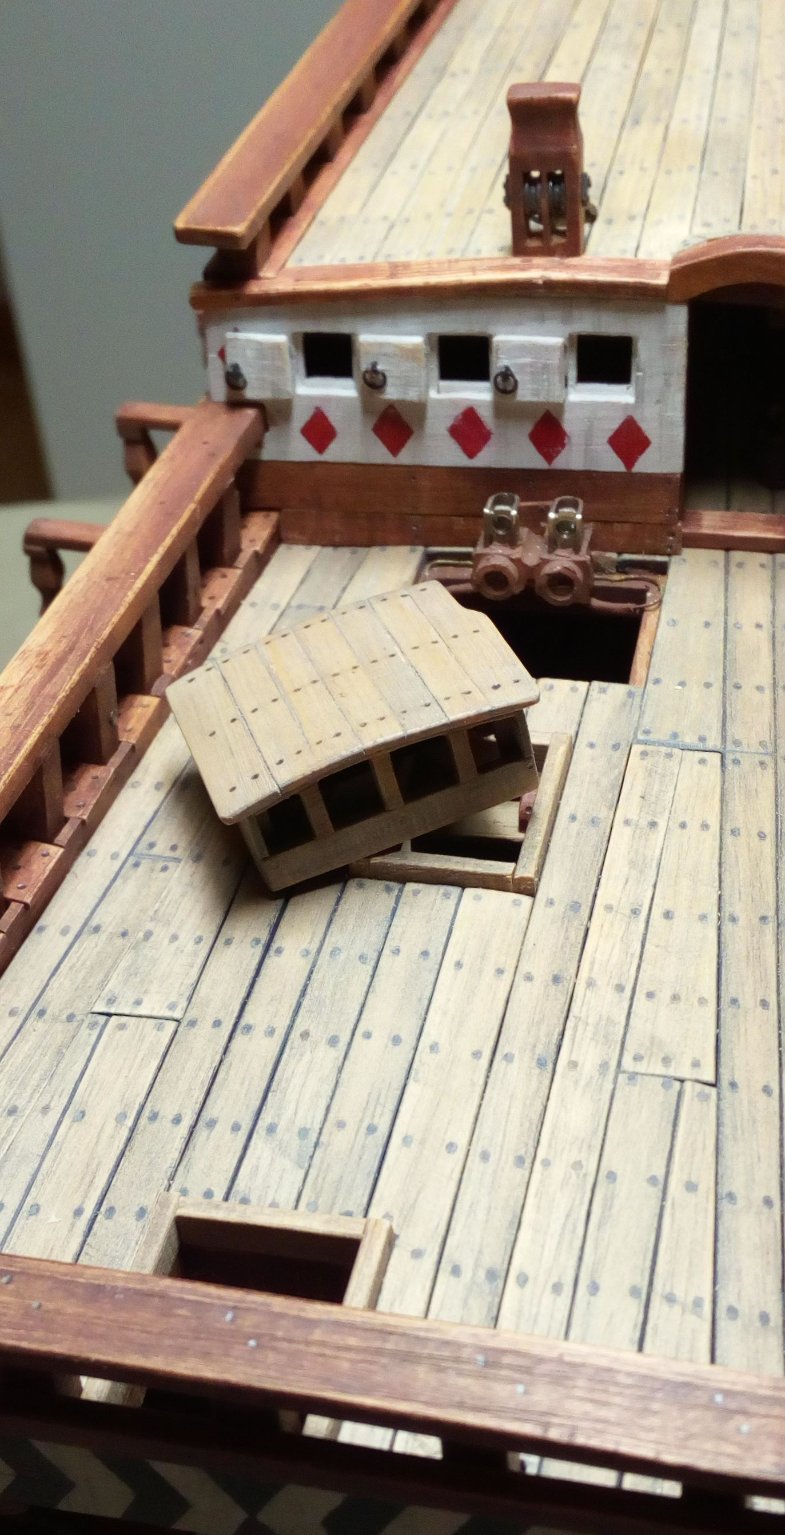
Hello, i slowly restarted the Pelican build. So a small update.
Made a removable plug for the battery of the LED lights. Not hi tech, but it does what it should do: turn on the LEDs.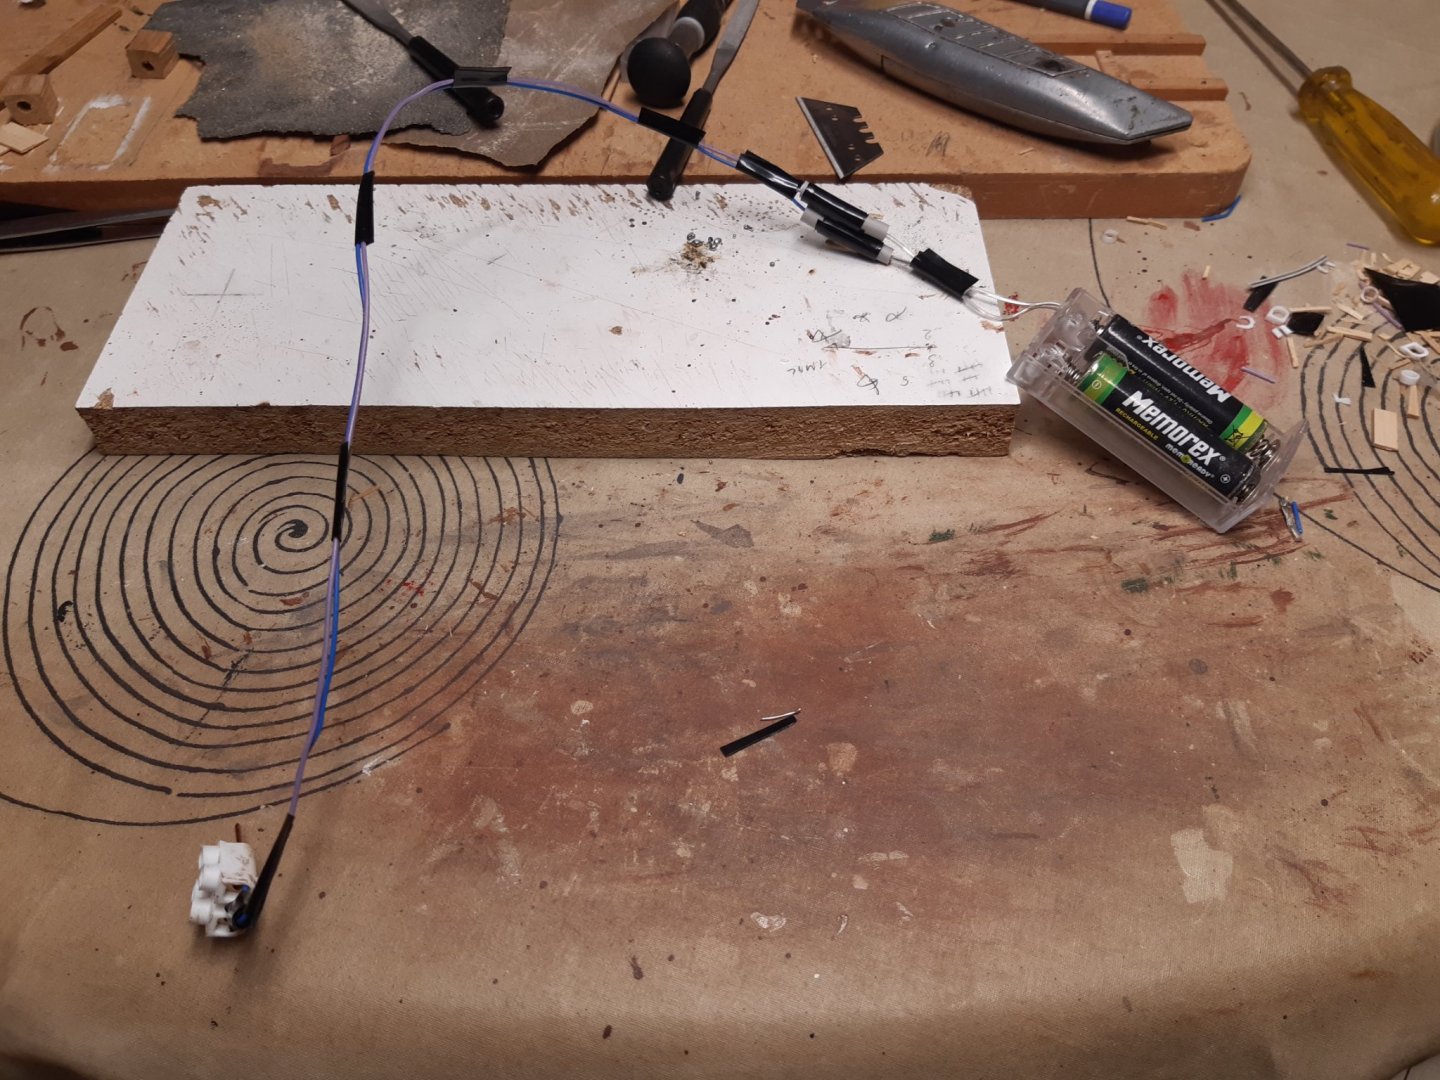

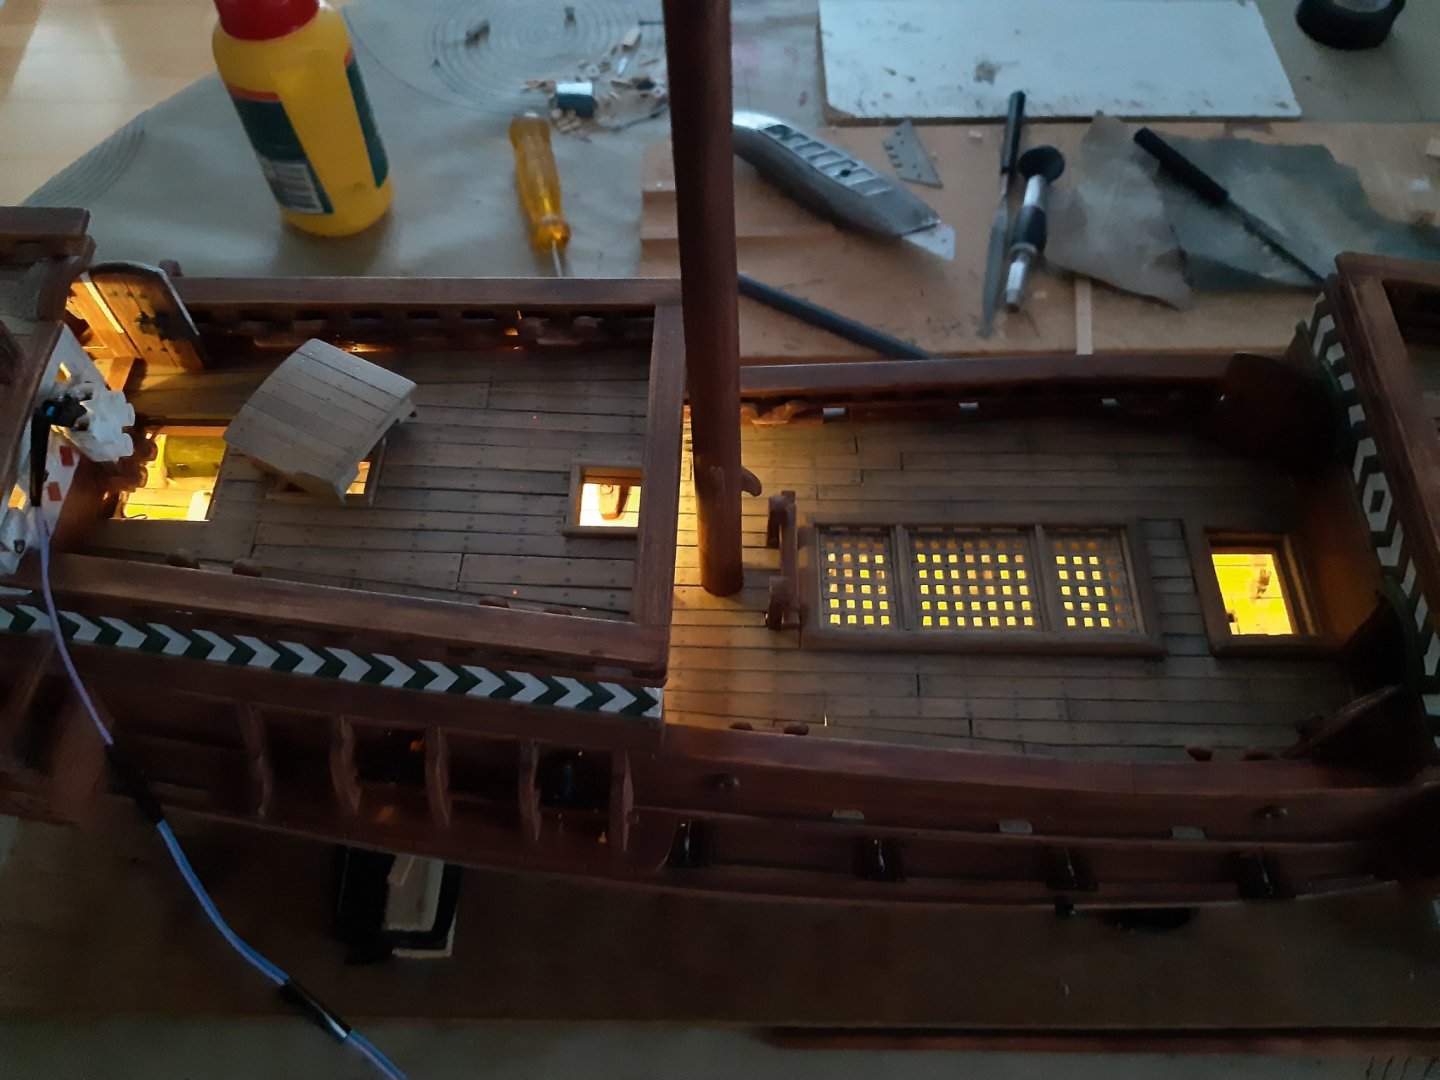
Some things that may not be completely correct have been adjusted.
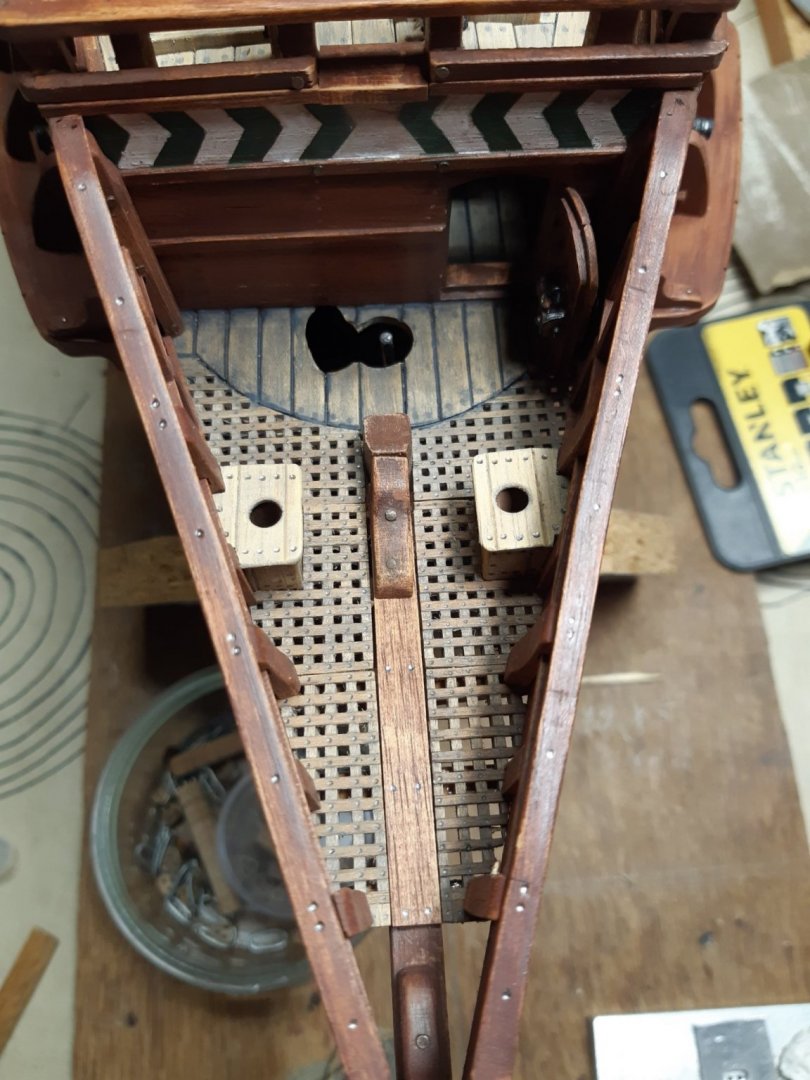
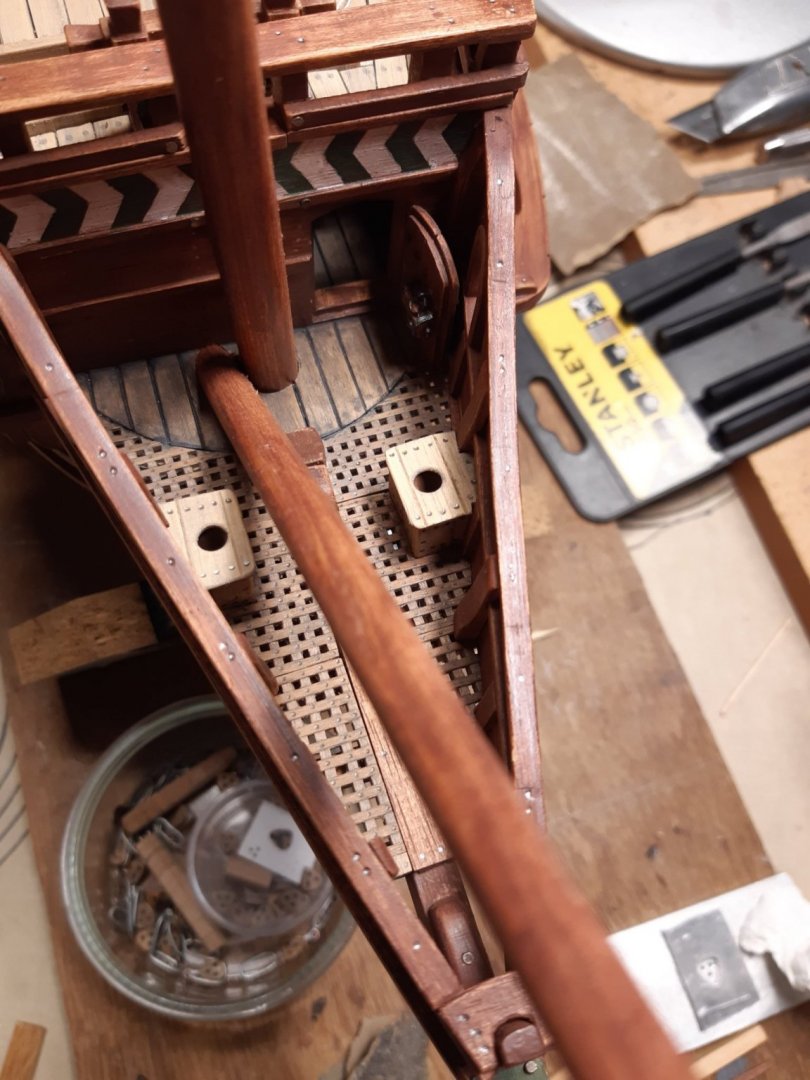
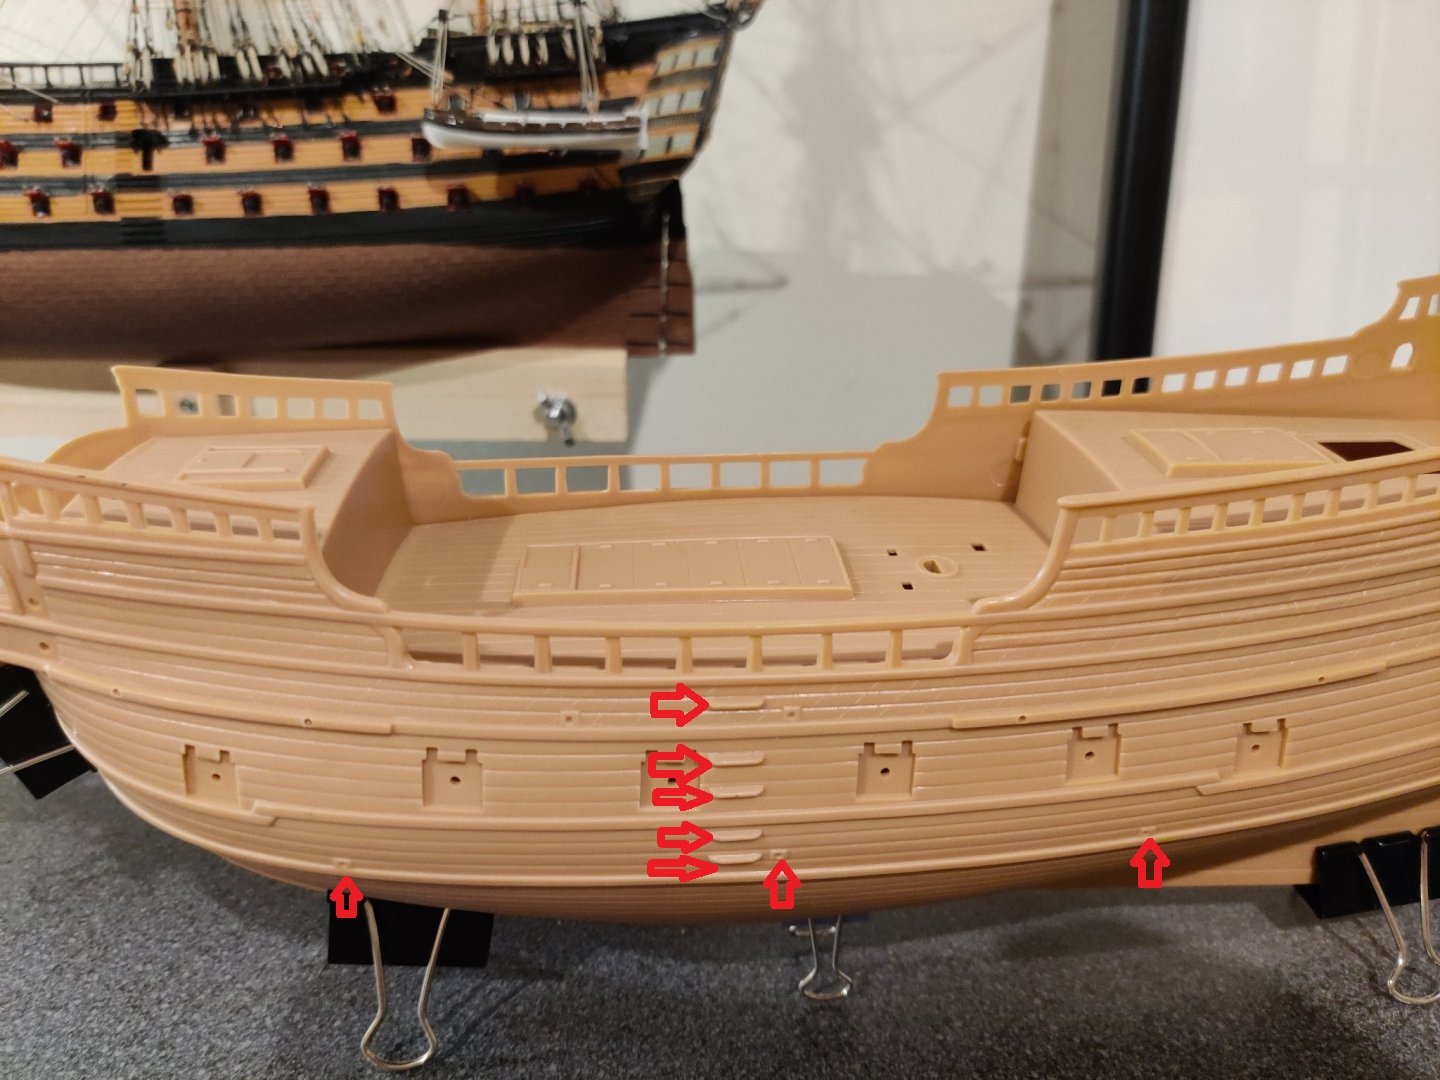
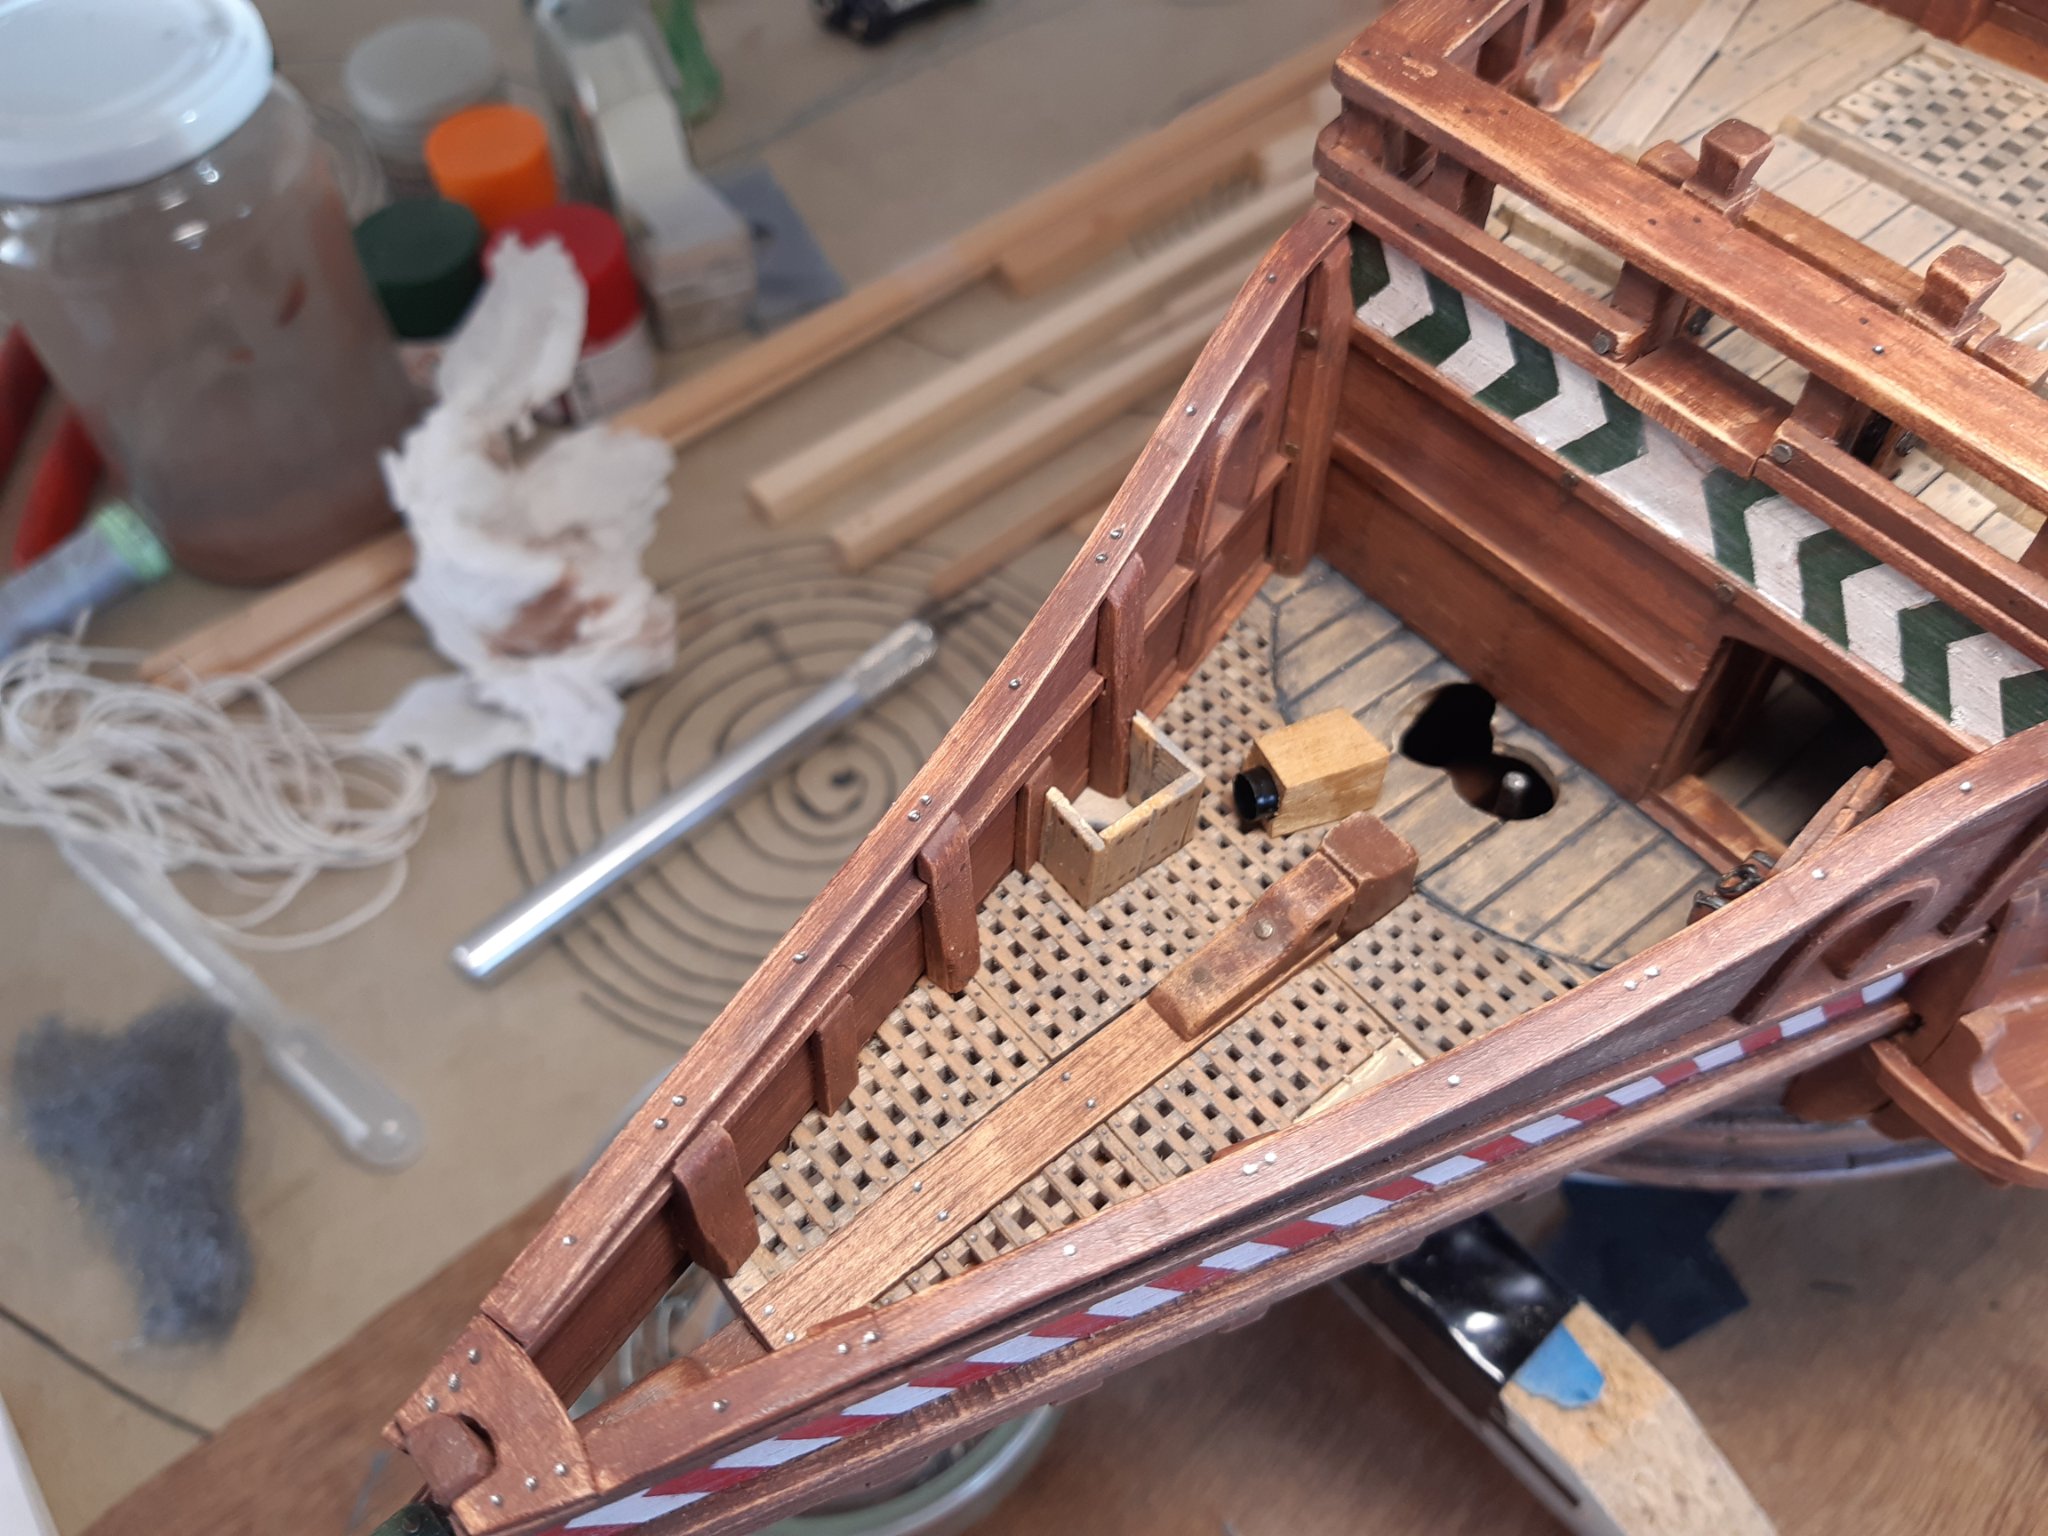
The stern gallery was also normally used as a combat station. So no sanitary facilities here. The holes are closed.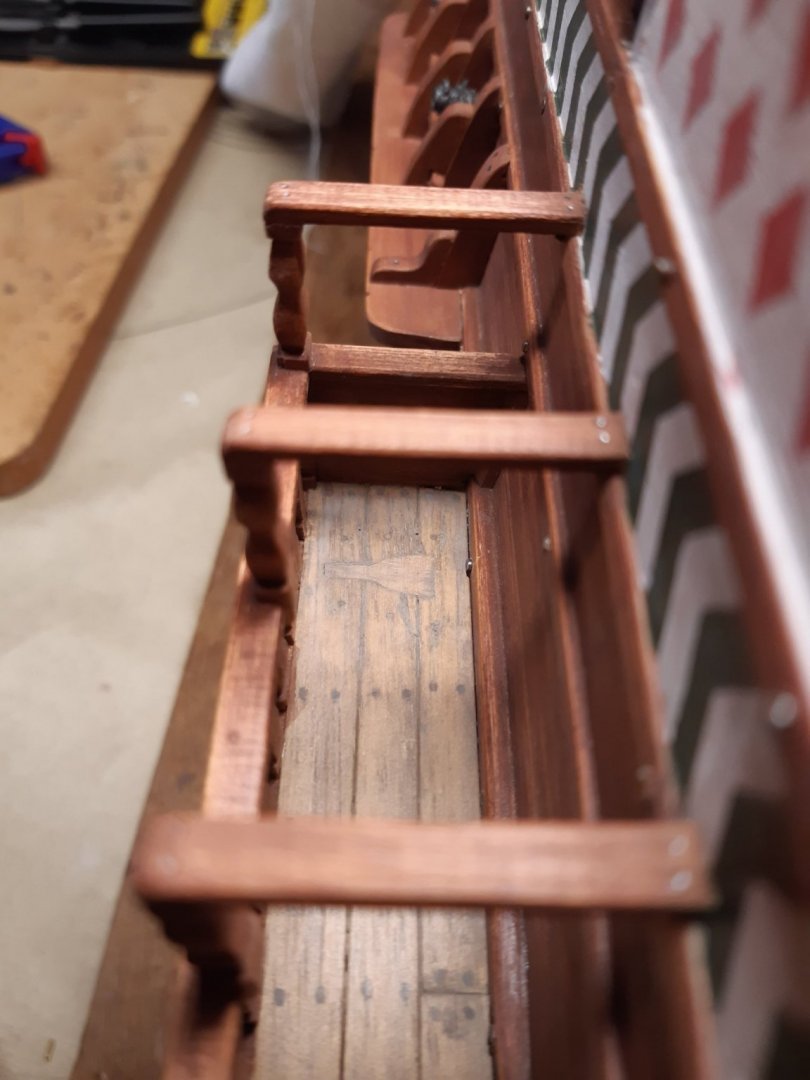
The two holes in the beakhead have been modified, there are now two seats of ease.
The black tubing turned out to be a bad idea and was not used.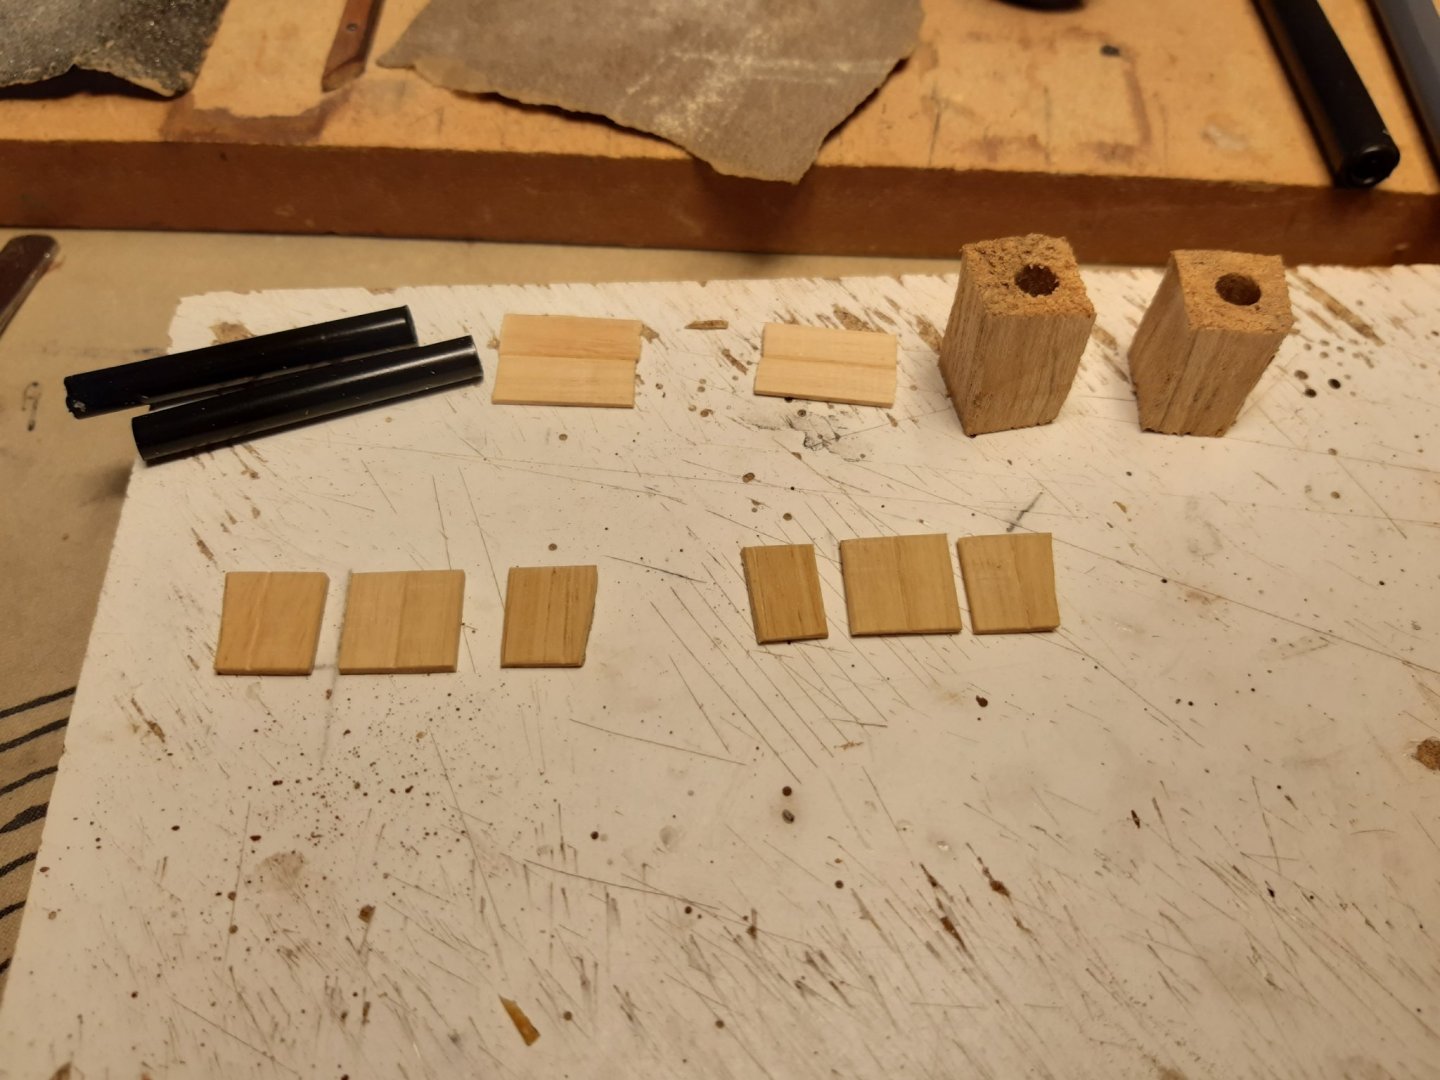

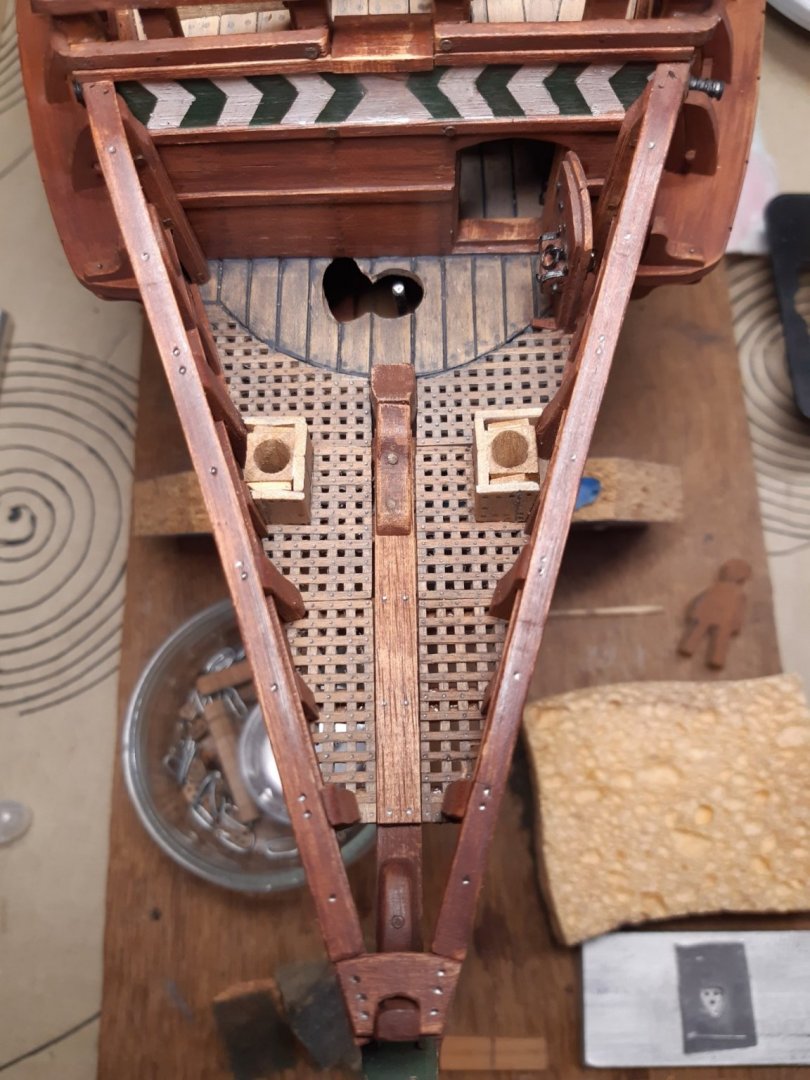
Thanks for following
- Edwardkenway, mtaylor, rkwz and 7 others
-
10
-
28 minutes ago, jct said:
I've been determined to get my figure painting skill back
You have completely succeeded in this.
Congrats, nice painting job.
-
-
13 hours ago, Danstream said:
I noticed that you are used to paint with Tamiya acrylic paints. I understood you apply them by brush. If yes, how do you manage that? I largely use them, but only by airbrush. In other builds of yours, I have seen that you brush them also on wood with quite realistic results. Also in that case, how do you do that?
Well, I'm a little very old fashioned. I don't have an airbrush. Simply the old methods. painting, dry brushing and a washing with thinned paint.
On plasticHave a look at the military models (links in signature)
On wood
Paint with thinned paint, Let dry, polish with scotch brite (post 129) -
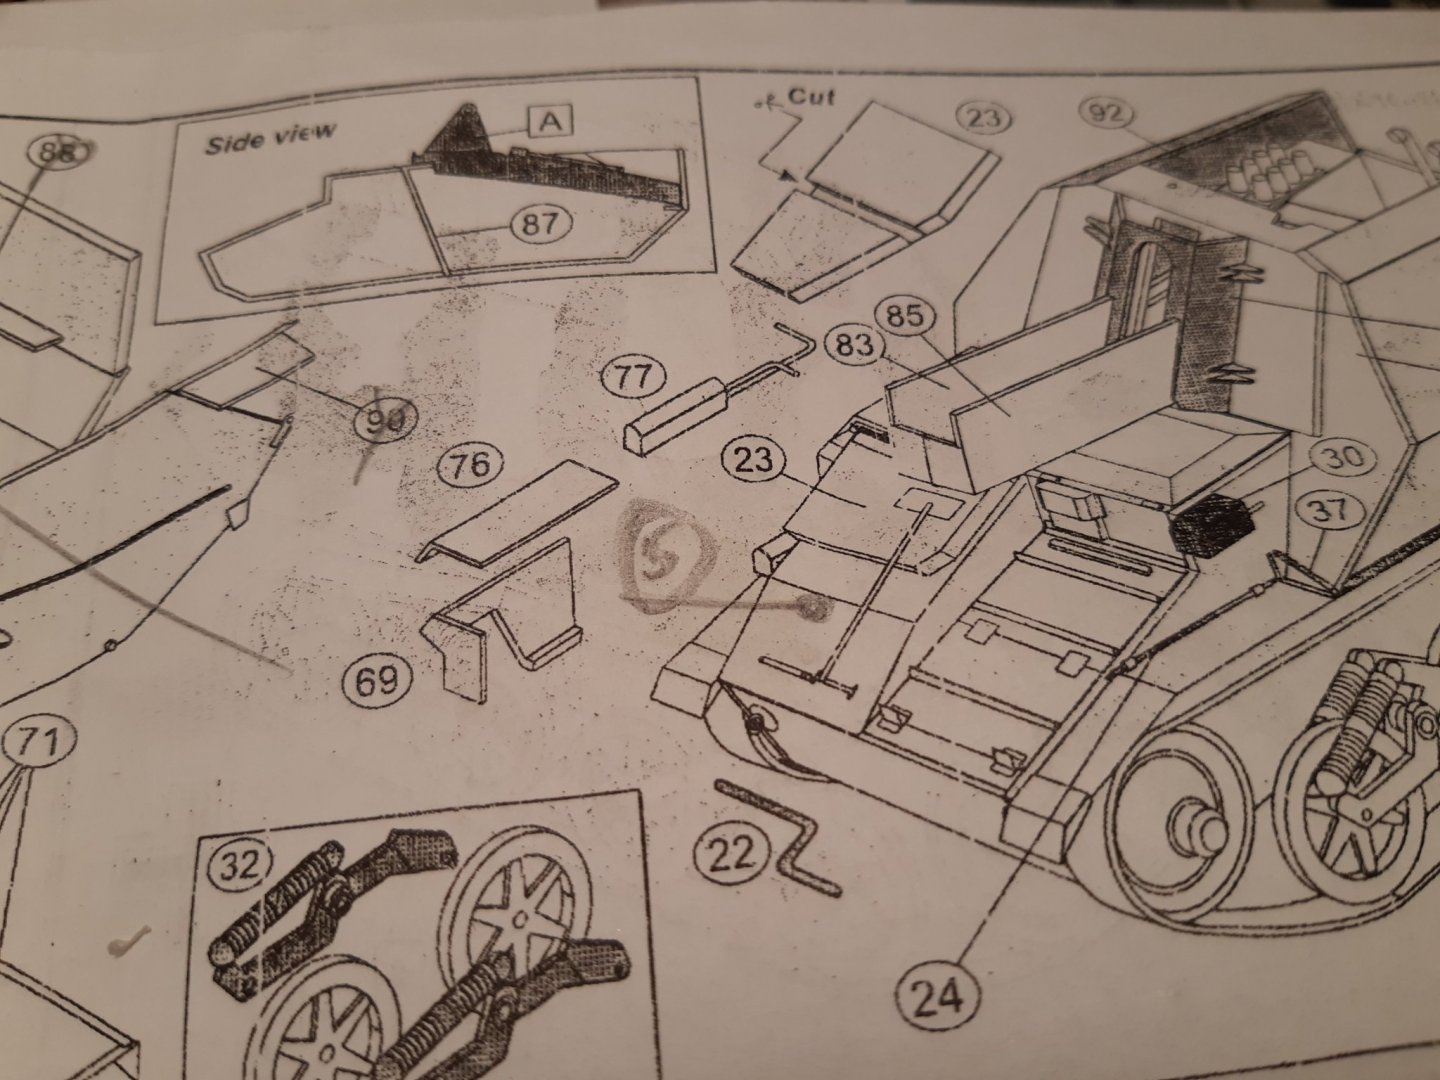
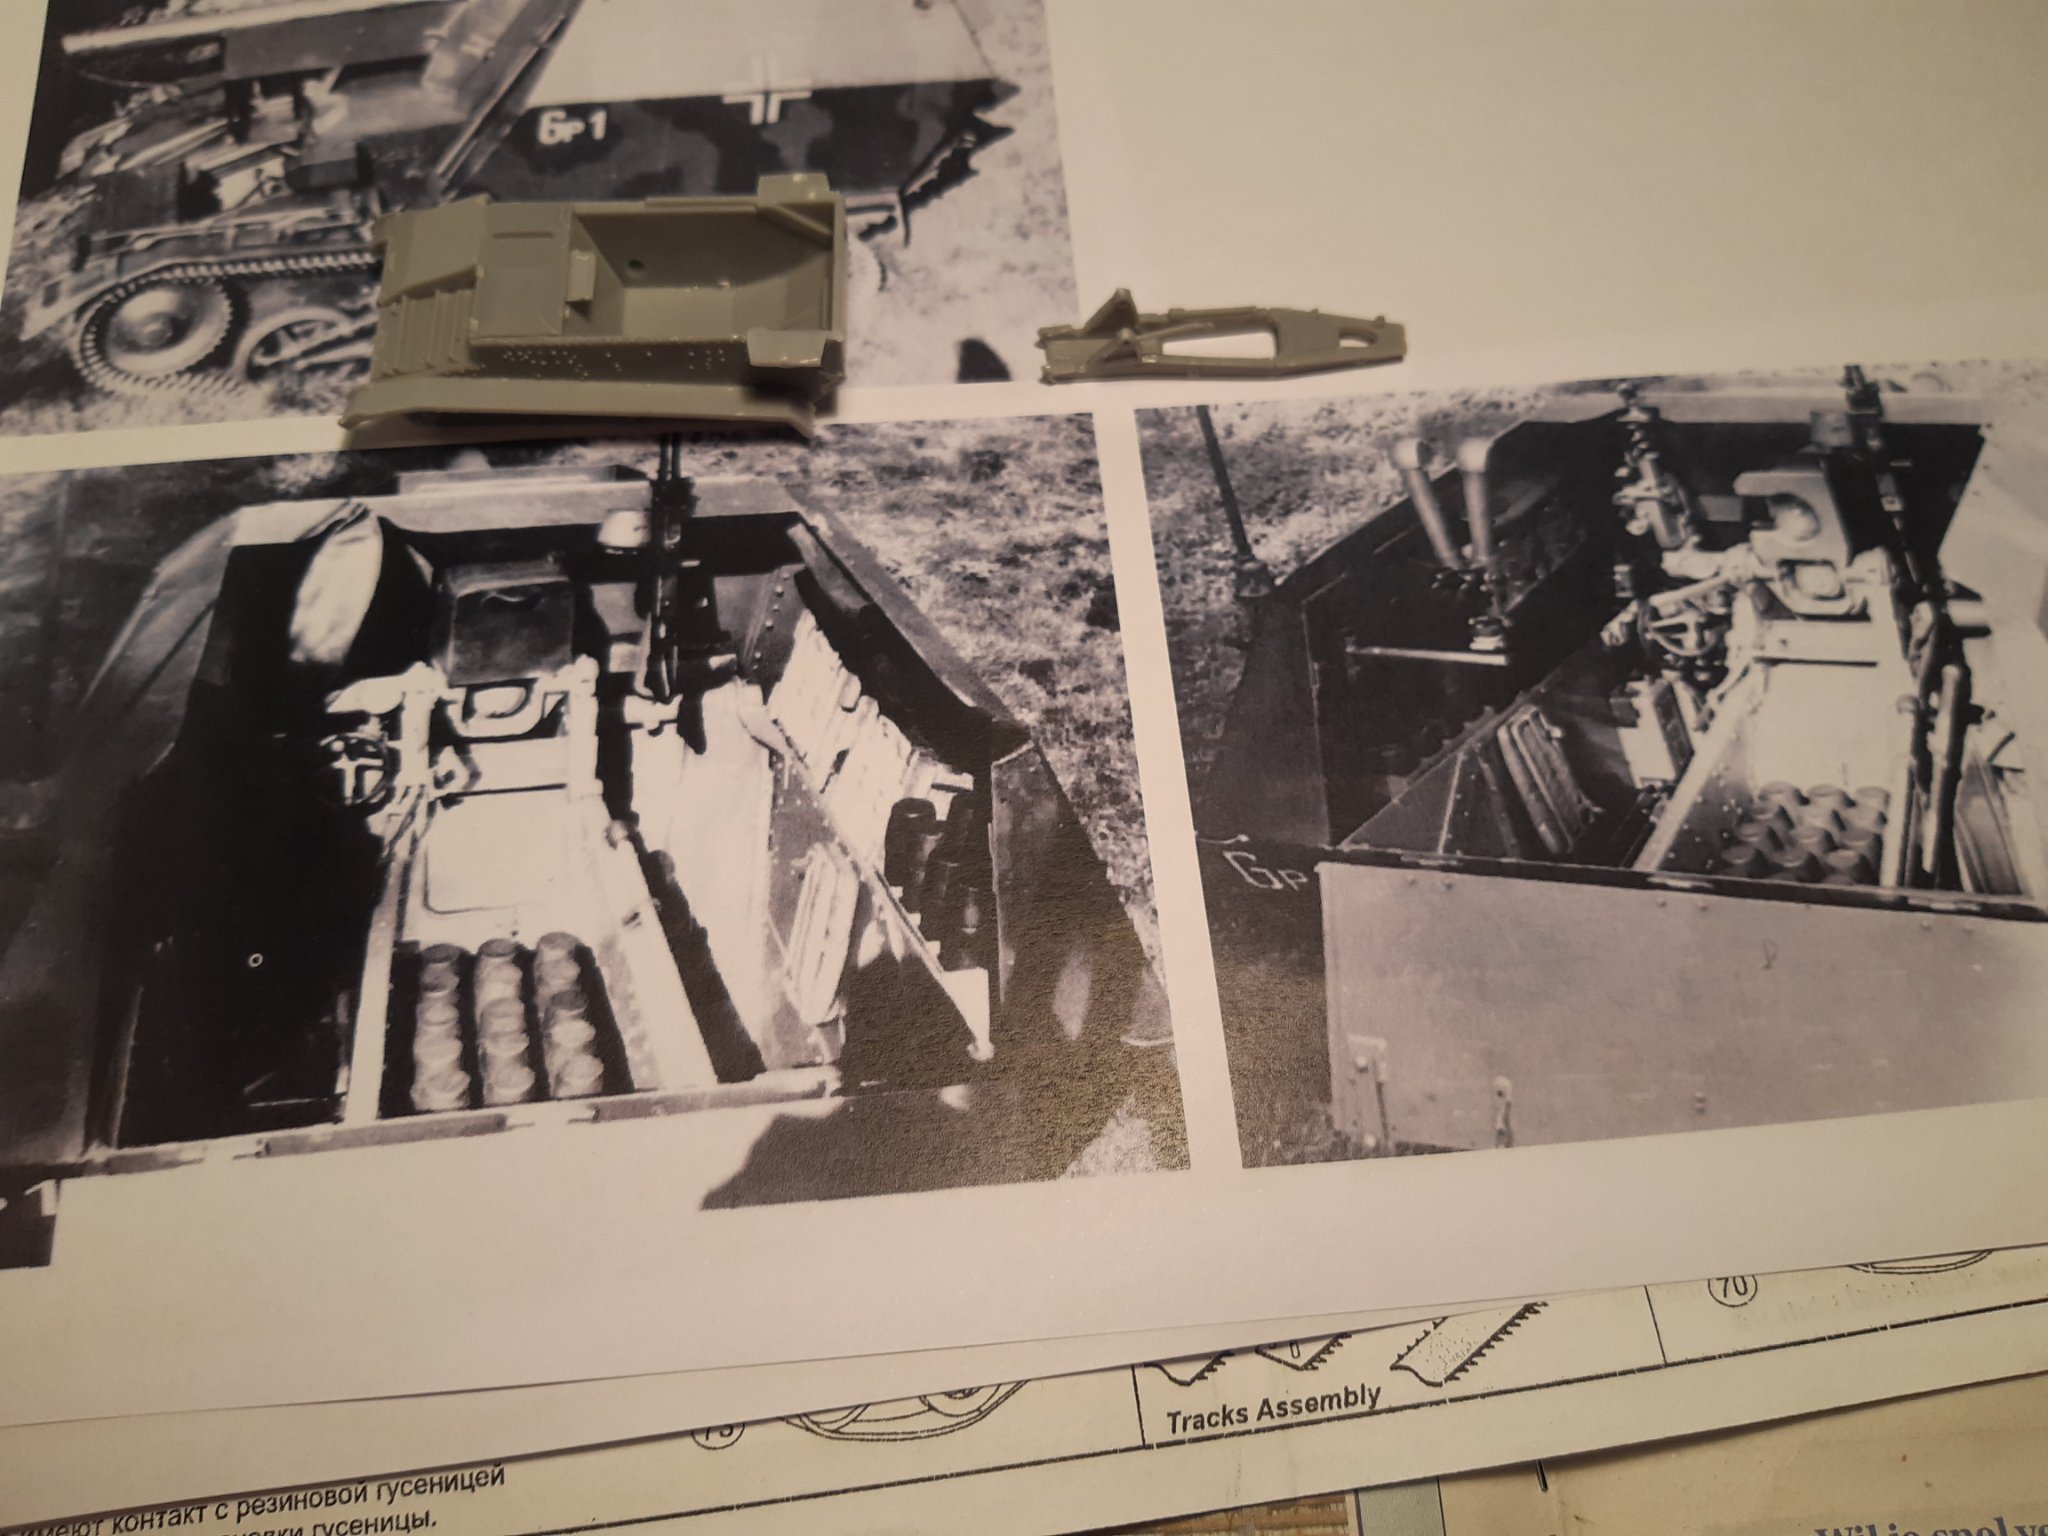
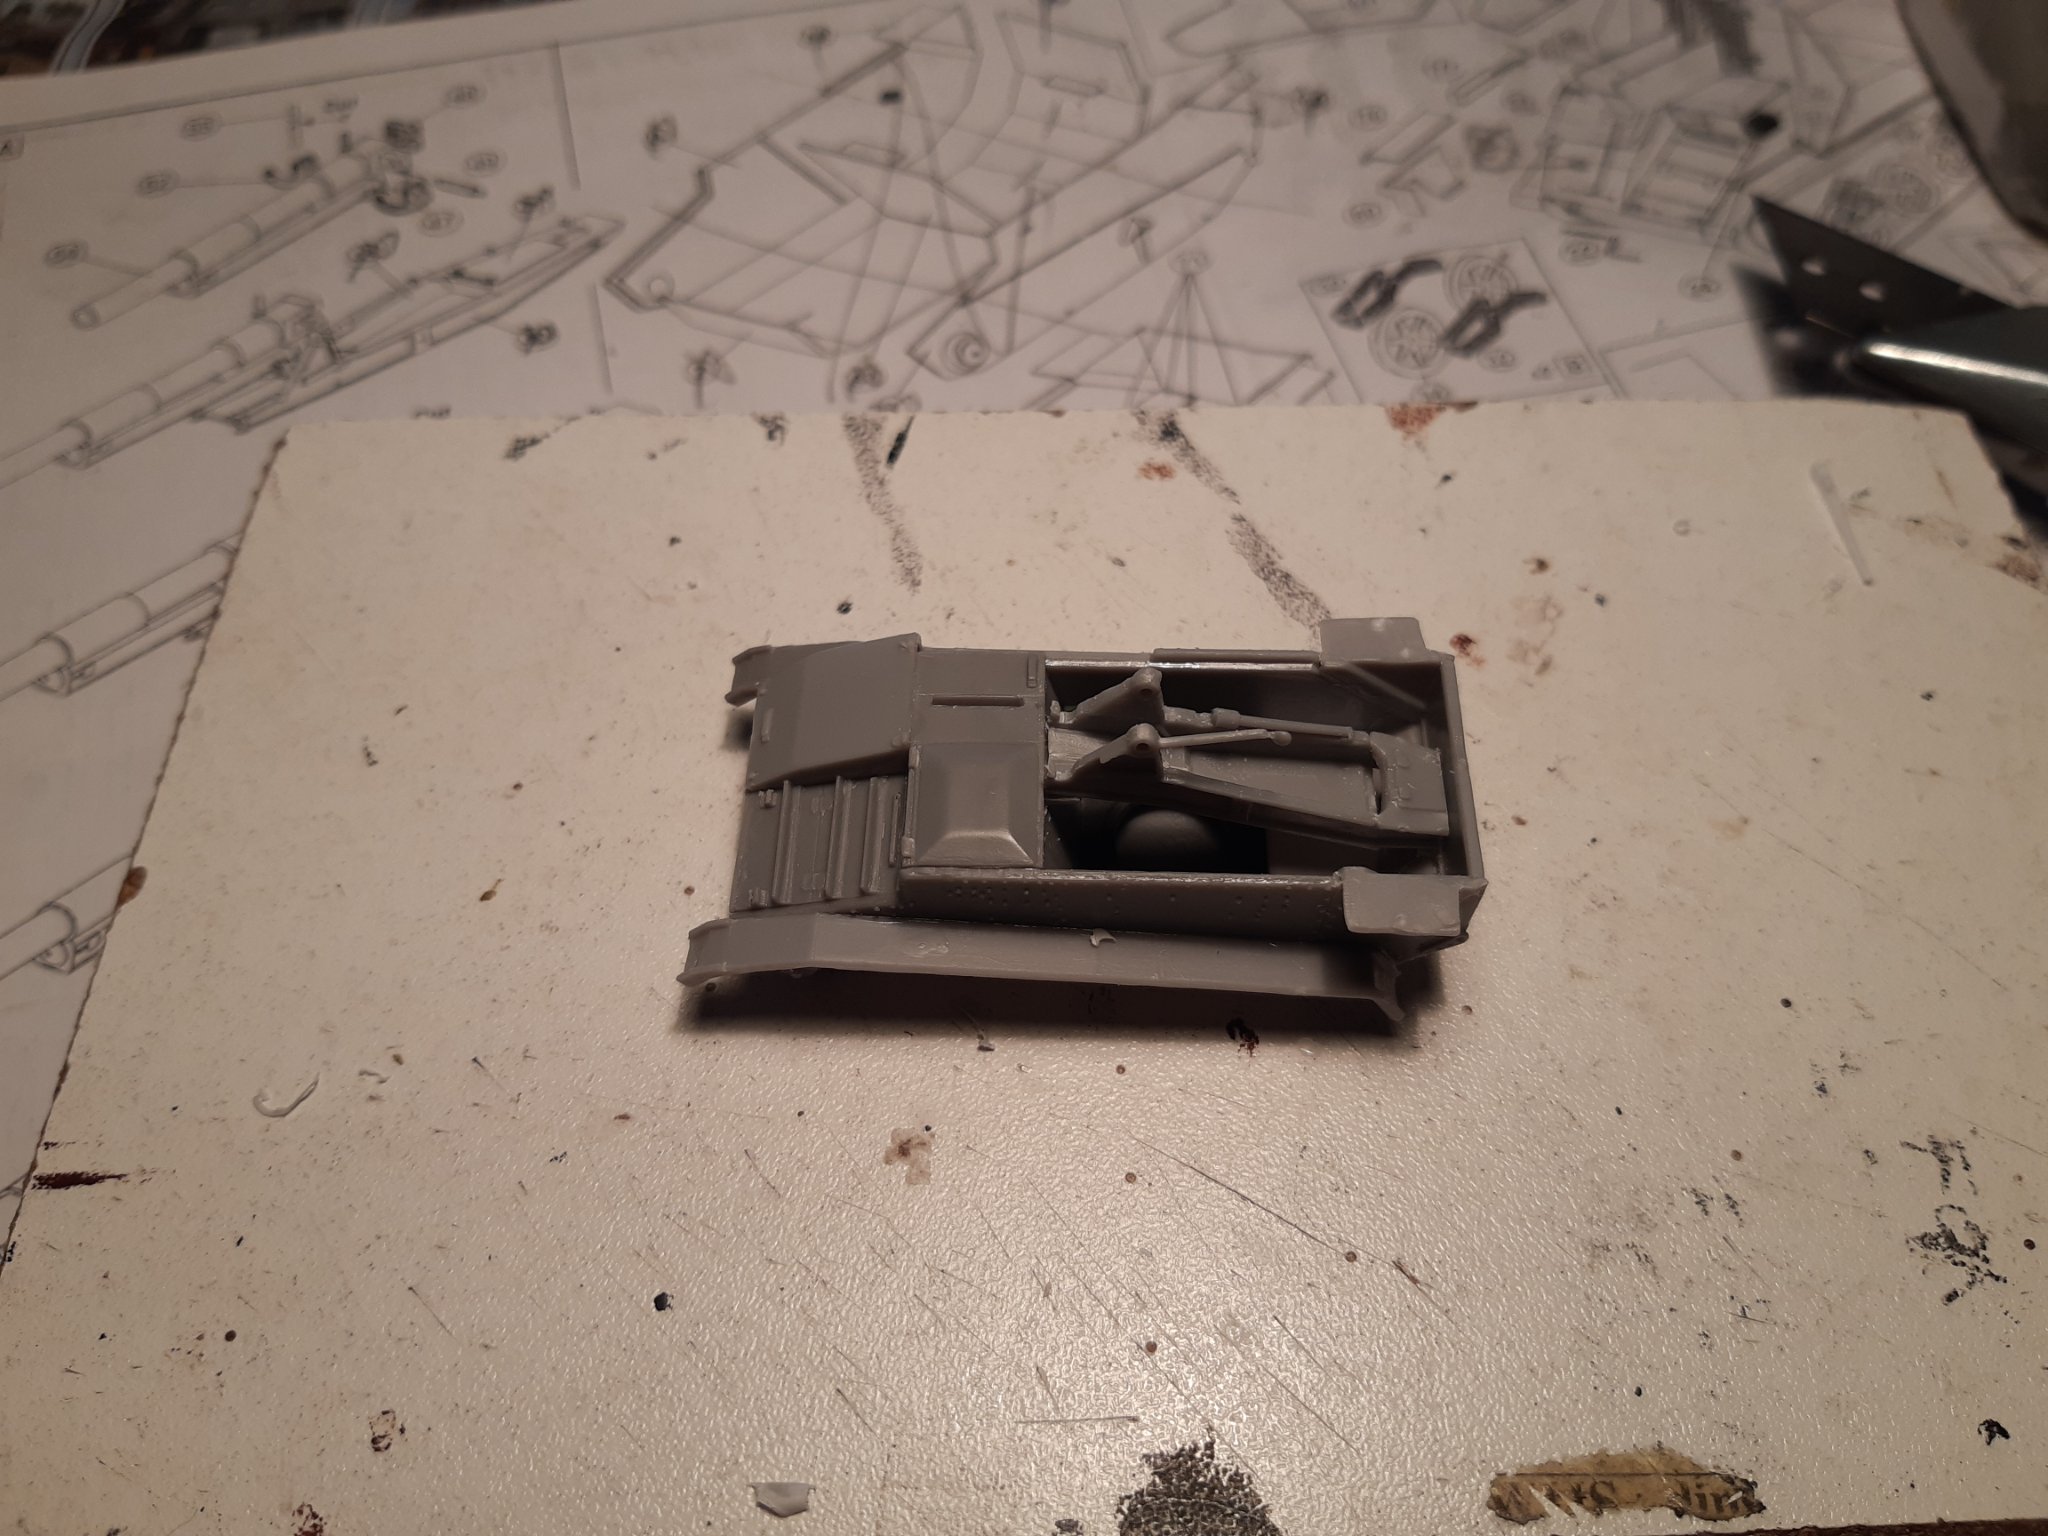
Building the superstructure of both vehicles.
The ammo carrier (left)
All parts fit 👍

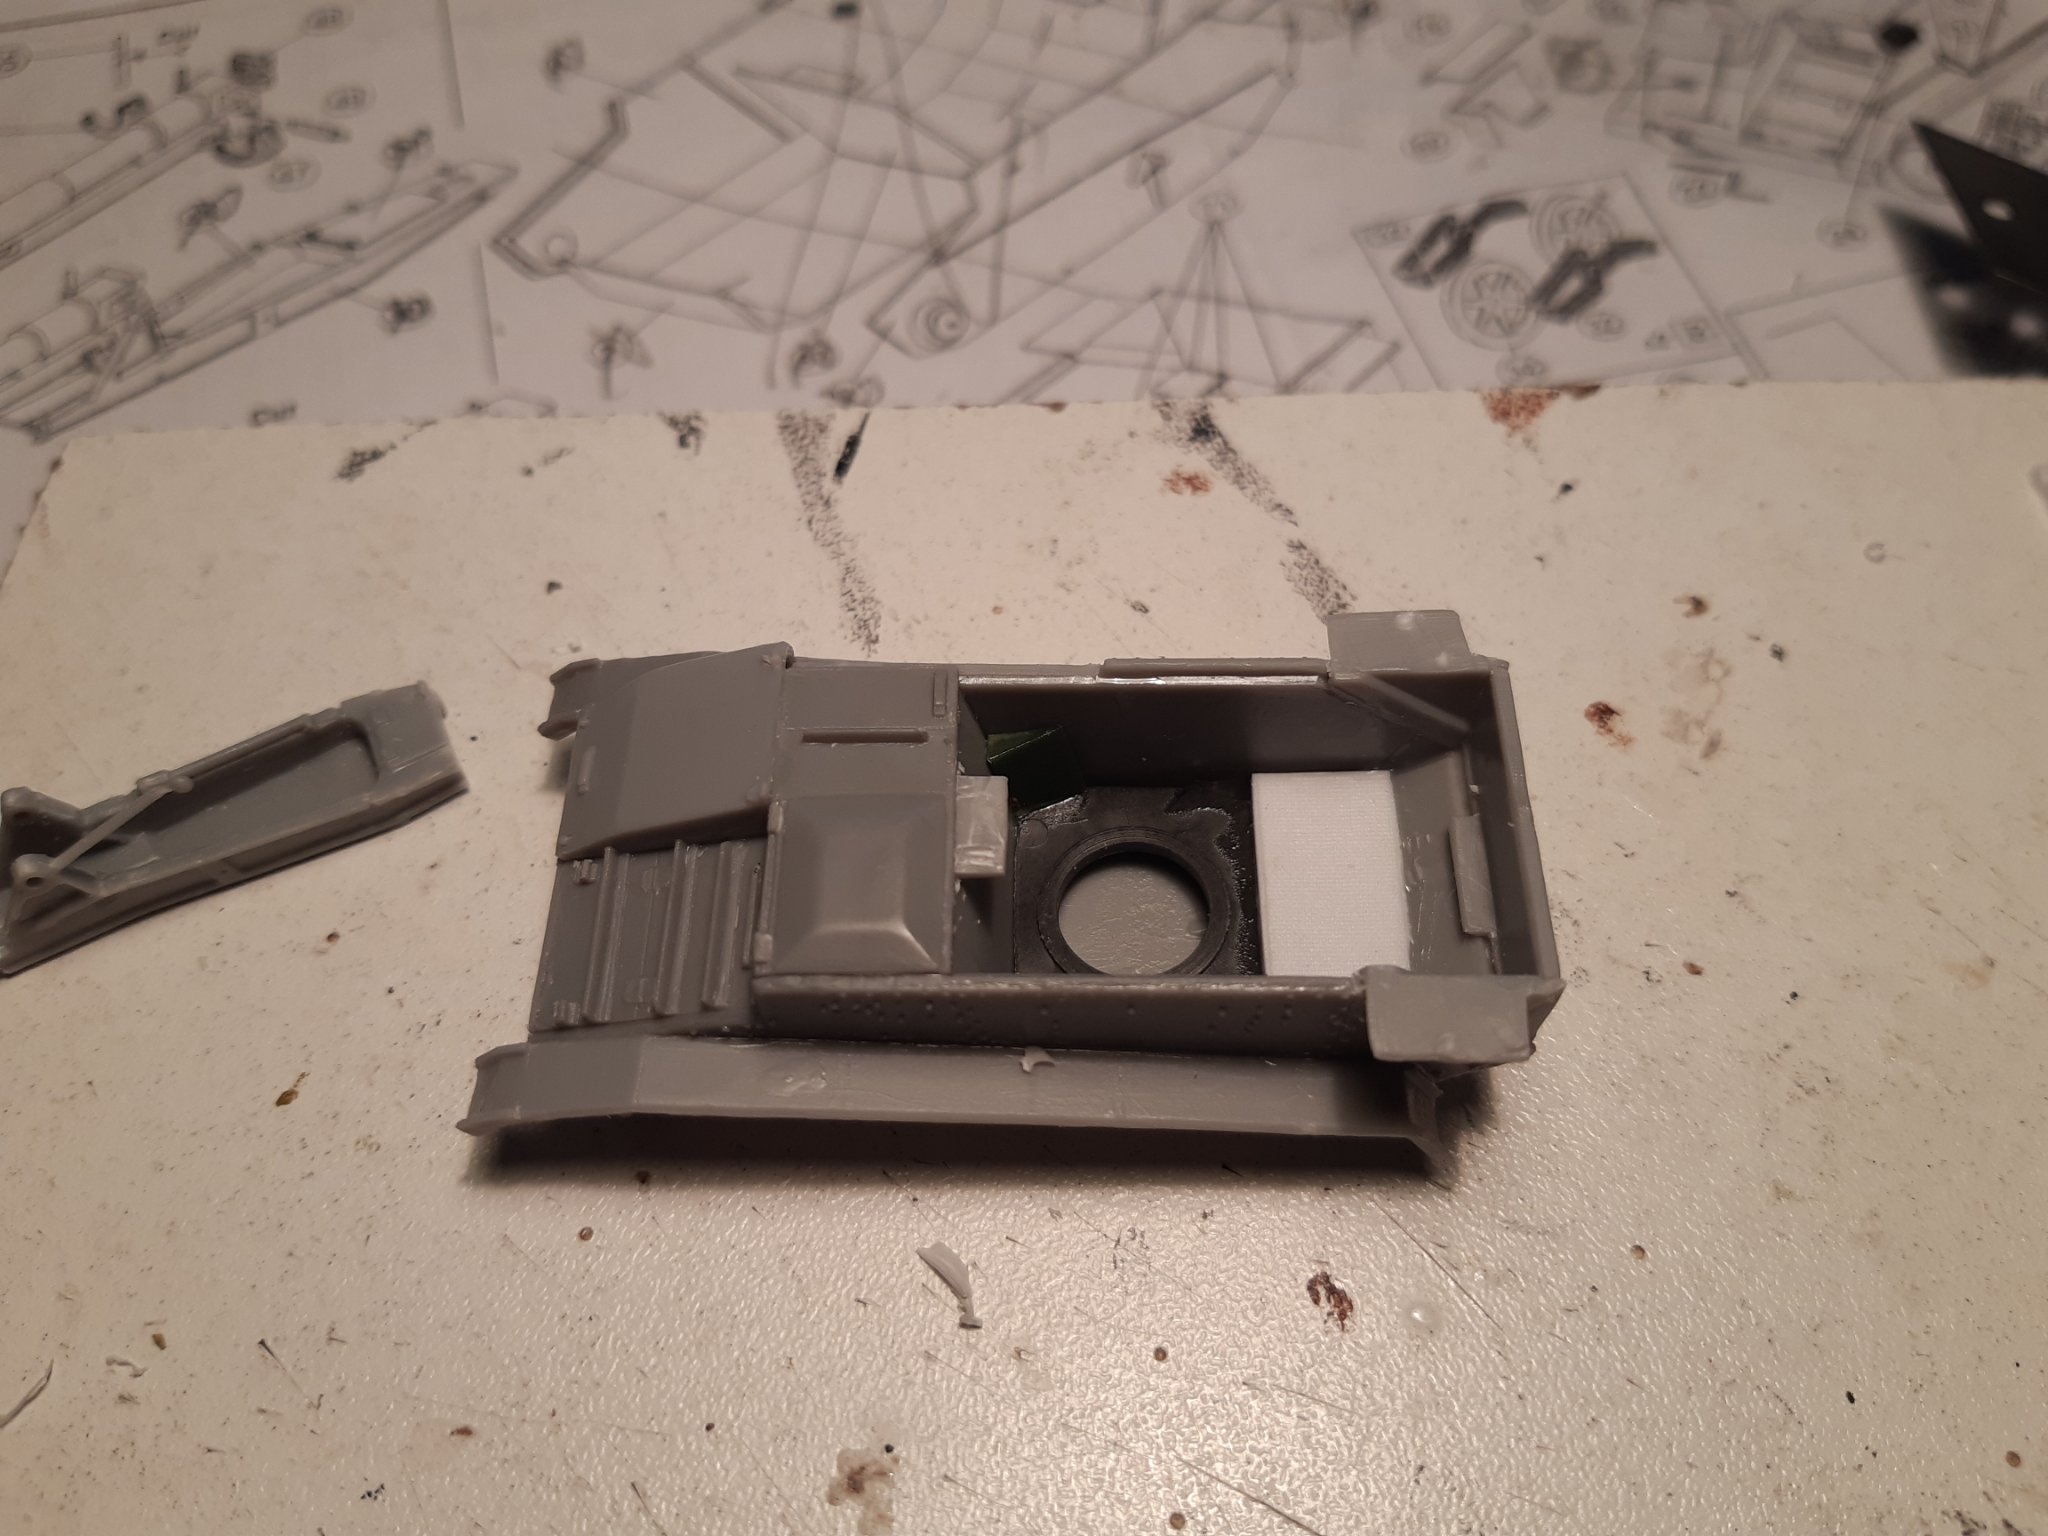
Grrr
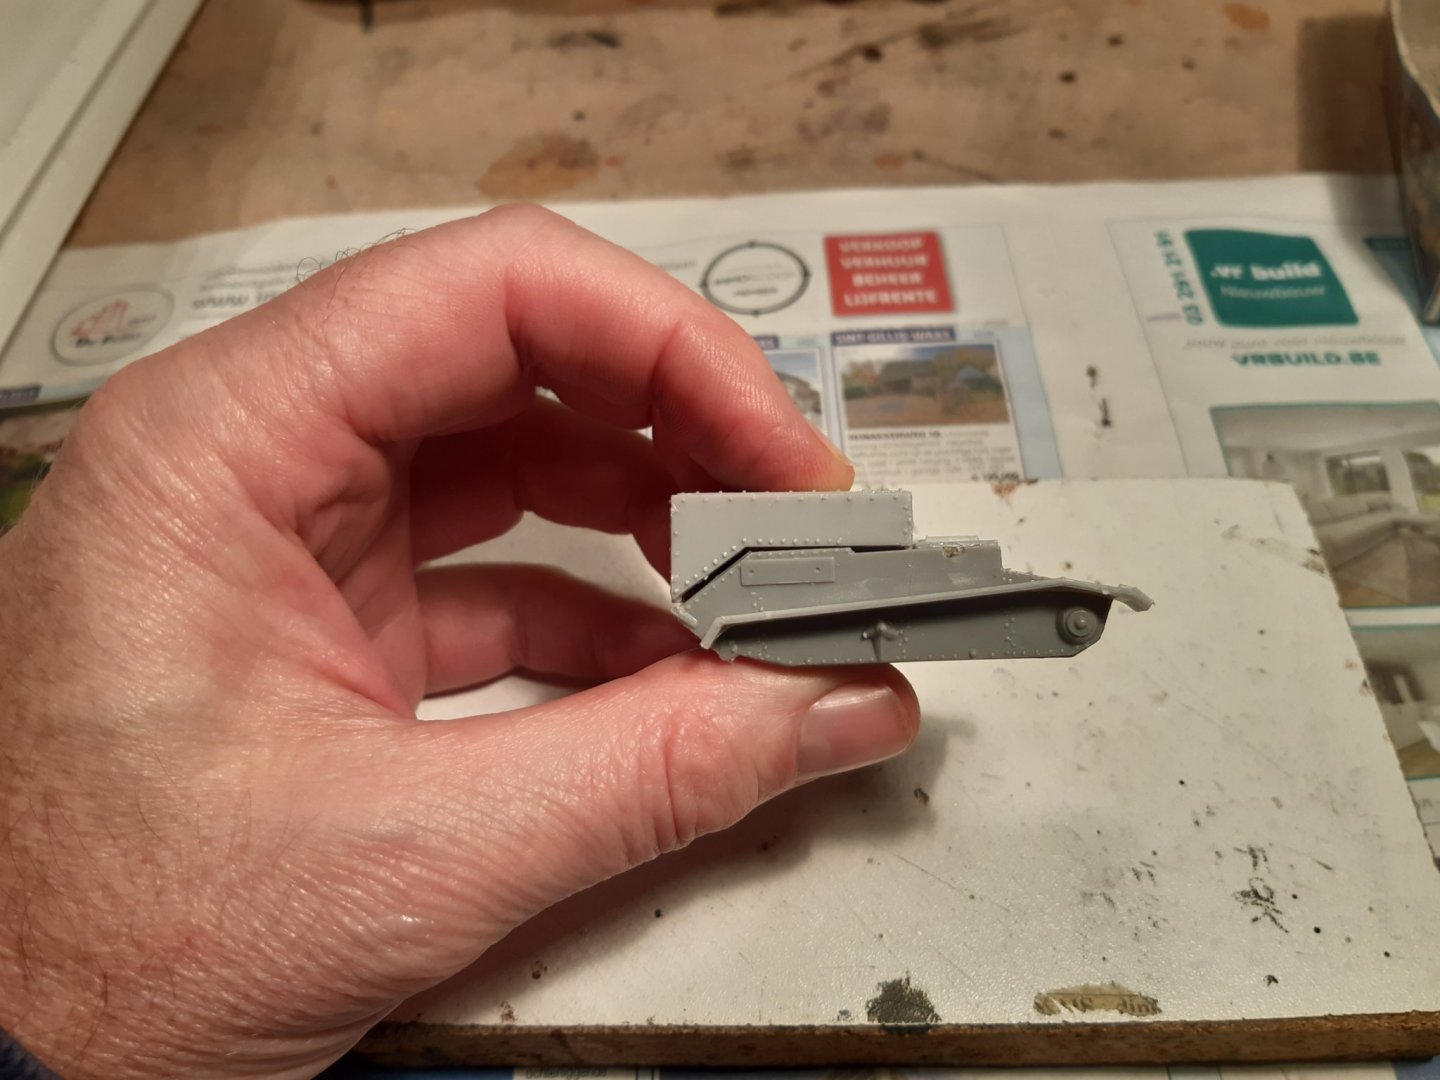
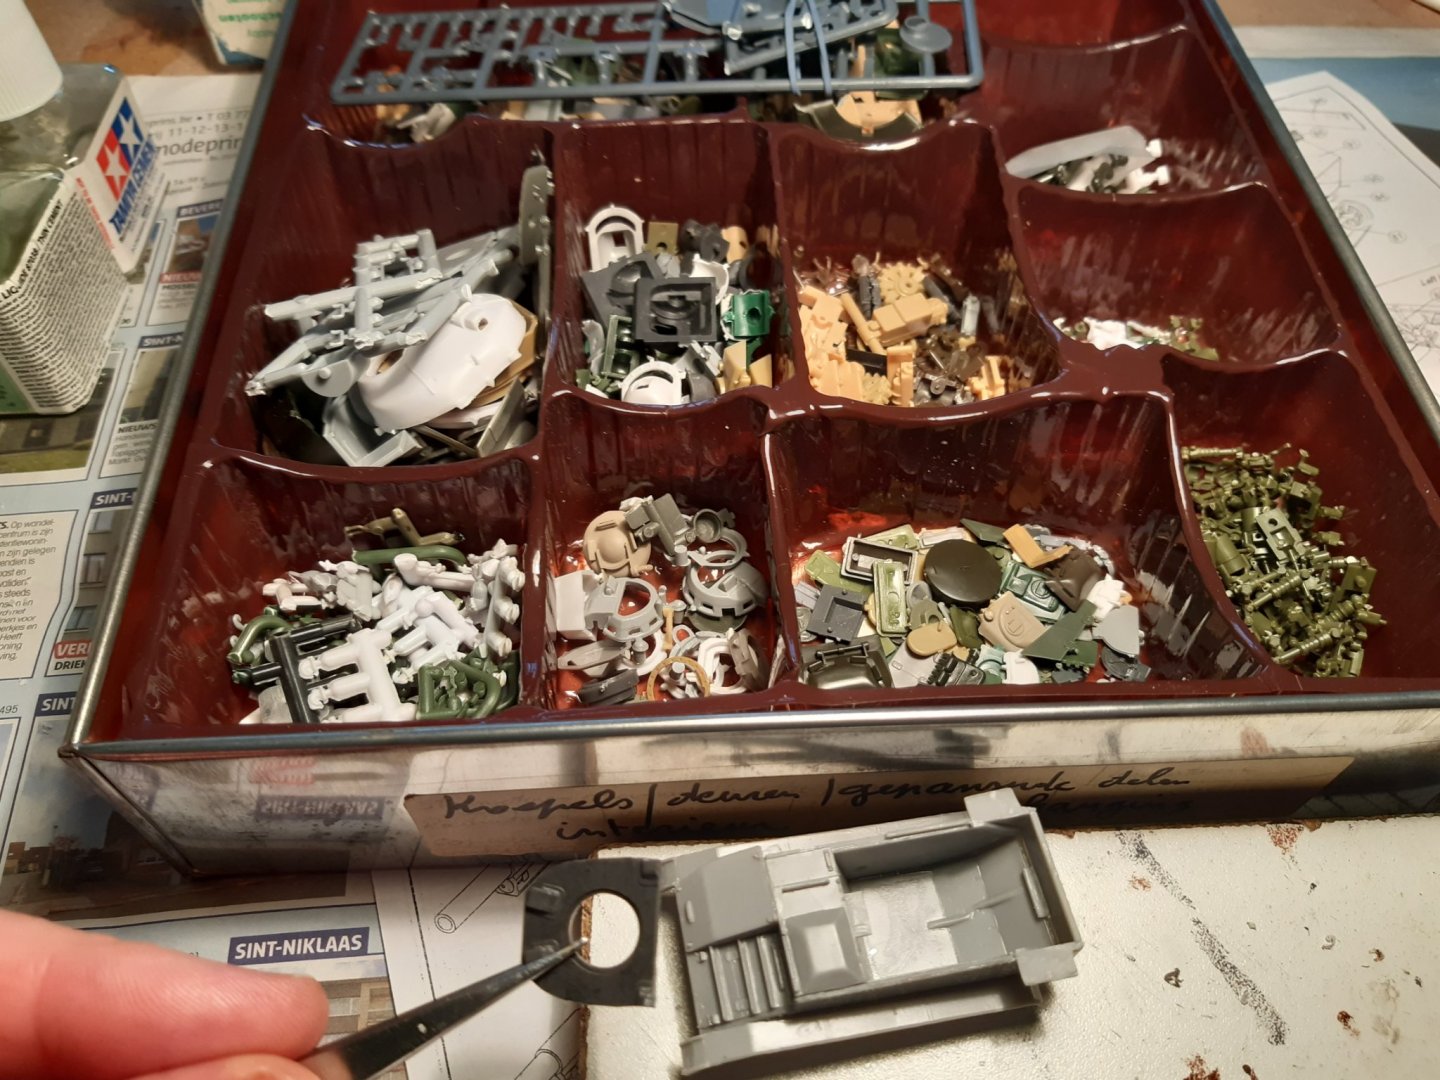
Some cutting and sanding, and hairpins and glue
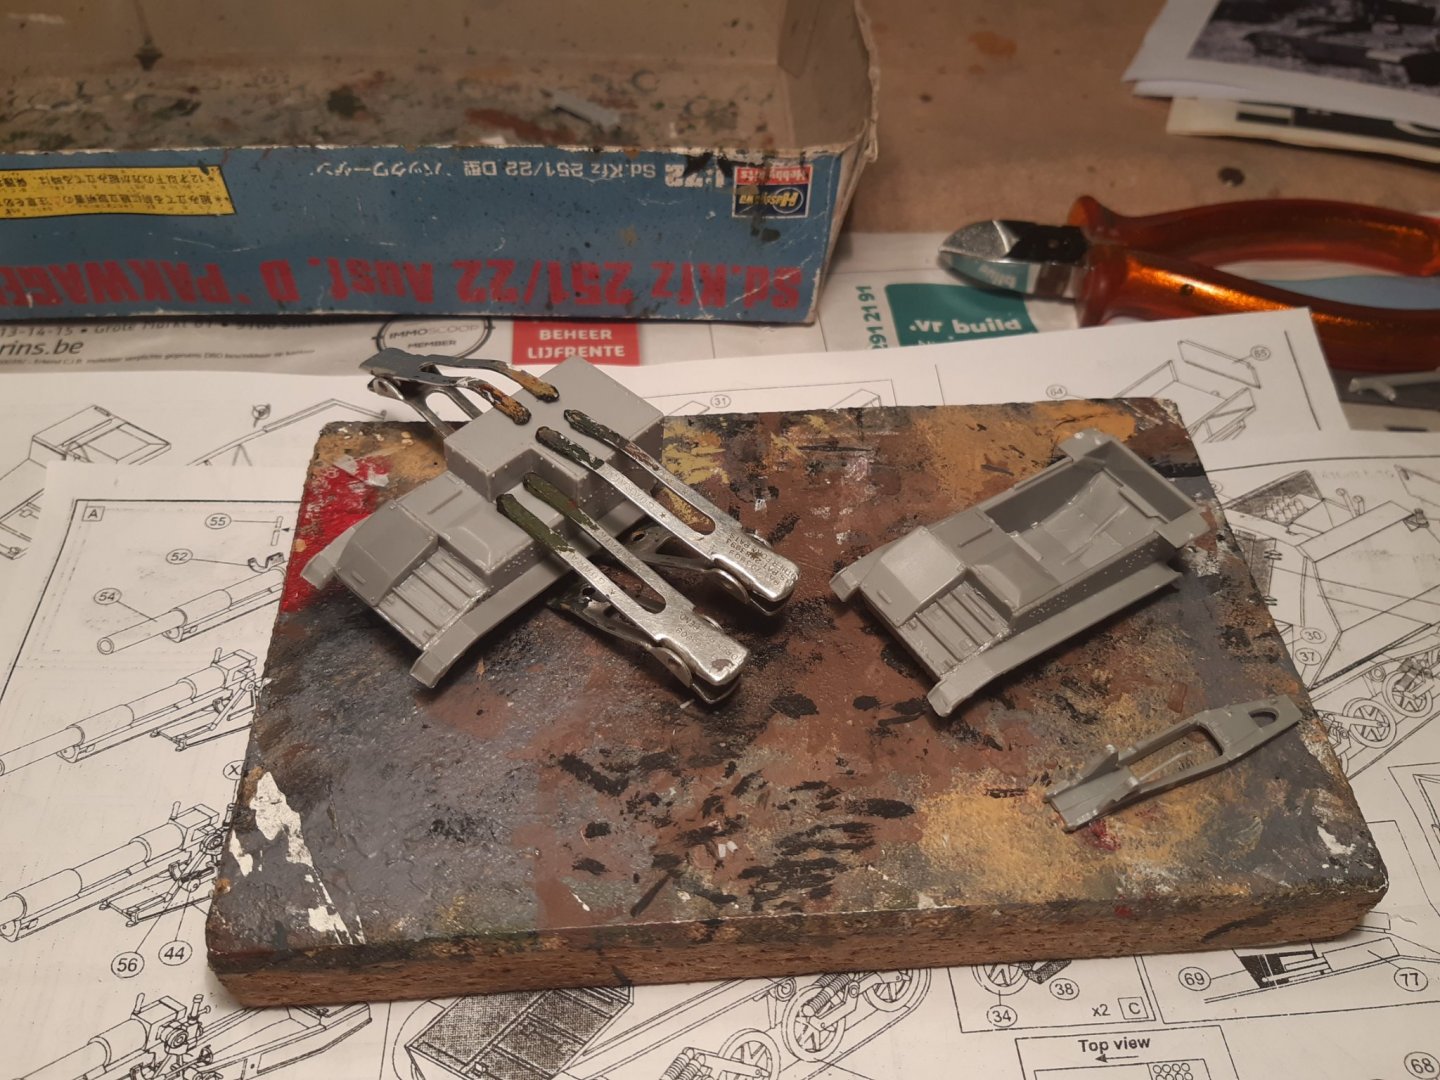
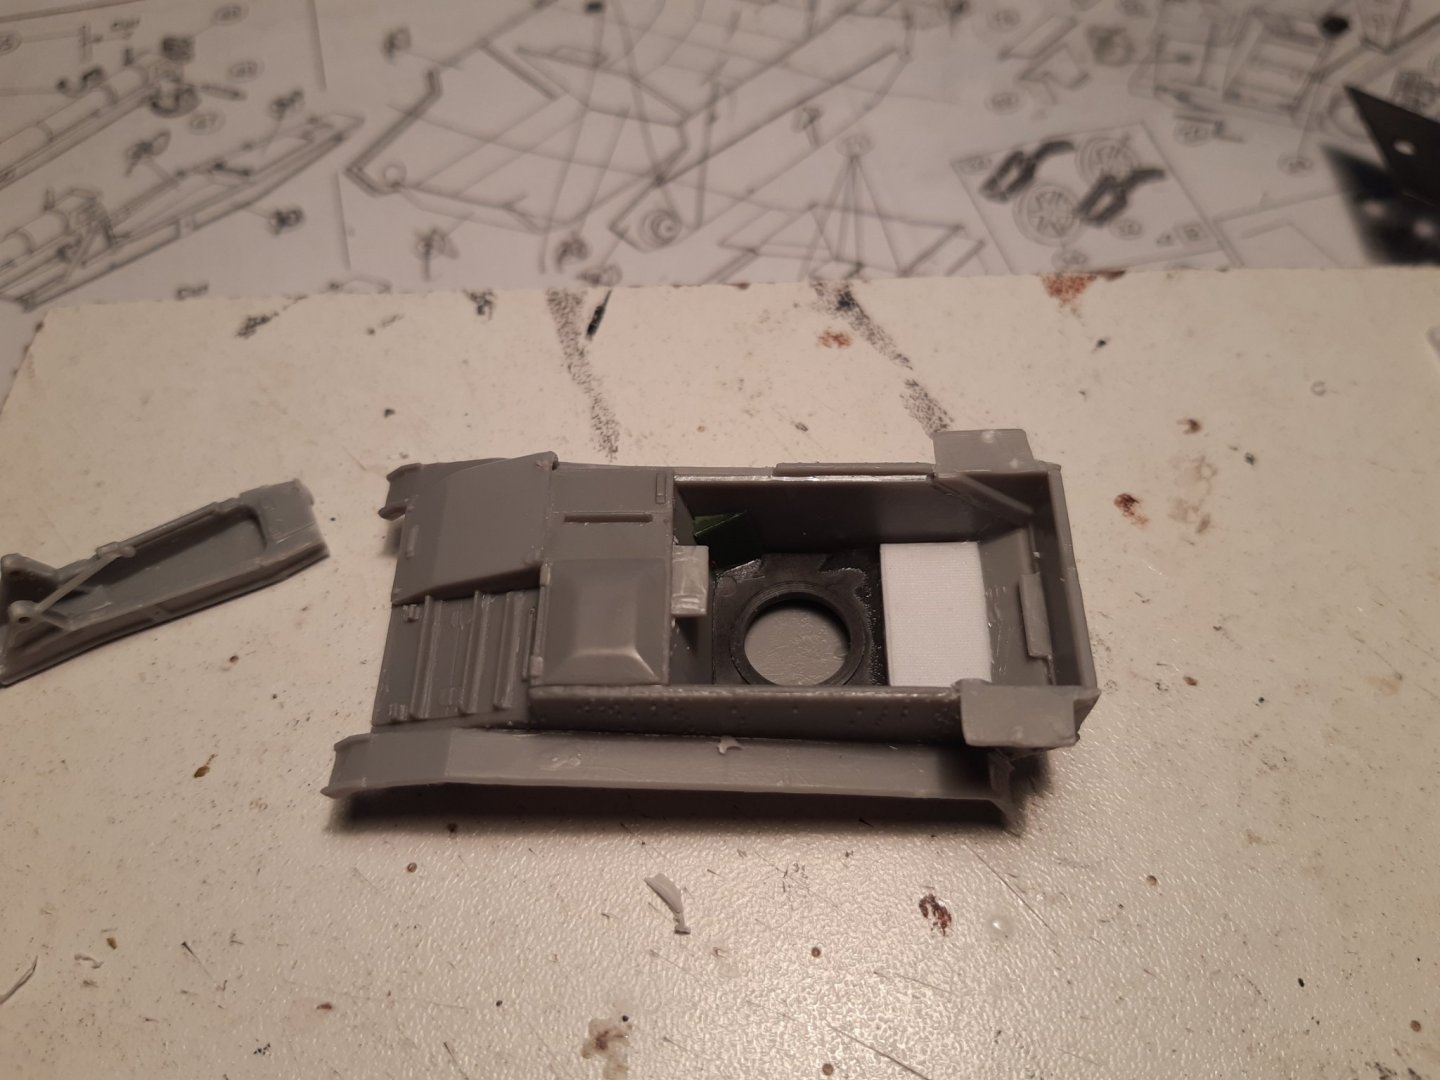
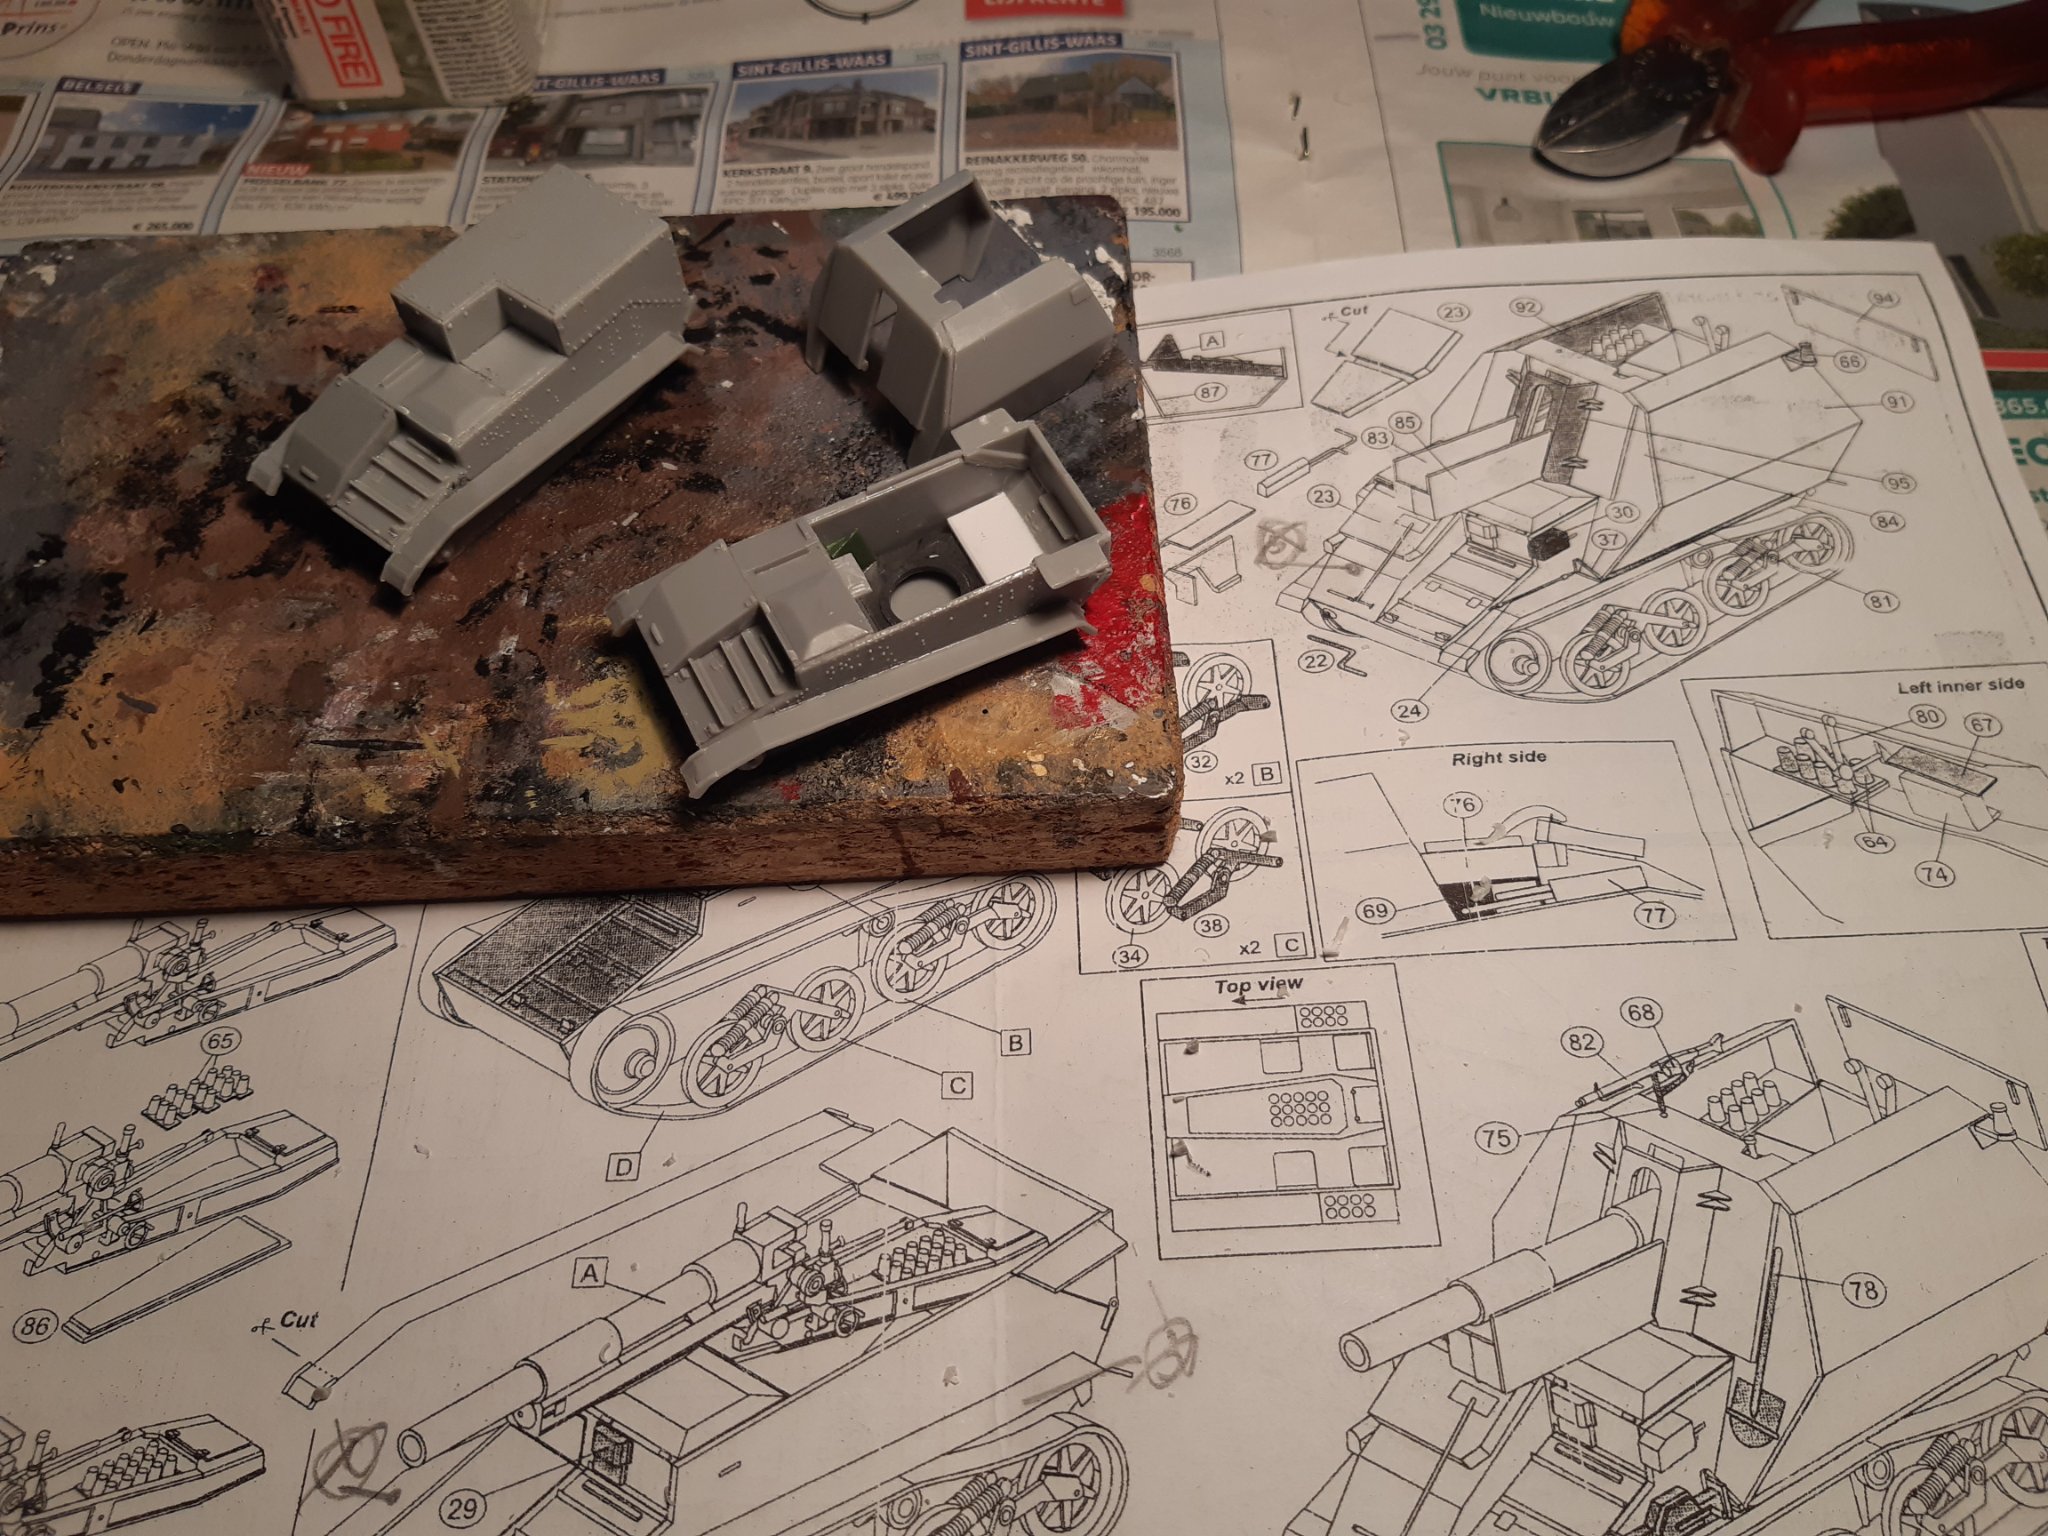
The gun carrier : little space availeble for many things to place

Some extra parts for detail ( from Russian kv turret...)
The instructions say to place the cannon first.
But I don't know if the parts of the superstructure will fit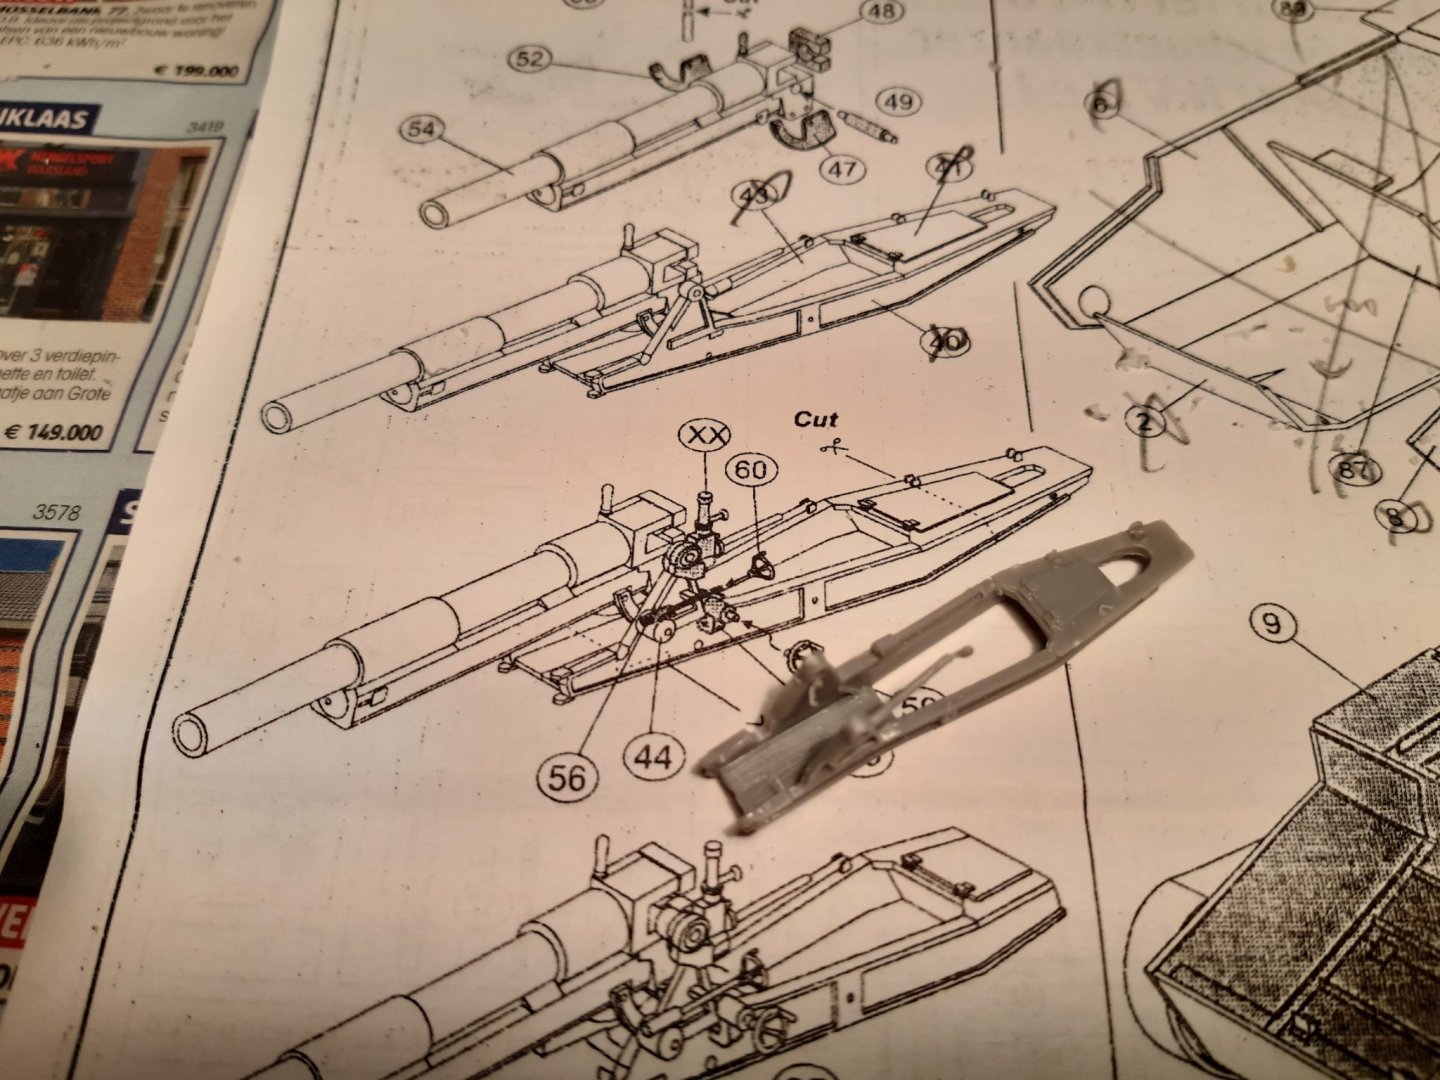
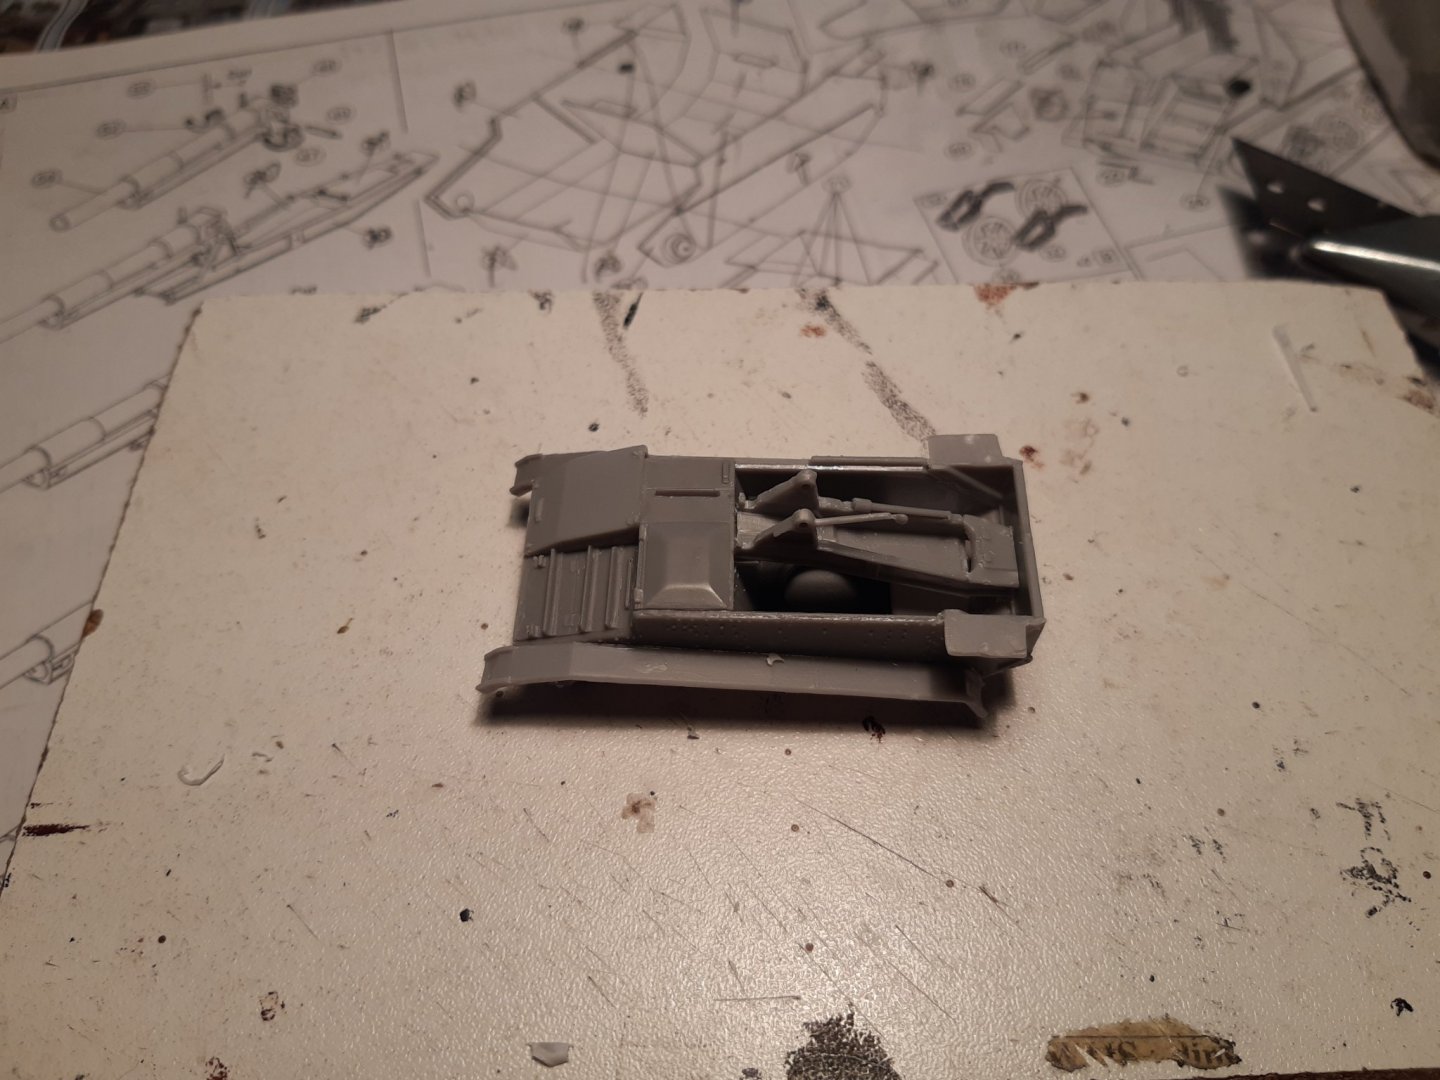
so i make the superstructure first and dry fit this on the chassis (Surprise, it fits from the first time )
And then the cannon doesn't go in anymore
I will place the cannon first and then the superstructure.
It's been a long time since I've built such a difficult kit like this one. But we'll get there.
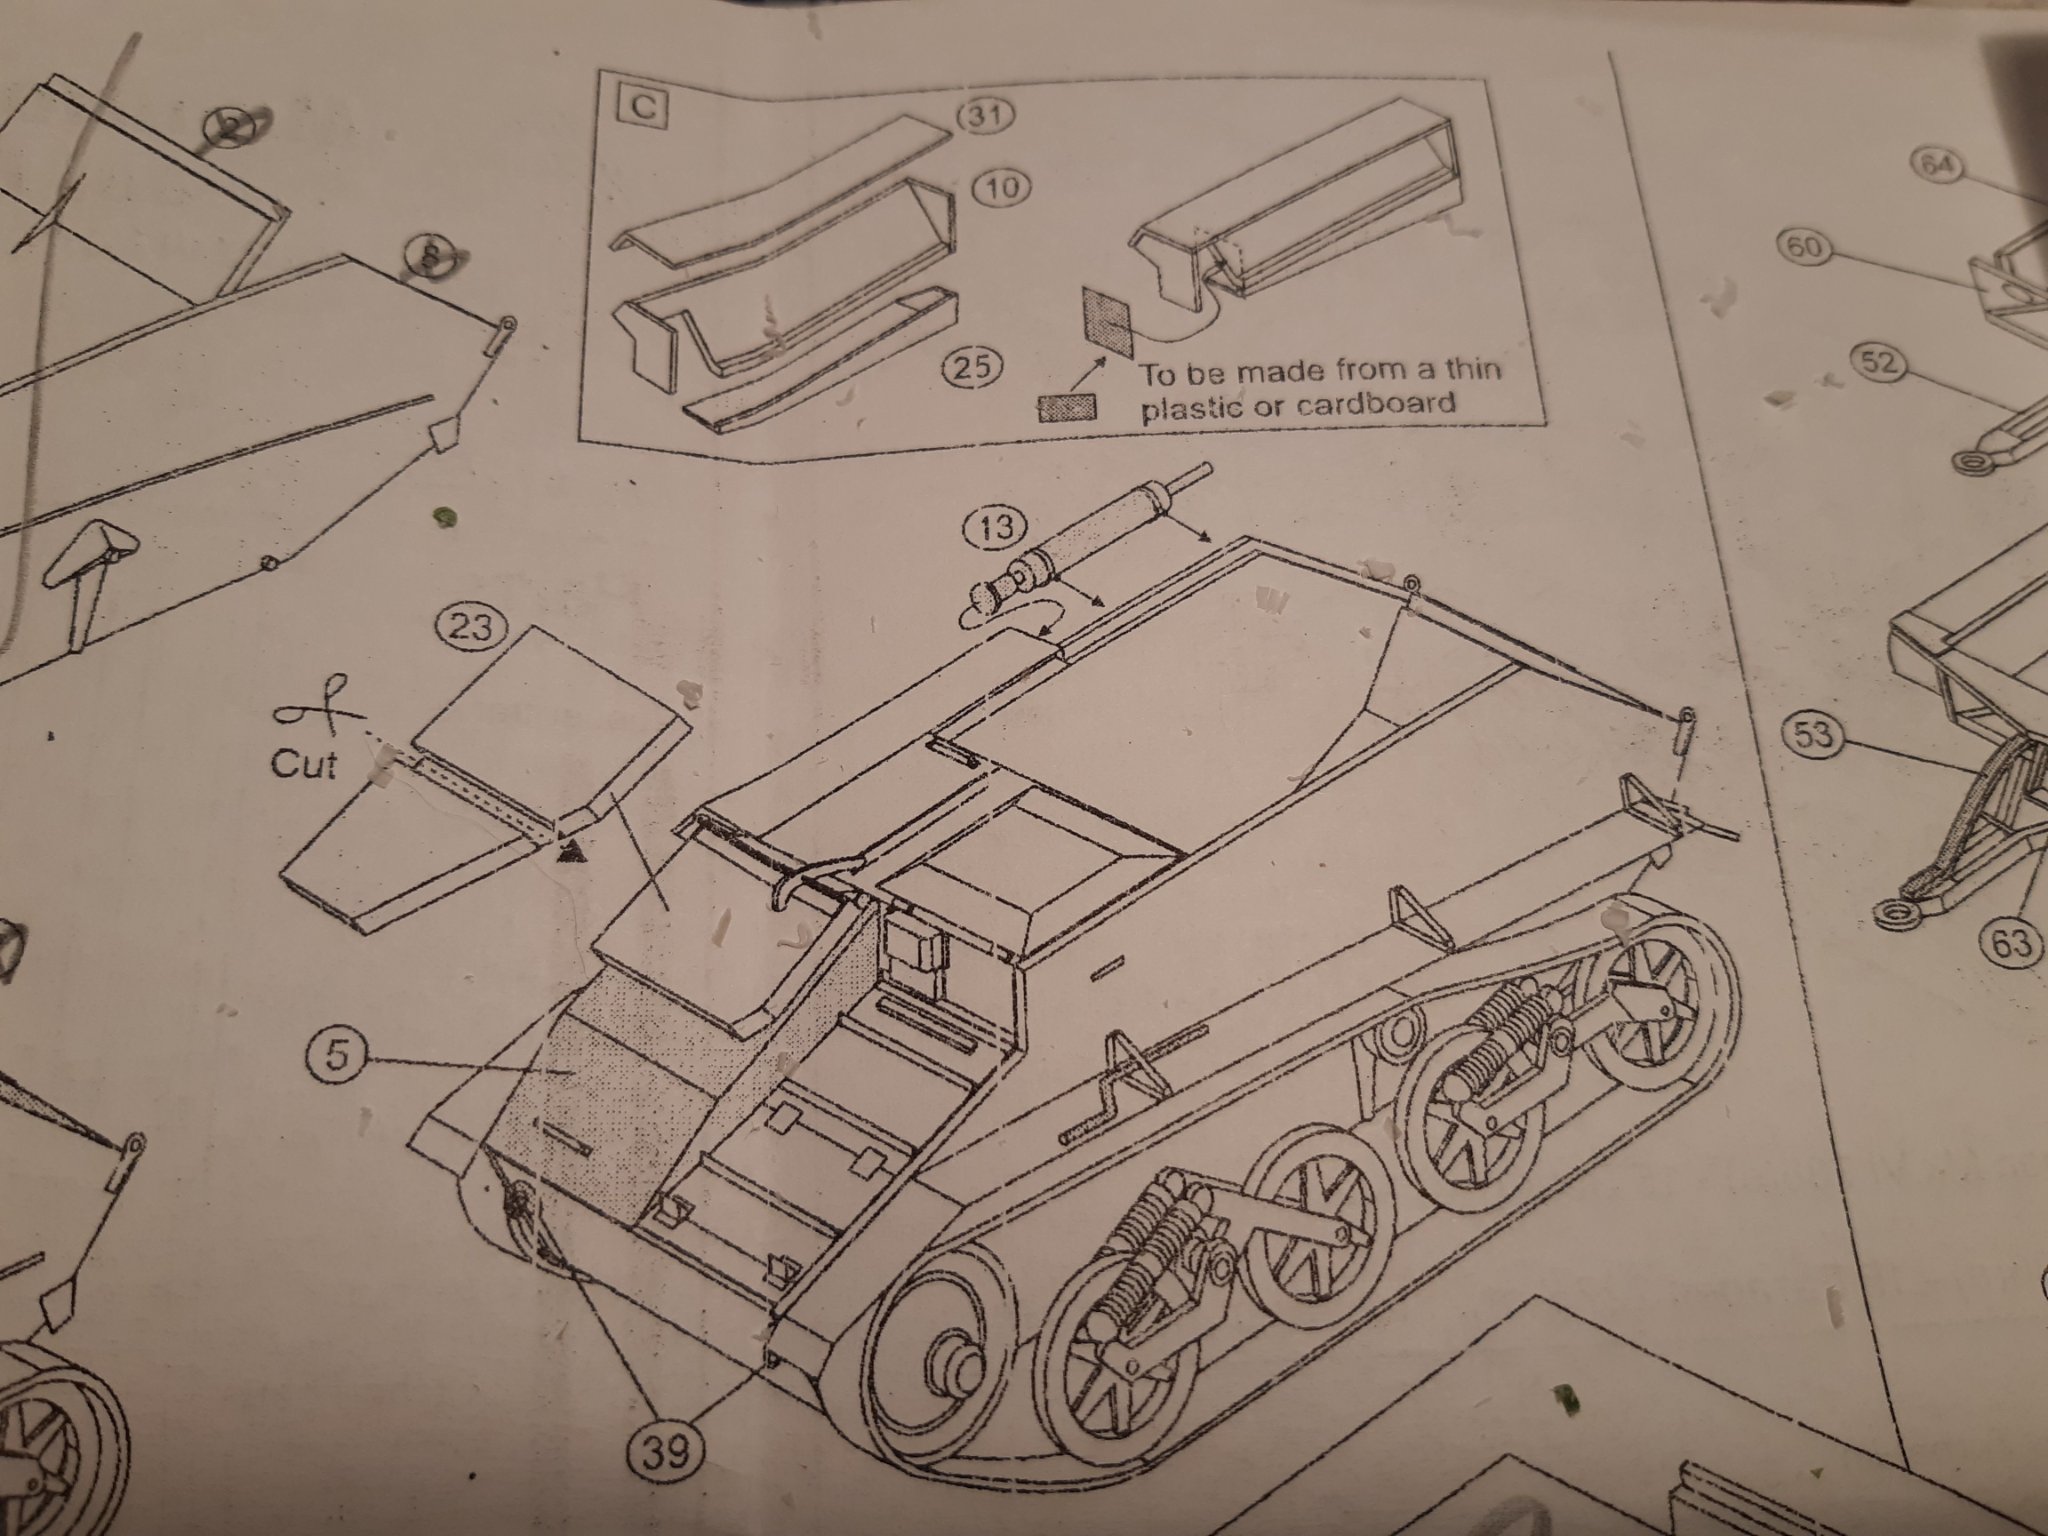
Instruction riddles : Make part C and see where you put it an they sometimes forget to number part 5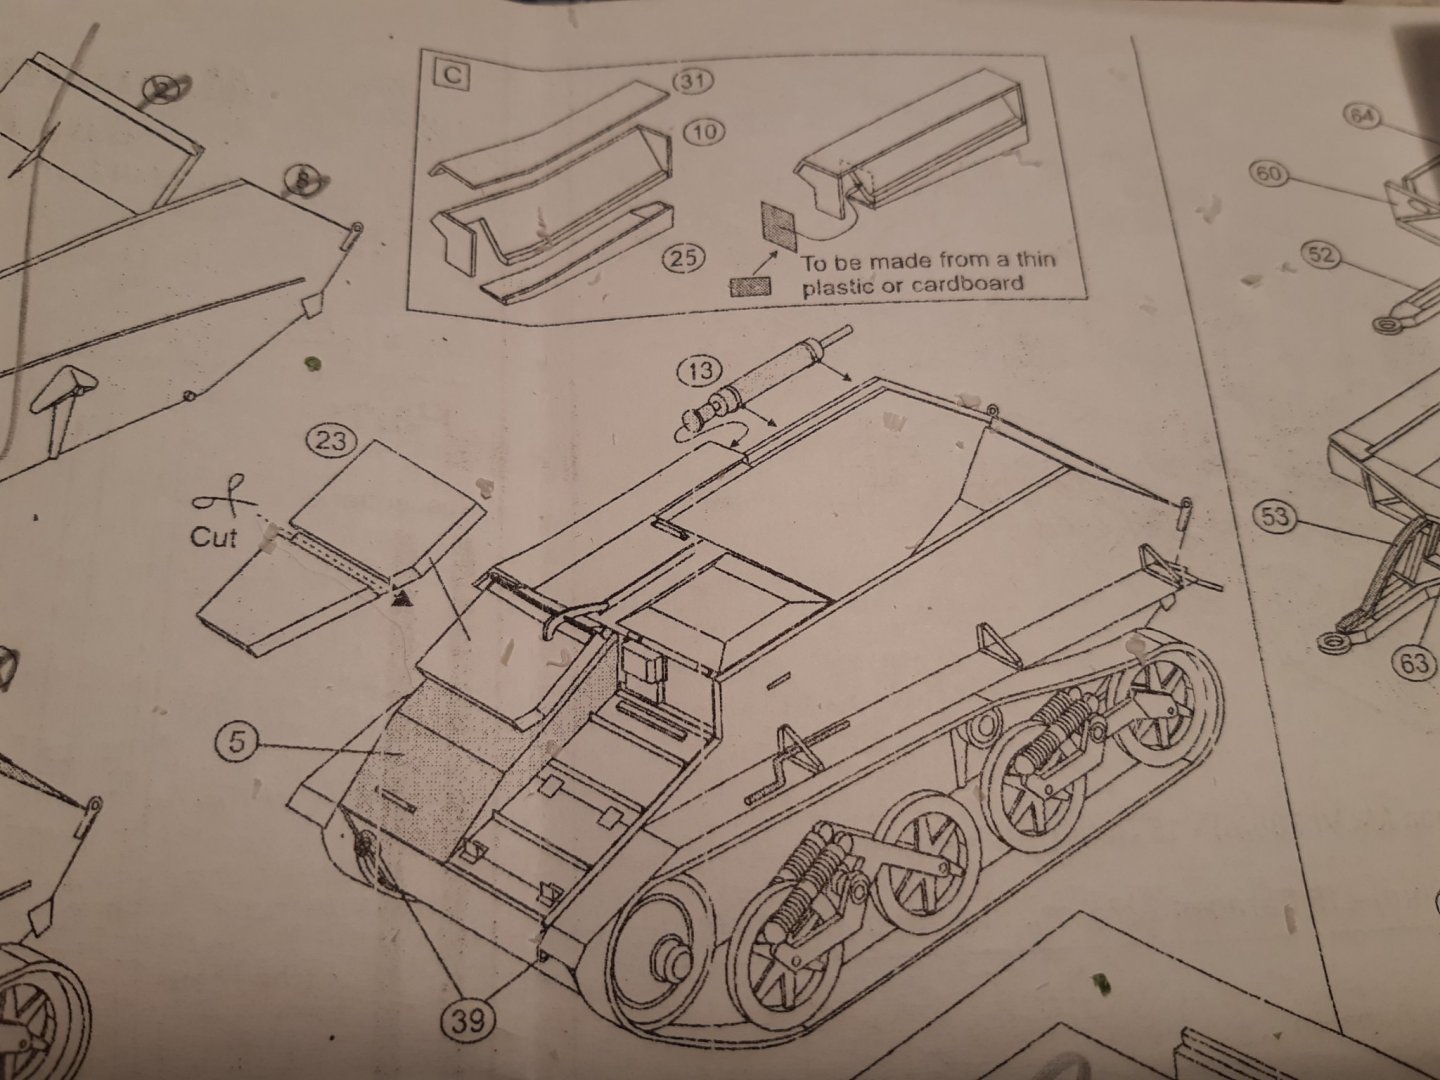
Thanks for following
-
When fully planked an sanded, it will look great.
Shields, shields,shields. Looks you really like to make them
- mtaylor, RdK, Old Collingwood and 1 other
-
4
-
Great work G.L.
And of course, thanks for the detailed explanation .
-
-
-
-
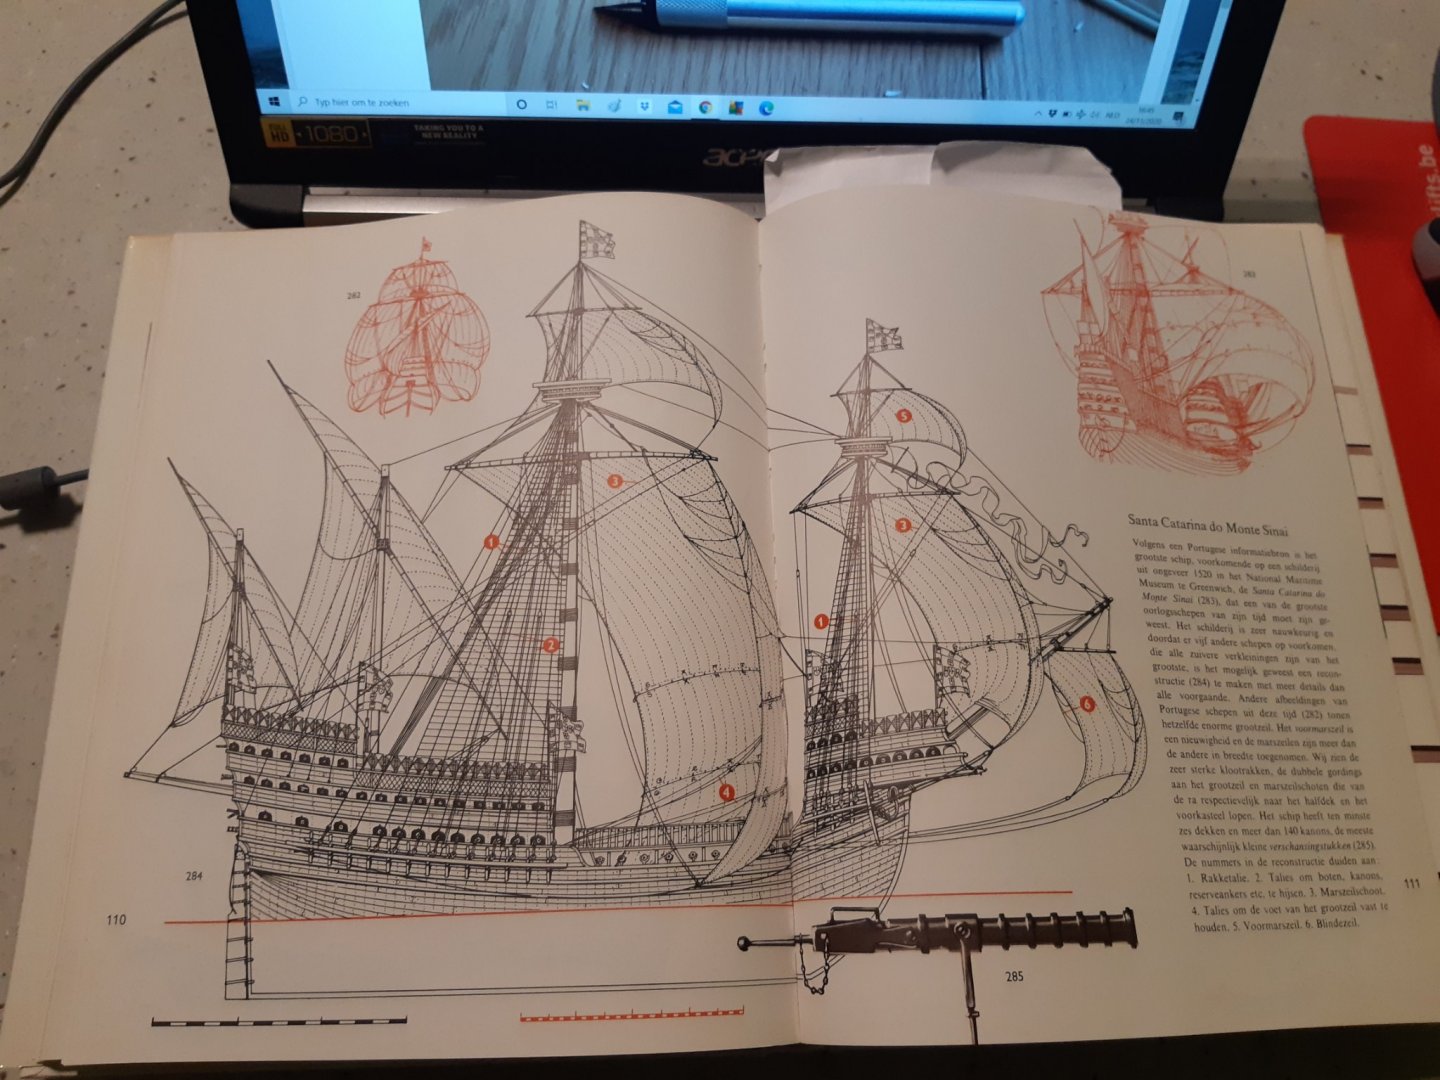
2 hours ago, Robert Taylor said:
After some research I will not be including a bowsprit sail or yard as original paintings seem to depict the Santa Catarina do Monte Sinai with none and various other carracks from this period, albeit some do, so I guess it begs the question why did some and some not use them ?
The purpose of a spritsail was to help with steering. It may be that this was still experimental during this period.
With the help of the spritsail it was also "easier" to keep the ship on course.
Helpfull?
-
-
If you want to drill out the barrel of the cannons. Usually these were 6 pounders with a bore diameter of about 76mm (on this scale 1 mm looks ok).
I think you have a rigging plan a few hundred years later than the GH, 16th century rigging is different from your drawings.And yes, normally first the shrouds, and then the yards
- rkwz, bosco72 and SigEp Ziggy
-
3
-
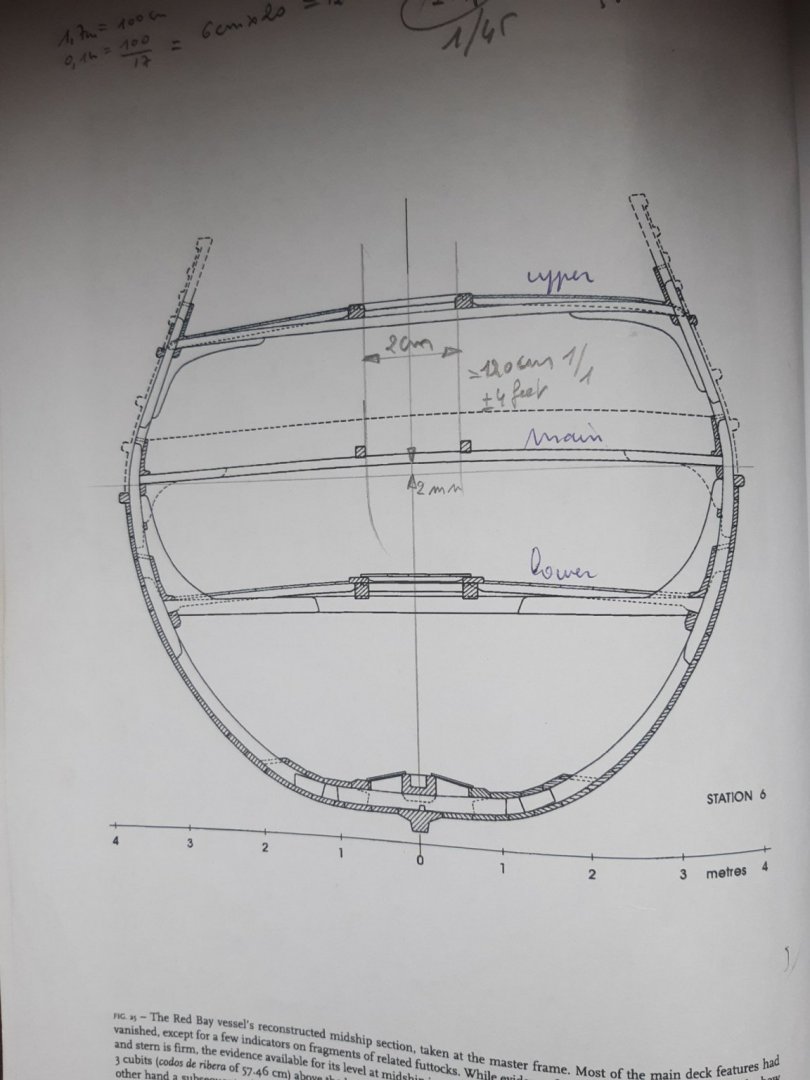
The deck curve
English

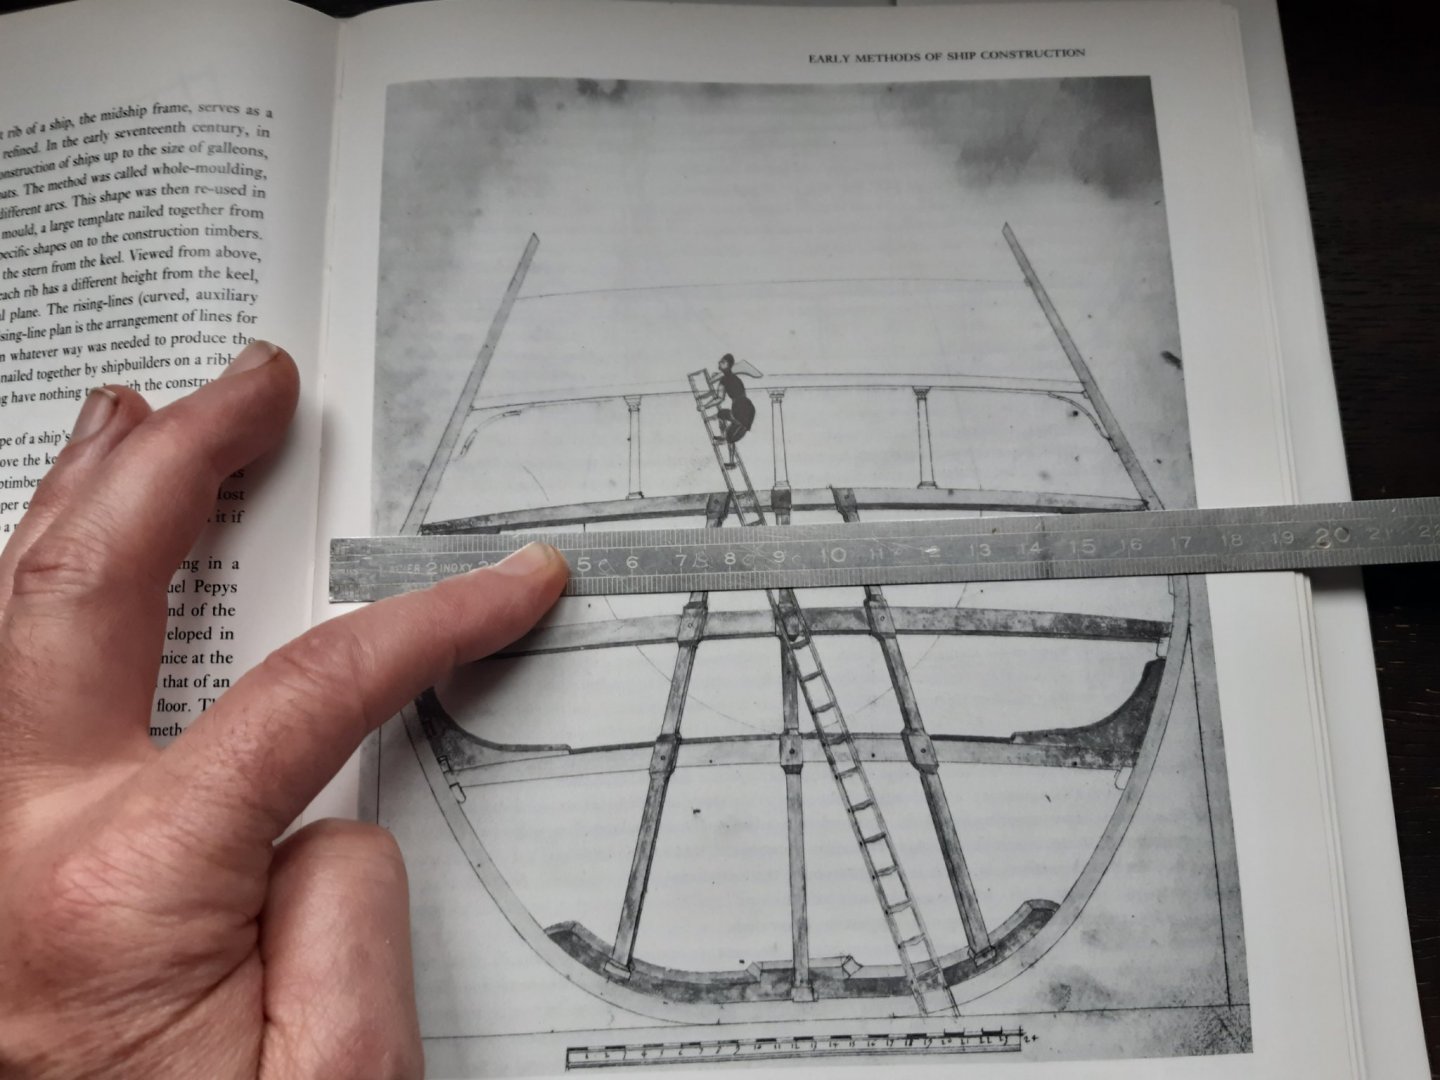
Spanish
- Jeff T, rkwz, Old Collingwood and 3 others
-
6
-
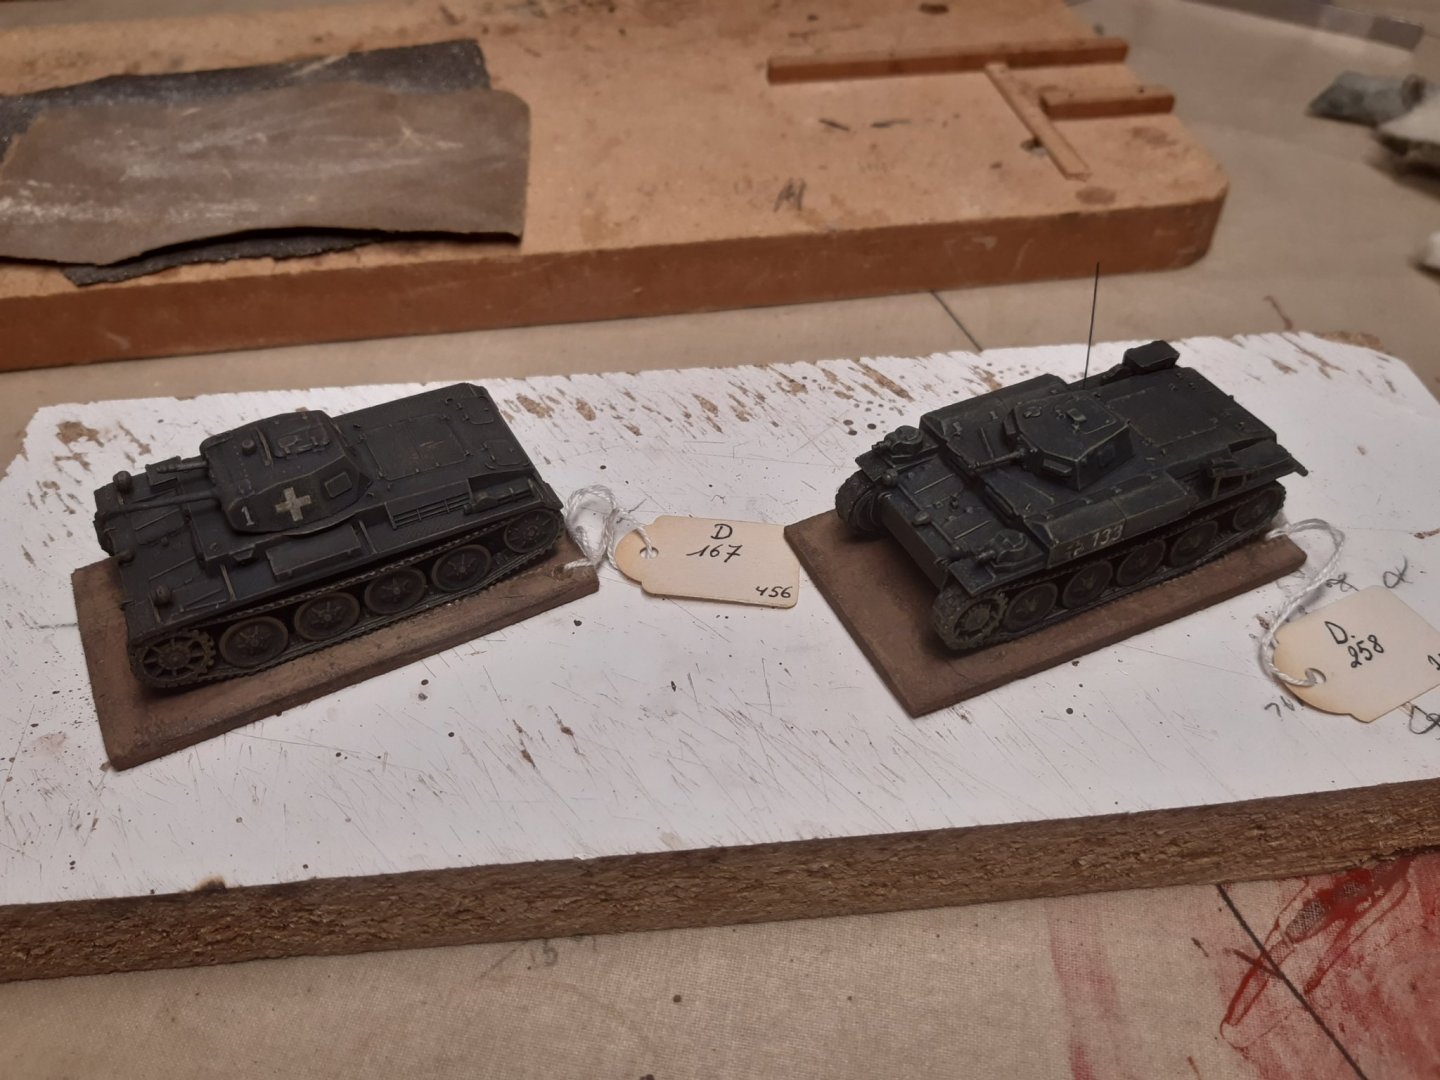
1/72 scale Panzers in white metal from MMS models. painted more then 25 years ago with Tamiya acrylic paint.
Looks ok to me
-
14 hours ago, rkwz said:
looks like I've opened a can of worms with this build haha.
We can go fishing with the worms for bait.
In this build I will only give you an idea every now and then. It's your model and you build it There is some free interpretation in 16th century shipbuilding
Some things that I don't think are right.
The "stairs" on the side of the hull, never seen them on a drawing of a ship from this era
The draines of the lower deck are also questionableGrating or hatches? I think : grating that can be closed with hatches
-
15 hours ago, popeye the sailor said:
these two look really neat! the main tank bodies look fairly similar.........did the munitions tank have any armament?
Neat : indeed Armament ammo tank : none
13 hours ago, Canute said:Isn't that similar to the chassis for a Universal or Bren Gun Carrier? It was also a light tank for the British? Interesting.
No
The main purpose of a carrier is to transport material (weapons) and people. In theory, people and equipment leave the carrier before entering combat
In a tank everyone remains "safe" inside the tank and takes part in the battle13 hours ago, Old Collingwood said:Some parts in that.
OC.
Indeed. But i think only some parts of the suspension
12 hours ago, Edwardkenway said:Interesting subjects.
Yep.


10.5 cm LeFH-16 Auf Geschuetzpanzer Mk. VI(e) and ammo transporter by Baker - FINISHED - ACE - scale 1/7 - PLASTIC2
in Non-ship/categorised builds
Posted
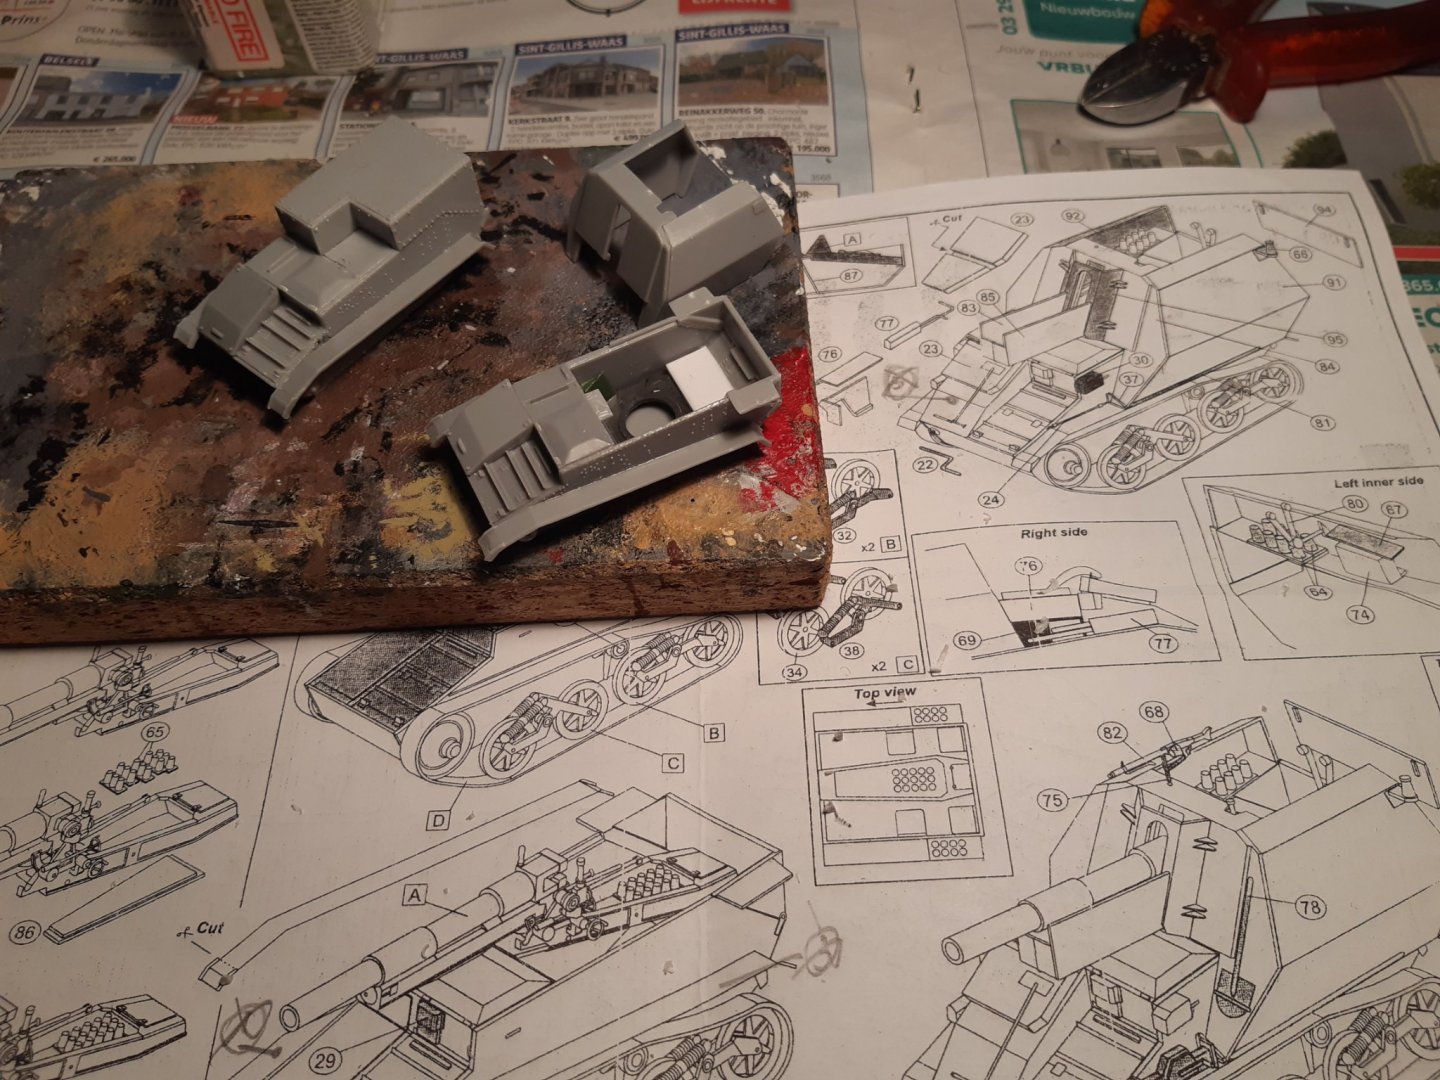
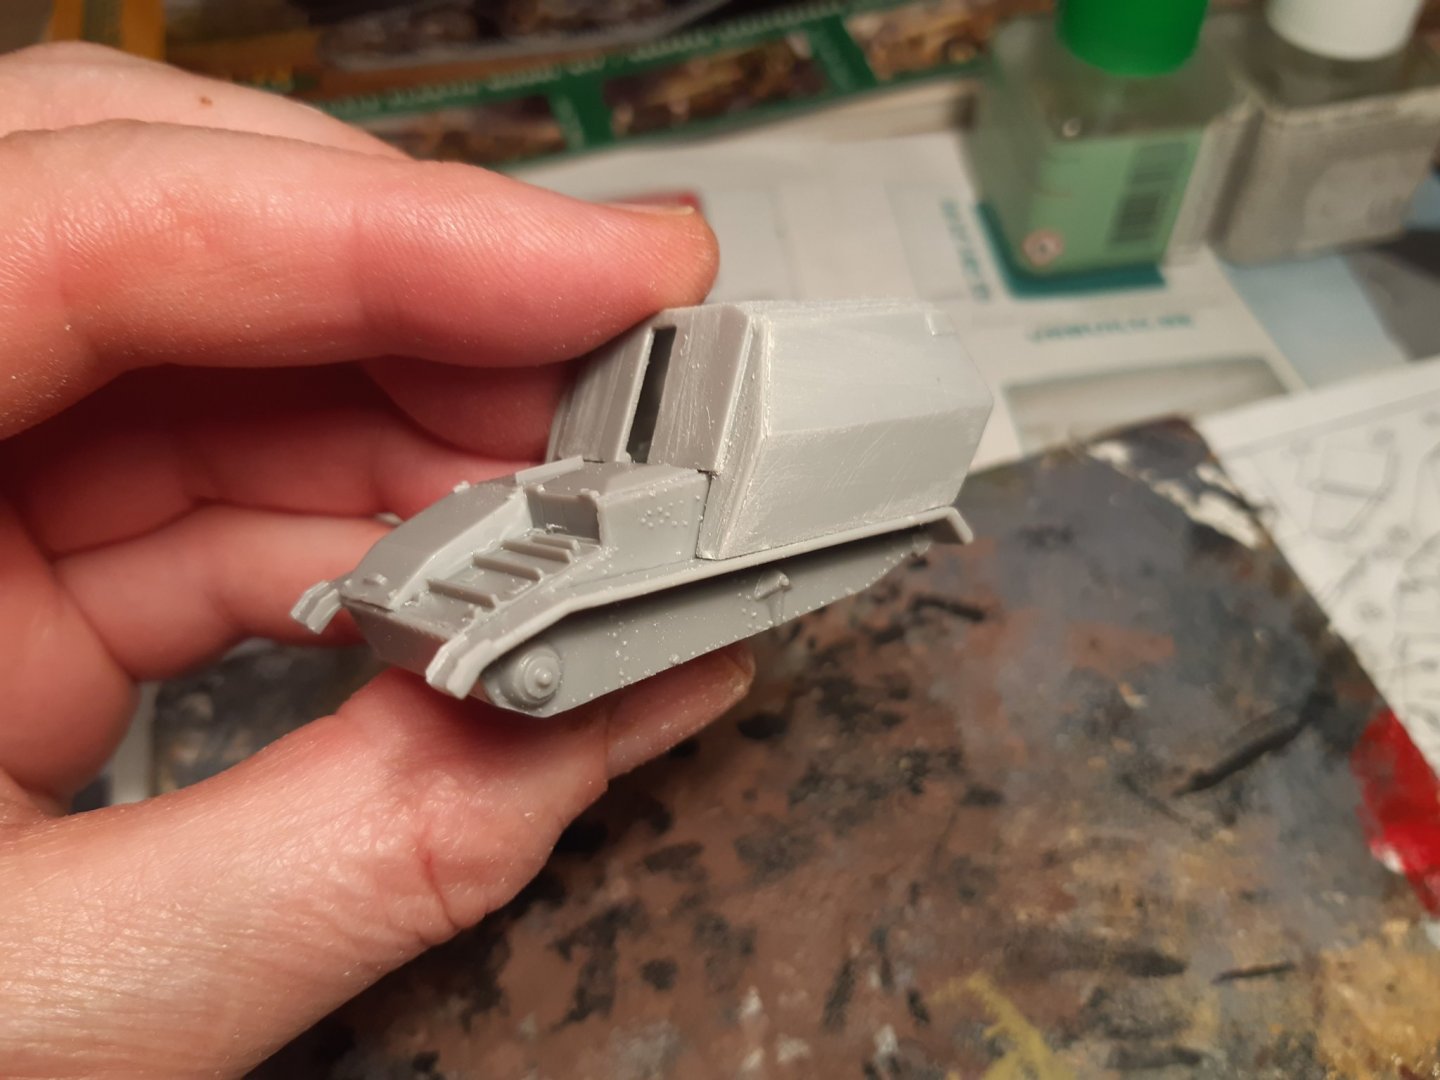
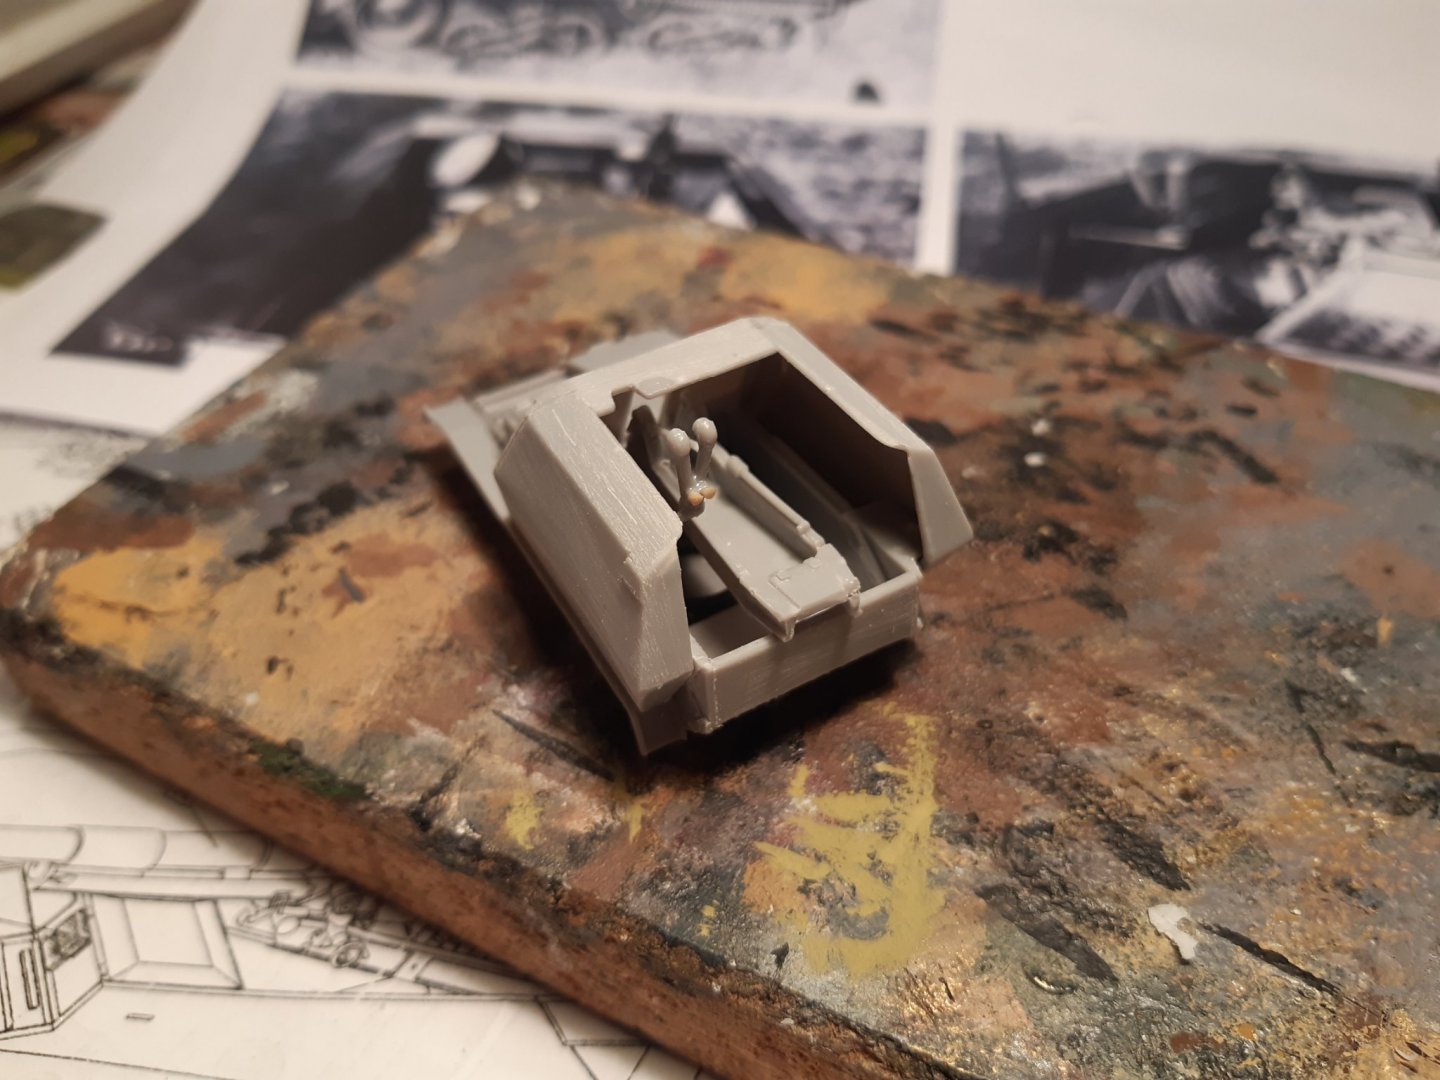
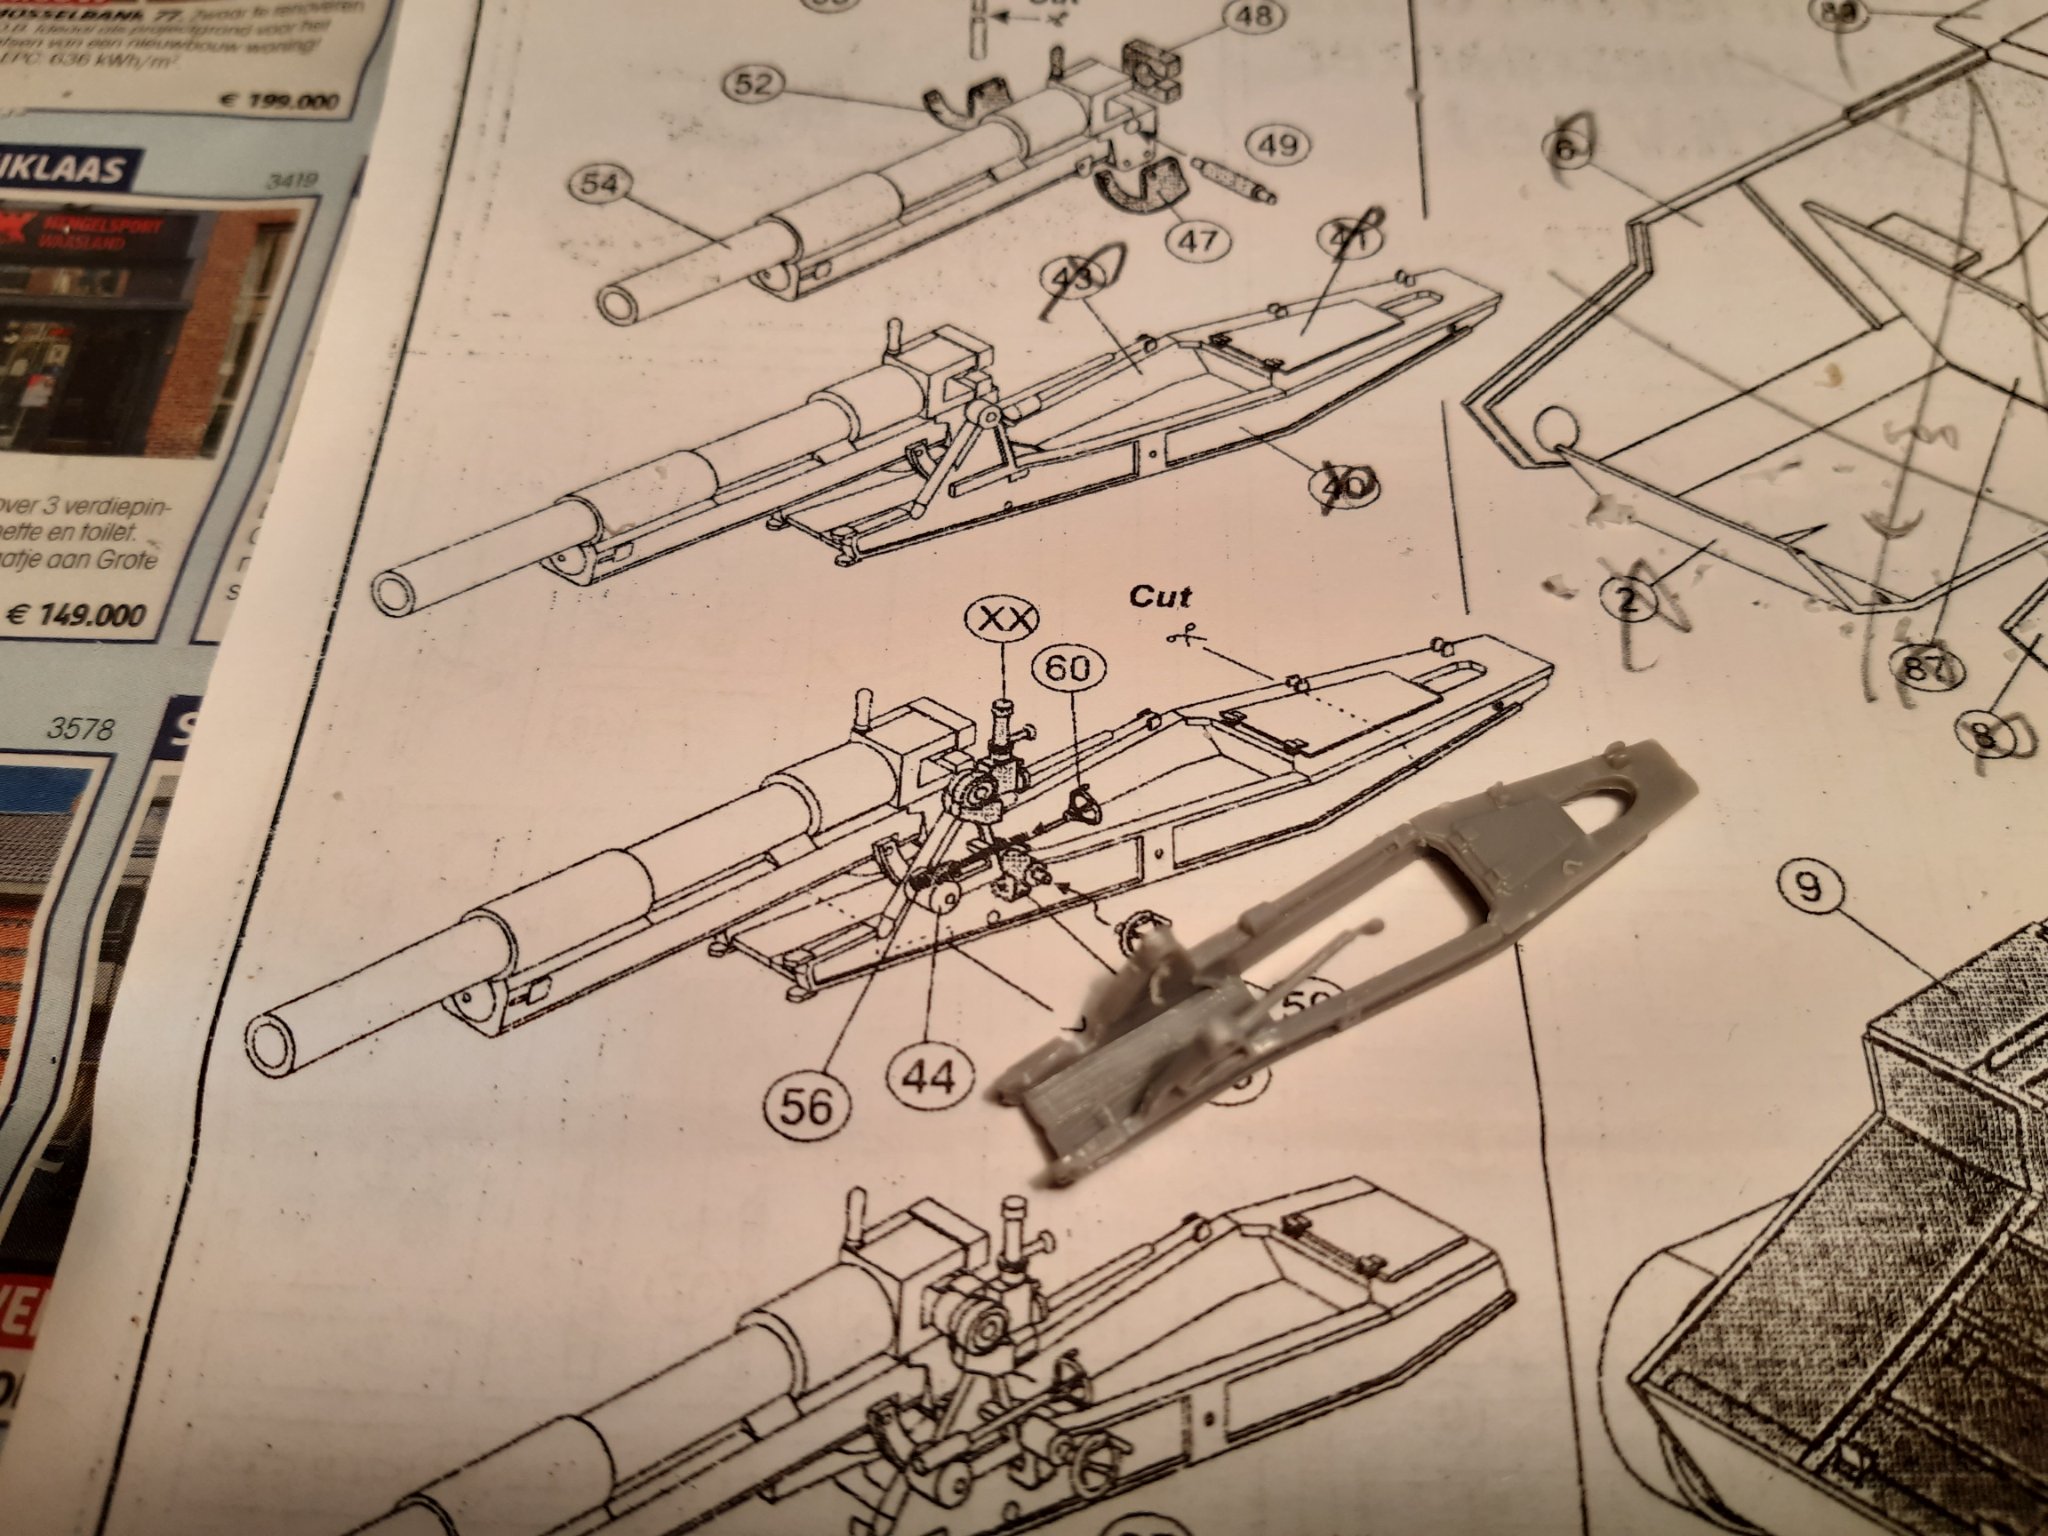
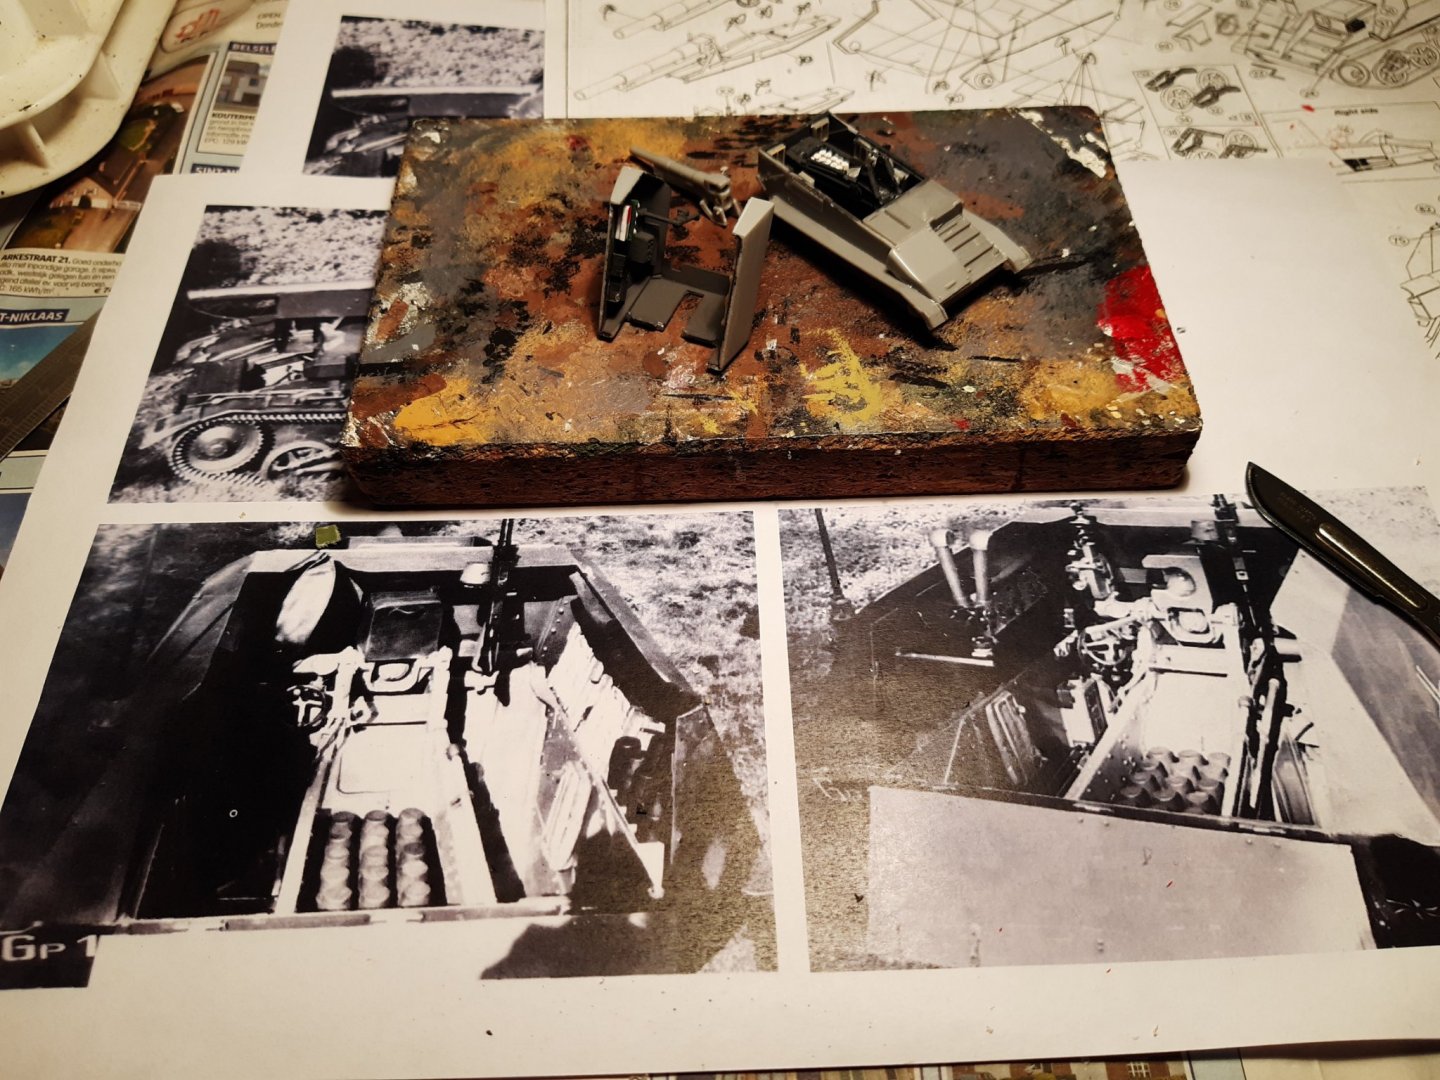
Building the howitzer compartment.
Extra detail on the 4 seats
New ammo (cleaning the ammo from the kit was more work) and some other extra's
Drilling out the barrel
I always do this with a knife like this. Just turn the blade until the correct diameter is reached. Ideal method in plastic
But, watch out for the fingers...
ready for painting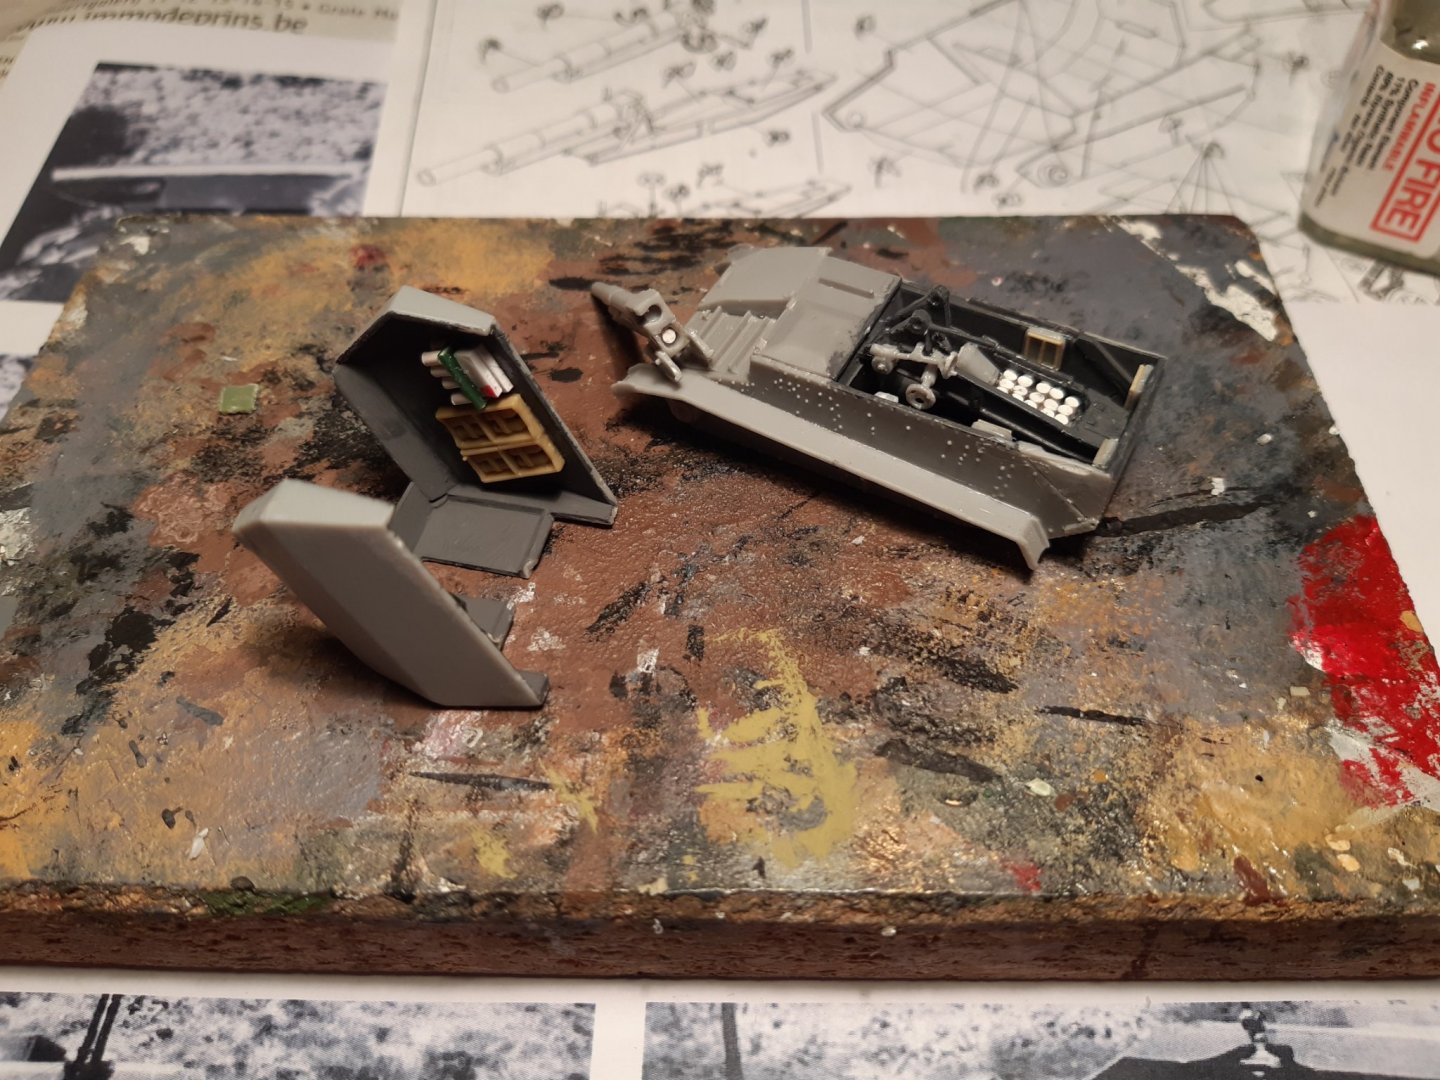
Parts painted, adding the howitzer is for later
glued together (and a wash with diluted black)
Next, wheels an tracks. Again lots of cleaning to do...
Thanks for following