Baker
-
Posts
4,286 -
Joined
-
Last visited
Content Type
Profiles
Forums
Gallery
Events
Everything posted by Baker
-
 Looking for a second time. indeed not on the right track. Planking is a complicated thing, especially at the bow. I also had problems with it the first time, and probably also the next times.
- 740 replies
-
- 2
-

-
- Tudor
- restoration
- (and 4 more)
-
More work than prescribed by the manufacturer. But so much nicer and more accurately executed. congrats to you Rodolfo
-
Looks good I think you're on the right (planking) track
- 740 replies
-
- 2
-
-
- Tudor
- restoration
- (and 4 more)
-
Roter Löwe 1597 by Ondras71
Baker replied to Ondras71's topic in - Build logs for subjects built 1501 - 1750
I have full confidence in you for a successful finish👍 -
and welcome to MSW Nice model
-
Nice models Sparky And
-
La Toulonnaise 1823 by ward - FINISHED - 1/50
Baker replied to ward's topic in - Build logs for subjects built 1801 - 1850
Nice work Ward 👍- 26 replies
-
- 1
-
-
- schooner
- la toulonnaise
- (and 1 more)
-
Great work Geert. You are a very patient man who works very accurately 👍
- 86 replies
-
- 2
-
-
- whaling
- clinker built
- (and 2 more)
-
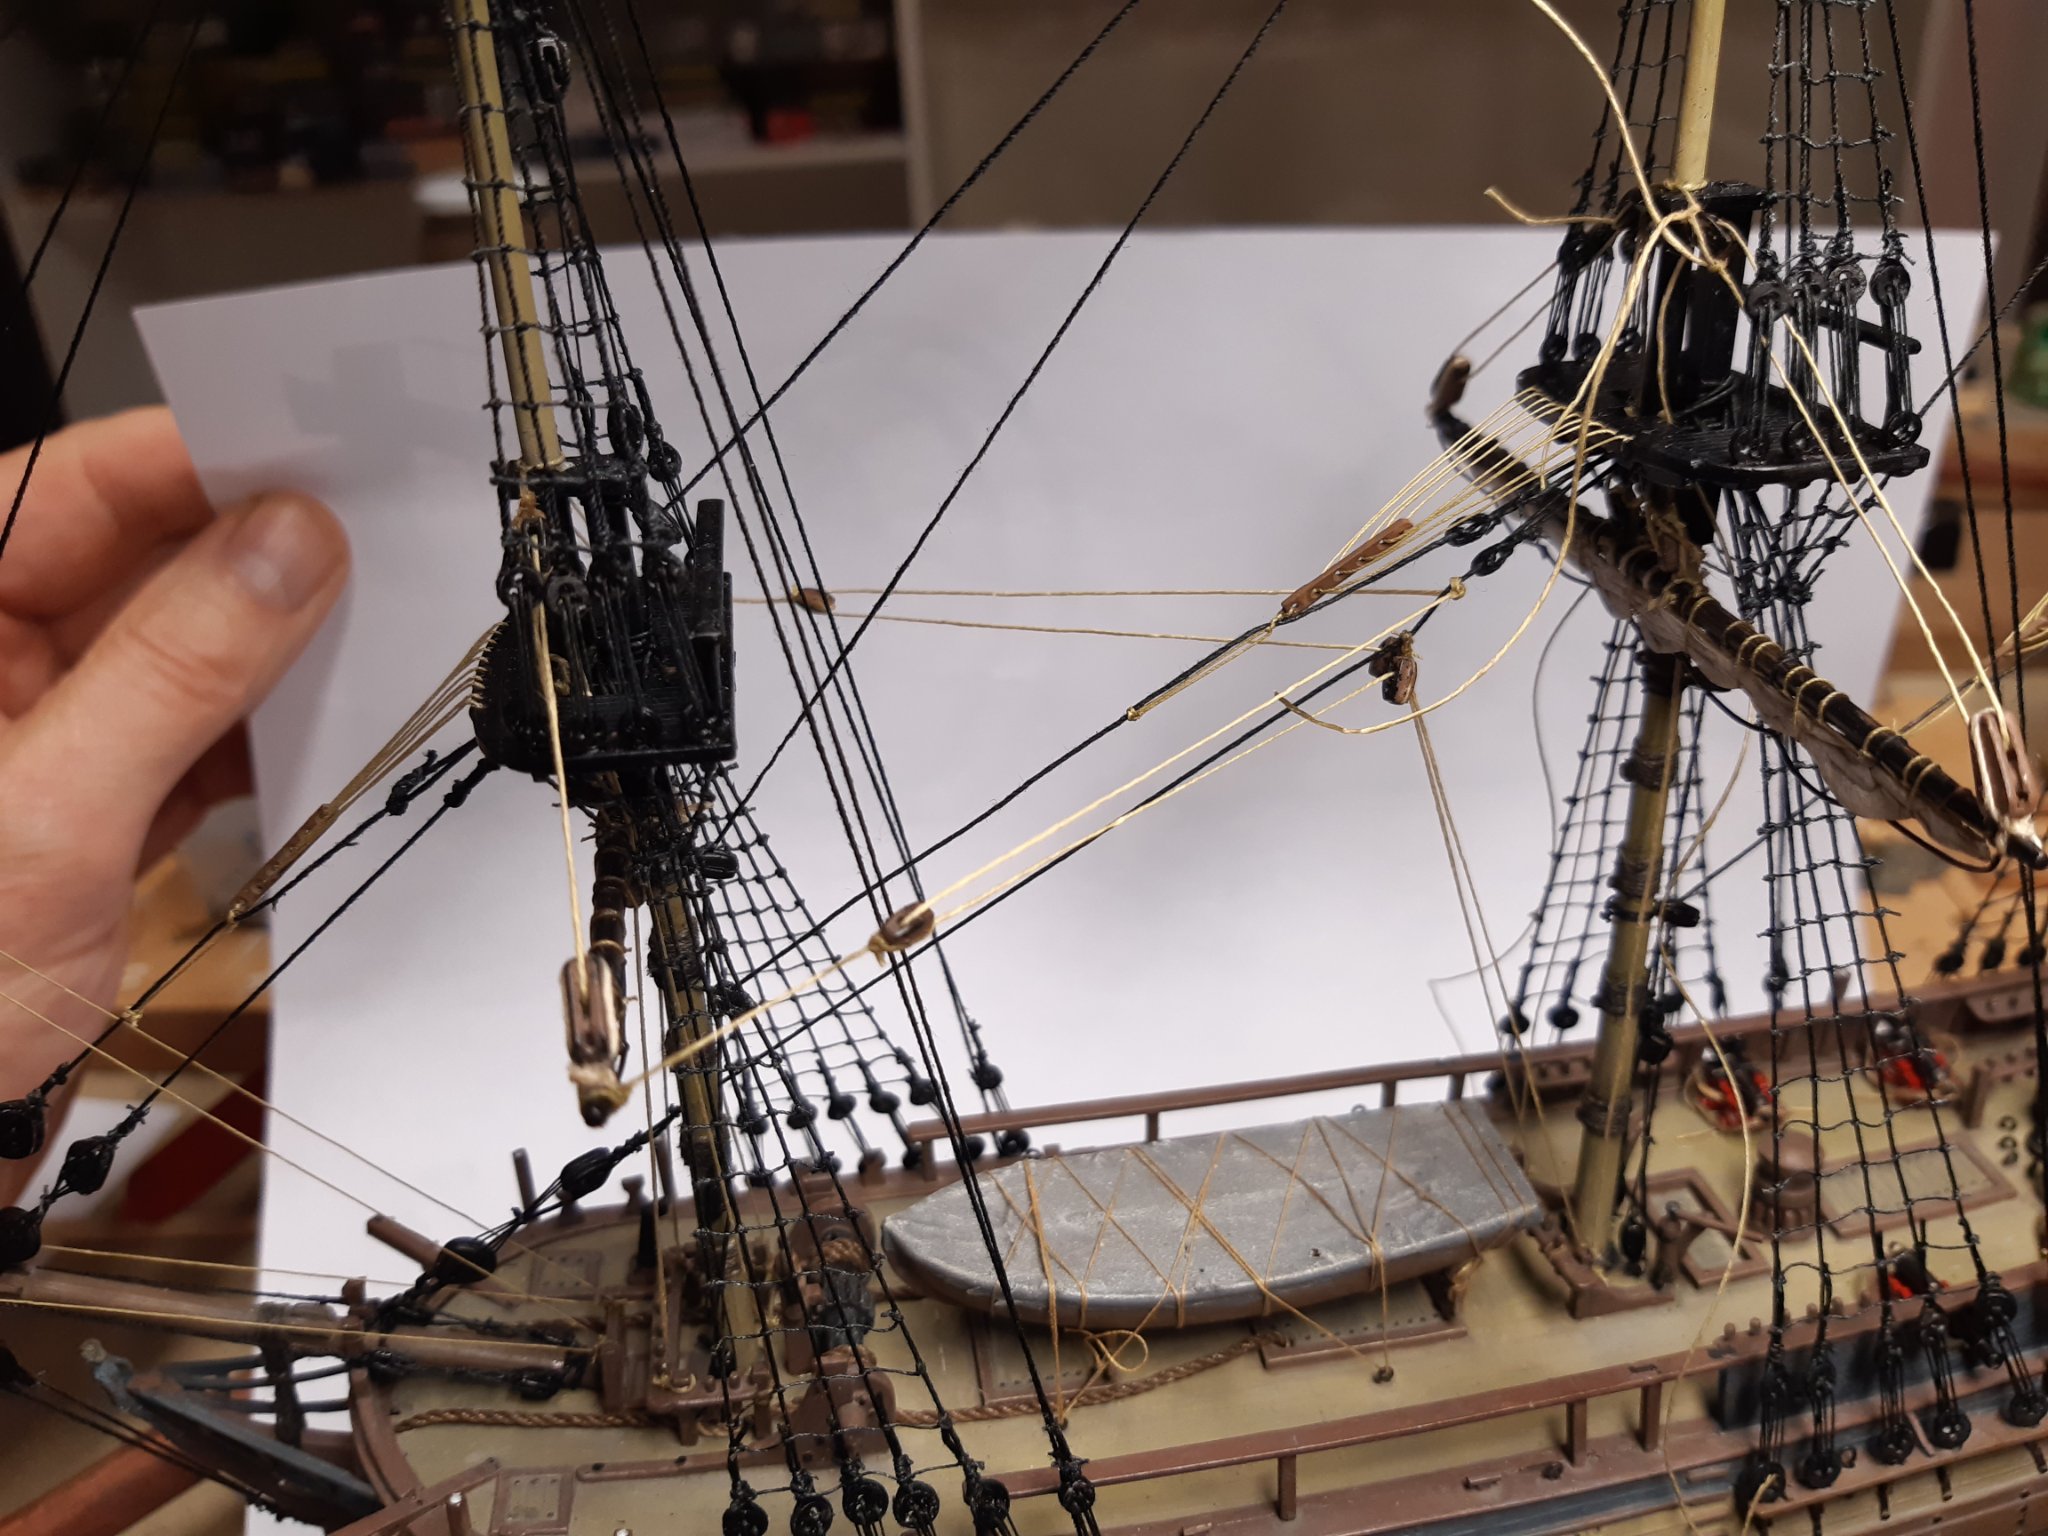
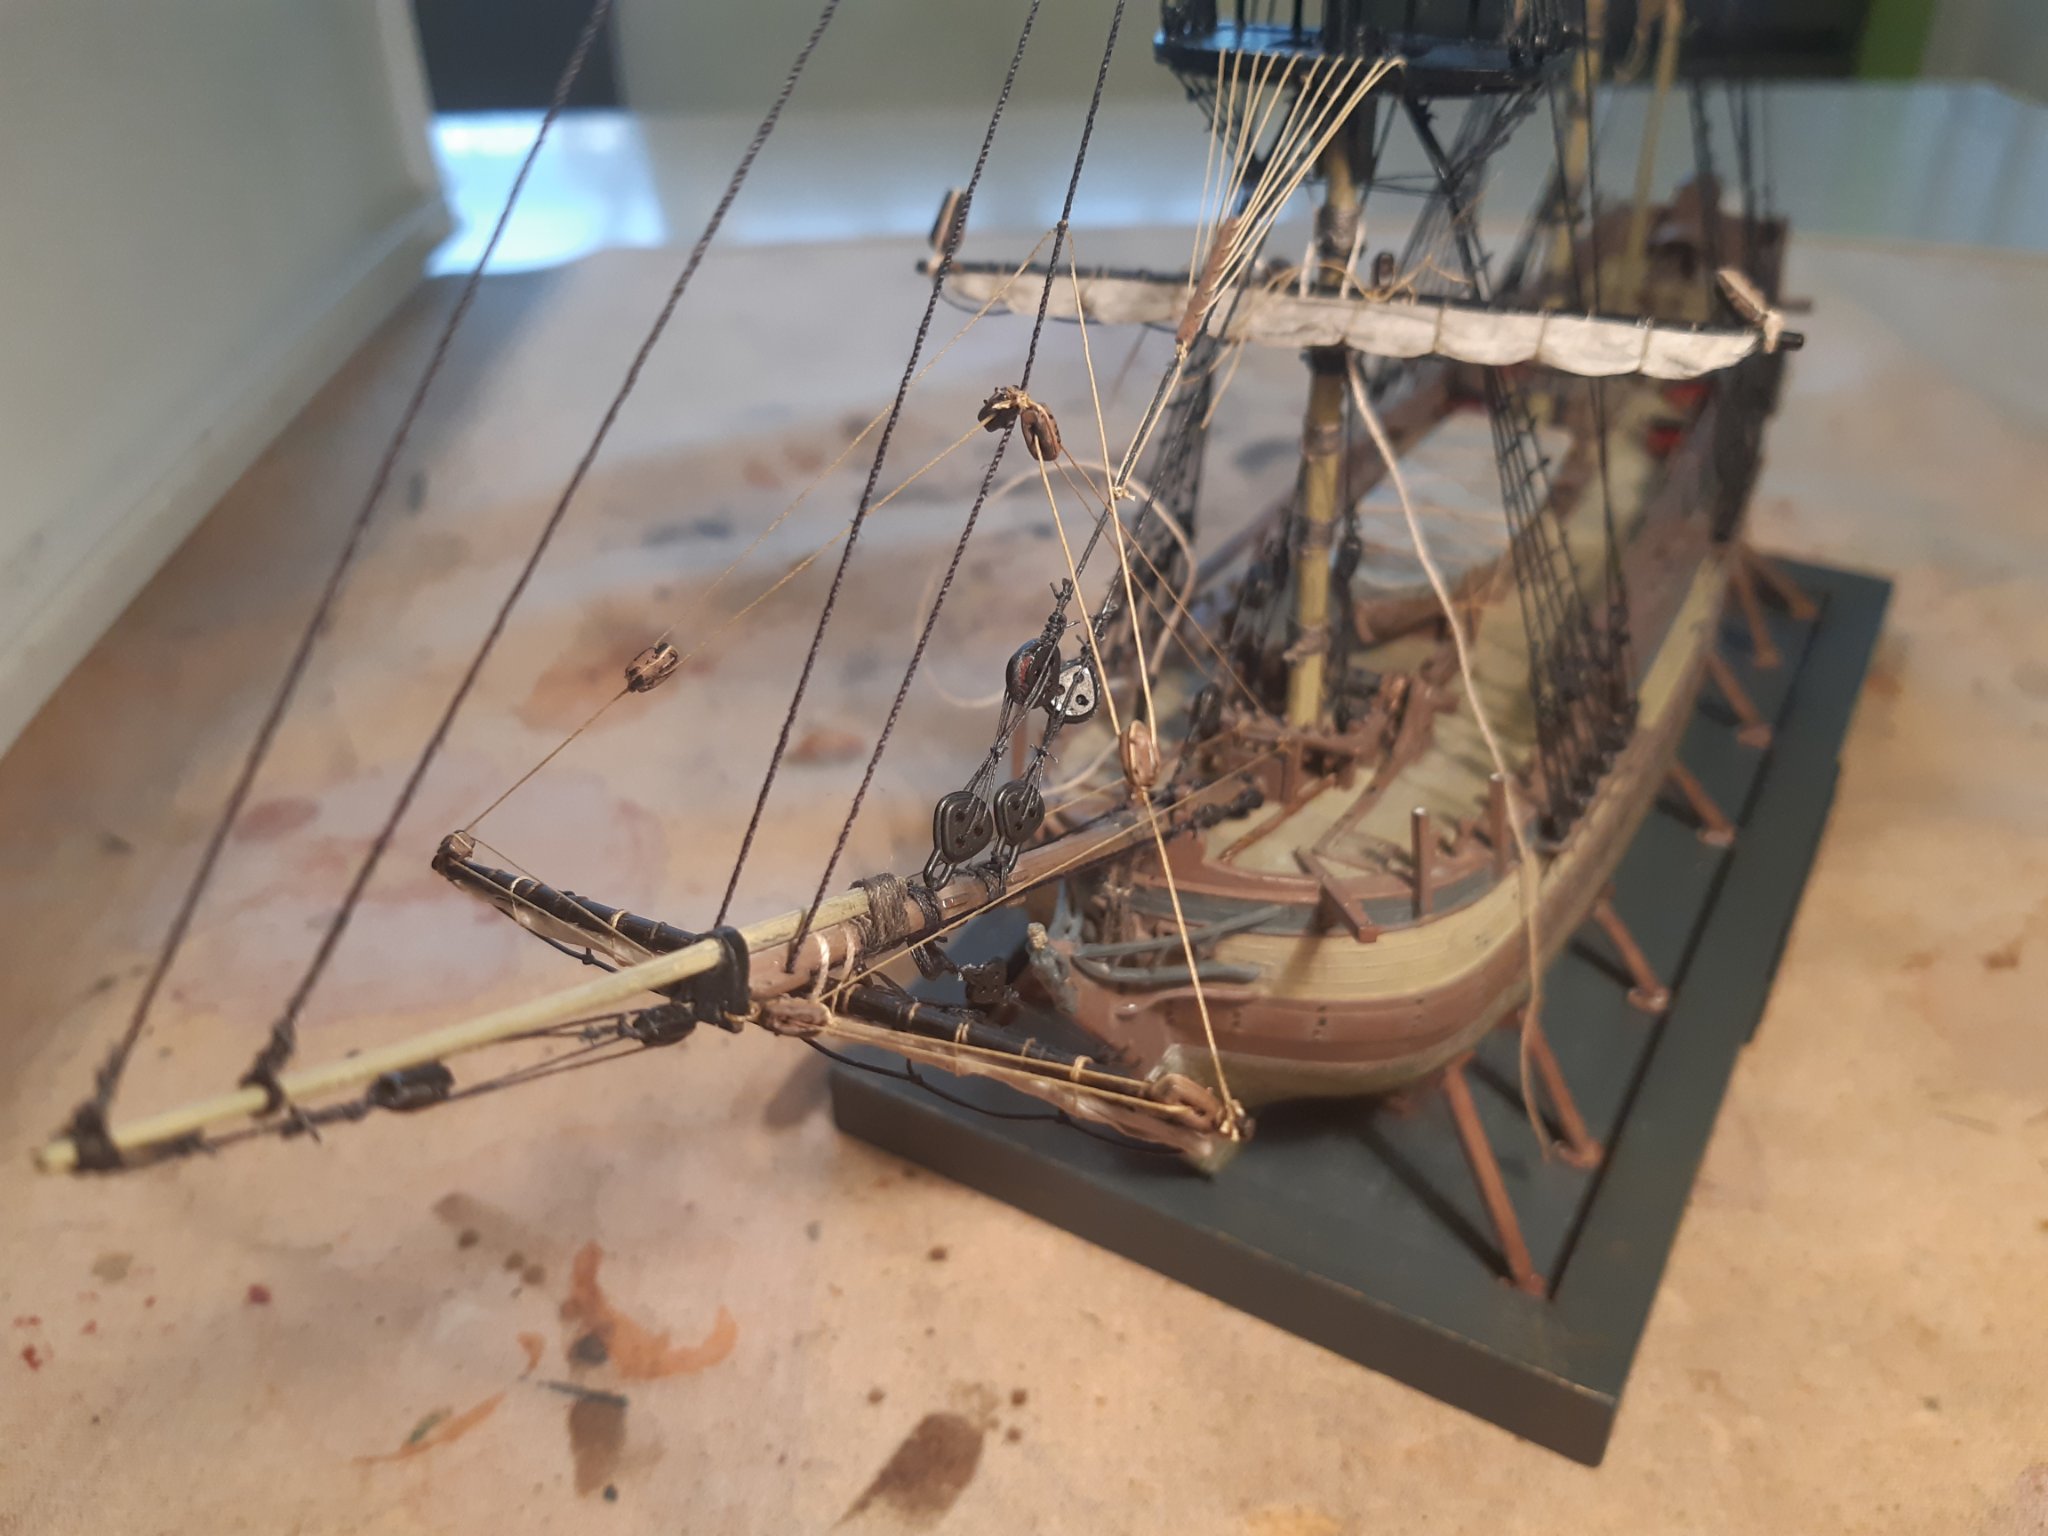
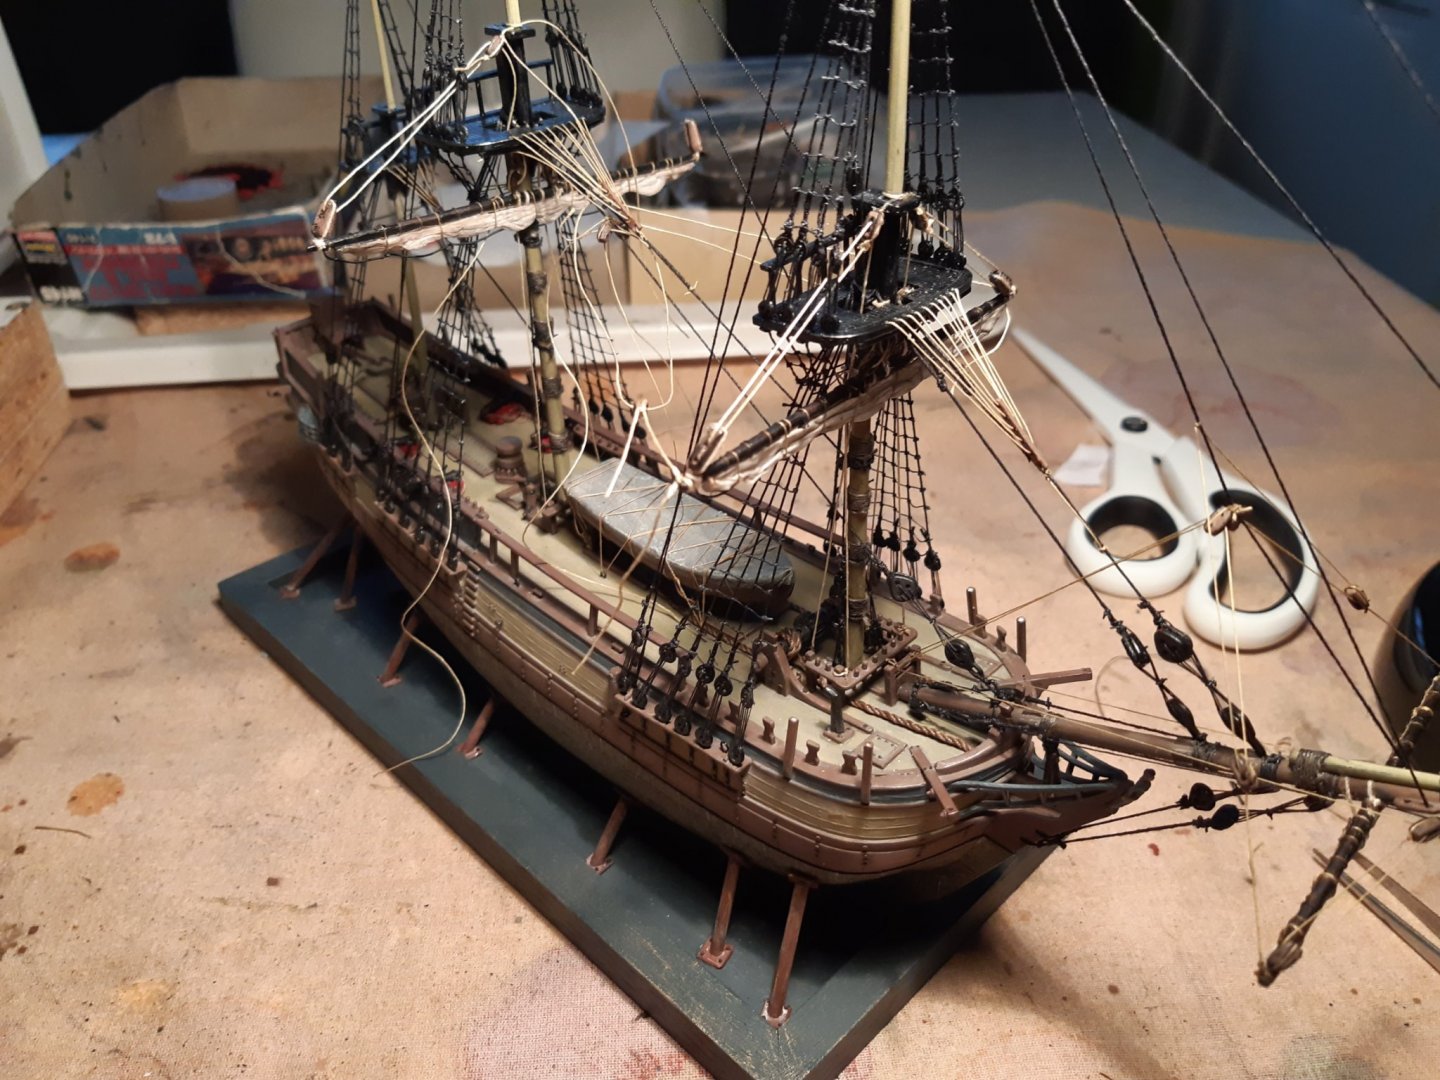
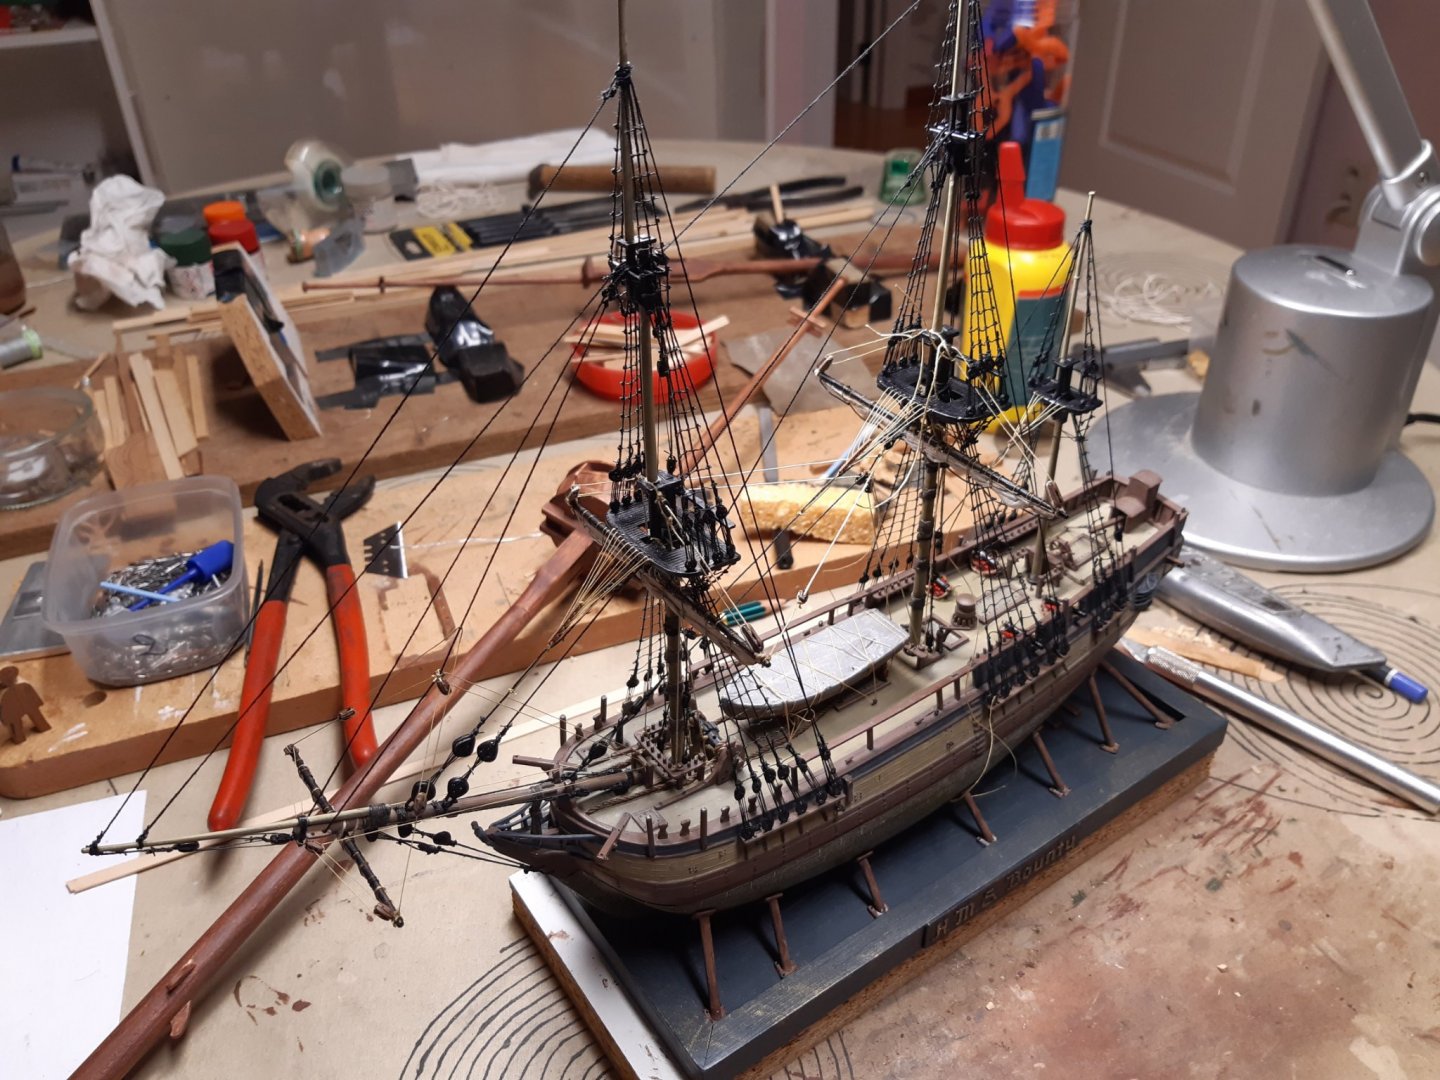
Thank you everyone for the good wishes, this is much appreciated. Tired quickly but otherwise only slight symptoms. My wife got it too (from me) she has the same symptoms with a few days delay The strange thing is that food no longer tastes like it used to, everything tastes pale (also with extra pepper added 🥵 🤧) In the meantime, the rigging continues. Lots of free time now. The extra wire supplied by Revell is thicker and used on the lower (heavier) yards. evanals de blocks (from the SR van Heller). The thinner original thread is for the lighter yards and I will probably have to make smaller blocks for them. Some rigging done, a lot of rigging to be done. There are several Bounty models and buildlogs on this site. Kits and scratchmodels (and there are sometimes differences in these models). To have a general idea of the rigging I usually look at this site. Easy to view for me. all photos are on 1 page https://www.modelships.de/Bounty/Photos-HMS-Bounty_details.htm Thanks for following, comments and likes

-
Thanks everyone. We have been very careful since March this year. You can't enter my workplace (factory) without a temperature control. Disinfect everything, mouth masks, etc. And yet infected at work. Advice from Backer : If possible, avoid all unnecessary contact. corona can be everywhere
-
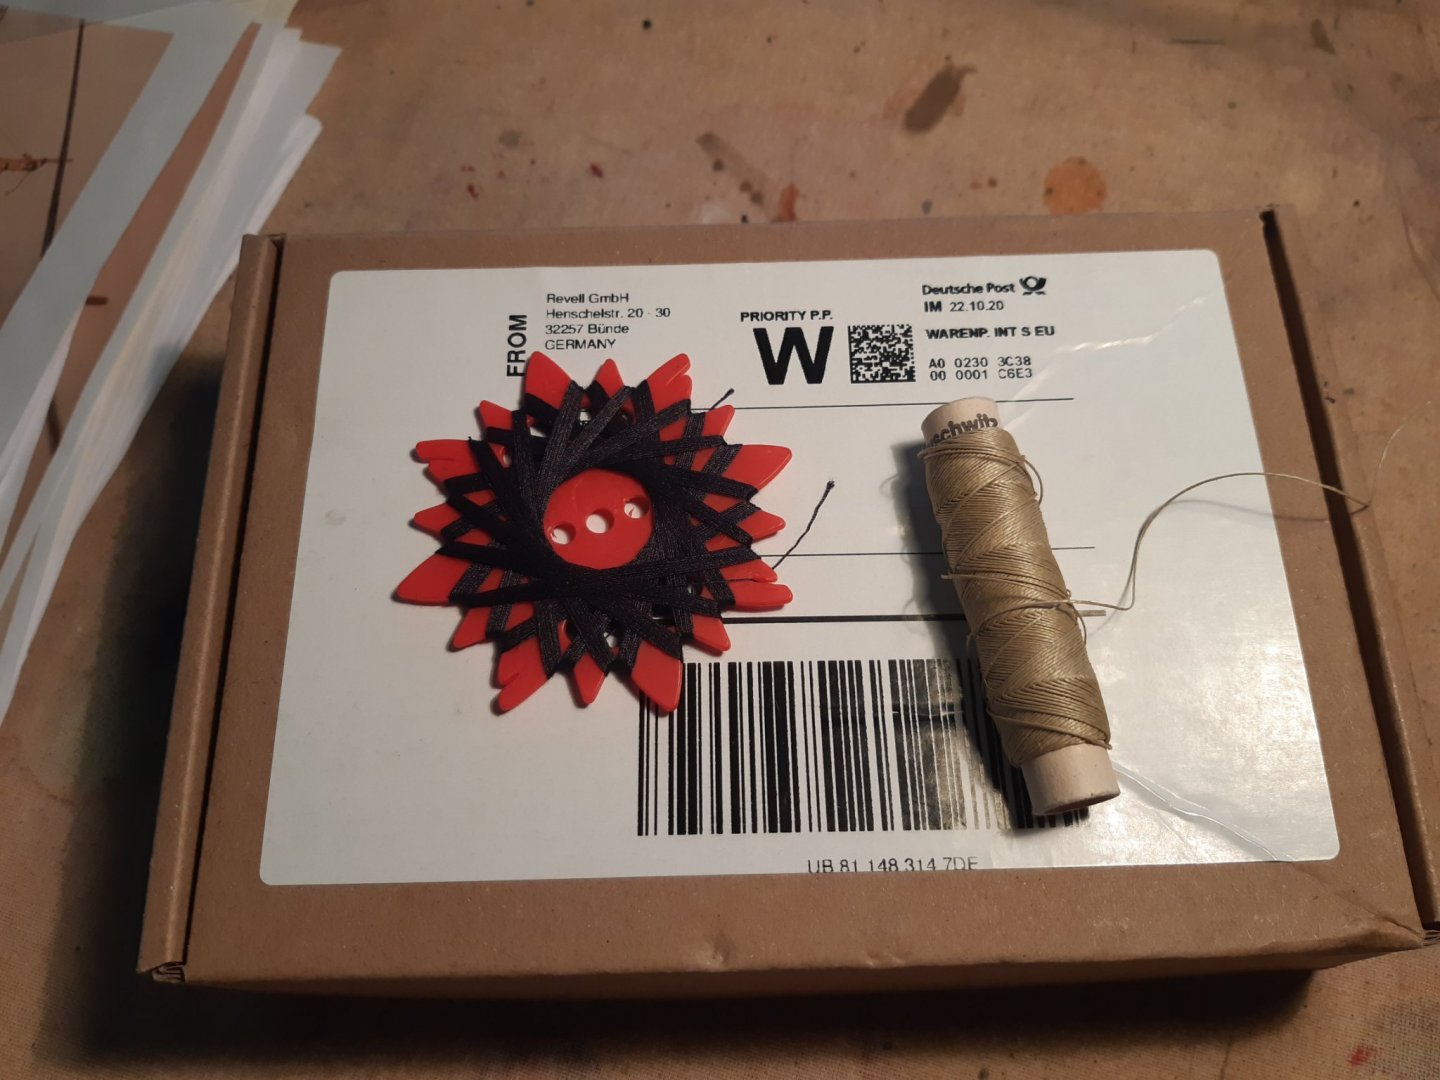
And received 2 things today. a good A few weeks ago I asked through the Revell website if I couldn't buy extra rope from them. For the extra finishing of the Bounty A reply came pretty quickly that they were going to send this. And today, a package (And without a bill attached) a bad I received a positive result about my corona test 😷 Fortunately, the symptoms are mild and hopefully soon forgotten. So a lot of free time for rigging. But I am tired quickly
-
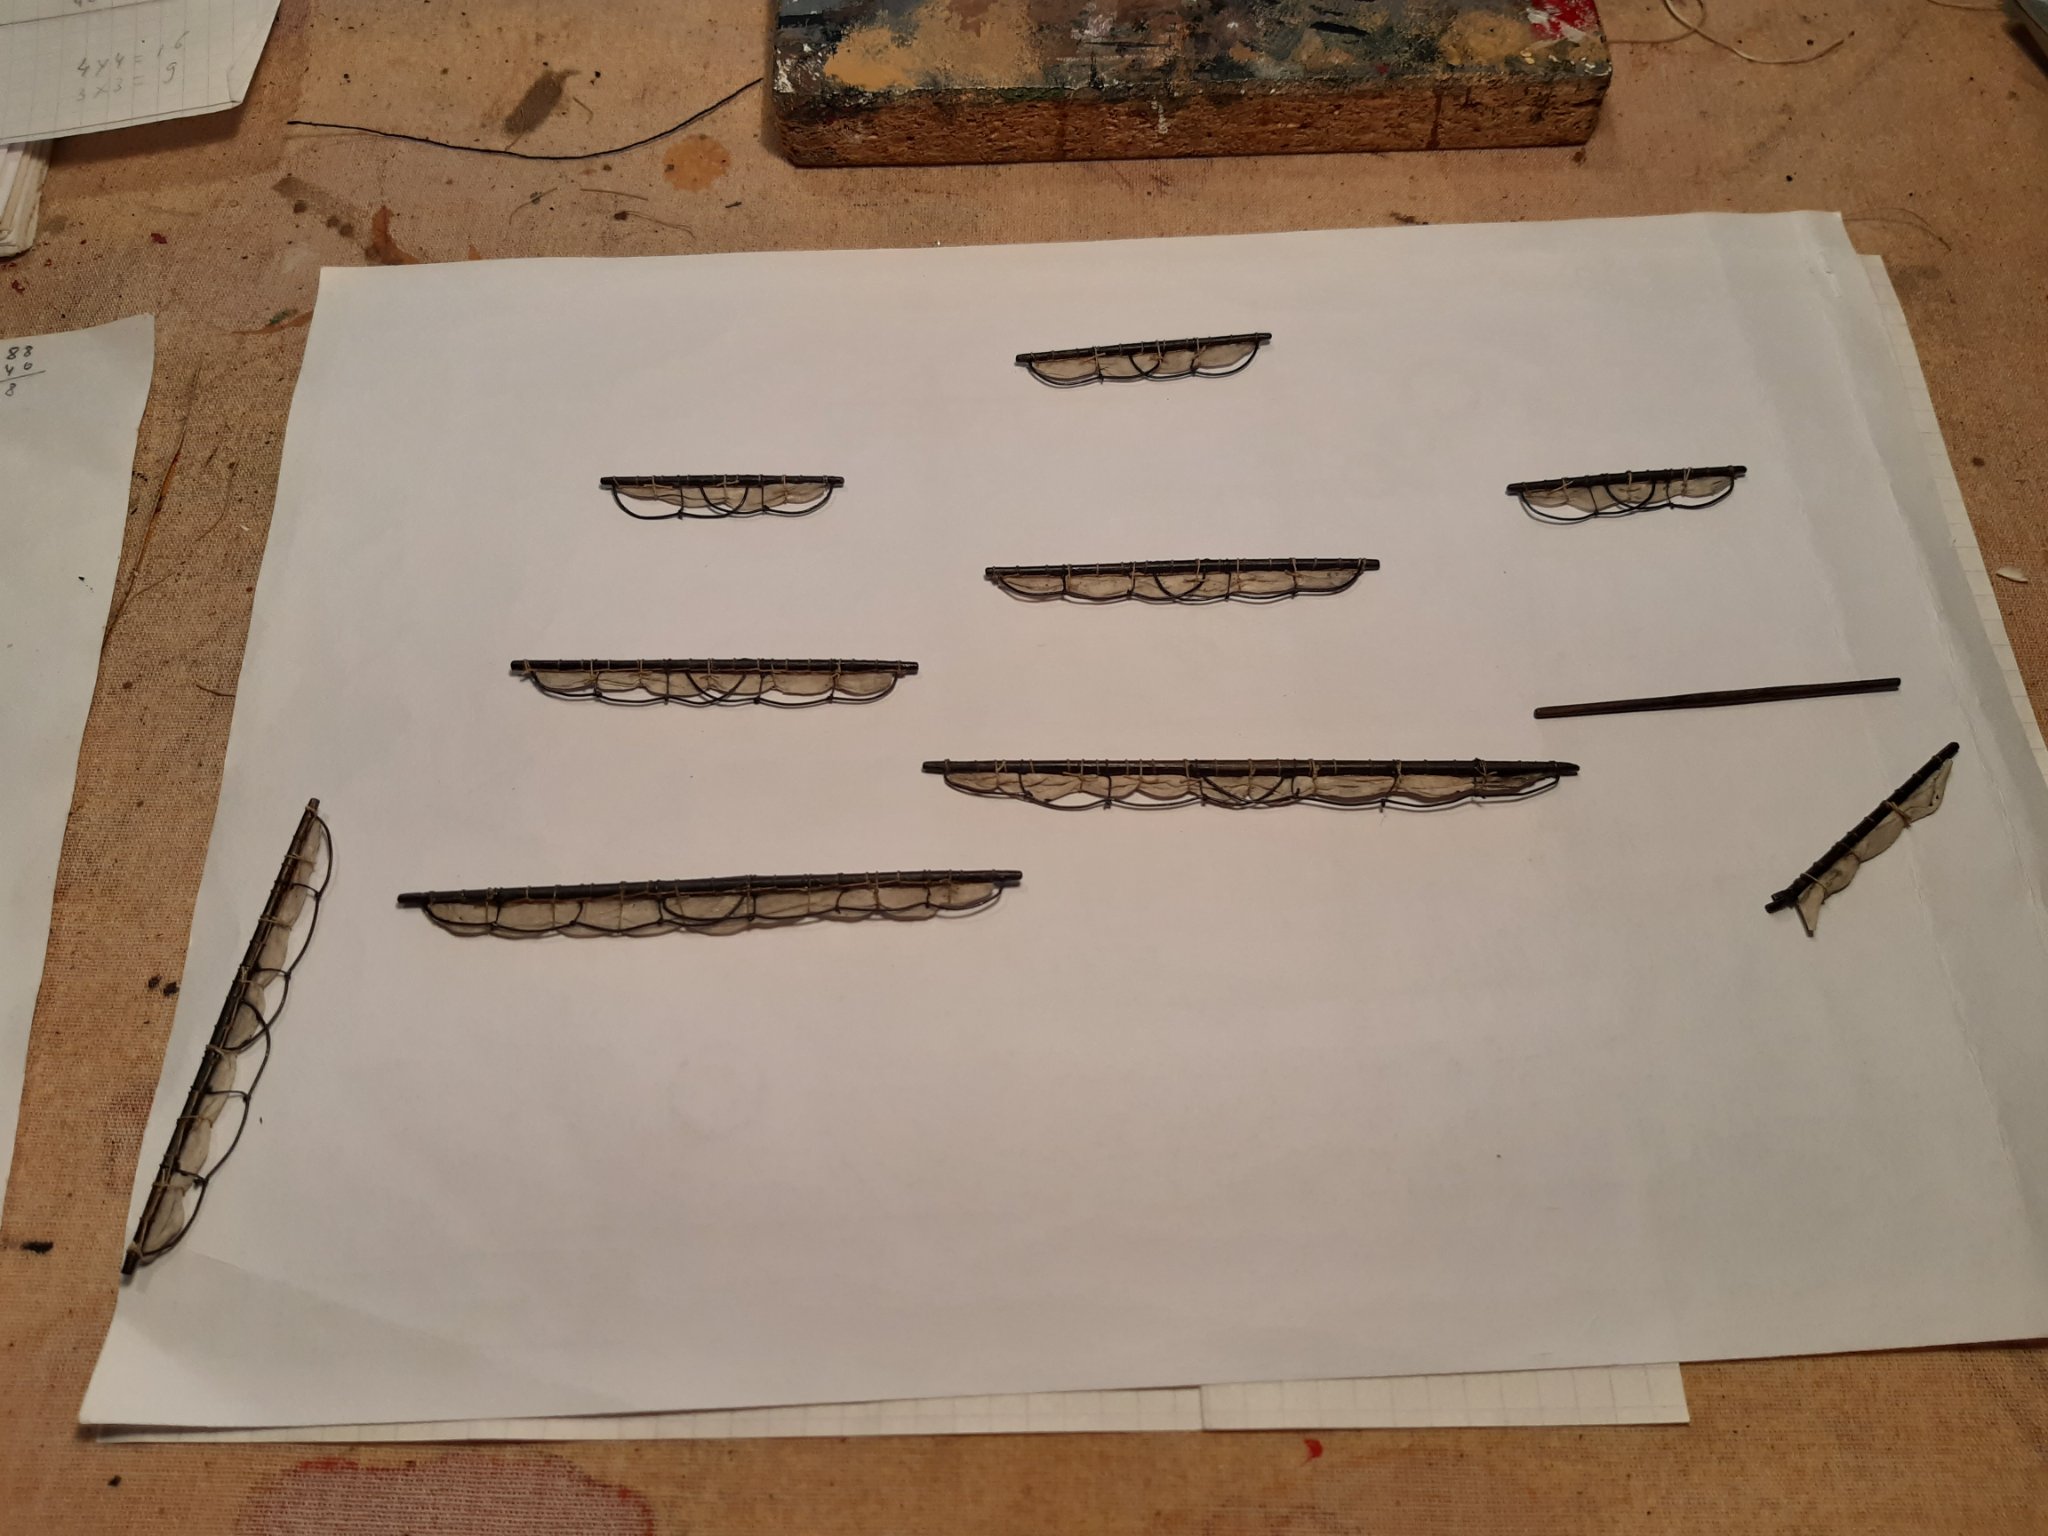
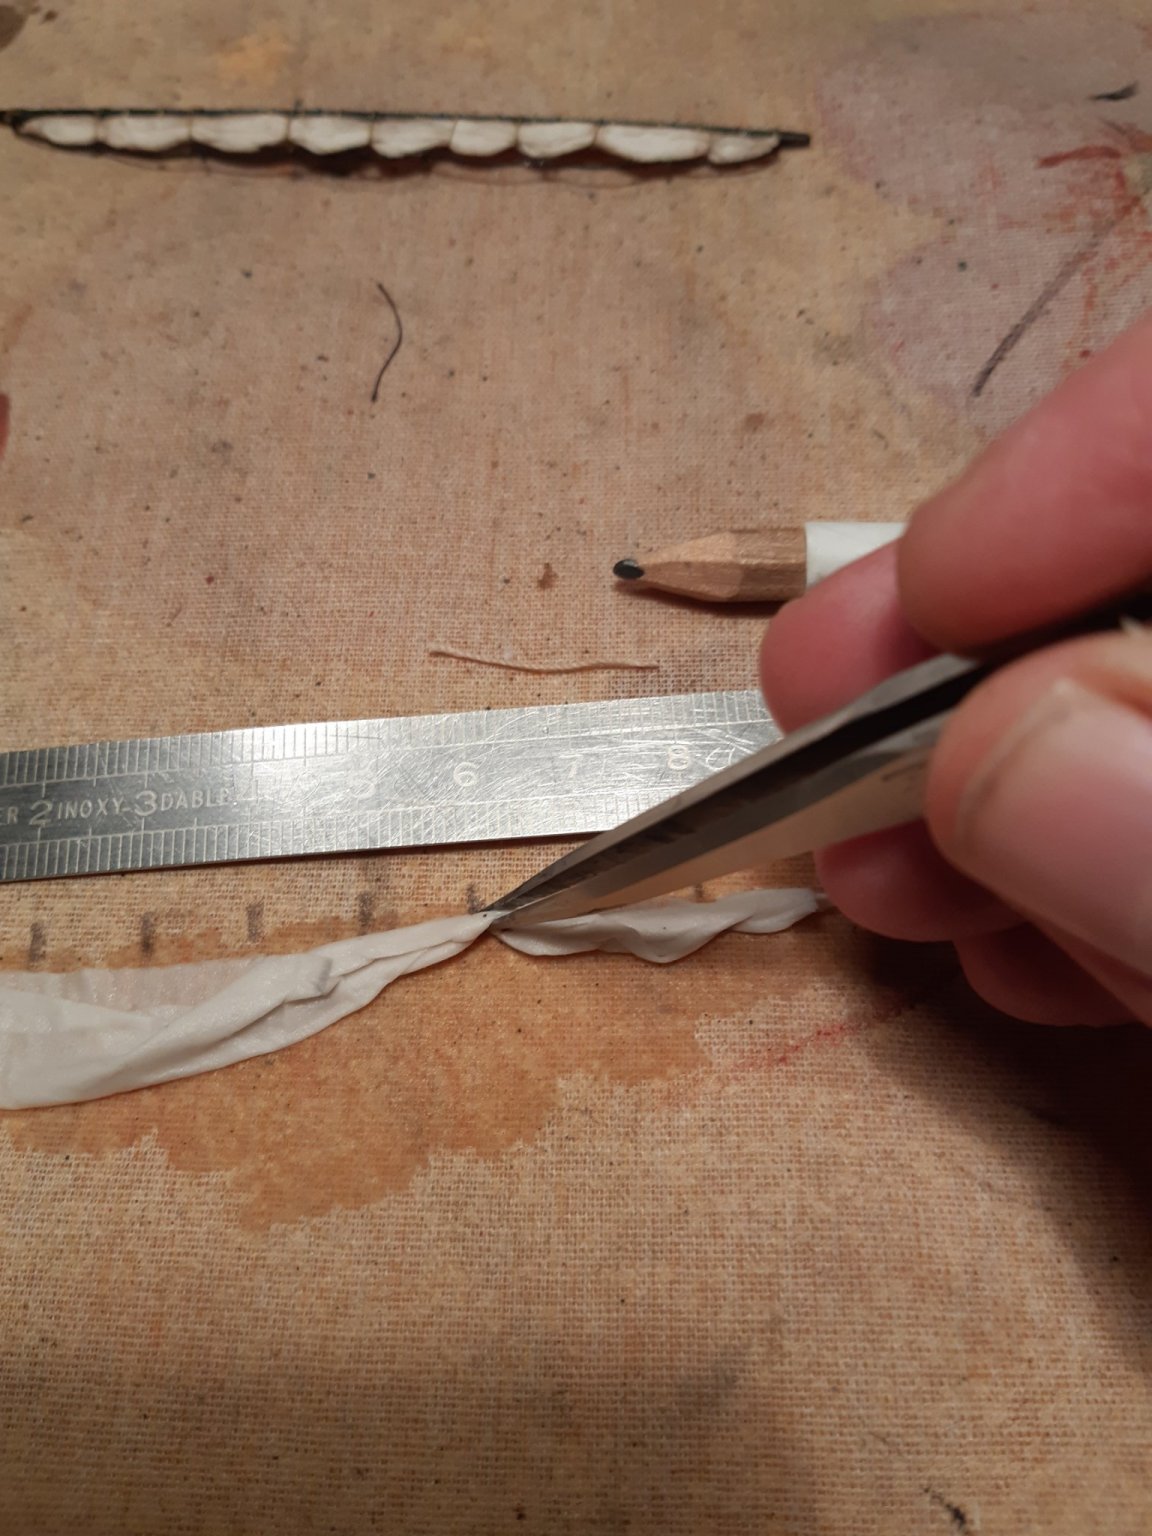
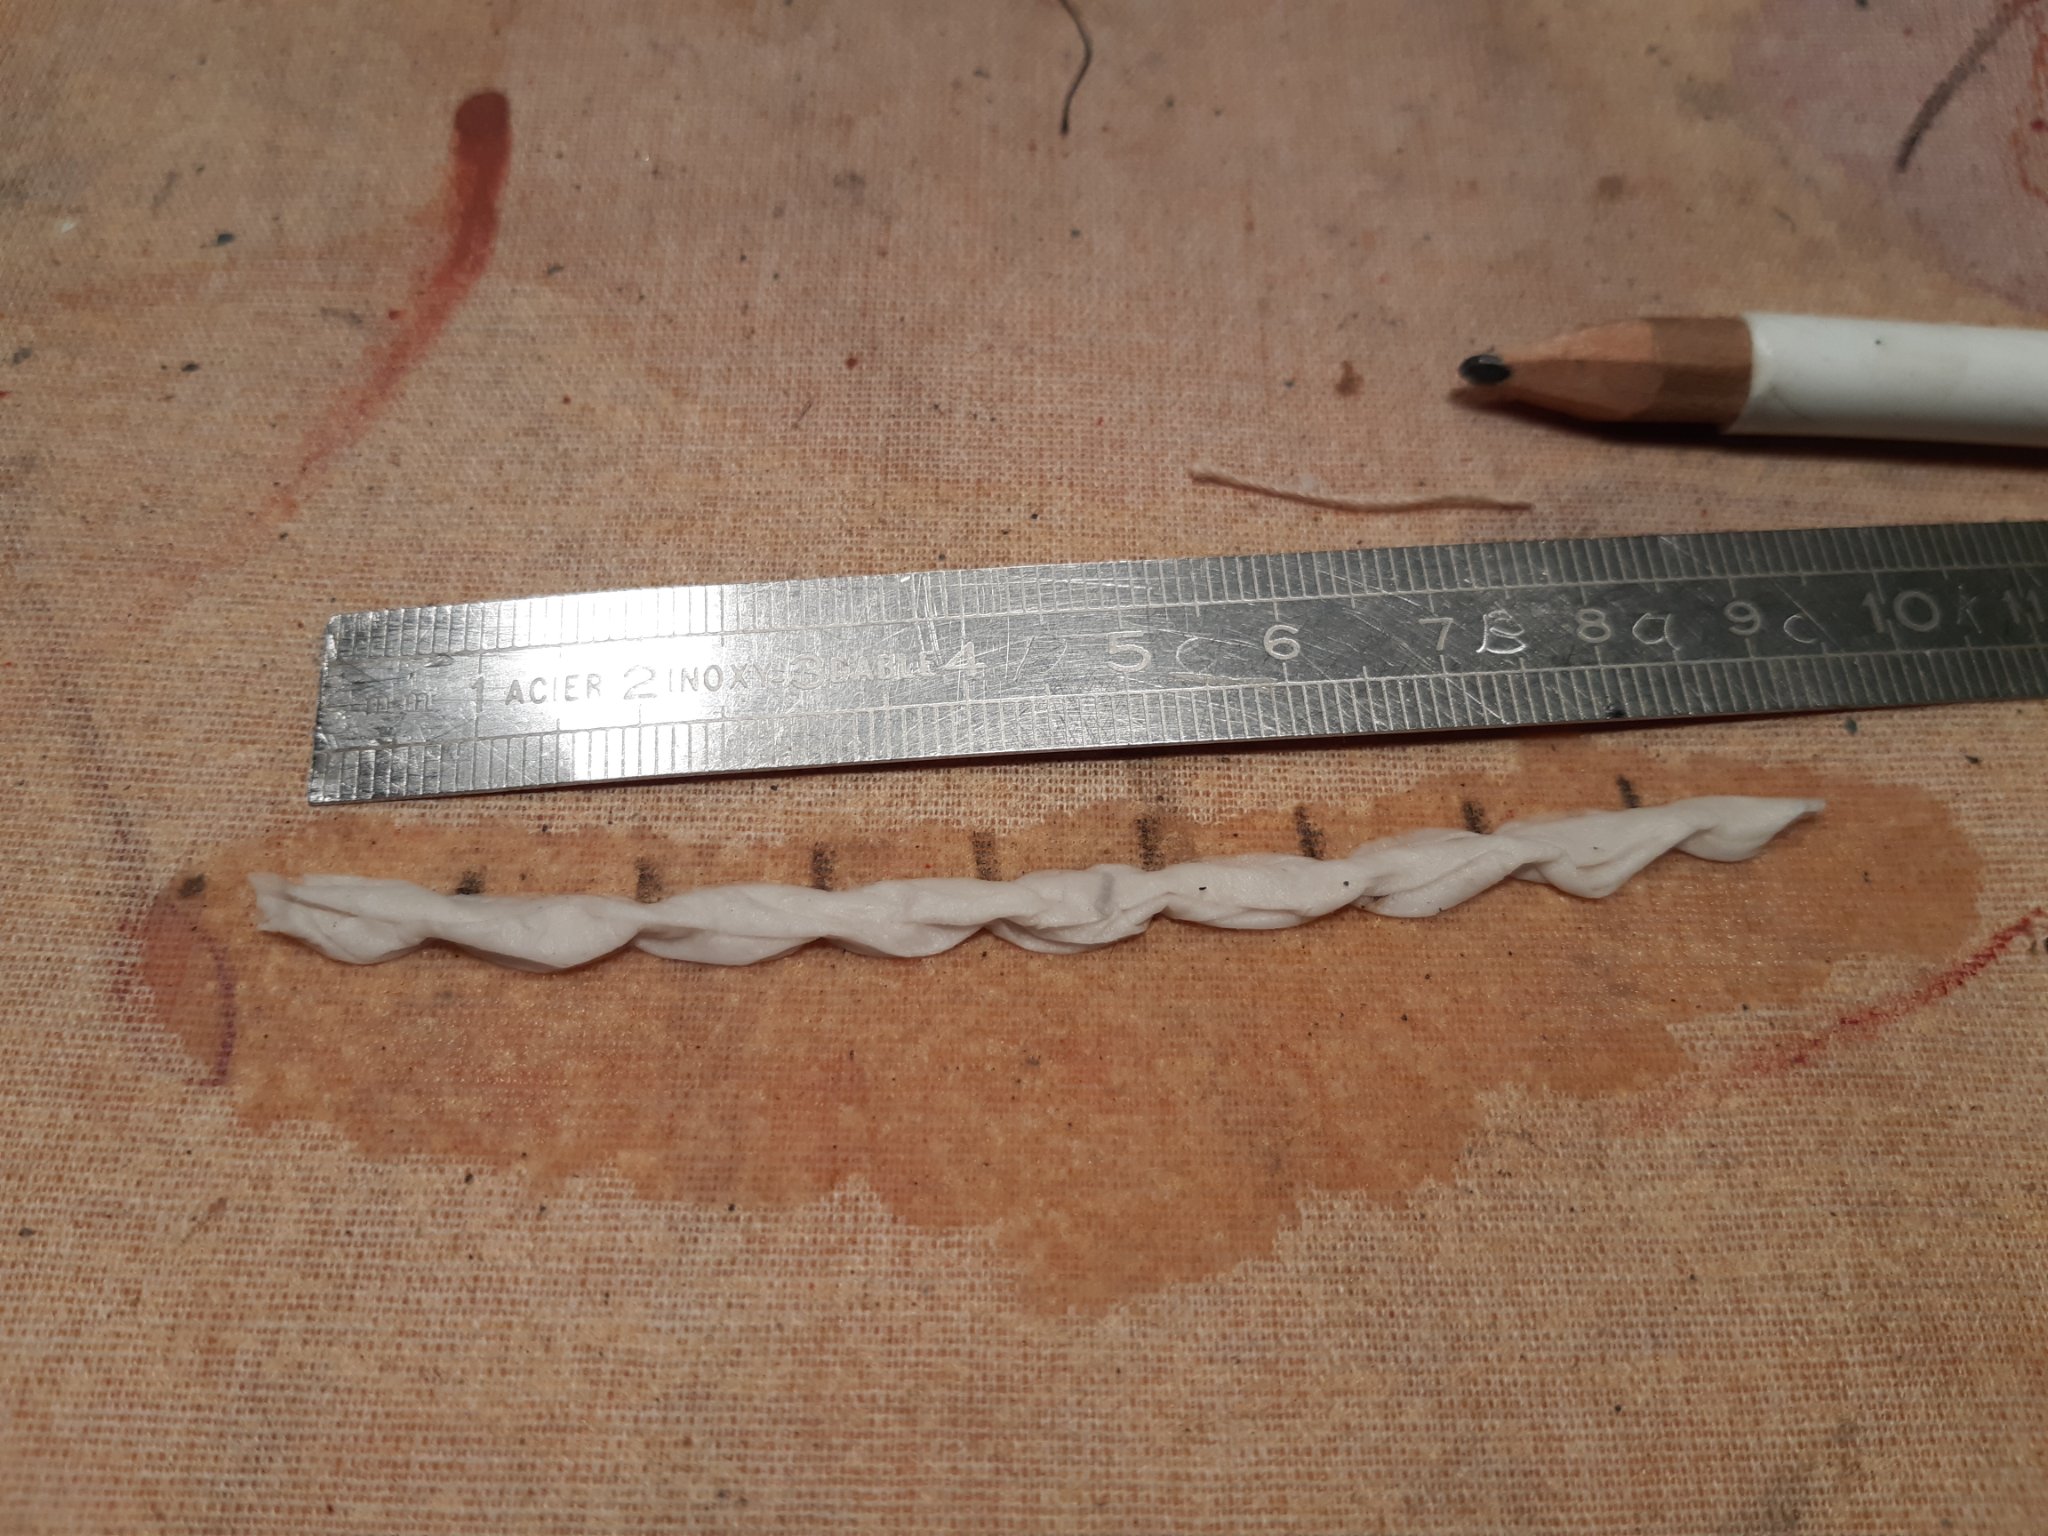
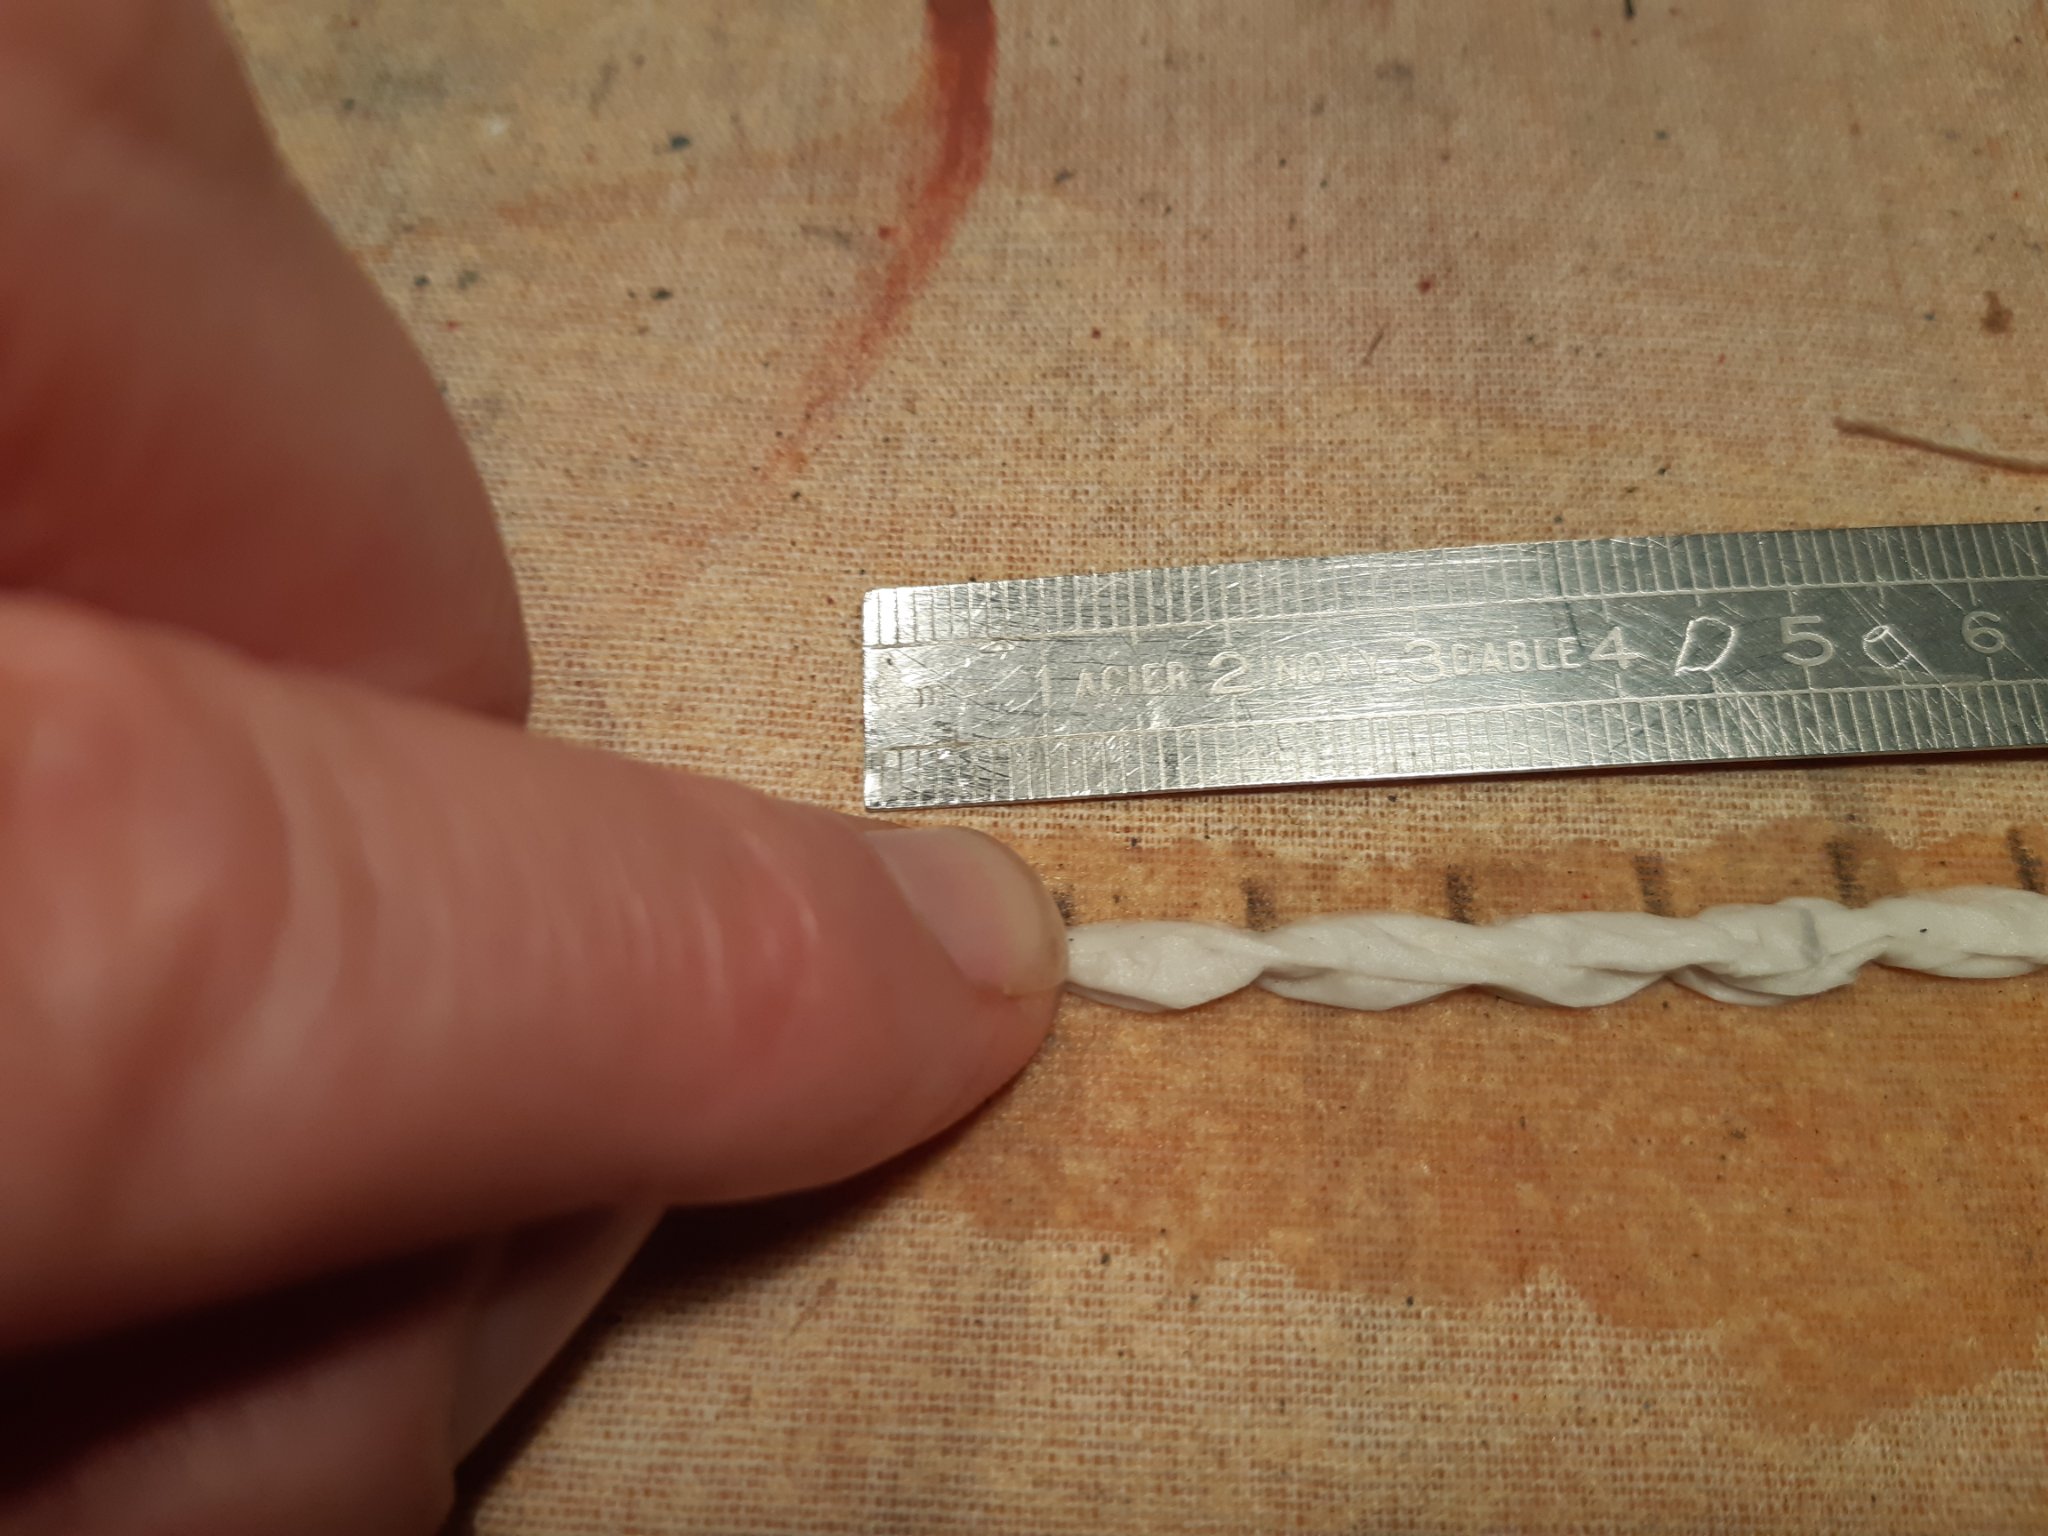
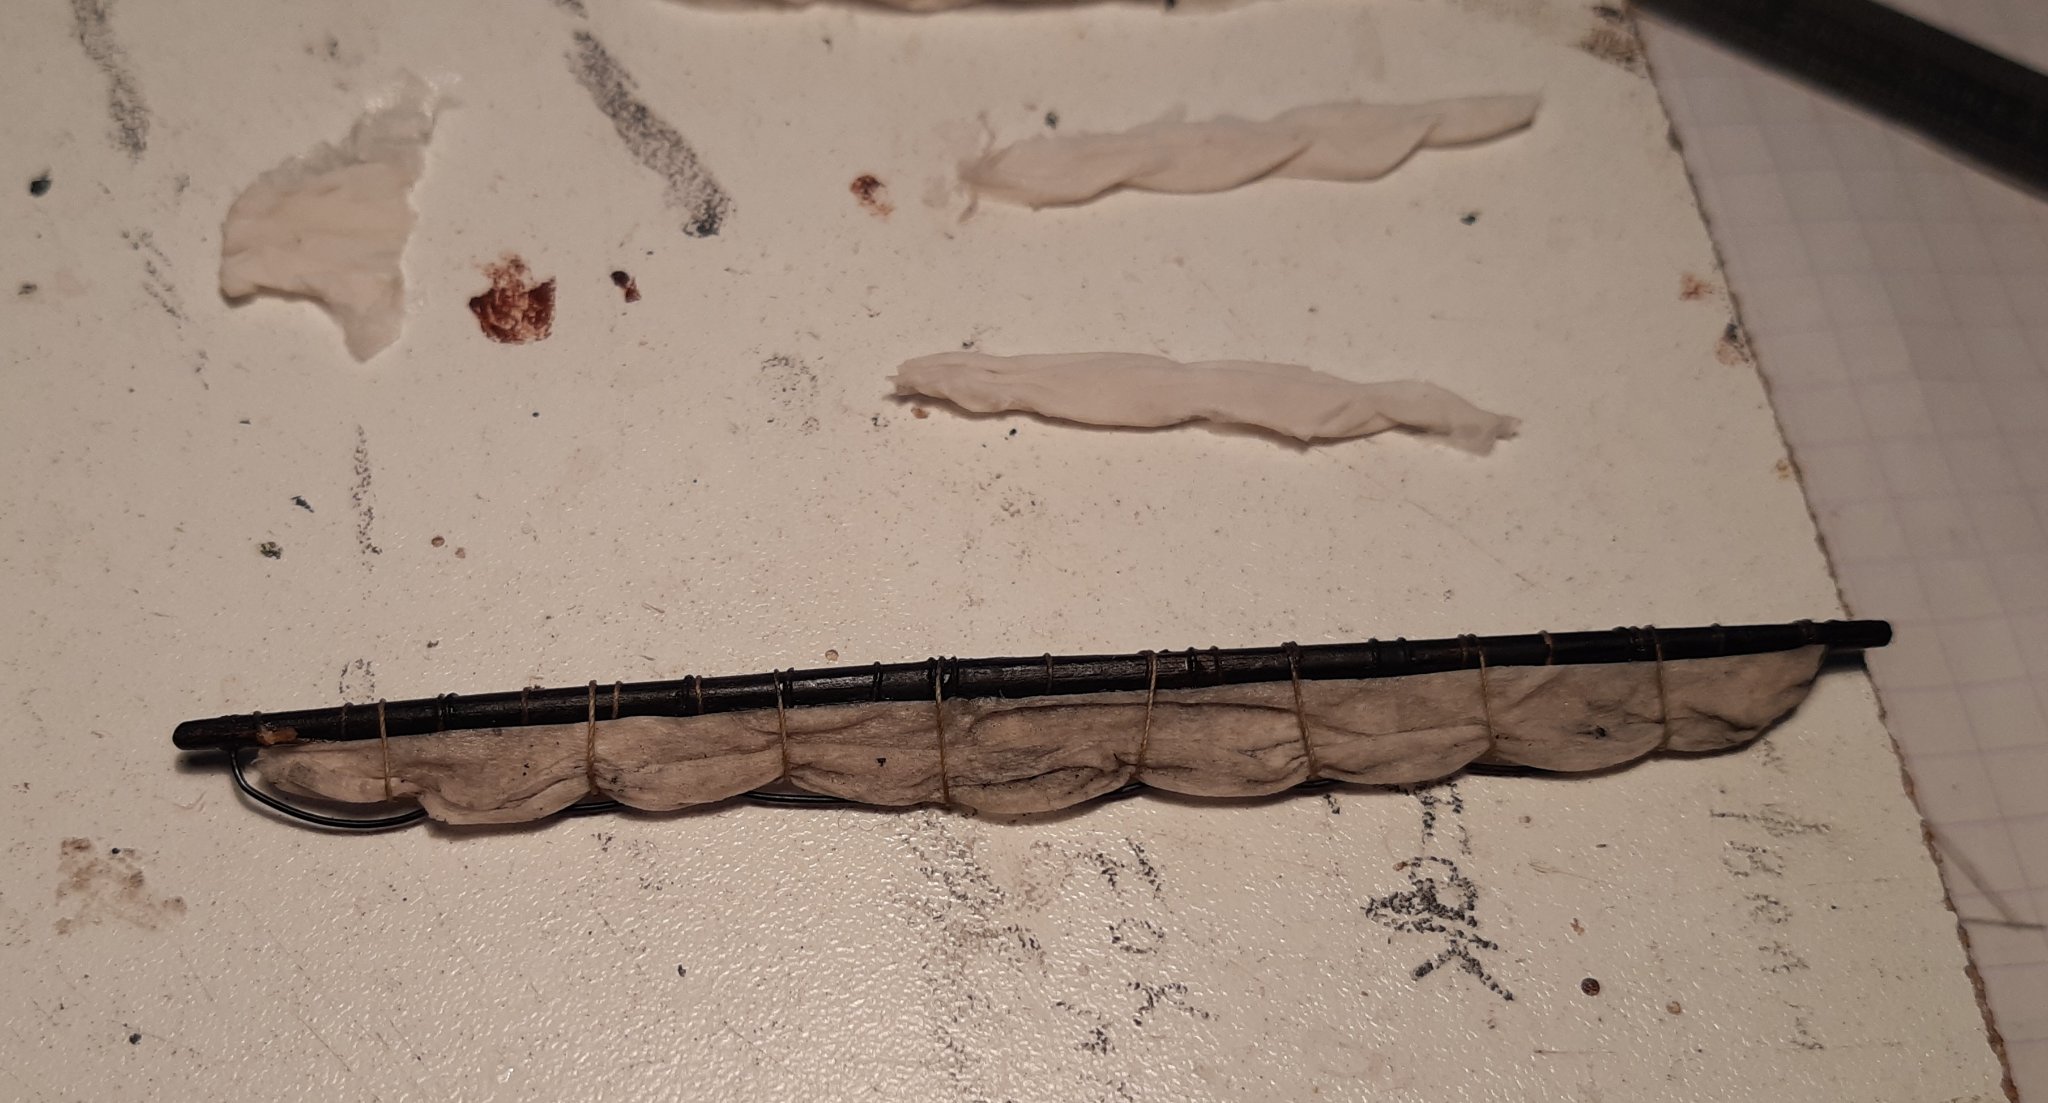
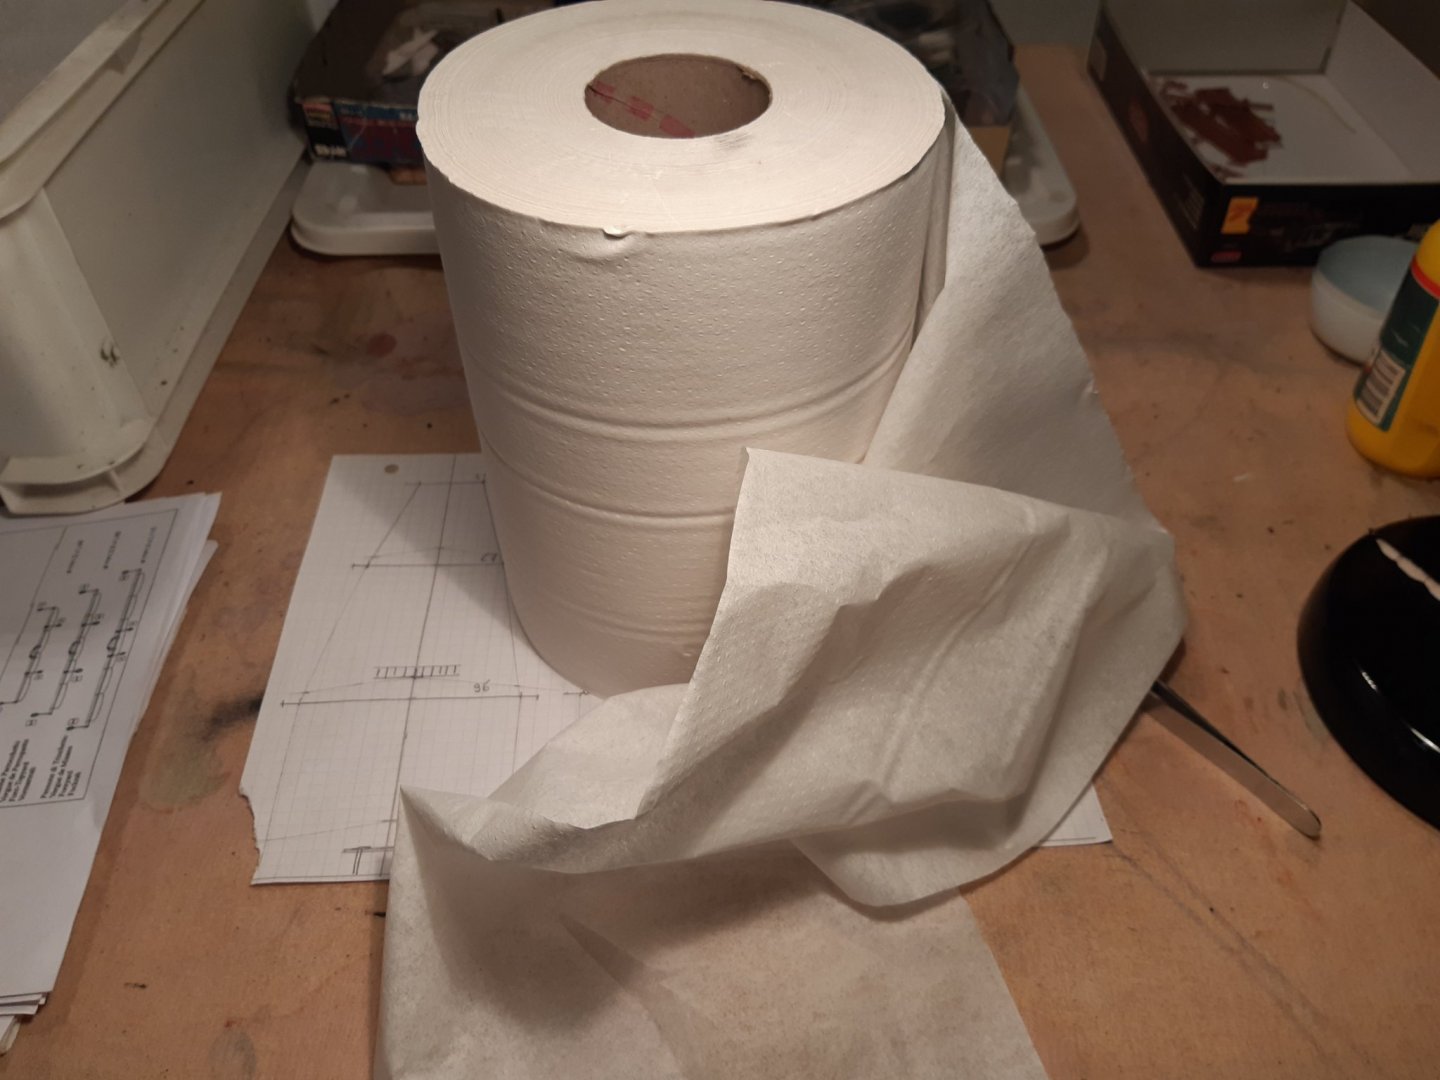
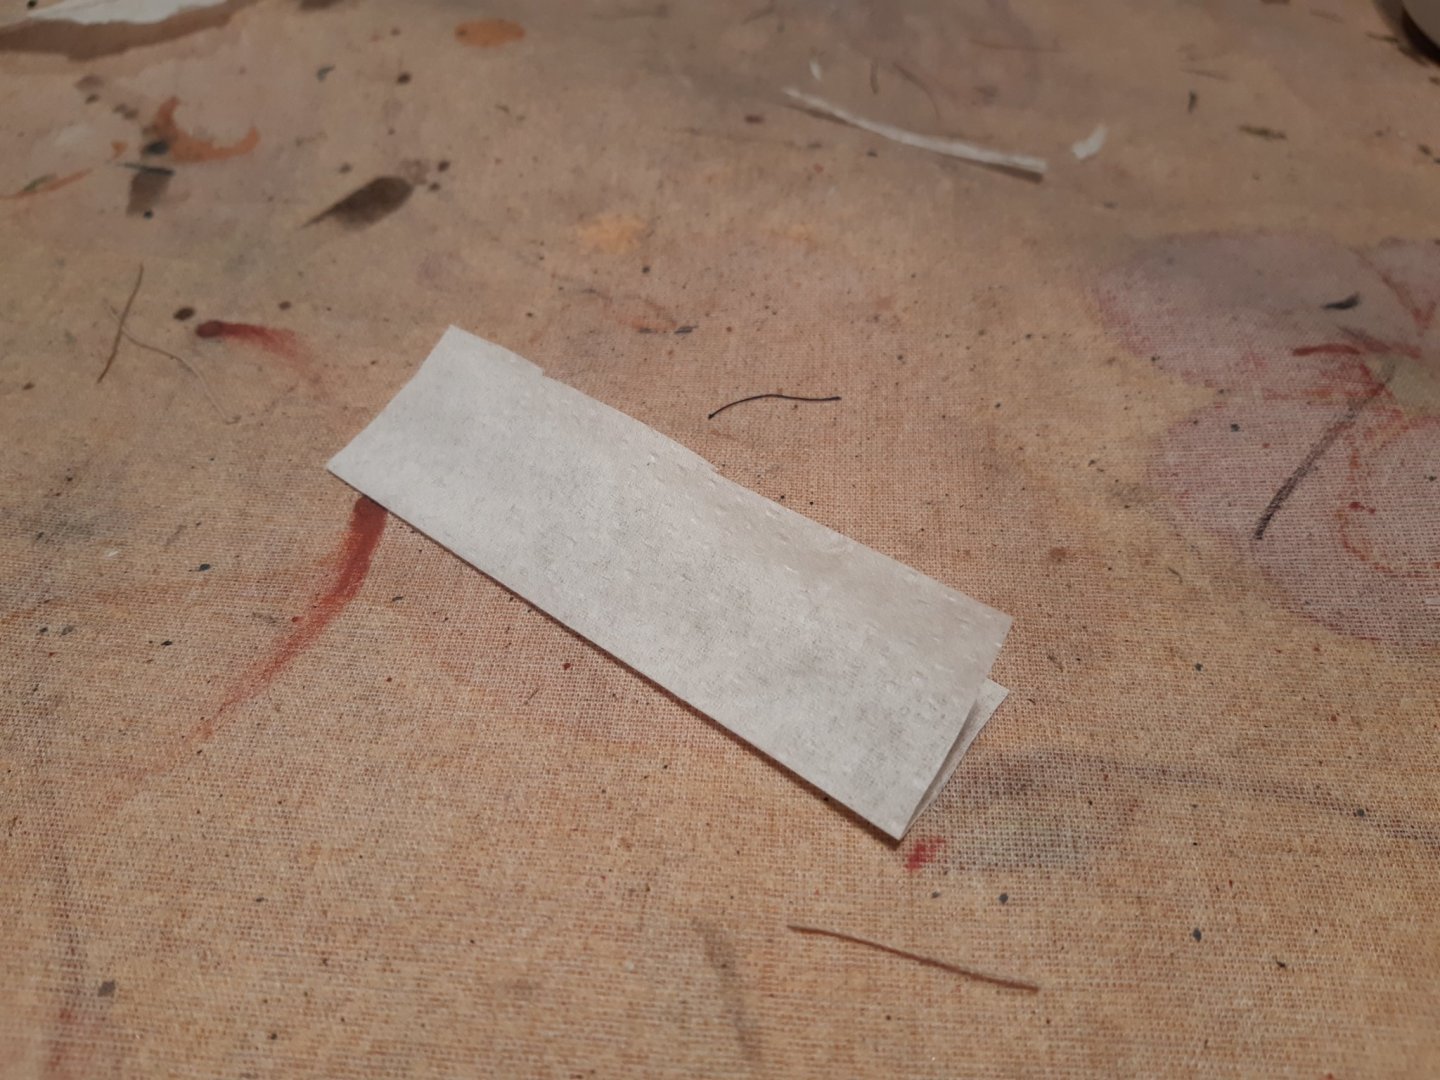
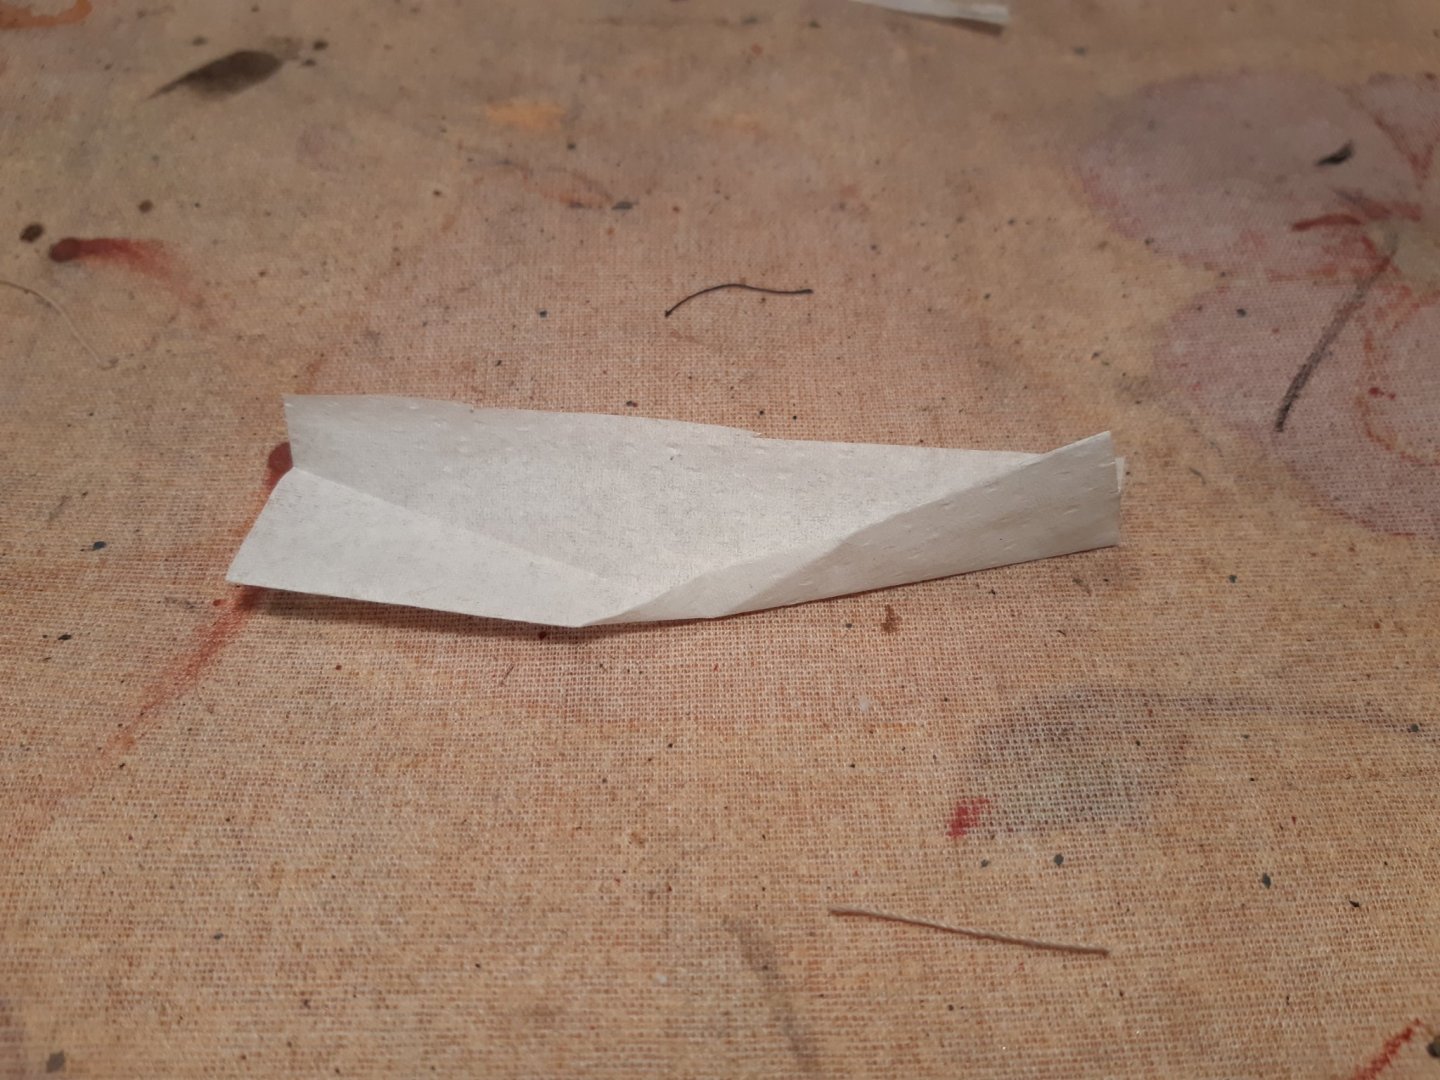
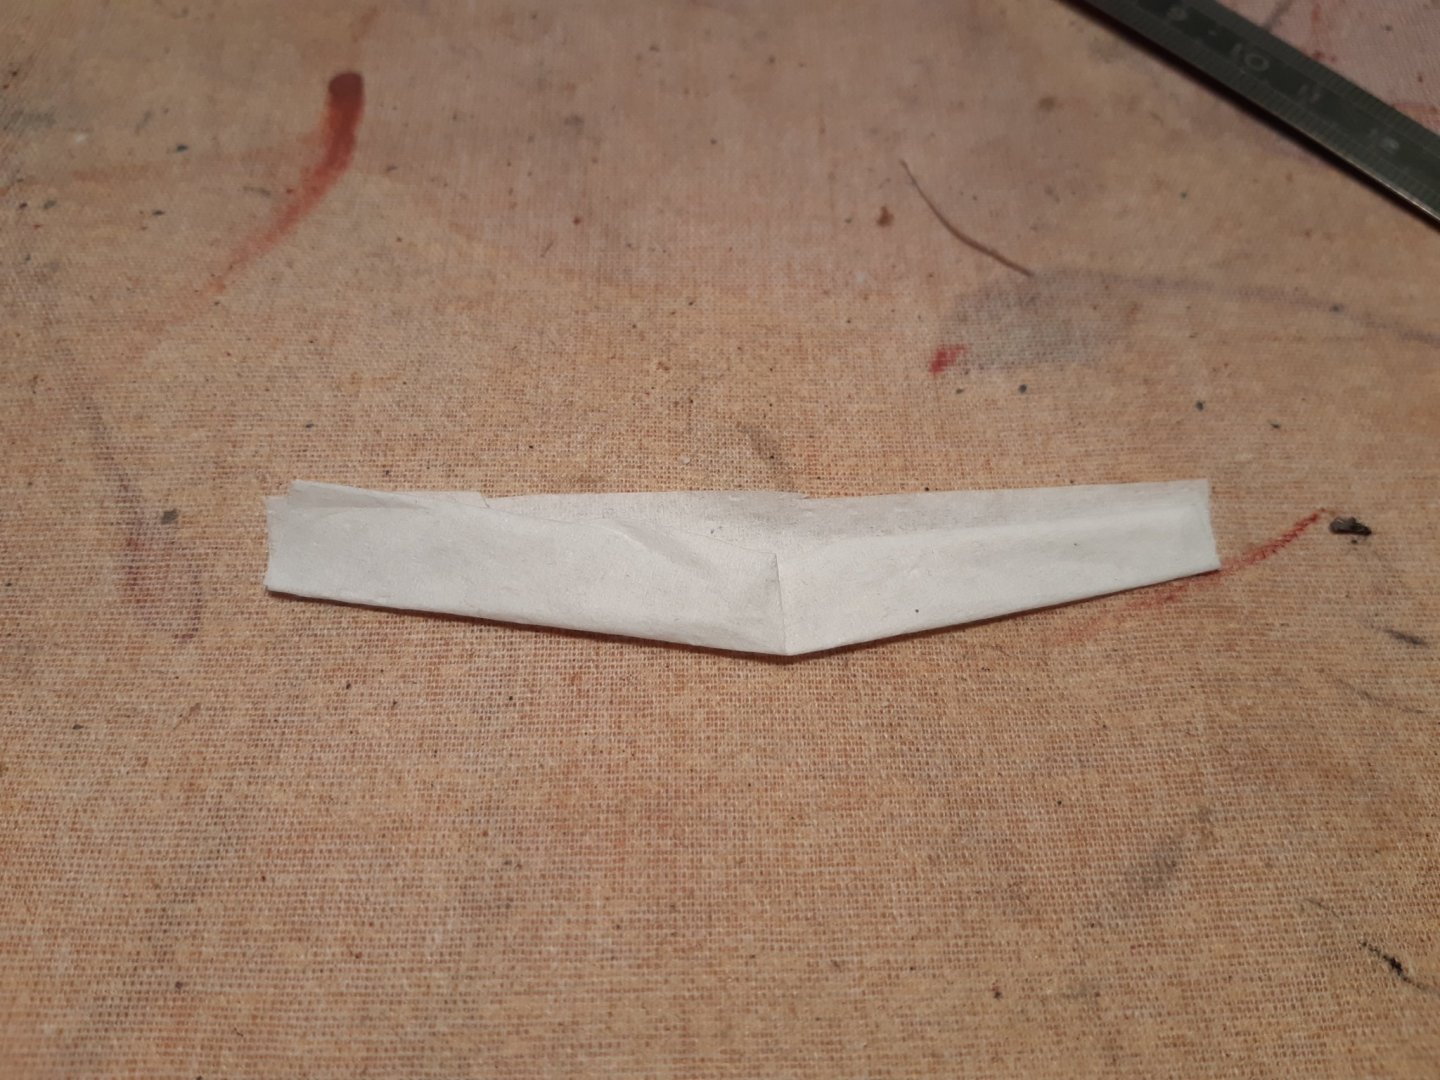
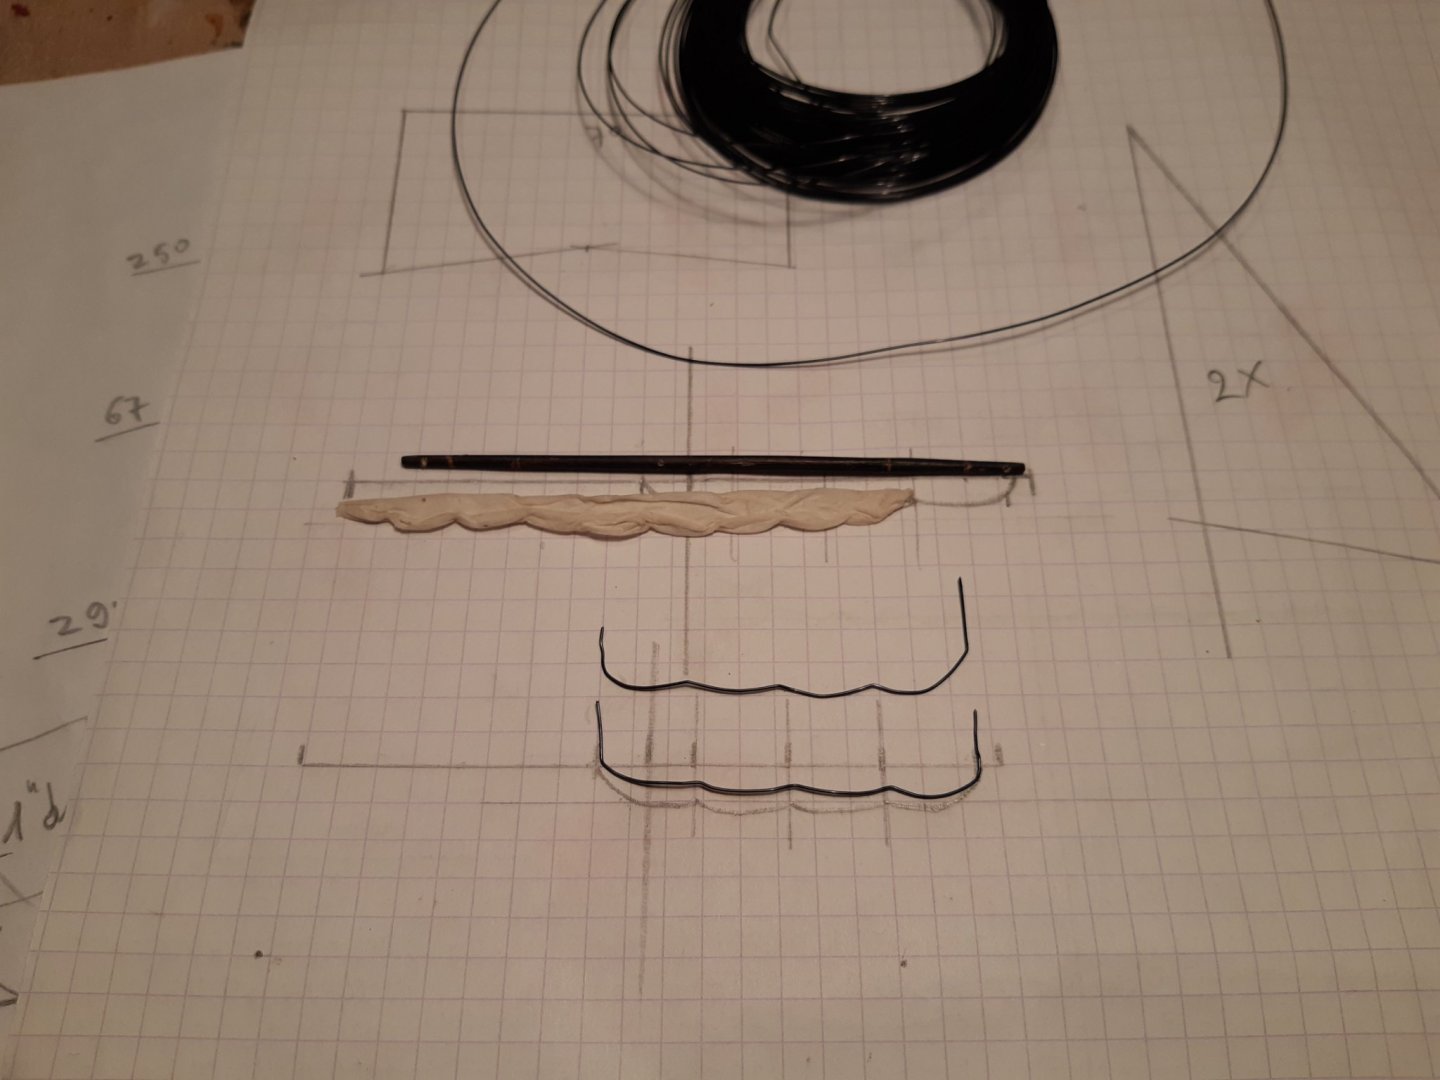
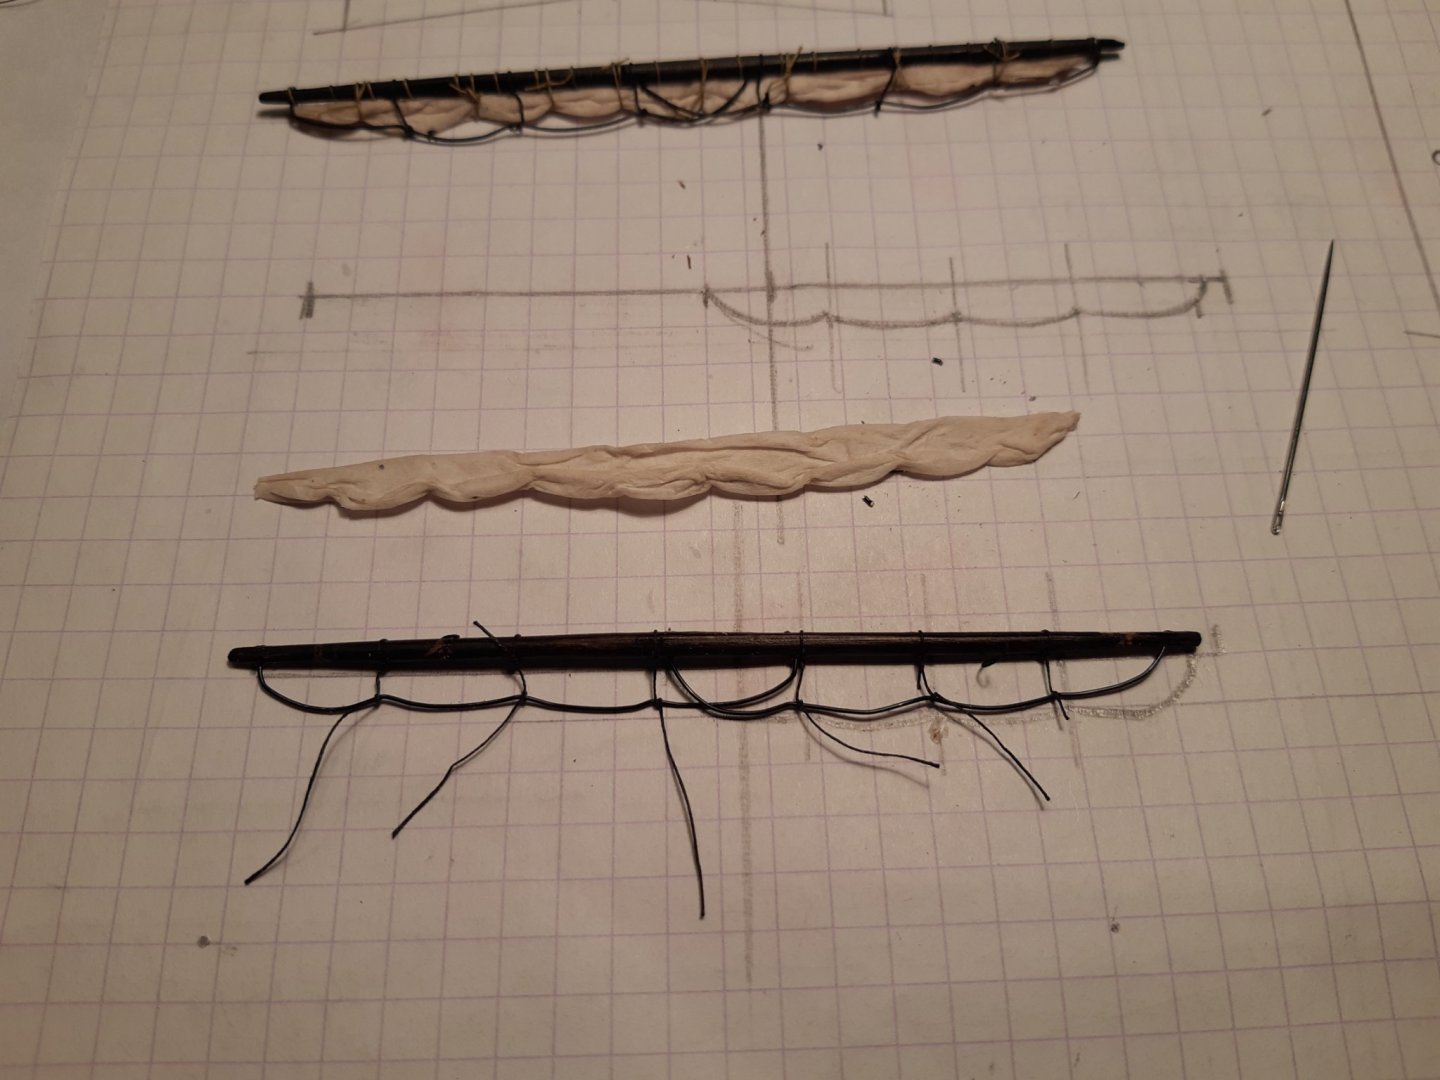
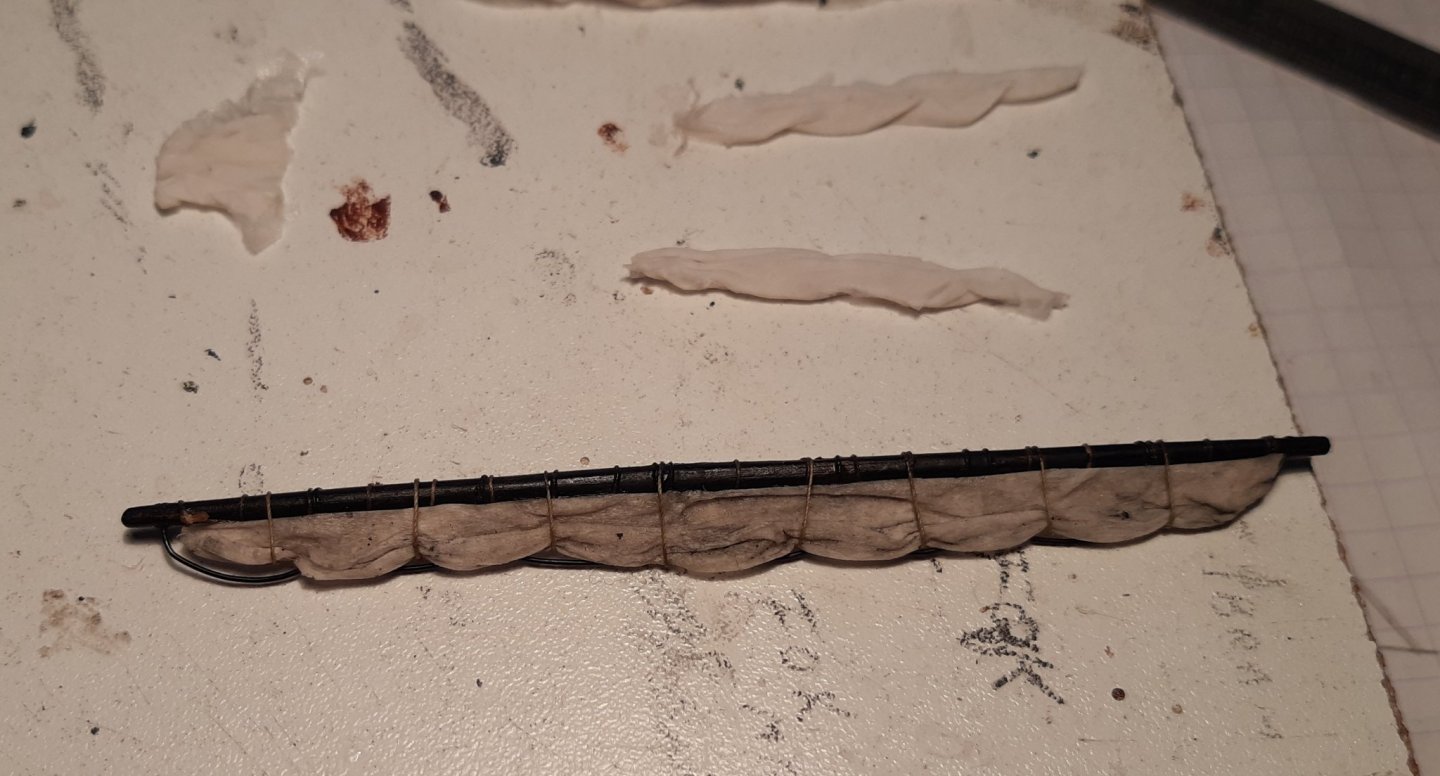
the "tissue" is from a roll of paper used in factories,garages. To dry hands after washing, clean up oil or dirt, ect. low quality paper, but suited for furled sails.
-
Smal update The sails are finished and i started with the rigging. The aim is to apply as much rigging as possible. Since I am not an expert in 18th century rigging, there may be something here and there that is not entirely correcty Thanks for following


- 173 replies
-
- 10
-
-
-
"the hoe on the feet" and "I've shot myself in the foot"... I just do 🤣 These rails are going to be more work But in the end you will be more satisfied with your model
-
Did an update yesterday on how I made my sails (page 4) Ps, The GH had no footropes
- 265 replies
-
- 2
-

-
-
- Golden Hind
- Airfix
- (and 1 more)
-
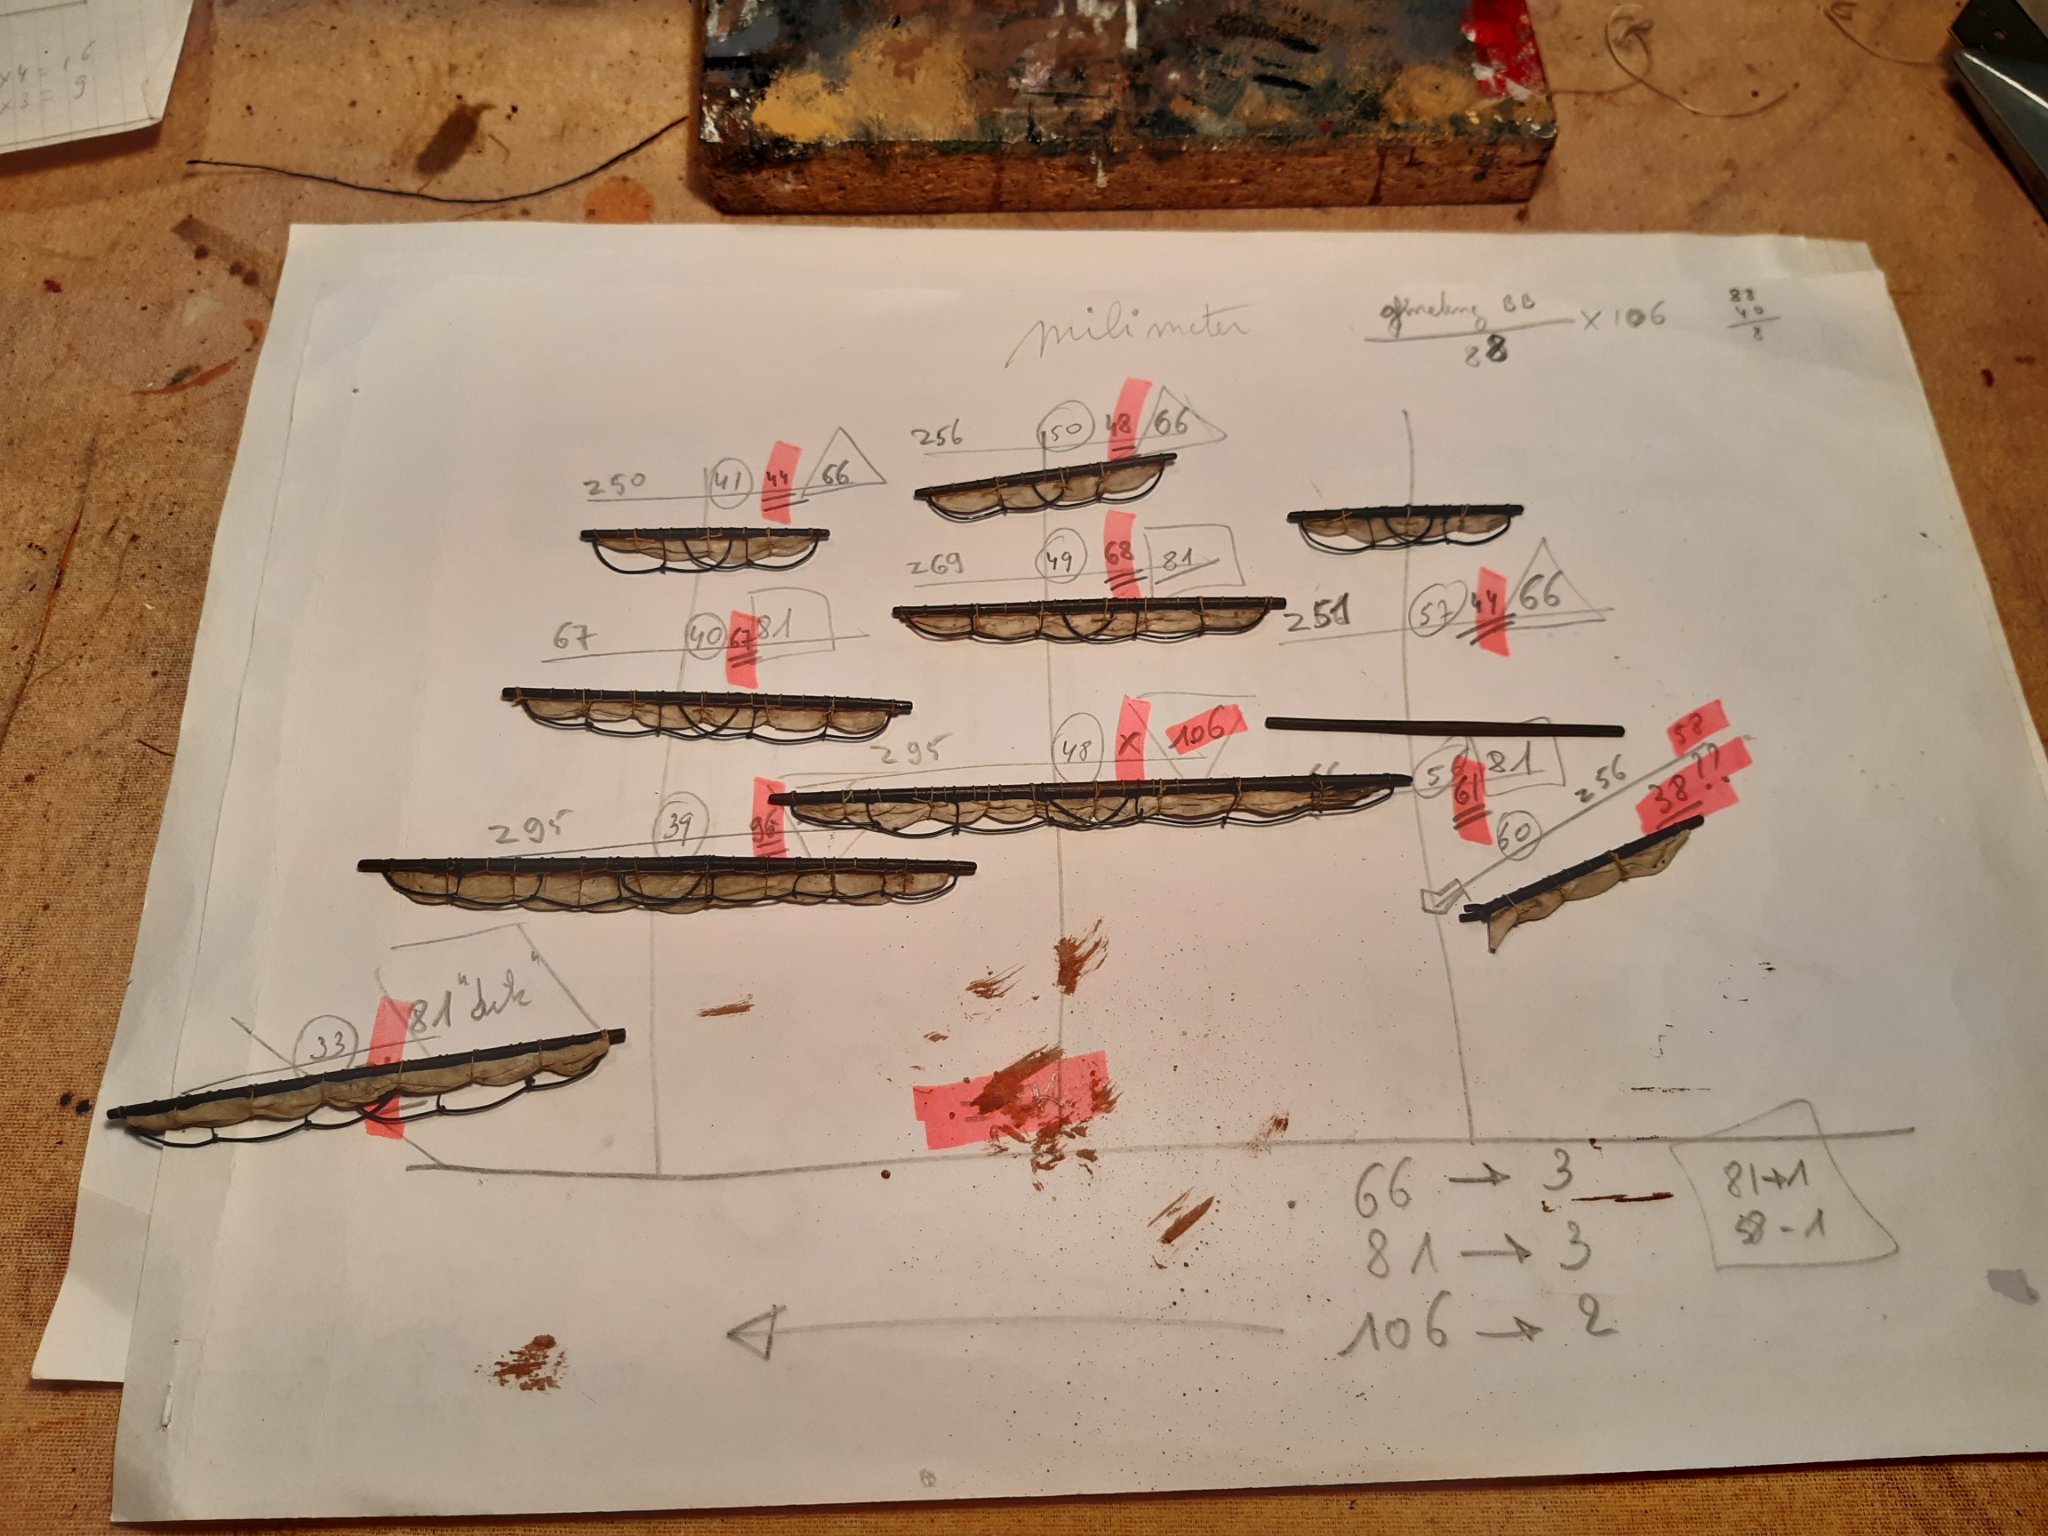
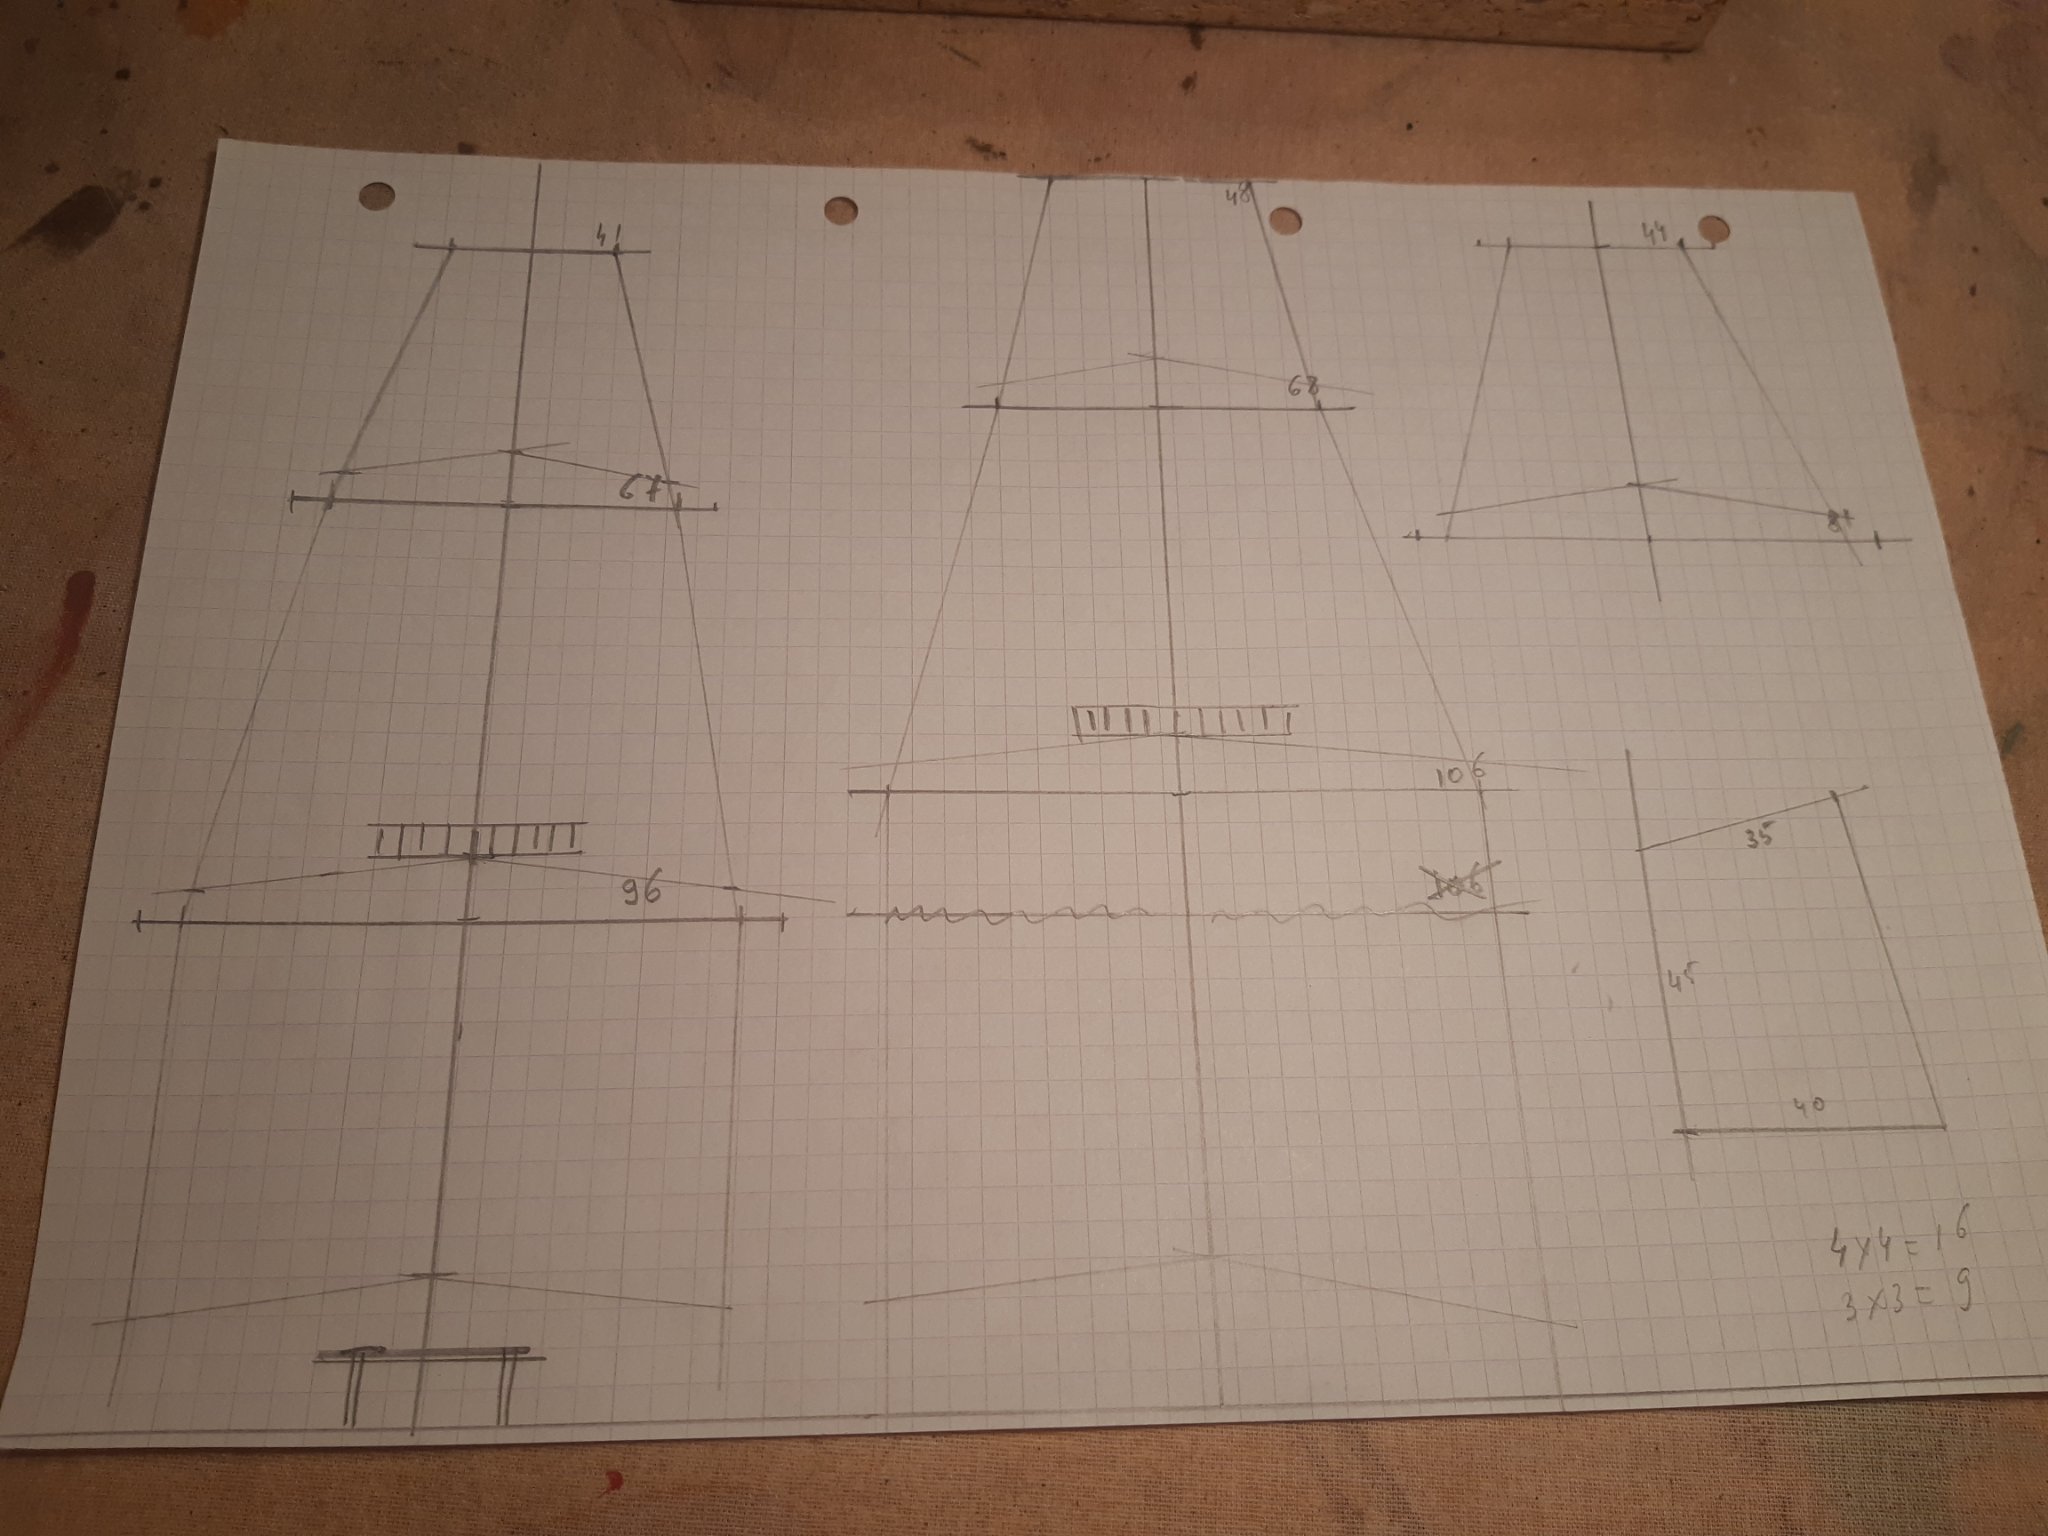
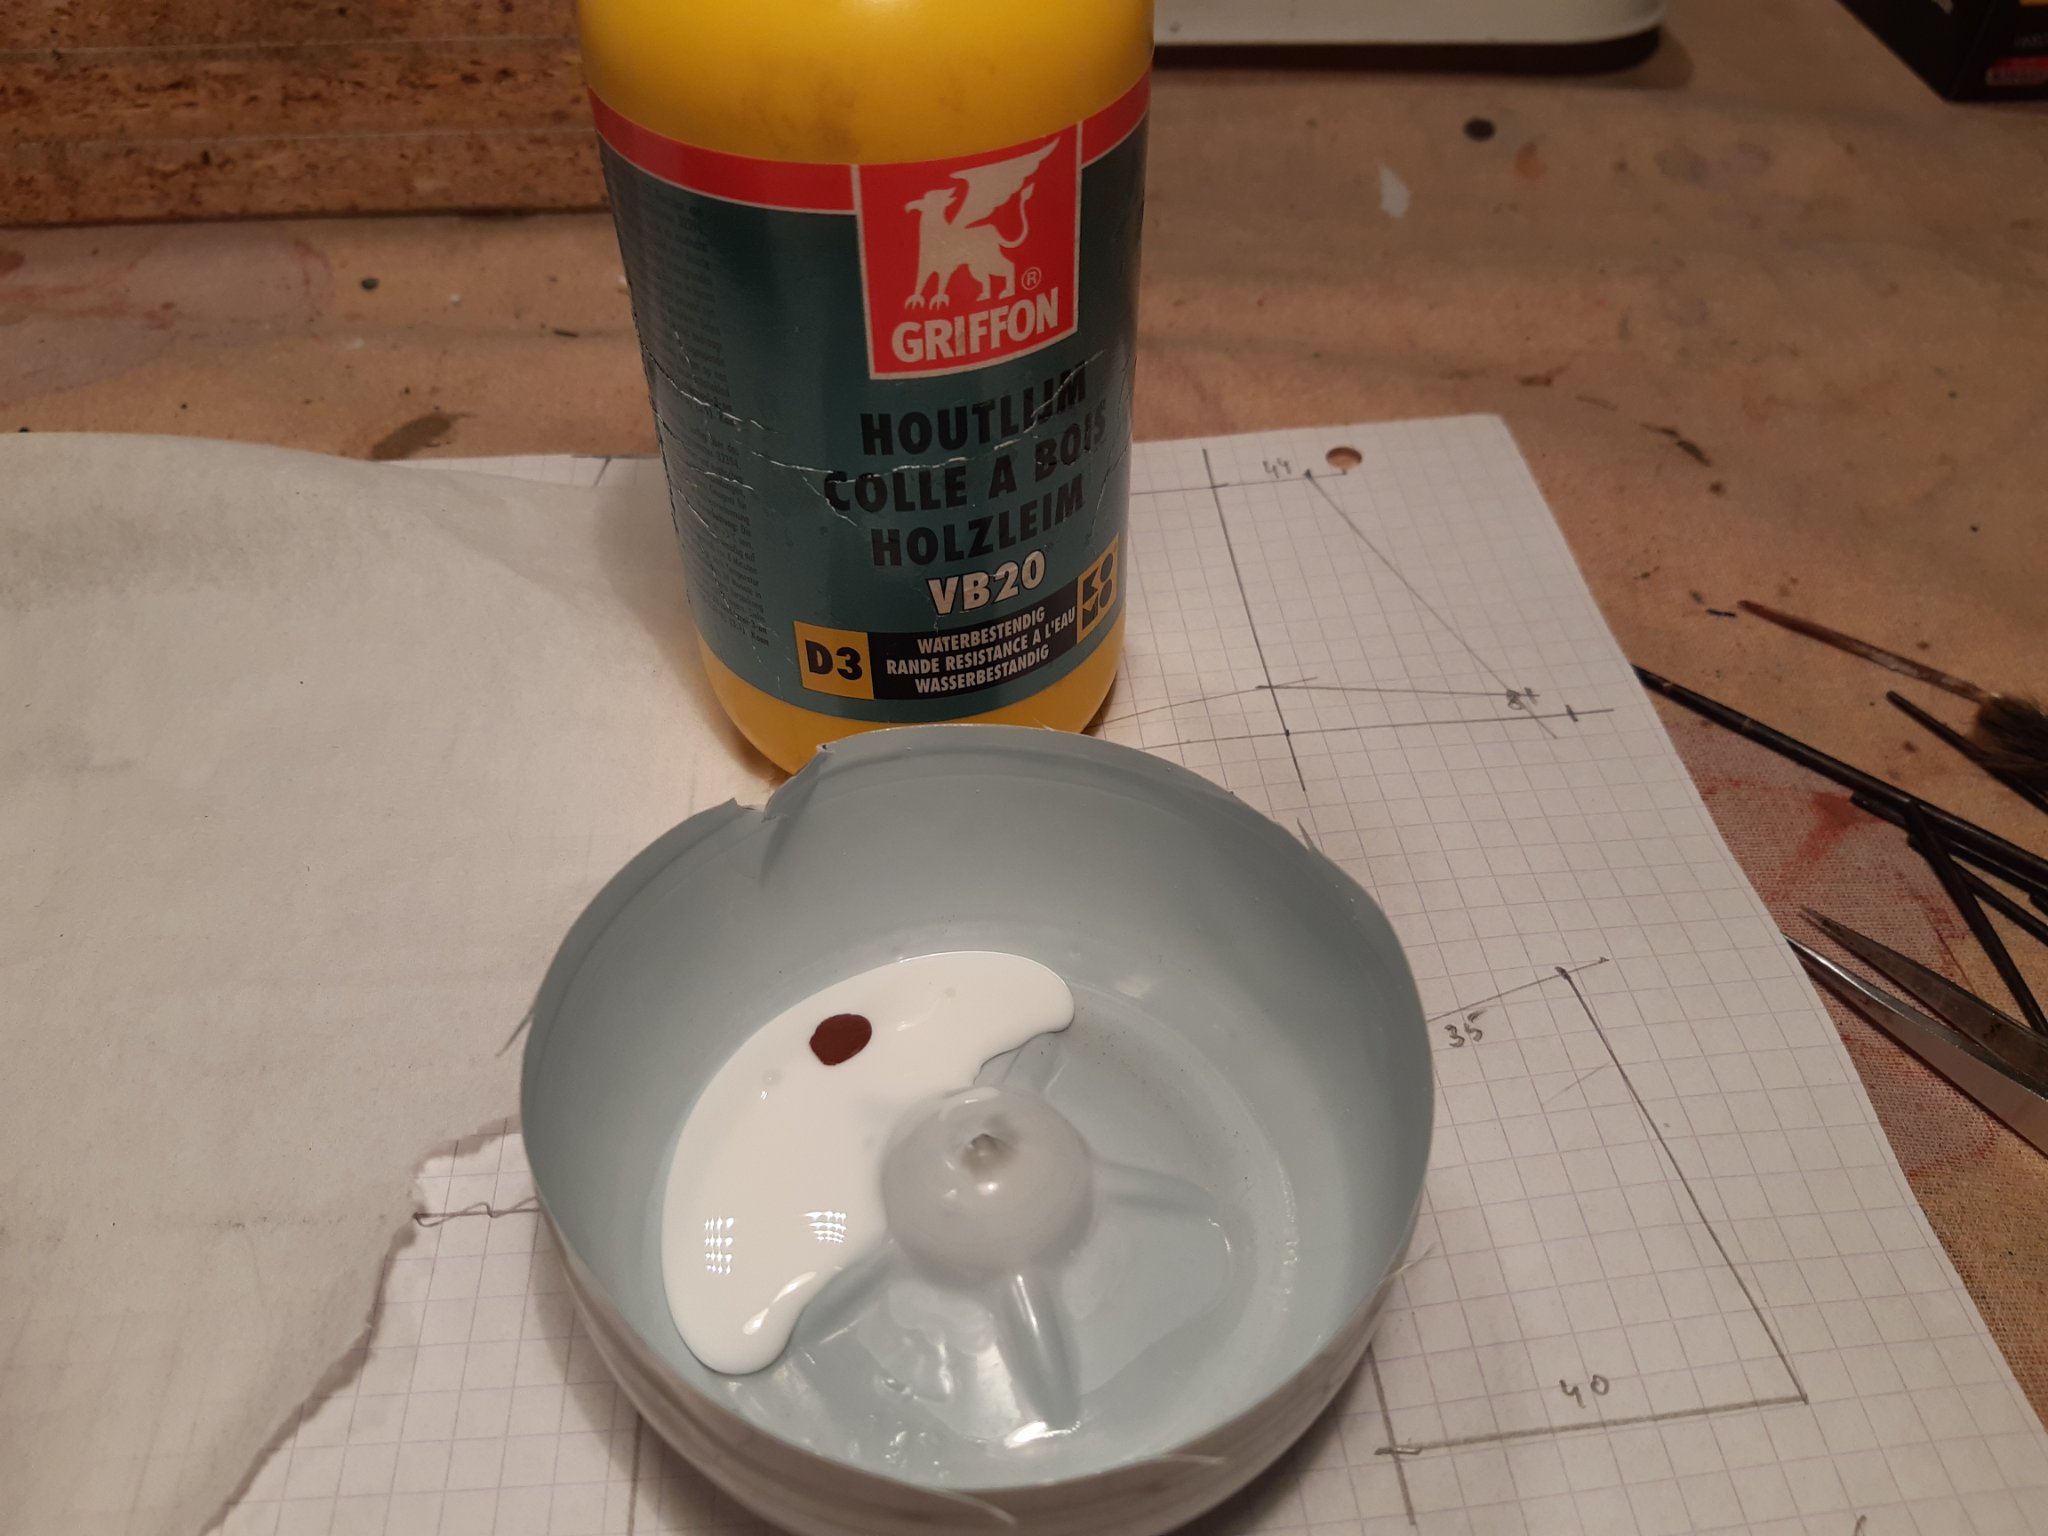
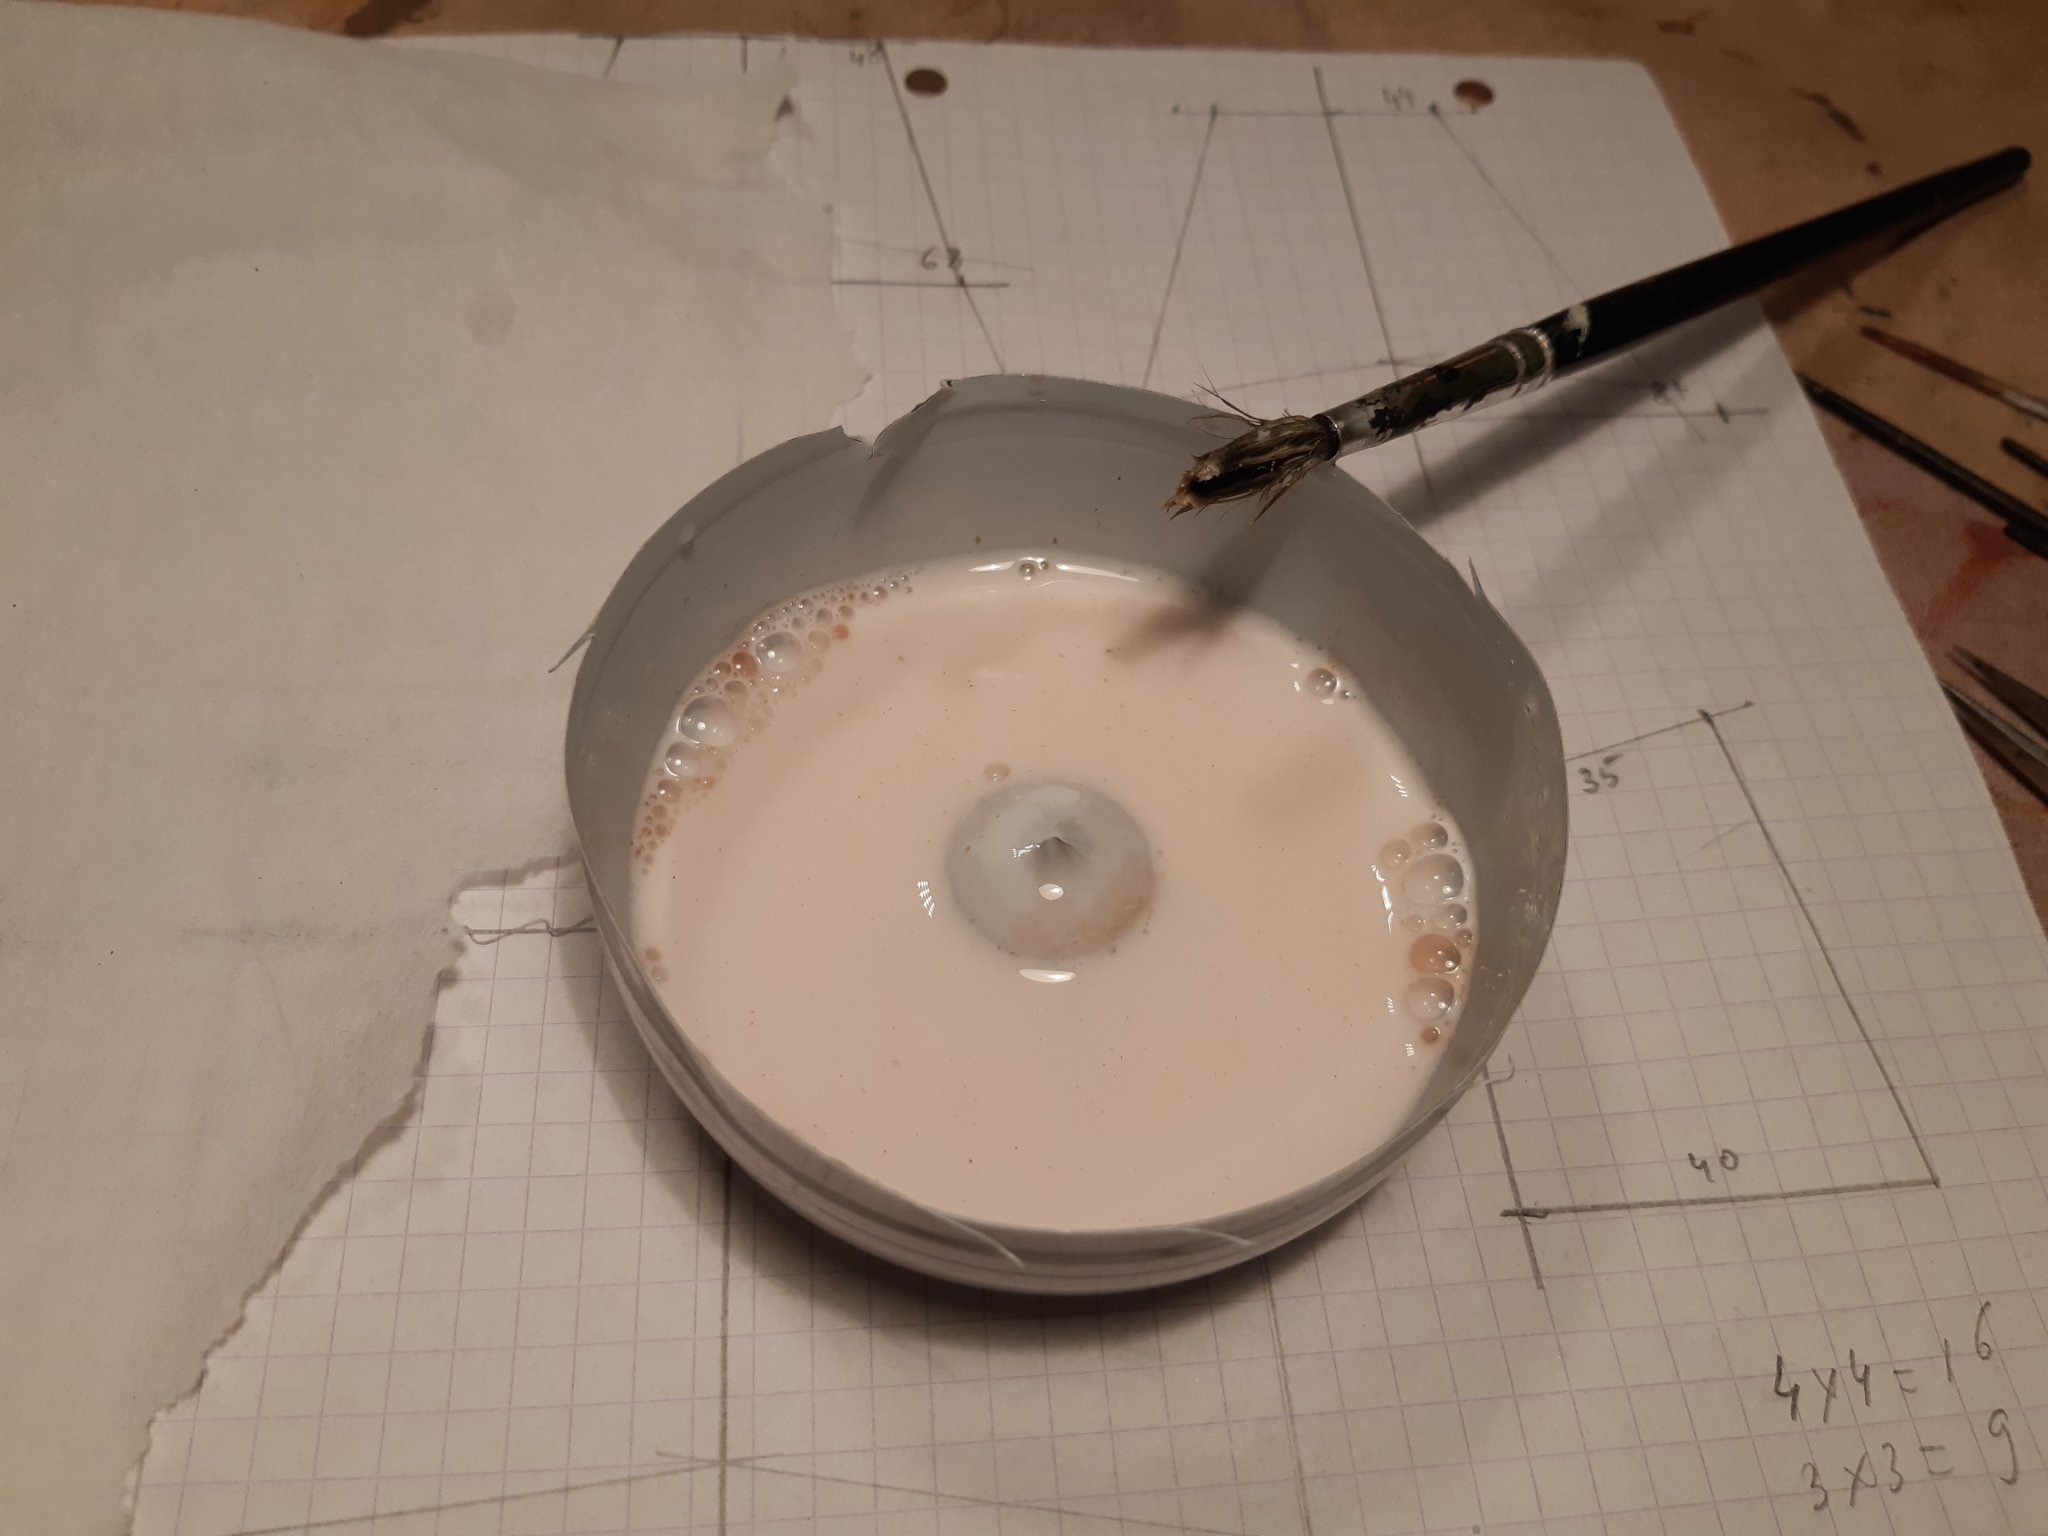
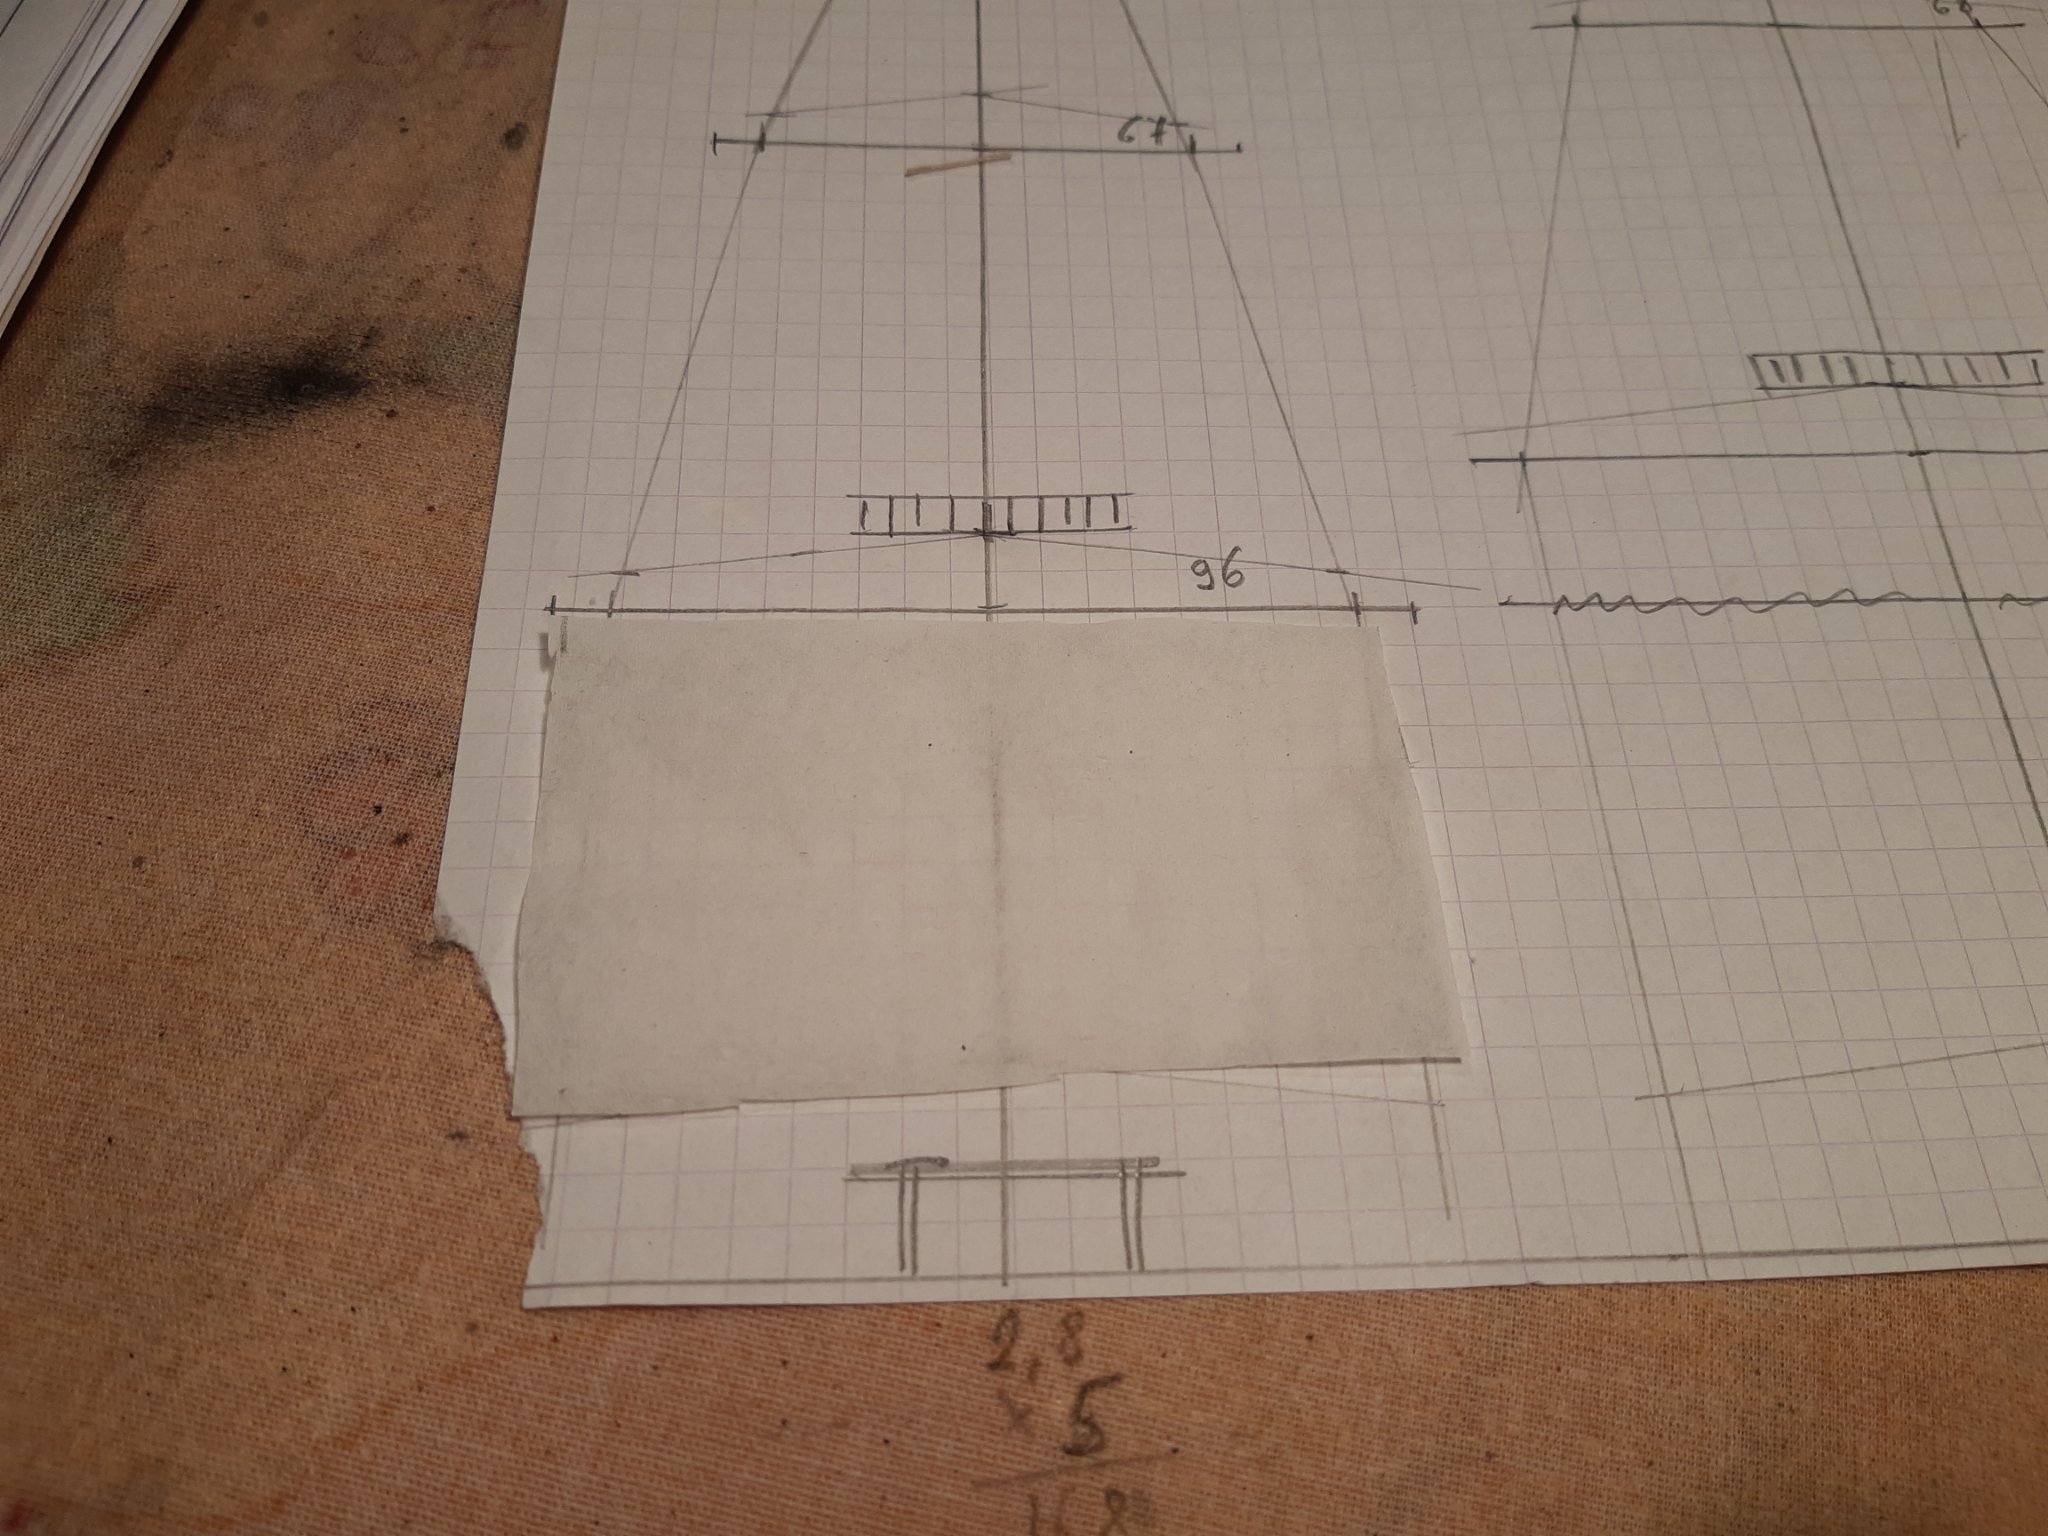
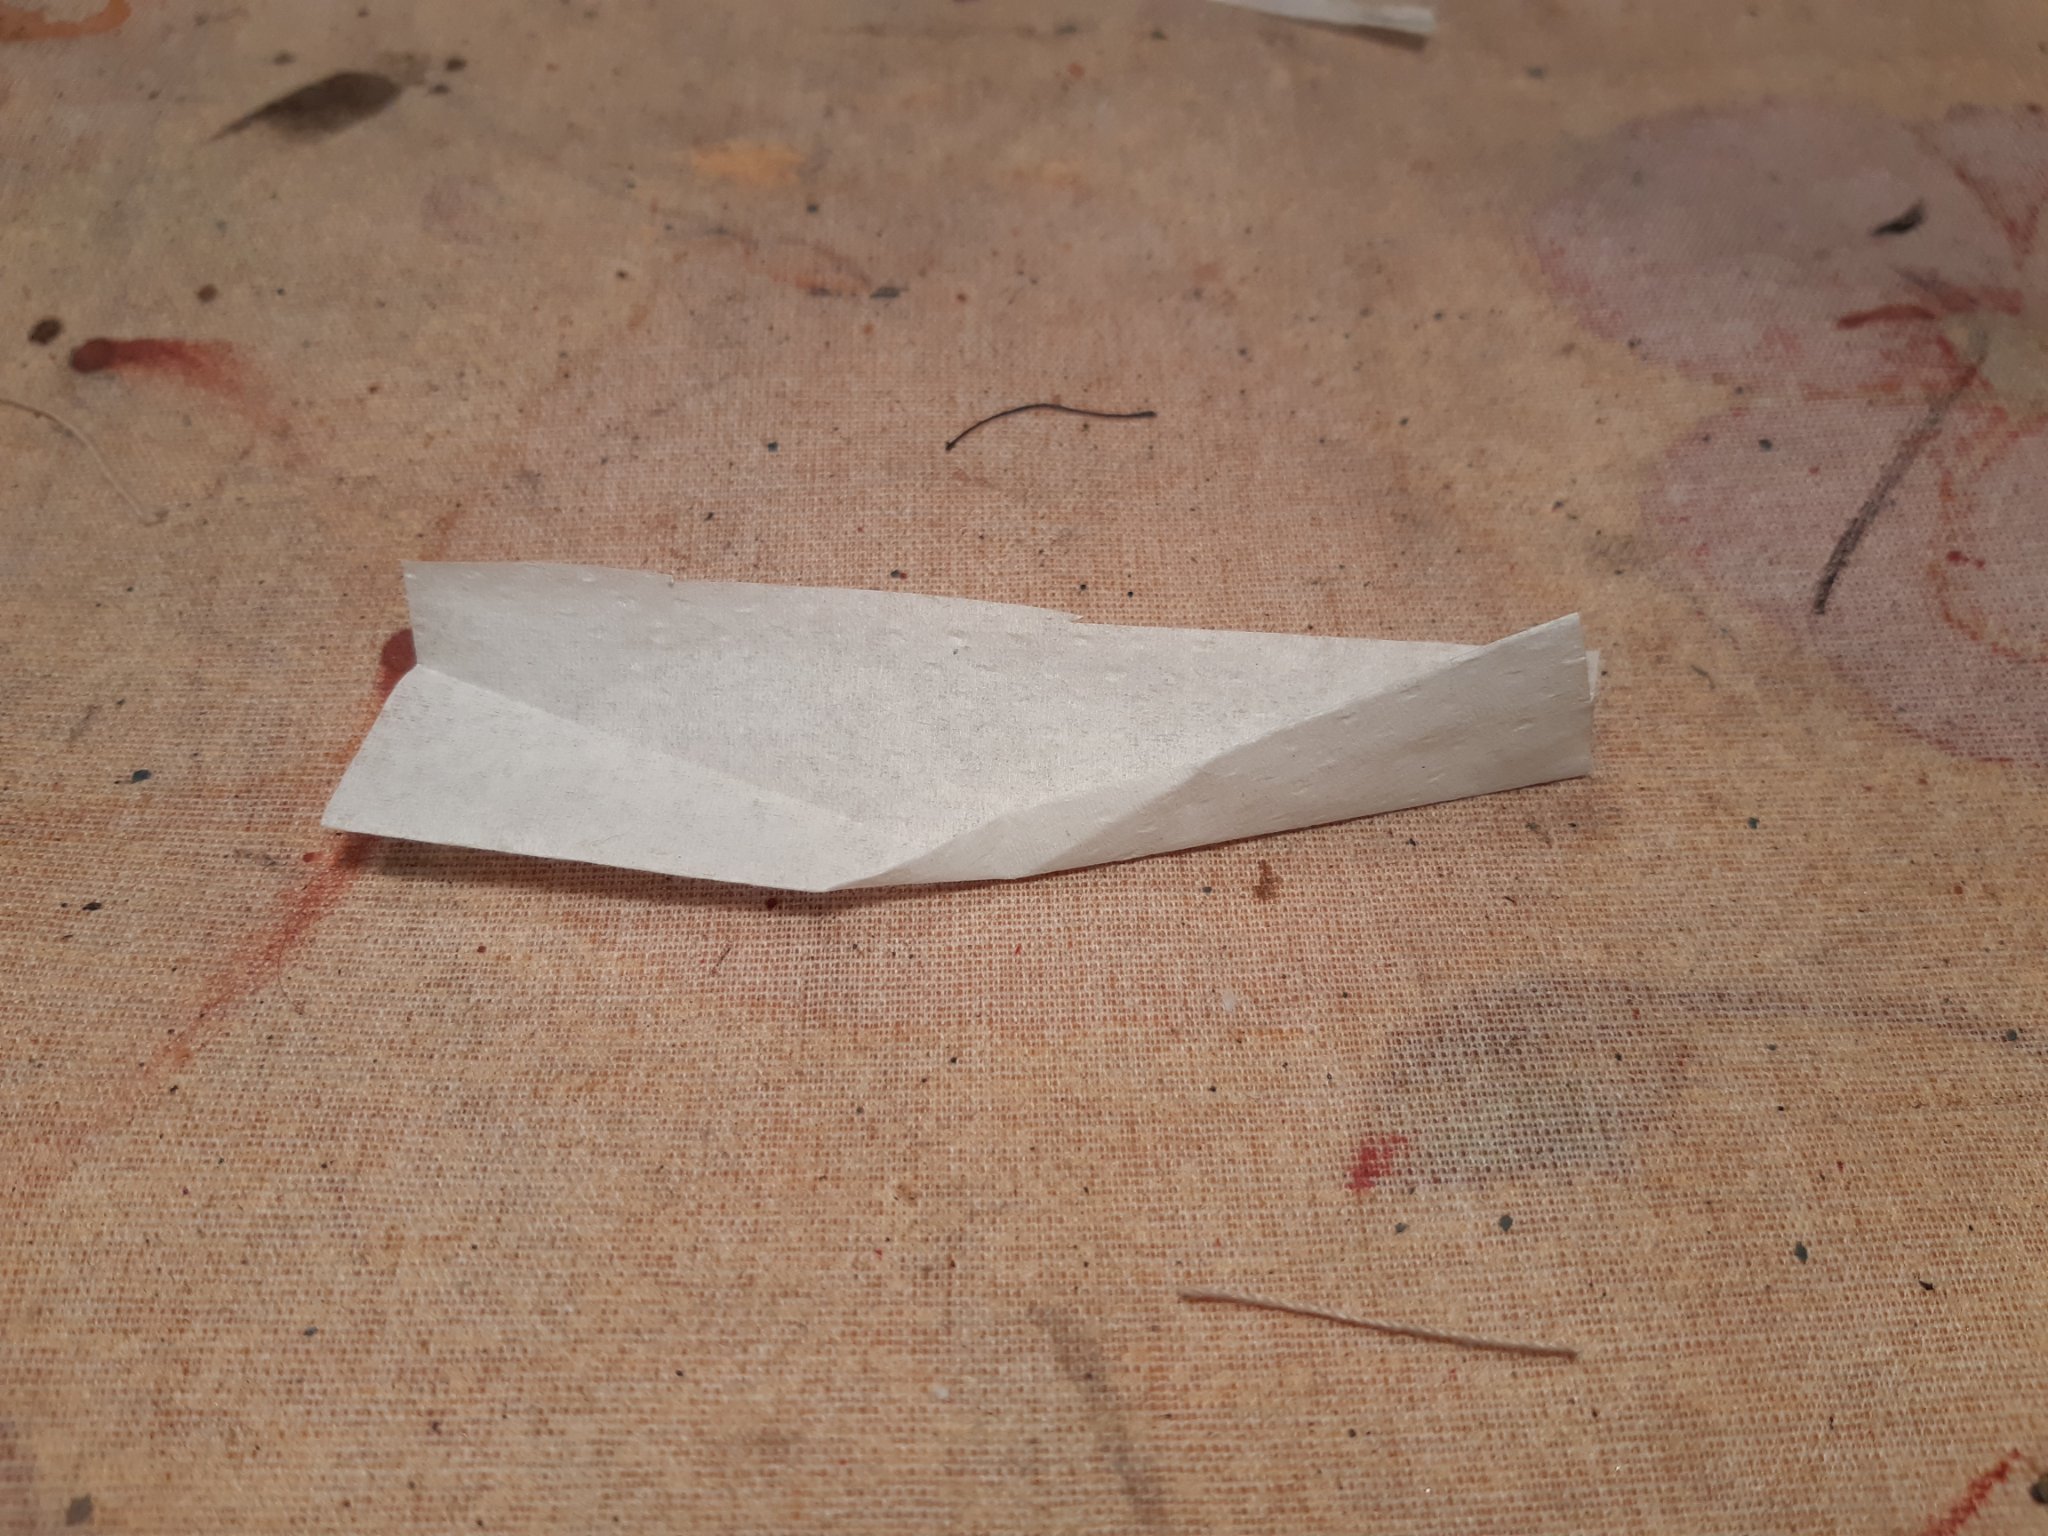
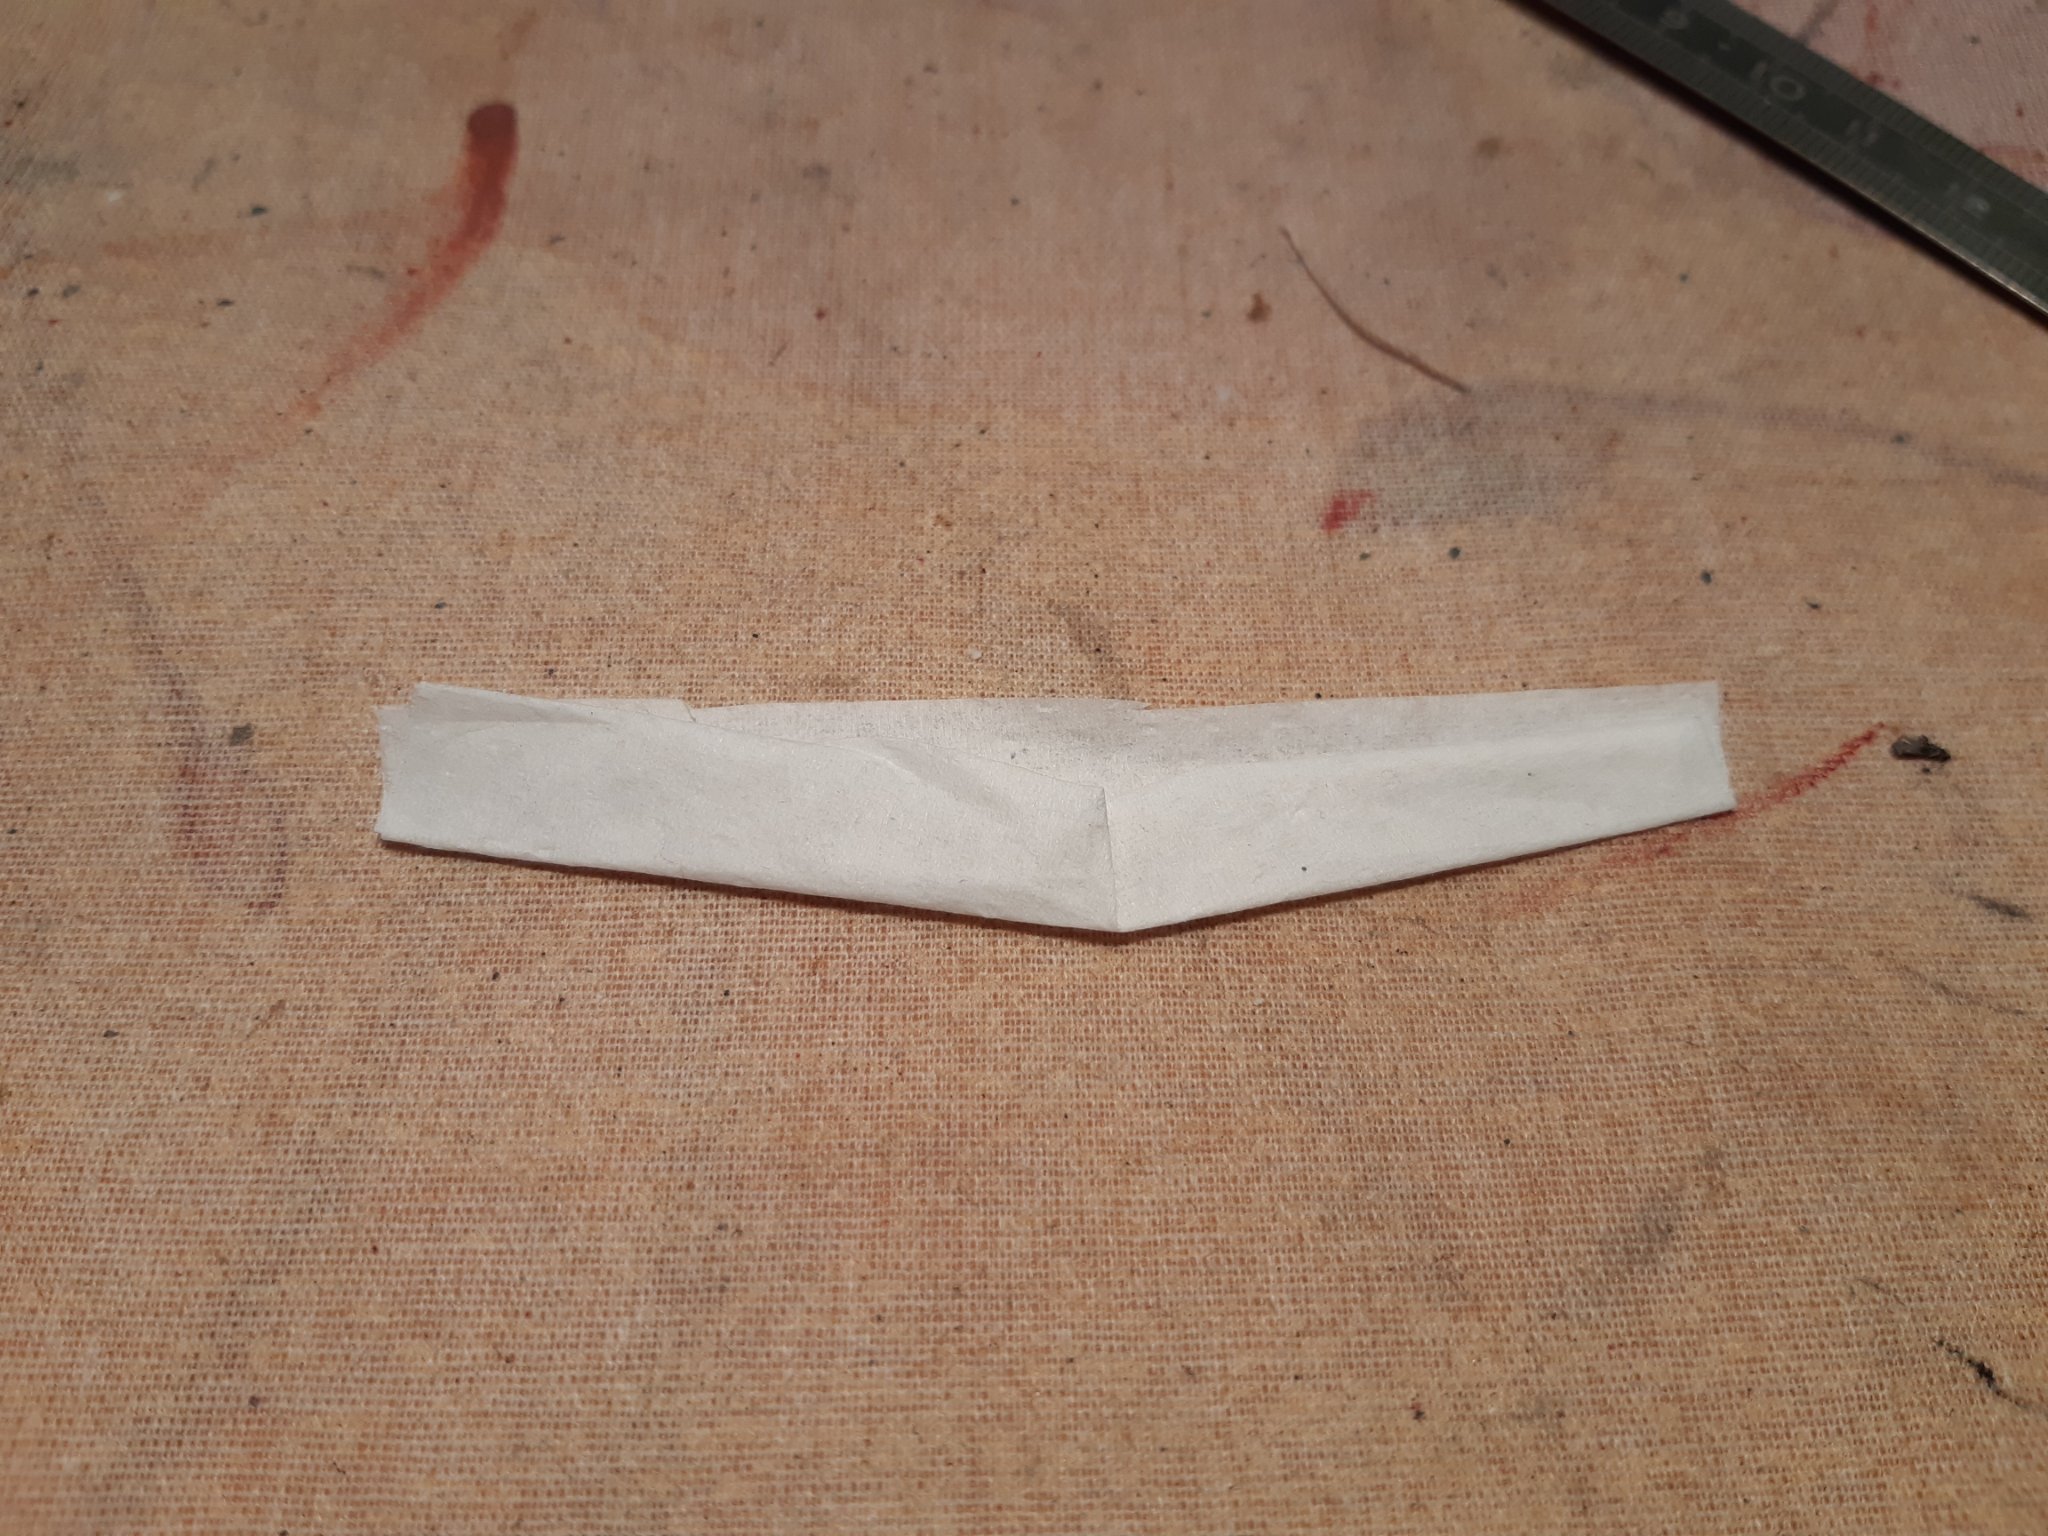
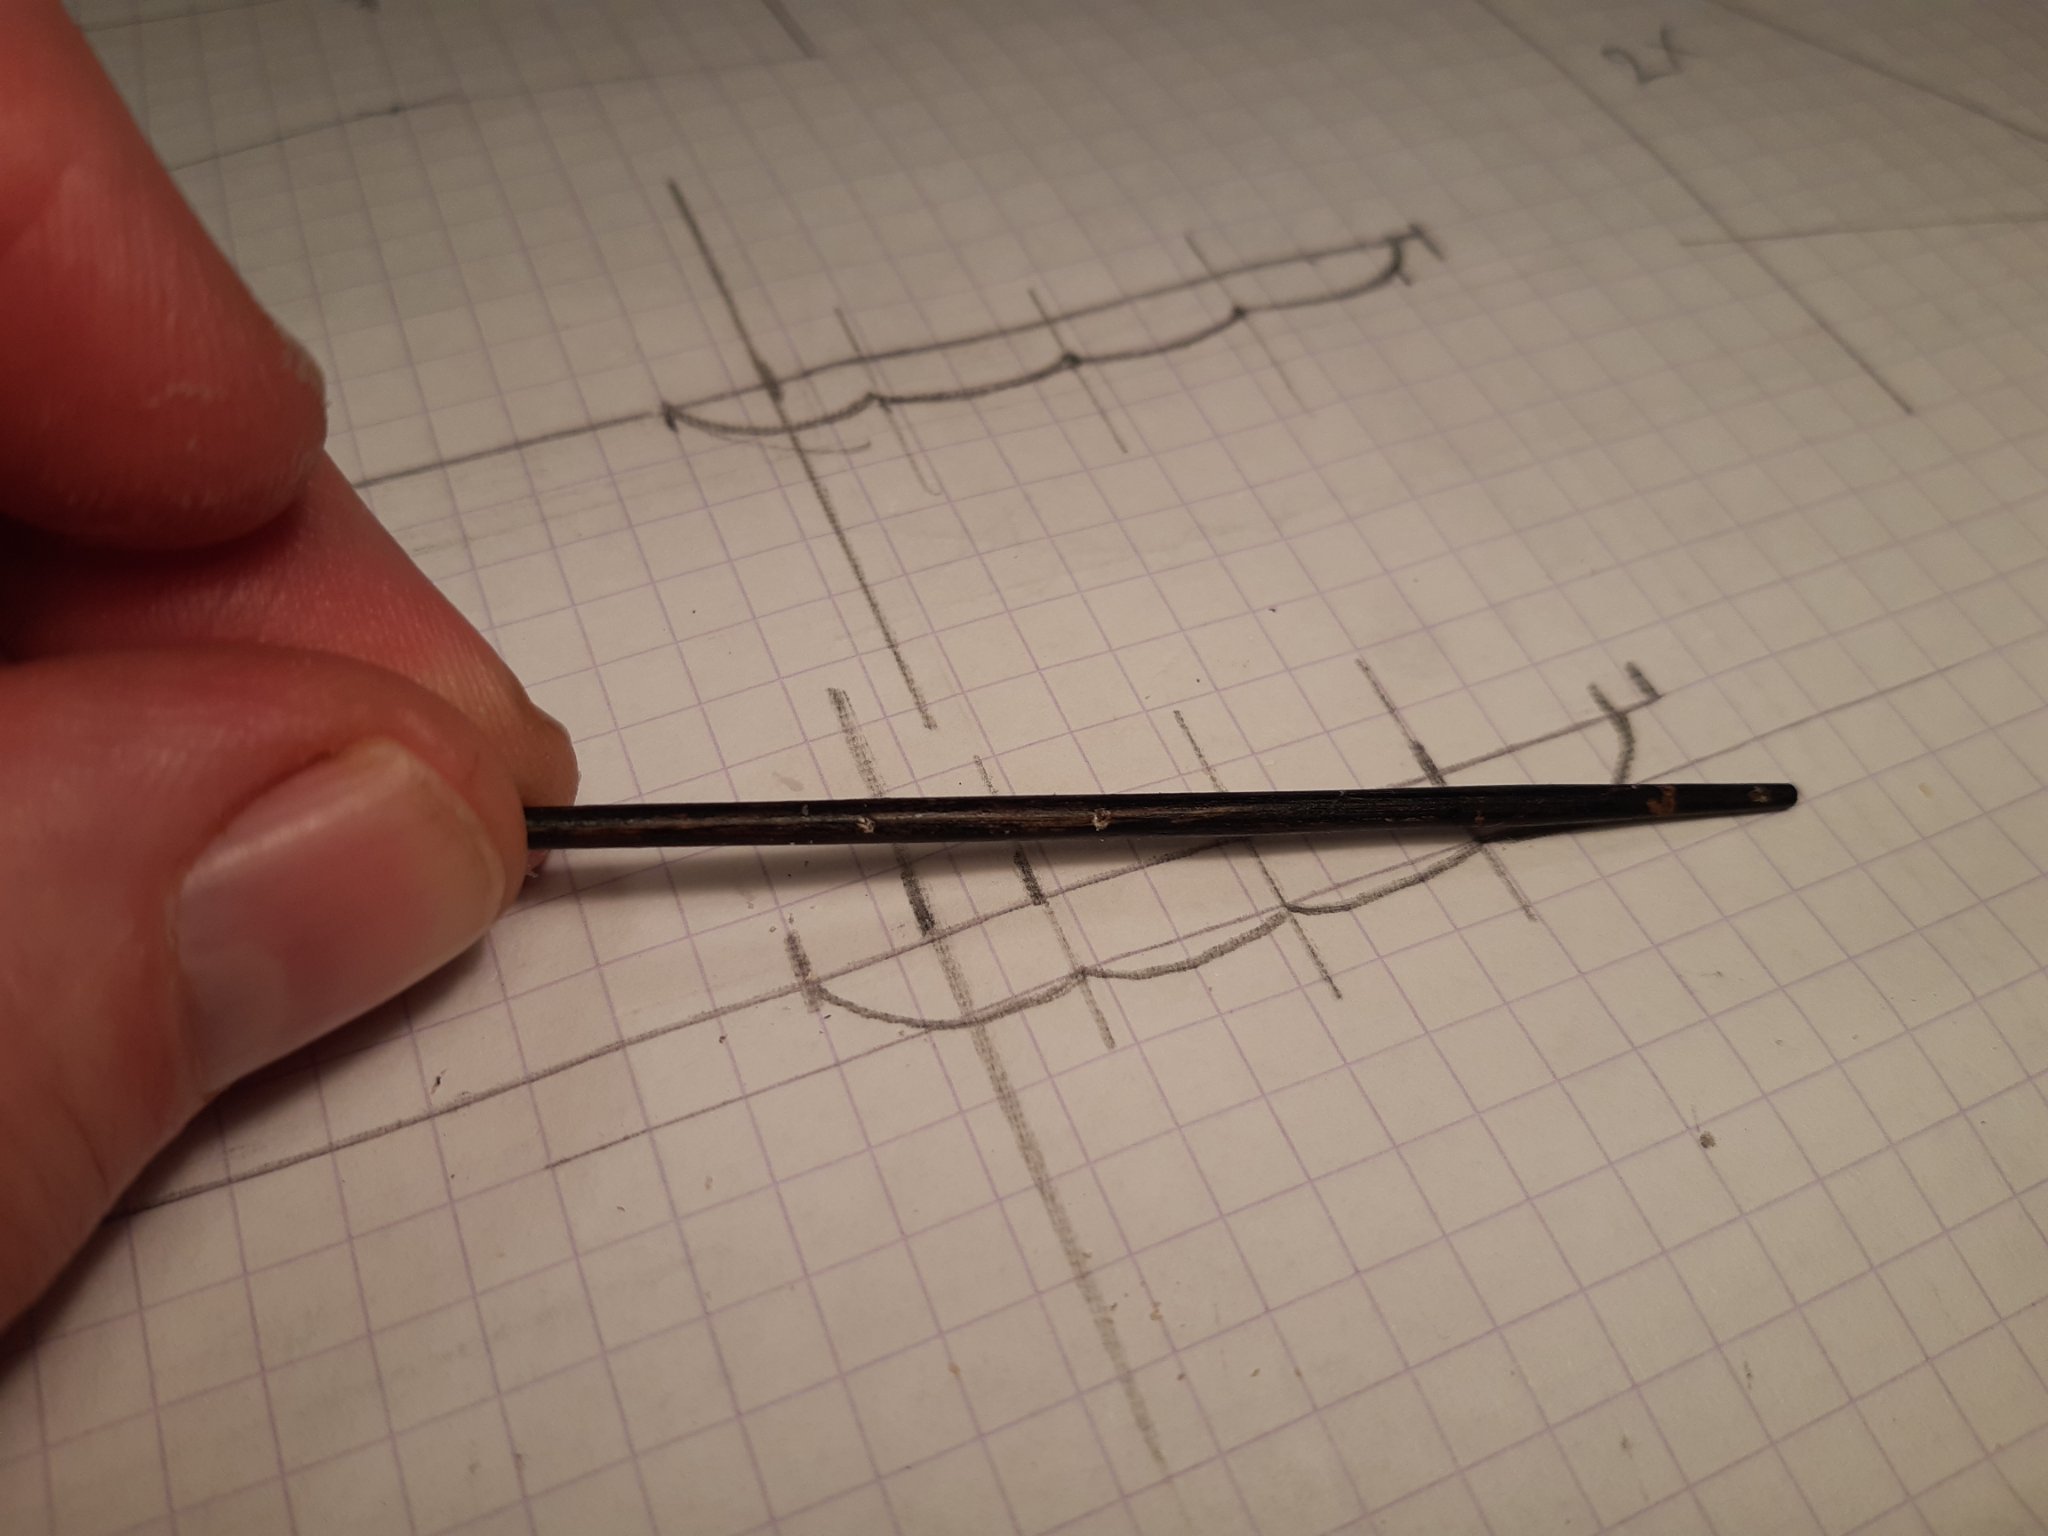
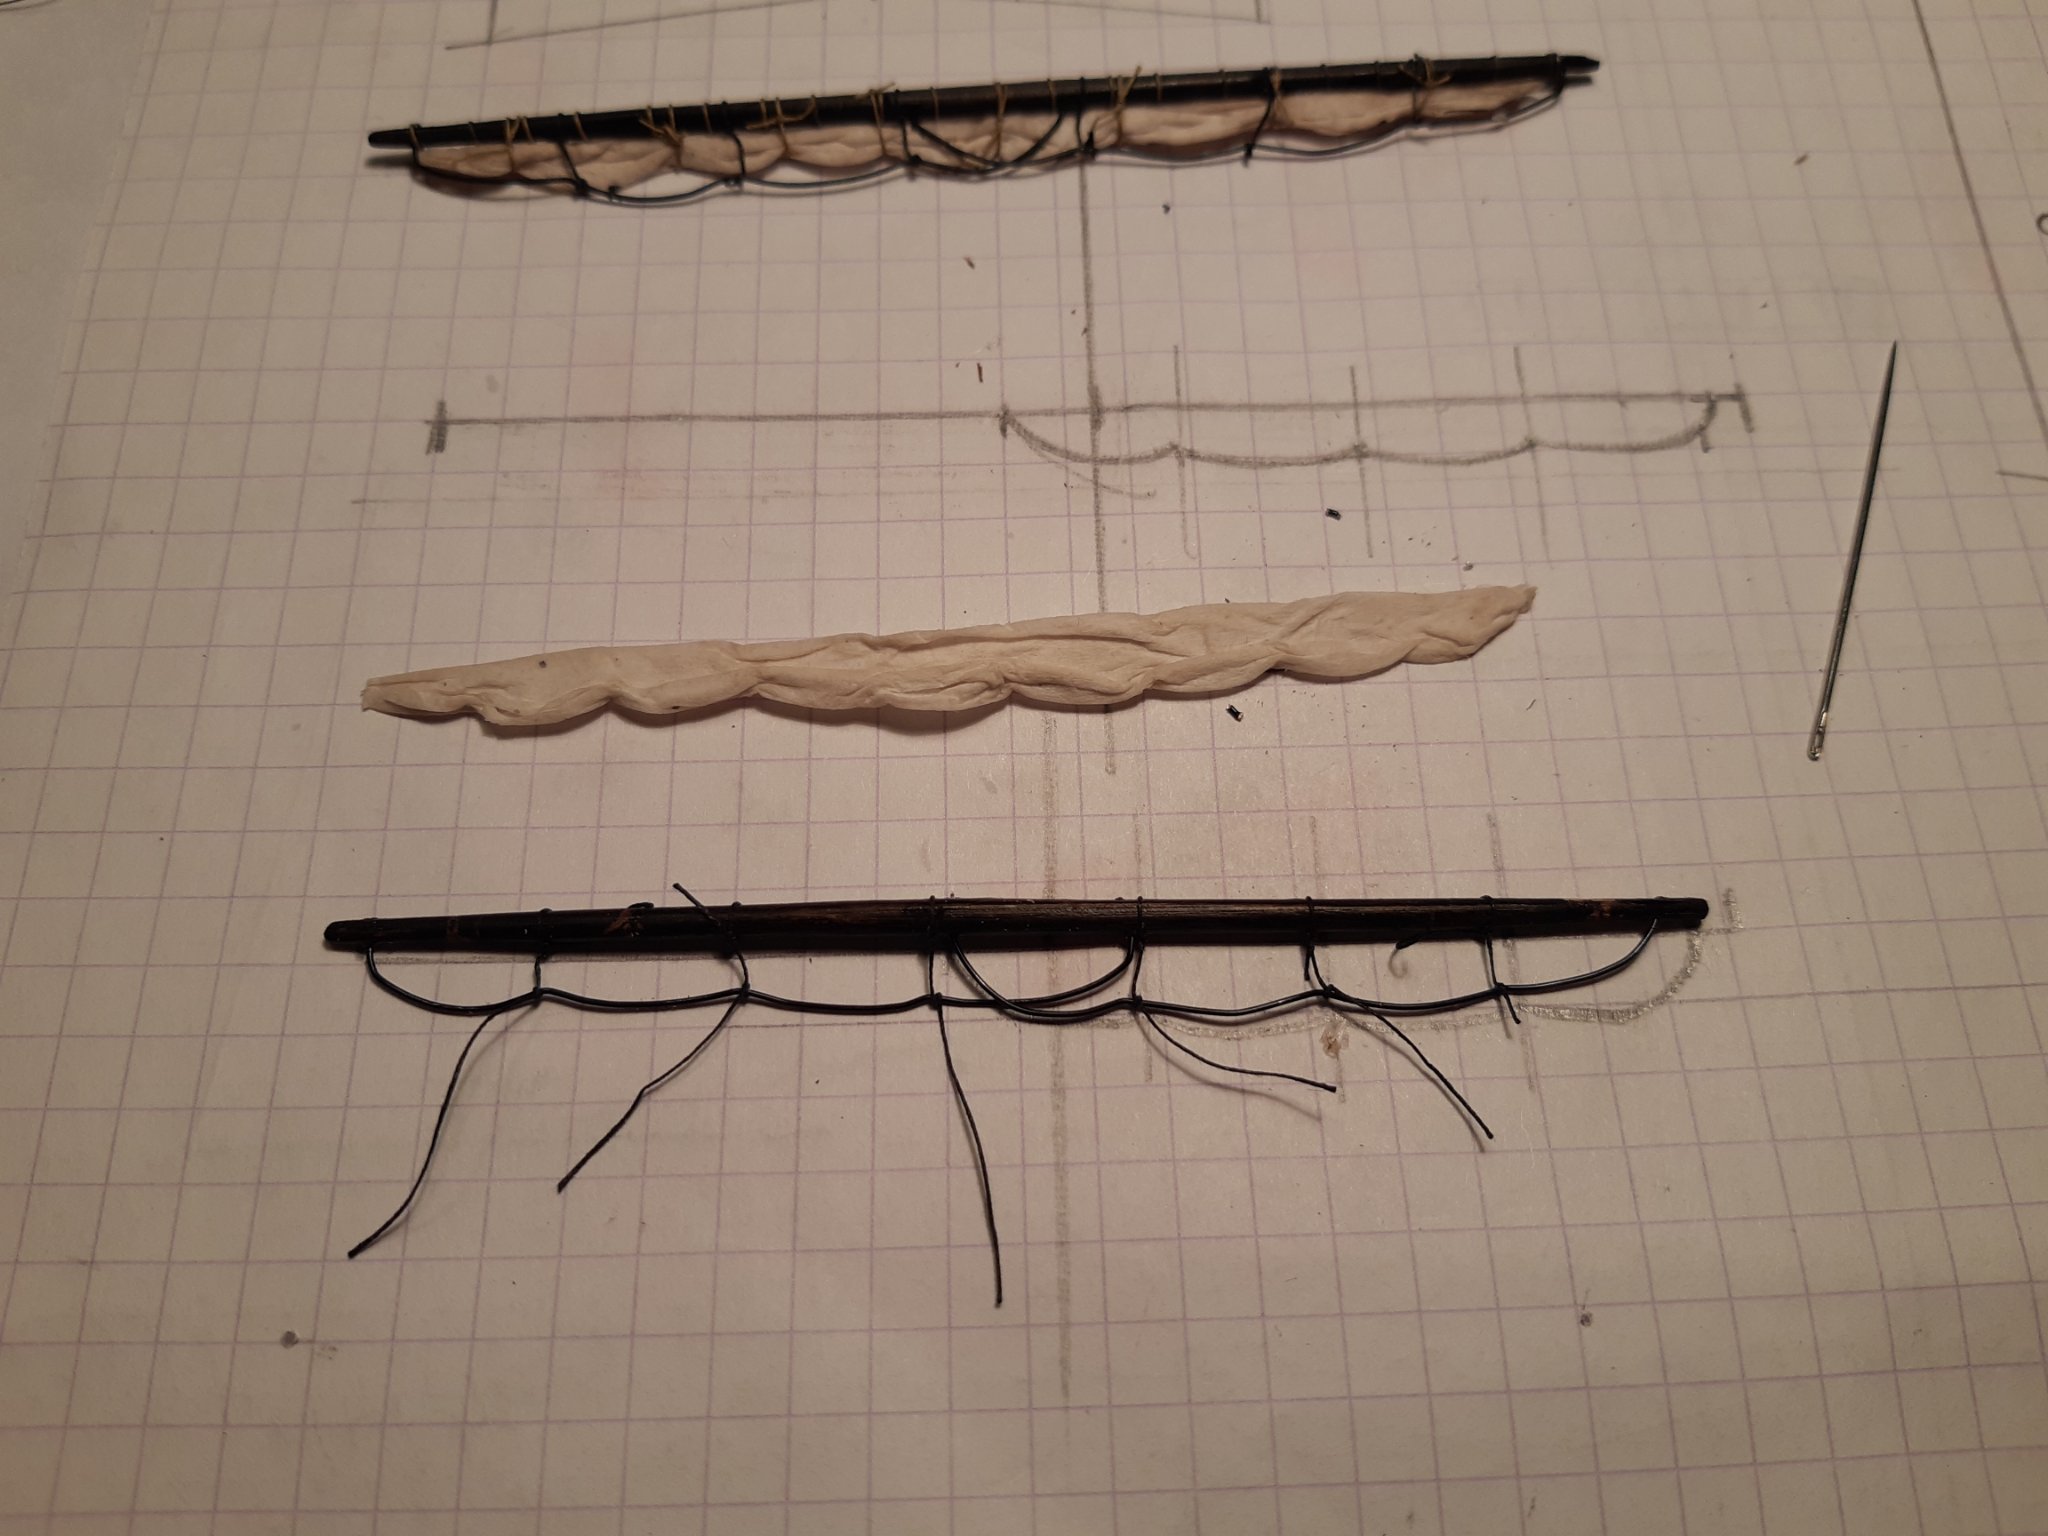
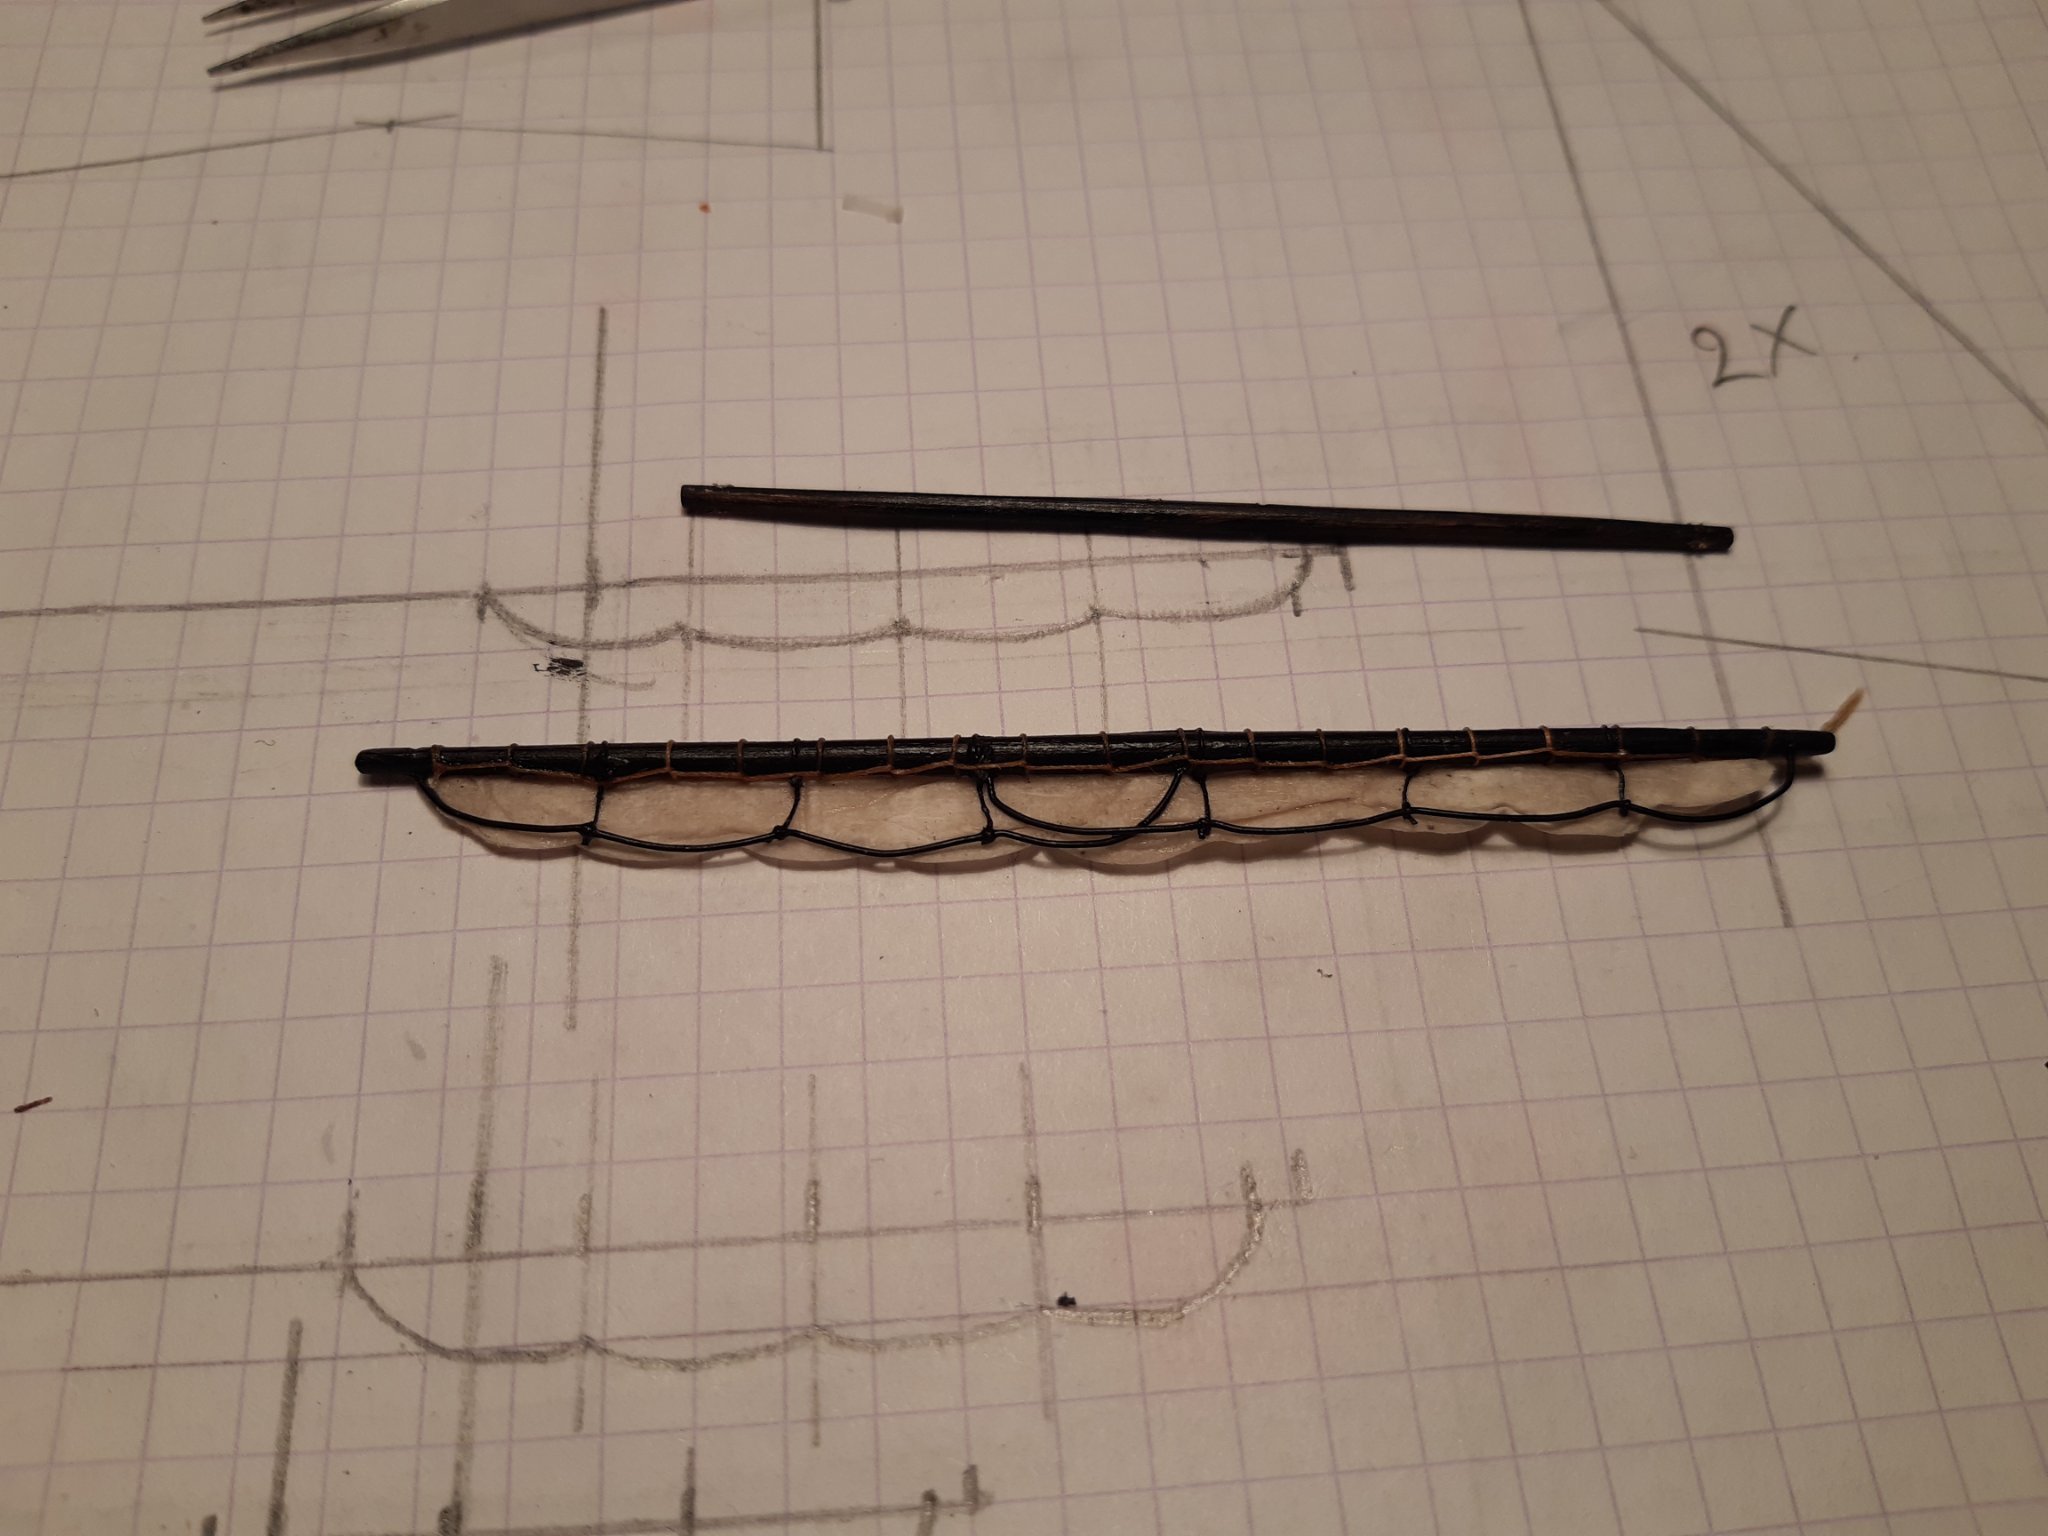
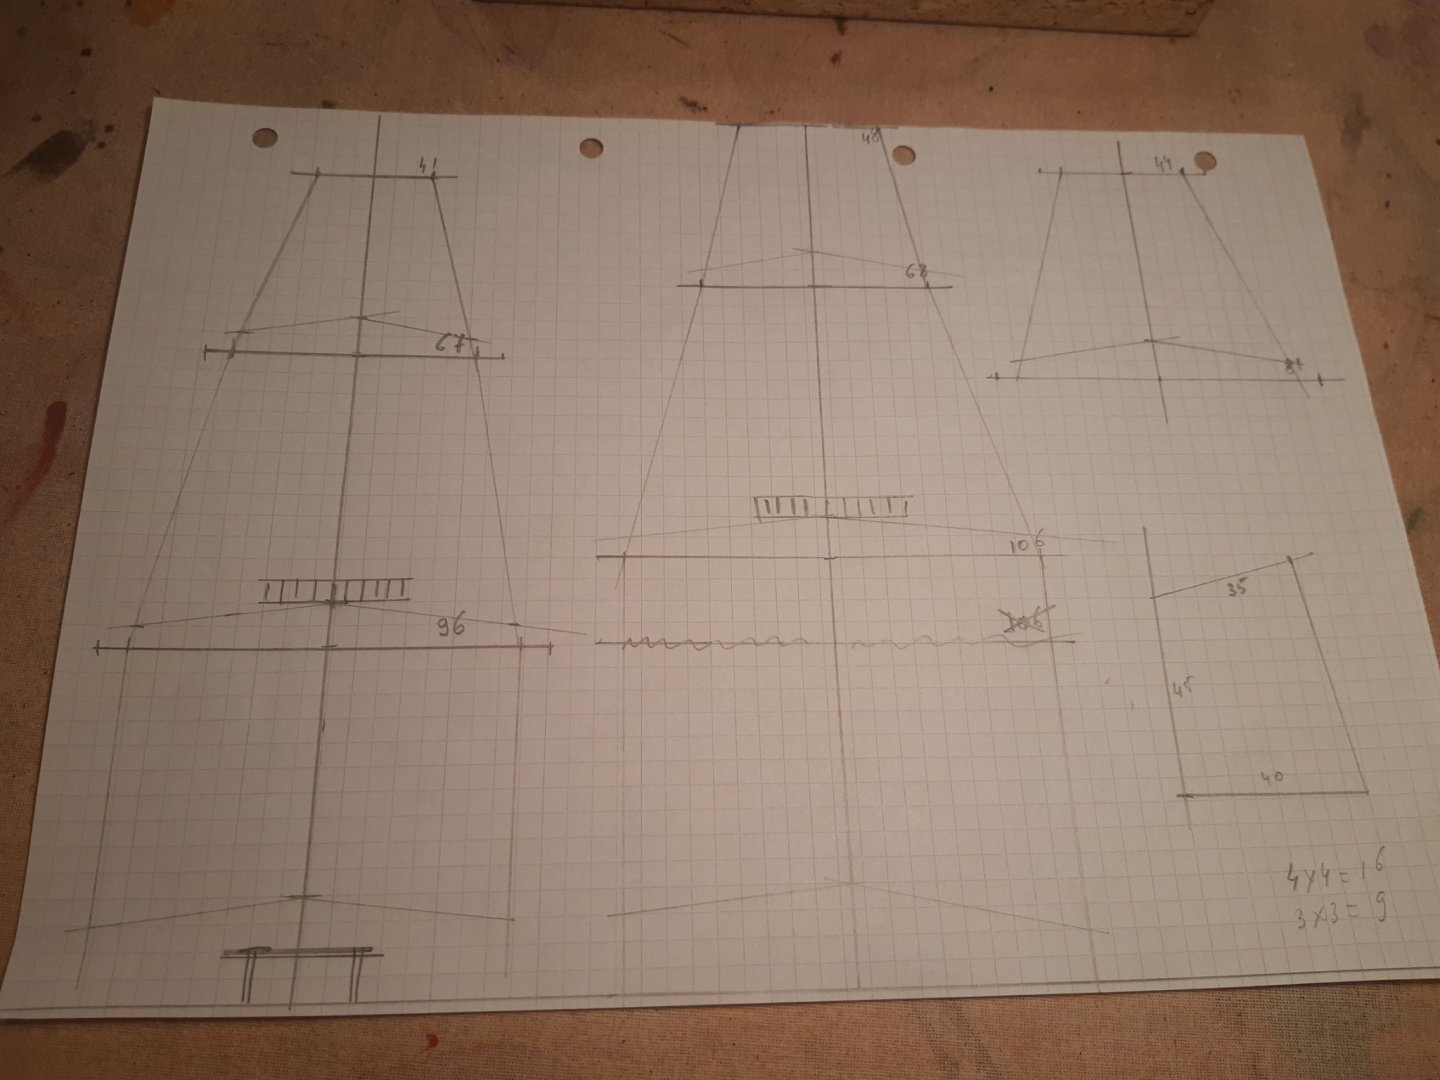
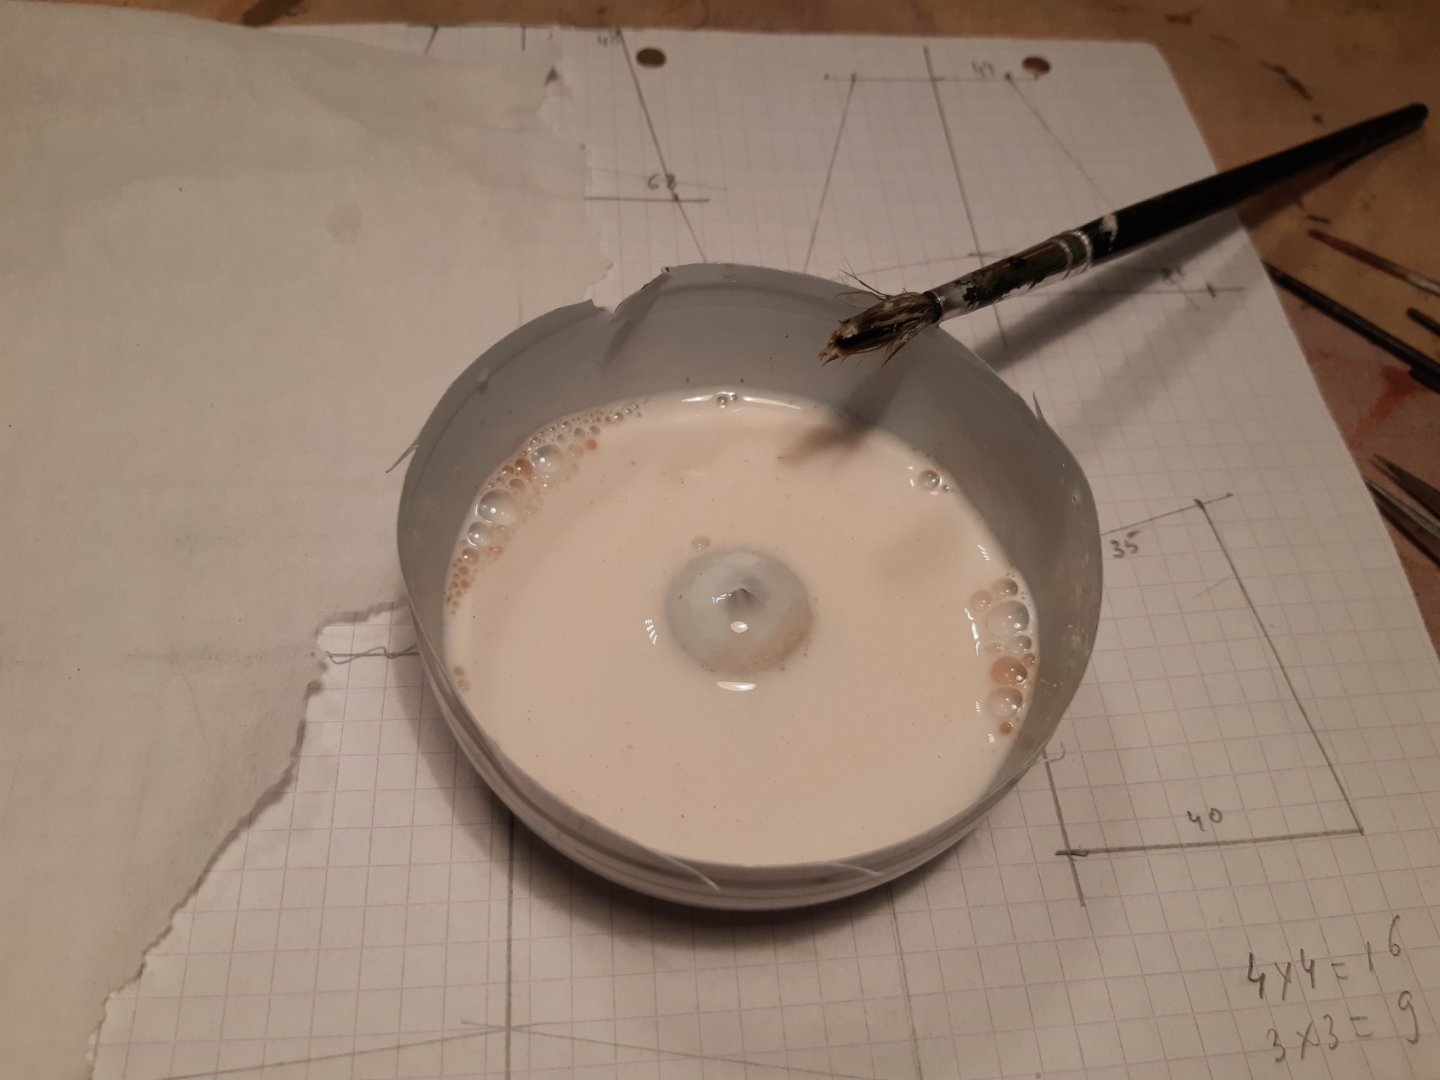
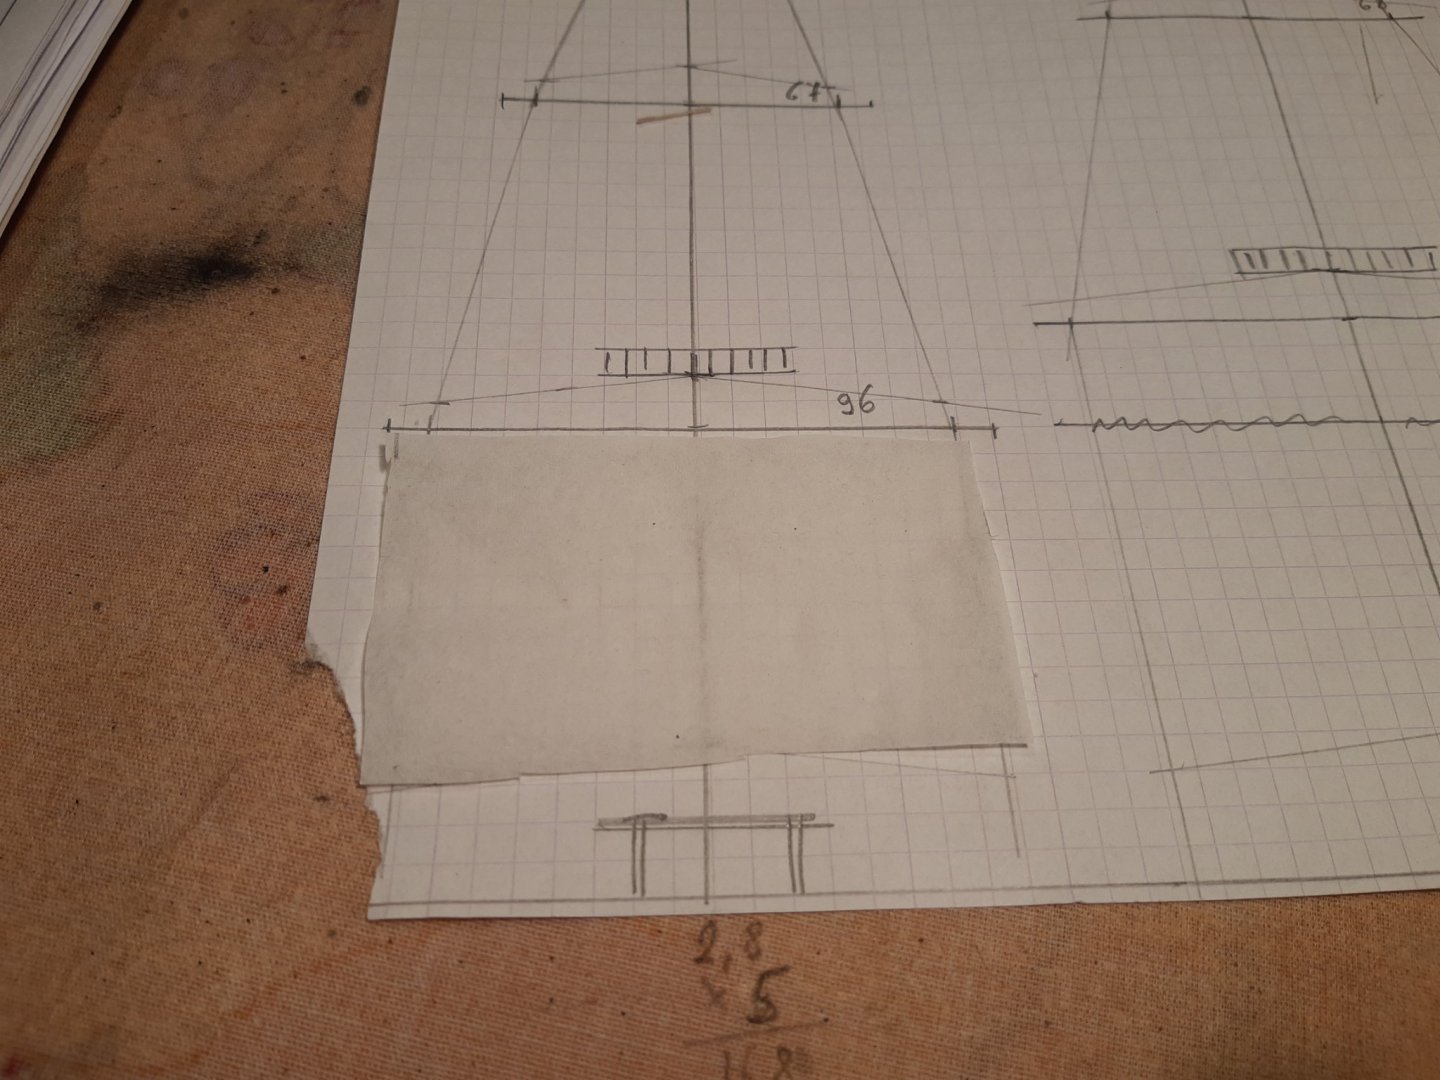
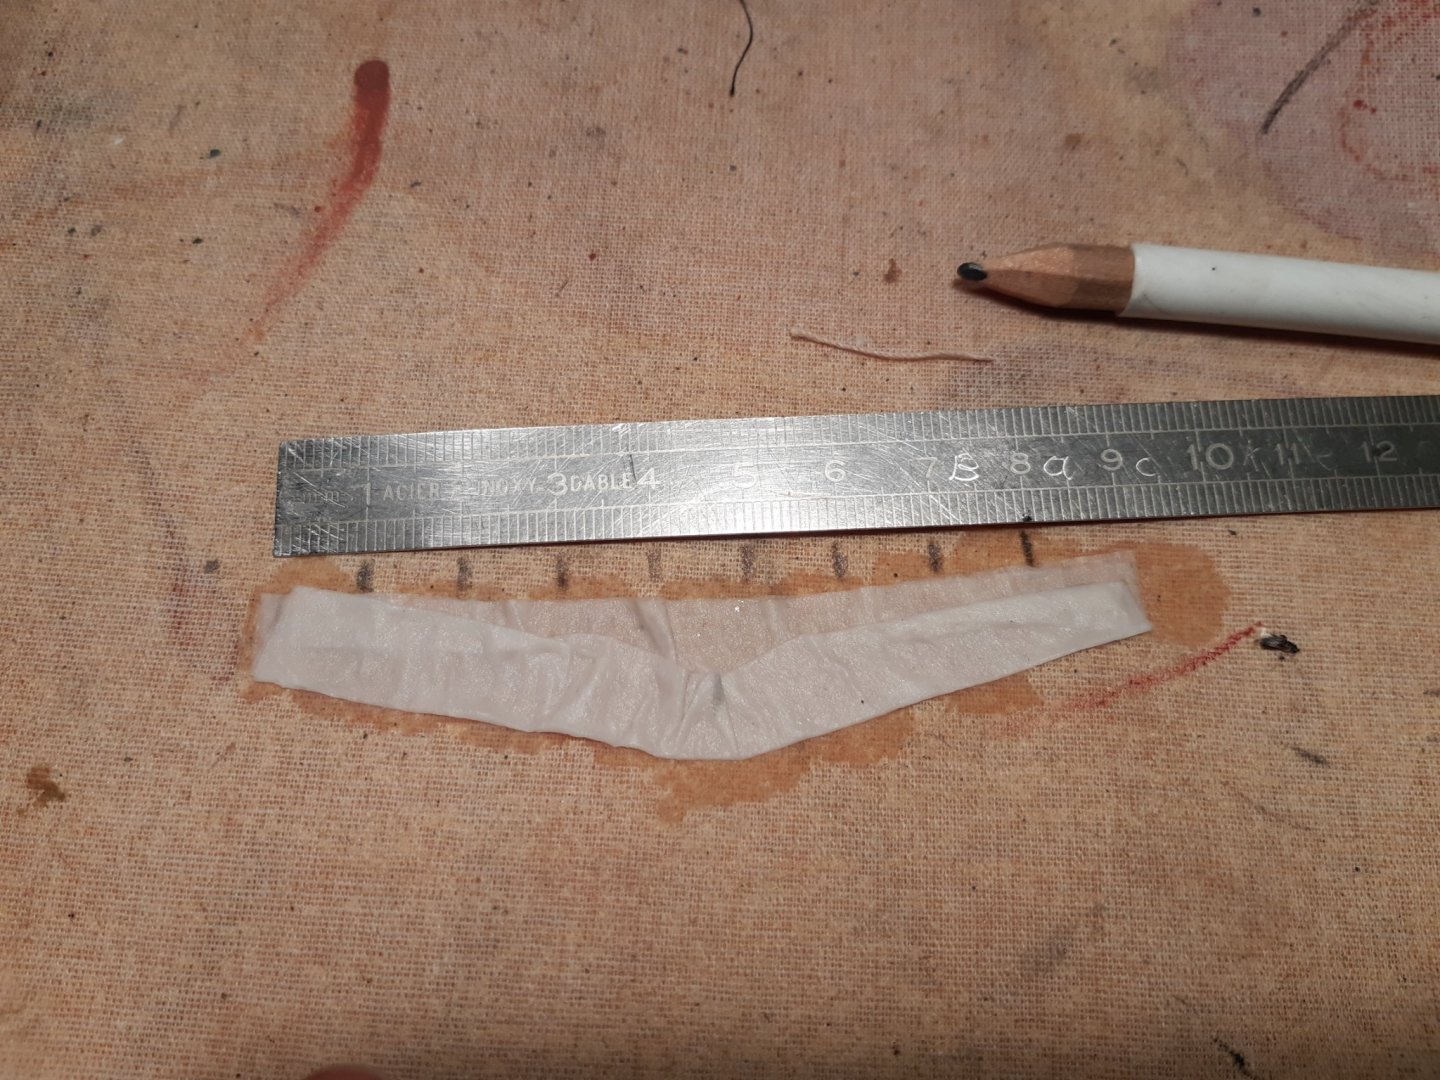
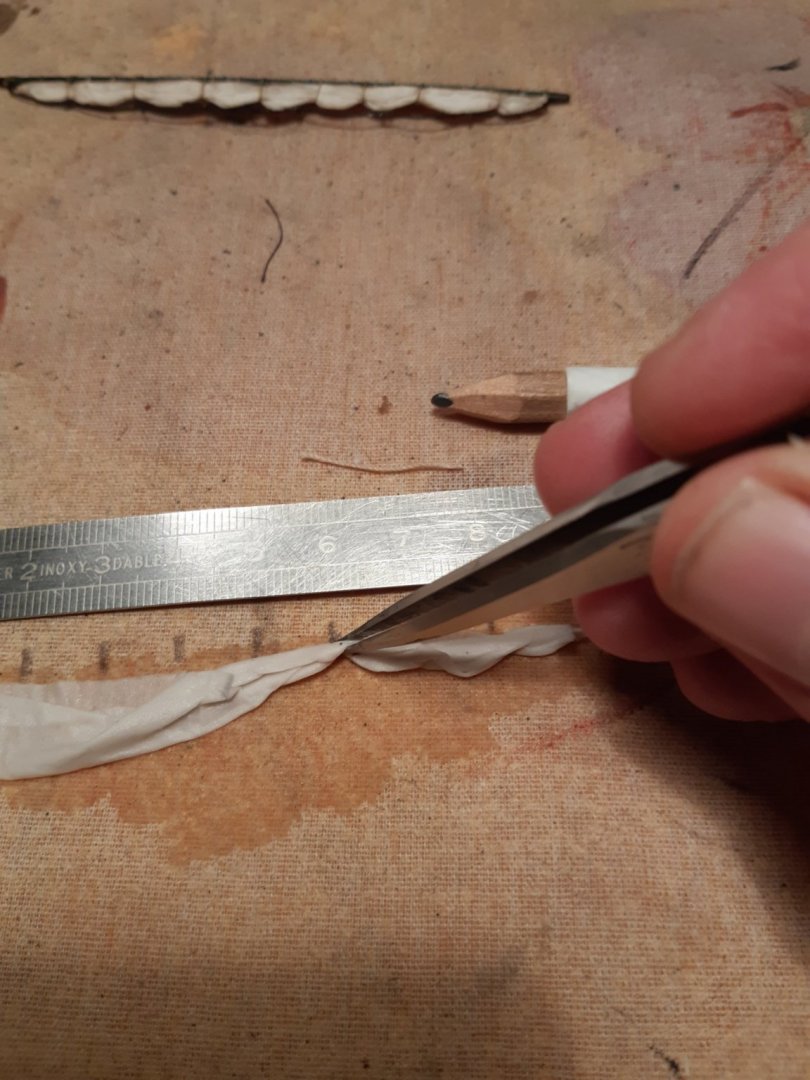
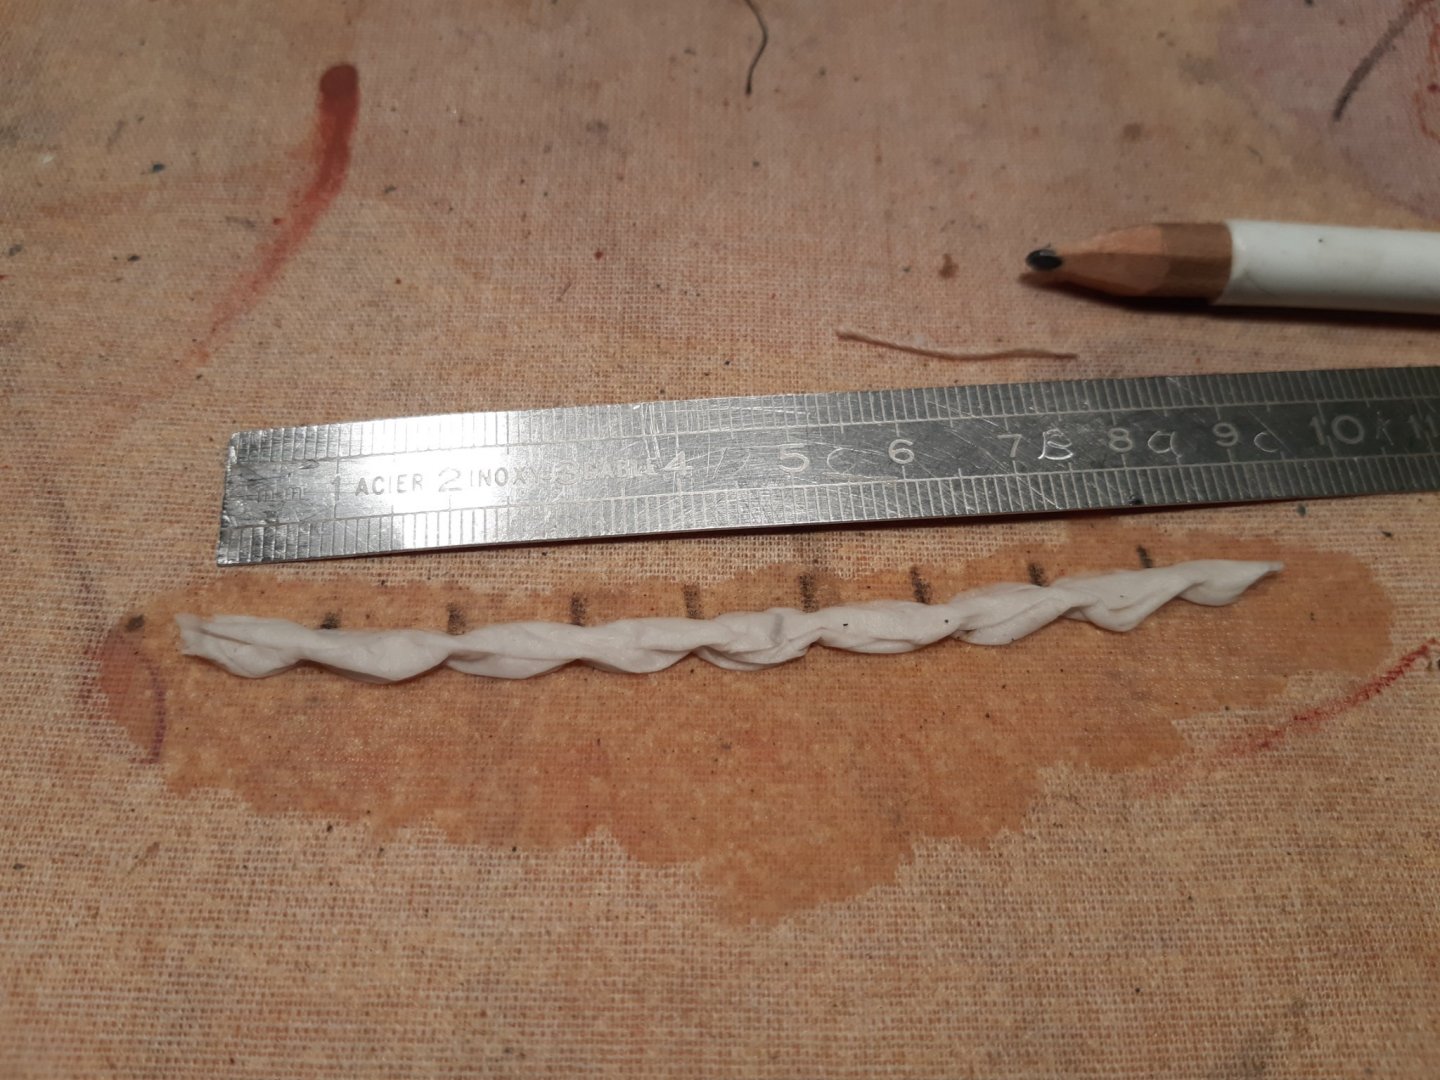
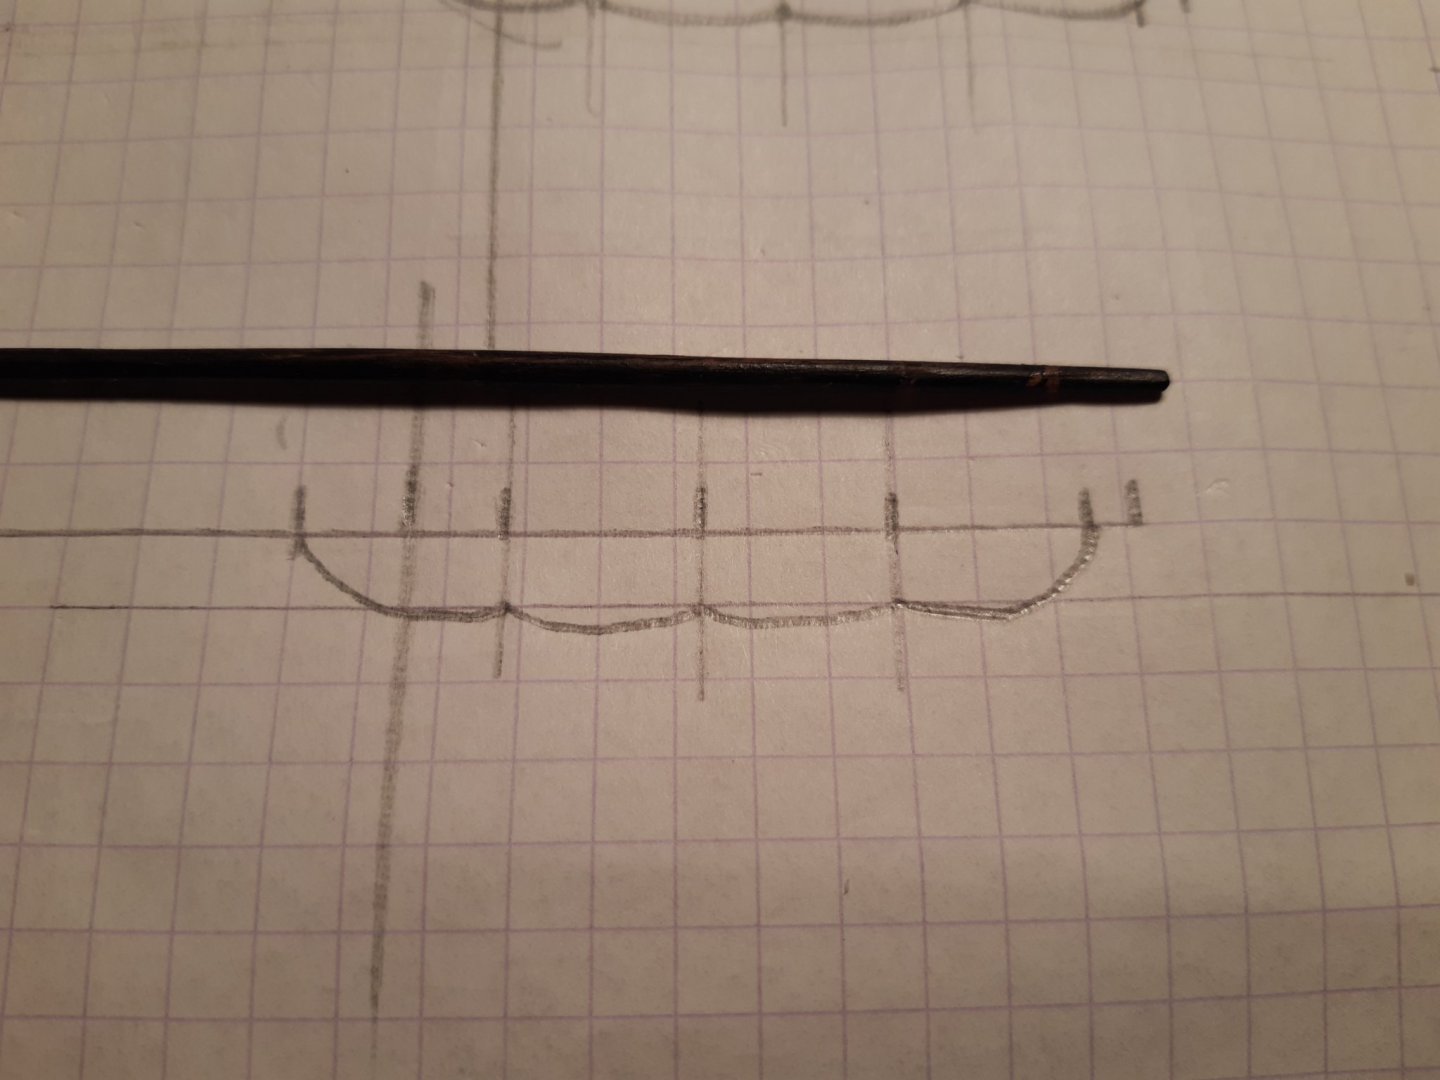
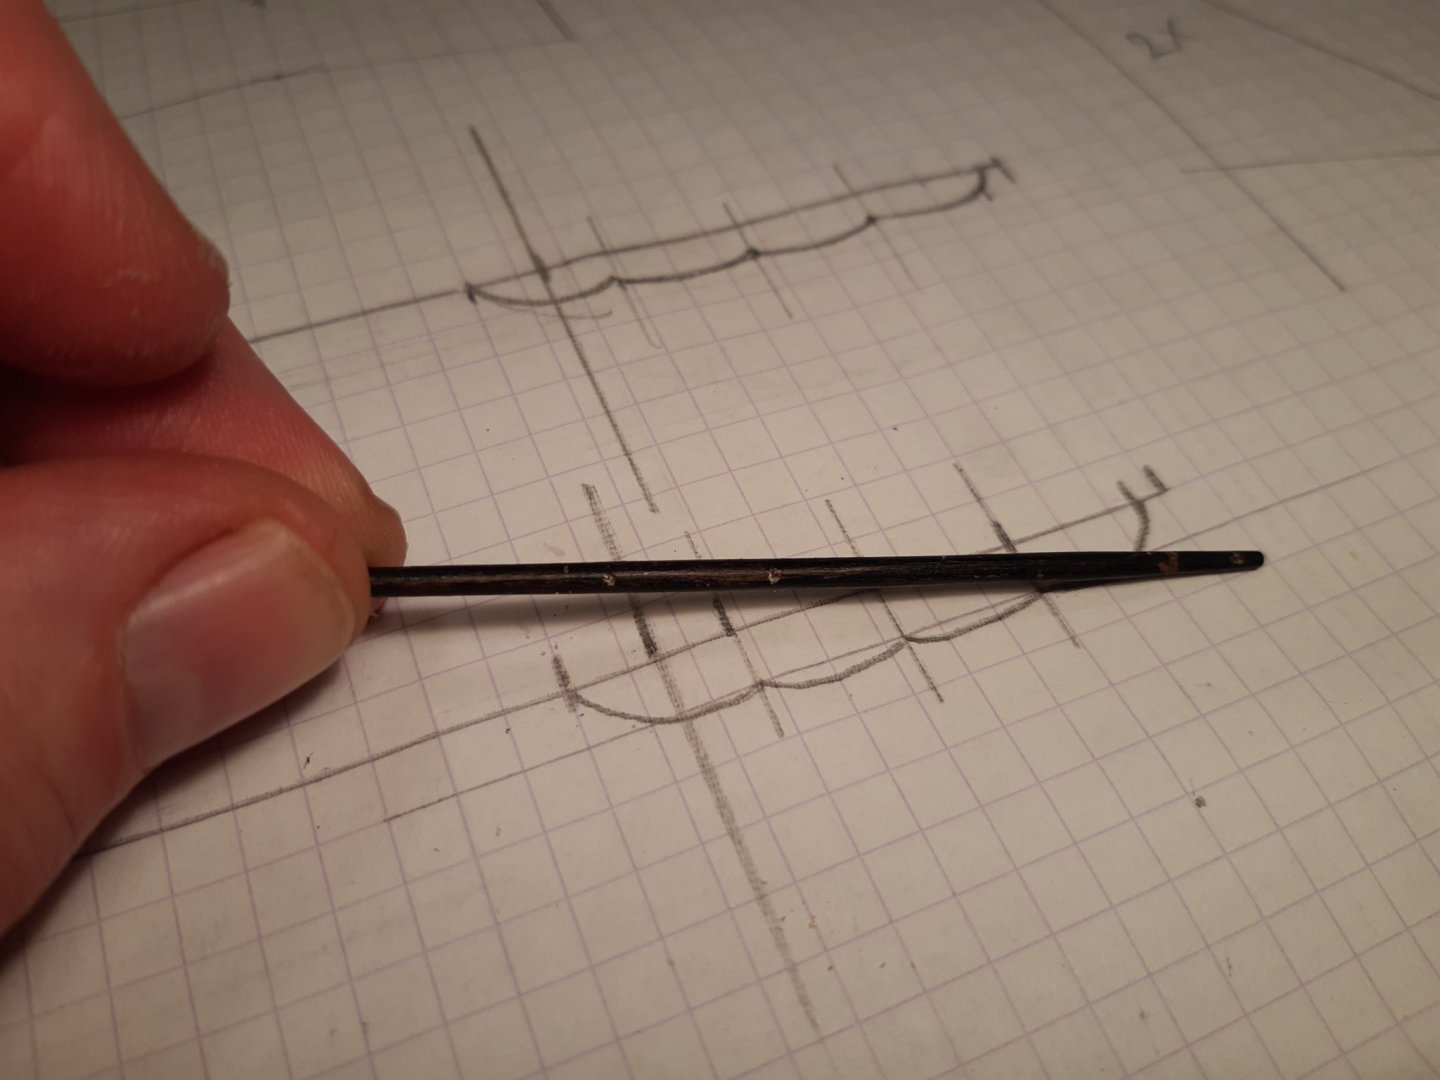
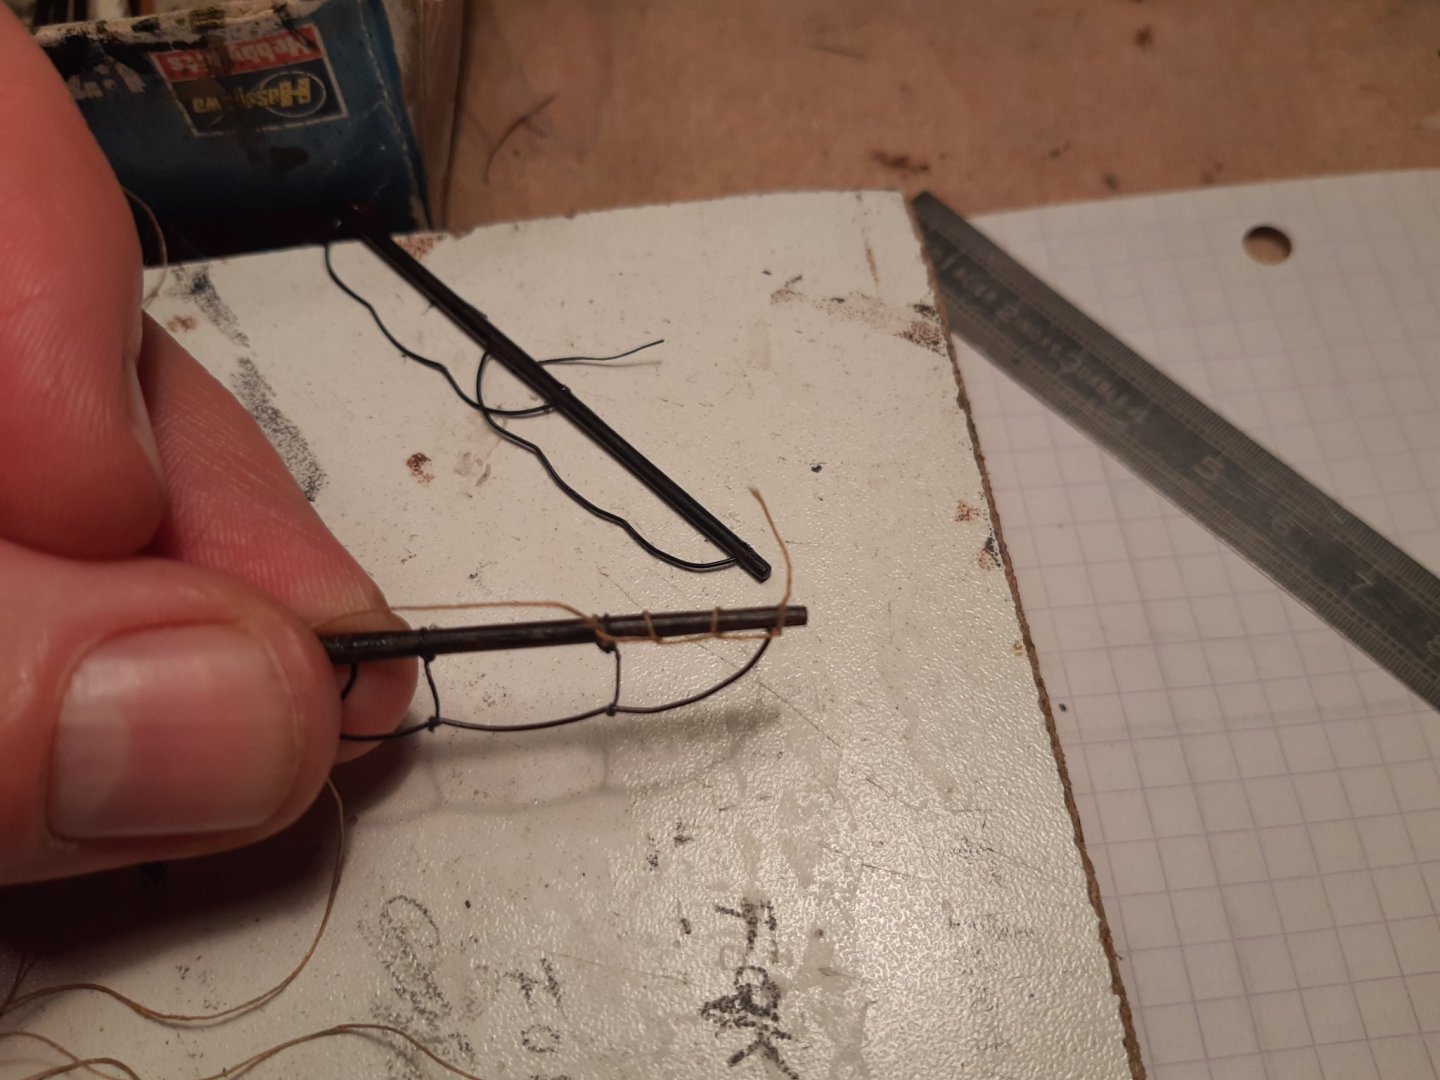
Thanks for all the nice comments and helpful info. Much appreciated 👍 The sails and footropes attached on the yards The how I made them, step by step. A plan with the general idea of the dimensions The basic material, not the normal papertissue but a slightly harder version. The PVA glue diluted with water with a drop of brown paint Cut to size fold Moisten with the PVA solution Shape with tweezers and fingers (then let 24h dry ) The footropes, copper wire bent in to shape 4 holes, drilled in the yard. Here the copper wire goes through and is then glued with CA glue. footrope ready and the part of the sail that will be glued to the yard is cut flat with ascissors The rope that normally attaches the sail to the yard. The sail glued on the yard wit CA glue. A very light wash with thinned mat black (In the picture it is slightly darker than reality) The sails are not always in the right shape from the first time. But there is plenty of paper and diluted PVA glue. Not a good result the first time? Throw it away and make a new one. To be continued


- 173 replies
-
- 12
-
-
A Danish builder rediscovering model ships
Baker replied to Procyon74's topic in New member Introductions
-
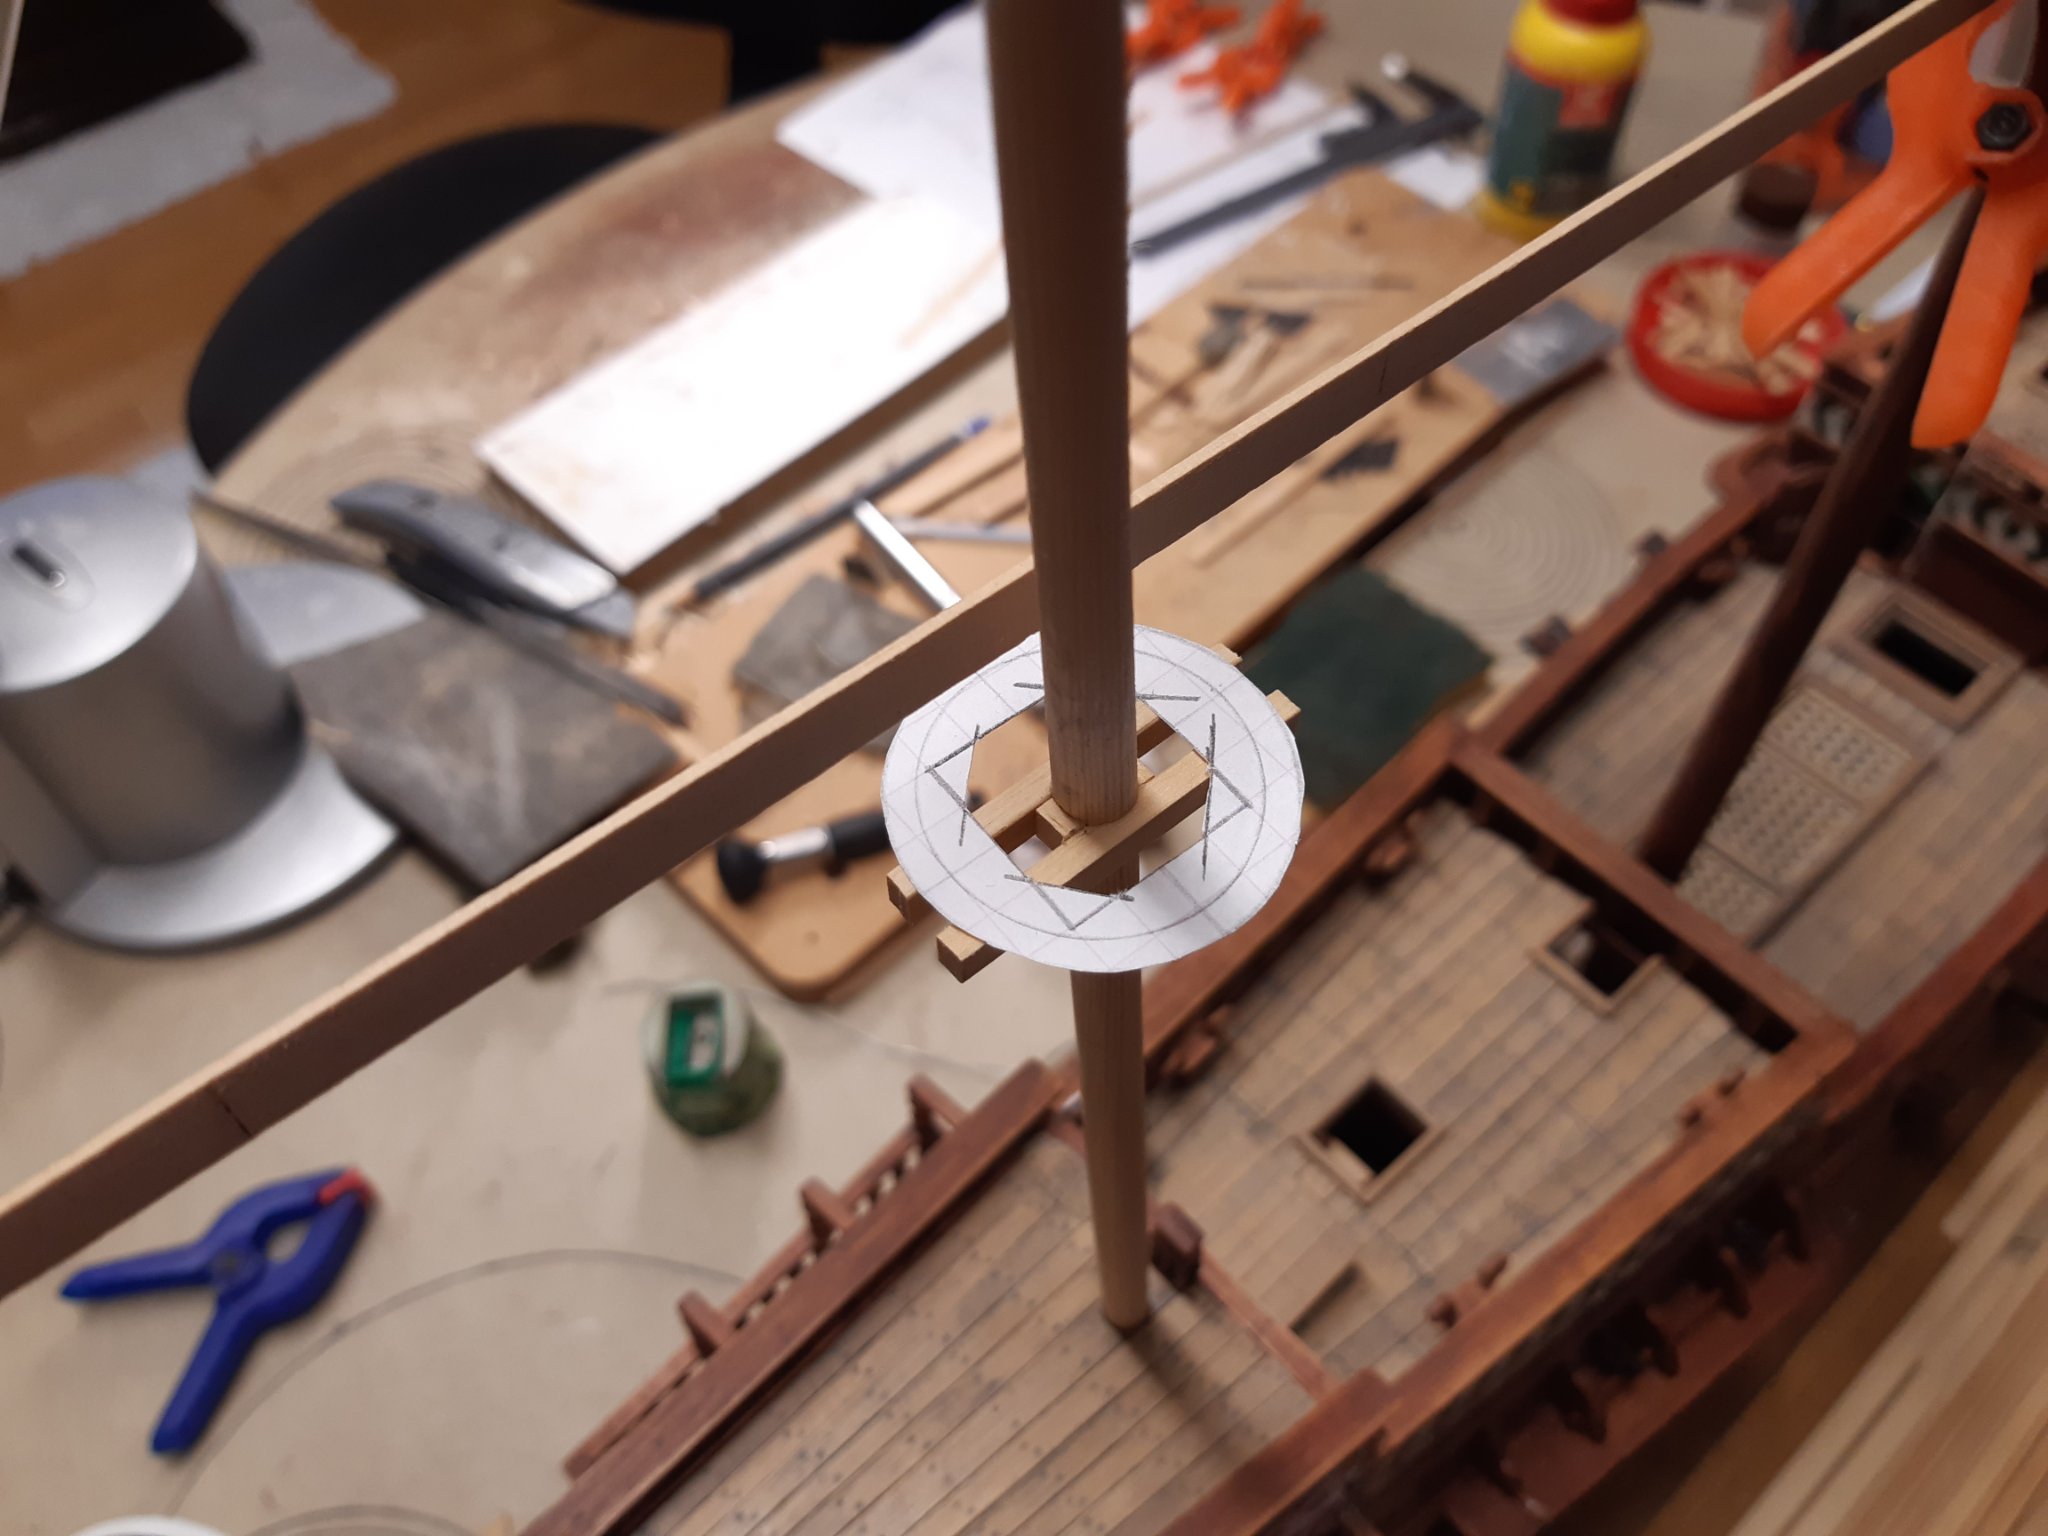
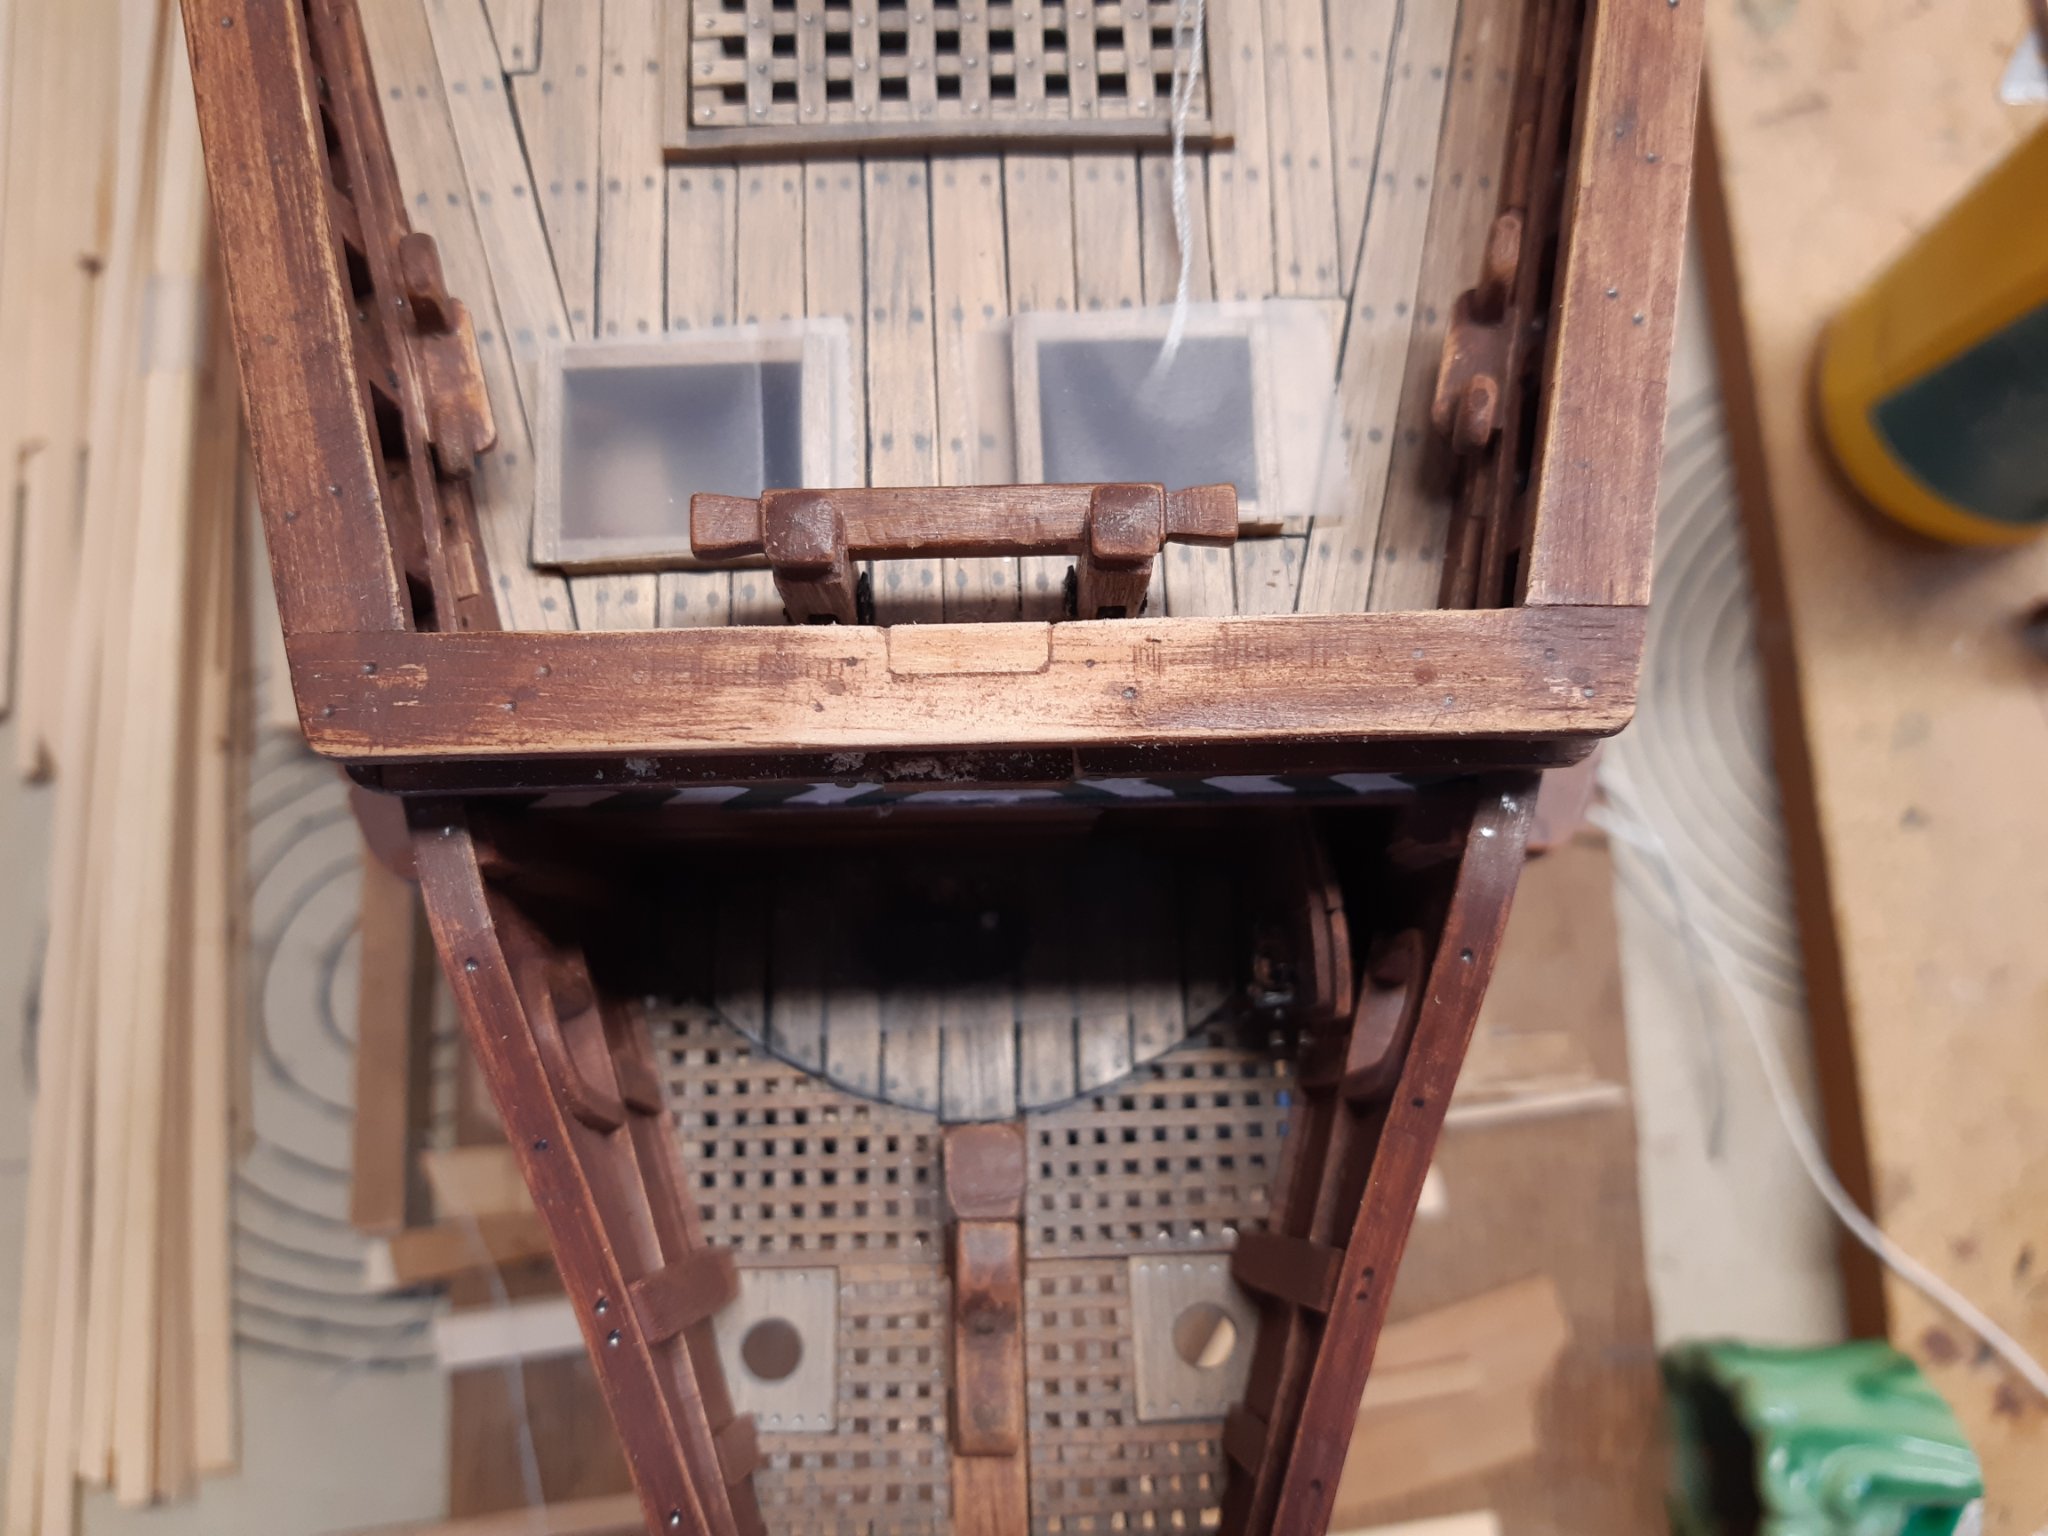
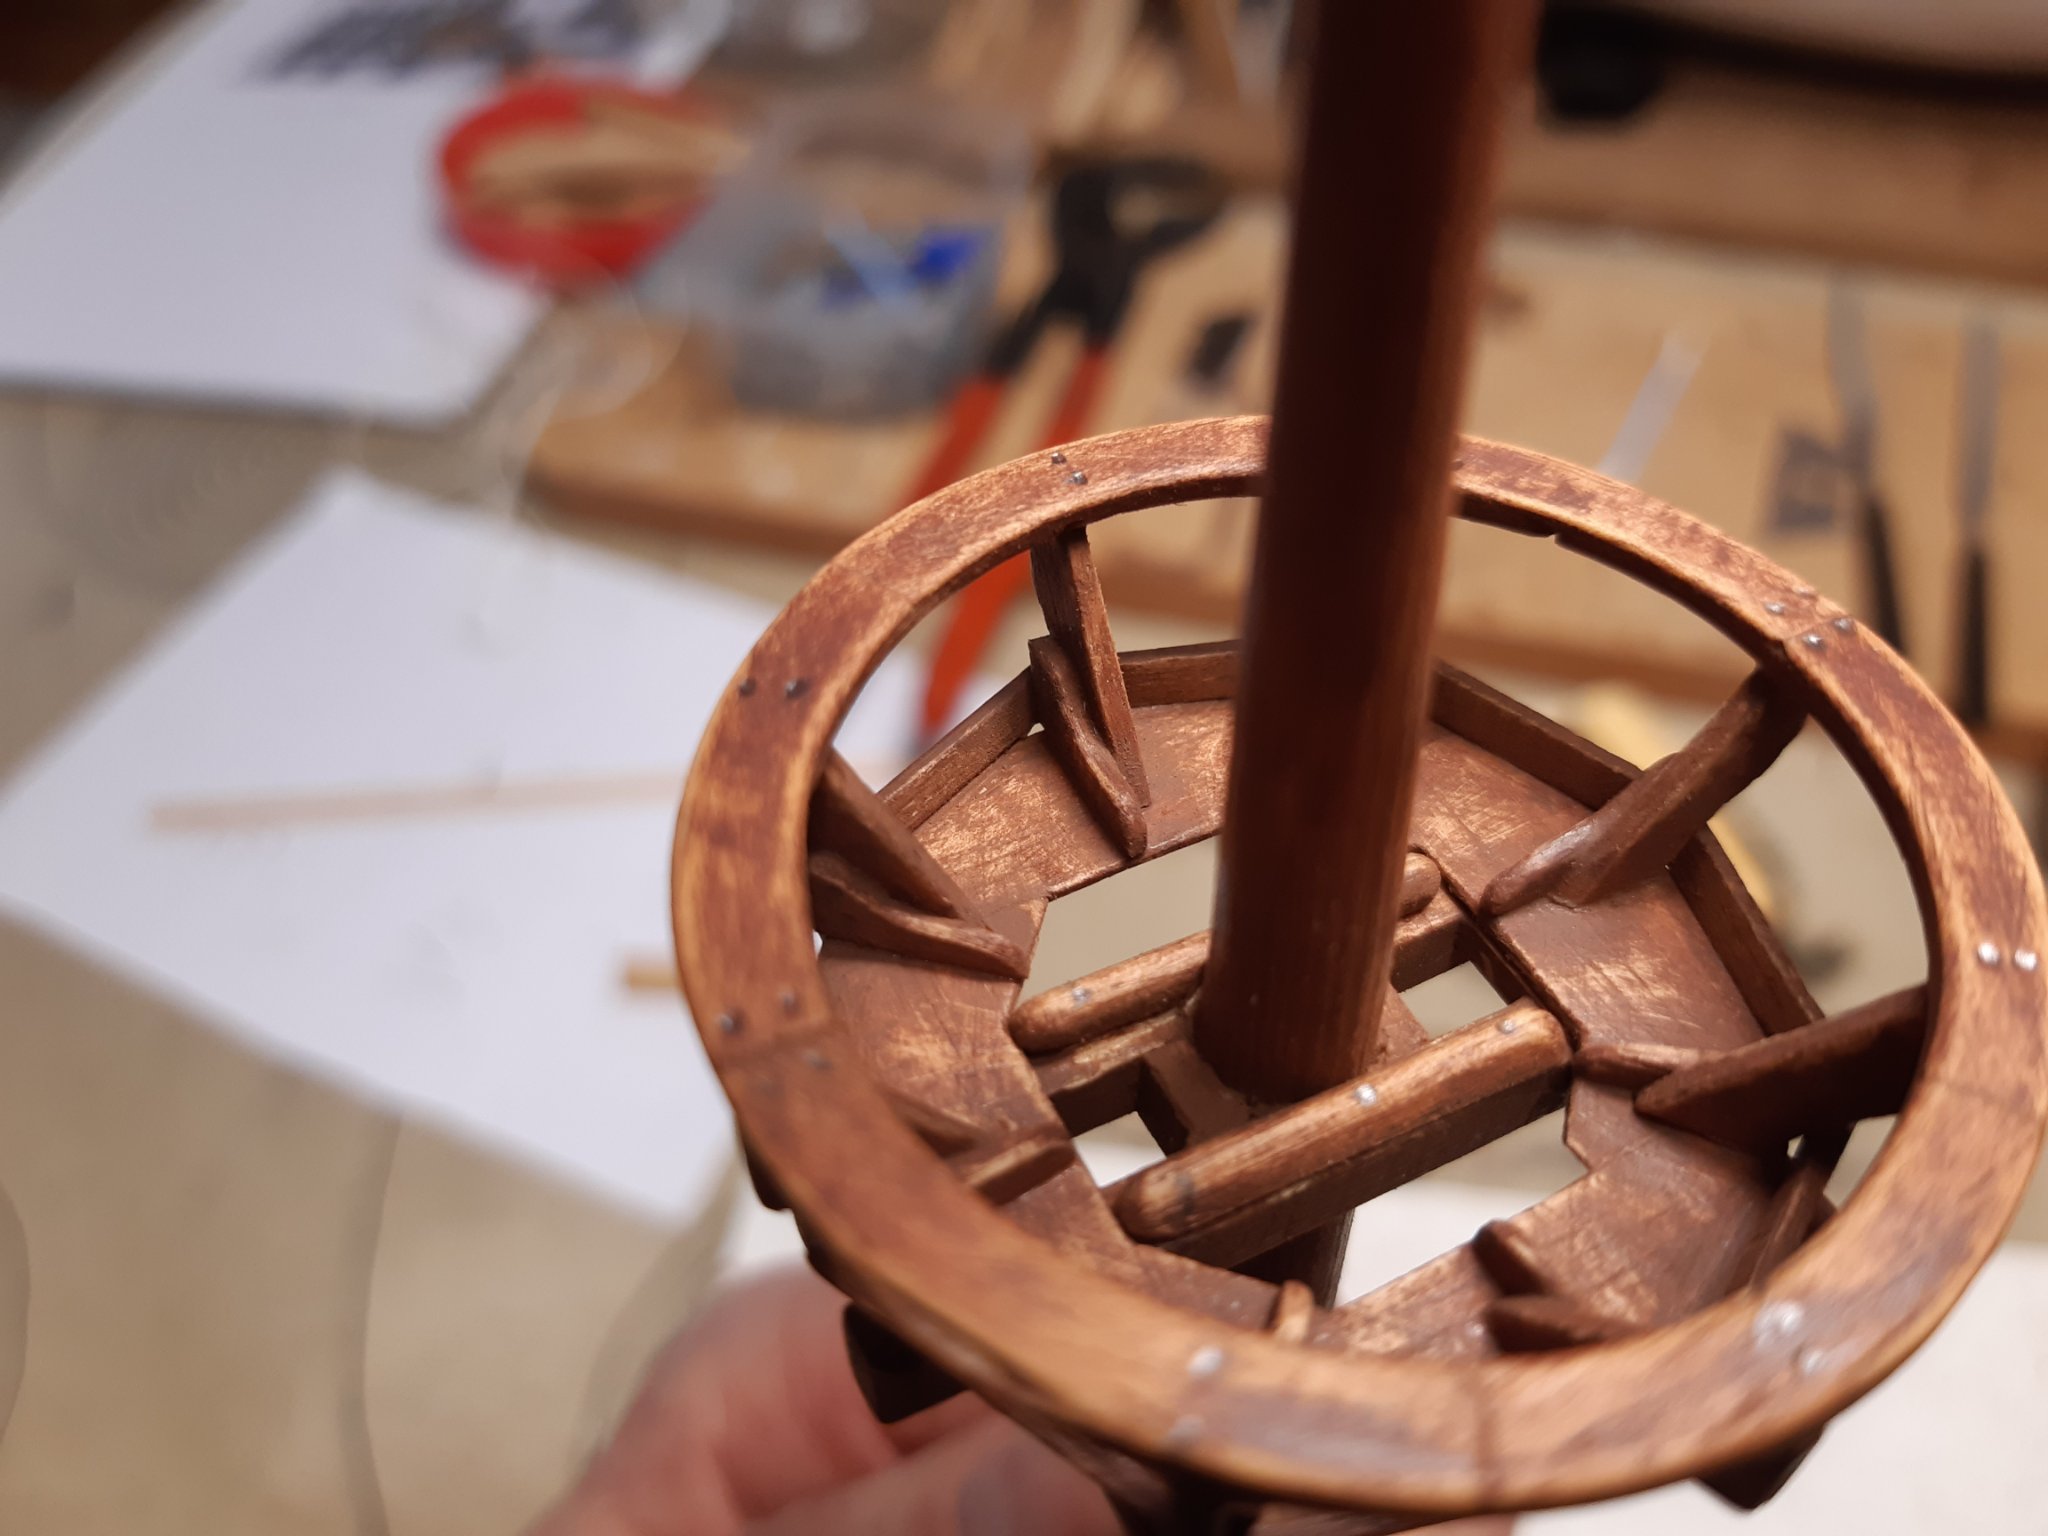
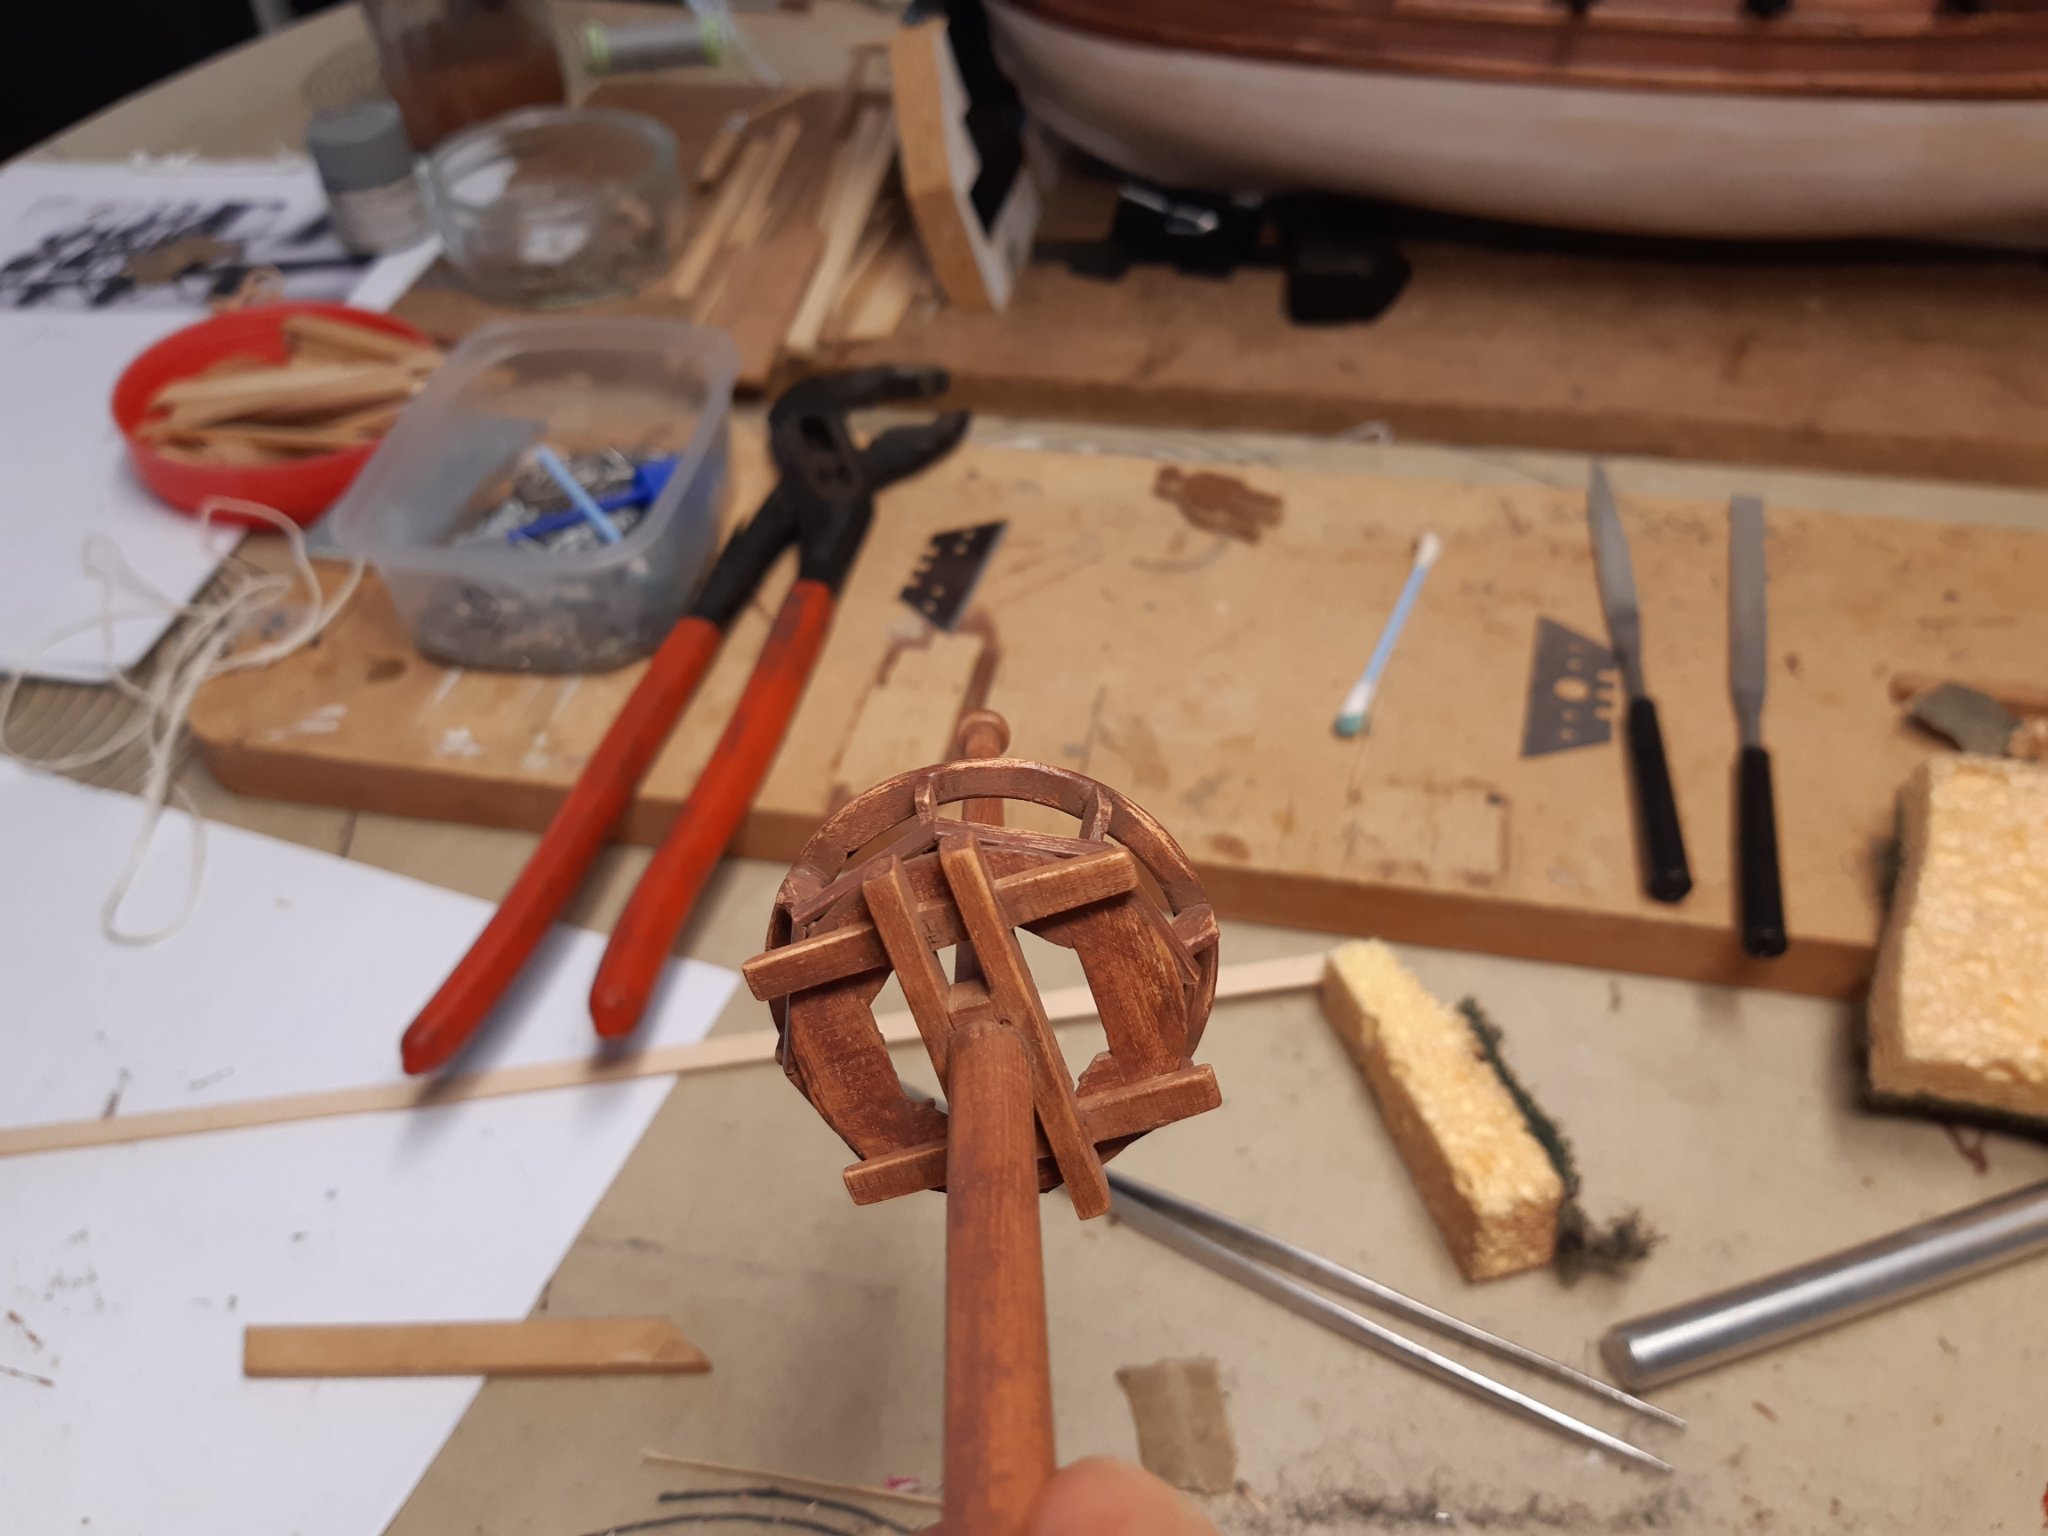
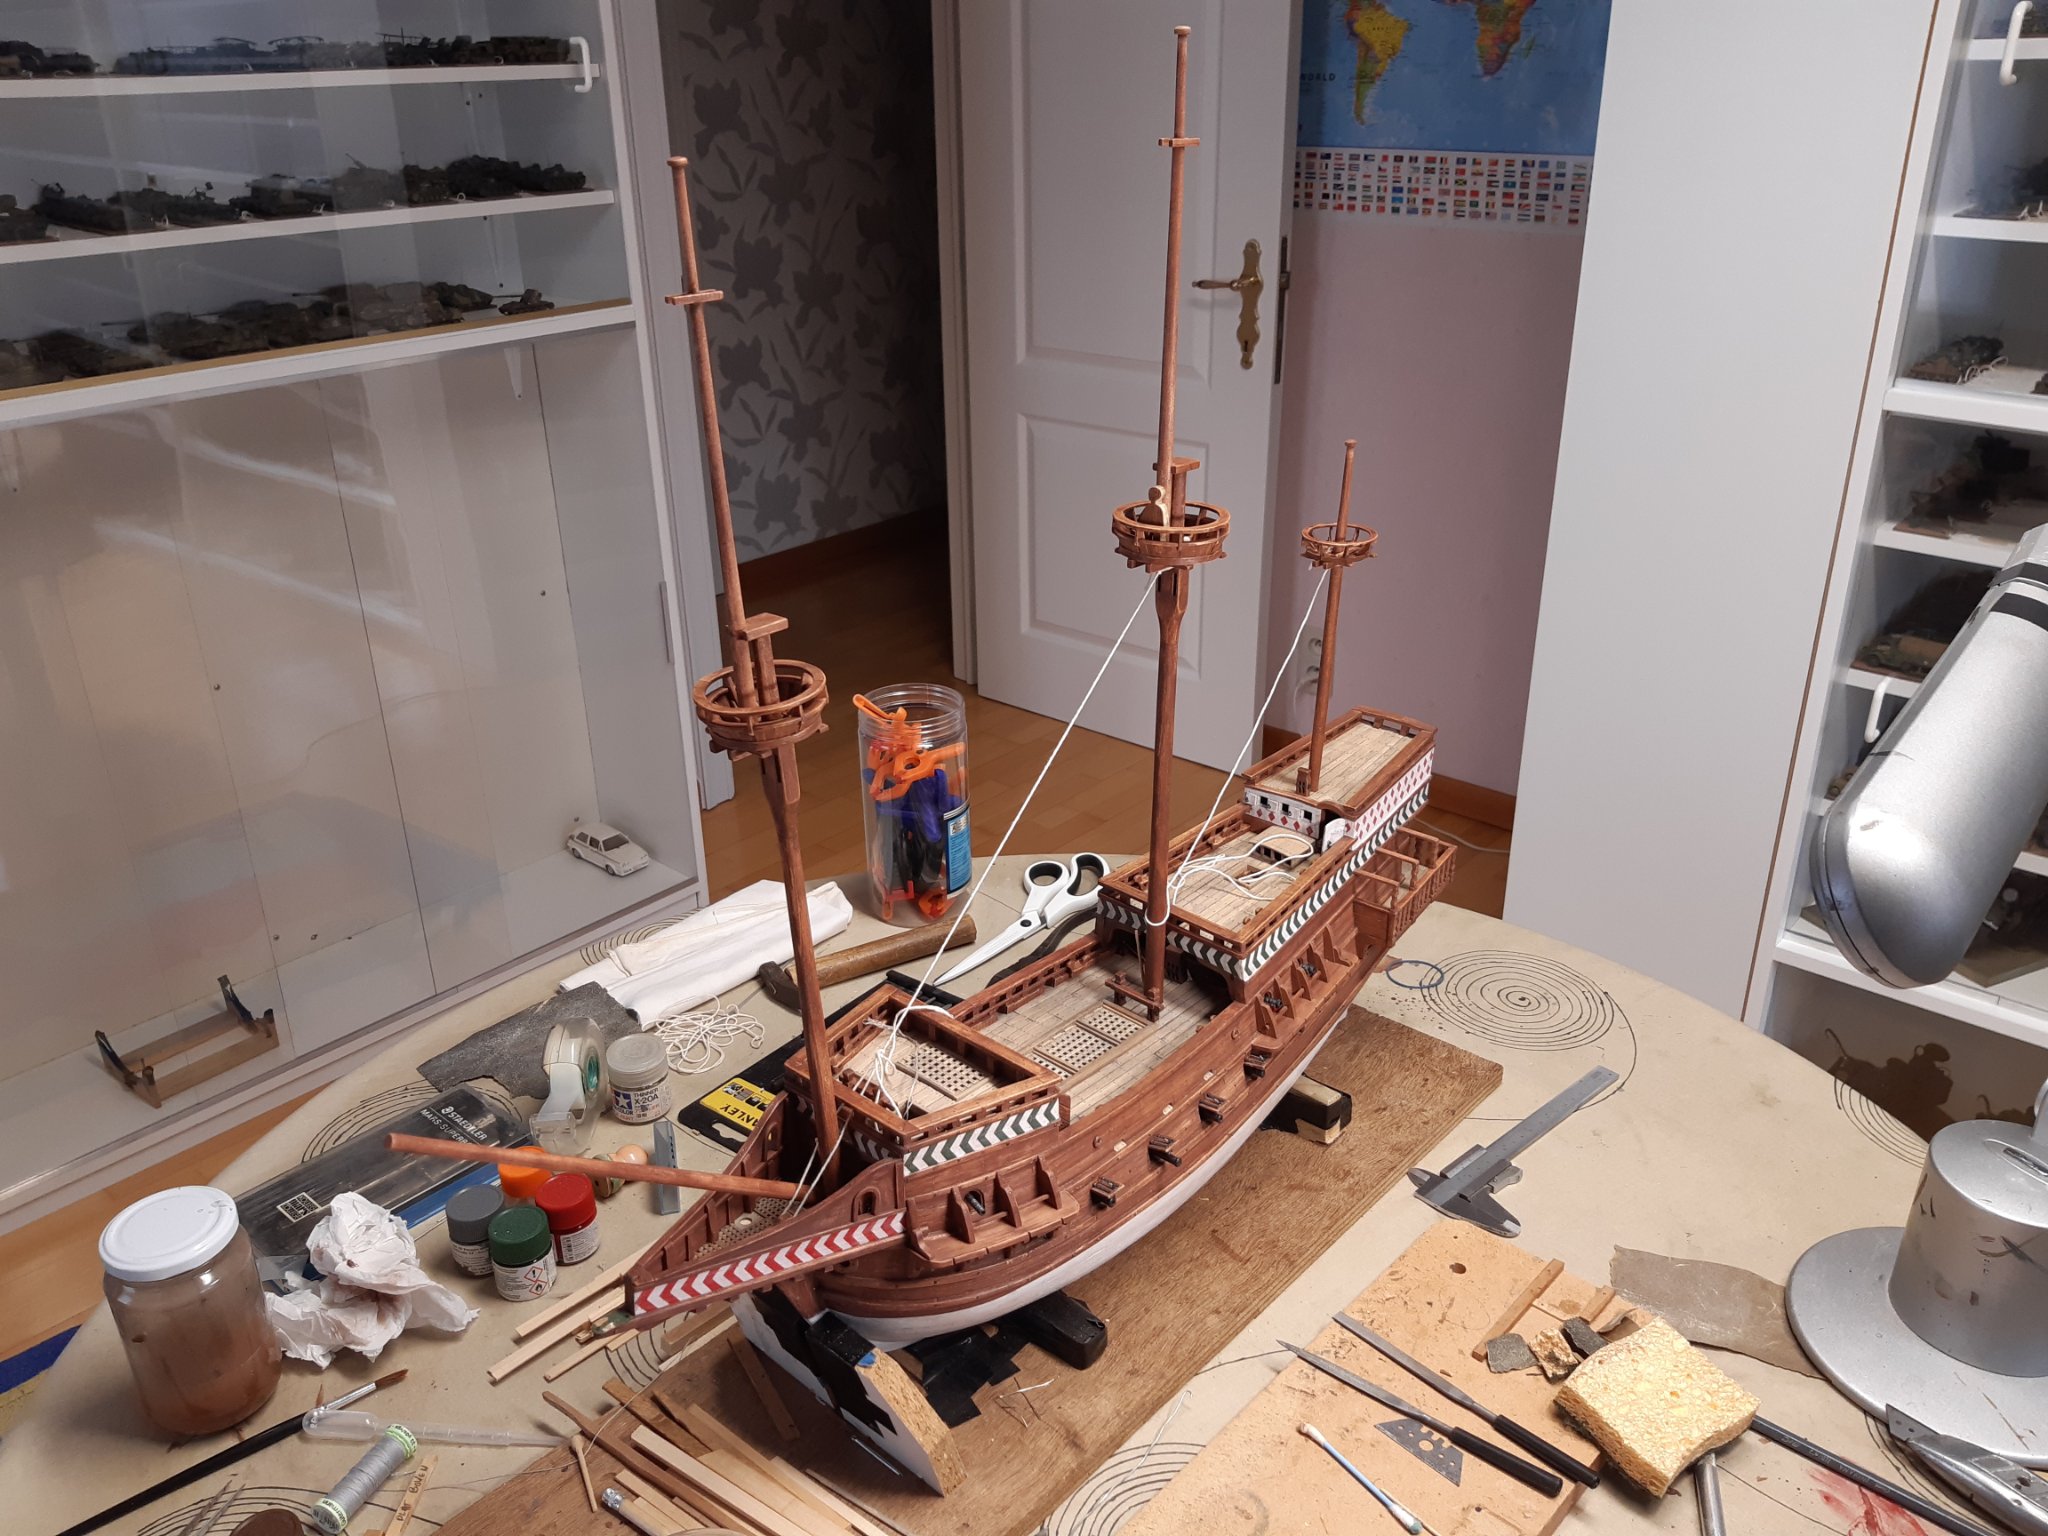
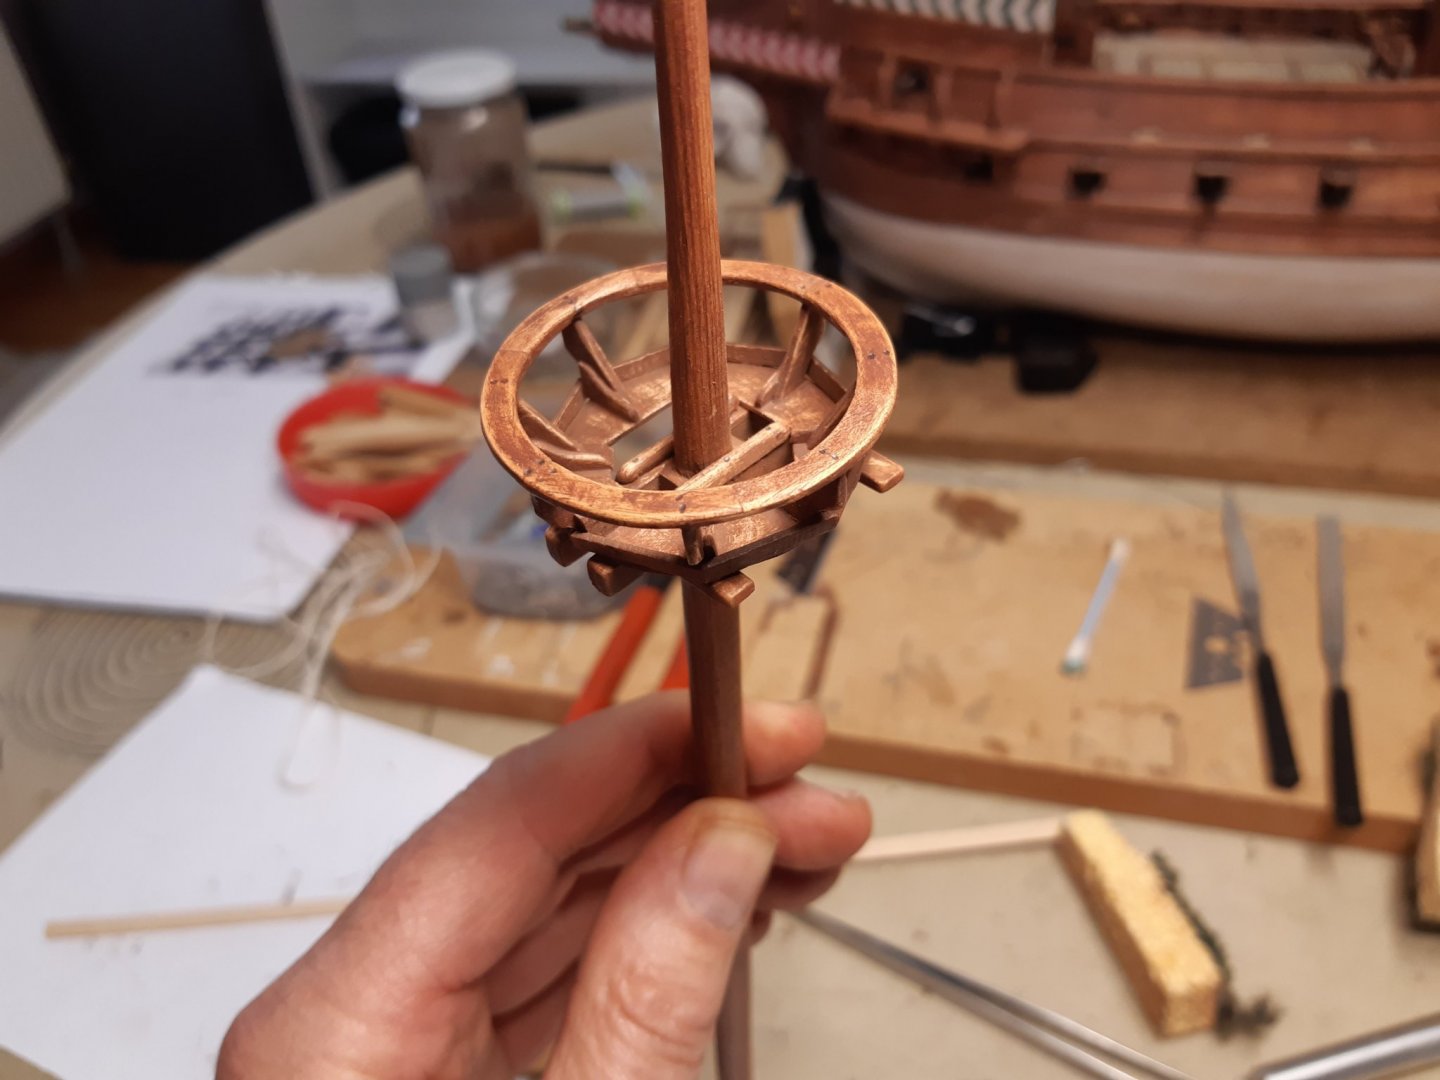
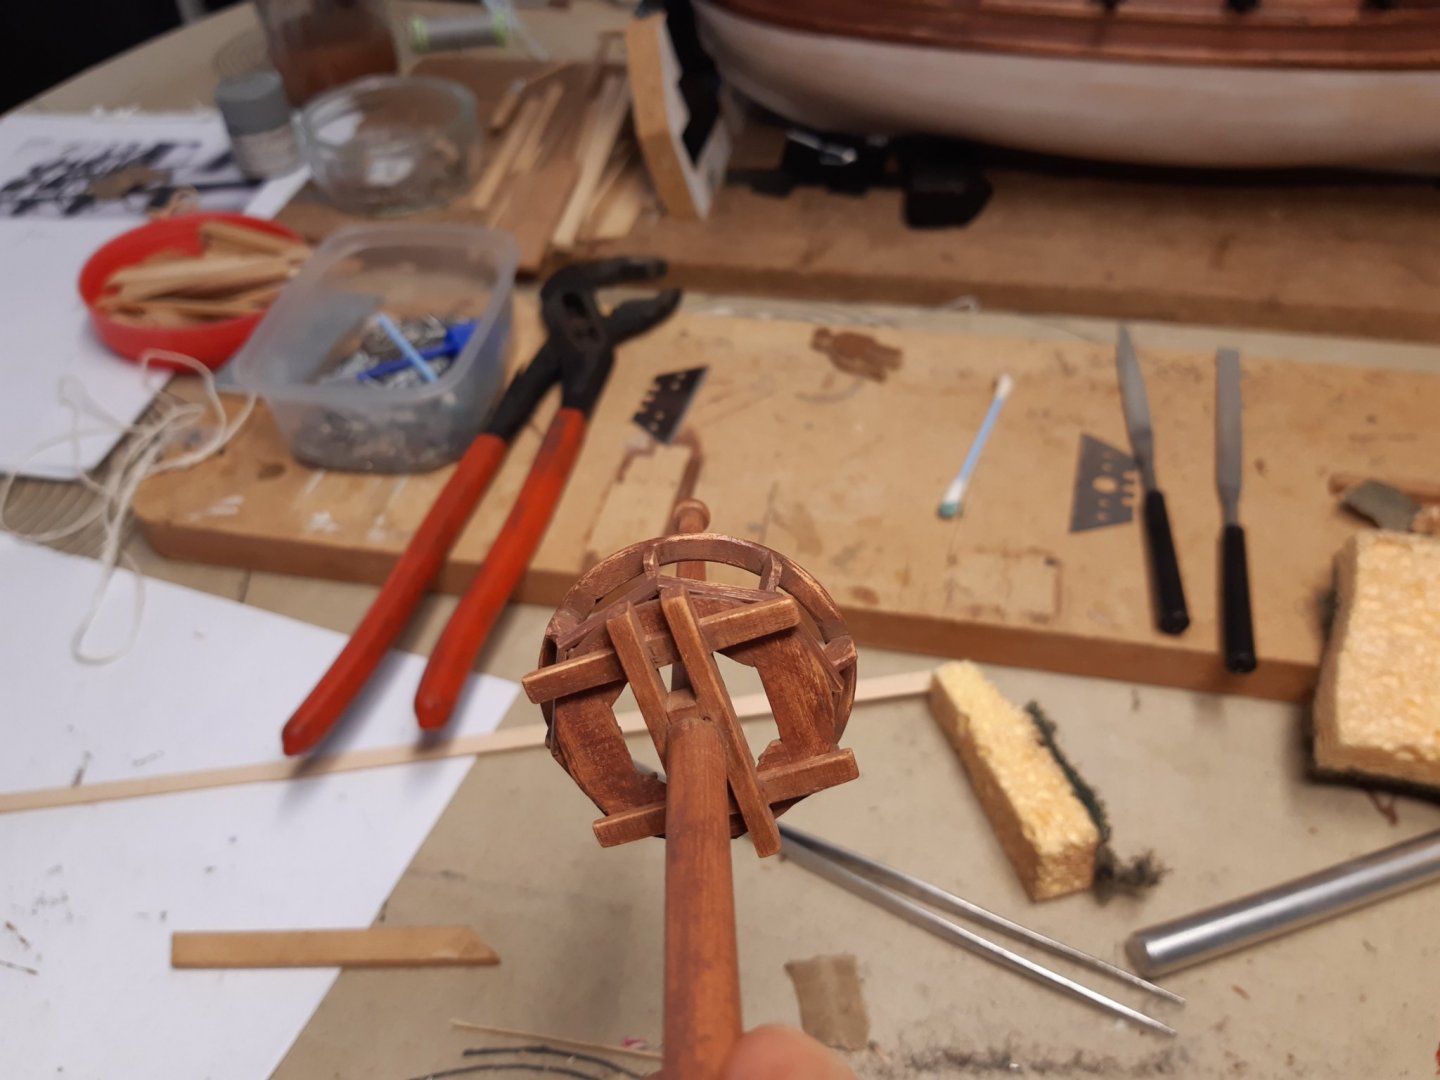
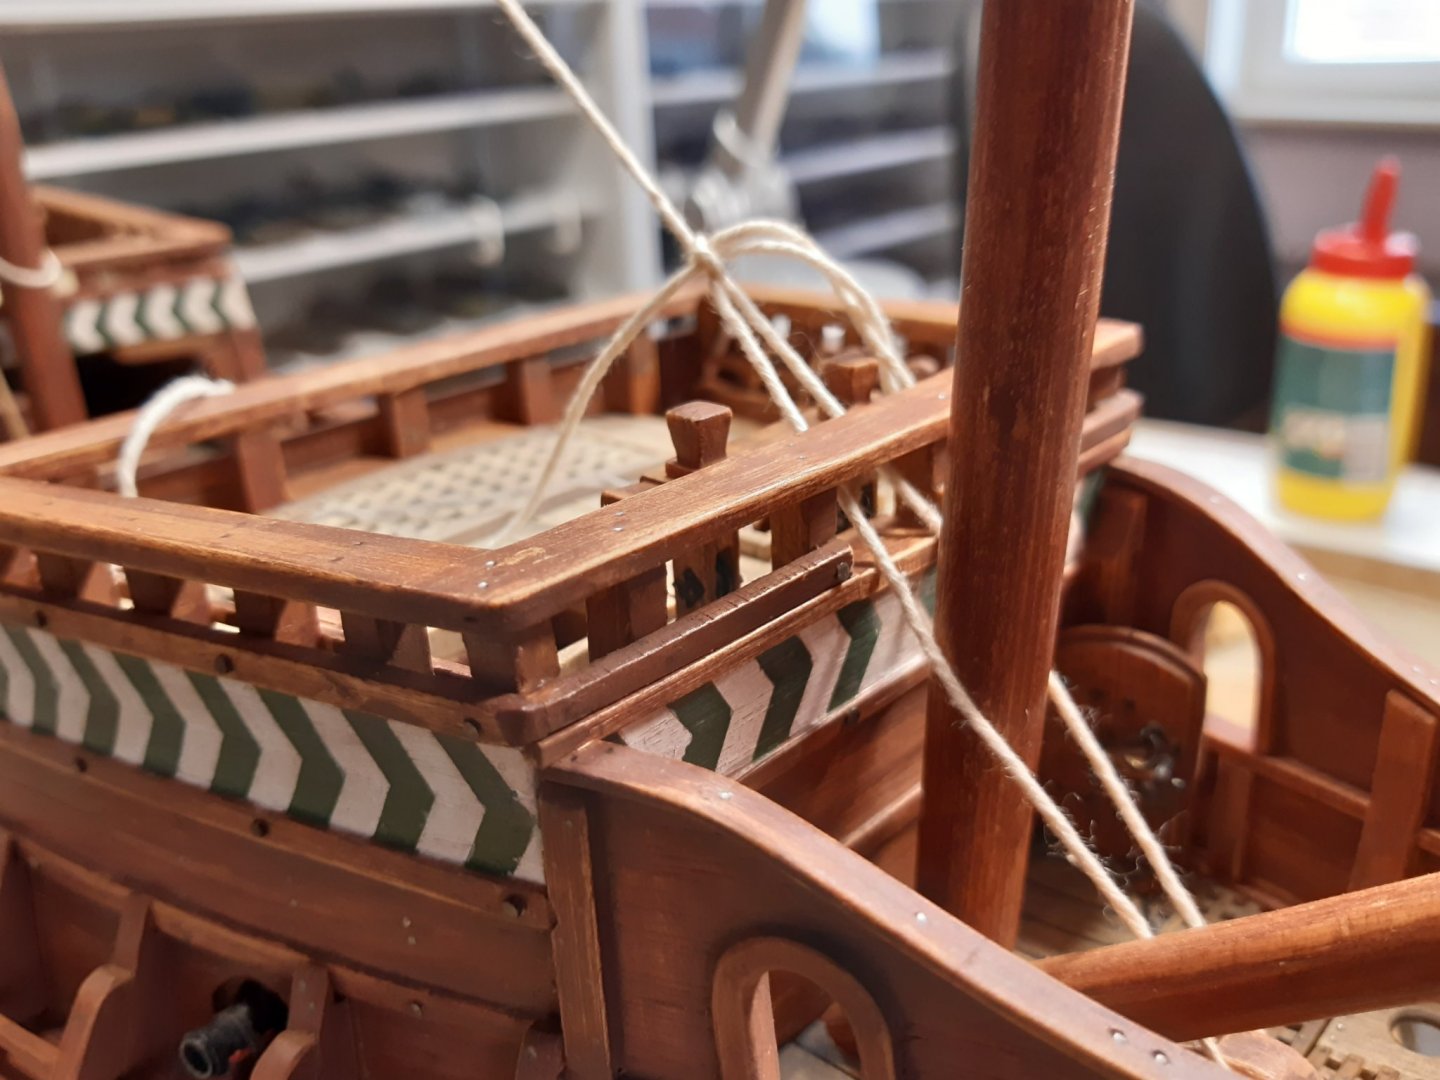
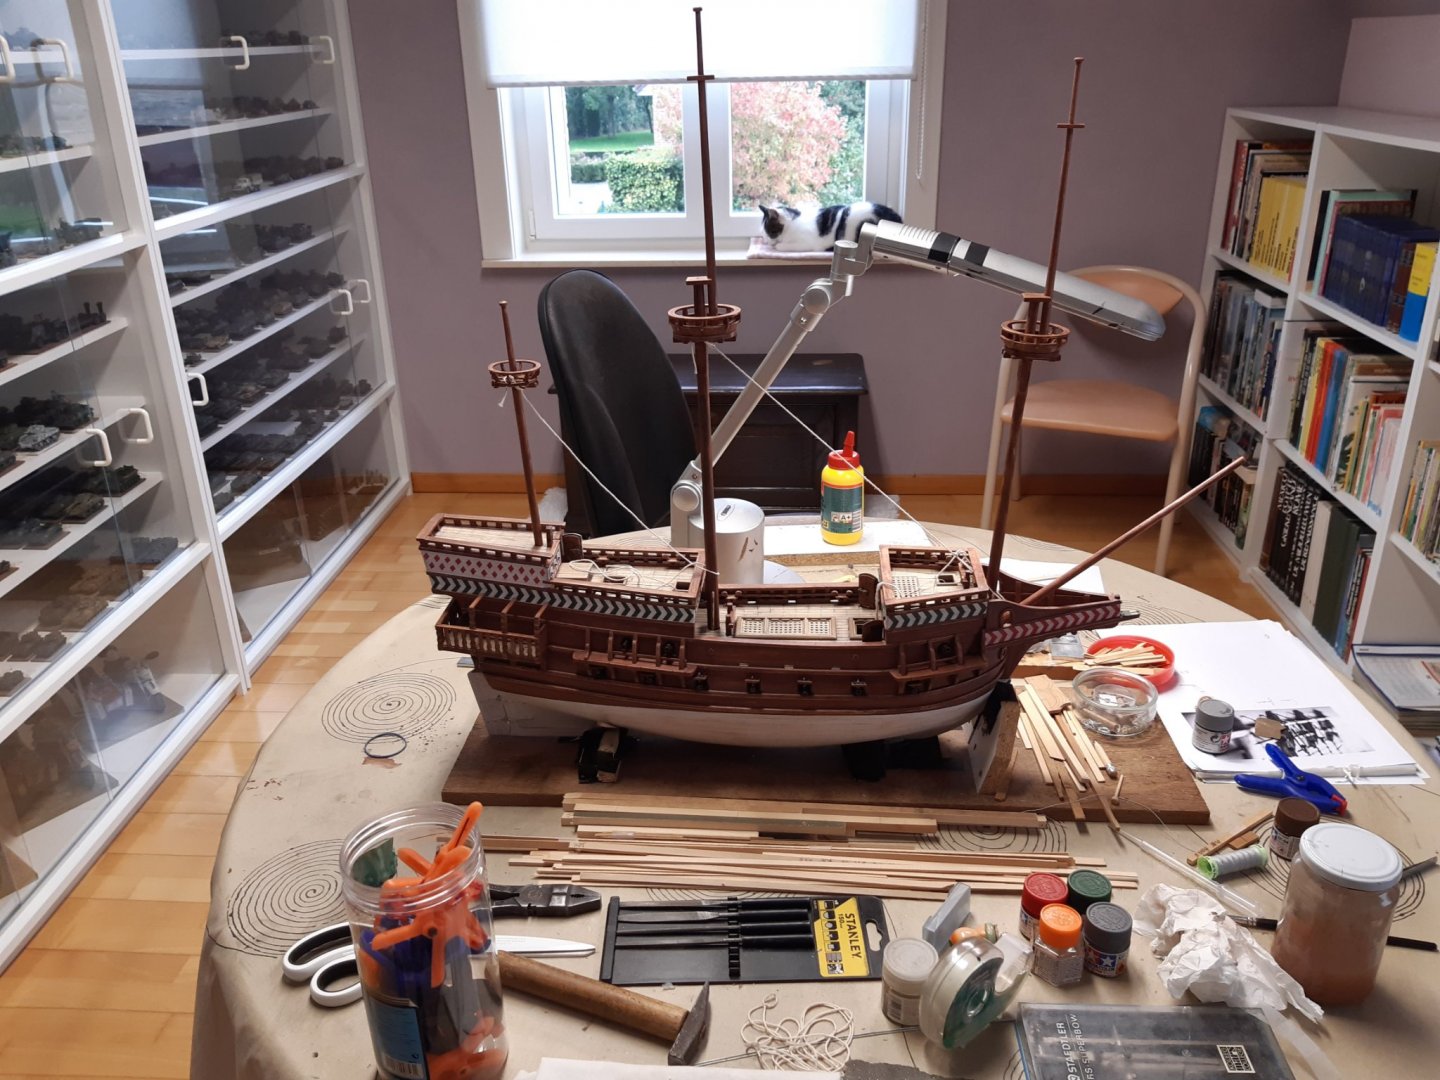
After finnishing the fore and main mast, i started with the mast top of the mizzen mast. There is a choice with or without a mast top. I chose to build a mast top, but smaller and simpler than the 2 previous ones. A little too much removed from the fore castle So, repair and repainting. The modified version (almost correct) The 3 masts and the bowsprit dry fitted in place (and someone is taking a nap 😴) My loyal assistant, on the lookout in the mast top The wooden parts of the masts are now ready, the masts are now first further finished (bolts and other metalwork). And then think about how and where the deadeyes are attached to the mast tops. Thanks for following


- 756 replies
-
- 21
-
-
- galleon
- golden hind
- (and 2 more)
-
windows certainly not silver. I've seen some kind of light blue used on this forum once. this gave a good result. but the choice is yours
- 265 replies
-
- 2
-
-
- Golden Hind
- Airfix
- (and 1 more)
-
There were one-piece masts. made of tall straight trees. And there were made masts (parts from several sawn trees) Made masts are with rope (to keep the pieces together) one-piece masts not
- 265 replies
-
- 1
-
-
- Golden Hind
- Airfix
- (and 1 more)