


Baker
-
Posts
4,134 -
Joined
-
Last visited
Content Type
Profiles
Forums
Gallery
Events
Posts posted by Baker
-
-
A flemish horse on a ship??
Needed to google this...
Here. A flemish horse is : a horse, a pub, beer... 😅
-
-
-
7 hours ago, rkwz said:
Maybe a little extra dry brushing of black to define the planking lines?
Be careful with black. I had no good results with it
Quite a "hard" color difference for a deck.
It is best to try on another piece of plastic first and not directly on your deck.Looking at the photo. I would leave it as it is, it already looks good
7 hours ago, rkwz said:Lesson: Get the painting done right before rigging 😭
I have also learned this lesson

")
(You may find painting ideas in post 93 of my Bounty project)
- shipman, Edwardkenway and rkwz
-
 3
3
-
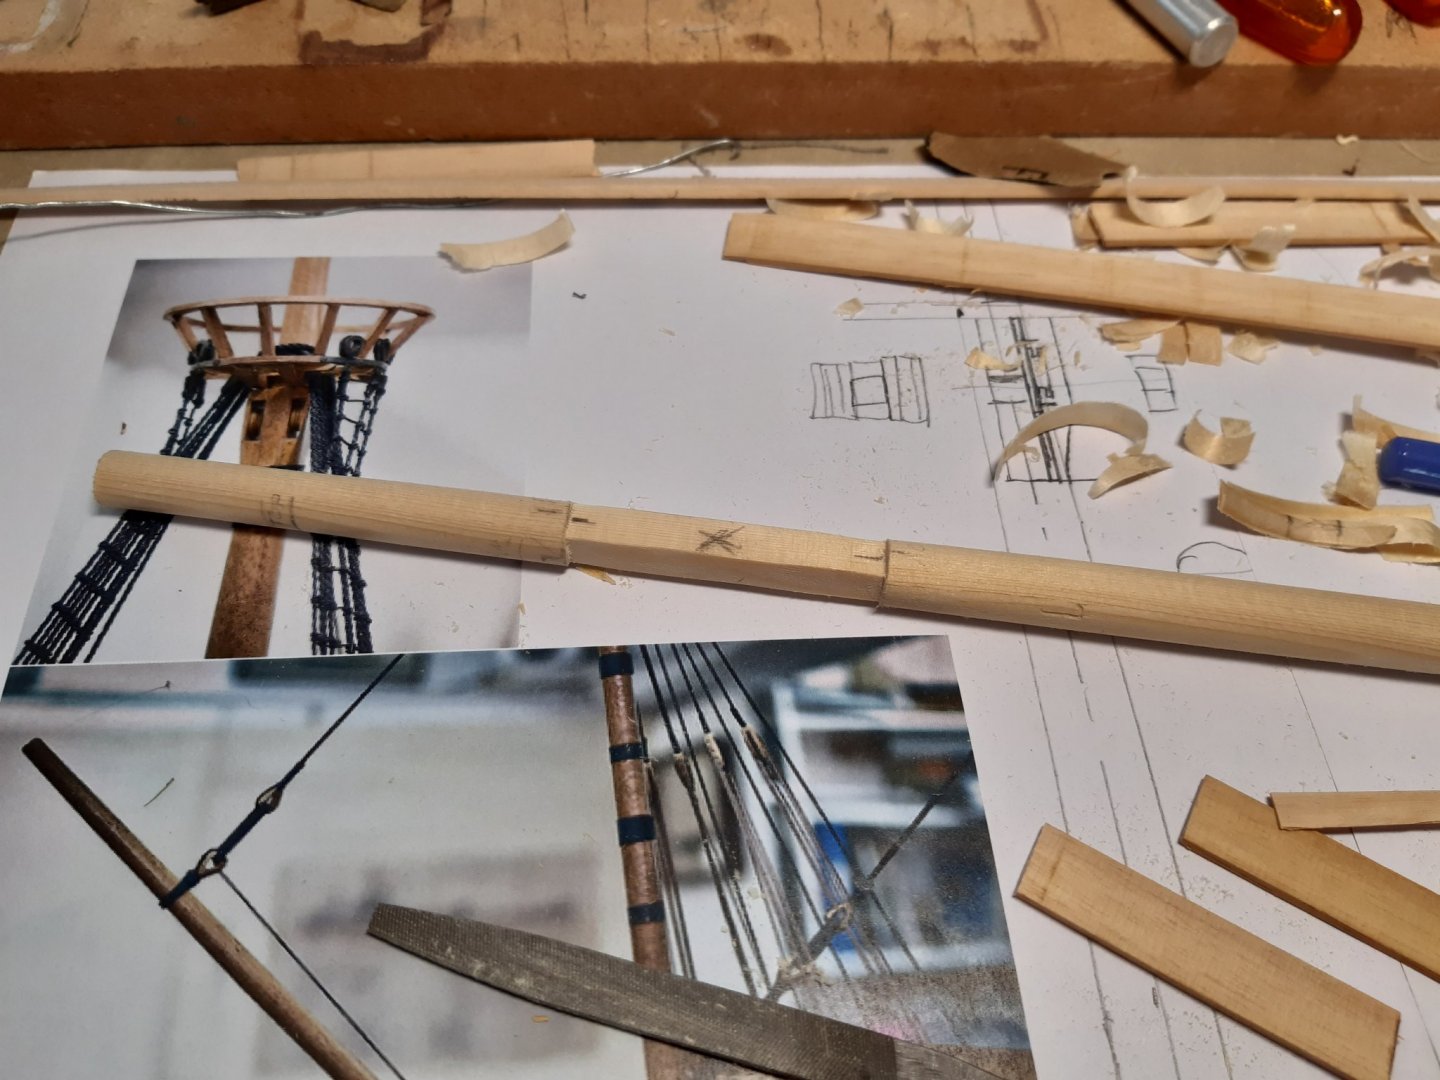
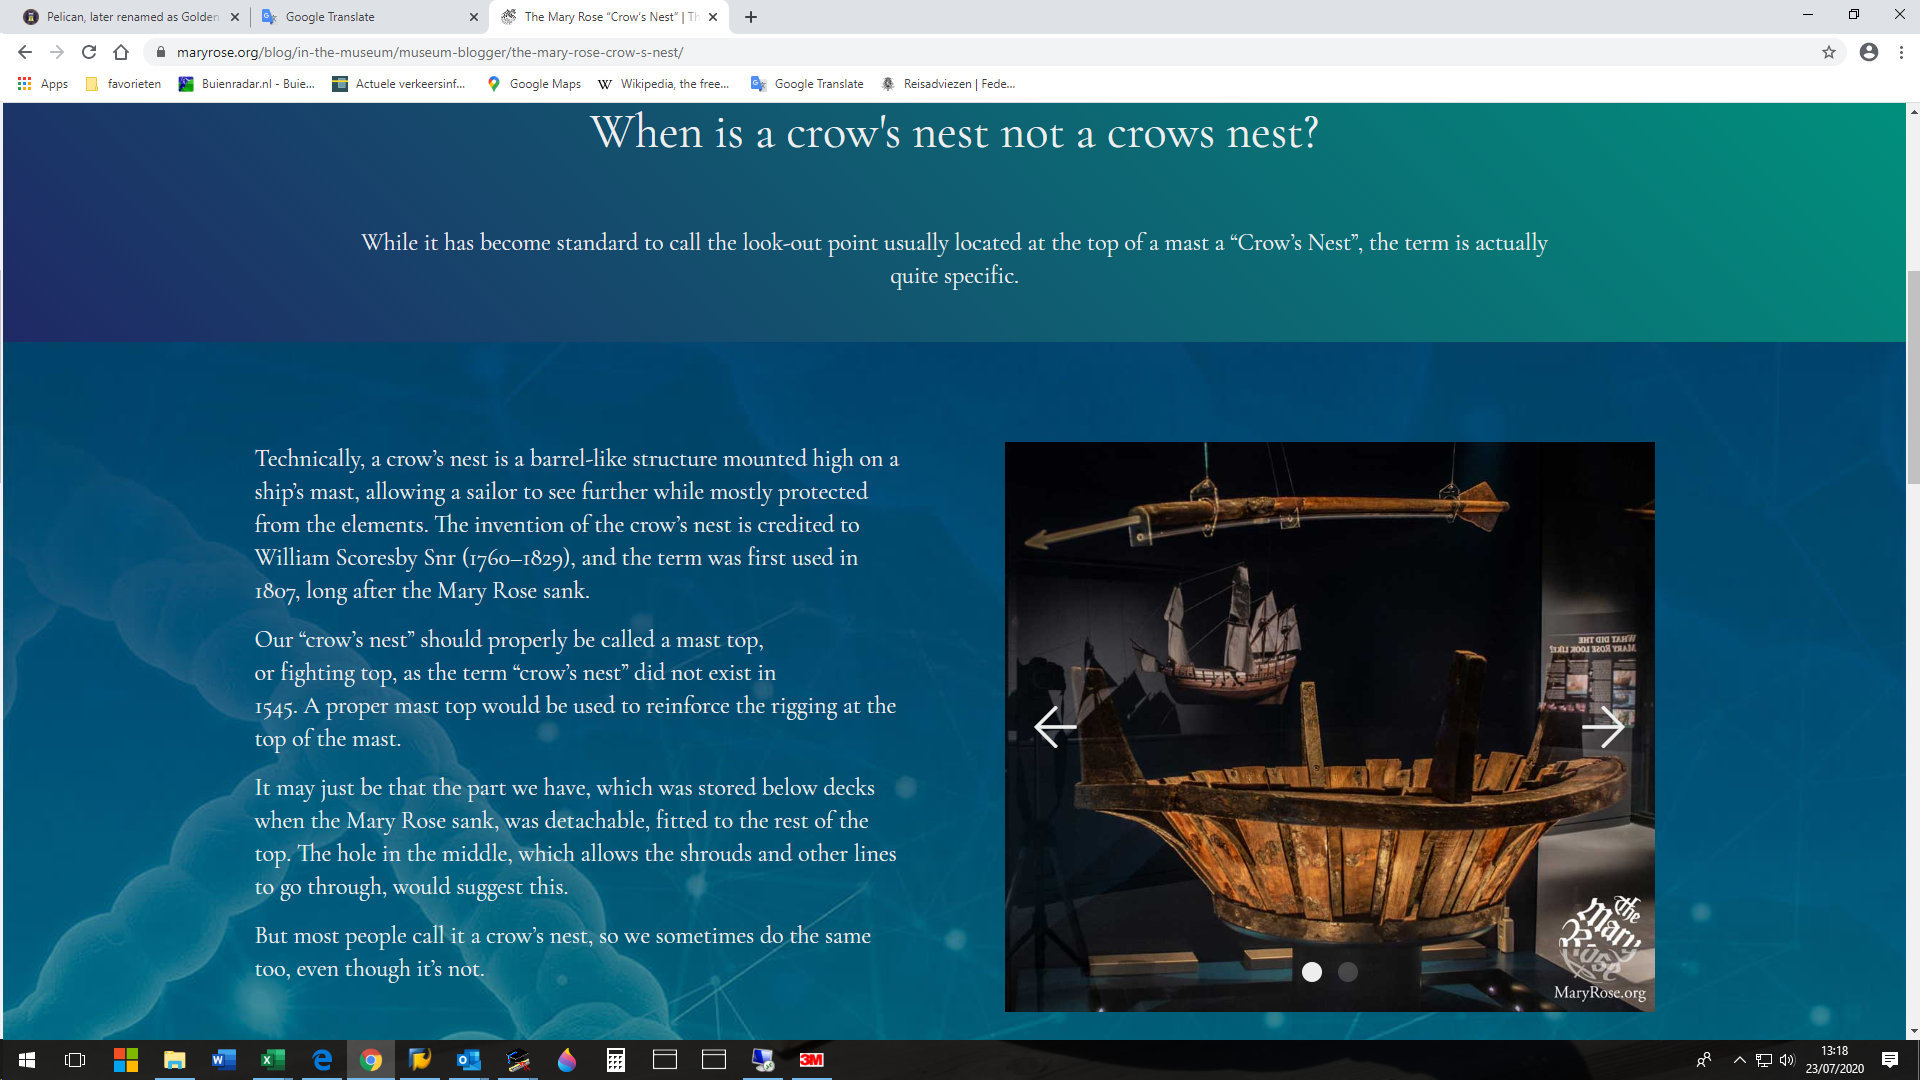
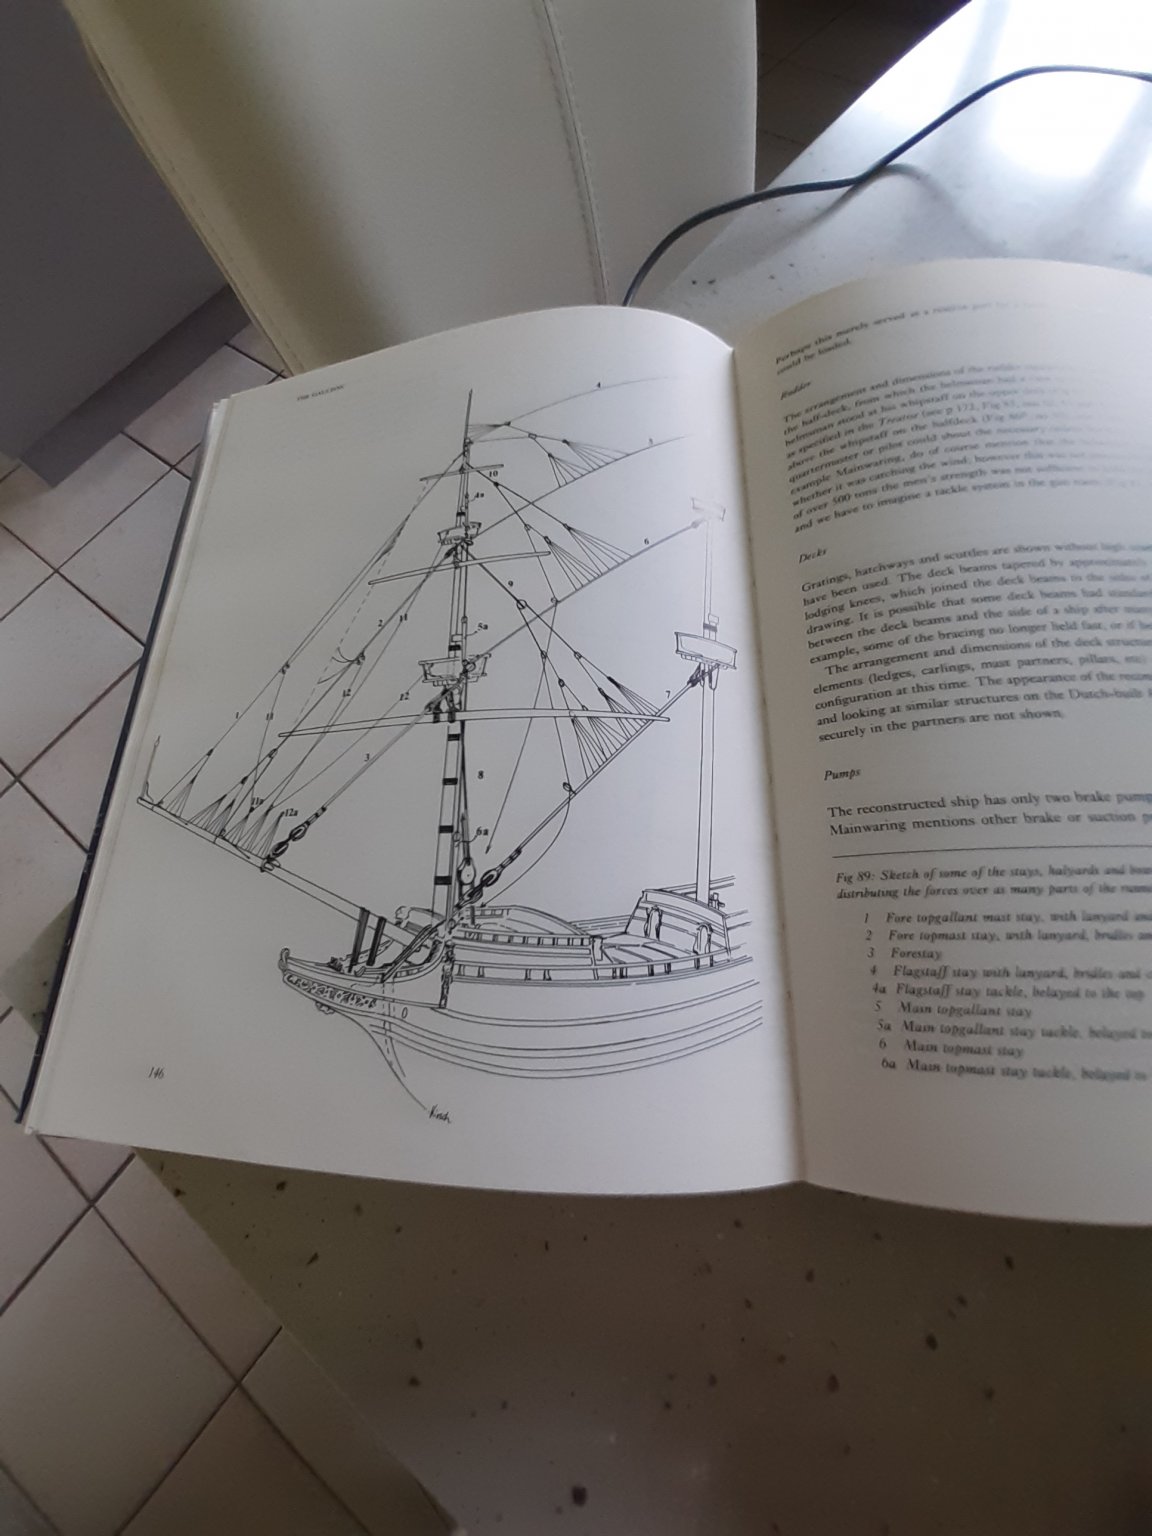
Indeed, a mast top is not a crowsnest.
When I was young. I (and probably many of us) dreamed to be a pirate, exploring the horizon from the crowsnest, high in the mast.
Now I discover that I sat actually in a simple mast top. ☹️
My childhood dream, shattered to pieces 😲 😆https://en.wikipedia.org/wiki/Crow's_nest
_p184_I_SCORESBYS_TUNNA.jpg.923f975142ec98f64993836e86c86939.jpg)
https://maryrose.org/blog/in-the-museum/museum-blogger/the-mary-rose-crow-s-nest/

-
Thanks.
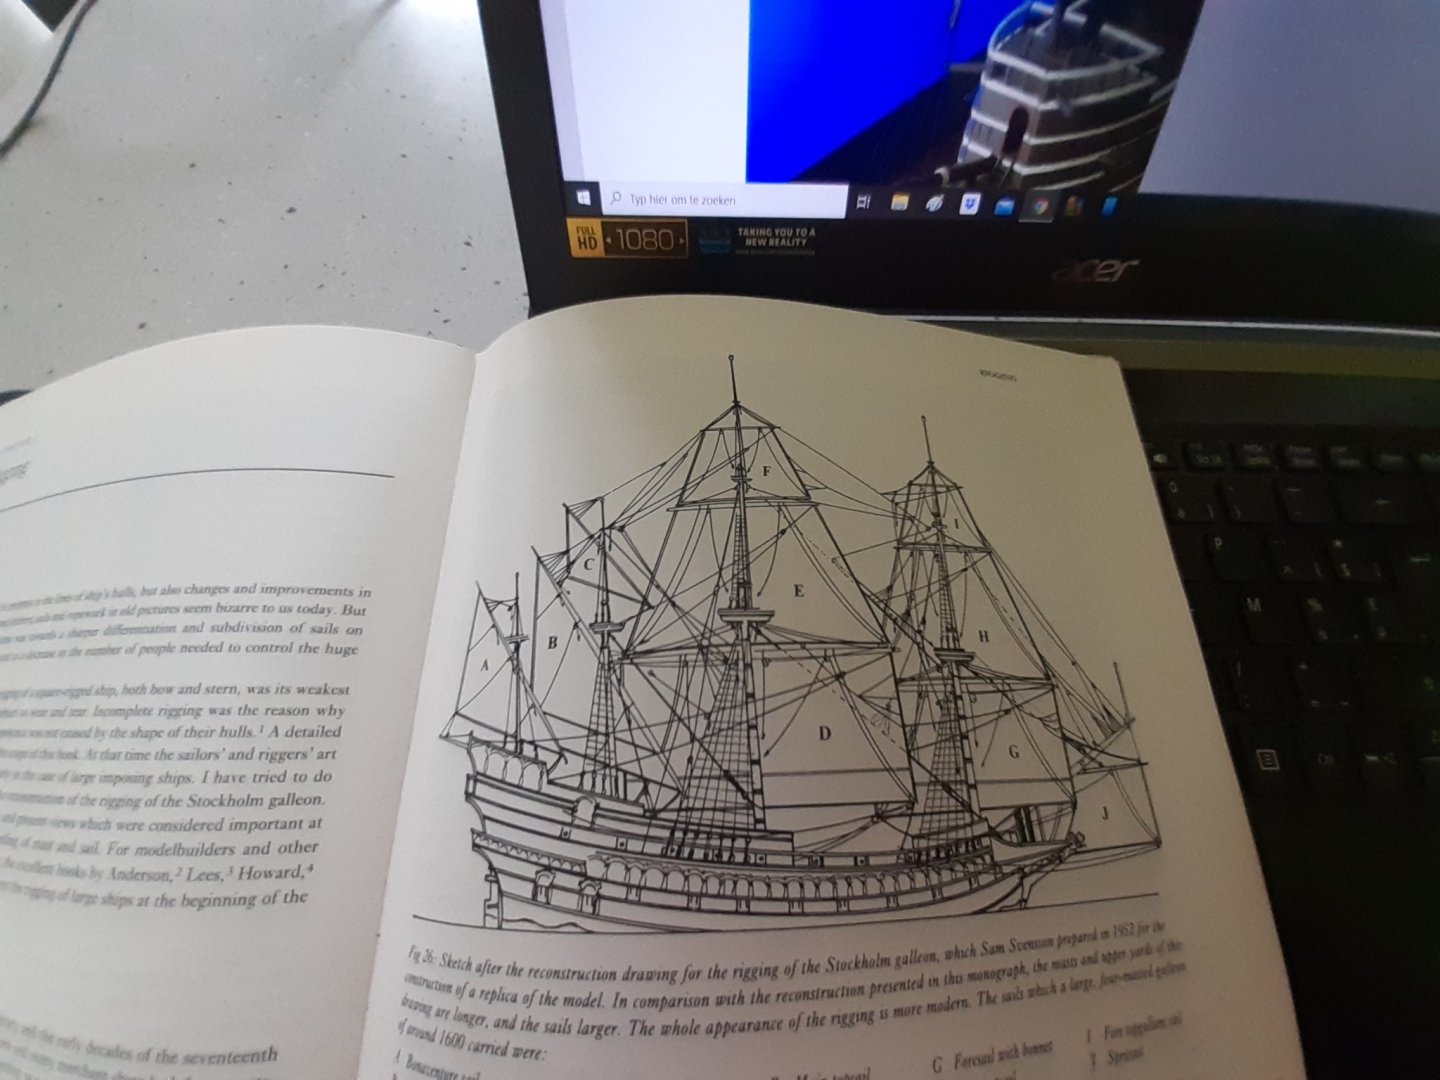
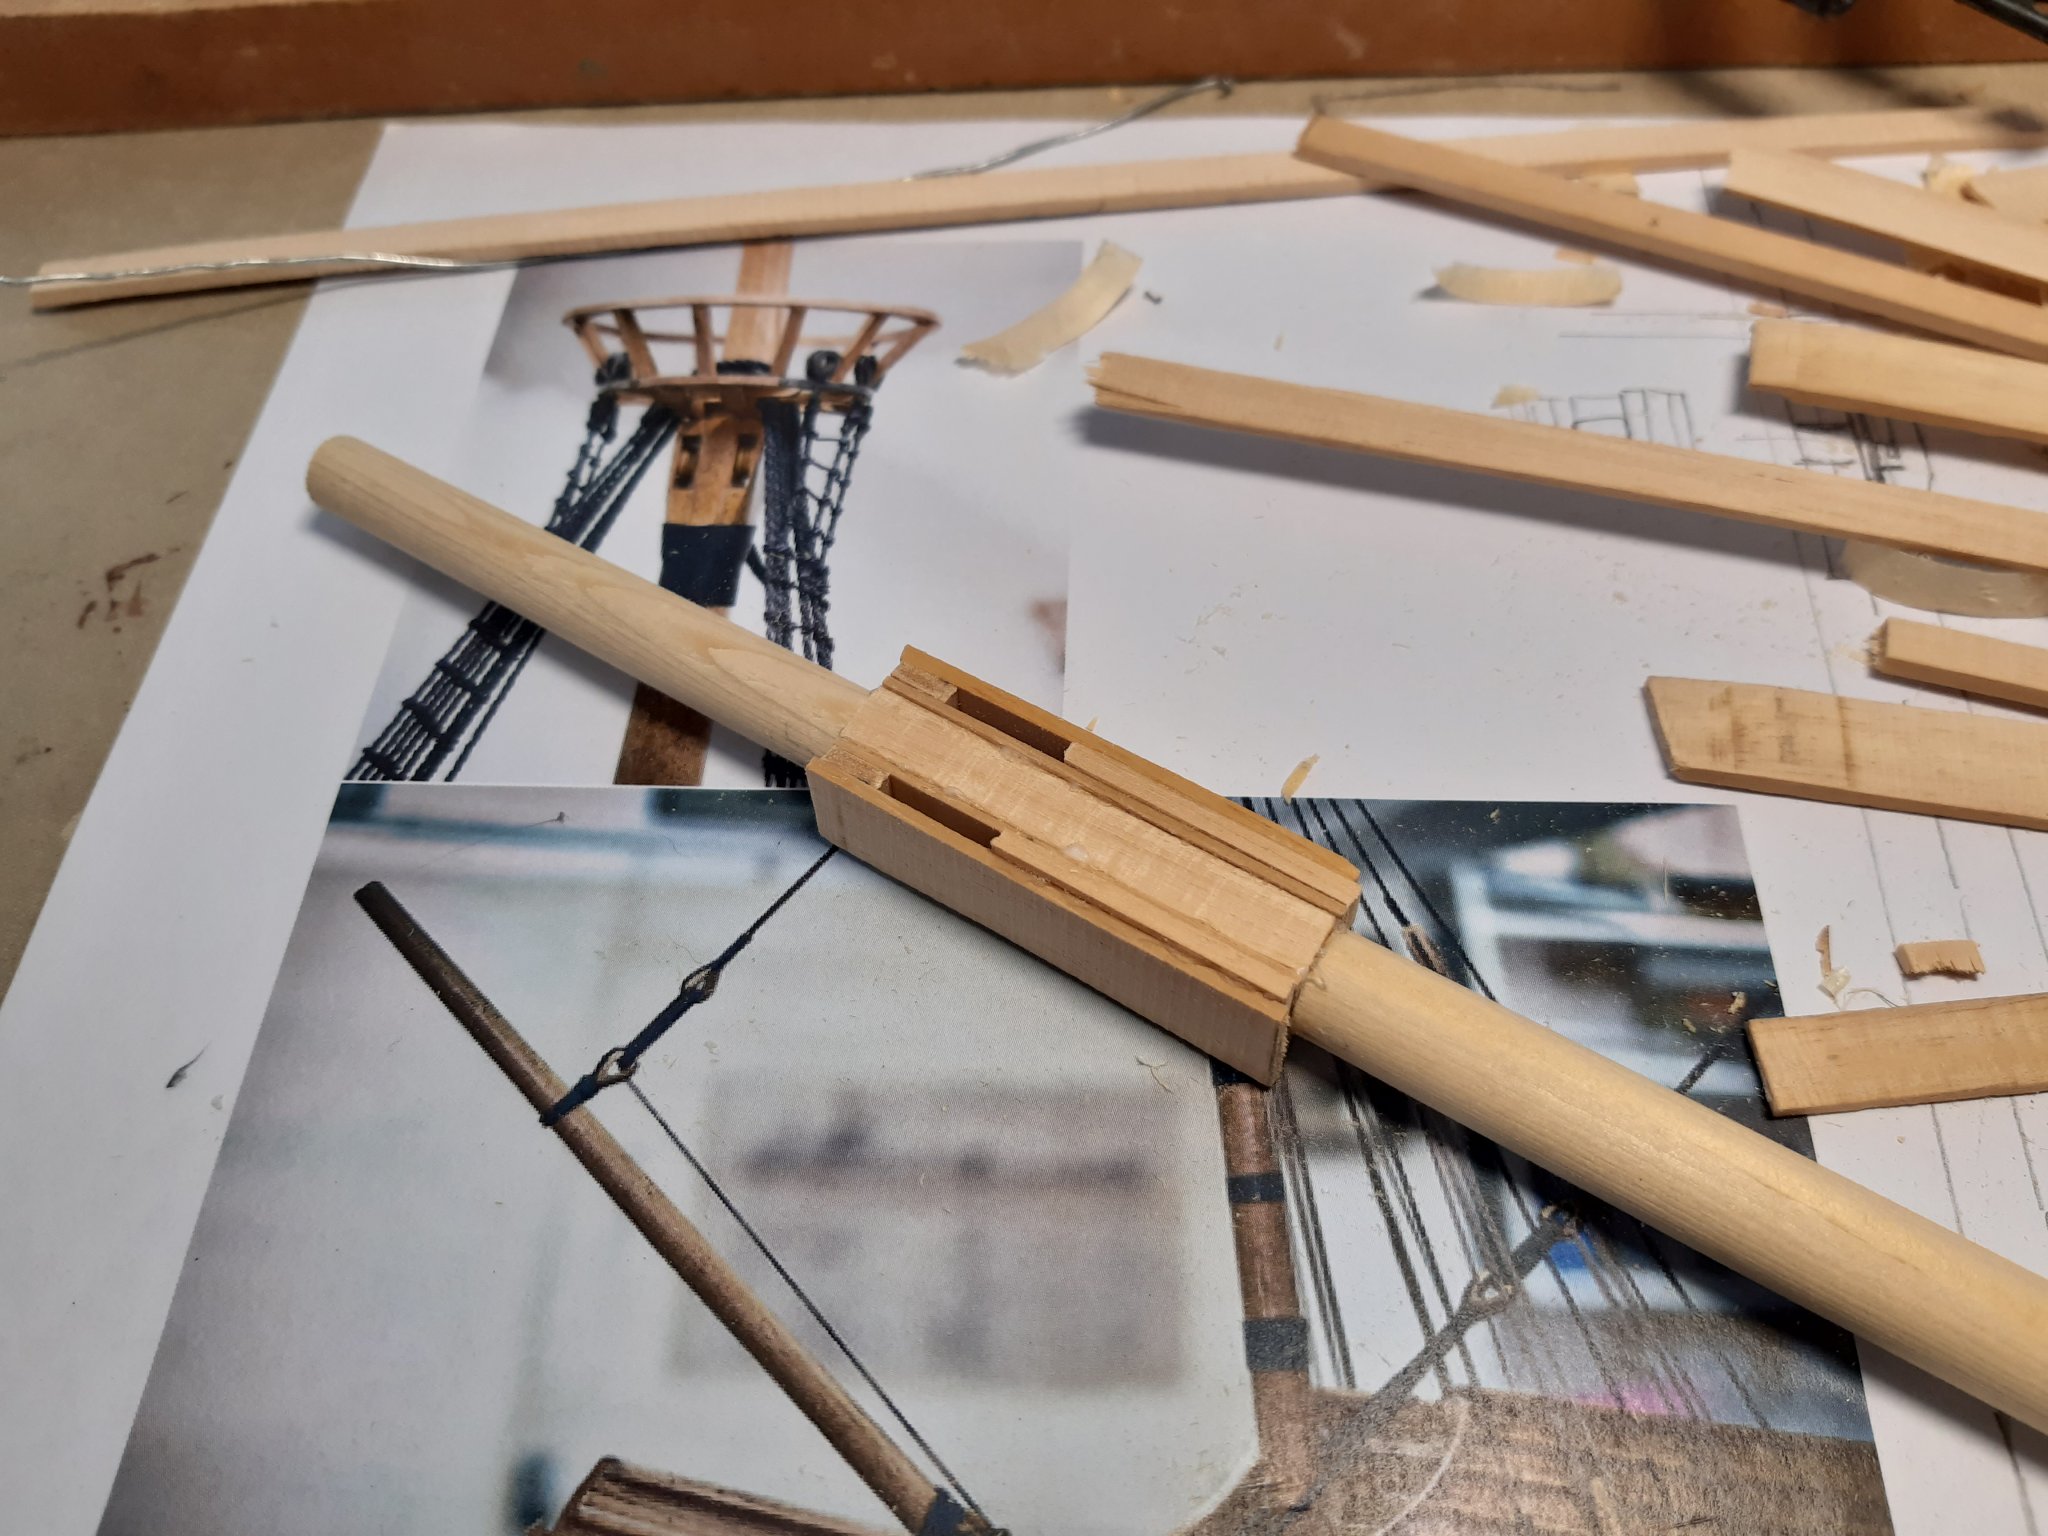
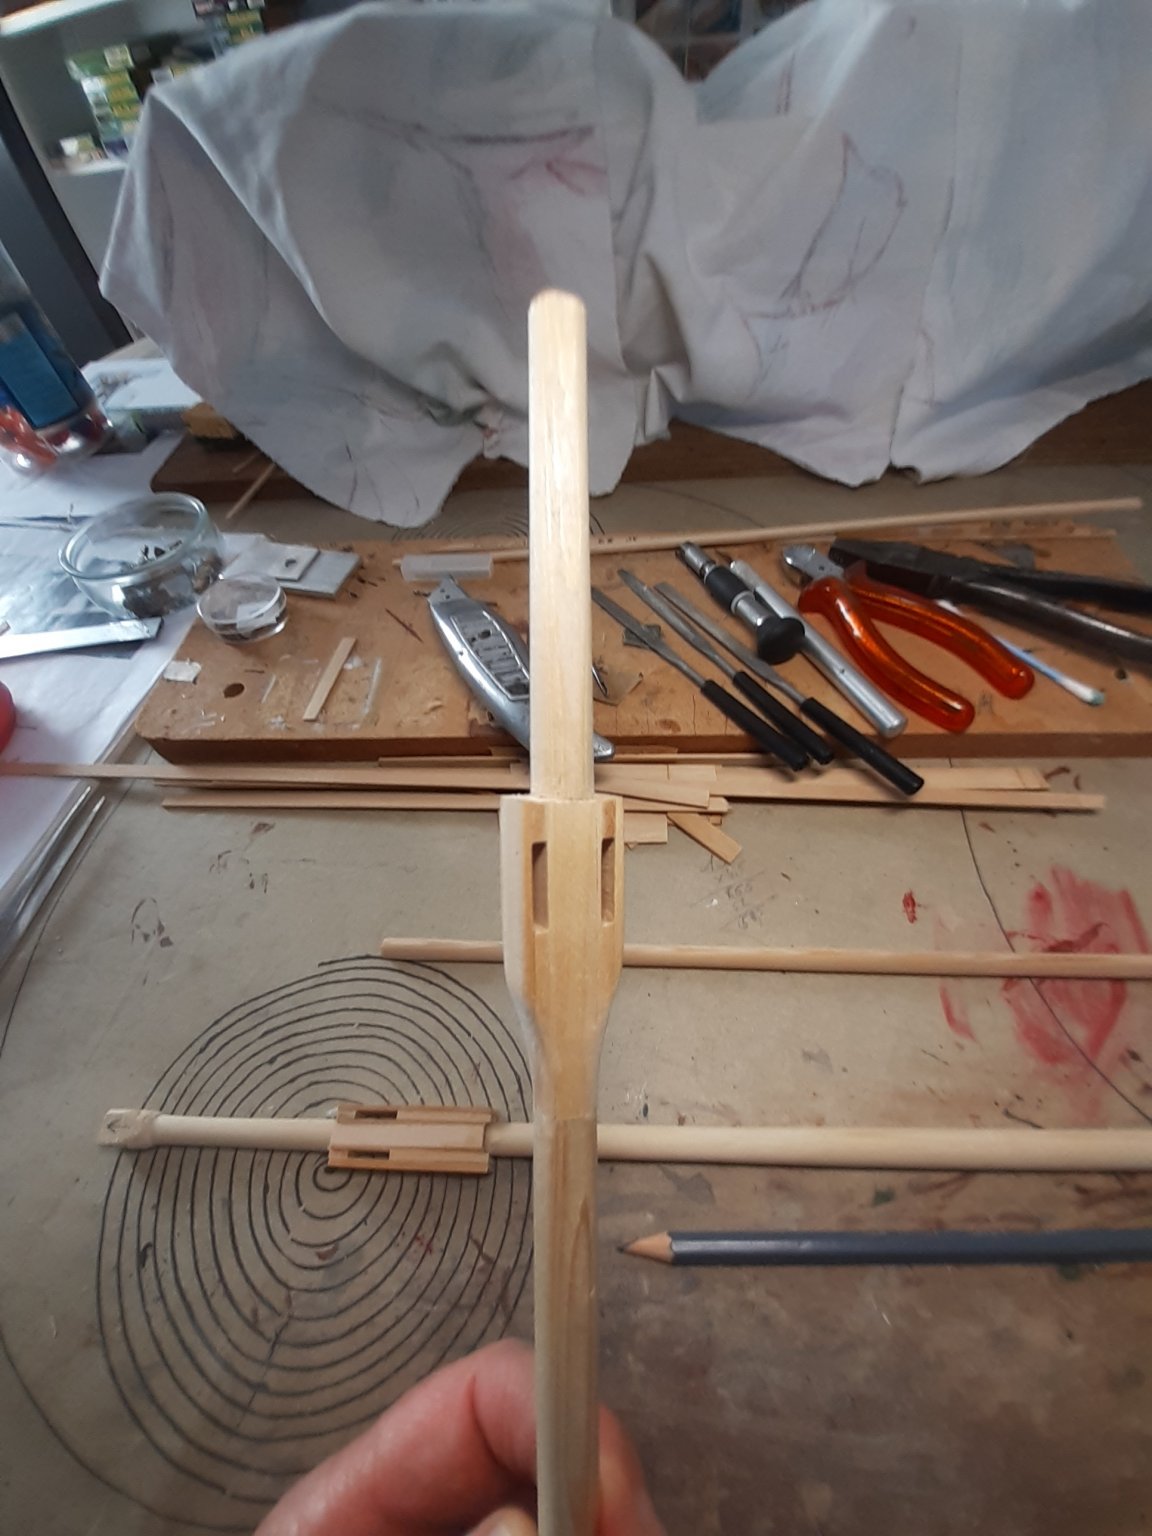
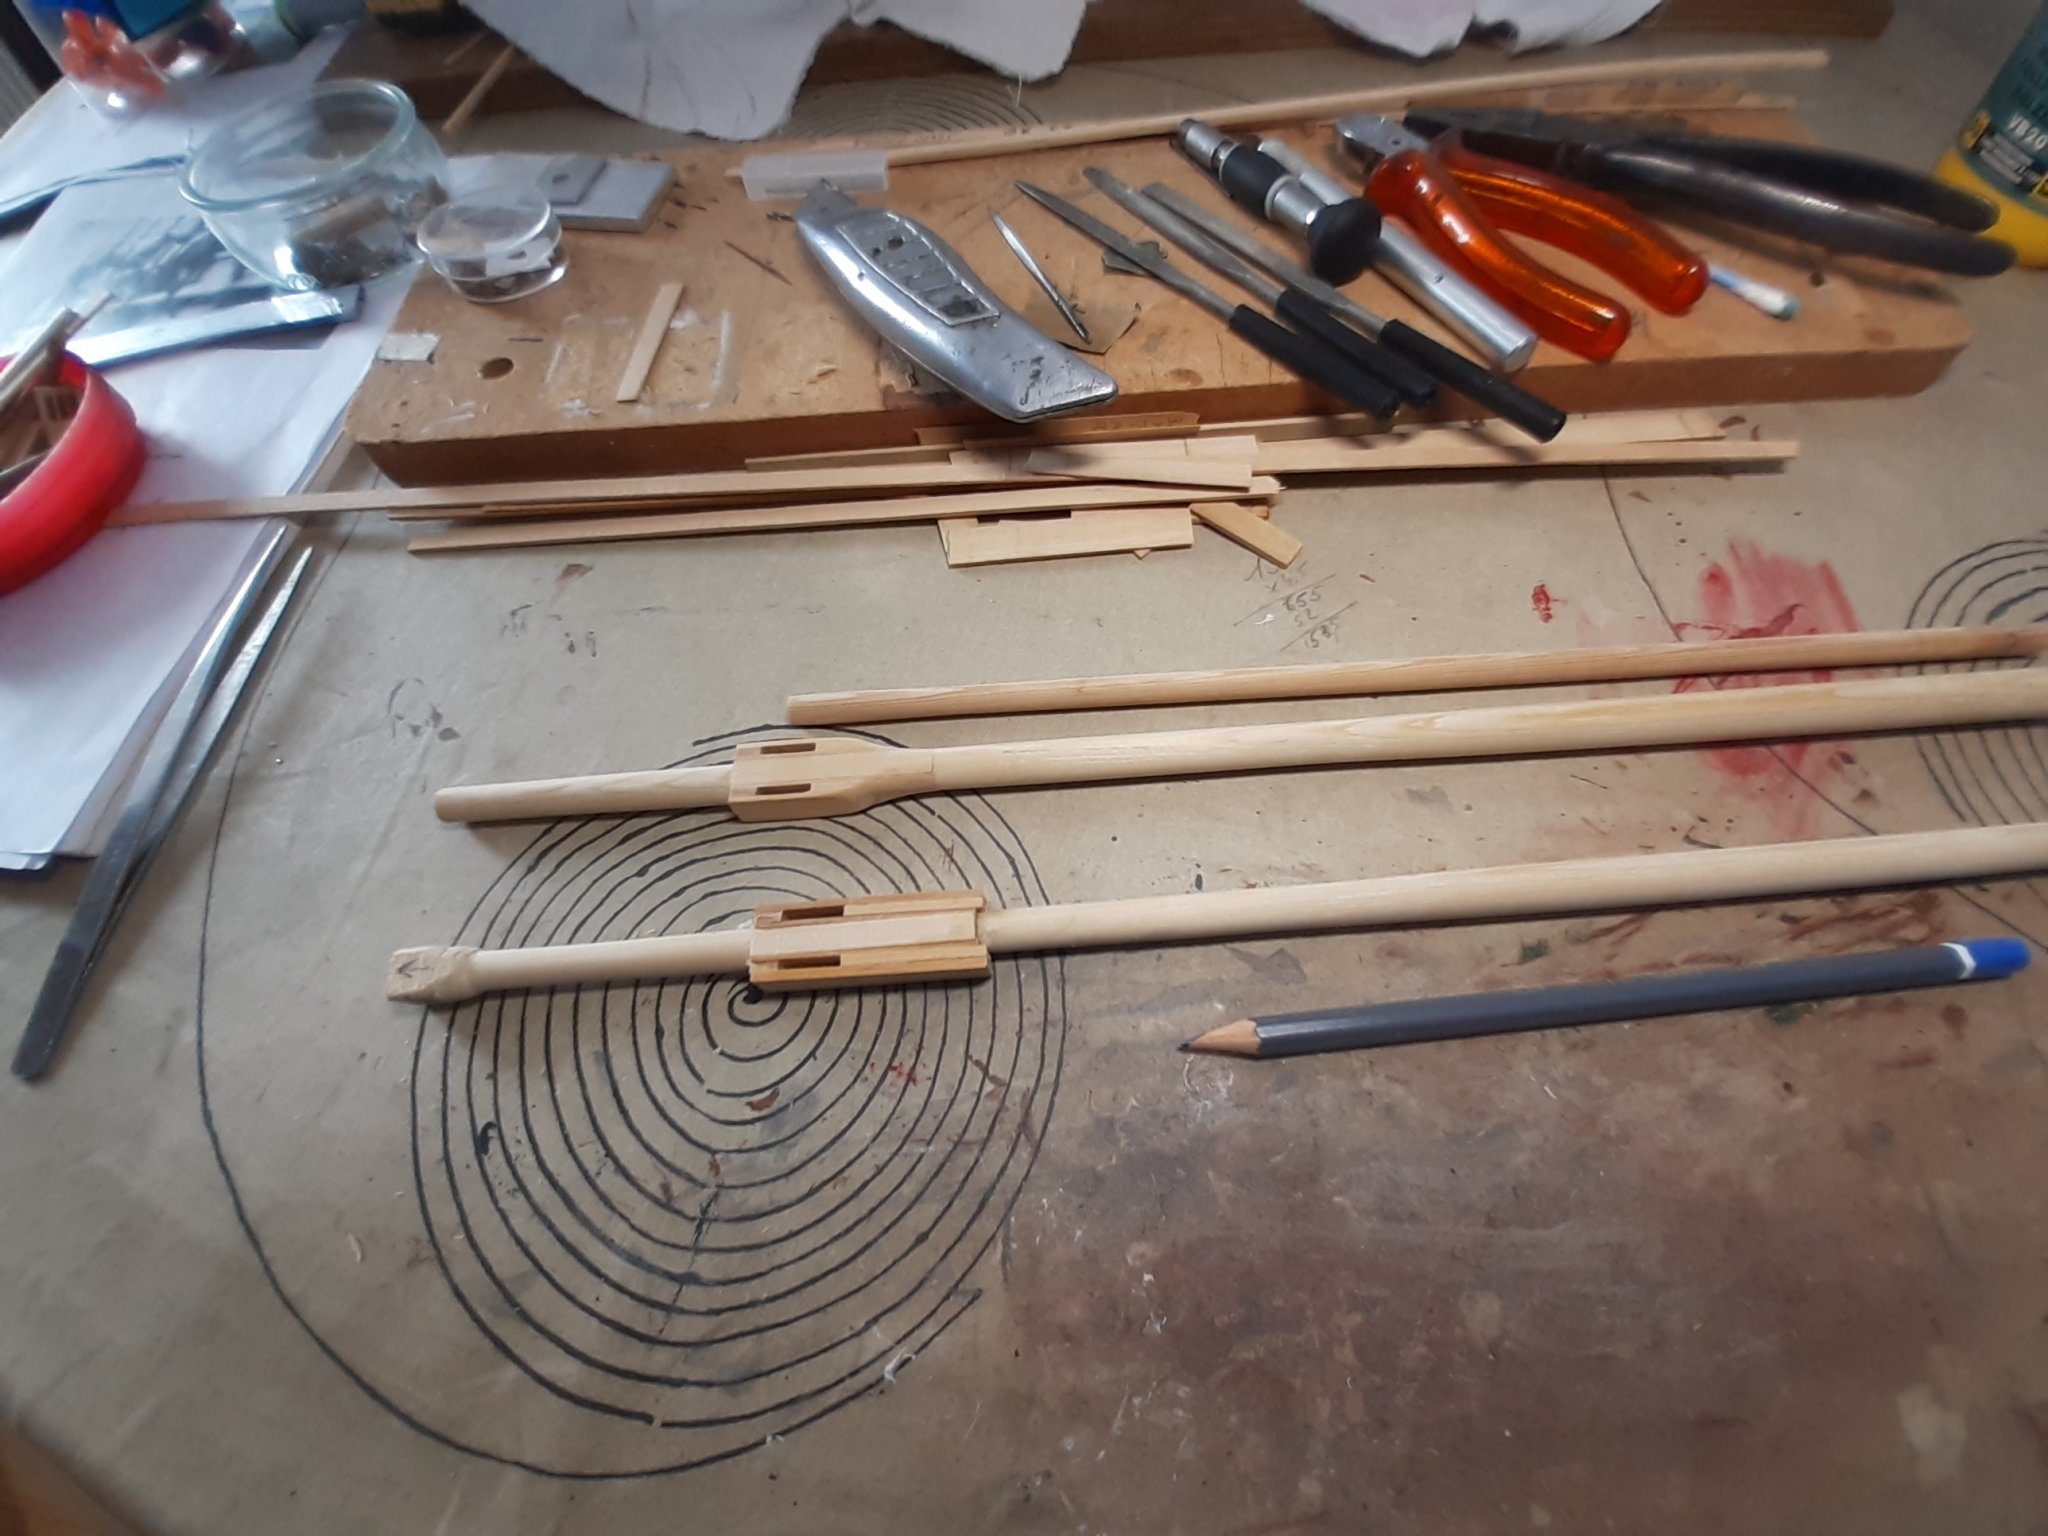
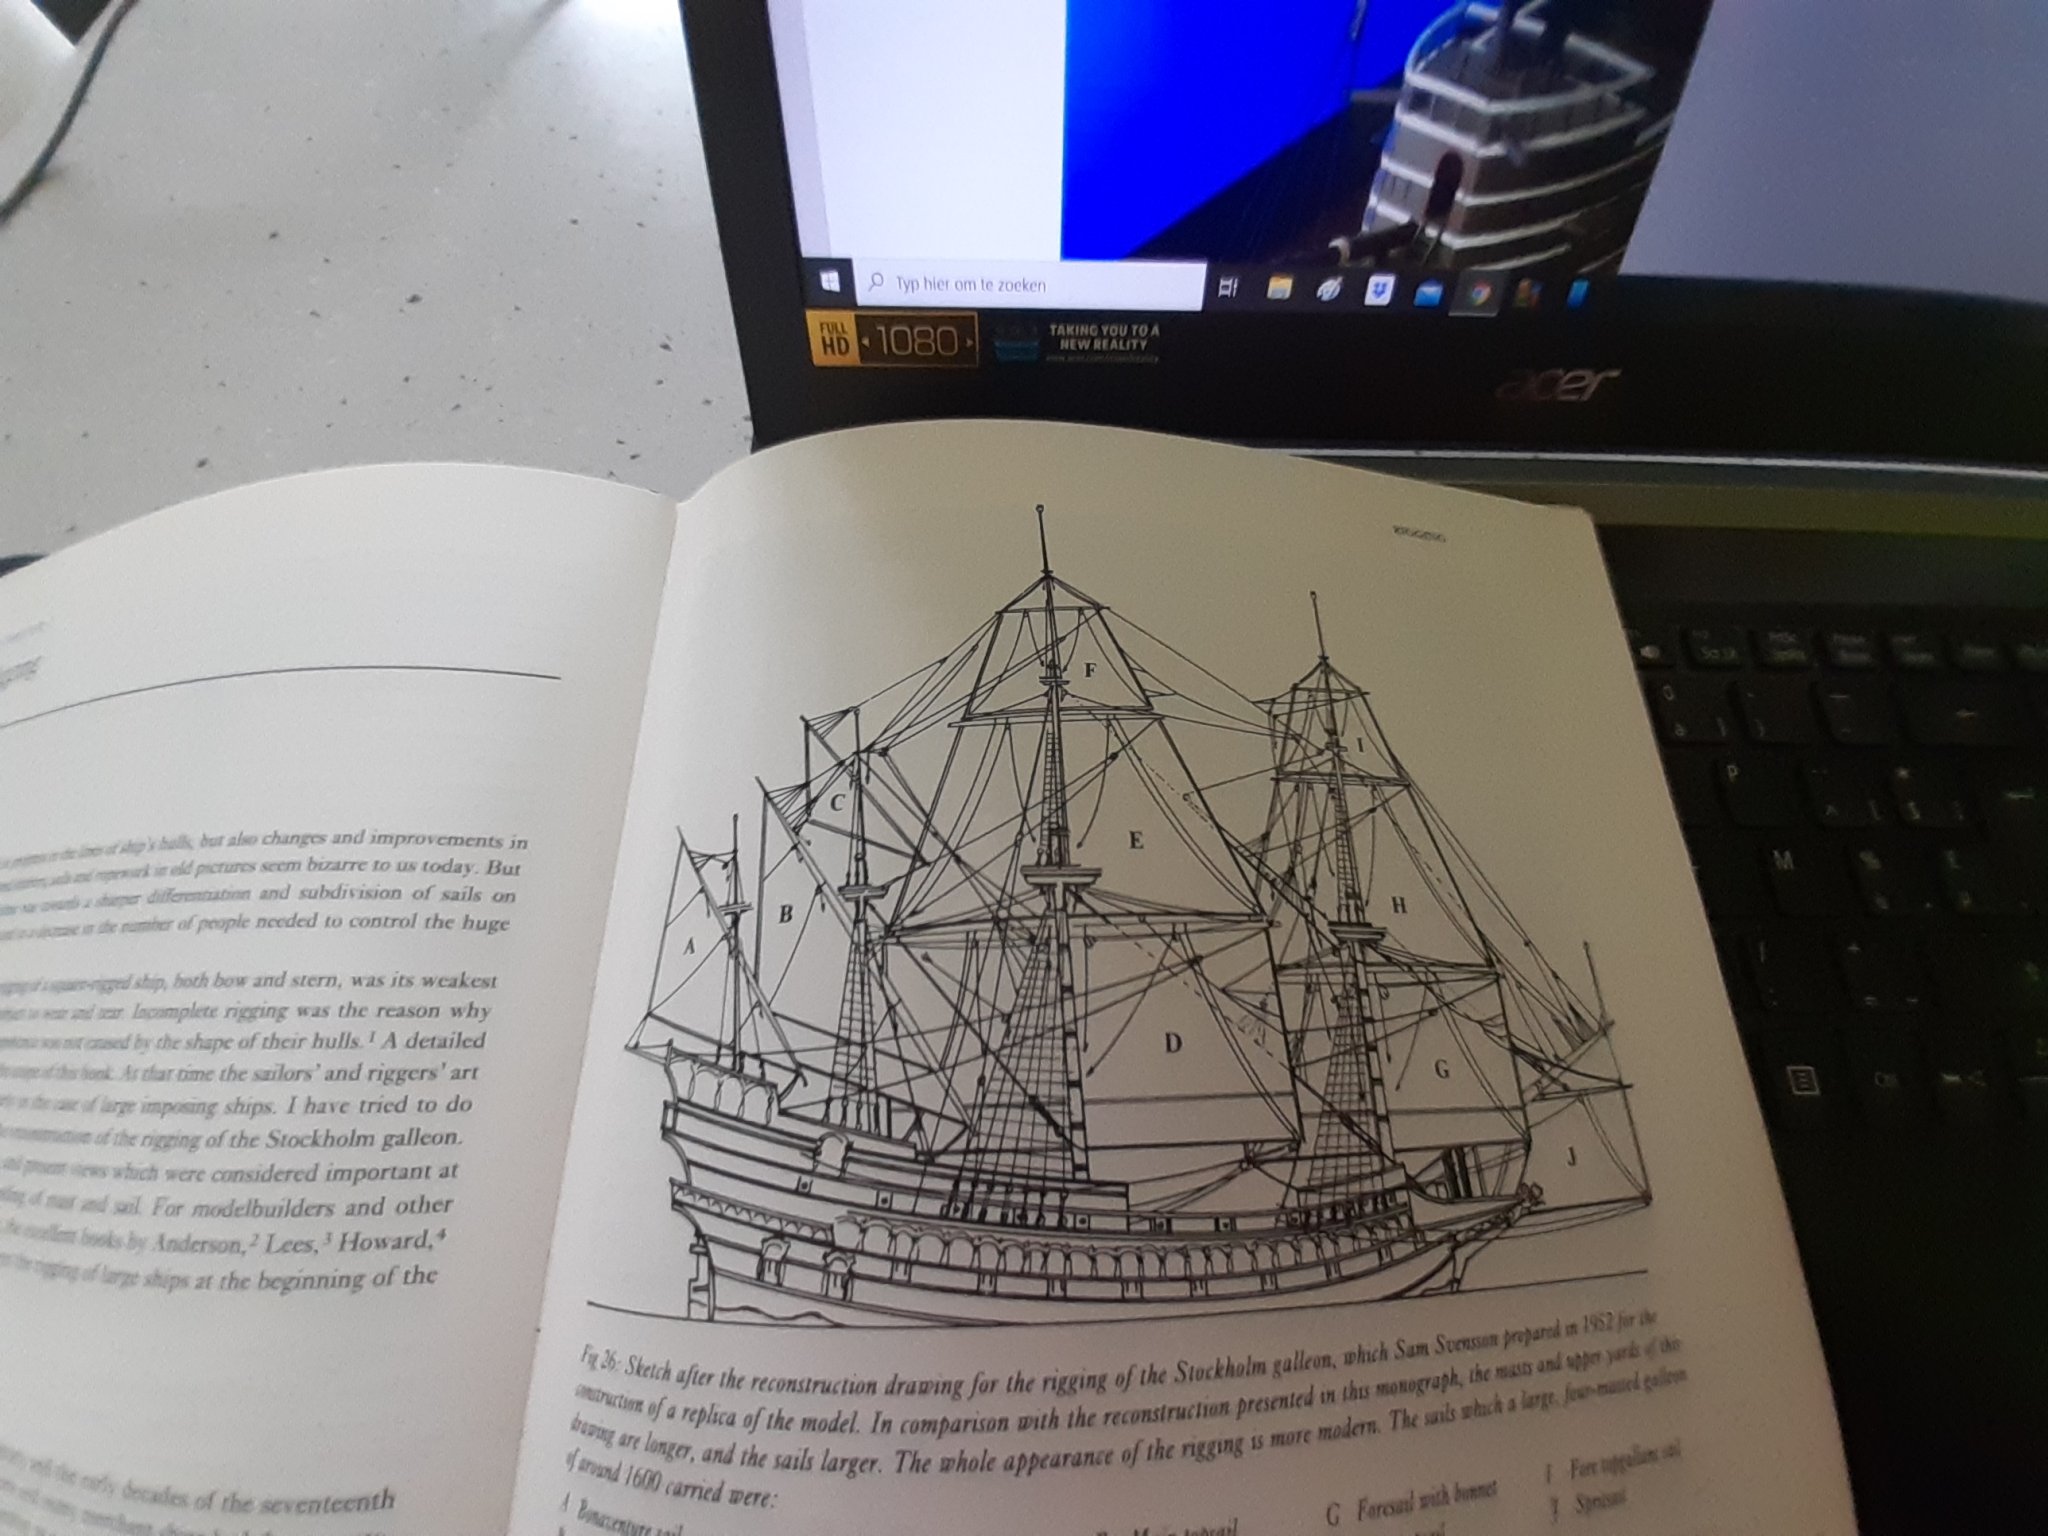
First the fore and the main mast will be made because they are similar.
Also discovered that this ship had no "crowsnests". But mast tops.
will be simple... : "looks like a large barrel" they write .... haha, dont think sohttps://maryrose.org/blog/in-the-museum/museum-blogger/the-mary-rose-crow-s-nest/
-
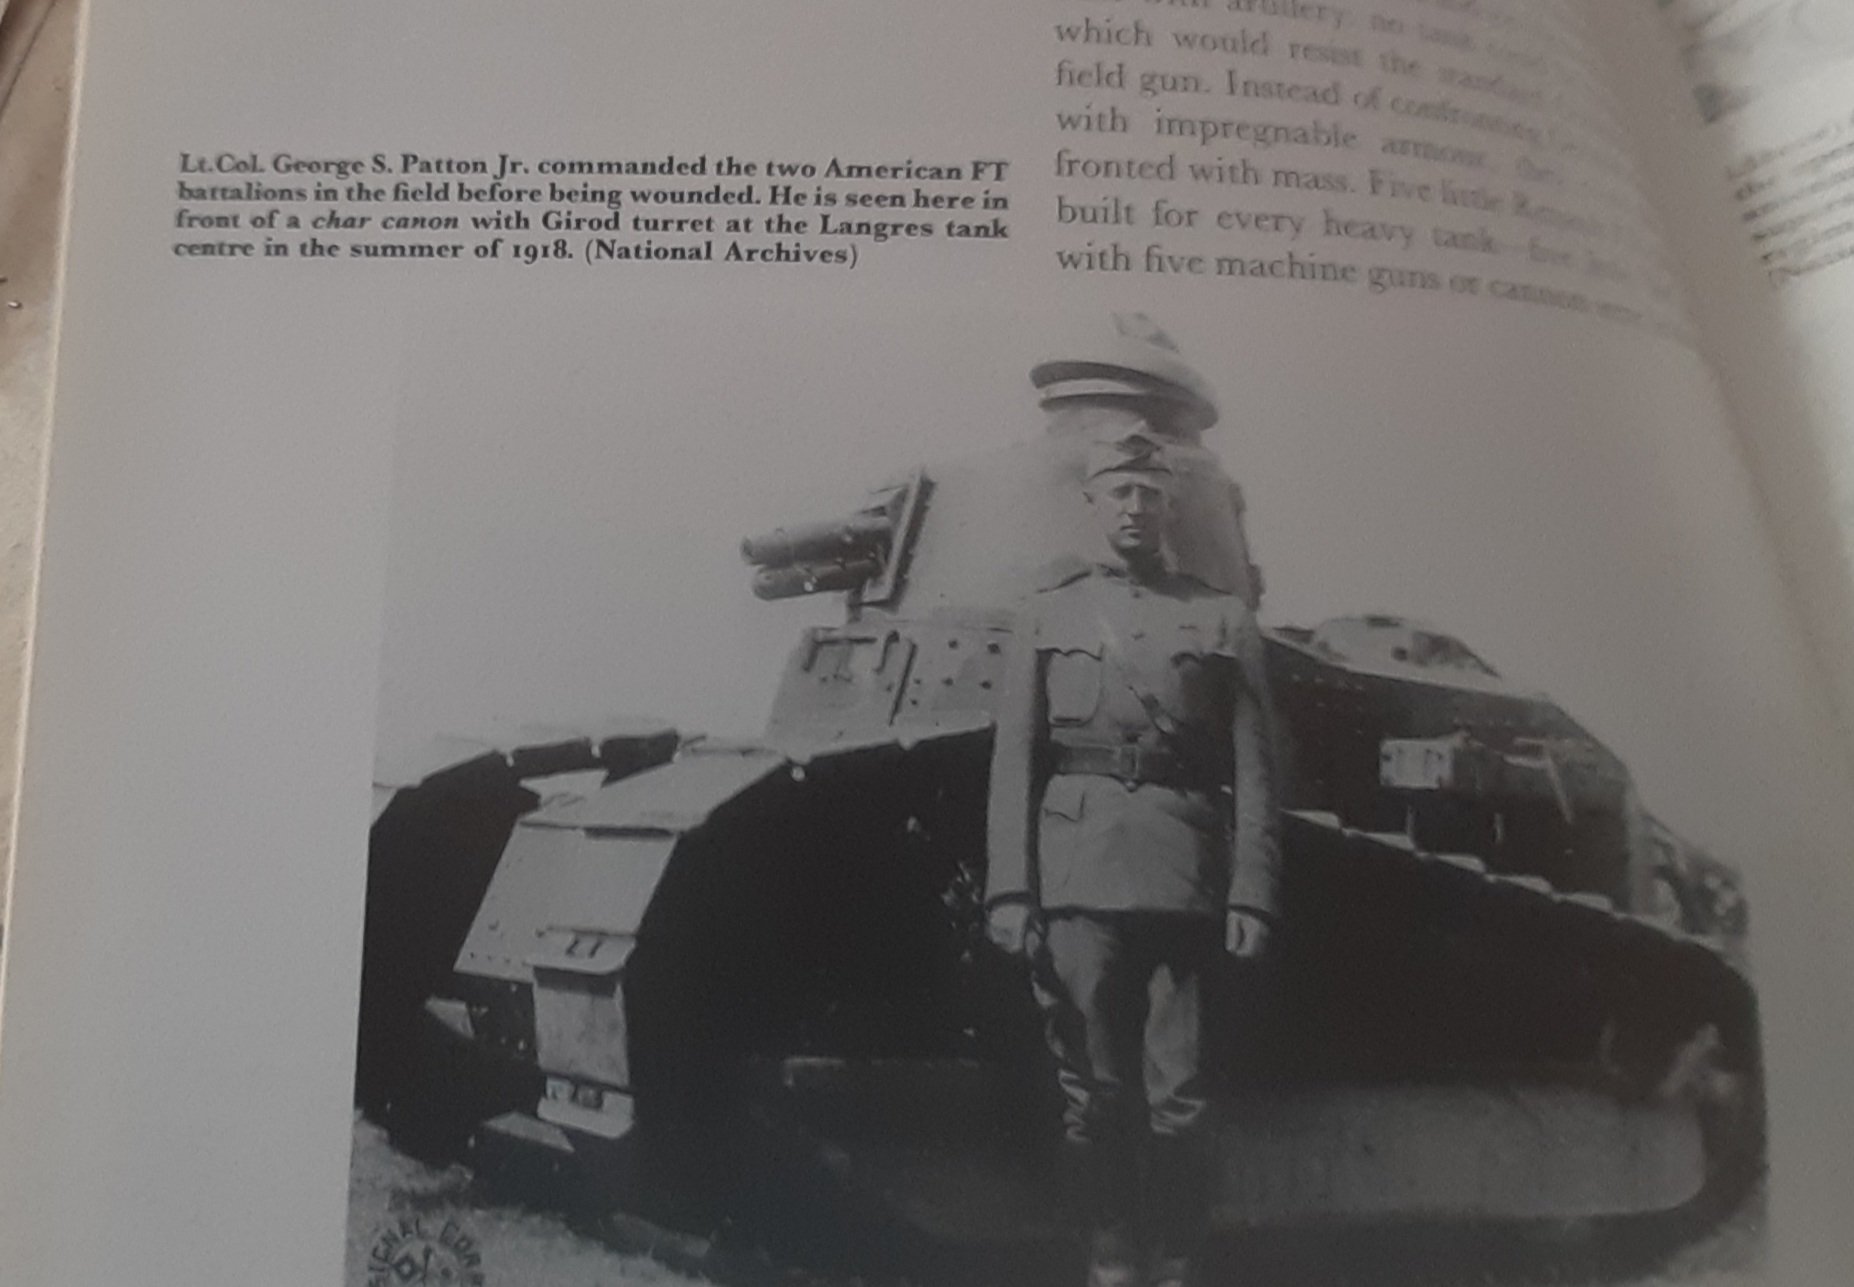
Thanks. A very interesting lesson in American military history 👍
- Edwardkenway, Canute, lmagna and 3 others
-
6
-
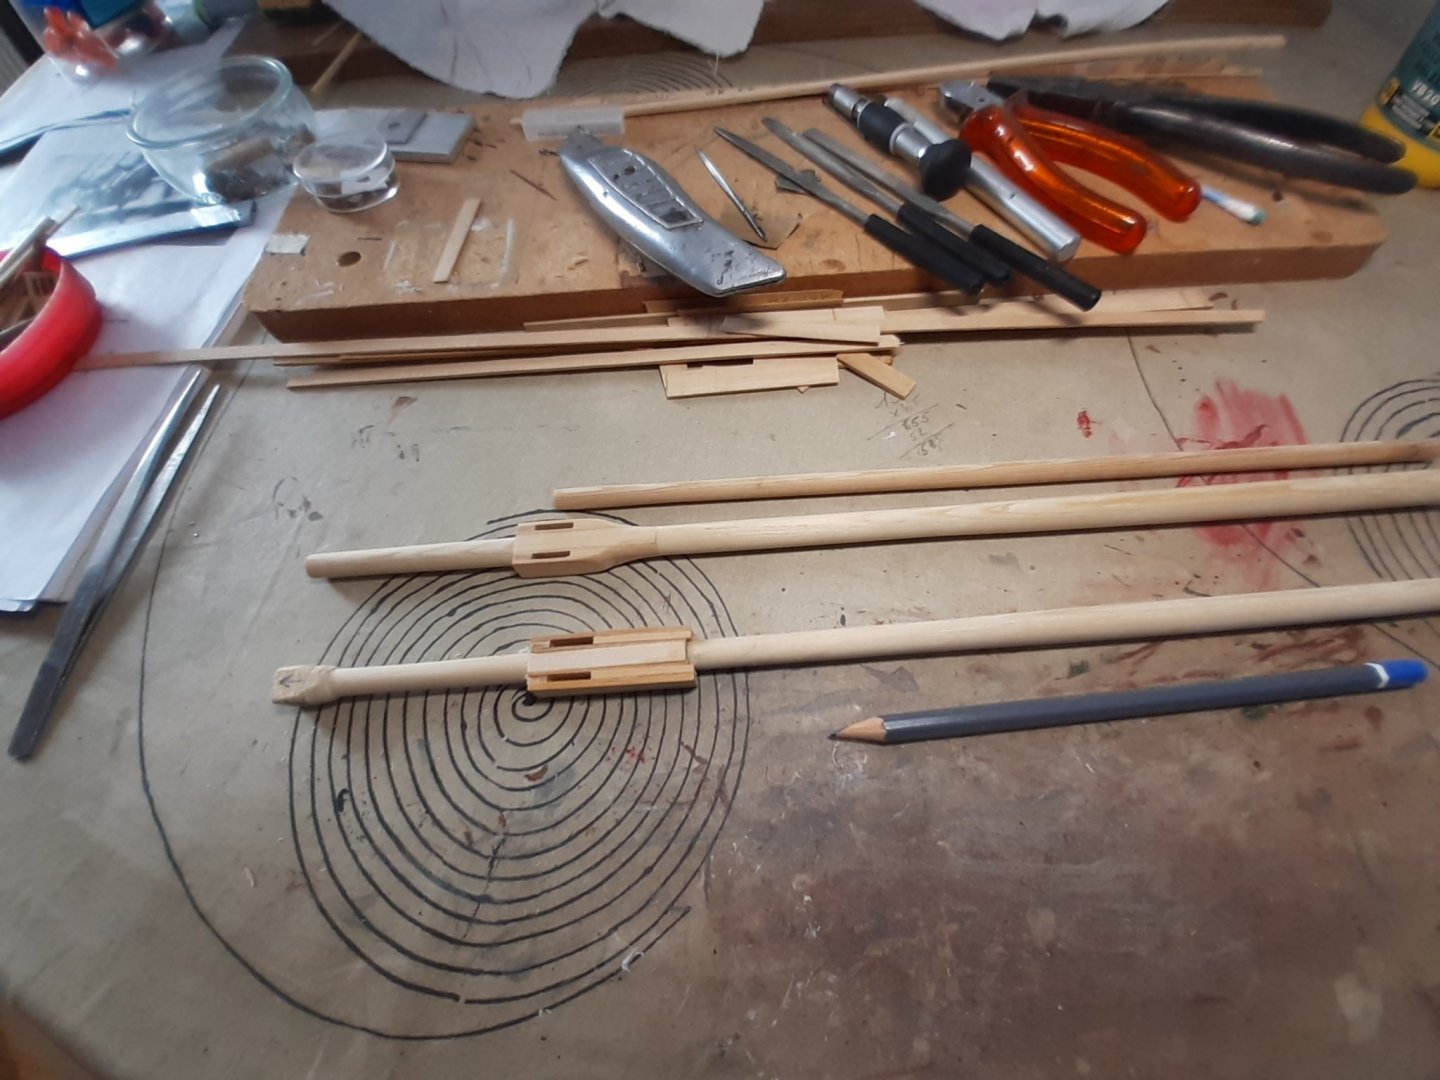
Because I'm a bit of a dead end with my deadeyes and chains. I'm going to build the masts first.
This is a completely different order from what I had in mind. So I first have to study and think about what and how.
And if I have to think, I build military models. For me, this goes on automatic pilot and meanwhile the ideas come up to build my masts.Builds can be found in the shore leave category https://modelshipworld.com/forum/73-non-shipcategorised-builds/
The only examples I find for the time being is the San Juan model and the Vasa.
There were one-piece masts and made masts. Somewhere I found that around 1600 in England there was no longer a suitable tree to make a one-piece mast.
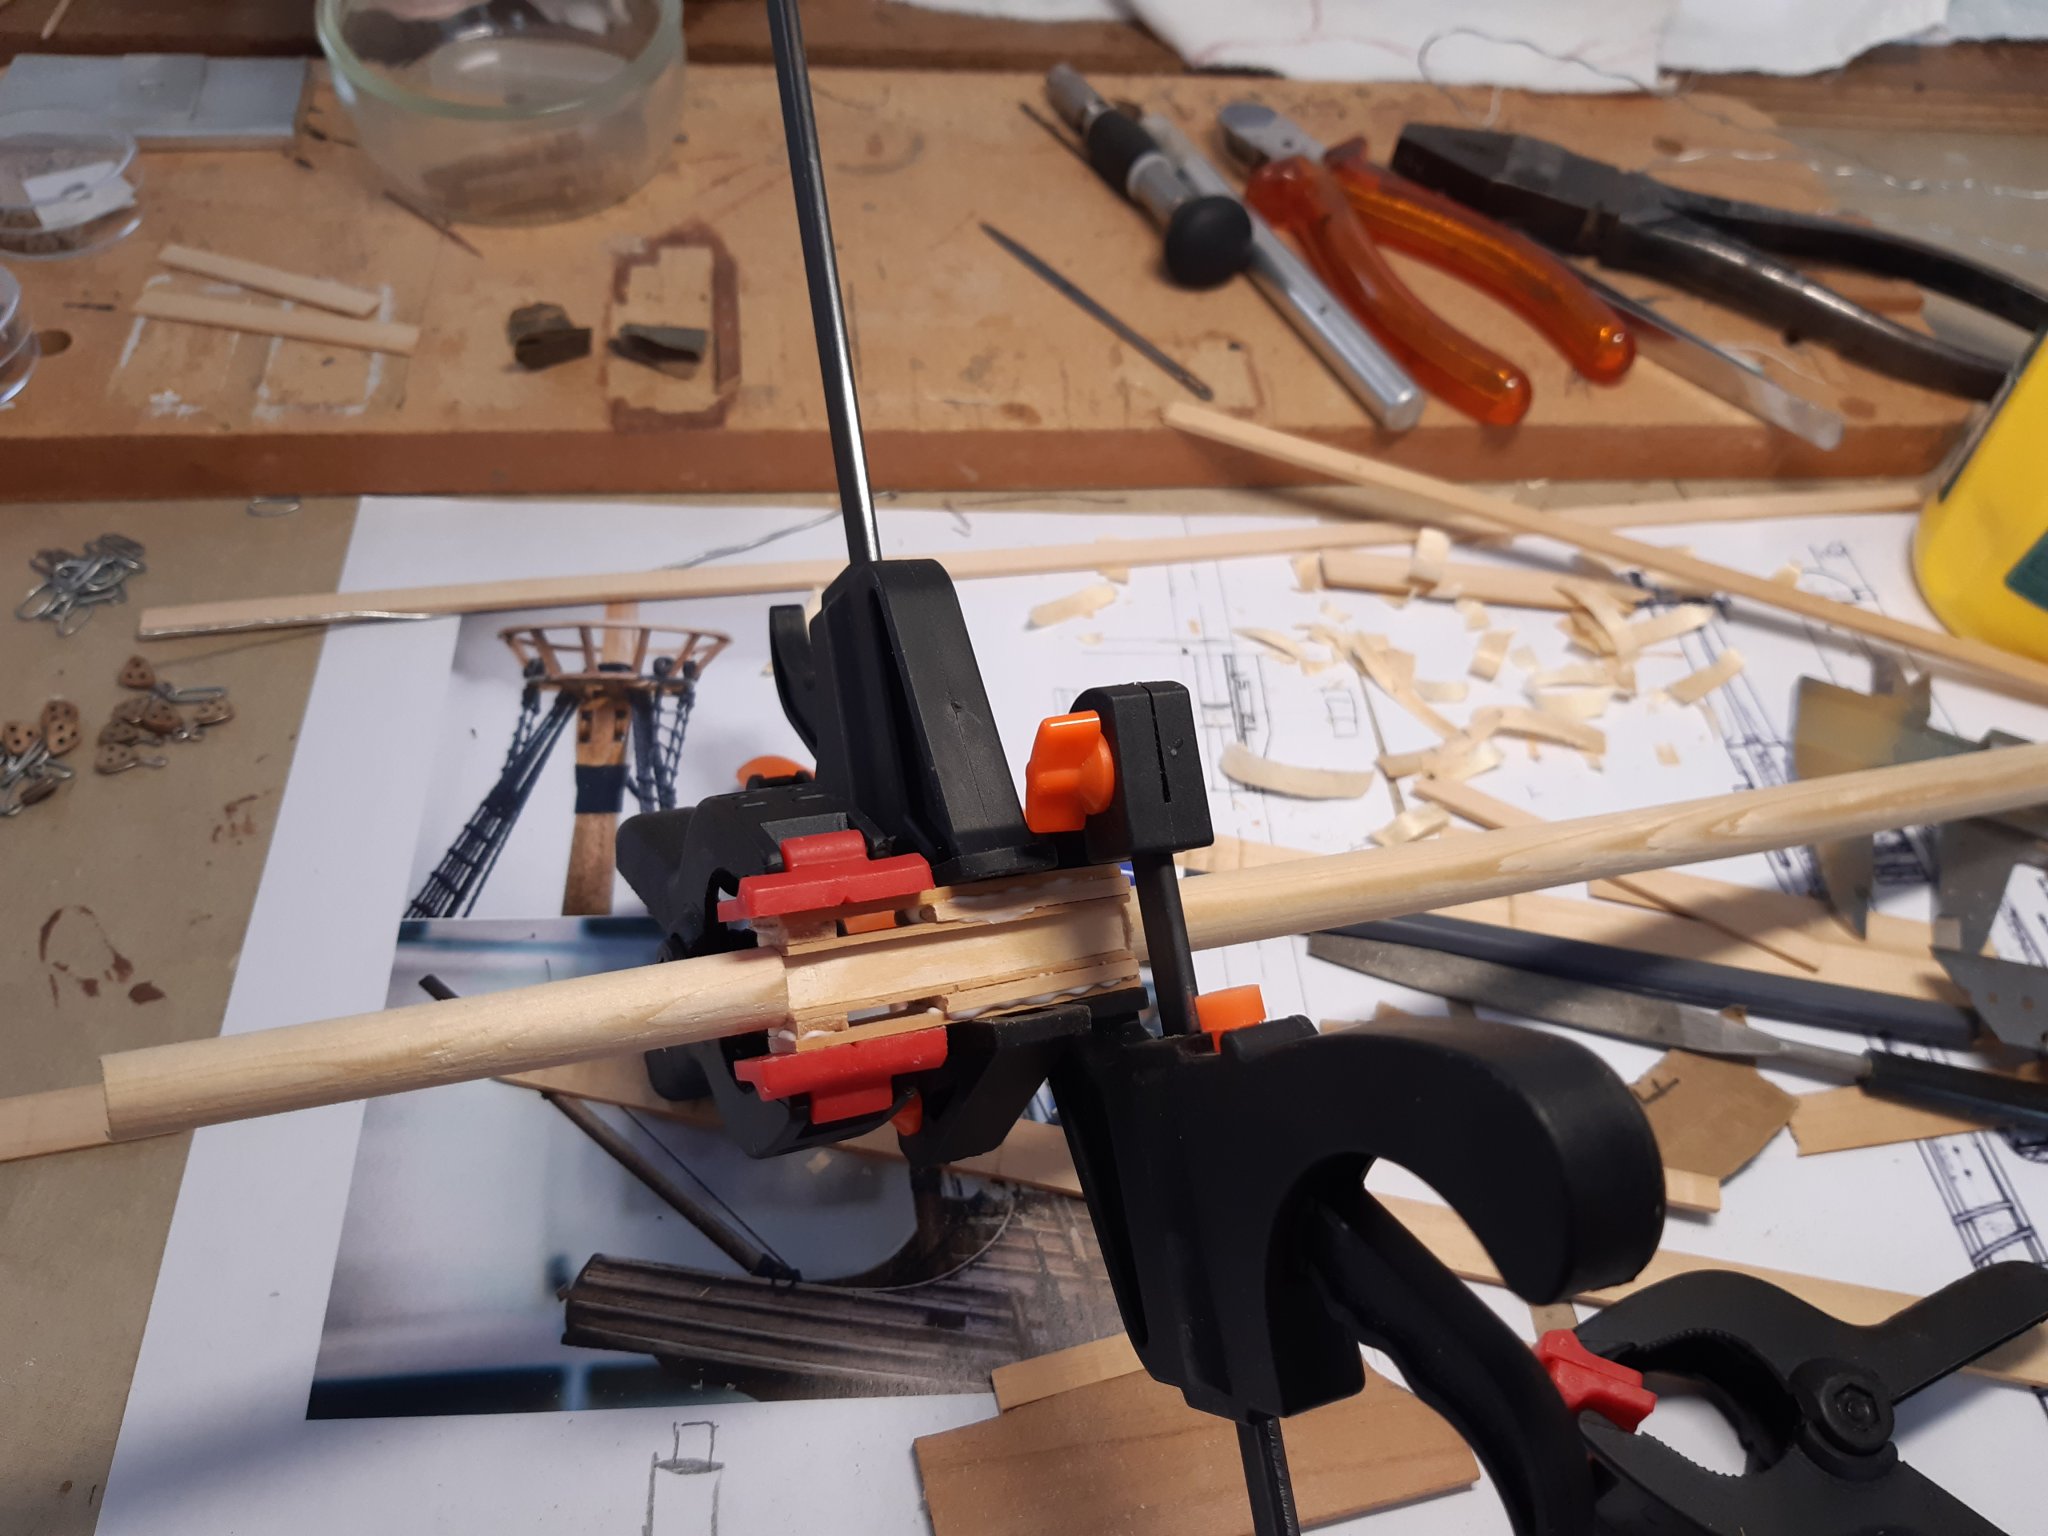
Fortunately my model dates from before 1600 👍Building the lower part of the fore and main masts.
Work in progress, so far so good. i think.


Thanks for following
-
On 7/16/2020 at 9:00 PM, Egilman said:
Practically every armored officer of any serious rank during WWII (B.Gen & up including Patton and Eisenhower) learned their craft at the controls of one of these...
A proud Patton in front of a Ft 17

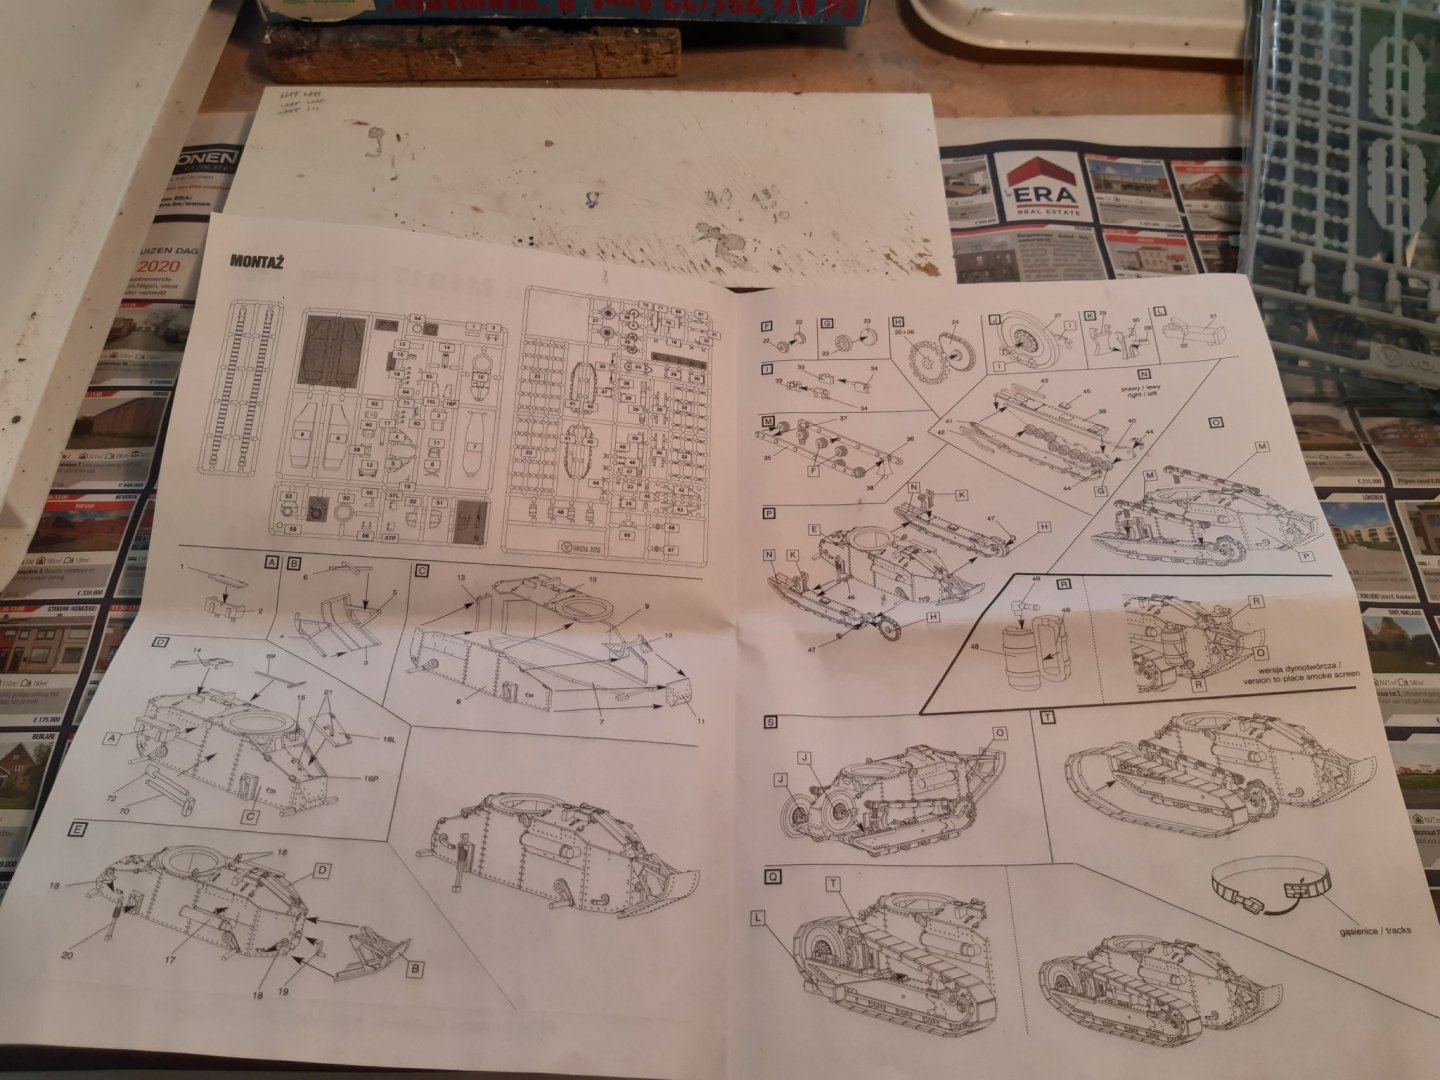
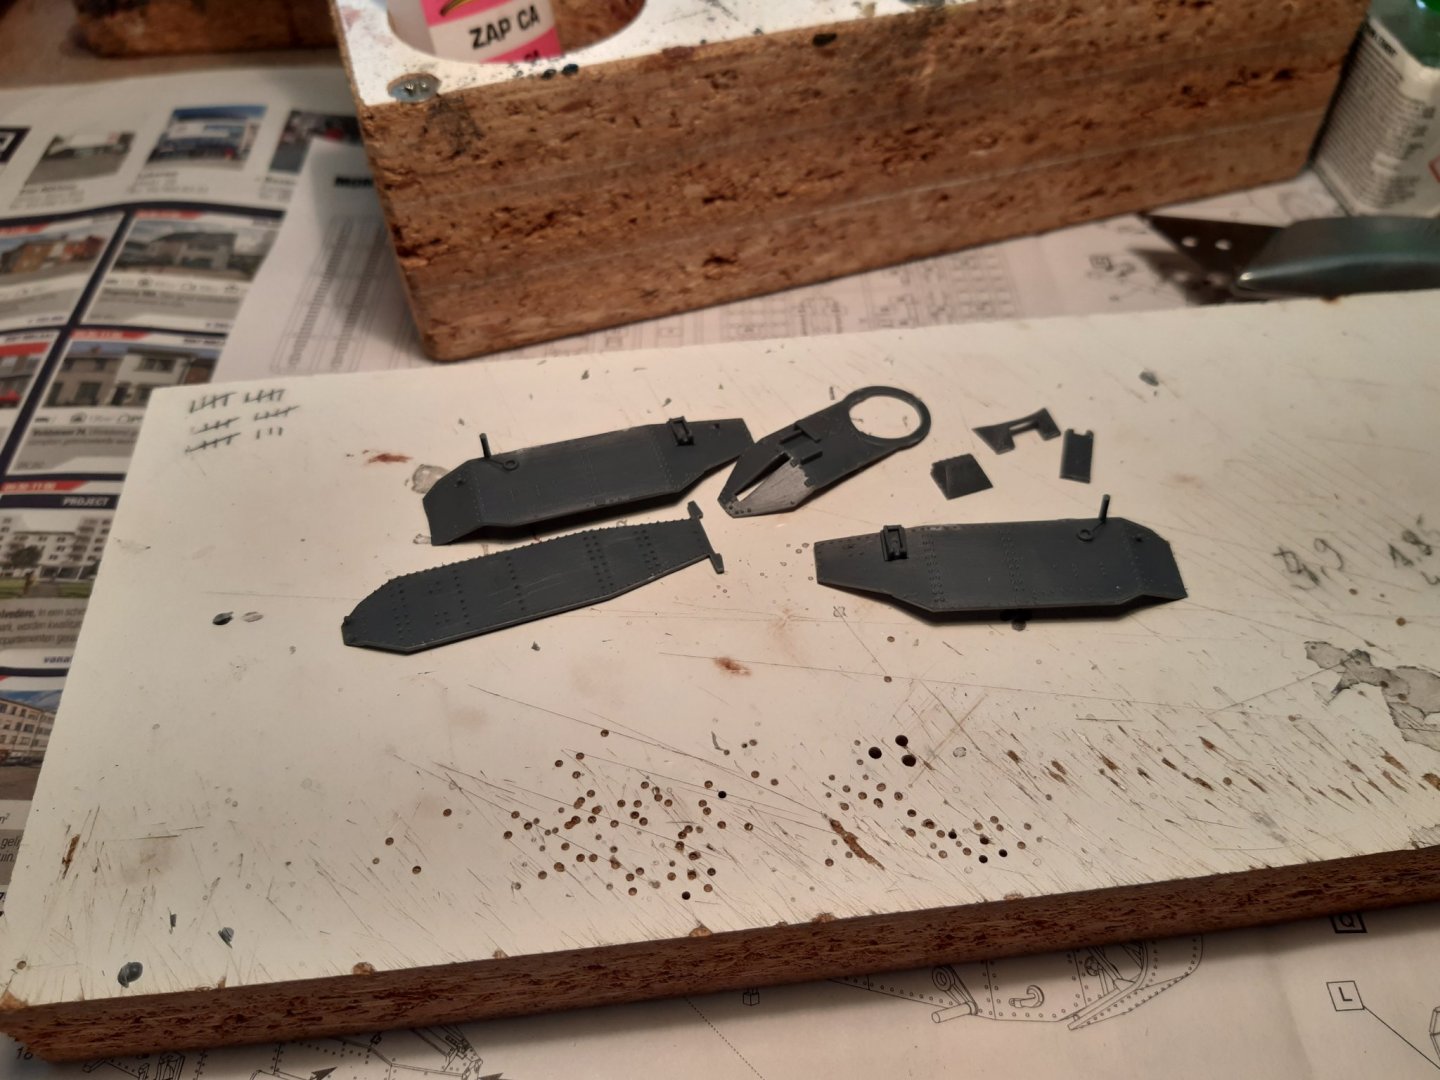
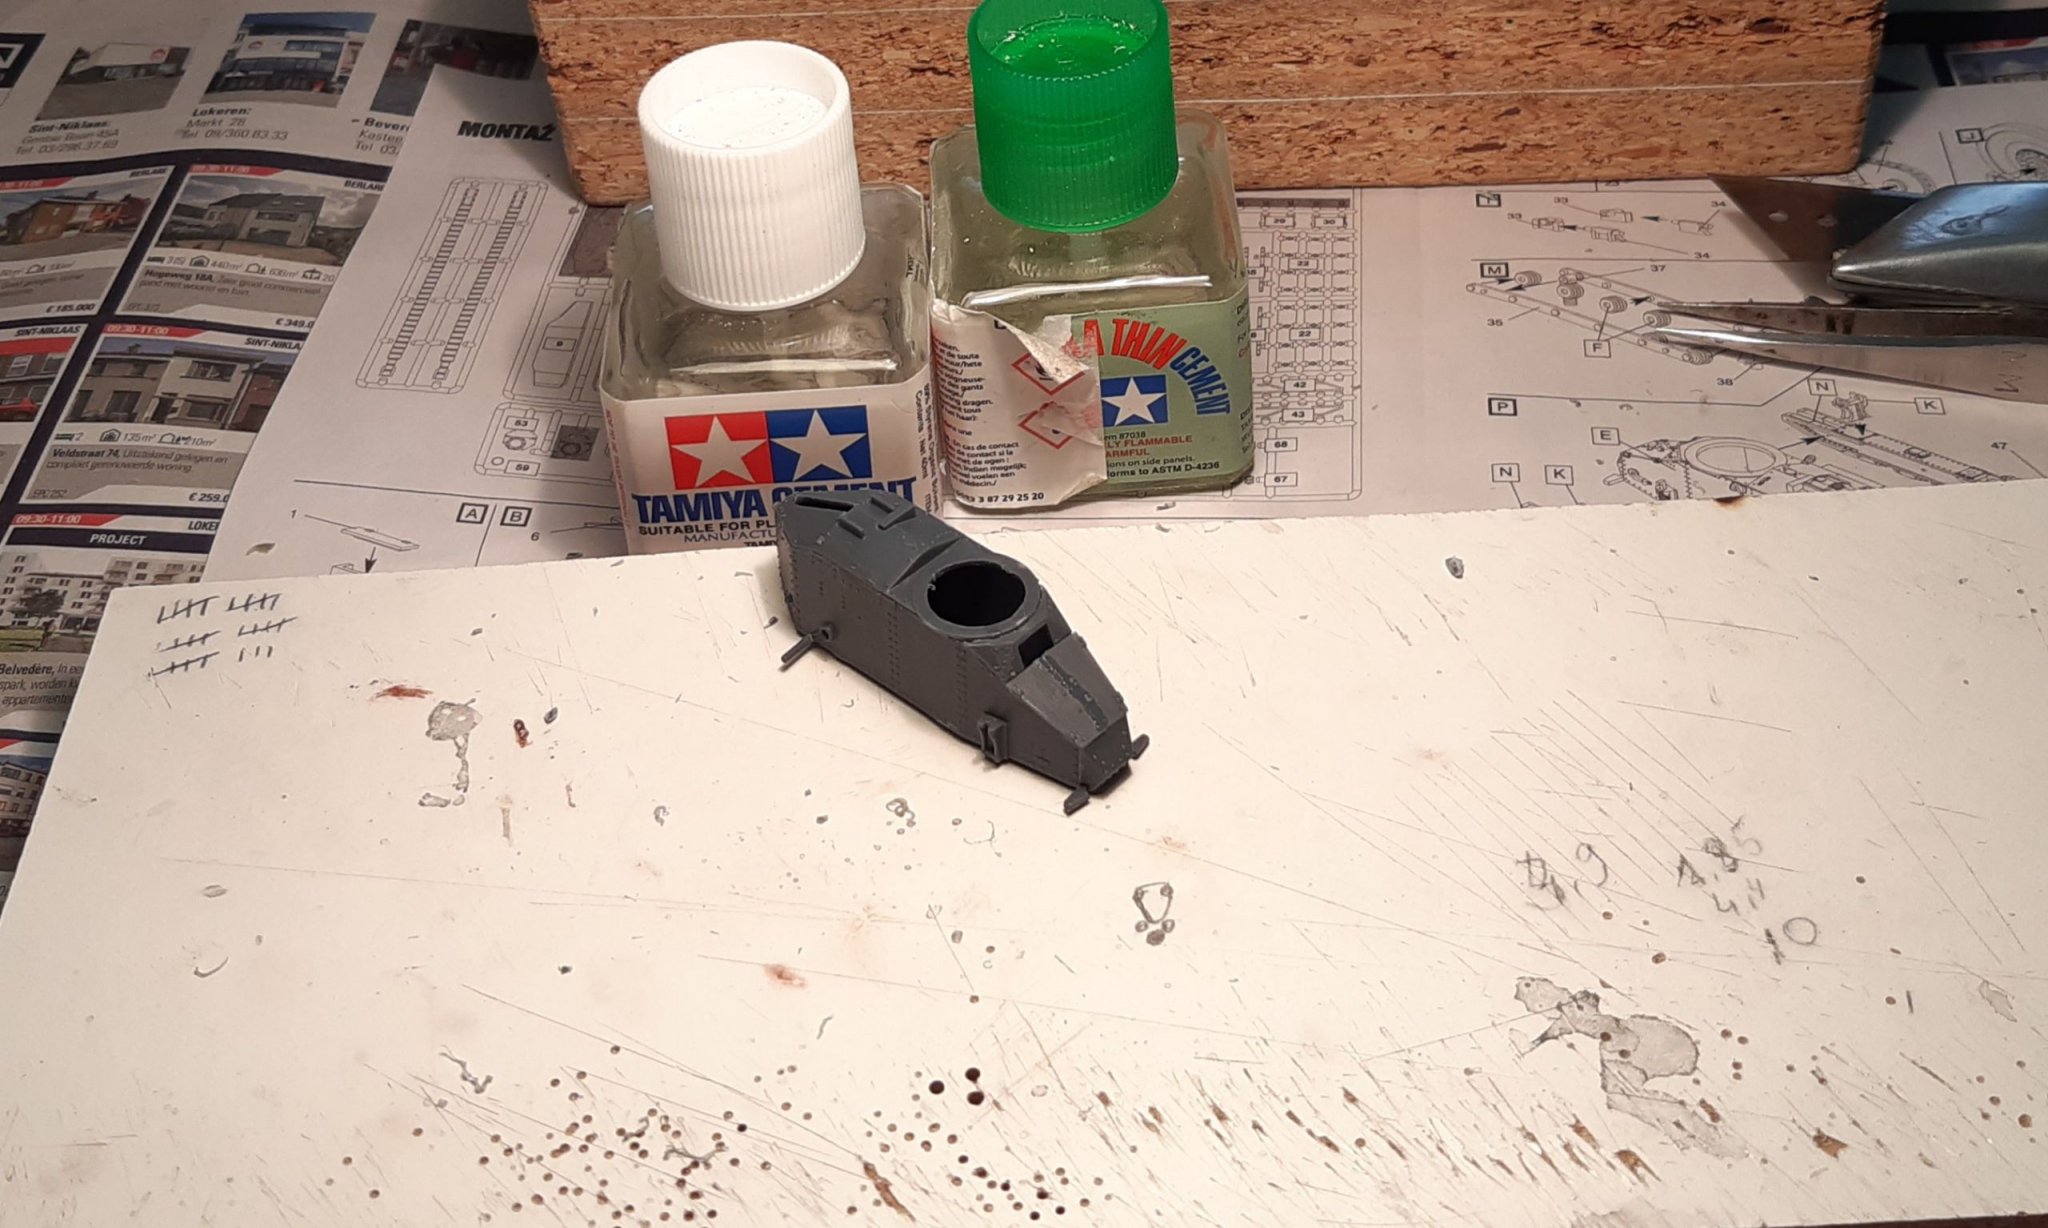
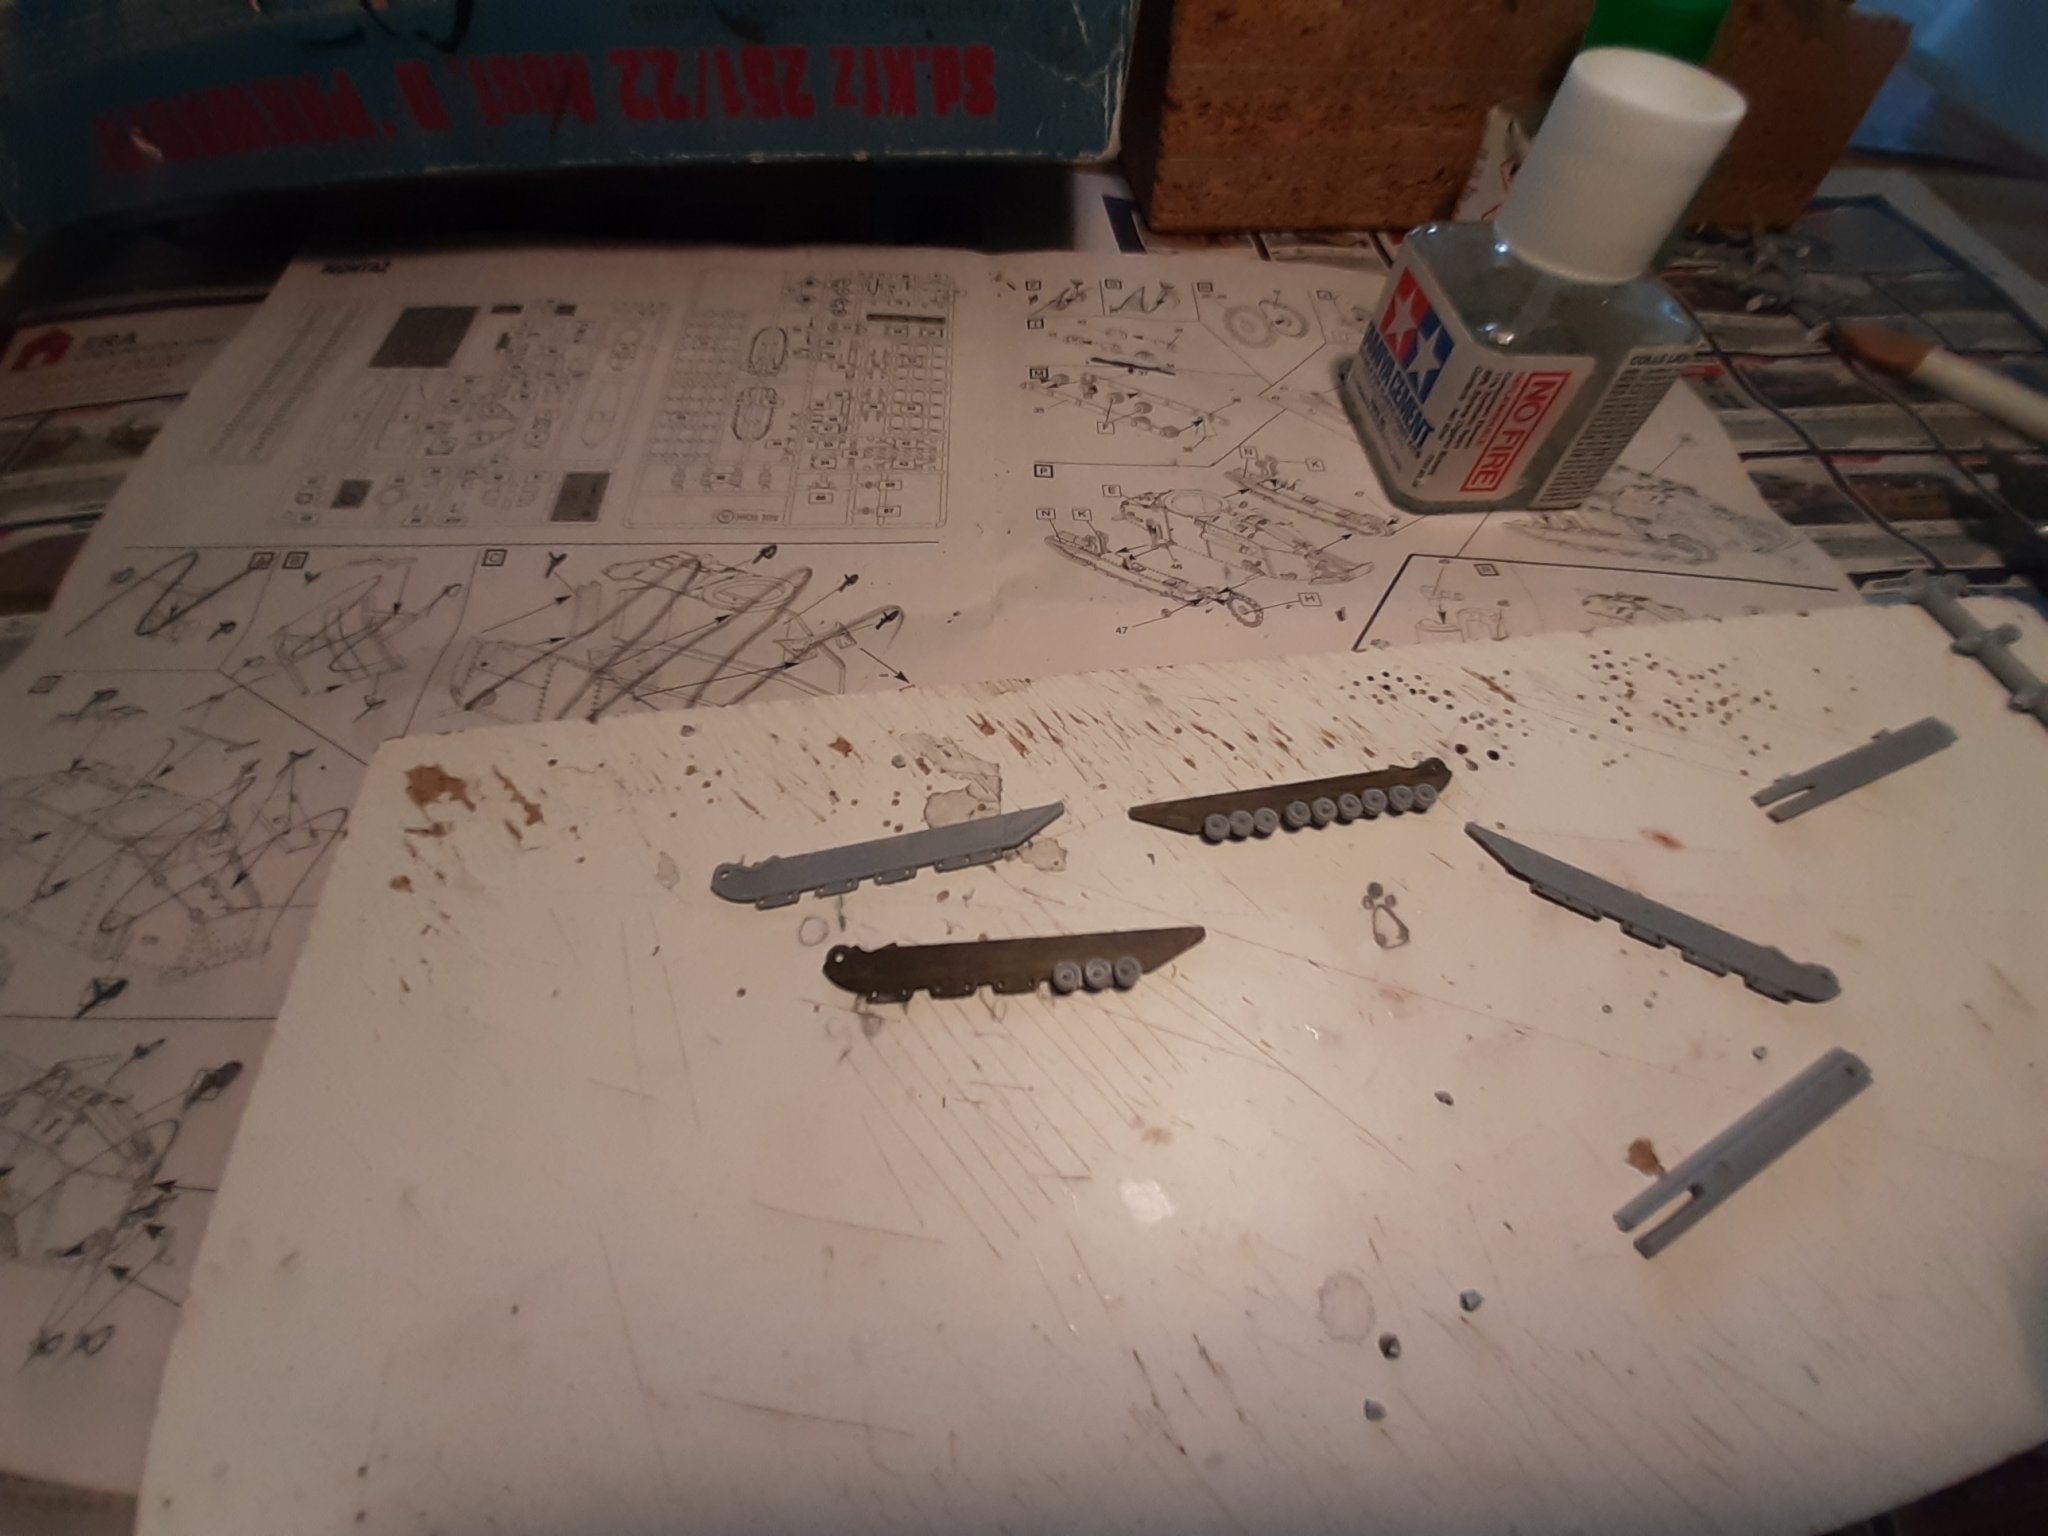
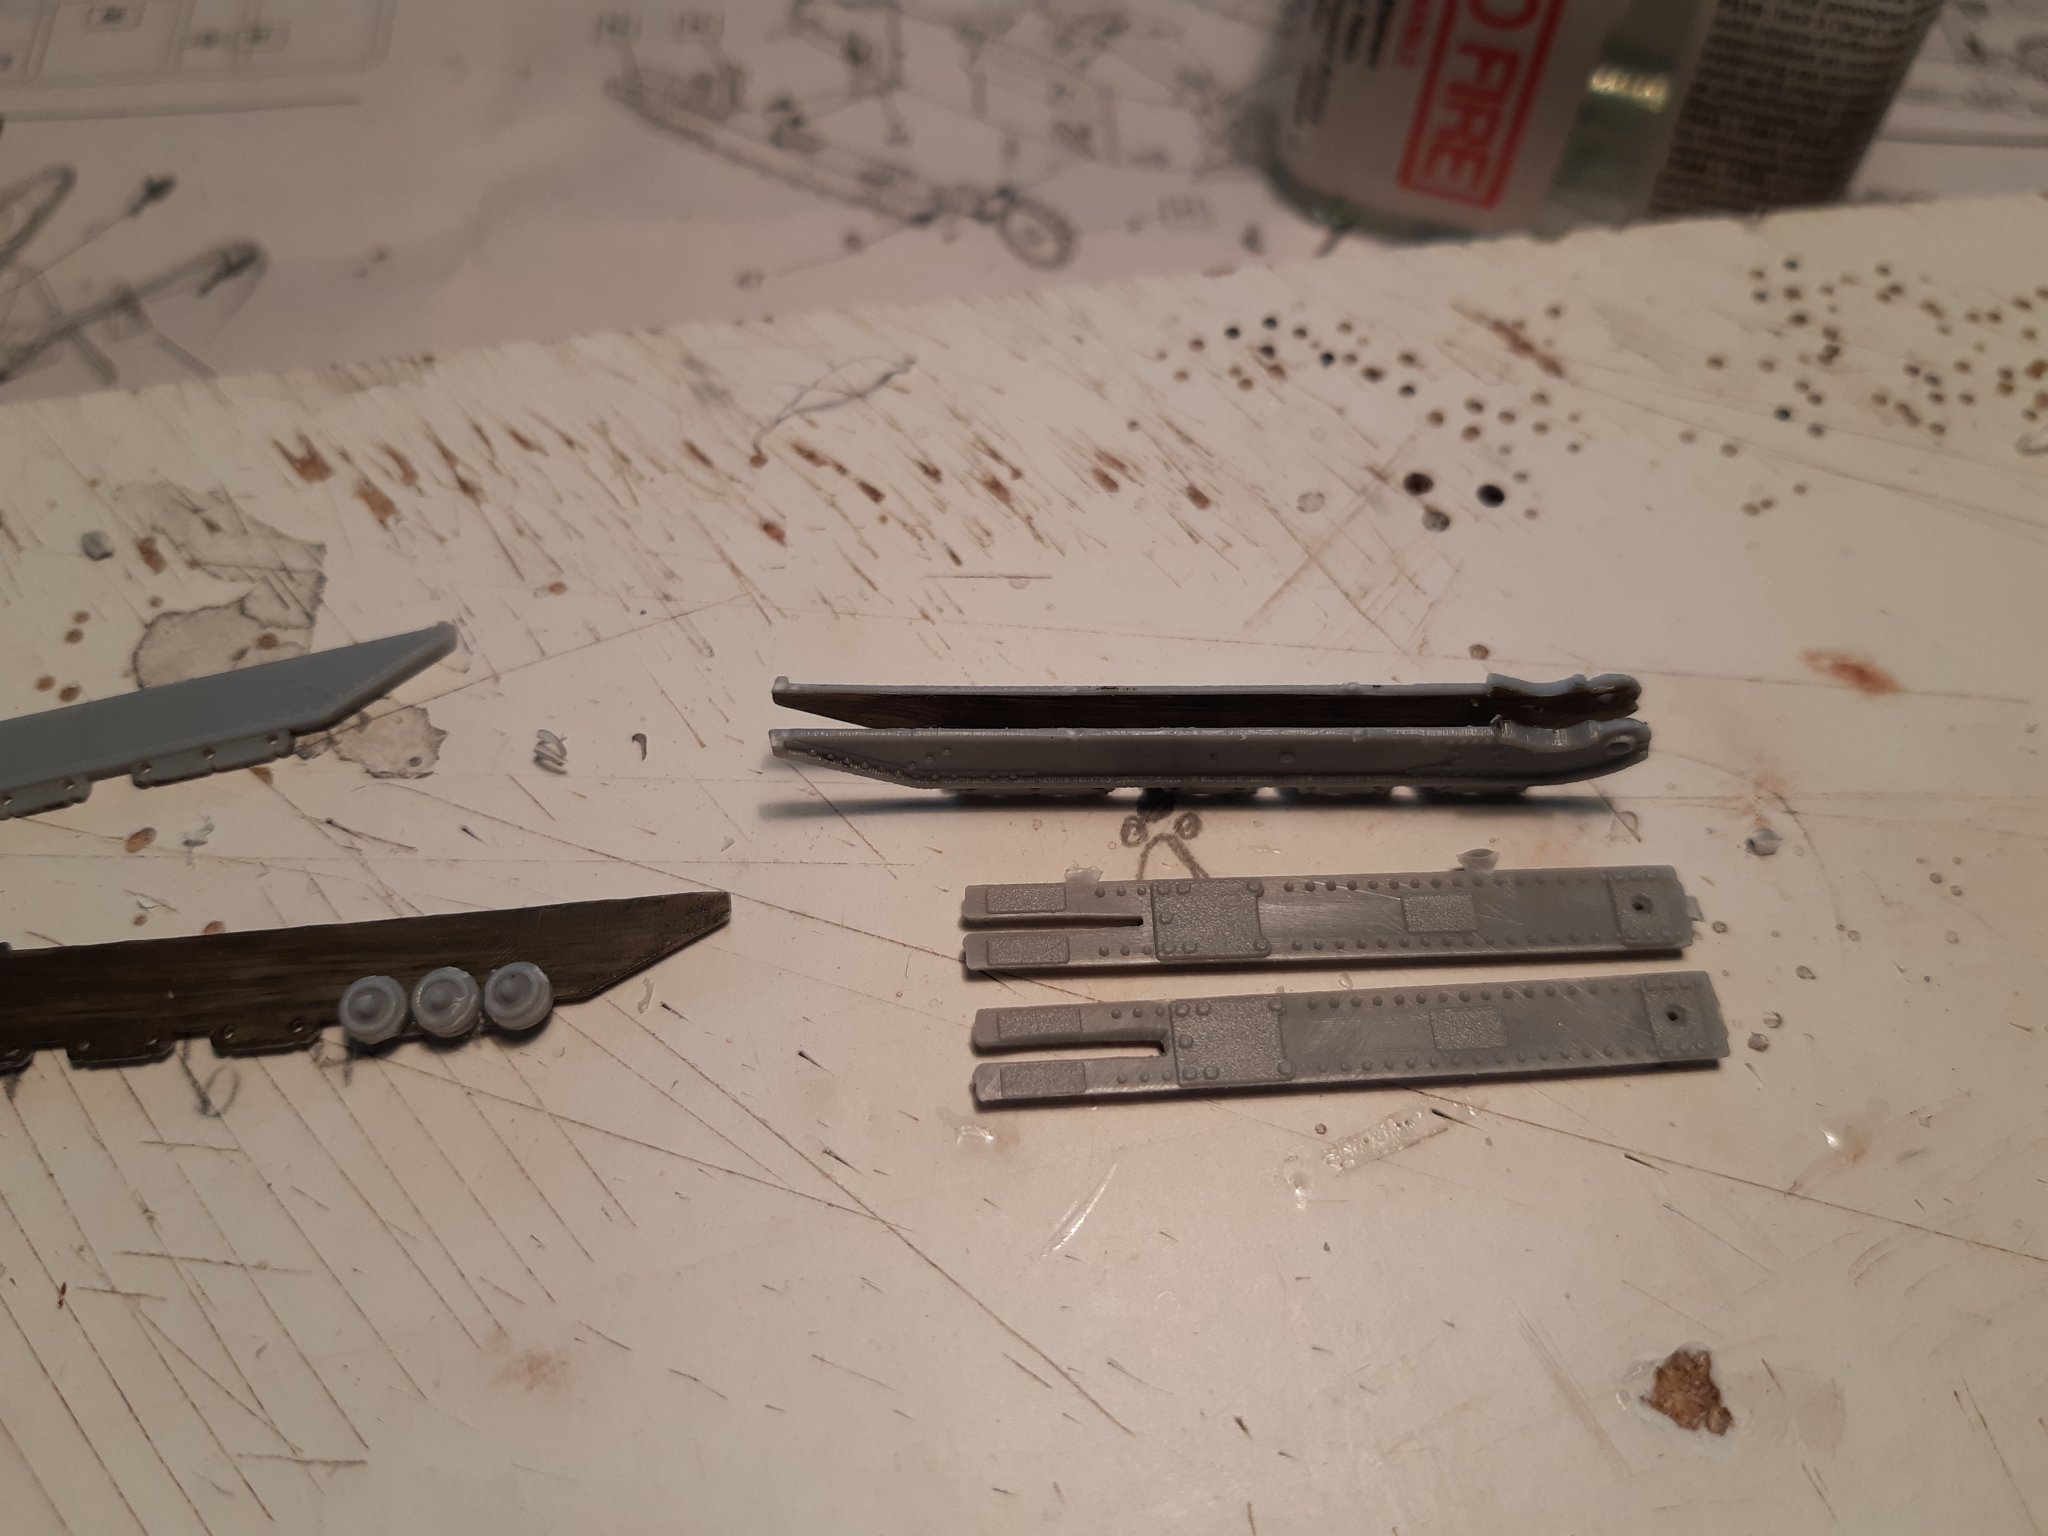
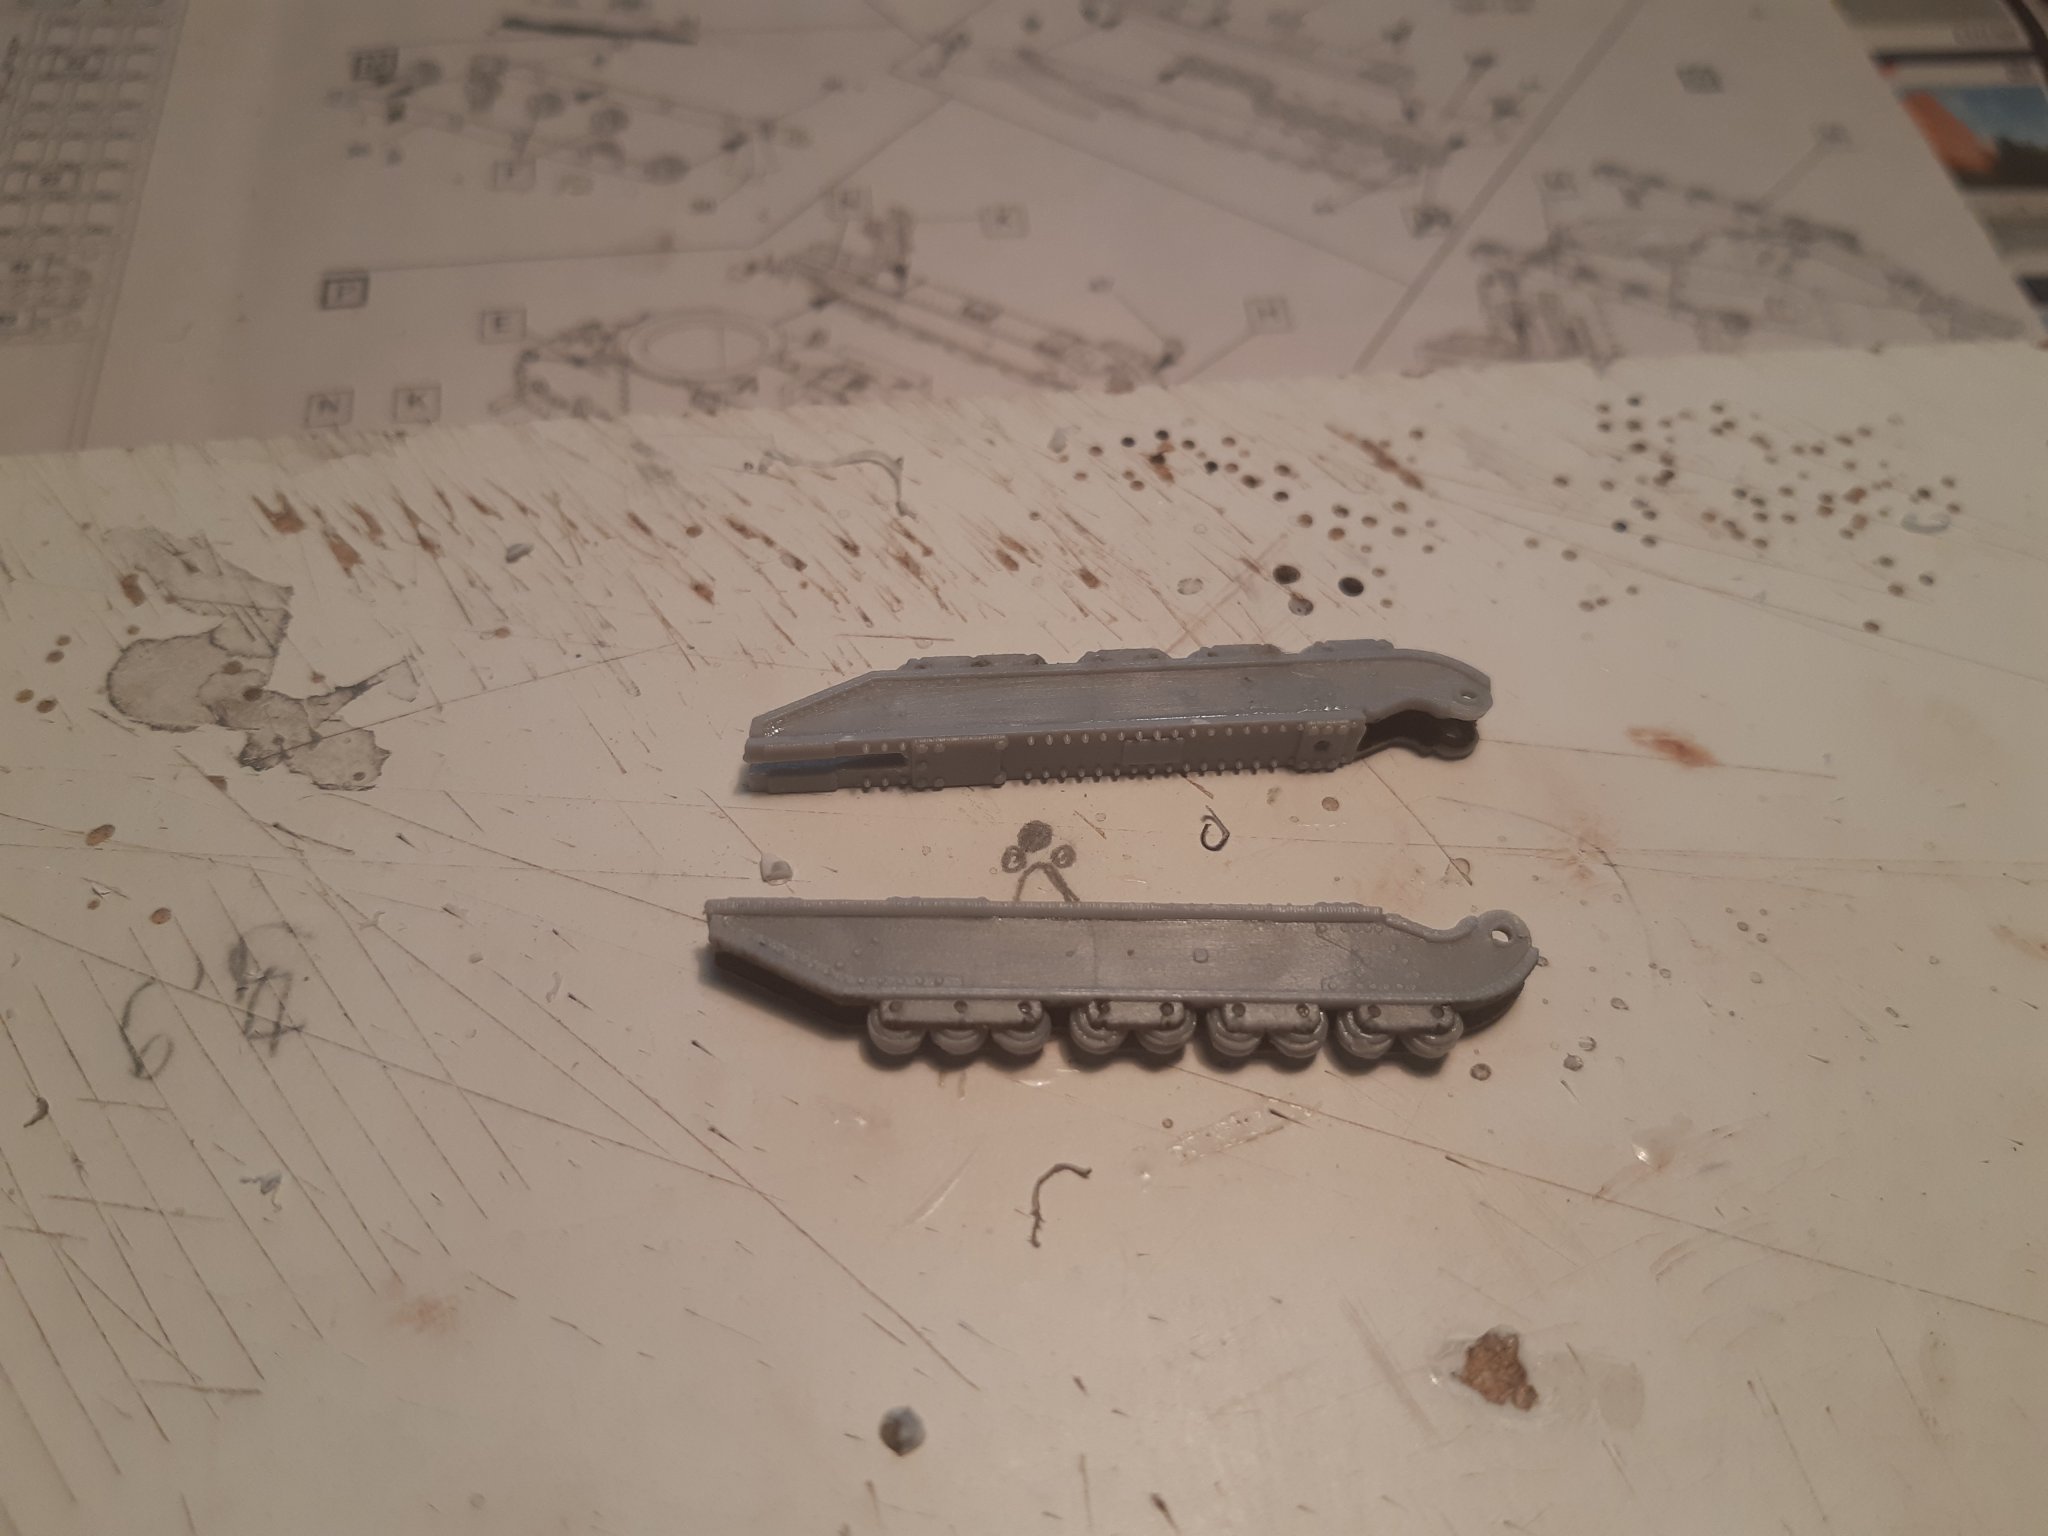
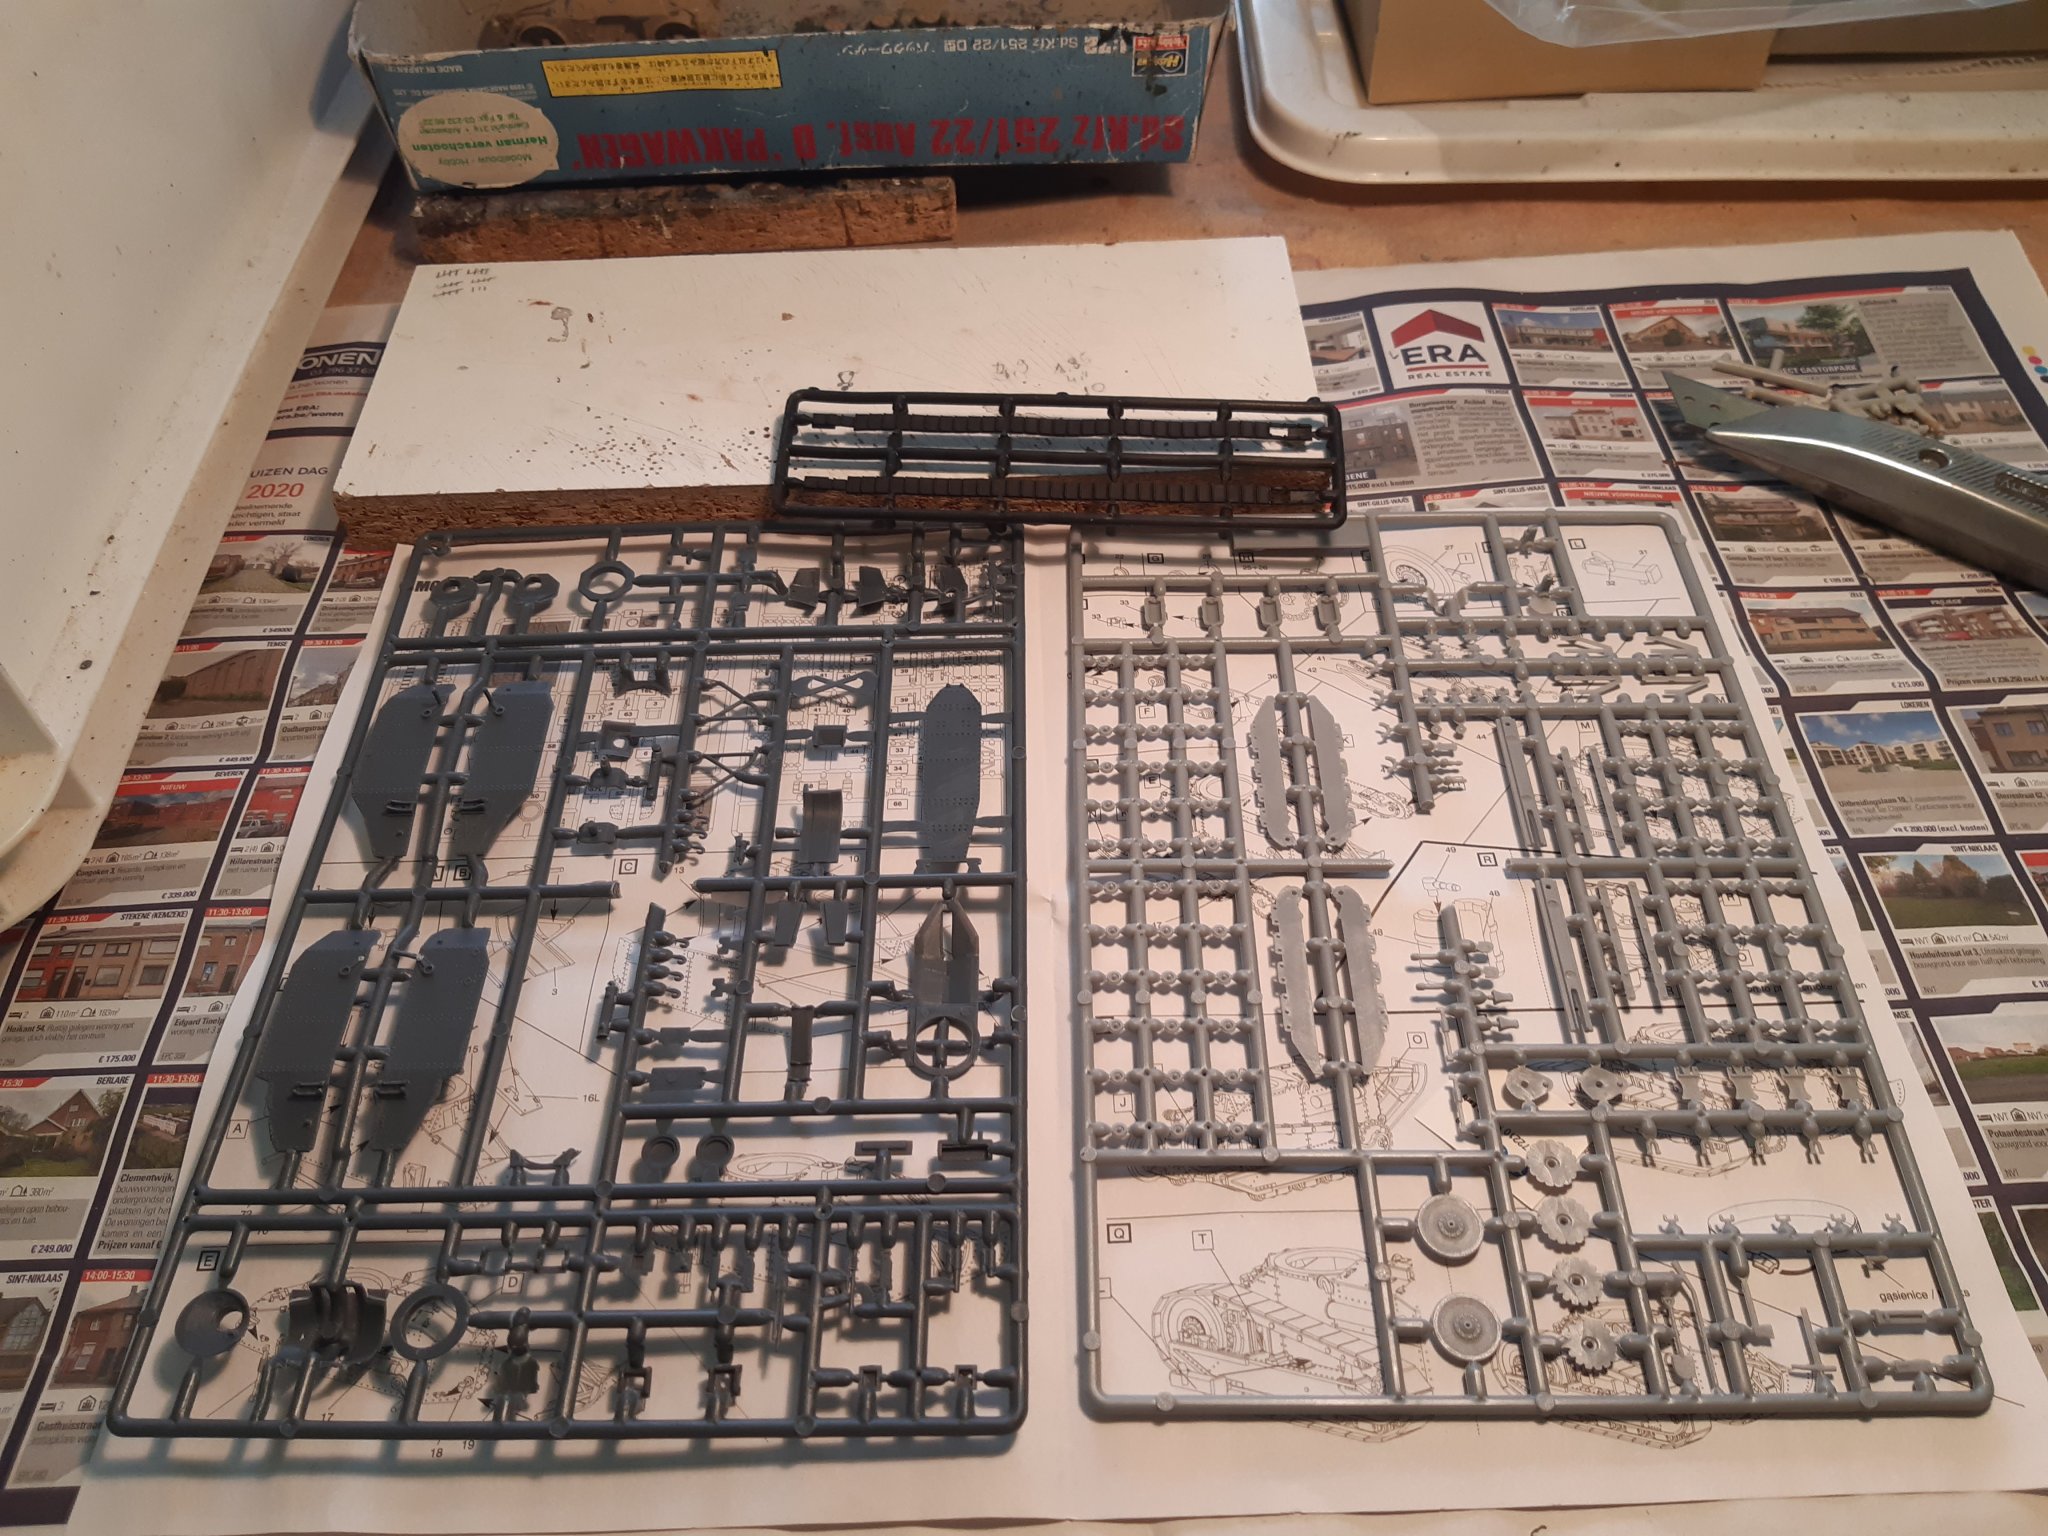
Building the hull.
Everything goes together smoothly. The small plastic parts are sometimes a bit brittle, so careful cutting is needed.
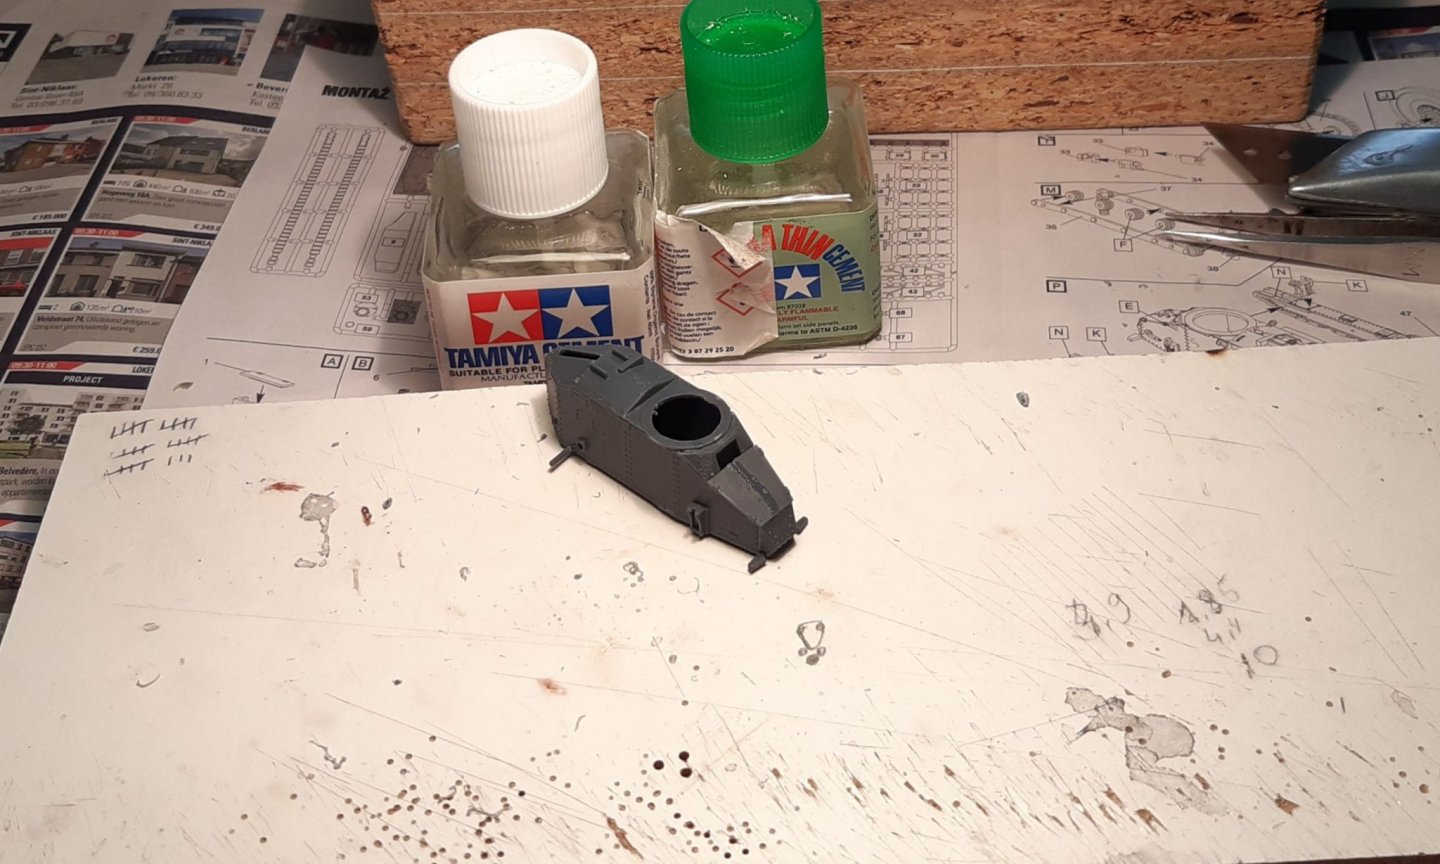
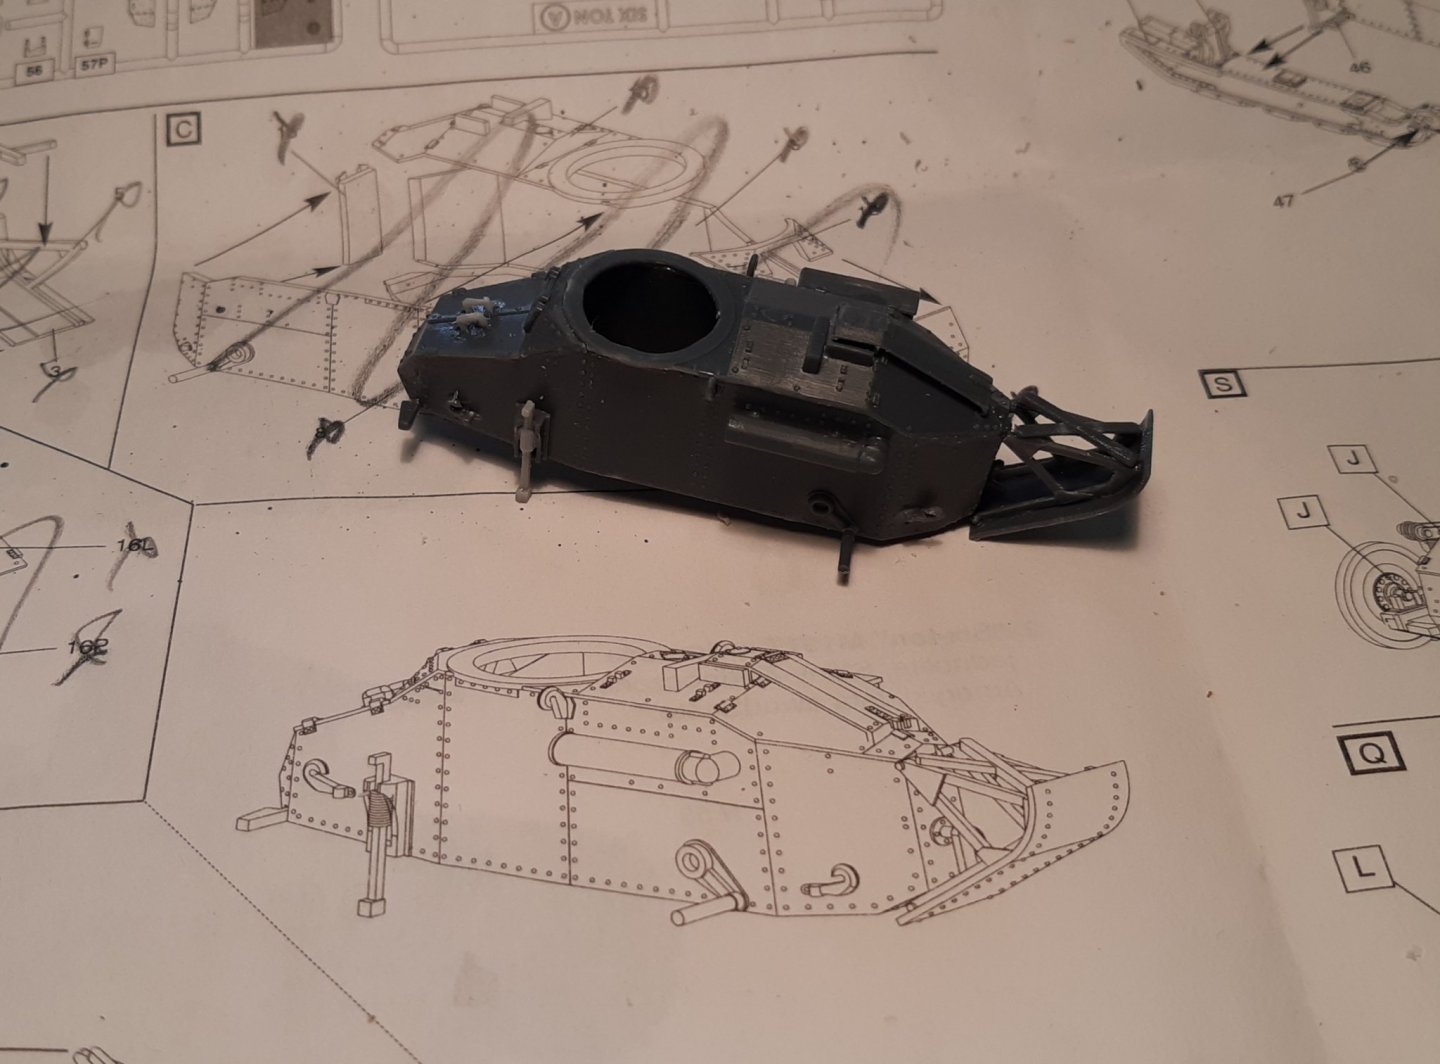
And started on the wheel assembly

The inside is pre-painted, This works easier later

The groove for the idler wheel is too narrow (I know from experience of previous models) . So I make this wider

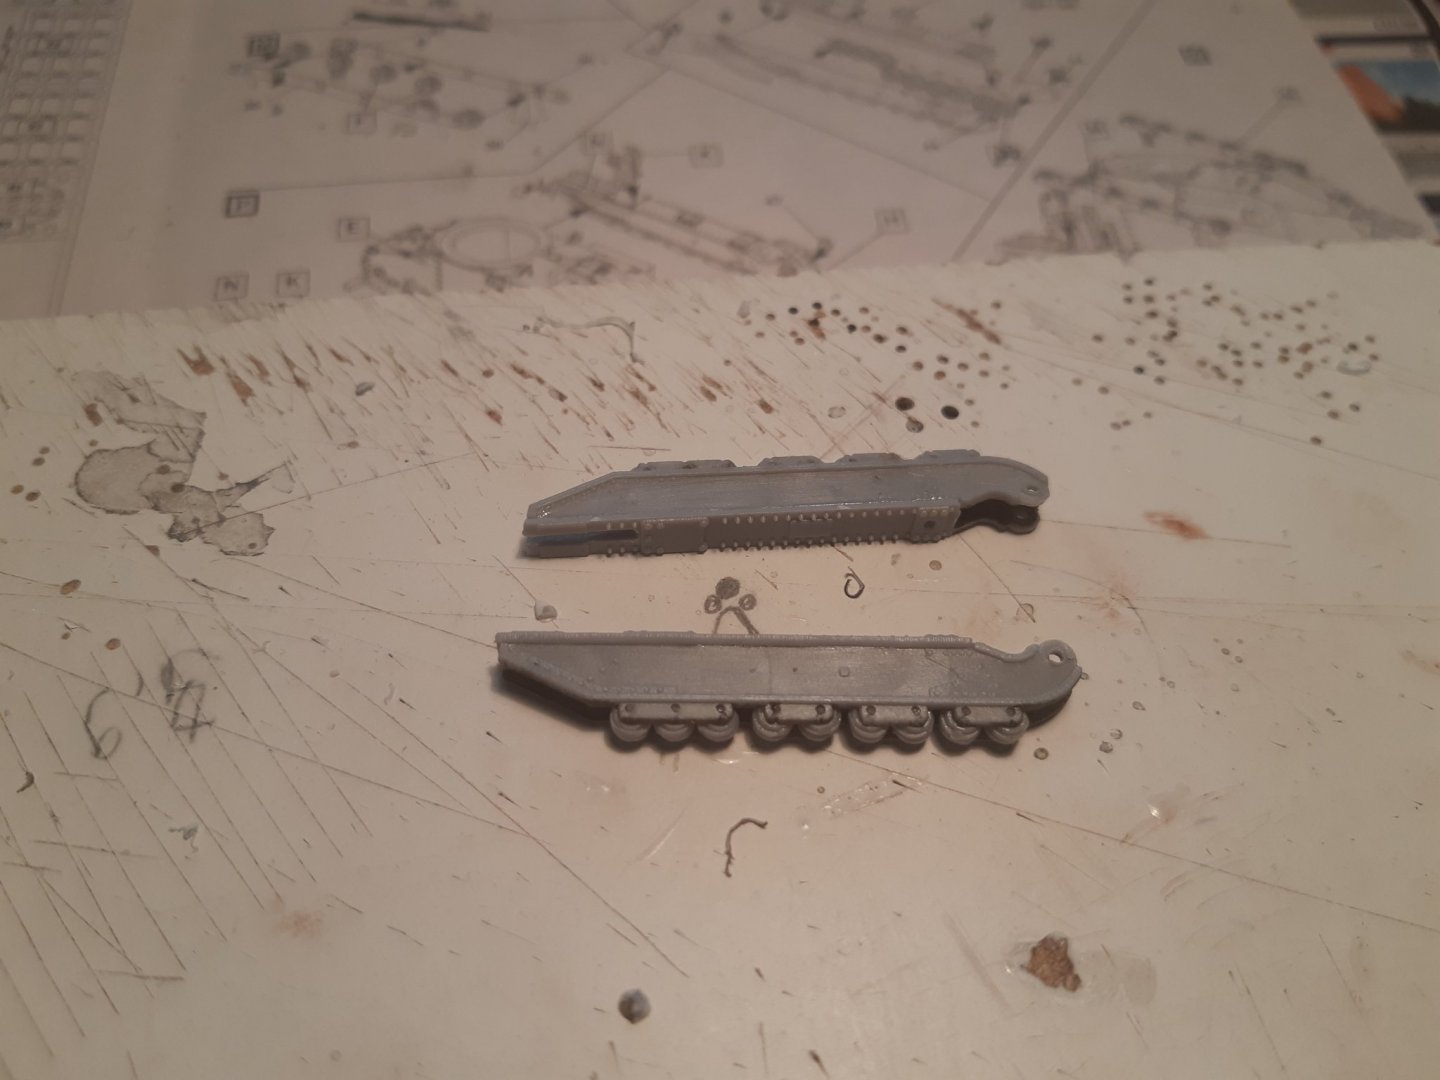
Thanks for following
- GrandpaPhil, Canute, Egilman and 7 others
-
10
-
-
My first FT 17models are from matchbox. These came together with the Char B1 as a kit.
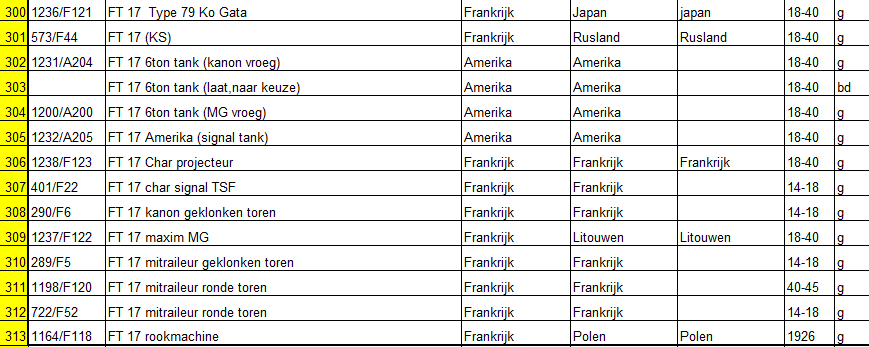
RPM came later, meanwhile my Ft 17 family has grown.Excel, to remember
g(gebouwd, build) bd (bouwdoos, kit)
number Model origin user rebuild in era status
-
-
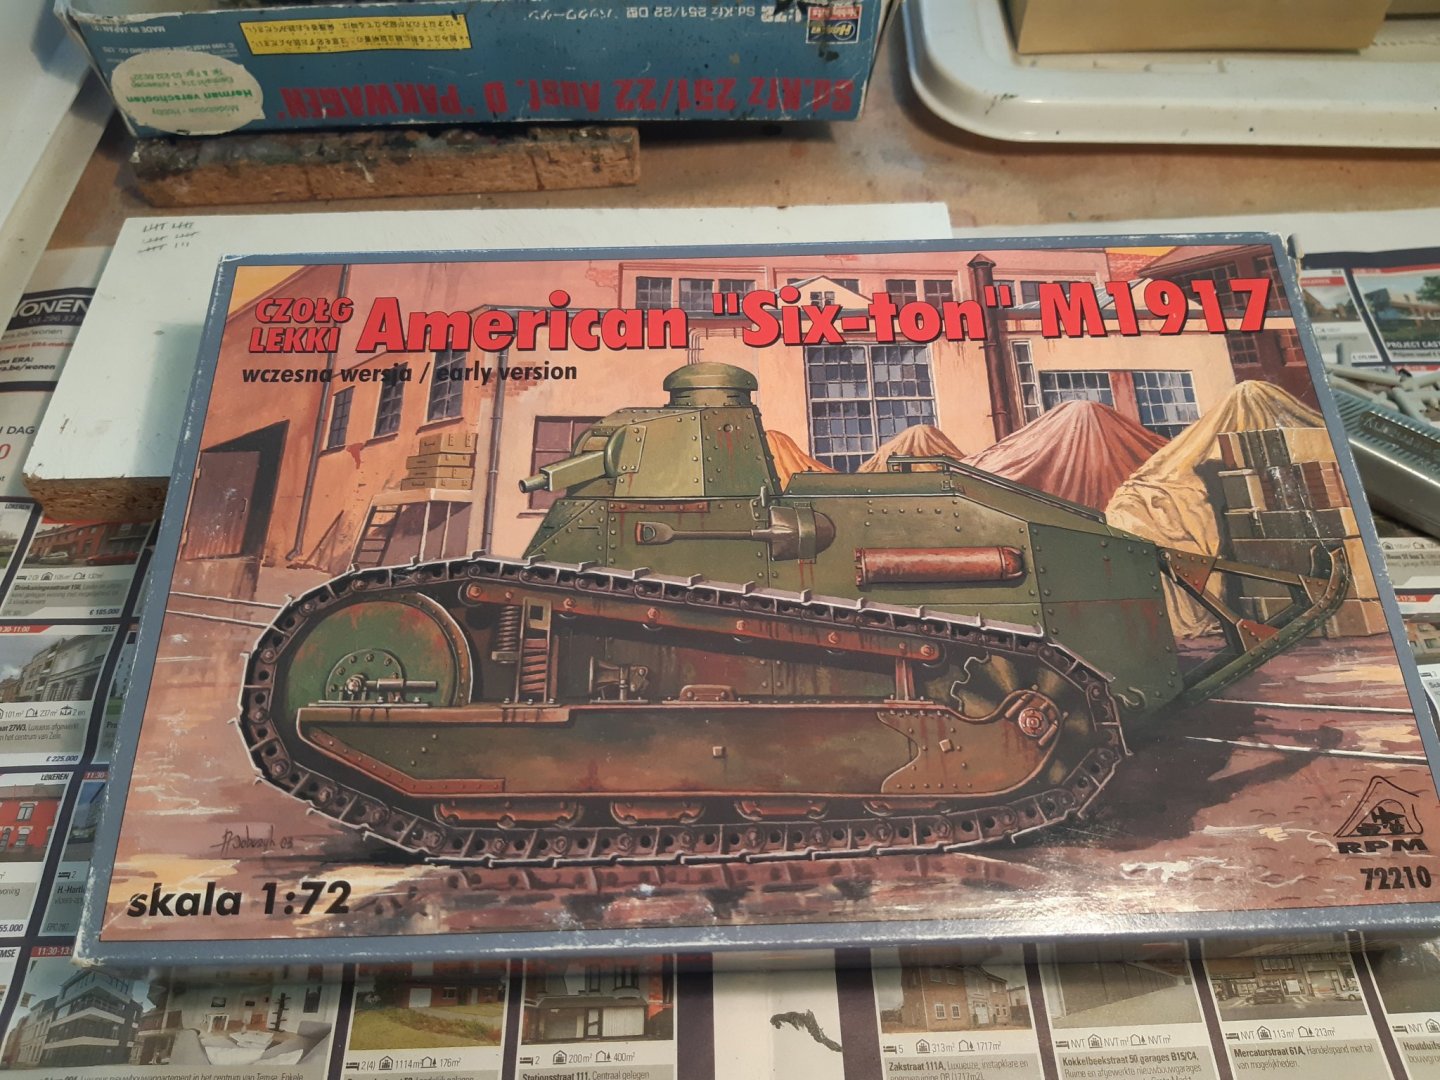
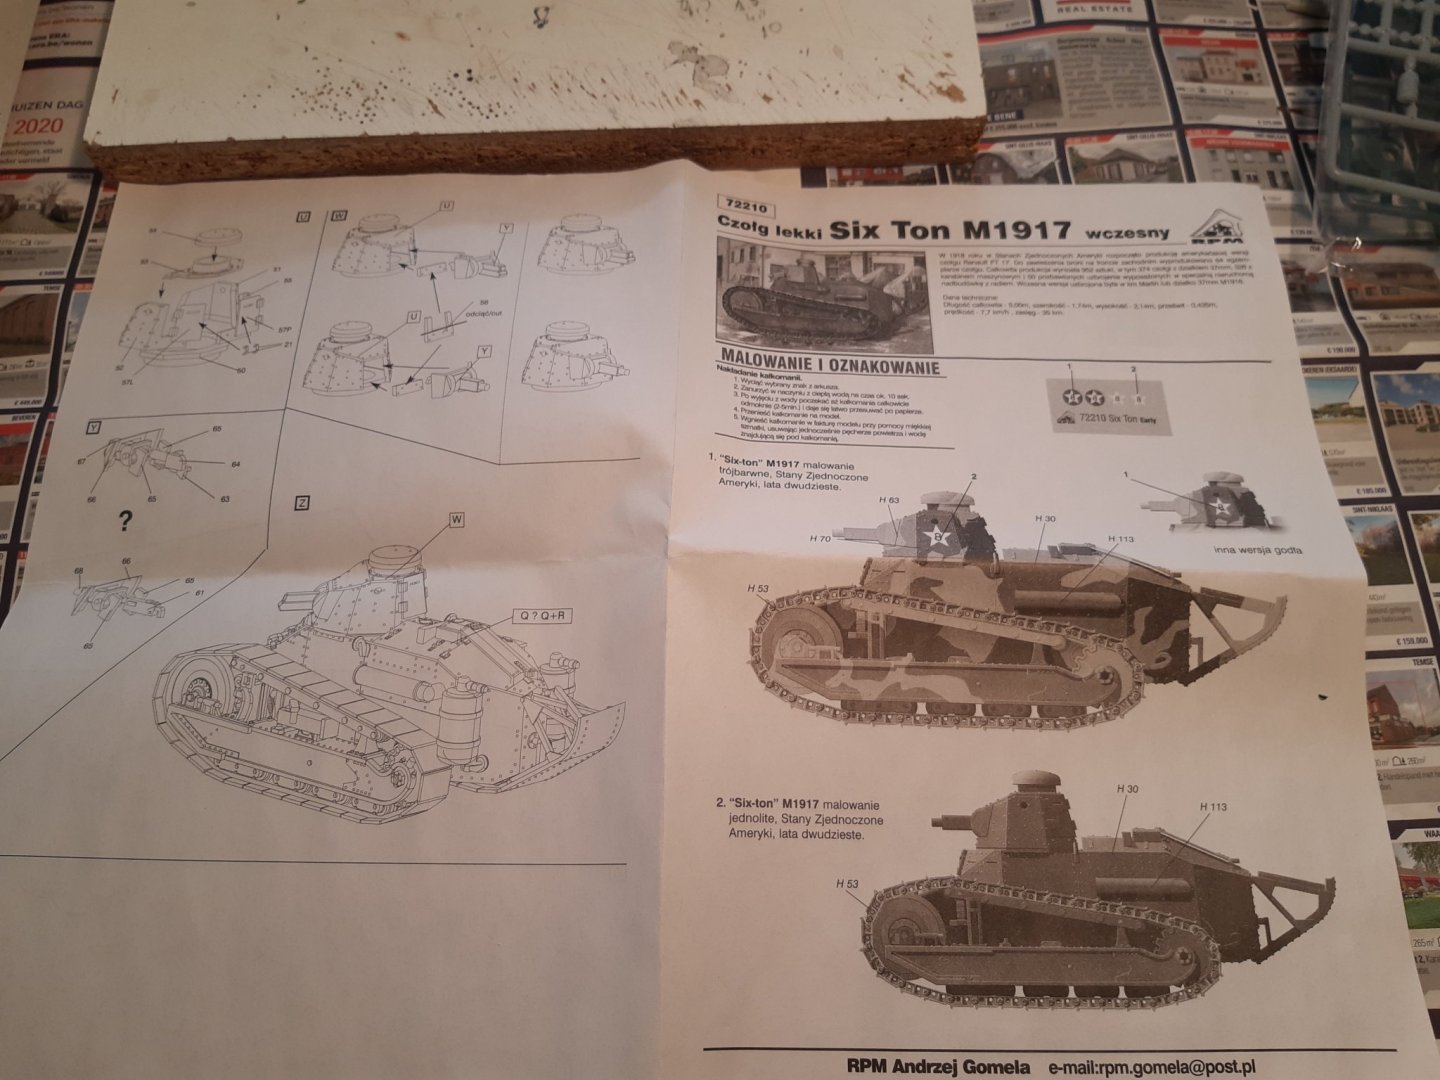
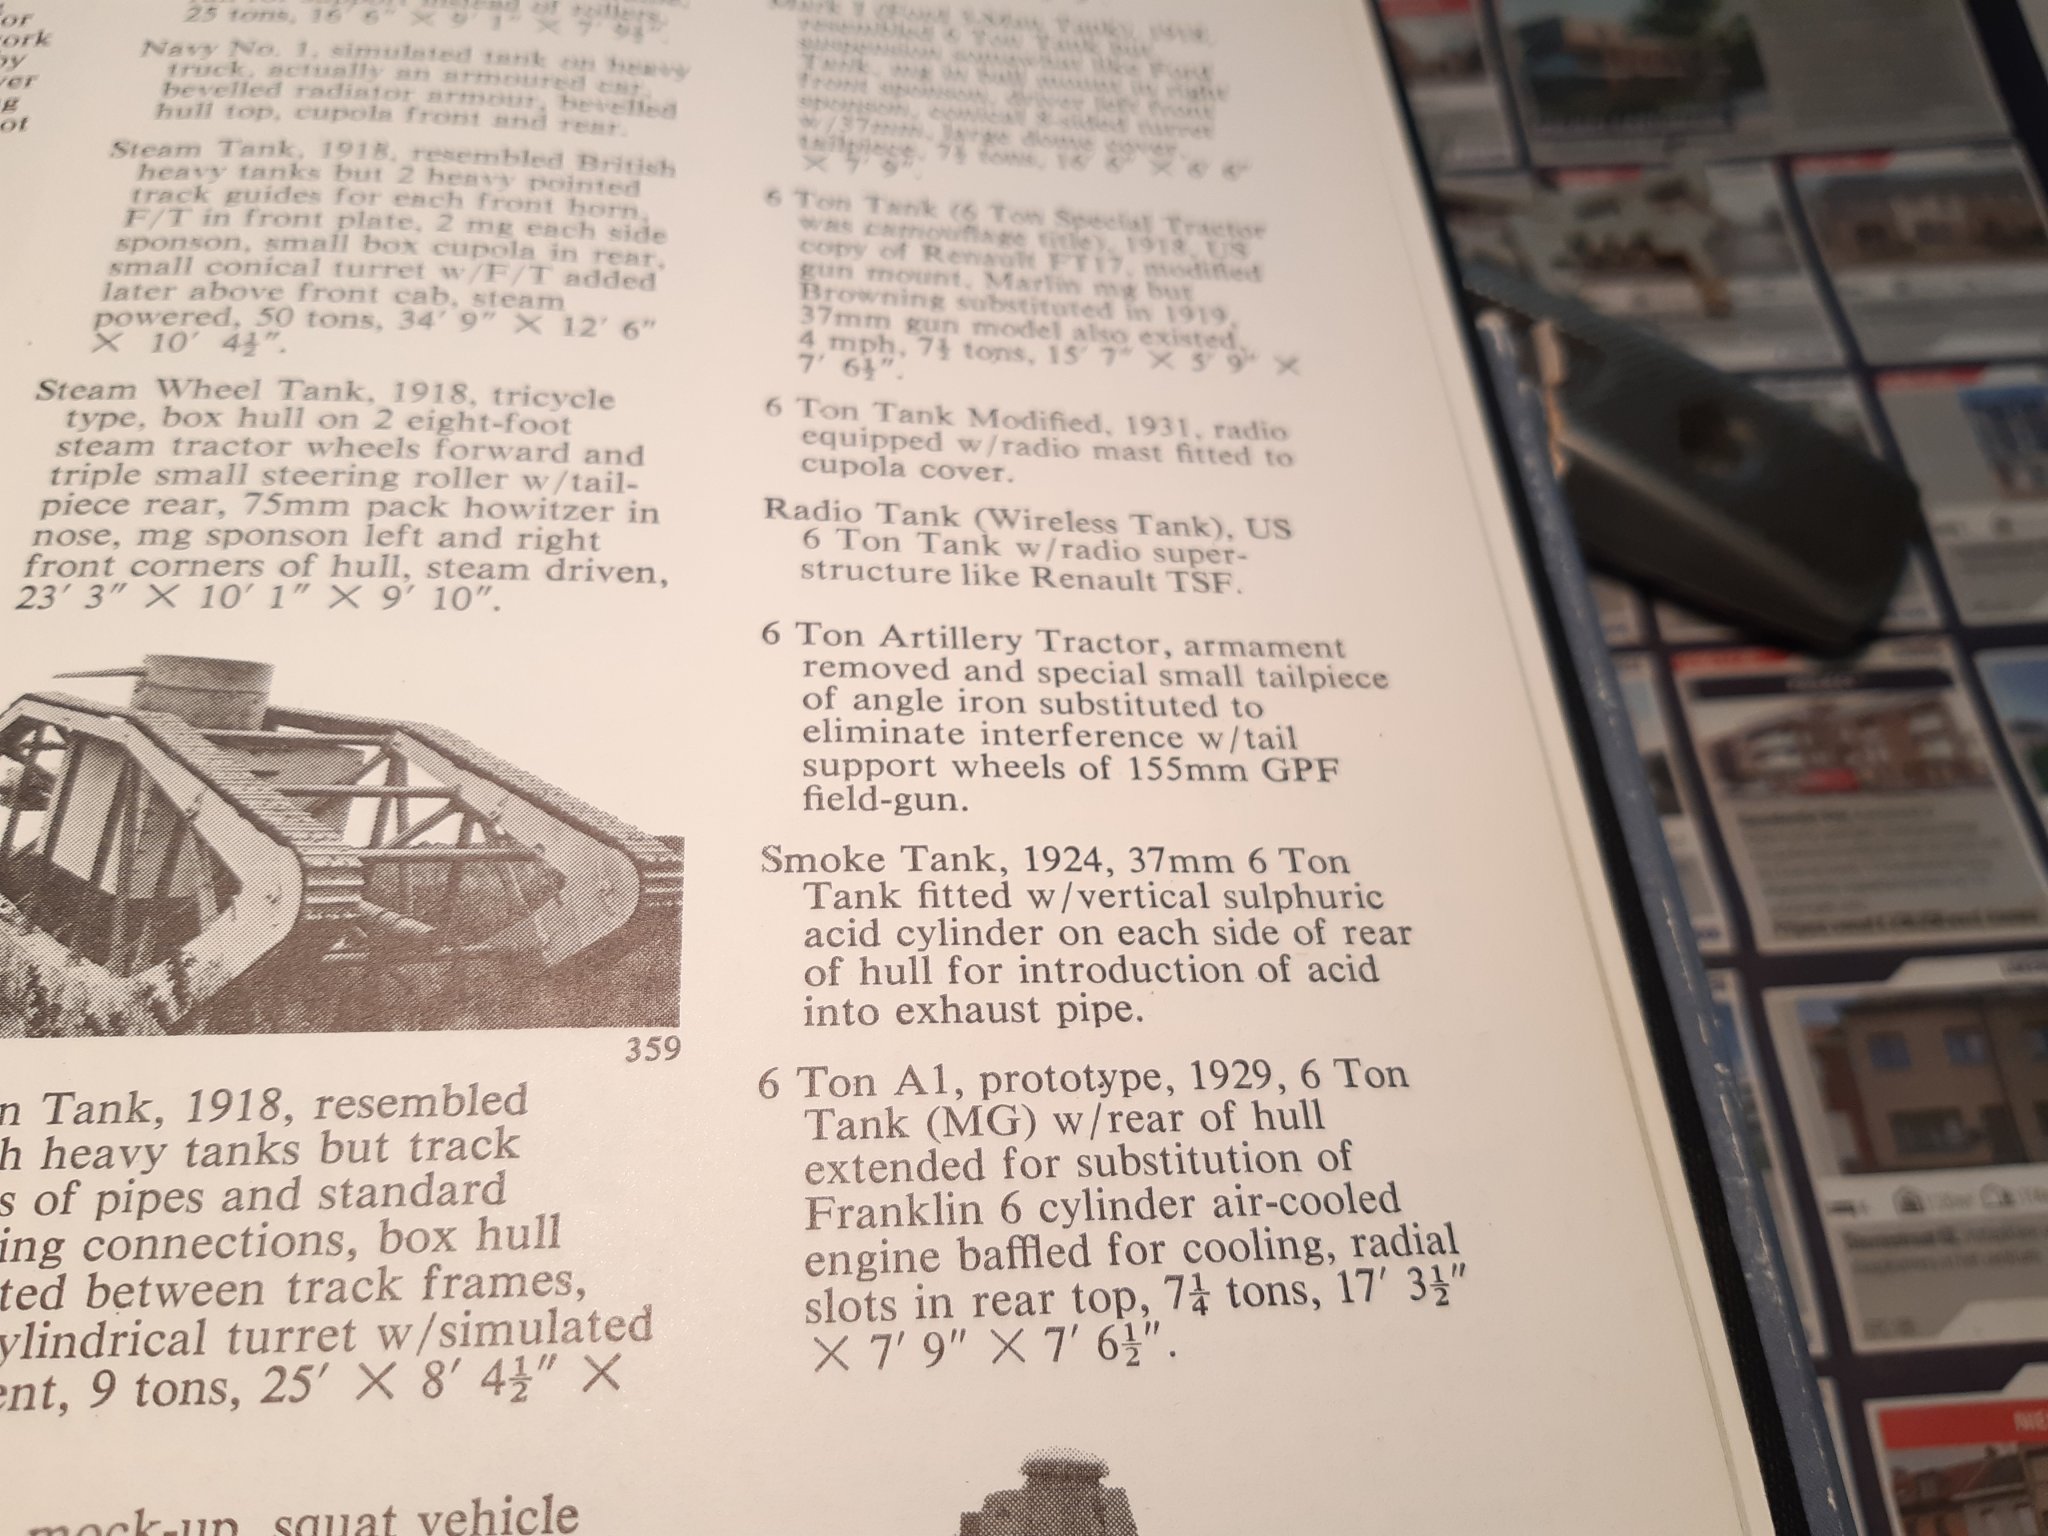
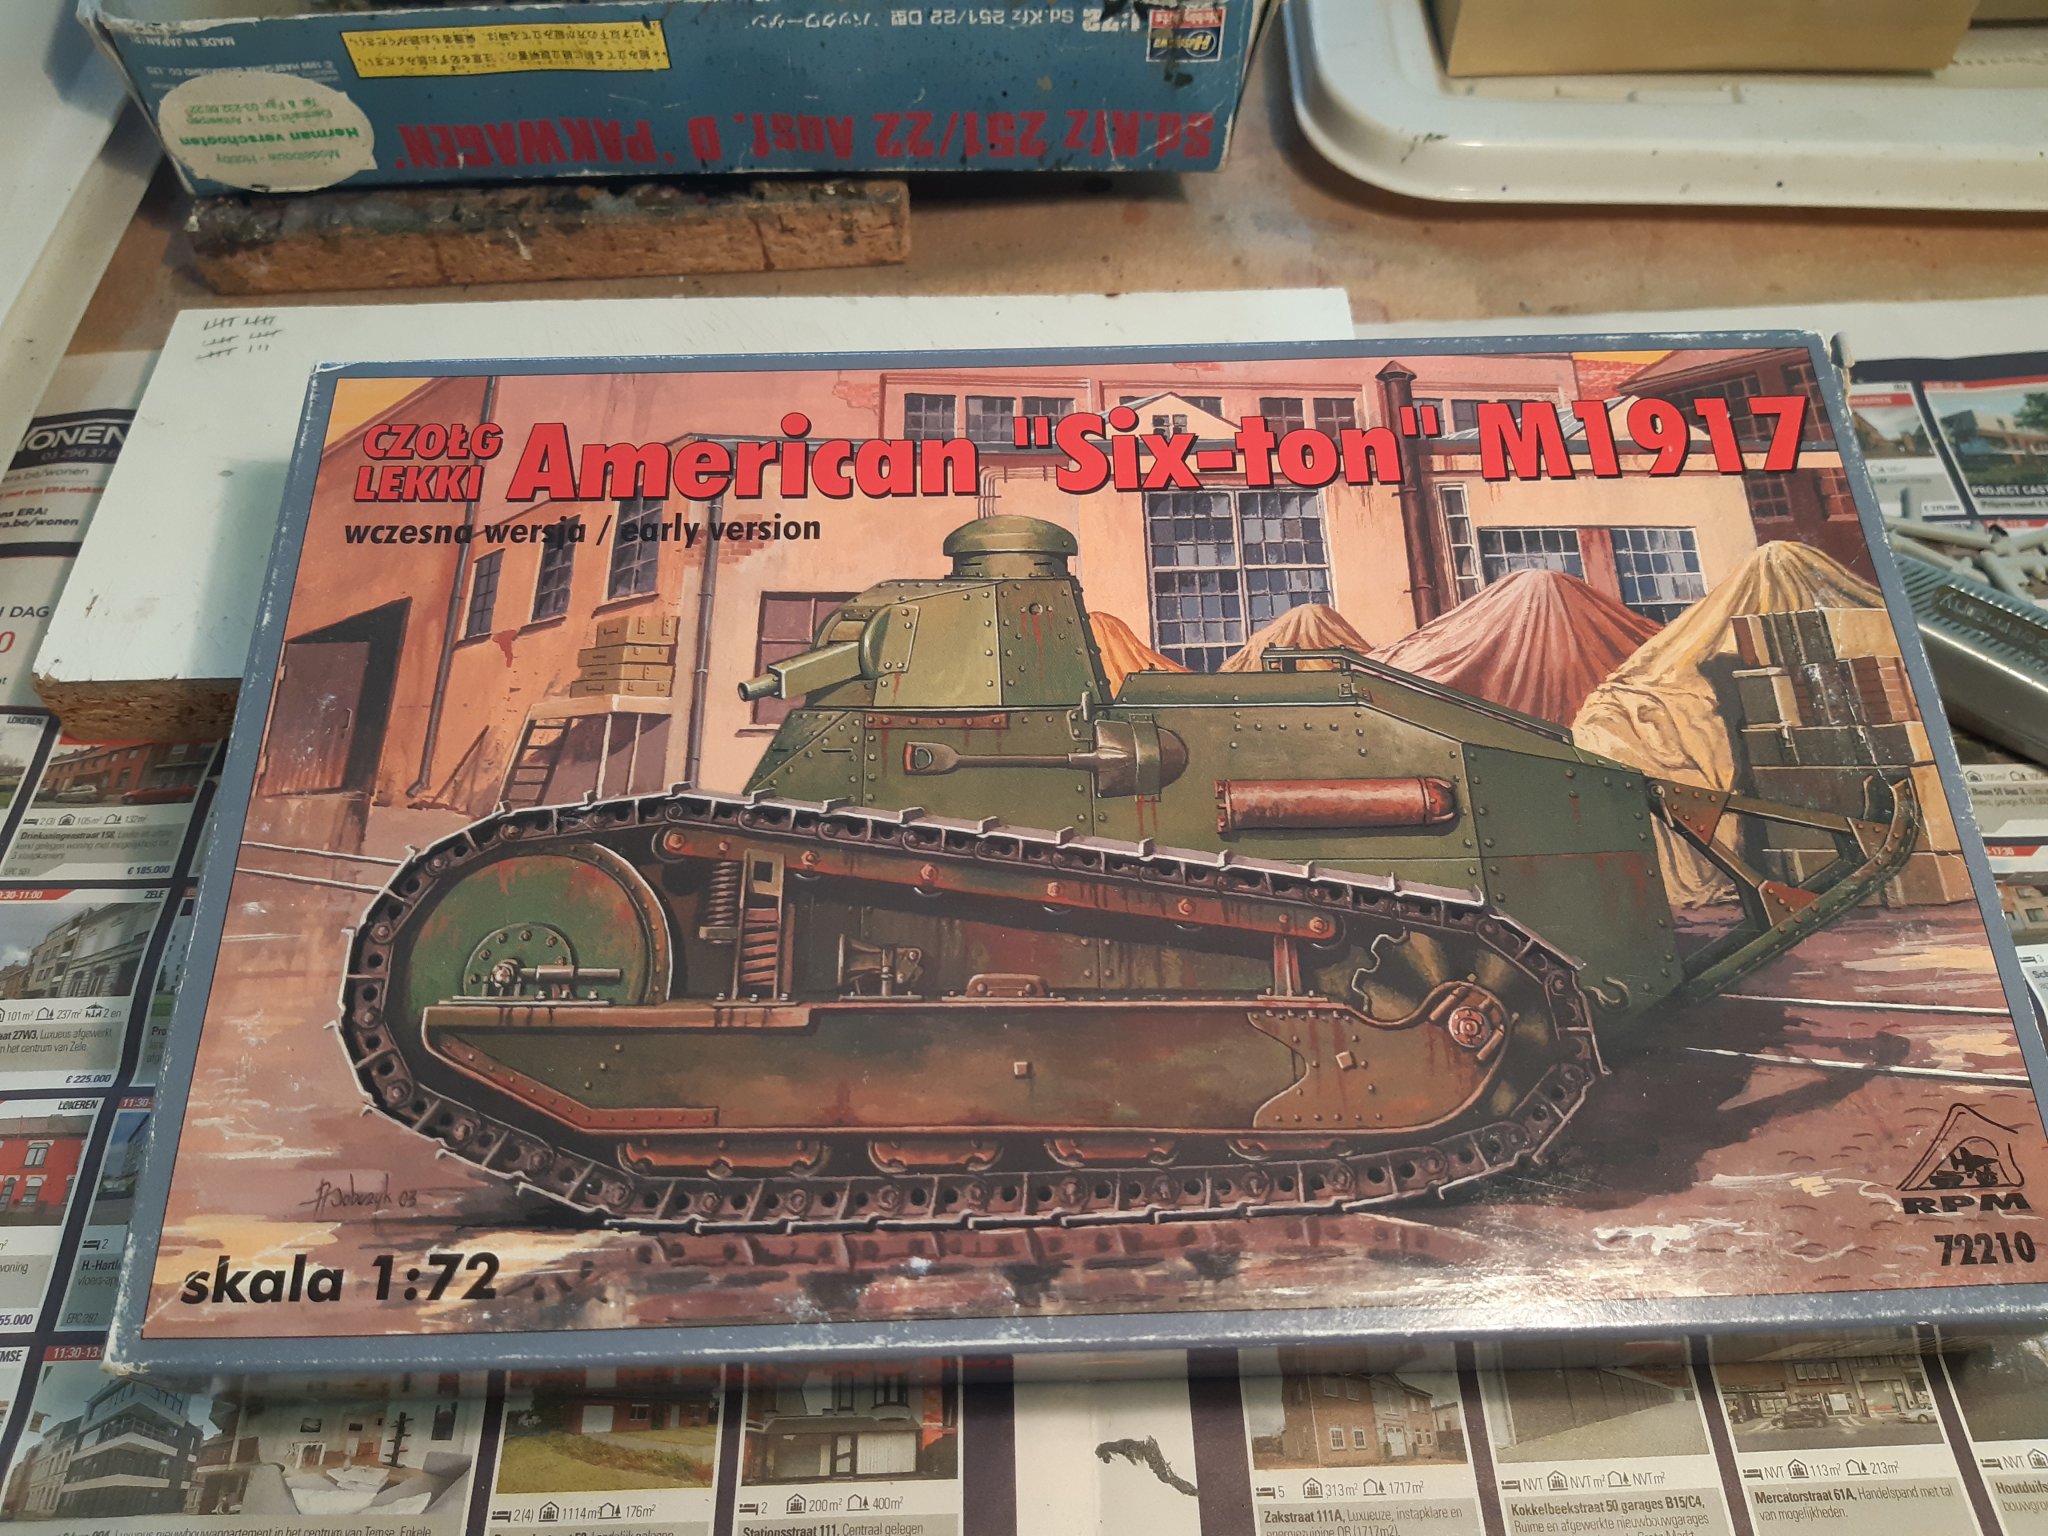
Welcome to build an American 6 ton tank. Scale 1/72 from the Polish company RPM
General info (wikipedia). https://en.wikipedia.org/wiki/M1917_light_tank (This tank is roughly a fairly exact copy of the French FT17.)
We build a smoke tank. Actually this is a normal 6 ton tank with smoke equipment. Probably only one model was built in 1924.
I cannot find the RPM website.
Fortunately there is Henk of Holland's website. If you want to find info about a military model at 1/72. This is the place to be.https://henk.fox3000.com/index2.htm https://henk.fox3000.com/Rpm.htm
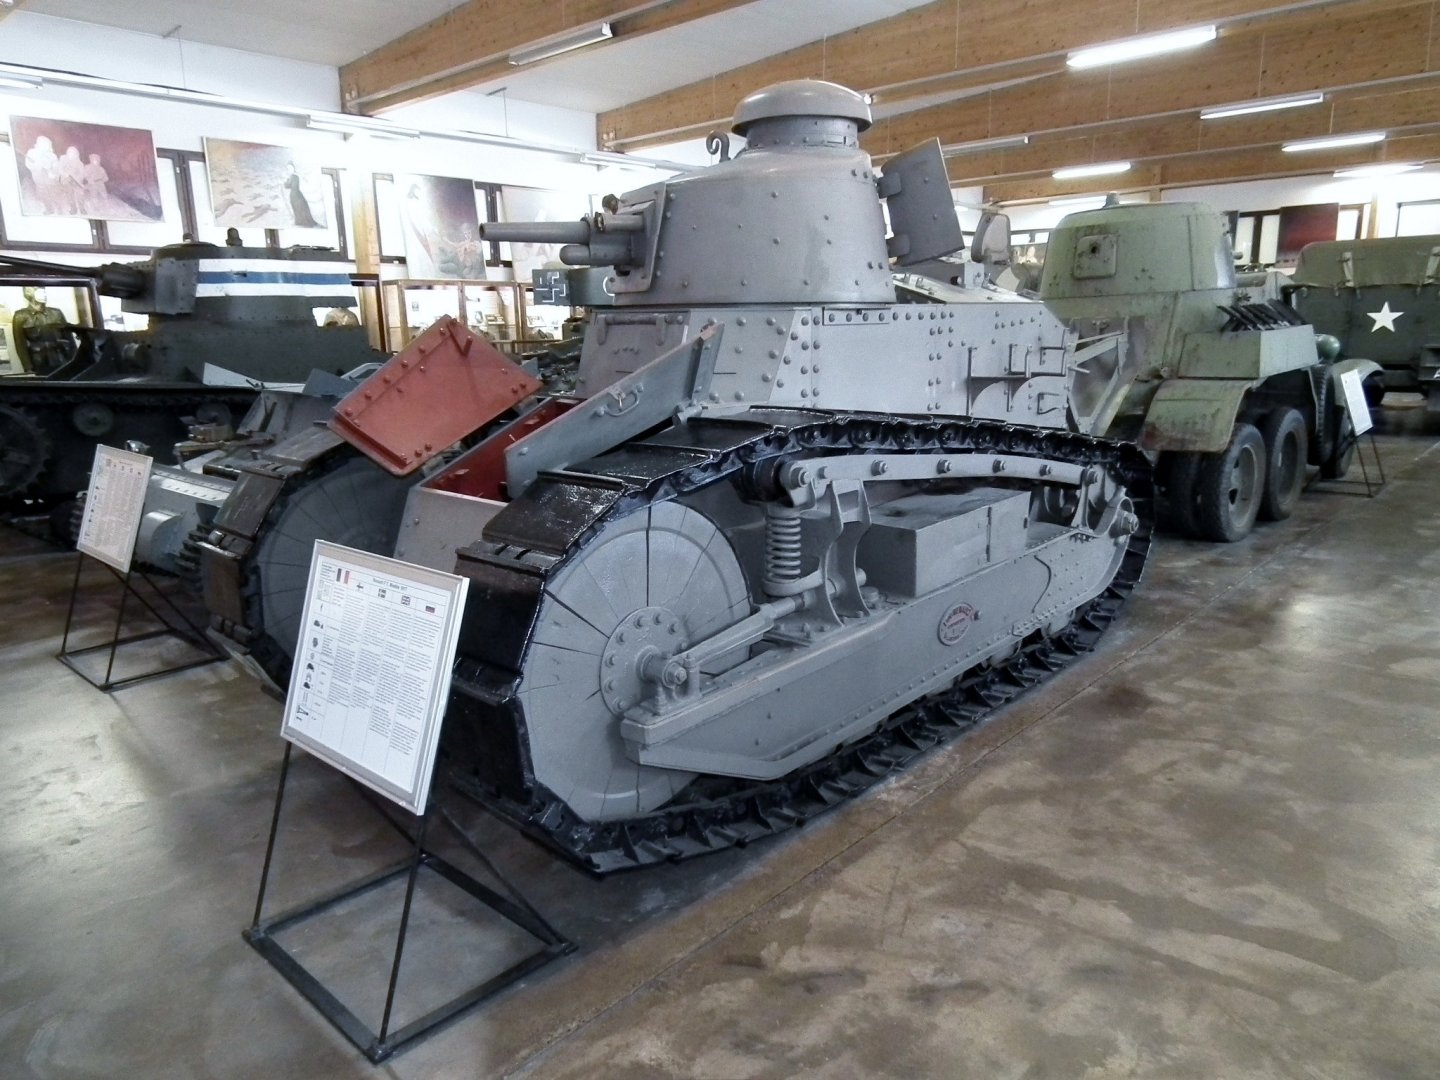
The only time I've seen a real FT17 was on a road trip in Finland. In the Parola tank museum https://www.panssarimuseo.fi/en/
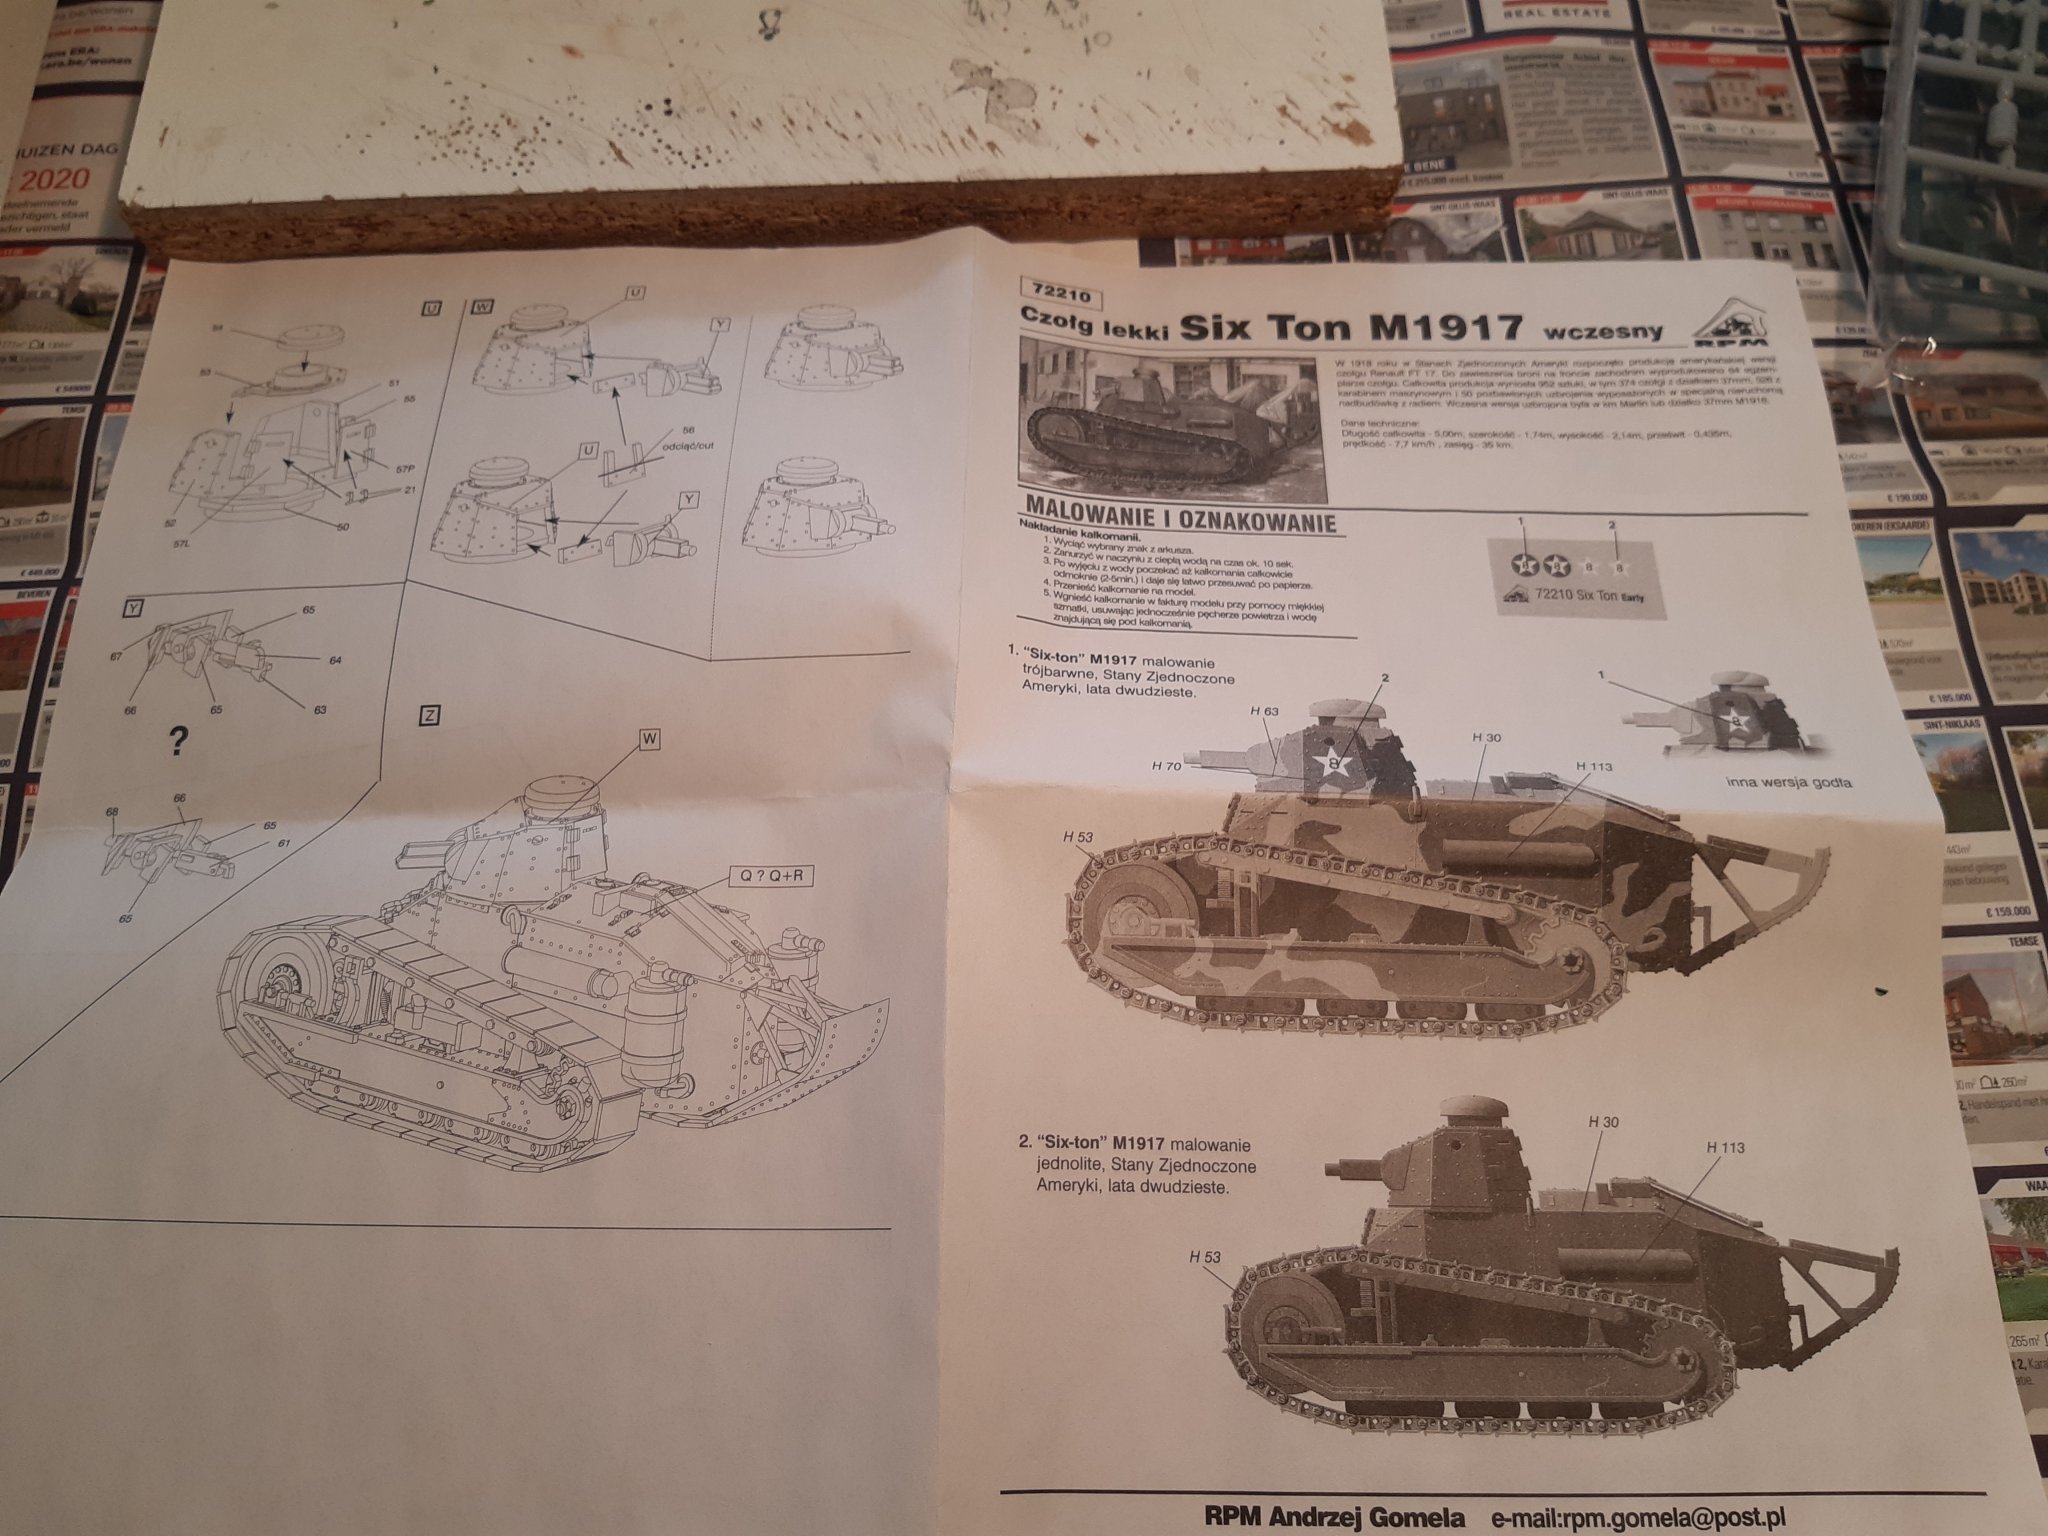
The box, plan and content

Start
-
Very nice work.
Good idea to replace the deadeyes.
-
11 hours ago, Egilman said:
Nice Job Patrick, and the regiment get a little bit bigger...
Excellent work....
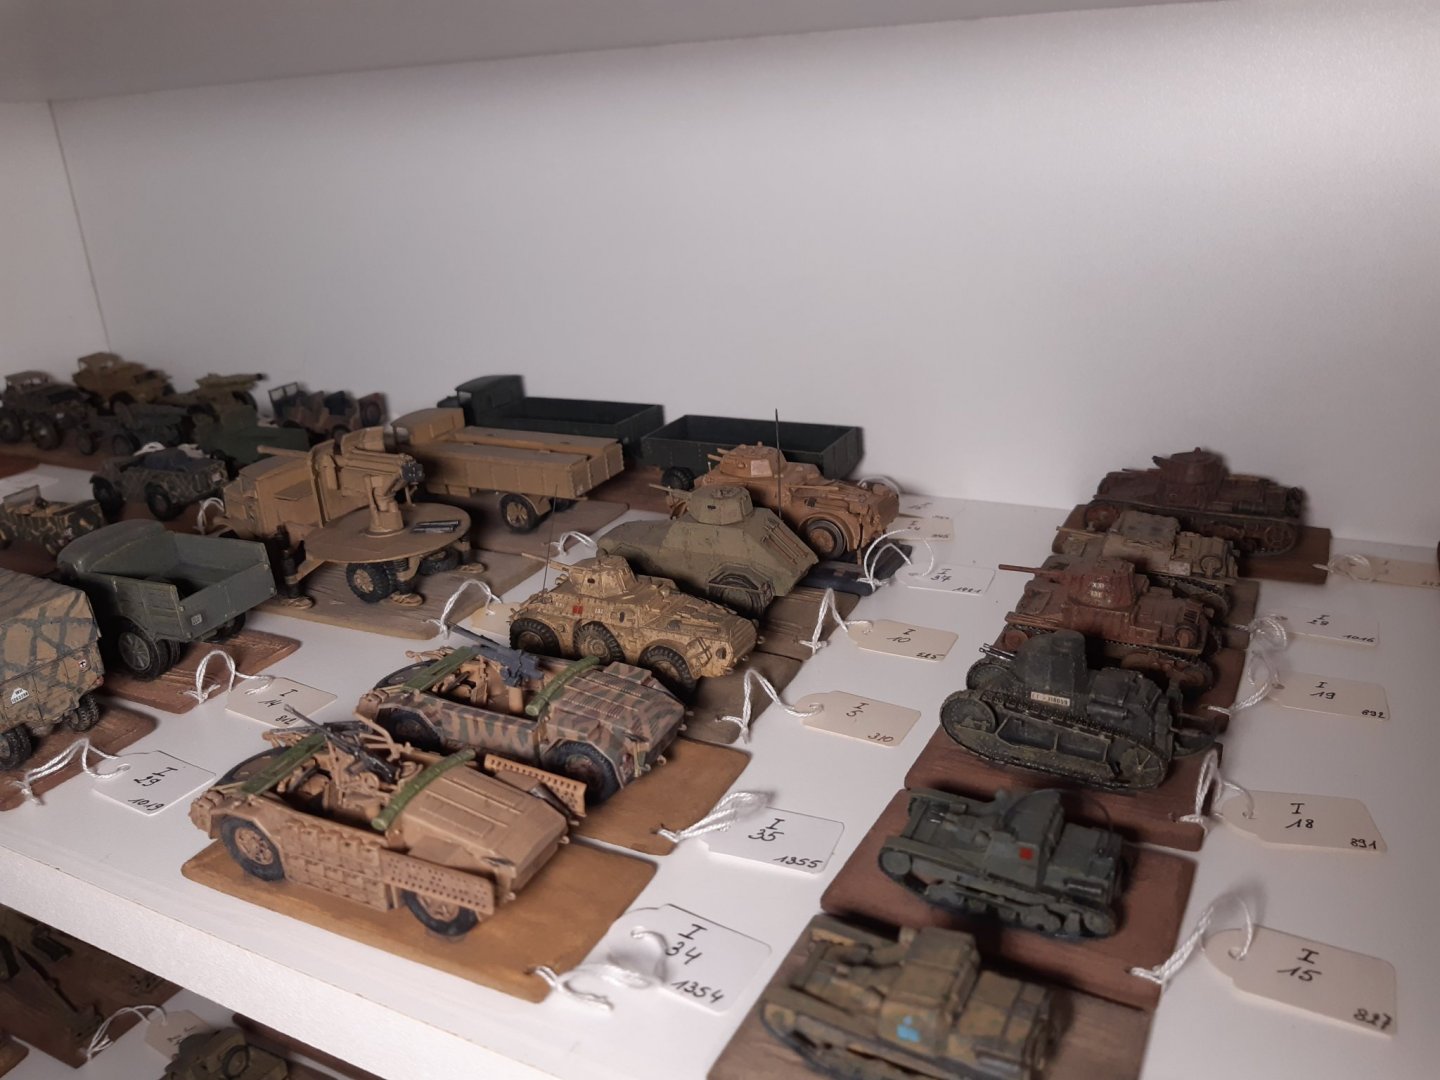
Thanks. The WW2 Italy corner is becoming a little overcrowded
11 hours ago, Edwardkenway said:Lovely work Patrick, there's a few years work on those shelves by the looks of them

Thanks. I once built 60 of these models a year.
8 hours ago, Old Collingwood said:Excellent job looks swell.
OC.
Thanks
4 hours ago, popeye the sailor said:very well done........cool way of making the tracks! quite a collection you have there........you log each one..... do you sell them?
Thanks.
Not for sale. The unfortunate one who is going to inherit this. Will have a lot of work to pack and move all of this.
-
After all these Bitburgers. Time for finishing the model.
A wash with diluted matte black (matte black, 50% water, 50% ipa) And some pencil here and there.
Ready
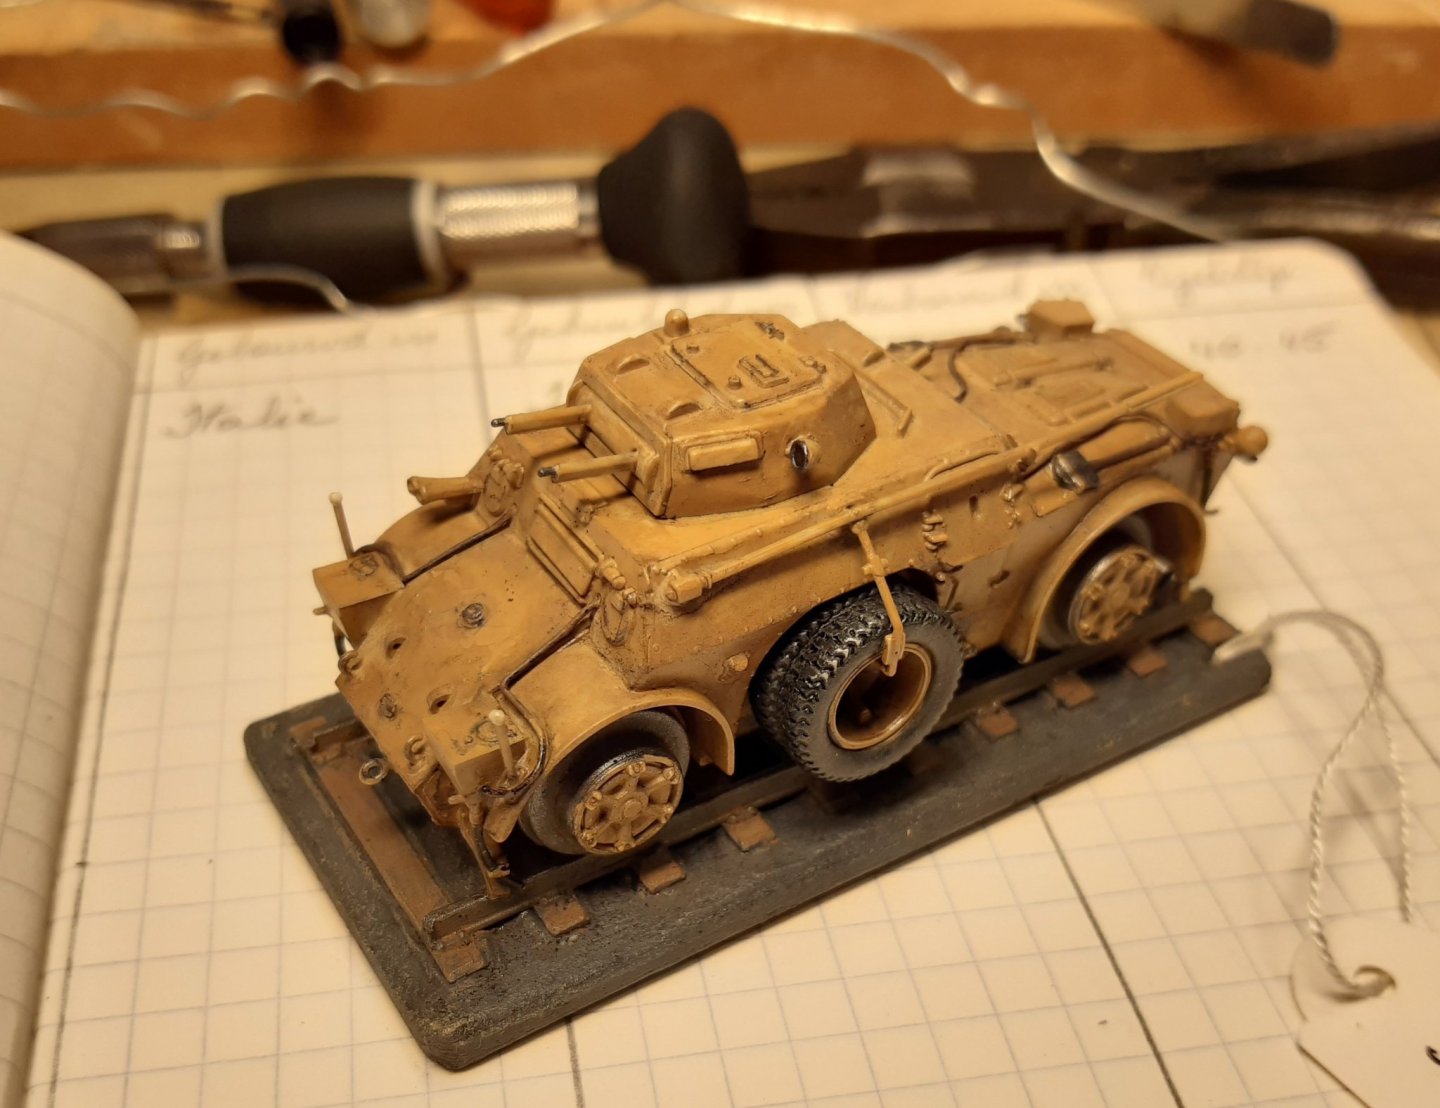
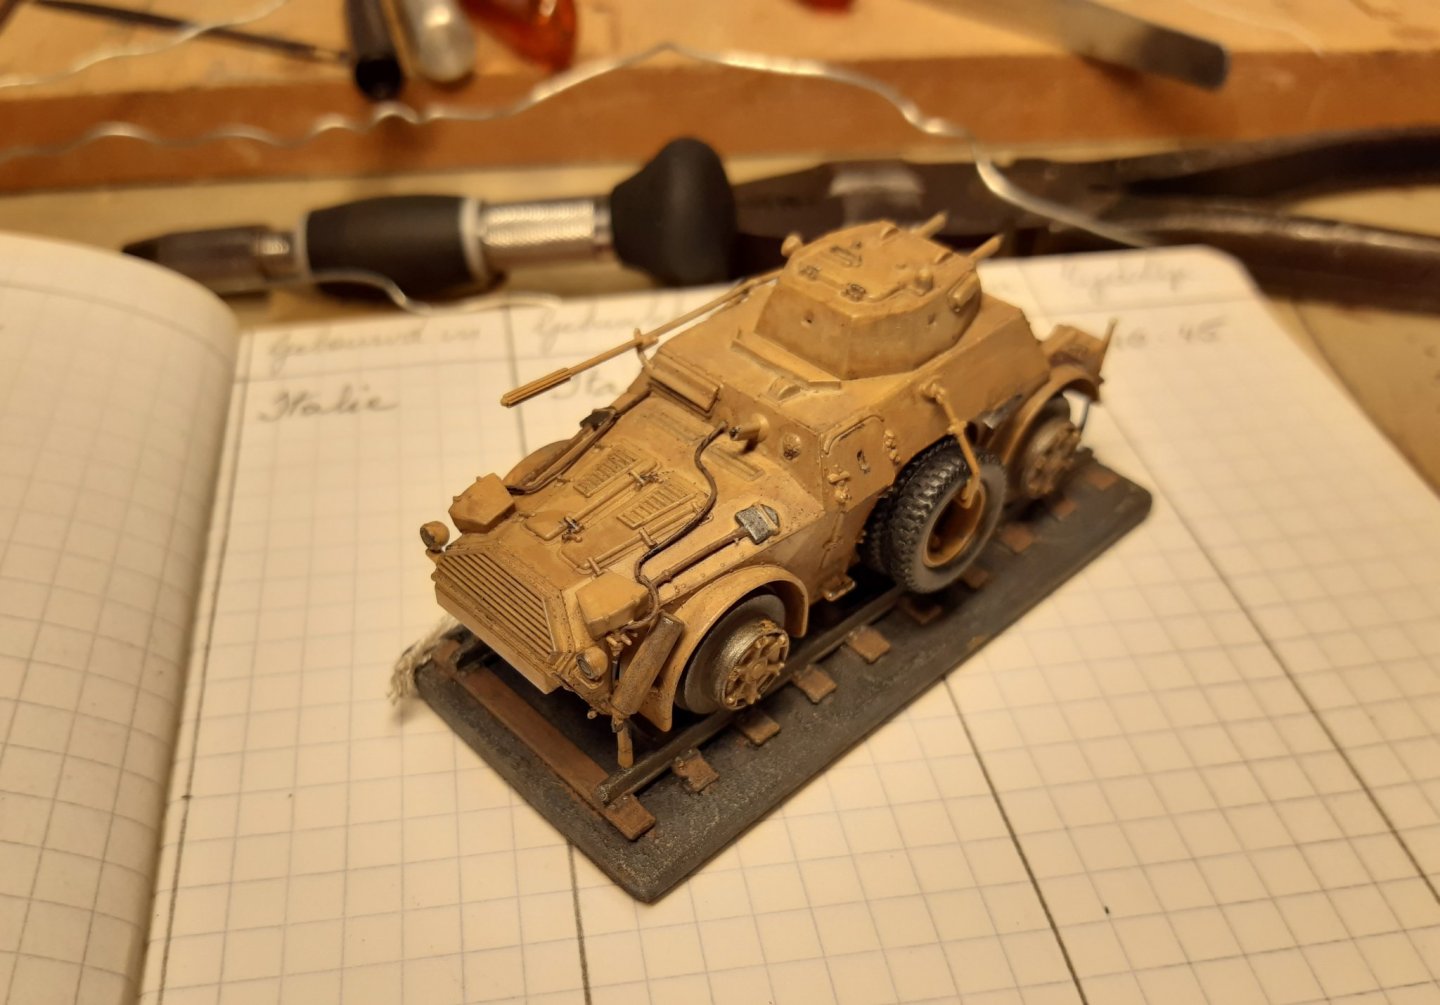
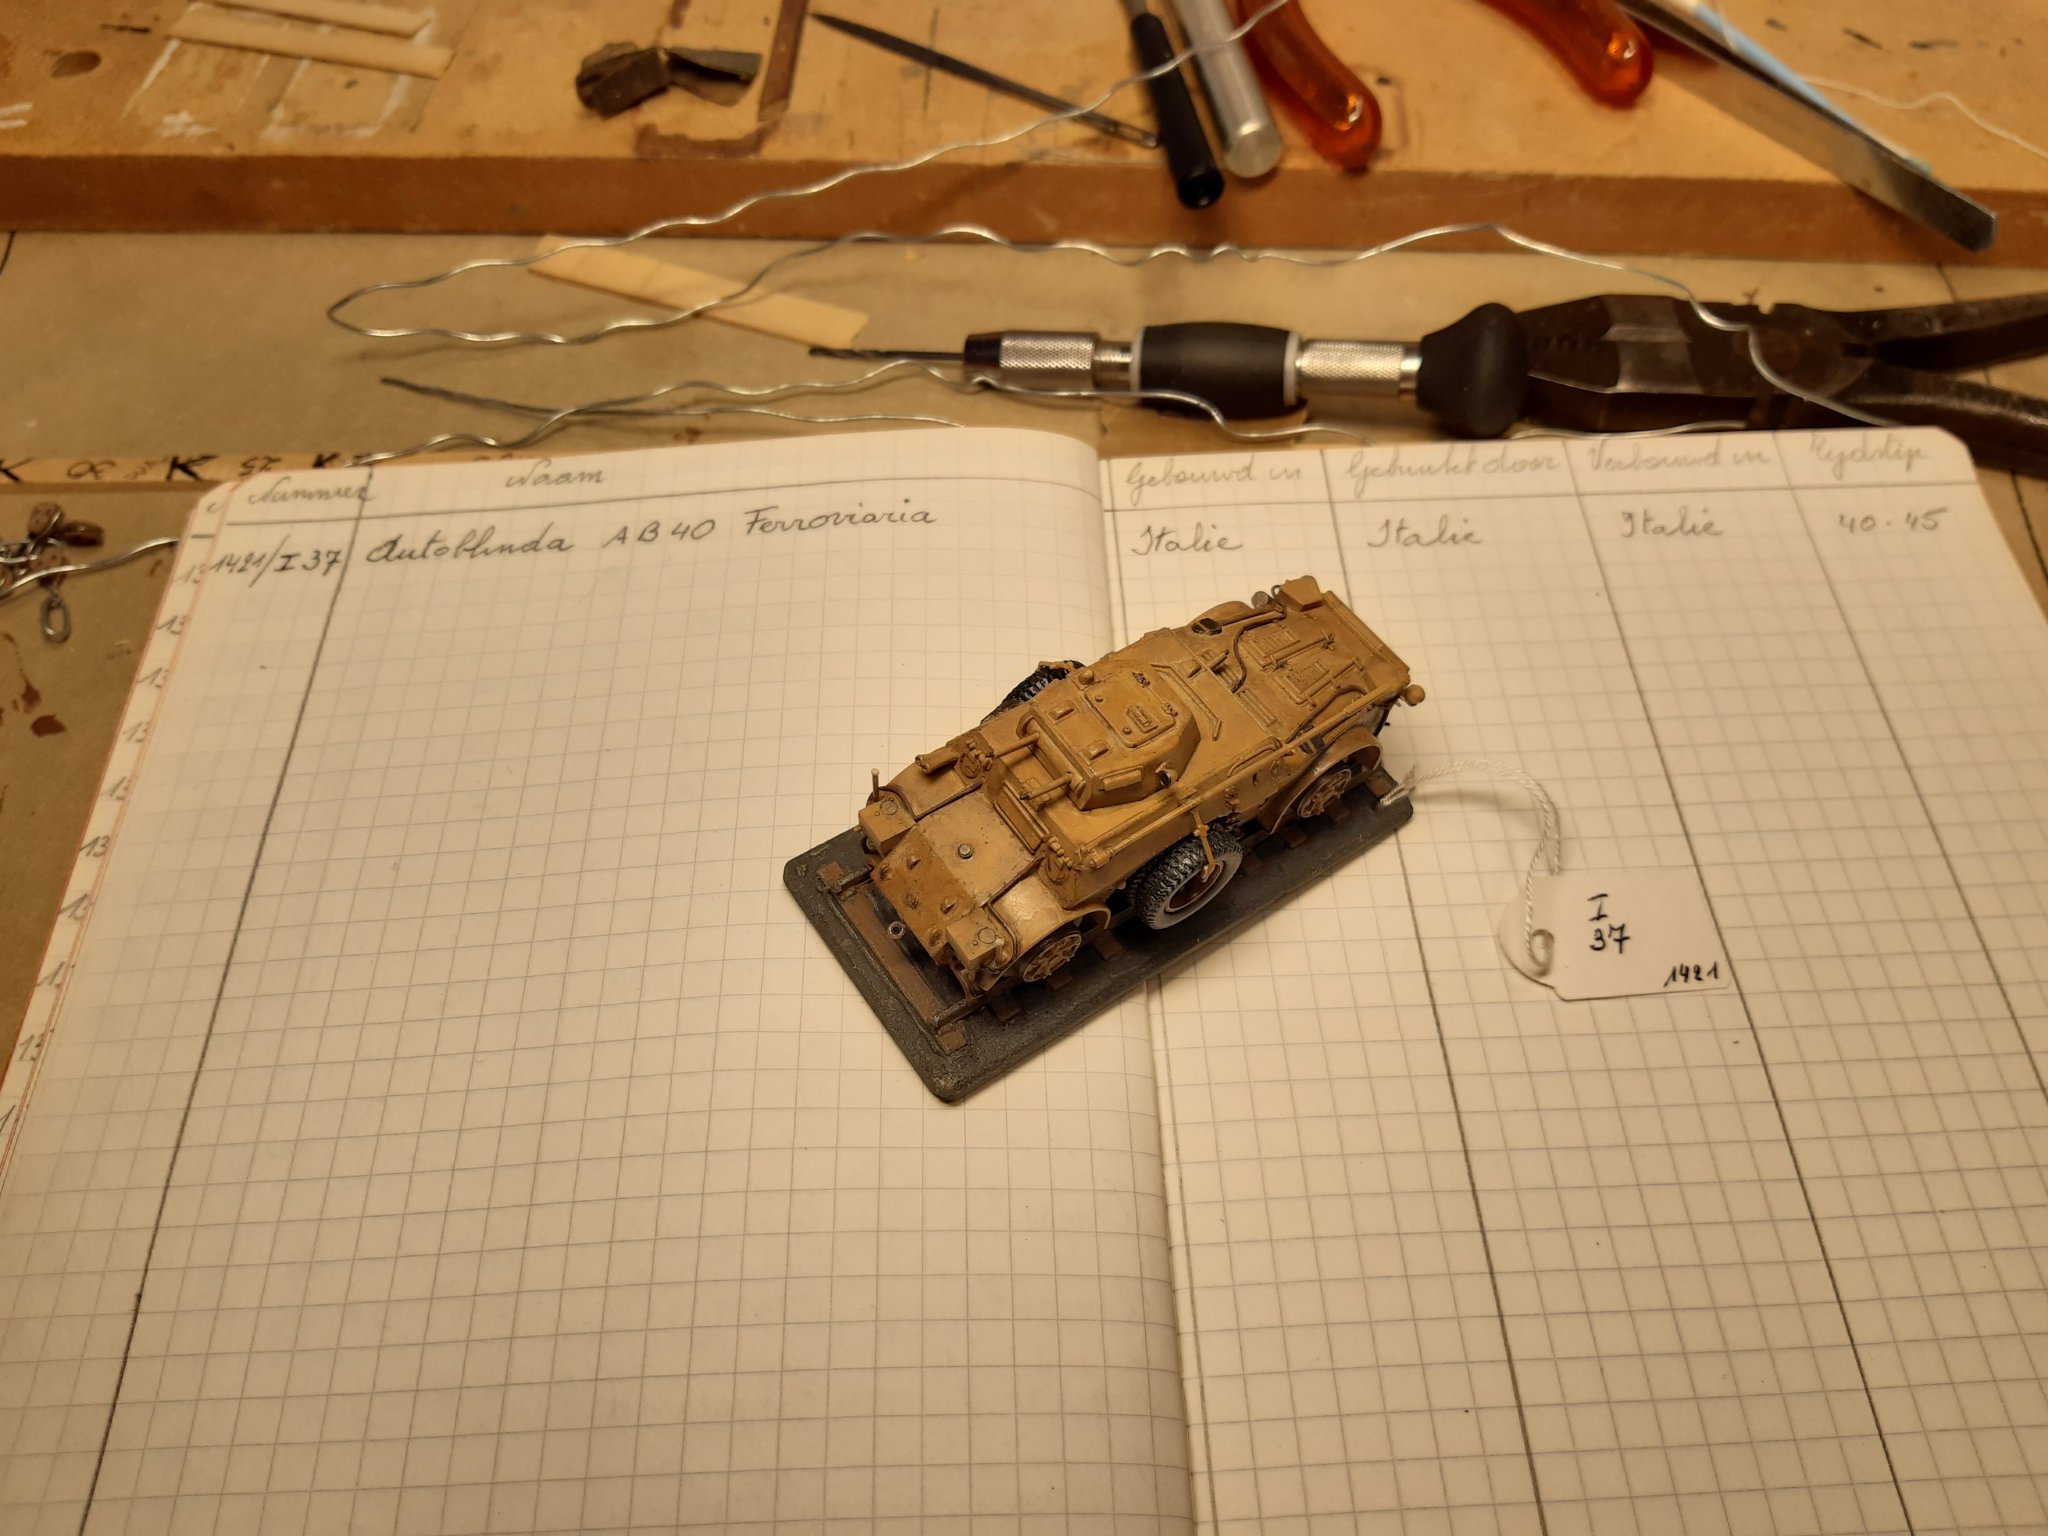
Numbered and registered.
Italian number 37
total number 1421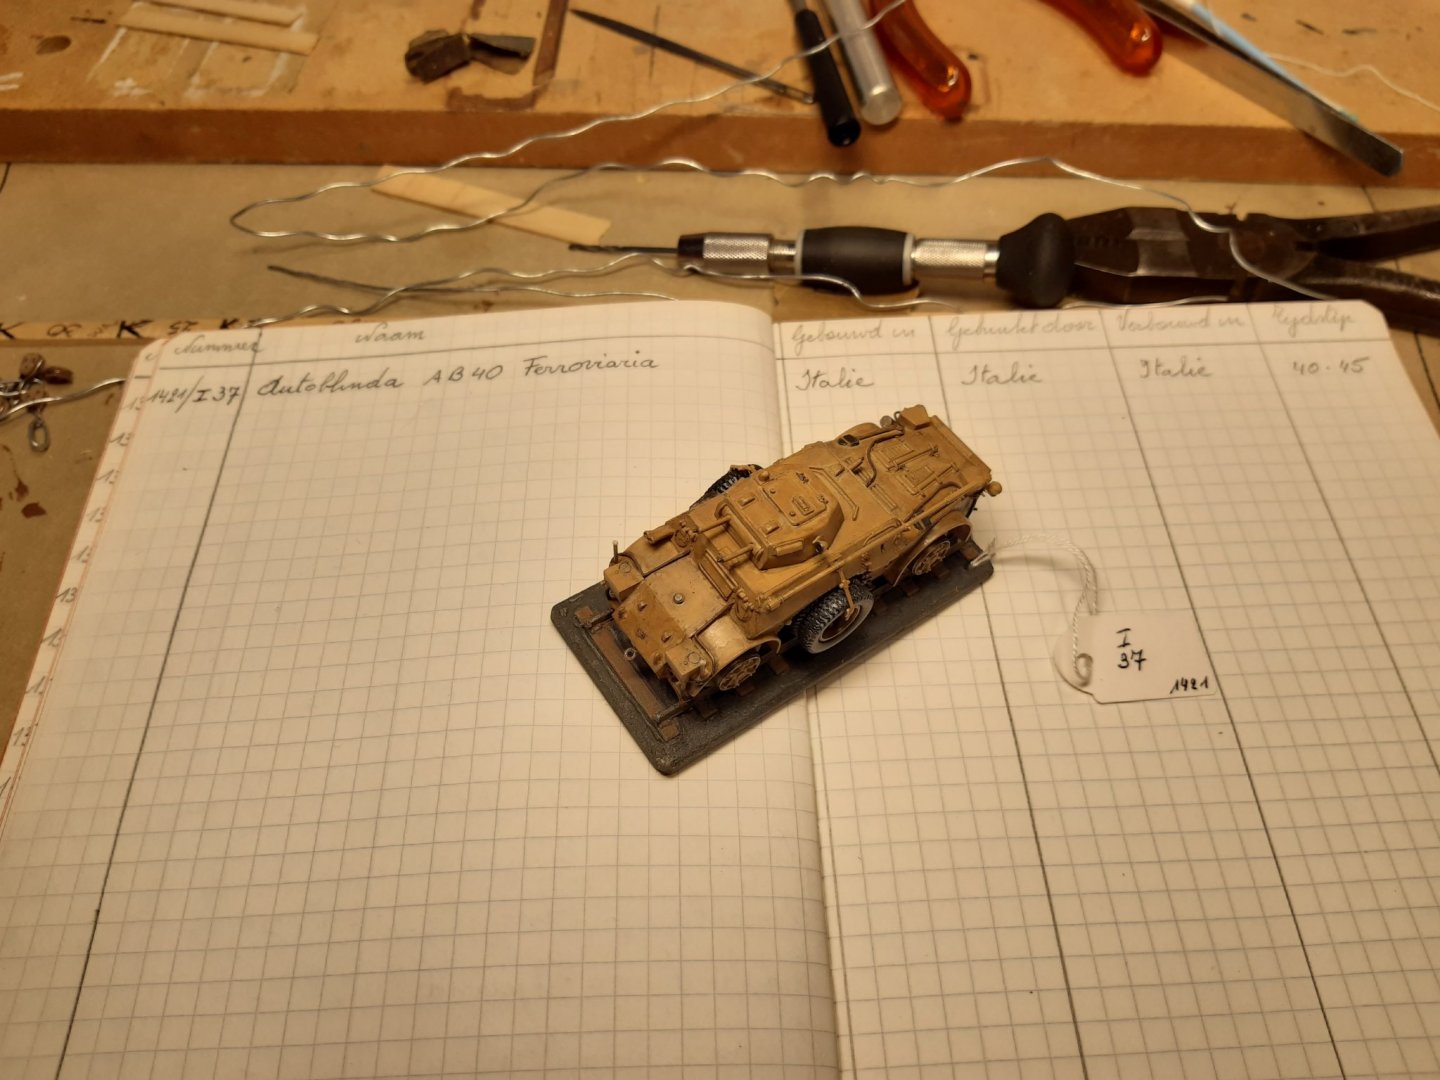
The Italian corner (almost full)
Thanks for following this build.
Next project : a US 6 ton "smoke tank" from 1924
-
Goed gedaan (well done) 👍
- Barbossa, Edwardkenway and mtaylor
-
3
-
This will be fun to follow.
-
-
-
As i have zero combat experience, i can only agree with you both.
My only experience is a one NATO exercise in Germany ( sept. 1983) and 2 weeks in camp vogelsang (in winter, brrrr cold 🥶)
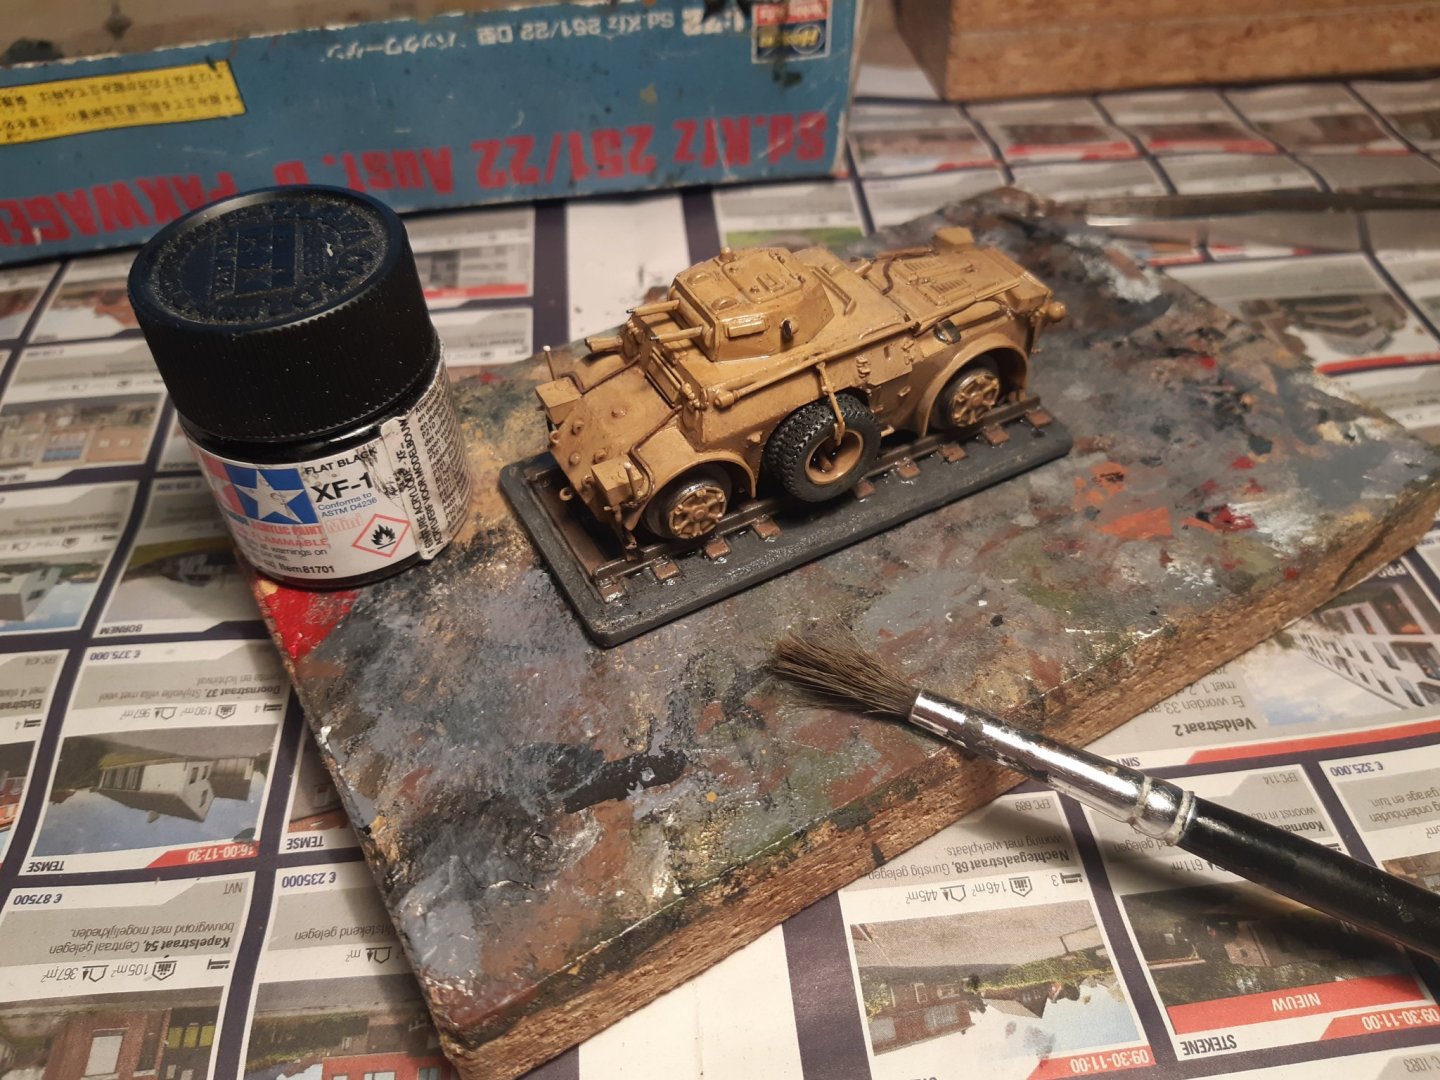
Continue with the Autoblinda (google translate translates "car blind" haha)
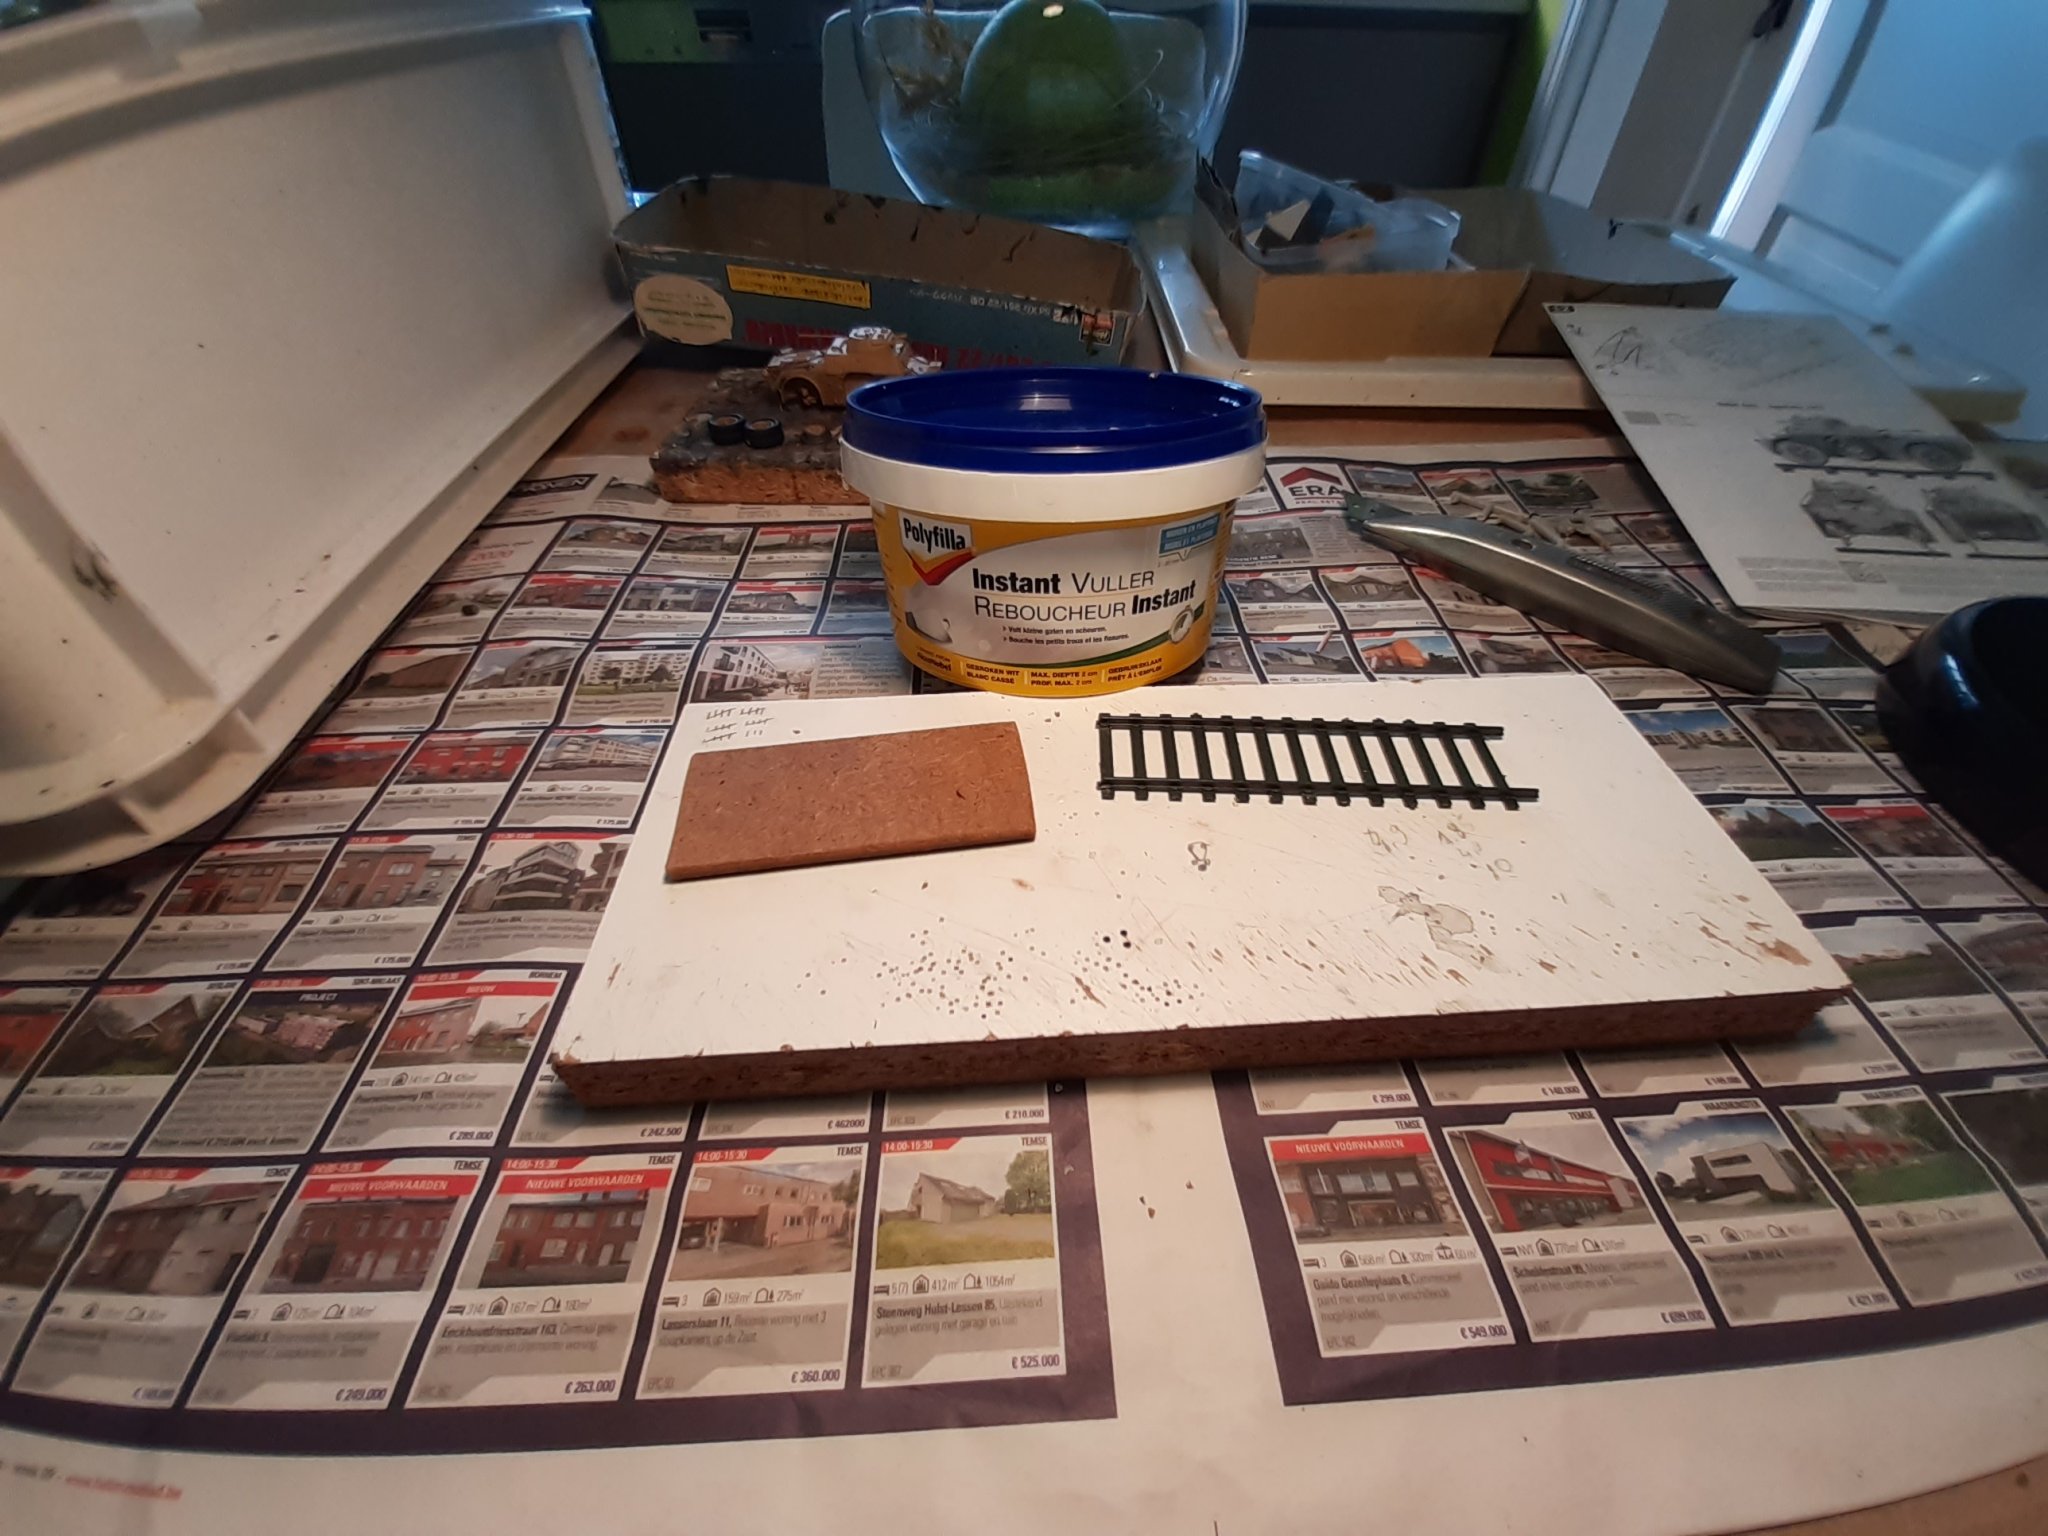
The rail from the kit has already been used elsewhere. This one comes from the part box
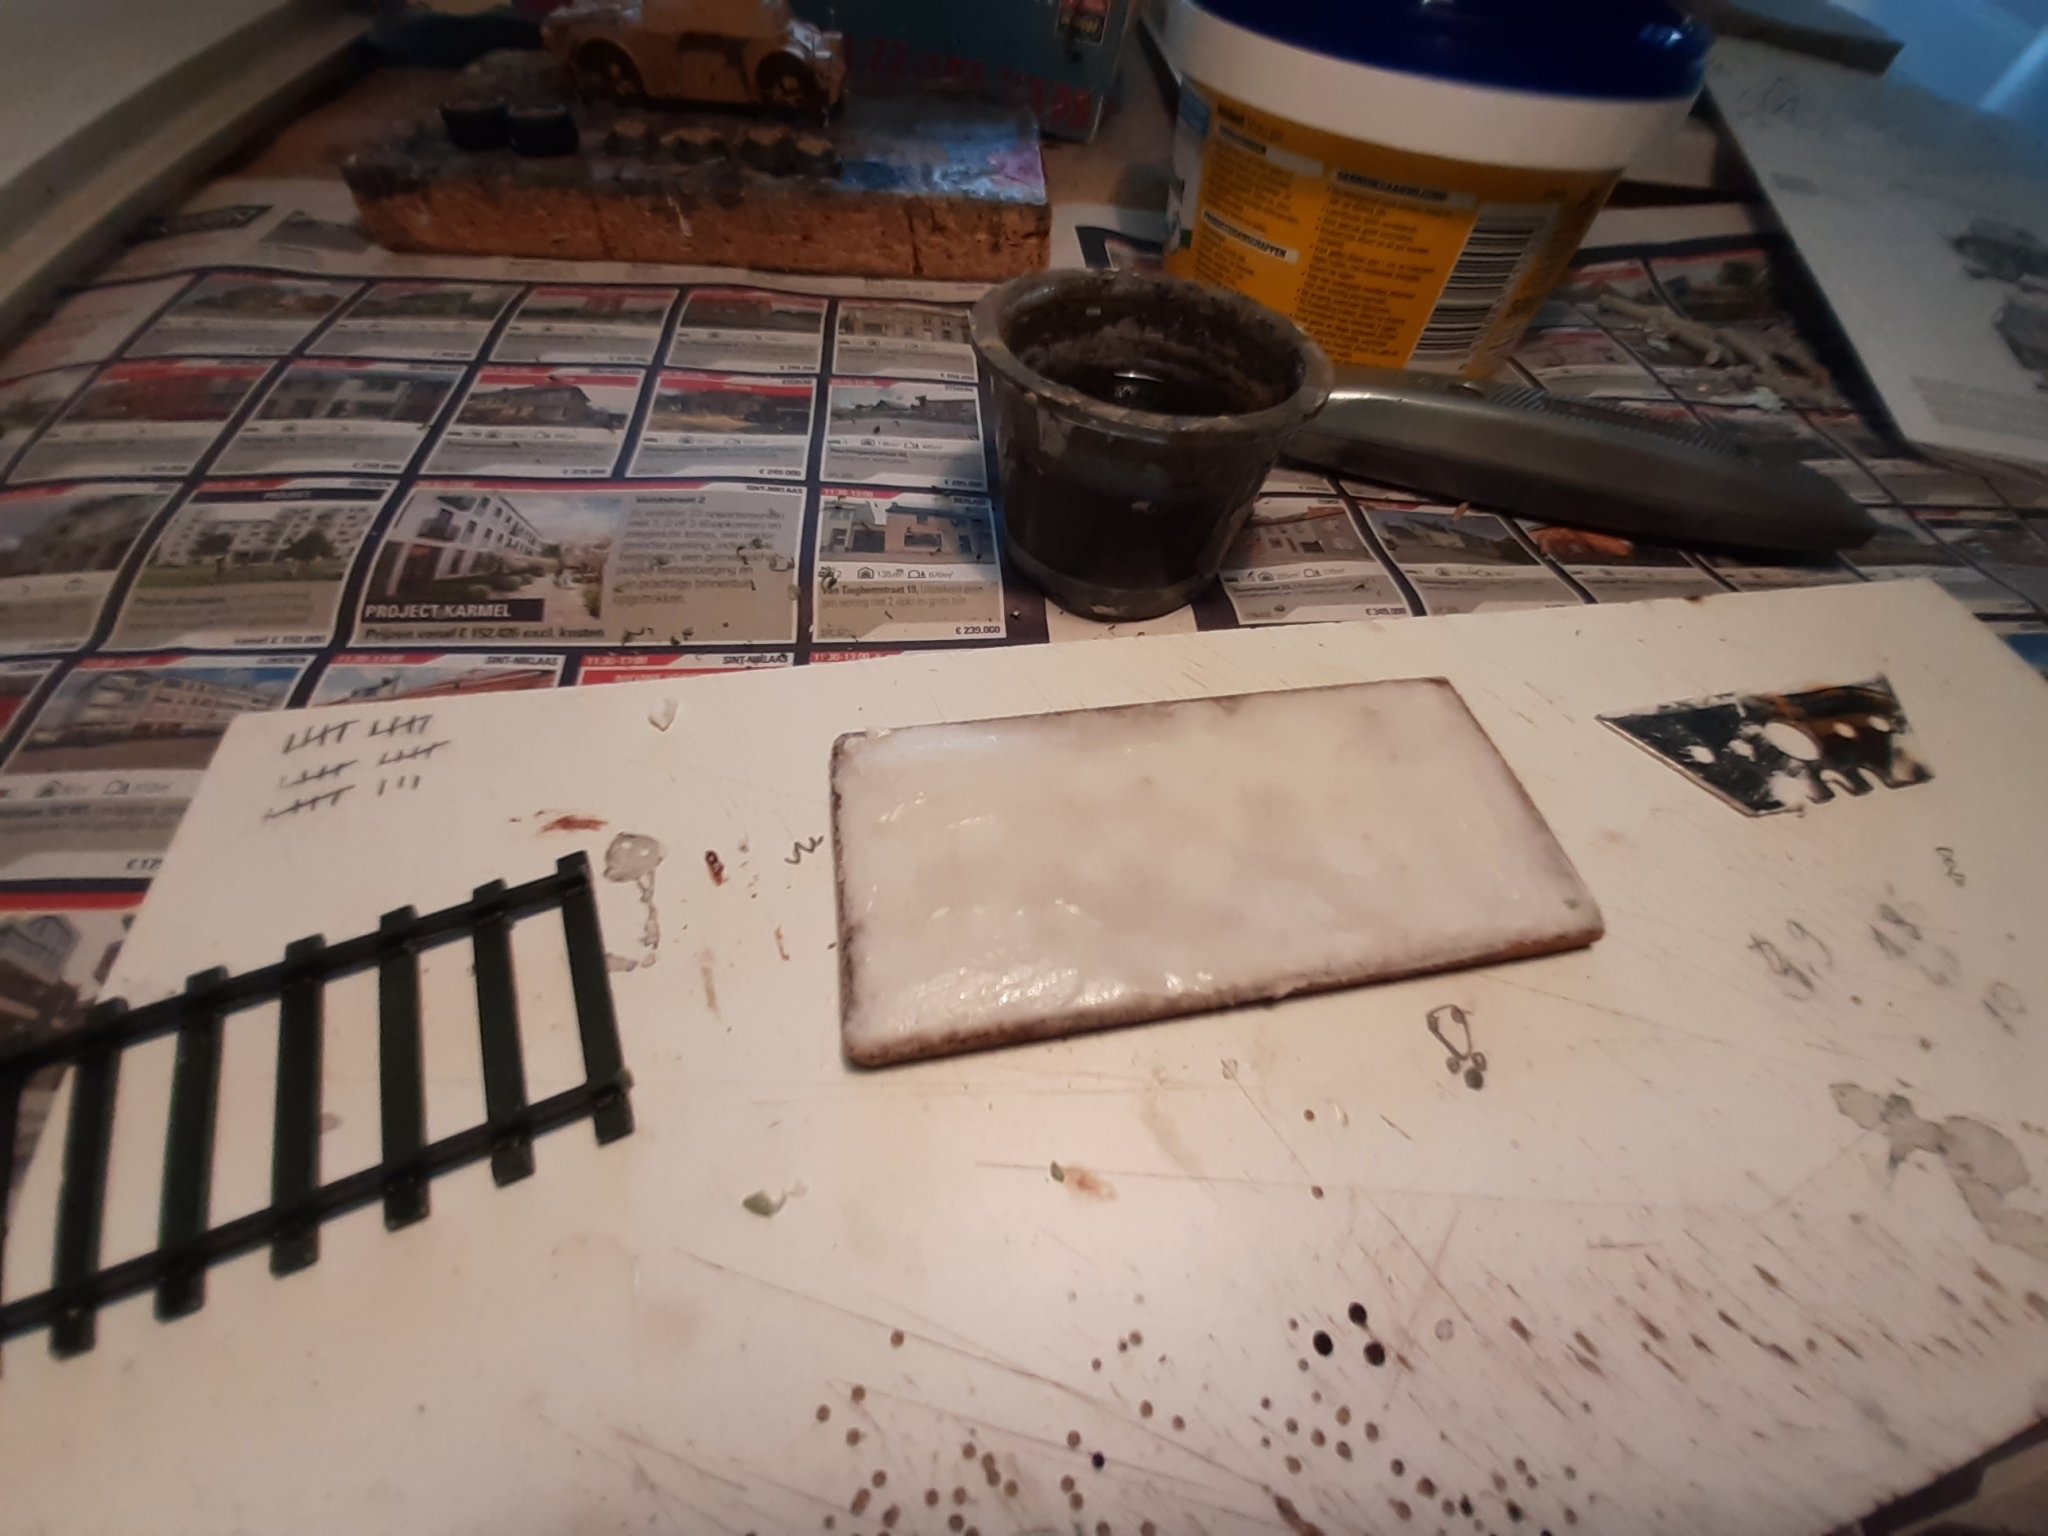
The base : wooden plate, plaster and the rail. The rail is pushed in the plaster.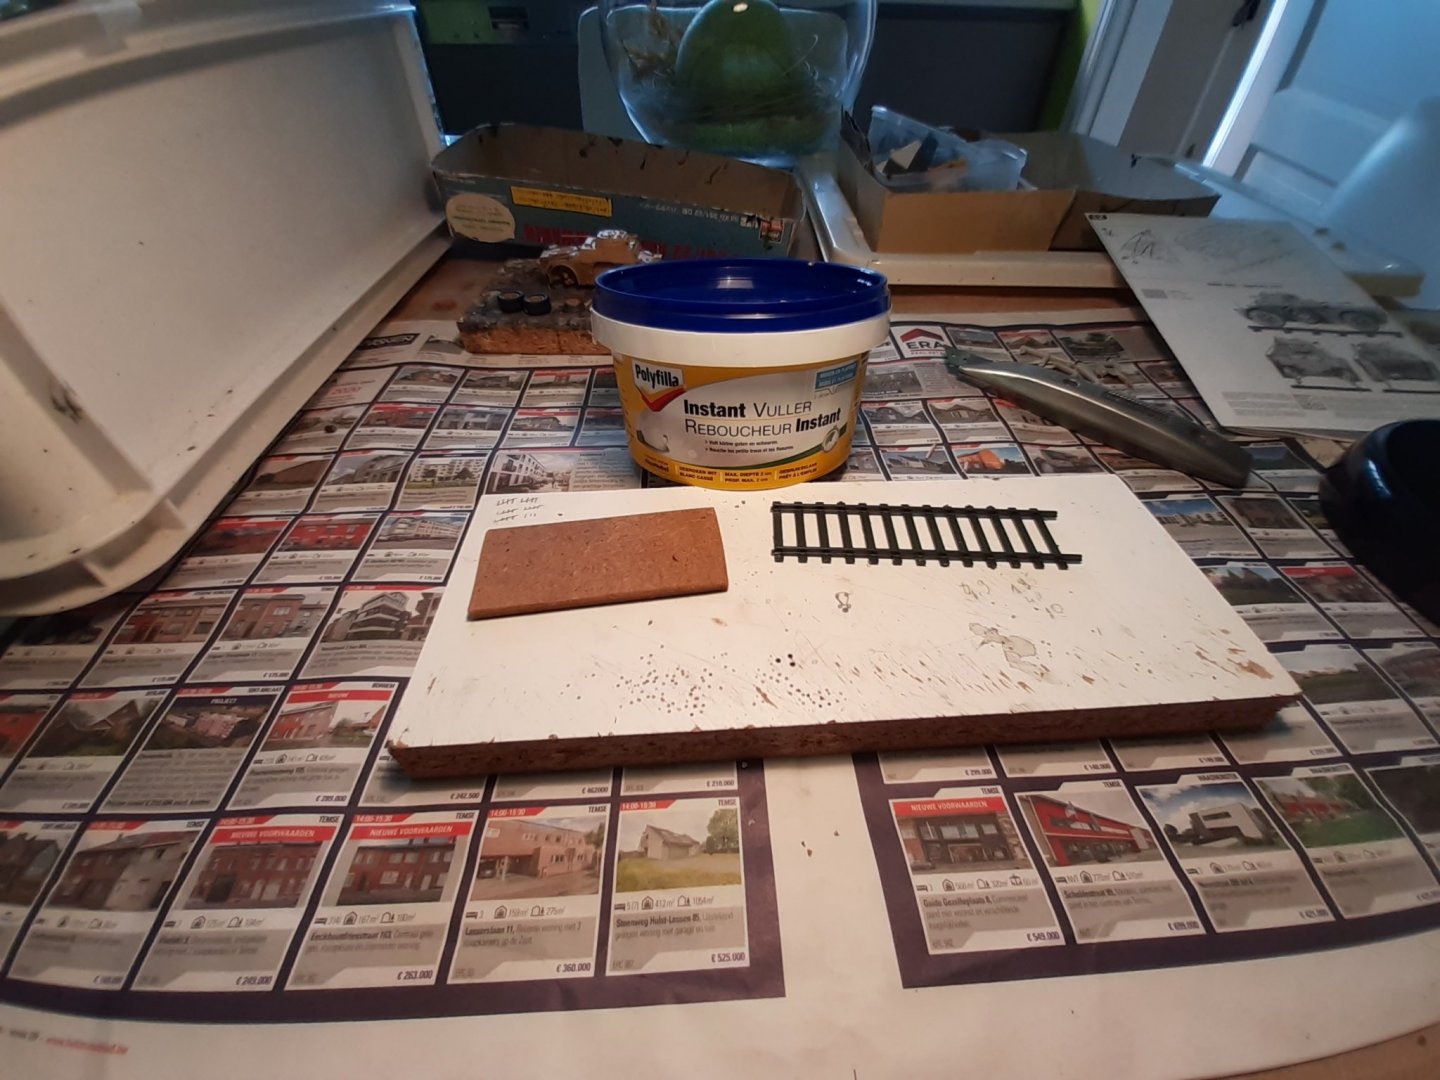


Painted dark grey
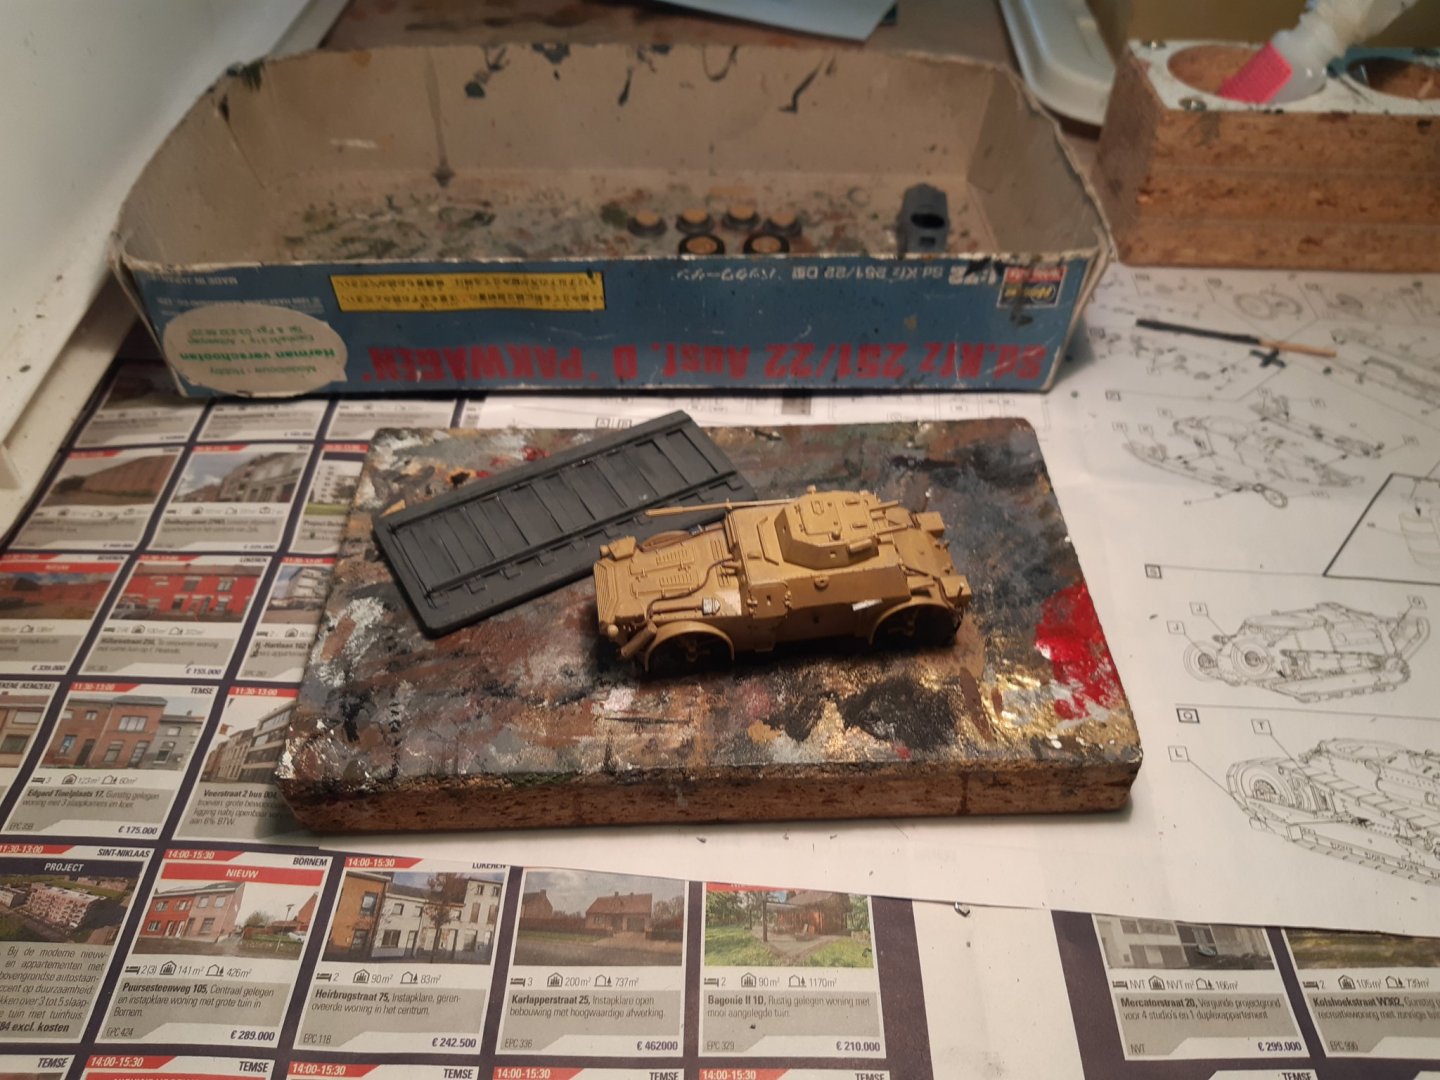
Model and base painted and added some rust
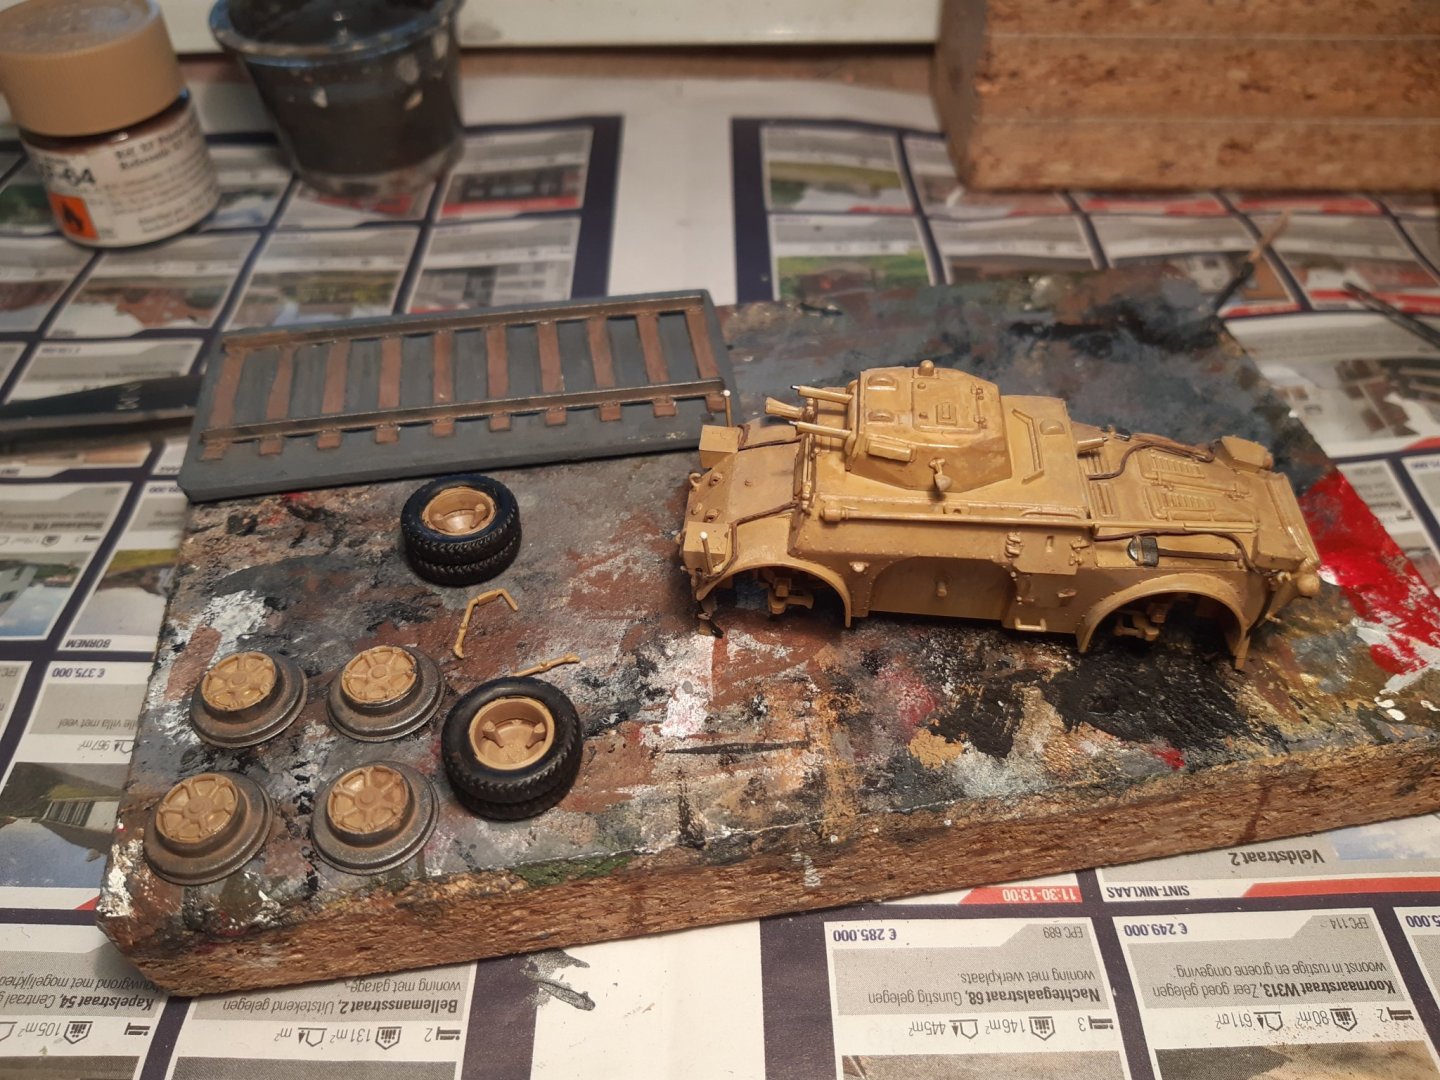
Dry brushed with sand.

Next post is finishing the model
- Egilman, mtaylor, Edwardkenway and 5 others
-
8
-
I once had more than 100 kits in stock.
now about 40.
the cabinets with finished models, more than 1400, are starting to fill up ...- Egilman, marktiedens, mtaylor and 7 others
-
10
-
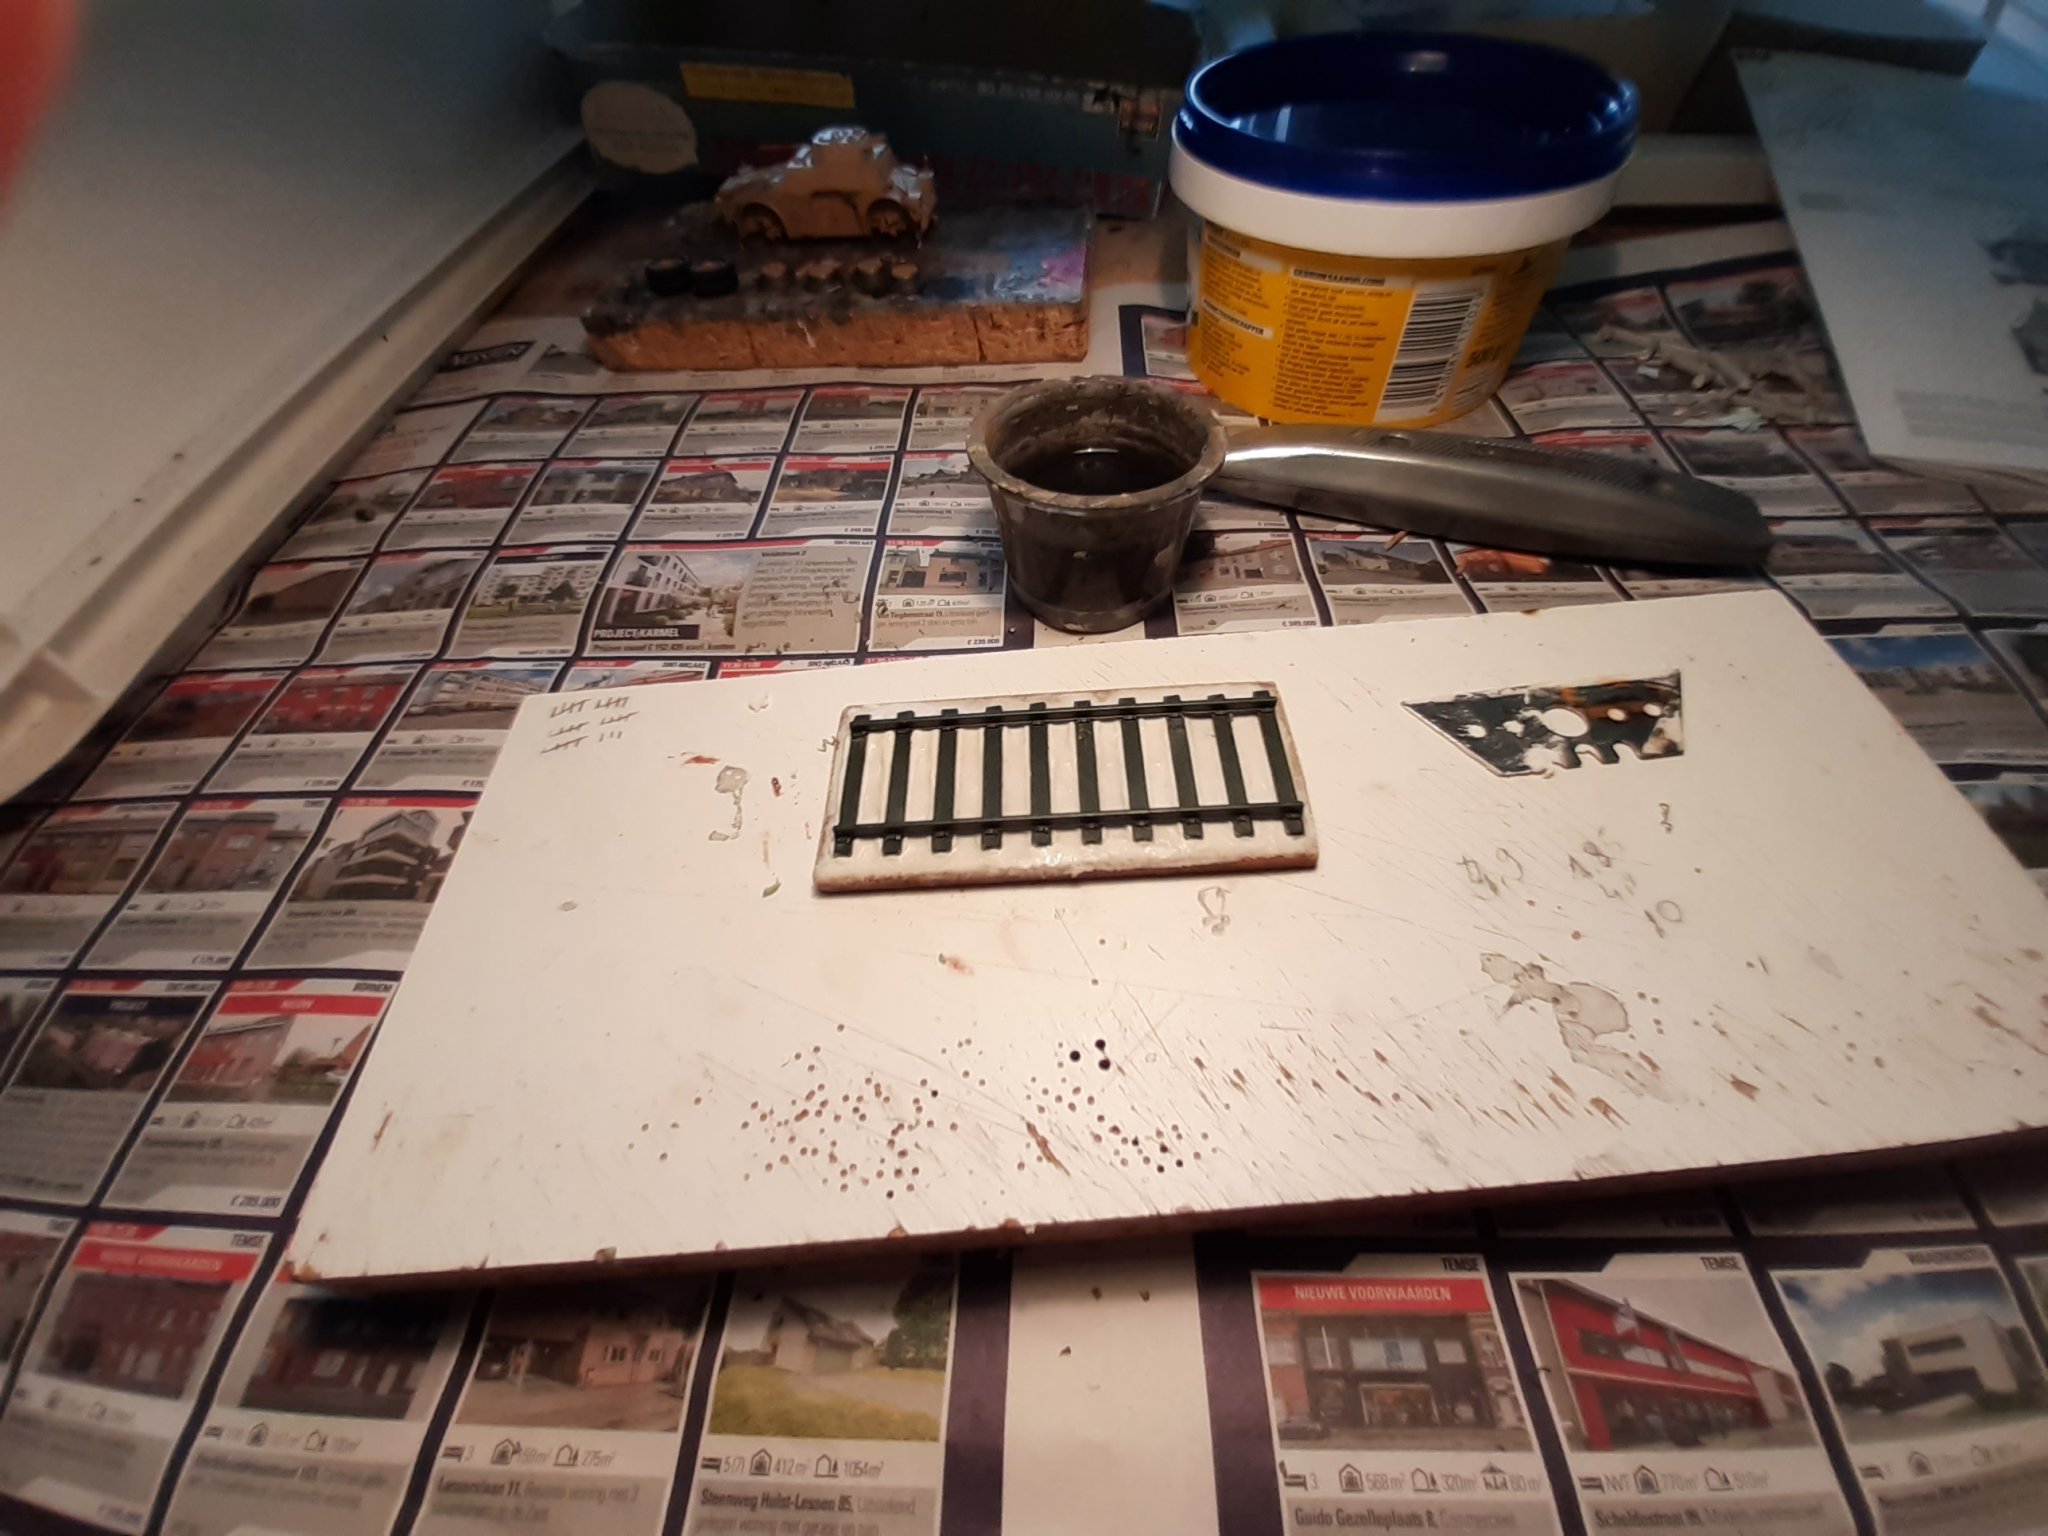
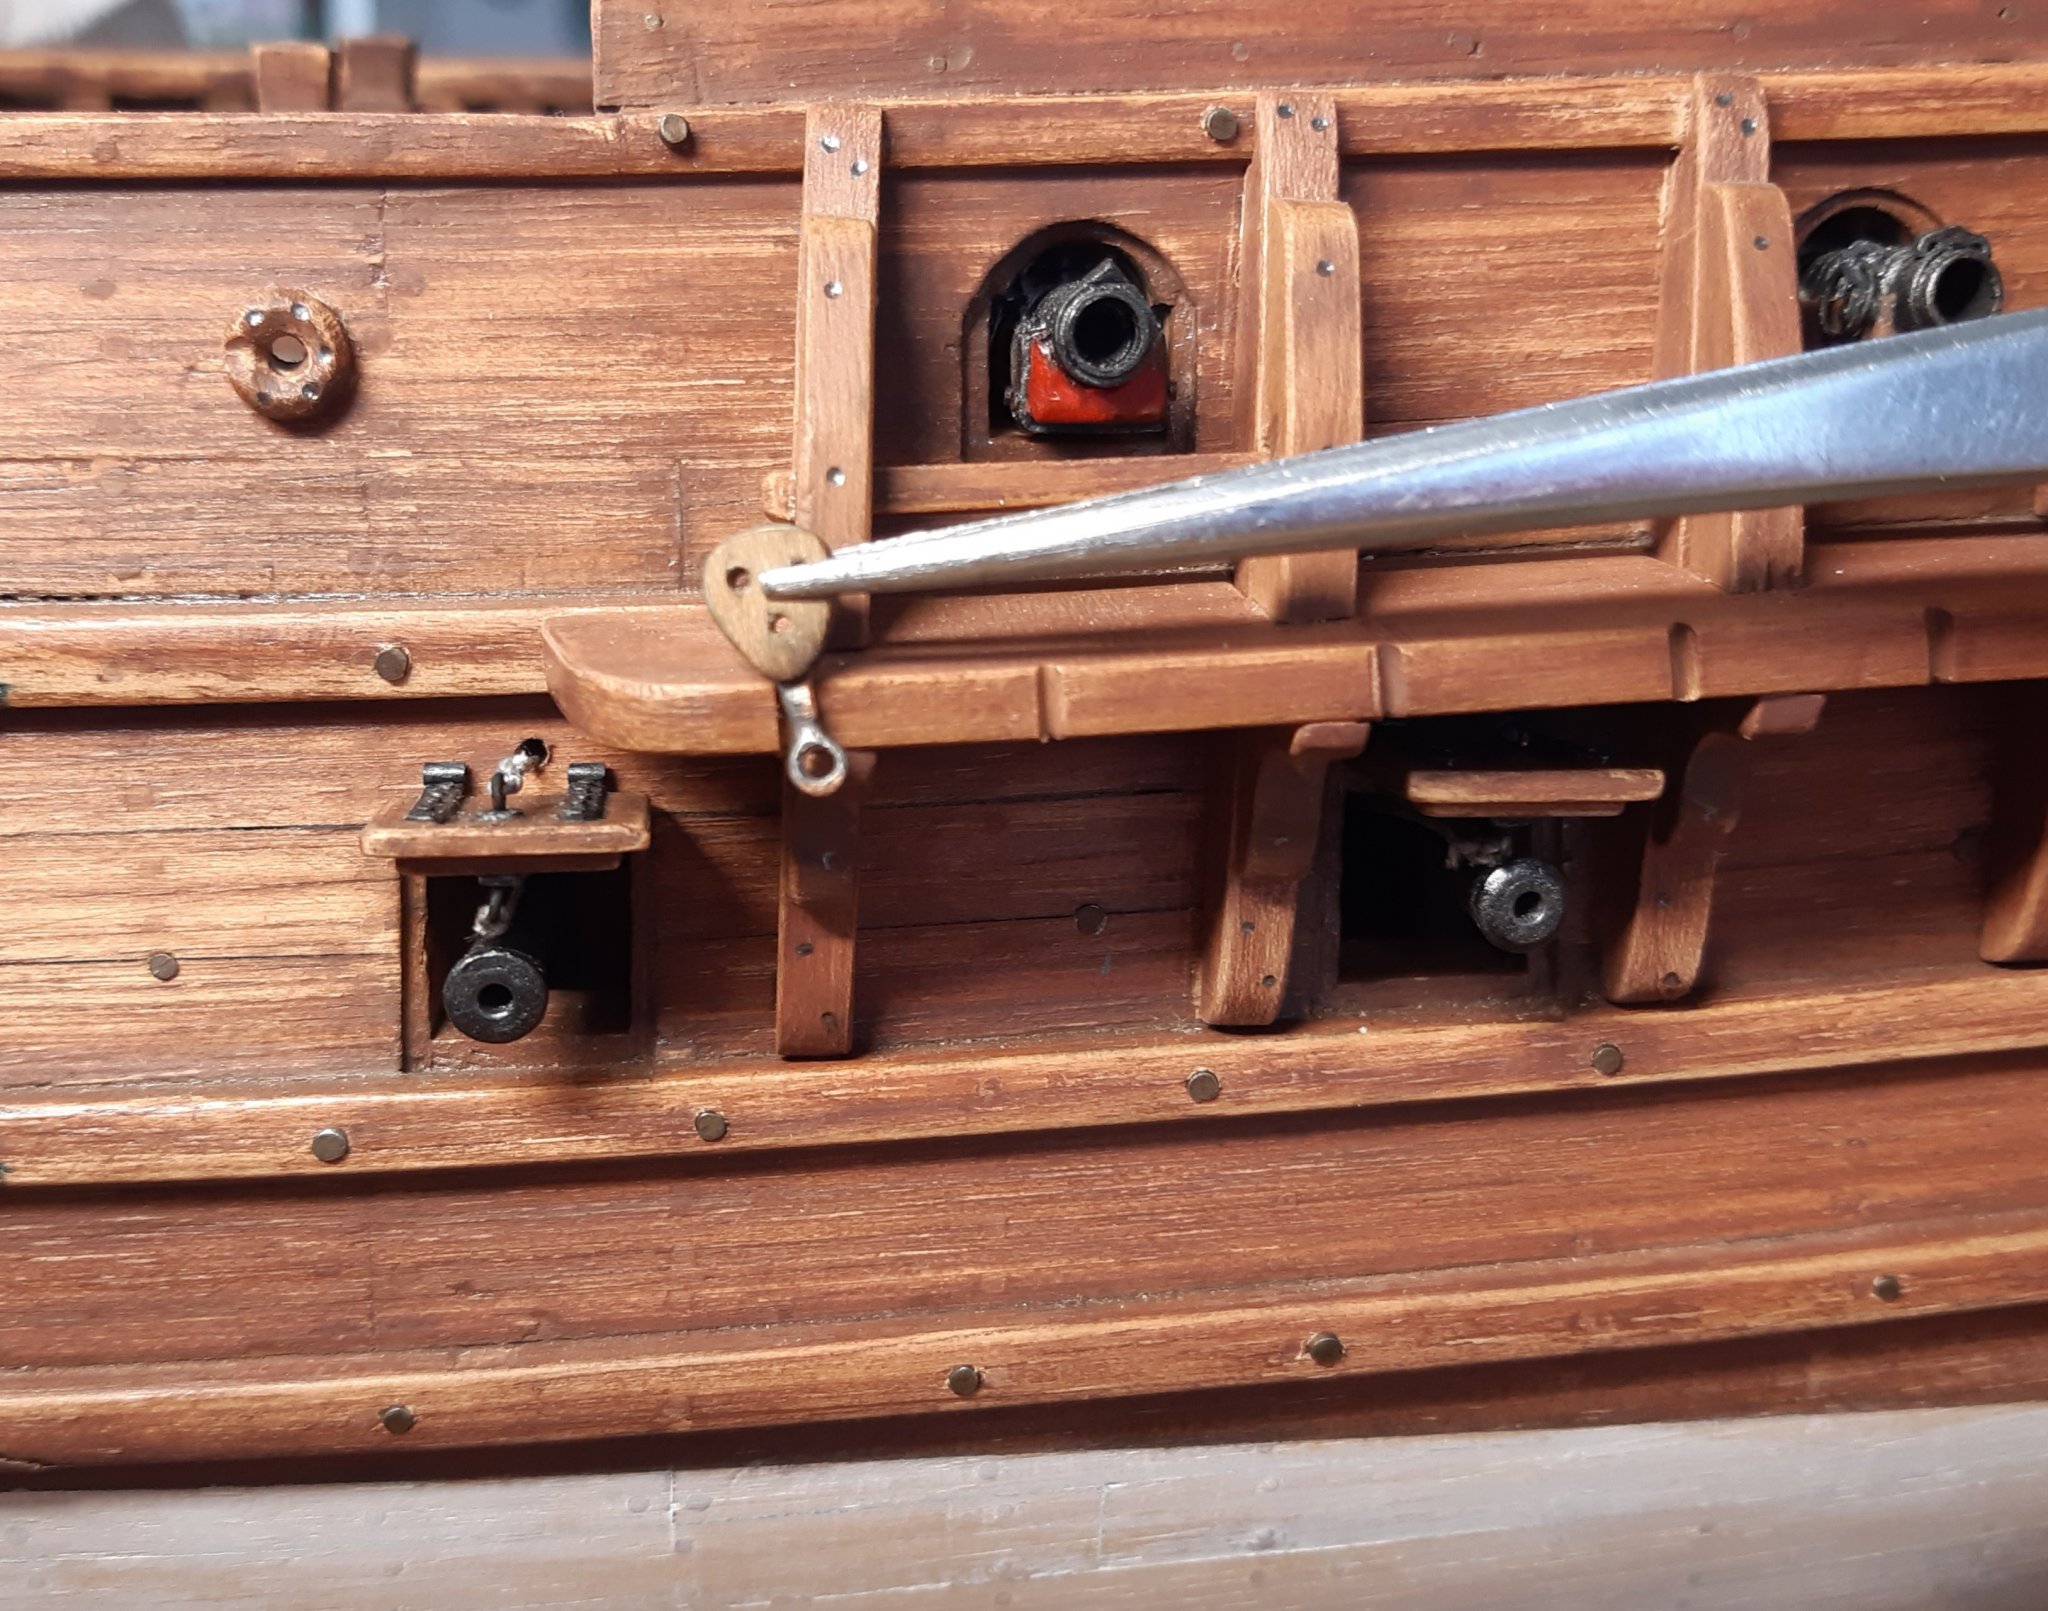
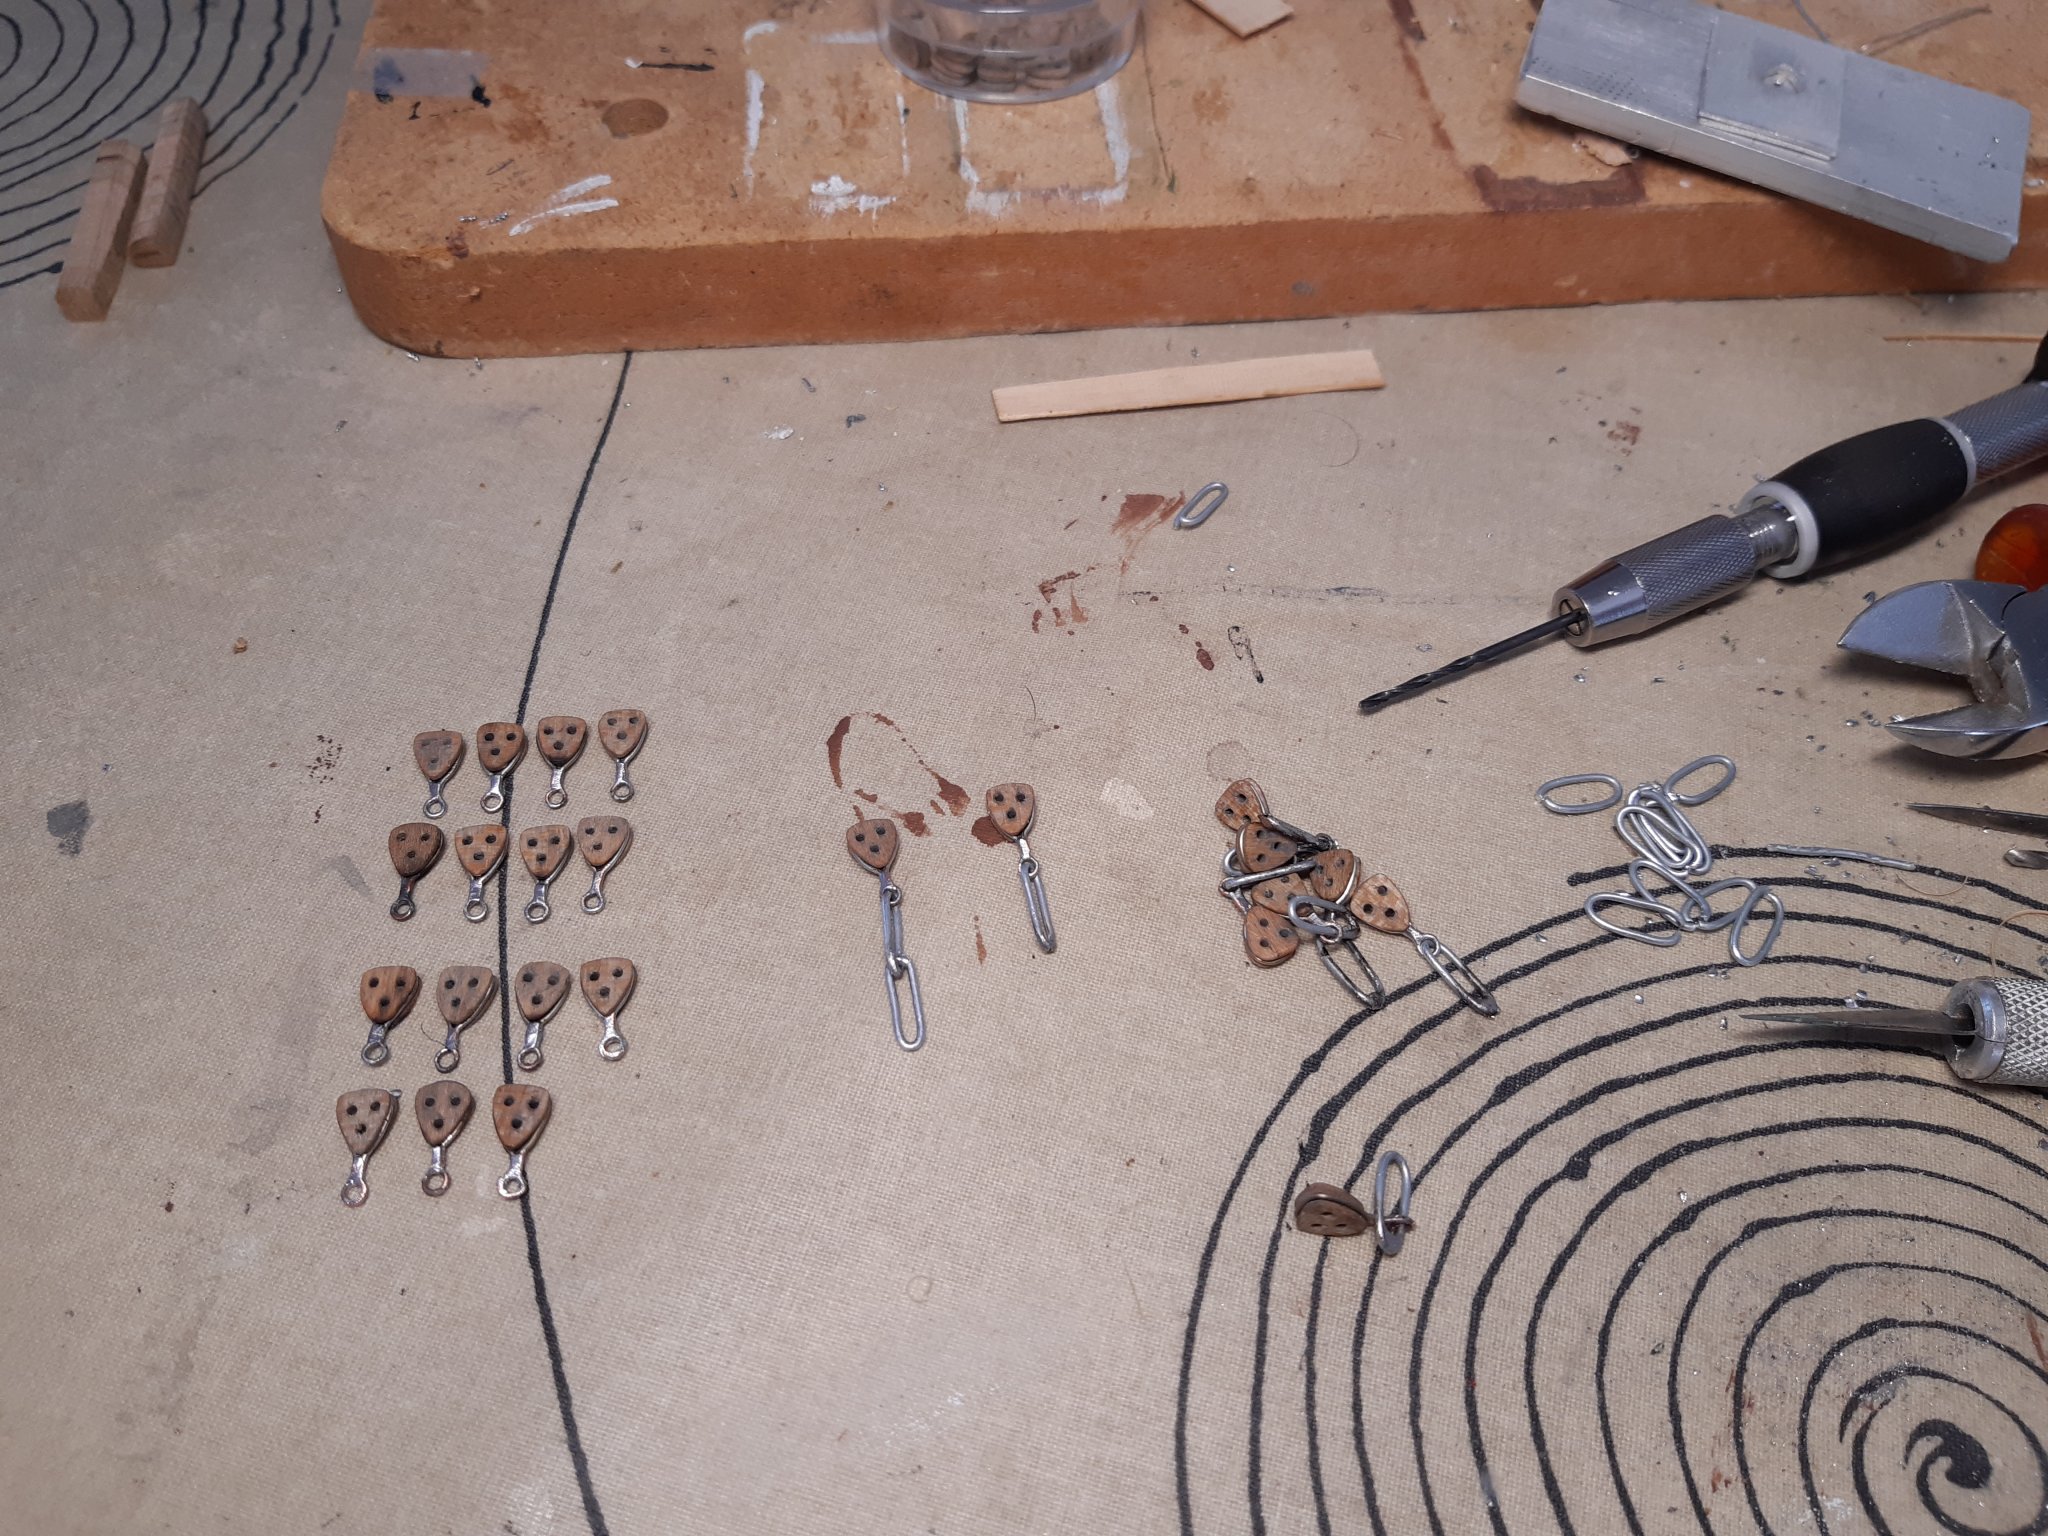
Continue with the deadeyes.
Started a topic in masting, rigging and sails first.
And, continued with the "ironwork" around the deadeyes and started the chains
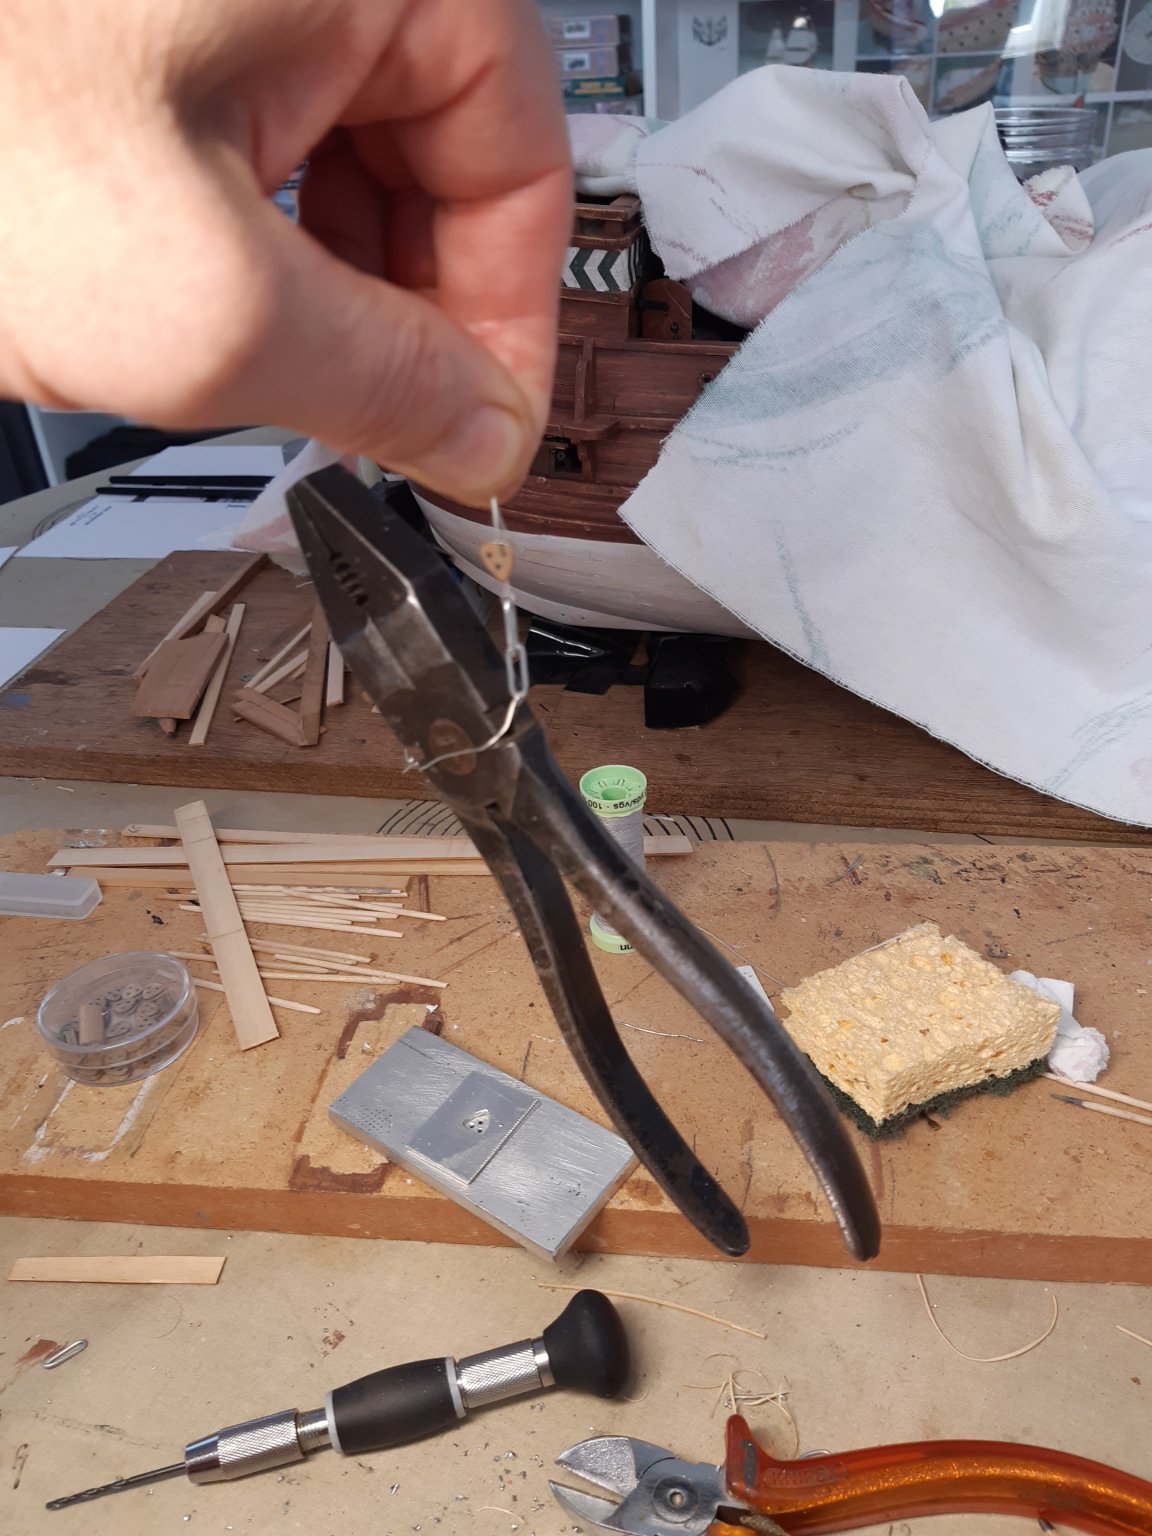
Ironwork deadeyes, work in progress.
this is not really the activity I enjoy doing most. Learned soldering at school a long time ago (Didn't like it then and still don't like it now 😂)

The chains.
Each chain consists of 3 links. For the time being 1 link will be added to each deadeye.
The length of each chain will be different. So most of the links will have a different length.The deadeyes are in a groove in the side channel of the channel, they are not attached to the channel itself.
I will probably have to make the masts (lower part) first. Or temporarily fix the deadeyes with a wooden strip that will be removed later (dont now yet)

According to the dimensions of 1 archaeological find, the metal around the deadeye is slightly thinner in diameter than that of the chains.
(The wire of my chain is 0.1mm too thick.)
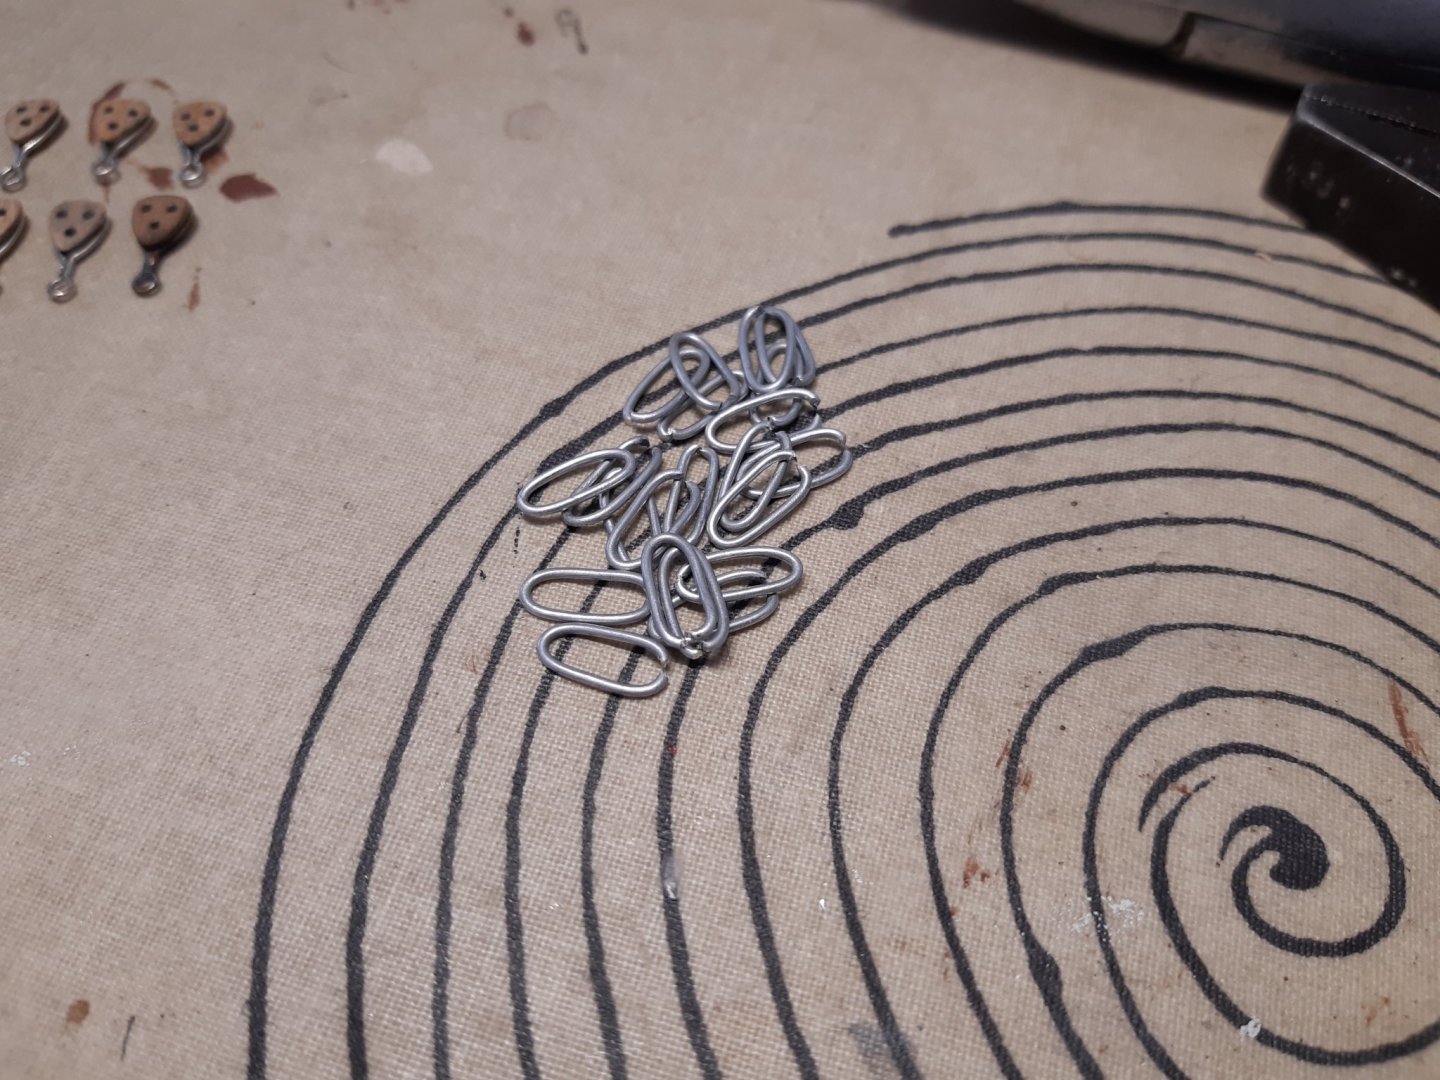

Quality control on strength (looks good 👍)

Thanks for following
- BLACK VIKING, Edwardkenway, JpR62 and 9 others
-
12
-
Well done.
But noncommittal comments.
If these are the rigging instructions from revell, then they are wrong.
Have a look at the attached photos.
- coxswain, J11, Robert Taylor and 1 other
-
4


HMS Victory by rkwz - AIRFIX - Scale 1:180 - First plastic ship build
in - Kit build logs for subjects built from 1751 - 1800
Posted
Haha...
A young backer and a flemish horse