


Brucealanevans
-
Posts
450 -
Joined
-
Last visited
Content Type
Profiles
Forums
Gallery
Events
Posts posted by Brucealanevans
-
-
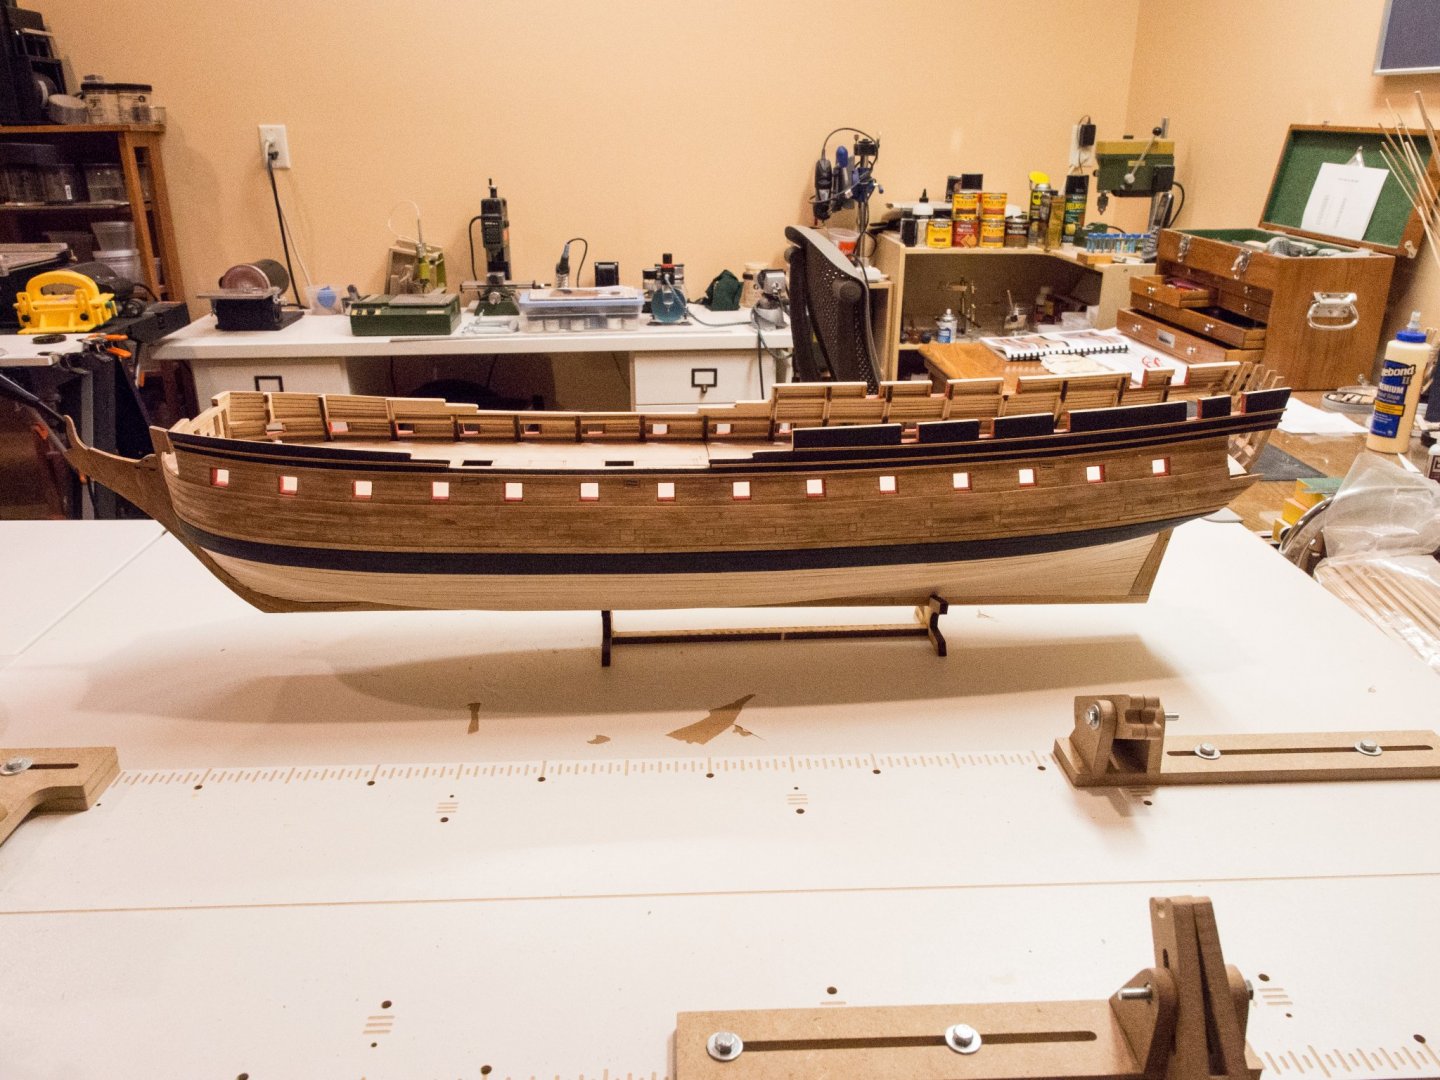
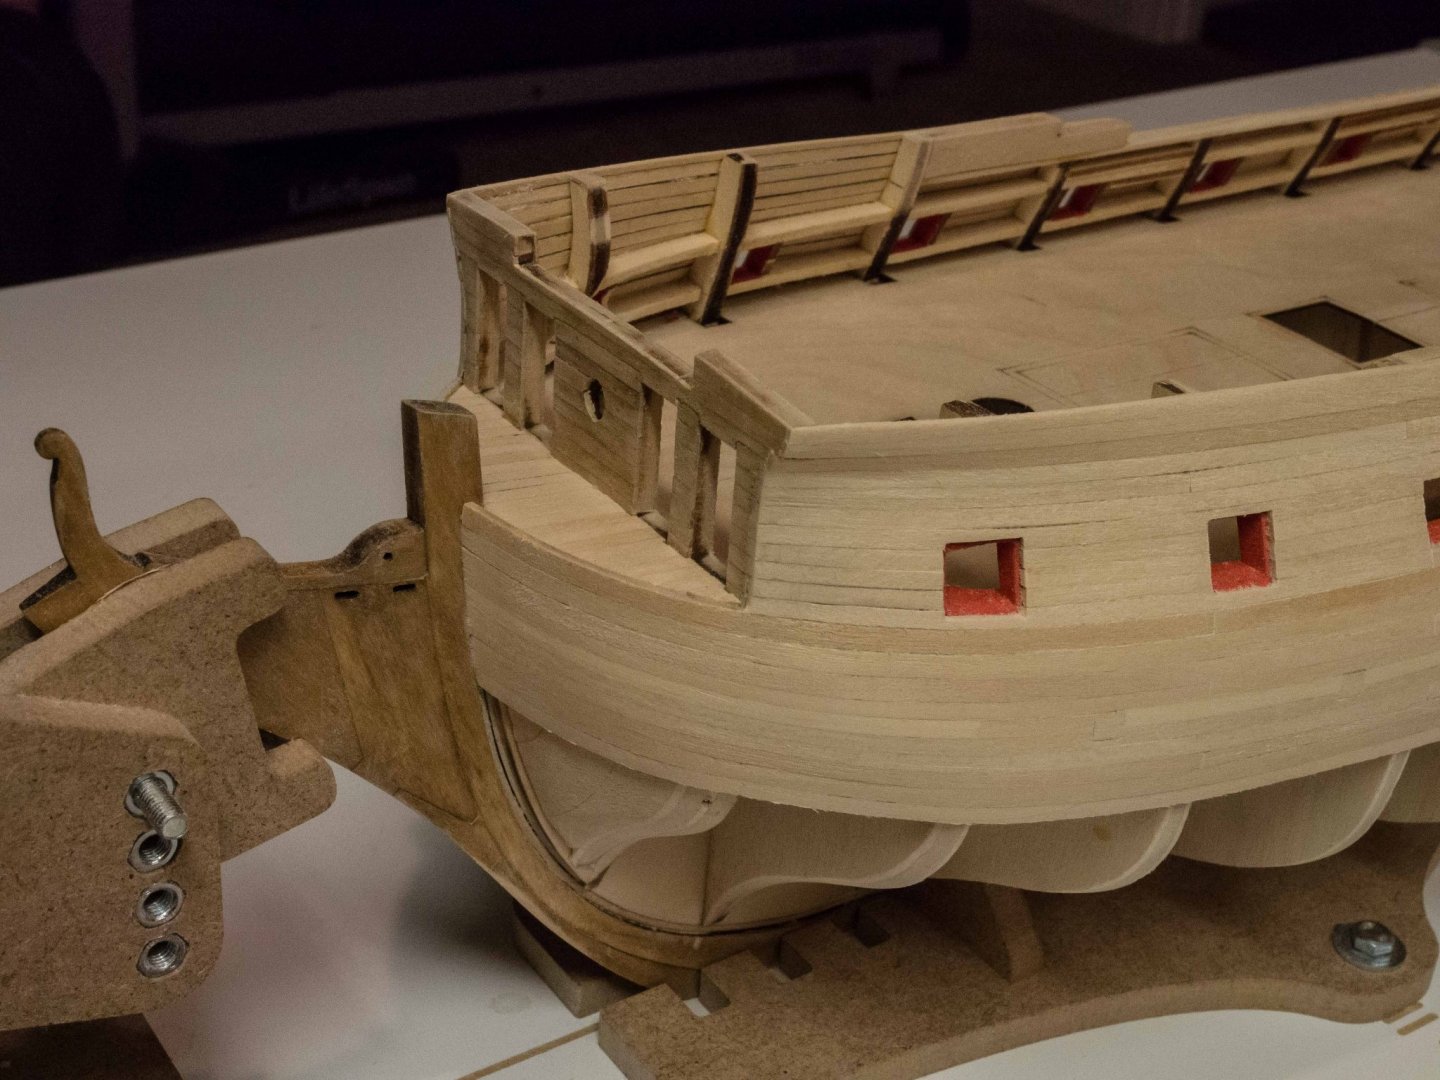
Received my replacement piece from Model Expo. Shaped, stained, and fastened the sternpost on and trimmed the keel to fit.
touched up some staining where worn by the clamps of the building board.
In general, reasonably pleased. Not a great look at the bow where the planks below the wales meet the bow stem, but acceptable (except when I look at it of course)
Now ready to start on the stern.

-
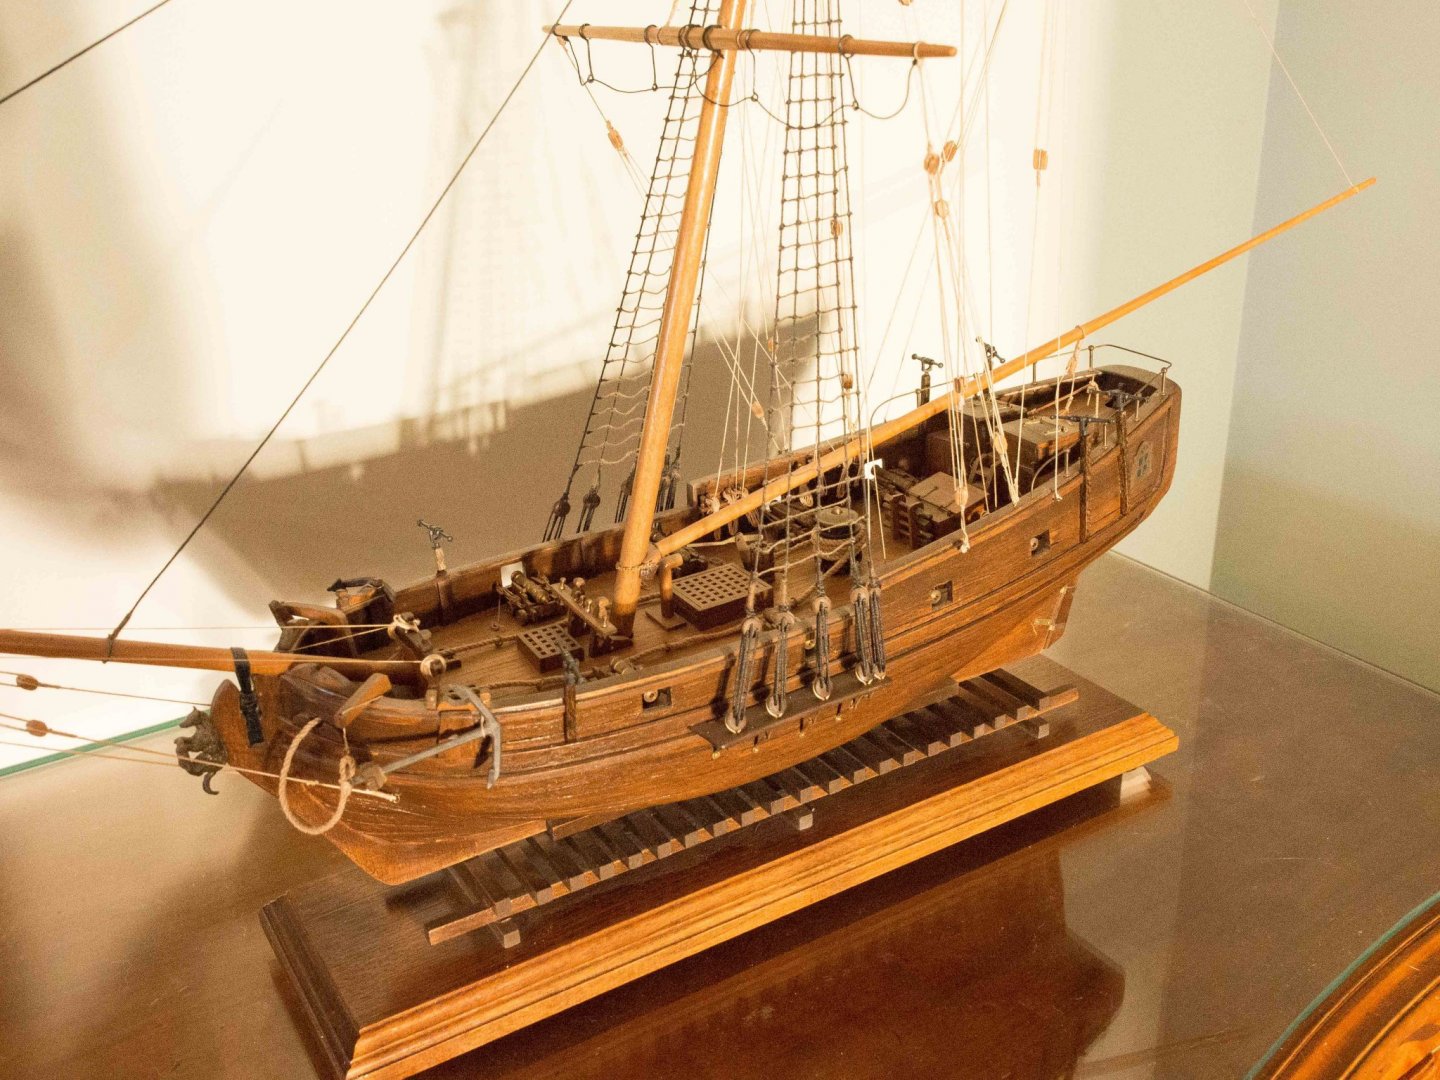
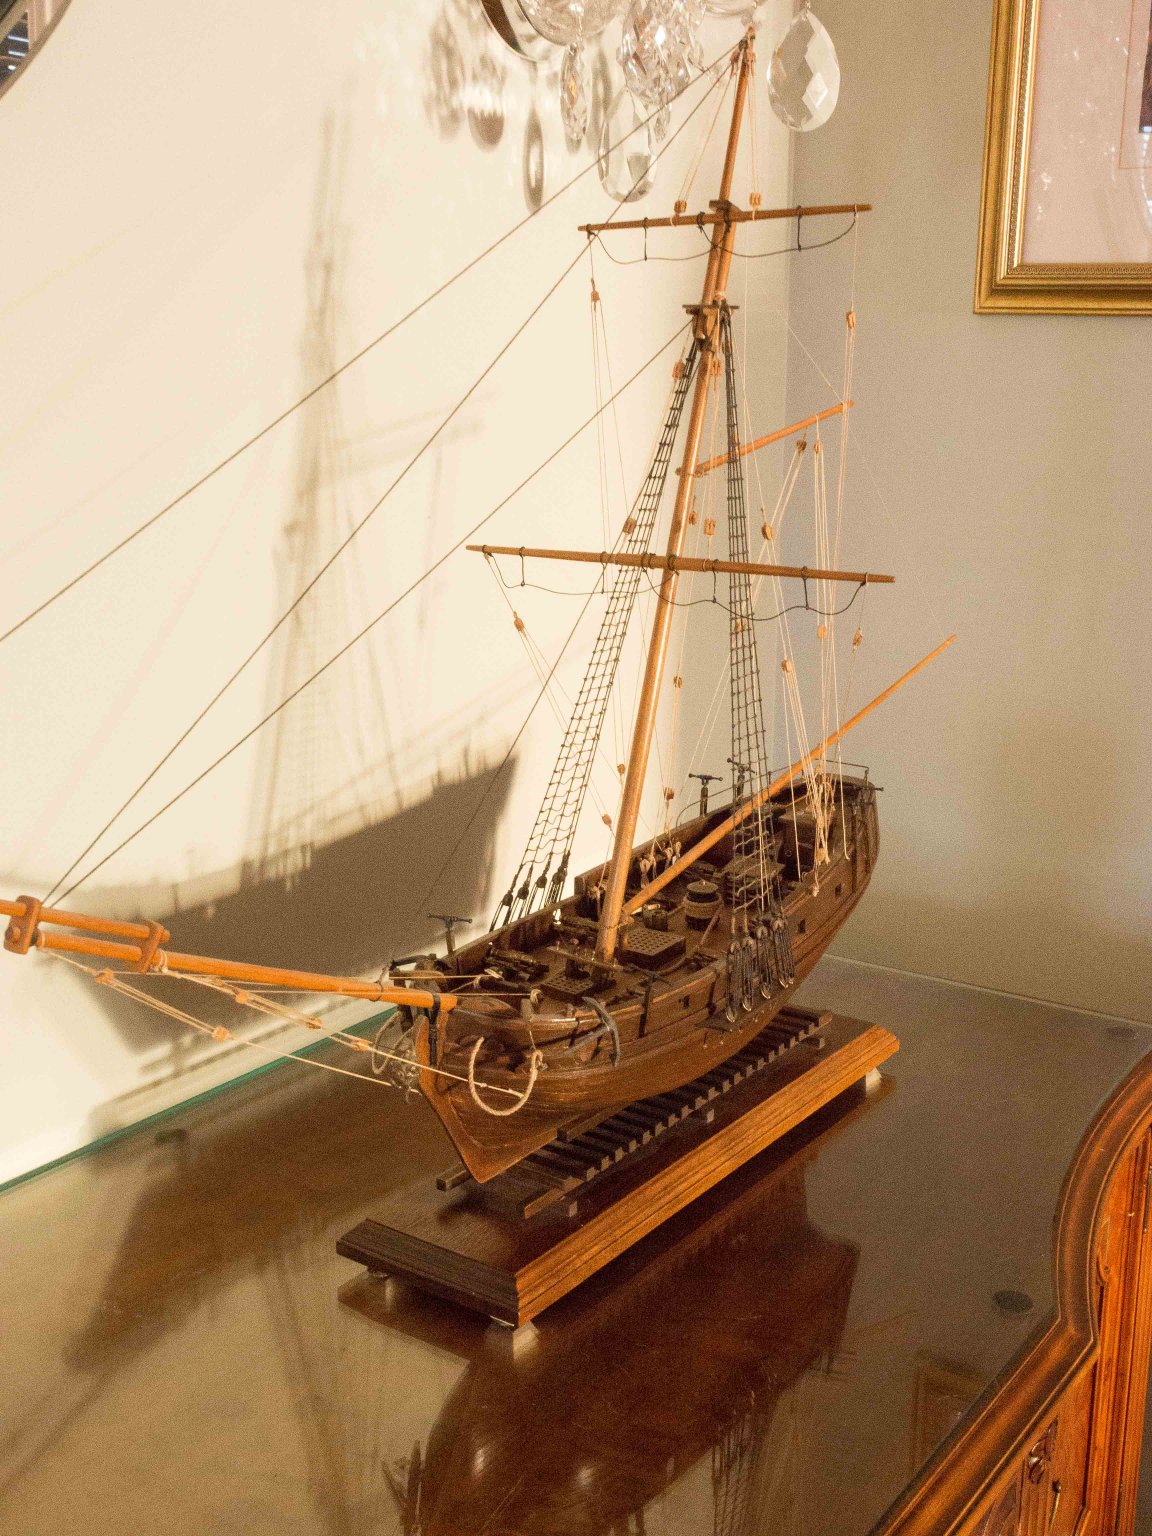
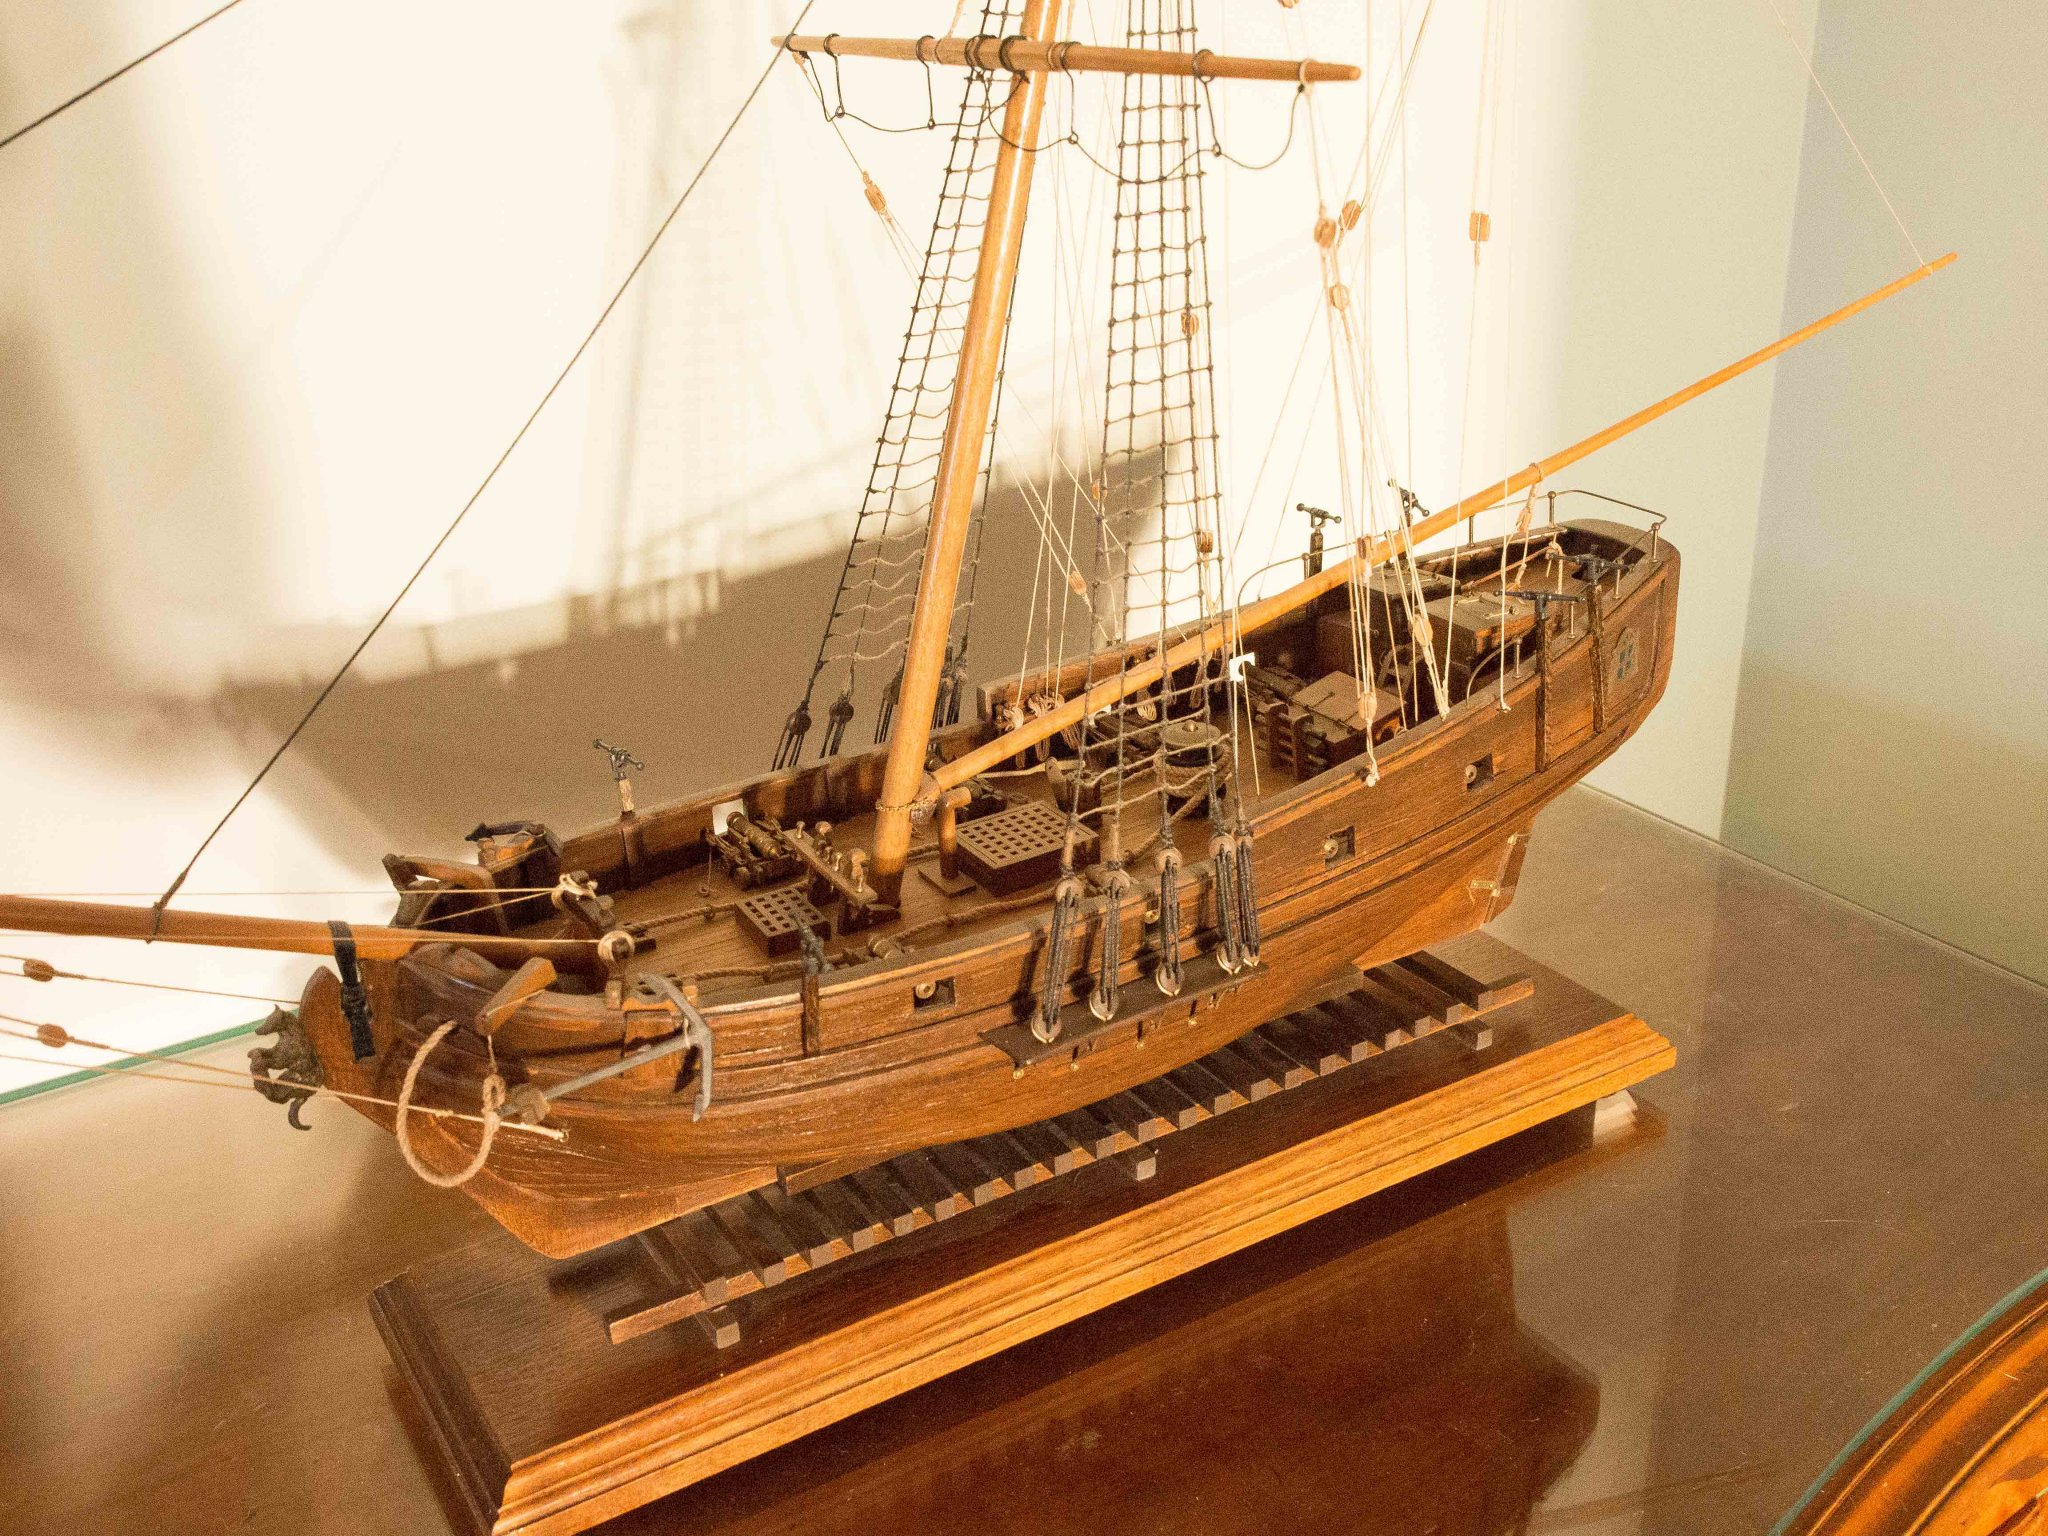
While waiting for my replacement piece from Model Expo for the Confederacy, I got twitchy modeling fingers.
So I turned to the very first ship model I built back around 1980 - Mantua Model 1:50 HMS Schooner Sharke.
I don't remember exactly why I cut that project short after doing most of the rigging. I never properly dealt with the 2 yards after putting the uphauls on them. Just tied a string from mast top to top yard ends and down to main yard tips and then to a belaying pin just to hold them in place. Also didn't mount the falconets - as I recall had trouble getting the uprights for their mounts to stick to the finish on the hull.
At any rate I found I still had the falconets hardware in my stash, and with time on my hands decided to finish the orphaned model.
Placed parrels to fix the yards and added foot ropes and proper braces. Added the falconets, 3 to each side. Just a few hours work. A bit fiddly to add the rigging with the yards already in place.
Now after 40 years (nearly the span of my professional career) it is done and looks much better, ready to honorably take its place with my other builds on display.
Now, if my new stern post comes soon, I can get back to work on the Confederacy.

- mtbediz, Edwardkenway, Duanelaker and 1 other
-
 4
4
-
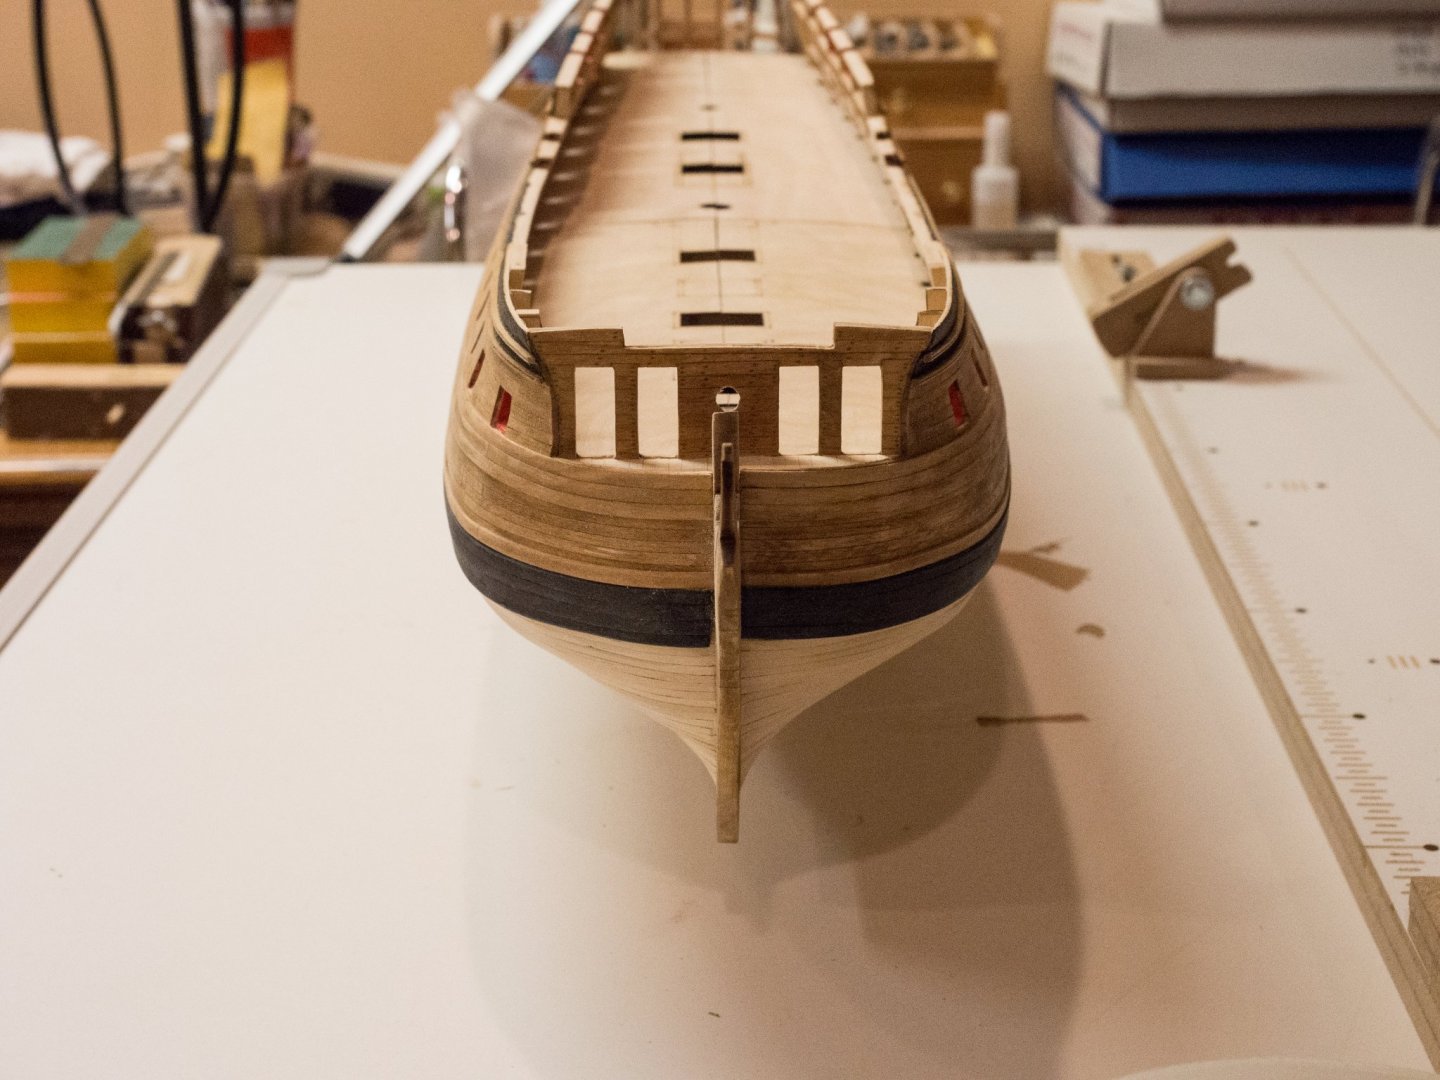
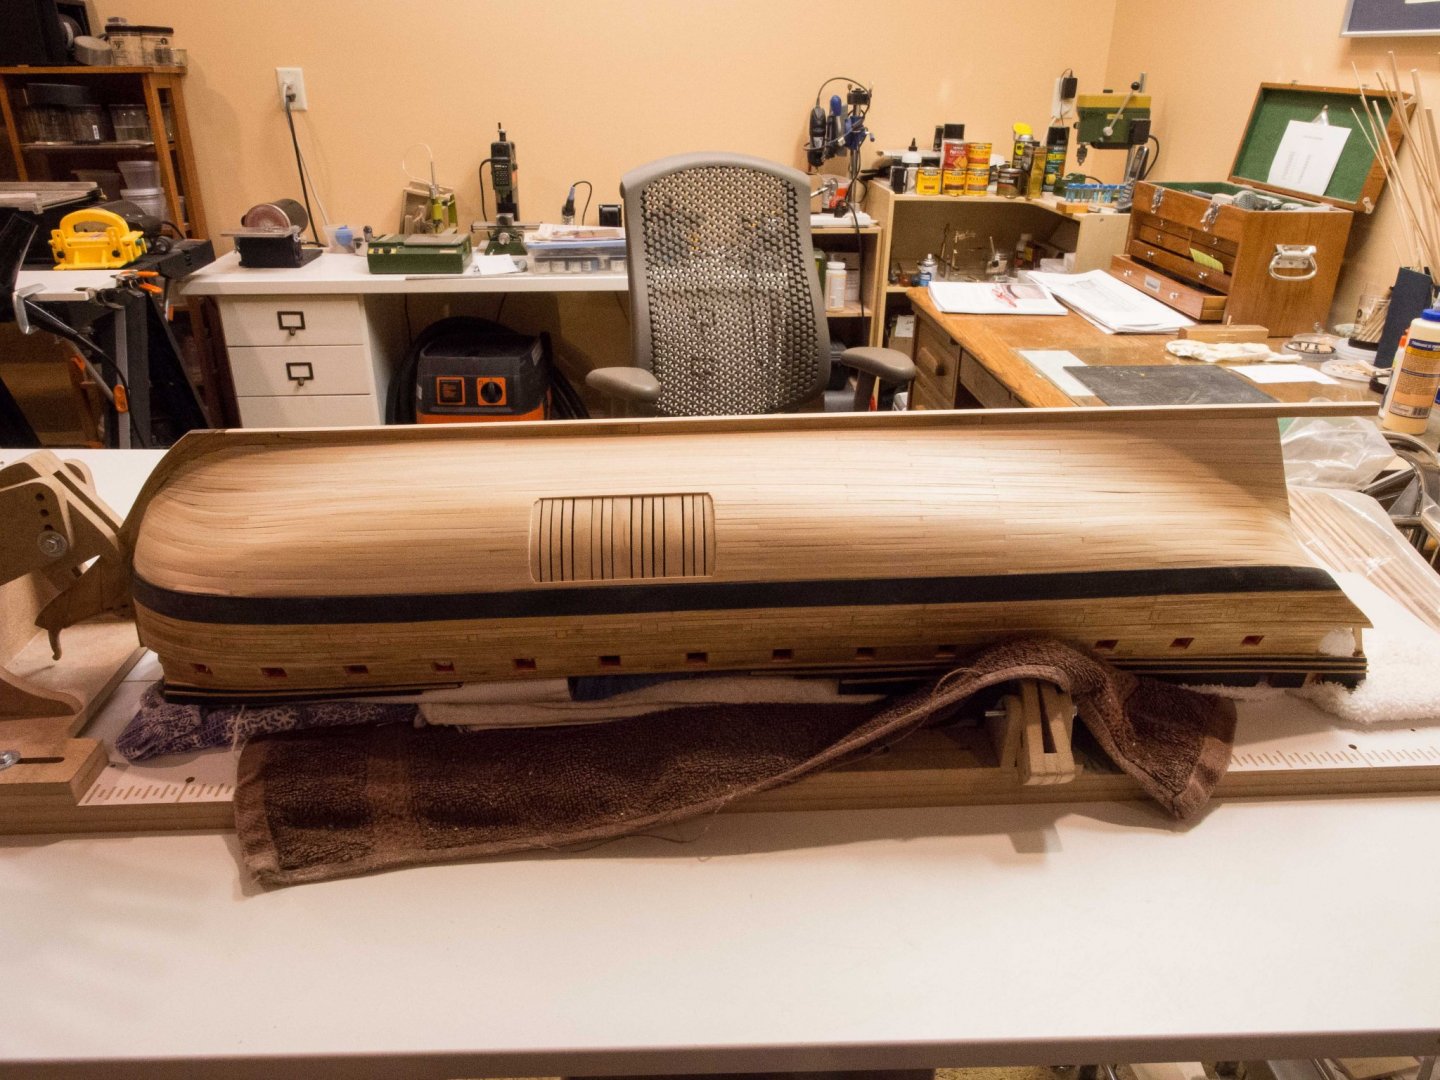
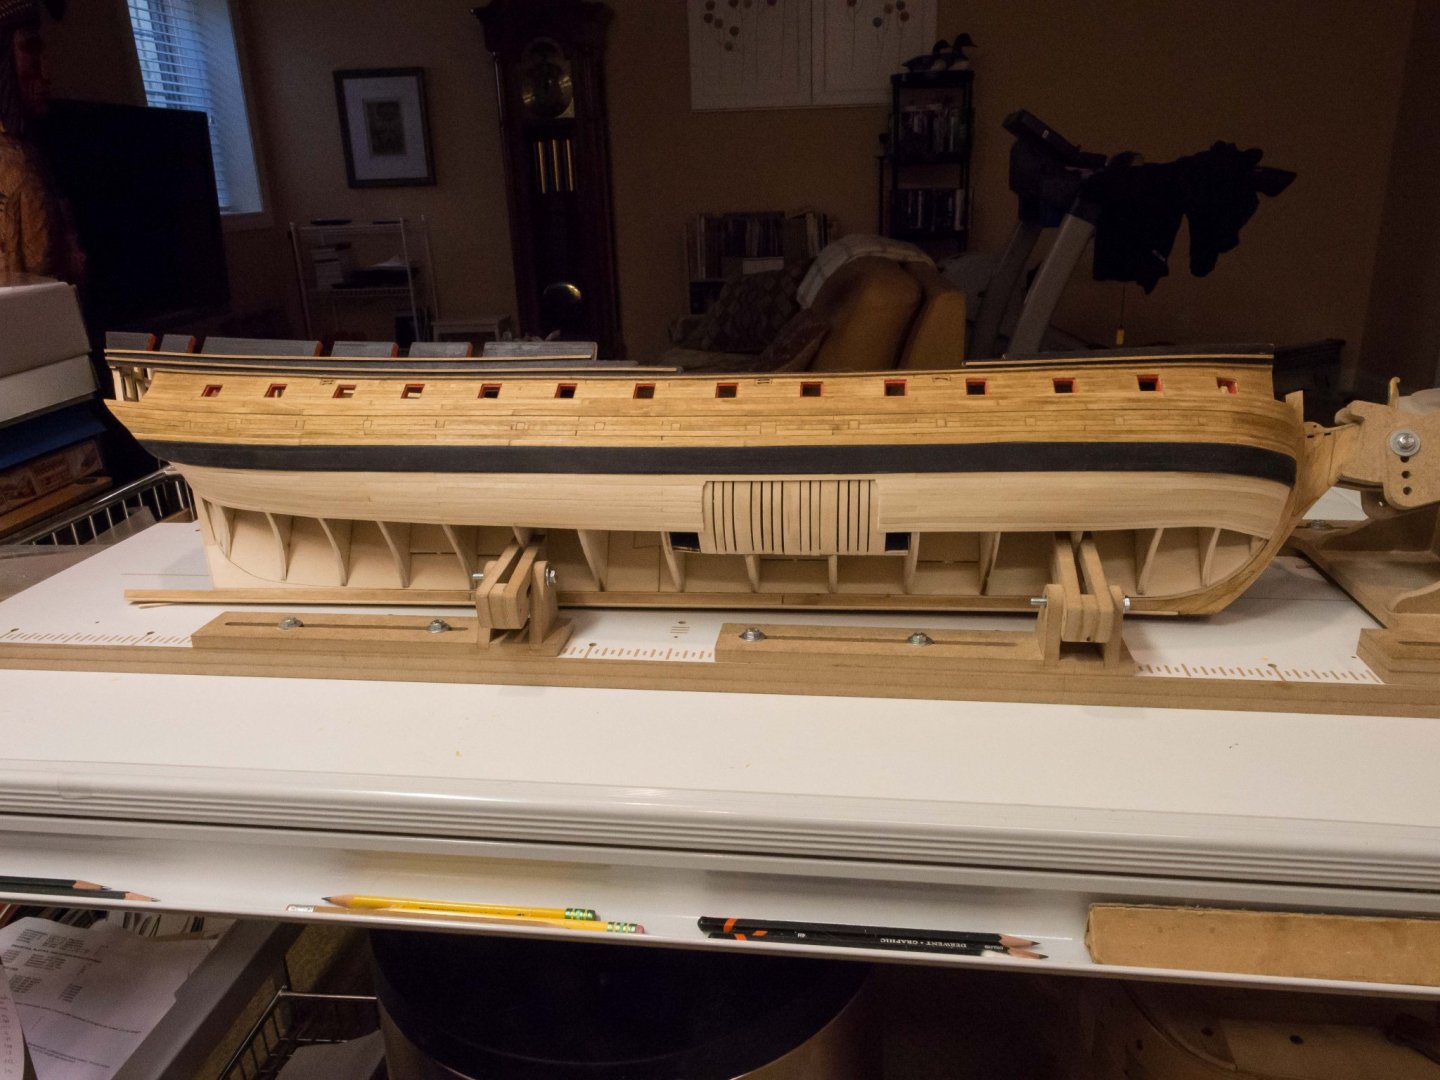
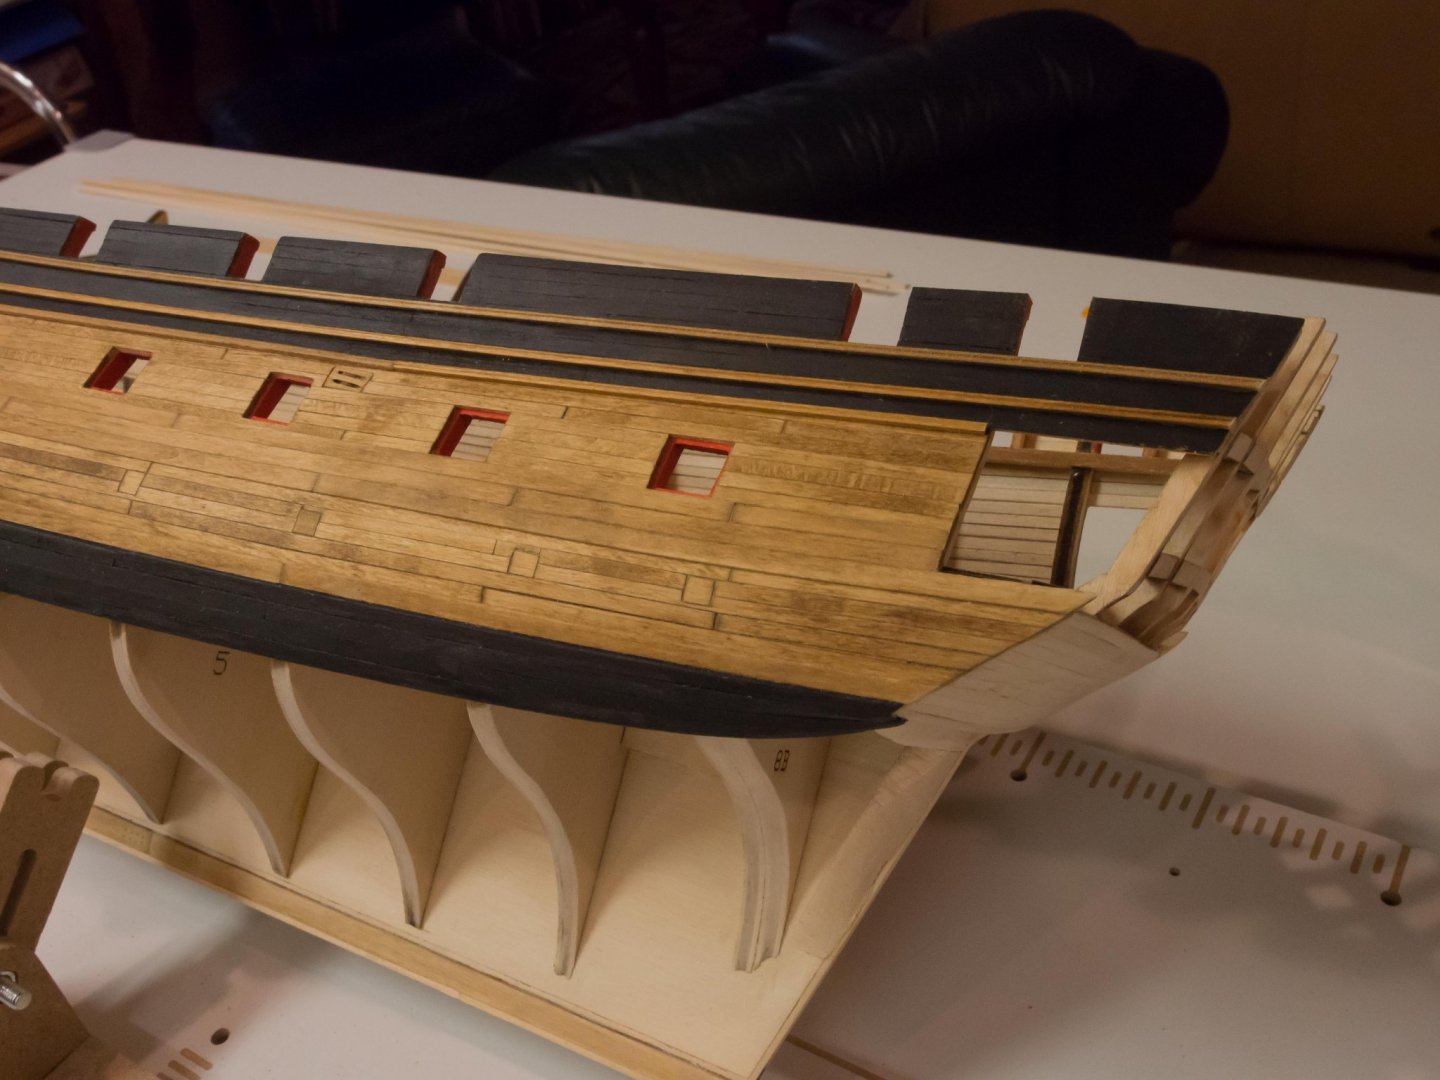
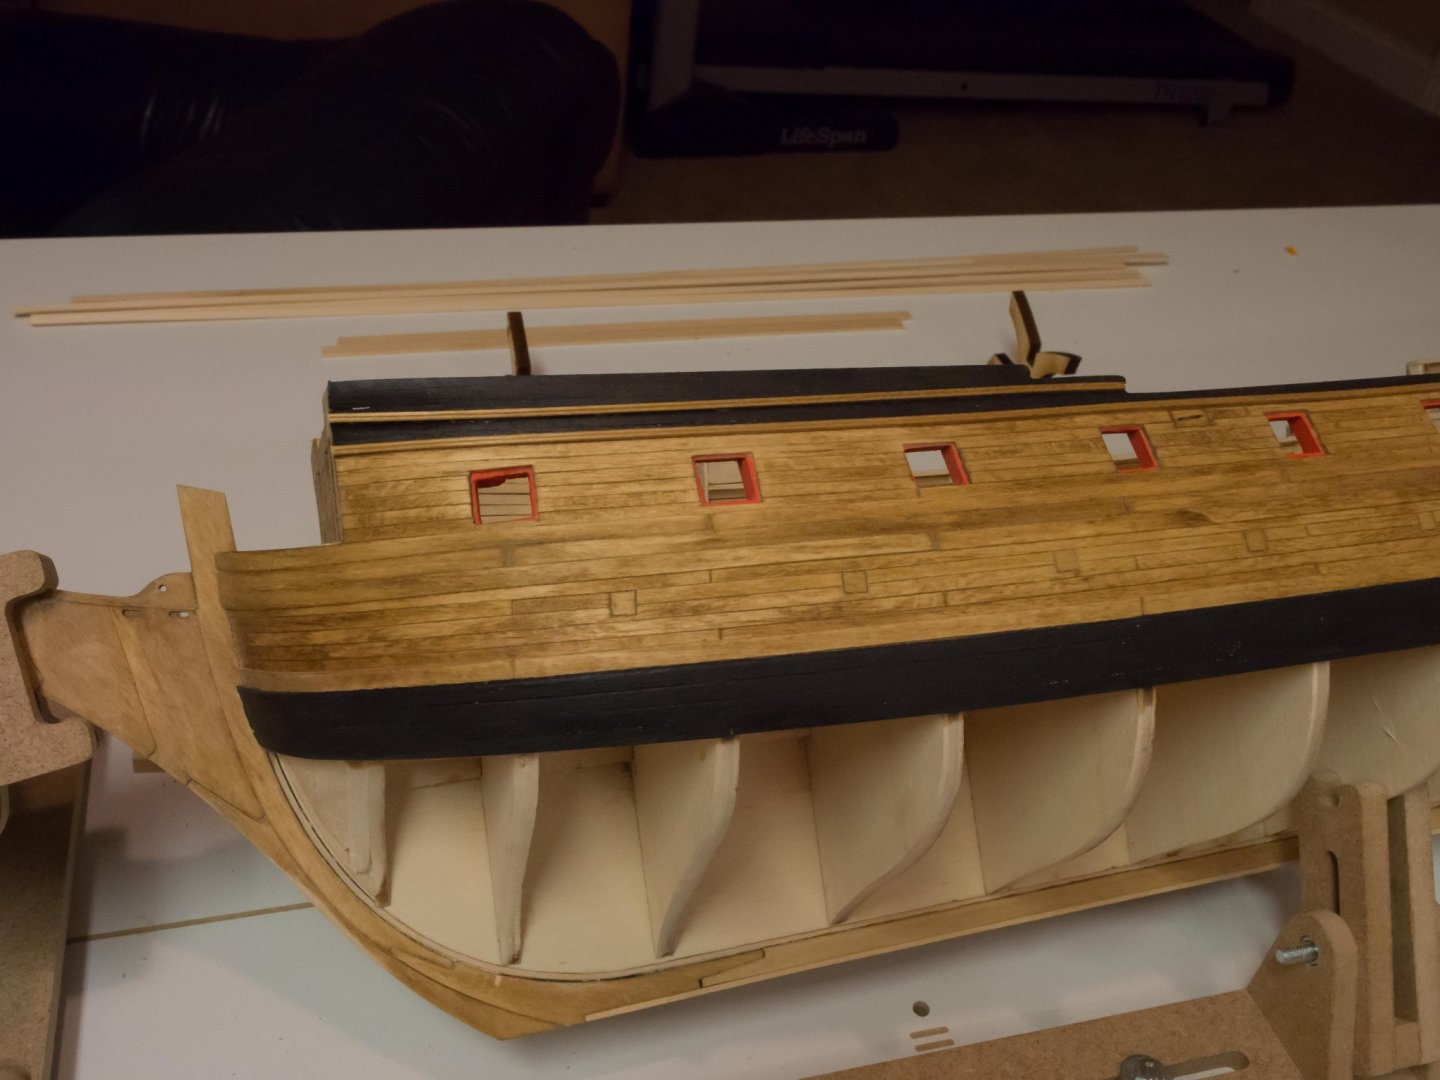
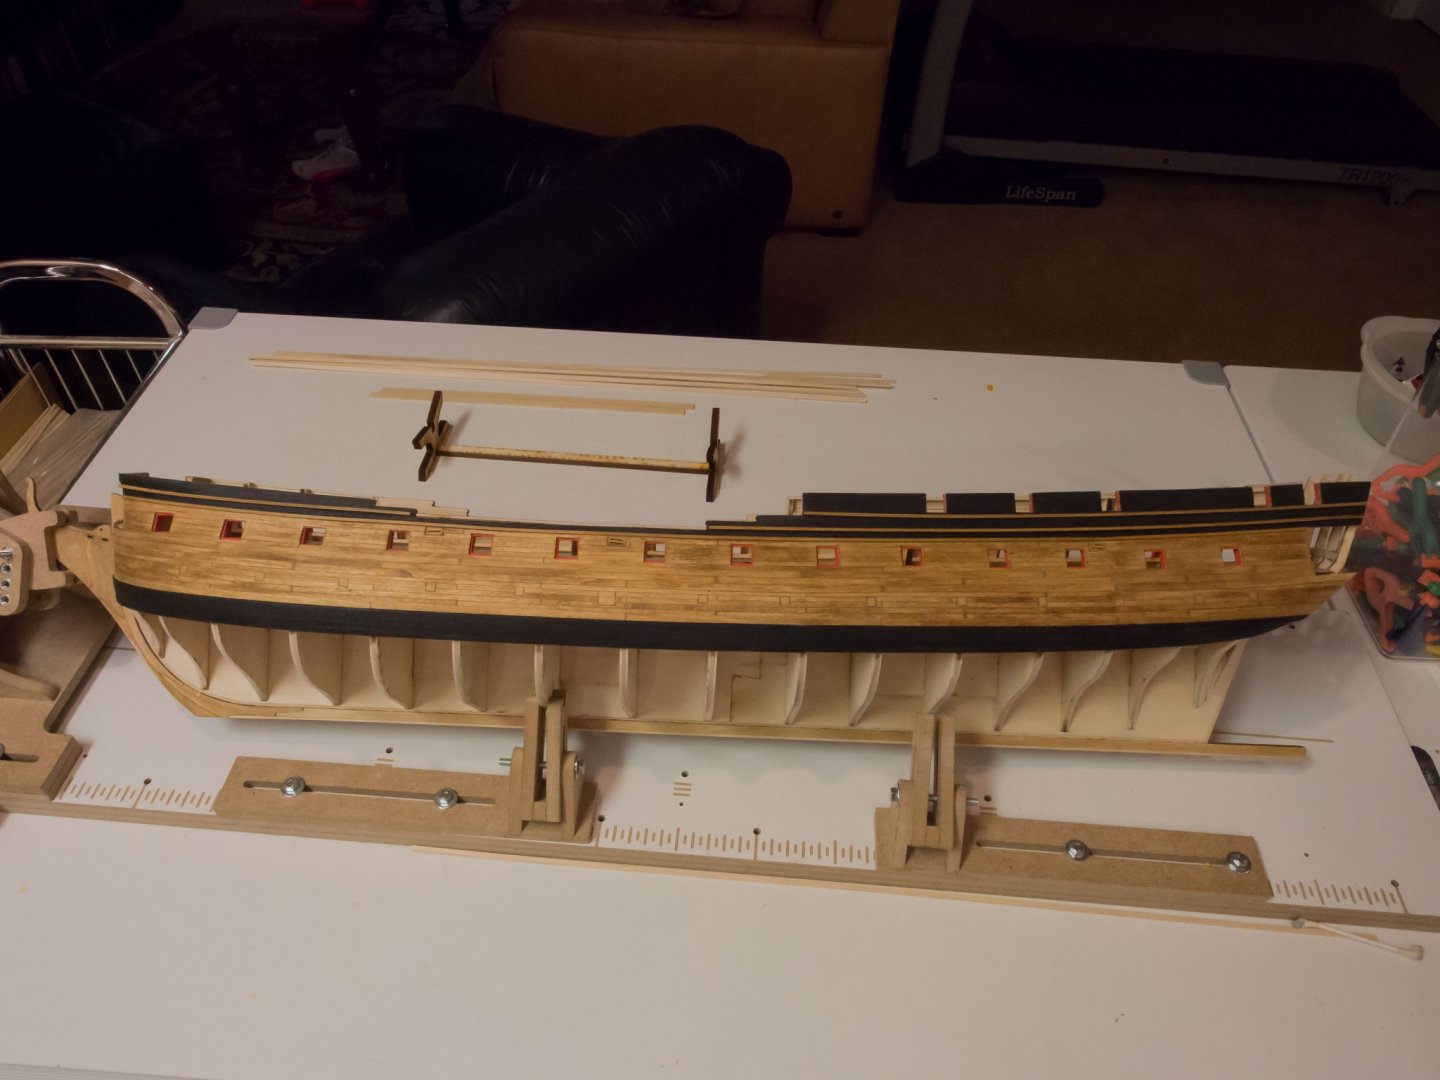
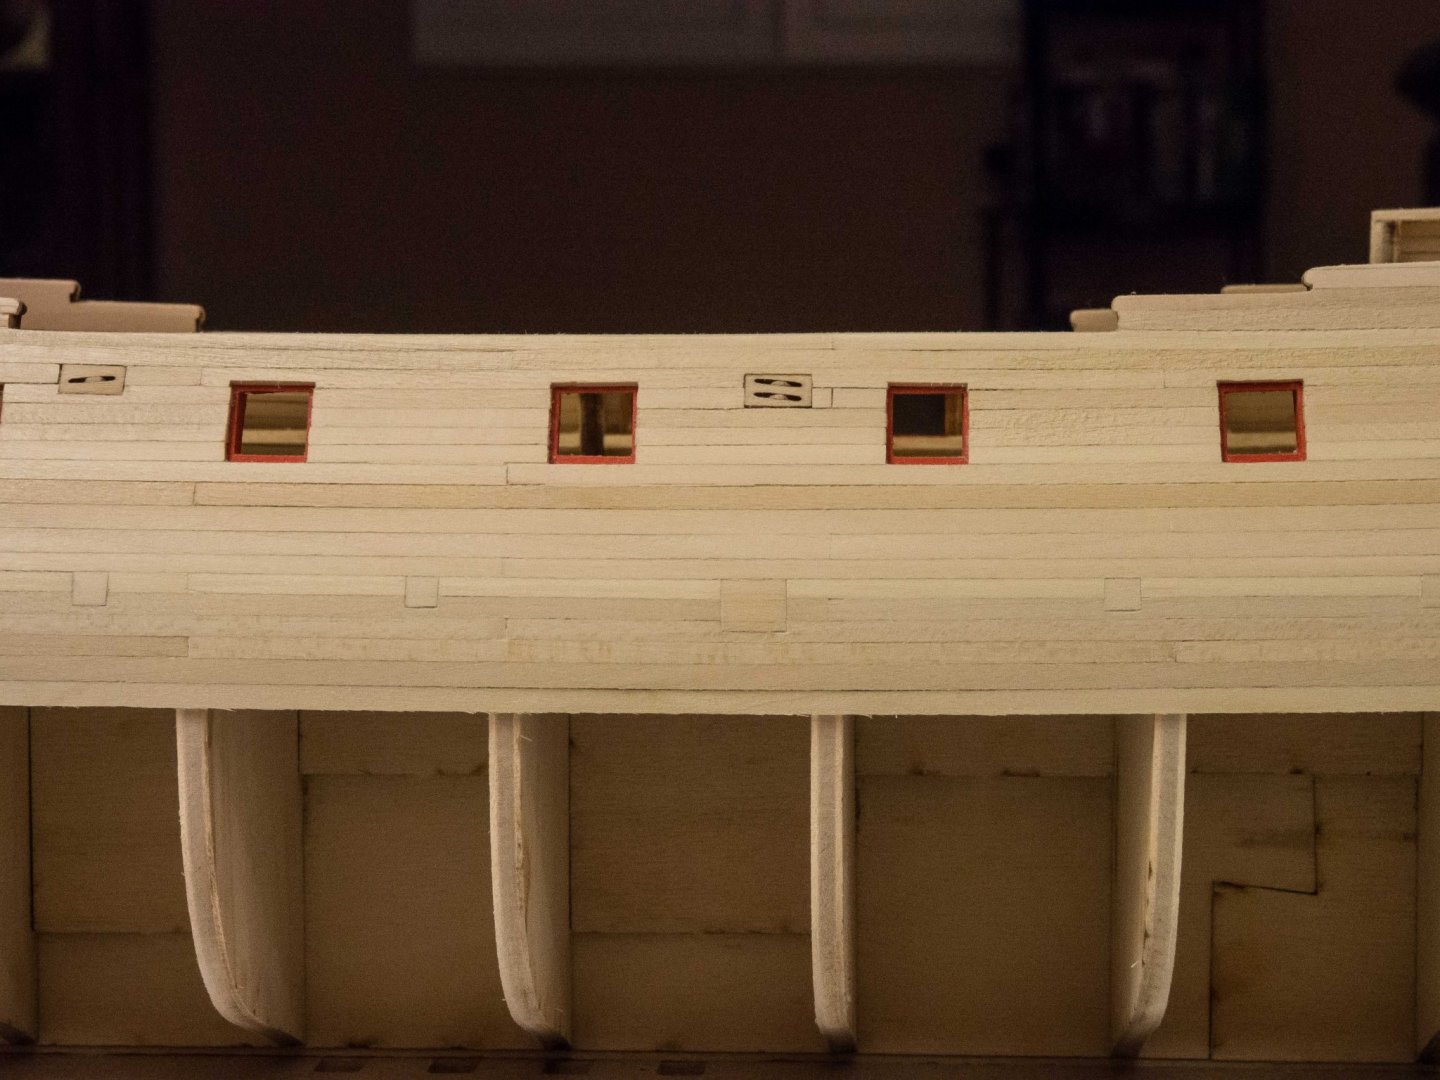
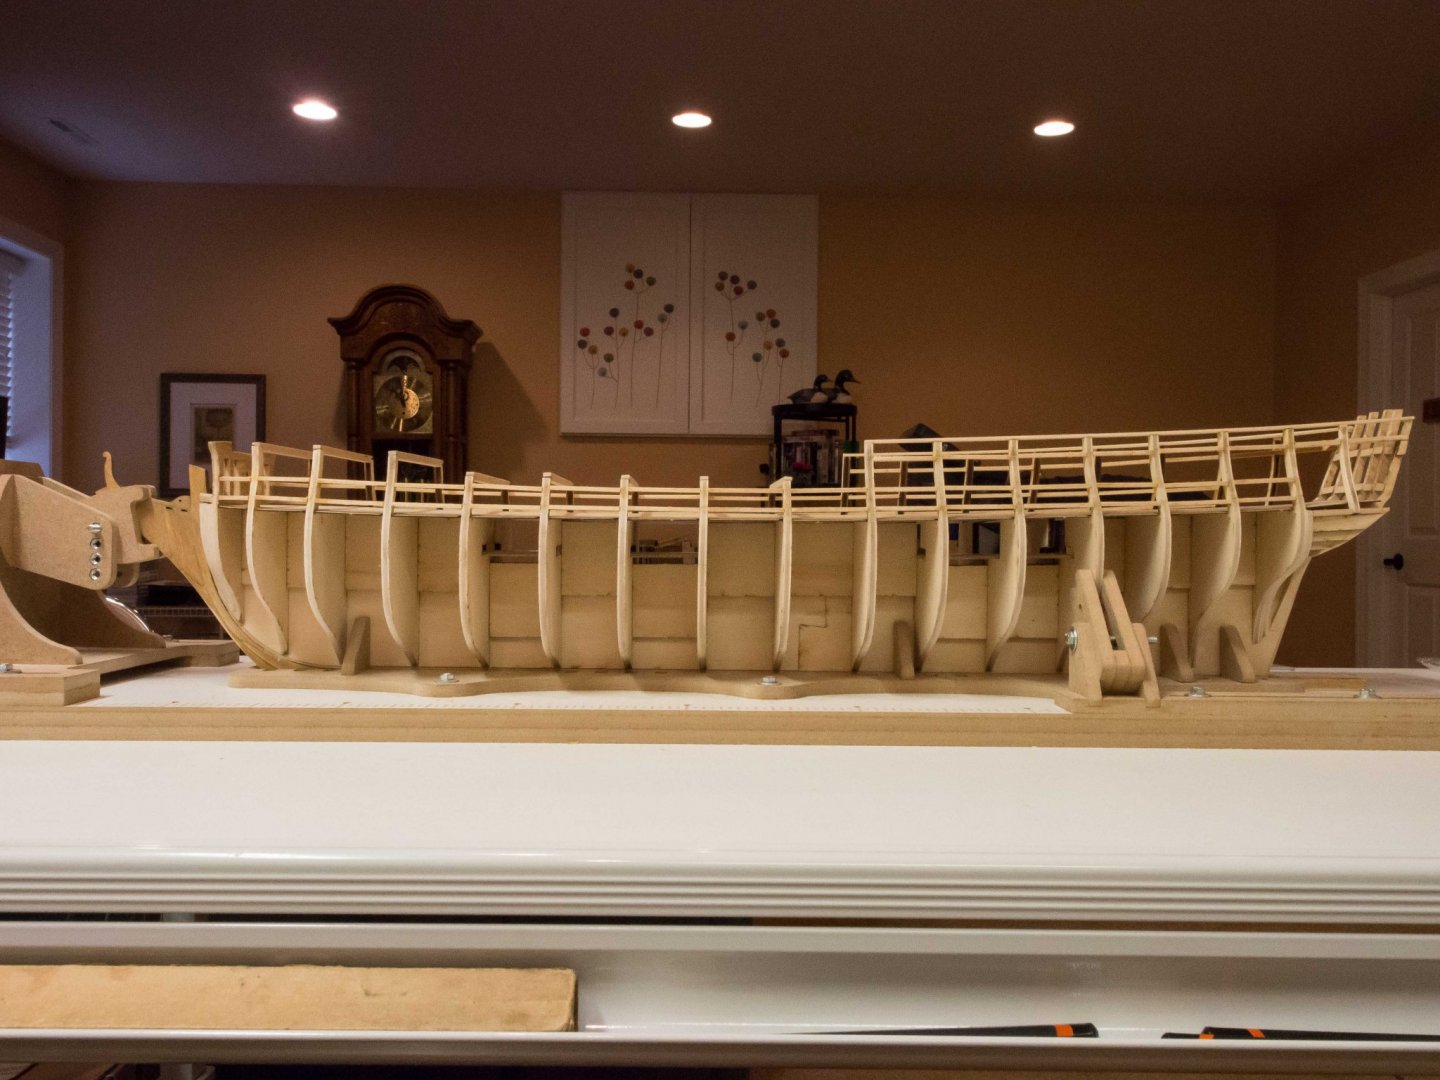
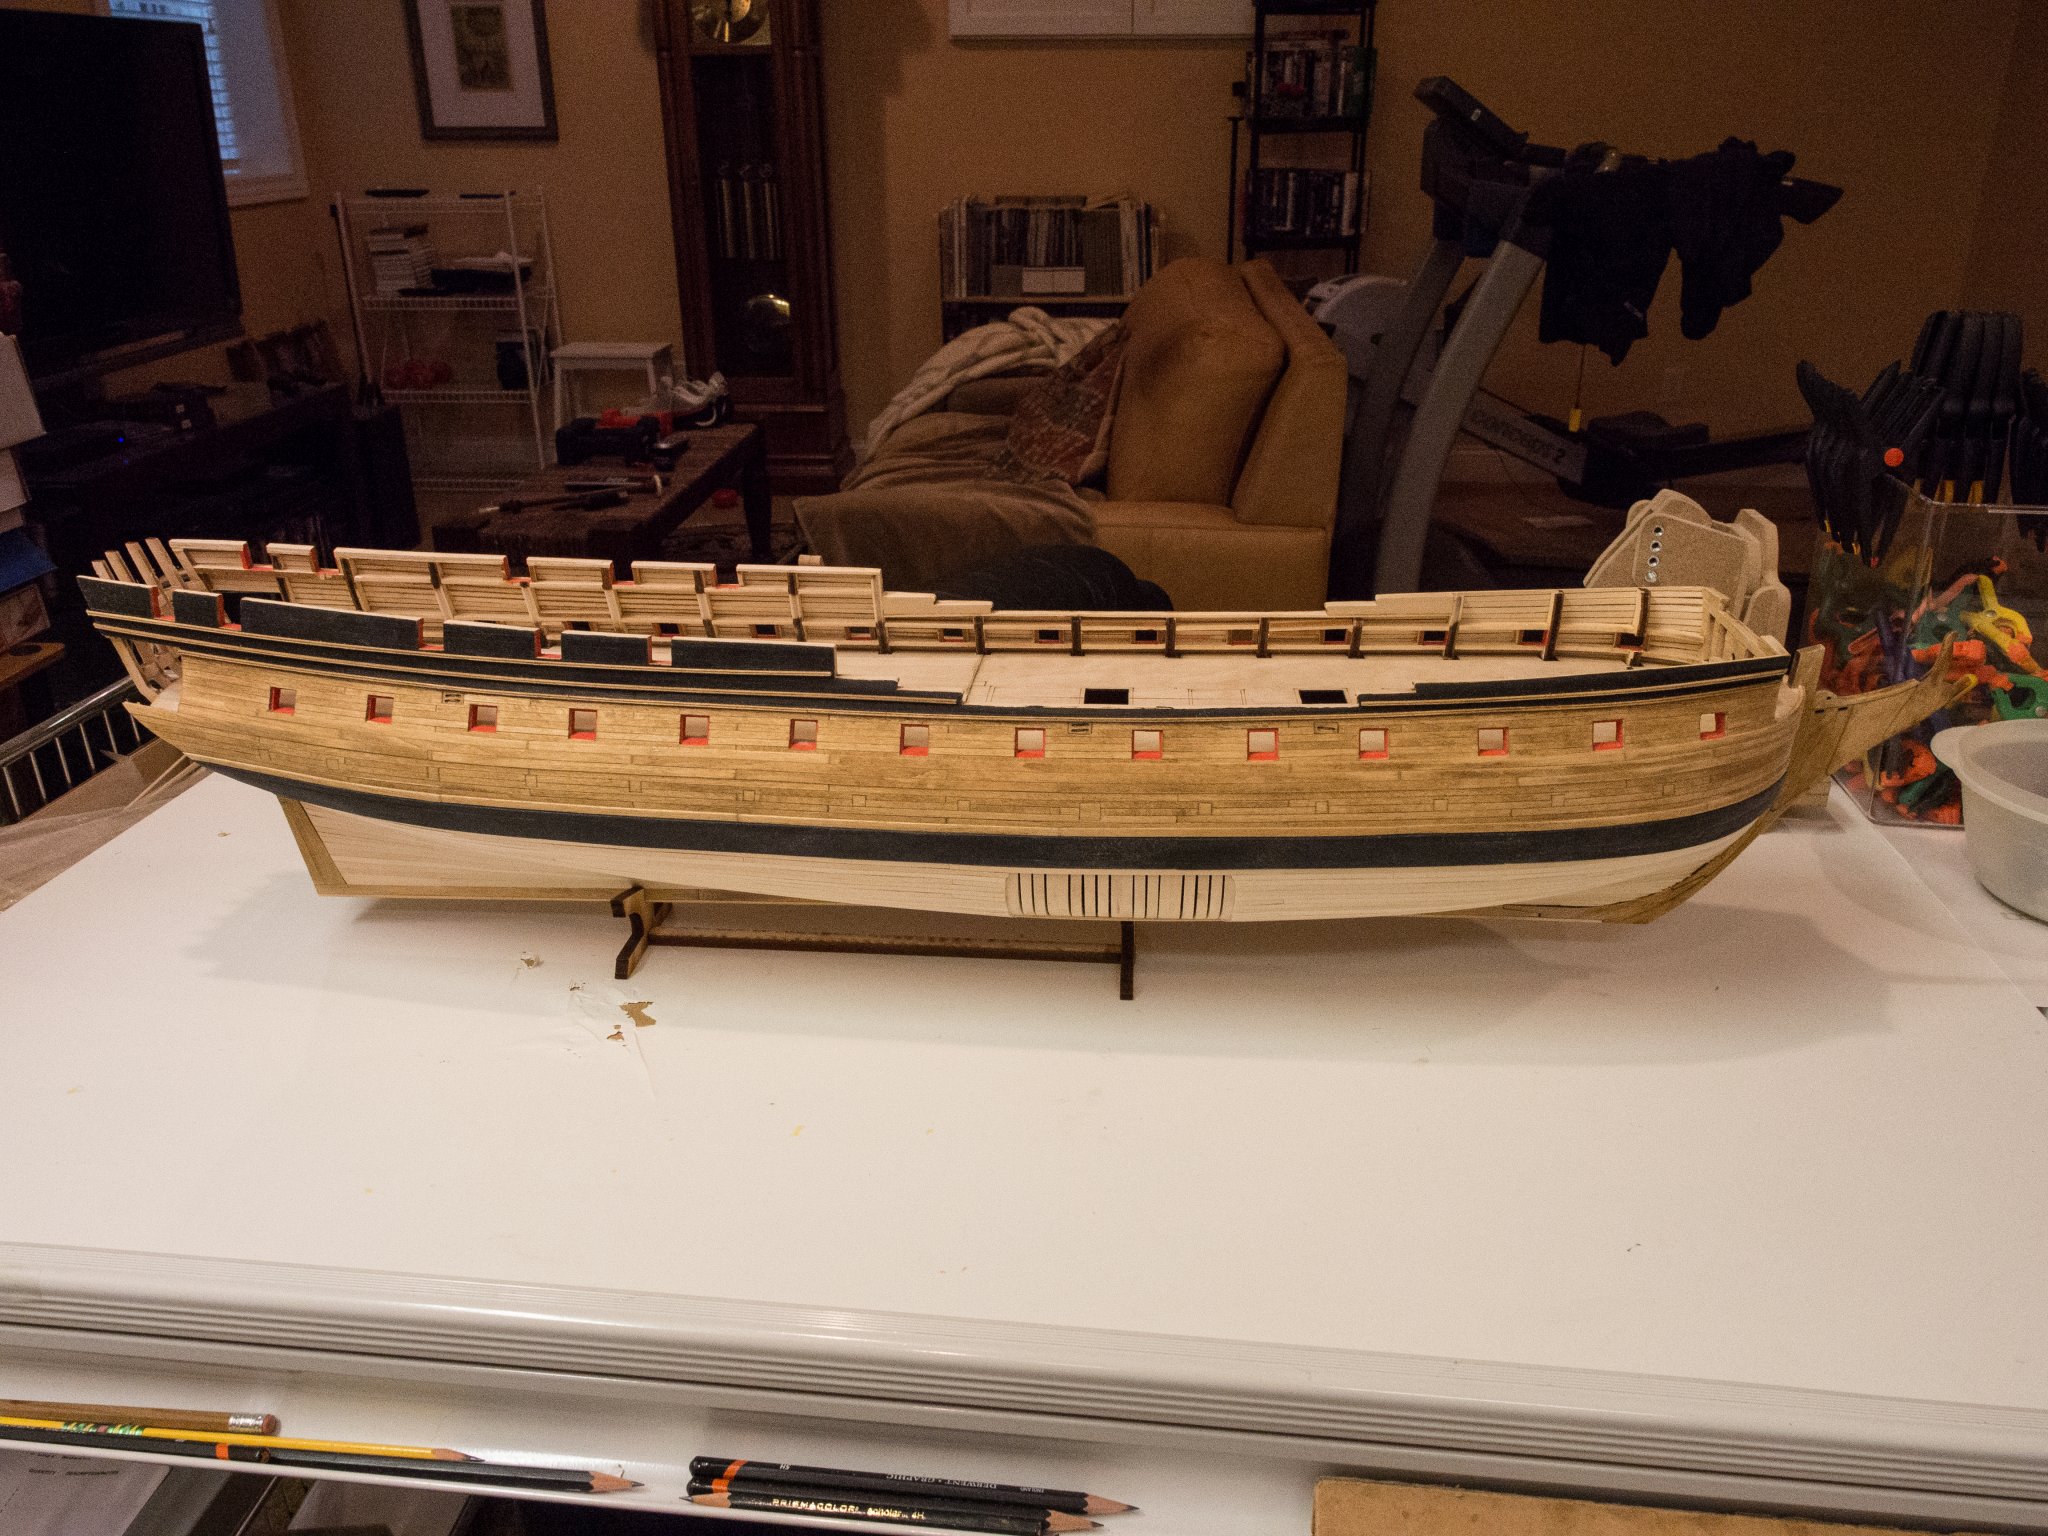
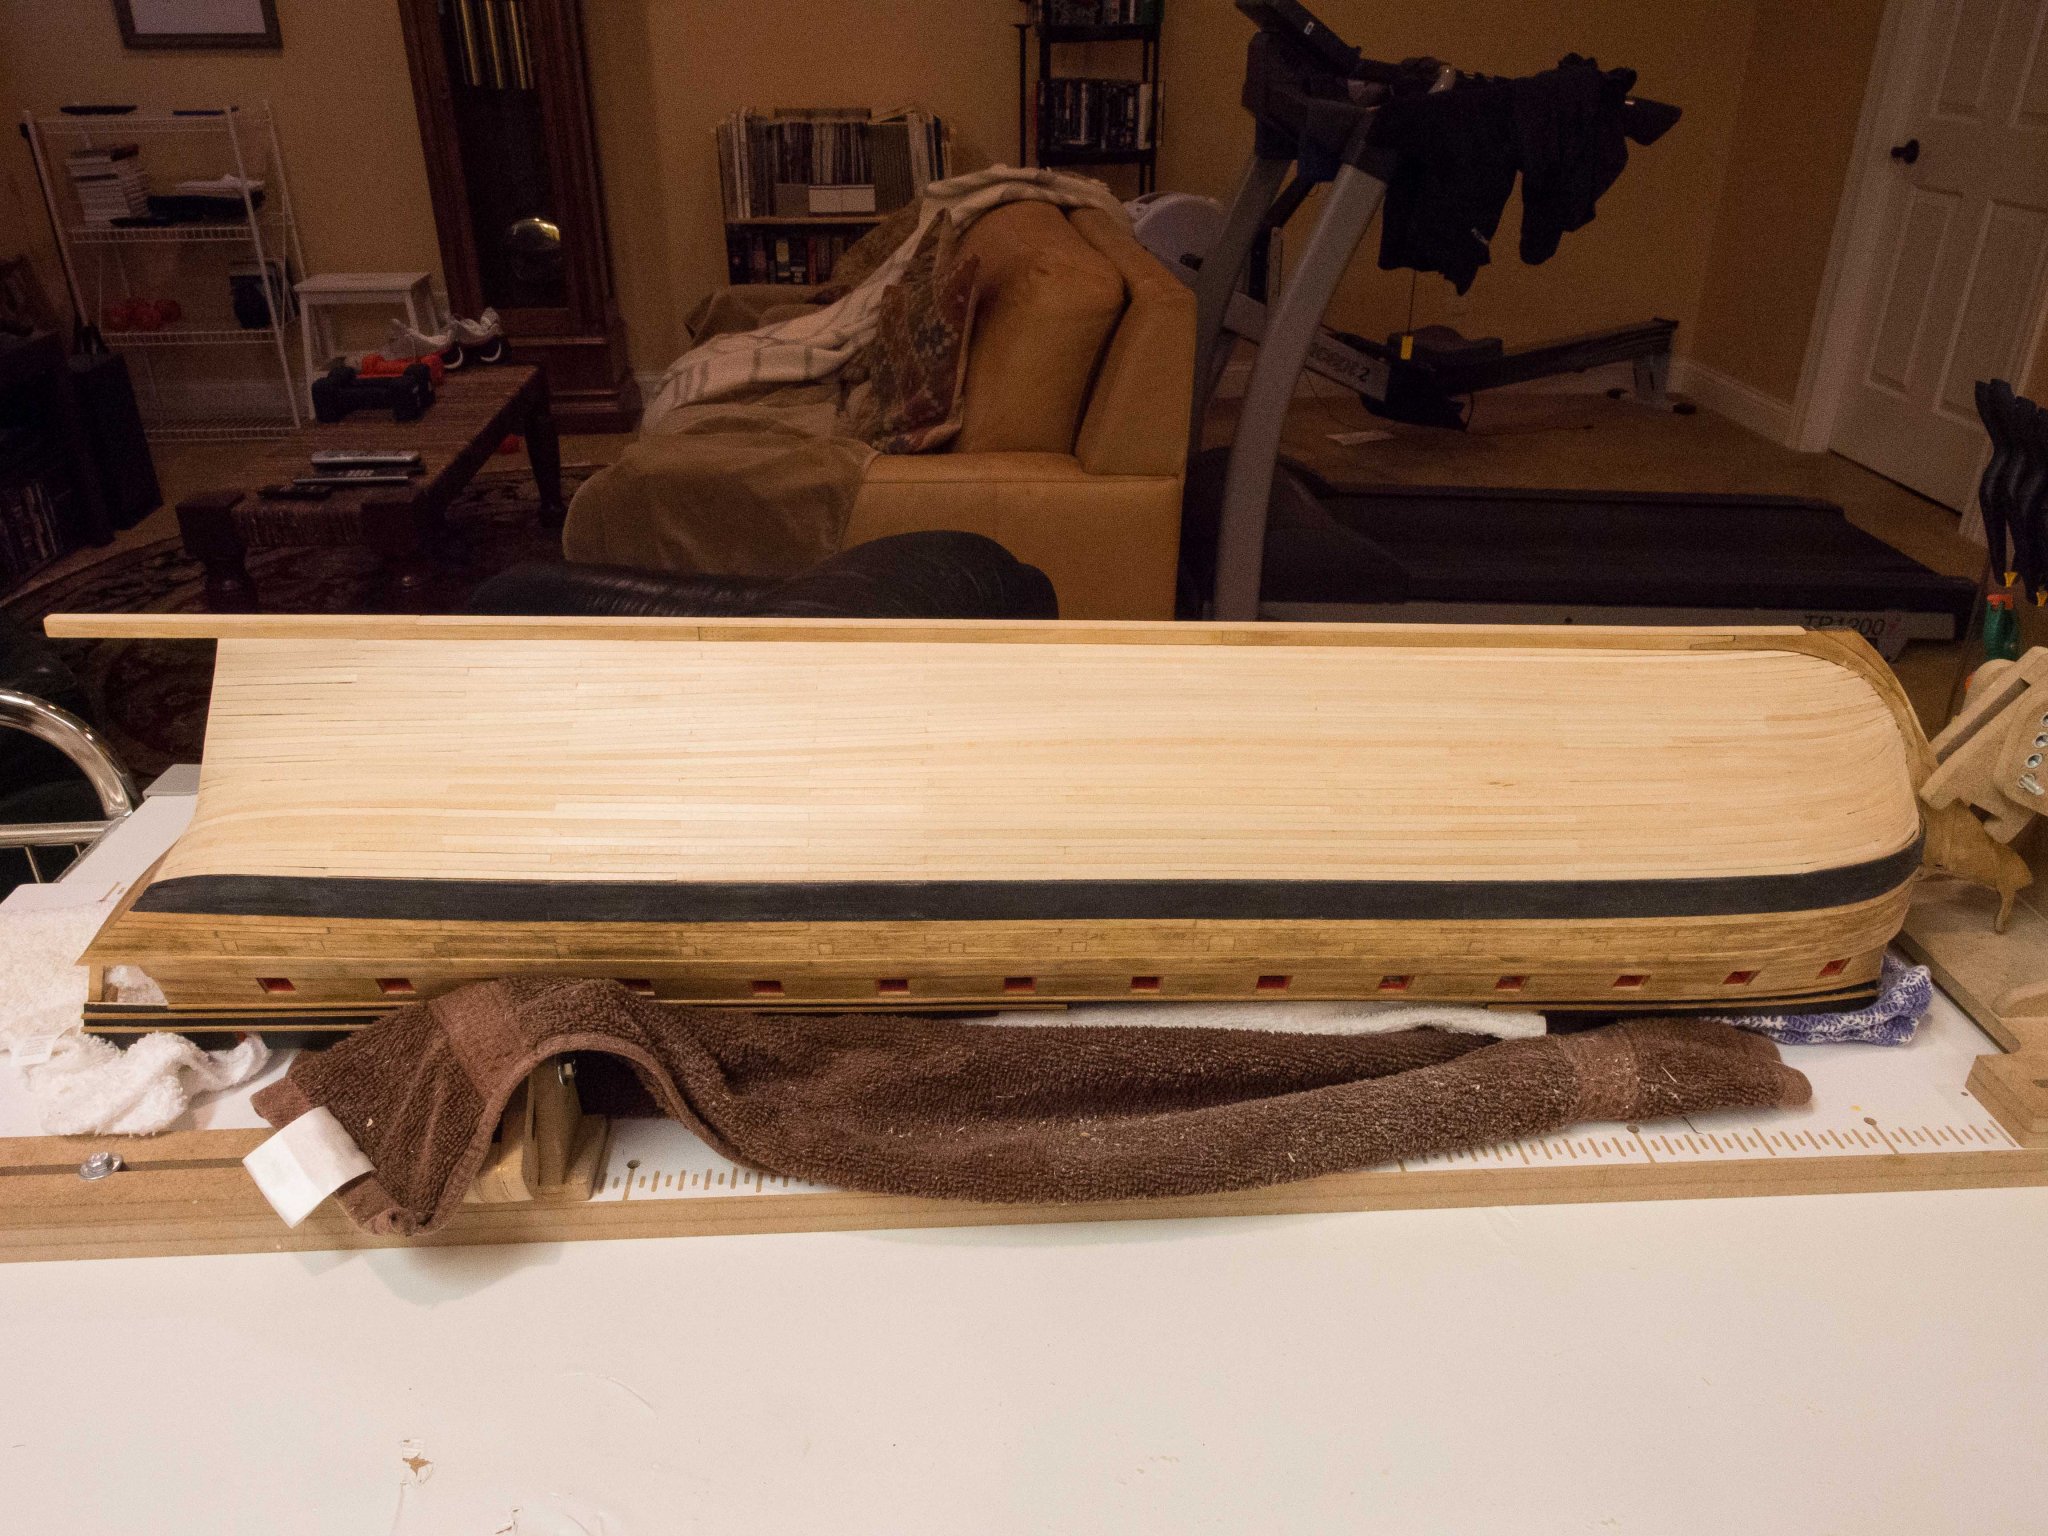
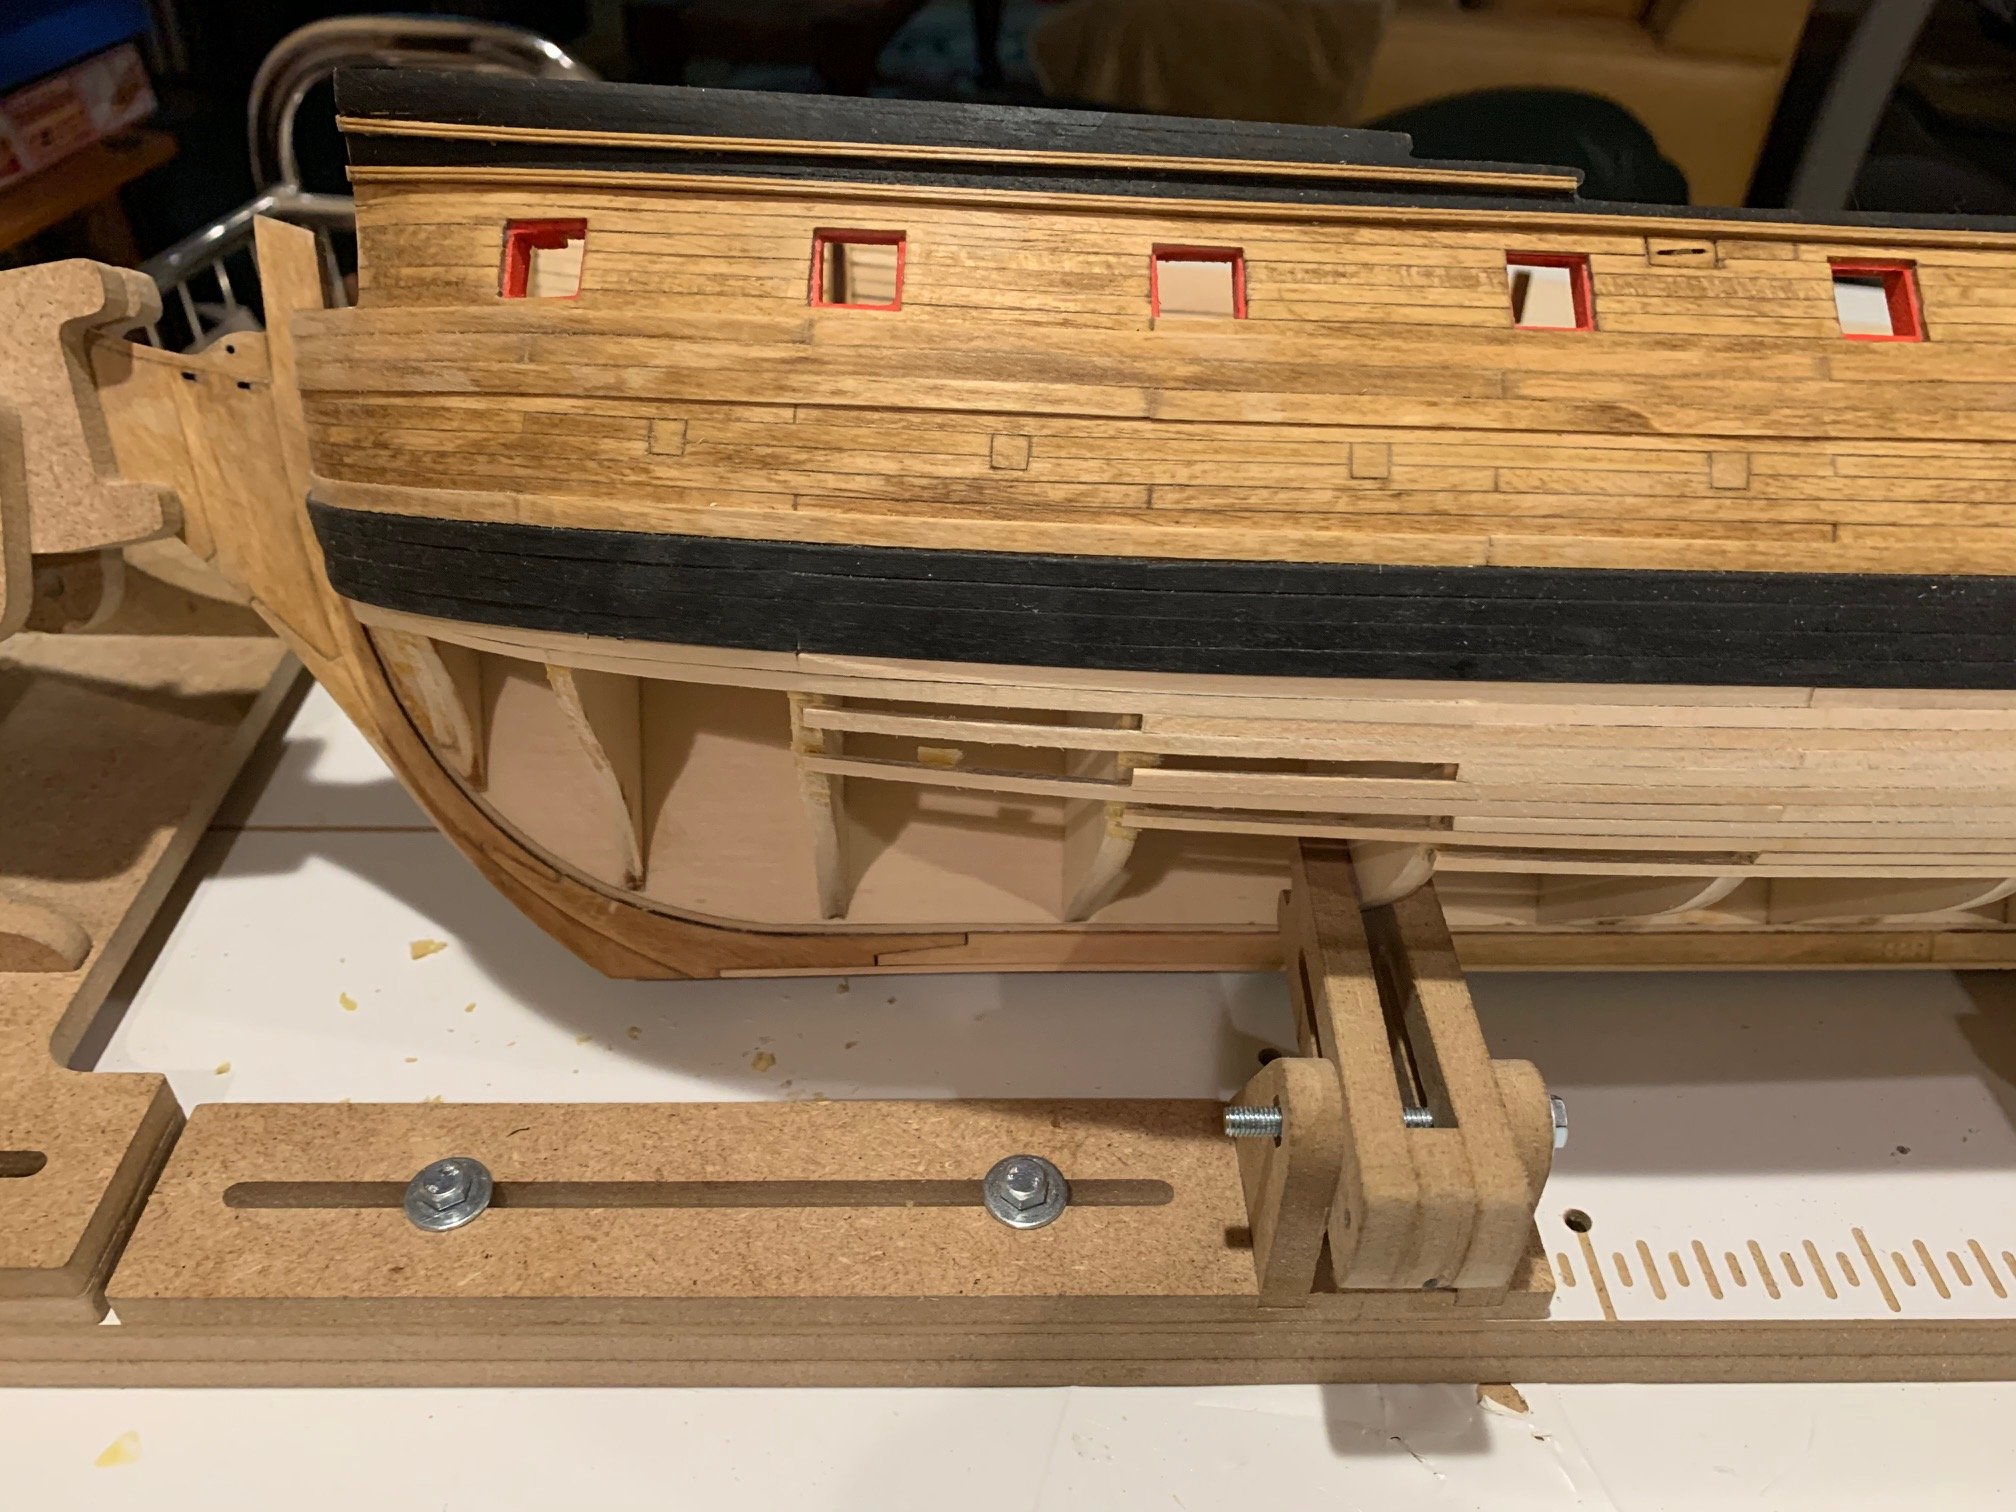
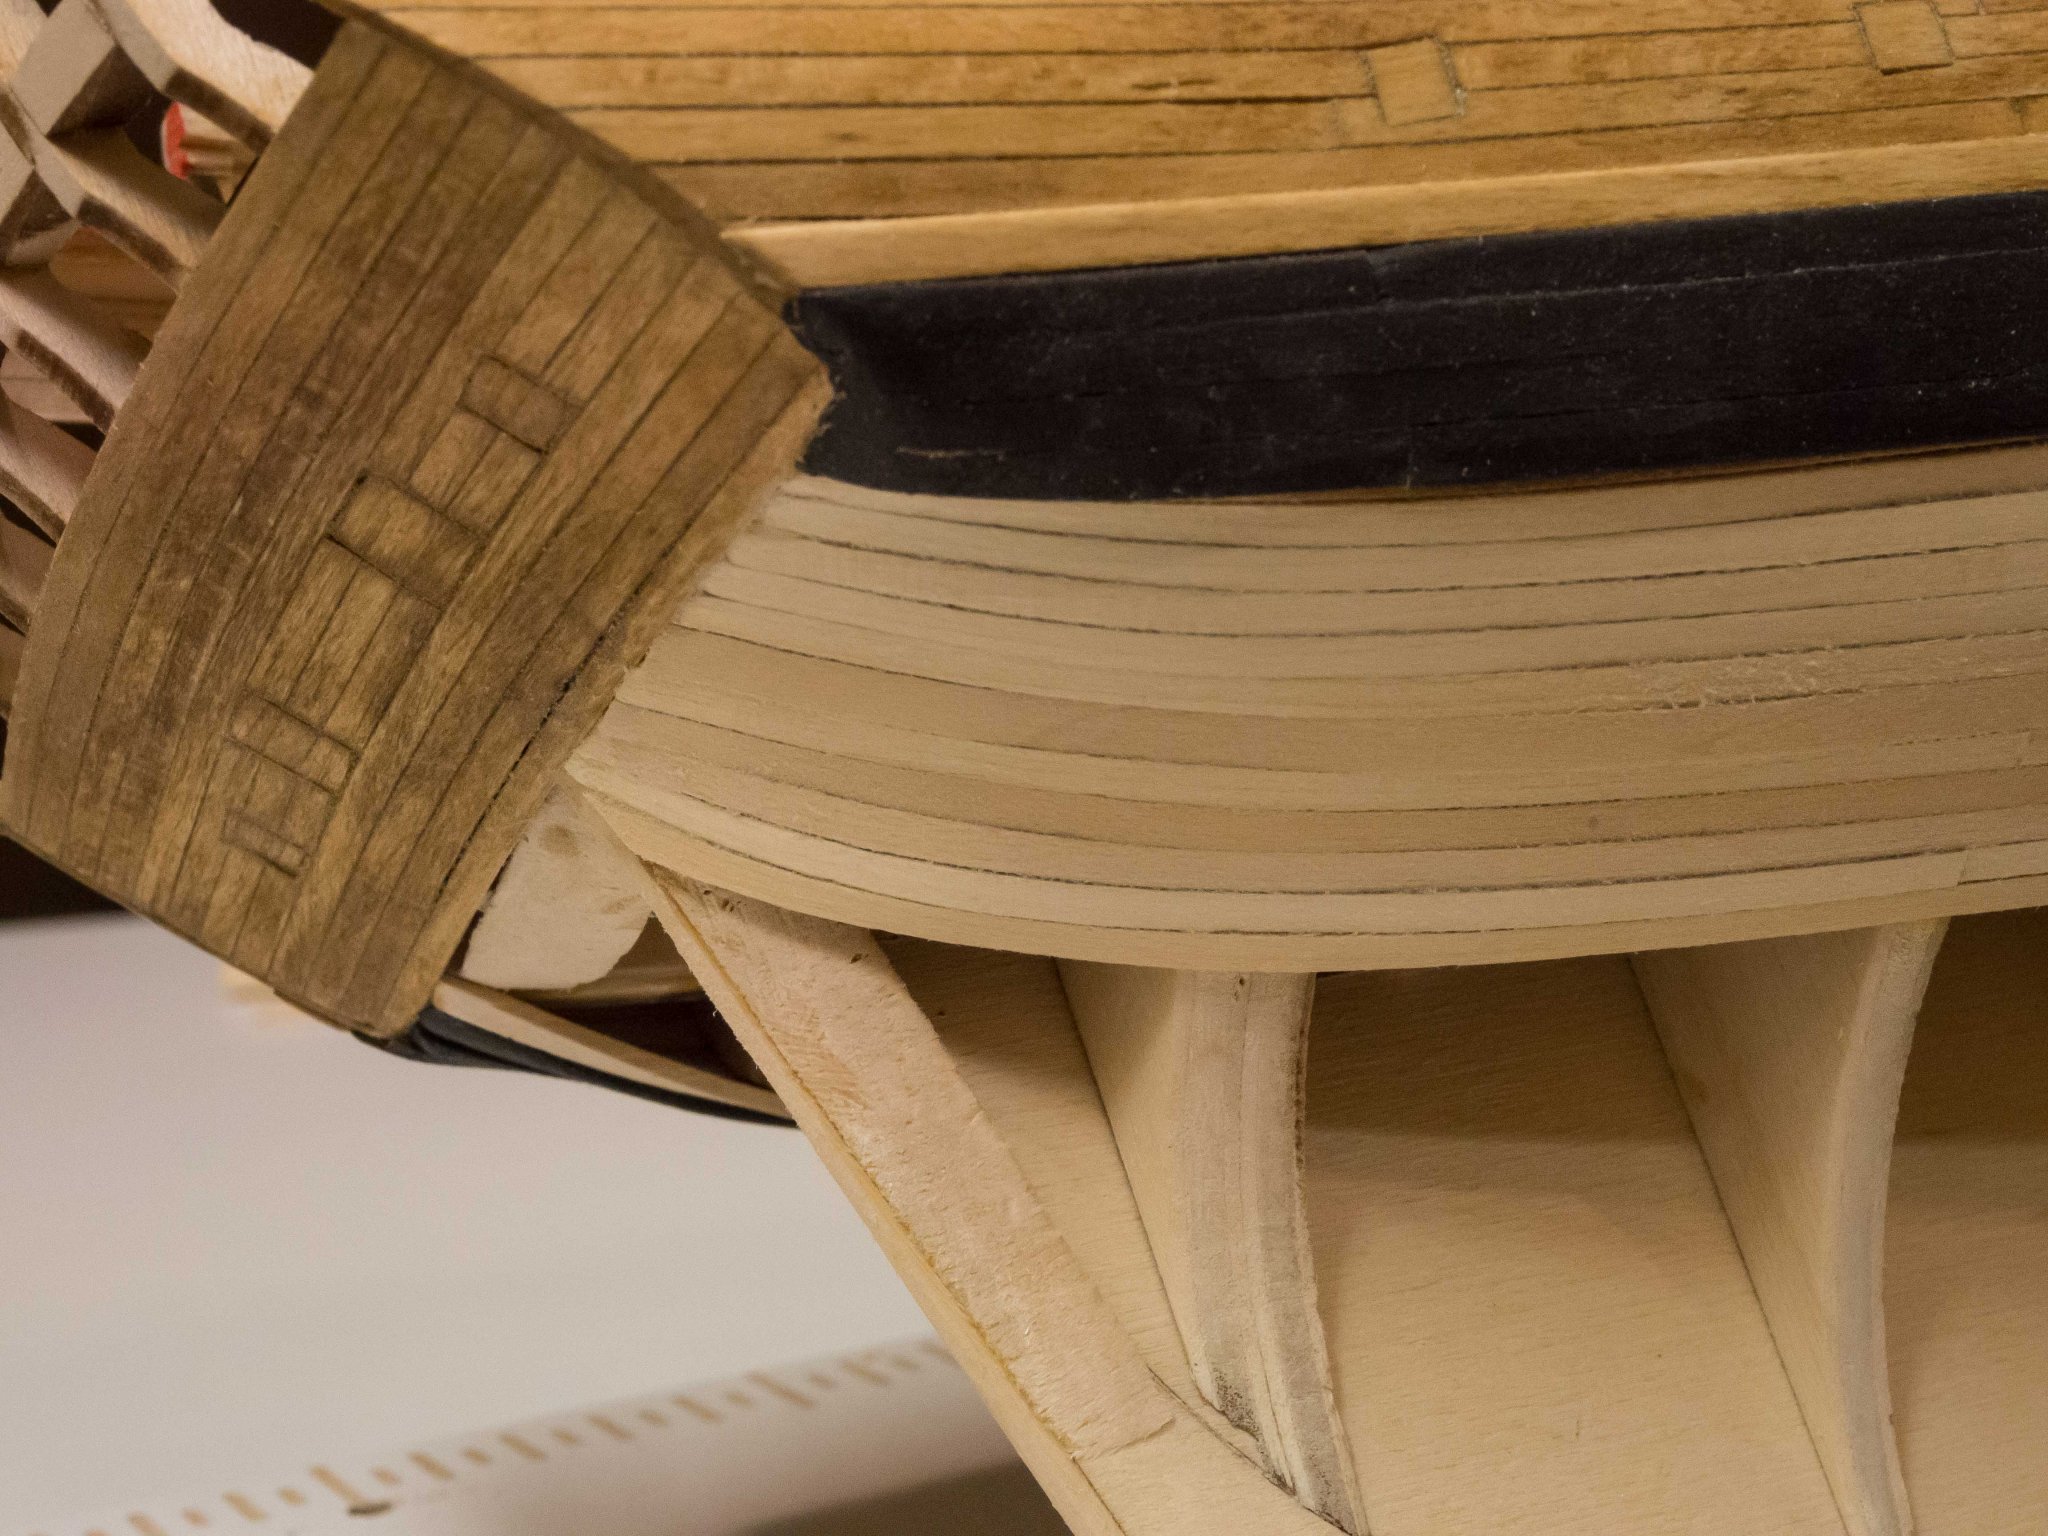
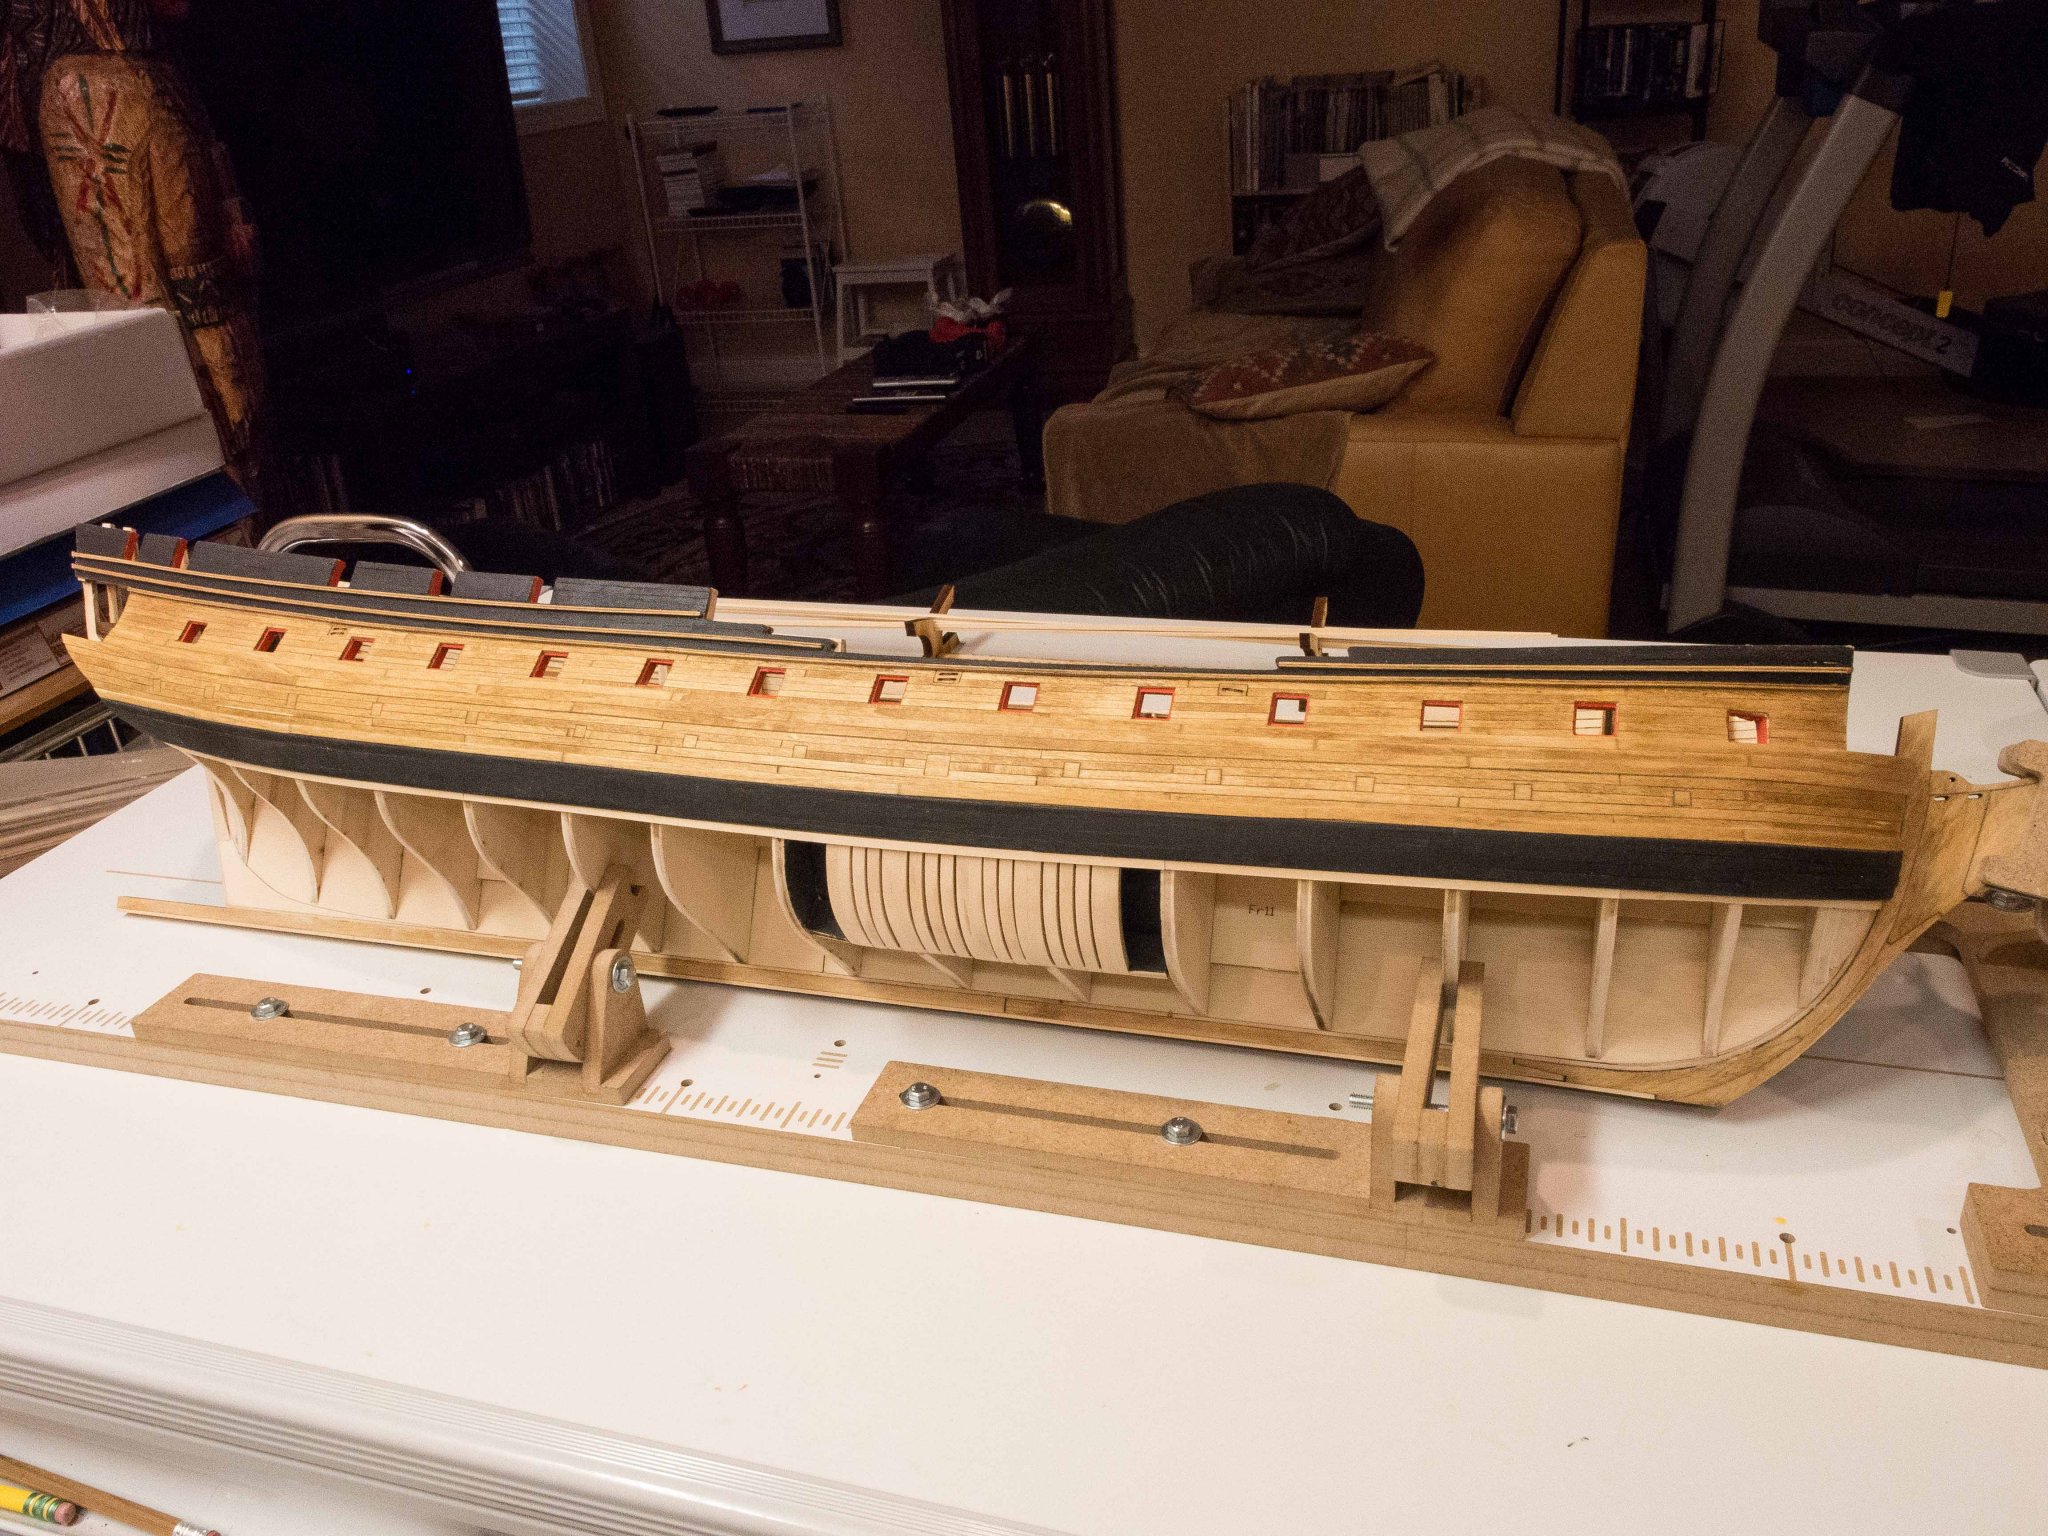
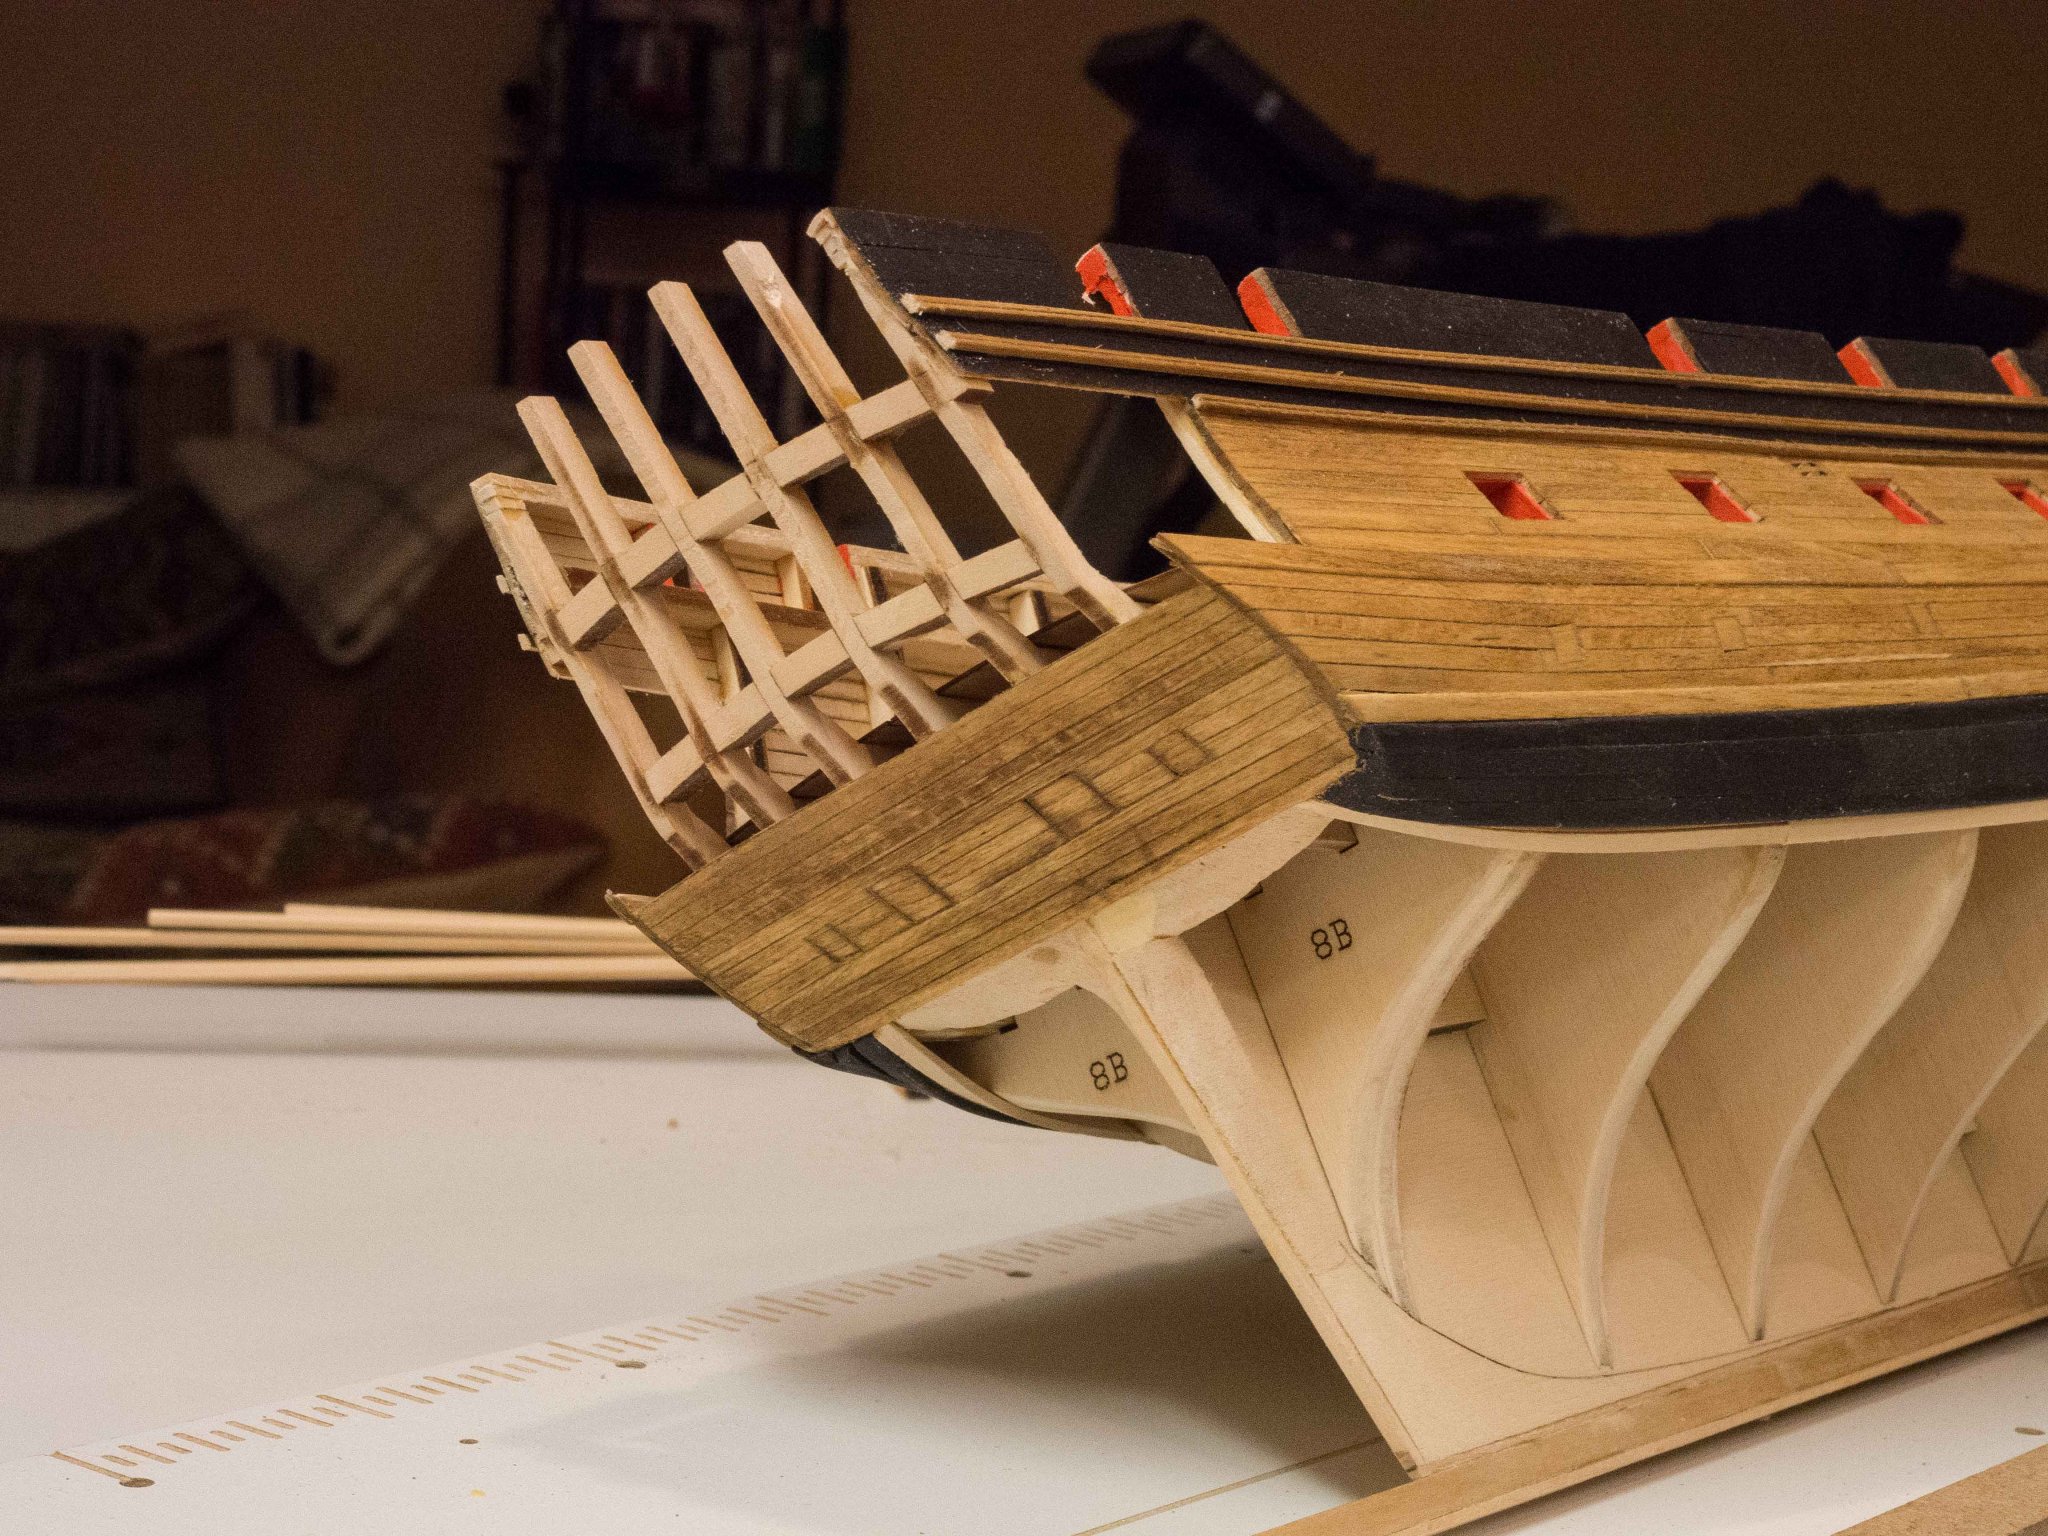
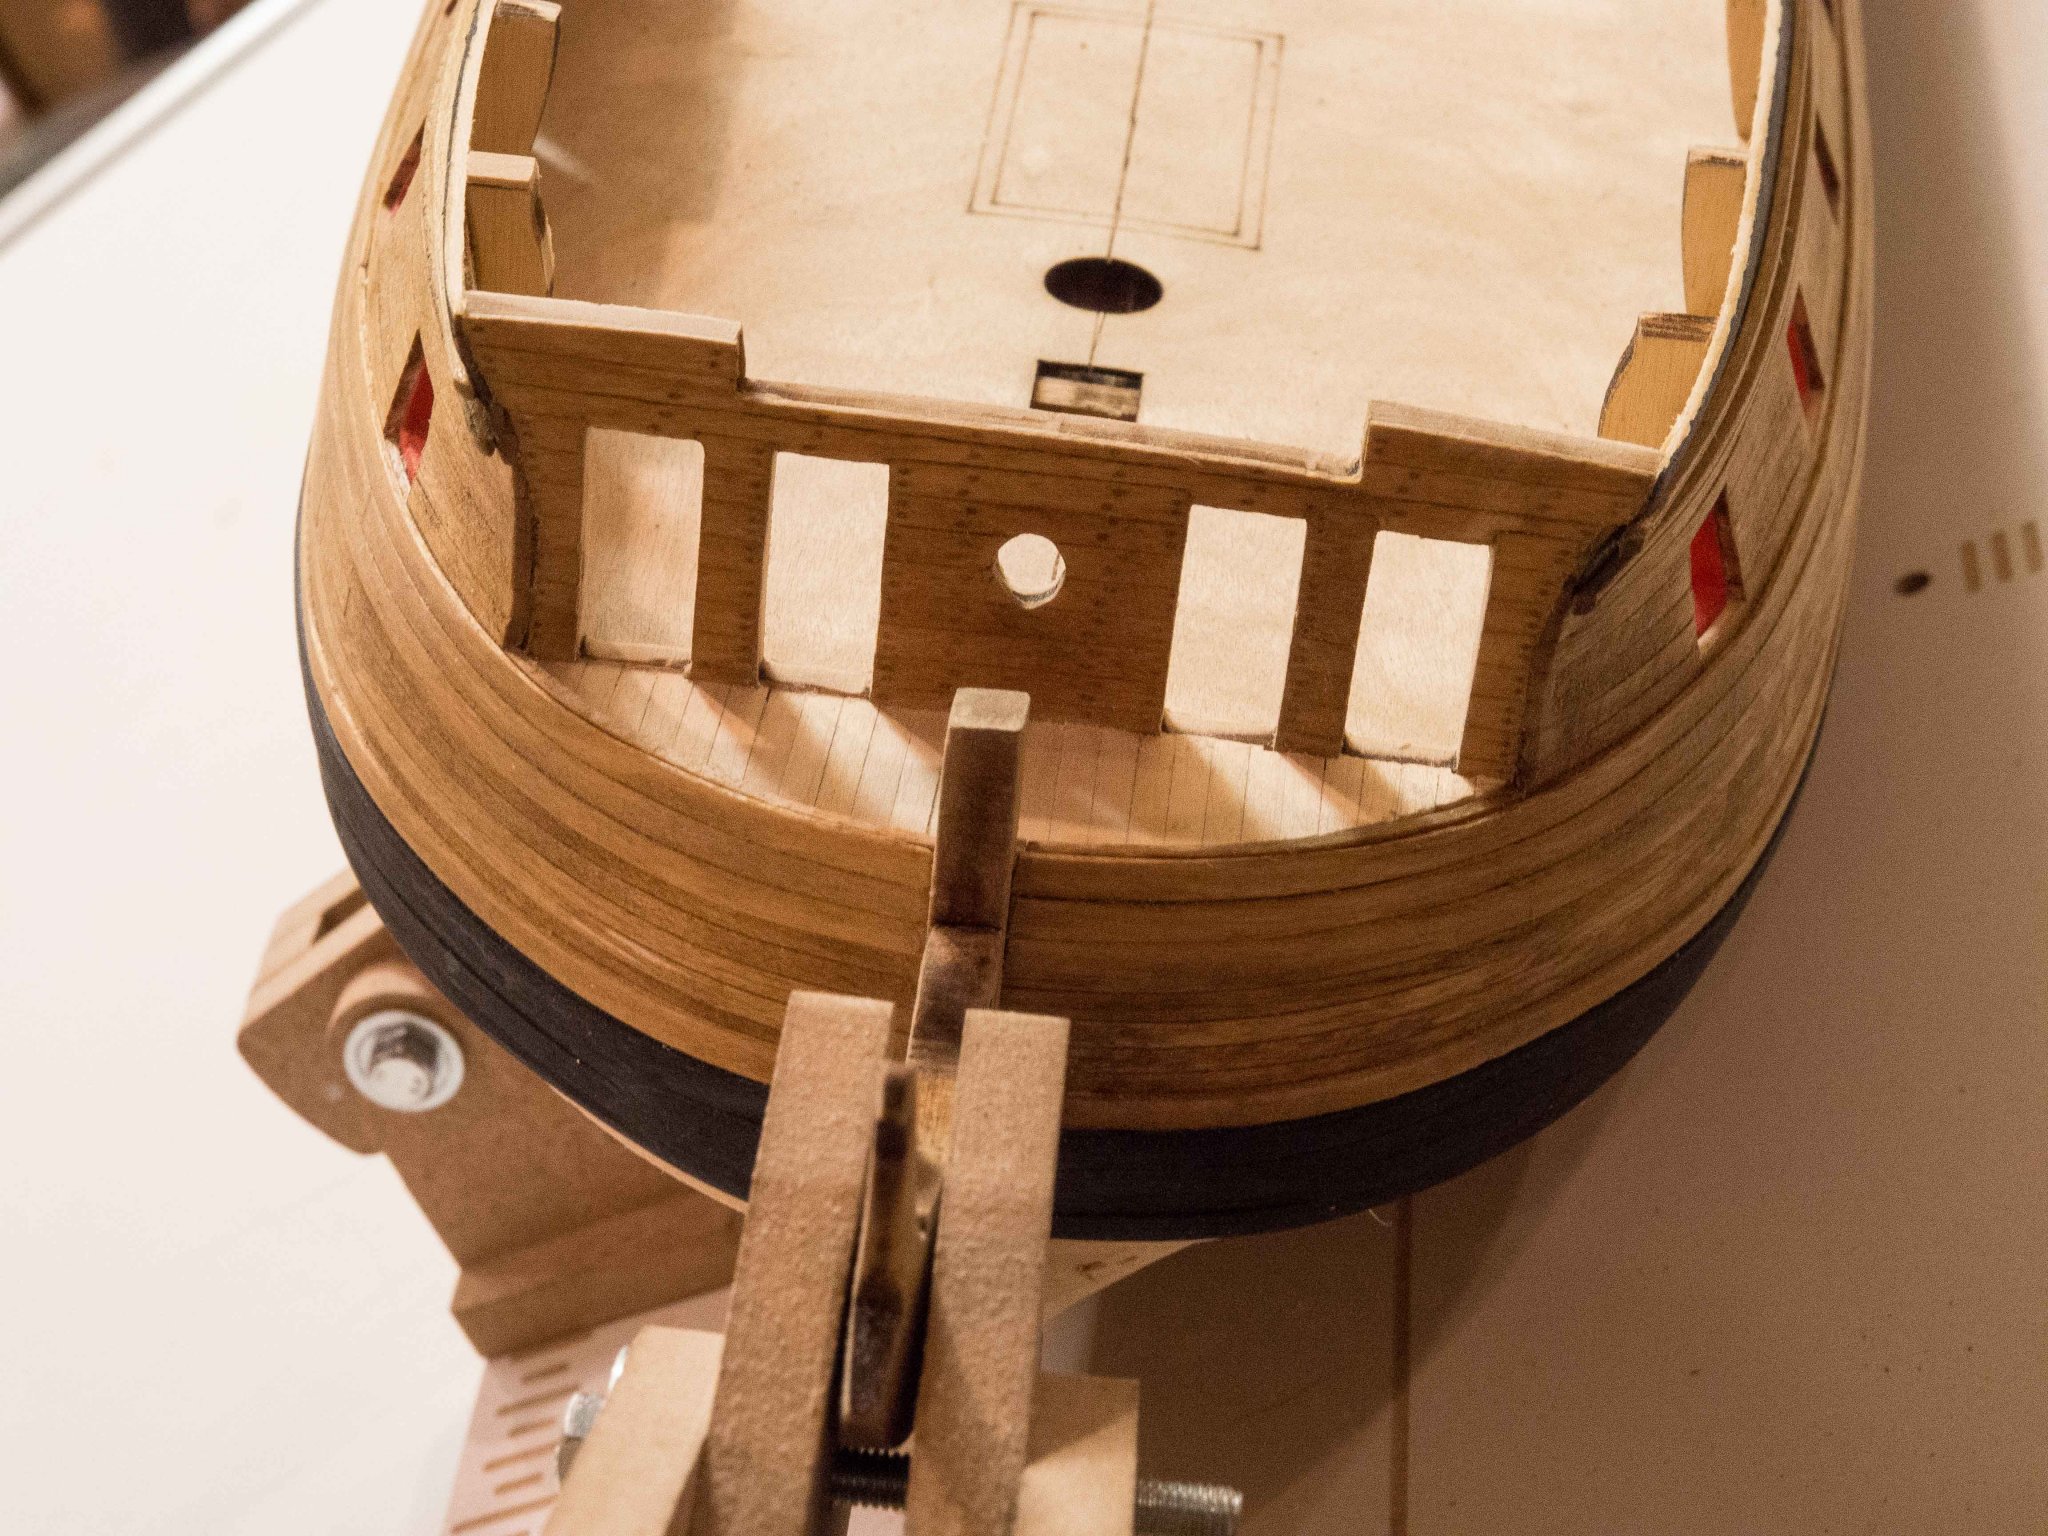
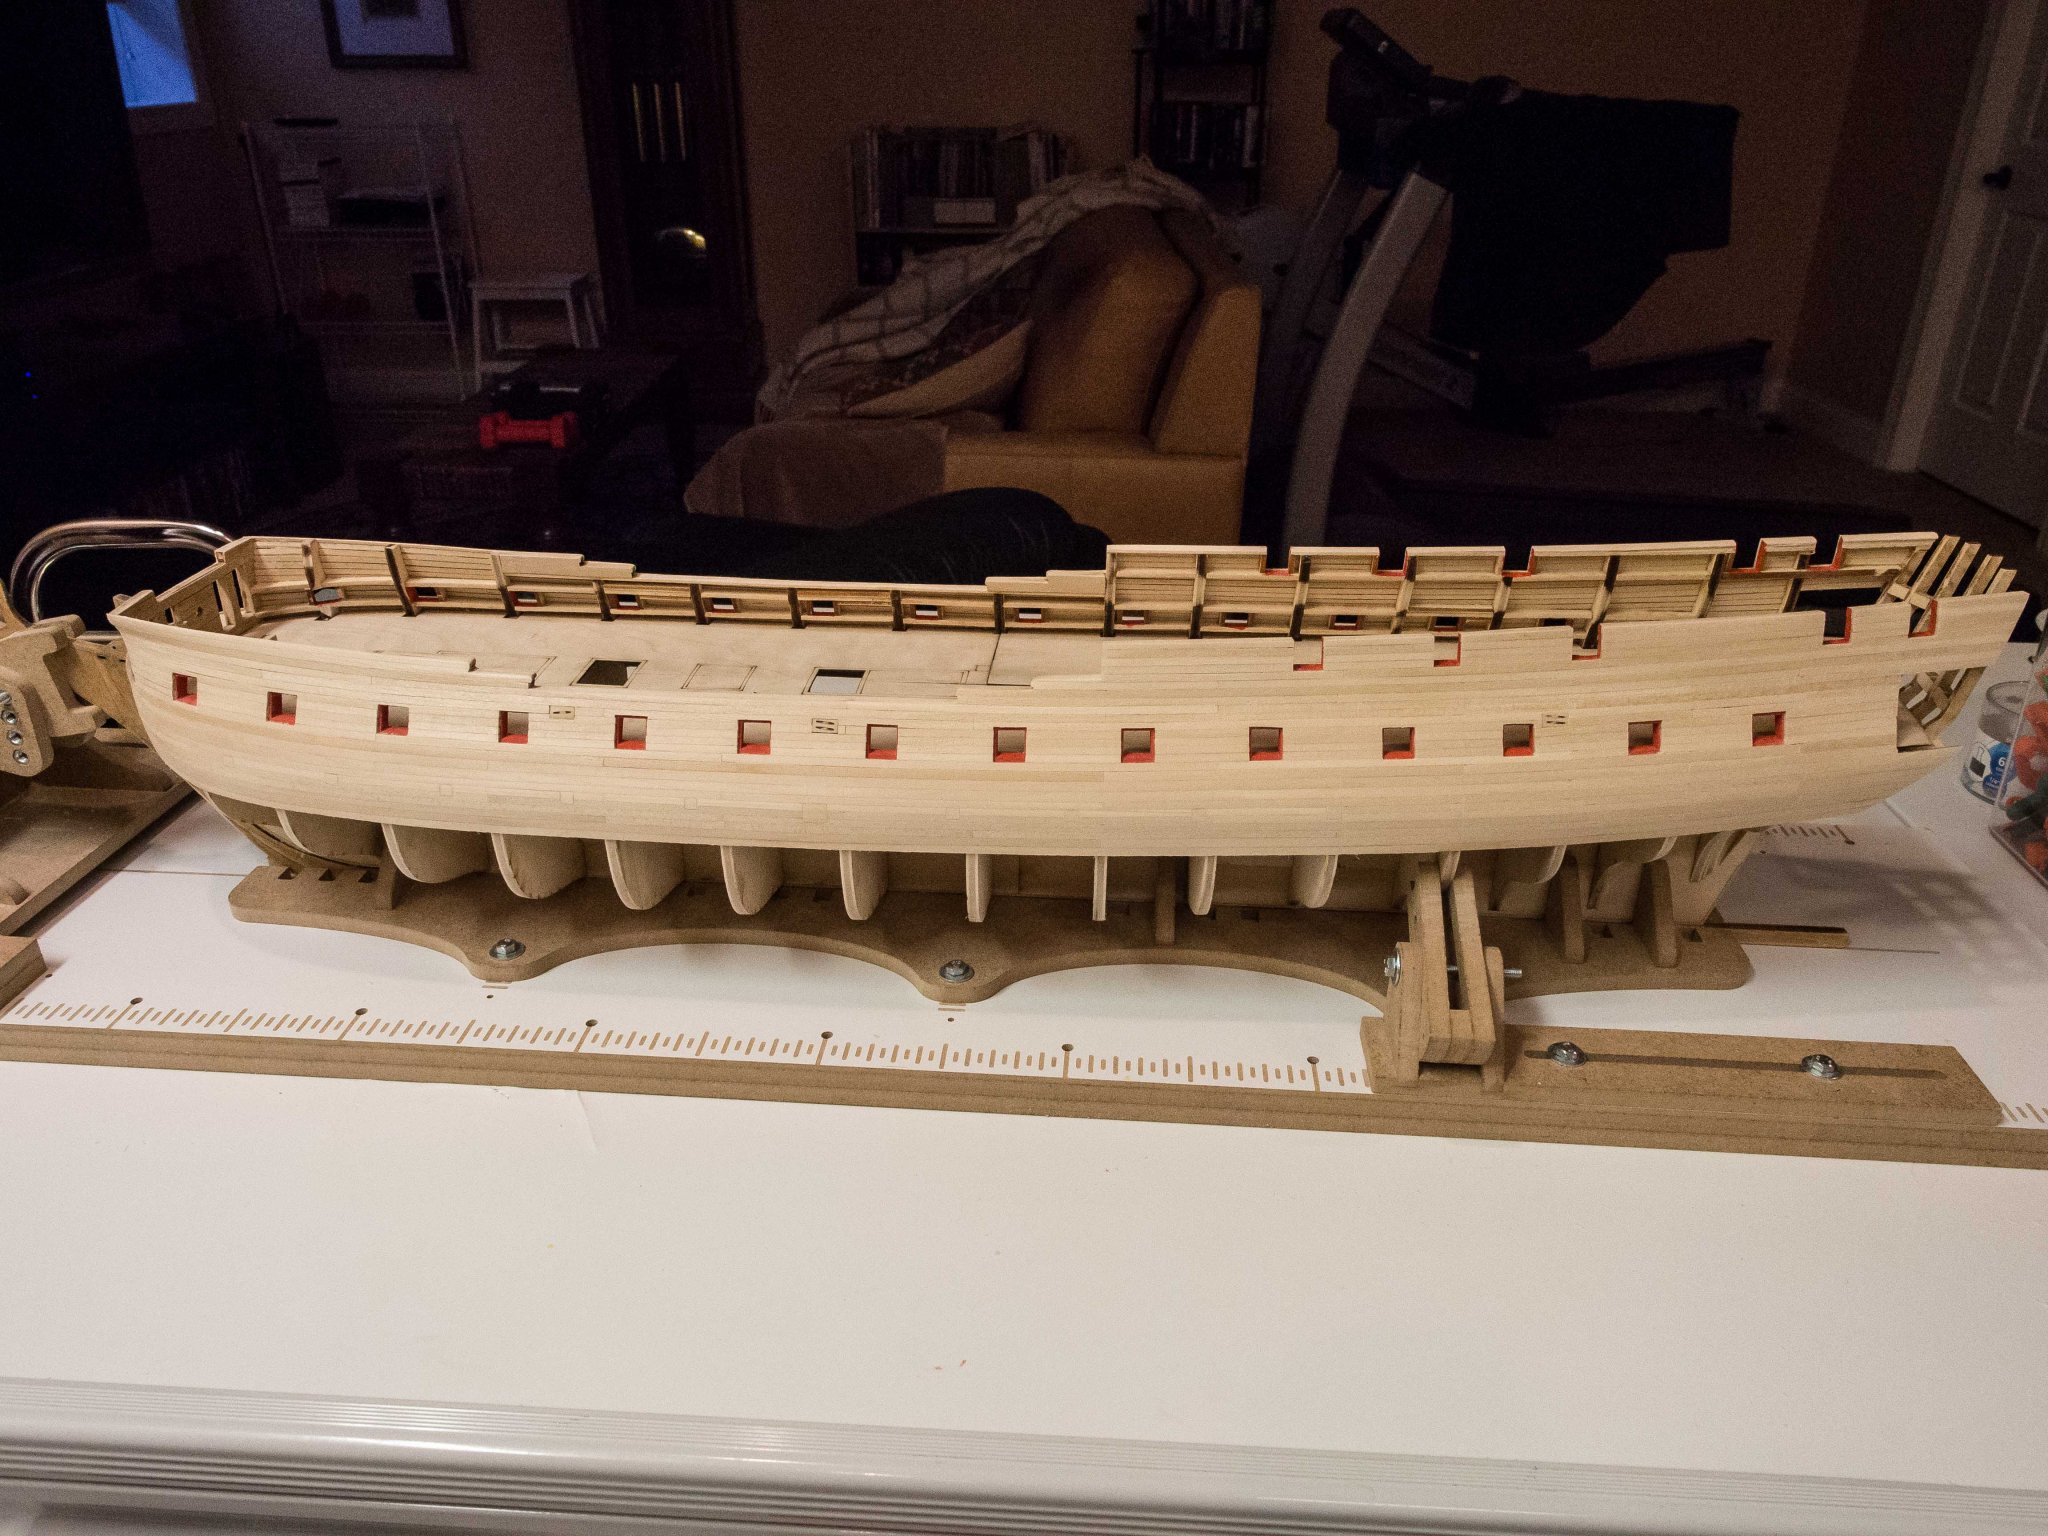
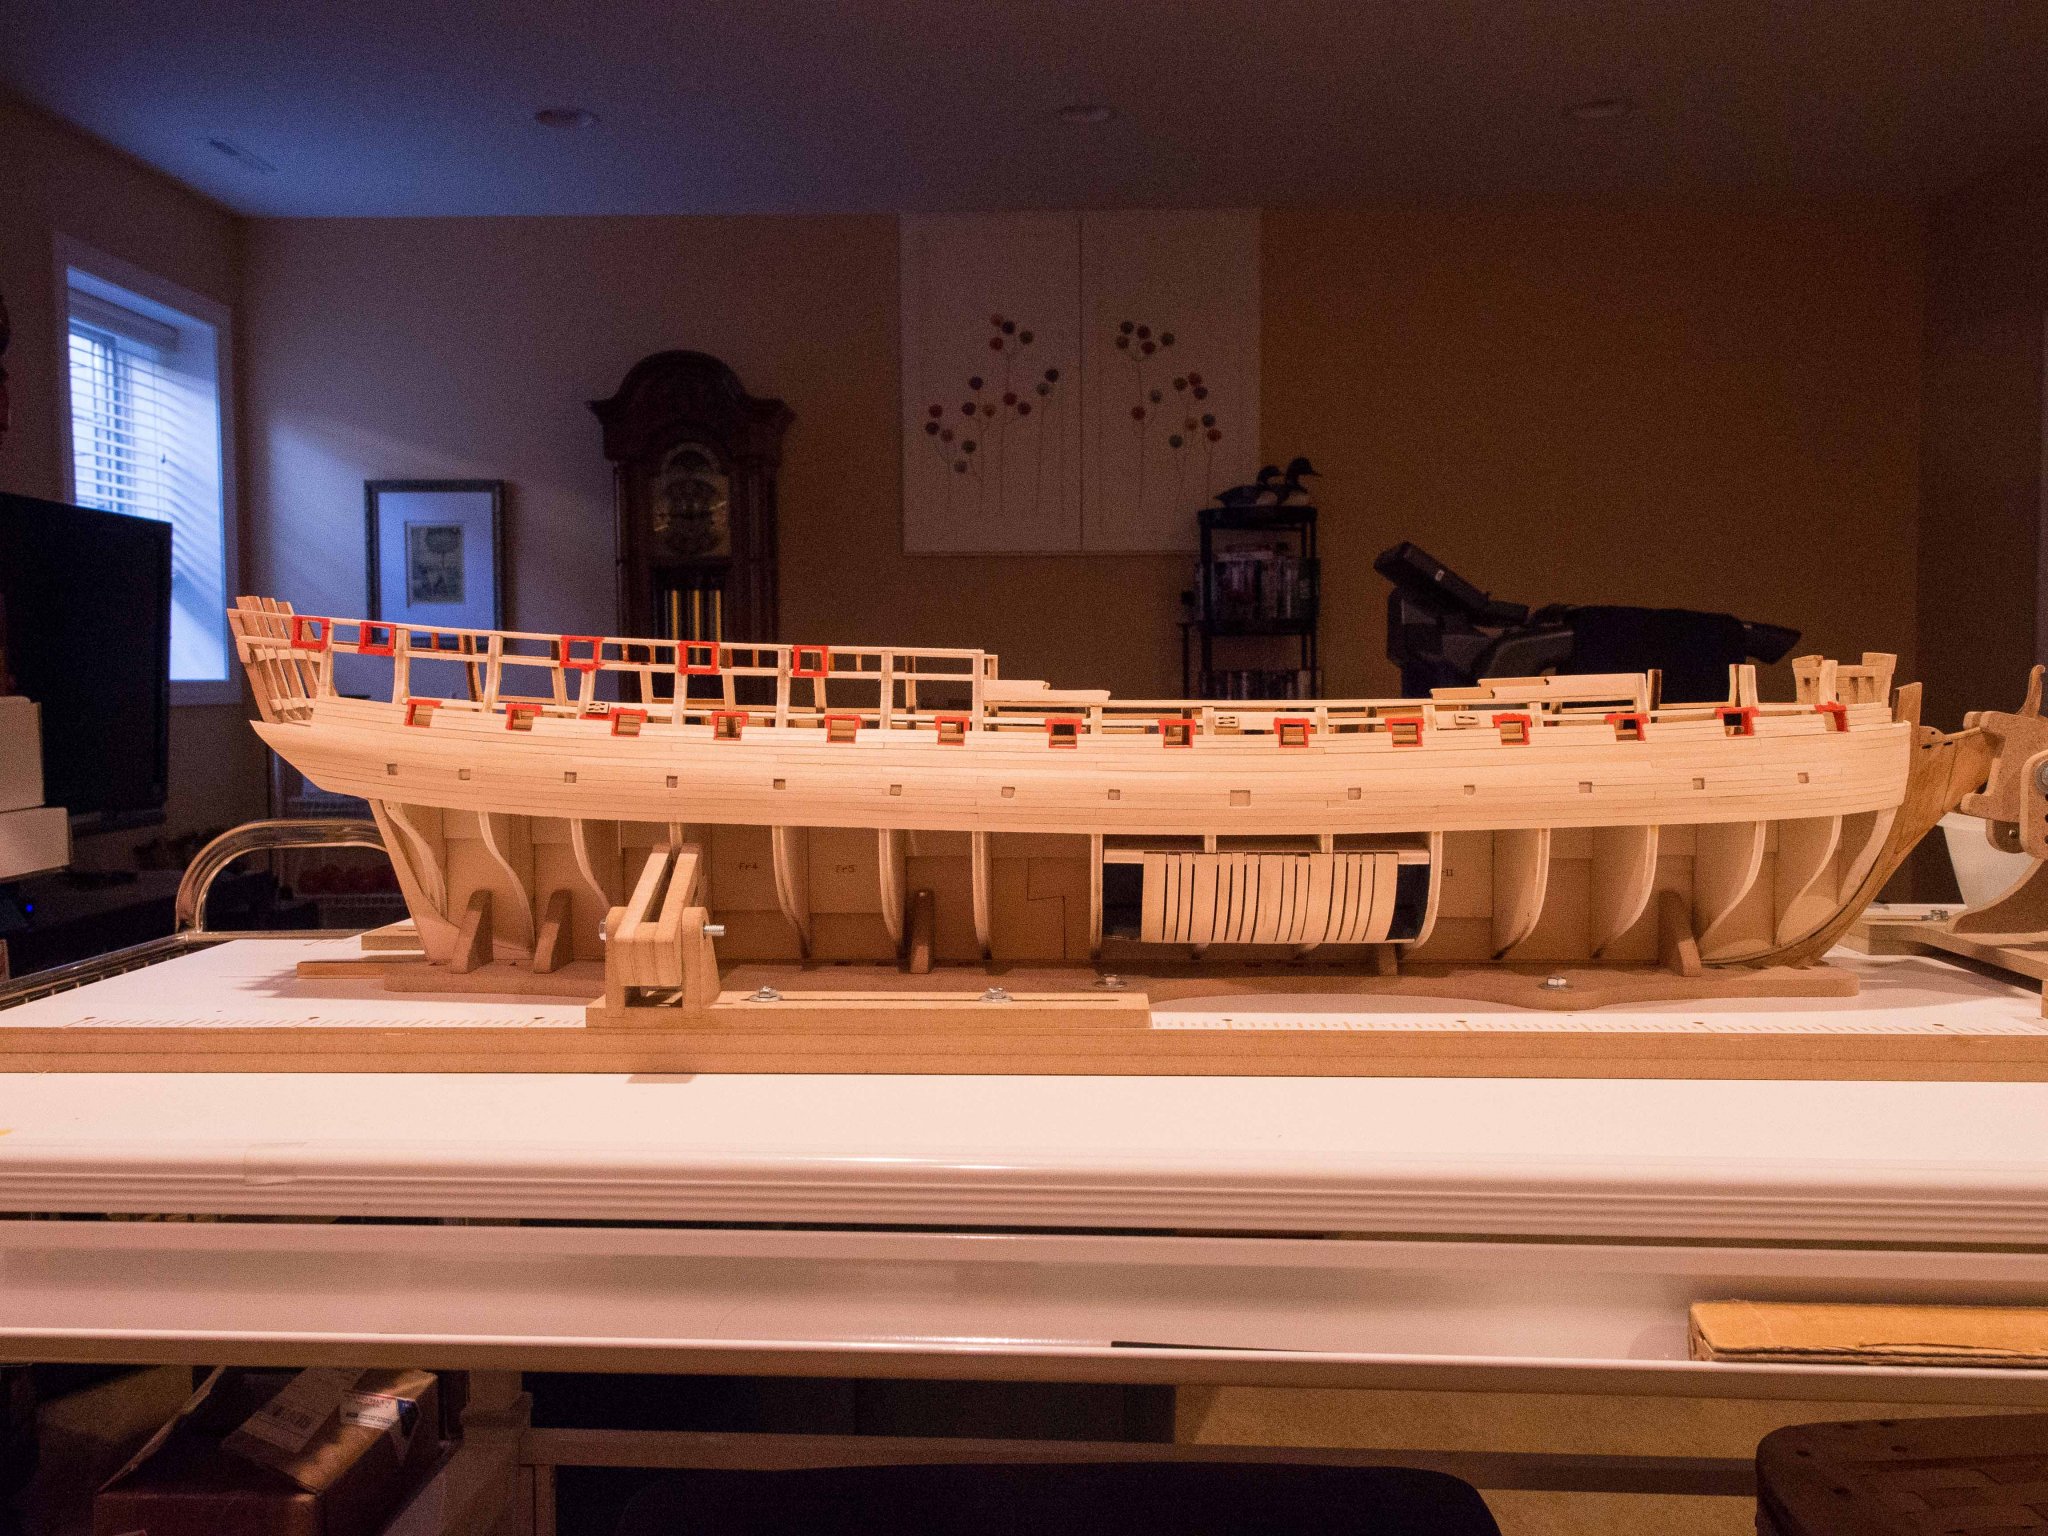
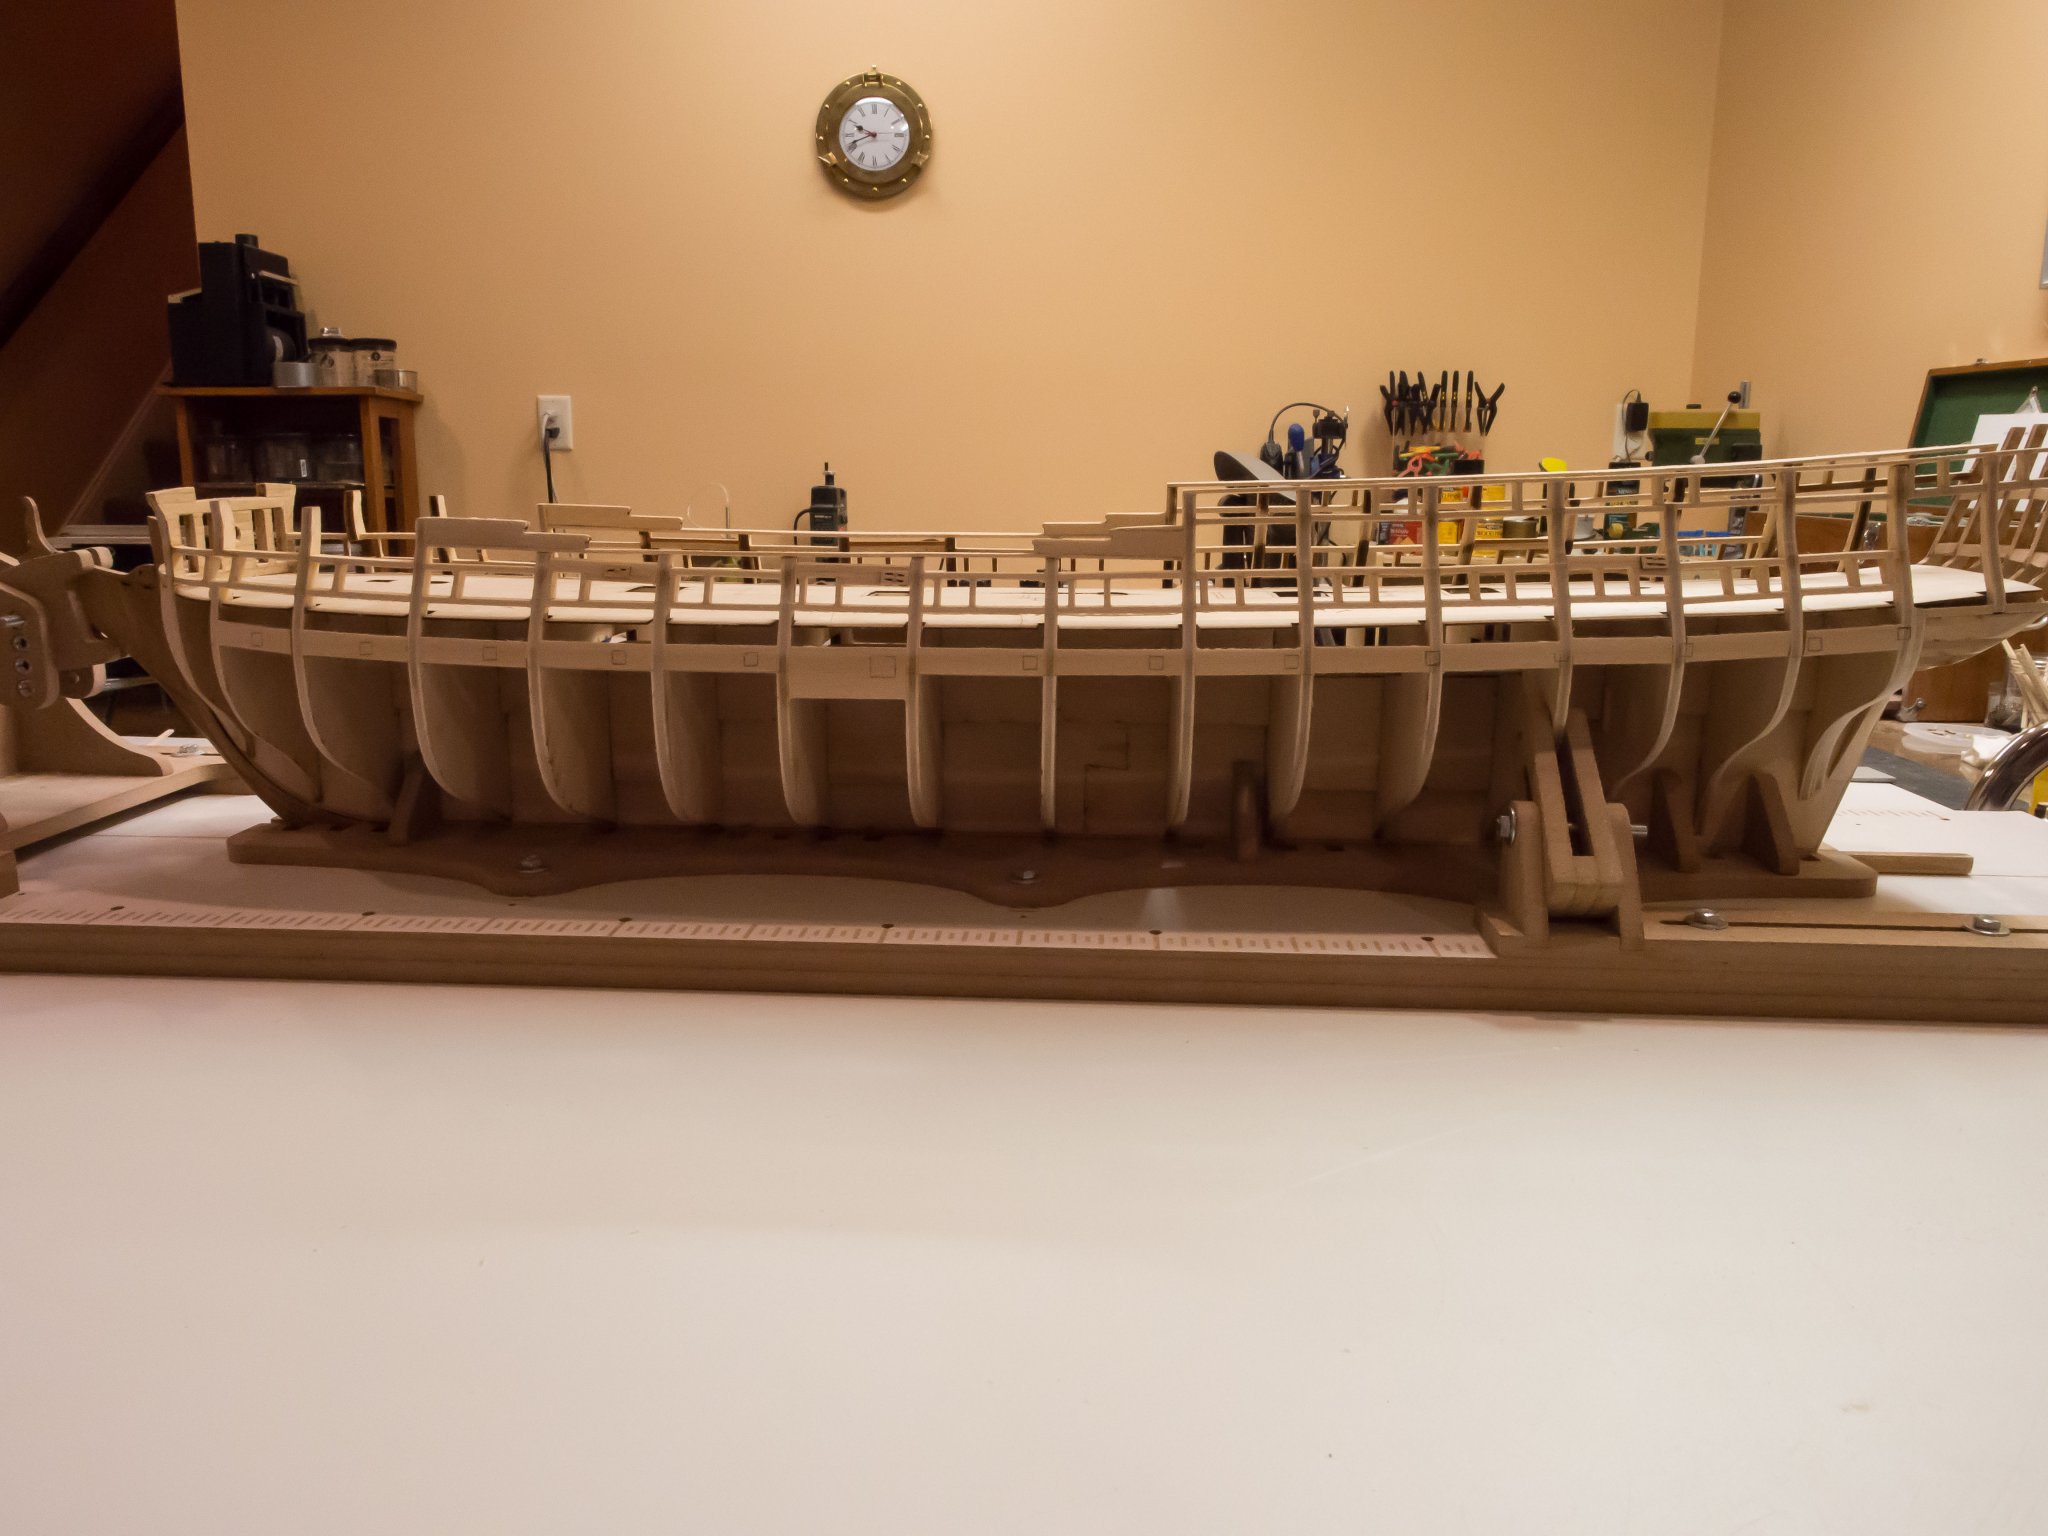
Finished the planking. Only did a couple of strakes per day so took a while. A fair amount of fiddling. Didn't (I guess) taper the bow strakes enough so ended up having some severe tapering and several drop planks added to the final 2 belts. In the stern, ended up with the same problem, probably due to the fact that I wrapped the black painted wales around the stern but didn't take that into account when I started the planking below the wales and blindly added widened planks per instructions.
Overall, met my goal of not requiring filler/painting so I'll be able to clear finish the planking below the wales. Far from perfect - the bow area is a bit uneven on both sides, but overall I'm grudgingly satisfied with the effort. Learned a lot, and were I to ever undertake a planking project of this size again (unlikely) I would do much better.
The light from above for the pictures highlights the imperfections.
Unfortunately, I'm now at a standstill. The stern post piece has a sizeable flaw on the edge that meets the planking leaving a visible gap, especially on one side. Since this piece will be stained, can't use filler, so I've requested replacement from Model Expo and will have to wait for that to arrive before I can fit the stern post and then turn this puppy over and get to work on the stern.
- jwvolz, CiscoH, Edwardkenway and 6 others
-
9
-
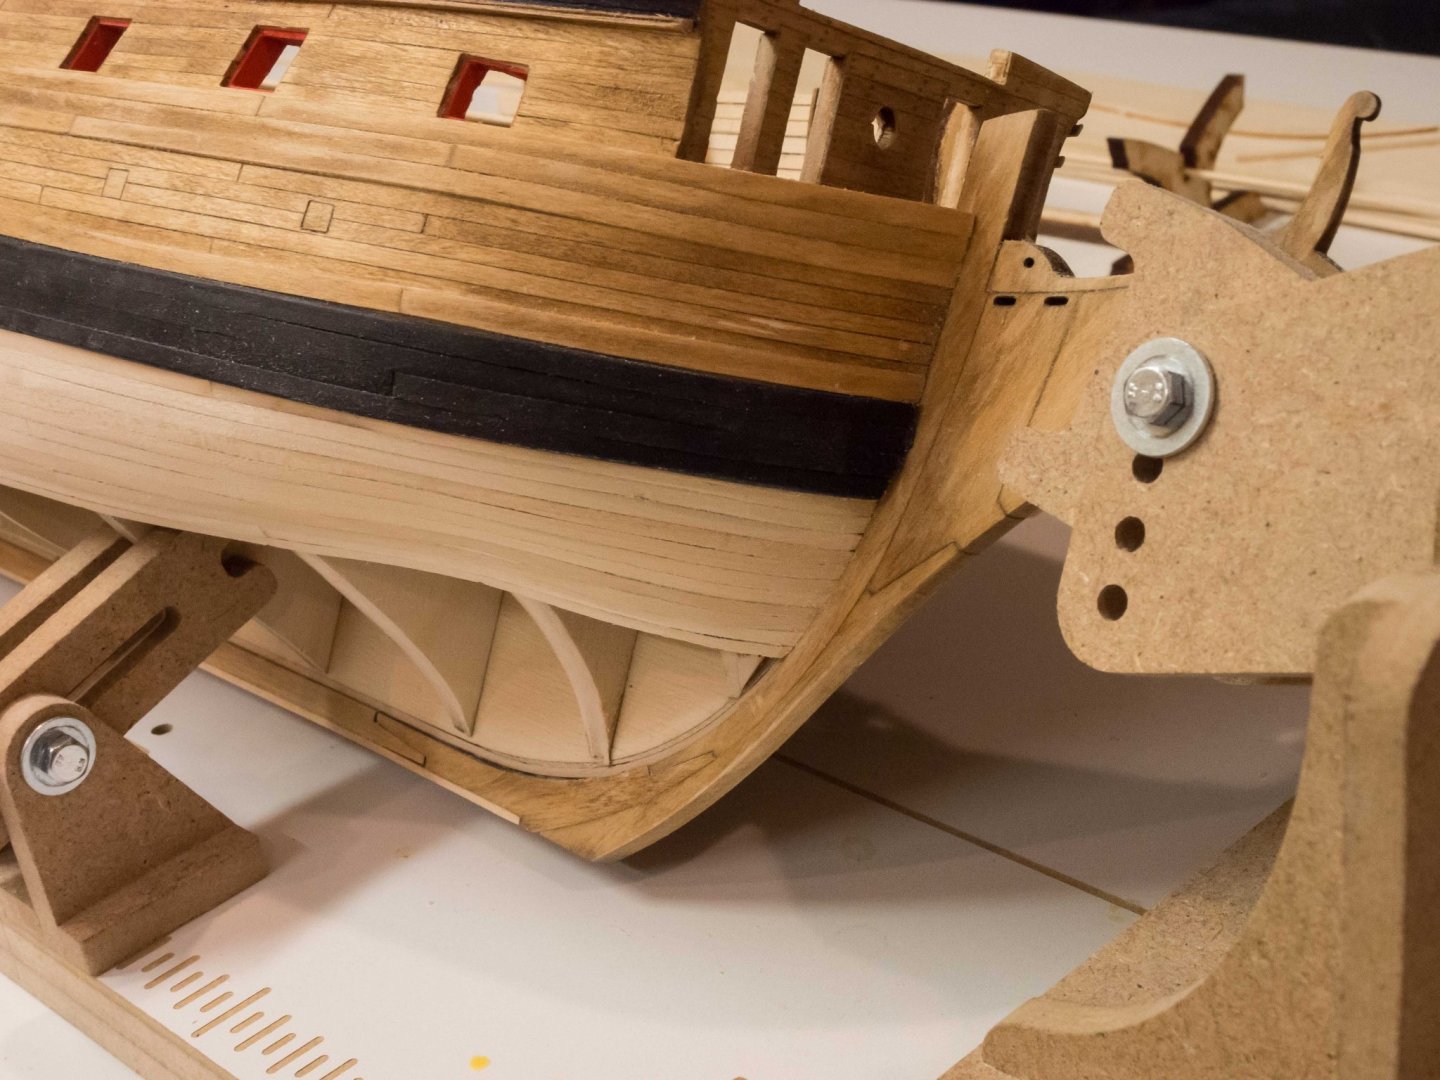
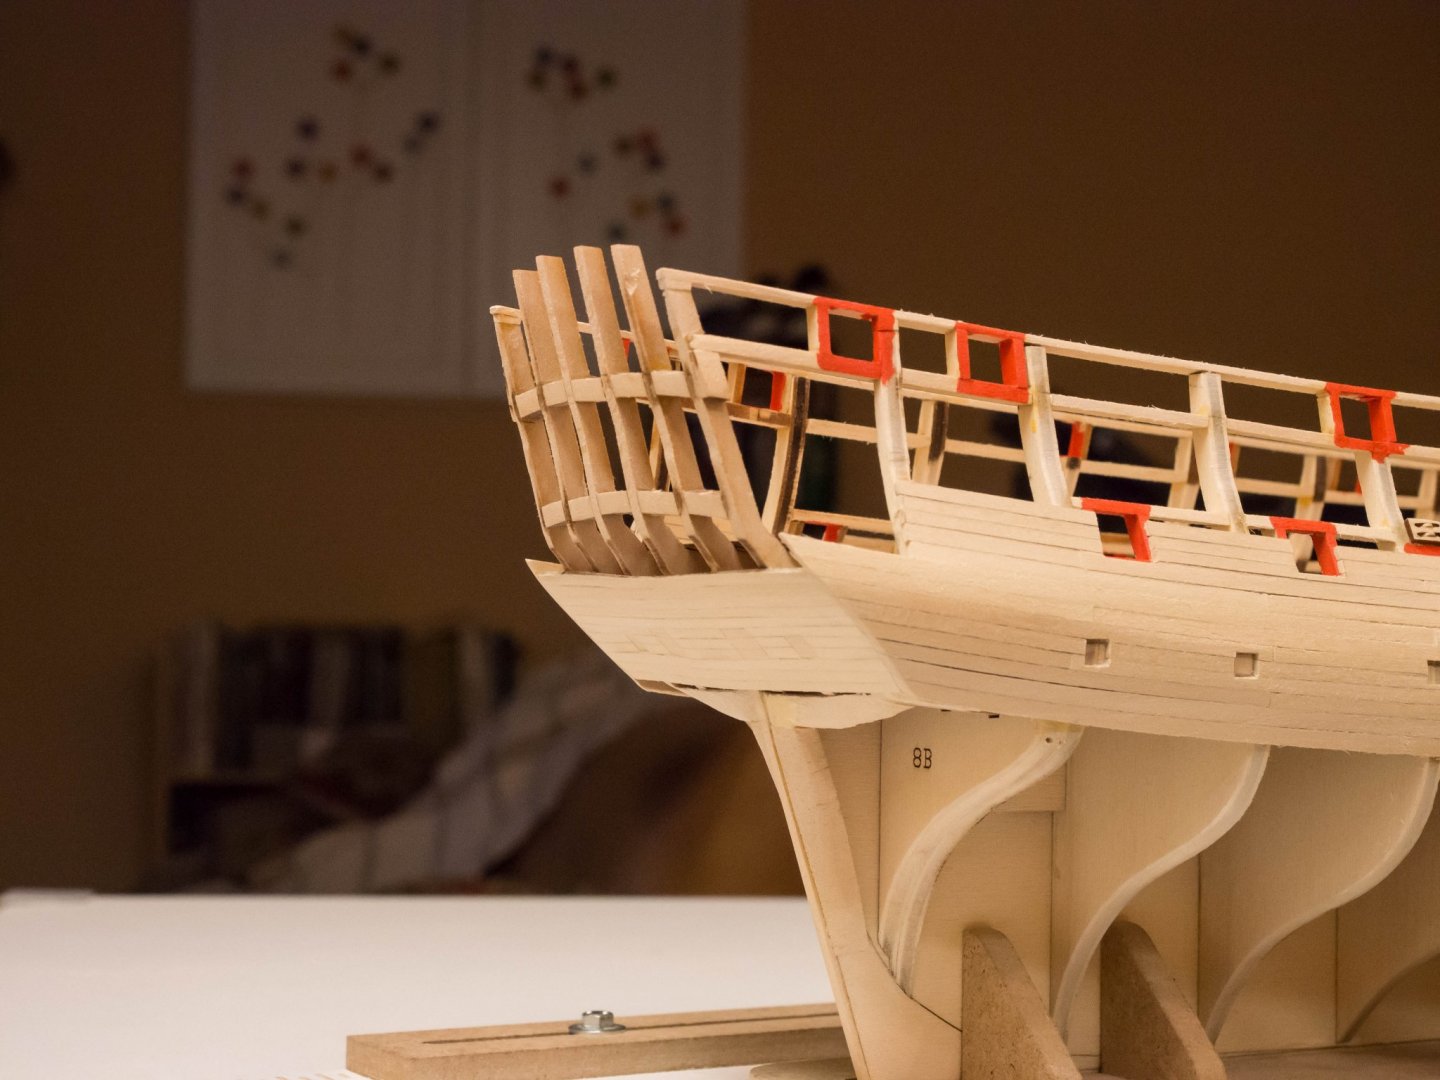
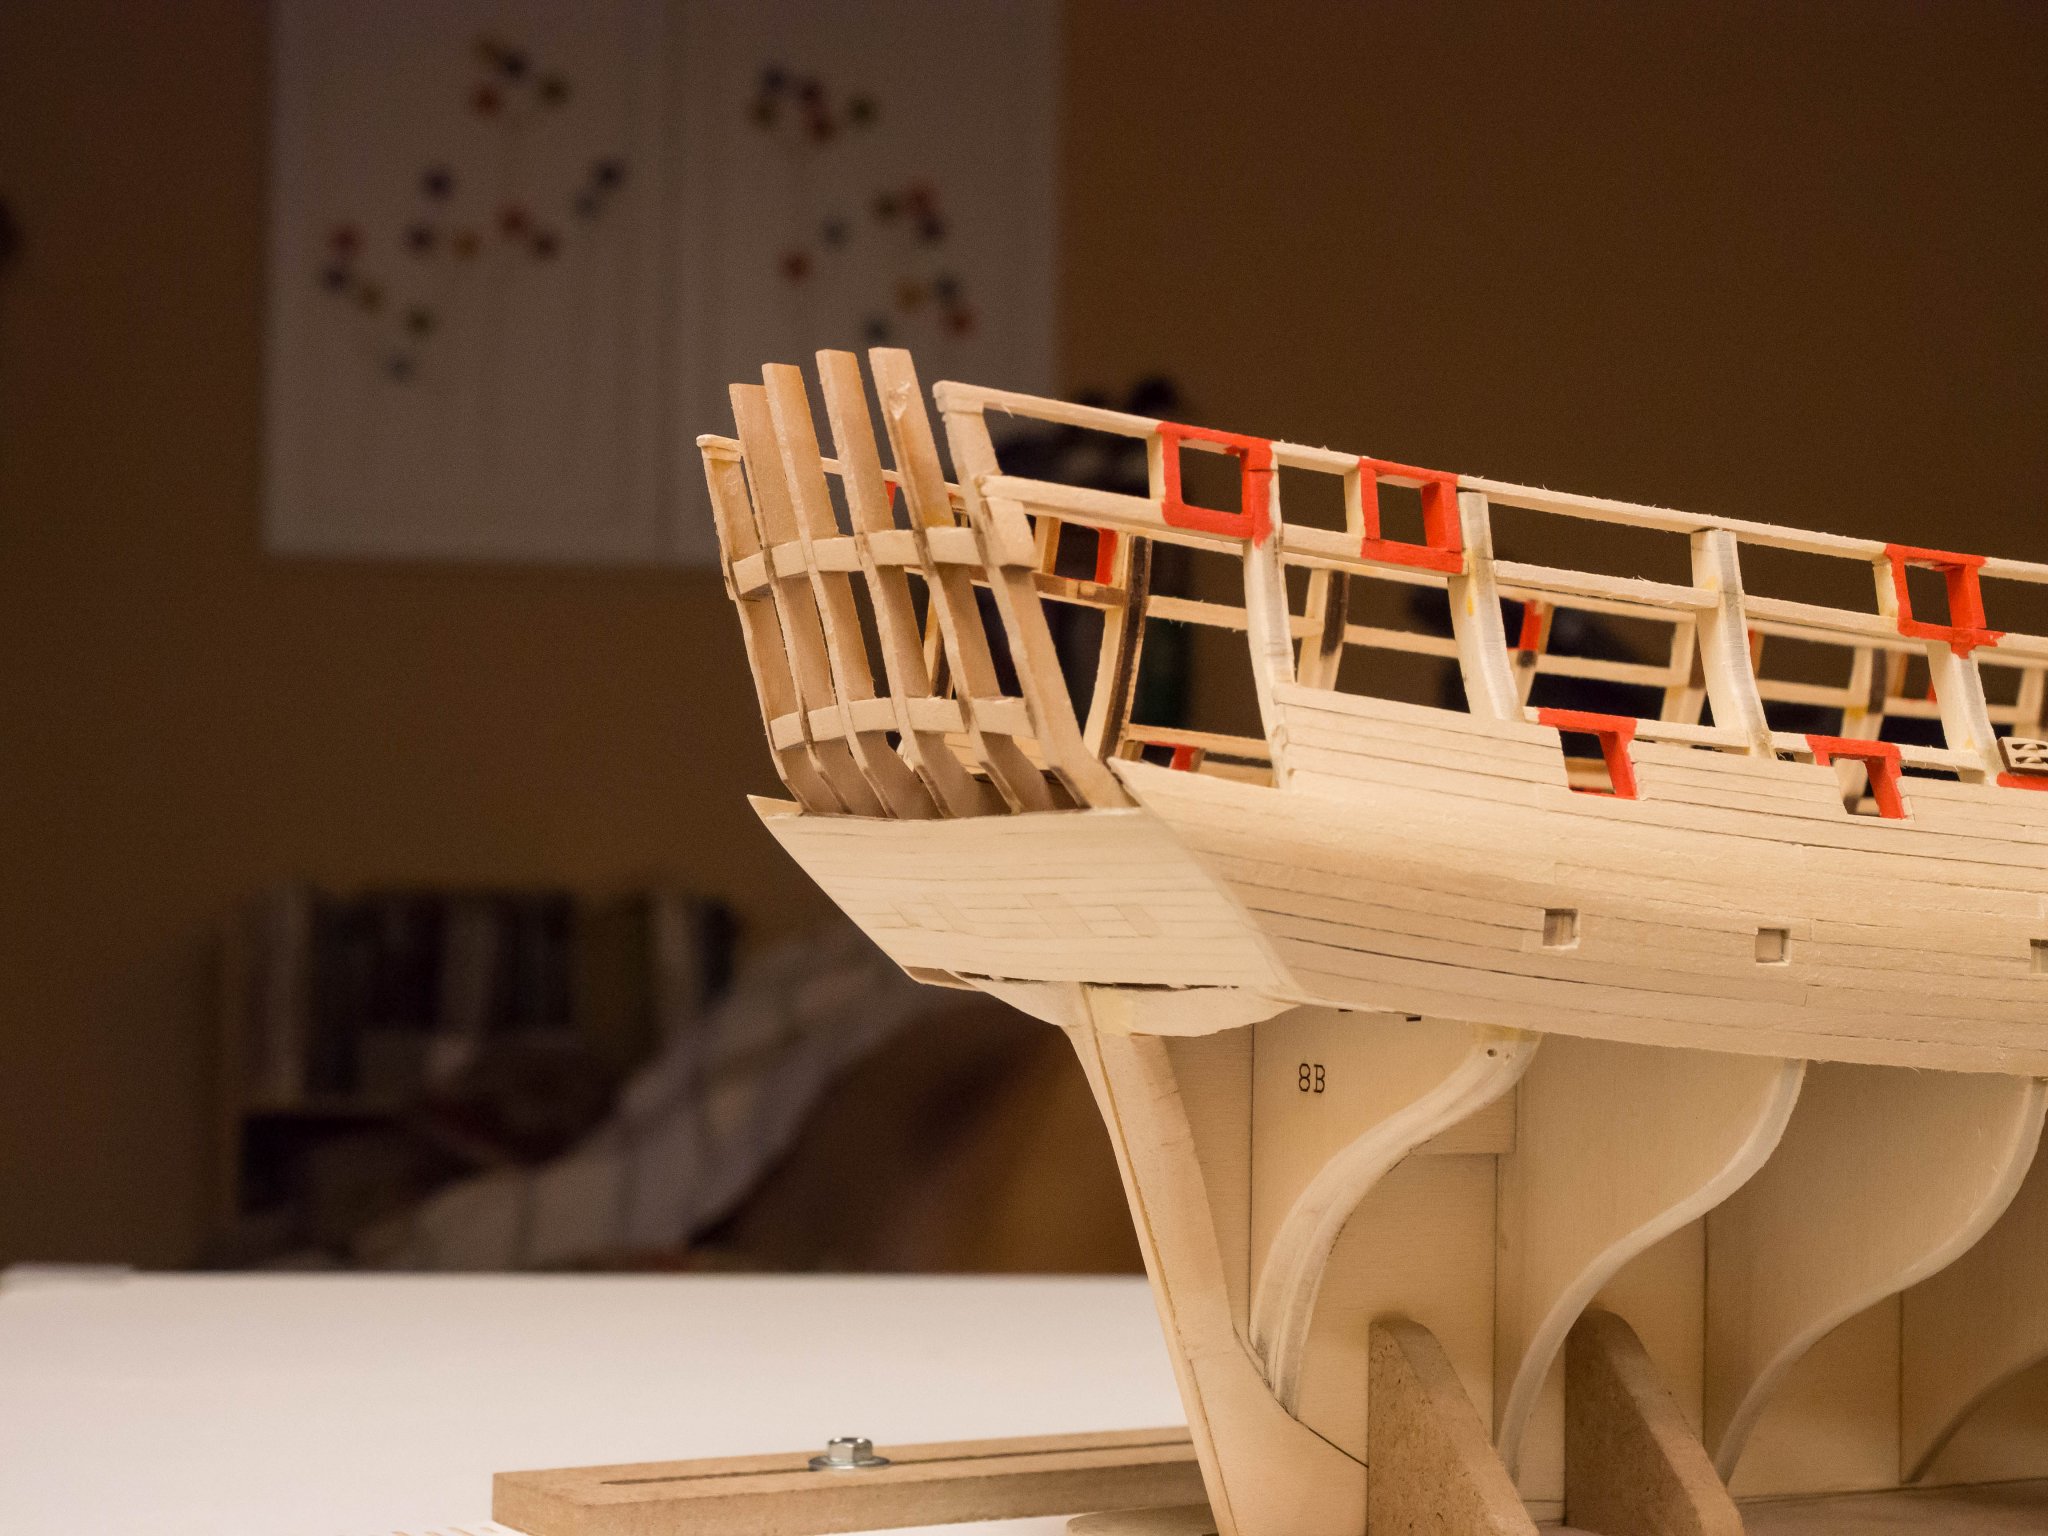
After planking 10 strakes below the wales on both sides, I inspected the bow configuration. I was very unhappy with the job, and determined that the line was wrong, especially with the planks diverging away from the foremost bulkhead. The problem appeared to be insufficient/downright wrong faring of the block in front of the bulkhead leading into the stem, which should have been gradually beveled better as it moves down towards the keel. The error forced a more bluff contour to the planks which then could not fully contact the first bulkhead.
Ugh.
So, with a heavy heart, I removed the foremost planks to prepare for a better faring job so that the planks lie appropriately. I wish I hadn't talked myself into "it'll be OK" after doing the port side, since I now have two sides to fix. At least I have really learned something from this job. We'll see how the repair goes. I'm happy with the rest of the planking going aft.

-
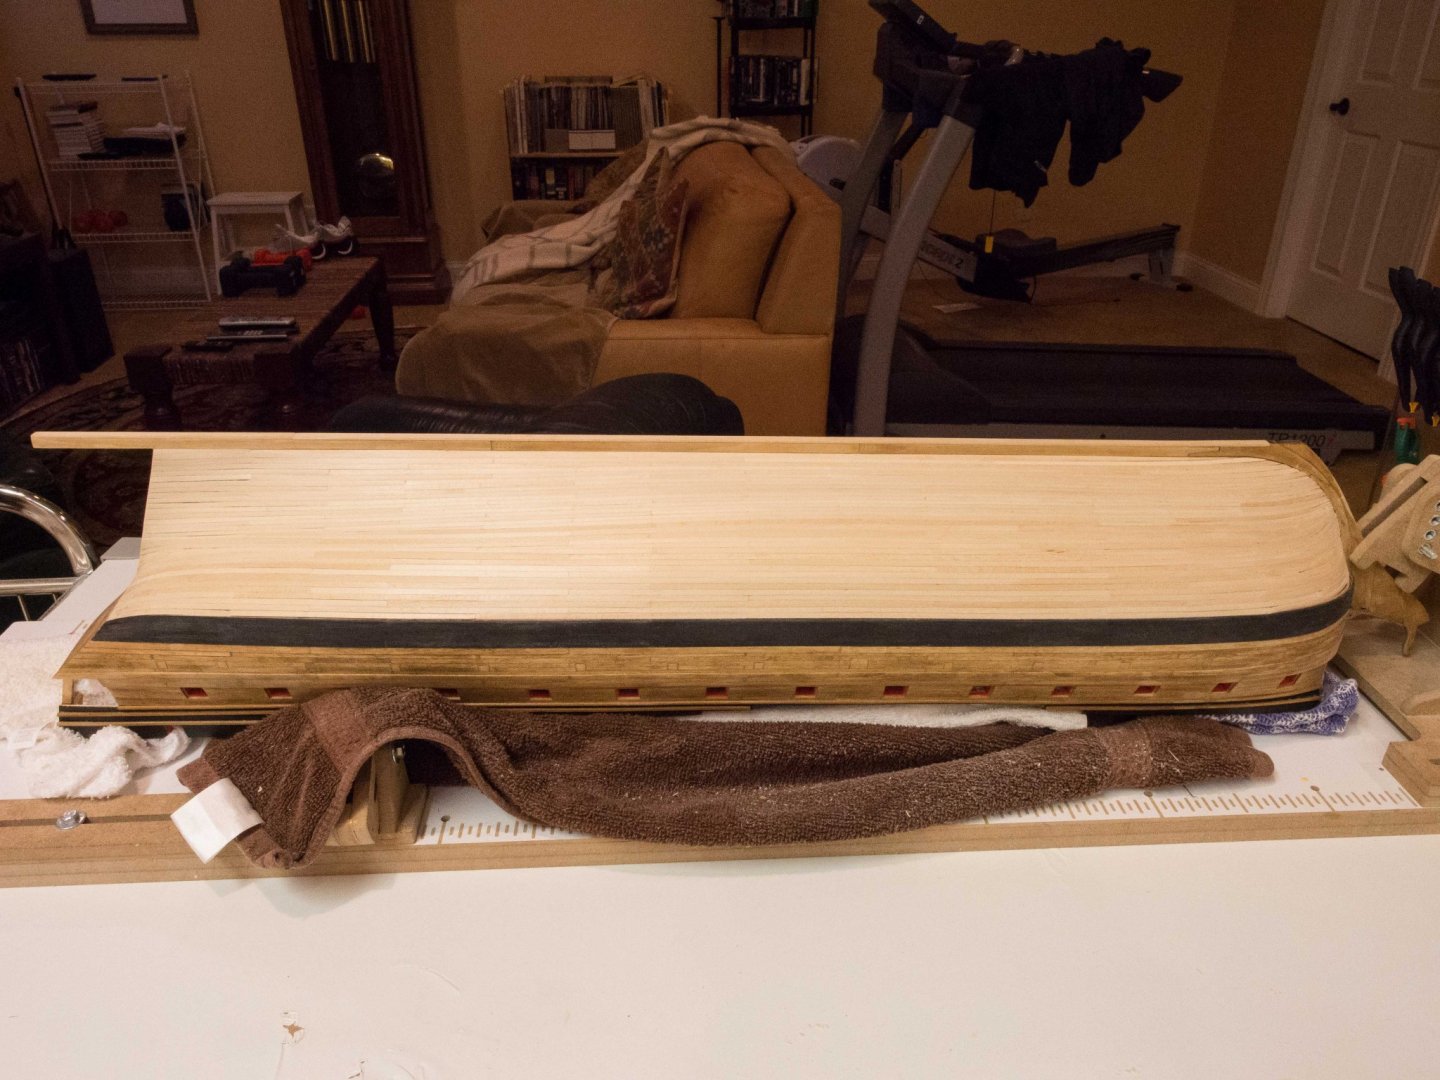
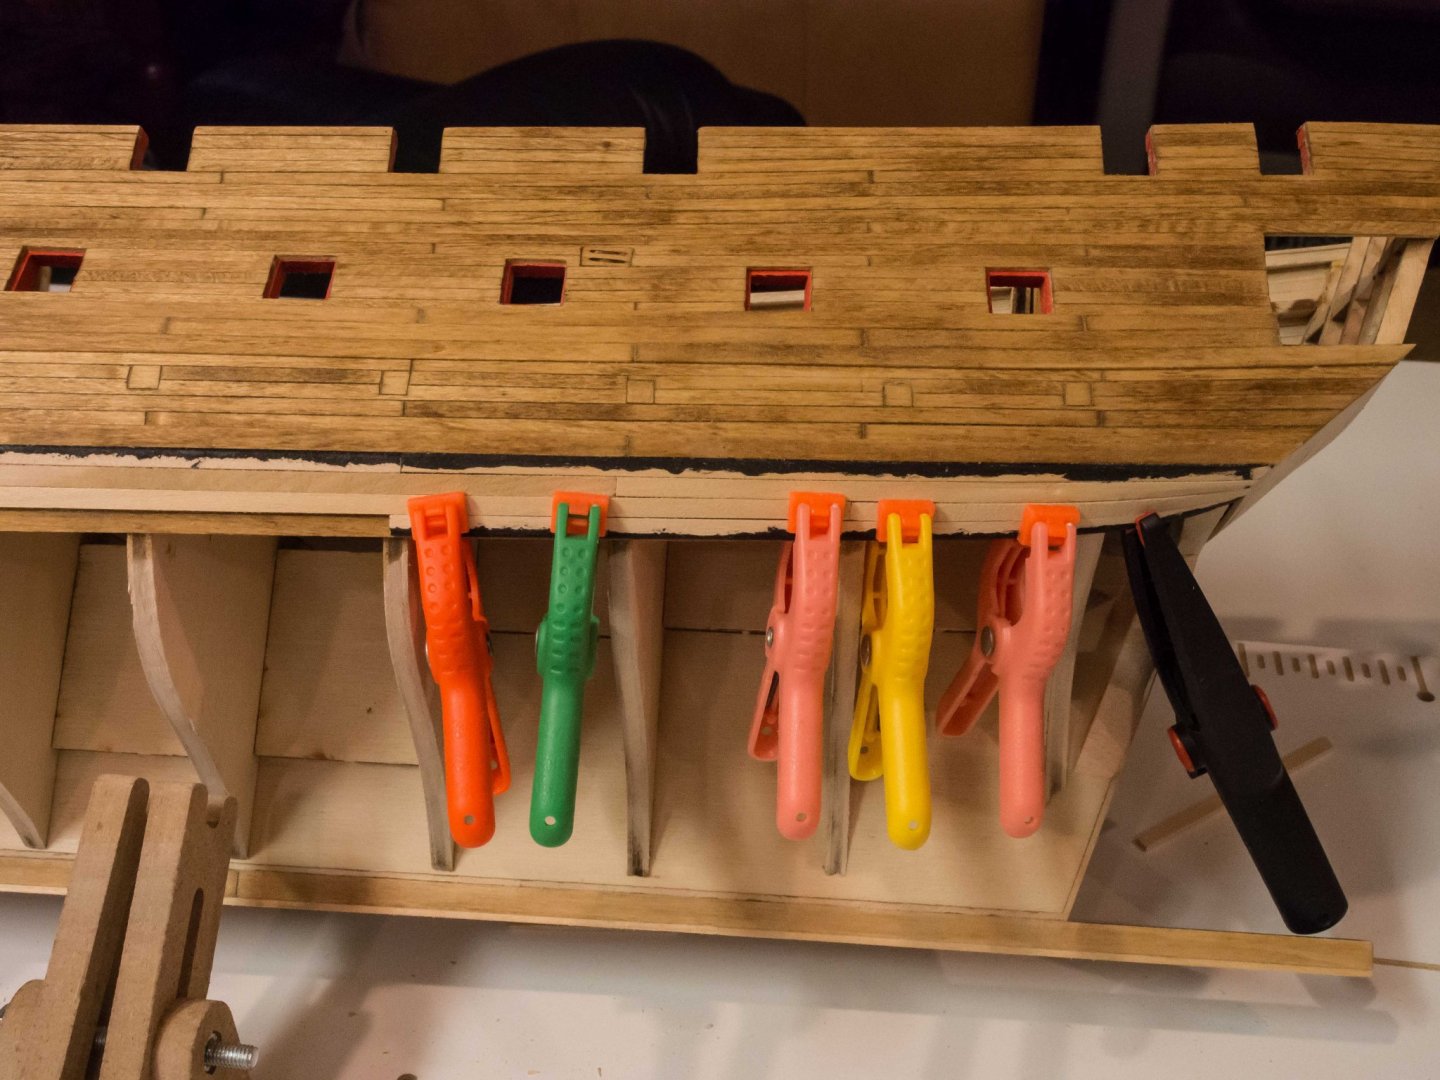
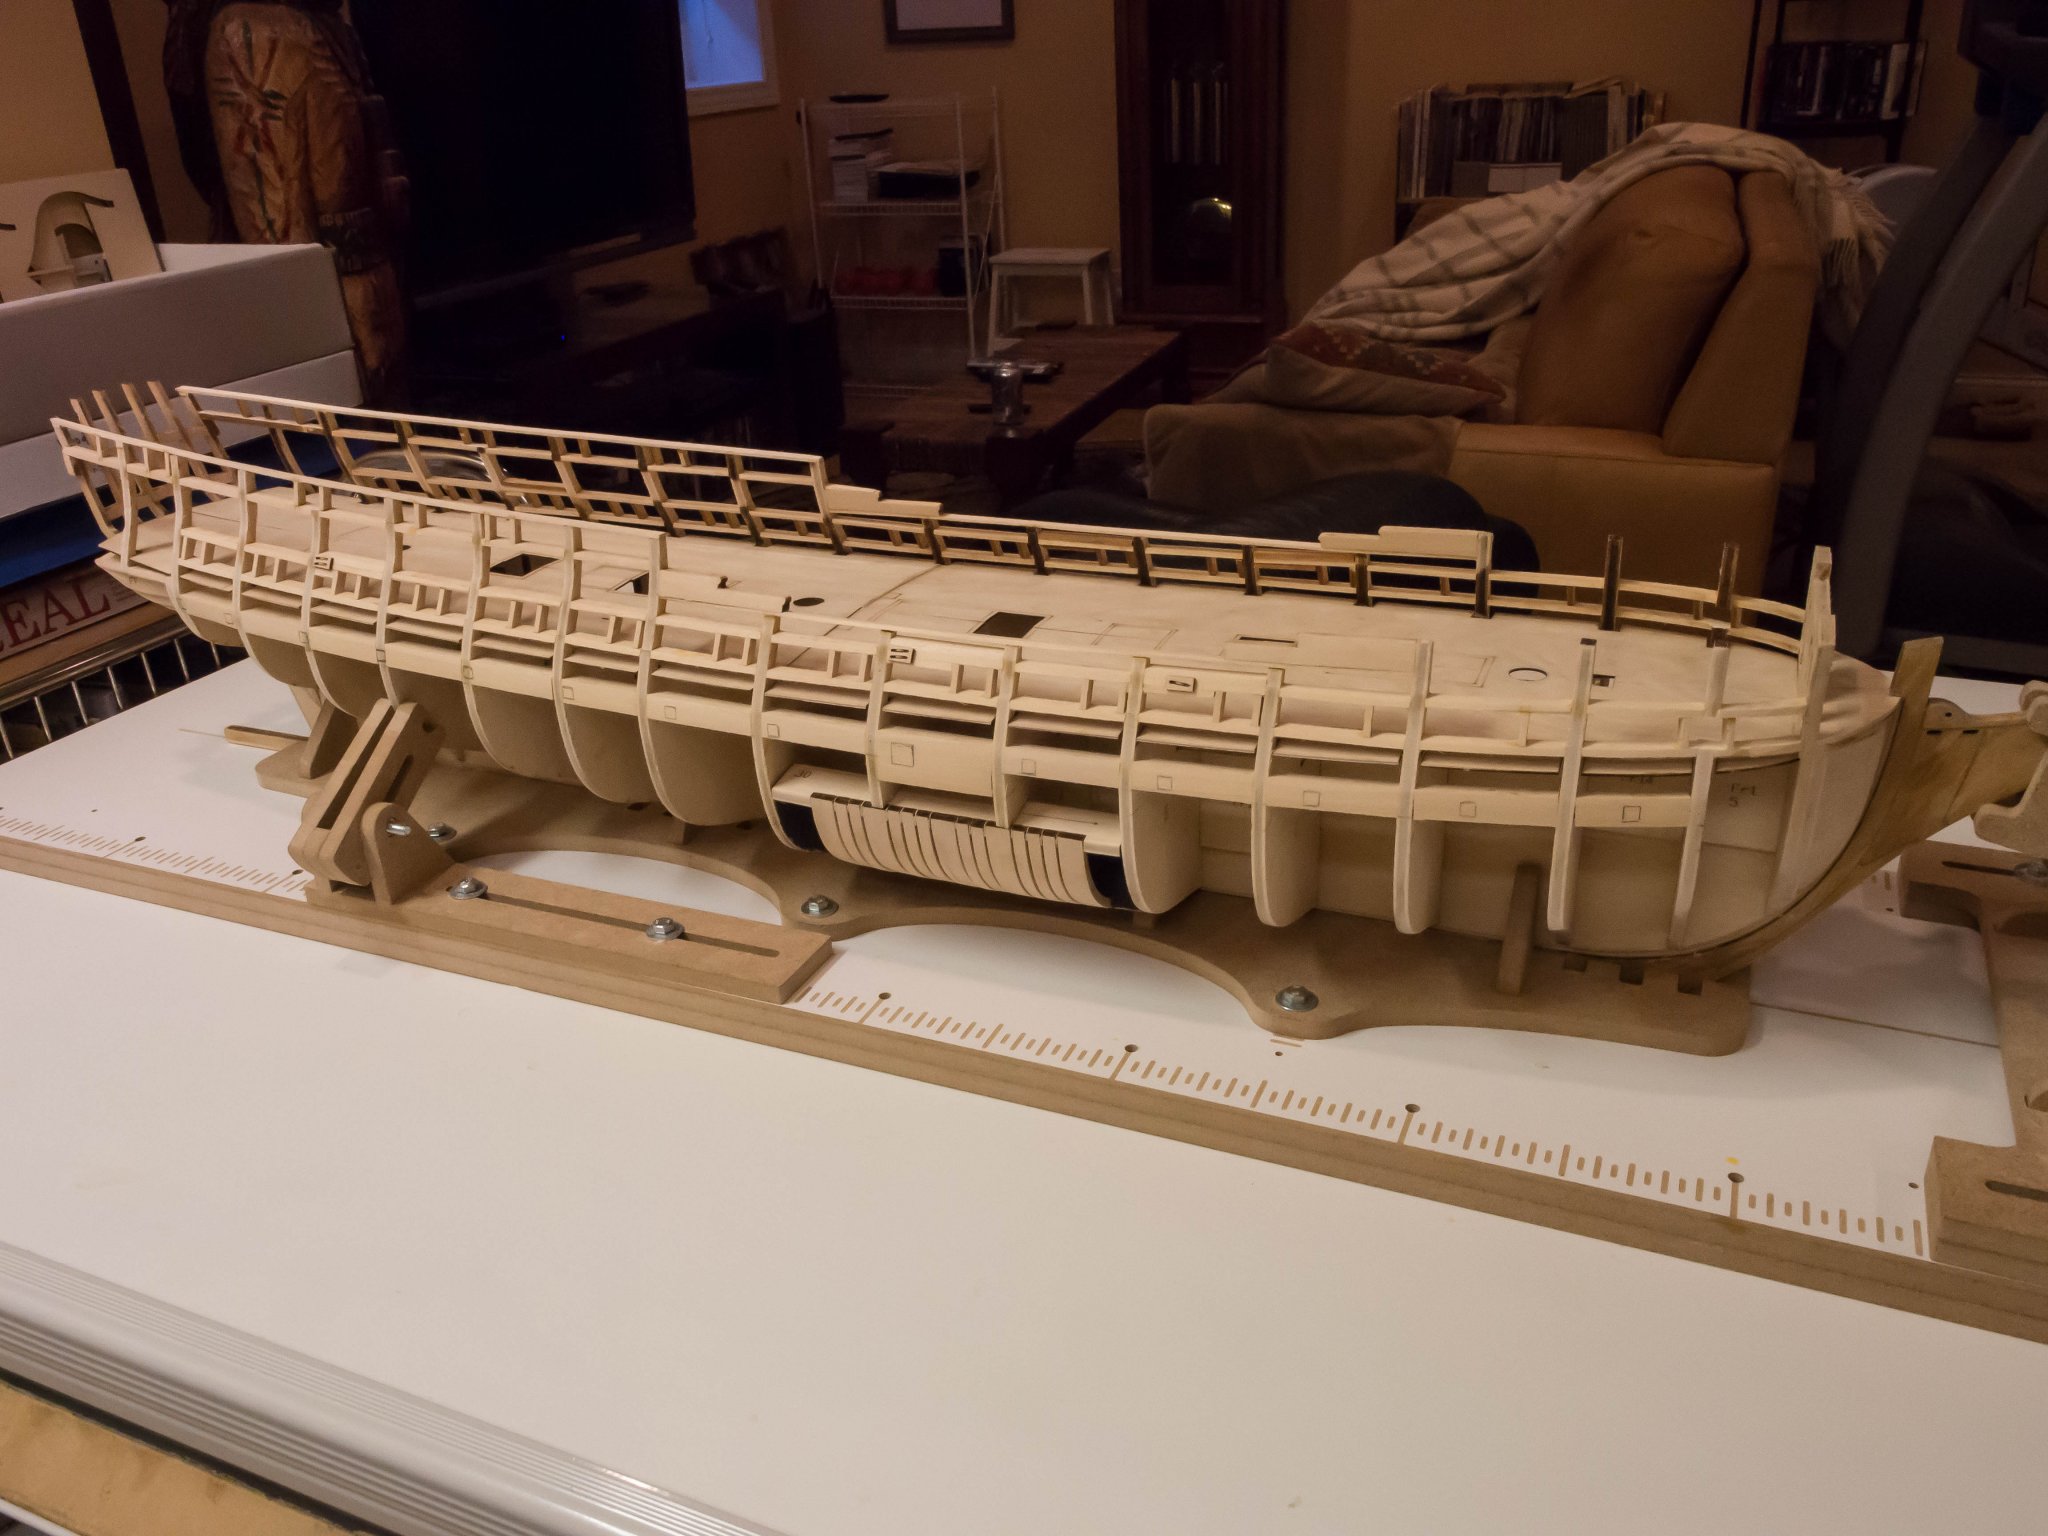
Finished port side first planking belt below the wales.
Only doing perhaps 2 strakes per day - each plank, especially at bow and stern - is a mini project with bending, twisting, beveling, etc, to try and get it neat enough that no filler or painting over filler required. Would like to be able to just give a wipe on poly finish to these planks. The edgewise bending jig included in the kit is a real life-saver!
Bow especially hard and a bit wonky on this side, but overall looks ok. Have given the planks a preliminary sanding to make sure of the look and fit. Will clean up the meeting of planks to the stern counter later.
Now to turn her over and repeat on the starboard side. Decided to really take my time with the planking to try to get it right. It's easy to get tired of it and rush but so important for the final look of the model.

- GrandpaPhil, mtbediz, JpR62 and 3 others
-
6
-
Just finished the starboard side above the wales.
Now ready to begin planking below the wales. My goal is to go slowly, treat each plank as a project, and strive for an acceptable look without having to resort to filler and painting. We shall see.
Reasonably happy with the look so far.
Measuring midships yields 33 1/8 “ planks.
Plan 11 in initial belt in this building board configuration on each side before turning her over to work on the bottom belt.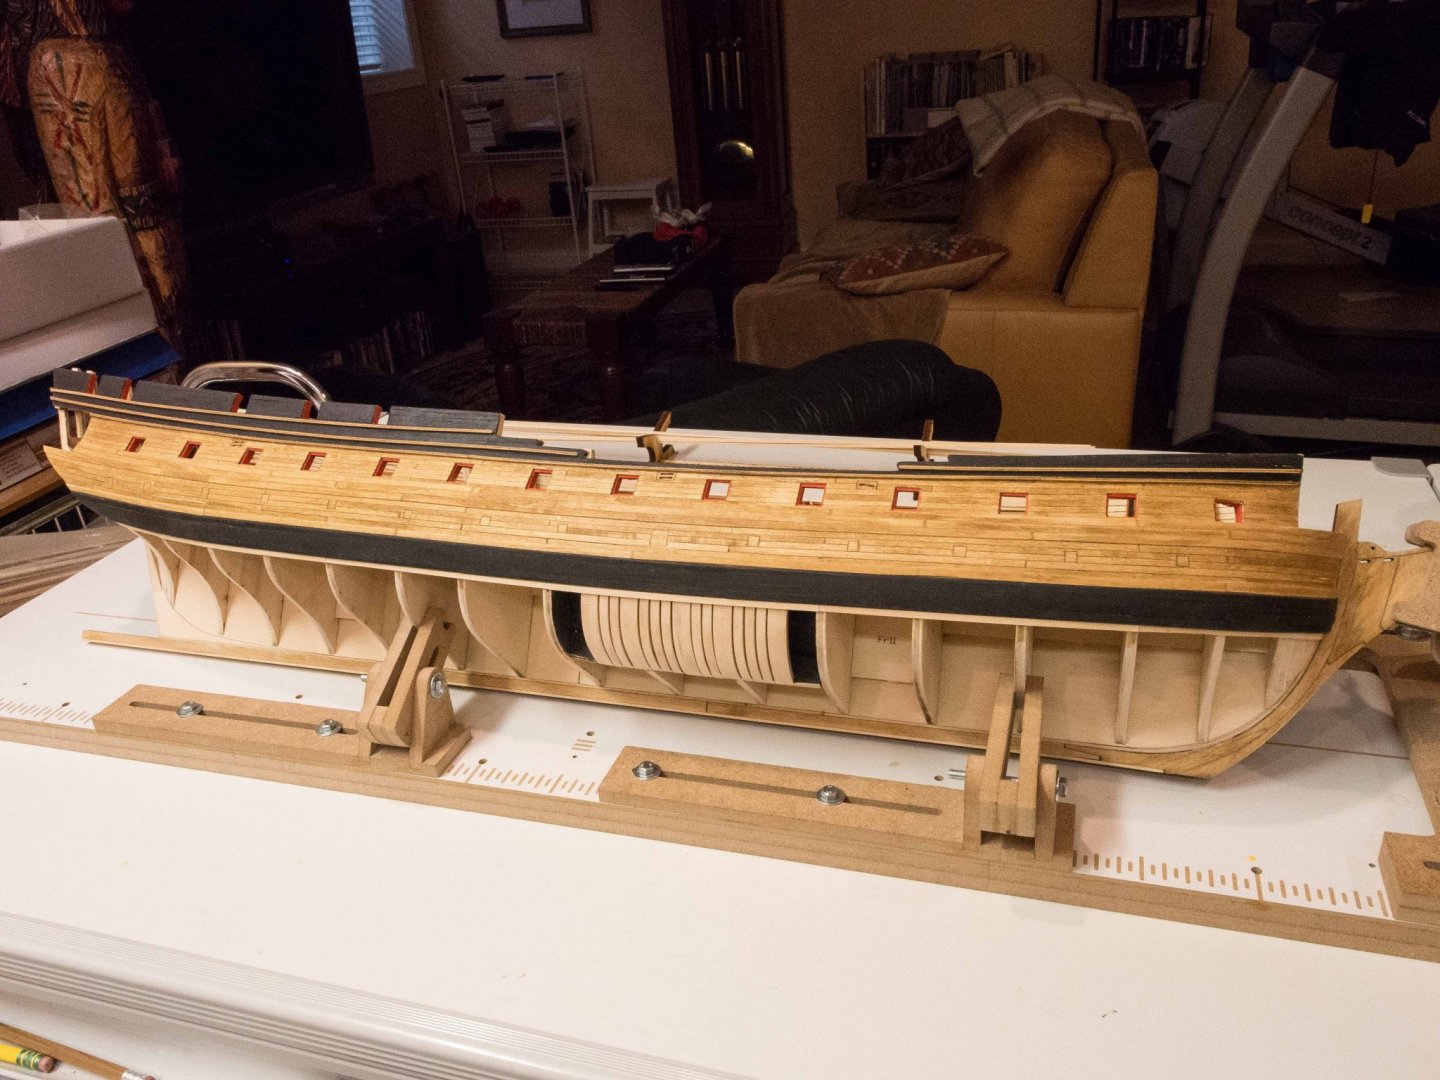


- Edwardkenway, mtbediz, Tigerdvr and 5 others
-
8
-
Finished painting and molding strips on the port side.
Reasonably happy with this so far.
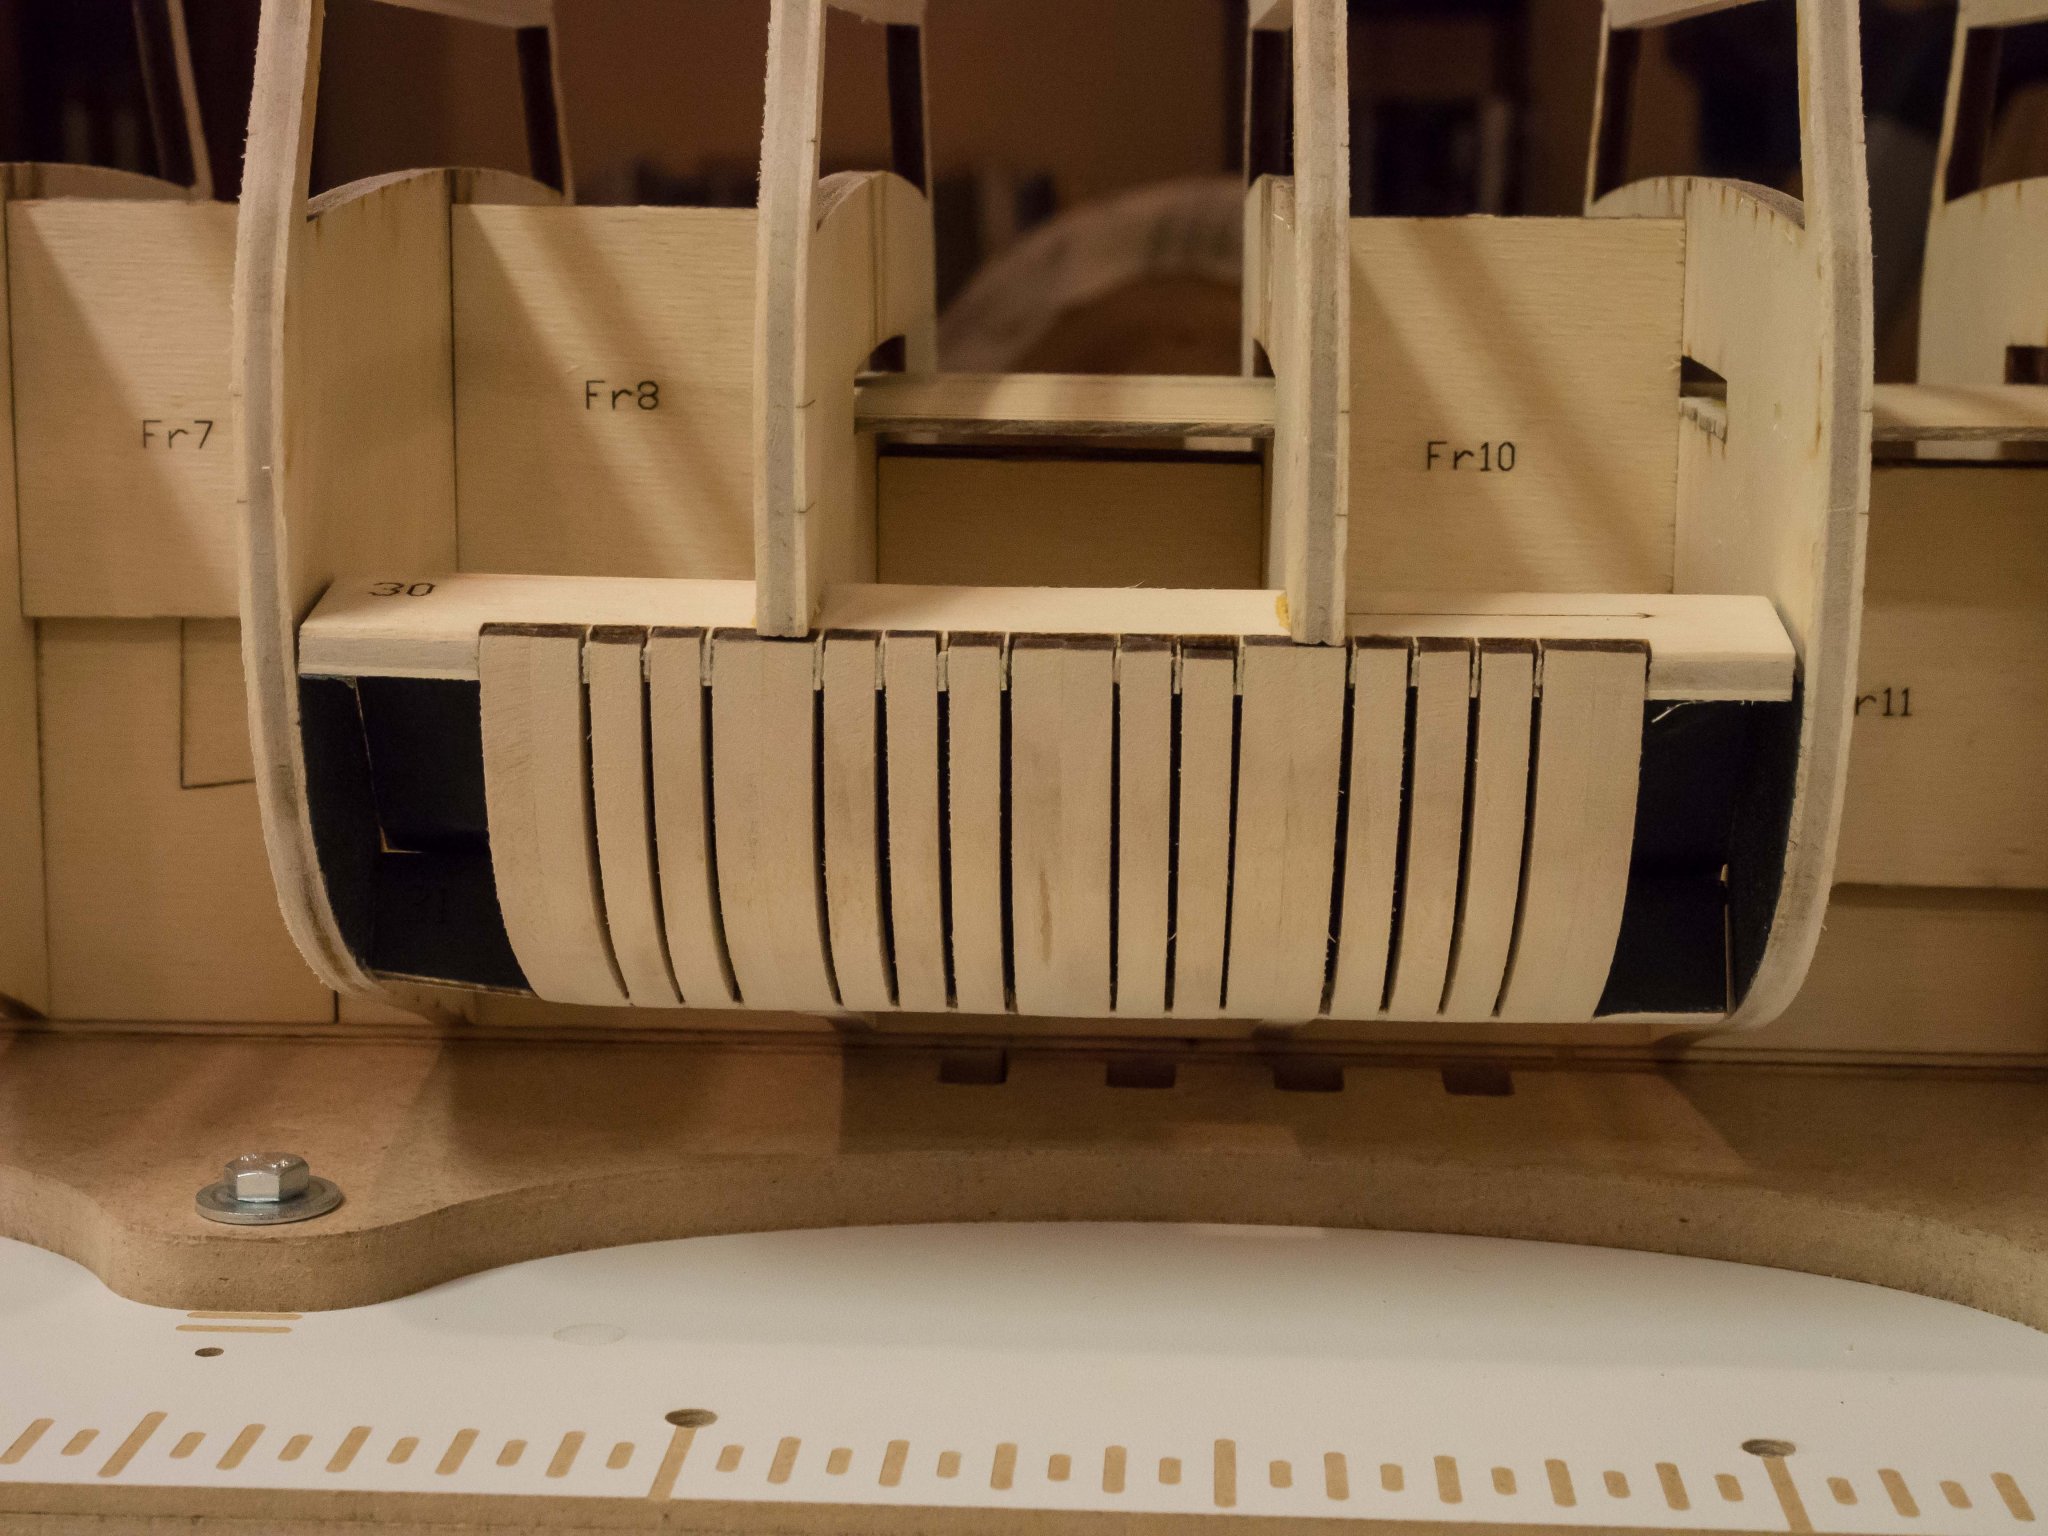
I do need help: Looking ahead to planking below the wales I see the strakes at the rear are run off the frame and sanded smooth prior to adding the stern post which, according to the instructions "will be added later"
The finished pictures of the planking below the wales before beginning work on the quarter galleries and the stern, however, show the stern post in place. I can't find in the instructions where and exactly how it is added, which seems to involve making an appropriate hole in the counter.
Am I just missing it? What page in the instruction book covers this?
Meanwhile, the pictures of progress:
- JohnB40, JpR62, Edwardkenway and 7 others
-
10
-
Finished the channel wales doubling and the "black strake" and stained everything (on one side).
Now placing the main wales that will be black. I'm pre-painting the beveled edges so that I don't have to do any touchy taping/brushwork to get a nice sharp border.
I did the aft end first since the bends/twists involved were the most intimidating so I went there first.
As Mark Twain supposedly said, "Eat a live frog first thing in the morning and nothing worse will happen to you all day." Or something to that effect.
When these are done, I'll sand and then finish the black paint, and finally place the first 1/8 x 1/16 unstained plank below the wales.
Then I think I'll tape to just above the sheaves, and paint everything above black. Once I then place the molding strips including the long one at the border of stain and paint, I'll turn this thing to the other side and repeat.
-
Finished the planking above the wales.
Cut out the quarterdeck gun port lintels and touched up the red paint.
Did a fair amount of sanding of the planks. Almost ready to (gulp) stain what's been done so far. A few of the strakes are a bit rough and will require a bit more sanding before that.
Will paint when I'm ready to put on the trim pieces - likely after I add the 3 lower wales and double up all the wales.


- Script, Tigersteve, Dwight and 7 others
-
10
-
Thanks for the reply.
Looks like you tapered the ends a bit too? -
Ok I need help.
Have I screwed up?
I have finished planking up to the top.The black strake and wale strake below it come just to the lower edge of the counter at the stern. See picture in immediately above post. Now I am instructed to lay 3 more 3/8” wale planks before doubling them.
Where do the stern ends go? No picture to help.
Do they twist to meet the lower Horizontal edge of the counter? Or just extend in line with the strake above? Can’t see how that latter would work. -
Slowly working onward. Spending perhaps 2 hours a day - despite "sheltering at home" as a bona fide old fart I have lots to do and this complex model is only one of them.
Thanks for the comments. I'd rate myself an intermediate modeler/craftsman at this point, and this model is a bit of a challenge. Some of the beautiful ones on this site are an inspiration.
My rabbets around the cannon ports are turning out a bit generous, but I can live with that. About 1.5 mm difference in the plank heights side to side, except for the front which is dead even. Not enough for me to worry about.
The 1/8 x 1/16 strips are not as uniform as I would like, resulting in some unevenness. The lower strakes up through the channel wales have had at least a rough sanding. The planks above that have not yet and therefore look a bit uneven, almost all of which is edge elevation variation rather than actual gaps and will look much better after sanding.
Here's where I am now, just enclosing the gun deck cannon ports. I'm doing both sides simultaneously, 1-2 strakes at a time.

-
Thanks Chuck.
This model has intimidated me since I added it to my stash several years ago. I'm glad I didn't start it until I had more experience.
-
Finished Chapter 4! A lot of work just on the hull bones with this model and a lot of sanding.
I'm only working on this 1-2 hours per day so things move along slowly. A moment of panic when my Byrnes sander started making a rubbing noise and stalled. I couldn't see anything stuck in it but whatever it was responded to a few rapid starts and stops and now working as silently as ever. Quite a relief as that is my mainstay tool, along with a small hand-held Dremel that was very useful to rough sand for faring.
Not real pleased with the crispness of the sweep port outlines. It was surprisingly difficult to neatly cut out the openings from the template and then neatly trace perfect squares. I'll have to make up for that with the planking I guess.
No other real issues yet - we'll see how the planking above the wales lines up after I paint around the cannon ports.
I am already not looking forward to sanding the inside of the bulkhead extensions/lintels/sills to taper to the required thickness (or thin-ness) at the rail.


- Dwight, JpR62, CaptMorgan and 5 others
-
8
-
Finished the sills and lintels! No real problems. For the sills, I put them in in pairs (port and starboard) and trued them to level with the spacer 3/8" square strips spanning both lintels and clamped to them while the glue set.
I had to adjust the height of the last two uprights to get the cap strip for the quarterdeck lintels to run true so that the ports would be symmetric, especially the upright supporting the "zz"strip which for some reason (operator error I'm sure) came up short.
Next some sanding to fair the new woodwork to the hull exterior, and then on to the uprights.
I have never seen a kit with this degree of excellence in the instructions! Thanks Chuck.
It's starting to look like a ship!

-
Received my replacement false deck pieces. Really appreciate MS service!
Only working on this an hour or two a day due to other projects/interests.
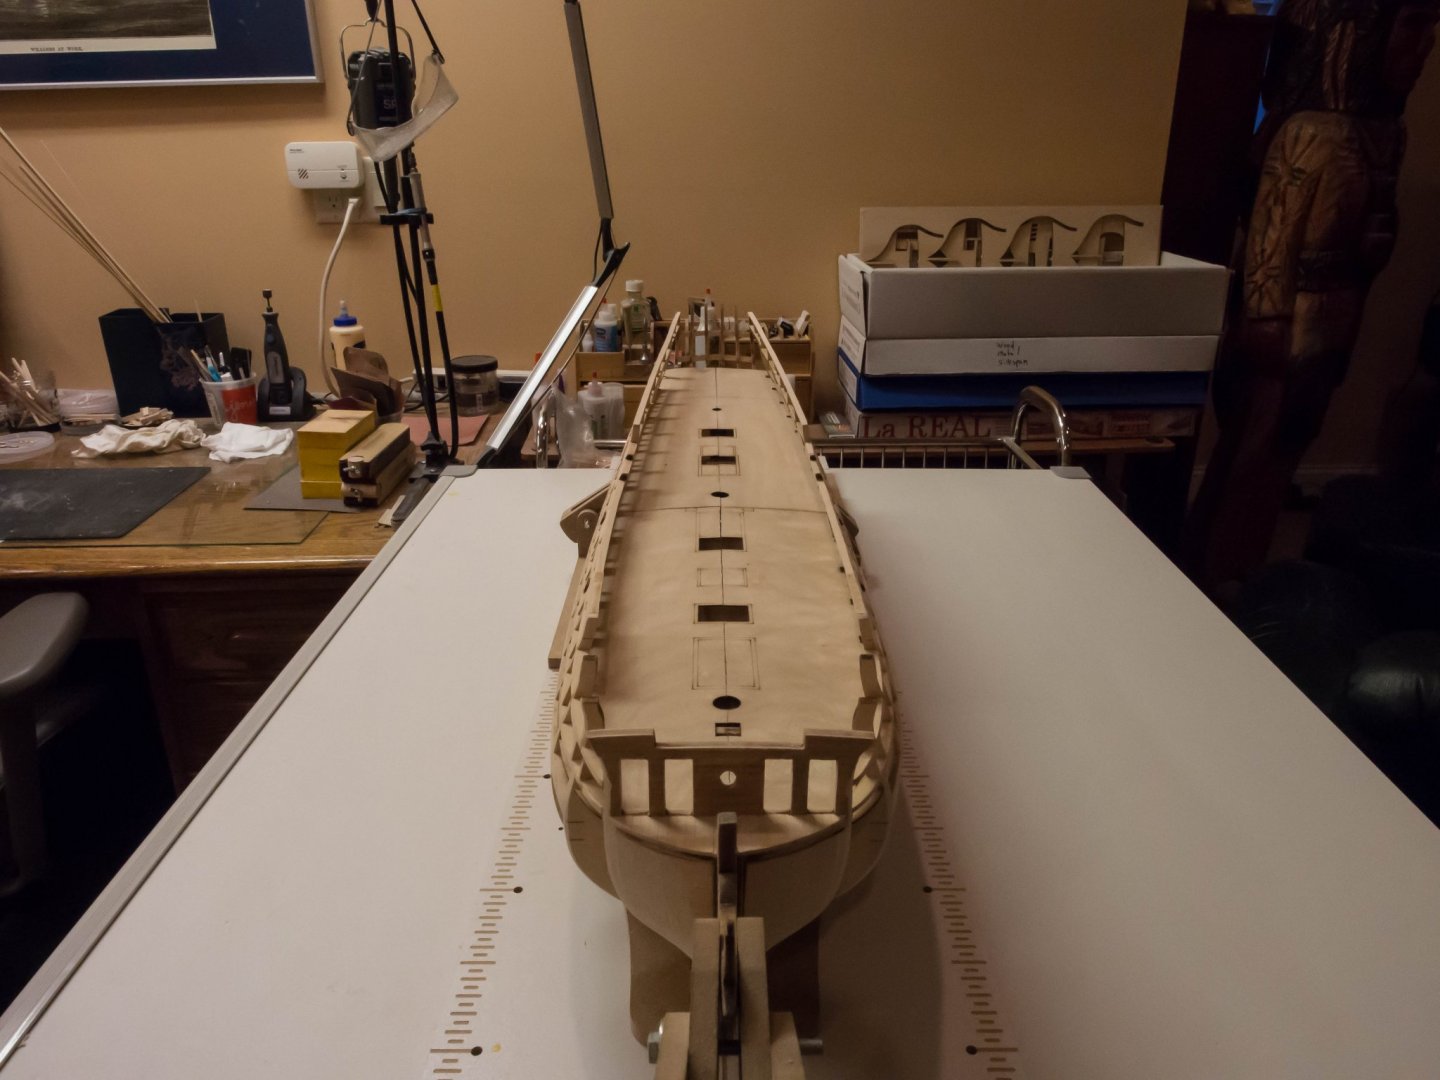
Placed the false deck and planked the forward bulkhead and the beak deck.
Some rough edges in the doorways yet to be smoothed.
Now on to the dreaded cannon port placement.
-
-
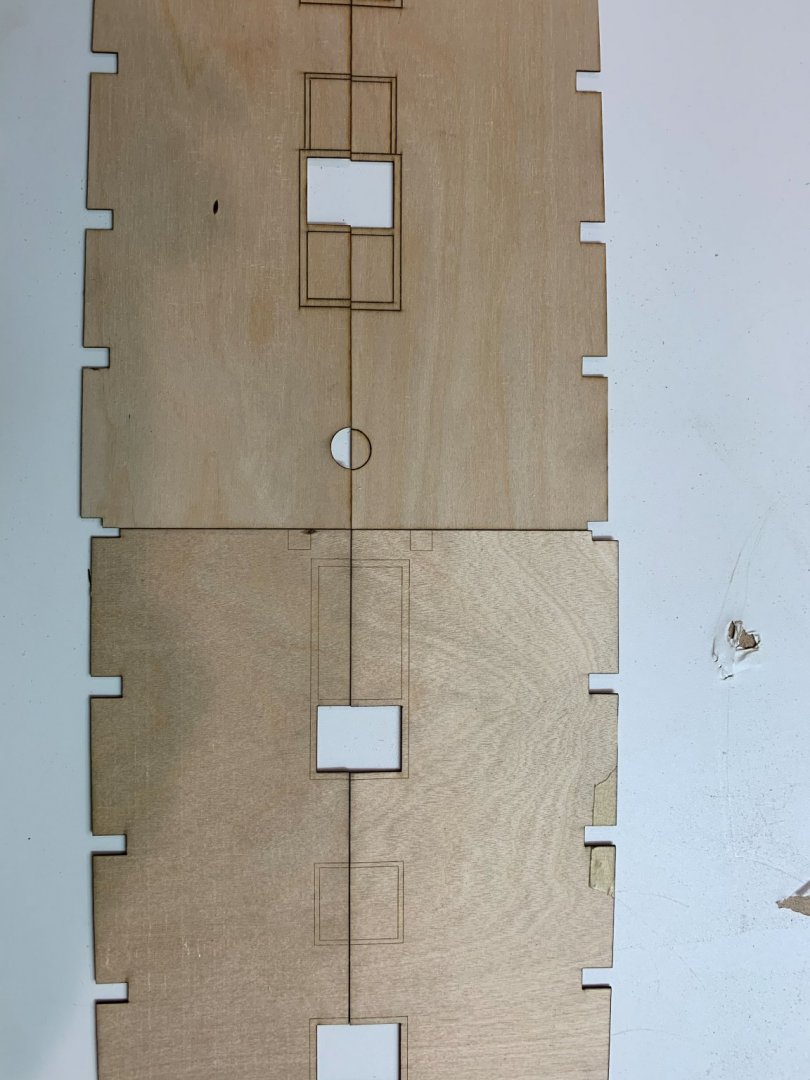
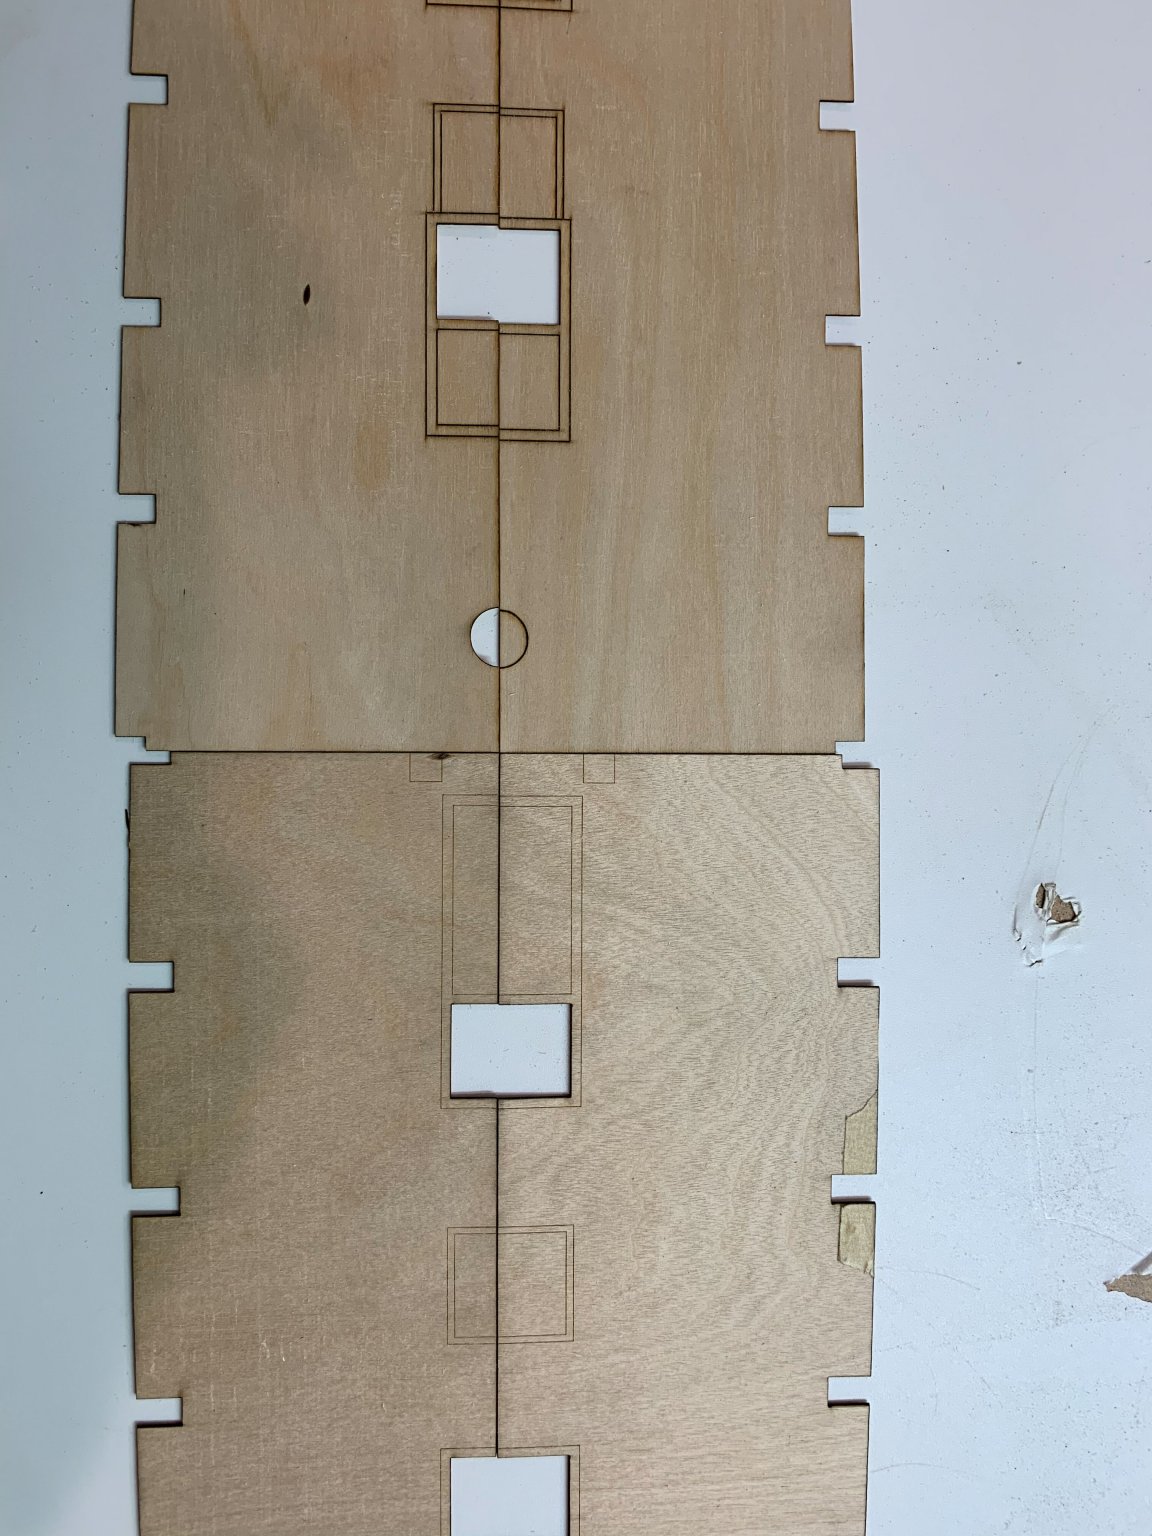
The fore and aft pieces are on different 1/32 sheets that are a significantly different color.
The aft piece midline/division between the two pieces seems off. While the mizzen mast hole is on the midline. the hatch markings are, as seen asymmetric, and the edges don't line up with the fore pieces.
Are these faulty pieces? I don't see how I can correct this by messing with the notches without throwing things off.
Help please!
-
OK, Confederacy experts, now I need some help.
I tried dry fitting the false deck pieces and it wasn't working. When I laid them out on a flat surface, got this:
-
And set back upright for the next steps:
.thumb.jpg.8d8e474c2490de8f644bfe2be6a6cec8.jpg)
.thumb.jpg.09700c2a71504b27cb225e29182c153e.jpg)
.thumb.jpg.66b4af9ab194483cee6159c182aa539c.jpg)
- GrandpaPhil, Dwight, Edwardkenway and 2 others
-
5
-
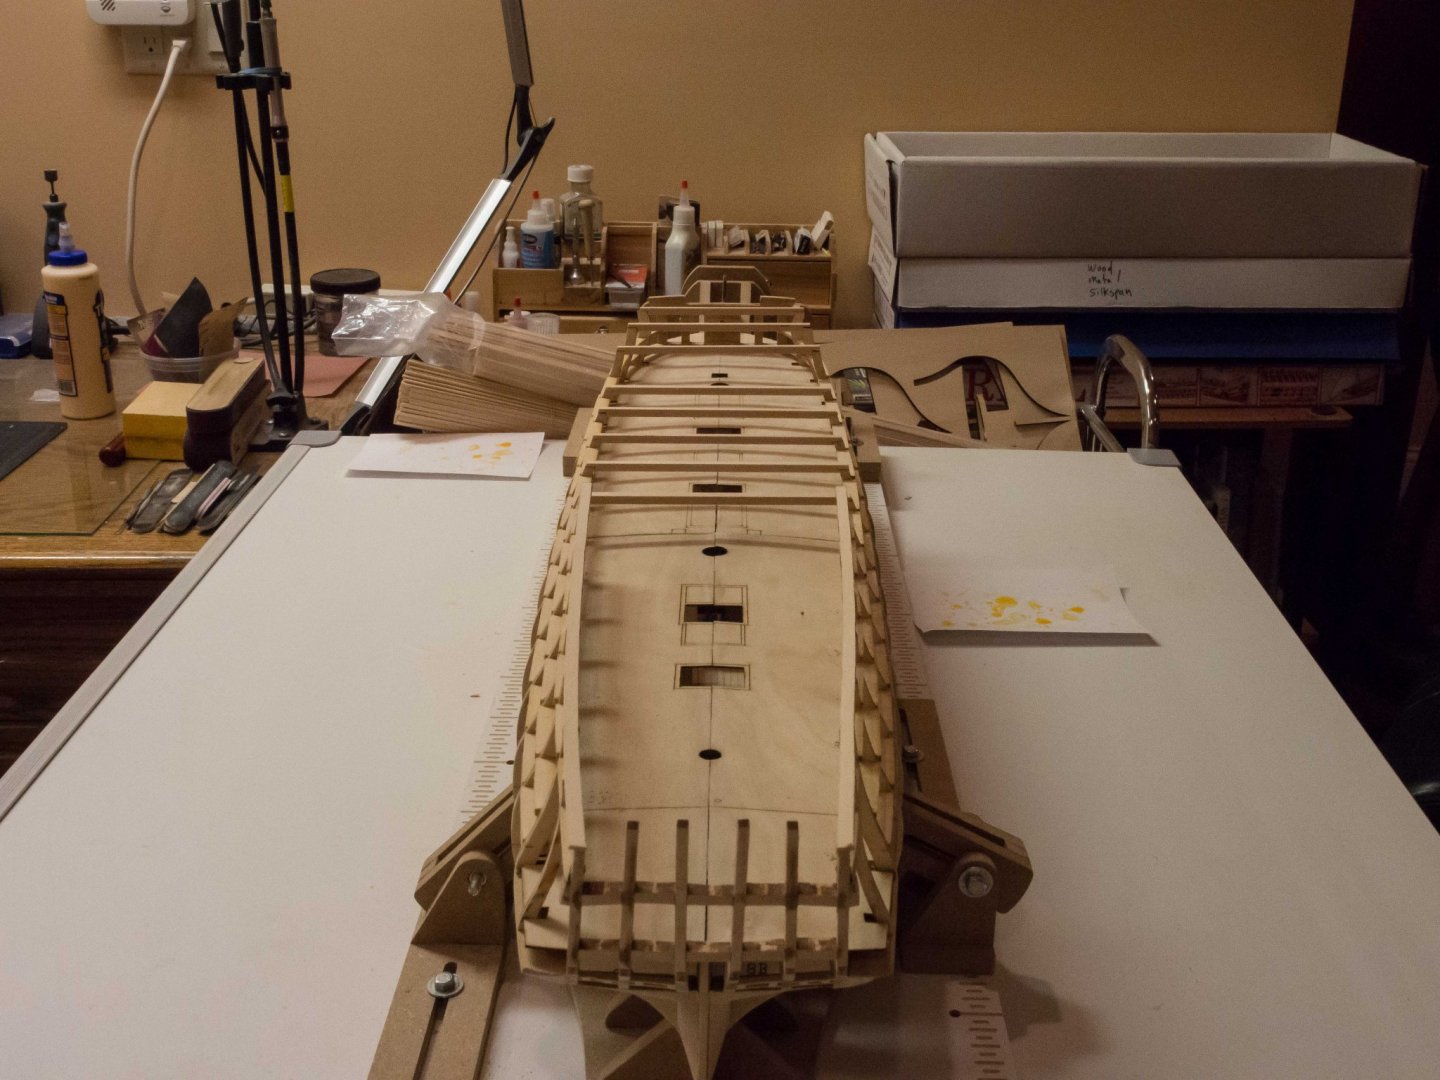
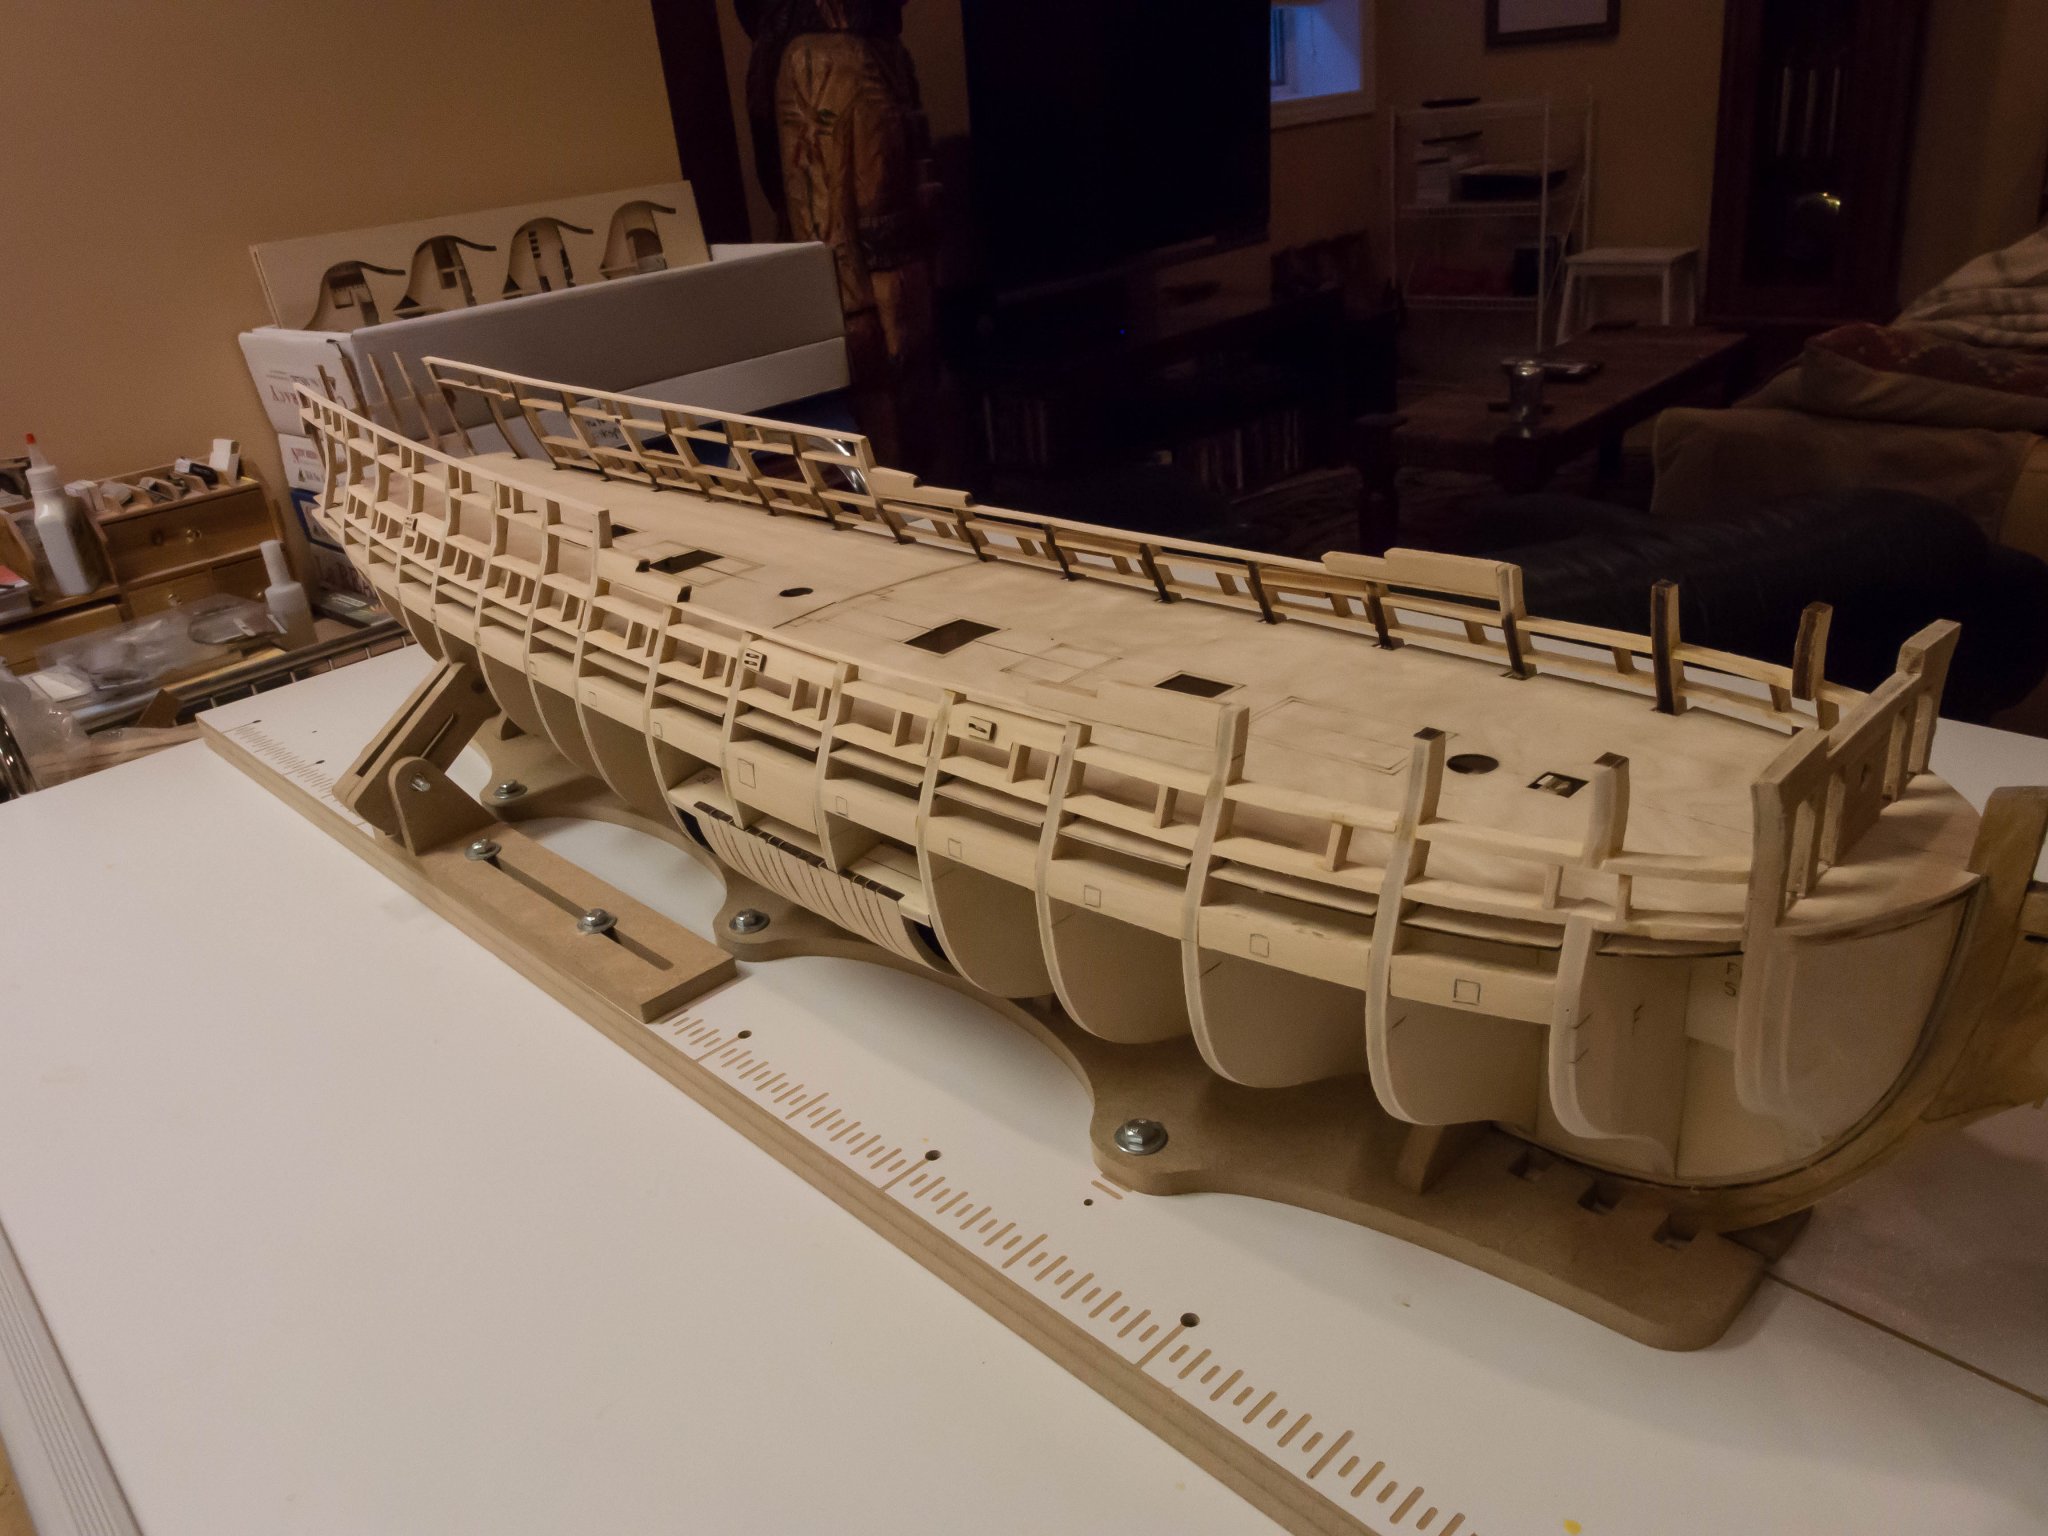
Continuing to work at a slow pace, given other activities demanding my time.
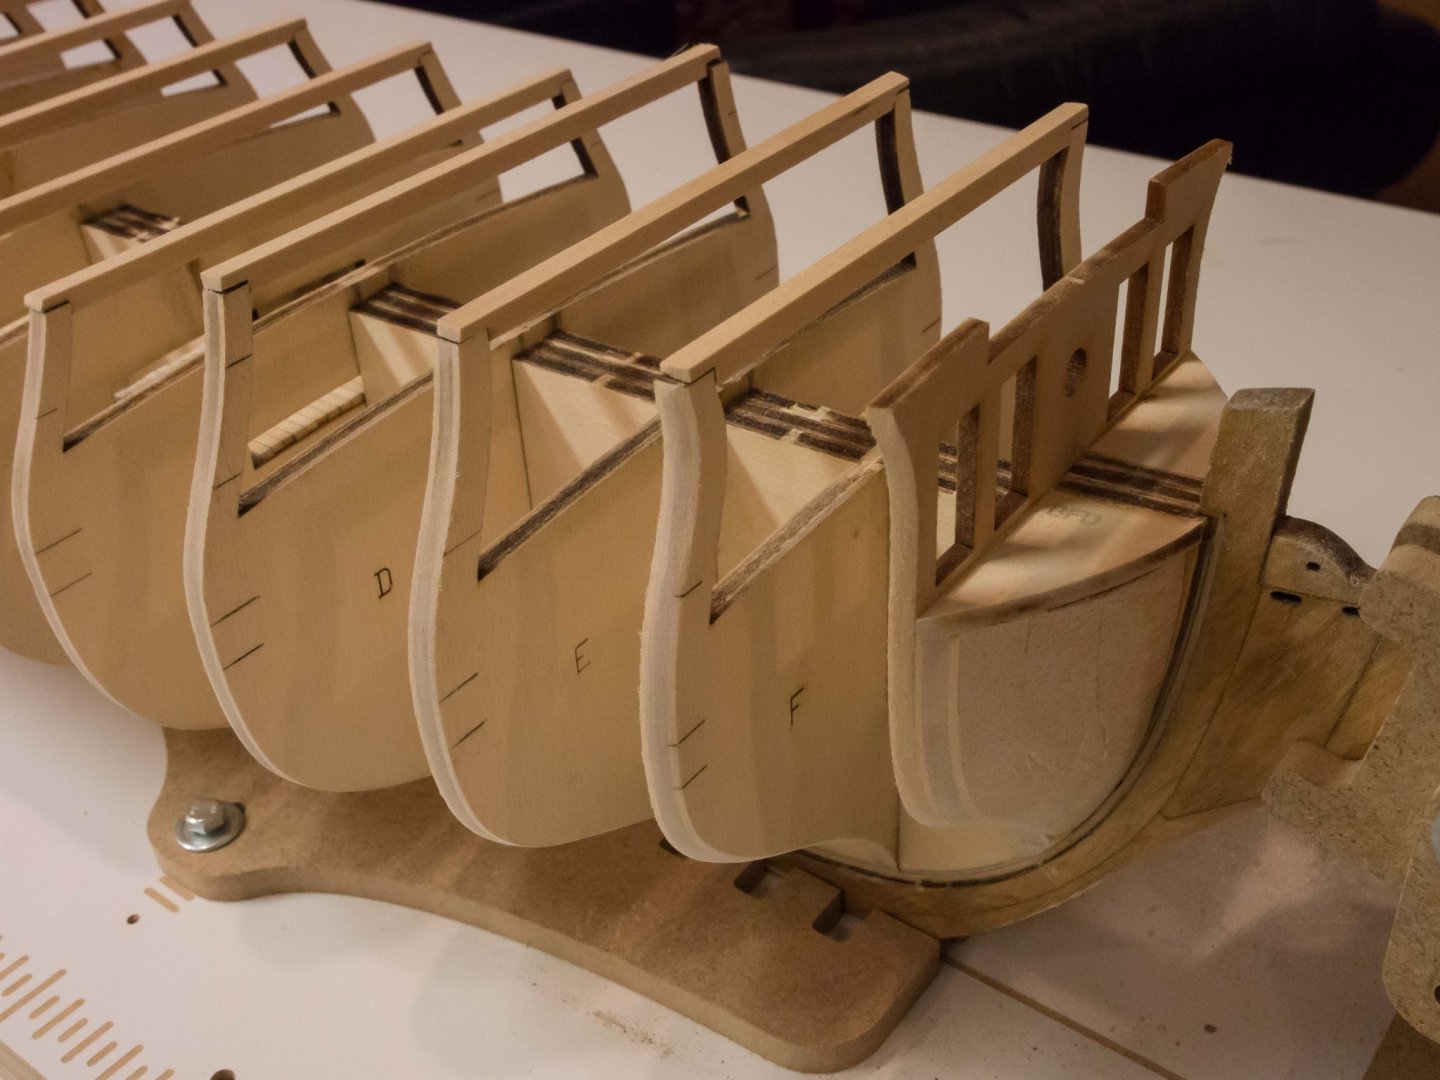
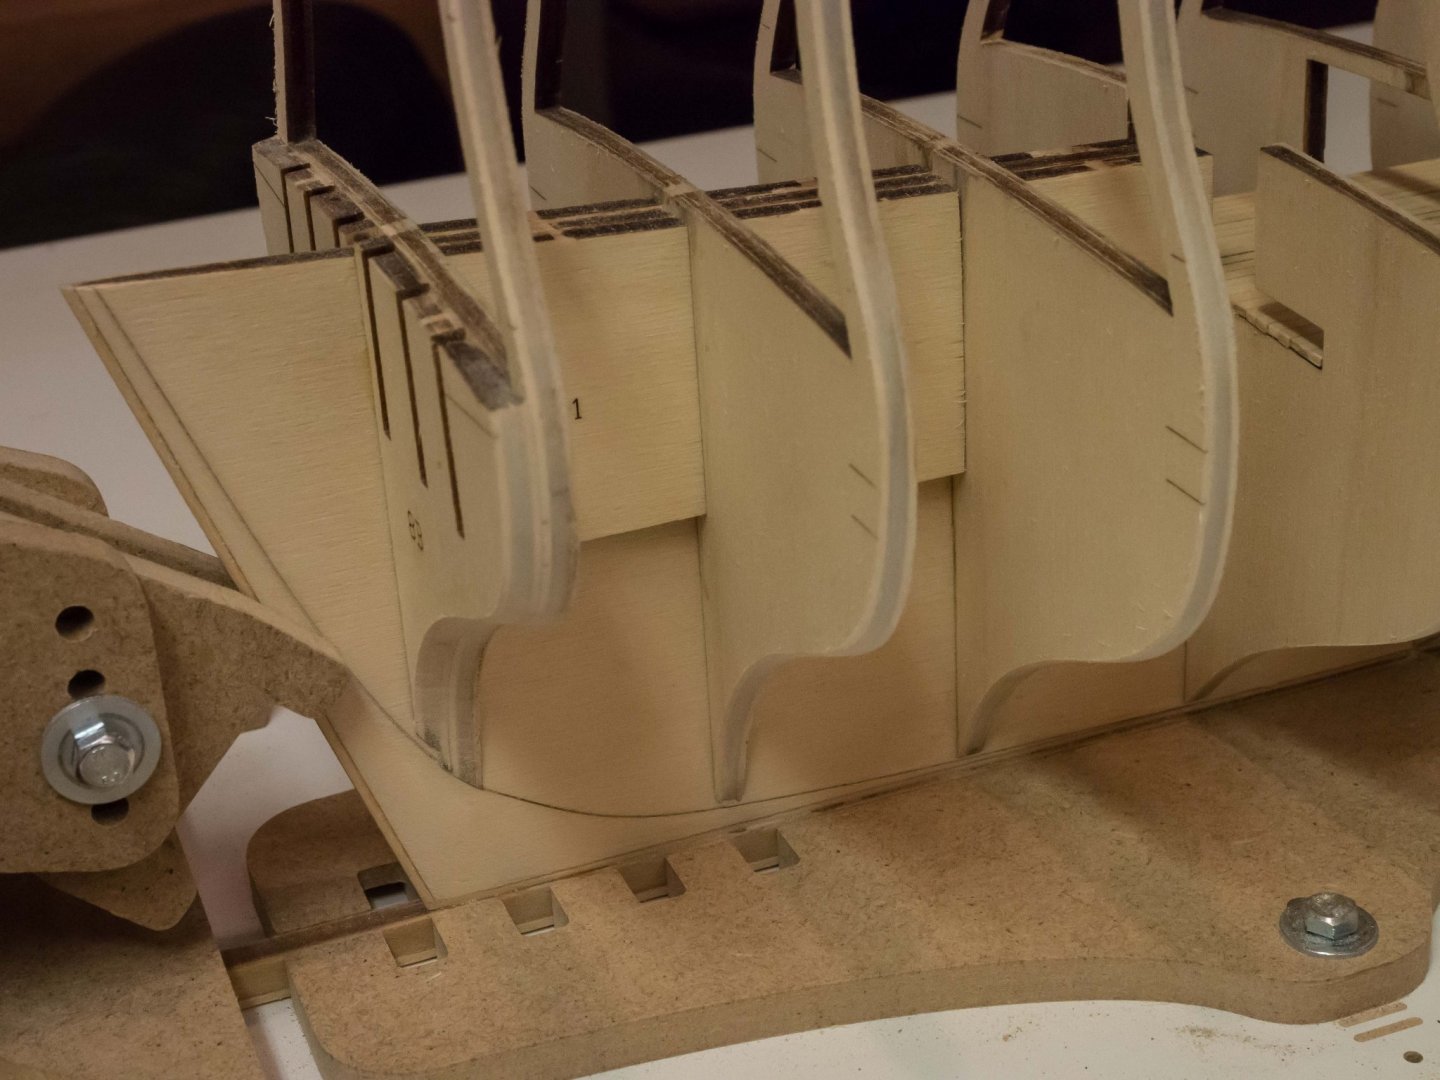
Finished with the stern structure. A fair amount of fiddling (including correcting things that migrated under clamping while the glue set, and, as is my habit, having to "unglue" and replace 2 pieces I cheerfully put in upside down) and a LOT of sanding. Using a small hand held battery driven Dremel tool with sanding drum to rough out some of that which helps a lot.
Here's where things stand, now ready for placing the false deck:
.thumb.jpg.8b92985e5bbfa79673f8ac5de2a9762a.jpg)
.thumb.jpg.a691d1a620fb08ac26006785200f73d0.jpg)
-
-
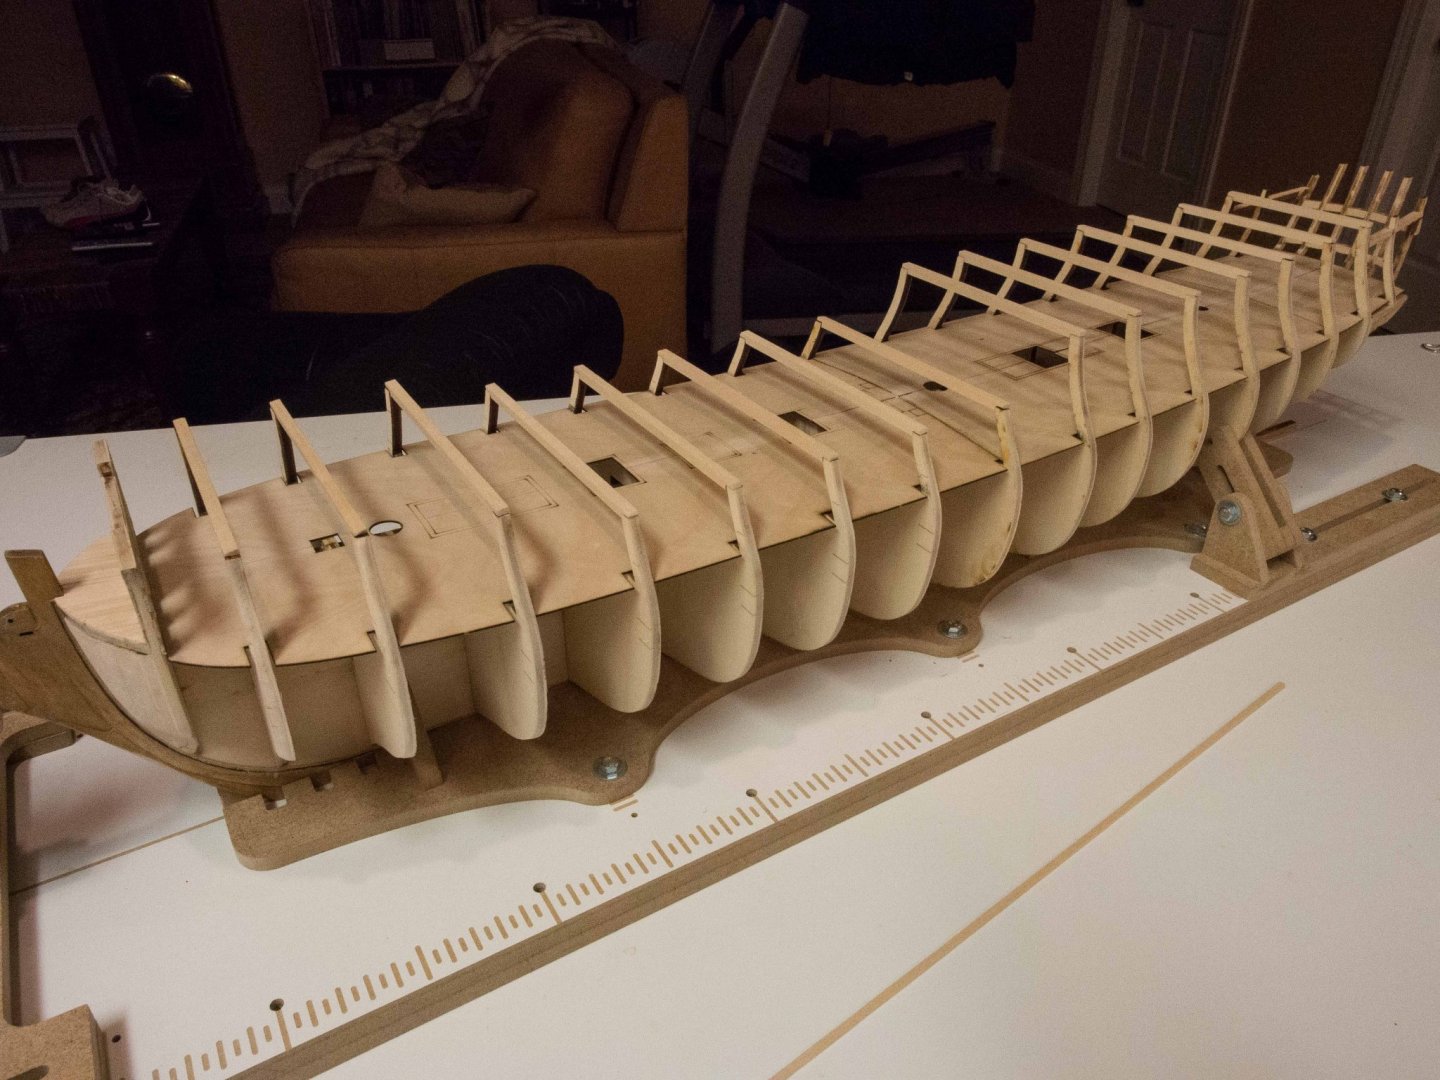
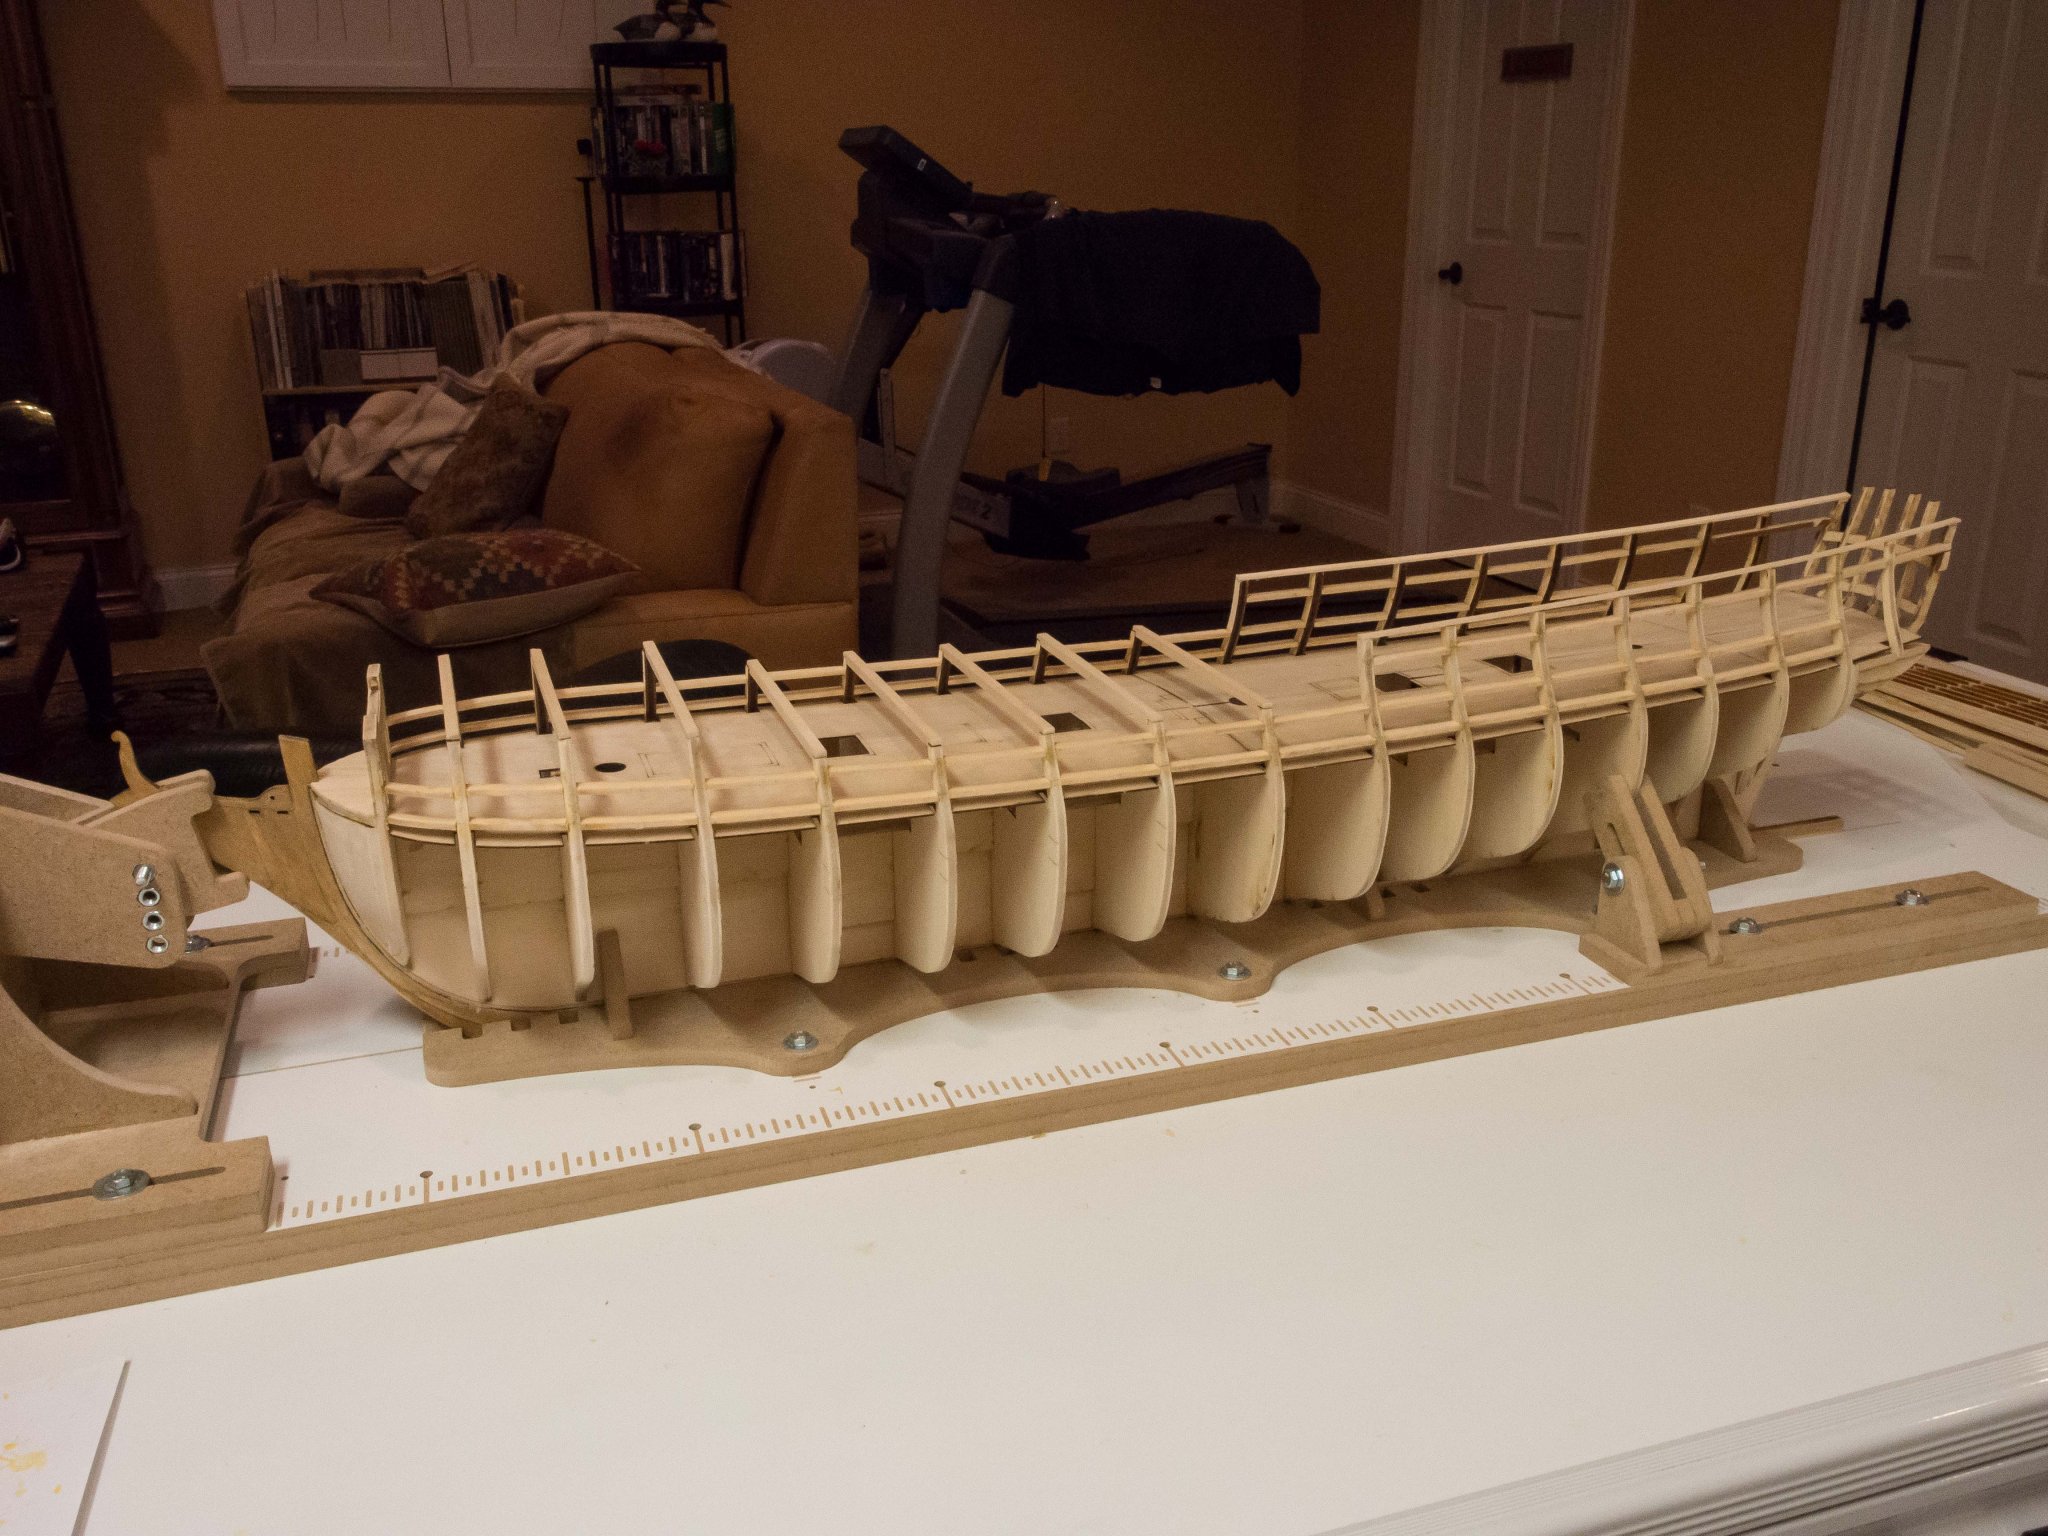
Finished with bulkhead faring. A lot of sanding. I was really quite diligent with this, probably more so than on the previous builds.
Also put the shadowbox and its ribs in - again, a lot of sanding to bring it into line with the bulkheads.
No surprises or issues thus far, but I'm about to start on the stern structure, the like of which I have not previously done.
May not get going on this for a week or two with holiday and other projects. This will be a slow build.

- Dubz, Tigersteve, Ryland Craze and 5 others
-
8
-
Search hobby world USA for hobbyzone professional building slip.
it was discussed quite a bit here a few years back.
putting it together from diagram based instructions a bit of a PITA - you need to be very careful regarding part identification and orientation. Originated in Poland I think.
there is a smaller one nowhere near as flexible.


.jpg.39a877dd256d4ab4d3fb88bb9c8600ee.jpg)
.jpg.7581f8ff25e00abed632c86252d4f660.jpg)
.jpg.529ef617556af61461683887be9e7cab.jpg)
.jpg.1e71a3e1d169aff78933495afd3c0817.jpg)
.jpg.88aed9117a96f72fe385aba8f9101328.jpg)


USF Confederacy by Brucealanevans - FINISHED - Model Shipways - 1:64
in - Kit build logs for subjects built from 1751 - 1800
Posted
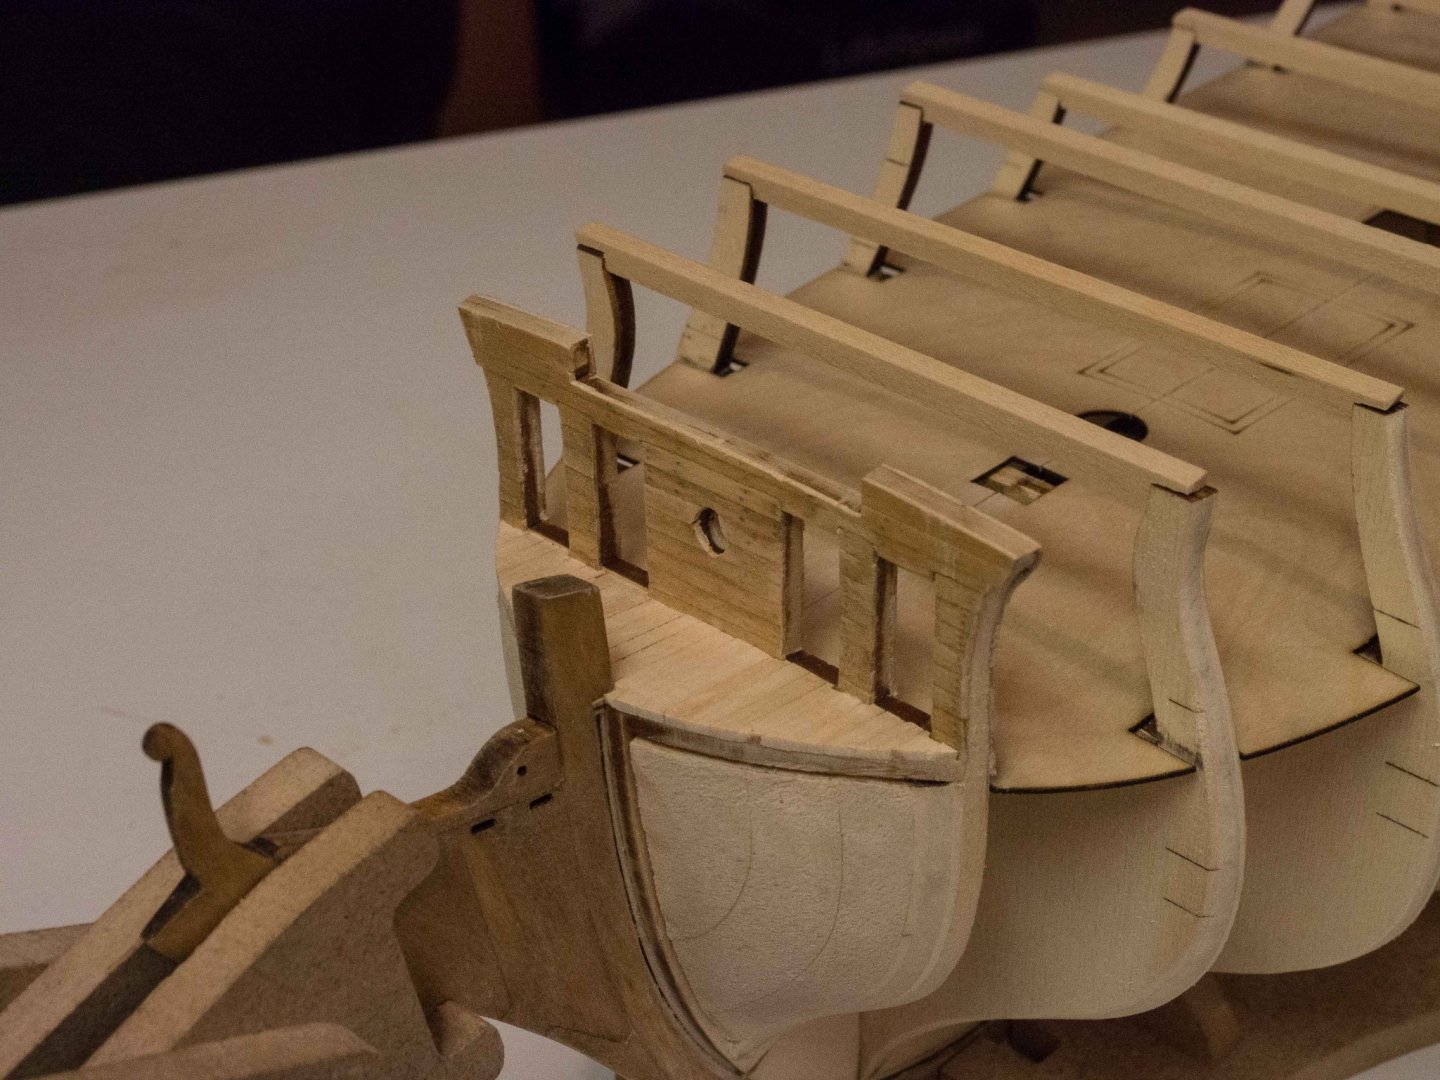
Finished up the initial work on the stern and on the bases of the quarter galleries.
Some of the alignment of the pieces was not perfect, but by and large I was able to compensate. Getting all those pieces starting with the stern frames and the associated bits in perfect alignment was the hardest thing on this build for me so far (except for the endless planking).
Now on the the bulwark thinning (UGH). I have not been looking forward to this from the very start.