


Brucealanevans
-
Posts
450 -
Joined
-
Last visited
Content Type
Profiles
Forums
Gallery
Events
Posts posted by Brucealanevans
-
-
Oofff!
first attempt to notch timbers and fit middle rail was a failure.
with tears in my eyes had to rip out the head timbers on one side after staining and permanently gluing them. The placement of the rail just didn’t work - the rail was too far lateral where it meets the hull and the notches therefore too close the the outboard end of the timbers (at least the first three). Resulted also in the rail being a bit too short. Should have guessed since instructions say it is longer than needed. I have to remake those five and go through the whole process again and try to do better. But not today. Or tomorrow. Too disgusted.
I think I’ll work on my Agora Cobra for a while.
-
I have roughly shaped the five head timbers and spot glued them in place preparatory to marking the places for the notches for the middle rails. The timbers themselves will require more shaping which I will do when I remove them to do the notches.
This is a very fiddly task overall and I doubt it will look perfect to say the least. Doing the best I can, and will be very happy when the middle rail is finally placed and I can move on.
.thumb.jpg.f4e205afe1ee05a4eaf071753ea63661.jpg)
.thumb.jpg.f92e68e15ee22c6f00077c4f84040f07.jpg)
- Ryland Craze, yvesvidal, WalrusGuy and 5 others
-
 8
8
-
Began fitting the main head rail.
Let's just say hurray for extra parts - 4 supplied for the 2 main rails and I ruined the first two. Finally managed to appropriately adjust the last two.
Clamped the cross beam in place to adjust things so that the cross beam and rails are flush with the beakhead deck.
I have to clean up and re-glue some of the trim strips in that area and touch up the paint before staining these and gluing them in place.
I have tried (on practice pieces) to make the decorative scores just inside the edges of the wood strips and getting a smooth look is simply beyond my dexterity, unfortunately, so I will forgo those.
Not looking forward to the head timbers, which the instructions say is the most difficult and fiddly of the whole business.
.thumb.jpg.be1f9fdc1b4d155a847f0abd8a3ca69e.jpg)
- GrandpaPhil, JpR62 and yvesvidal
-
3
-
Good luck with your build. Be VERY exacting with placement when constructing the frame - especially in the stern - and in sanding the curved profiles in the stern per the plans. Time and care invested there will pay dividends down the road.
-
-
Thanks for the comments. The gundeck coamings are too thick and a bit too tall - they were the first ones I did nearly a year ago.
I will not be revising them as I am not driven for perfection here to that degree while I fully respect those who are. This monster of a model has fully stretched and often exceeded my abilities and I have learned much about following the plans and measurements more carefully. My model building career is time limited both in time in the day, time in the main house with the shipyard and tools, and by advancing age/degrading near vision.
Assuming I am able (big assumption) to do a reasonable job on the ships boats and make sure the rail stanchions for this coamings are not too high this will be less evident to the discerning. There are a number of errors I’ve had to work around and rather than tear down and redo I’ve compensated as best I can. Will take my lessons forward to my next and almost certainly last complicated build, currently planned to be Dusek La Real reimagined as a Maltese galley. I appreciate your attention to my build. -
Thanks for the "likes" all.
I have done some work on the beakhead, getting as far as the cheeks. Really fiddly work that shows up every small asymmetry in one's work. I hope I've mitigated these. The next work is worrying, as Chuck's instructions state that the head timbers are the really difficult part. Sheesh.
Anyway, 2 weeks now at our place on the east coast, so no ship modeling for a while.


- Wahka_est, tommay1953, CiscoH and 4 others
-
7
-
-
No, rigging her fully at this scale would result in a monstrously sized model and I’m already nearly out of display space. Also I’ve constructed this as an admiralty display model with partial decking to show structure and lower deck detail so full masts and rigging don’t seem appropriate to me. Happy to build as intended.
-
Note: put pins or a bit of monofilament to anchor the timberheads on the cap rail around the foredeck. You WILL snap them off multiple times as you work otherwise.
-
-
-
-
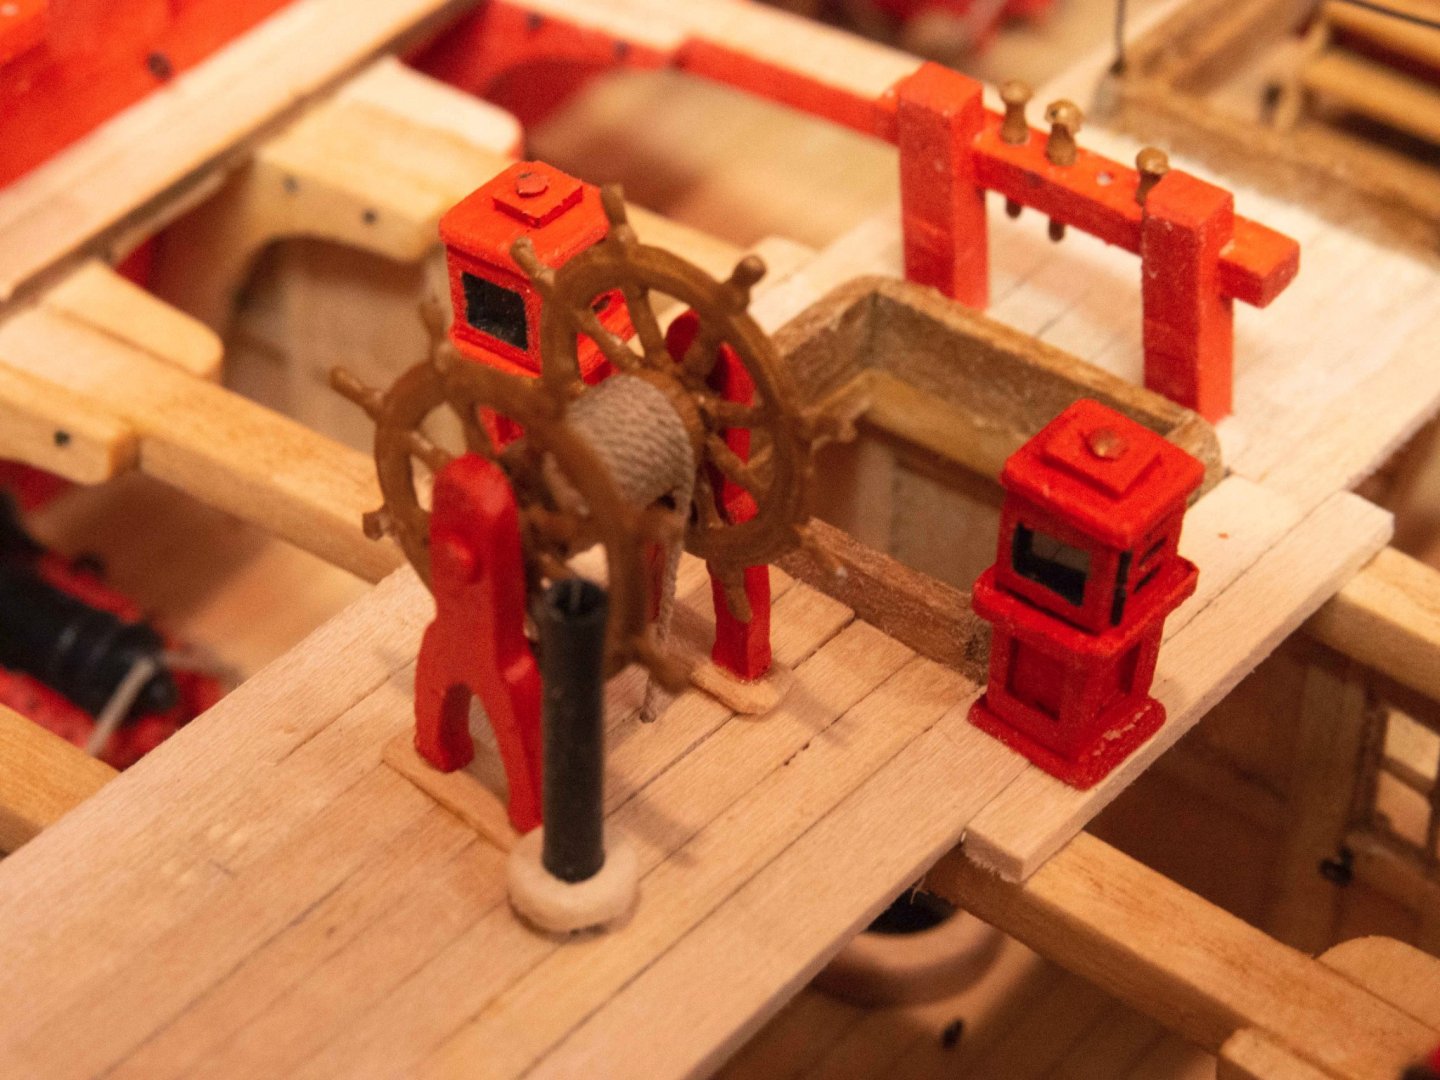
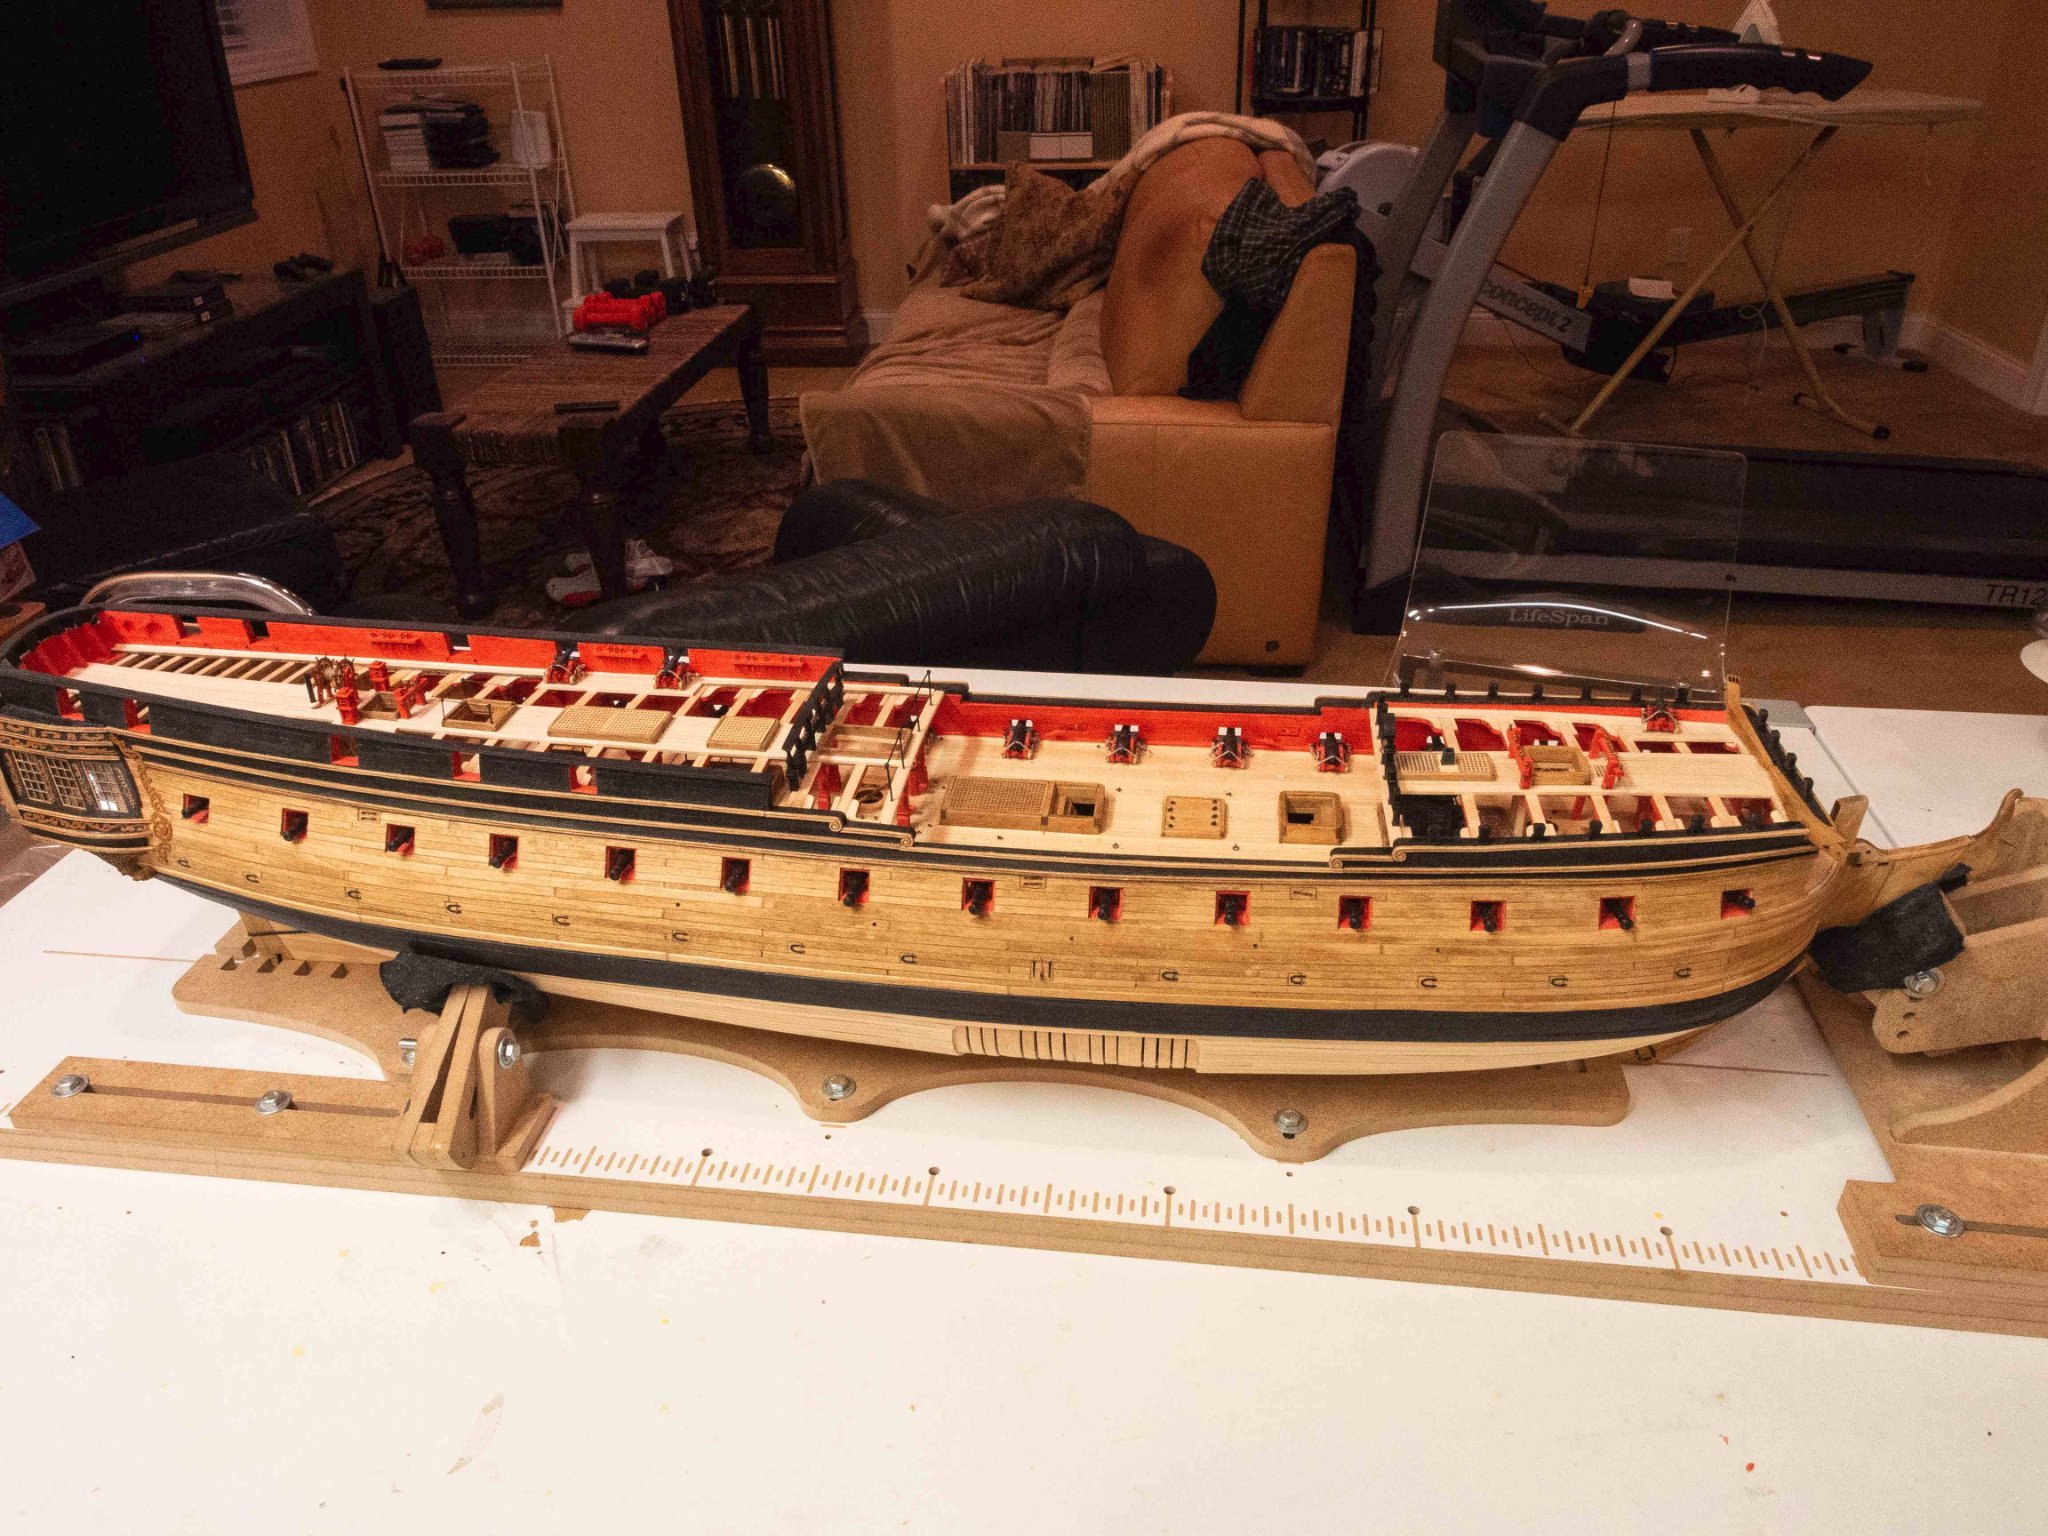
Finished the quarterdeck completely.
I decided to go with a look allowing maximal views of the main deck structures, planking along the mid-line as far as to enclose the coamings. Added a small area of planking next to the port bulwarks to mount 2 six pounders (the viewing side will be the starboard), and 2 small pieces for the binnacles.
As is my wont, I am my own worst enemy. I discovered (not until adding the piece for the deck planking to abut against) that somehow I drifted off the mid-line with my coamings and carlings as they moved forward. Arrgh. So a fair amount of jiggery-pokery to mitigate to the extent possible the resulting disruptions of the symmetry of the planking and the main rail. I guess it's my next build that will be perfect.
I'll take a bit of a short break before starting on the fore deck, as I have several packs building up for my Agora 427 Cobra model crying for my attention.

- GrandpaPhil, mtbediz, JpR62 and 3 others
-
6
-
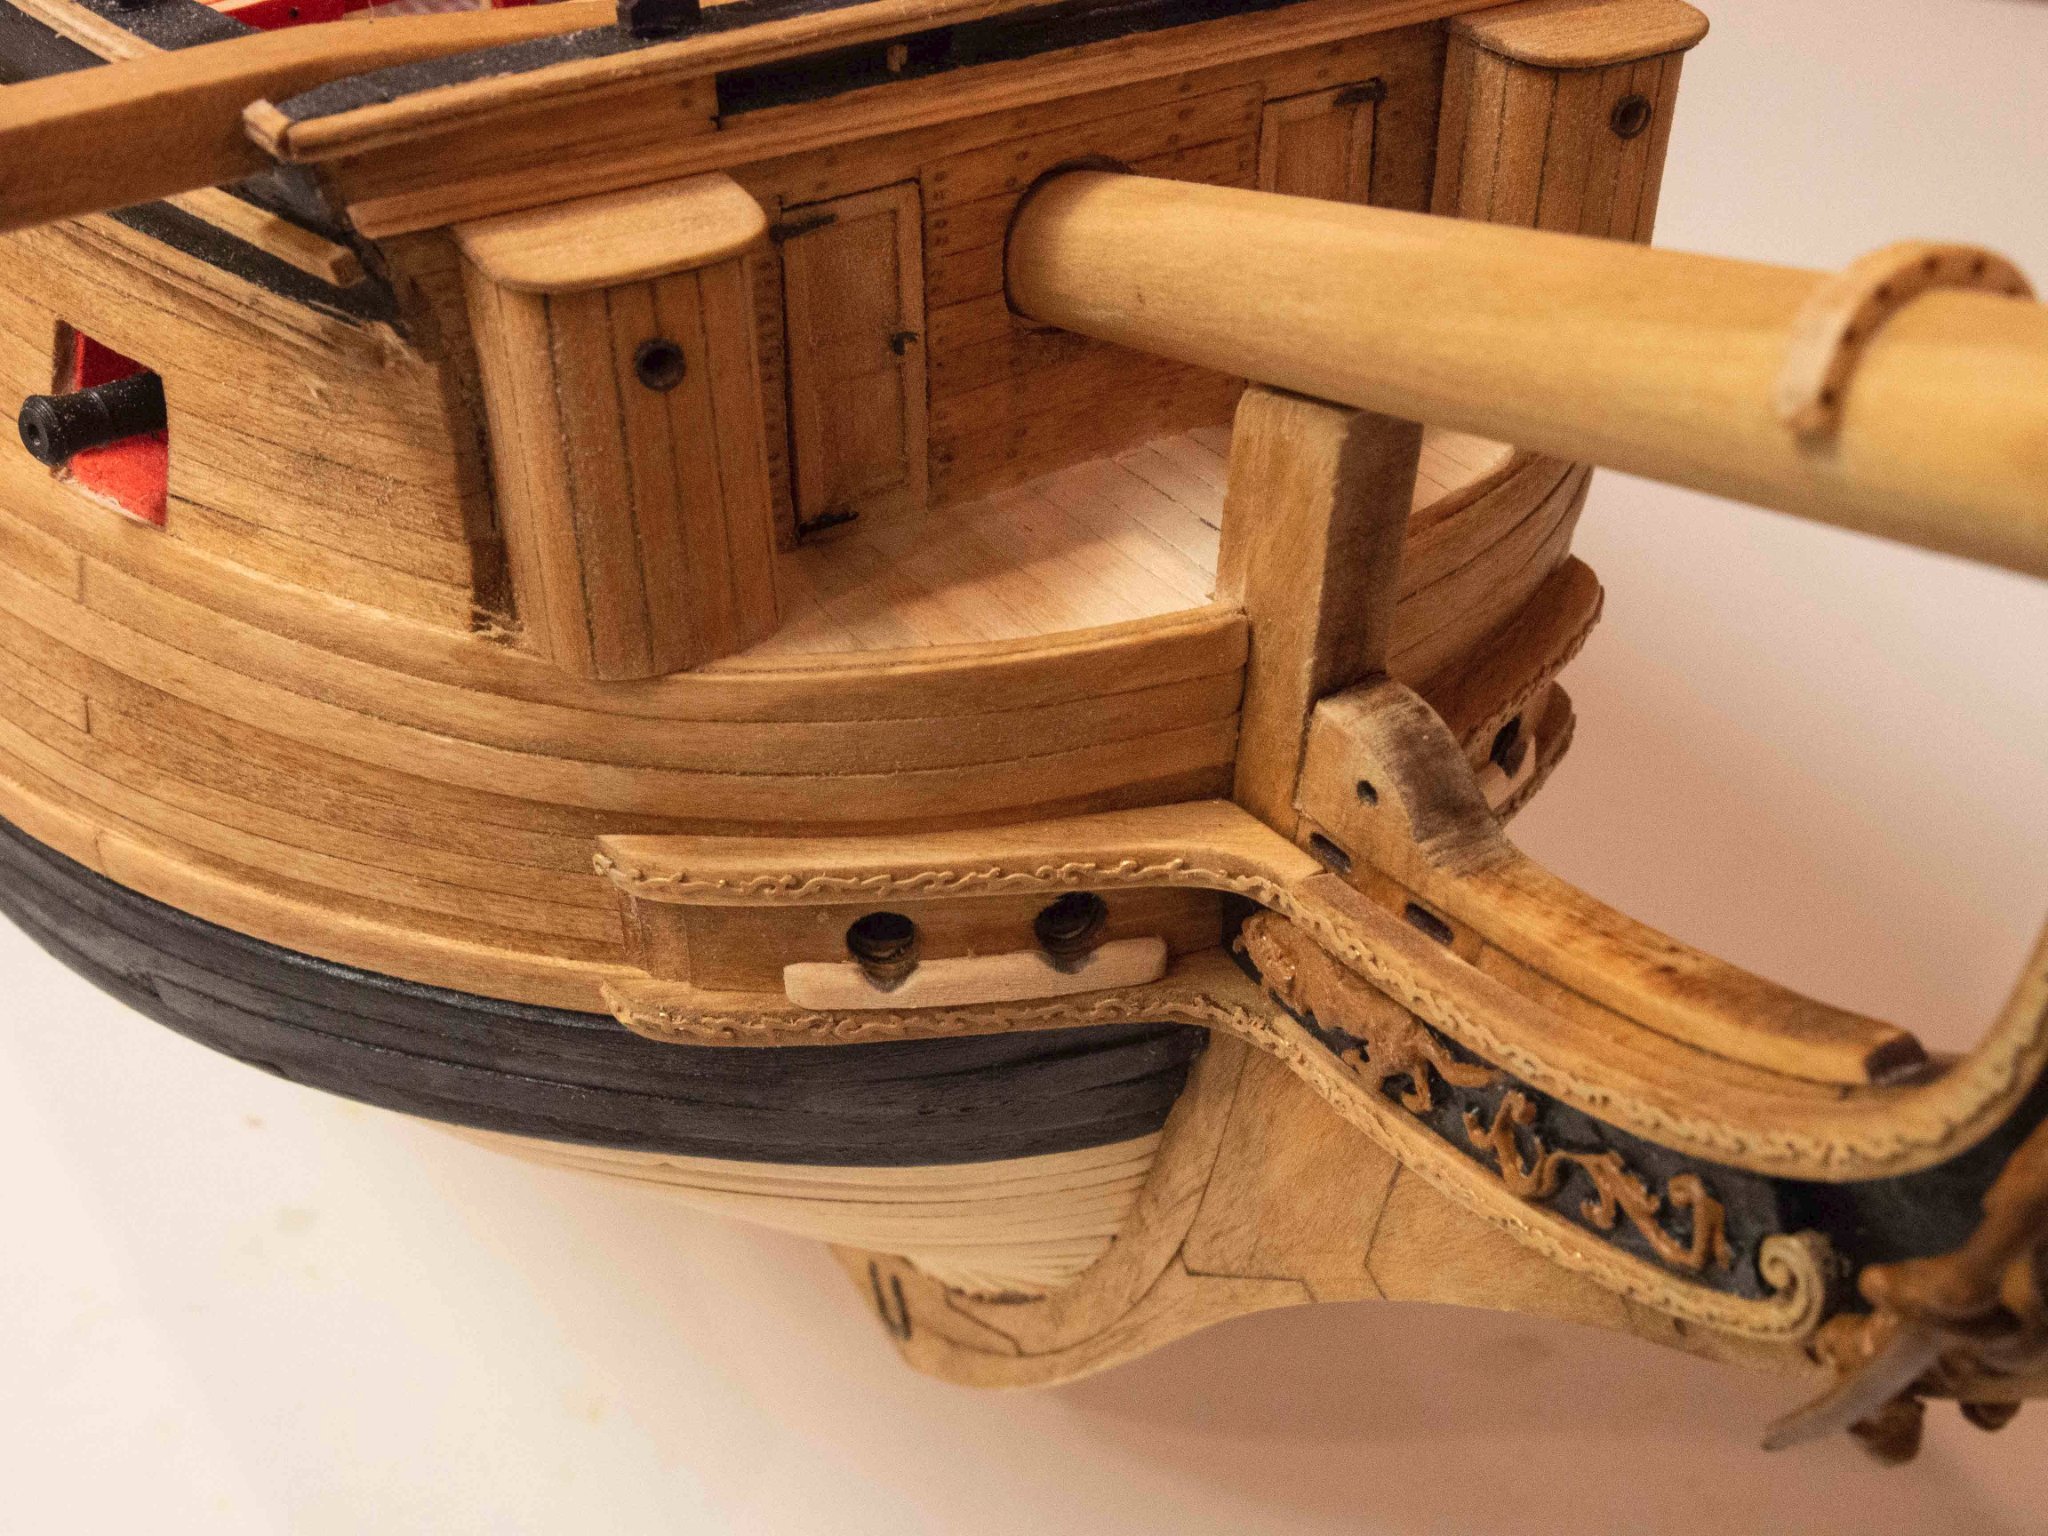
Finished the inner bulwarks and their painting, and then the cap rails, volutes, and associated decorative molding.
That's it: all of the internal structure is now hidden!
I think I'll take a step back at this point to touch things up. A fair number of dings and rubs from clamps, so some spot painting and renewing of stain in some rubbed spots. A few infelicities that I may be able to improve upon, and I need to see if I can salvage the rudder that seems magically to have lost all its pins. Then on to working of the quarterdeck.
.thumb.jpg.a2e732e8005bdc36aa6a663ed1ebb68a.jpg)
.thumb.jpg.350680c5ee9bc3ae8d42697140db322b.jpg)
.thumb.jpg.038a397232690113d94048267f8174fe.jpg)
.thumb.jpg.b1003a09c56260f8b056e2ae3992b8a7.jpg)
- Tigersteve, mtbediz, Edwardkenway and 3 others
-
6
-
Did up the stove, which was a fun little project.
Then put the additional foredeck detail in place, and added the beams and knees.
This wouldn't be a project of mine if I didn't make a silly mistake along the way - I placed the stove a bit too far aft so that the lower stack is not centered right with respect to the beams/carlings. Won't really matter, and it would take a nitpicker to notice that the upper stack will be slightly out of line with the stove, but bugs me nevertheless.
Next up: planking the inner bulwarks.
.thumb.jpg.c563c009197724d8c14a75c1eea081bd.jpg)
.thumb.jpg.17bc10d9cc97200f898b40728894c684.jpg)
.thumb.jpg.d258a7b822ac208456436019b7363435.jpg)
.thumb.jpg.613e7d3bad389dd7e900a40681fe6358.jpg)
- GrandpaPhil, WalrusGuy, CaptMorgan and 5 others
-
8
-
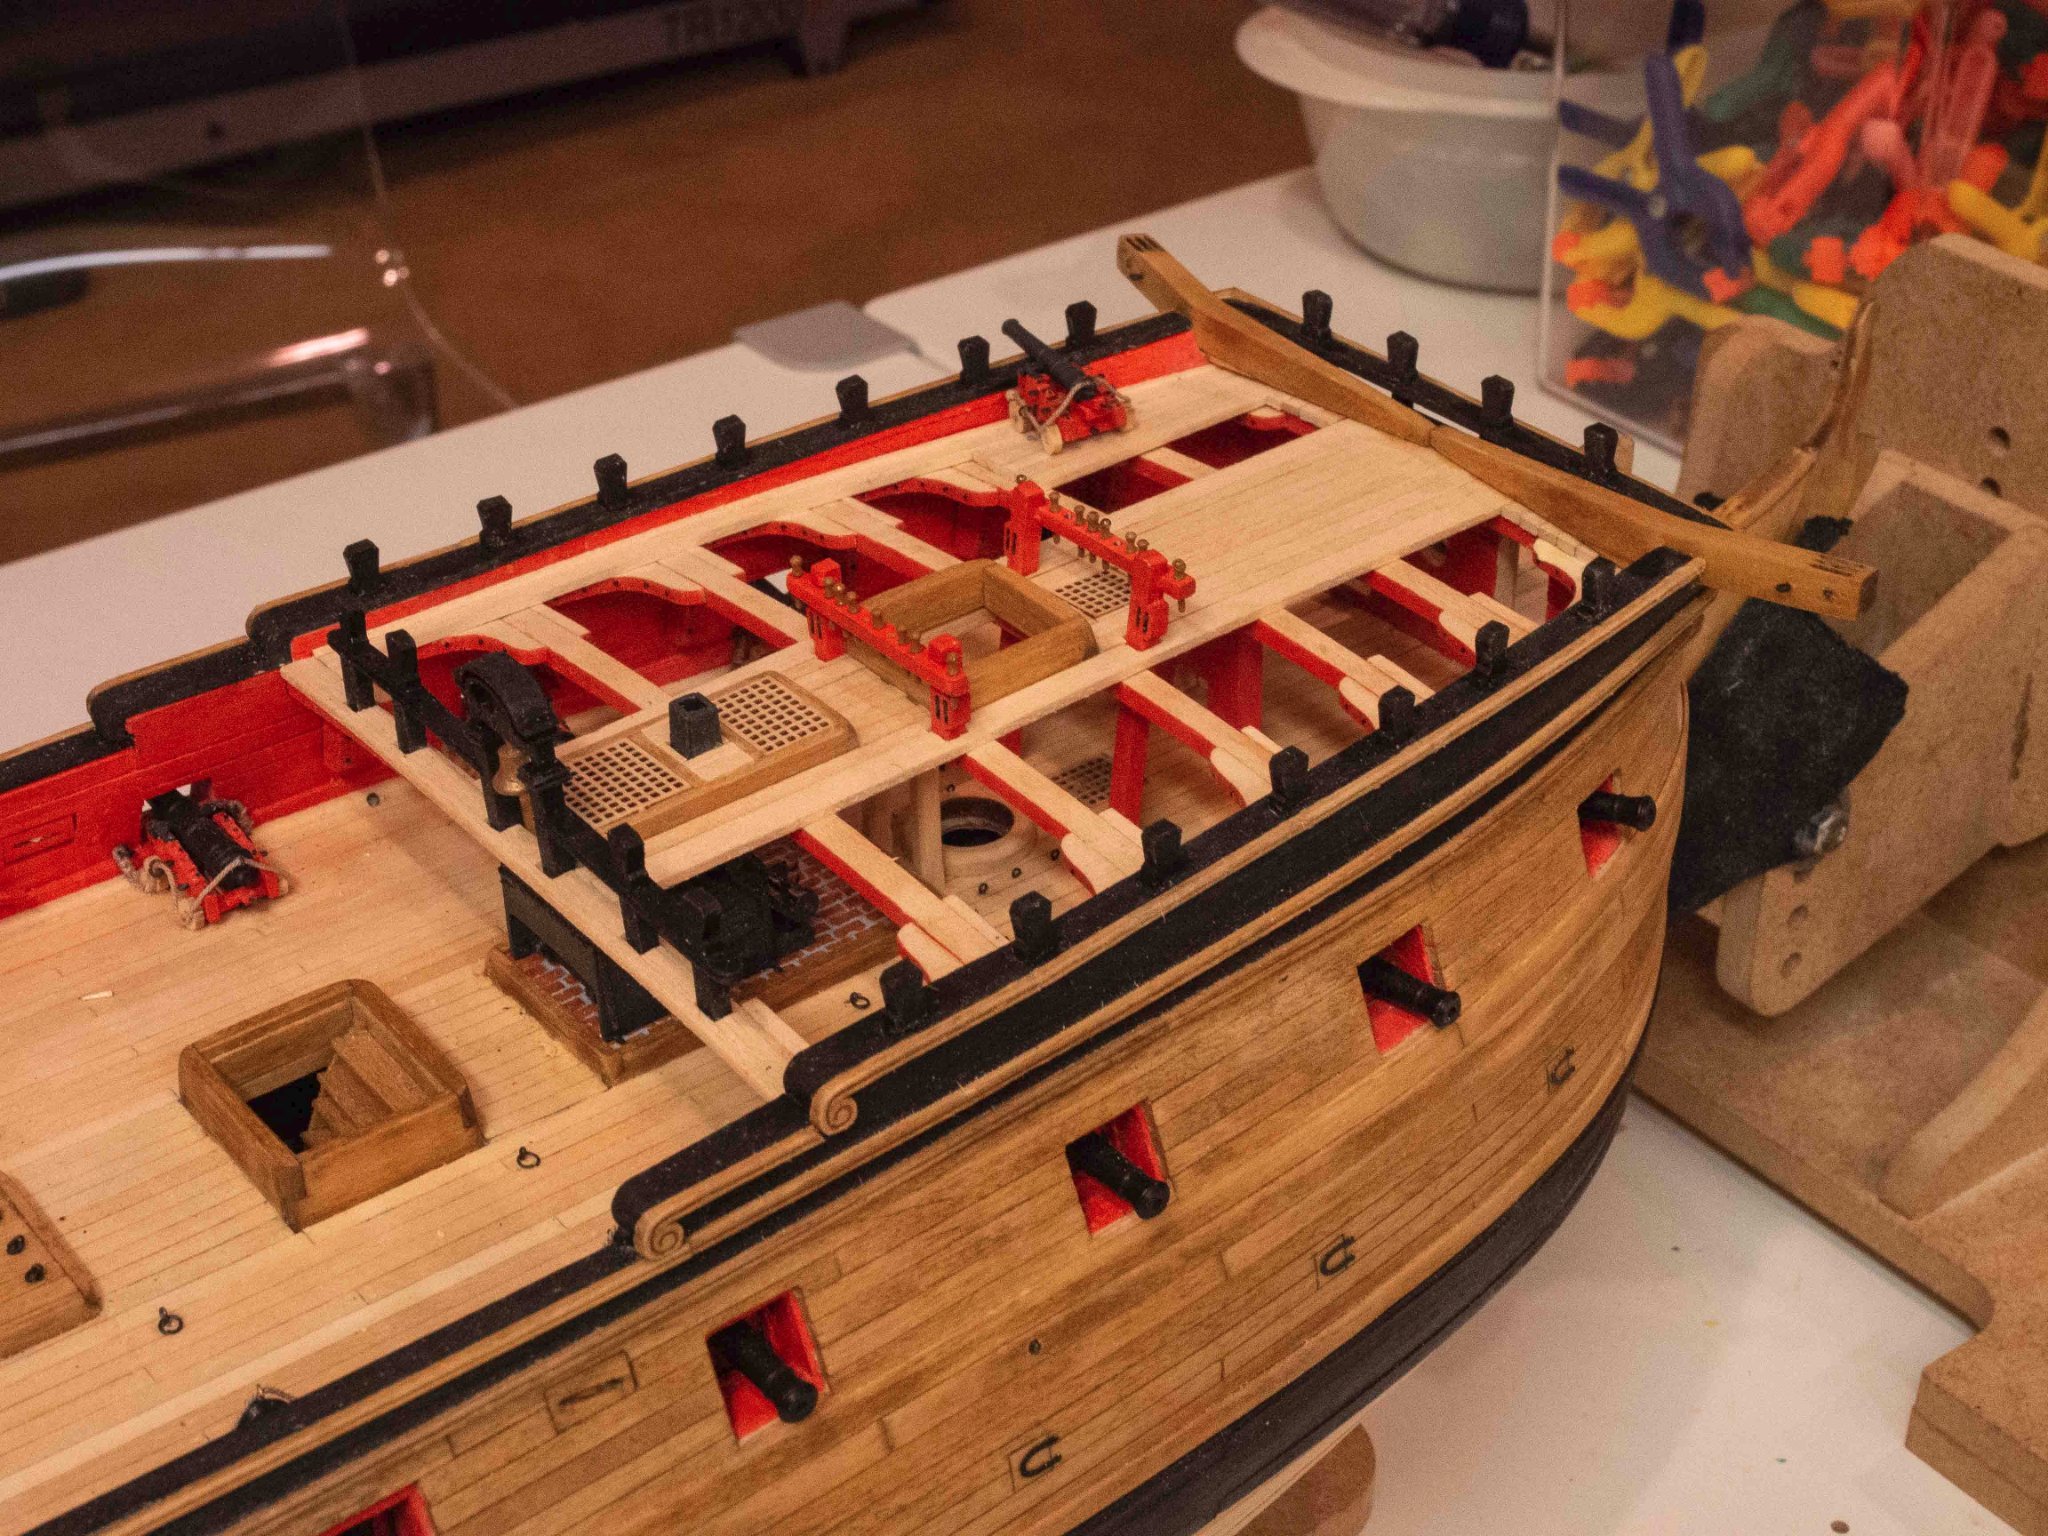
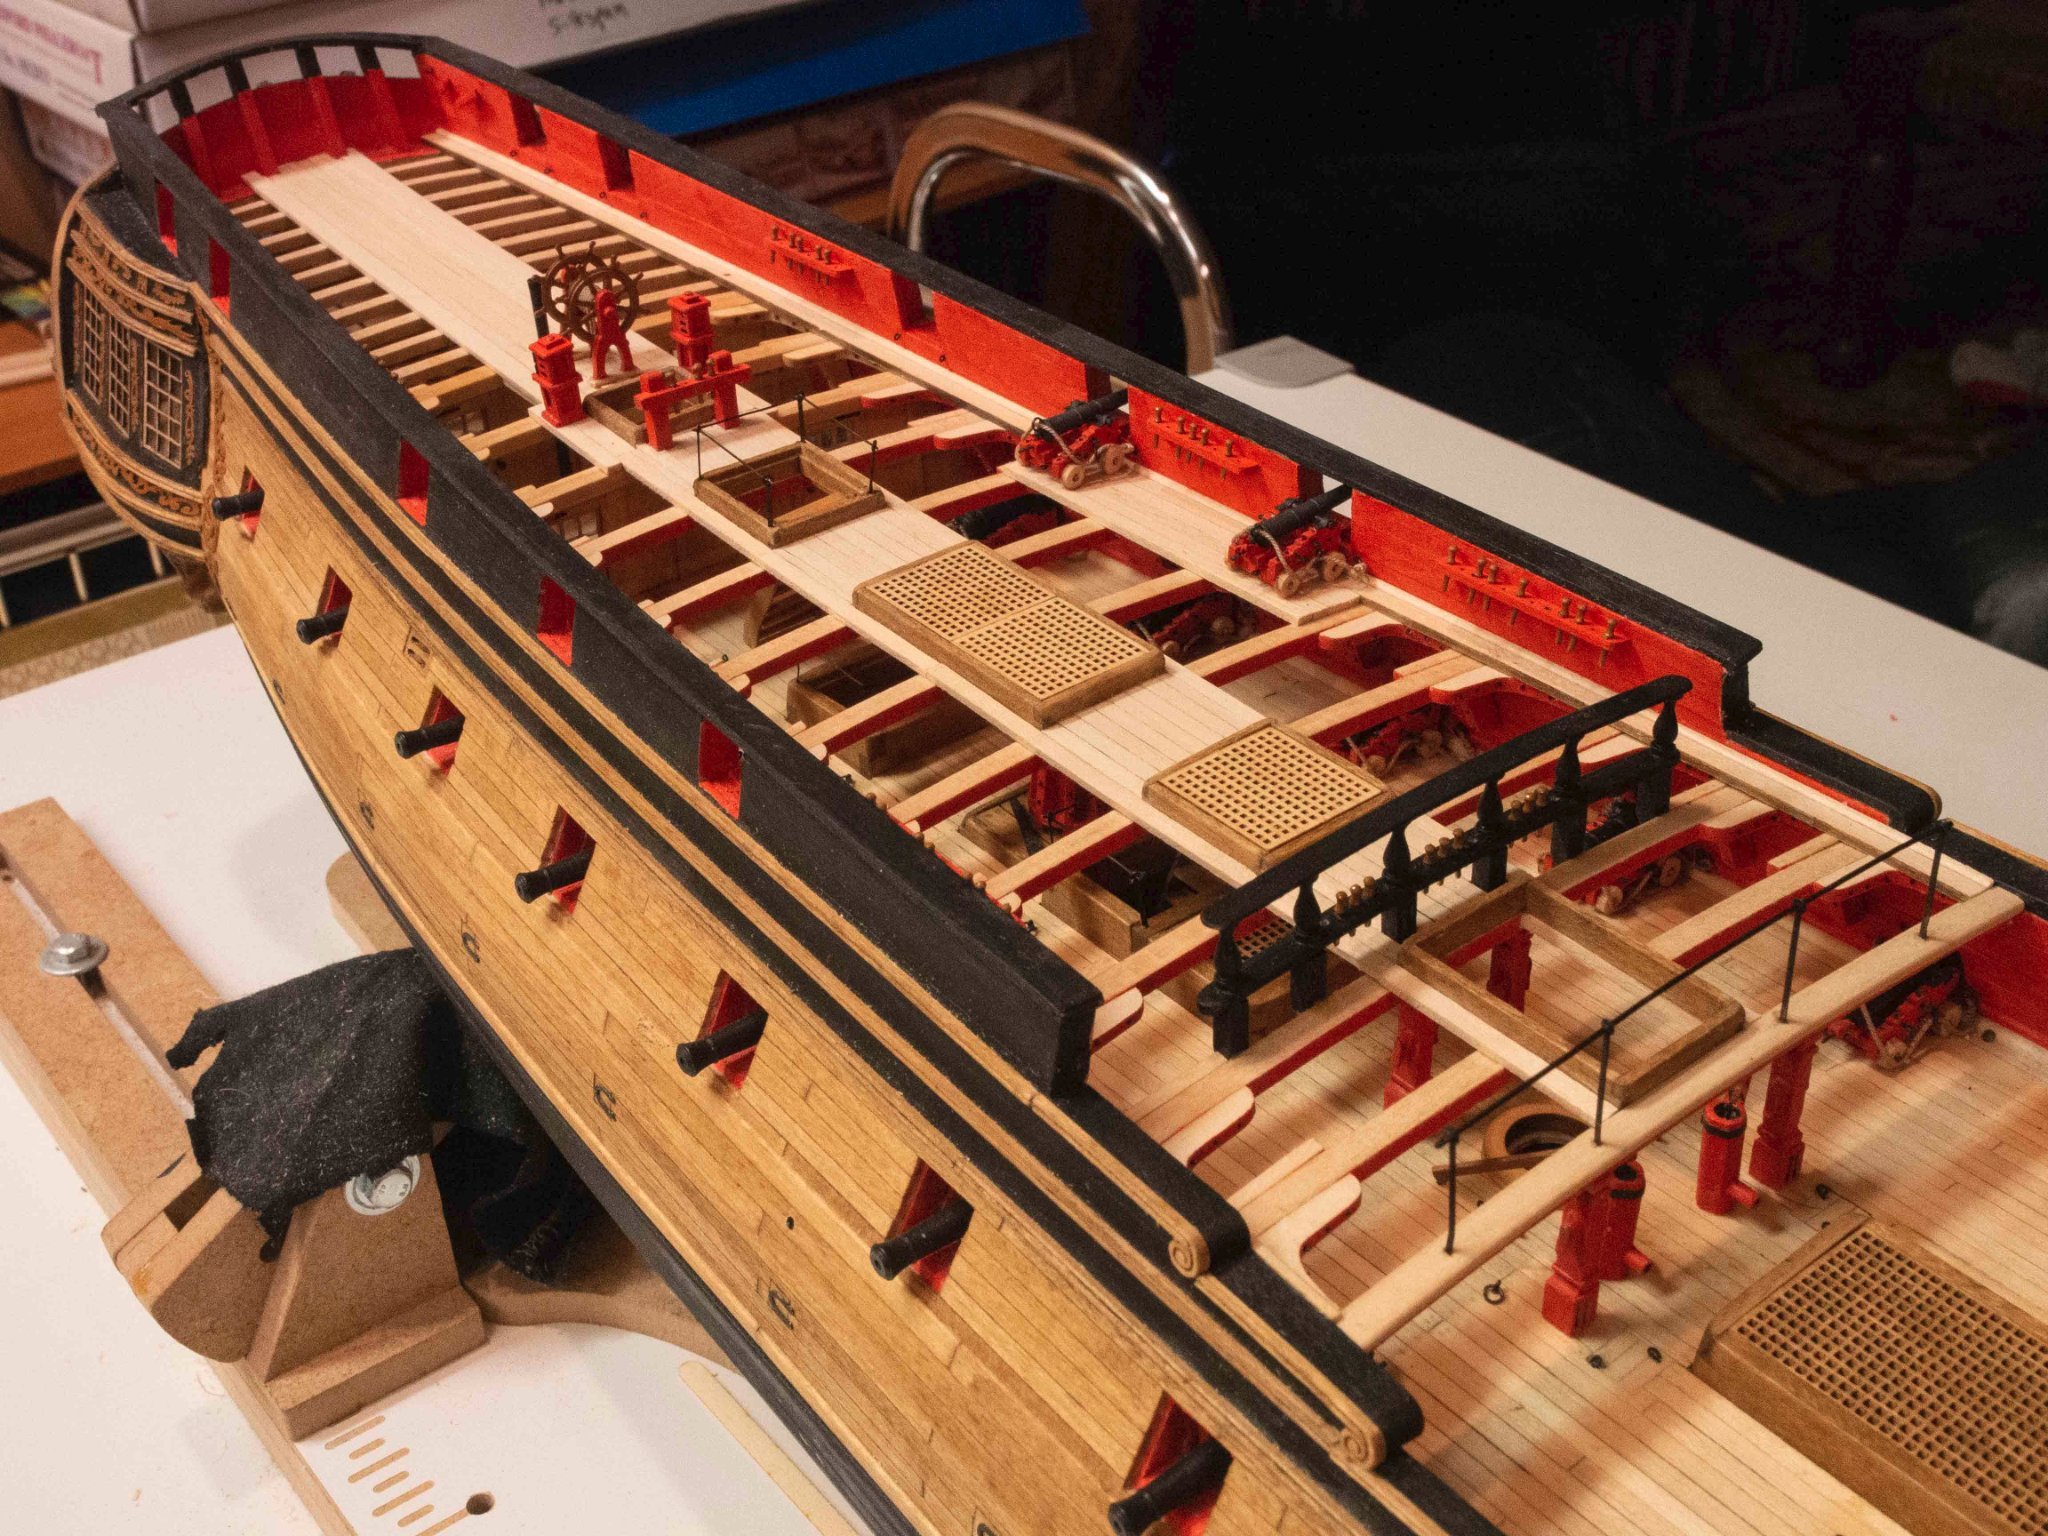
Finished the quarterdeck beams, knees, and carlings, as well as the underlying gun deck structures and details. A milestone of sorts.
Now time to turn attention to the bow area.
.thumb.jpg.d4710888d90949288094c4b33b44ce4b.jpg)
- oneslim, mtbediz, Tigersteve and 7 others
-
10
-
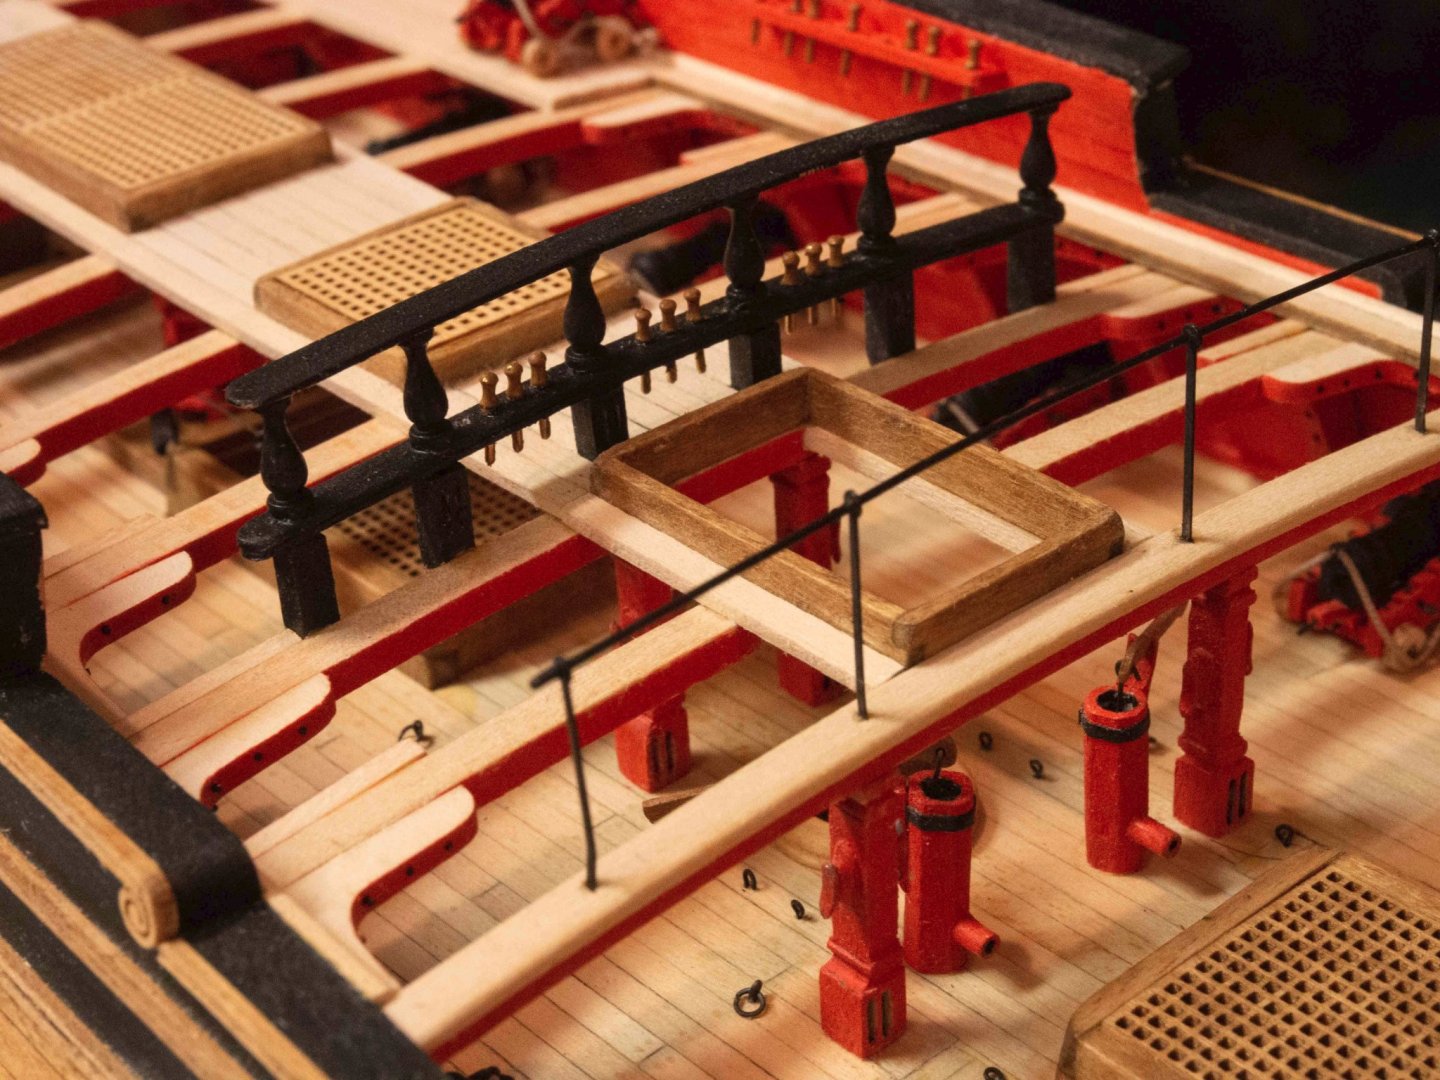
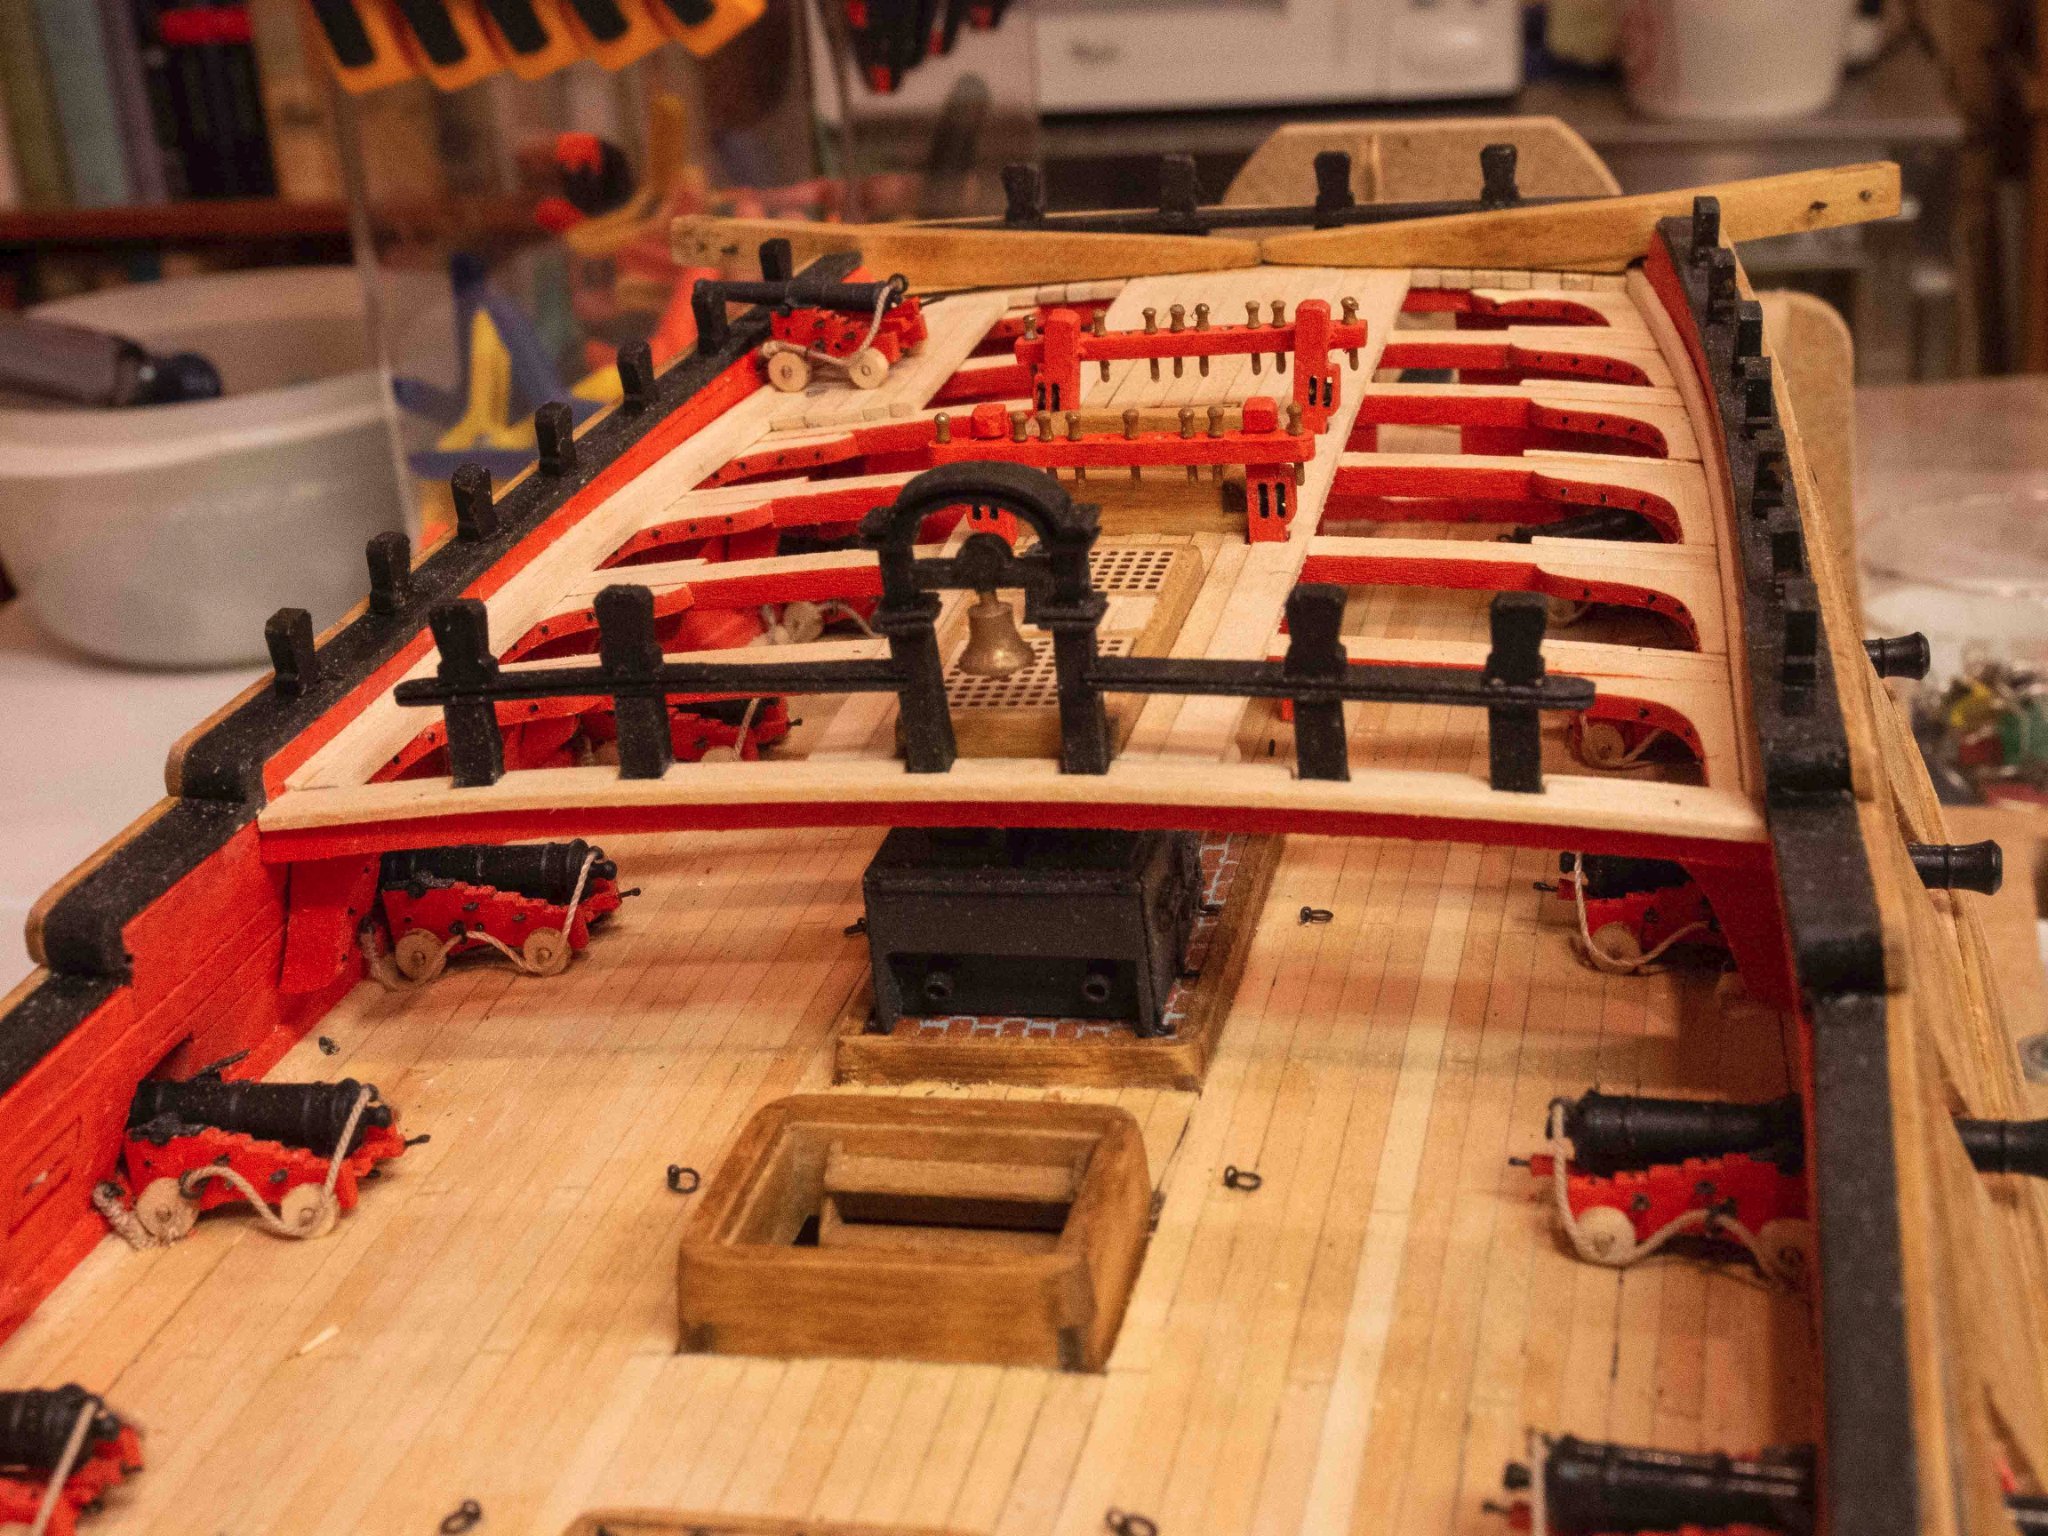
I've got most of the quarterdeck beams on (up to the mainmast area. Hanging and lodging knees in place. Here is where the eccentricities of the kit wood can bite you. I snapped the ends of several of the lodging knees off with minimal pressure while sanding due to the grain of the basswood running across that end (the smooth curved end). Thank goodness extras were provided!
I saw on the Winnie thread the beams in front of the cabins painted red on the front and back. Loved the look so I'm going with that. With the eight beams and their attendant supports done I'm now more in the phase of a bunch of sequential small projects rather than mind-numbing repetition, at least for a while. I love this part, and it fits well with the time periods I've allotted to building. The mainsail jeers were fun. Next, the pumps.
.thumb.jpg.8856599b75a100ee54dbea3a3d755162.jpg)
.thumb.jpg.2c83e7ff19efffdc9d717d75a915de84.jpg)
.thumb.jpg.b2afa201e10bddd05a0cc5abd6fd94b5.jpg)
- KennyH78, Edwardkenway, Bossman and 4 others
-
7
-
Good thinking.
did you substitute brass cannon?and if so how did you drill for the eye bolts in the breech? I have some for the 8 pounders and not sure how to approach that. Or for the white metal ones if it comes to that.
-
.thumb.jpg.41354e1ae7d5d5eaab1a004d5f23f857.jpg) A bit more progress, with both bulkheads now in place, including the speaking tube (not glued) and the supports for the first three beams.
A bit more progress, with both bulkheads now in place, including the speaking tube (not glued) and the supports for the first three beams.
Capstan next according to the instructions.
So far, other than the use of Syren resin 12 pounders and the carriage changes that necessitated, everything pretty much out of the box, including all the wood. I chose those cannon to make it easier (much!) to drill the holes to glue the eyebolt into the breech of each cannon. Not sure what I'll do for the 8 pounders when I get that far since the resin cannon don't come in the right size. I have brass ones but haven't decided how I'll deal with the eyebolts.
- JpR62, GrandpaPhil, JohnB40 and 7 others
-
10
-
-
Back home and back at it with the Confederacy.
Rudder trunk and aft bulkhead in place.
.thumb.jpg.1755c22baf3bca3b55d60565d3e41c46.jpg)
- GrandpaPhil, Tigersteve, bruce d and 3 others
-
6
-
Rats!
Couldn’t resist. Ordered this kit.
-
Darn, I wish I hadn’t seen this!
Now I’ve got this little voice in my head saying “wouldn’t this be nice to alternate working on the Confederacy?”….
truly a beautiful model.
- Old Collingwood, Egilman, mtaylor and 2 others
-
5
.jpg.bb0ddcceb27d5c3dde3aeb21bfcbce1c.jpg)
.jpg.240c11d3d7fdc546ef2bc7a2e95f72ba.jpg)
.jpg.08d91adce7ba66b0ffdfee7b79ae8771.jpg)


.jpg.8d418dd4c2b8ecb6ec0be592281b287d.jpg)
.jpg.d069d5207727a64033ee5f70e3fcdc48.jpg)
.jpg.b3392cb566e89c10024b97f435aca43e.jpg)
.jpg.35fd75e23bce7f5269899b1dfb3fad99.jpg)
.jpg.7af90da93f40a2b60a6630d8abc7cdfc.jpg)
.jpg.45e2de5802ffec1862062ae5f1543ec8.jpg)
.jpg.51e199f9ca47102c0371a695488055ec.jpg)
.jpg.bfef87c799736fbb52dc0b111b6b12ac.jpg)
.jpg.eb4a119f6906266c10ef3651c7132ff4.jpg)
.jpg.889e087f848a70772104bd833ba49014.jpg)
.jpg.dee832fb7ce7746e2a23190d128568f7.jpg)
.jpg.c7c4c871fcce286bcbc7135072f50eab.jpg)
.jpg.42e84716a796cb1ab16ca2064b1d539a.jpg)
.jpg.045cecd21169ab5e246aaa38aeefd8d6.jpg)
USF Confederacy by Brucealanevans - FINISHED - Model Shipways - 1:64
in - Kit build logs for subjects built from 1751 - 1800
Posted · Edited by Brucealanevans
Yeah, back at it today
made 3 new Timbers and I think I can re-use the most forward 2.
tomorrow will do some final shaping & fitting and will spot glue them and try marking and notching again.
I do think I learned from the failure.