

tlevine
-
Posts
1,933 -
Joined
-
Last visited
Content Type
Profiles
Forums
Gallery
Events
Everything posted by tlevine
-
 What horrible news. Hope your life returns to some semblance of normal before the year's end.
 -
Love the fairing cap concept. Definitely something I will steal for my next build.
-
I have the same light as Greg. Love it. It has almost no weight, unlike the other light attachments I have tried.
-
Nice work!
-
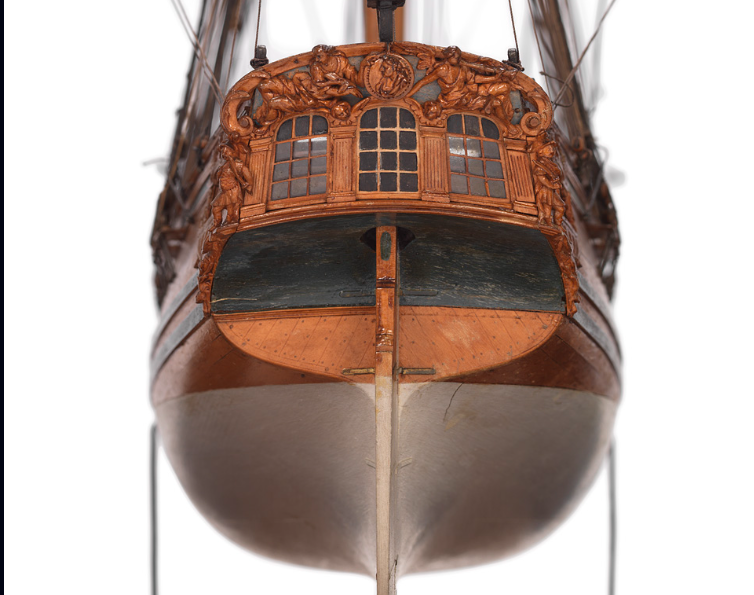
I like the side friezes but the counter looks (to my eye) too fussy. Even though the model needs cleaning, there appears to be a lighter color extending all the way across the counter.
-
Bend cast metal parts
tlevine replied to bogeygolpher's topic in Metal Work, Soldering and Metal Fittings
How brittle is the metal? Have you tried placing the pieces on a curved piece of wood (or even the side of a pot) and gently hammering in a curve with a rubber hammer? -
Since the structural strength is in your bulkheads, even balsa would work. It isn't necessary to fill in the entire space between the bulkheads. If you can pick up some pine from one of the big box stores, that would work well.
-
Patience? What's that? Seriously, the tops look great.
-
At the scale you are working at (1:55), you will rarely need a drill bit larger than #72. I built Roter Lowe back in the early 80's. When friends come over, they are always drawn to the colorful decorations. Historical accuracy be dam**d.
-
Gluing on planks
tlevine replied to rudybob's topic in Building, Framing, Planking and plating a ships hull and deck
By only applying glue to a few bulkheads at a time, you almost eliminate the need for clamps. Hold it in place with your fingers for a few minutes and you are good to go. Apply the glue to the bulkhead with either a toothpick or a #11 Exacto blade. -
To a large extent, what type of magnification you employ is a matter of personal taste (and budget). It also depends on what your vision is and if you wear bifocals. I own an ancient Zeiss operating microscope which I brought home after closing my practice. It has all the magnification levels you could desire. But with any microscope, you need to remove your glasses and hold your eyes a certain distance from the oculars. I hate taking my glasses on and off and so rarely use it. Optivisors come in different magnifications. The lenses are interchangeable. But the higher the magnification, the closer you must be to the object. The nice thing about an Optivisor is that I can easily flip up the lens and still be able to see because I am wearing my glasses. Druxey is right about lighting. Not only does a headlight prevent you from appreciating how light and shadow will interplay in the finished piece, but it will make everything look two dimensional during the carving process. That is fine for certain applications, like microsurgery or dissecting a frog, but it really is a detriment when you are creating a 3-D object from a flat surface.
-
Ticking off the bulkheads
tlevine replied to rudybob's topic in Building, Framing, Planking and plating a ships hull and deck
The run of the garboard looks OK, maybe just a tiny bit high at the stem. Is your keel piece glued in place or just placed there for the photos? I ask because there is a considerable gap between it and the stem. Which kit are you building? -
Ticking off the bulkheads
tlevine replied to rudybob's topic in Building, Framing, Planking and plating a ships hull and deck
Are you attempting to spile the planks or simply develop a run of planking for kit-provided strips? If you are spiling, take a look at the Half Hull Planking Project, starting at Post #22. -
Tips for the Second-Time Model Builder
tlevine replied to Melissa T.'s topic in Wood ship model kits
A bit late to this thread but I love your list. When I was at the point of deciding on my second model (first "real" model was the Revell Connie), the PC hadn't been invented and the only wood kits I could find were sold by a now-defunct craft retailer called Lee Wards. They sold two kits, Mantua's pirate ship and Peregrine Galley. I bought the better-looking of the two and was thrilled to find a catalogue included with the kit...Model Expo. It is so much easier now to find something that appeals to one aesthetically or historically or simply for the challenge. -
I went to your build log and have the impression that you want to drill holes into the hull with the drill press. If so, that is absolutely the wrong tool for the job. If your hands are shaky, your best bet is to make a dimple impression with a punch or pin and use that dimple to guide your hand. Whether you use a Dremel or a pin vise, this will keep you in the correct spot. I do own a Proxxon drill press and find it useful for parts that do not need to be or cannot be secured in a vise.
-
What are you using the drill press for?
-
This SWMBO likes shiny things where appropriate. What are you building? A modern pleasure boat has a much different appearance than an 18th century warship. Why are you considering a spray-can product when you have much more control with a hand applied one? I use Danish wood oil if I want anything other than a flat finish. Apply, wait a few seconds, wipe off. Adding more coats increases the gloss.
-
I use both carbide bits and HSS. If I am using a pinvise, the only type of bit I use is HSS. I will almost always use a carbide bit when I am using a drill press or the sensitive attachment on my Sherline mill. For drilling treenails, I usually use a carbide bit in my variable speed cordless Dremel. This requires a steady hand because any torque will snap the bit off in the wood.
-
Scratch built chainplate
tlevine replied to RossR's topic in Metal Work, Soldering and Metal Fittings
Taking a look at Allan's book "Scantlings", I found dimensions for Bindings of the deadeyes on pages 238-9. There probably is not much difference in the diameter between British and Spanish practice. A fifth rate of 34 guns would have had a binding of 1.5" fore and main and 1.25" mizzen. -
You could try copper tubing or sterling silver tubing, patinated with liver of sulfur and then burnished. The silver will look just like pewter but the copper is cheaper.
-
My scuppers were made from a silver-gray craft paper. I rolled the paper around an appropriate diameter dowel to form the scupper.
-
When I grow up, I hope to be only half as skilled as you are. Your work is amazing.
-
Jerry, this is how I tapered the planks on my Fair American. Measure the width of the deck at the fore end of the quarter deck and at the transom. Decide the width of planks at the break of the deck, for example ten inches. Divide the deck width by the plank width. It obviously will not be whole number. So if your deck width is twelve feet, you will have fourteen whole planks and an extra four inches. Add a quarter inch to the width of each plank and you have the width of the planks at the break. Now divide the width at the transom by fourteen and you have the plank width there as well. Now that you know those two numbers, make one deck plank out of card and use it as a template to make the planks. For installing, start at the midline. It is a lot easier to hide an odd plank at the waterway than in the middle of the deck. And don't forget the slight taper along the plank edges to compensate for the camber of the deck.
-
Ken, the etchant in this case is the vinegar. If you are asking about the Birchwood Casey, I use a 25% solution. I rarely use vinegar. I prefer to use a warm solution of Sparex (dilution instructions are on the package). It keeps forever in a glass or ceramic container. Mine is kept in a tiny crock pot which I turn on low when needed.


