

Peter Bloemendaal
-
Posts
236 -
Joined
-
Last visited
Content Type
Profiles
Forums
Gallery
Events
Posts posted by Peter Bloemendaal
-
-
Just a few more photo's to keep the log ticking along.
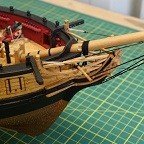
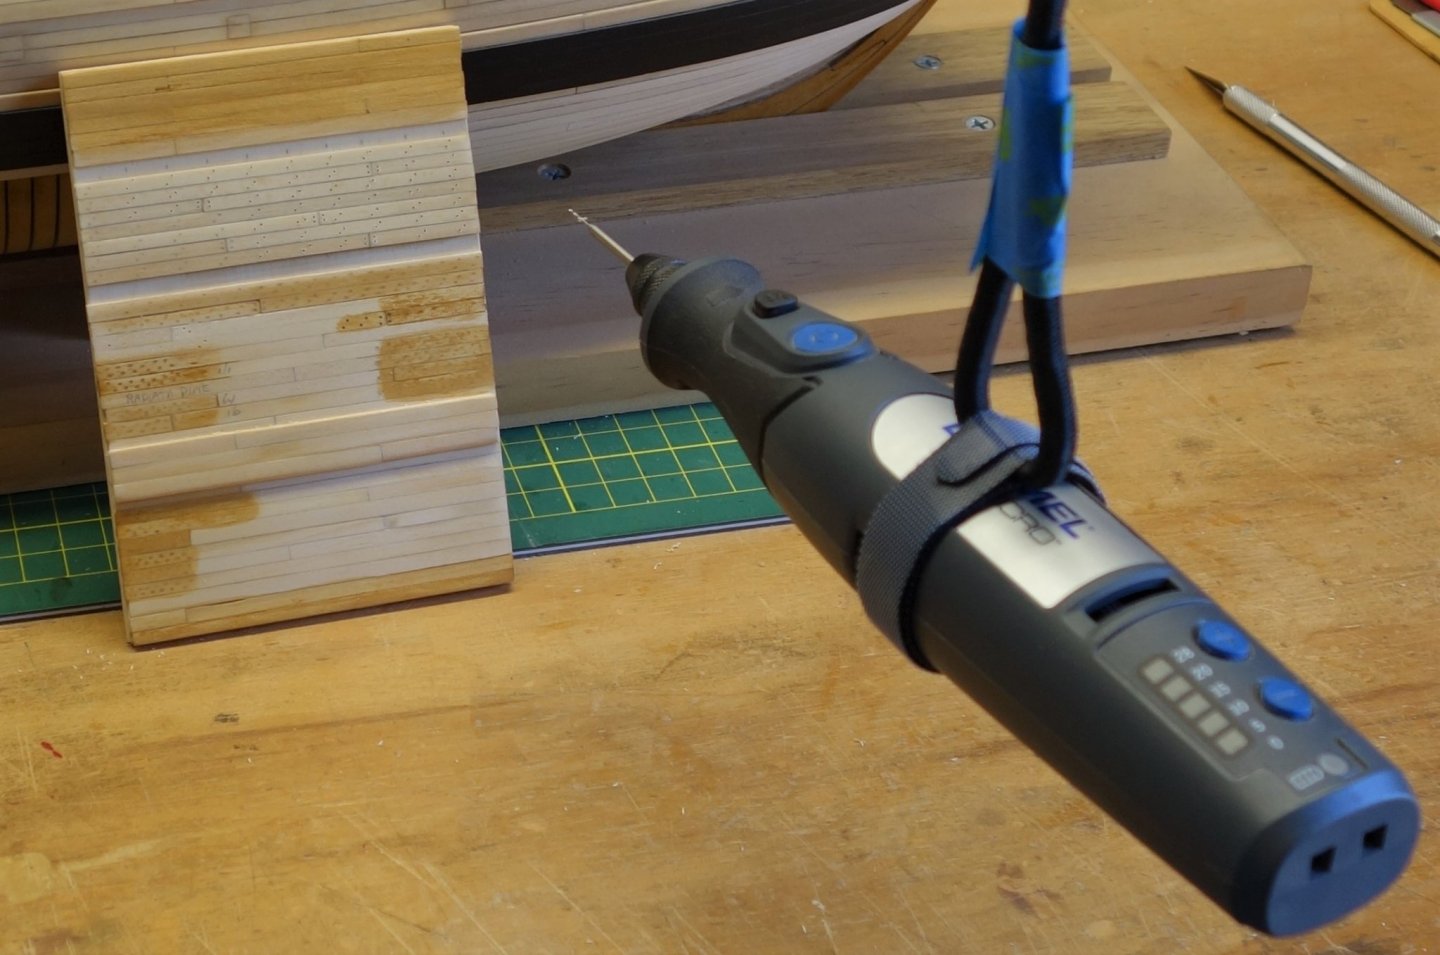
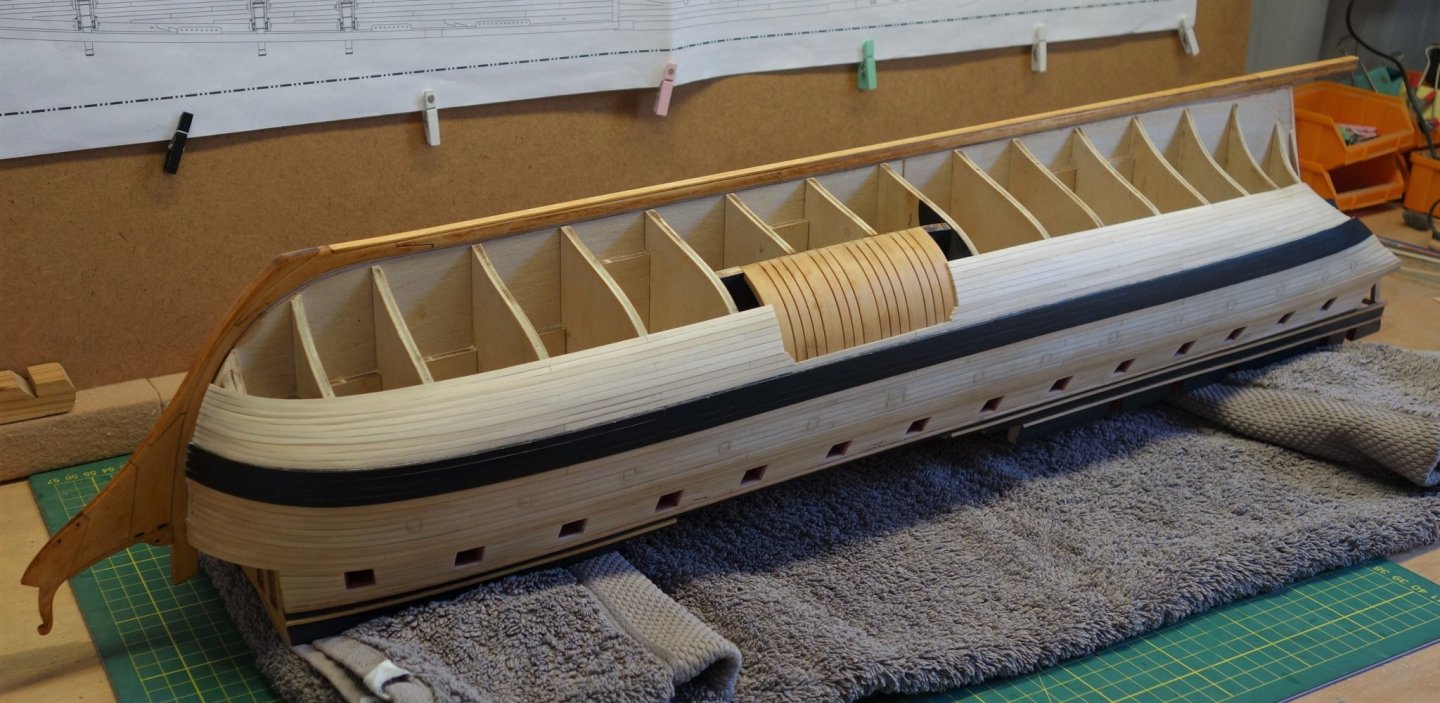
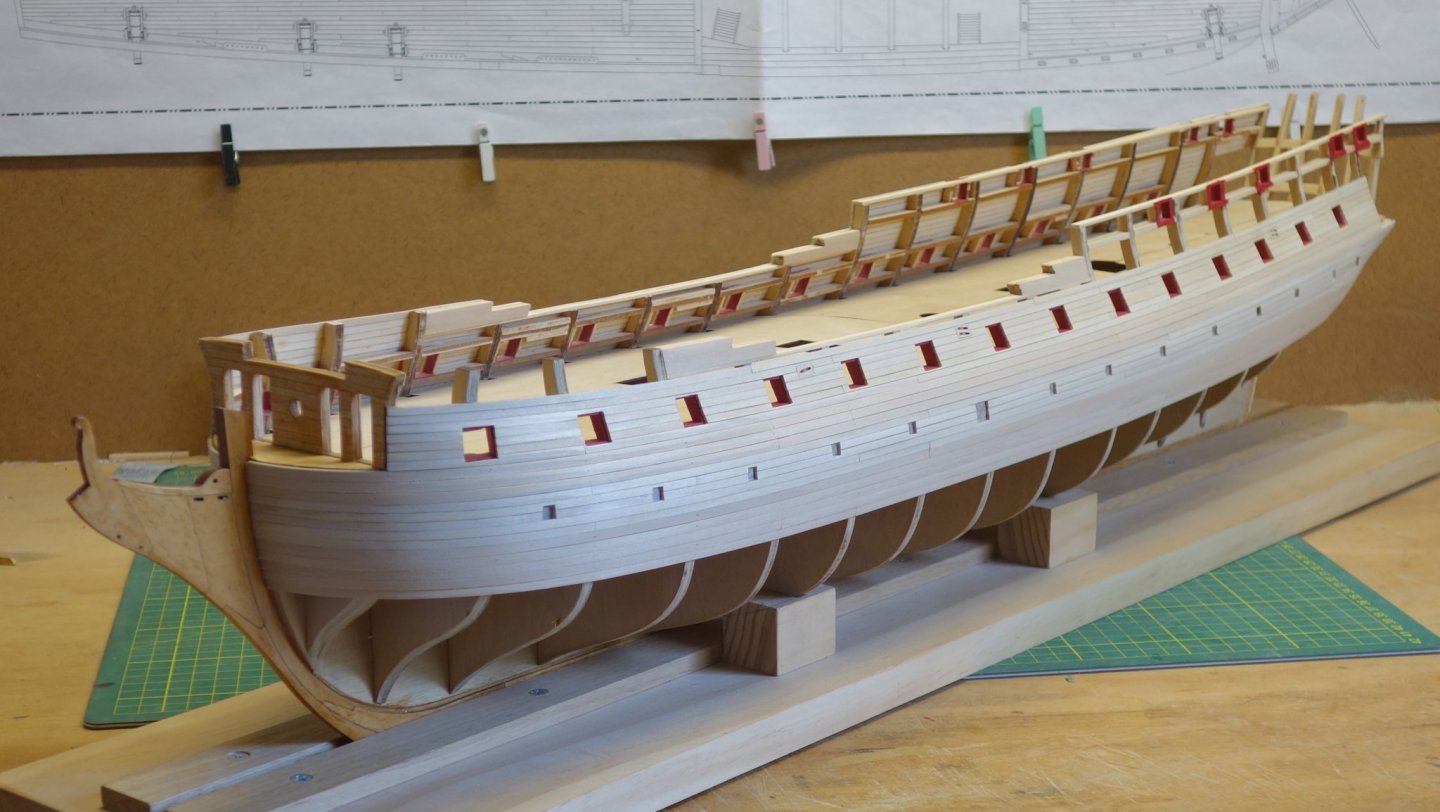
I'm working on 2 fronts now. One is drilling the holes for the tree nails and when the Dremel battery needs re-charging (or my hands need a rest...lol) I have started planking the second belt.


- Ryland Craze, CiscoH, Script and 10 others
-
 13
13
-
1 hour ago, Voyageur said:
are you drilling through or just deep enough to be filled in for appearance?
Hi Voyageur.
I'm drilling just a few mm so it can be filled with wood filler and sanded down after.
Peter
-
12 hours ago, Bossman said:
Peter, as you say, brilliantly executed! Very nice job on the planking.
Thanks Bossman.
22 minutes ago, Tigersteve said:You could always skip the treenails. 😎
Nah, I'm too stubbern to leave it. I'm not happy with the staining attempts on the sample yet, but last night I pencil marked one side of the hull in preparation for the drilling. There is no way back now....lol
-
Time for another update. First a thank you for the likes.
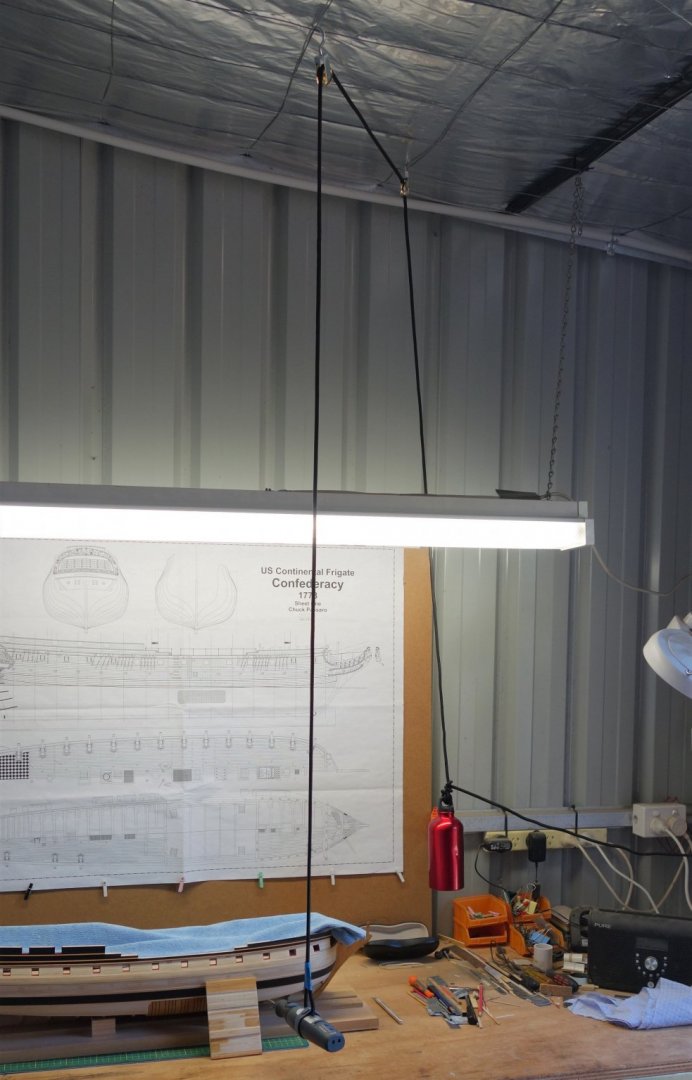
I have been procrastinating a bit on the treenails. How they end up looking is one issue, how to drill that many holes in the hull accurately is another. I didn't want to have the model on my lap and drill downwards and drilling horizonally holding a dremel or drill, I couldn't initially get a good feel for either. I end up finding a (brillianly executed...
") ) way of taking the weight off the dremel so I can have better use of both my hands to line up the drill bit. It worked fine on my sample board. I plan to pencil mark the hull first so I have something to aim at before drilling the holes. I'm still working on how to get to the right "look". There is a big color variation on how the various basswood planks react to the stain I plan to use.
) way of taking the weight off the dremel so I can have better use of both my hands to line up the drill bit. It worked fine on my sample board. I plan to pencil mark the hull first so I have something to aim at before drilling the holes. I'm still working on how to get to the right "look". There is a big color variation on how the various basswood planks react to the stain I plan to use.
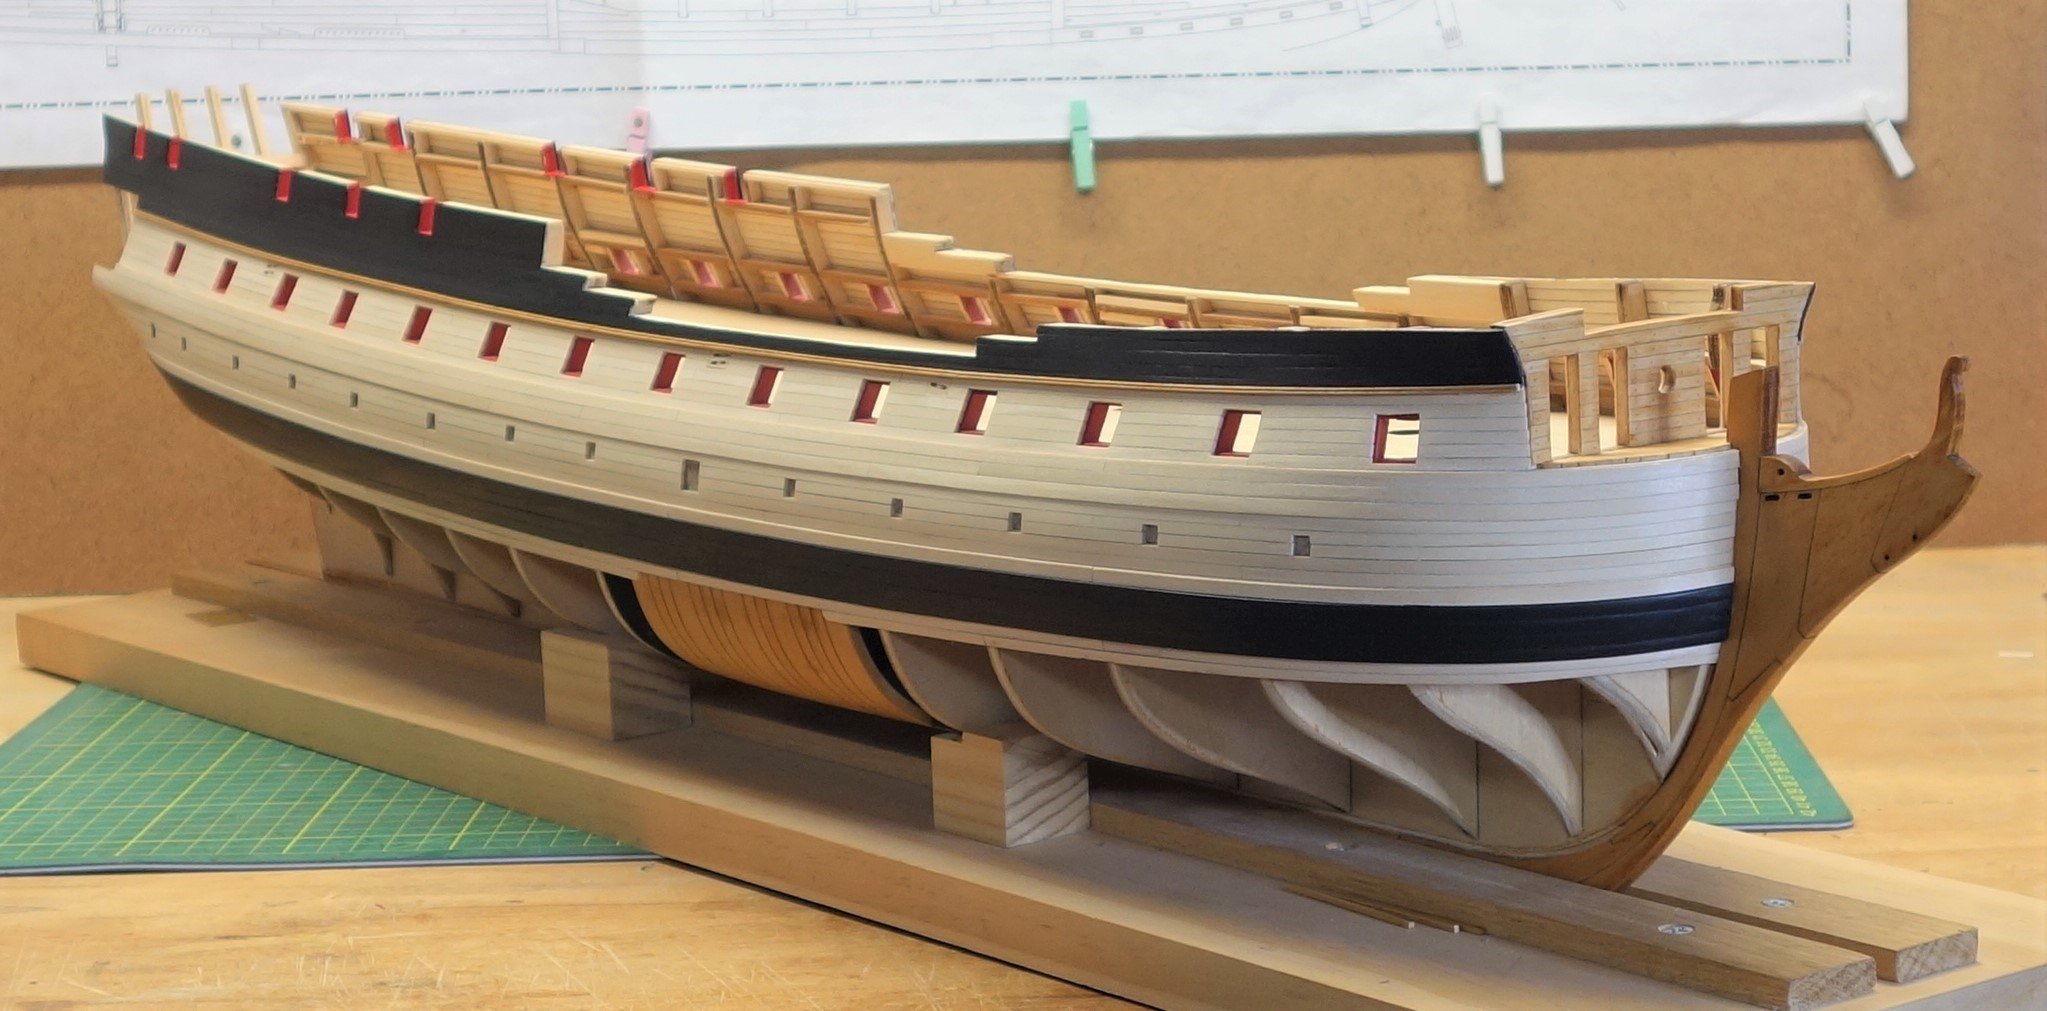
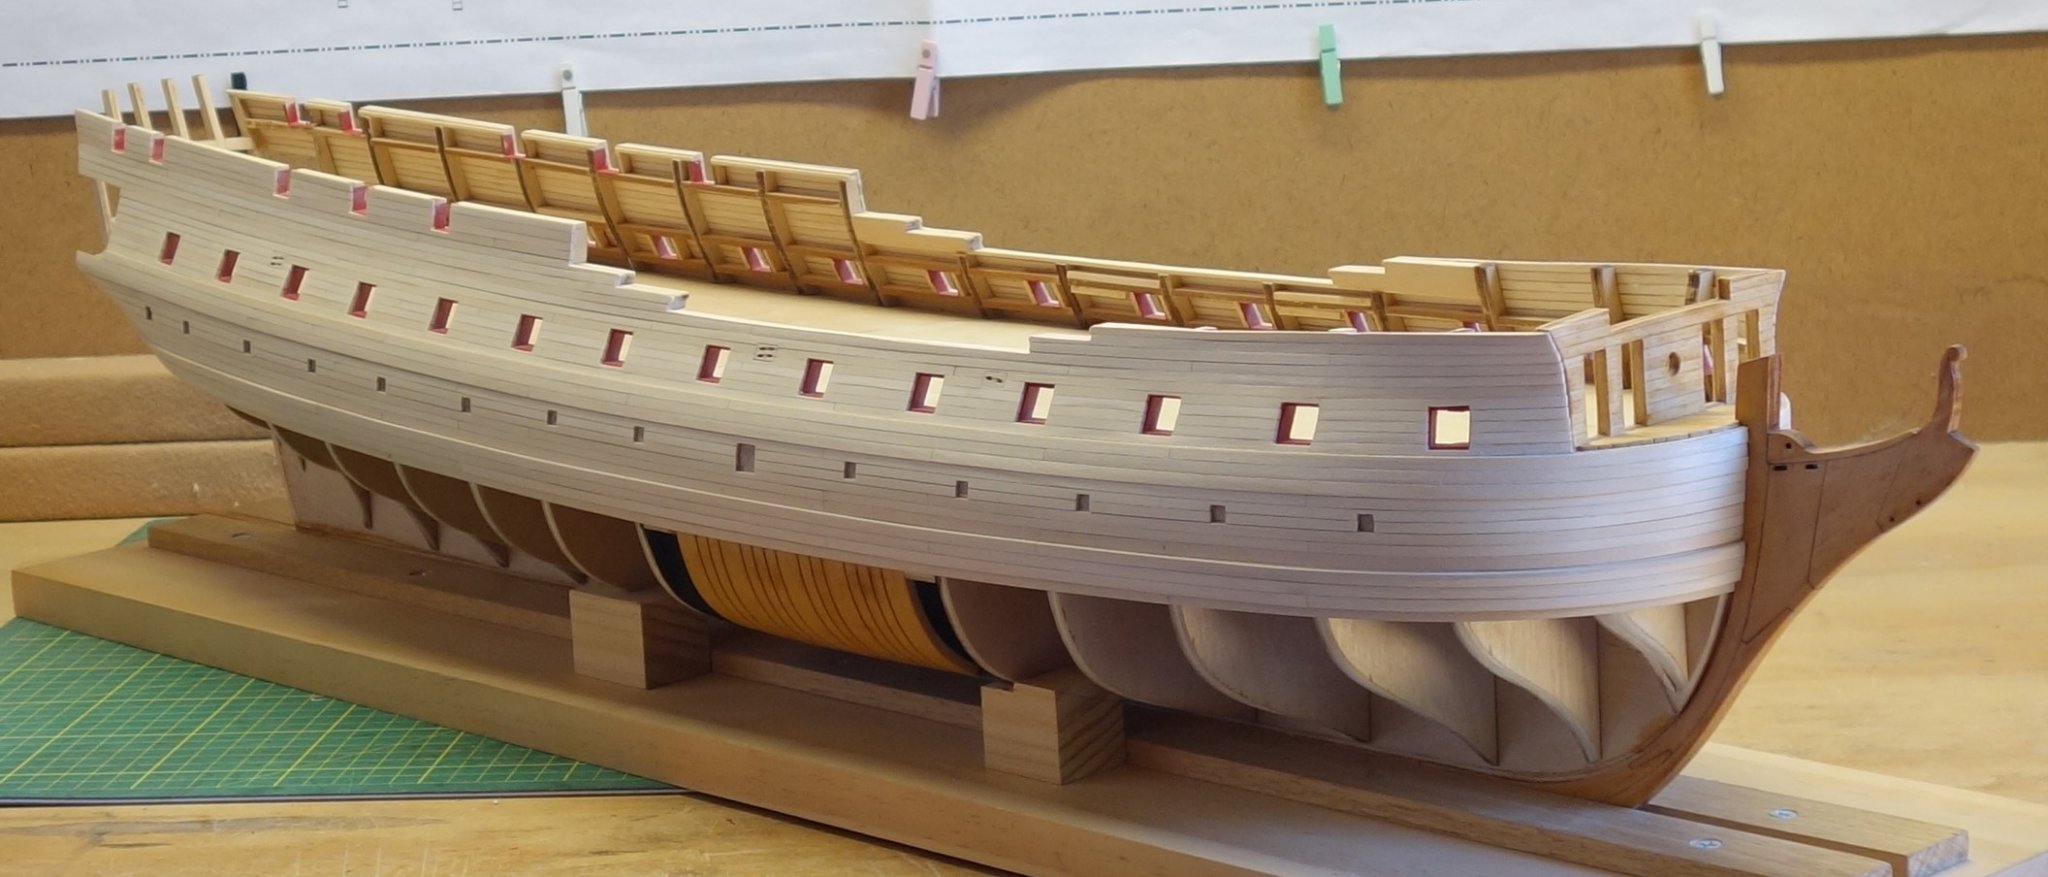
While this was going on I managed to get the first belt of planking below the wales done as well.
Here are some photo's.

-
Thanks Harley, John, Svein and Bossman for your positive feedback and also thanks for the likes everyone.
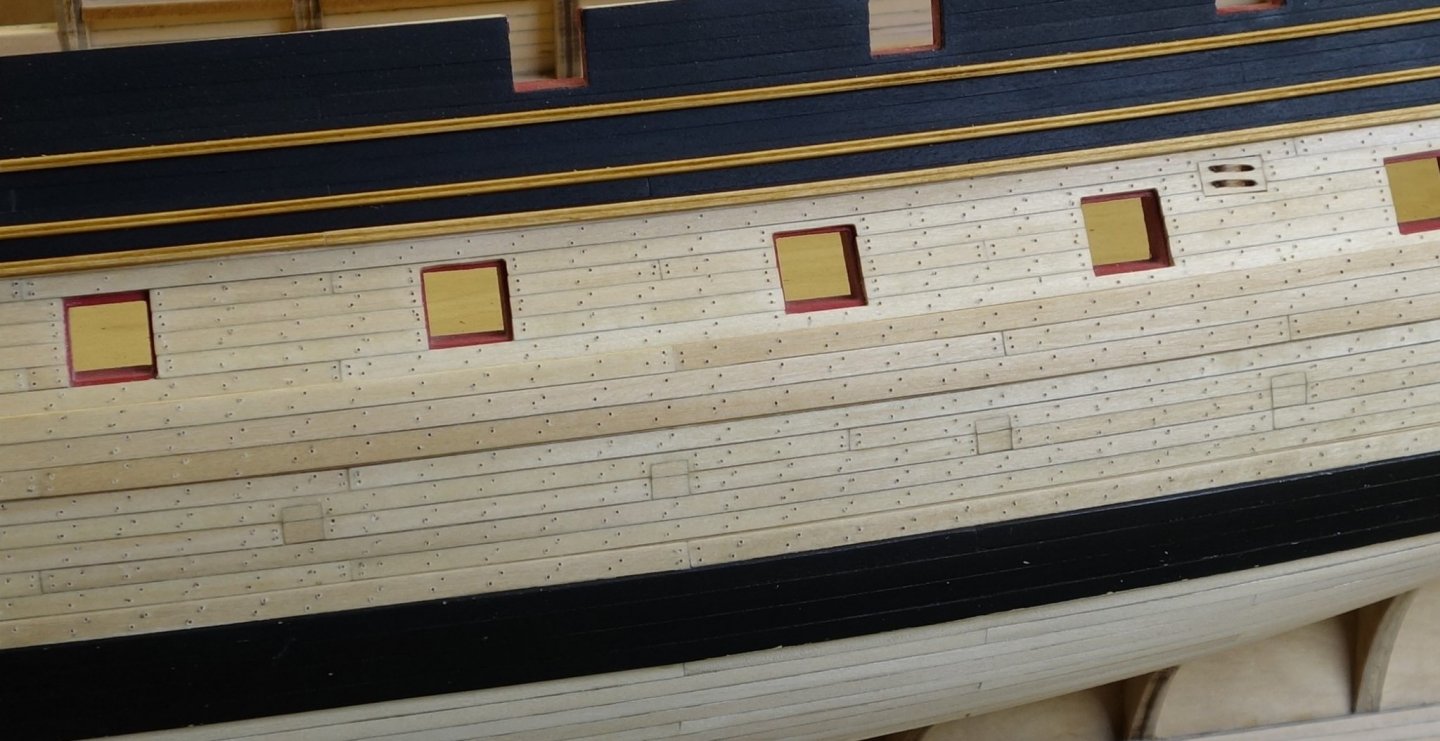
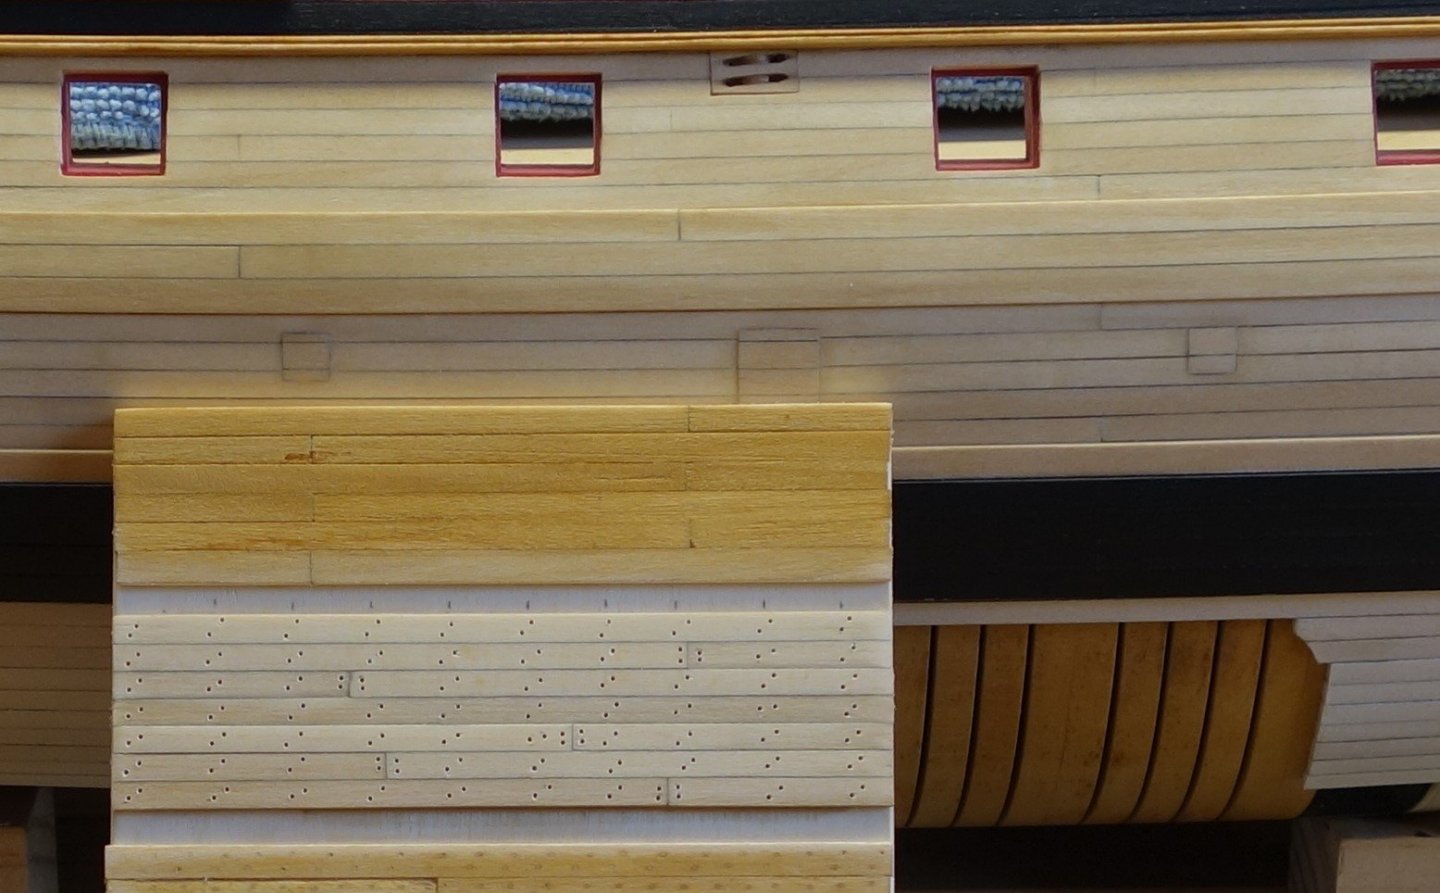
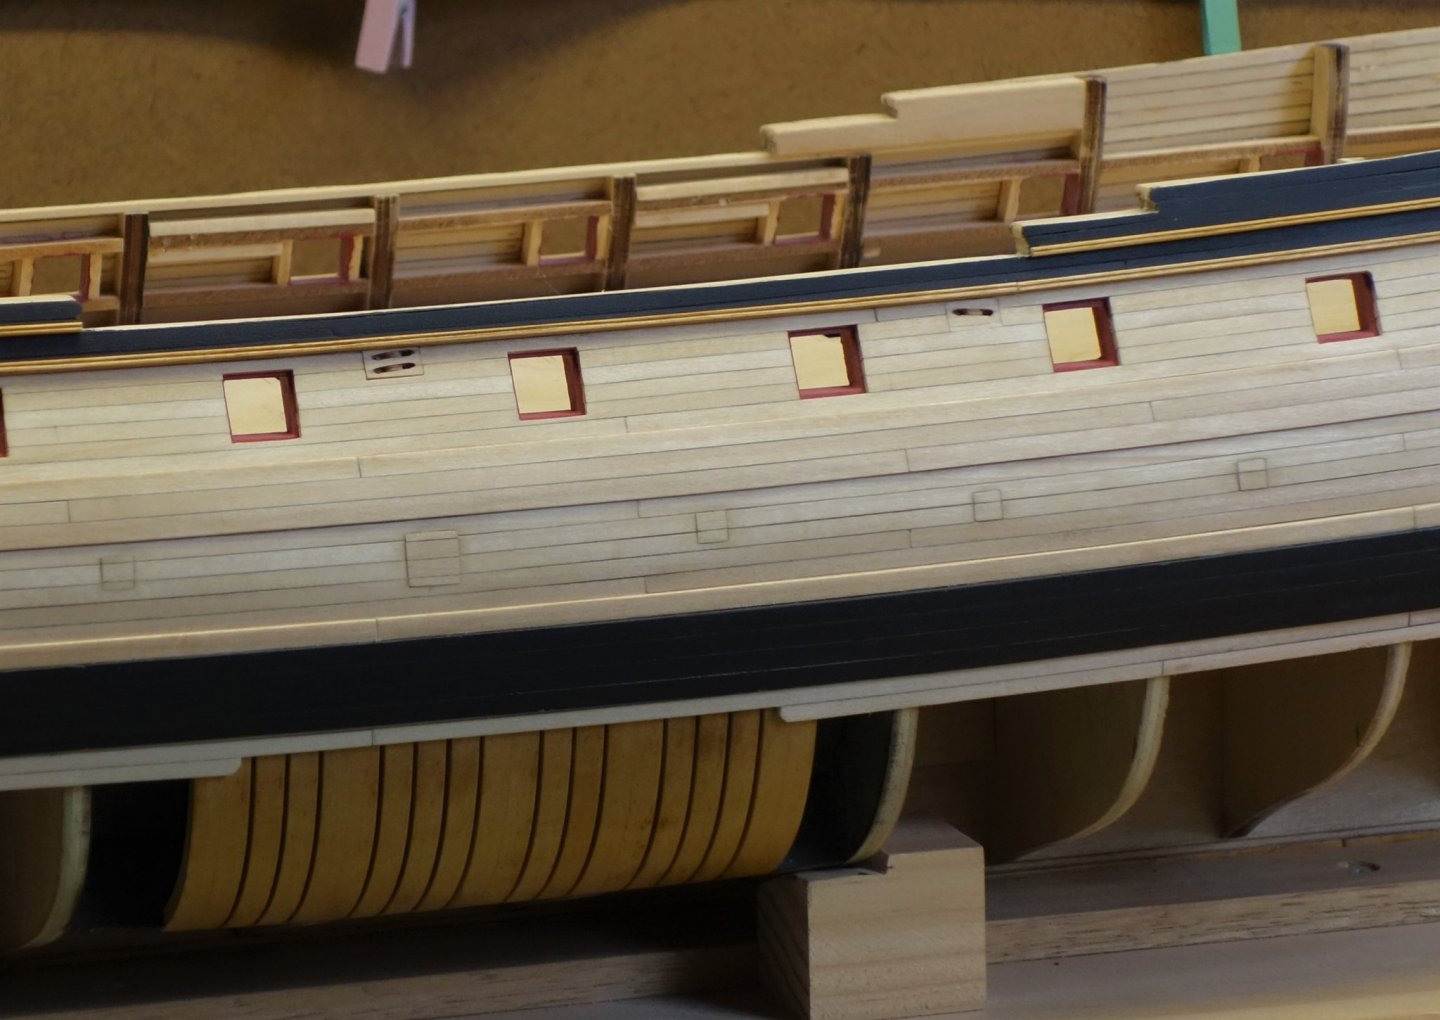
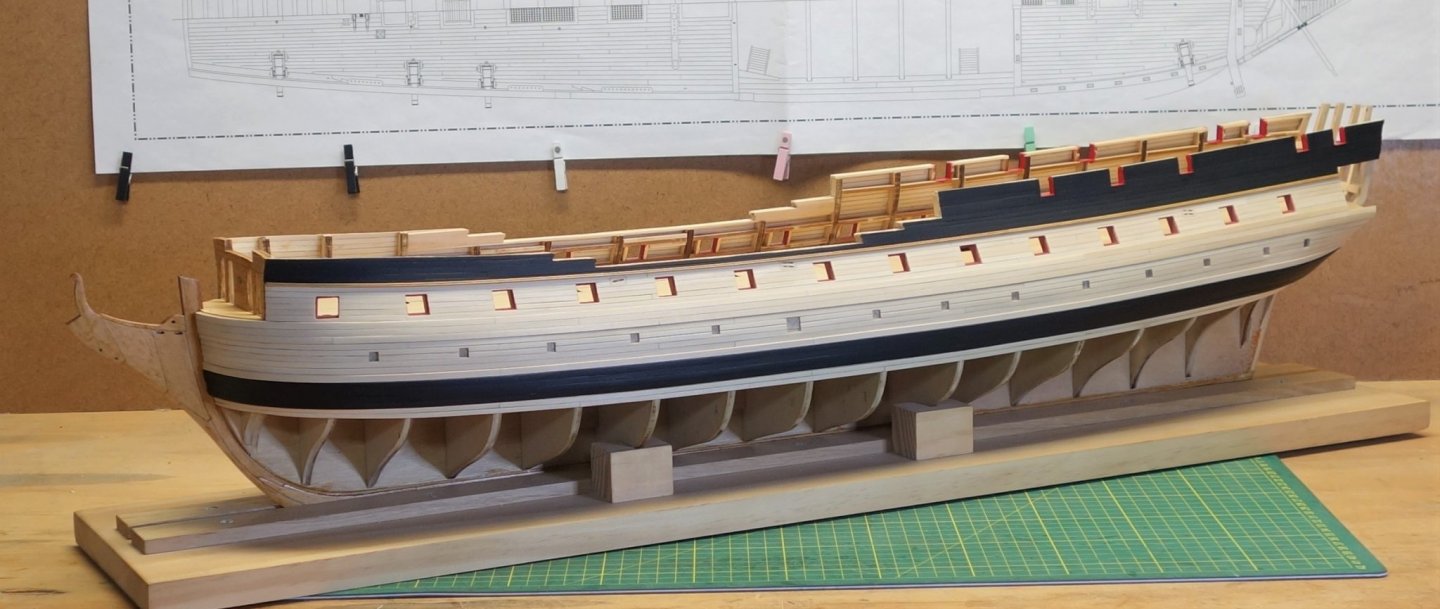
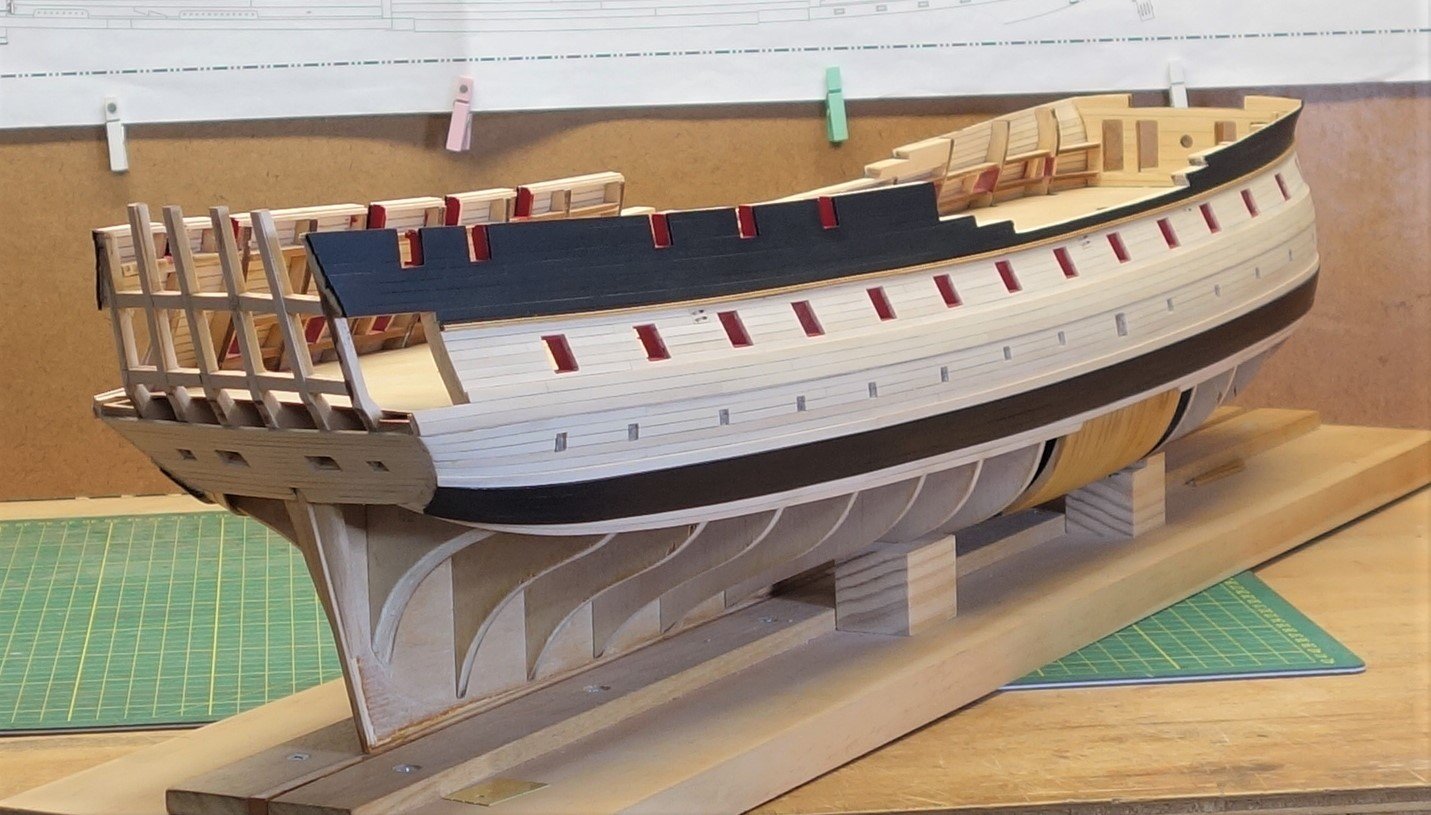
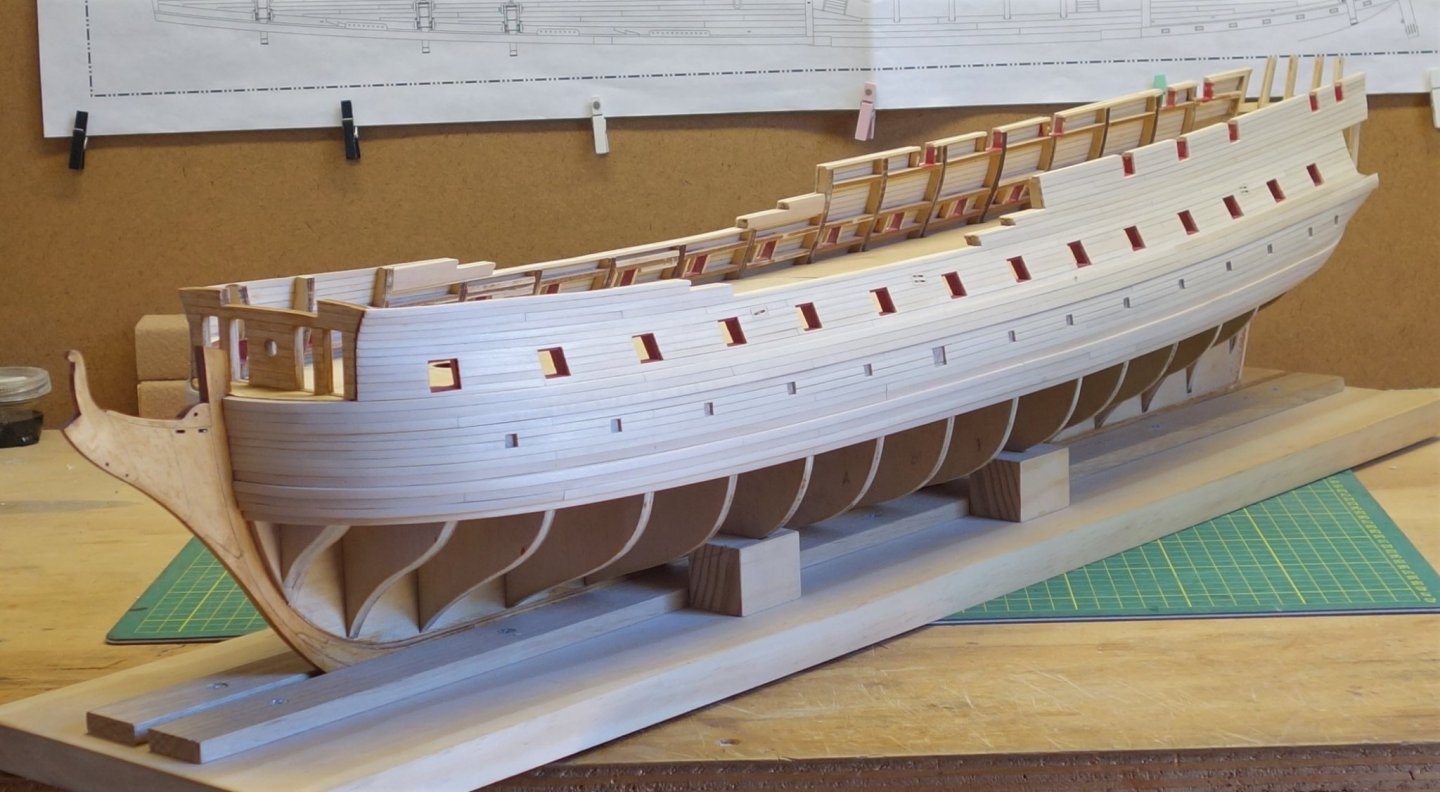
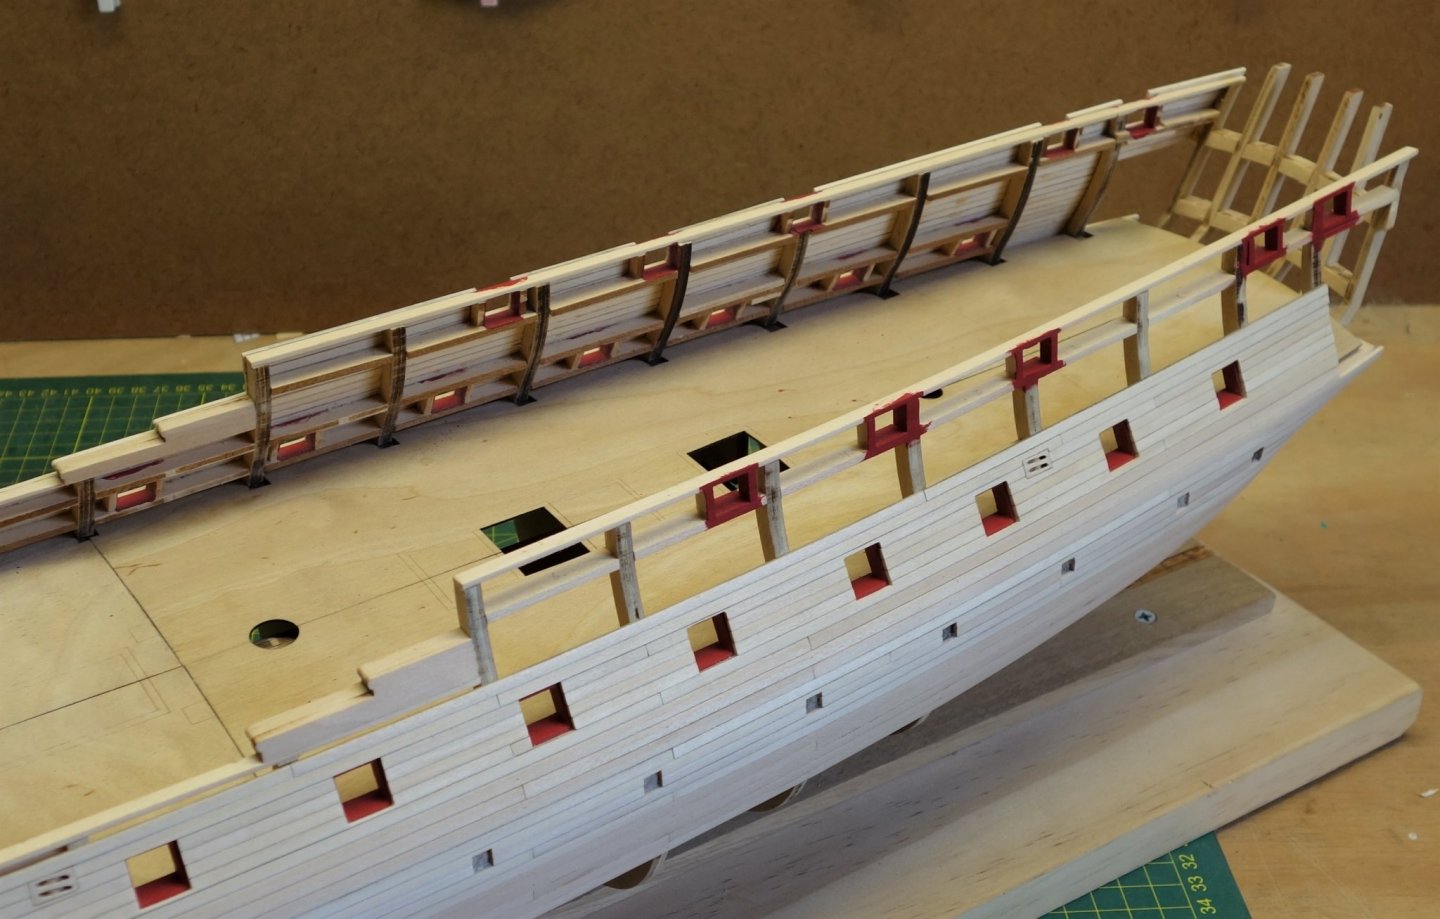
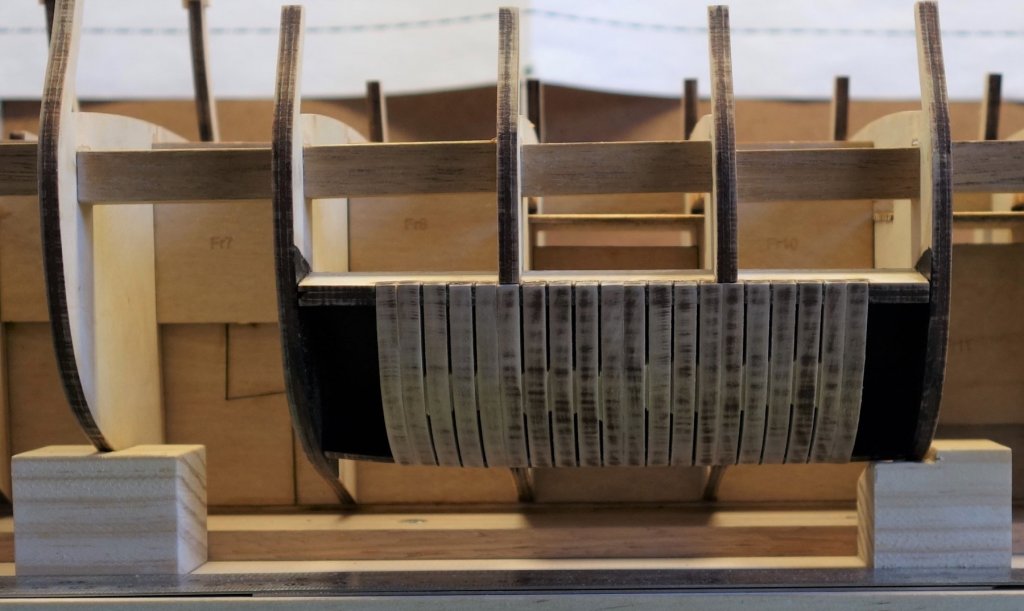
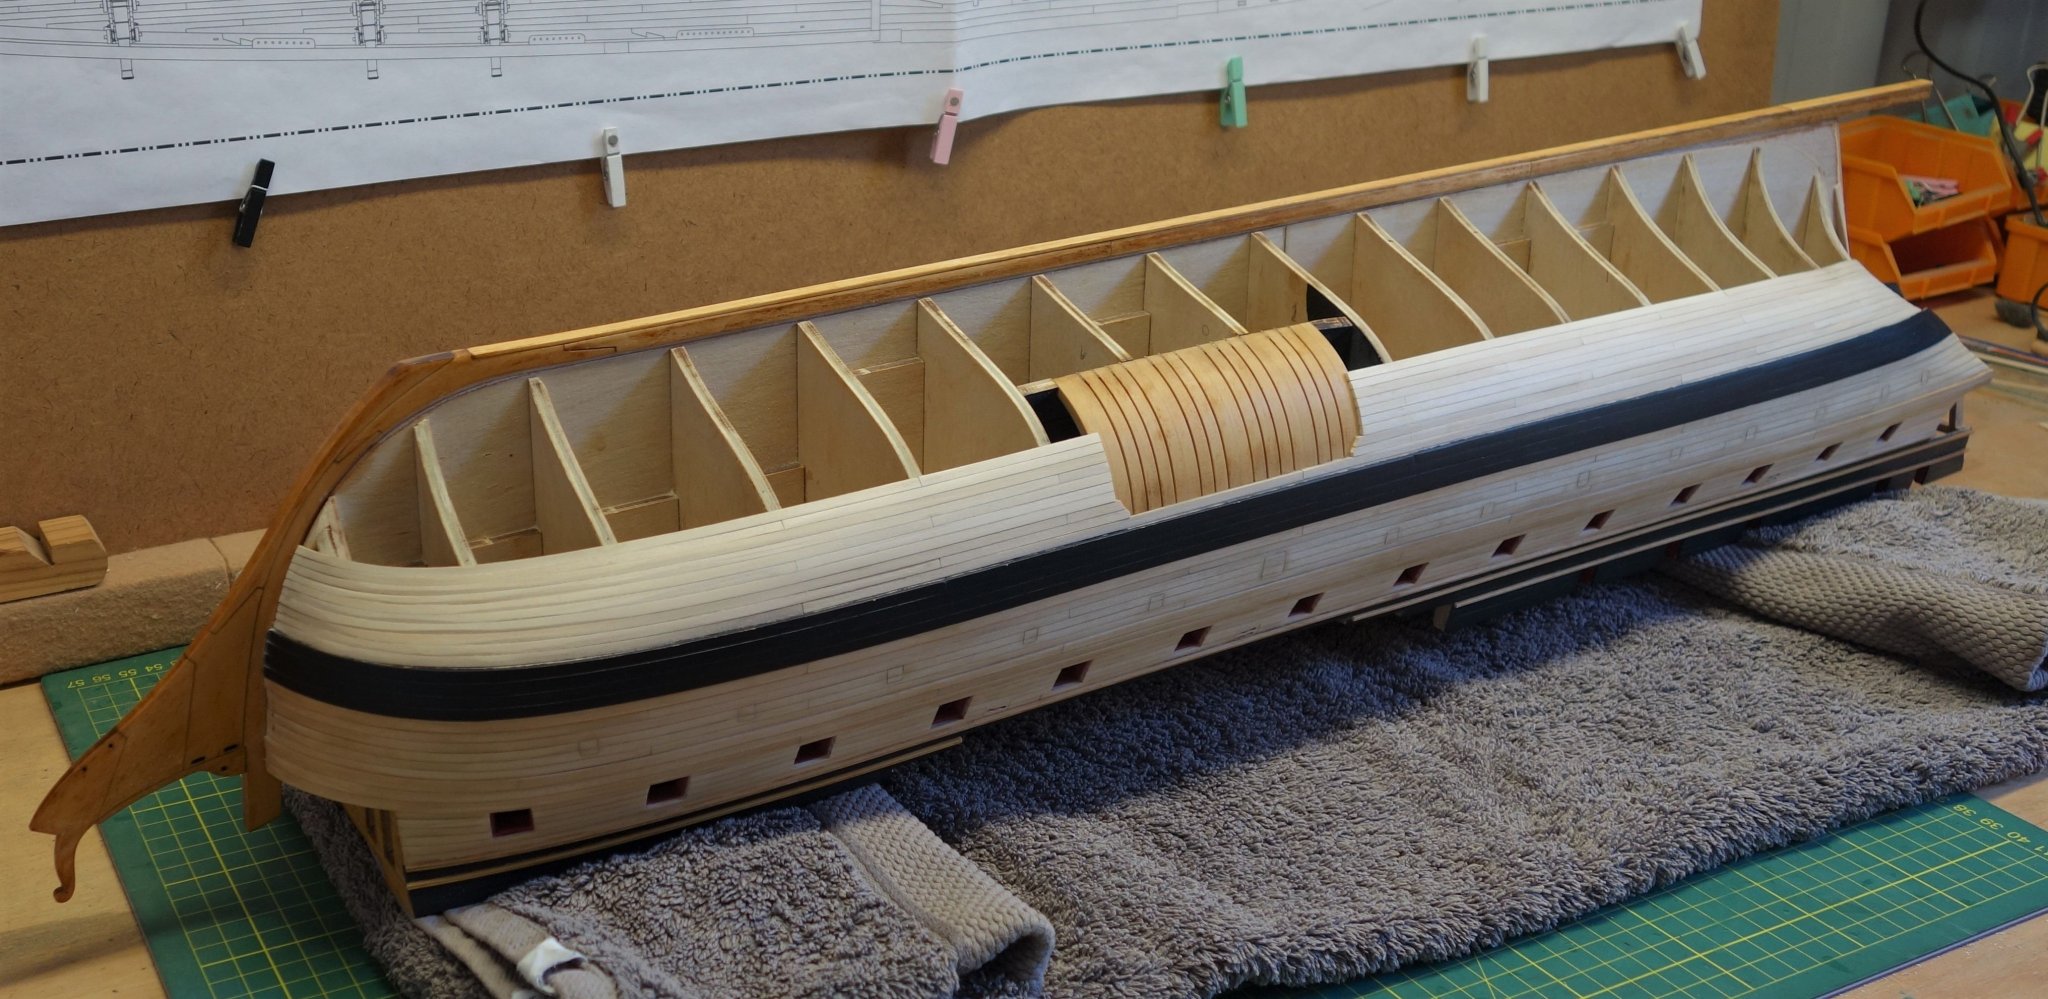
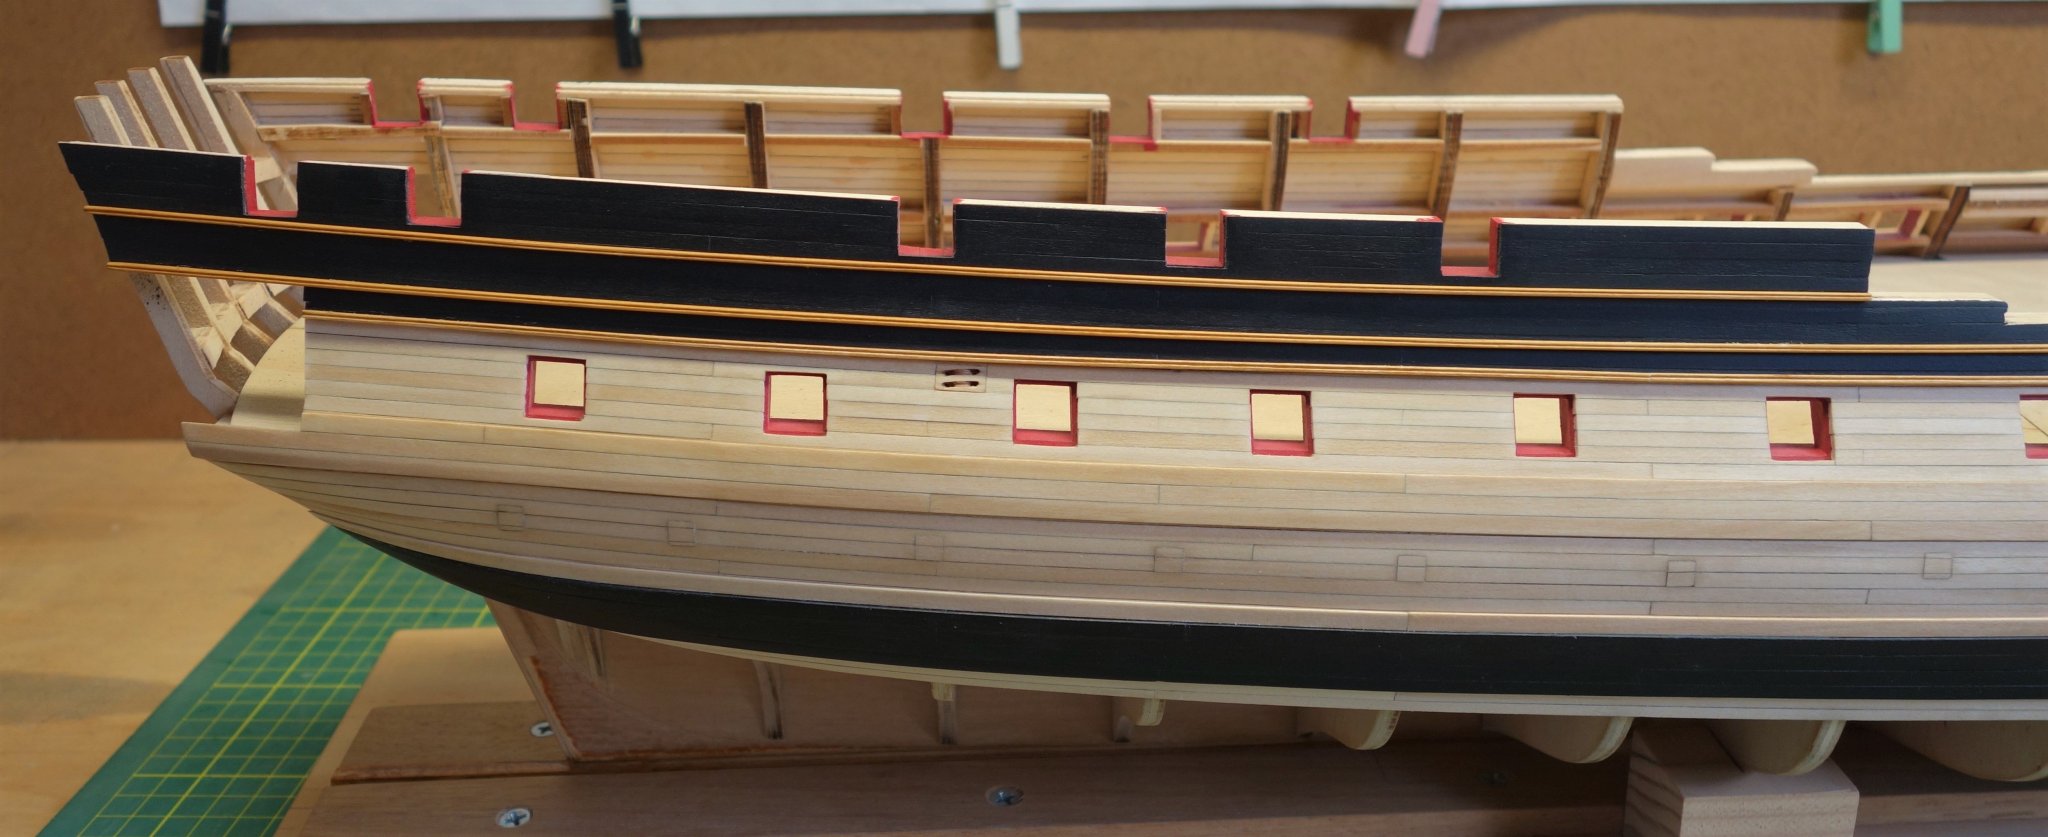
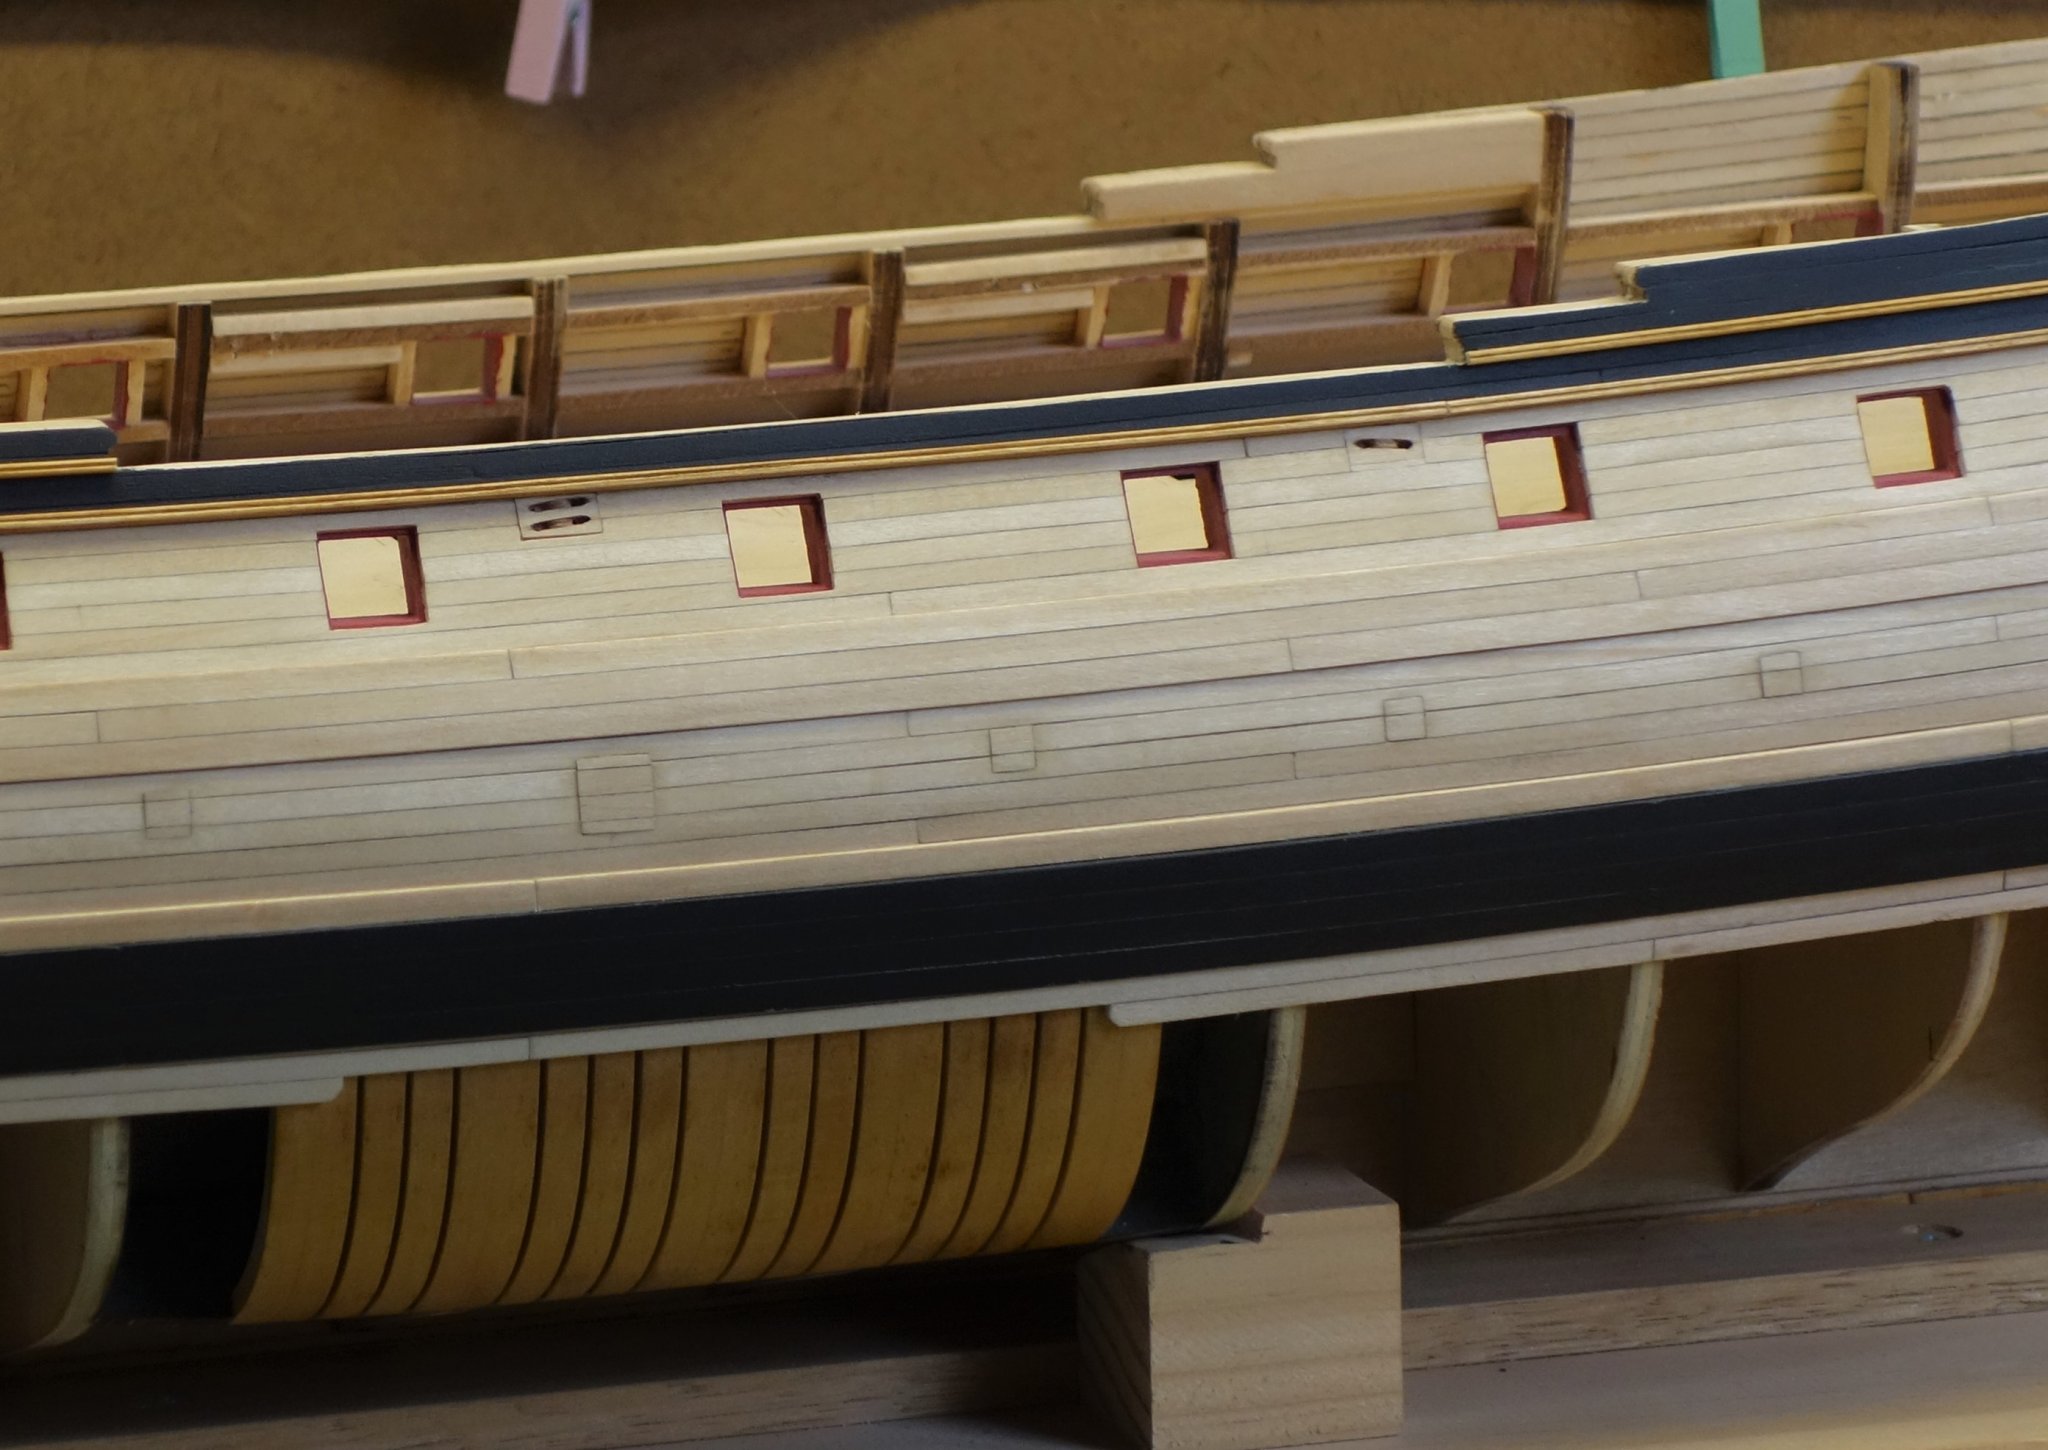
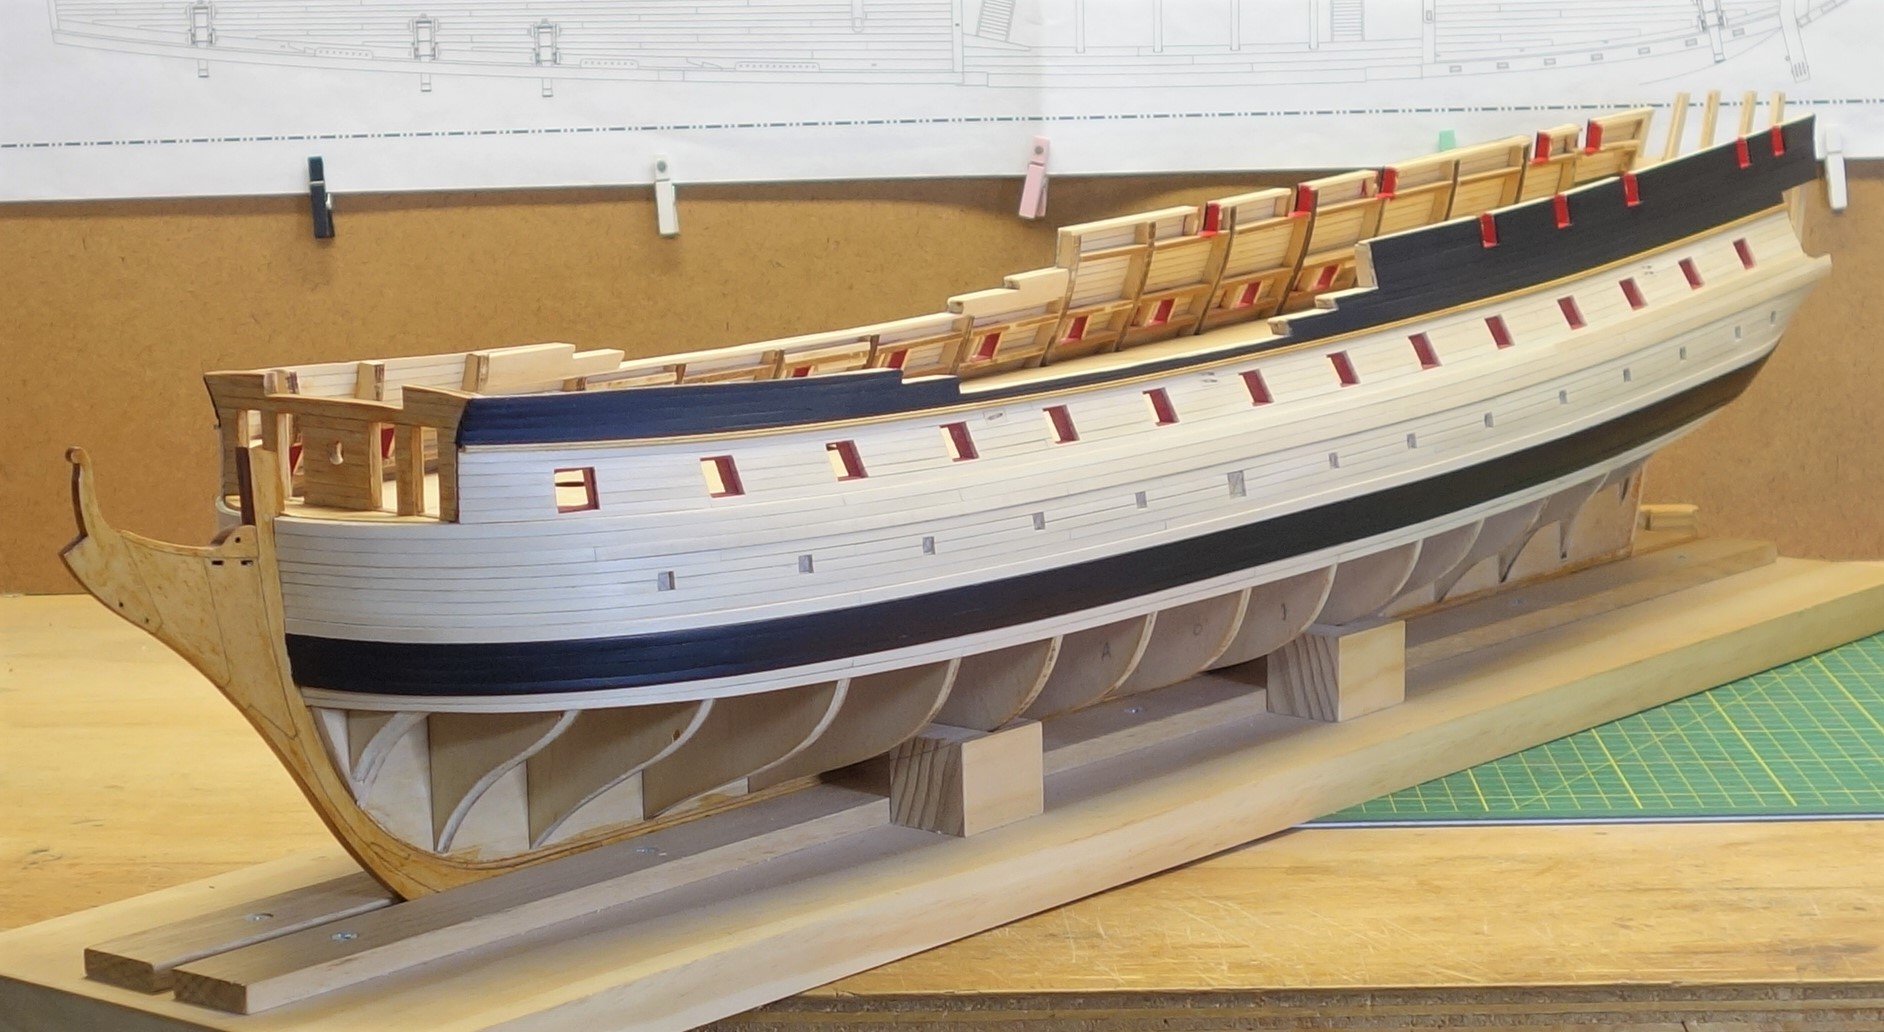
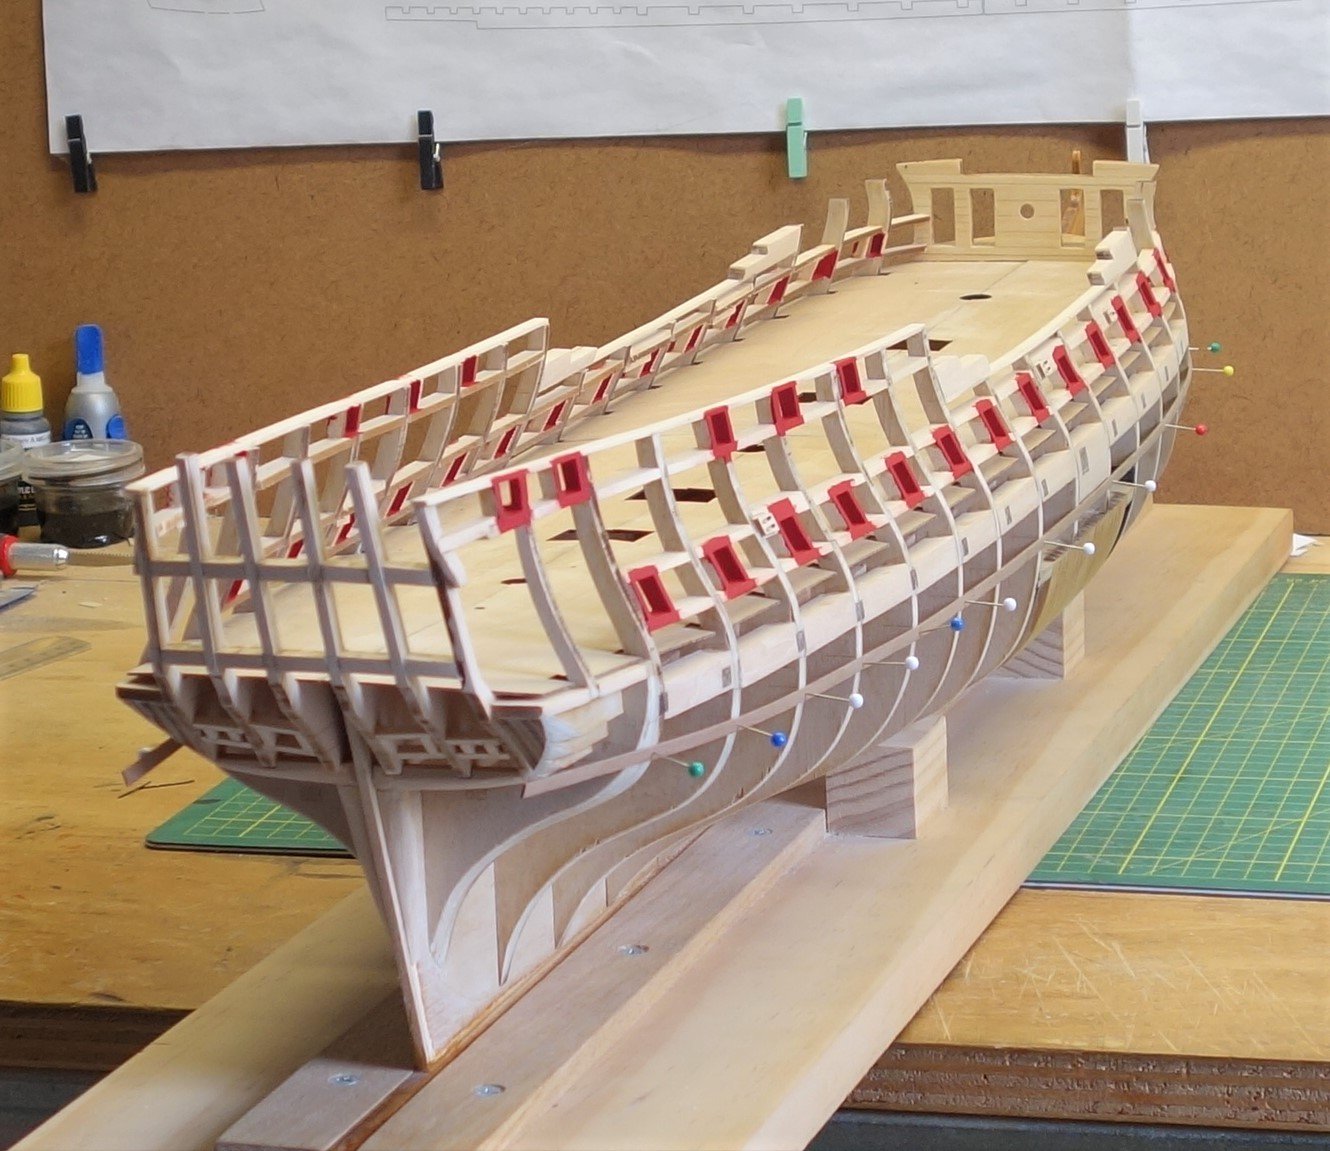
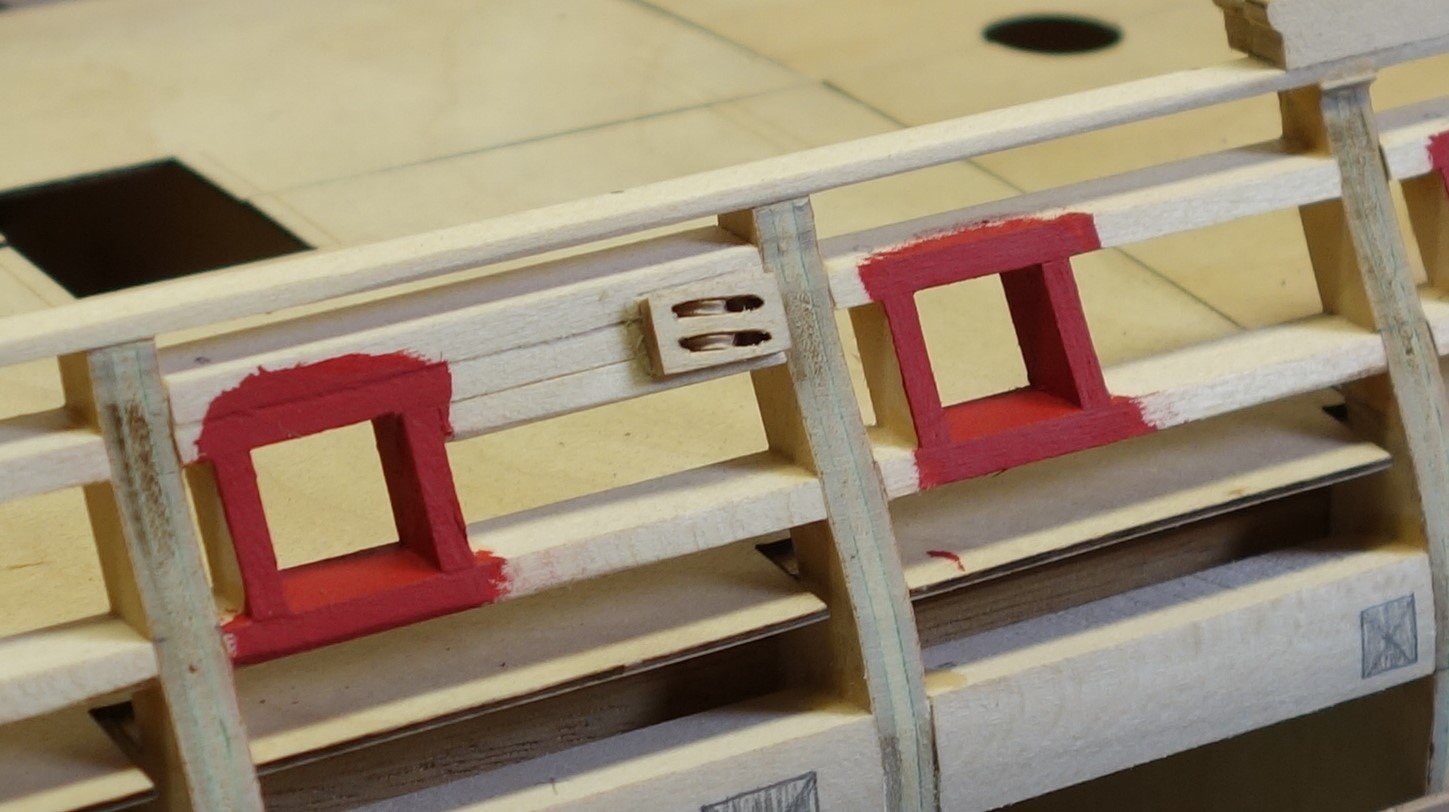
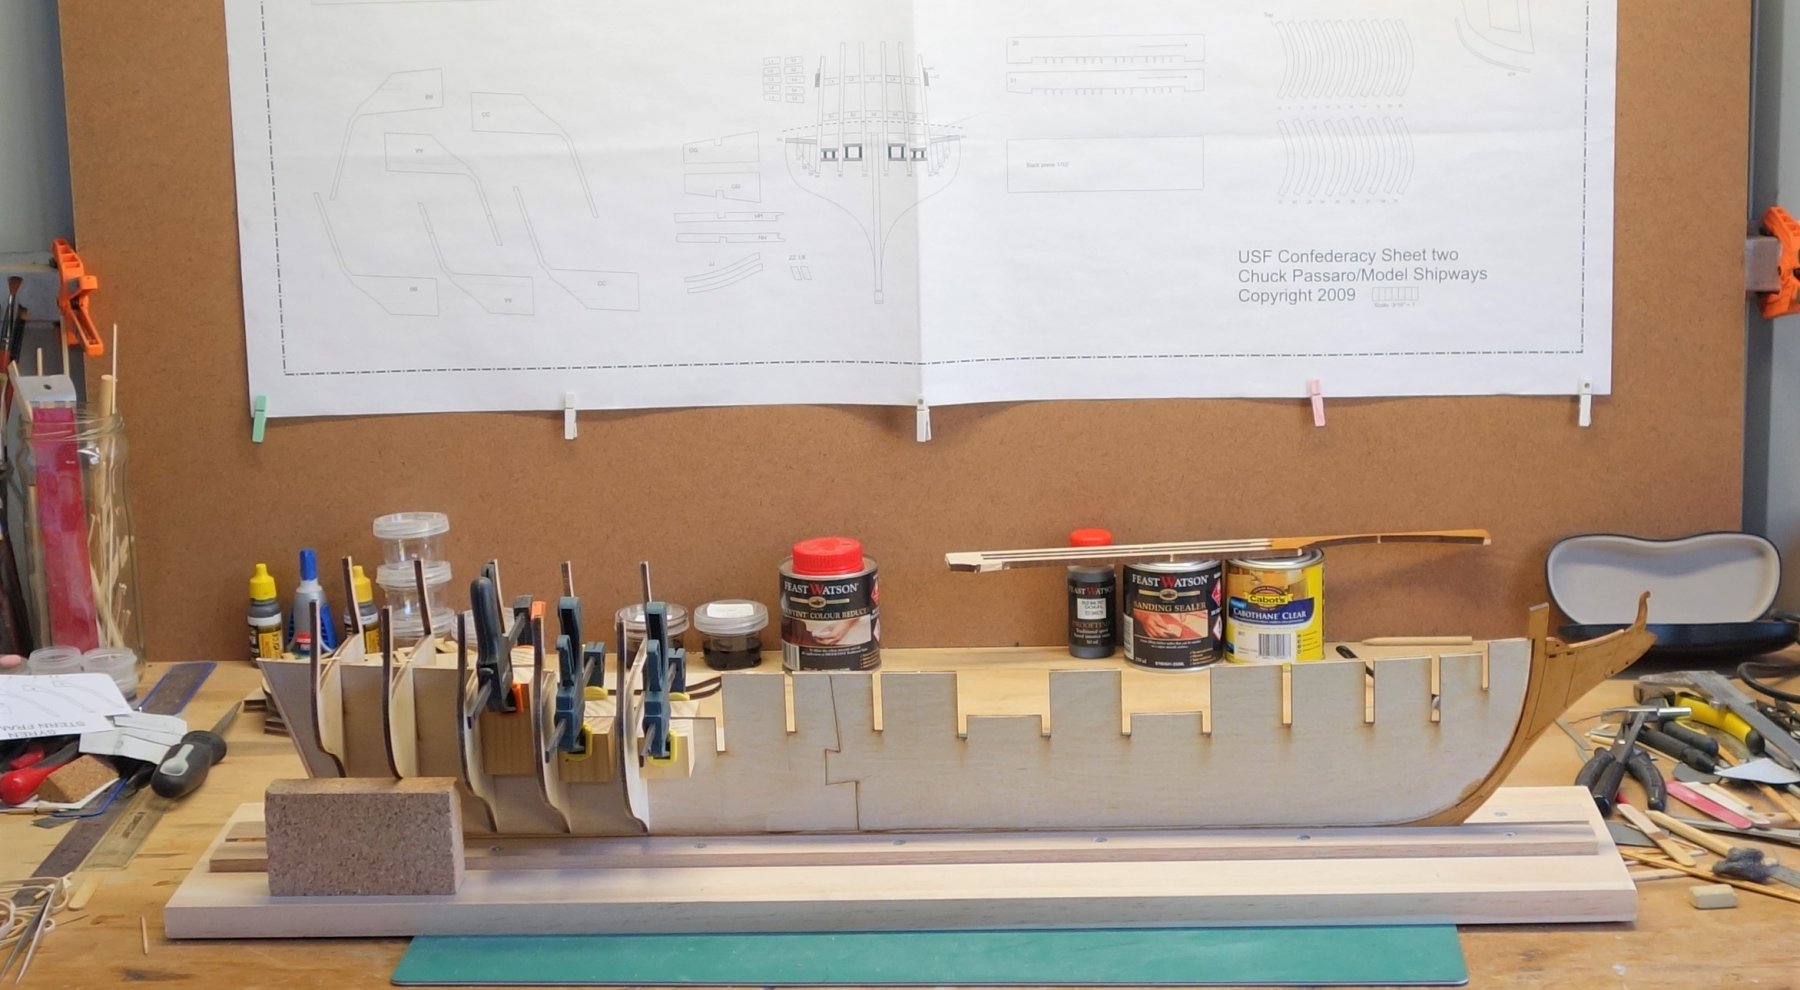
I have included a few more photo's with some progress. The sweep ports have been filled in and a few more moldings added. I have treated the planks between the black sections with sanding sealer, sanded it back and put a second sealer on it. This still needs to be sanded back.
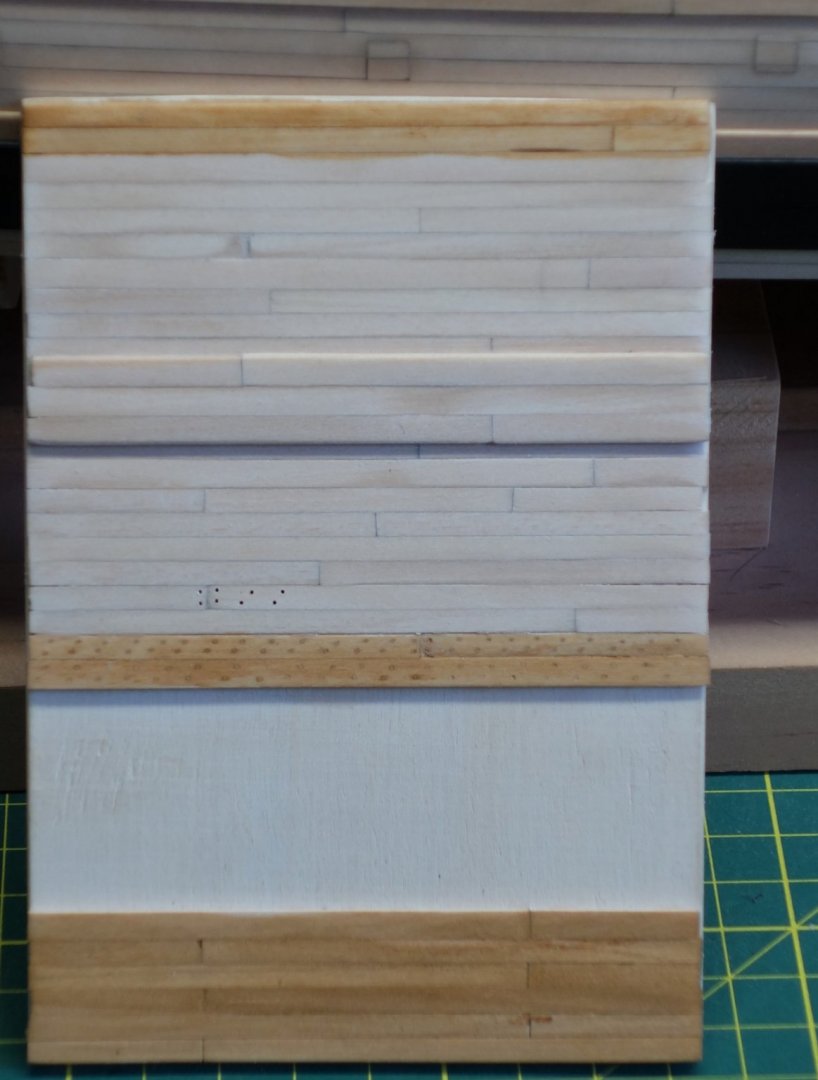
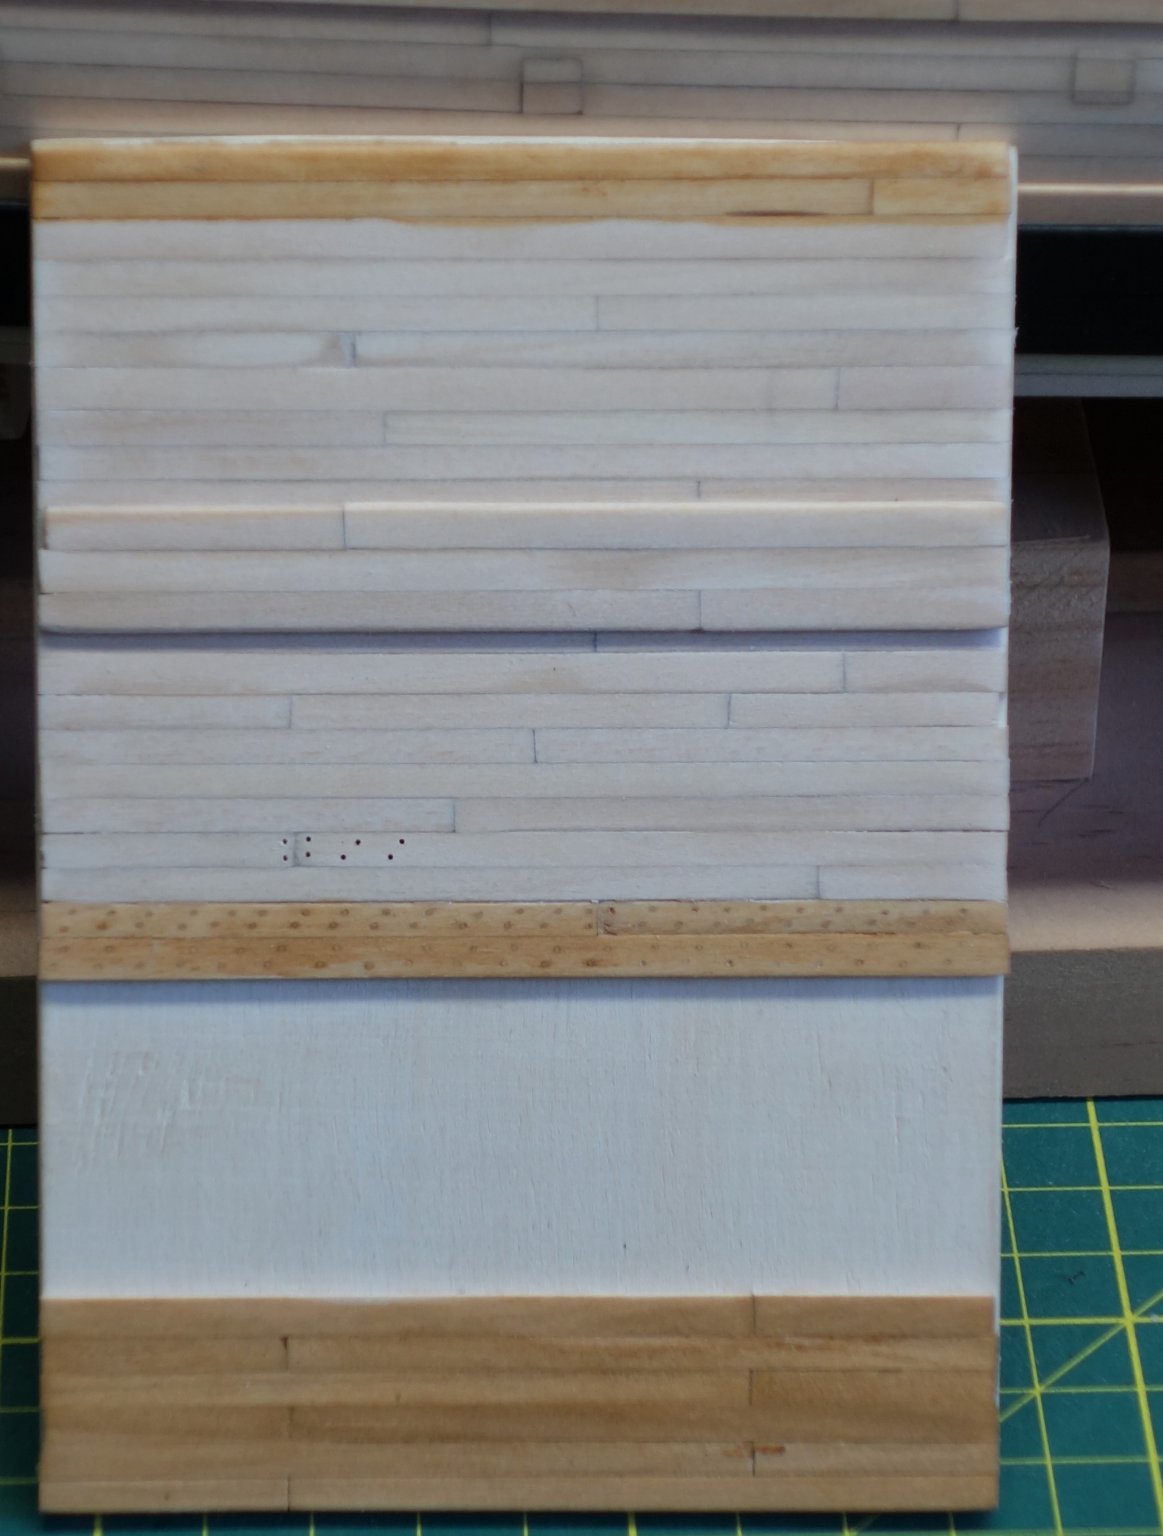
I now have to decide on how to apply the tree nails. I have added a photo with a small panel and some very early attempts on colors and wood fillers. So far, I am not happy with both. The fillers seem very grainy and difficult to apply and the colors blotchy. I will need to spent some time getting the process and materials sorted. There is of course the option of leaving them out. We'll see...
In the mean time, here are some photo's.


- JpR62, GrandpaPhil, Edwardkenway and 8 others
-
11
-
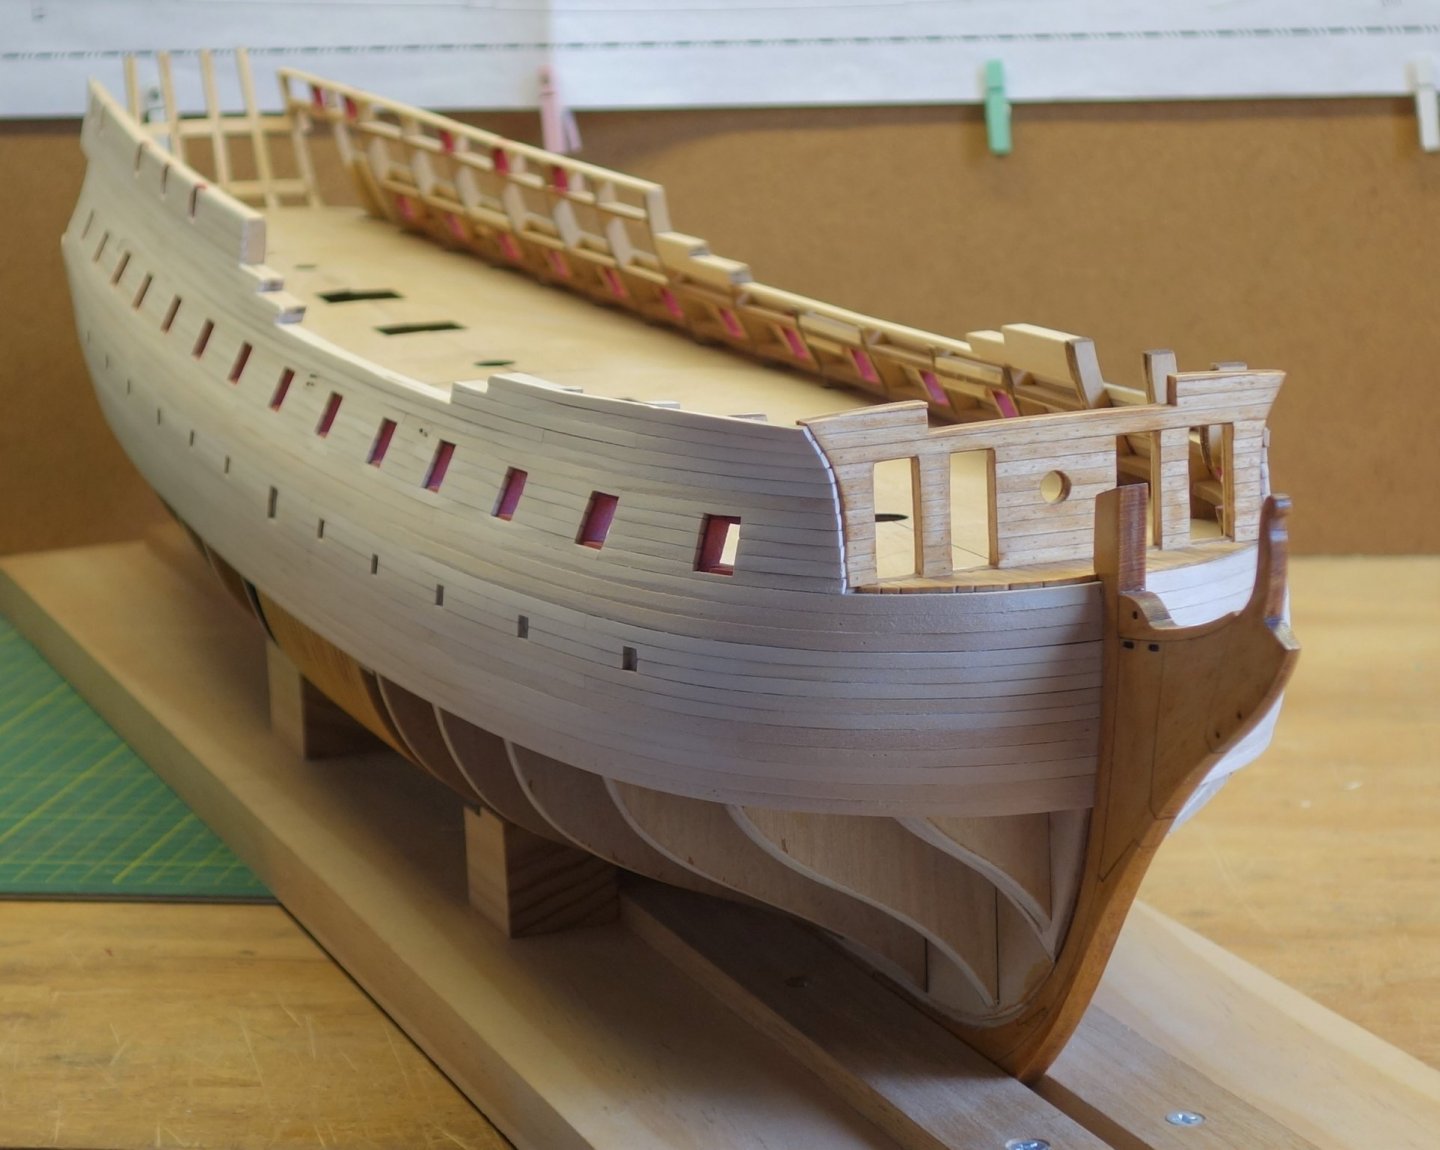
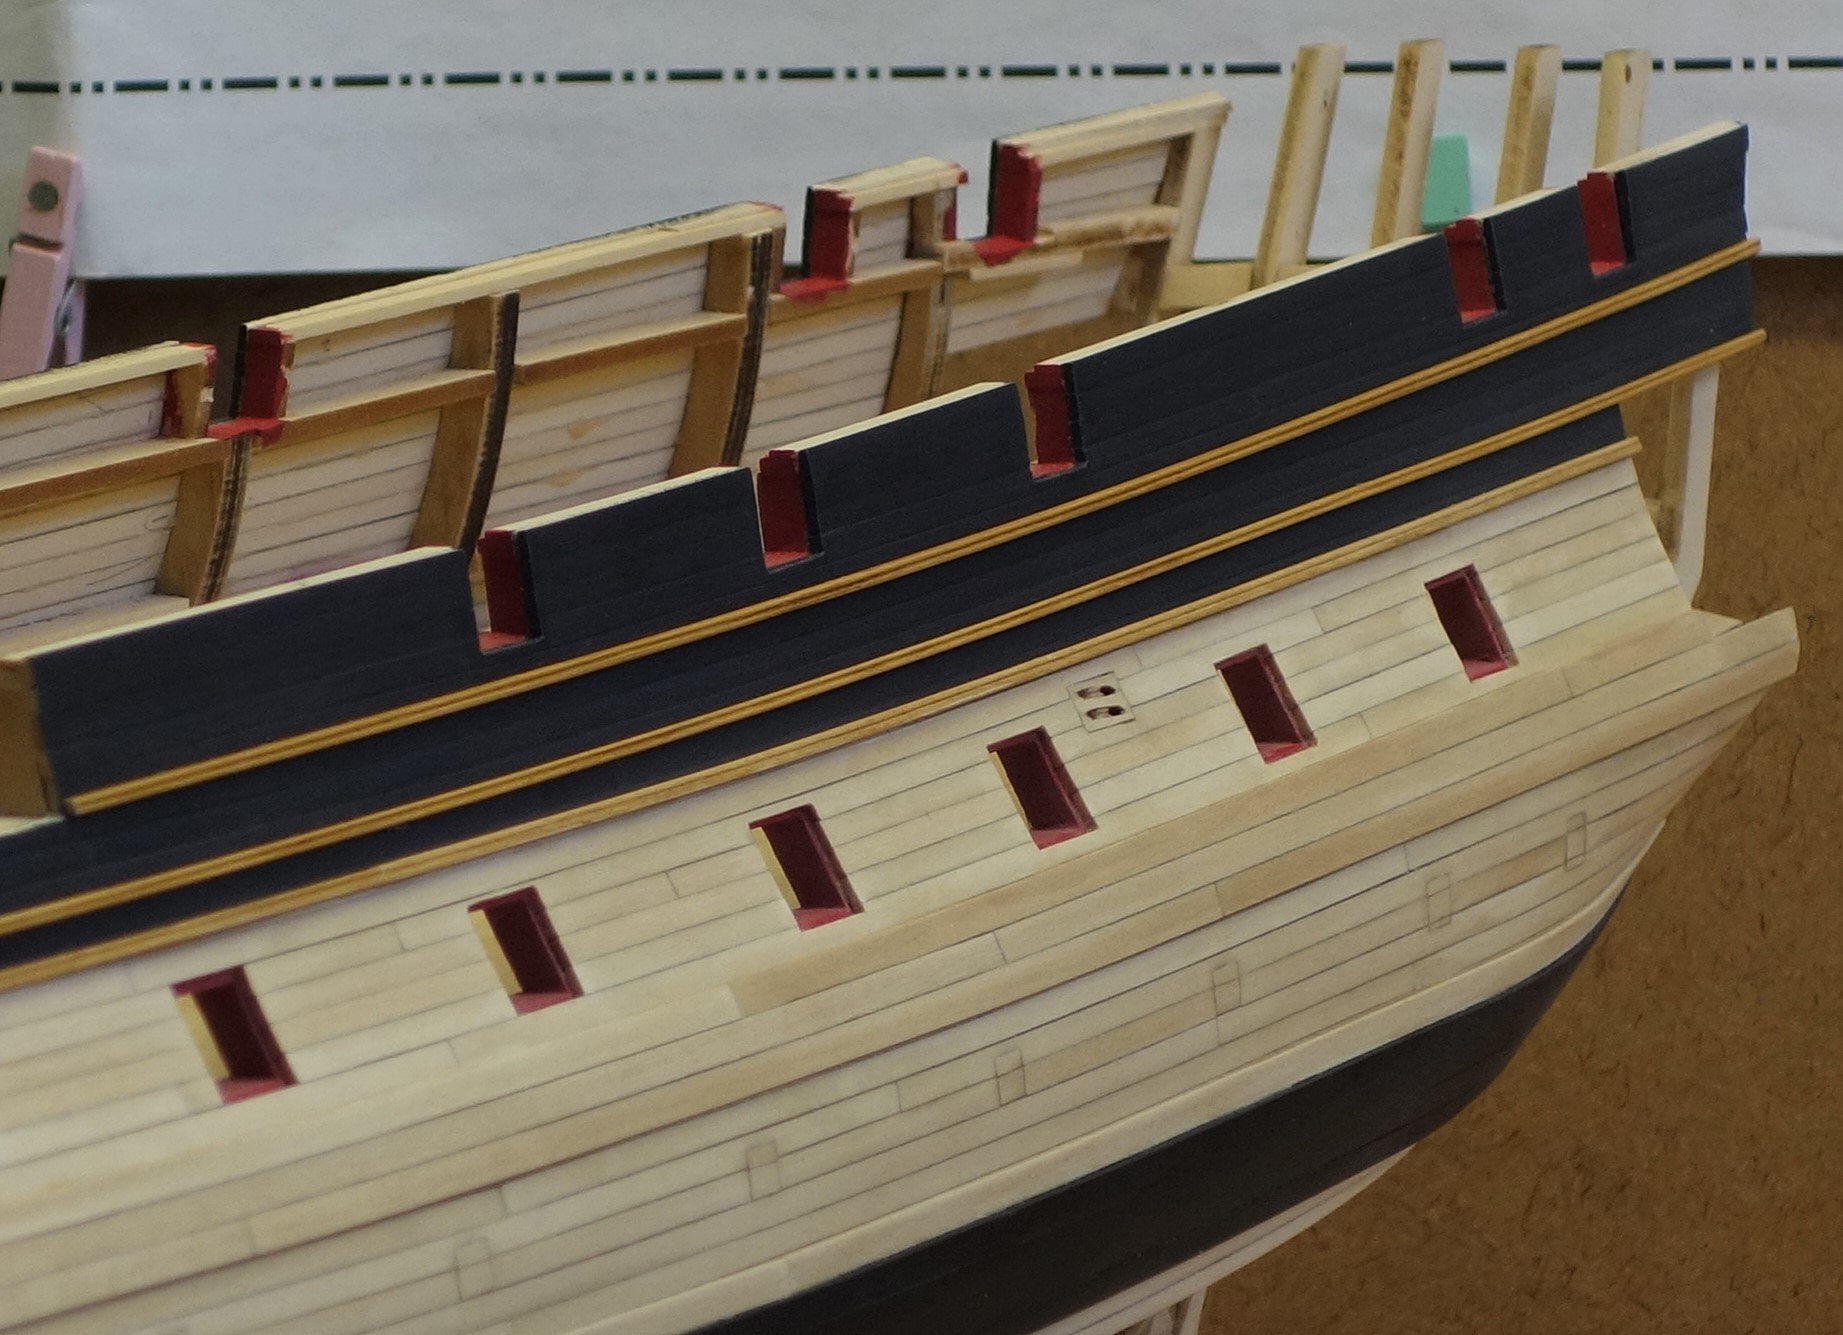
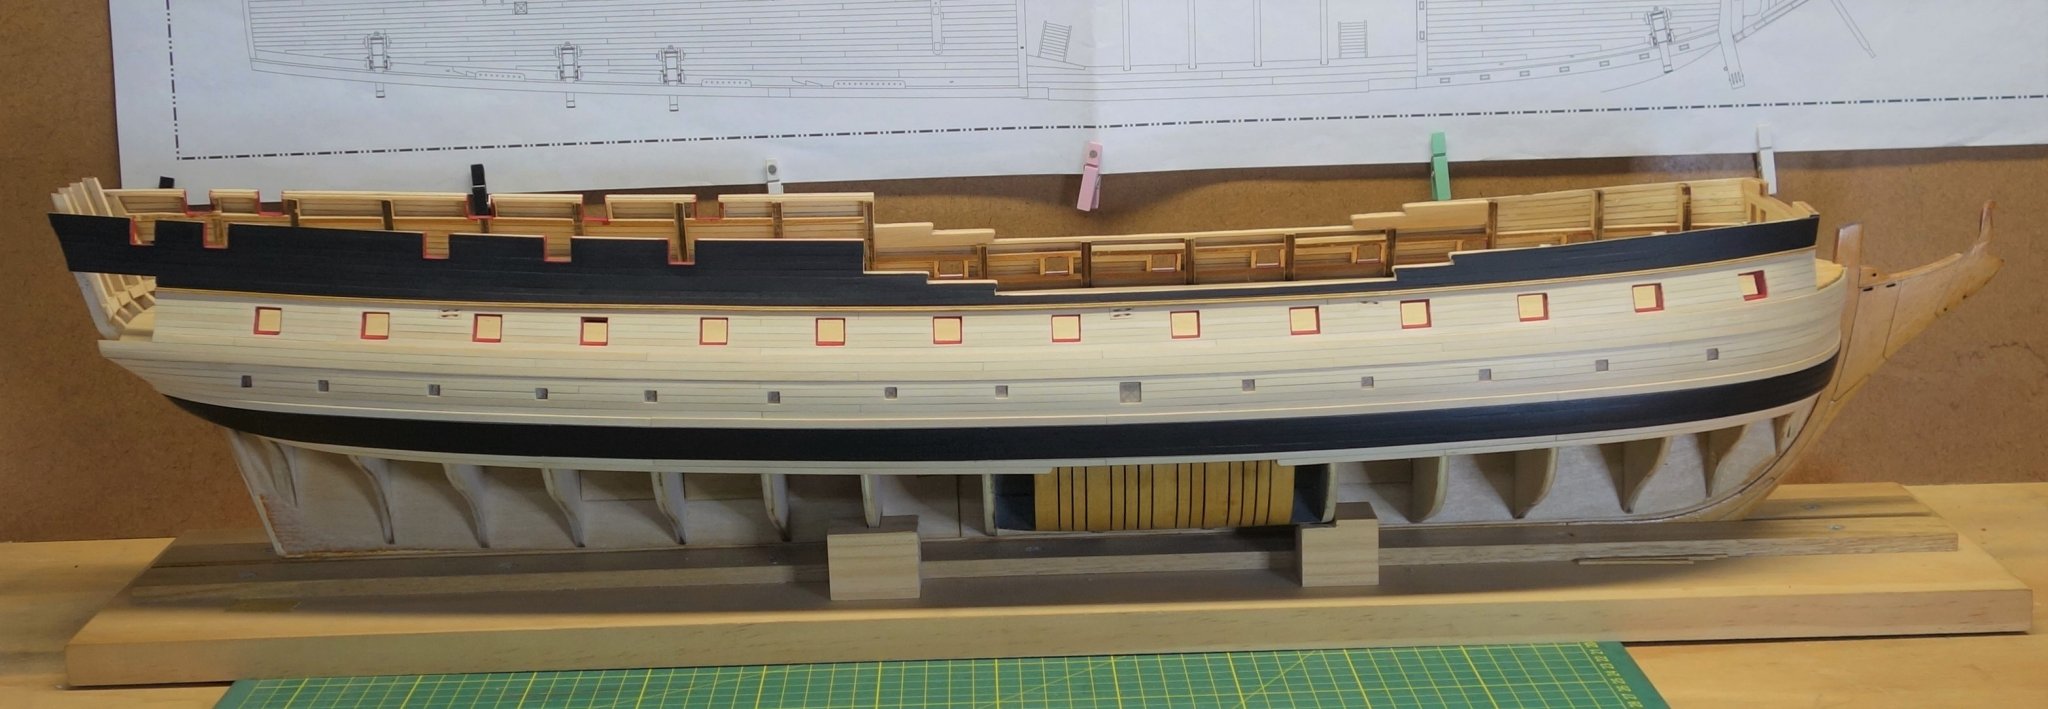
Just another short update with some progress photo's. I start adding some black to the model, added the black strake and one of the moldings. The only disappointing bit was that the masking tape I used pulled some of the top fibers off the surface of planking below the top black section. I have started sanding that back but it will/may affect the way the staining will look when I get to it.
I have also made a small panel with leftover strips which I will use to trial the stain colors and the tree nails before I go all gung ho on the model. I will probably use a small section to get the masking tape to pull some fibers off to see what it does.
Here are some photo's.


-
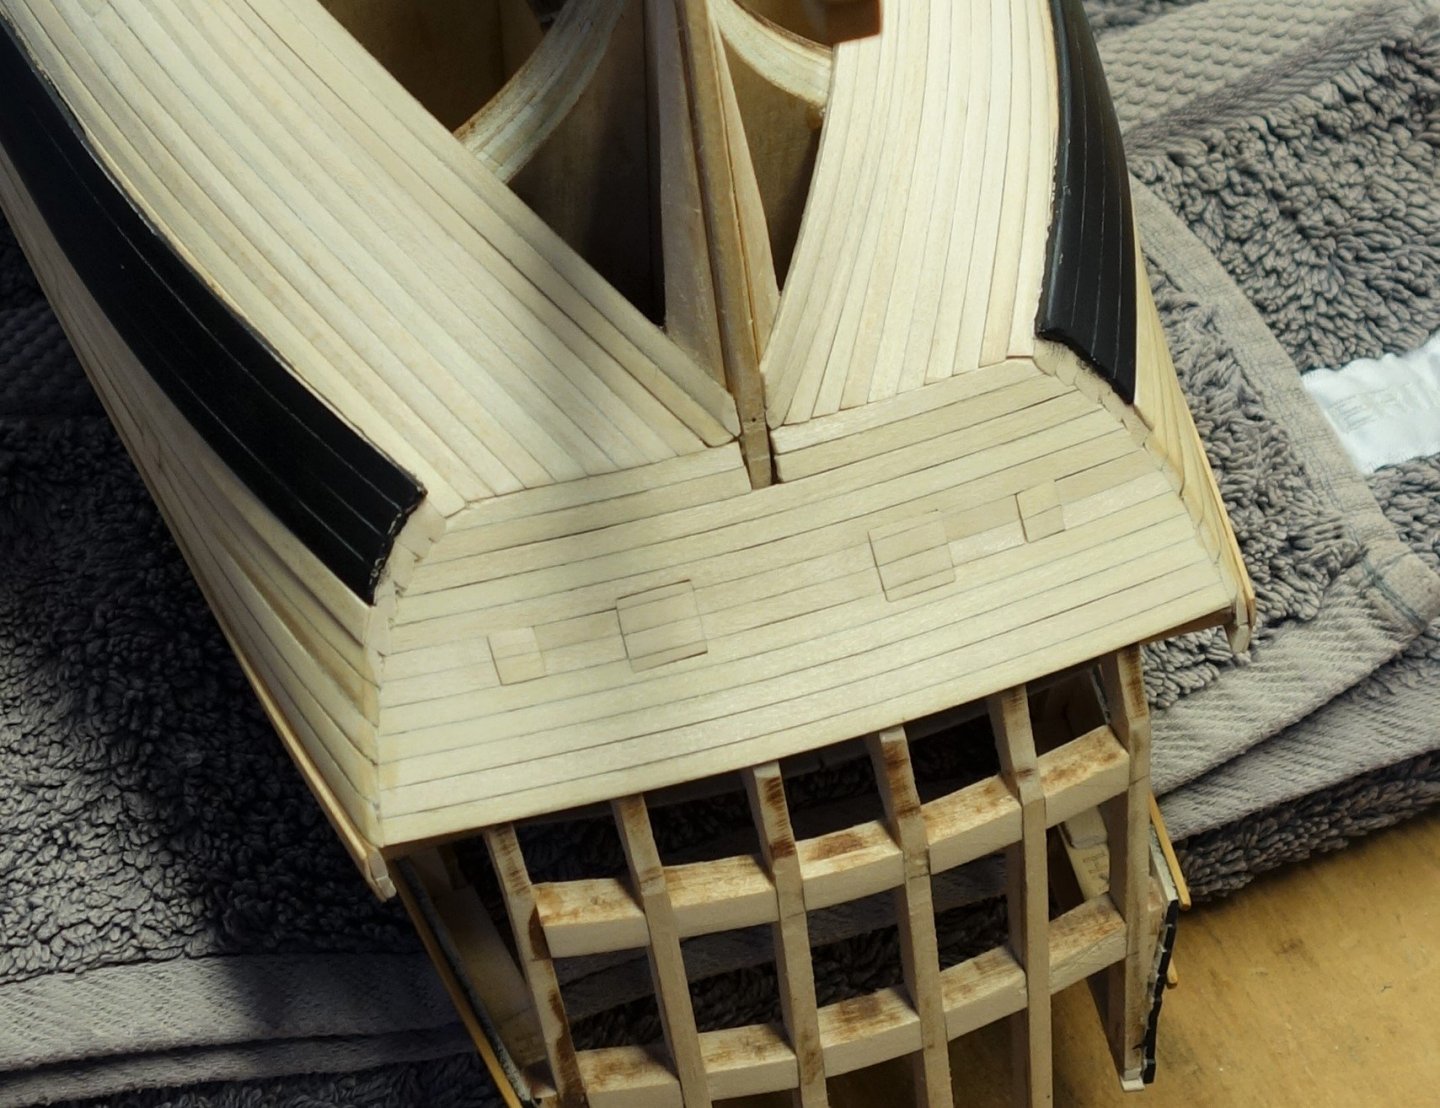
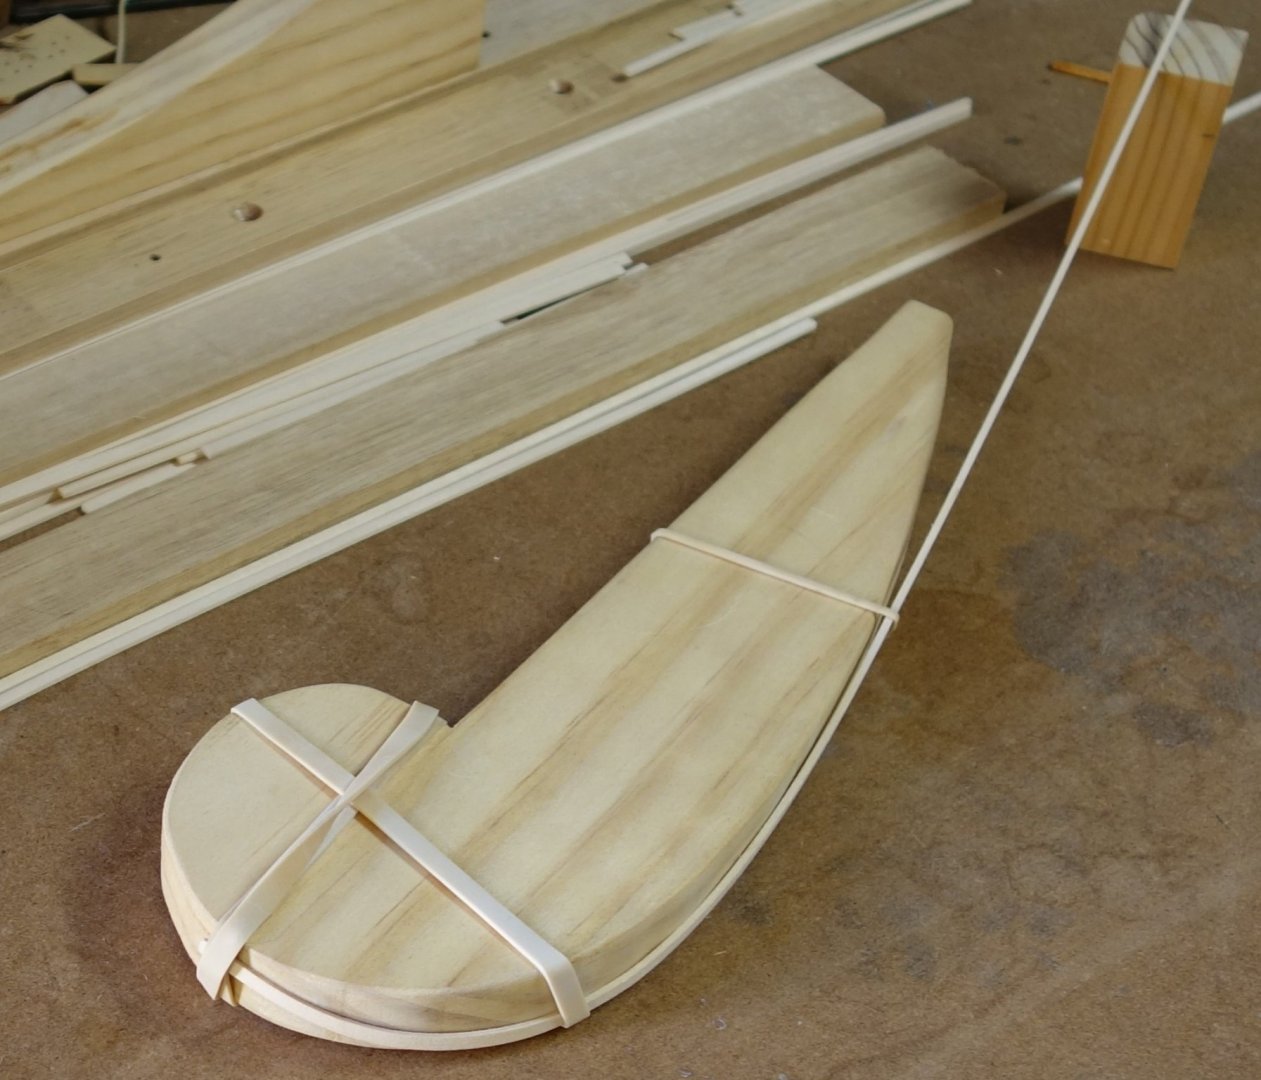
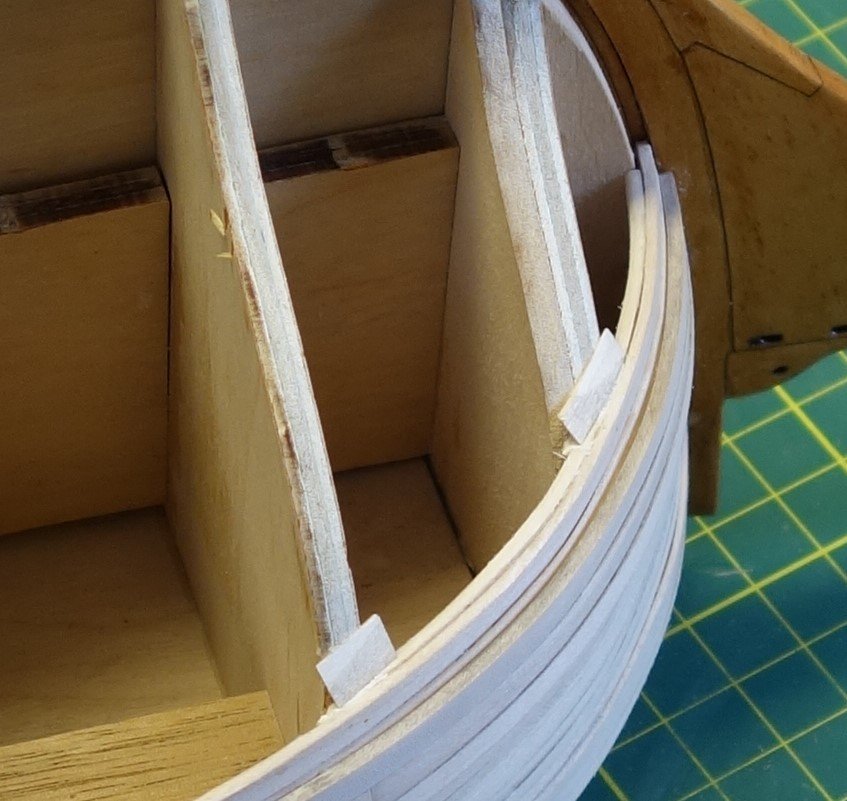
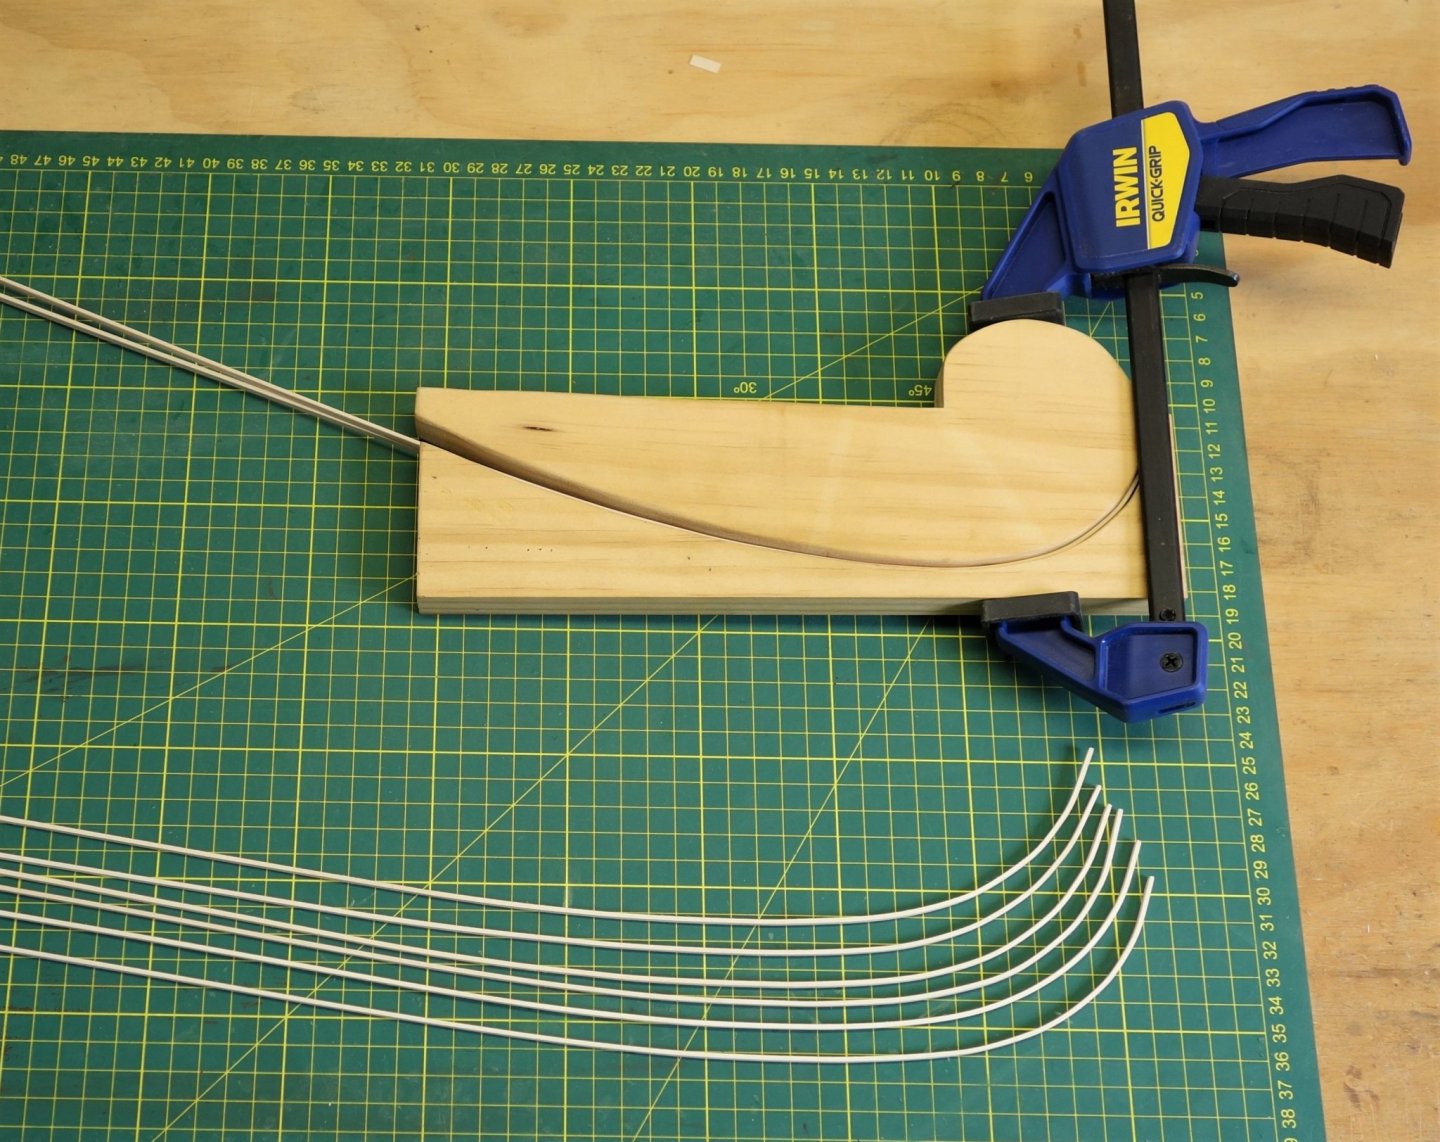
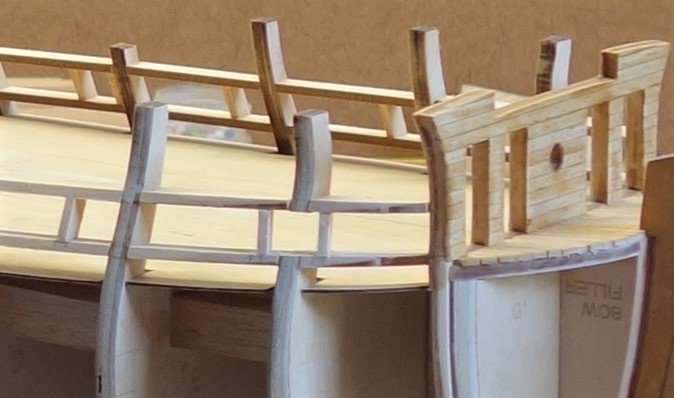
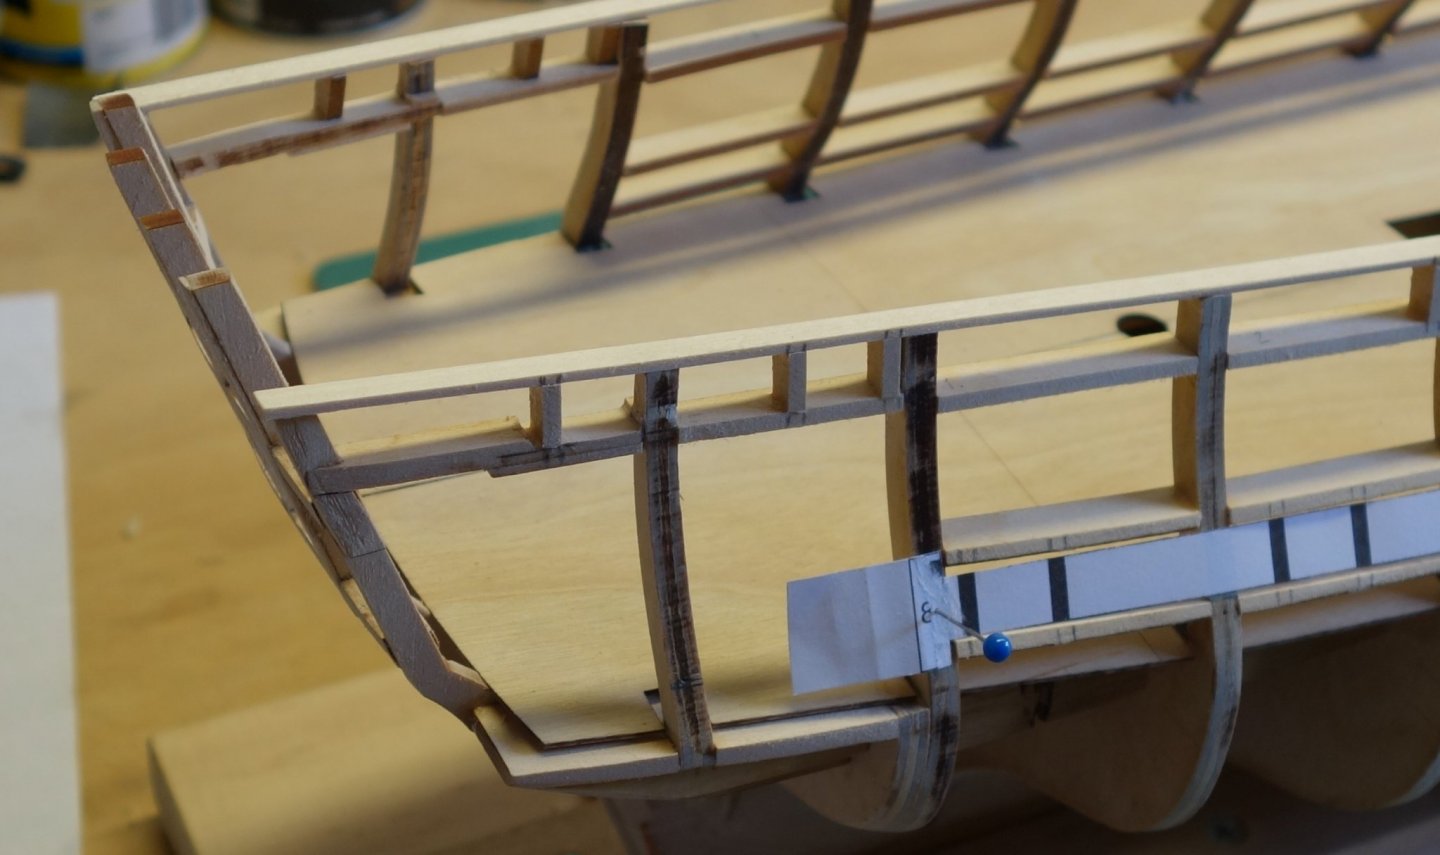
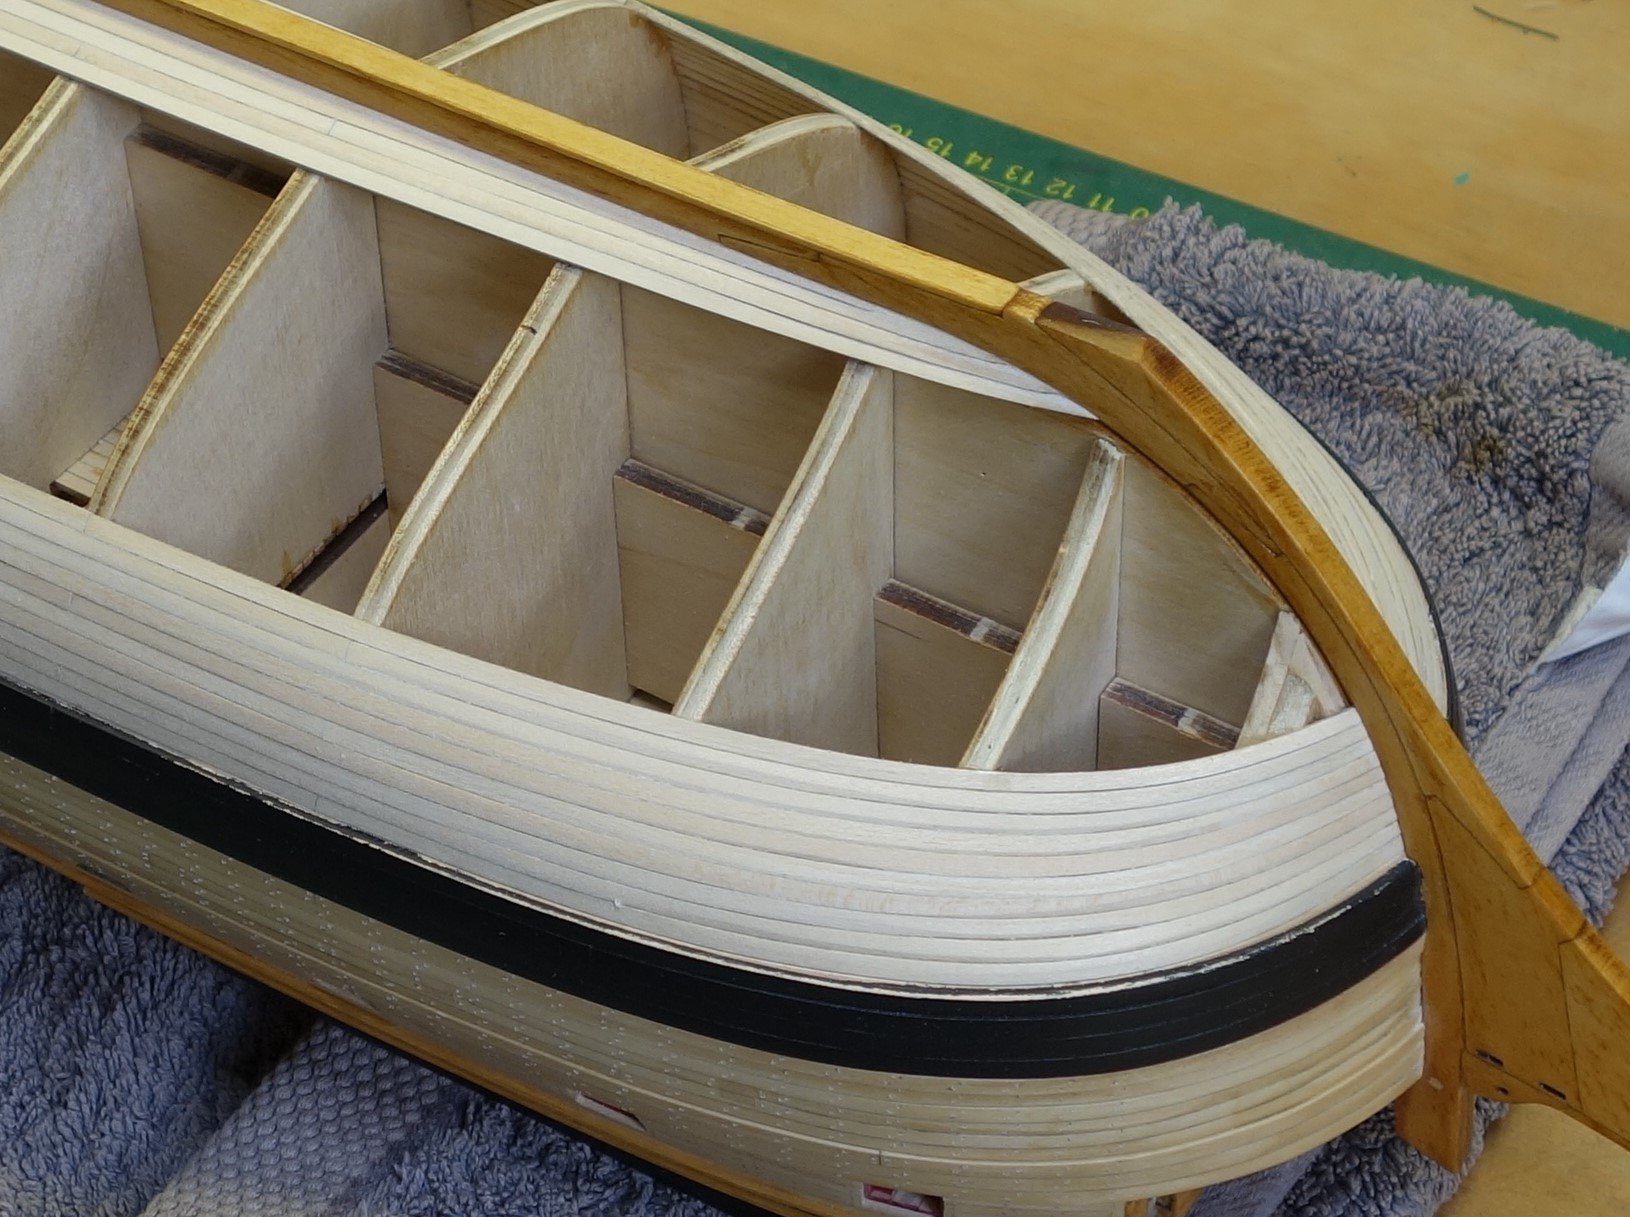
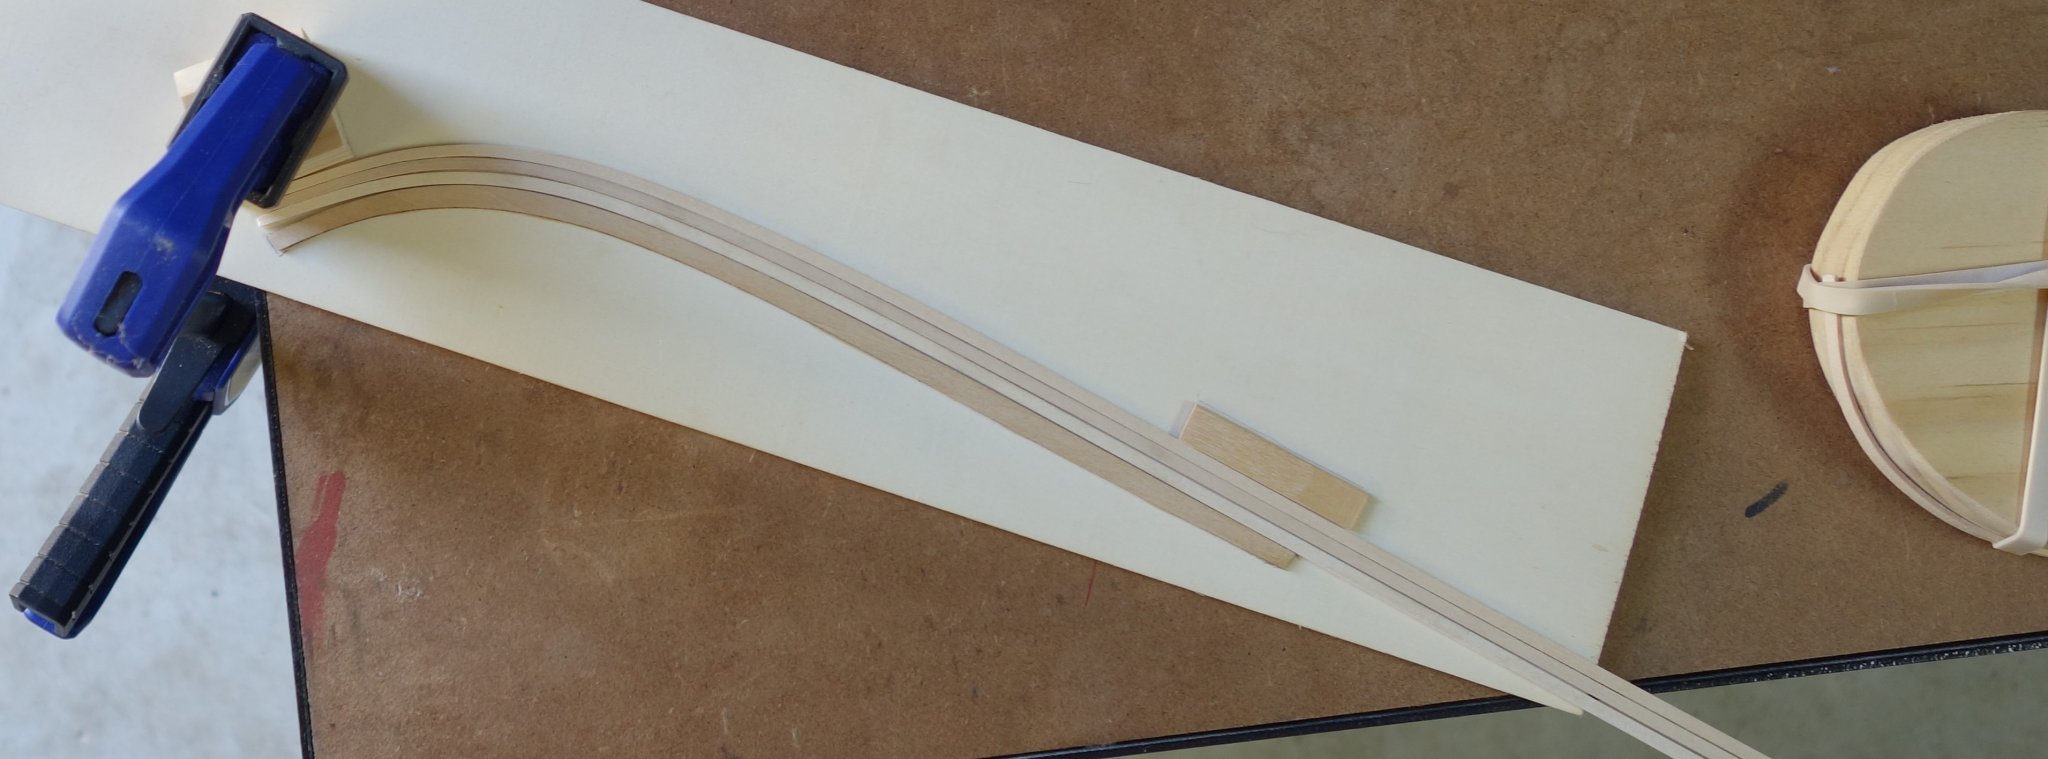
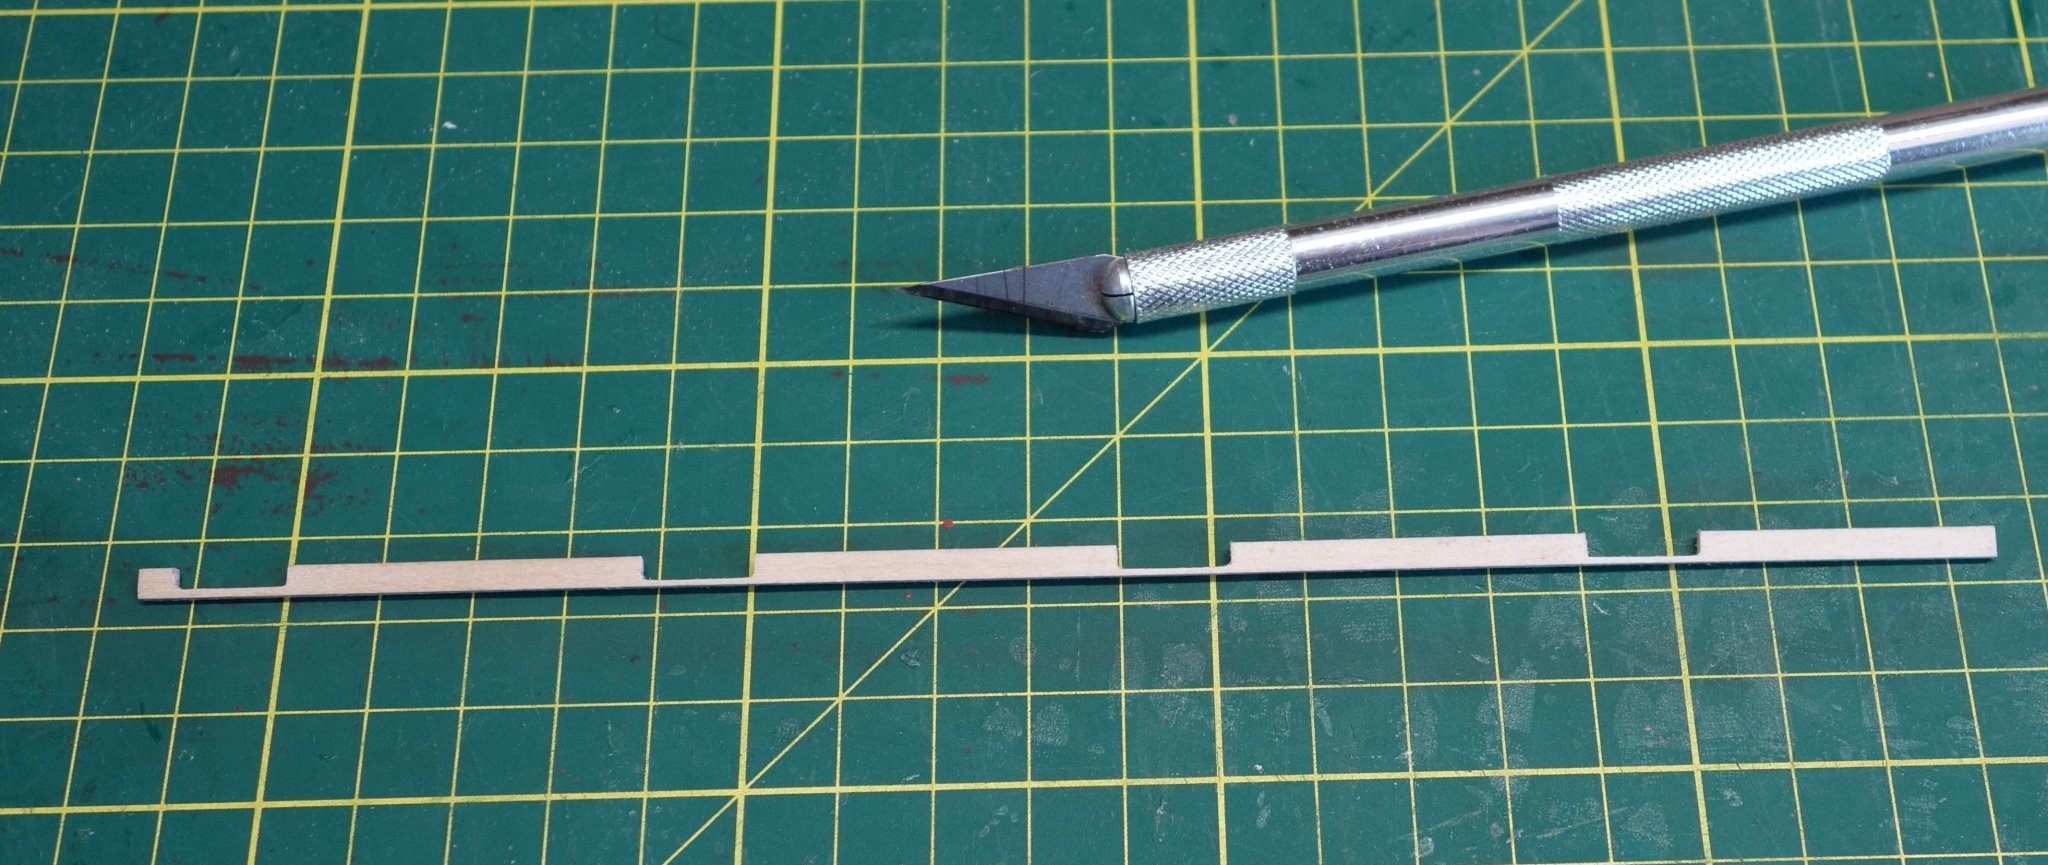
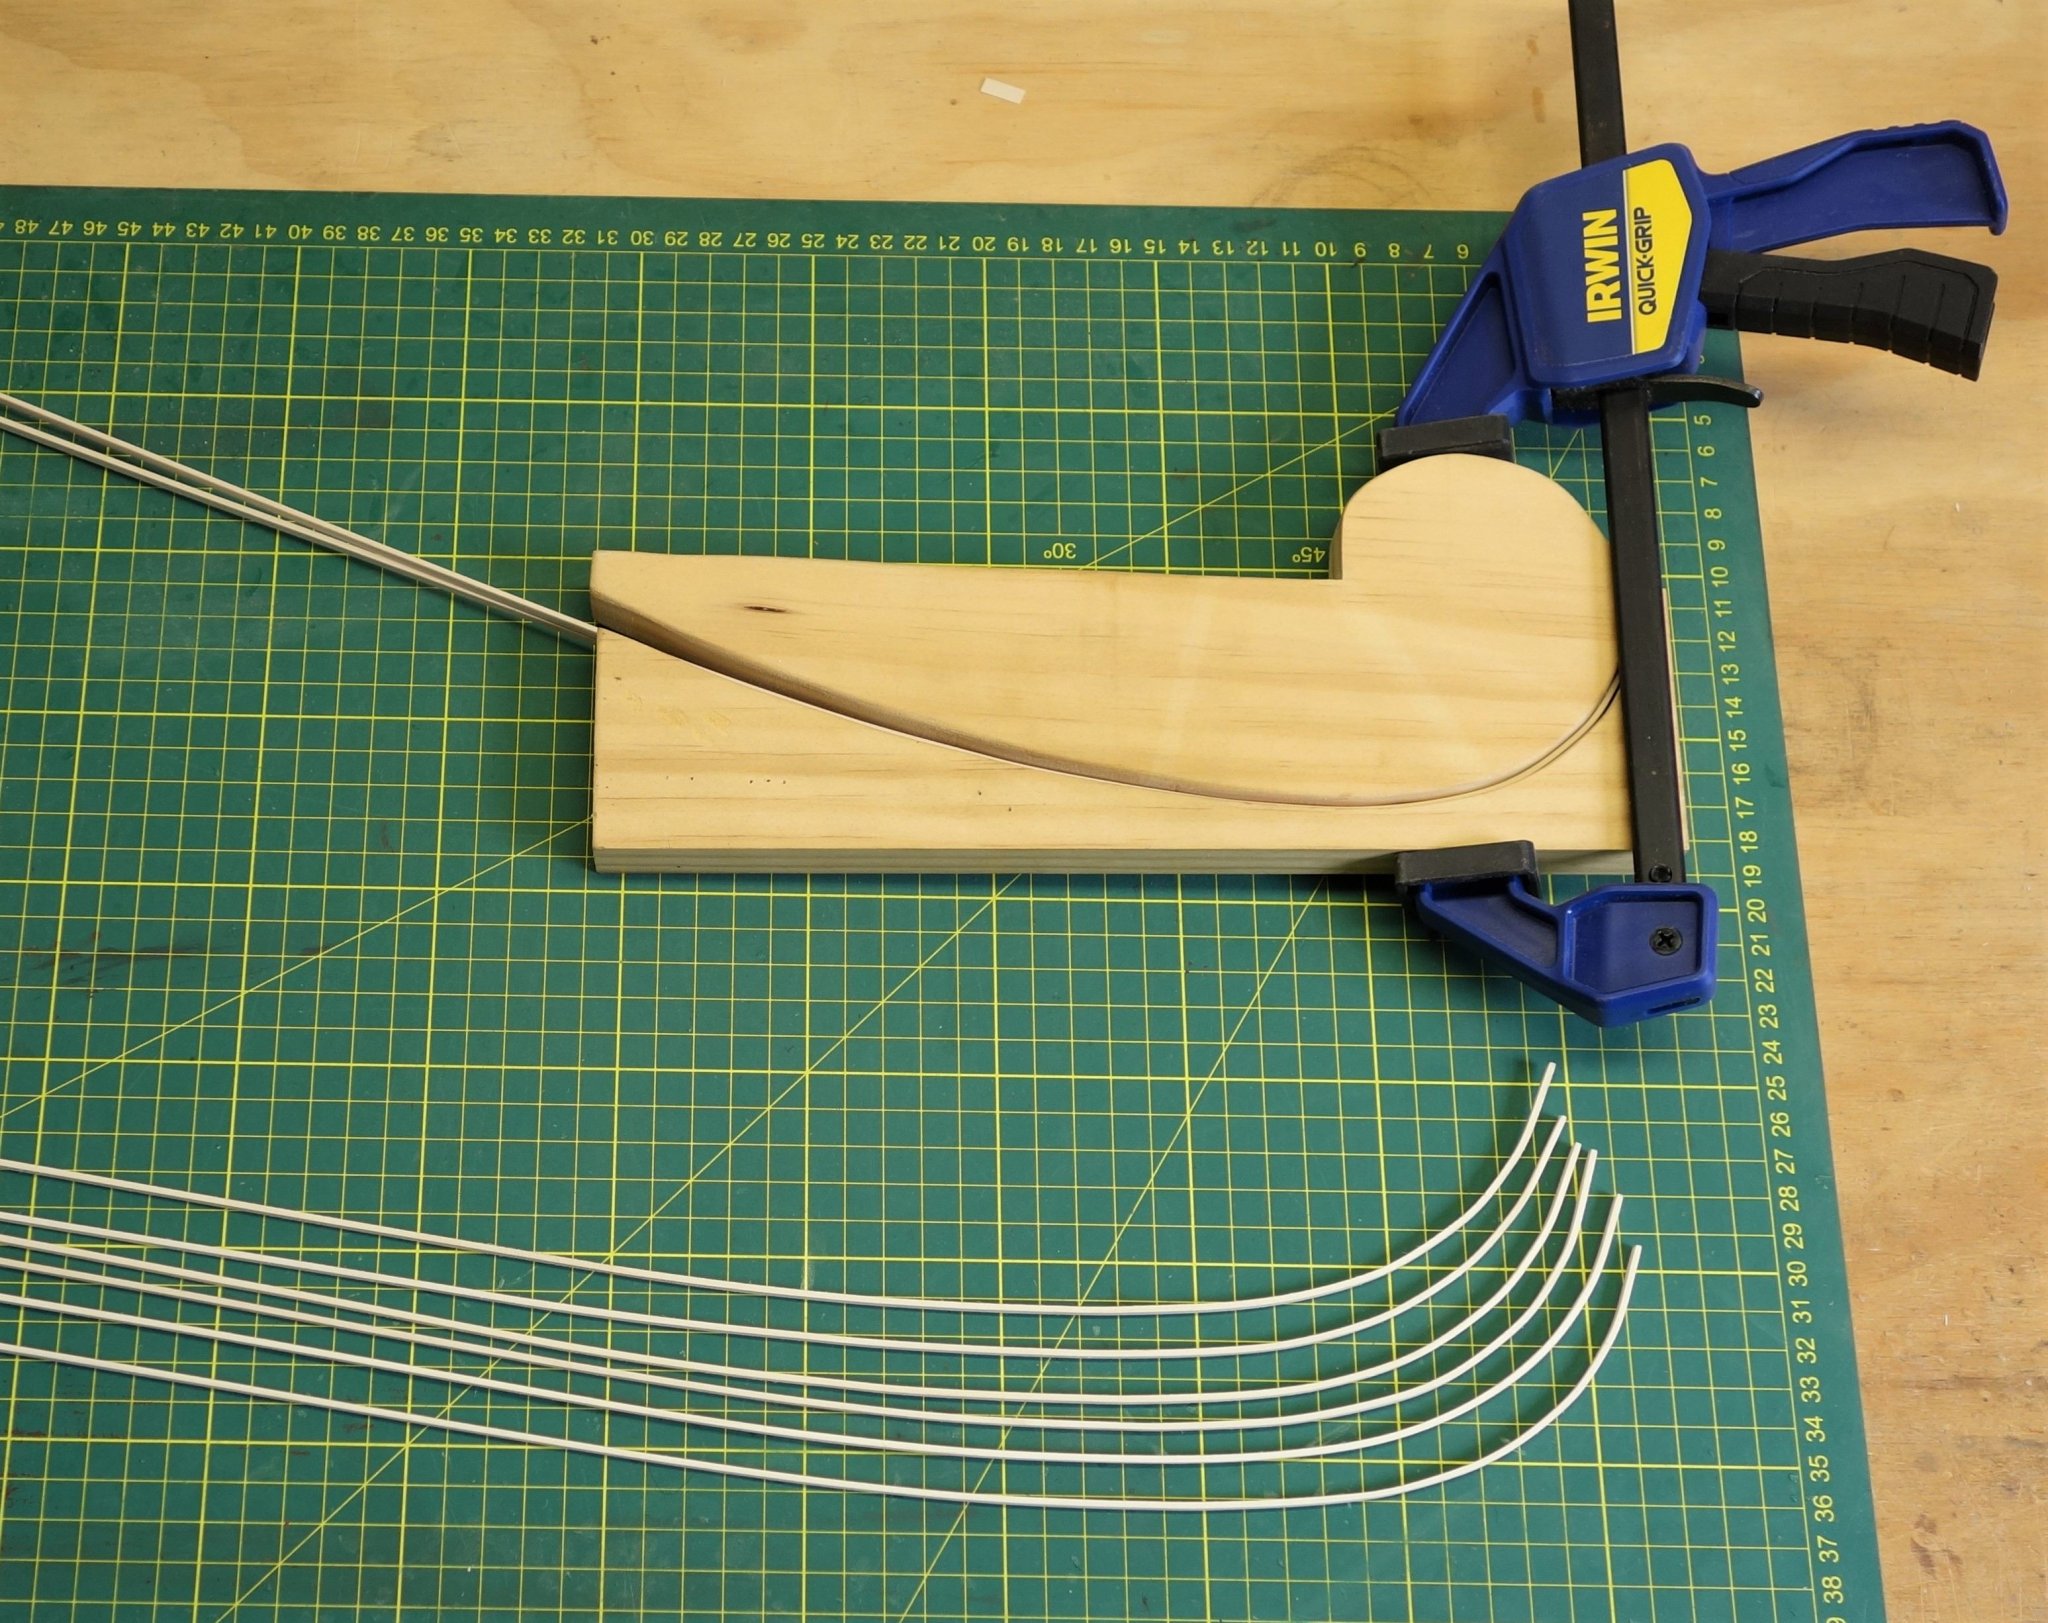
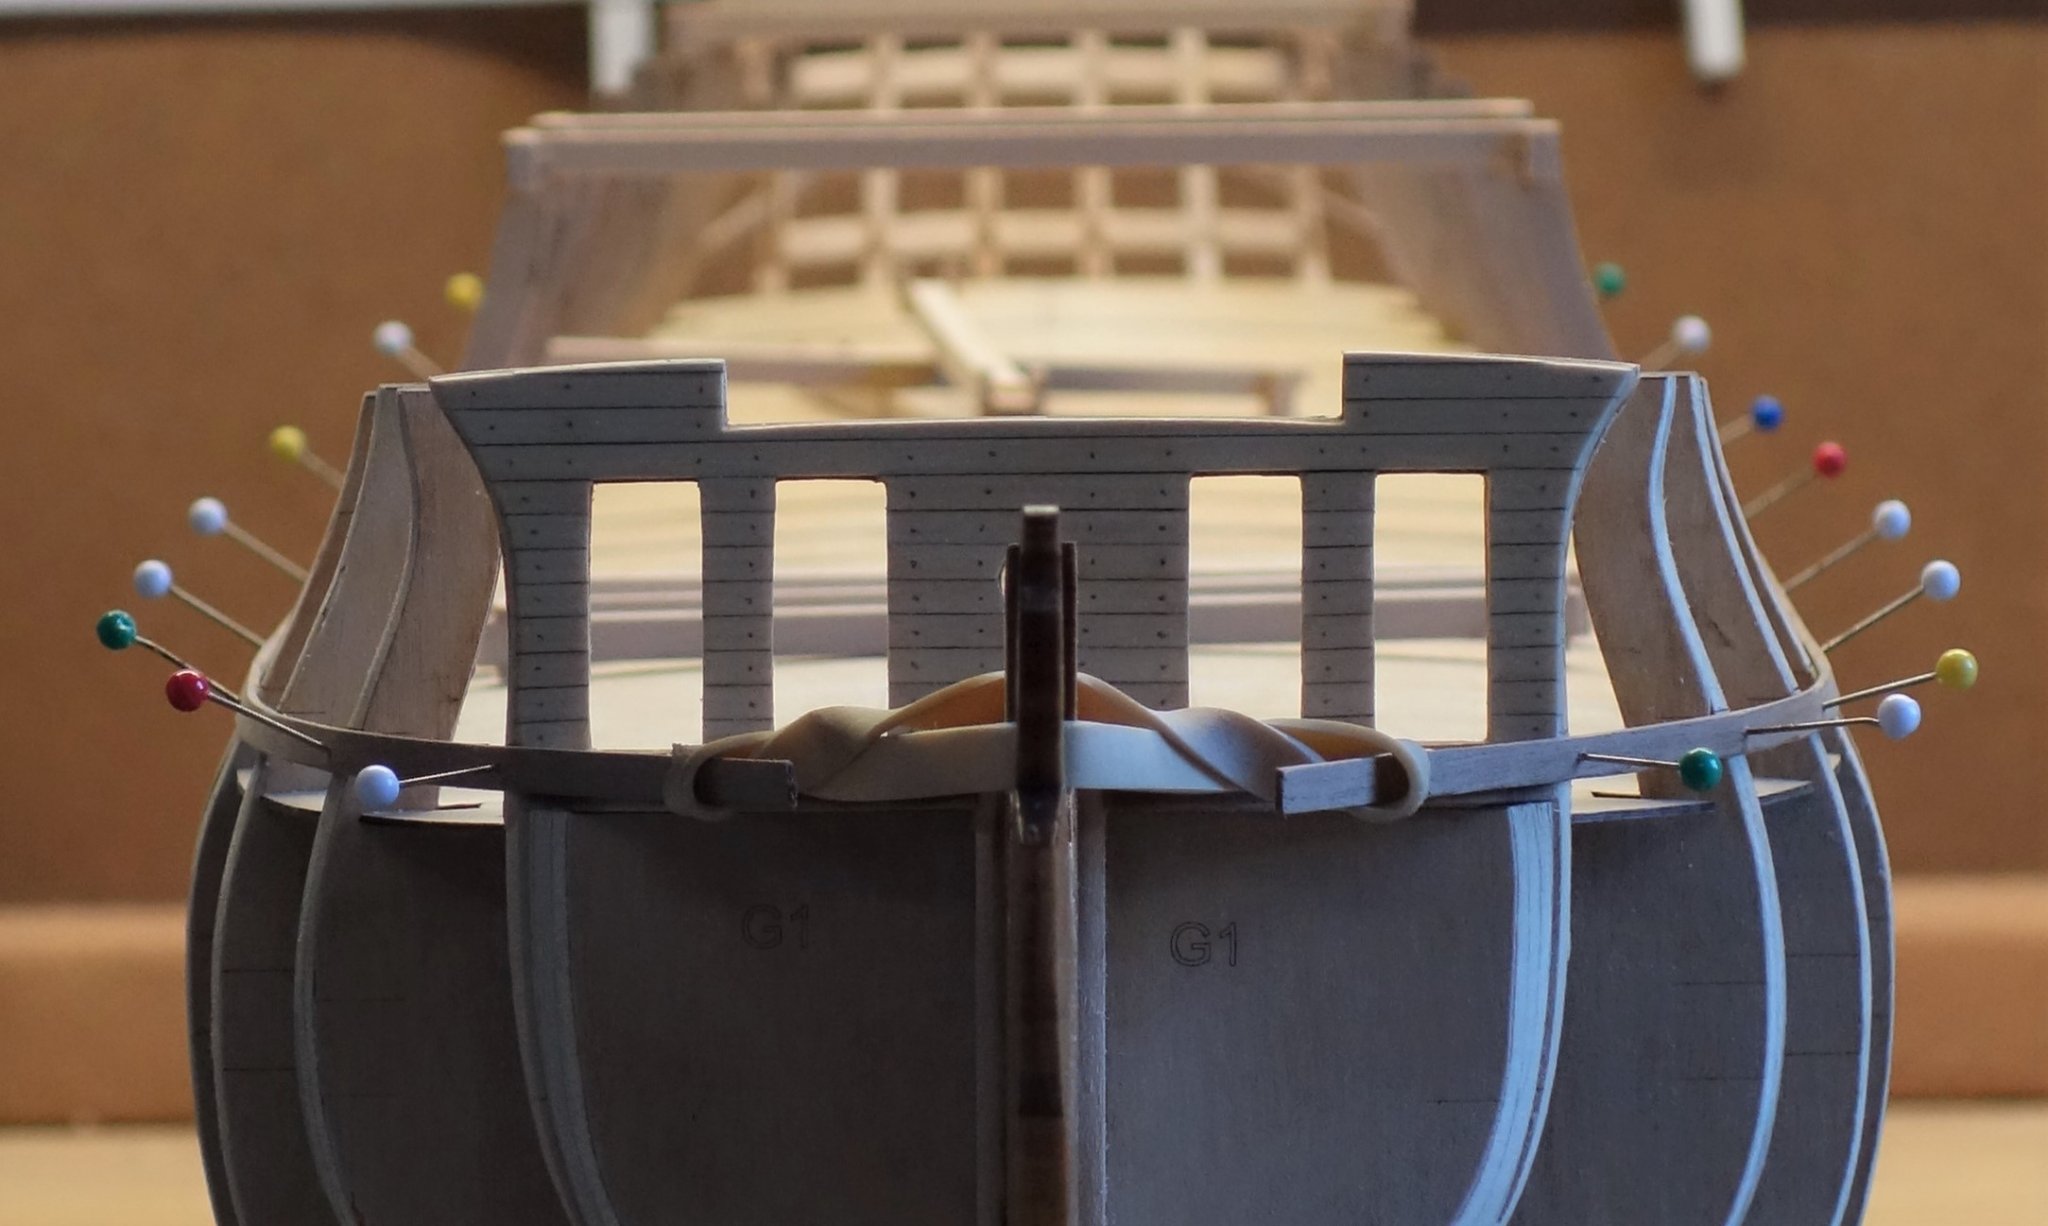
Just a few photo's describing the adjustment/ repair attempt at the bow section below the wales.
1st photo is of Chuck's Spiling guide jig to bend the planks edge wise. The second is an attempt to add the extra bend to get around the bow (without wetting the planks for a second time).
The other 2 are of the "additions" to the bulkheads to close the gap.
It's a true dogs breakfast but somehow I hope to get away with it. Fingers crossed....lol
(Next time I'll probably add fillers to the bow section.....sigh...)

- Edwardkenway, svein erik, Dwight and 7 others
-
10
-
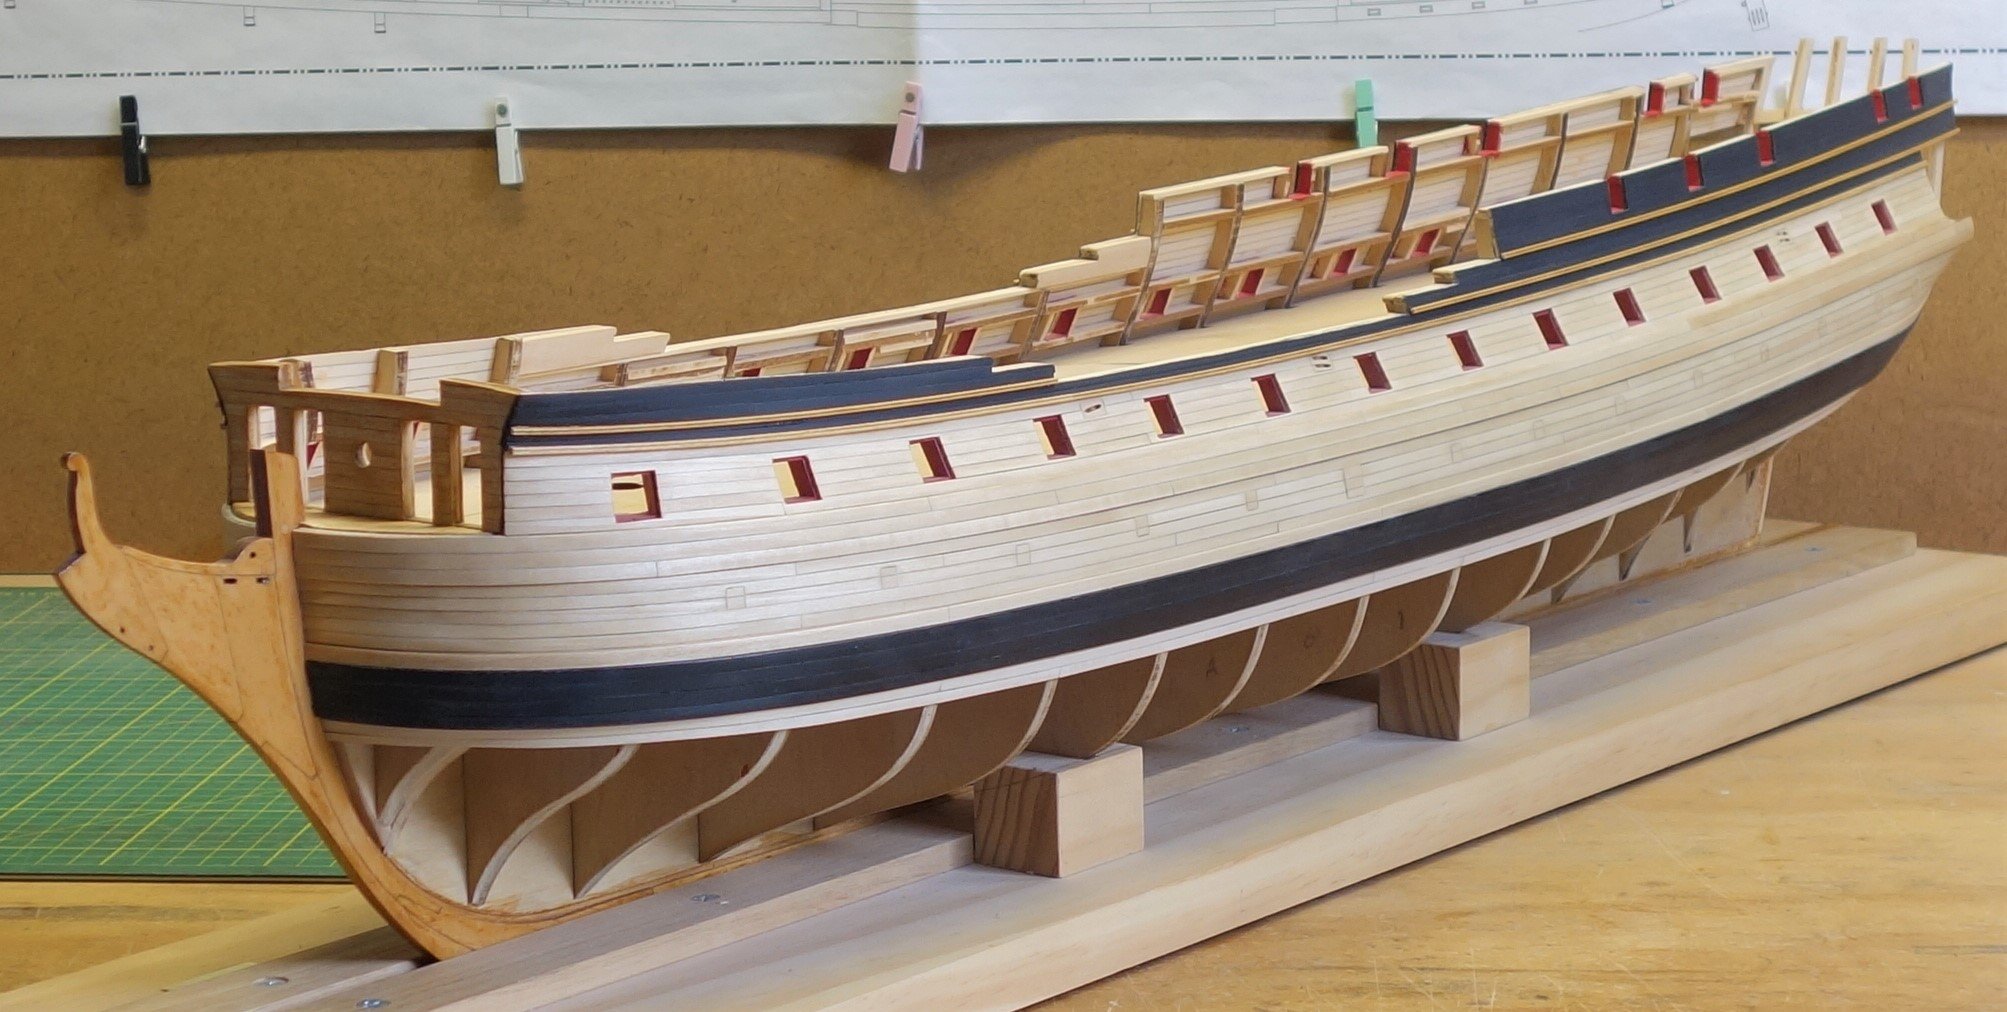
Thanks Bossman and everyone for the likes as well.
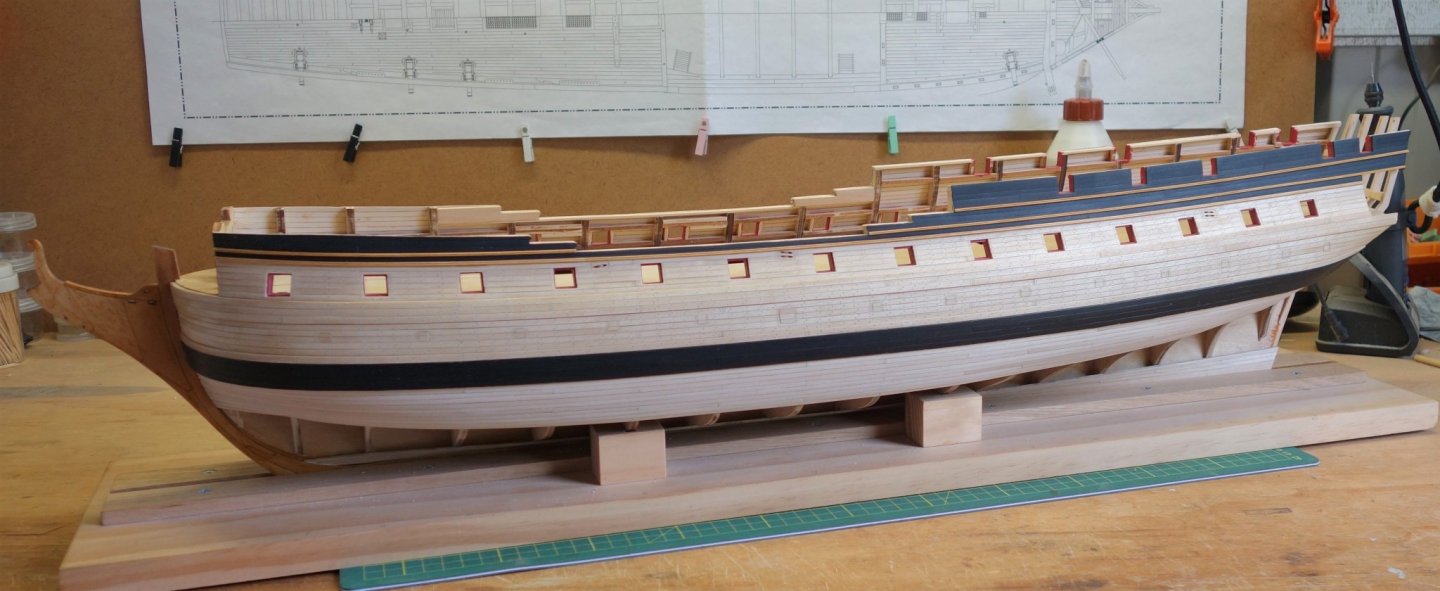
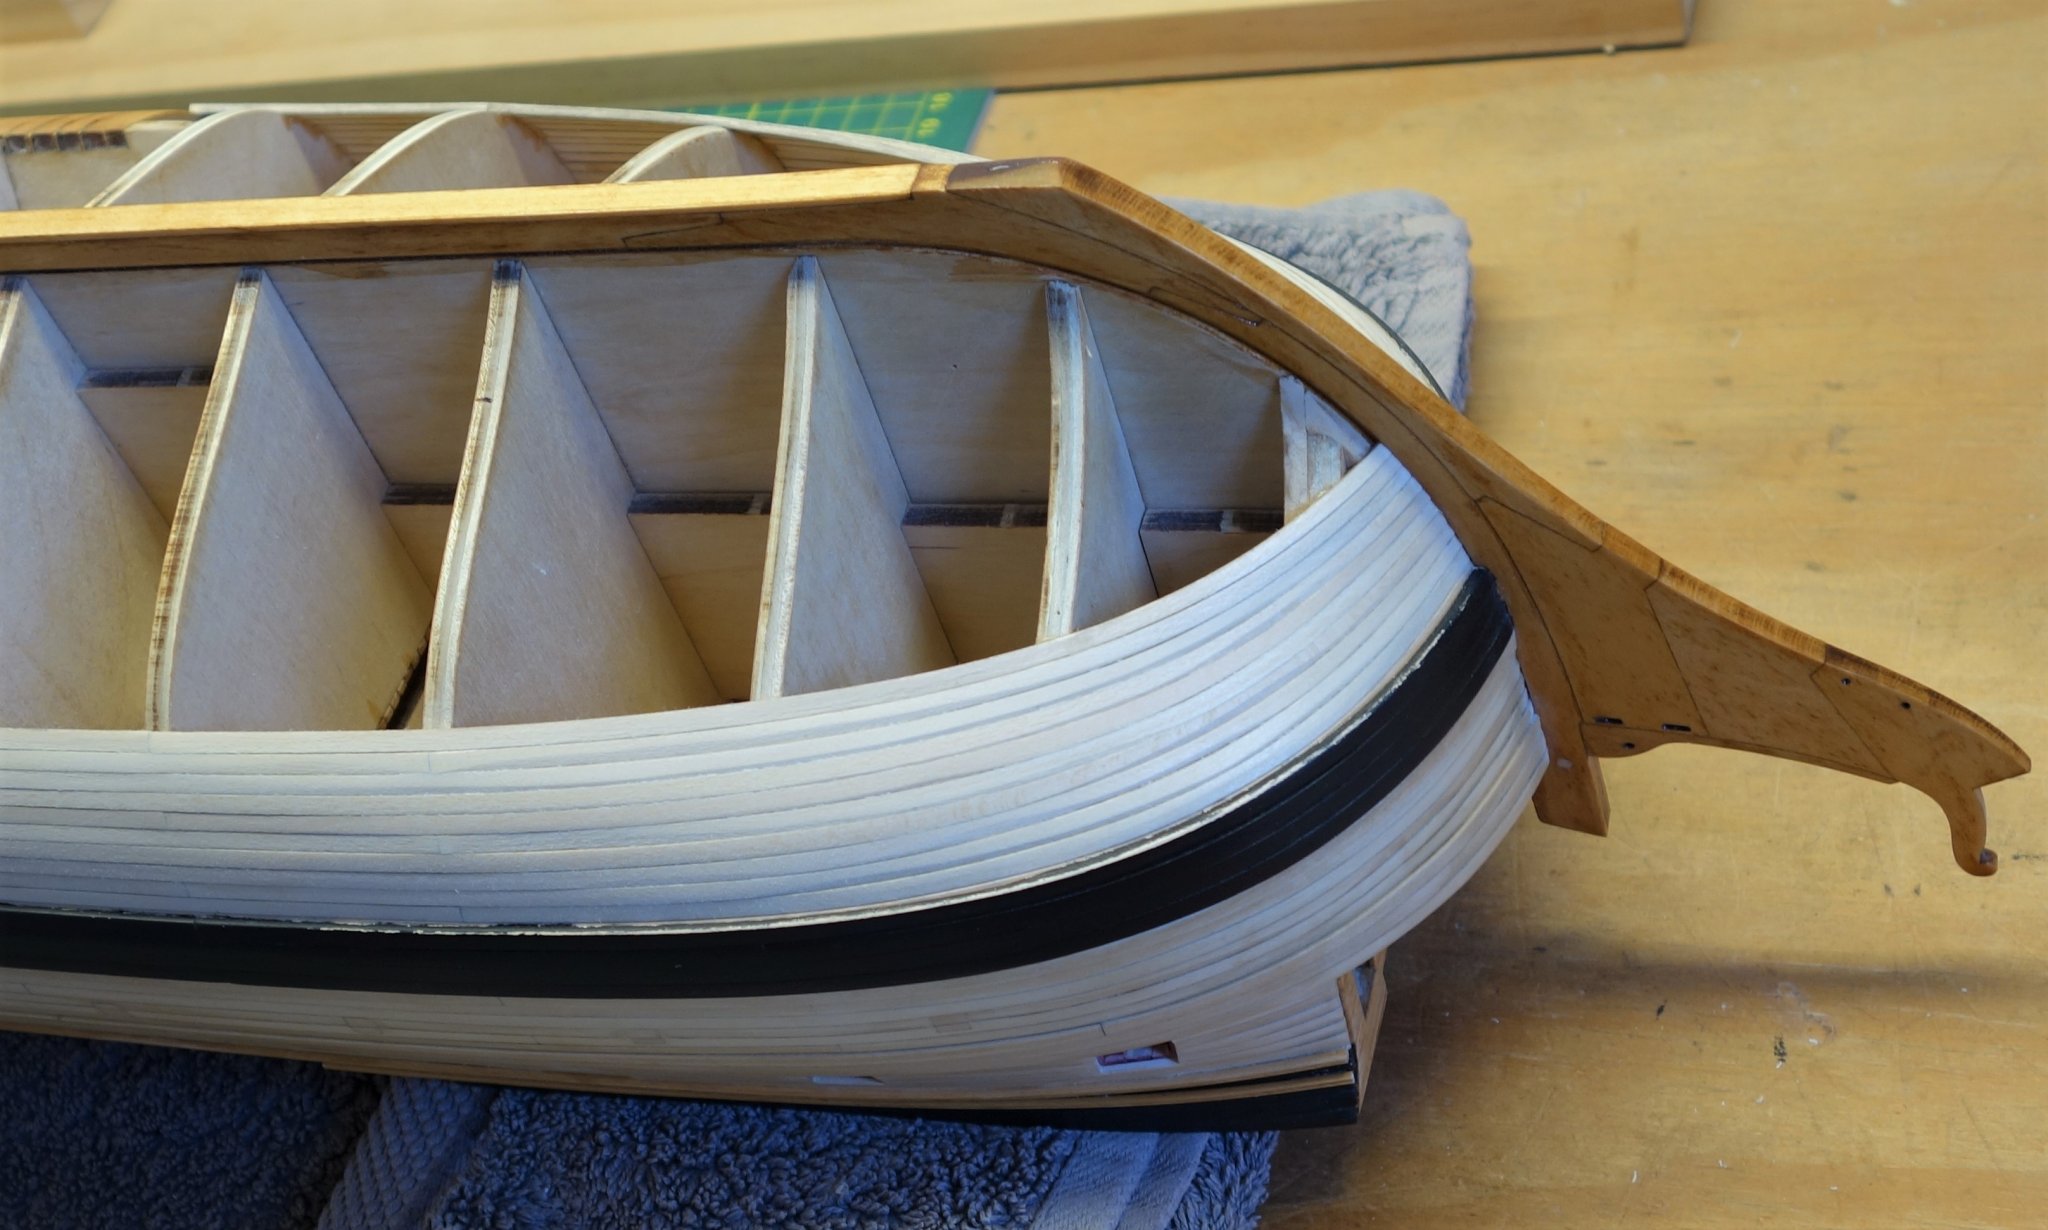
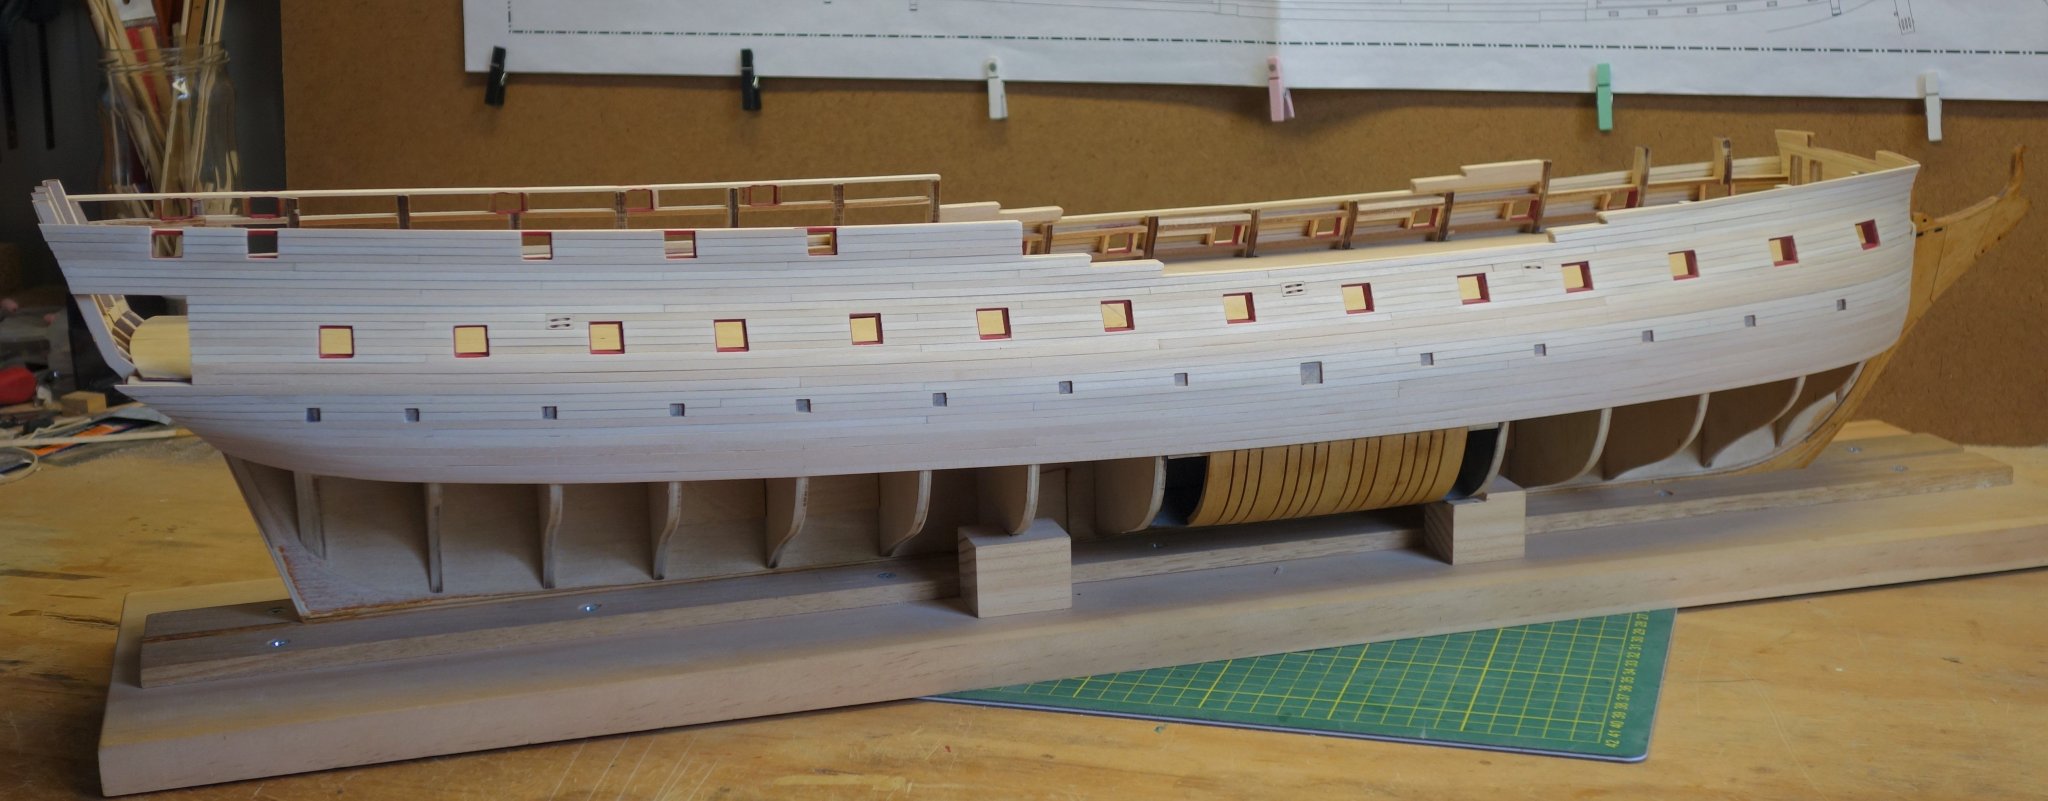
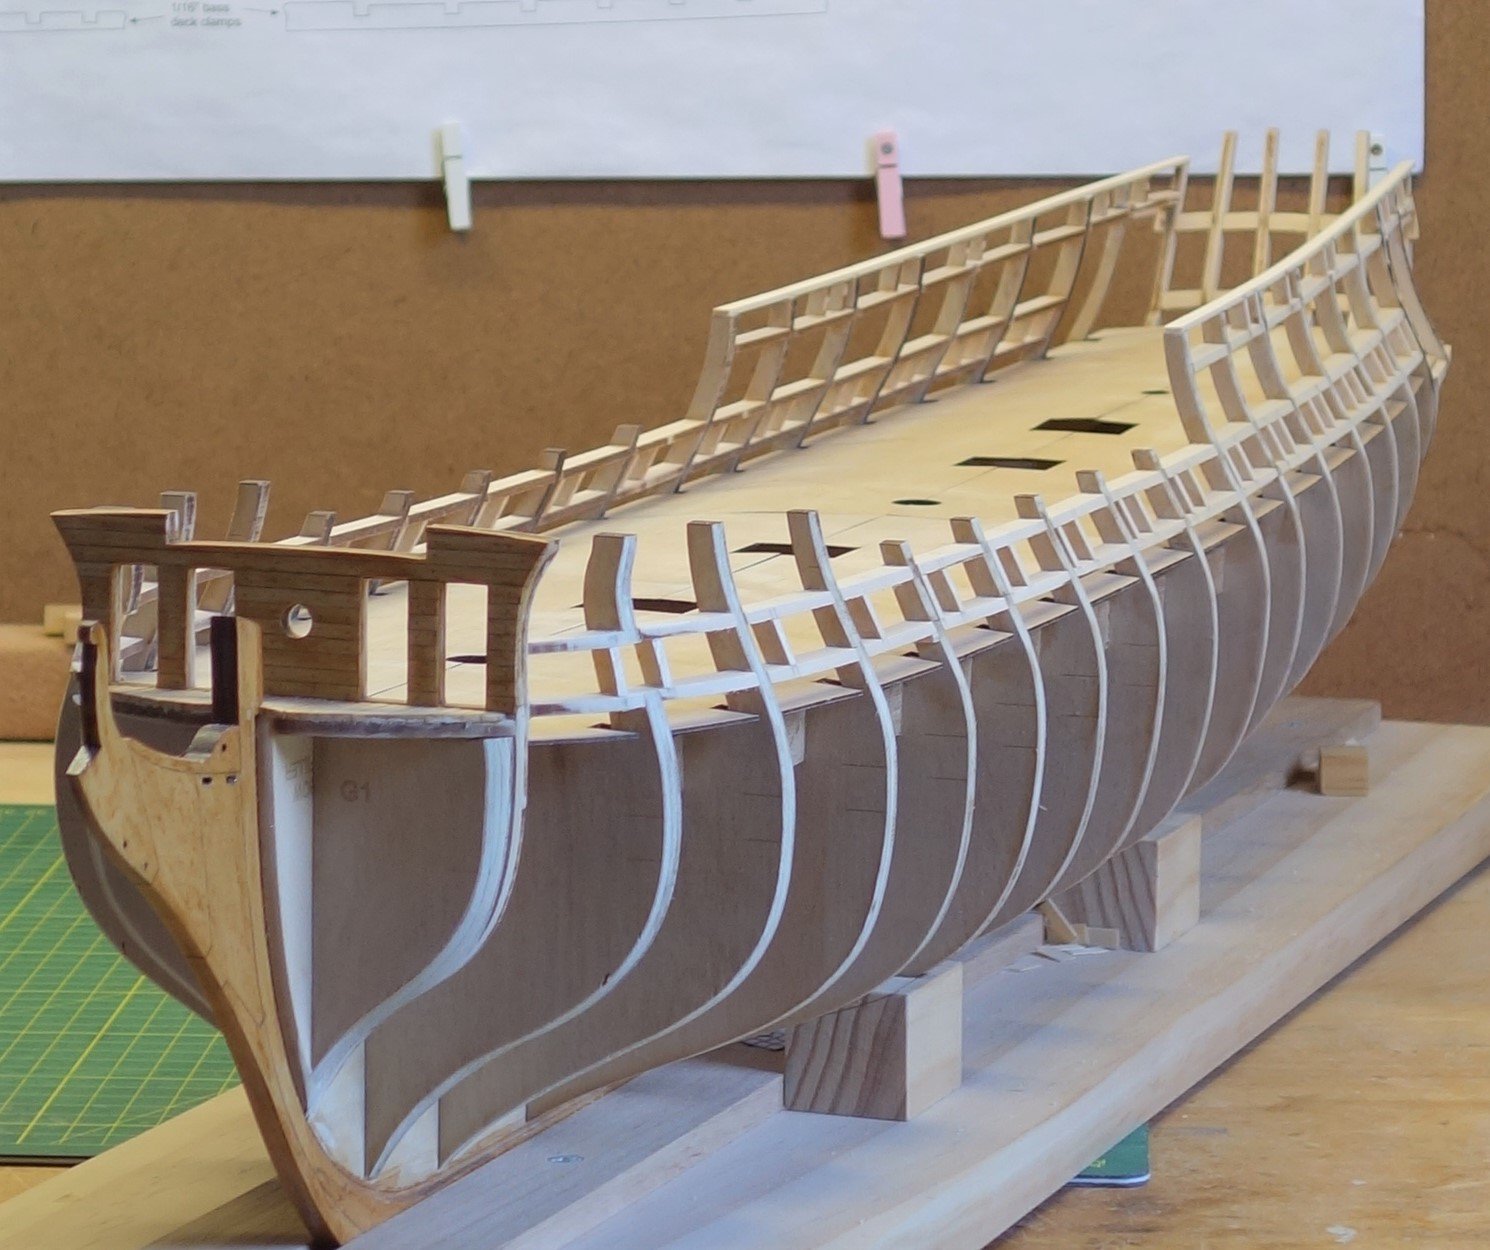
Just a few photo's of where I have added most of the wales.
I am having a struggle taking the corner with the planking below the wales at the bow so I have started playing with Chuck's Spiling guide jig to bend the planks edge wise. I still need to bend the planks around the bow as well. Doing it in 2 separate steps doesn't work. When putting the edge bend planks in warm water to prepare them for the bend around the bow, their "memory' kicks in and they loose their edge bend.
I also had to add some material to the E & F bulkheads to close the gaps I accidently created so I am fumbling my way through at this stage. I didn't take any photo's of that process yet.


-
Thanks Chuck, not convinced on the "before you know it" part just yet.....
Also thanks for all the 'likes'.
Not much to talk about, I just felt it was time to show some photo's on the progress to date.


- GrandpaPhil, Heronguy, svein erik and 12 others
-
15
-
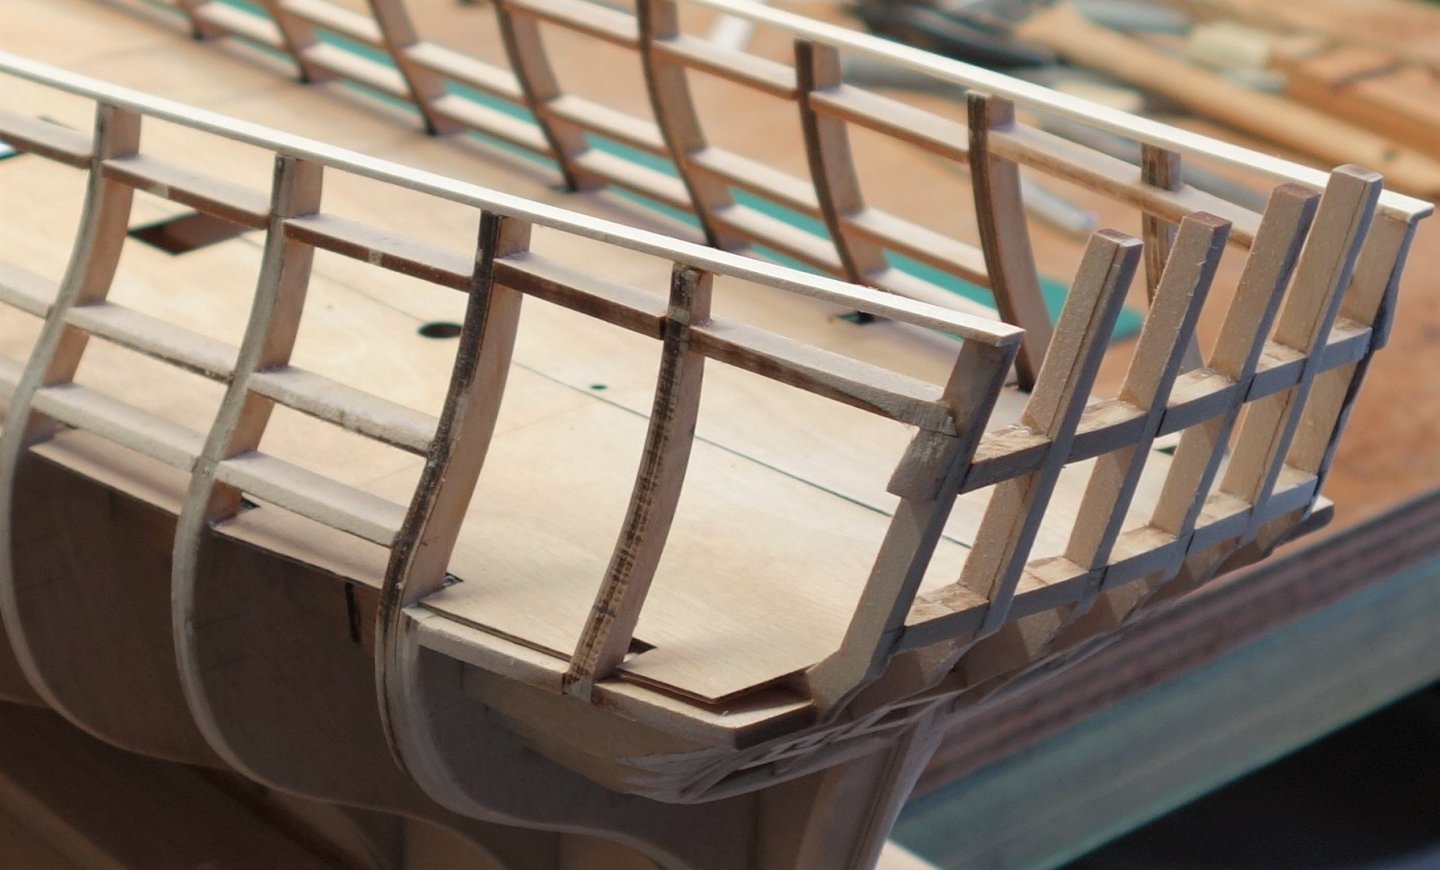
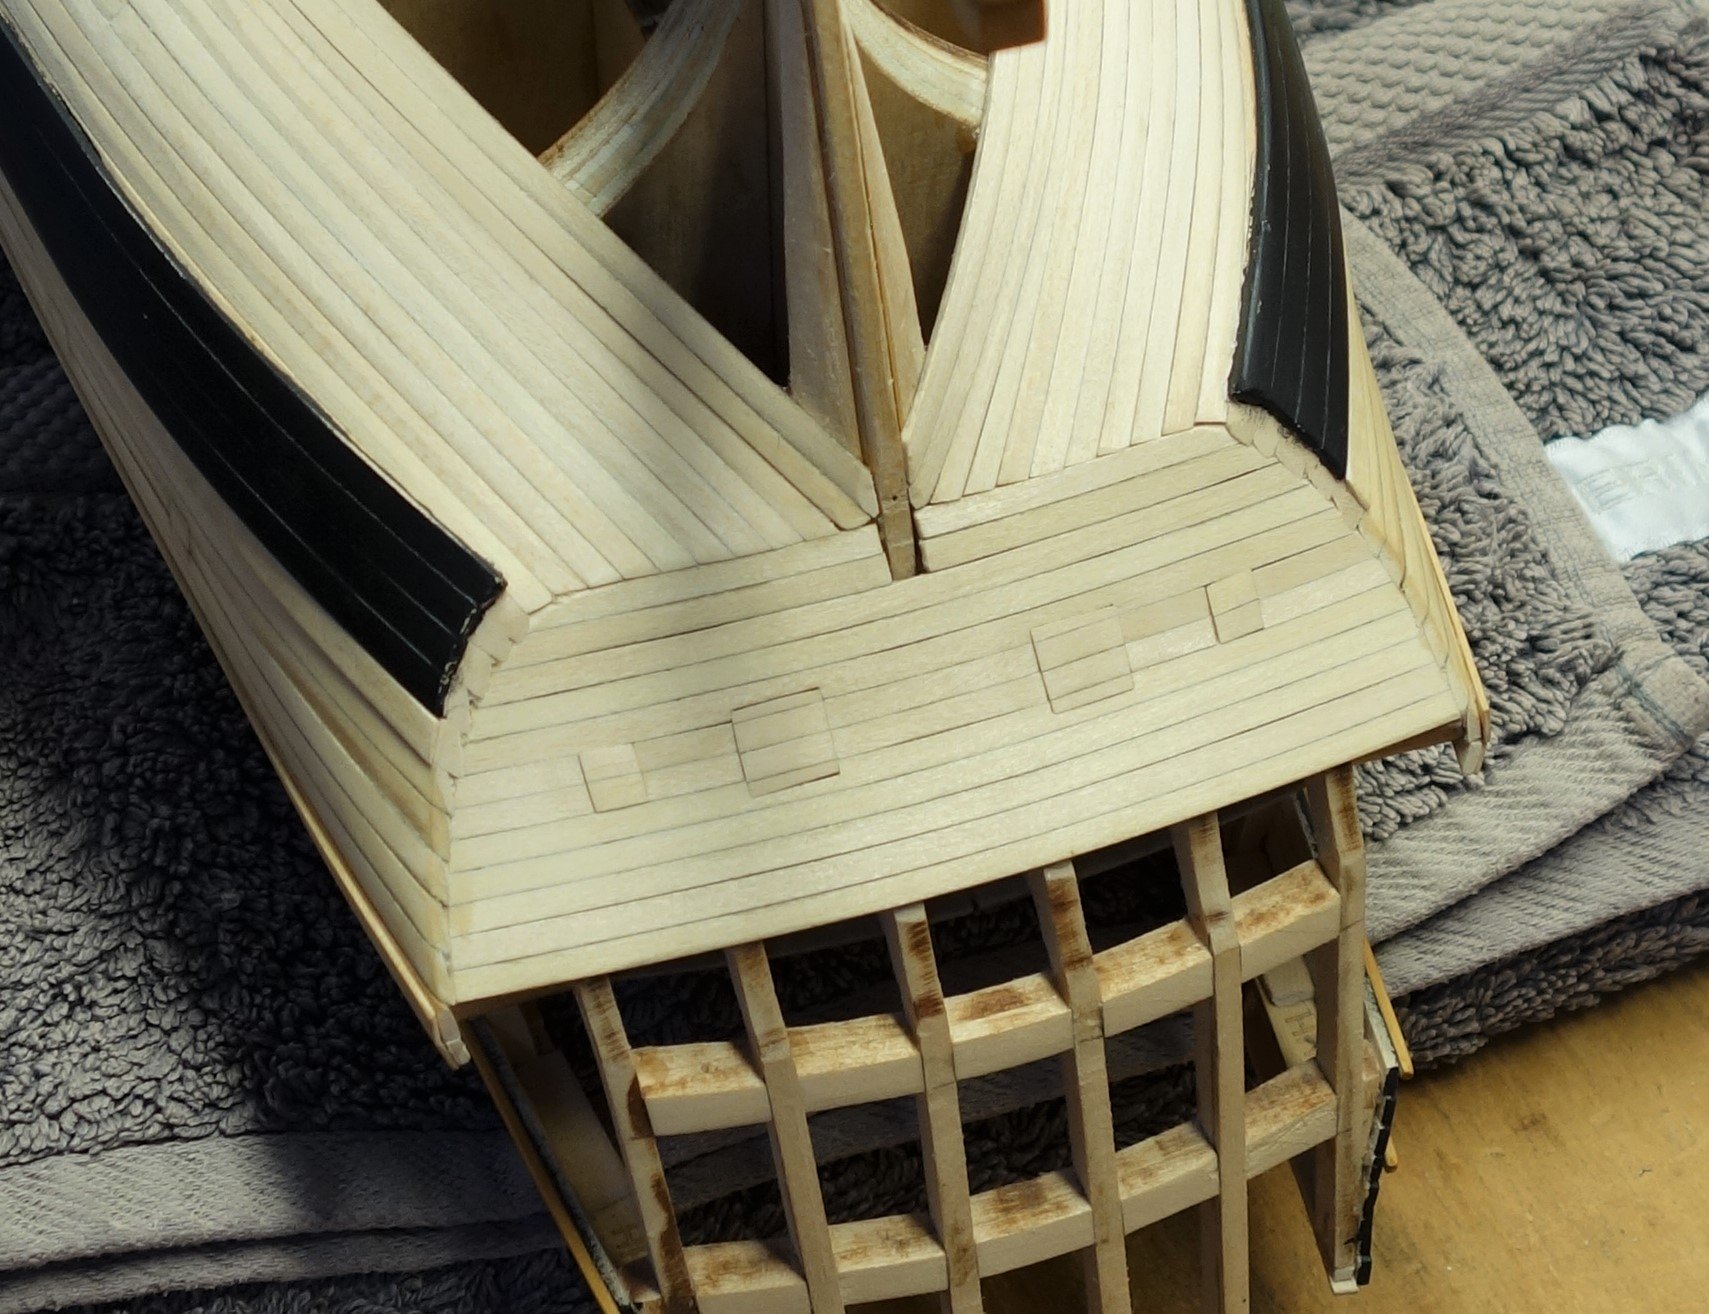
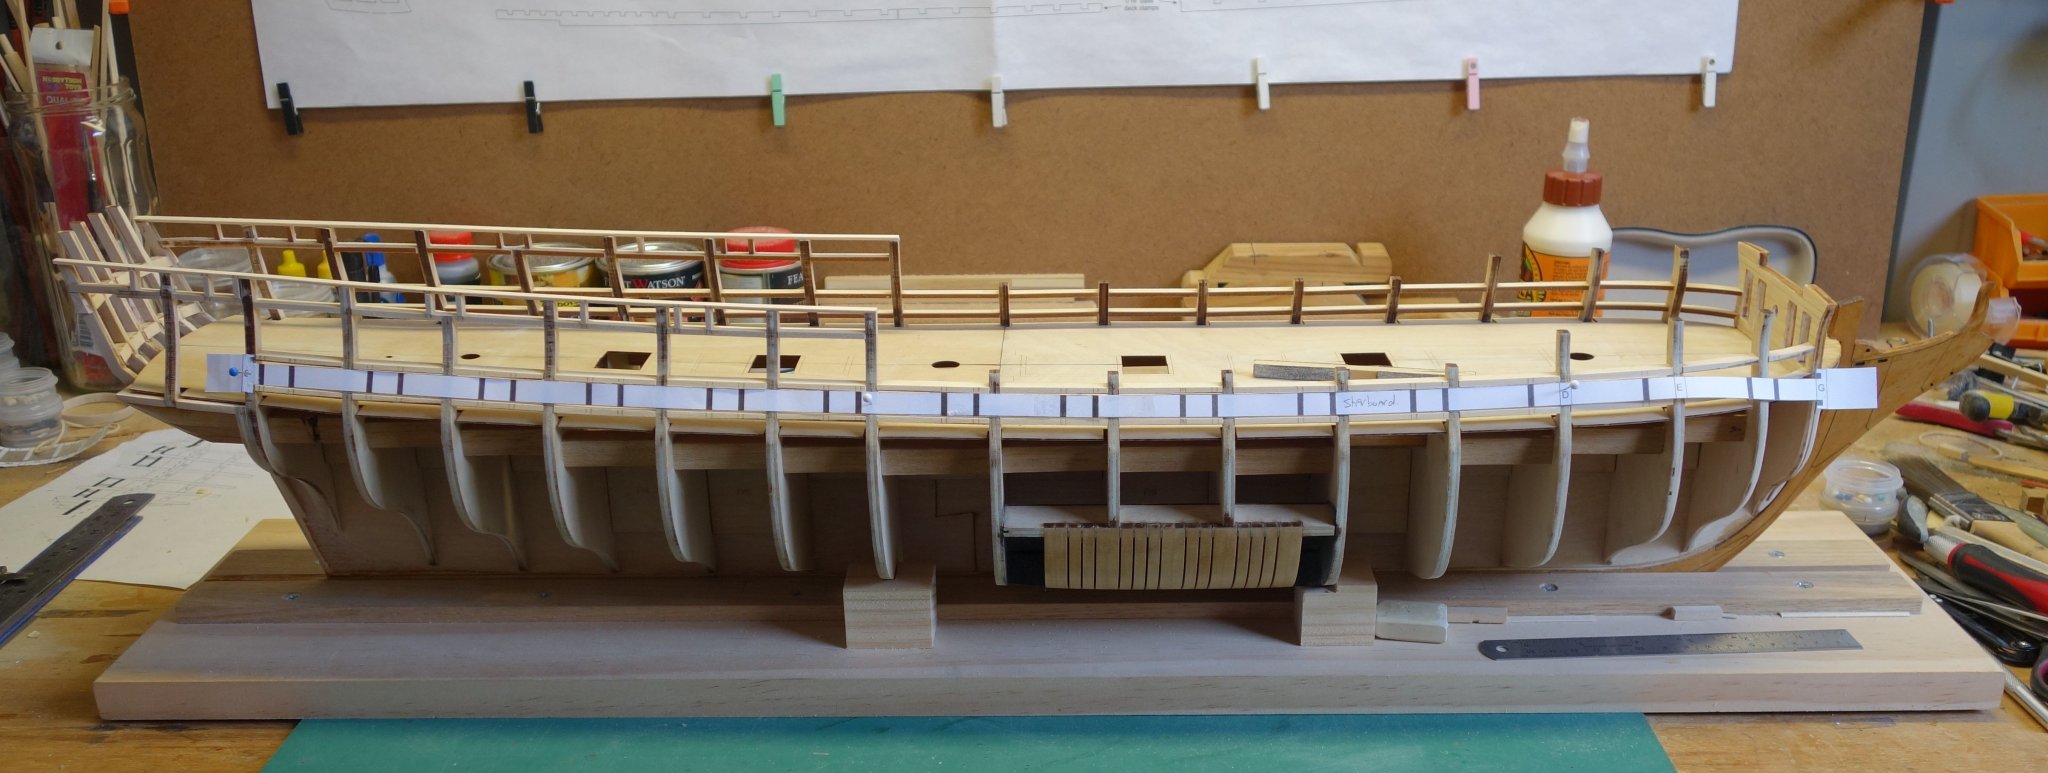
Just another quick update on the progress so far.
I have finished the planking of the lower counter and am working my way through the planking around the sweep port openings.
The last 2 photo's show the (very basic) jigs I use to pre-bend the planks at the bow and to pre-bend and twist the planks at the stern.
Here are some photo's..


- Tigersteve, mtbediz, Jack H and 12 others
-
15
-
Time for another update. It's been a while but I lost my MoJo a little bit for a while. A job change (unexpected) and a few minor health scares (hopefully minor) can do that to you. Luckily after being let go from the company I worked for I managed to get another full time job virtually within 2 weeks. Not bad for an old fart....(or maybe just lucky...lol).
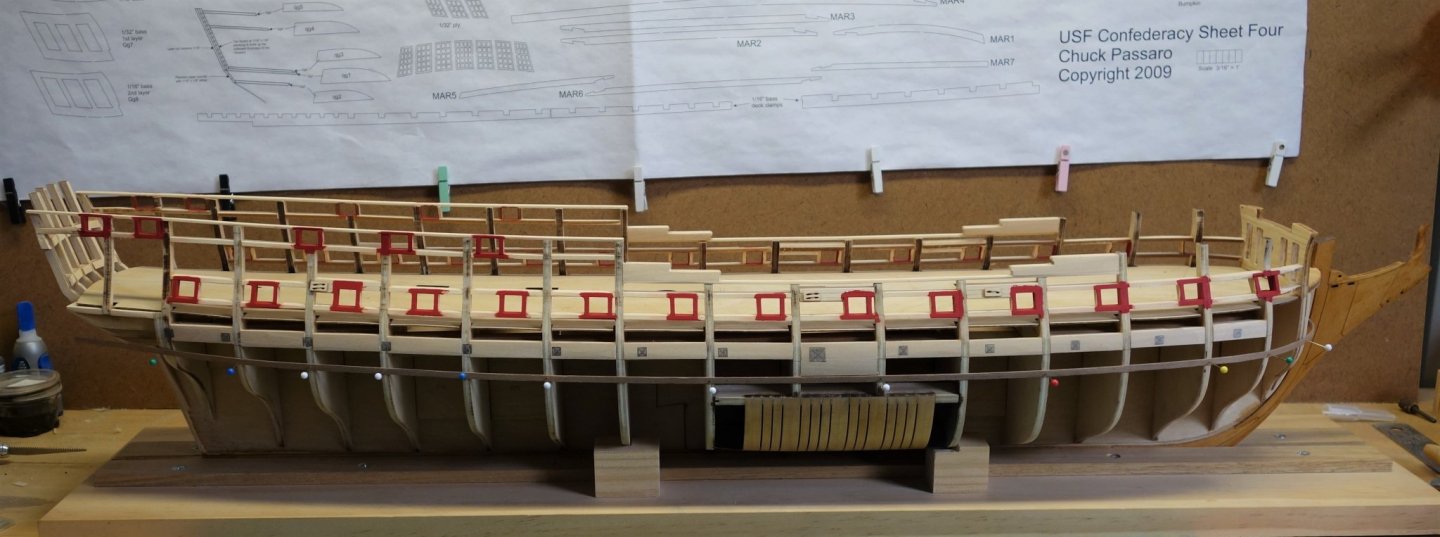
So..., my MoJo rediscovered I picked up from where I left and managed to finish chapter 4.
Just a few photo's to show where I am at....


- Heronguy, Tigersteve, Dubz and 8 others
-
11
-
13 hours ago, tigerdvr said:
She has a look of quality already, very nicely done.
Thanks Harley, as long as the mistakes I make are fixable I should be OK....
10 hours ago, svein erik said:wondeful ship, good luck with the build Peter, i did mine in basswood that come with the kit, but now i wish i had use boxwood or yellow ceder insted
Thanks Svein,
I actually don't mind basswood. The Syren turned out OK, you just have to be extra careful because of the softness. The softness also makes it easier to shape which can be a bonus when you are mainly using hand tools.
4 hours ago, Dwight said:Wow ! I've been thinking of doing the Confederancy but don't like the unfinished look without masts and rigging. I found a place thet sells plans for Confederancy with all the rigging. They are 1/98 th but that shouldn't be to big a problem. I'll look them up for you if you're interested.
Thanks Dwight, I have seen the thread here and already found the site where the plans are sold. It has been in the back of my mind but at this point I am leaning towards keeping her as a hull only. I reserve the right to change my mind in the future though….lol
-
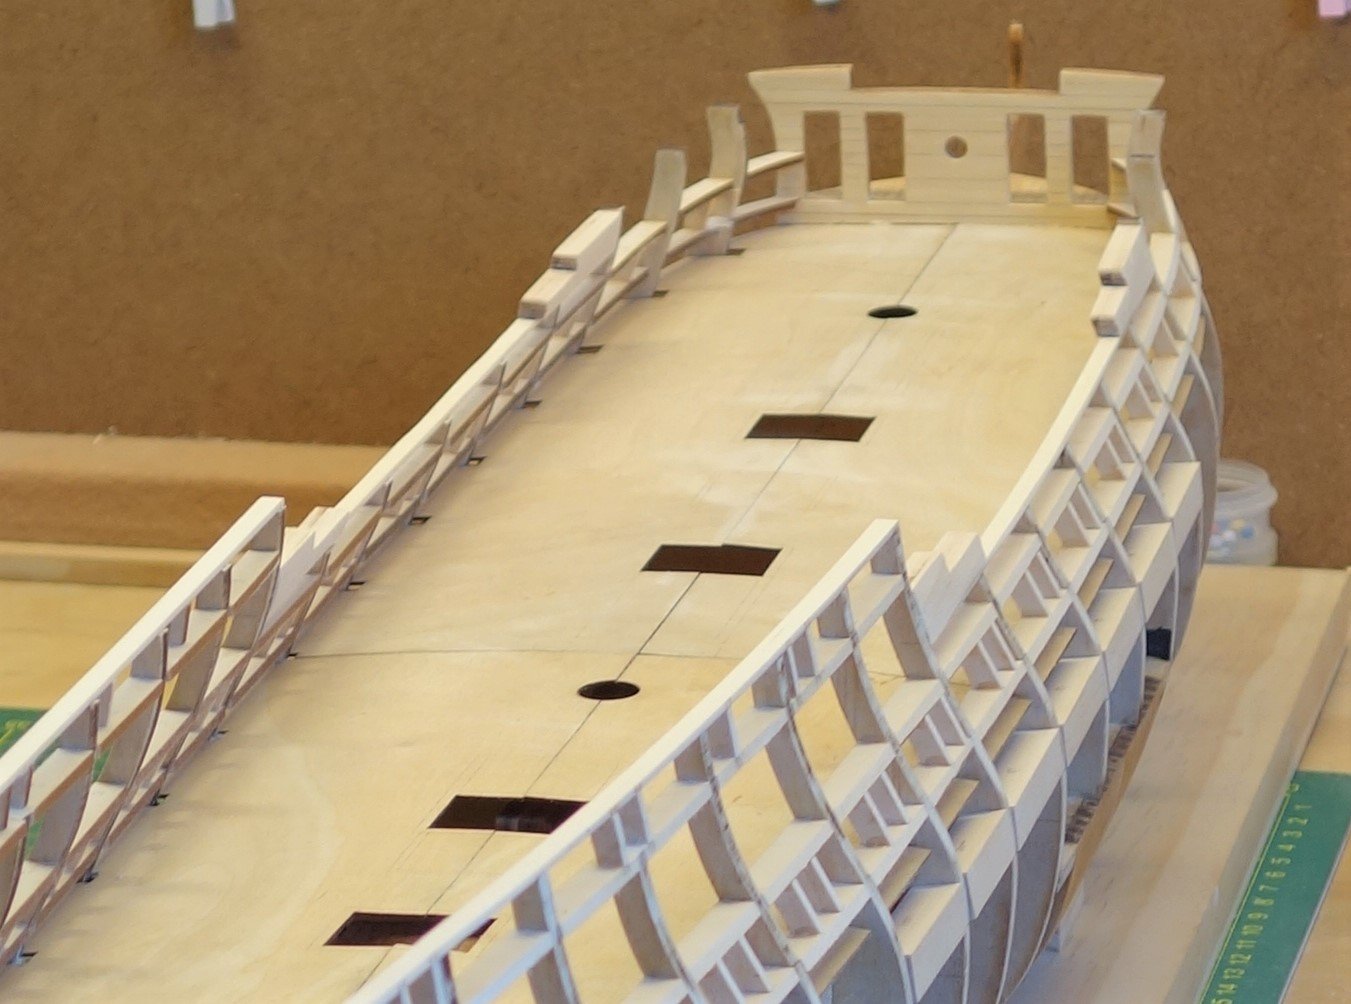
Another update with a few photo's.
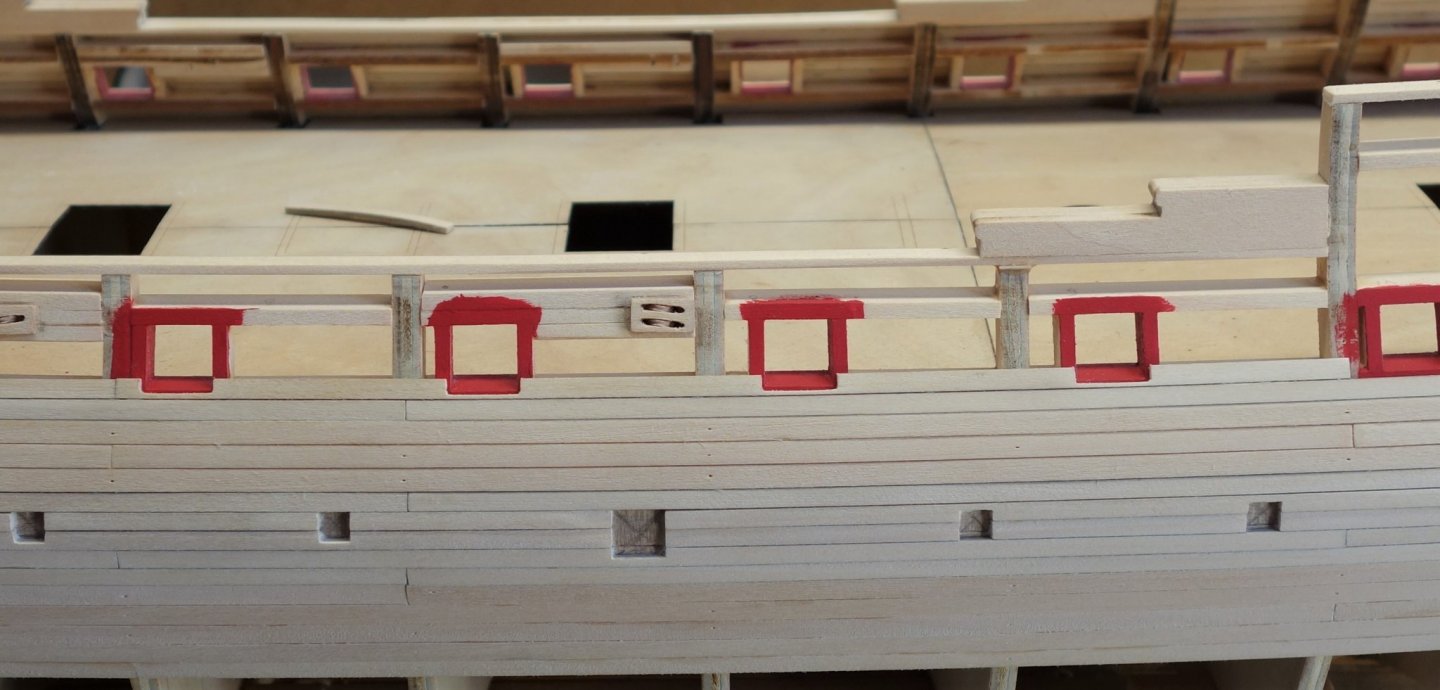
When working on the Quarter deck port sill and lintels I noticed I goofed up with the placement on the laser parts H-H. I placed them on the wrong side of the laser edge on the bulkhead extension. This required some fixing. I think I got away with it. This is shown on photo 4 & 5. (the photo's were imported in random order).
The other pics show a bit more progress after that (hopefully without any stuff-ups this time)....🙂
Peter


- svein erik, Dwight, Tigersteve and 11 others
-
14
-
Hi Kurt,
To take advantage of getting the HMS Winchelsea plans for free and because I wanted to become a member of the NRG anyway for a while I joined as a member today.
Because I am stupid...sigh..., I ended up putting an incorrect email address in the form so I won't get the confirmation email (I didn't check first and filled it in with a ".au" at the end).
My correct email address has no .au
What is the best way to fix that?
Peter
-
-
Hi Harley,
It doesn't feel like a good beginning at times but whatever has gone wrong so far is recoverable I think...lol.
The camera I'm using is Sony RX100-II. It's a 20 Megapixel full frame compact, so there is plenty of data to crop from.
Just curious, how are you going with your Confederacy??
Peter
-
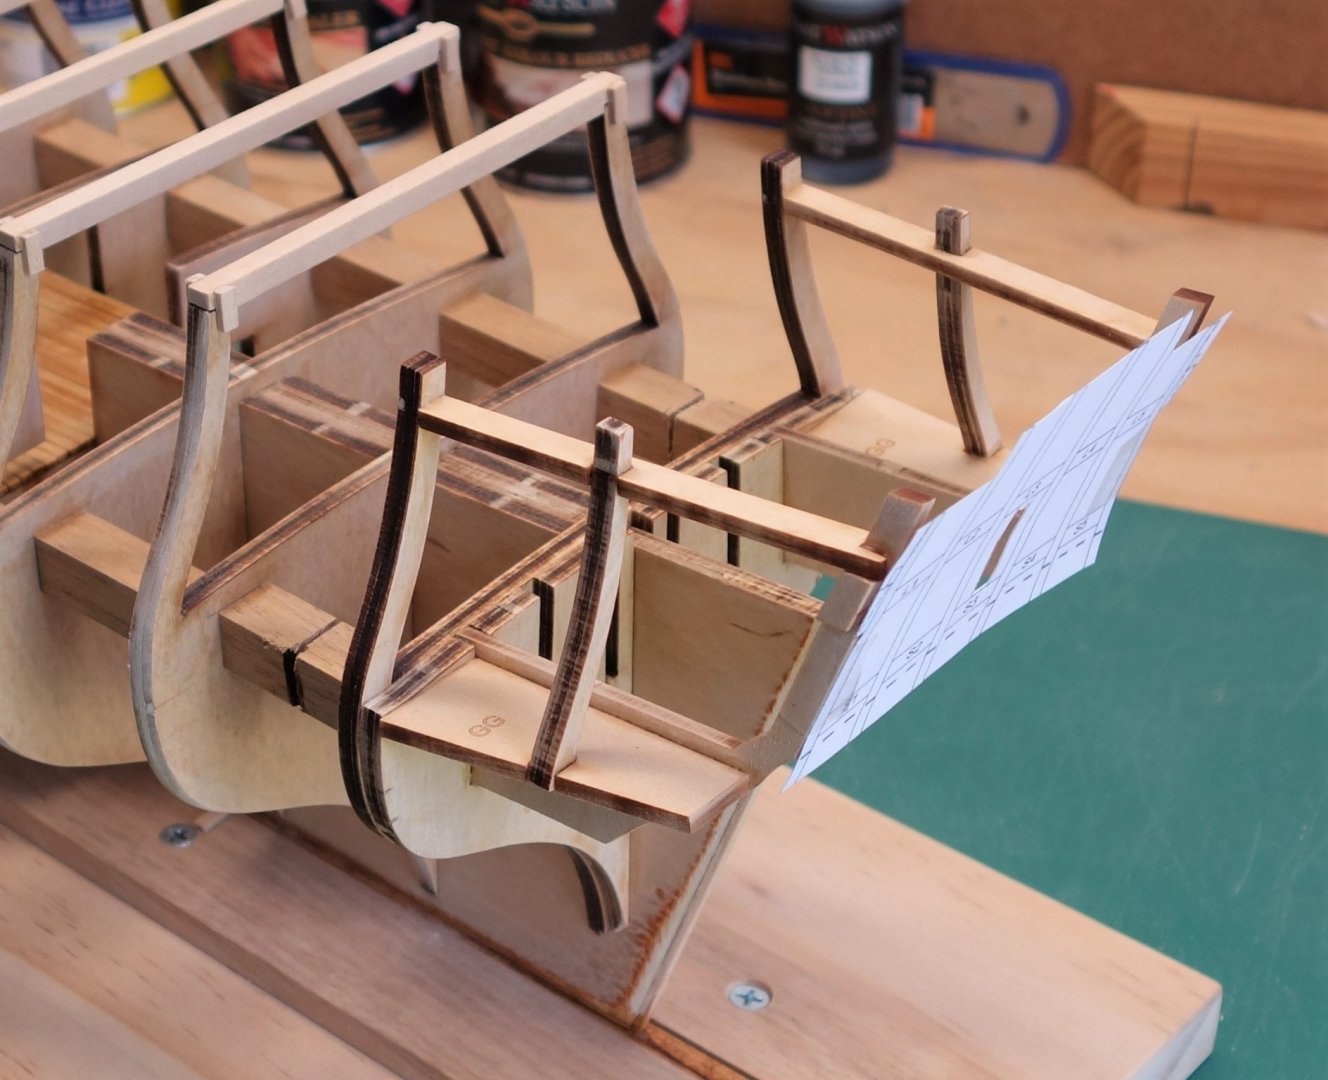
Another update.
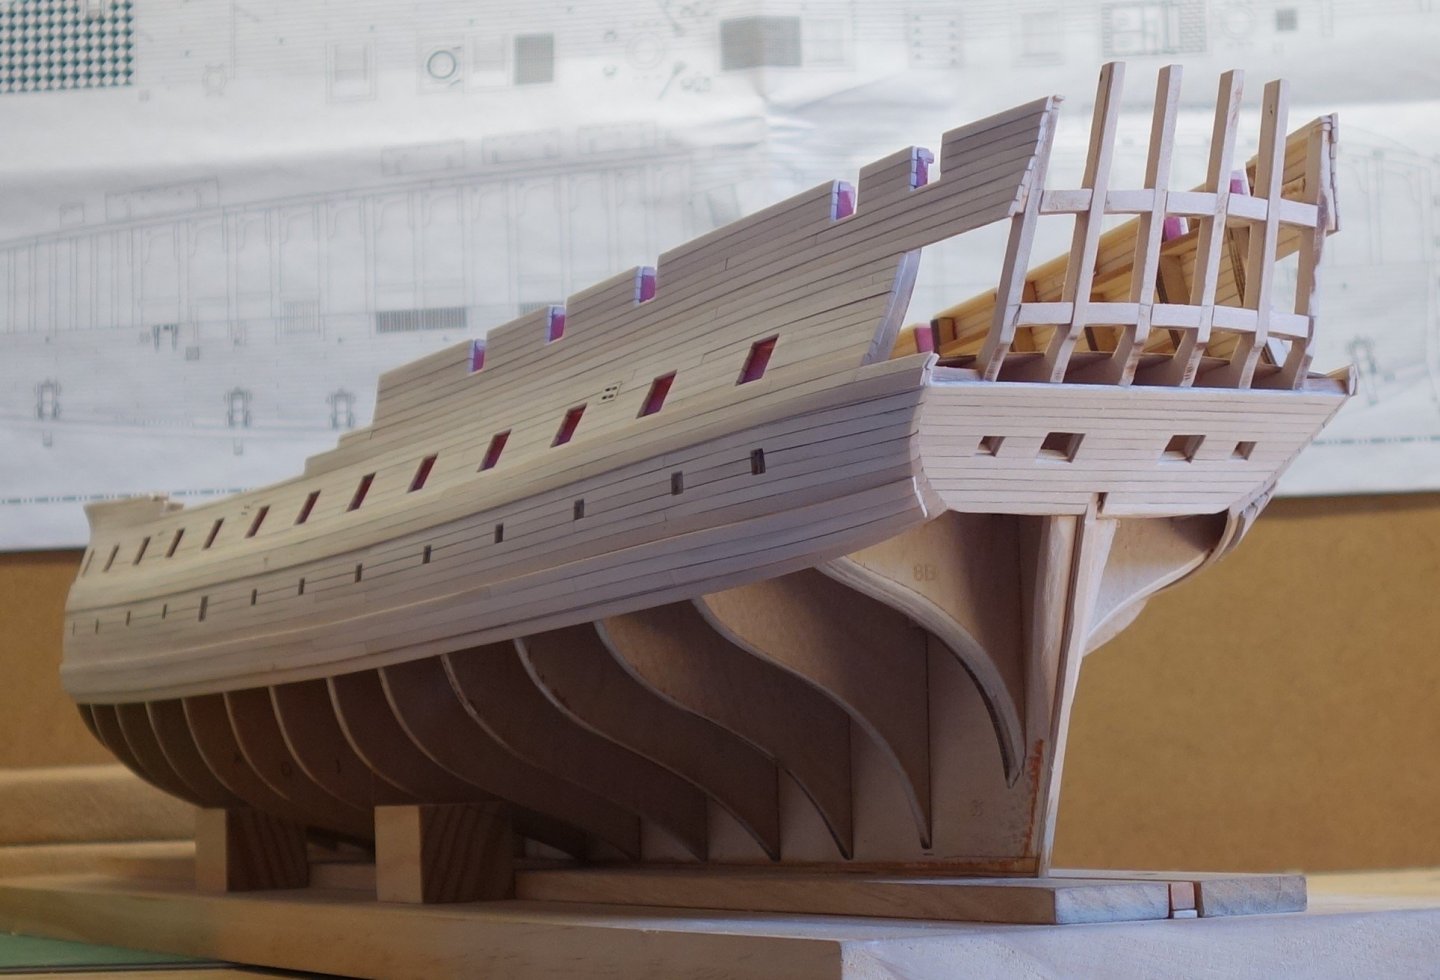
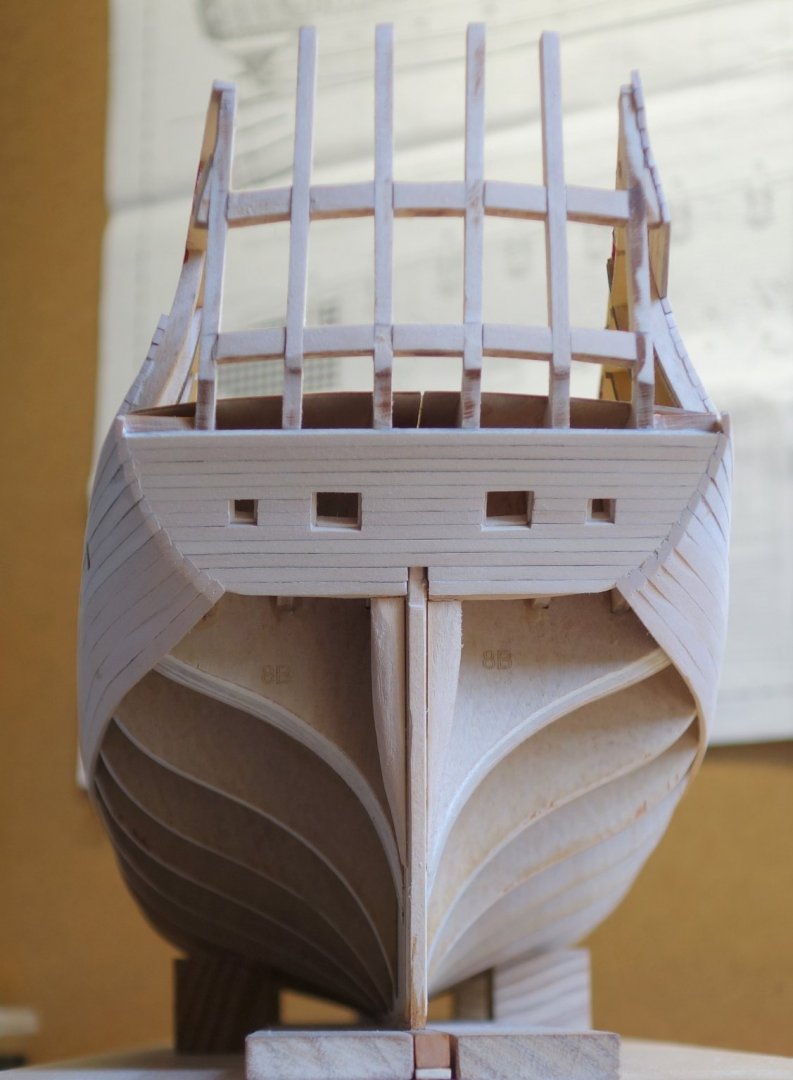
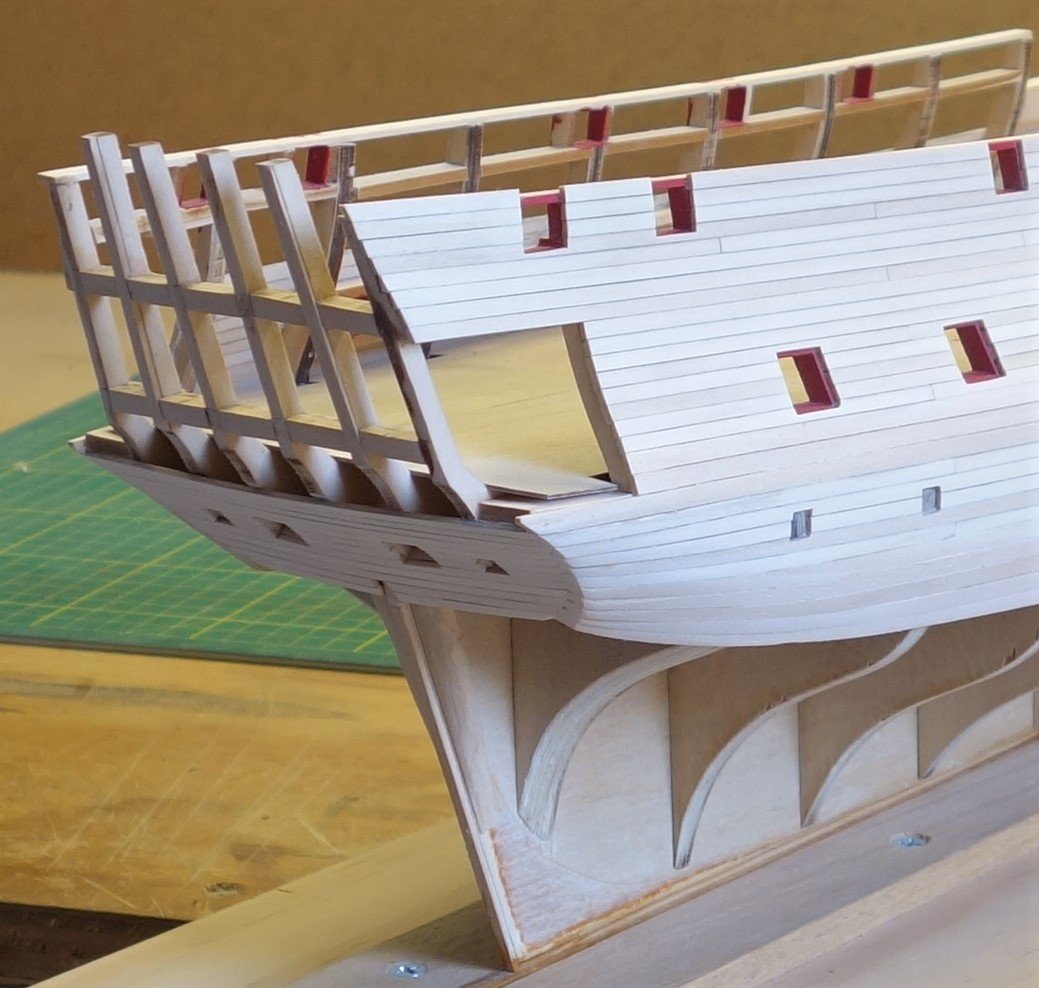
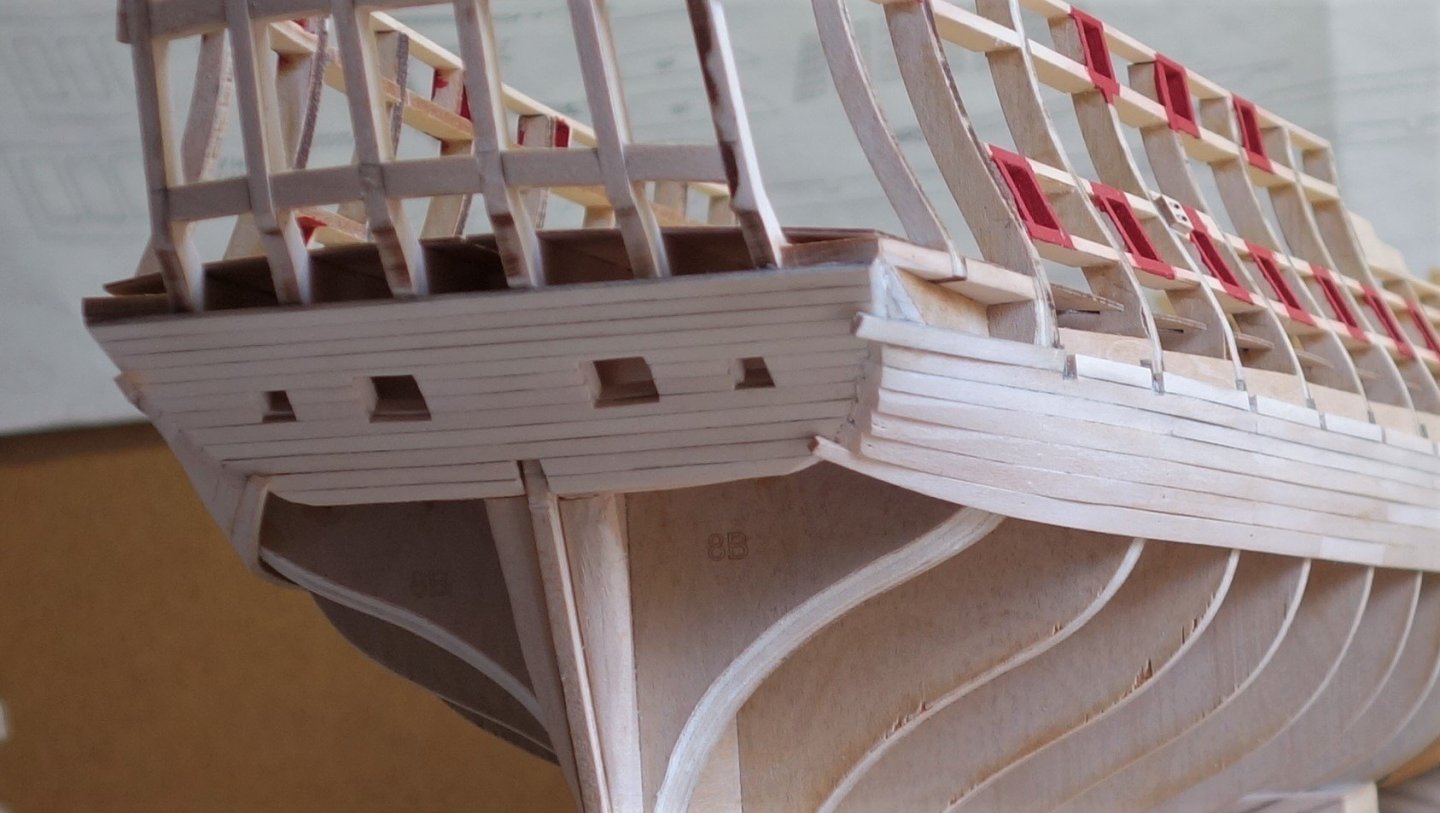
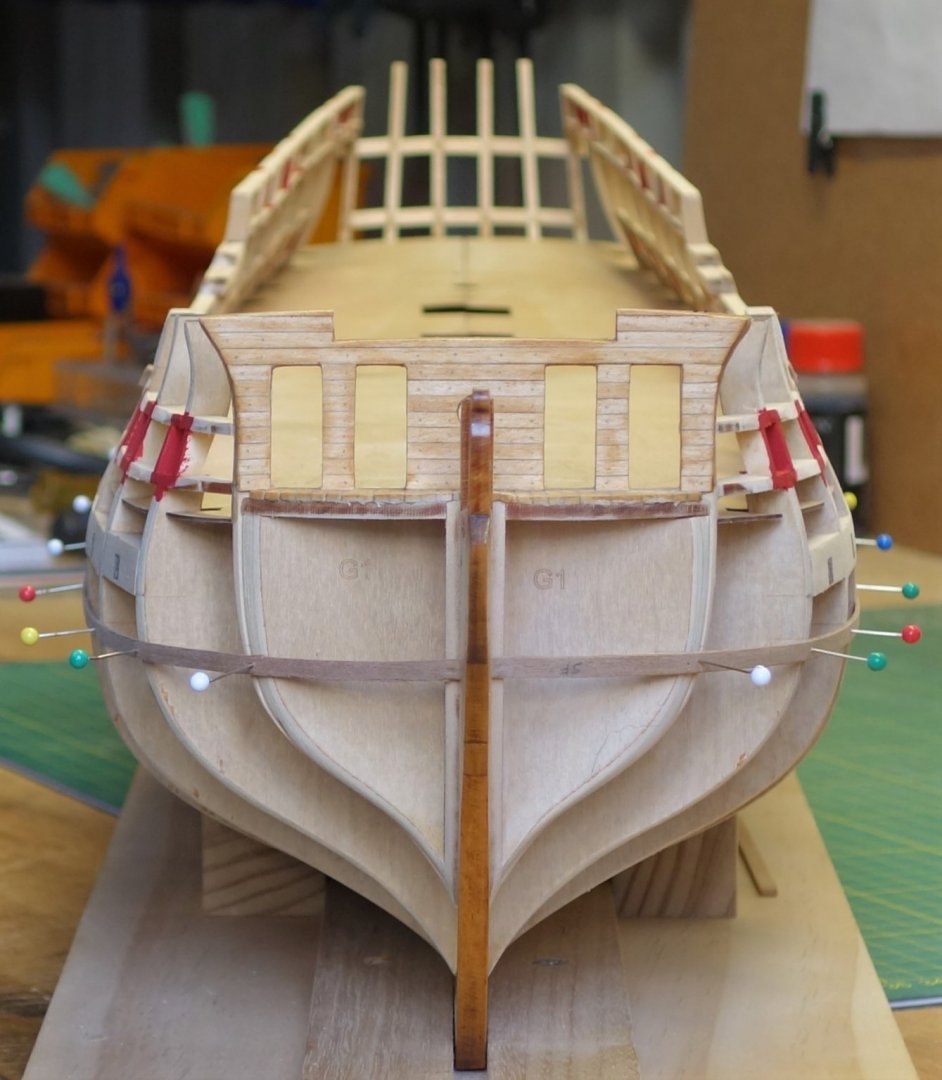
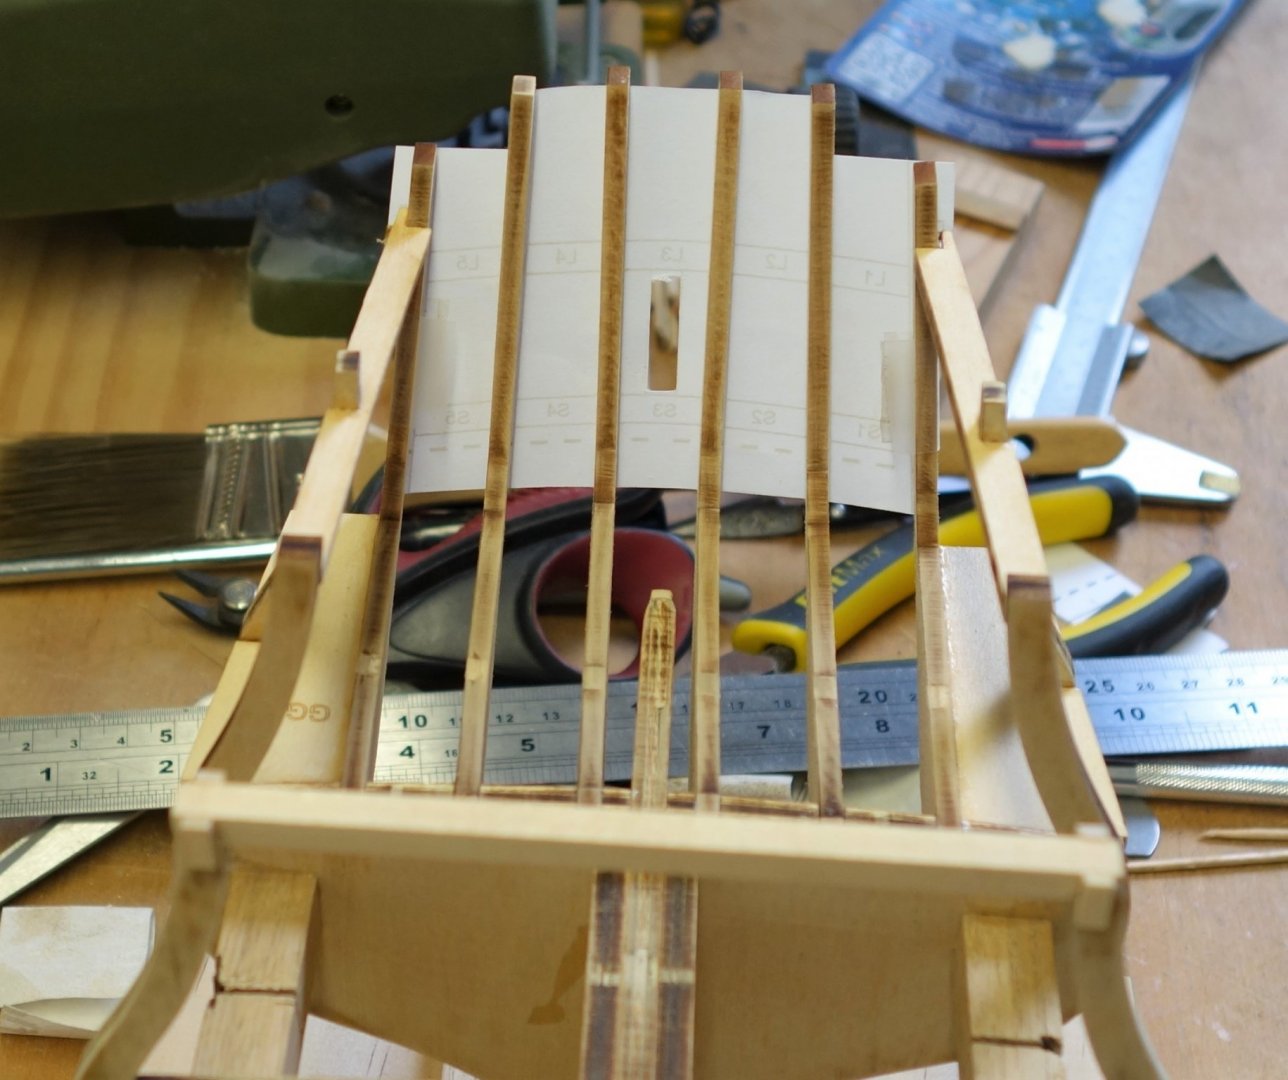
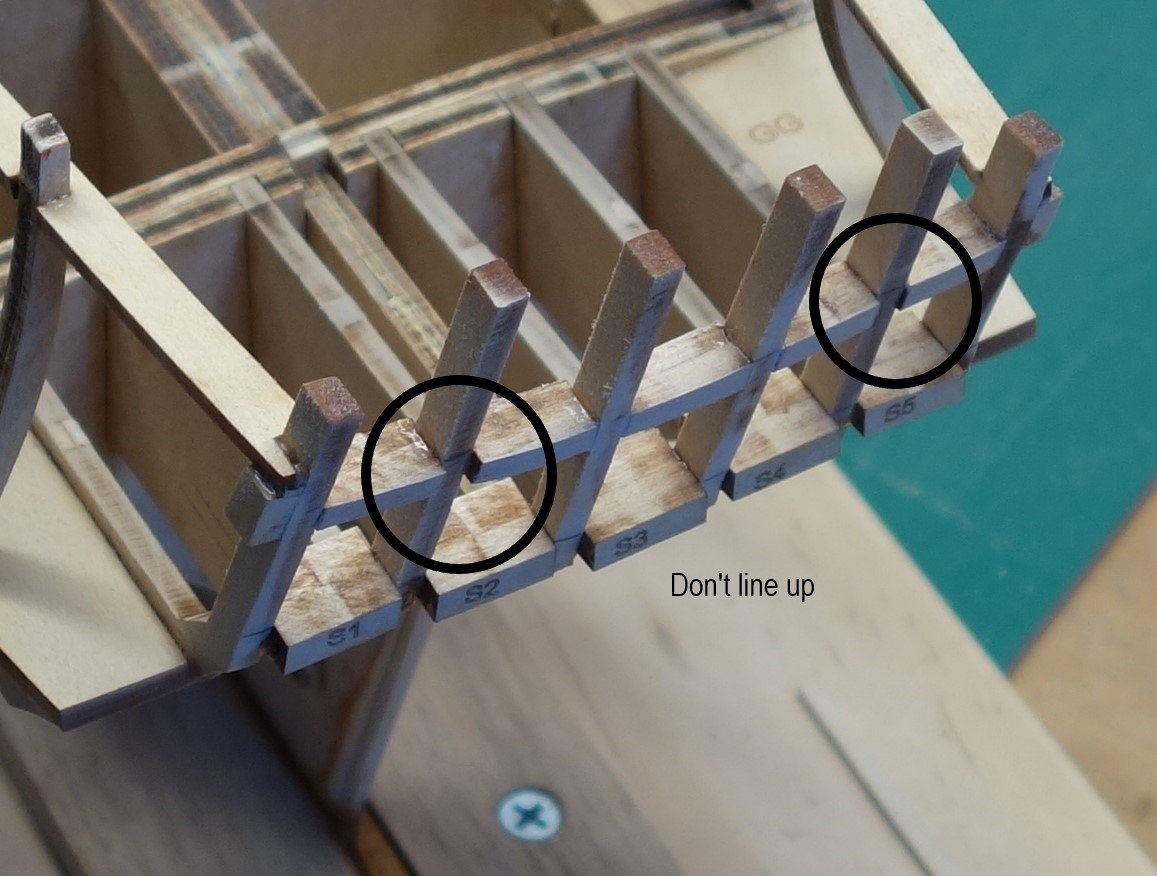
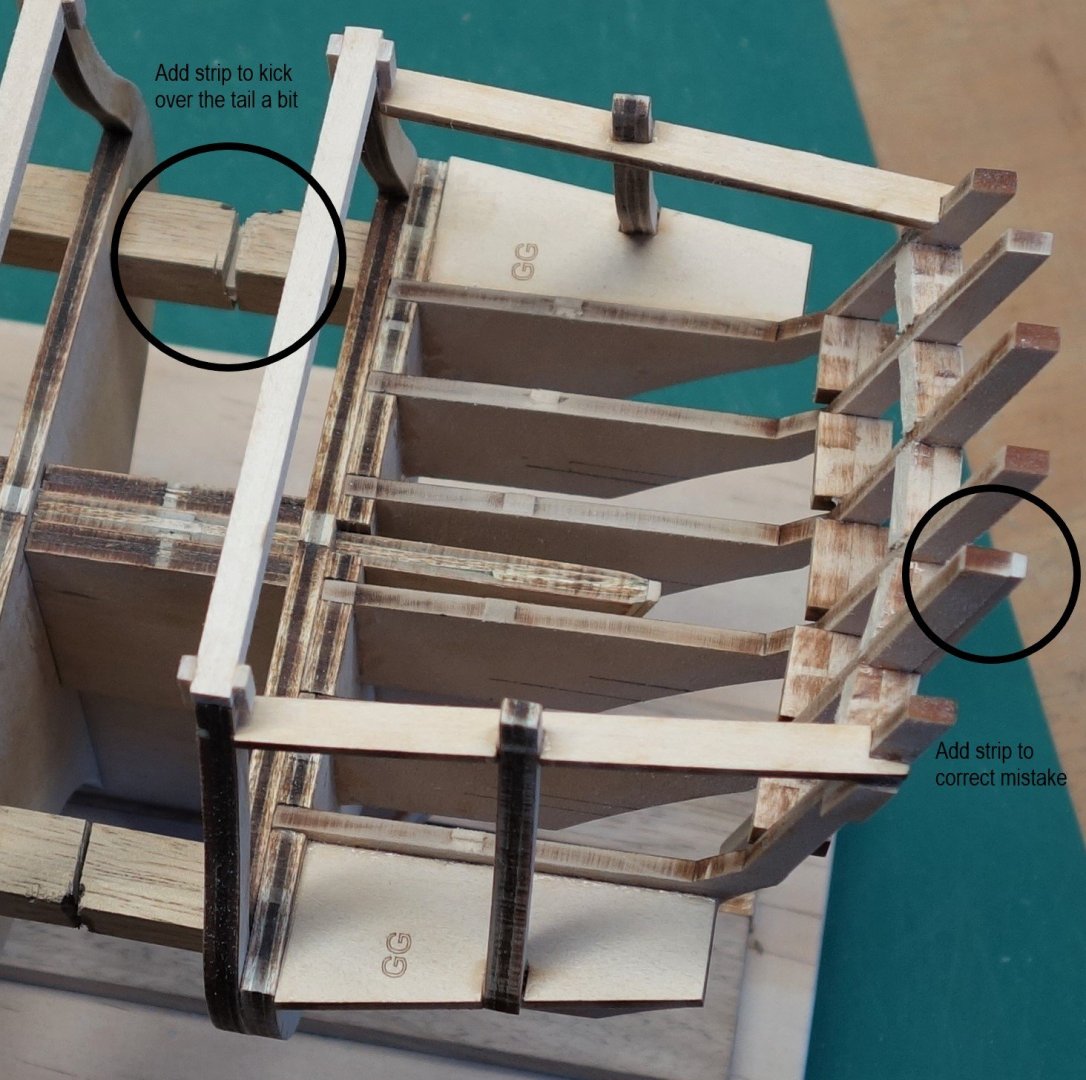
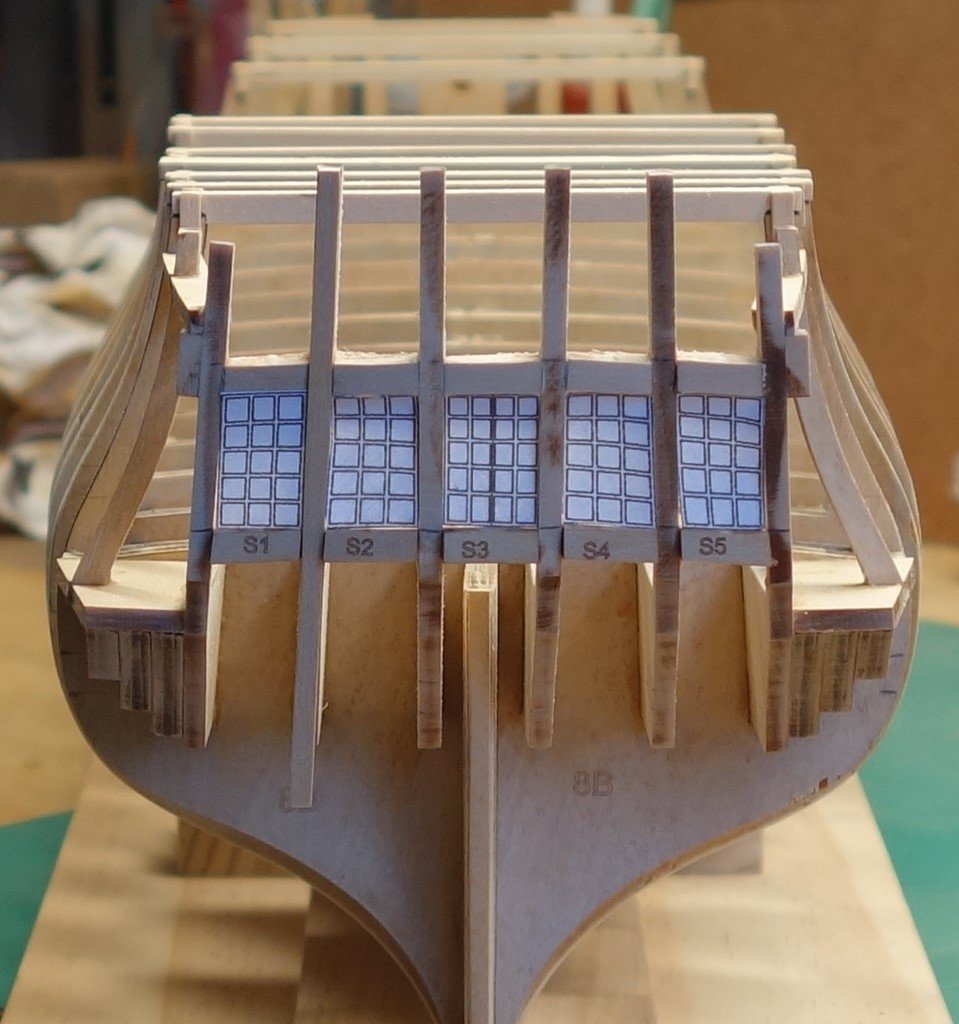
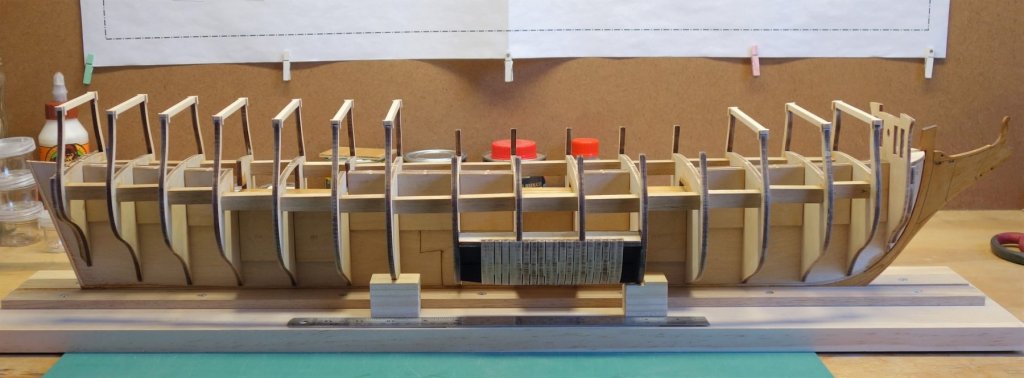
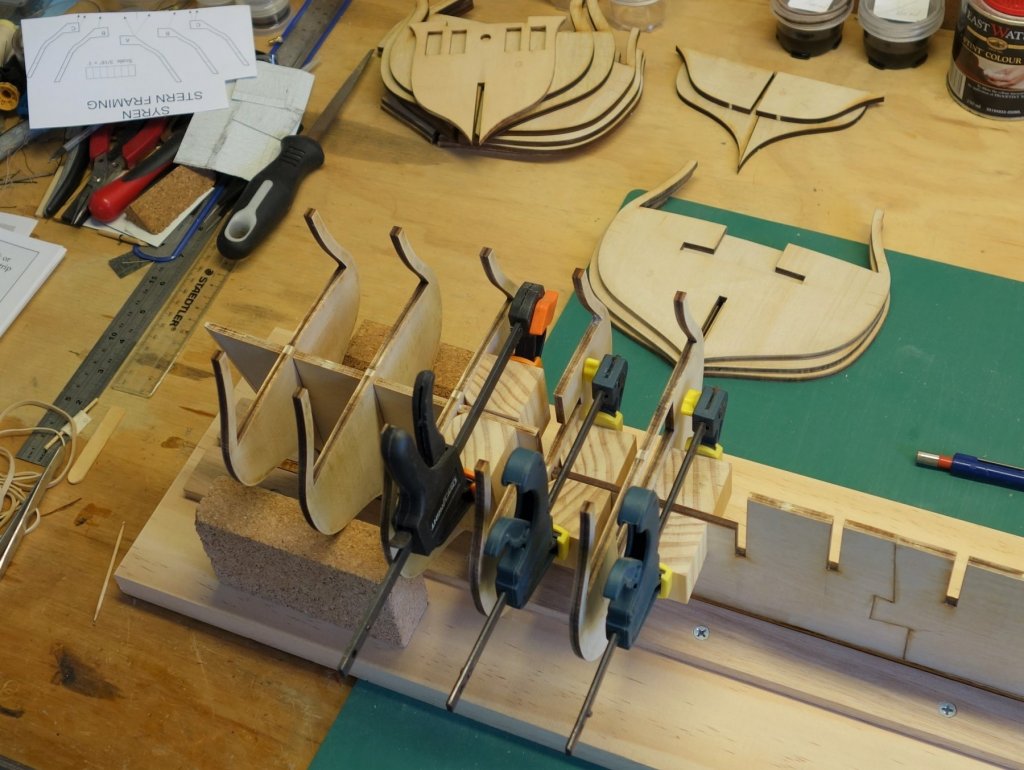
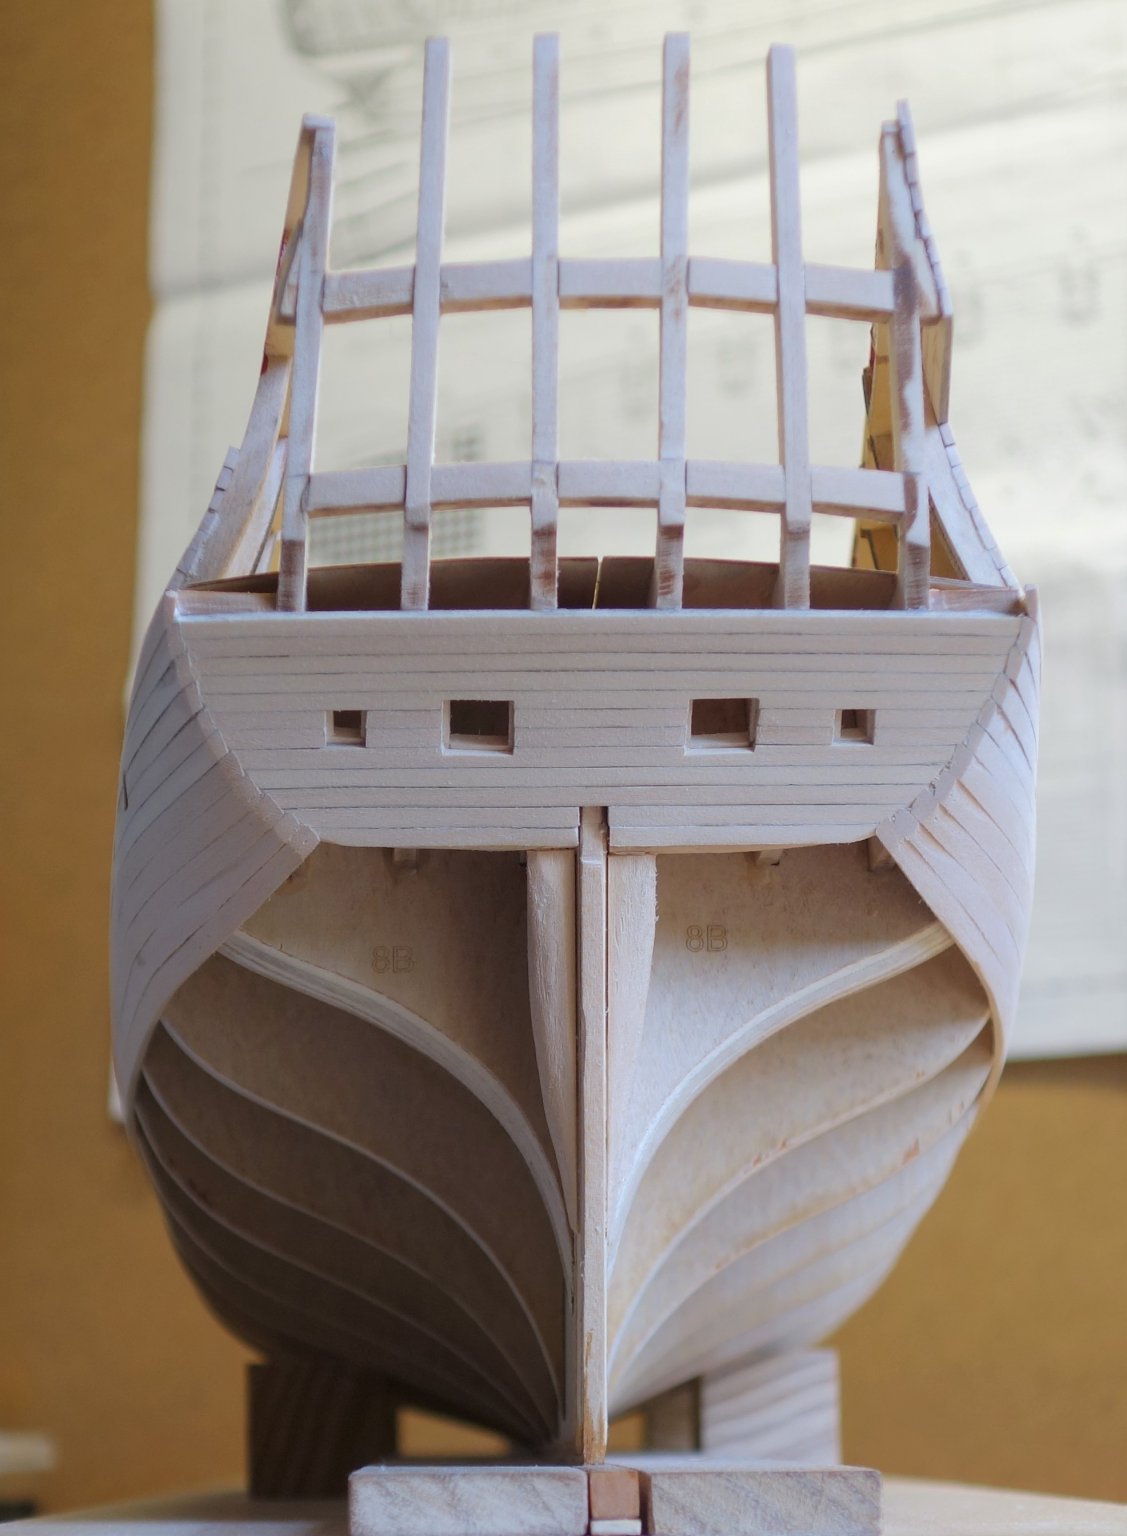
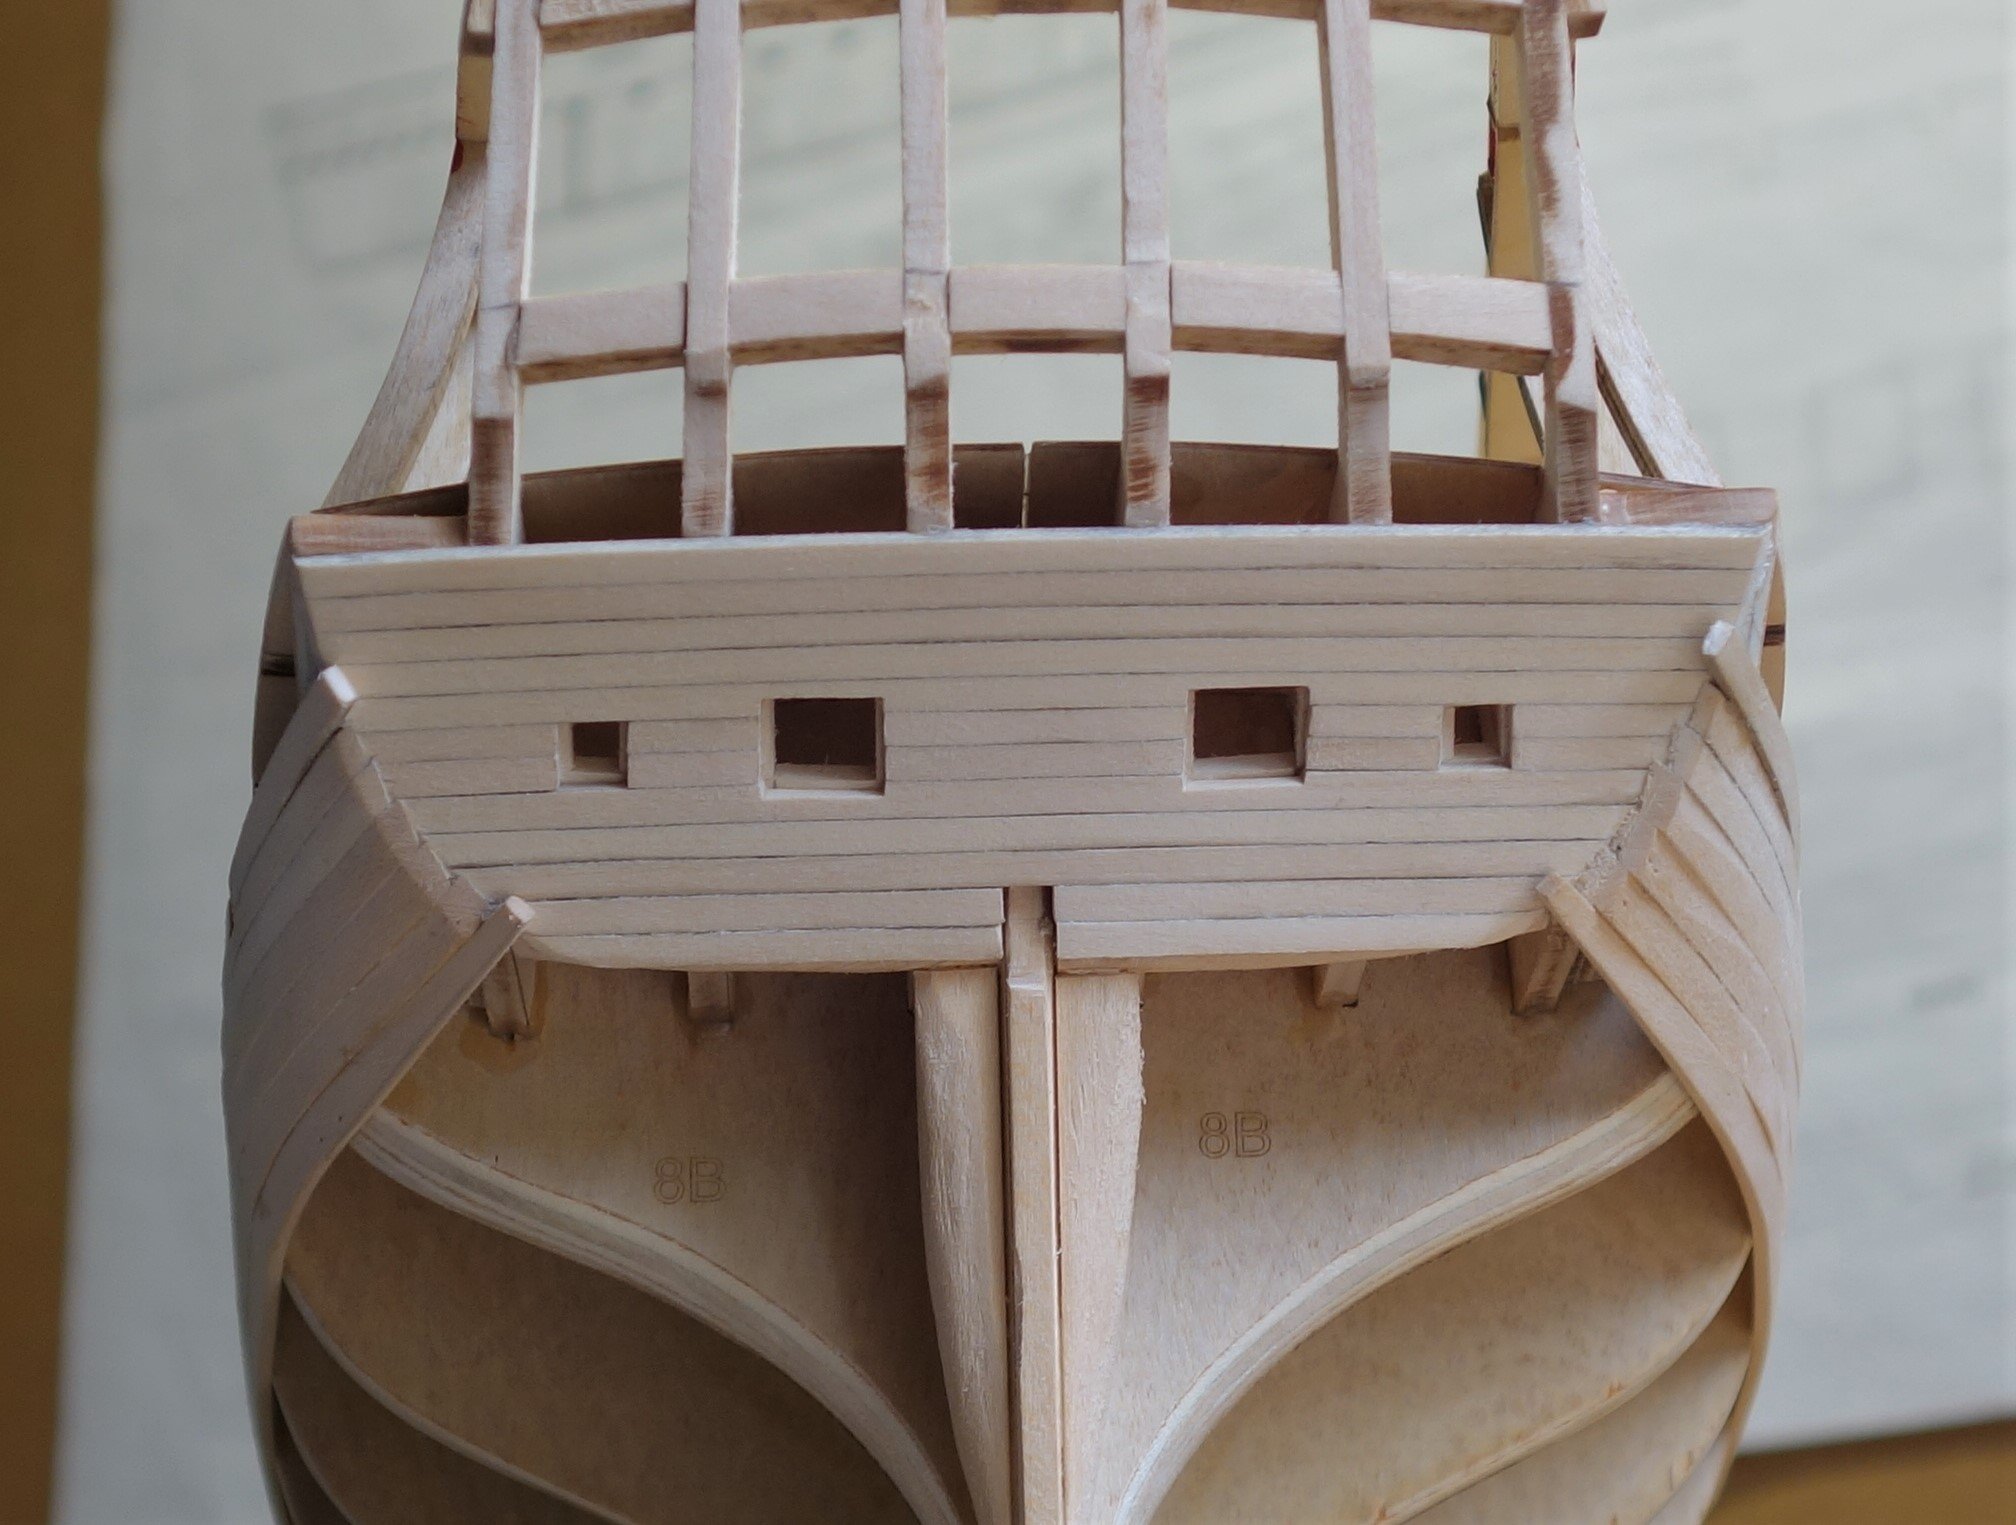
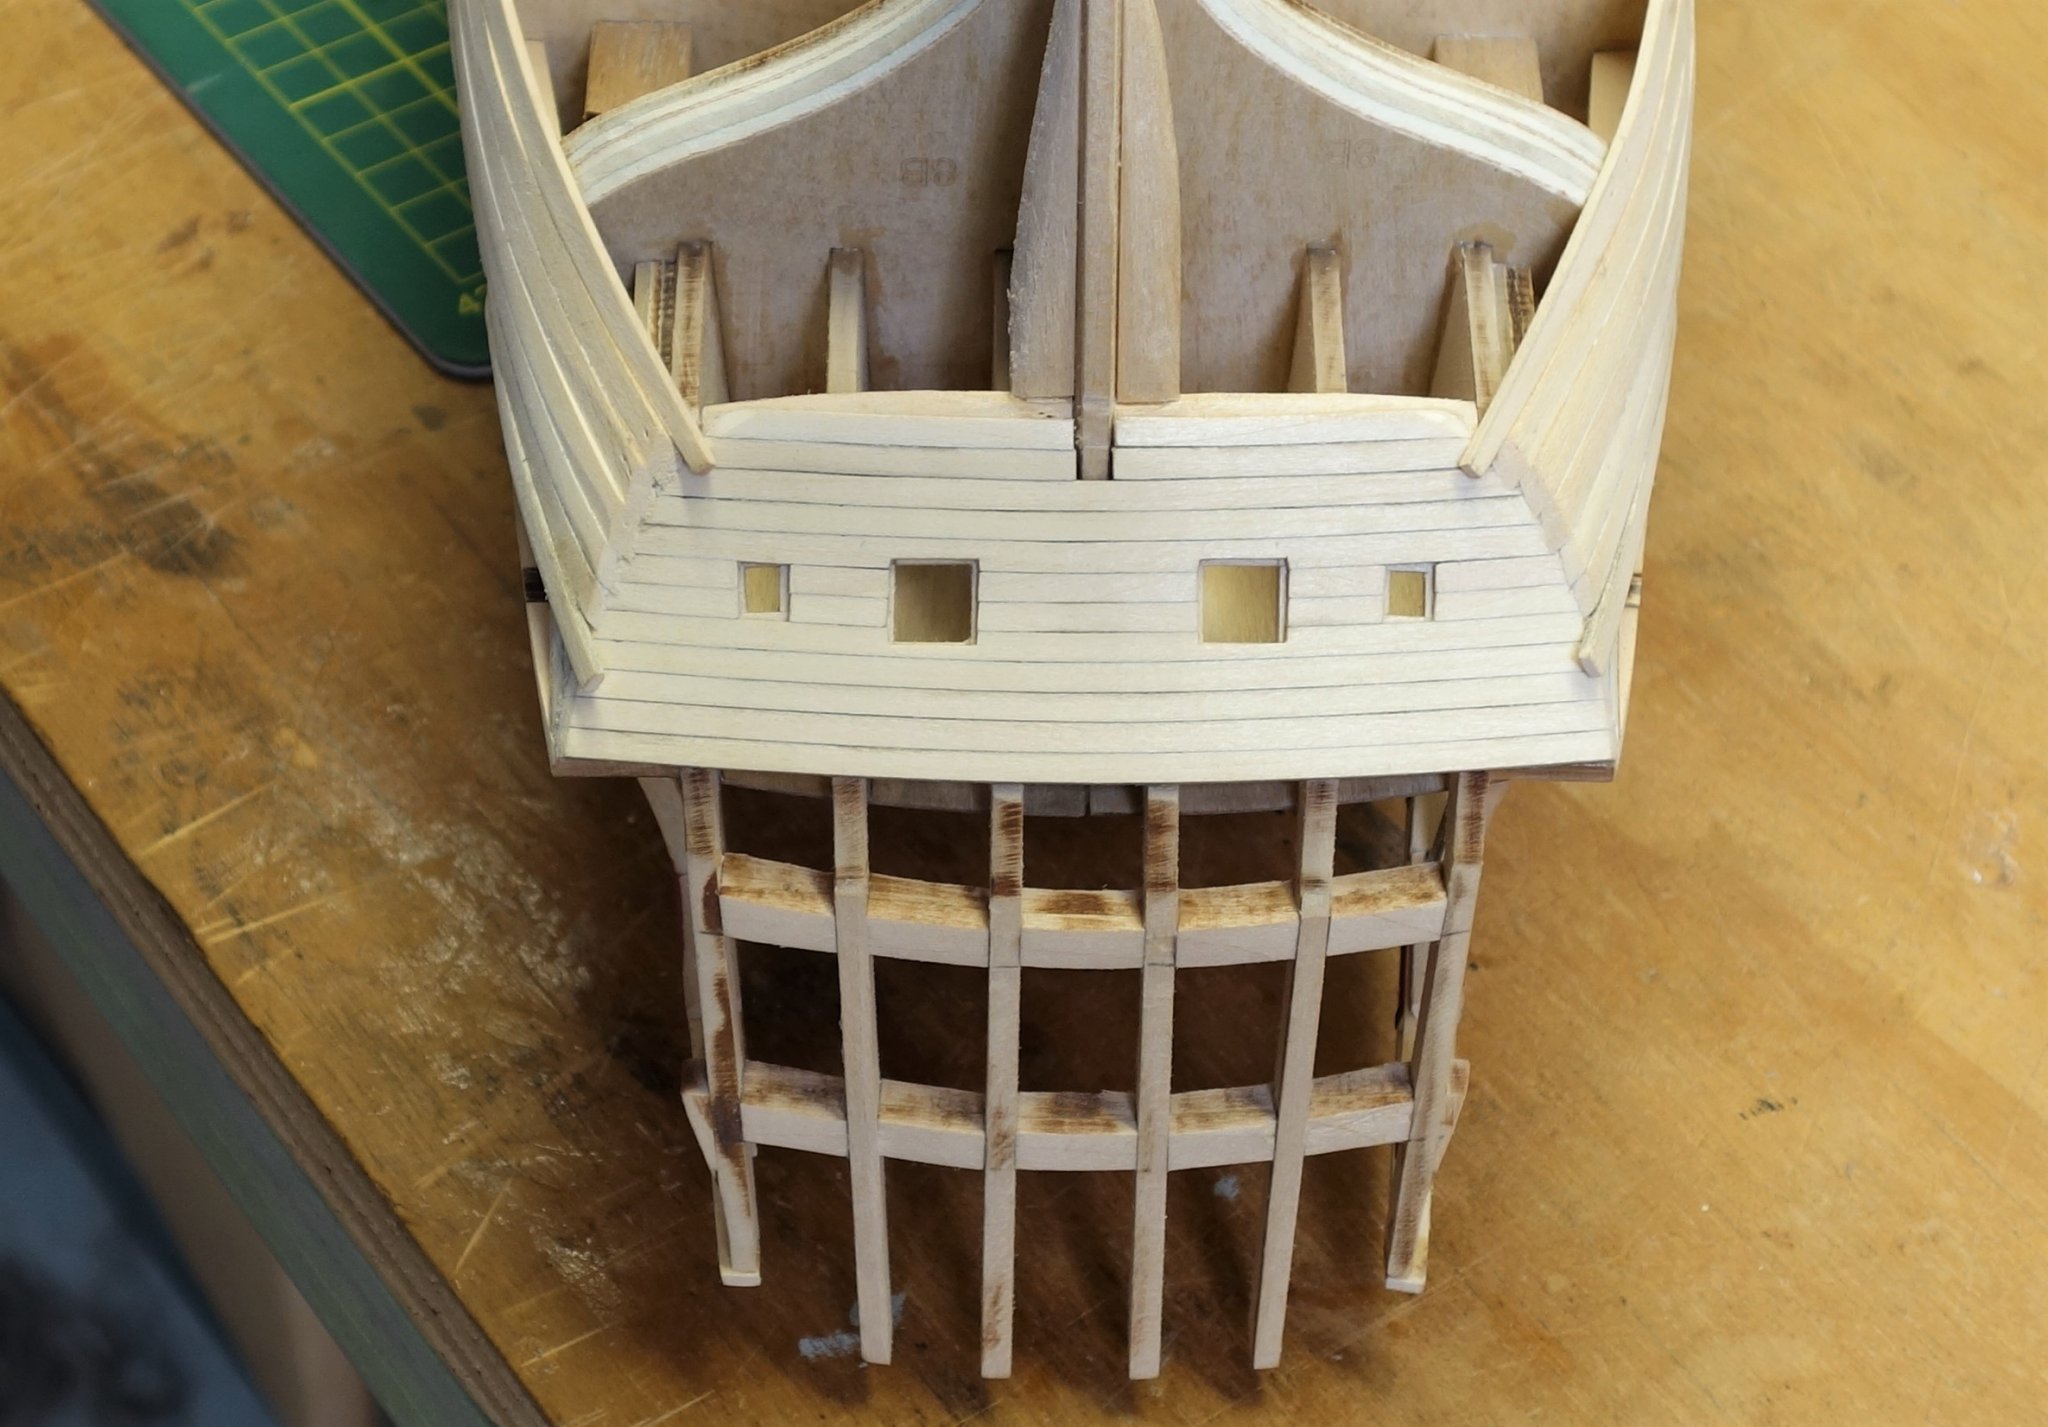
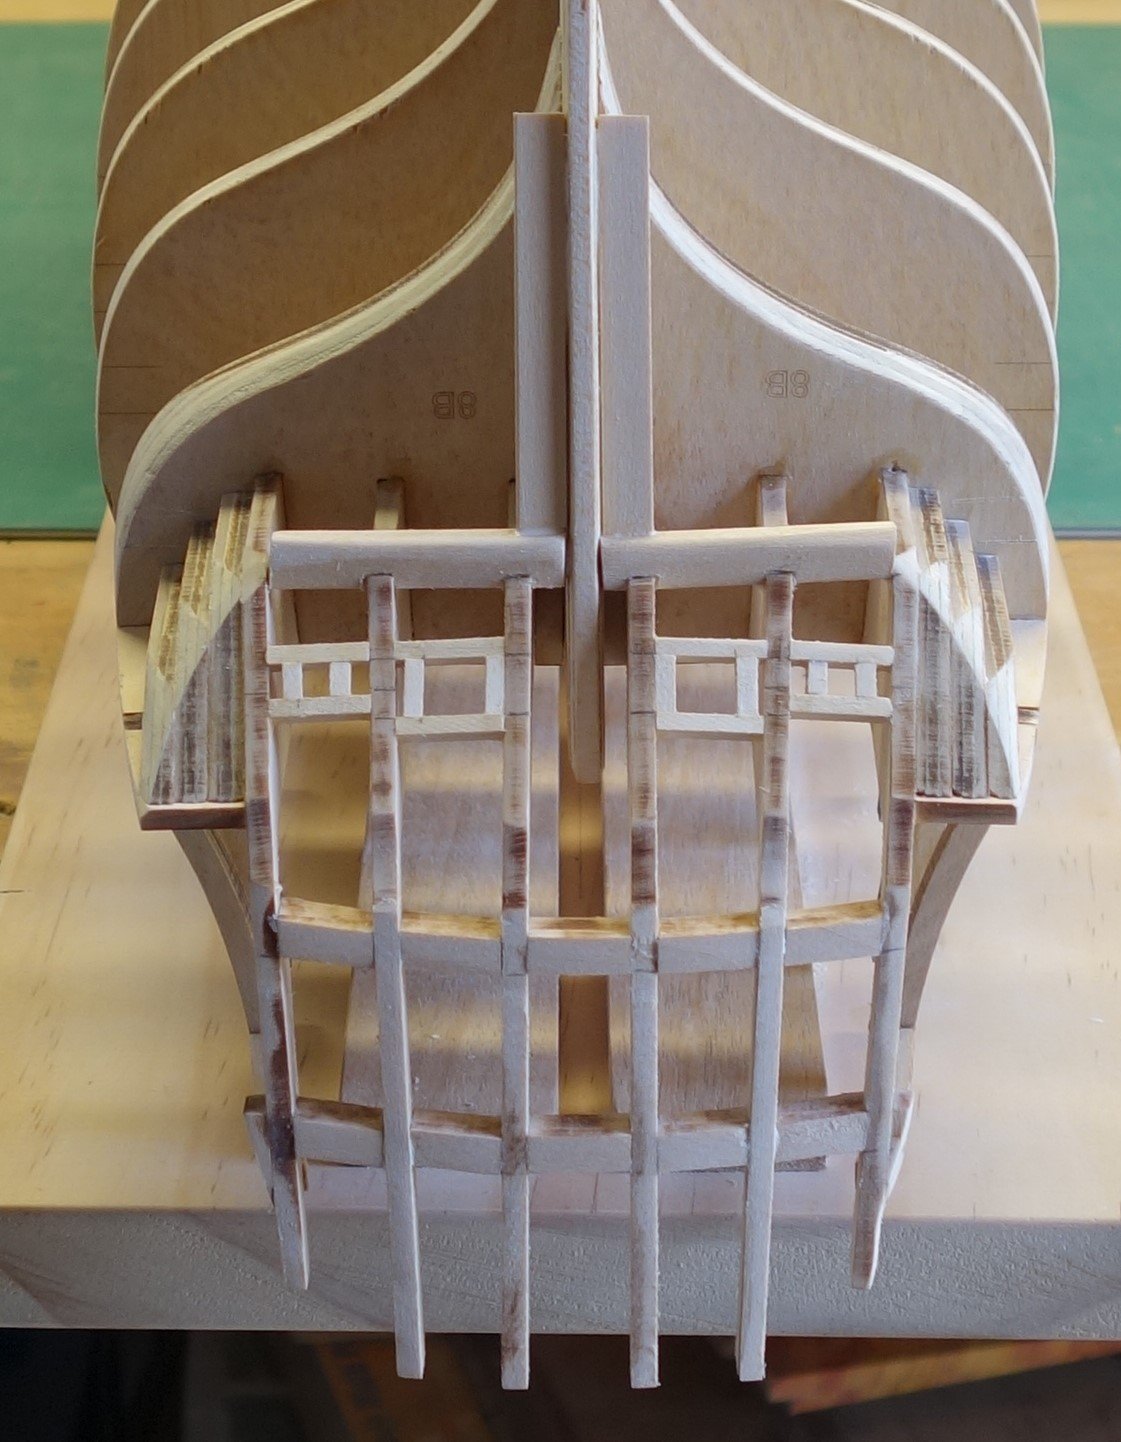
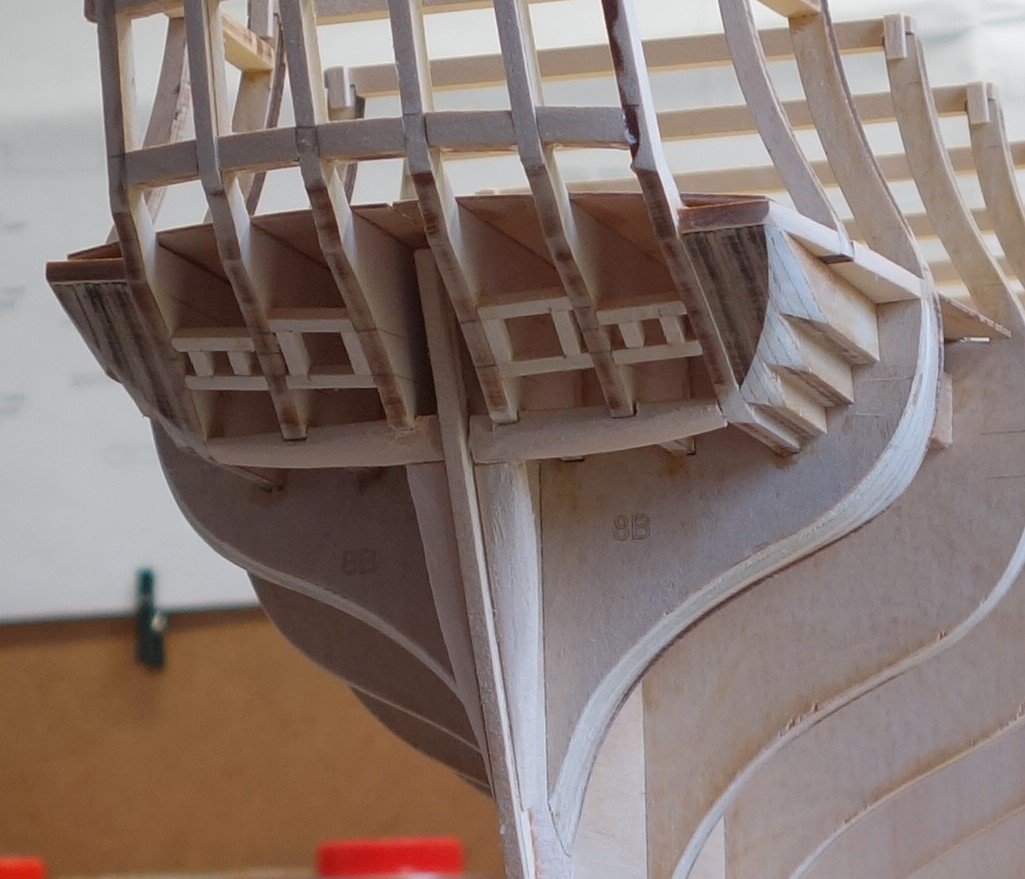
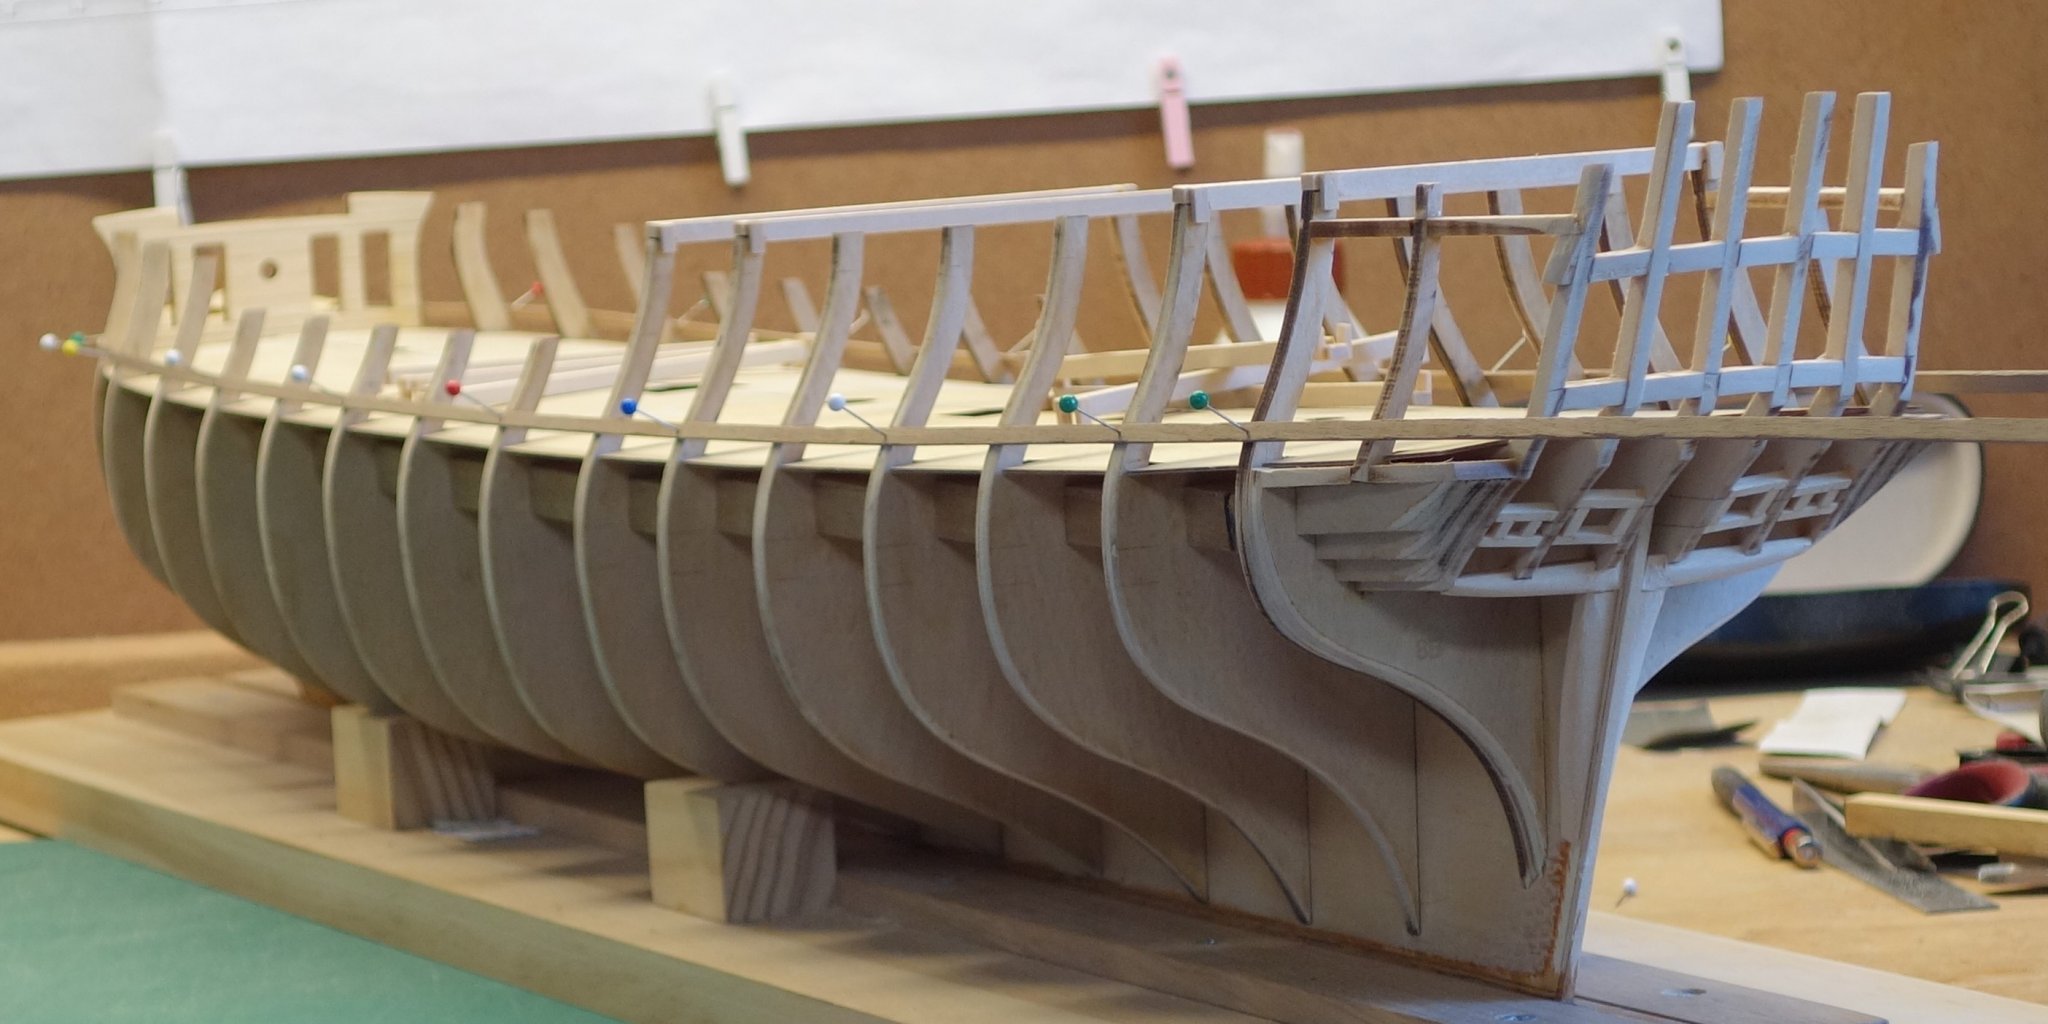
I'm having "fun" working on Framing the stern. The stern frames were way too loose for the slots so I decided to fix the outside ones first and use them to work my way in. When the 2 outer frames were fitted I noticed that Bulkhead 8 wasn't properly squared up. The outer stern frames had a 4-5 mm difference from the centre which was quite noticeable. Bugger...!!. Cutting the additional outer supports I put in helped a bit. When adding the inner stern frames I found after adding the lintels that two of the frames were misaligned as well. Bugger again...!!.
So I am fumbling my way through at the moment. Some additional sanding will be on the menu later.
Here are some photo's.
- JpR62, GrandpaPhil, JayCub and 3 others
-
6
-
Thanks everyone.
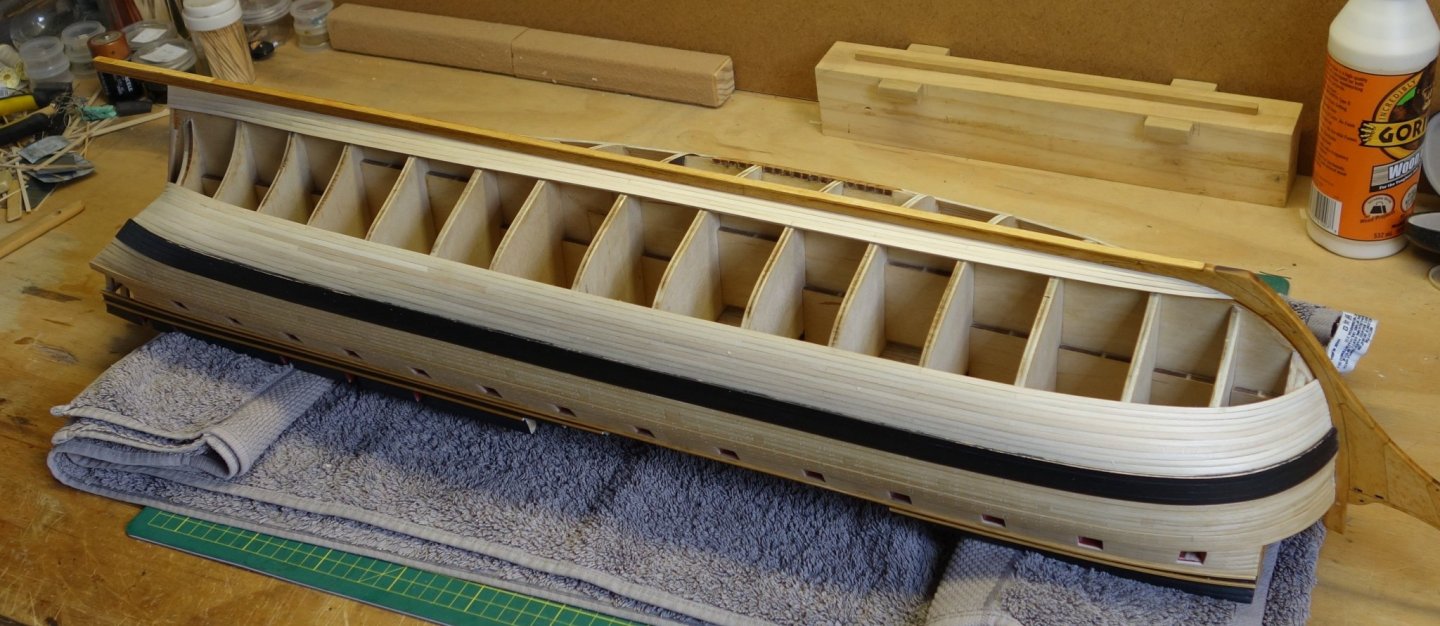
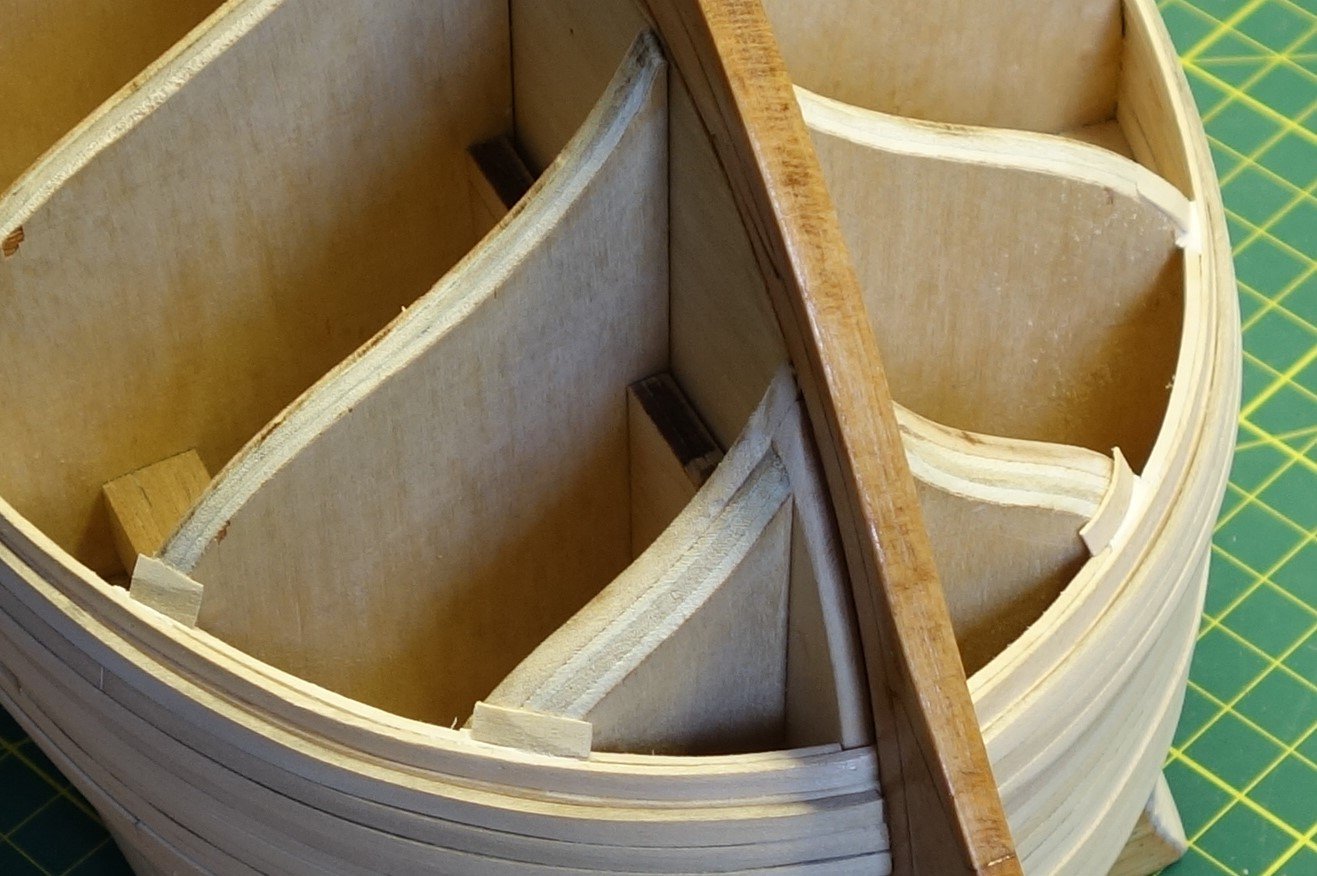
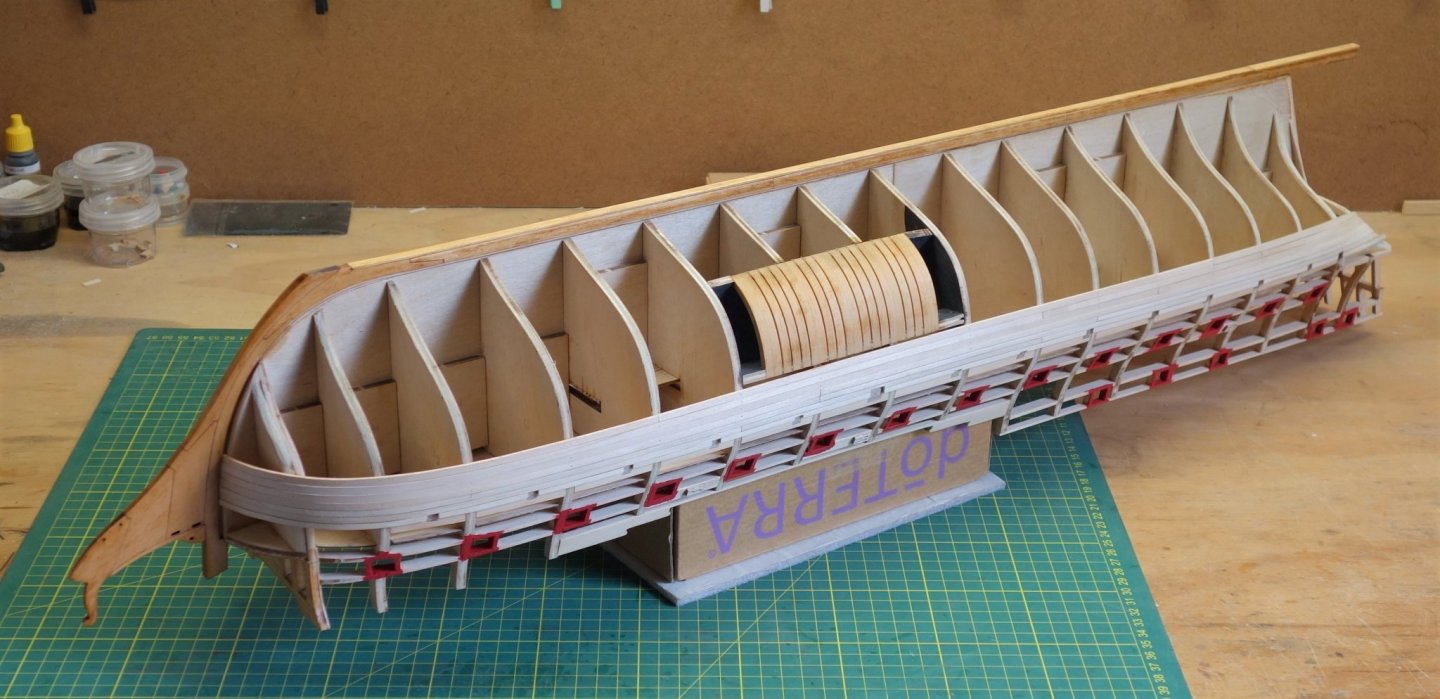
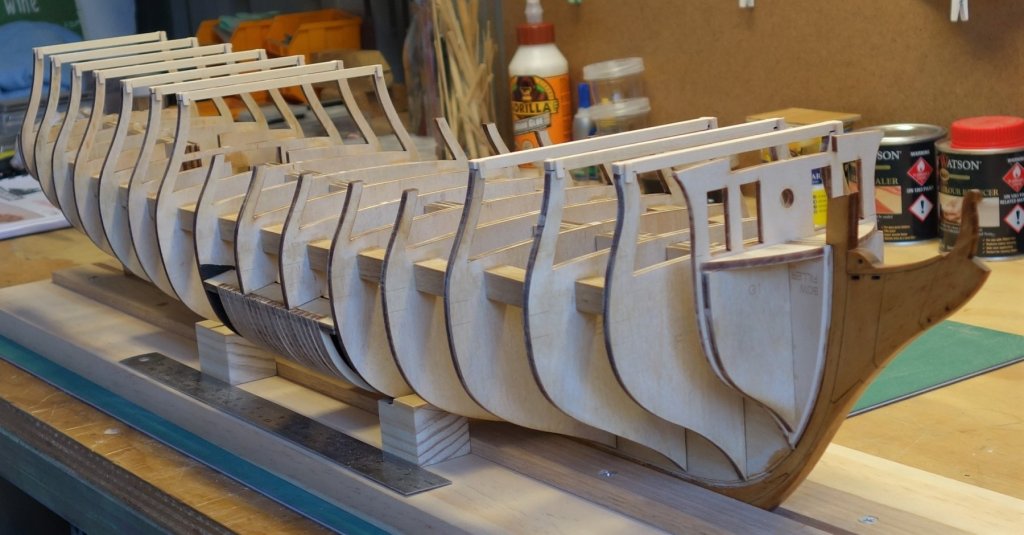
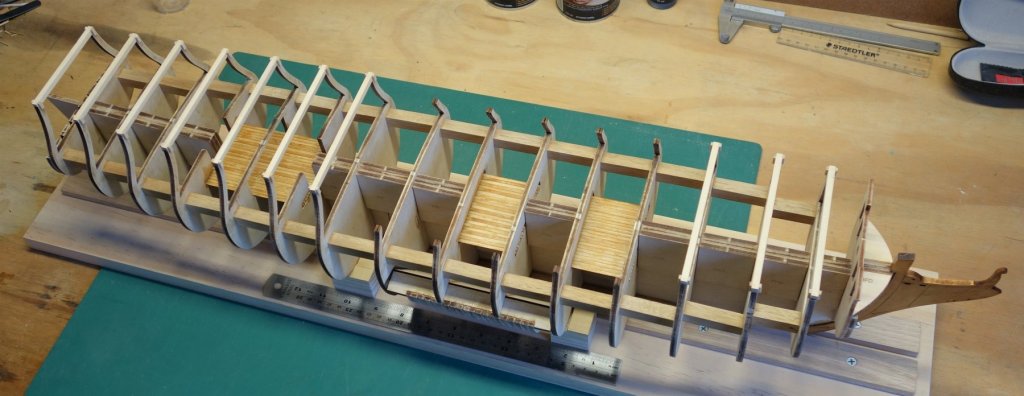
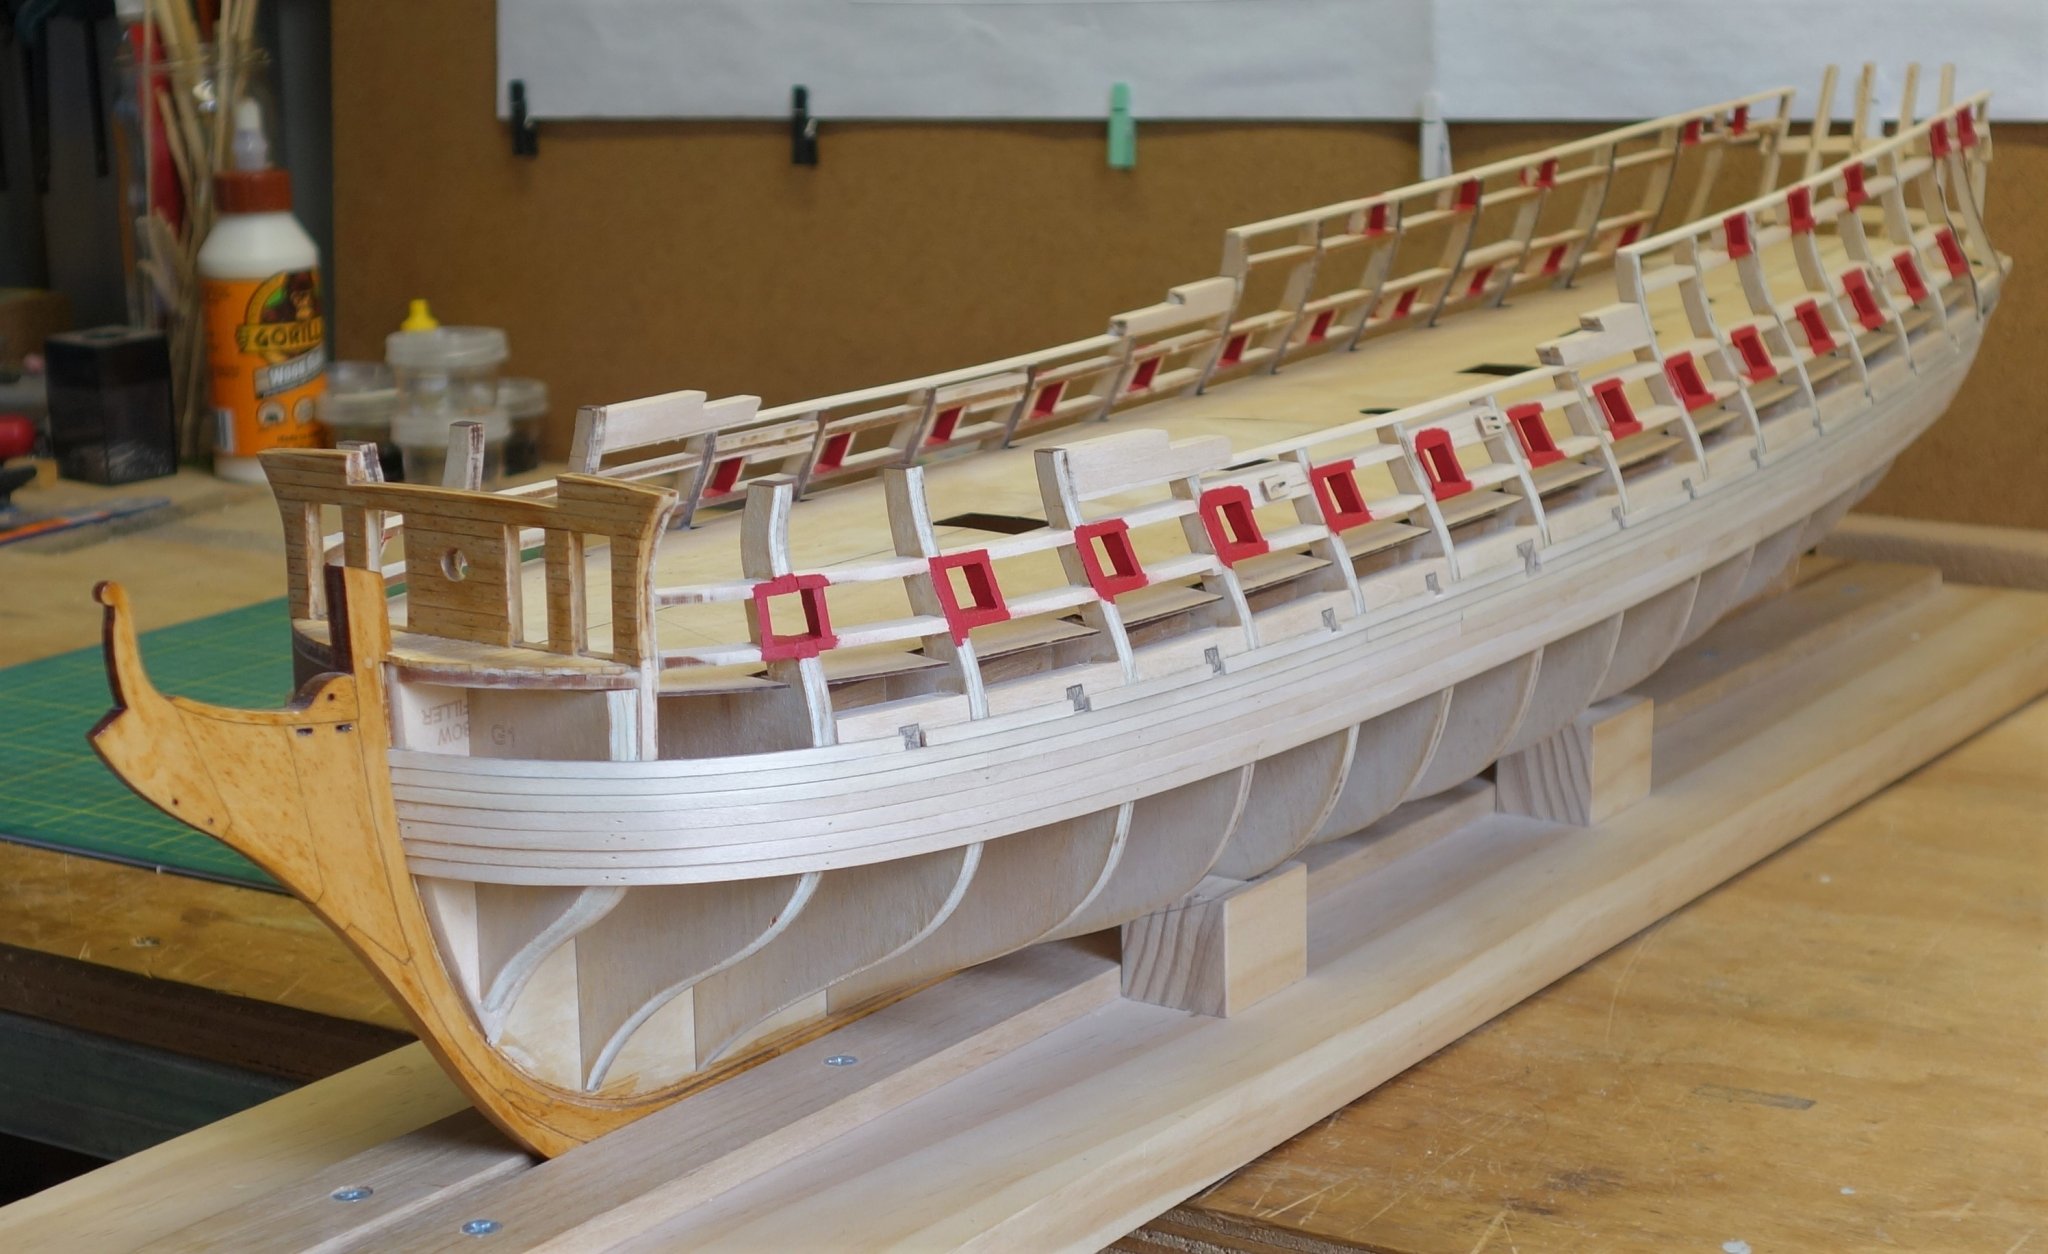
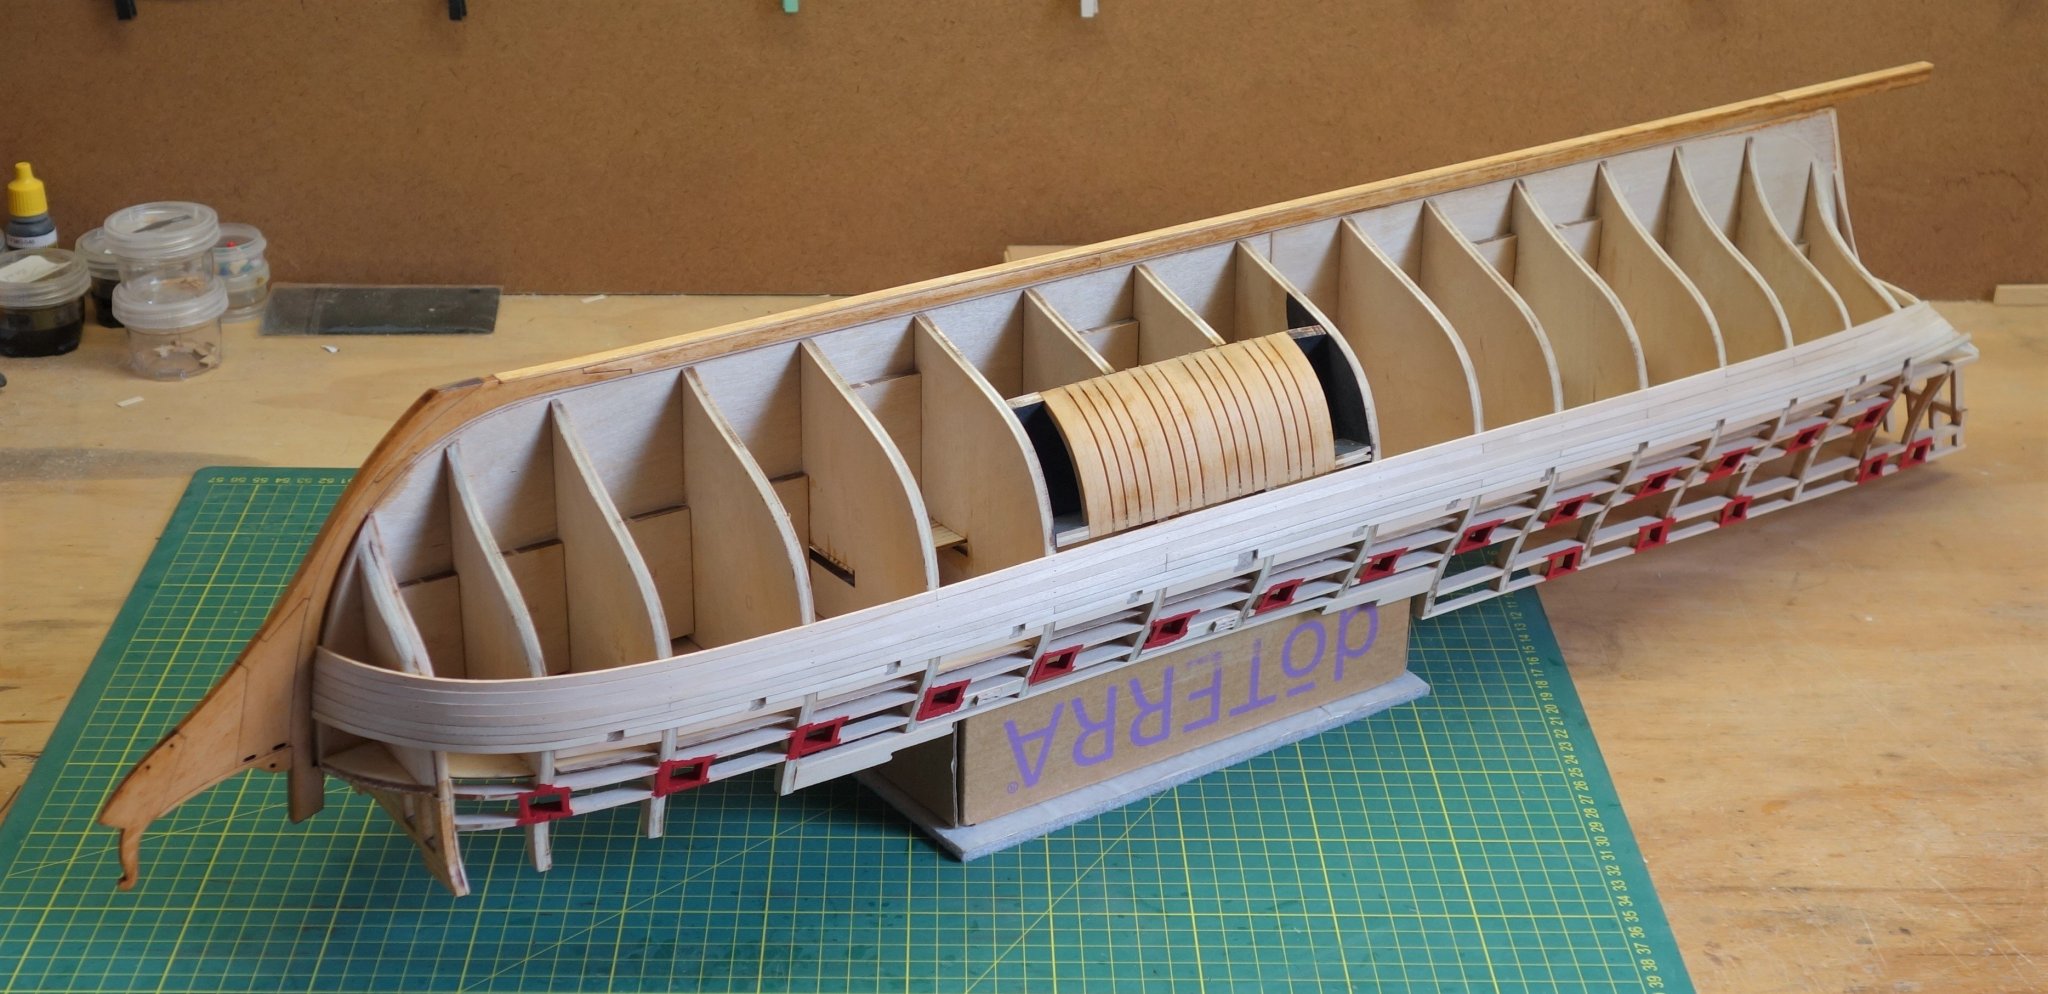
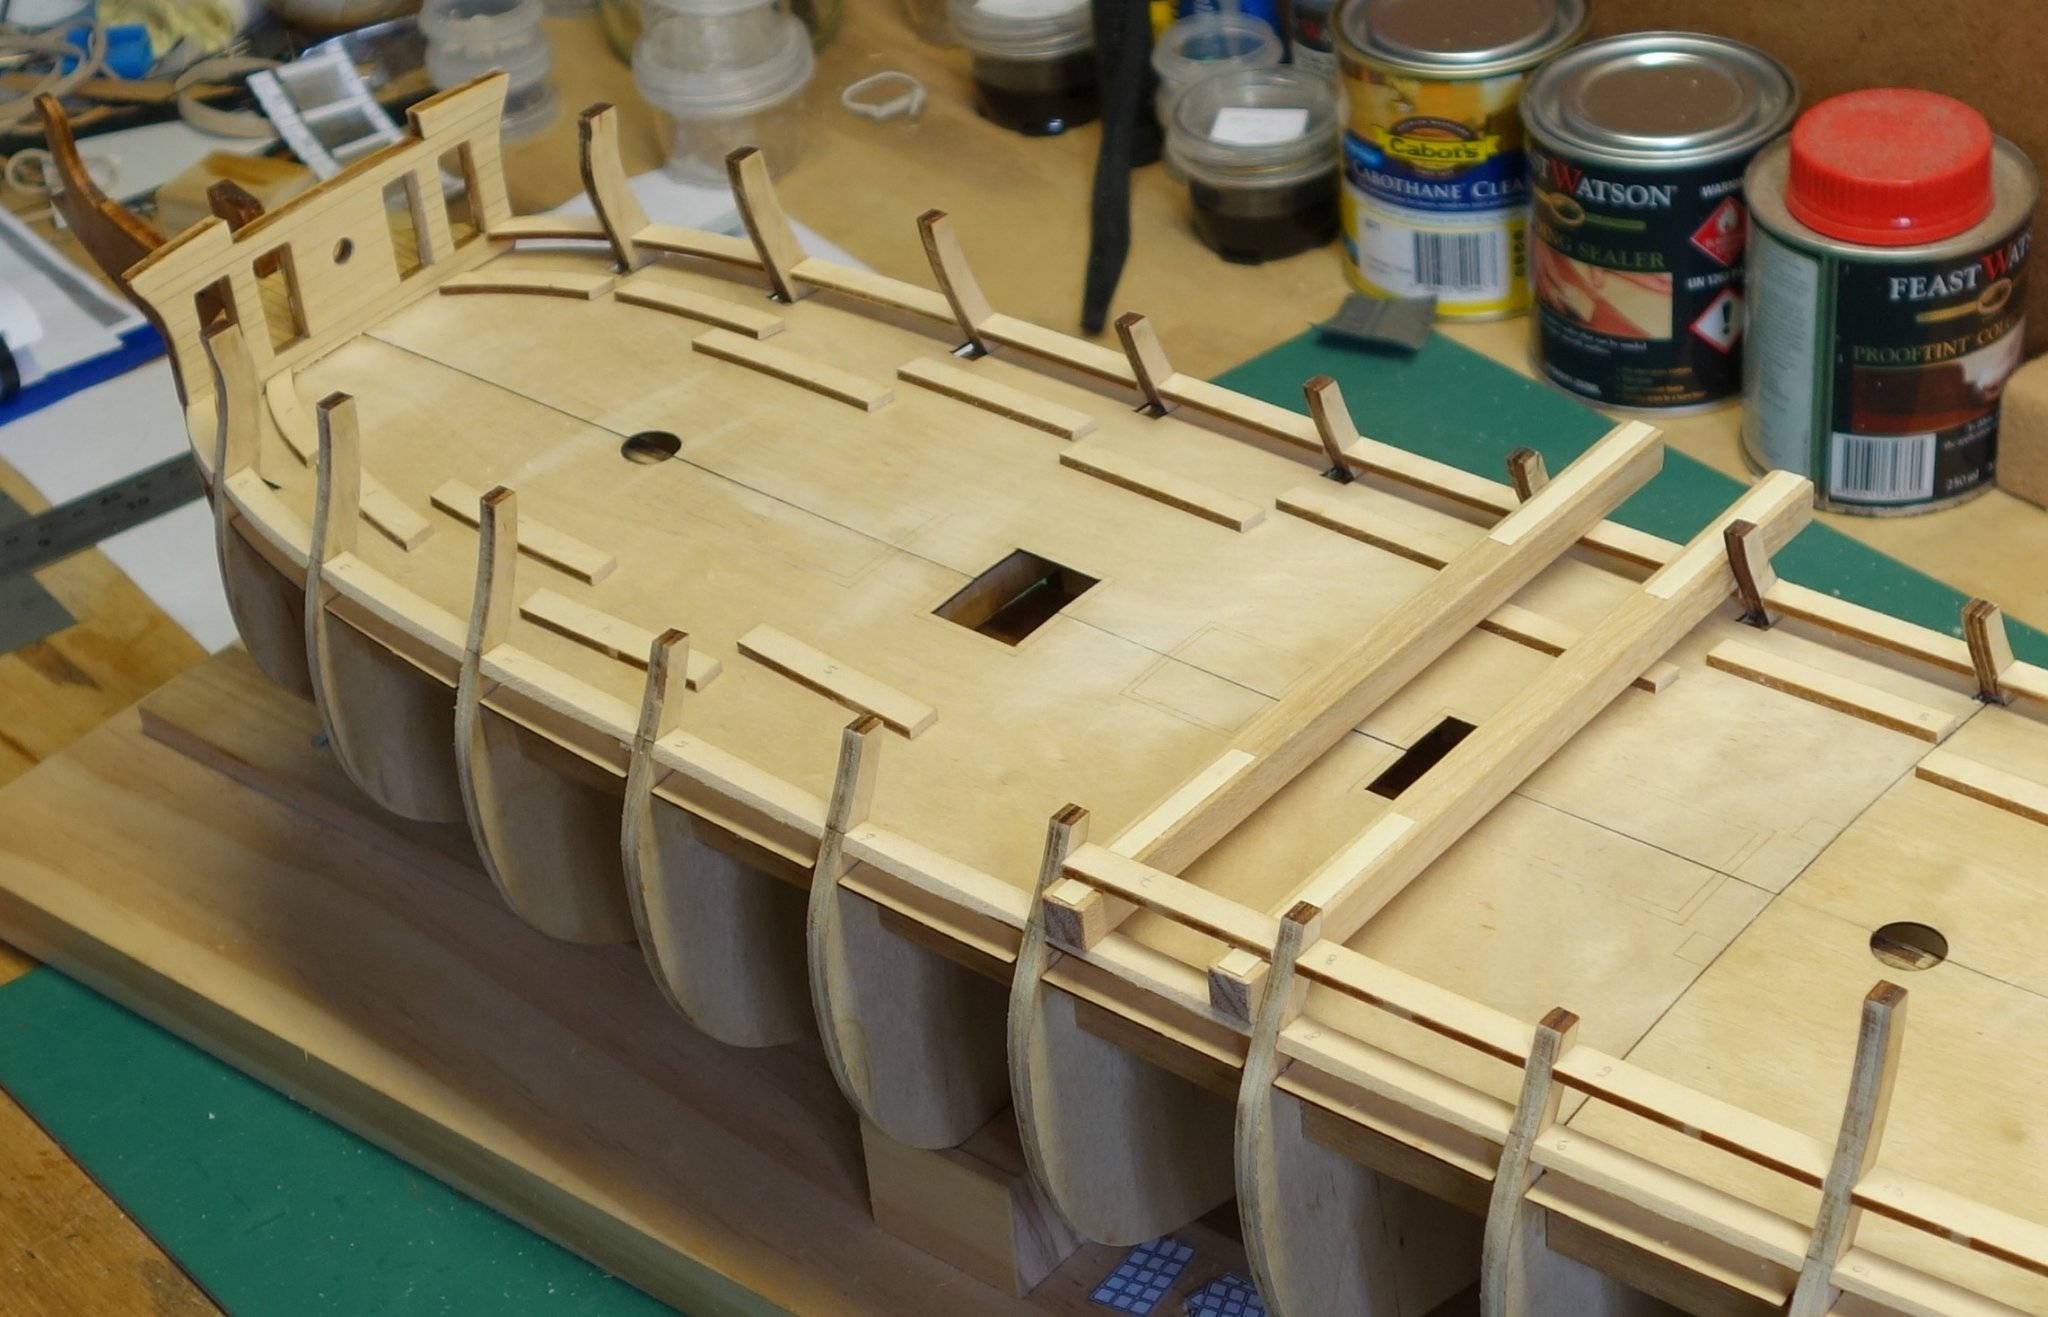
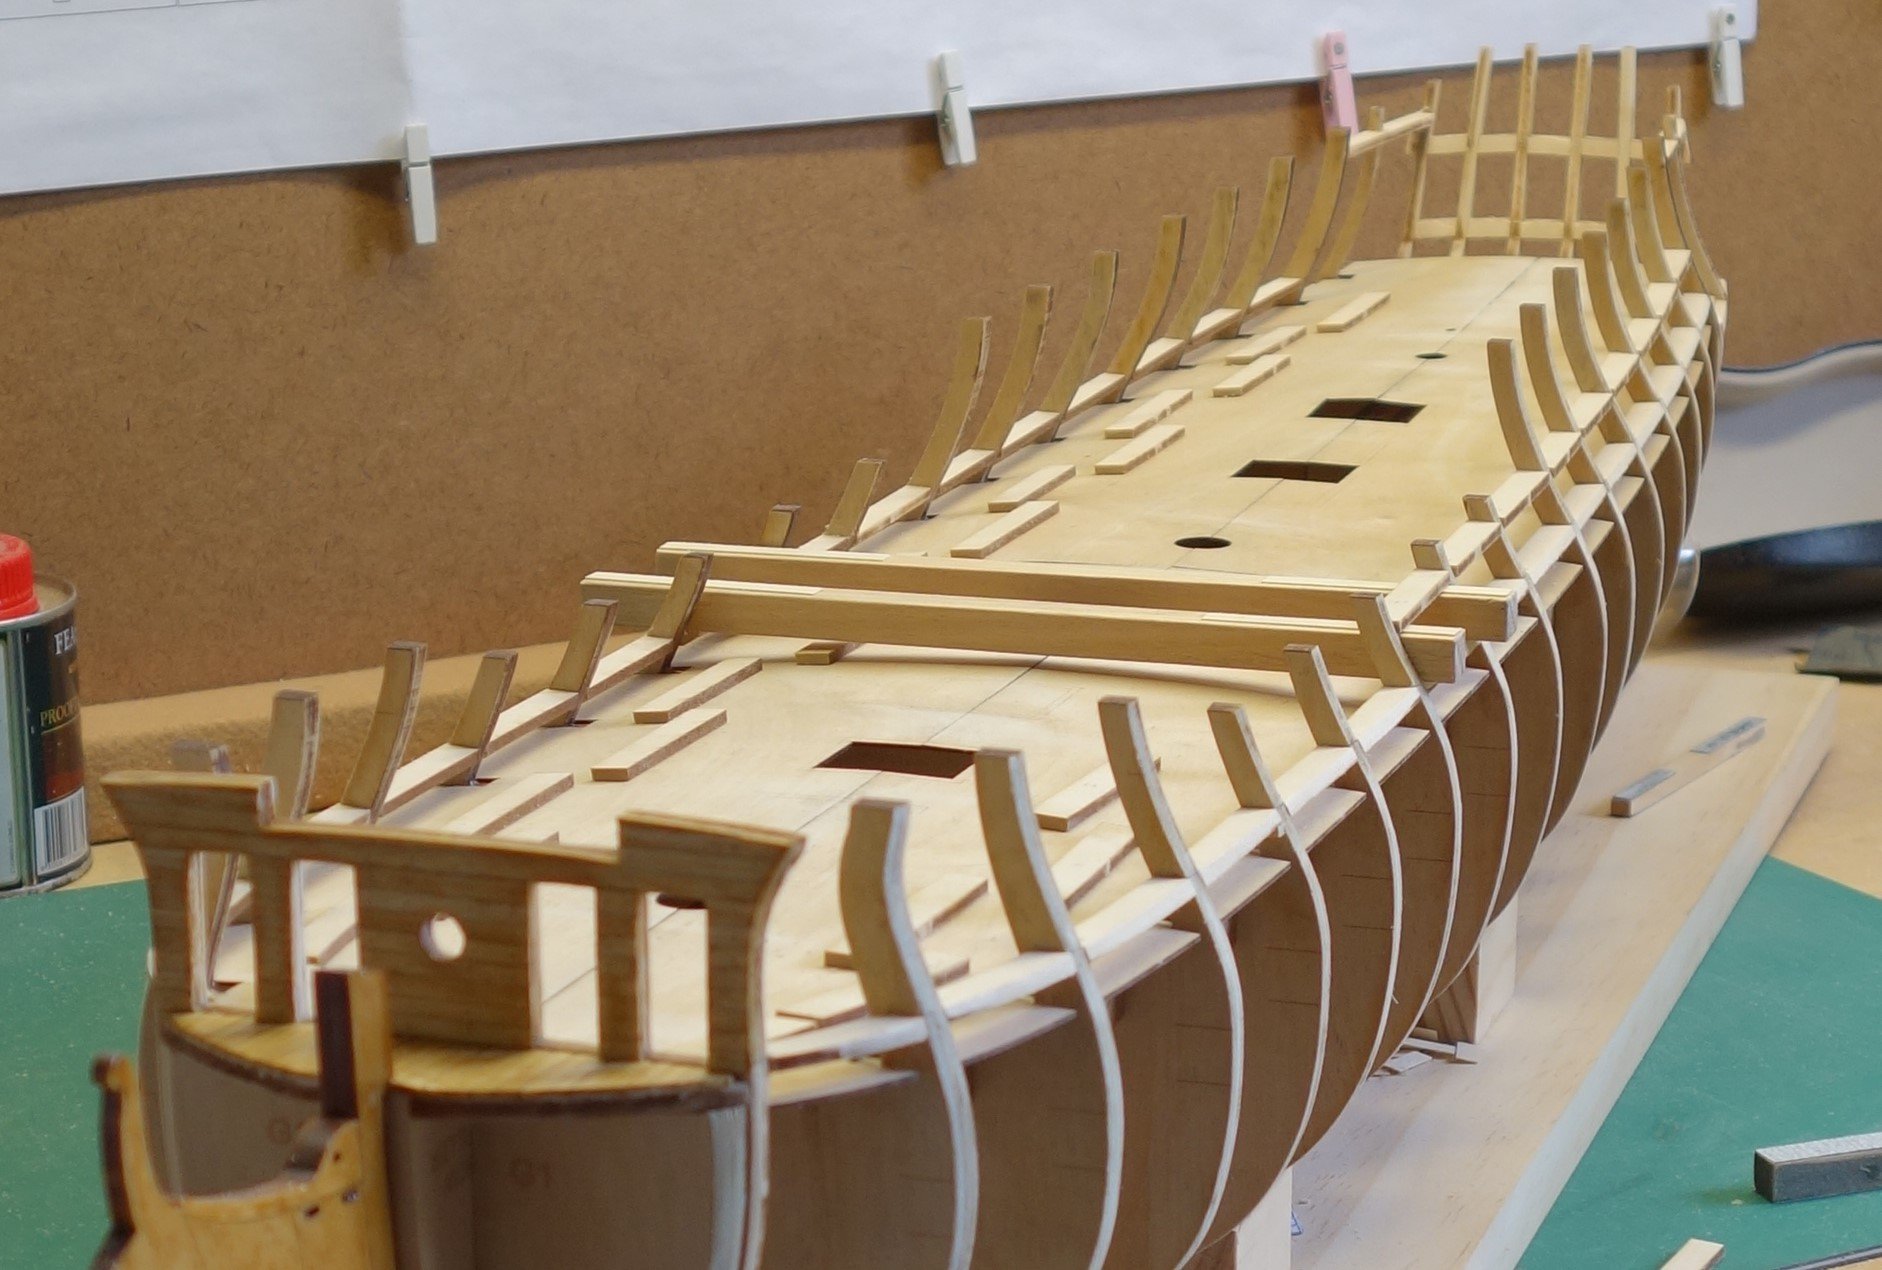
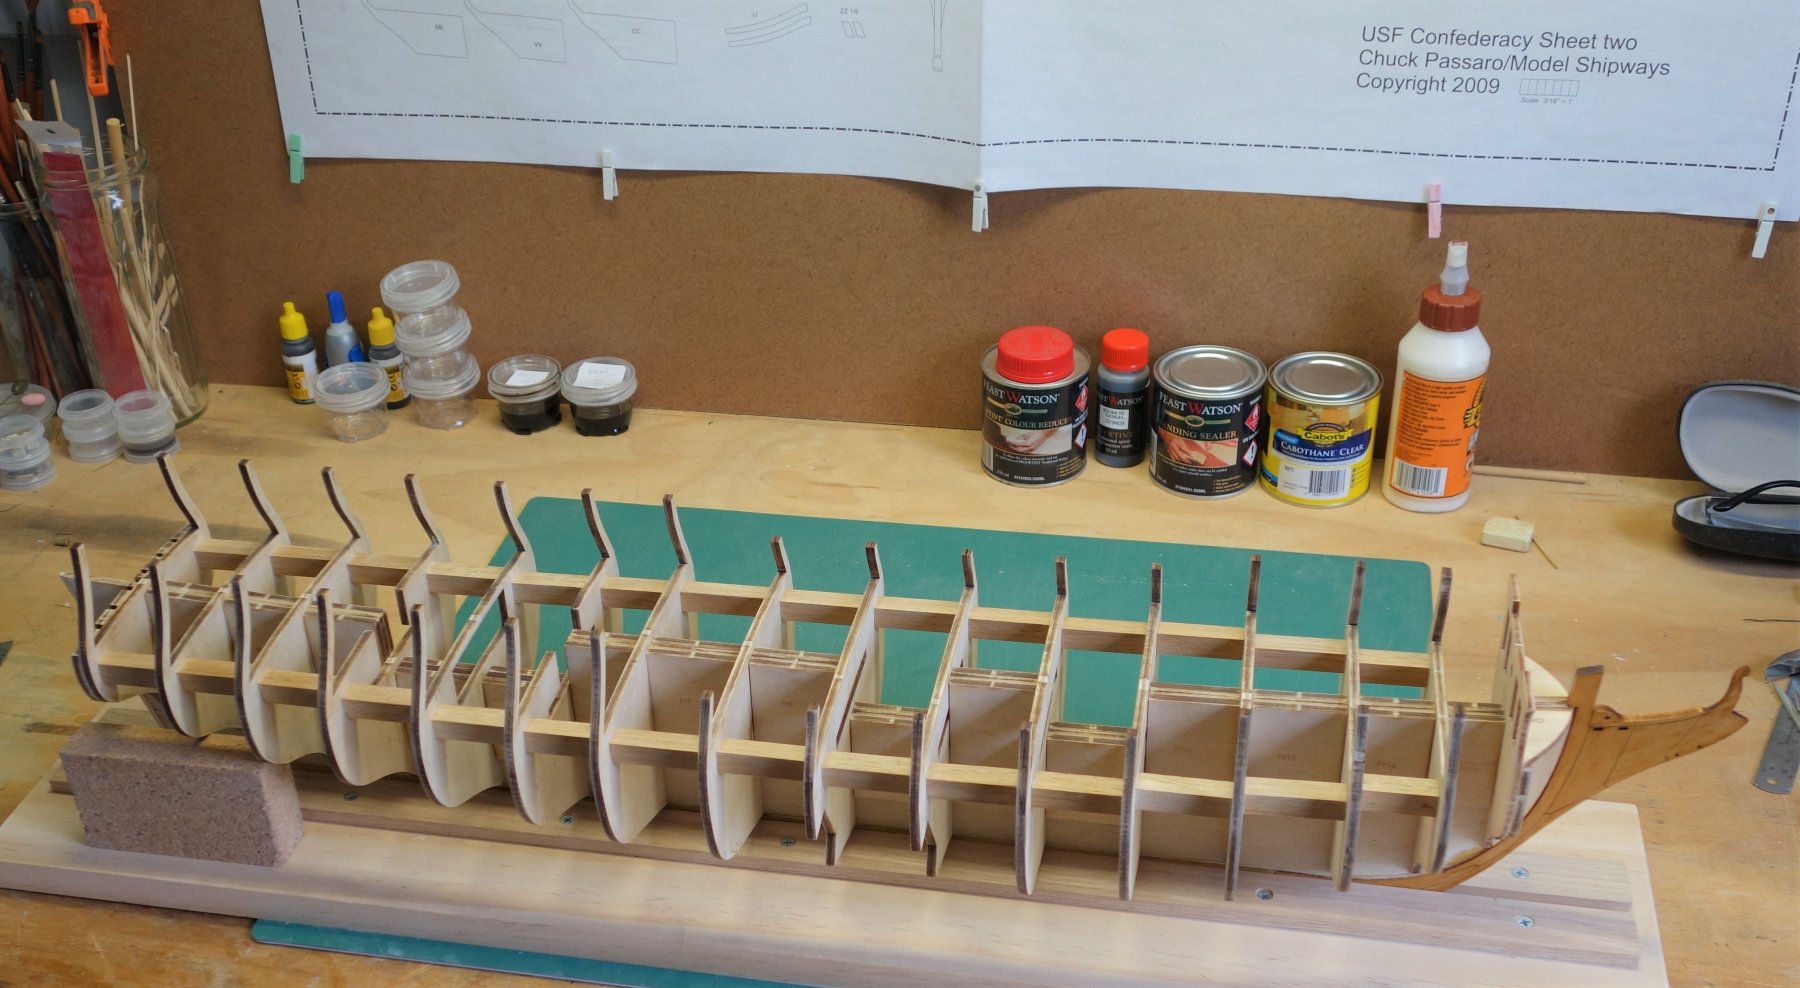
Just a small update to keep the momentum going. First I added some blocks to the working stand to secure the model.
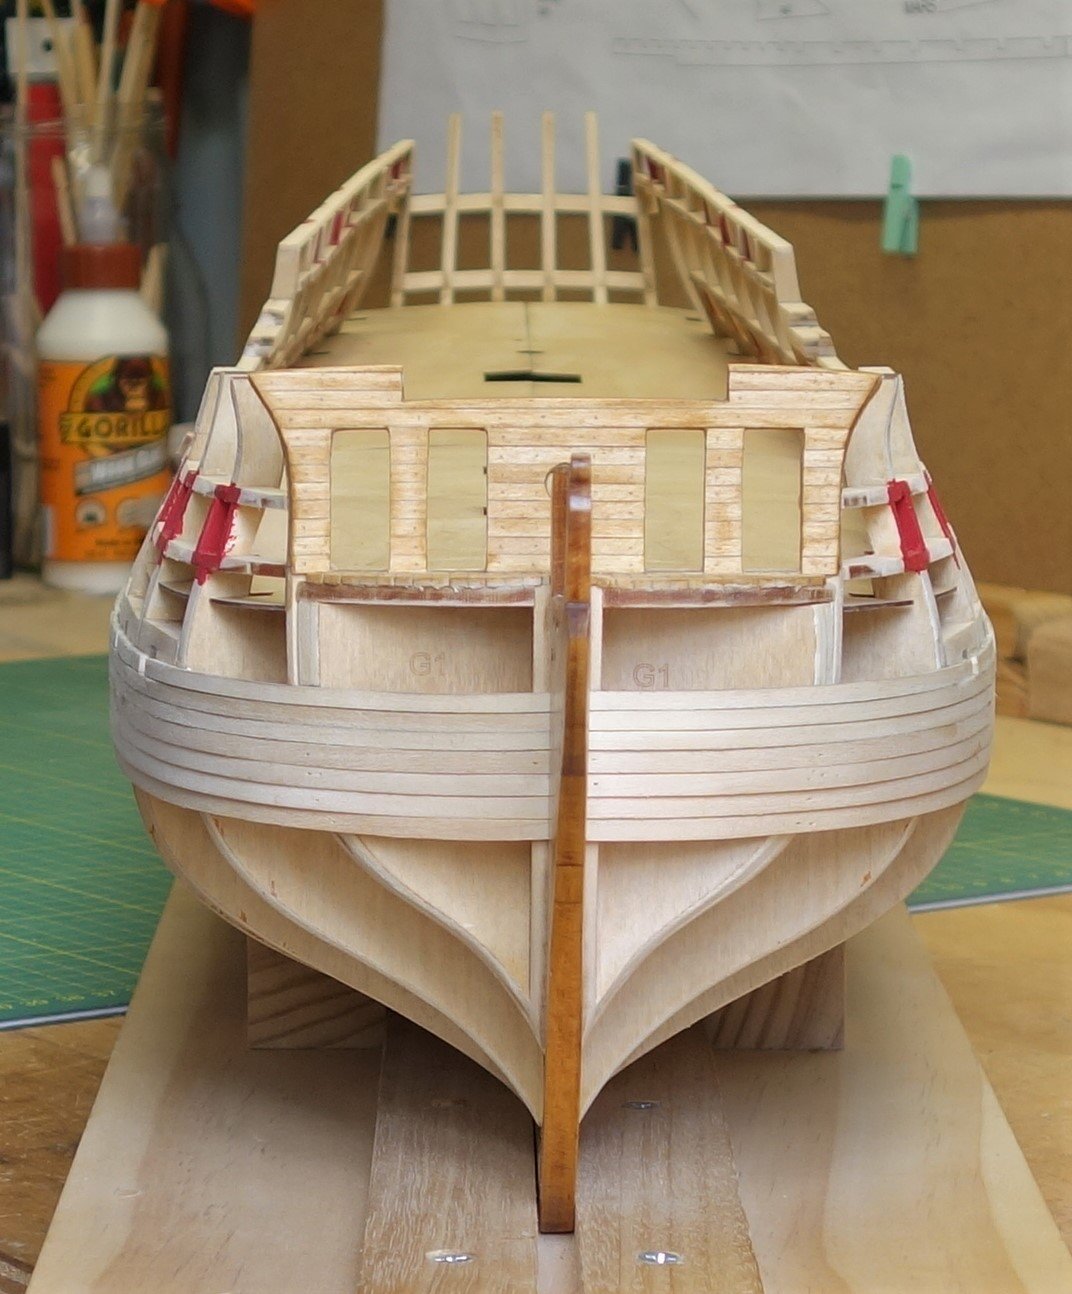
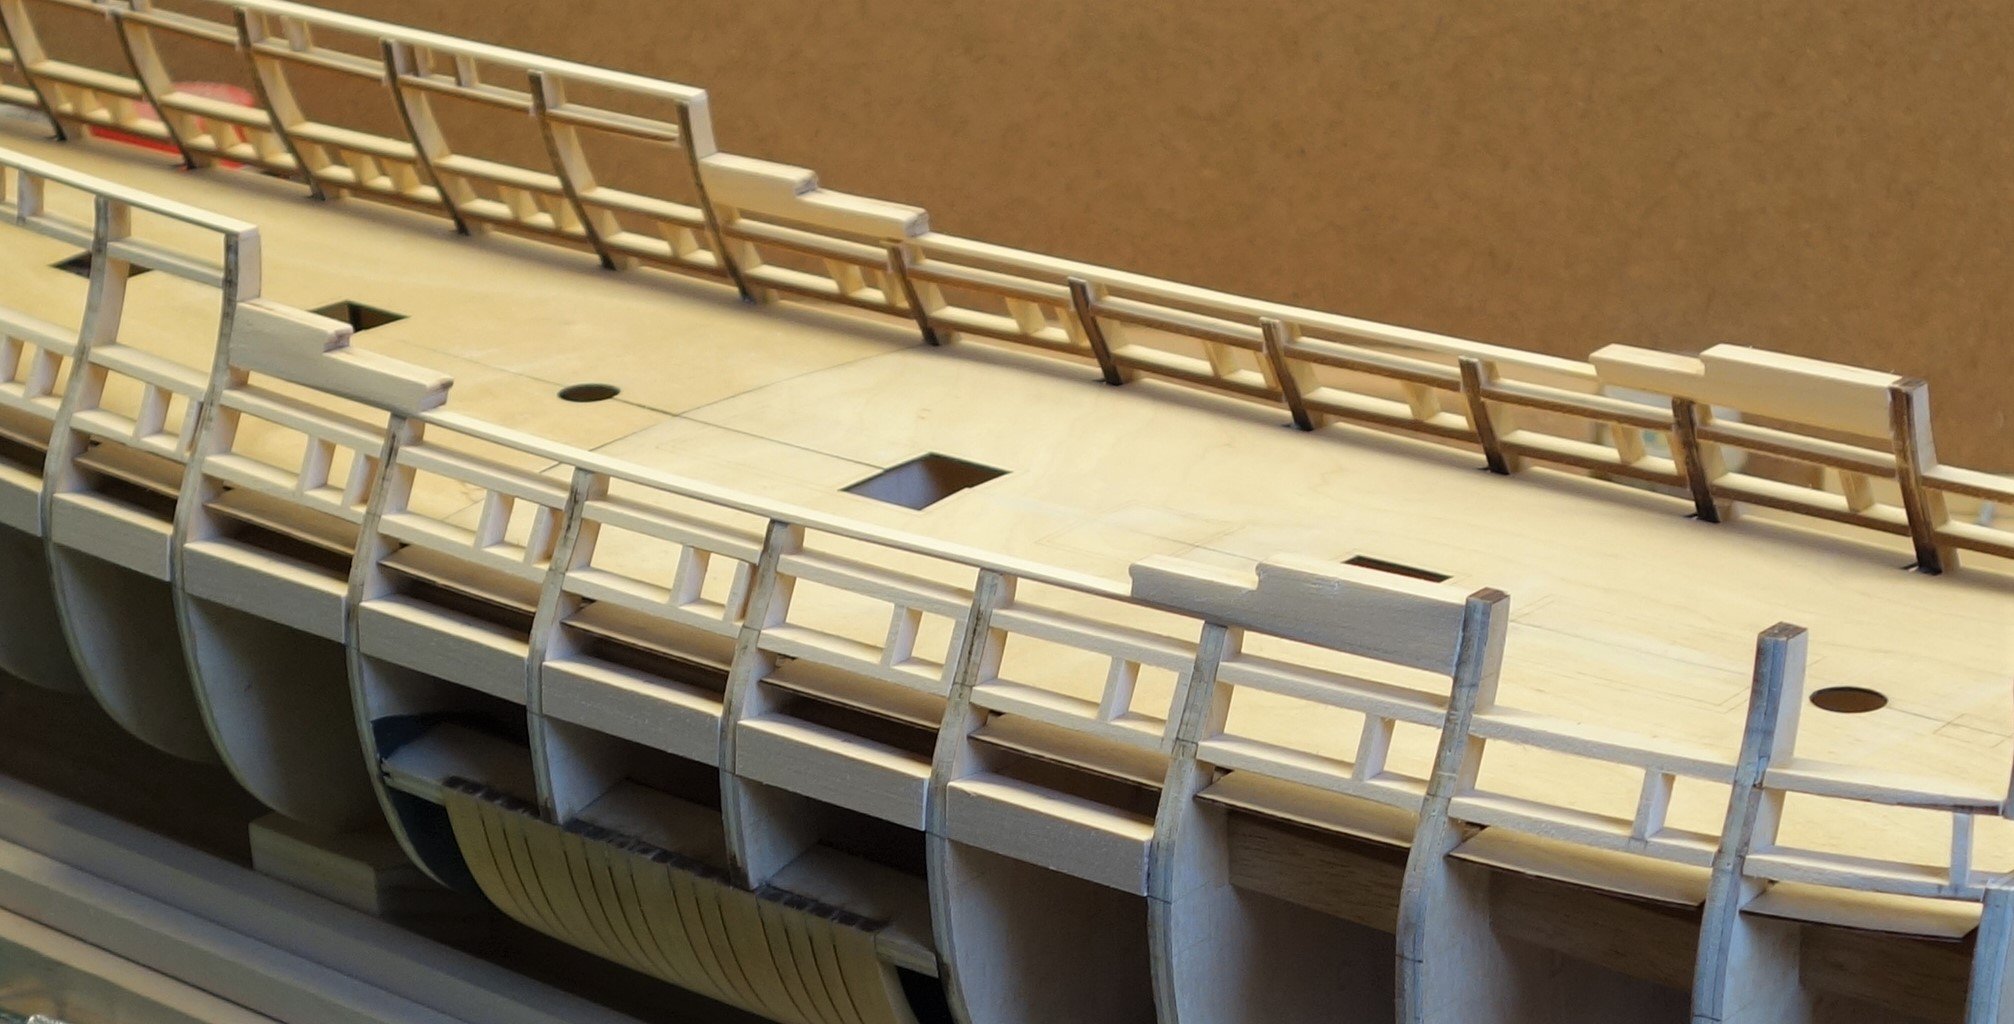
Next I added the Sub-gun deck Platforms. I am not totally happy with the look but I was experimenting a bit as these platforms are barely seen.
As a side note I have split the 1/8"x1/16" basswood strips into three batches. The lighter ones, the darker ones and rejects. I used the best of the rejects for these platforms. I don't have the luxury I had with the Syren covering the hull with copper plates so when I get to planking the hull I want to make sure I use the best strips.
I also added the safety timbers, the shadow box and timber frames. I added some temporary loose timber strips in the gaps of the frames.
Next will be fairing the hull..... Here are a few photo's.
- Tigerdvr, Tigersteve, GrandpaPhil and 3 others
-
6
-
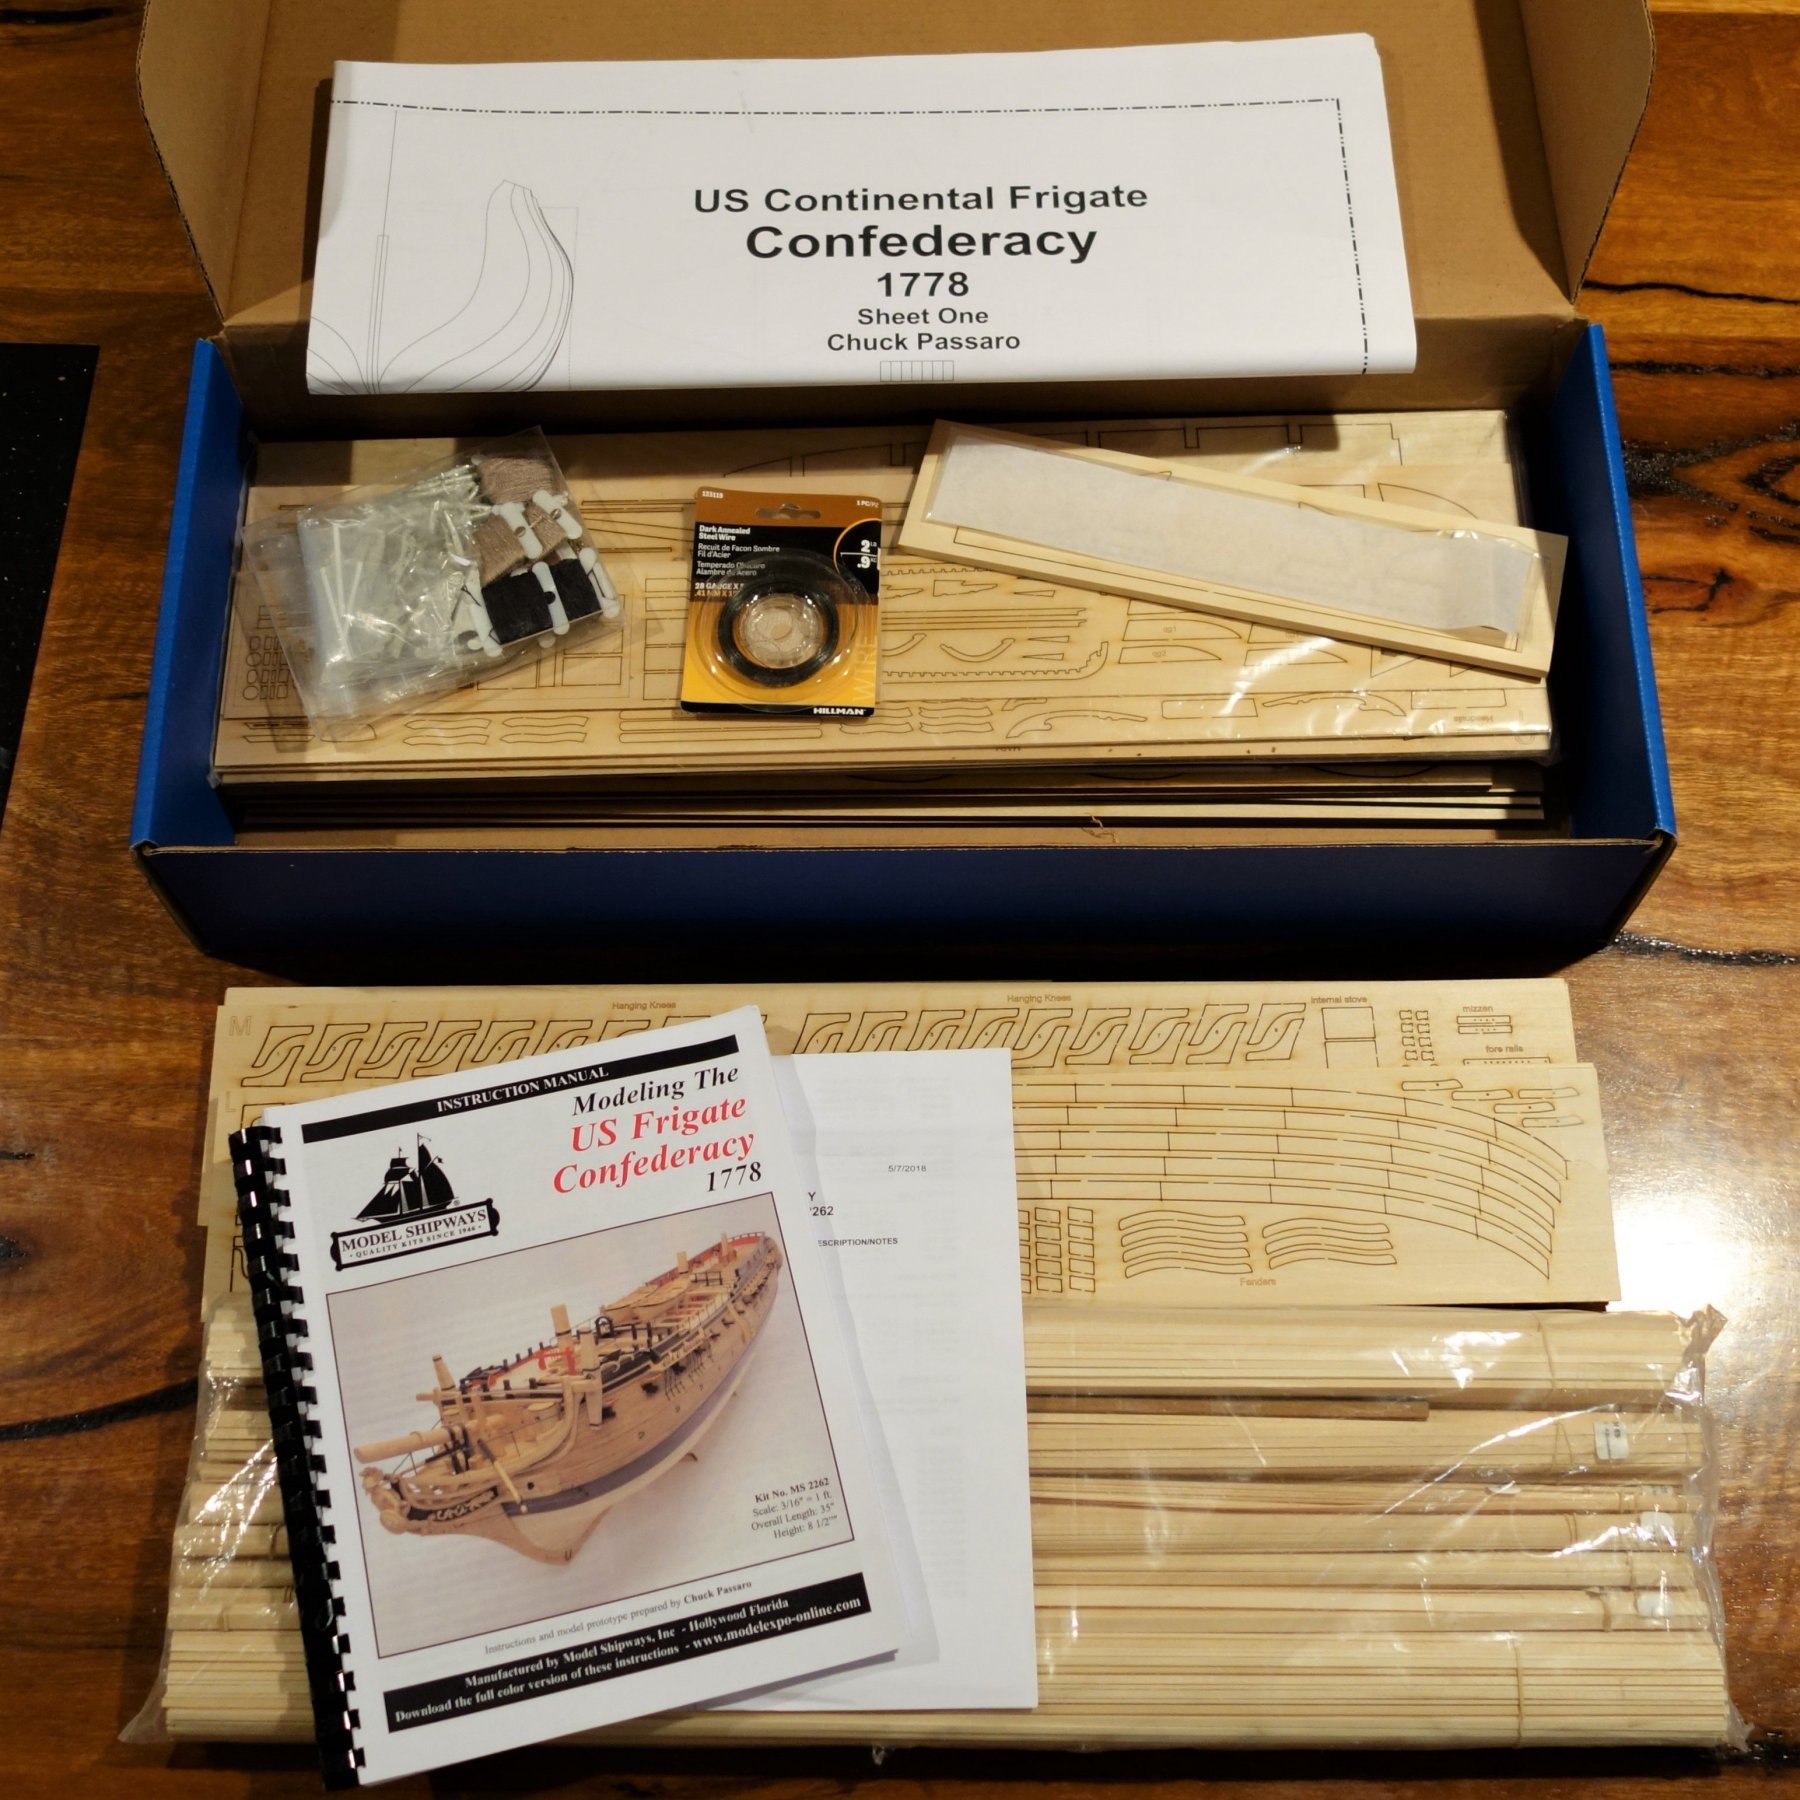
It's time to start a new log. I have only spent a few weeks making a start on the Confederacy so there is not a lot to show yet.
Others have presented some nice introductions to the history of this ship and of the content of the kit, so I don't feel there is a need to repeat that here.
I'll do my best to do justice to this beautiful ship.
So without further ado, it's straight to the first few photo's.


- chris watton, GrandpaPhil, BenD and 9 others
-
12
-
5 hours ago, Overworked724 said:
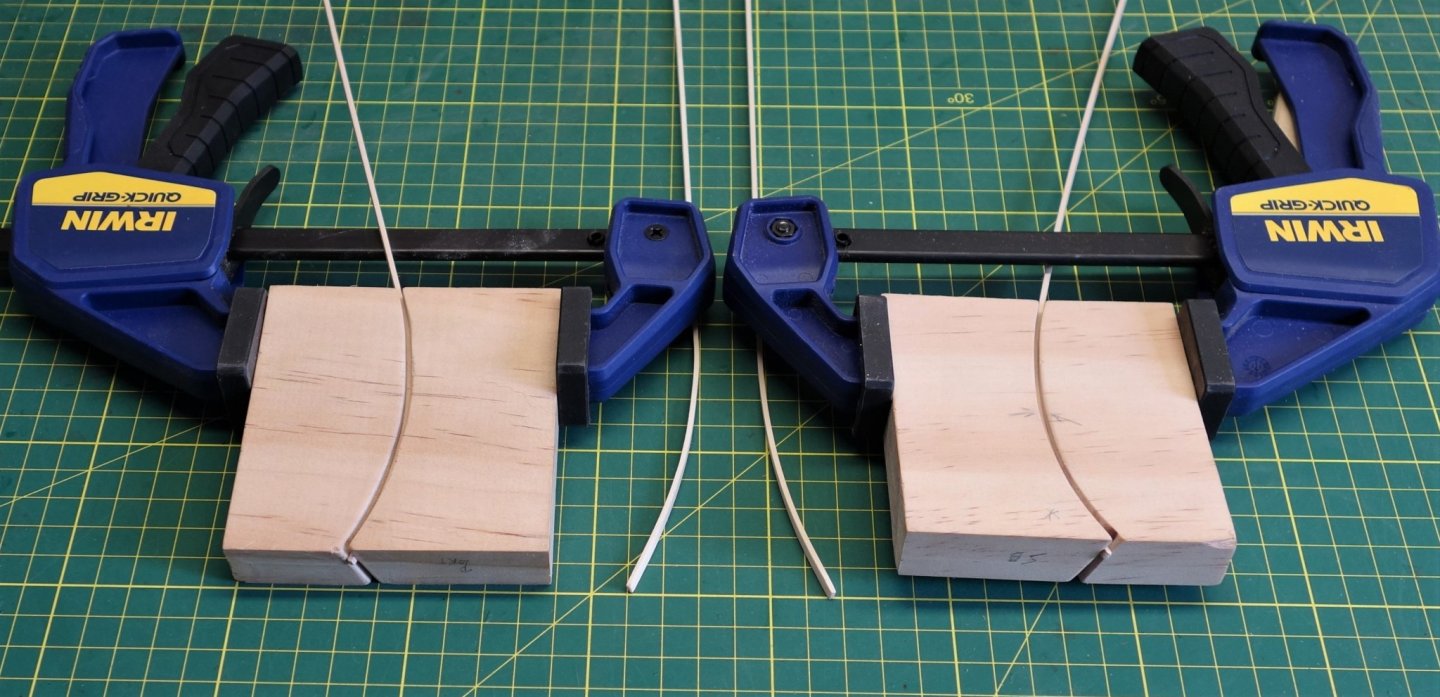
Hi Peter - those are interesting clips you used for clamping. Do you know where you got them or what they are called? They look like they don't have hard 'jaws'.
Hi Patrick,
They are clothing pegs I found at the local hardware store here (Bunnings). They have a decent 'reach' and they have rubber pads where they meet. Basswood is relatively soft and easy to dent so the padded ends worked out quite well. I'm not sure if you can get them in the USA.
Peter
-
-
Once I start a kit I am committing myself to finishing it before I start another one. I loose concentration and start making mistakes if I do too many things at once. You are also less likely to finish one, in my view. I am also not experienced enough yet to change the order in which the instructions are written. If the kits designer got to the finish line that way, I see no reason to mix it up.
I also don't break up repetitive tasks. Once I figured out the best way to do something and make a start, I keep going. The risk in taking long breaks is that the section before the break will look slightly different than the section after....lol
I do off course read ahead in the instructions and learn from the other logs on the forum.
- pontiachedmark and mtaylor
-
2
-
-
Thanks for all the compliments and kind words everyone. It's appreciated very much.
What a great forum this is....
18 hours ago, svein erik said:wow, beauteful ship, and congrats from mee to!
so wats your nex 😊
15 hours ago, Dutchman said:Very Nice! Excellent work! An example to us all (to me in particular)! Any idea what your next build will be?
My next build will be Chuck's Confederacy.
17 hours ago, Katoom said:Congratulations! I hope that you are able to find the Syren a good home, it deserves a place of honor. Hopefully you will be able to tell/show us where it will live!
Hi Katoom. You touched on the only problem I'm having with this build. I have no clue what to do with it yet...lol
We live in a small rental, so there is no place to display it there. There is one workbench in the shed where I build her so that eventually will need to be cleared for the Confederacy build (especially considering the size of the Confederacy).
So the other options are sell or donate. I have family members who will take her but without a case for protection I don't think she'll survive for too long.
It's been doing my head in for quite a while now. I would love to have it on display somewhere so others can enjoy her as well.
Peter


USF Confederacy 1778 by Peter Bloemendaal - Model Shipways - Scale 1:64
in - Kit build logs for subjects built from 1751 - 1800
Posted
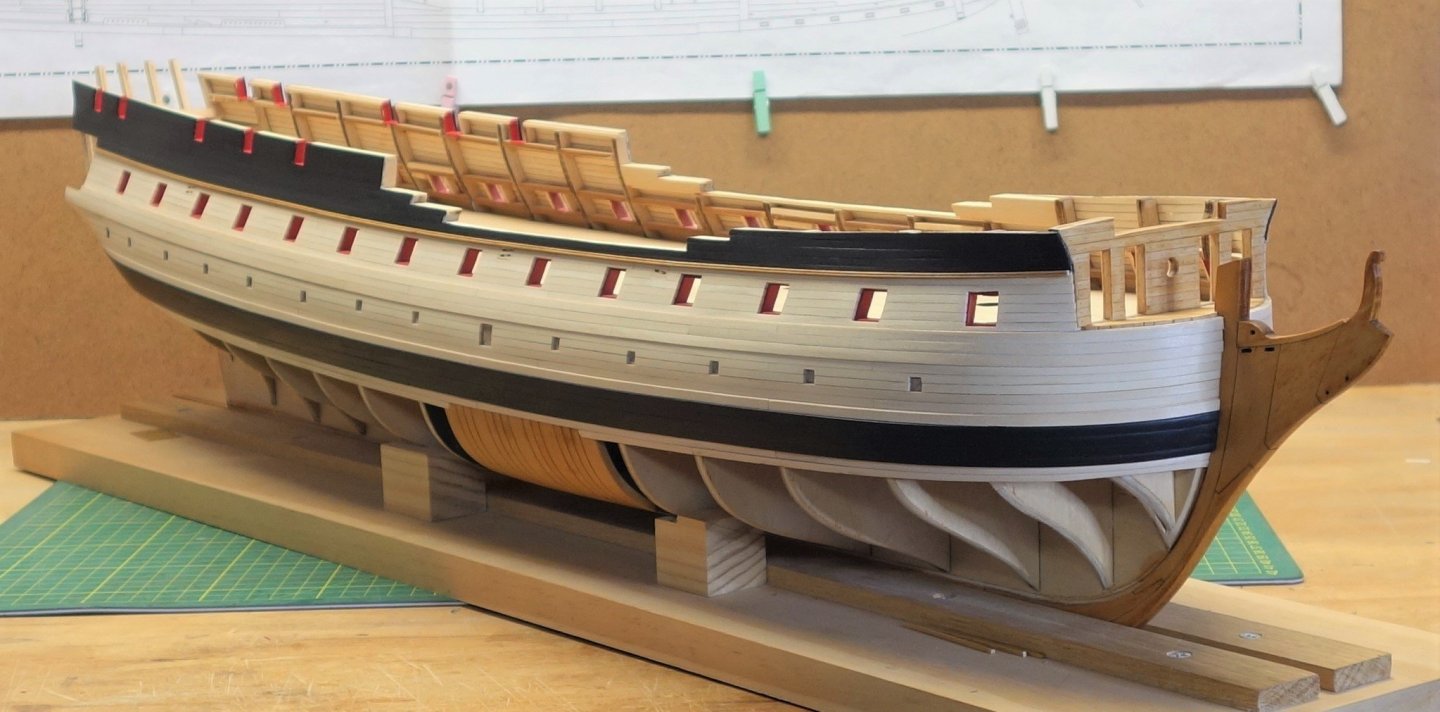
The holes for the tree nails have all been drilled. I decided to get the planking done first before filling the holes with wood filler (not looking forward to that one...lol).
Just a few photo's to show the gap getting smaller, 11 more rows to go.
Peter