

Peter Bloemendaal
-
Posts
236 -
Joined
-
Last visited
Content Type
Profiles
Forums
Gallery
Events
Posts posted by Peter Bloemendaal
-
-
Thanks for all the likes again.
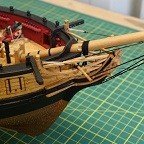
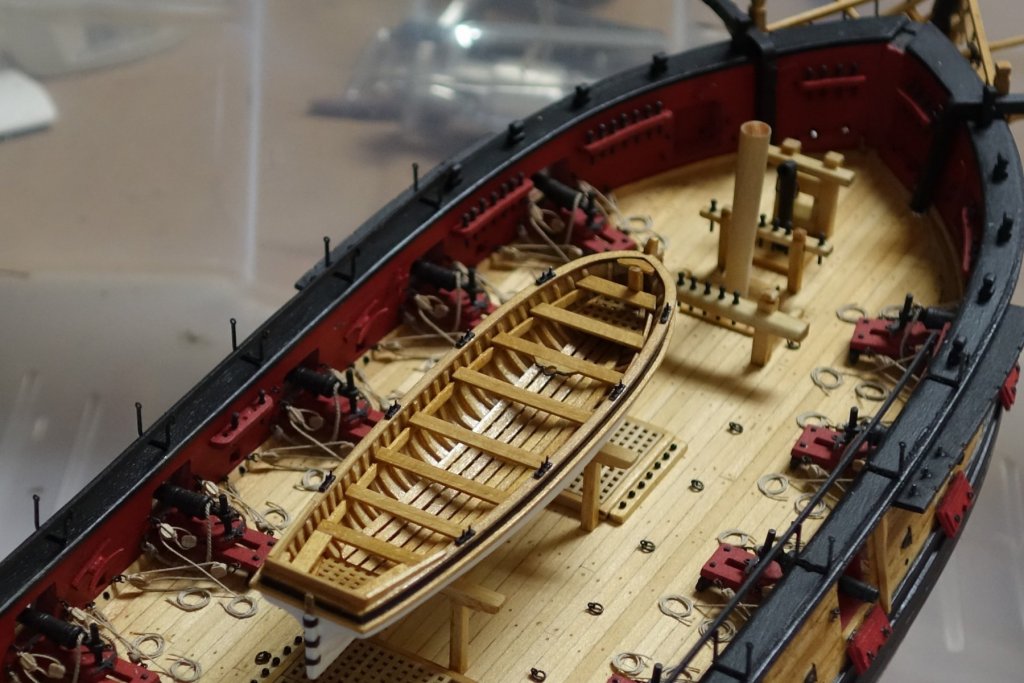
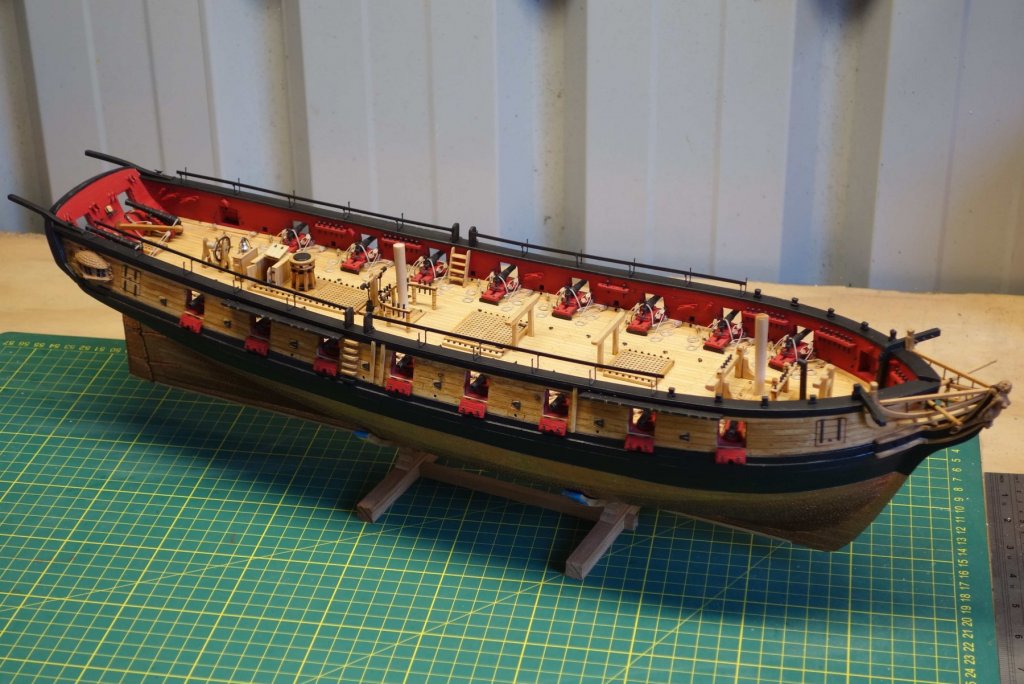
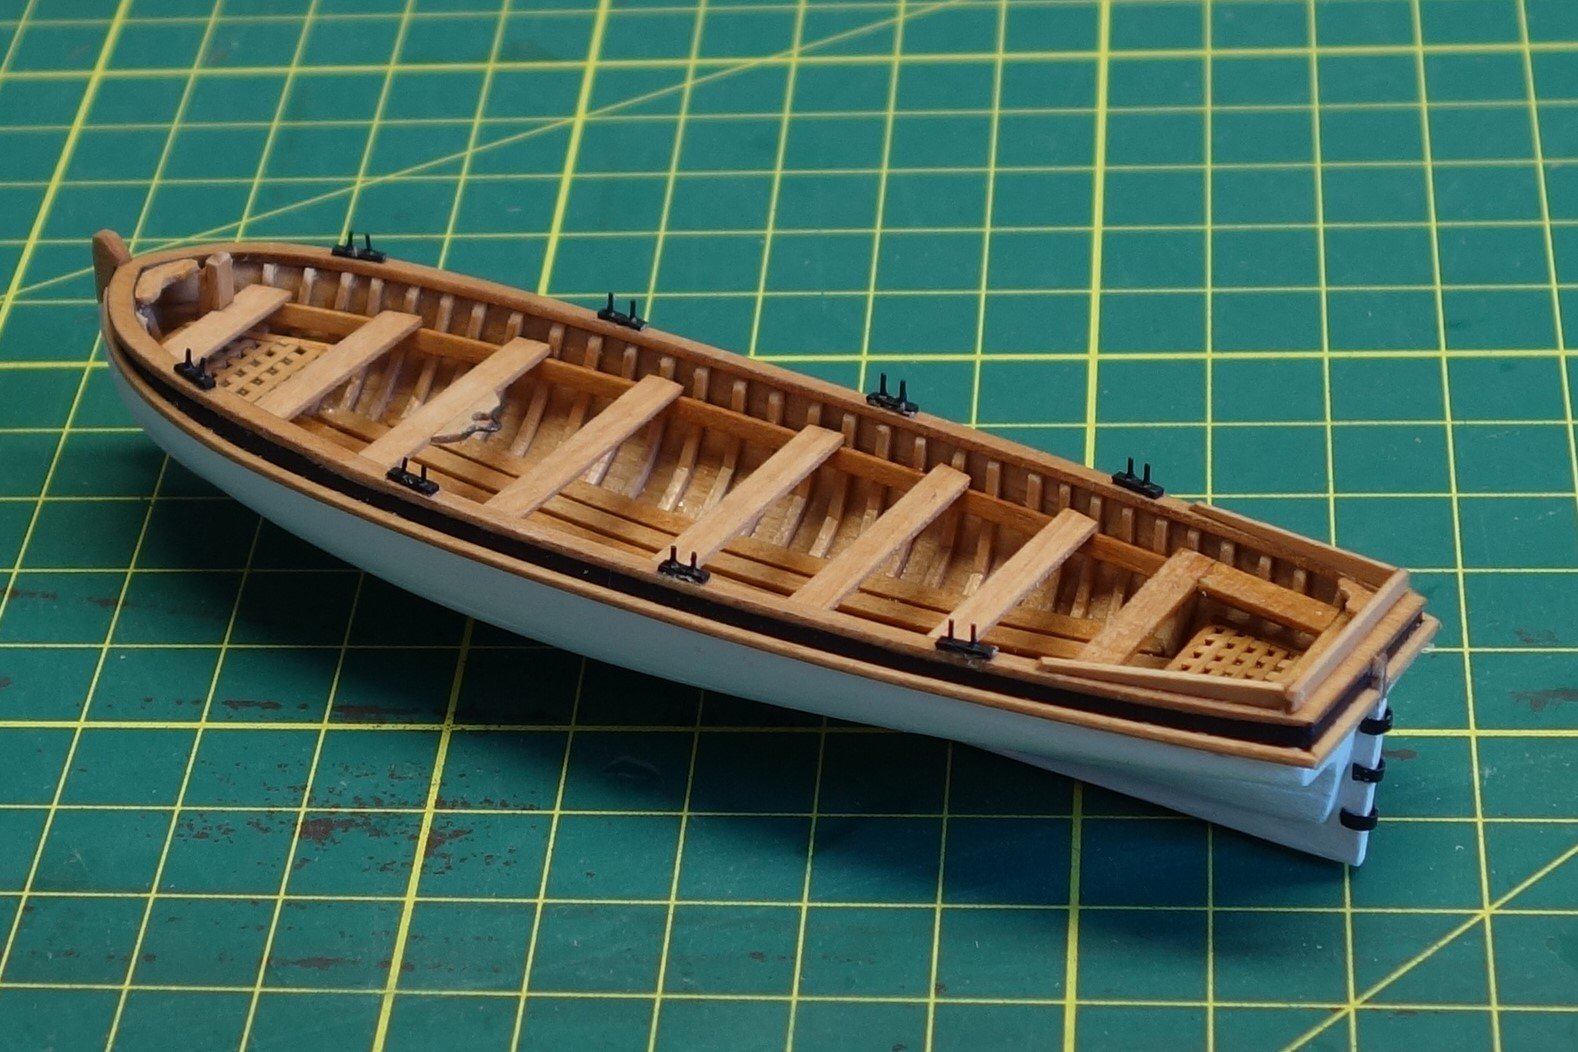
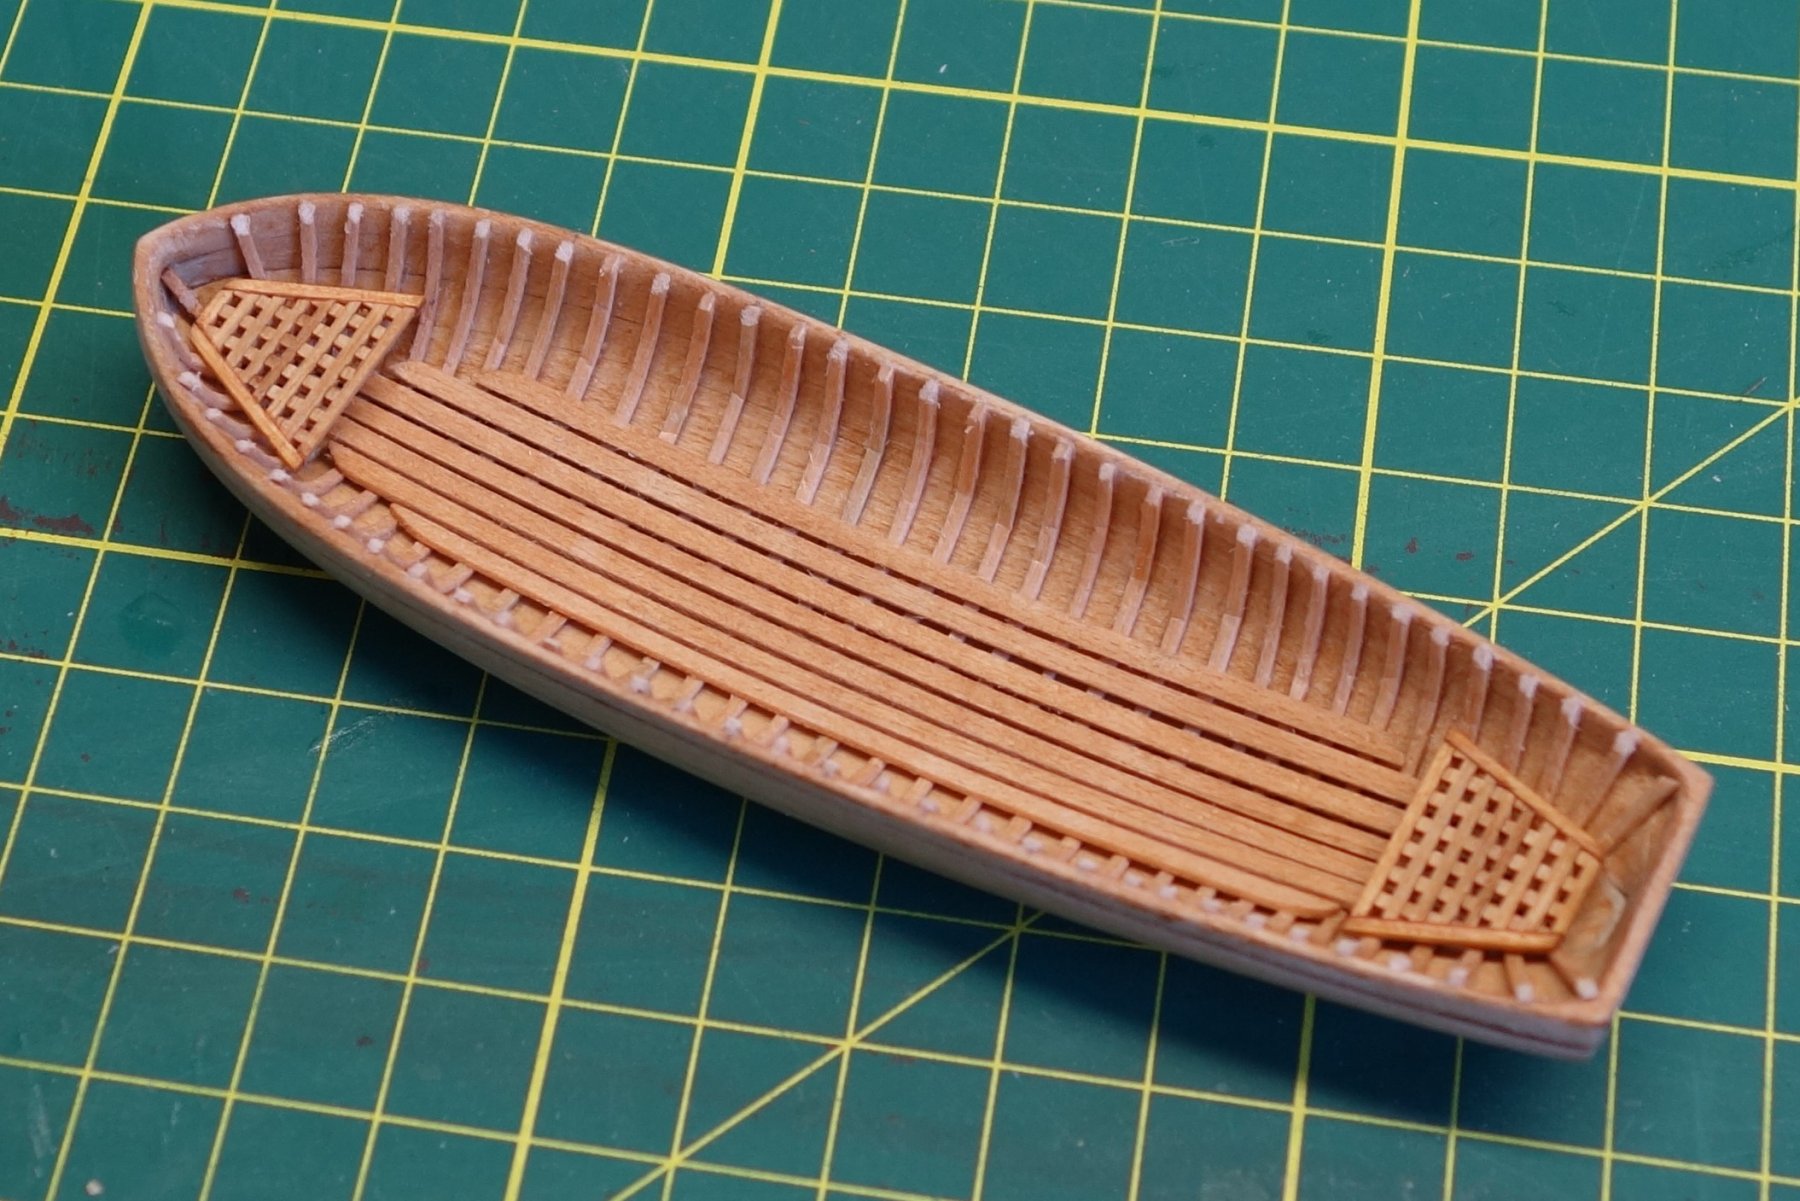
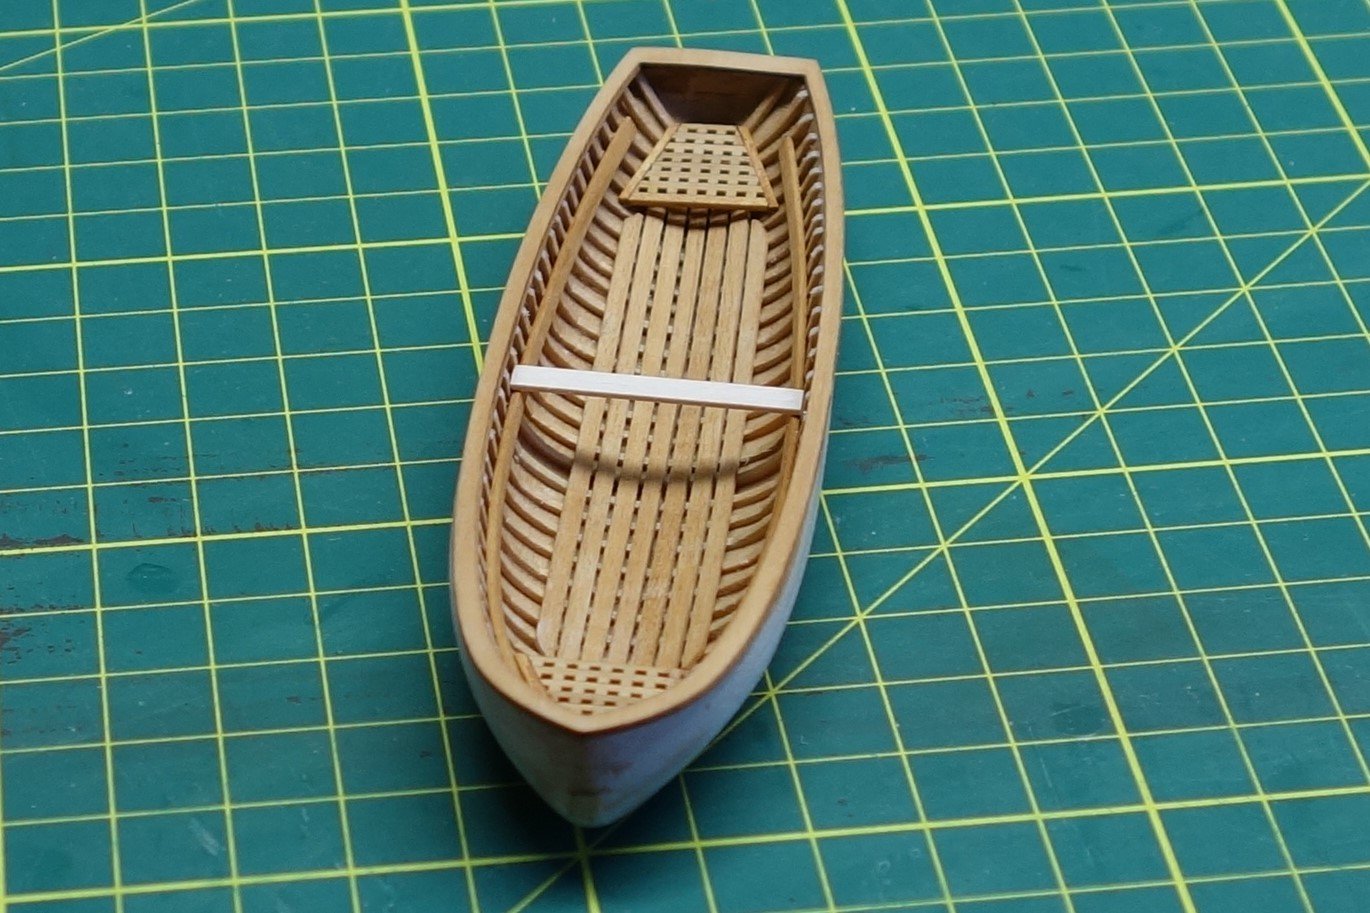
Just a bit of progress on the long boat (I used some black heat shrink for the Gudgeons).
Still have to add the knees on the Thwarts and figure out how to make the iron step on the bowsprit. I am also not 100% happy with the windlass yet and may give that one another go. But in general I'm pretty happy how she looks...
The two last photo's were made after dark in the shed so the colour is a bit all over the place.

- glennreader, oneslim, JesseLee and 15 others
-
 18
18
-
Great looking model Jessie.
I'm slowly moving closer to the rigging stage on my model and I am keeping a close eye on your progress. Looks like I have some challenges ahead of me. Keep showing me the way...

Peter.
- cog, popeye the sailor, Canute and 3 others
-
6
-
Reading your introduction you didn't just paint those figures, you made them as well. They are absolutely great.
In my humble opinion, if you are capable of that, don't worry about a beginners kit. Jump straight into a more complex one to your liking.
Just make sure you get one with decent instructions to help you out understand the different processes.
Just my 2 cents.
Cheers, Peter
-
Thanks Jim,
Great pick up Keith,
I remember being so concentrated on the ropes meeting in the middle under the drum so I can glue them there that I must have automatically assumed they start under the drum as well...DOH.
Never hesitate pointing out any mistakes, I'm here to learn as well as having fun and as you said it also gives me an opportunity to fix before it gets harder. My first reaction was, nah.. nobody will notice. But the more I thought about it, it changed to " But I will notice every time I look at it". So I will give it a try fixing it.
I'll finish the long boat first though, it's that multitasking thing again.....lol
Cheers,
- Ryland Craze, fnkershner and Nirvana
-
3
-
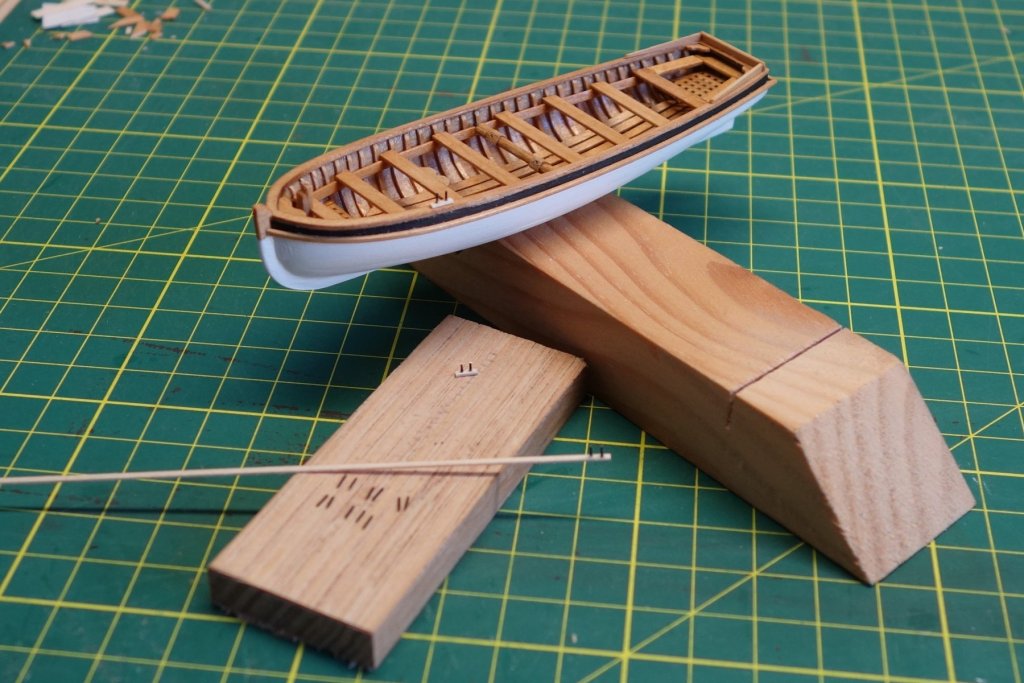
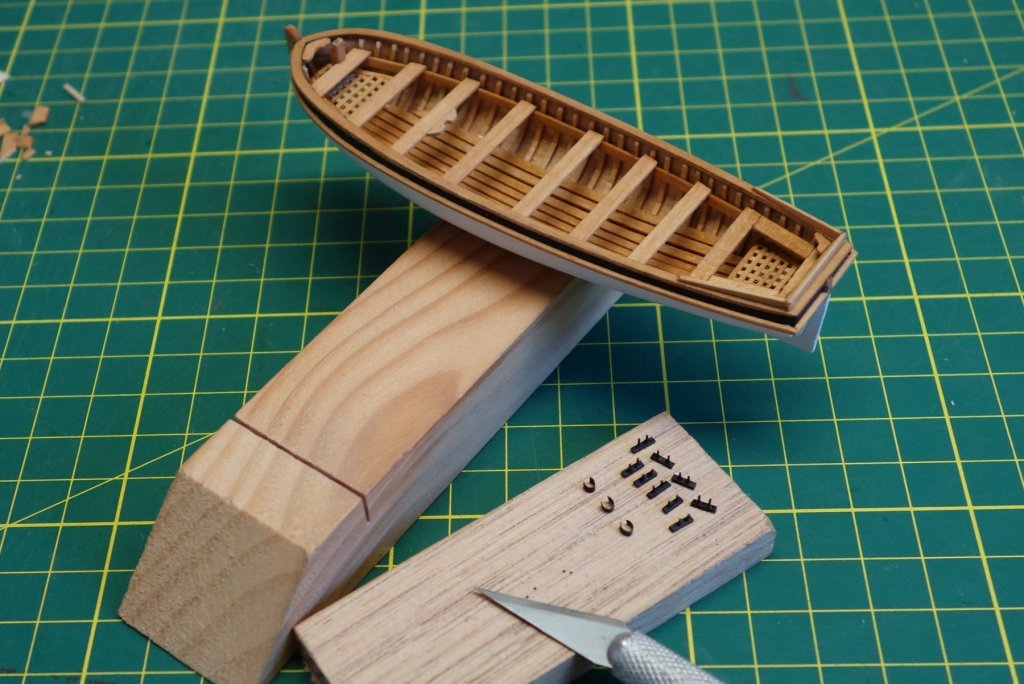
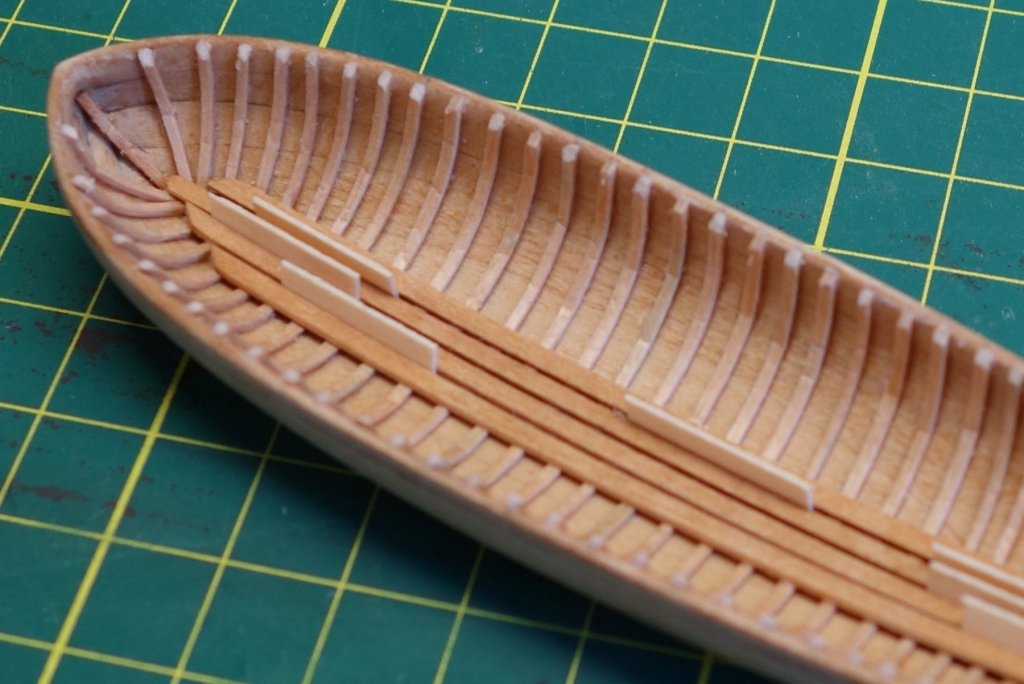
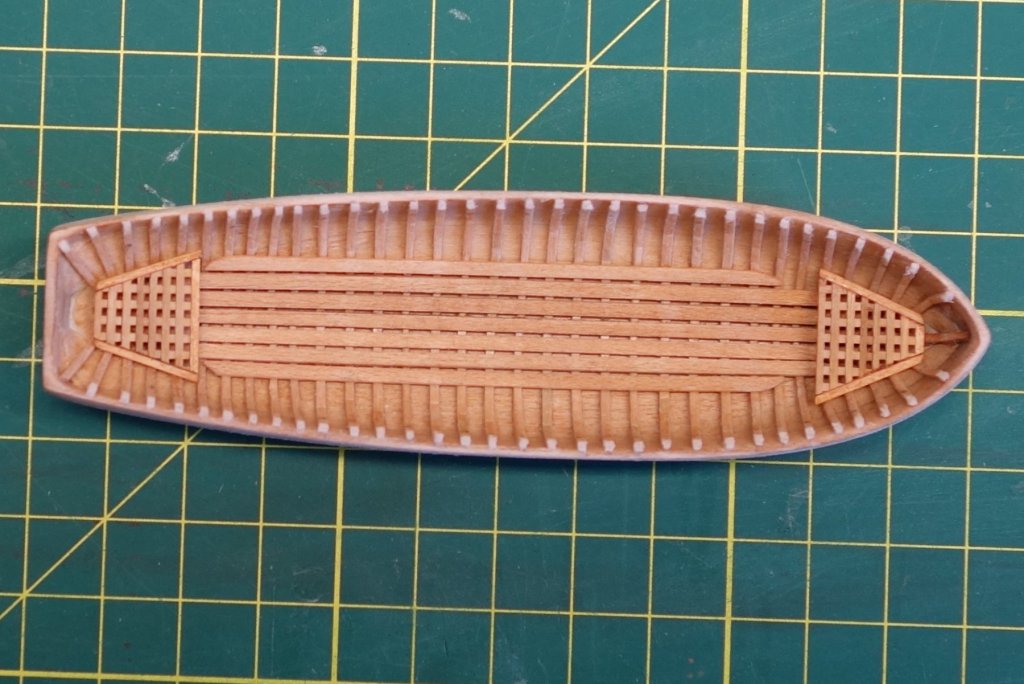
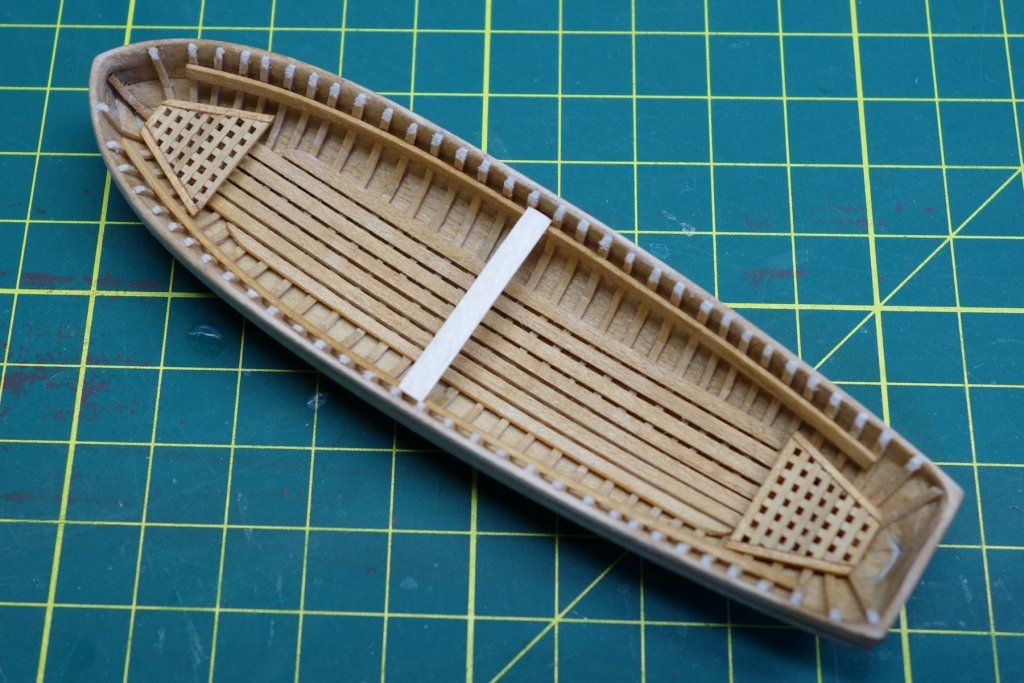
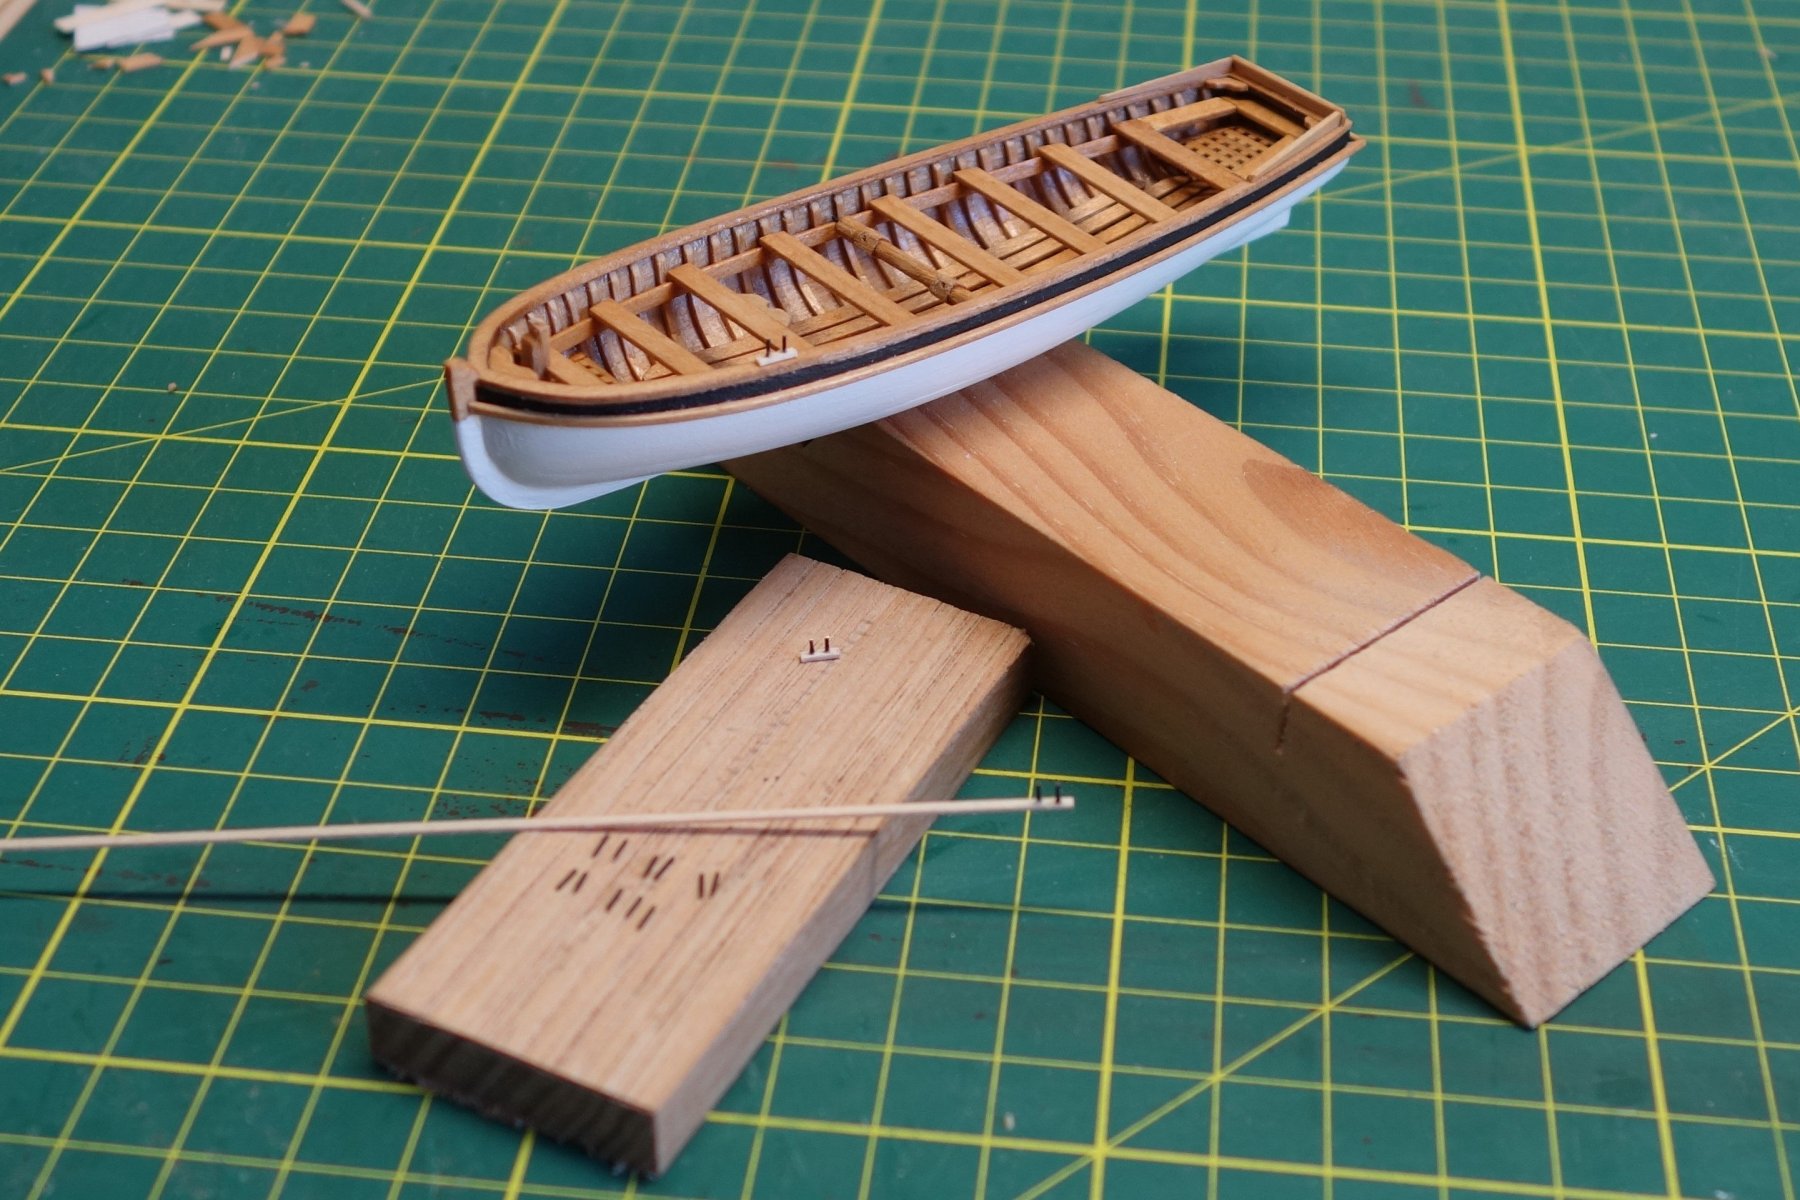
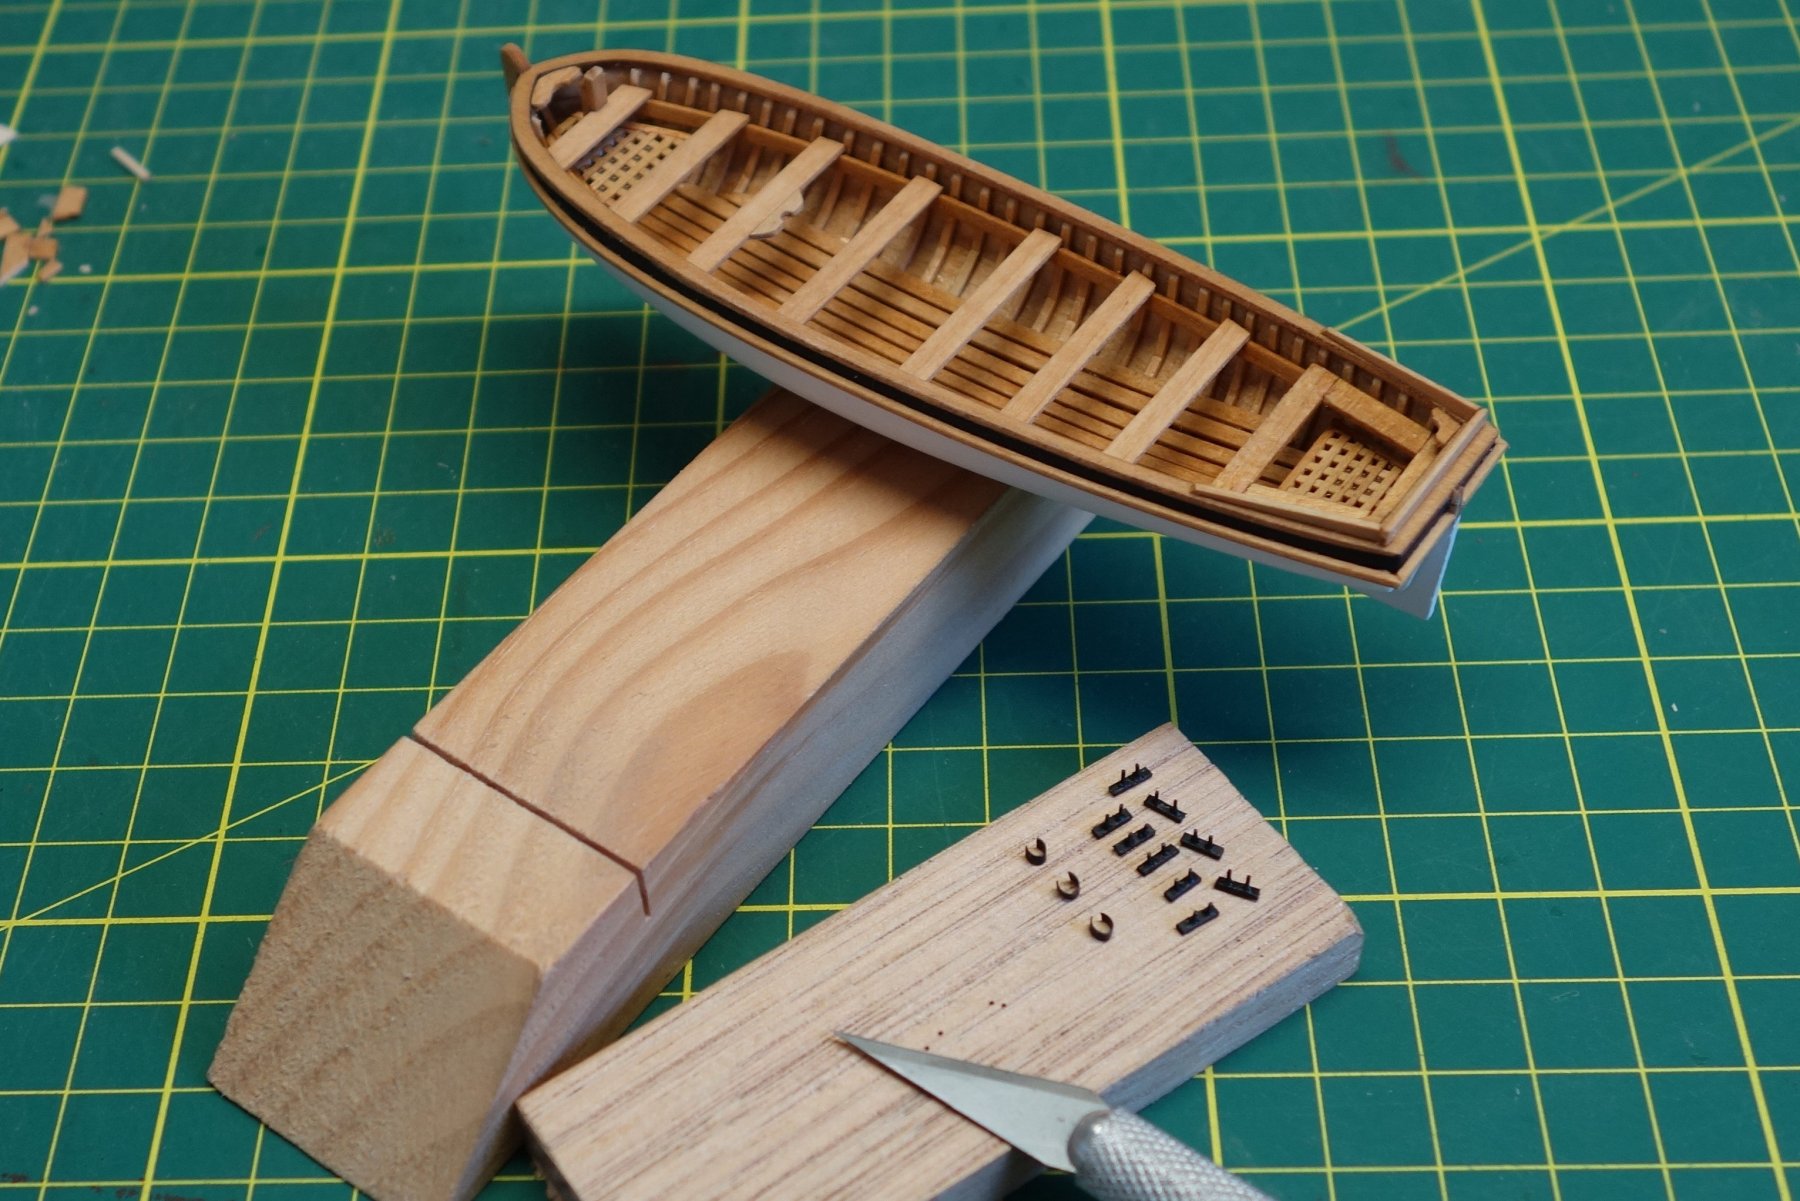
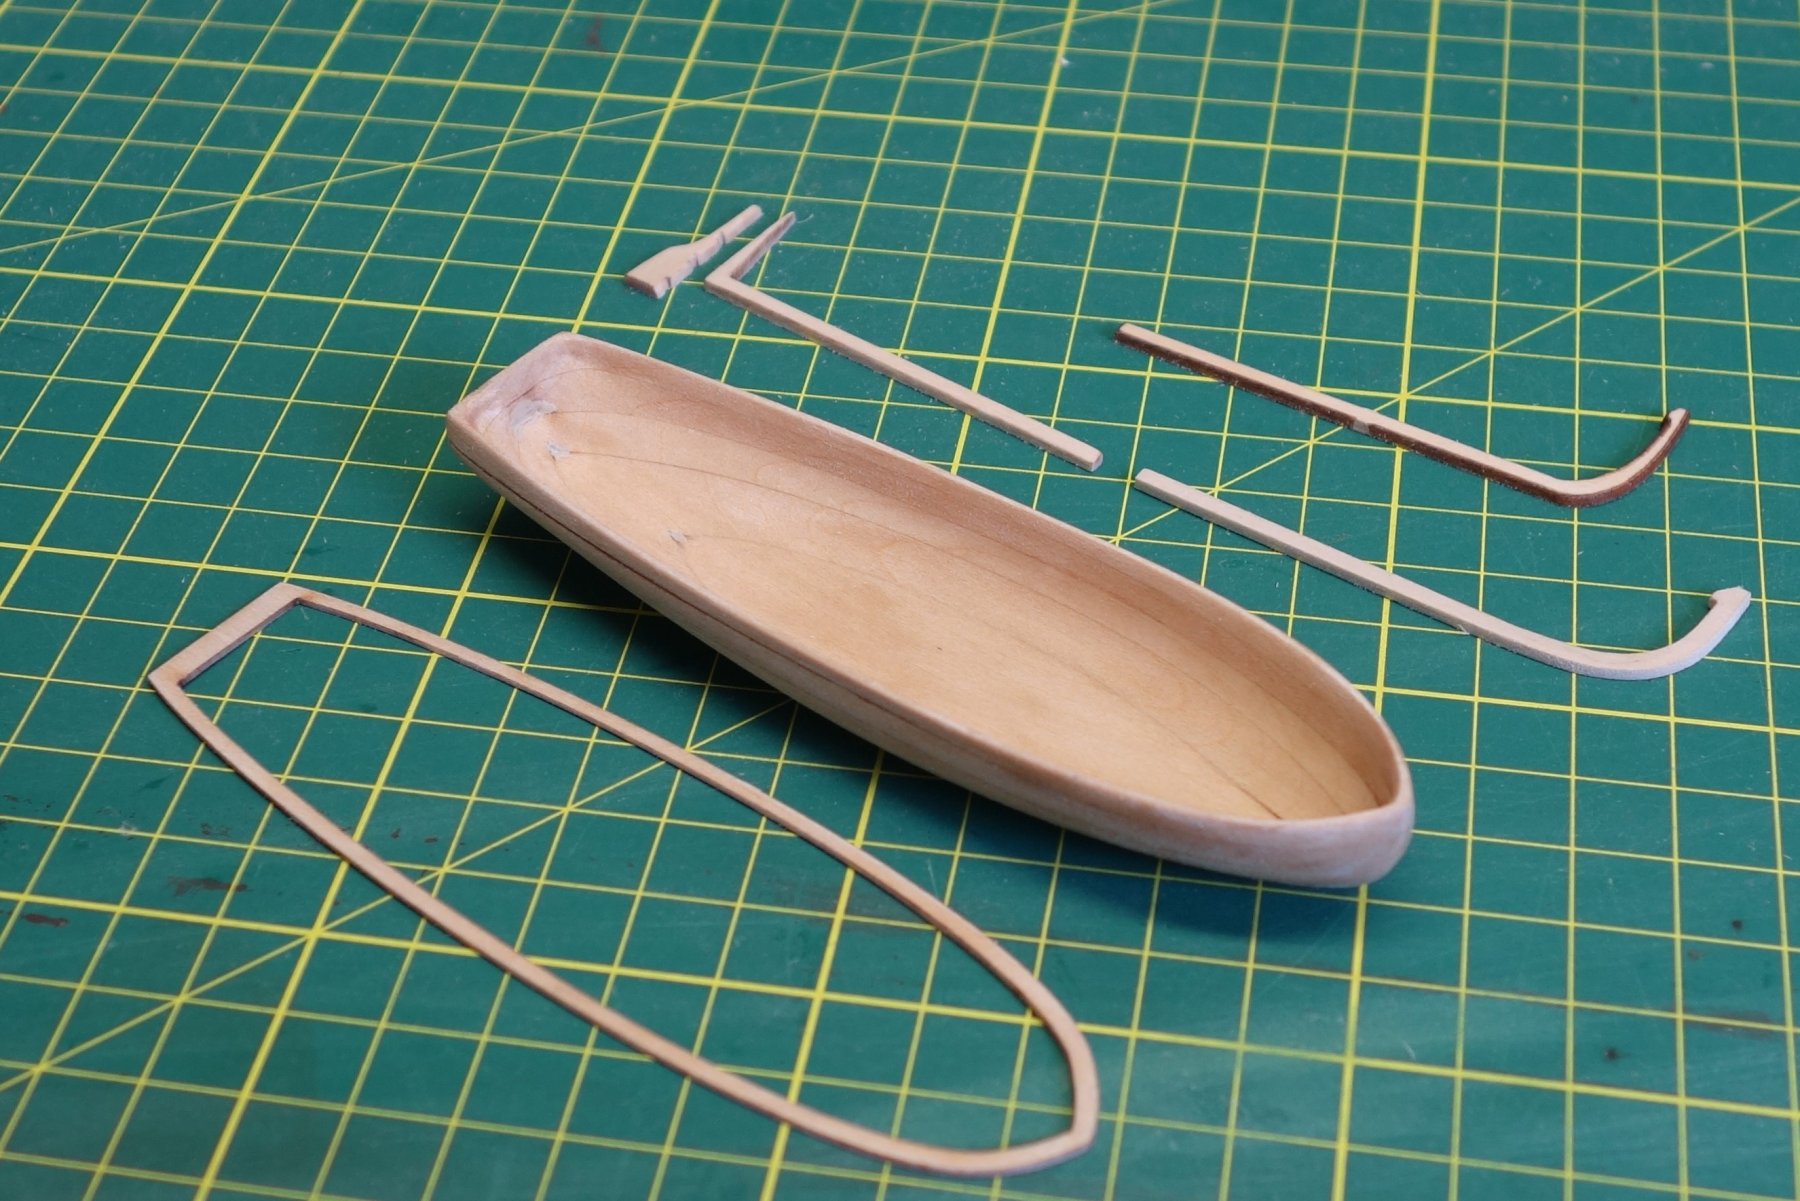
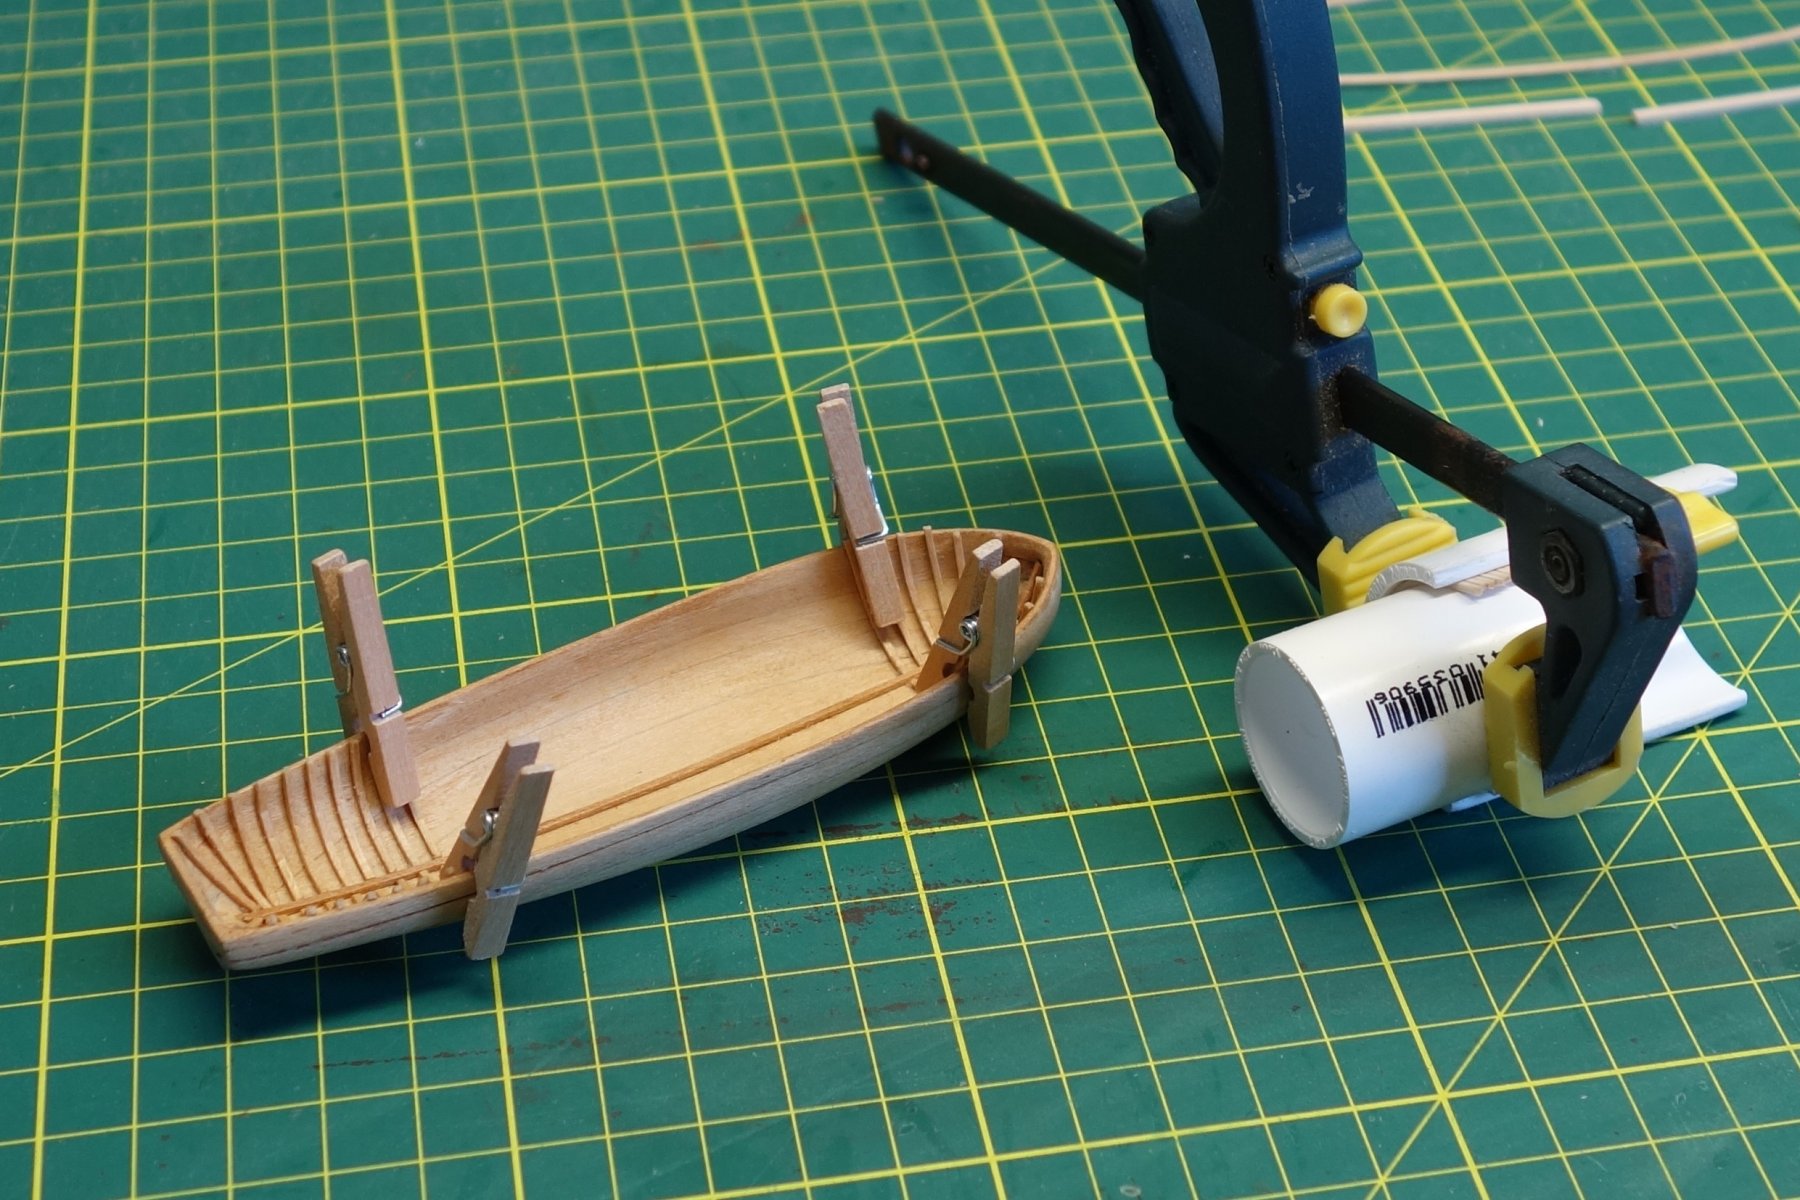
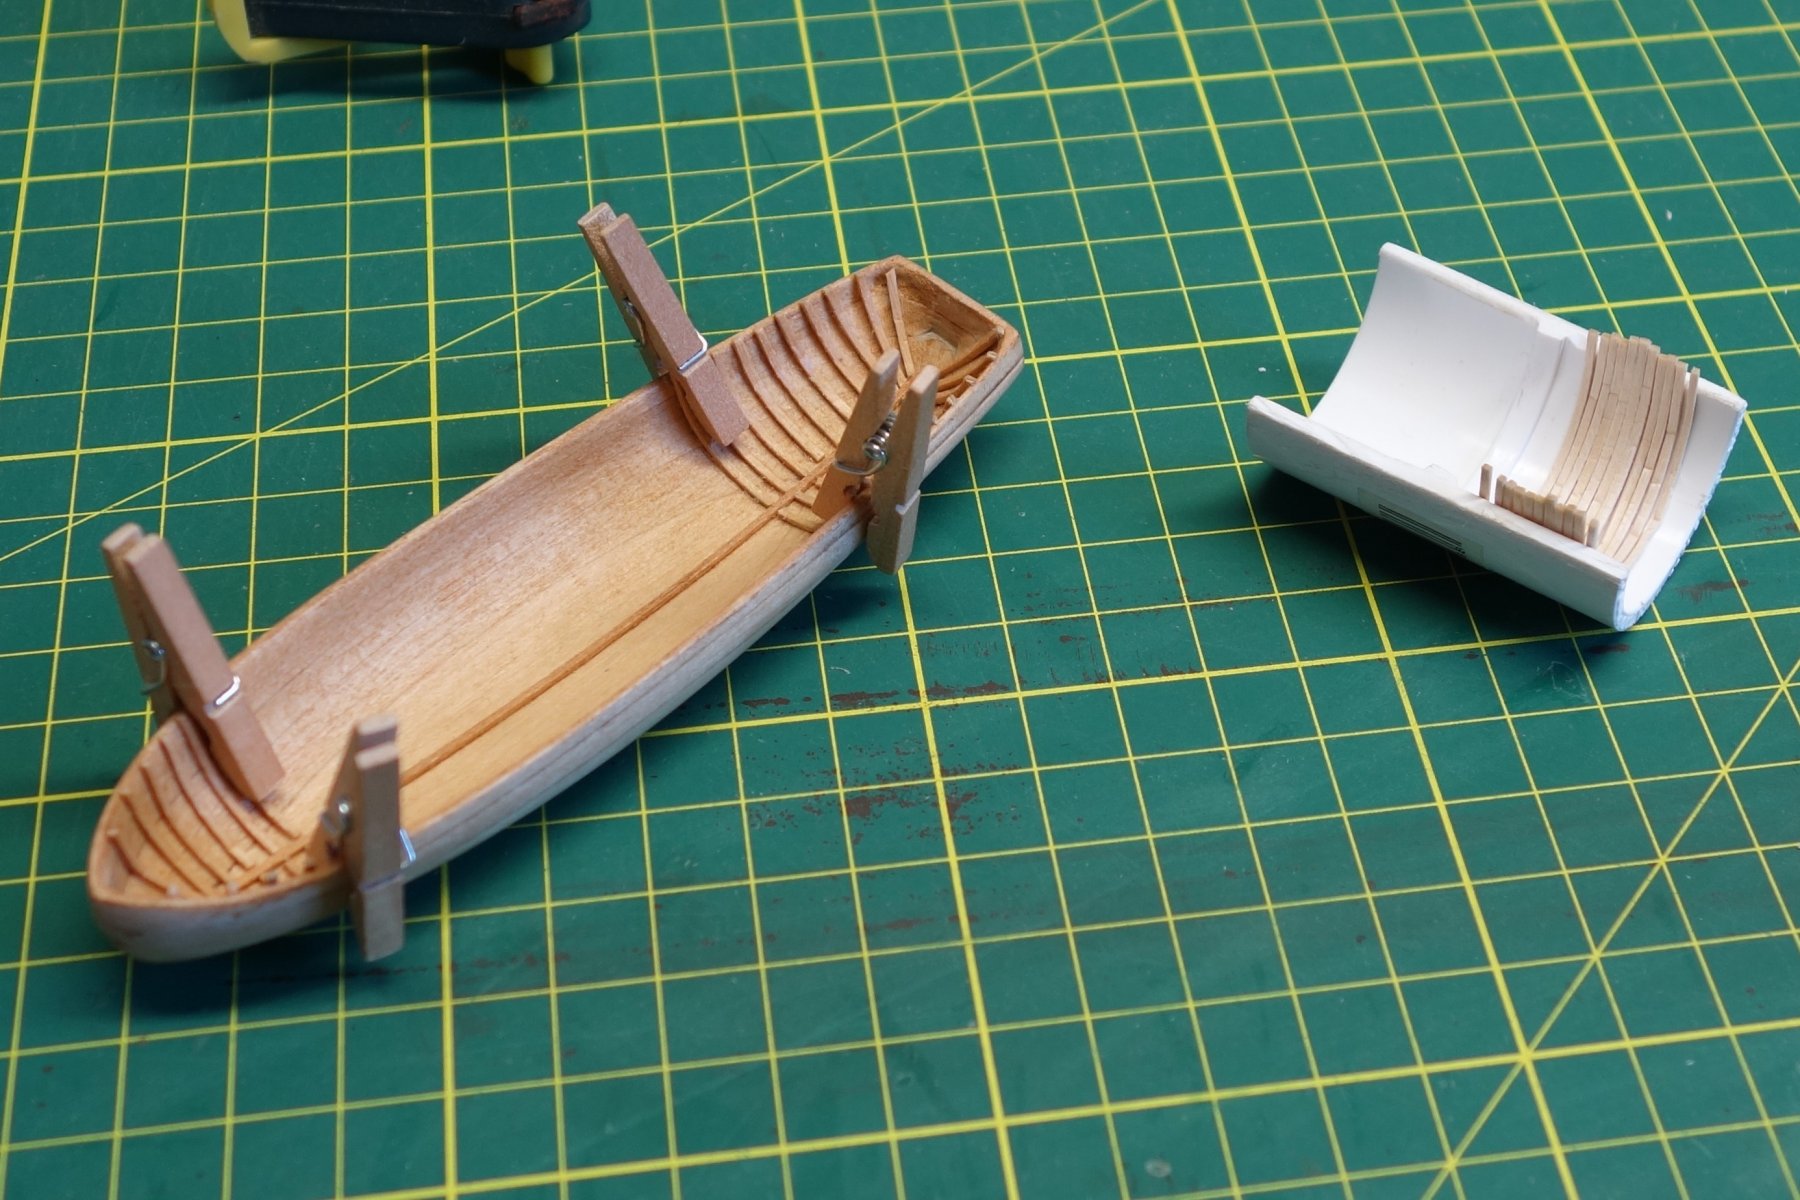
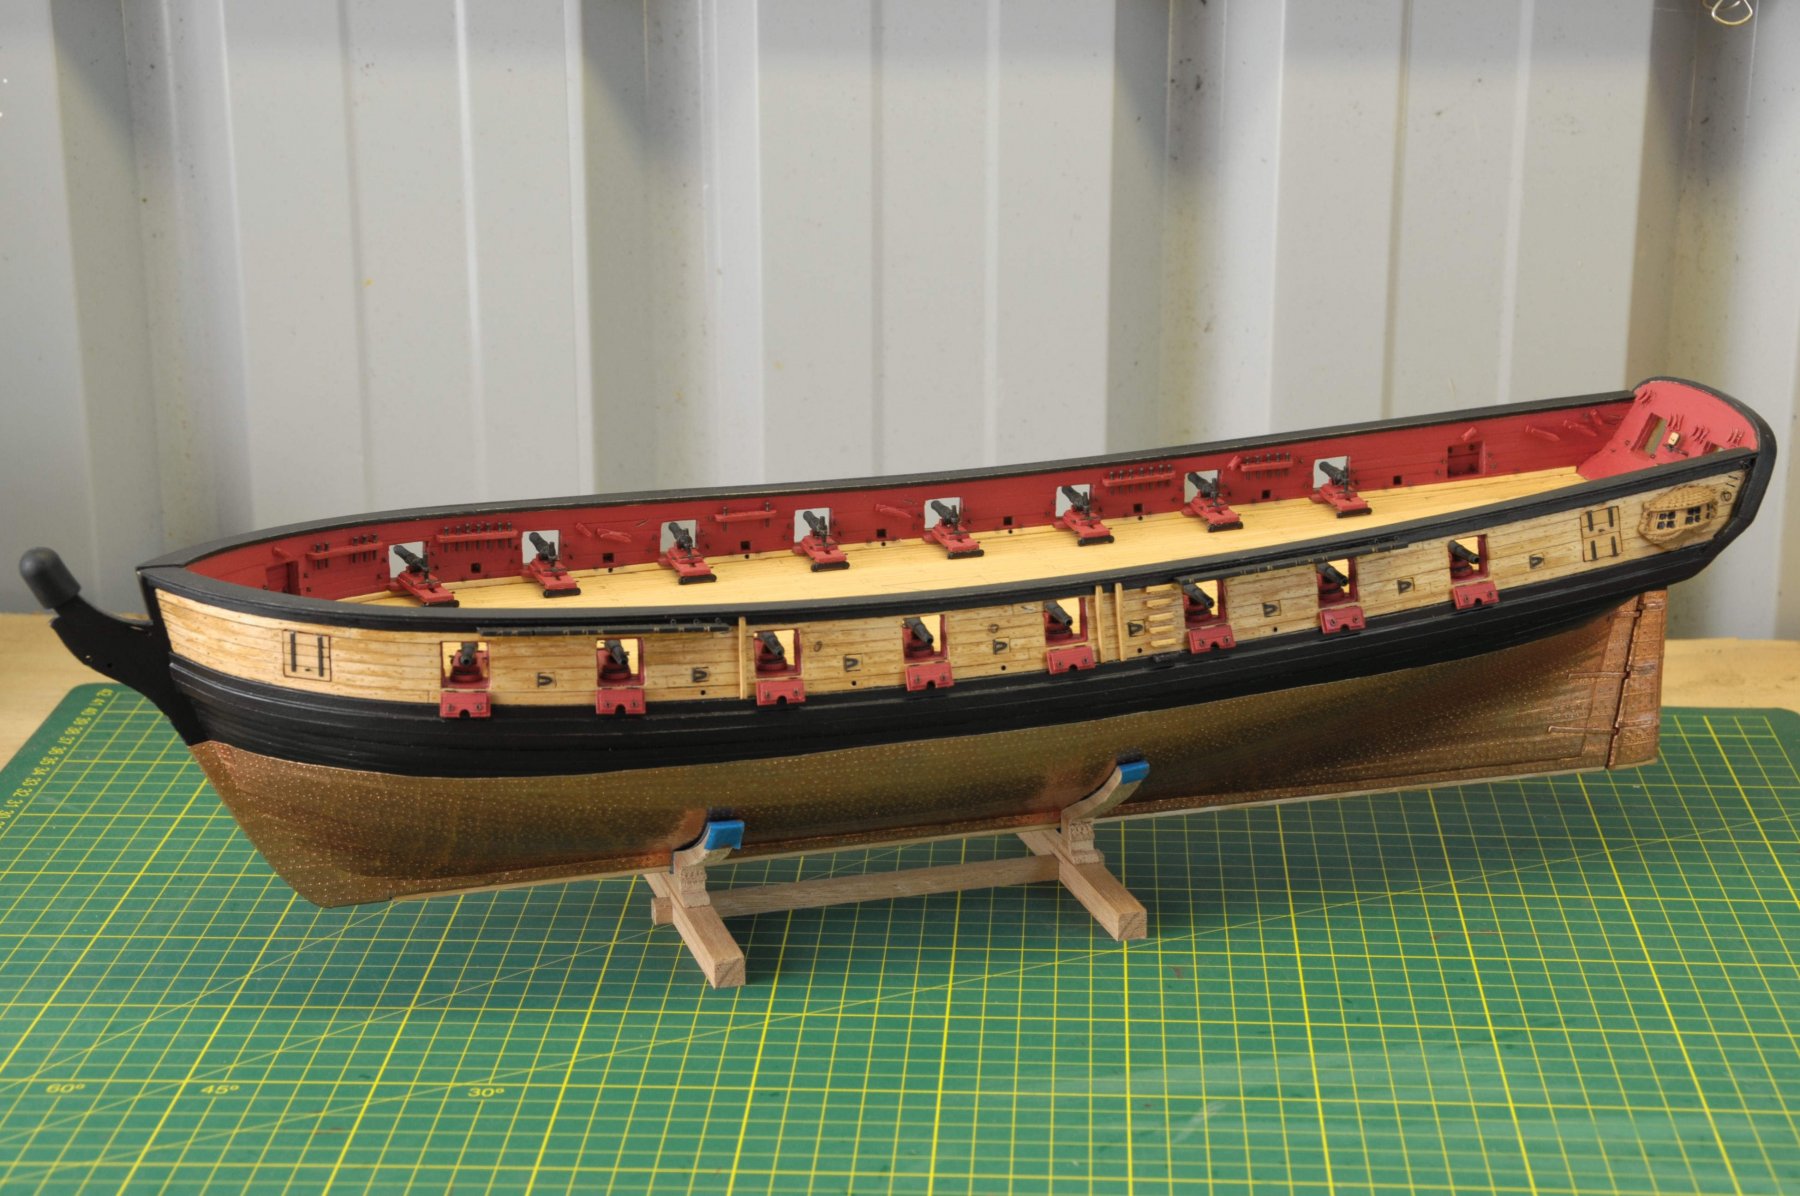
Well, I said the netting will be next. The plan was to make a start on the long boat while doing the netting. As mentioned before I suck at multitasking. So once I started the longboat, the netting had no chance and will have to wait.....lol.
I think I spent a good 8 hours sanding the inside and out before I got cold feet and didn't go any thinner. I'm sure I probably could go thinner but when I felt it starting to flex and crack a bit while sanding, I was happy to stop. I applied some creative ways to bend the frames prior to gluing them in.
It's a fun little project but takes just as much care as the big ship. Can't let your guard down or rush it....
I also forgot to dry fit the laser cut keel prior to sanding the hull so had to make a new one once I realised to do that and found out it didn't fit...
Here are some photo's (not everything is glued on yet).


- fnkershner, jwvolz, Nirvana and 14 others
-
17
-
Thanks Eric,
Yours in coming along quite nicely too. I like your work. Only 500 hours or so to go to get to this point....lol.
But who is counting when you are having fun....
Peter
- Nirvana, Dutchman and svein erik
-
3
-
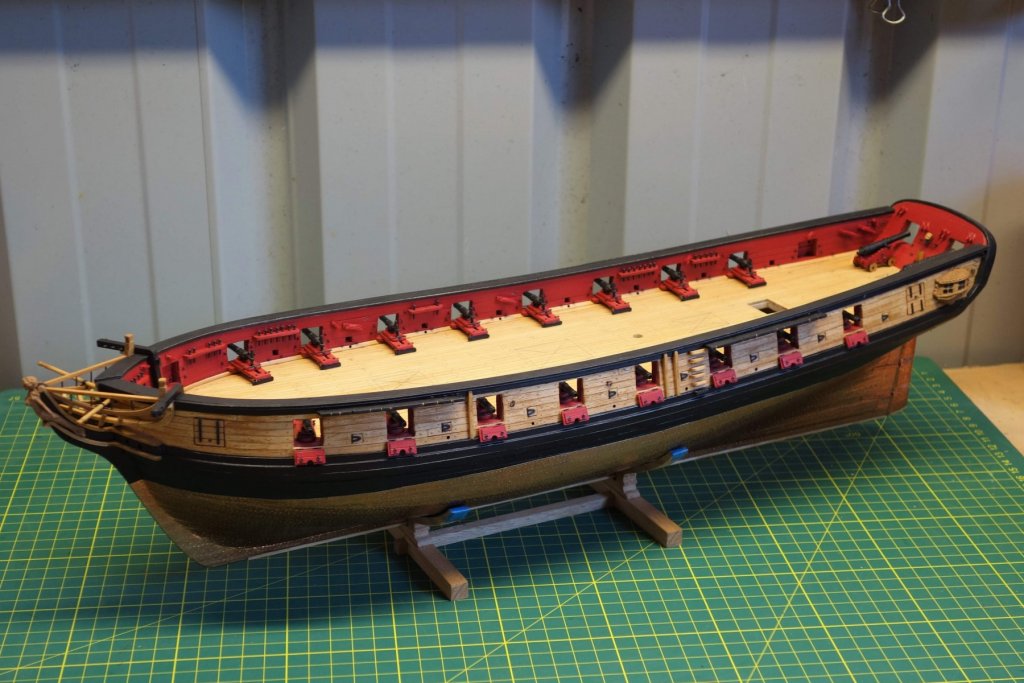
Thanks again for all the likes 🙂
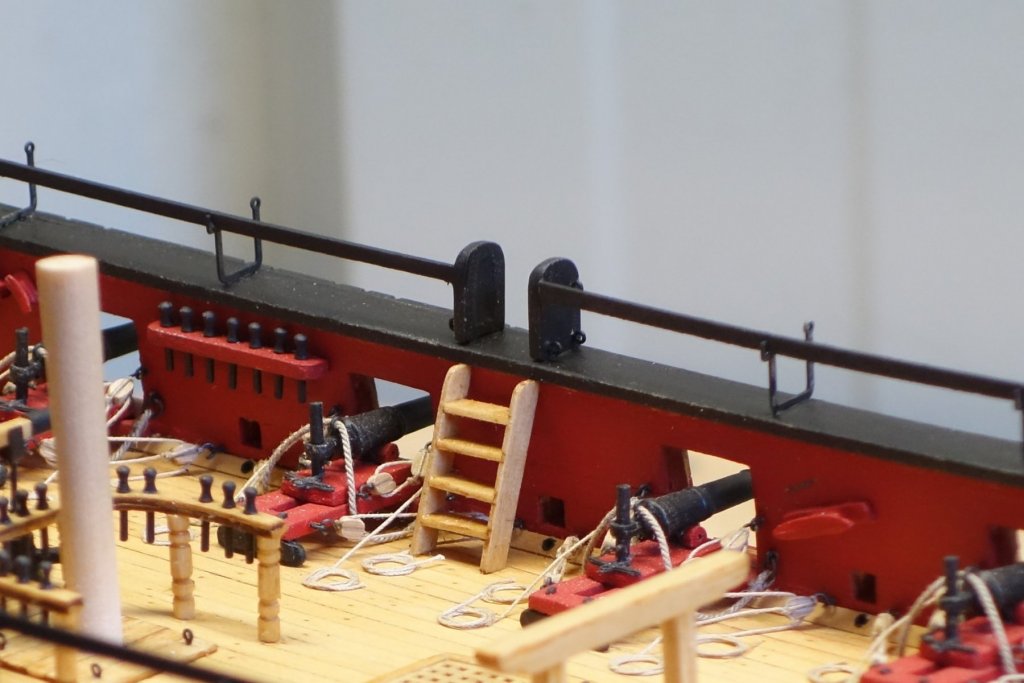
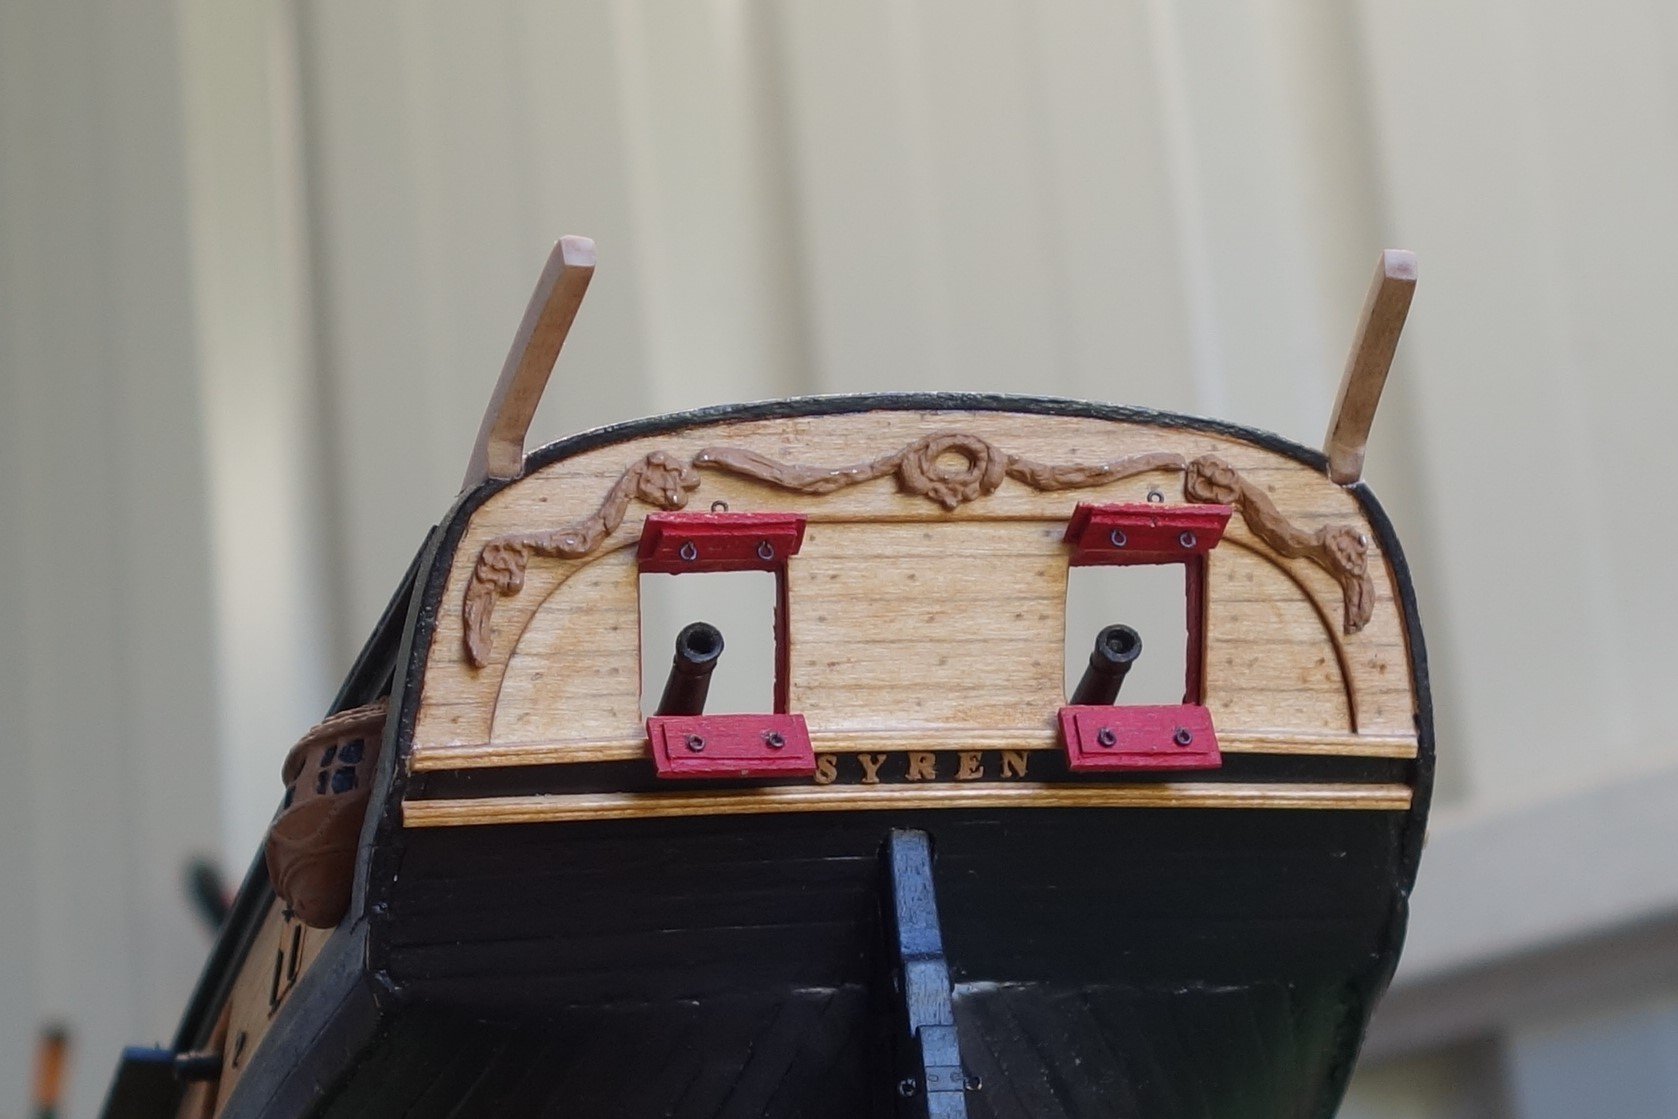
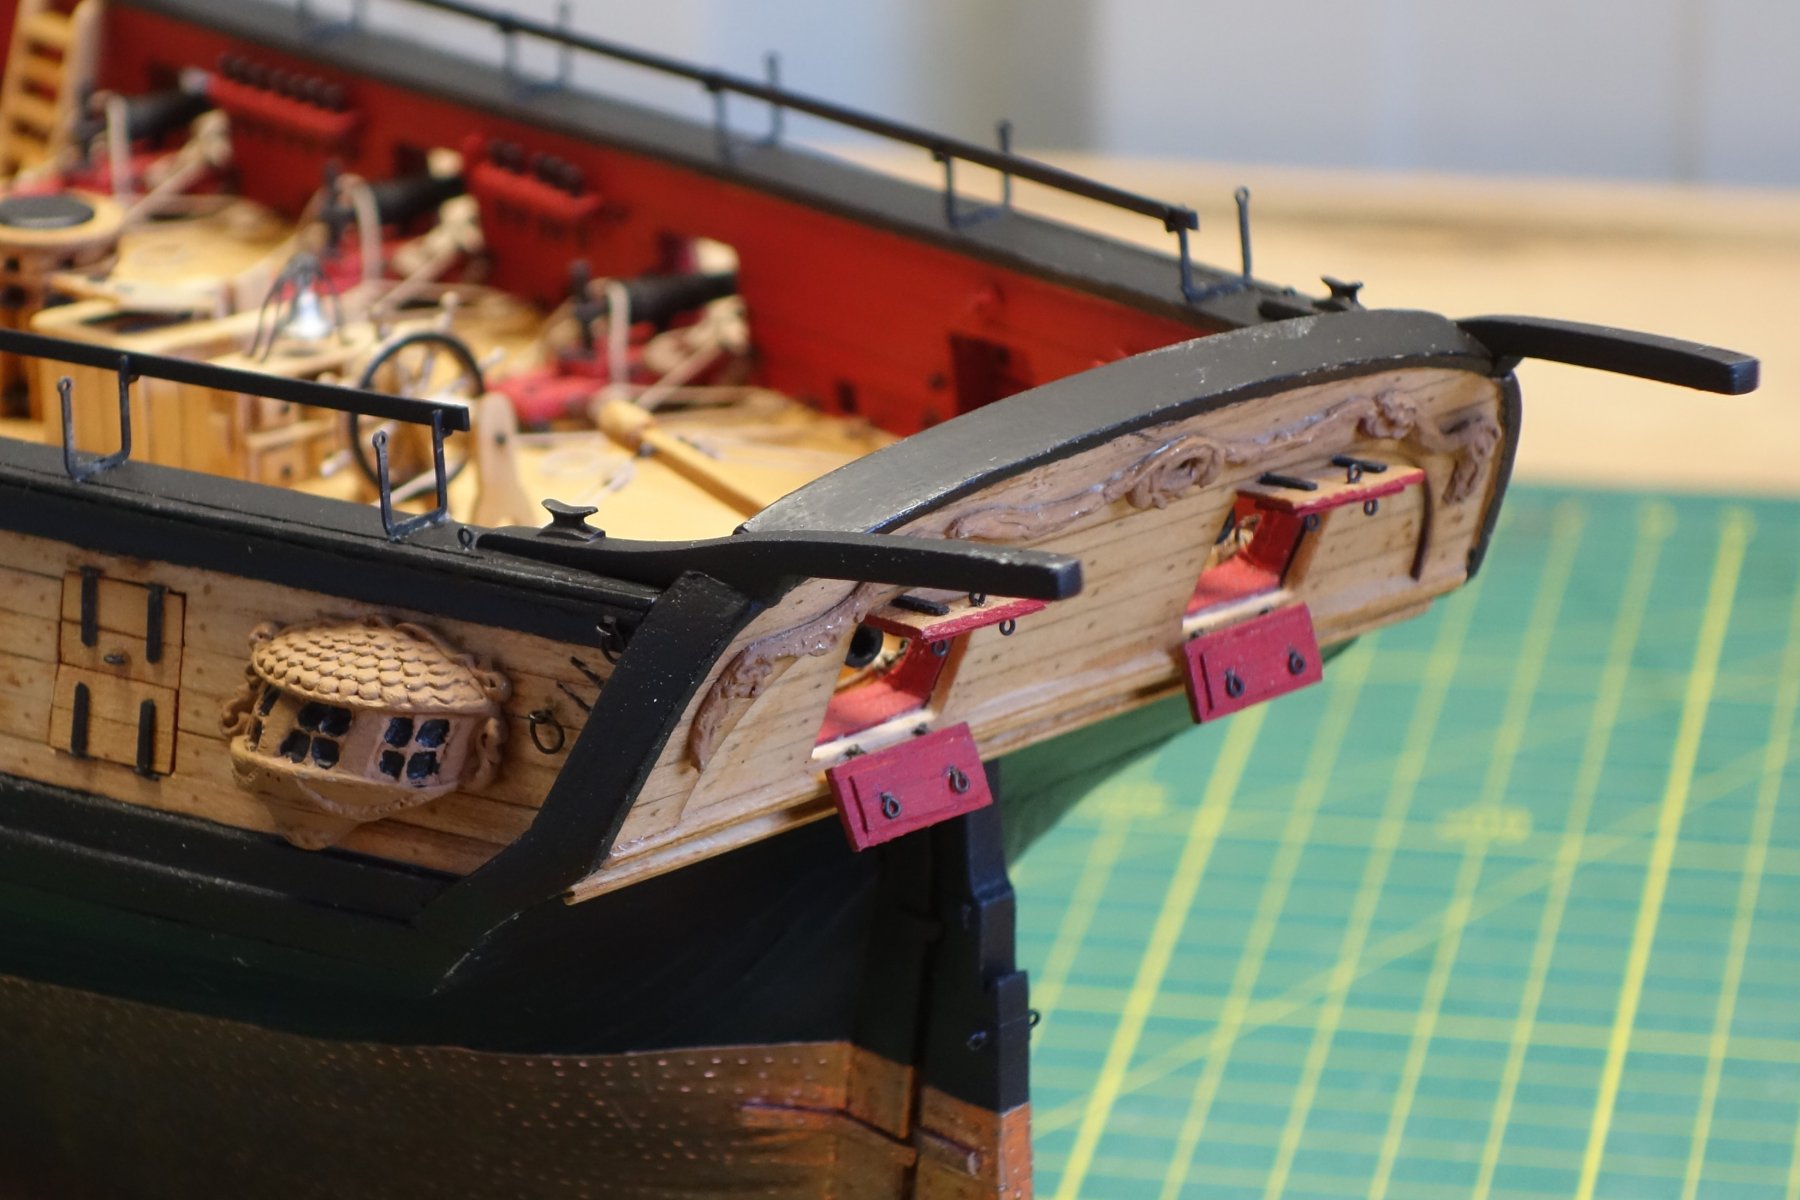
A bit more progress, this time on the cap rail details. I have added the stern davits, timber heads, inboard stairs and hammock cranes. The netting will be next.
I was so programmed to grabbing the model using the cap rail that it took 3 bend hammock cranes before this old brain switched on and figured out a new way of handling the model....lol
I let the photo's do the talking again.


- glennreader, JesseLee, el cid and 13 others
-
16
-
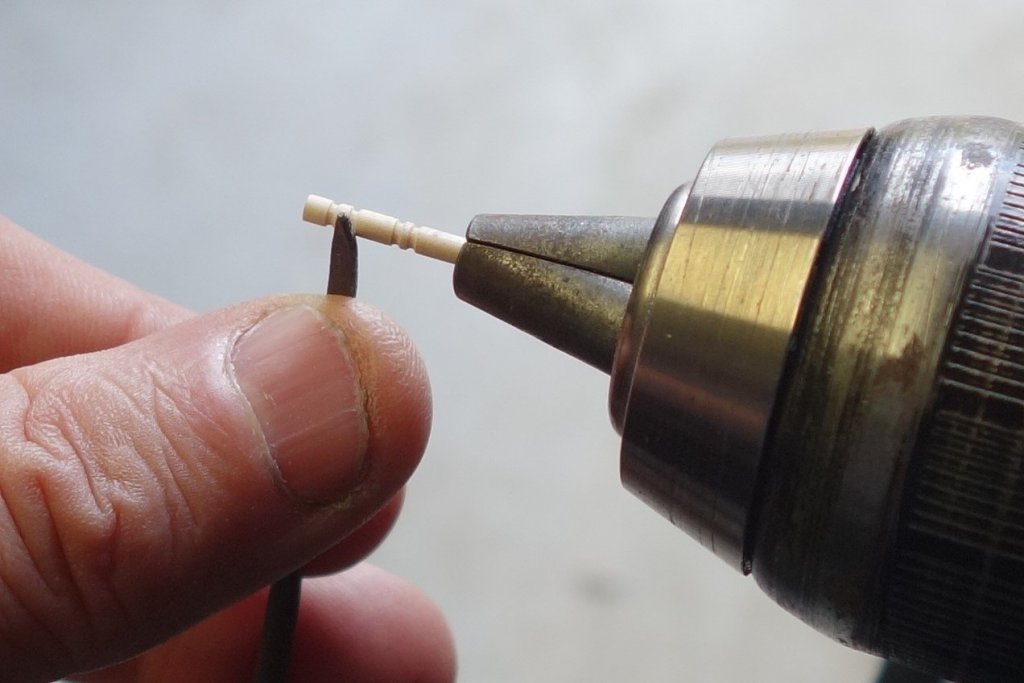
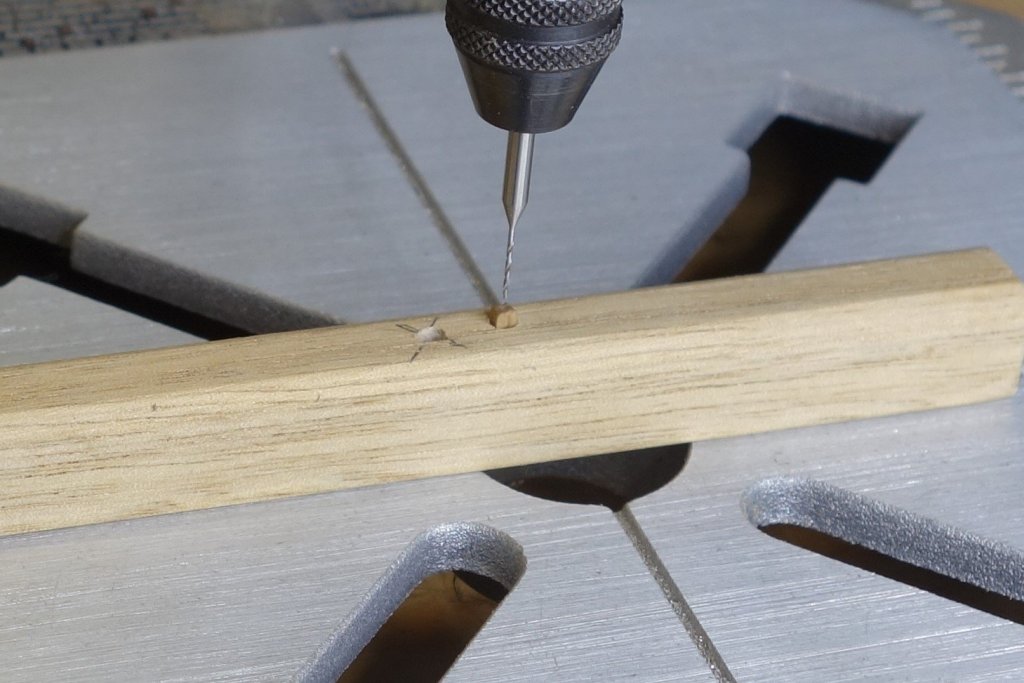
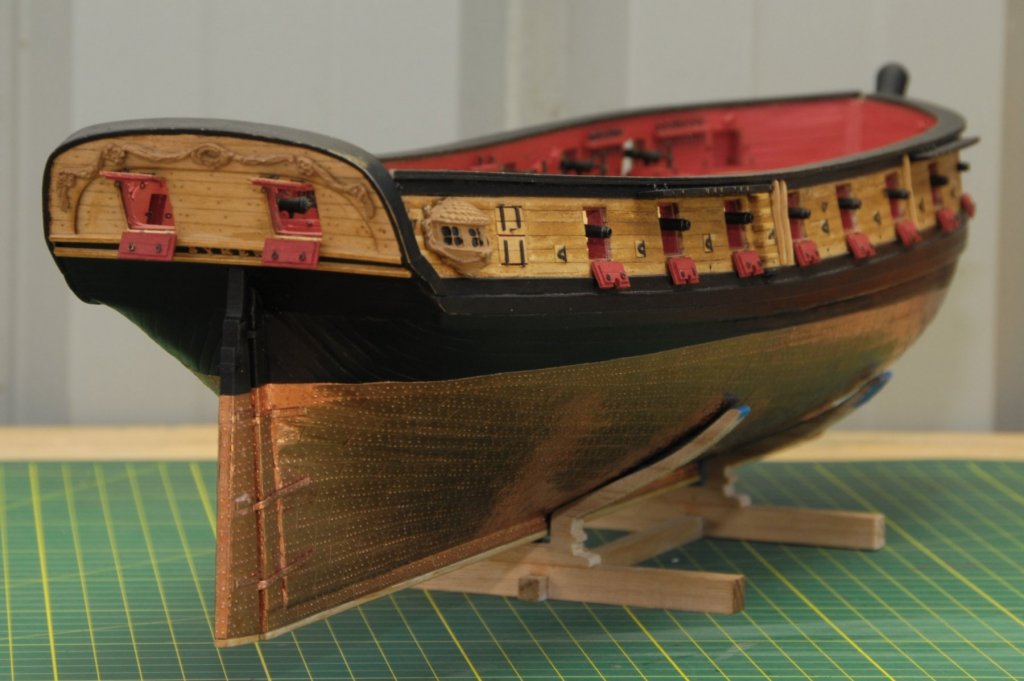
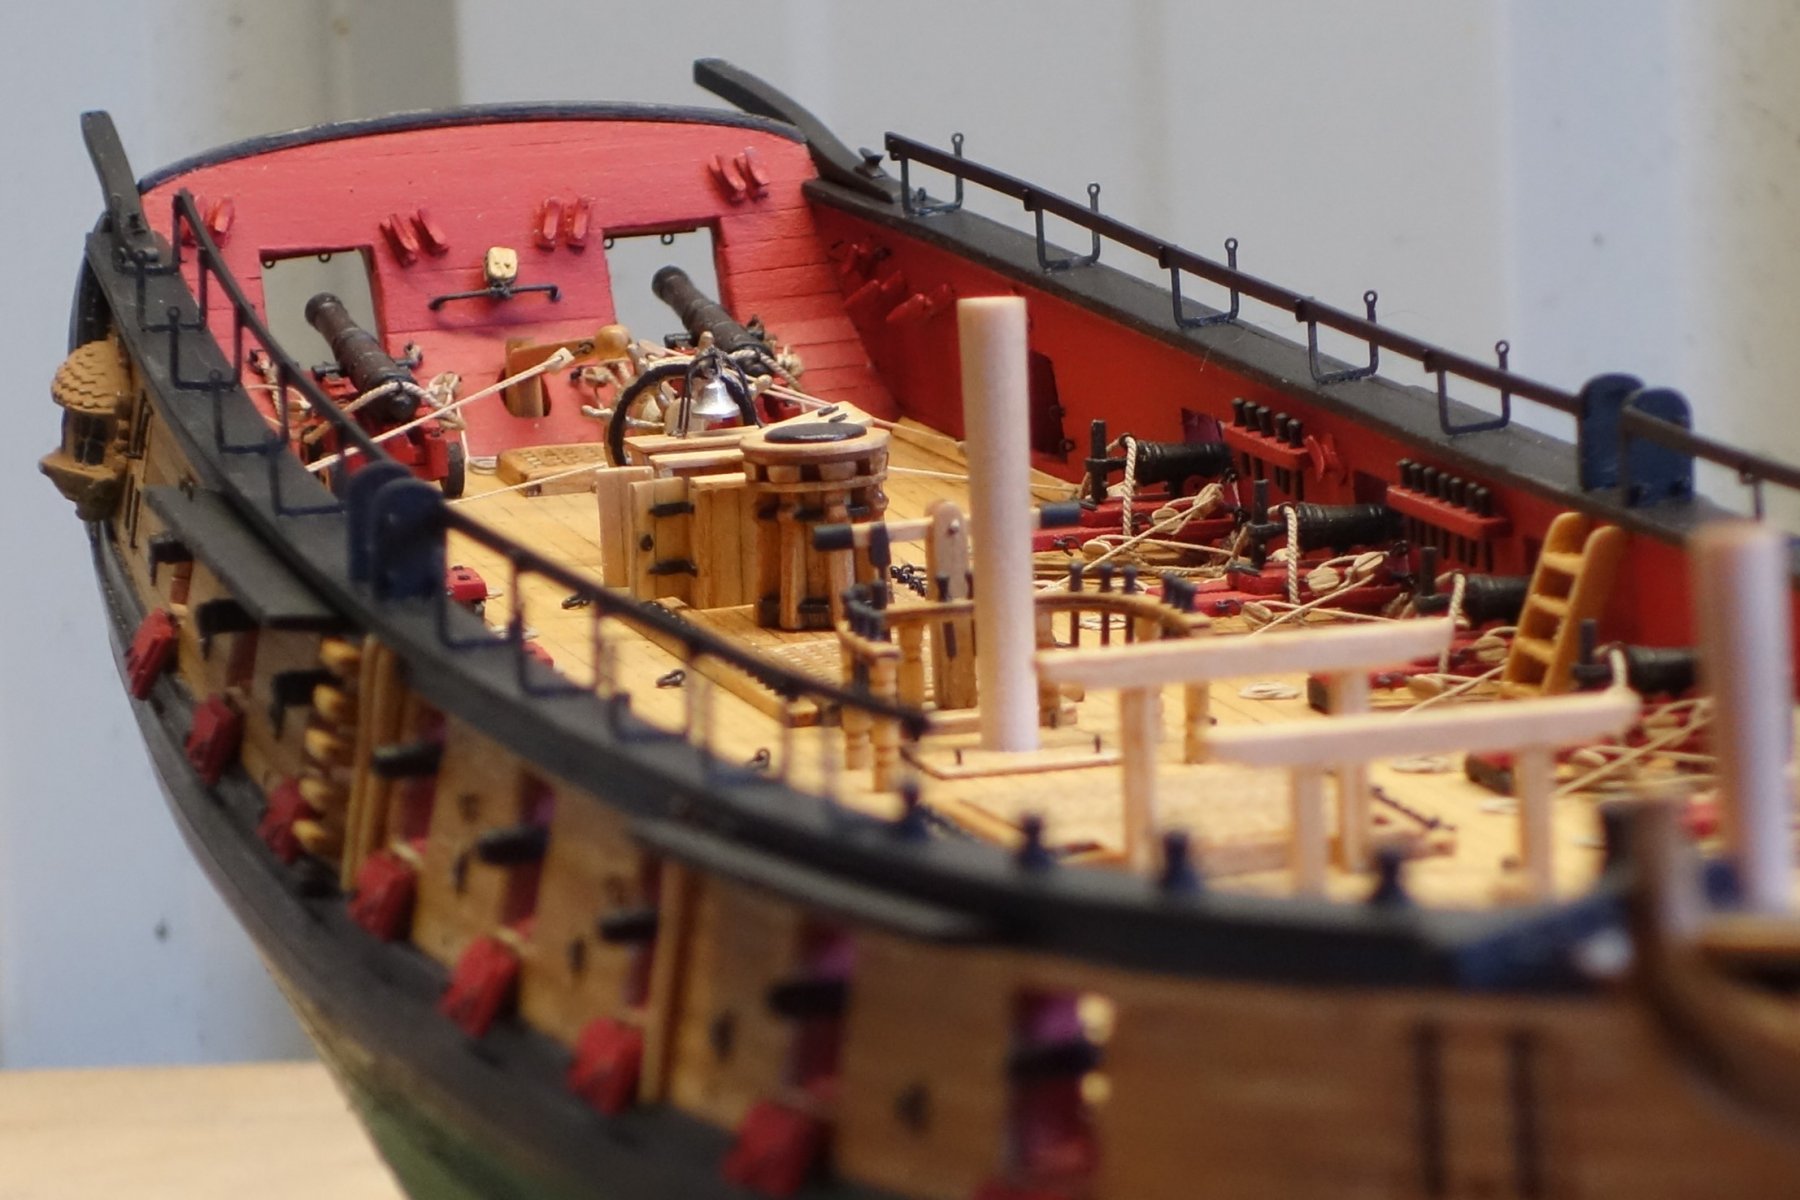
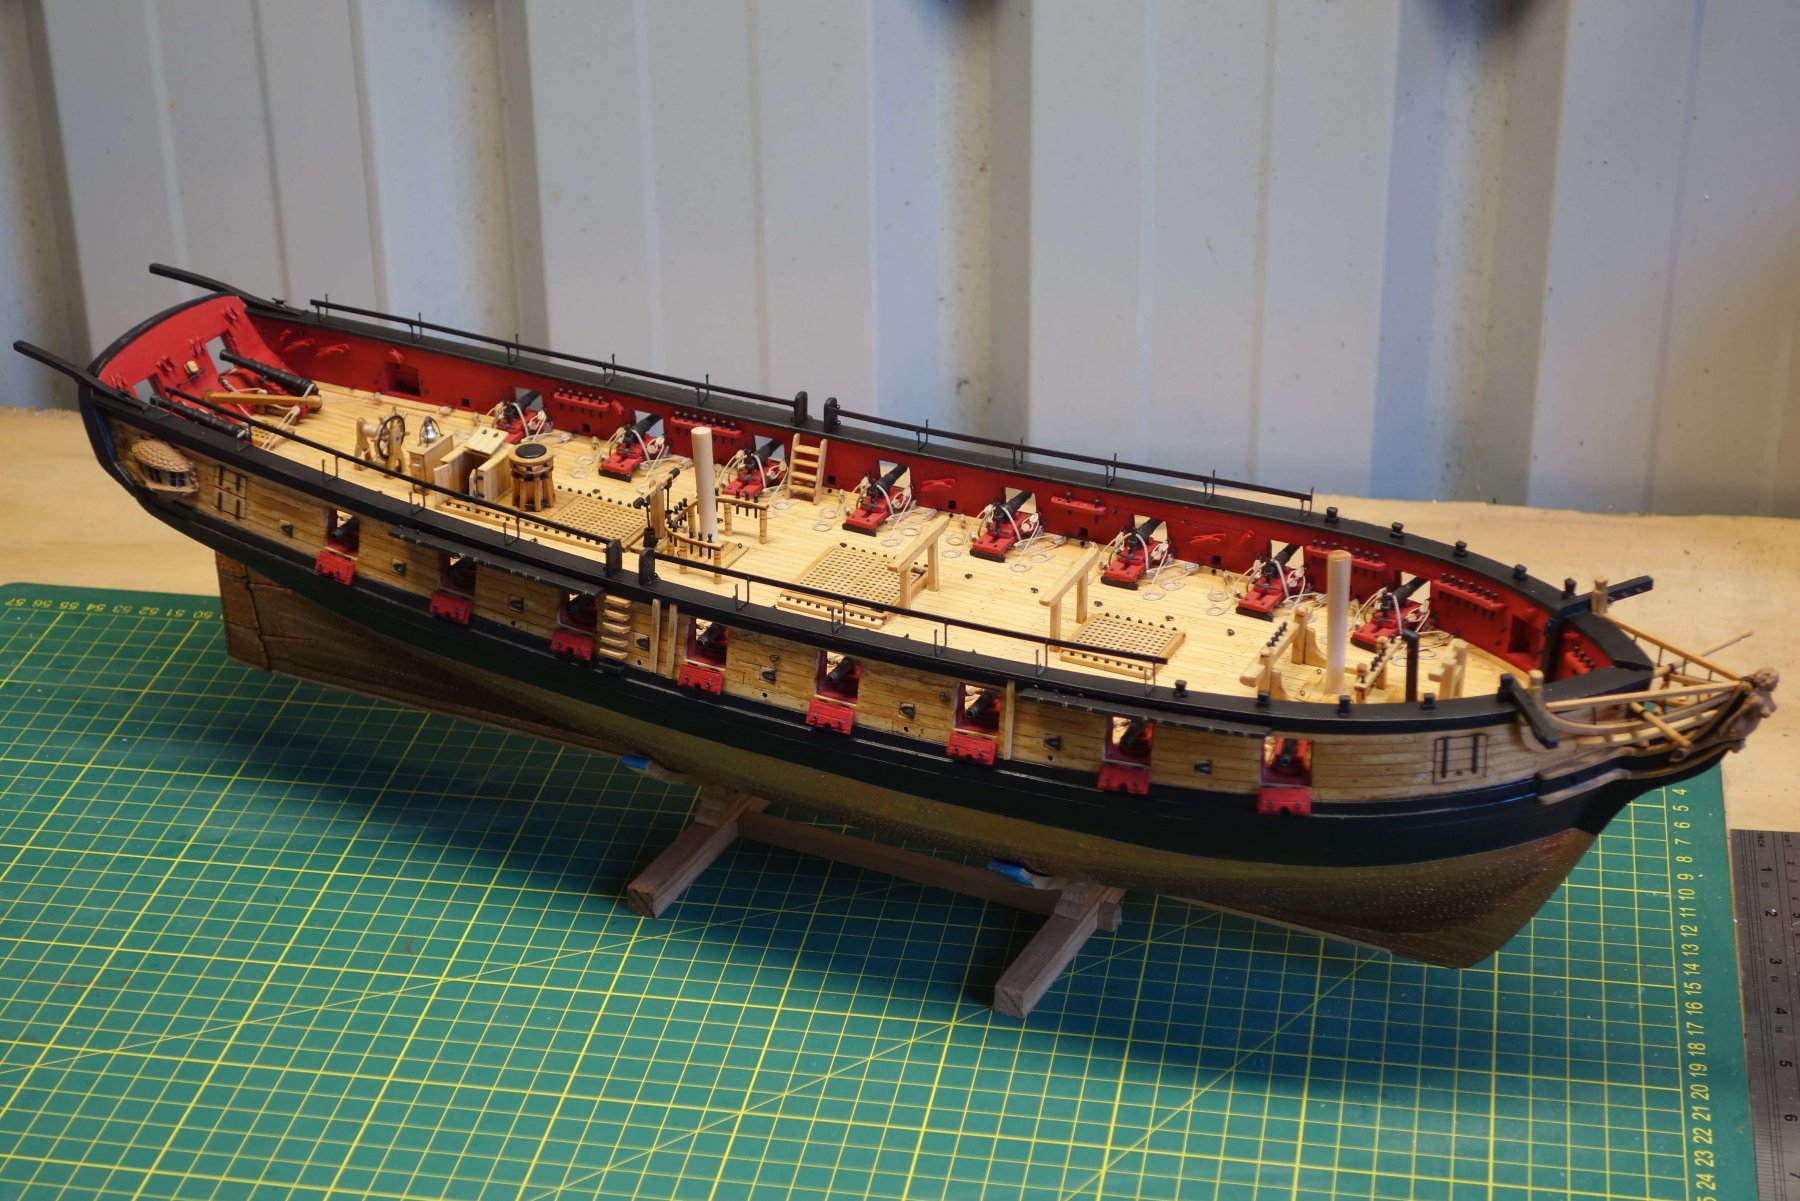
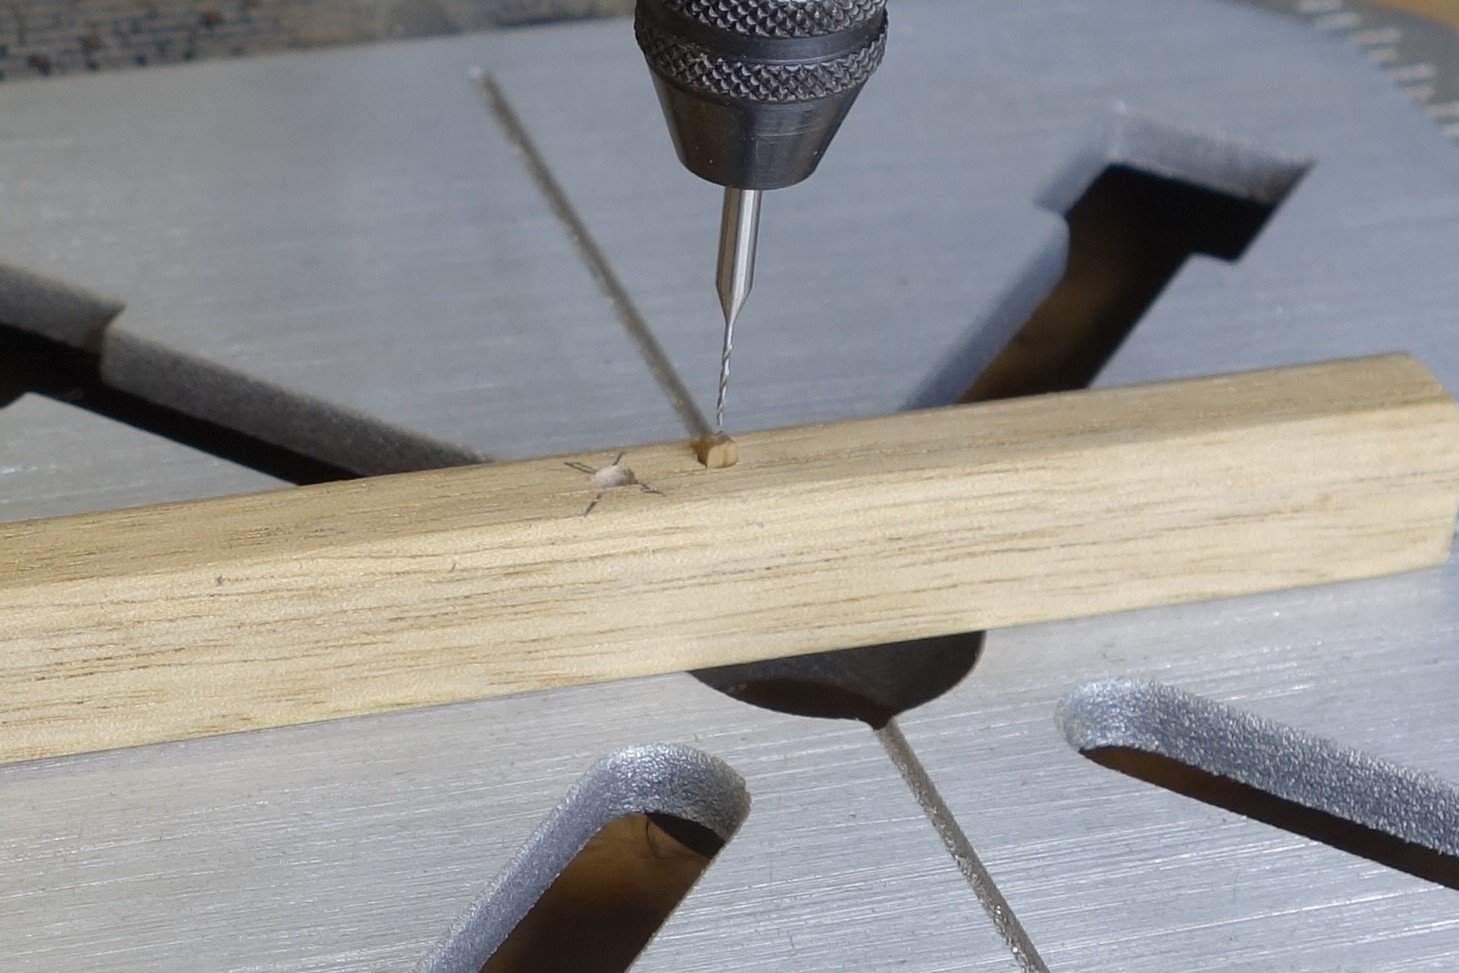
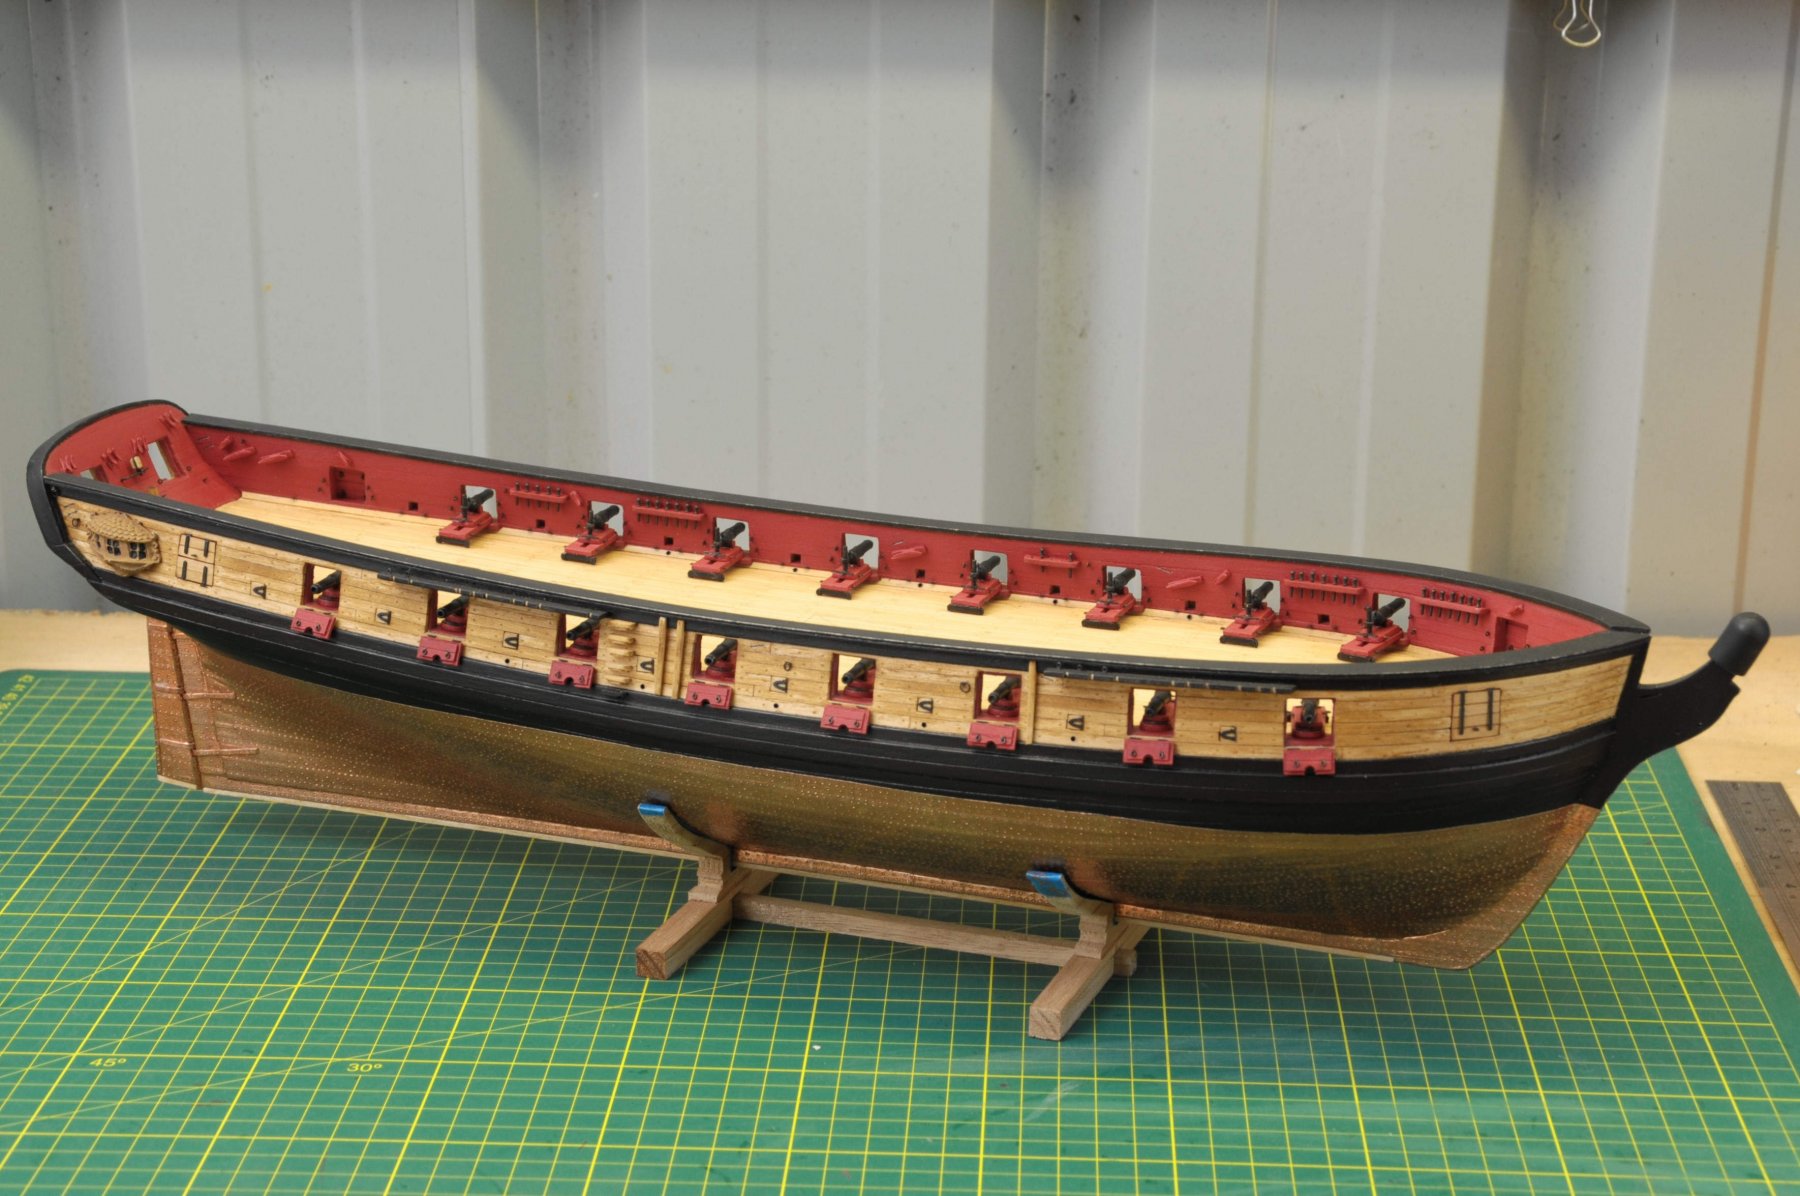
Well, ready for the next set of photo's. Chapter 13 is almost finished. The bowsprit bits isn't glued in yet, but I guess it's ok for the photo's while it's in it's position drying. My main problems have been in getting a consistent finished timber look. I have been using a sanding sealer prior to applying a wood stain with a clear matt varnish over the top. The effects on the wood strips, the dowels and the laser cut sheets have been quite different and a challenge to say the least.
In the end I just capitulated and will be (hopefully) ending up with a nice looking weathered ship rather than a new one....lol
Still enjoying the journey though. Here are the photo's, starting with my use of a poor mans lathe.


- fnkershner, Altduck, Dubz and 12 others
-
15
-
Thanks Al and Christos and also thanks for the likes.
A few more photos with some progress.
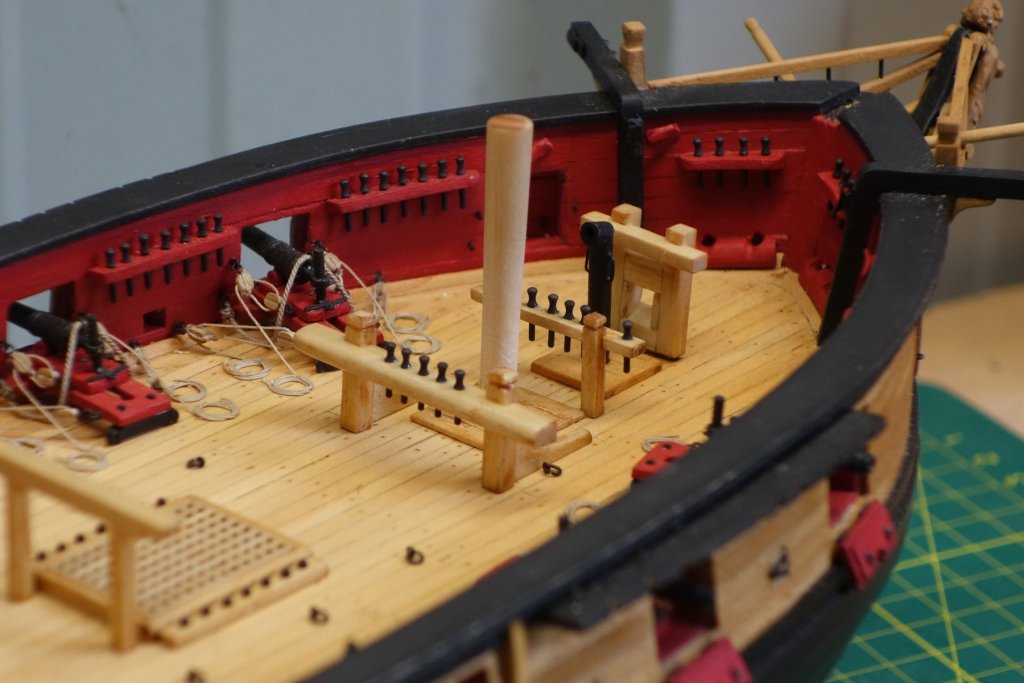
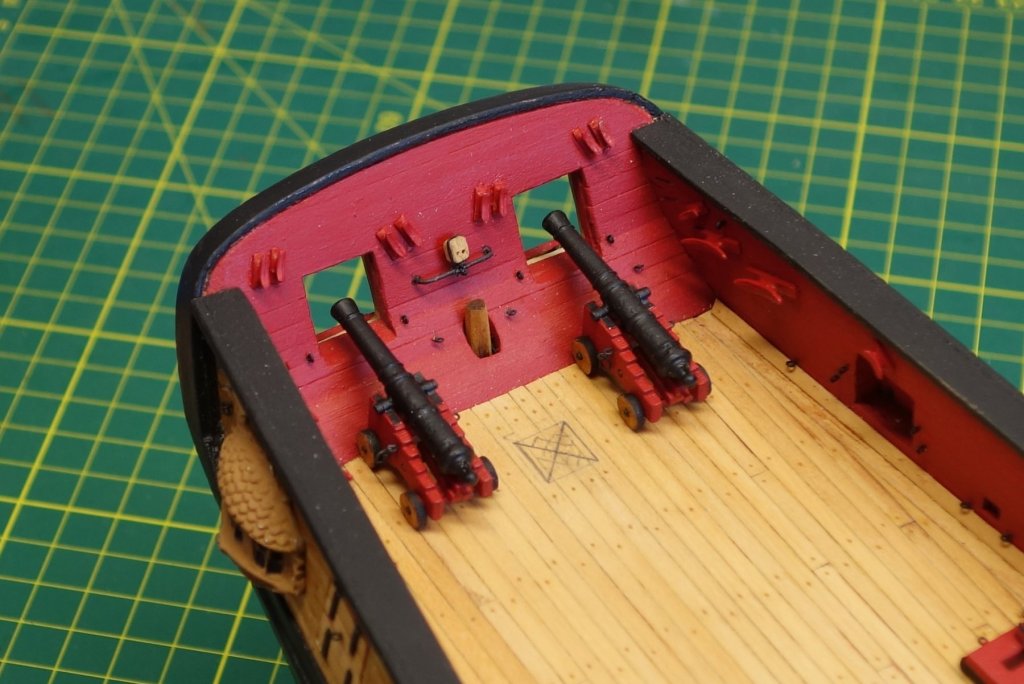
The first photo's are a mix with the kit supplied 1.2mm cannon balls and the 2mm balls I purchased. Surprisingly the smaller ones have won out (so far). The larger balls just look way too big compared to the carronades. They are not glued in yet so I can still change my mind.
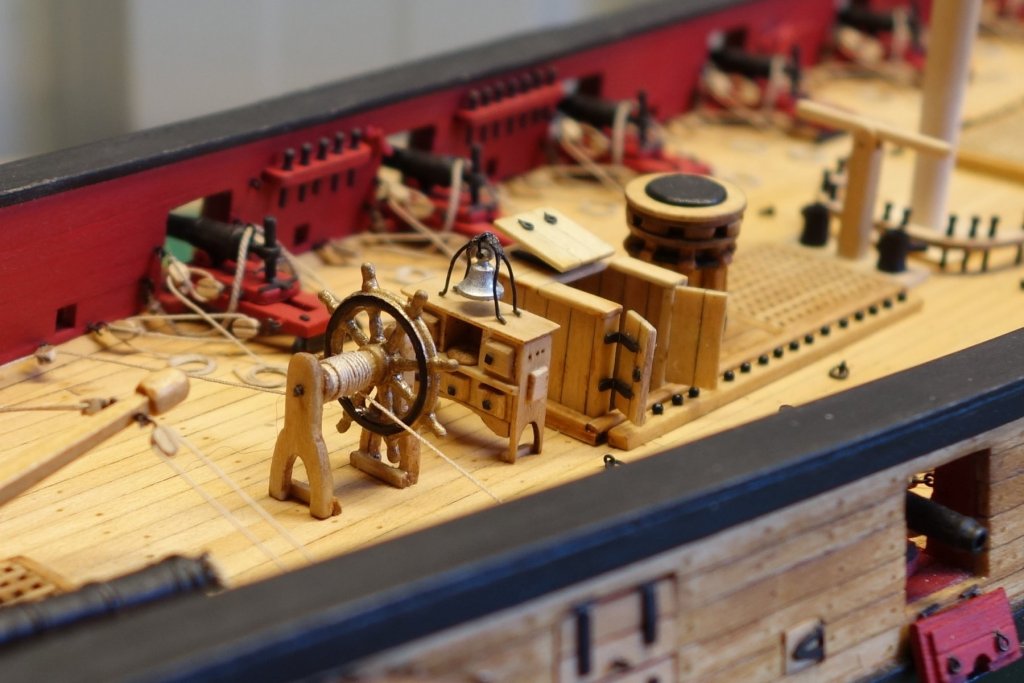
To say that the top fife rails are fragile is giving them too much credit. I broke both the top and bottom by gently trying to take the char off. I salvaged them because they broke at different places so I could still glue them together. The pump is also in progress.
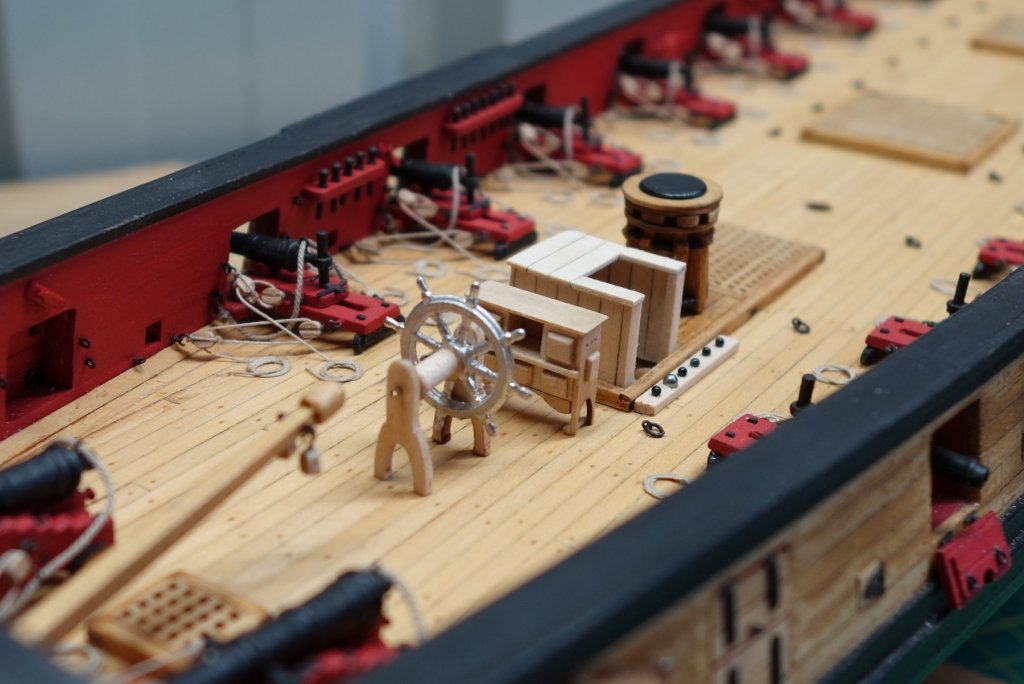
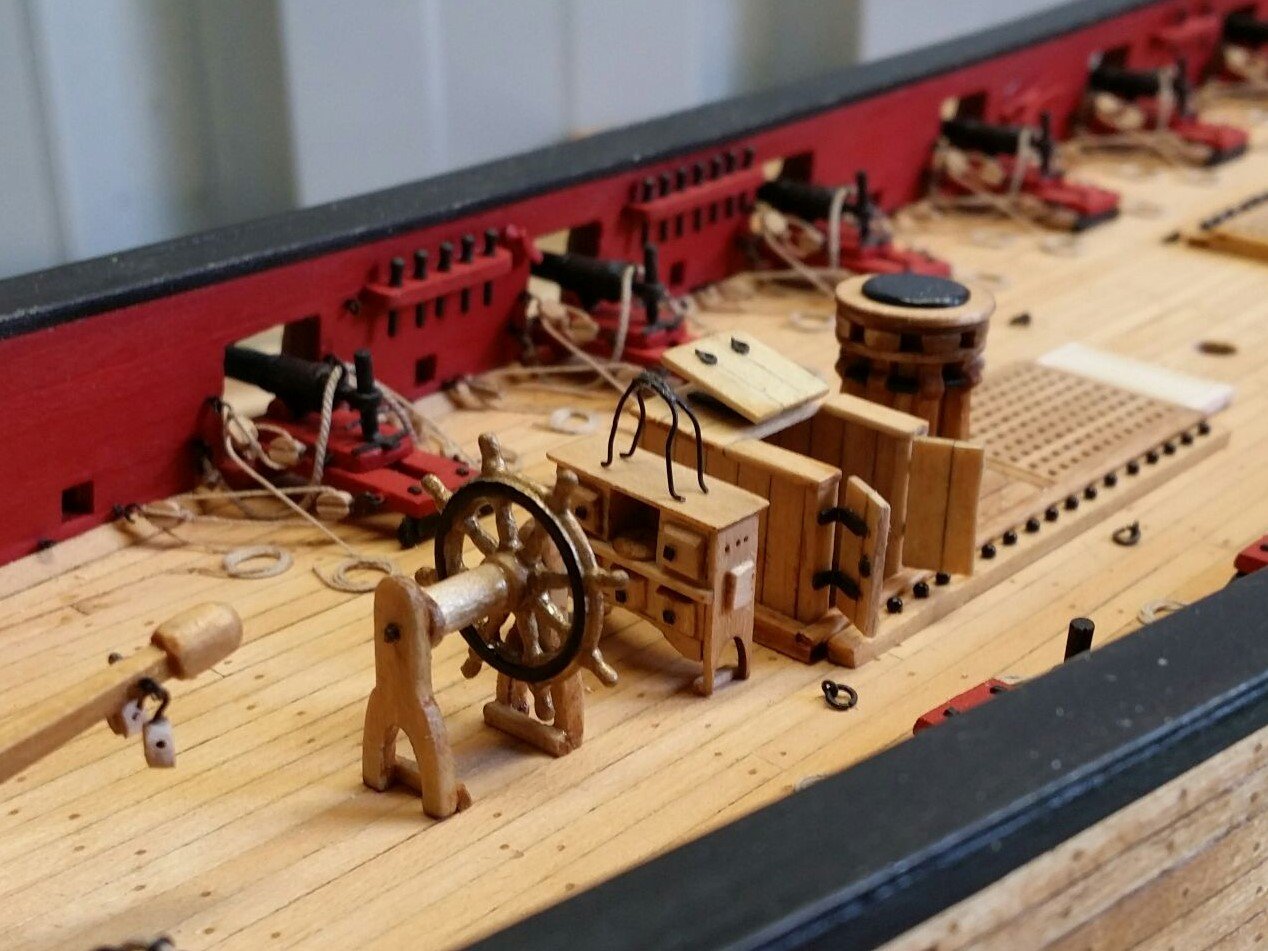
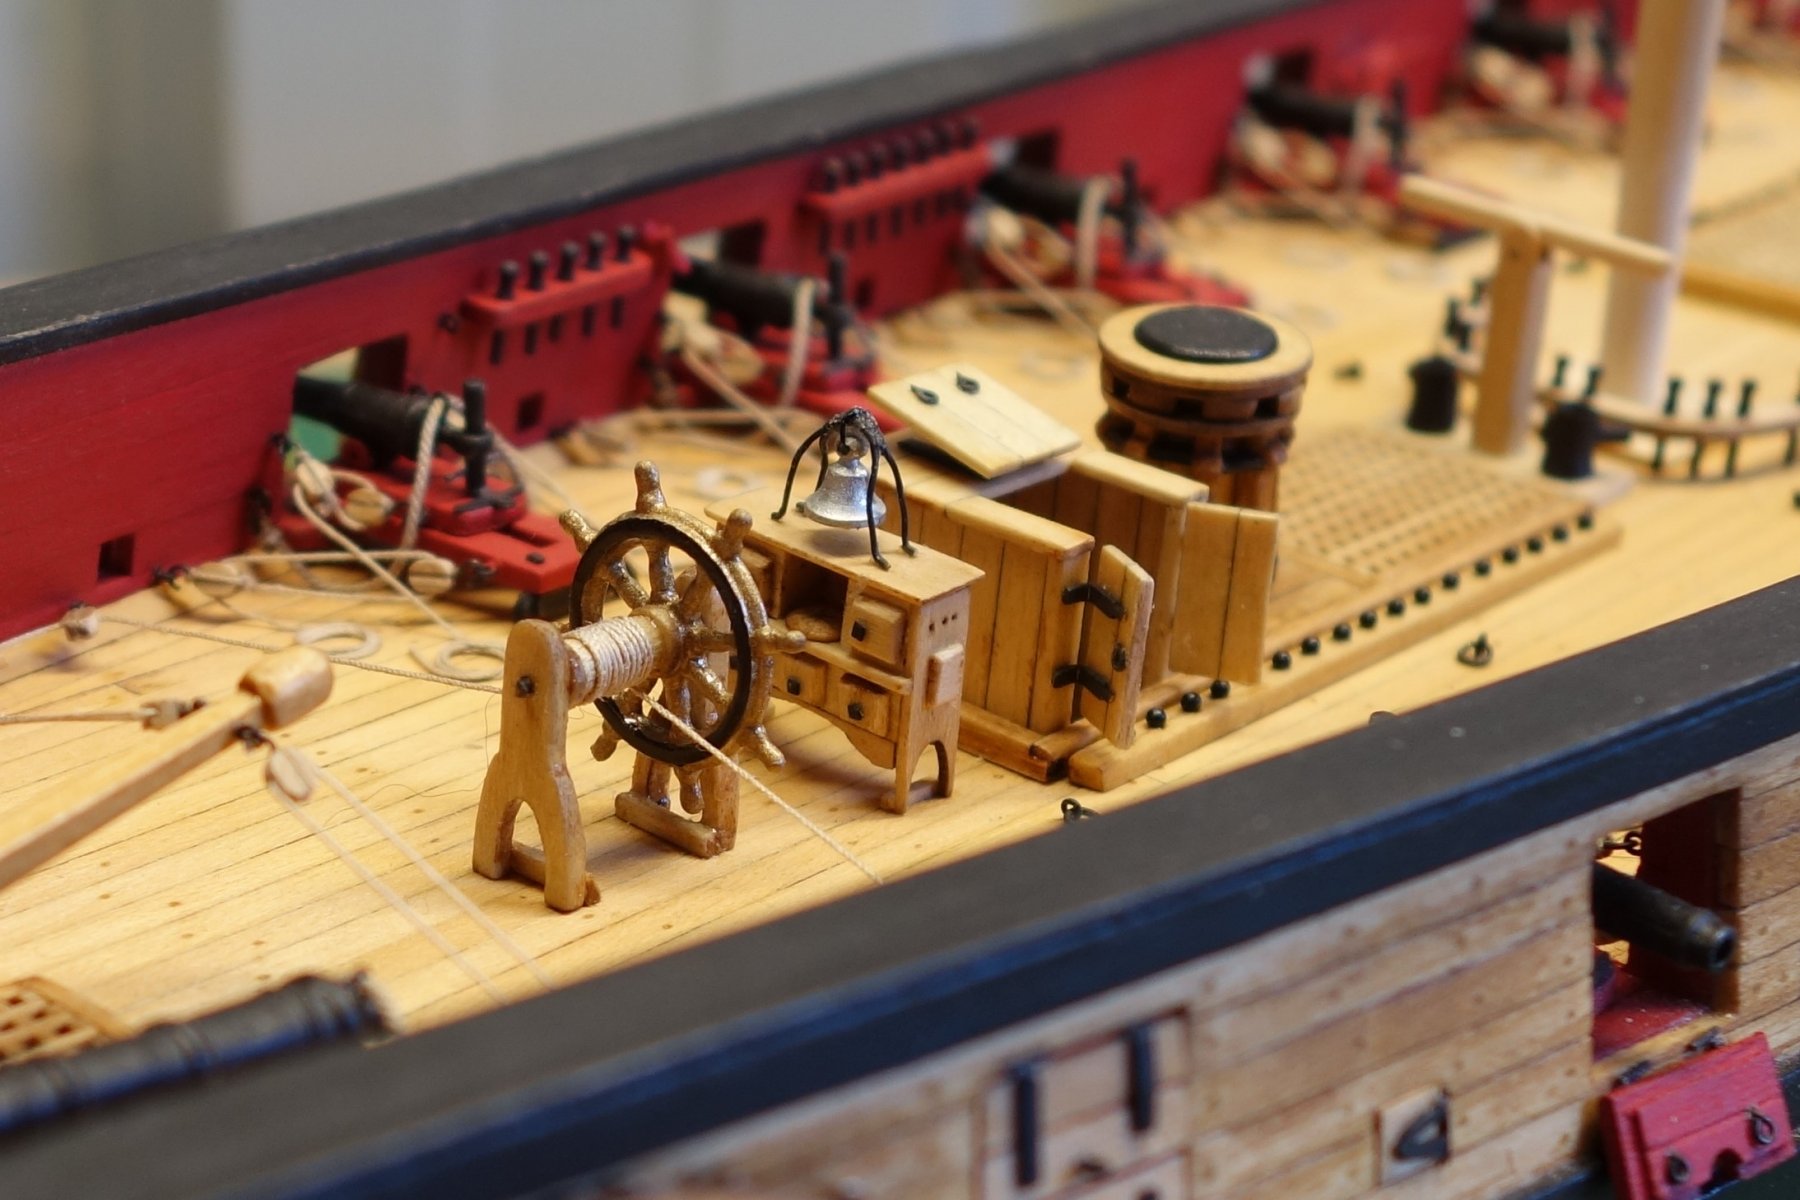
I had a bugger of a time deciding on the paint for the ships wheel. I just couldn't find the right wood colour. In the end I listened to the Admiral (again....sigh) and painted it with a metallic gold enamel paint, black acrylic to paint the iron rings and matt oil based varnish over the lot. I can already see some paint experts shaking their heads in disbelief but hey, I think it did the trick...lol
Here are the photo's


- svein erik, Altduck, Tigersteve and 12 others
-
15
-
-
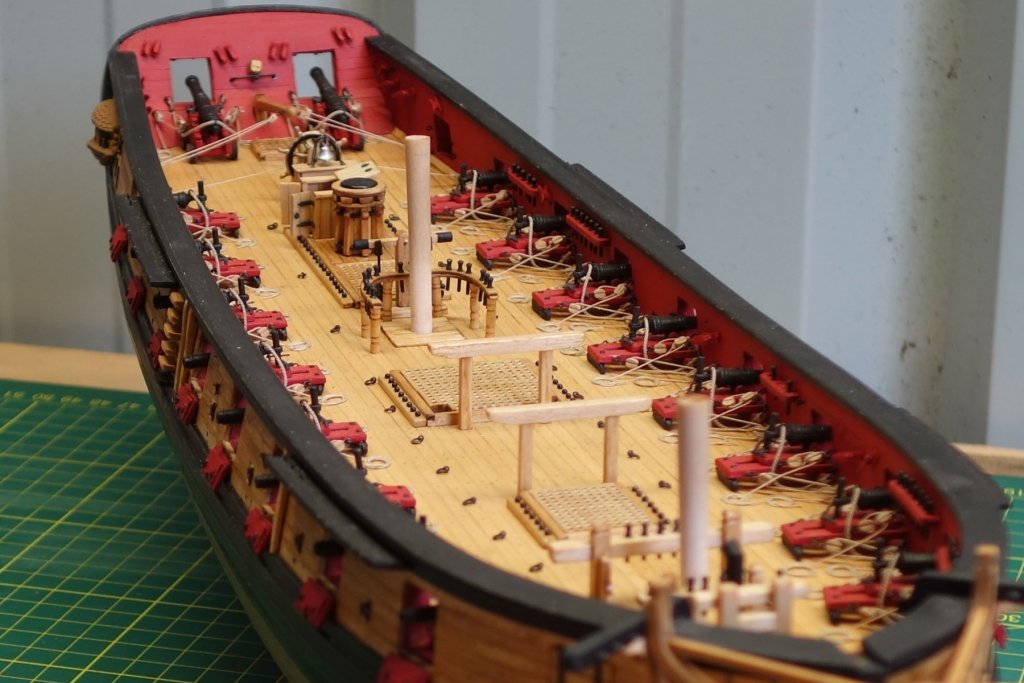
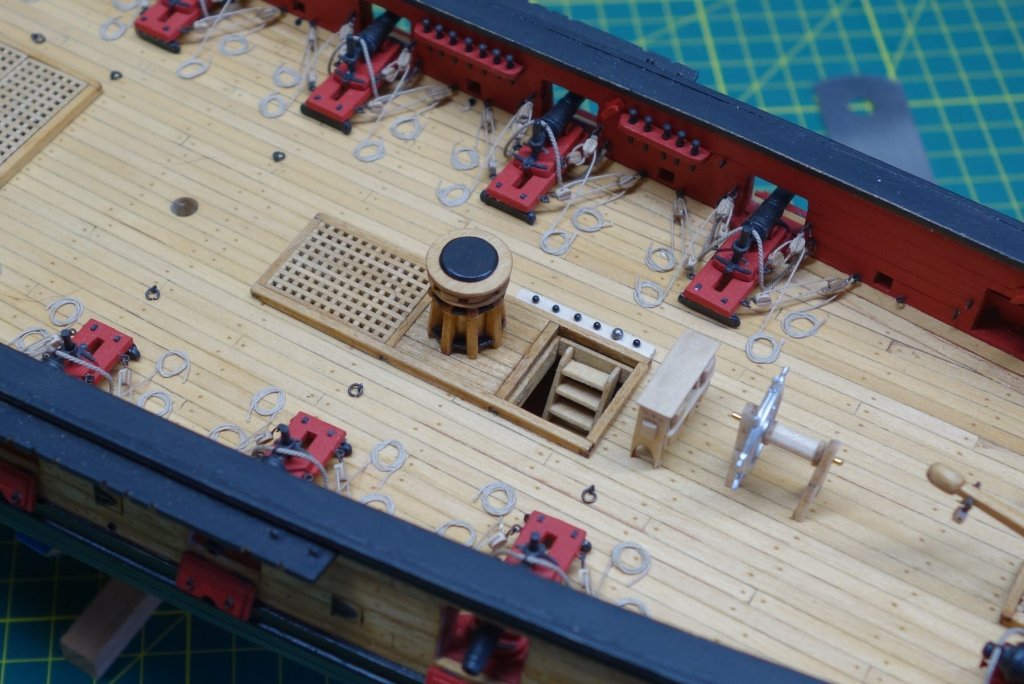
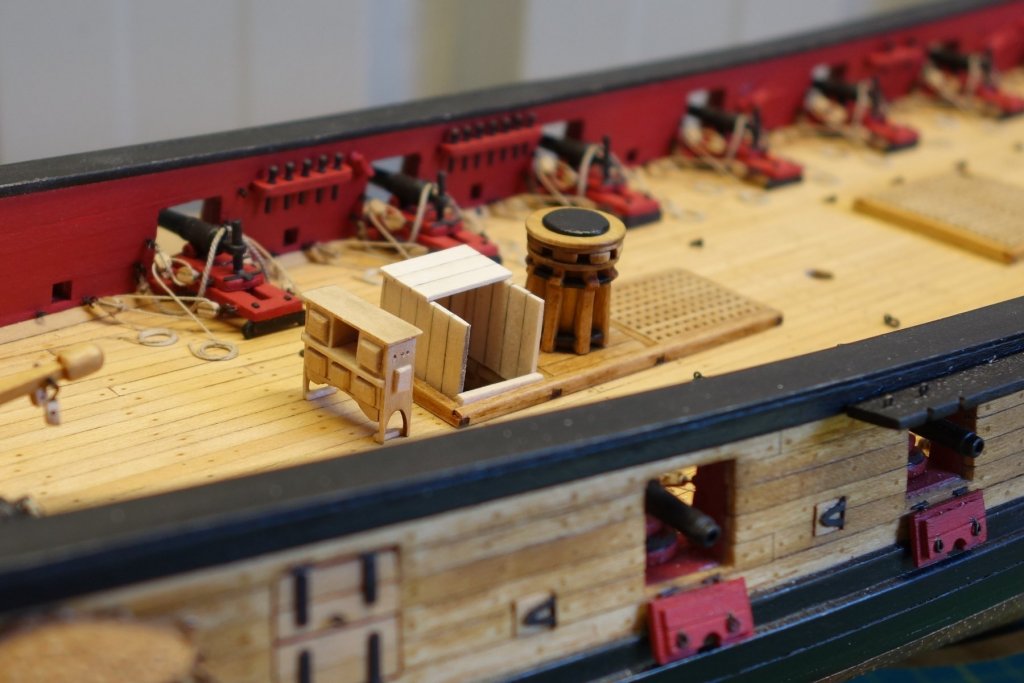
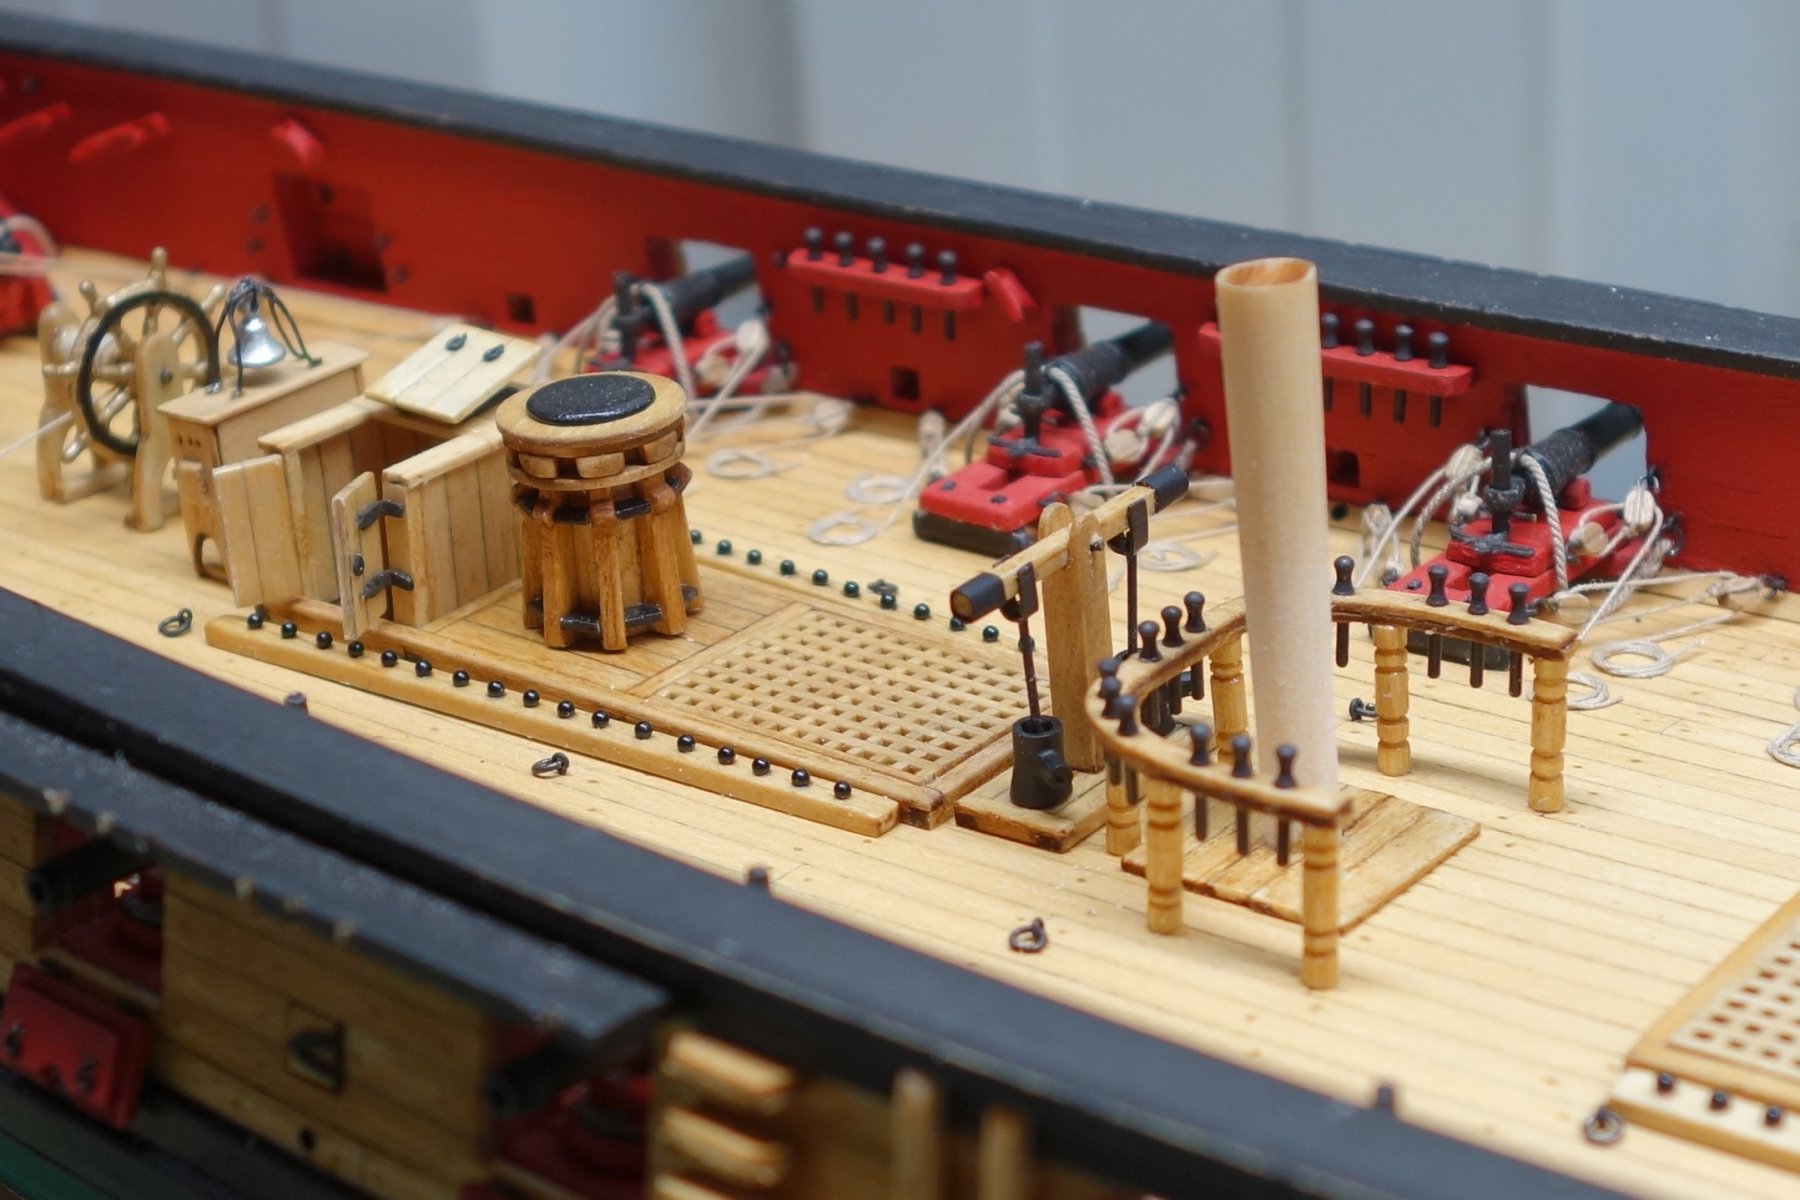
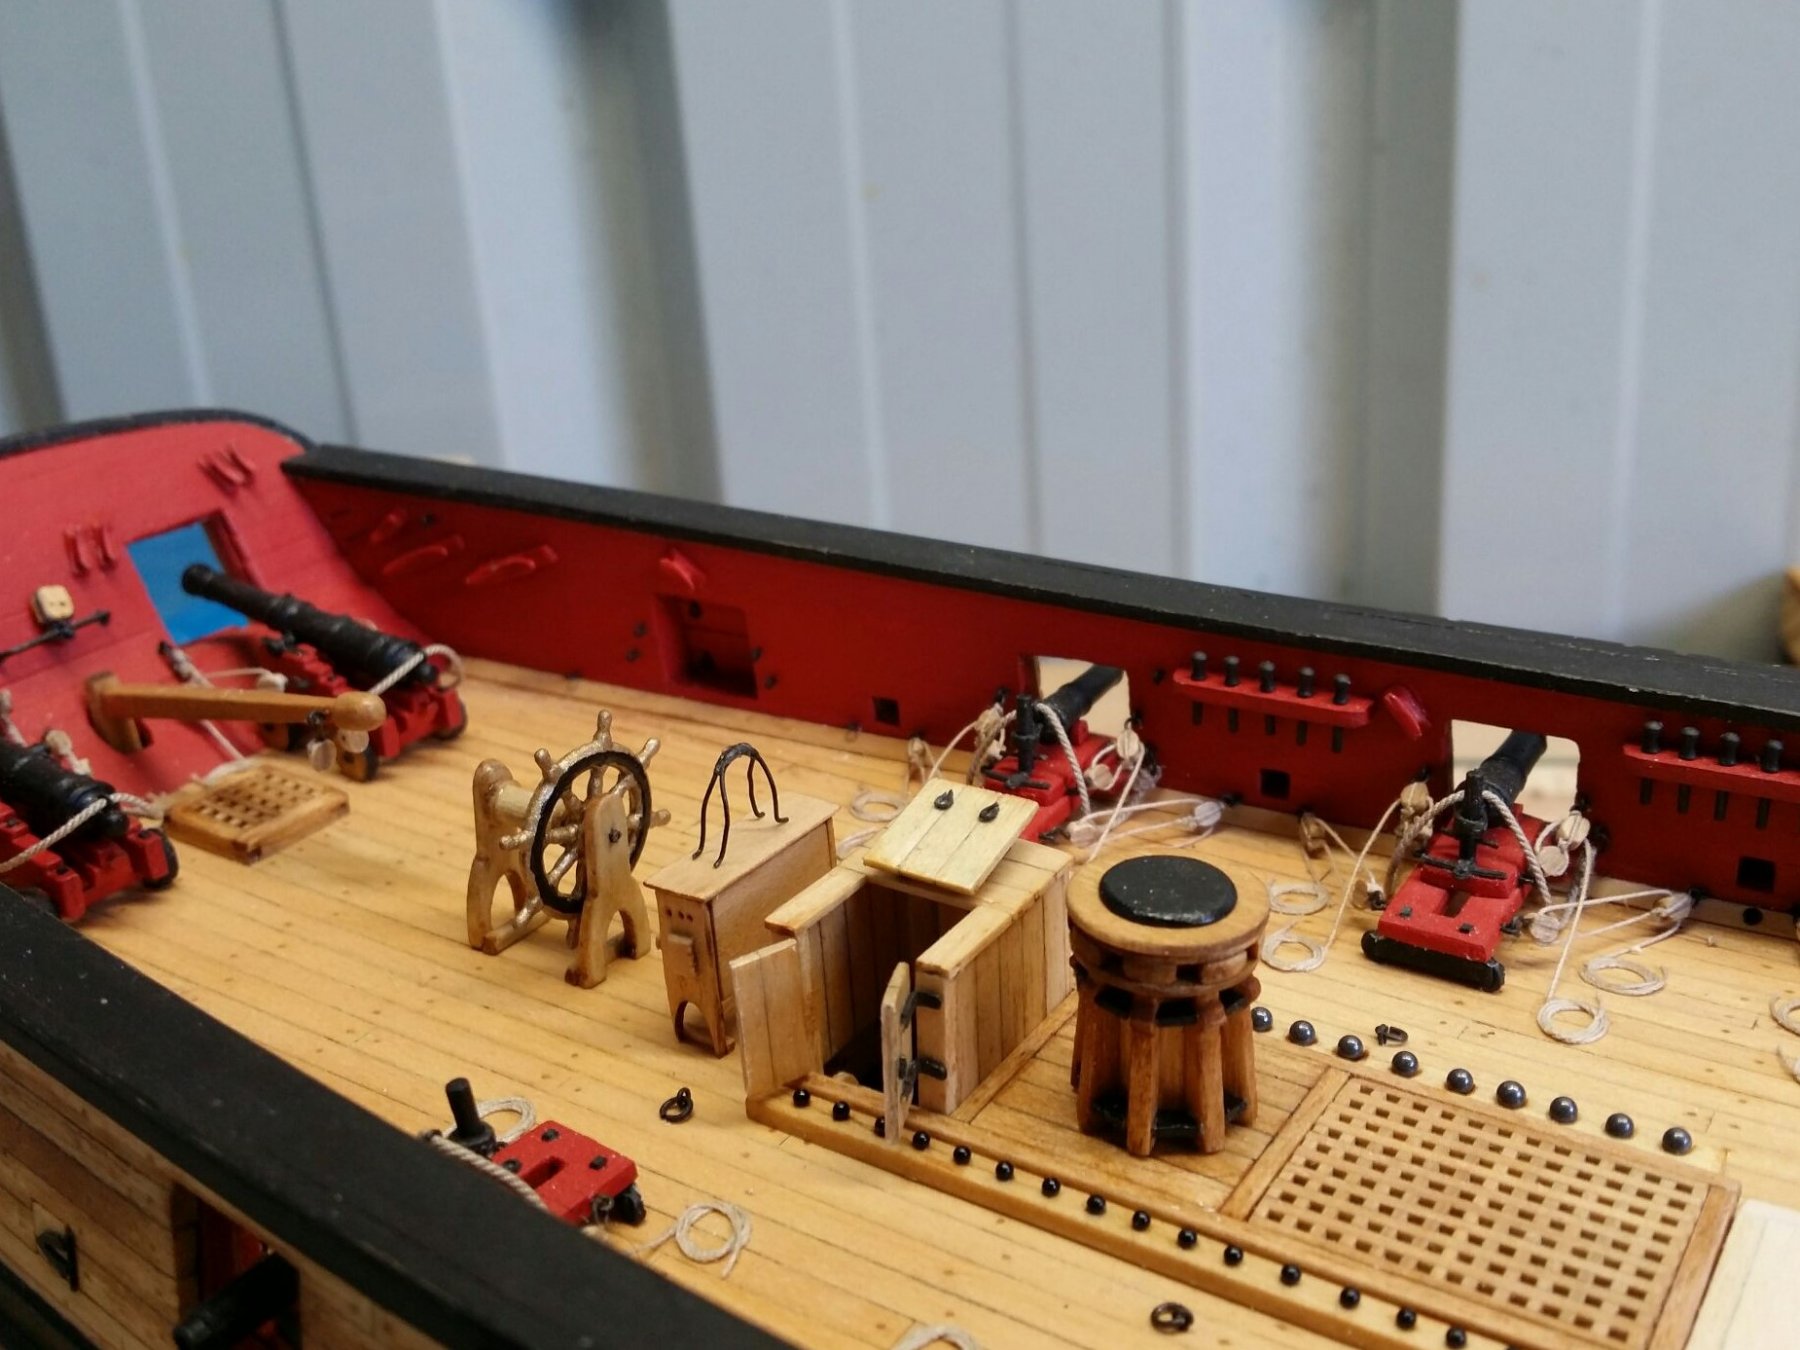
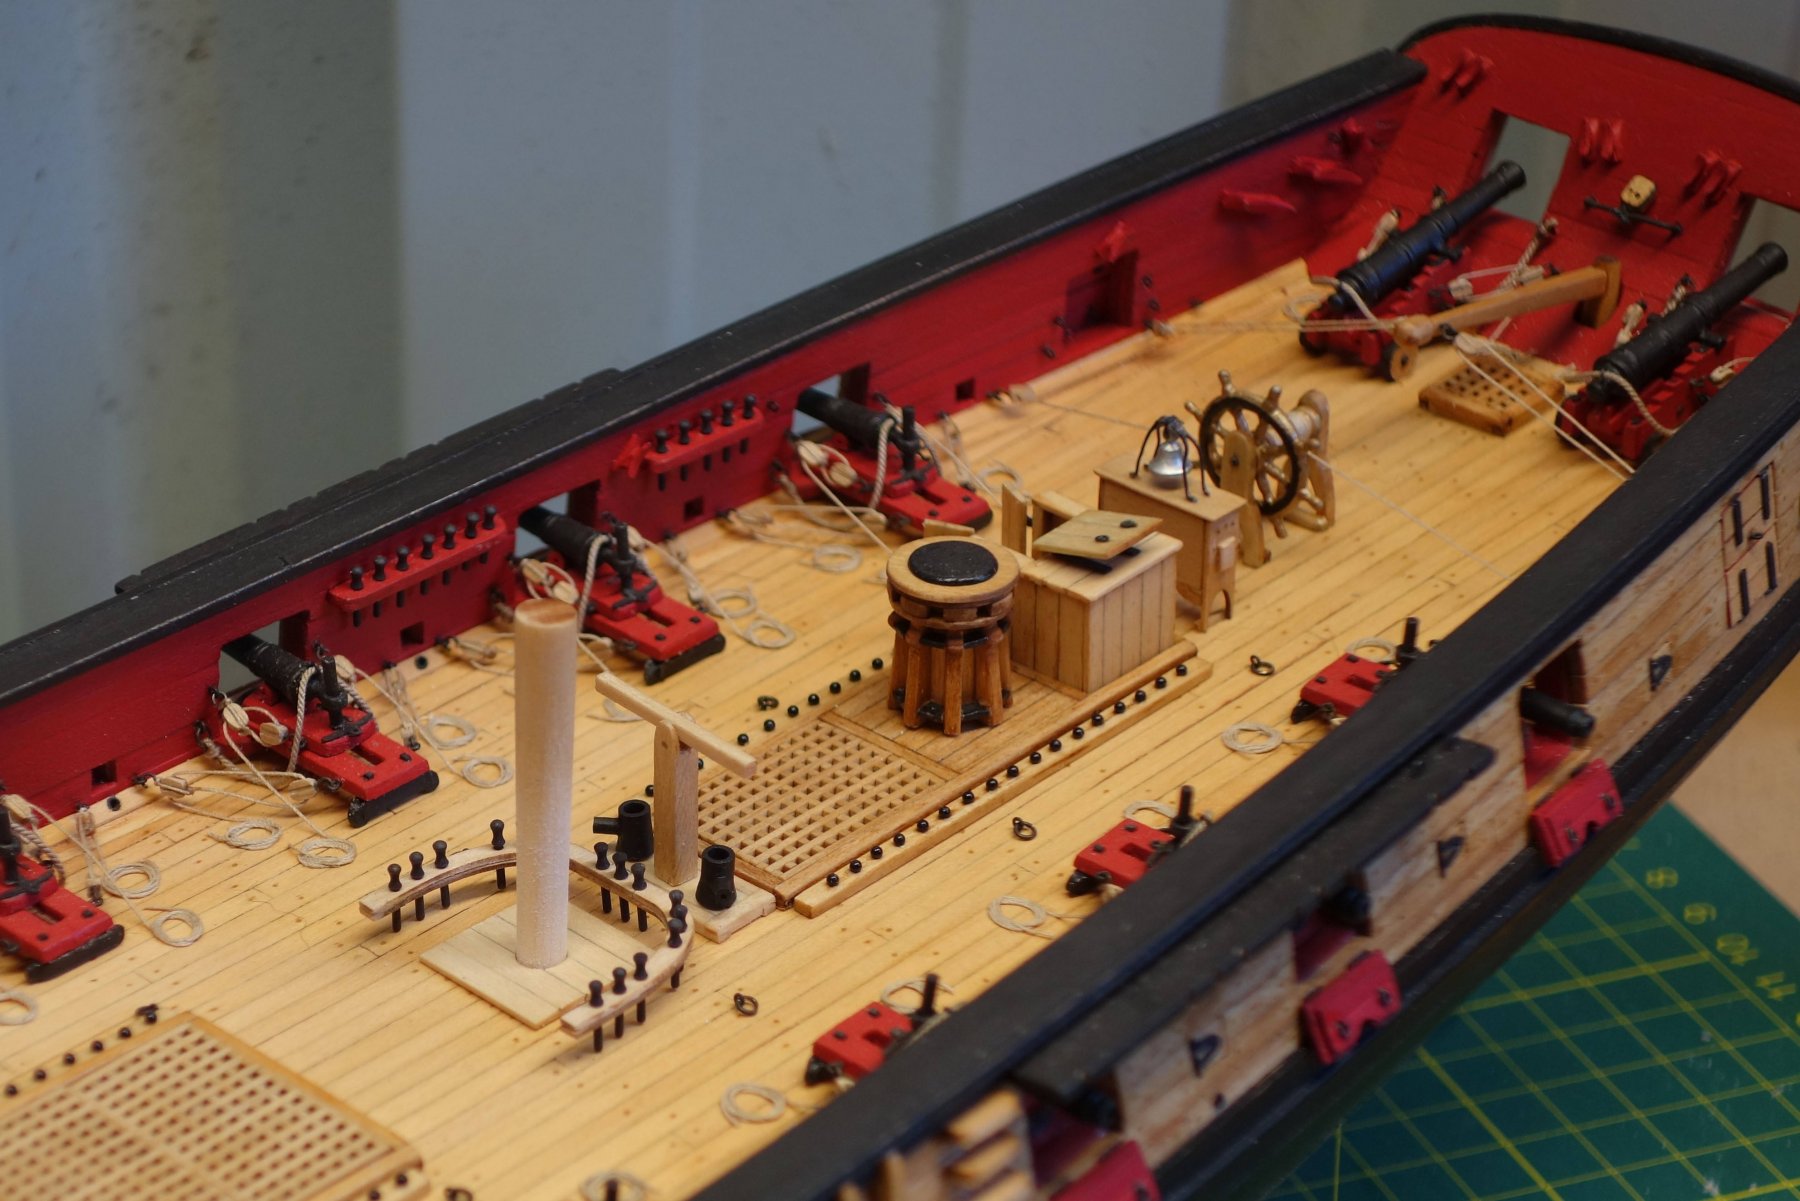
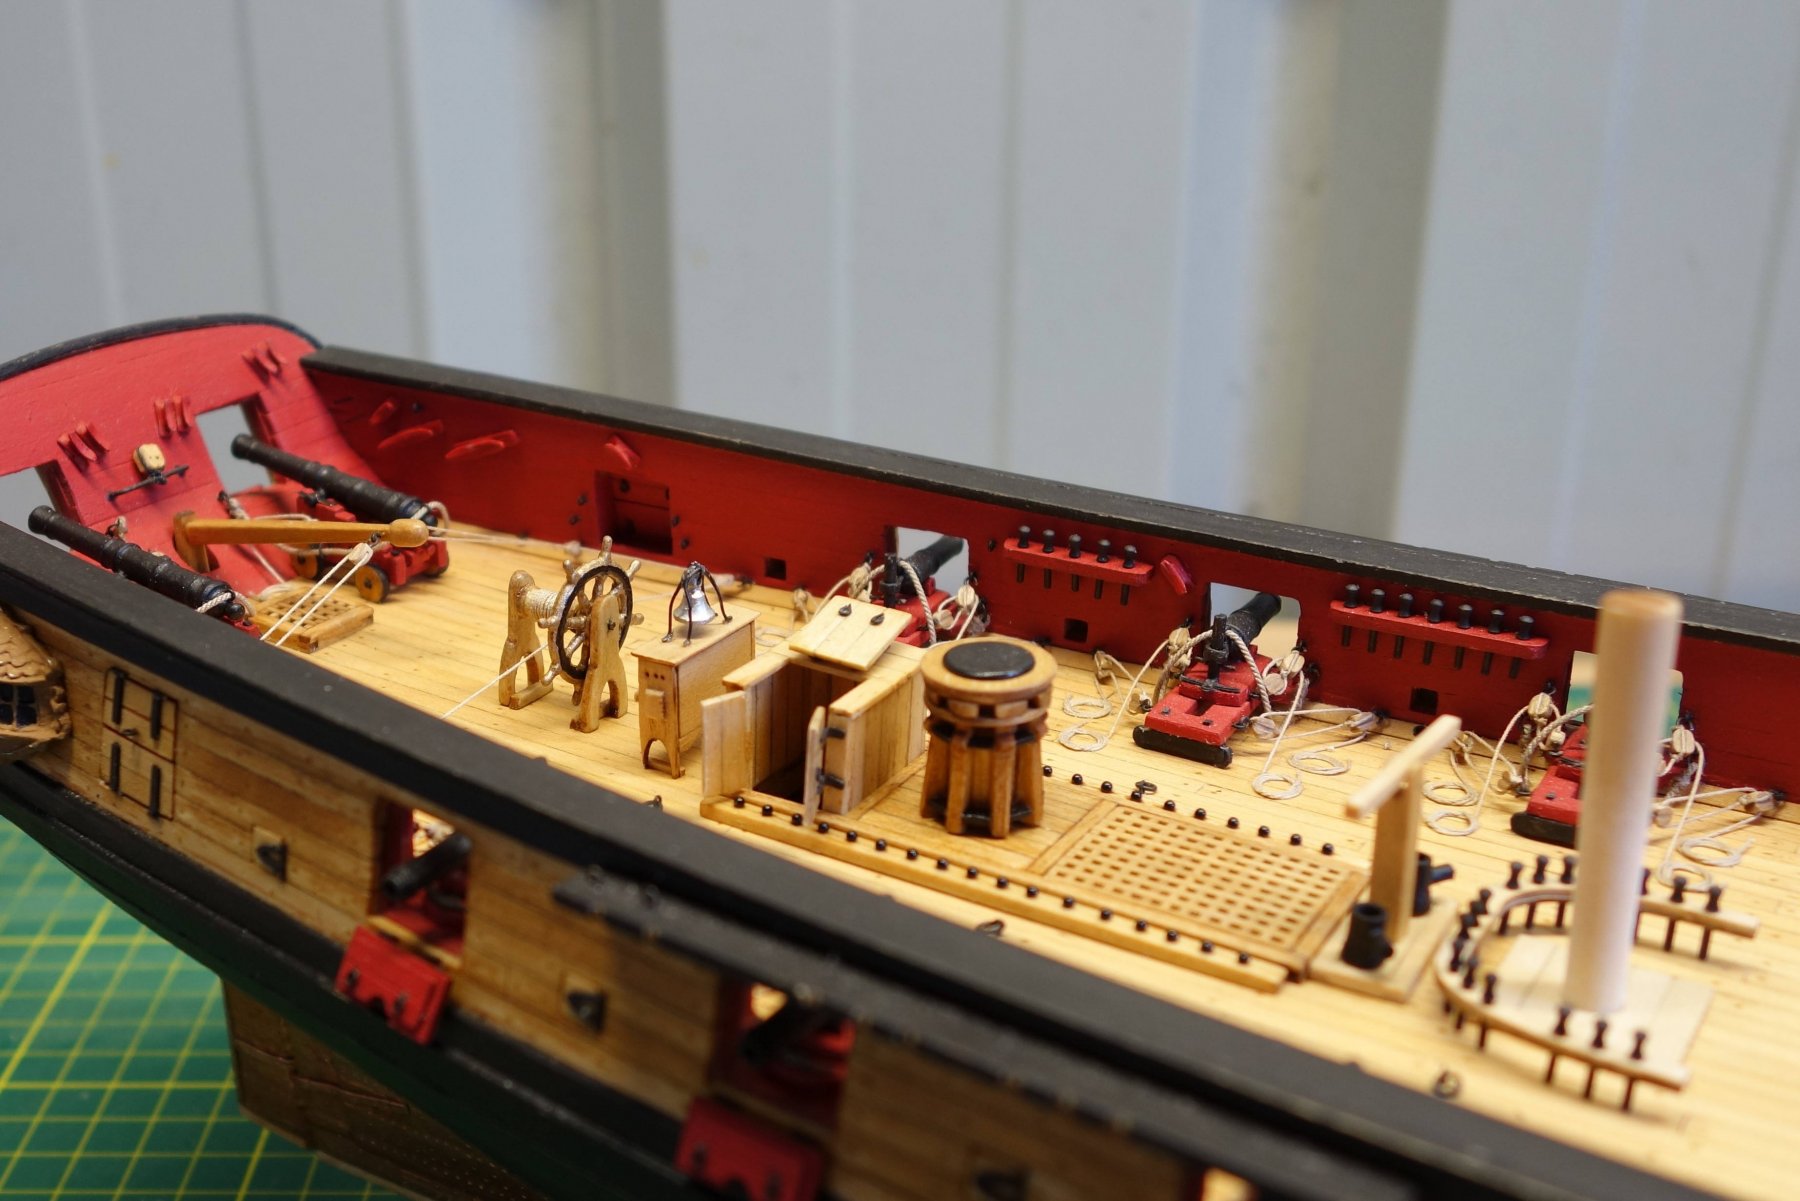
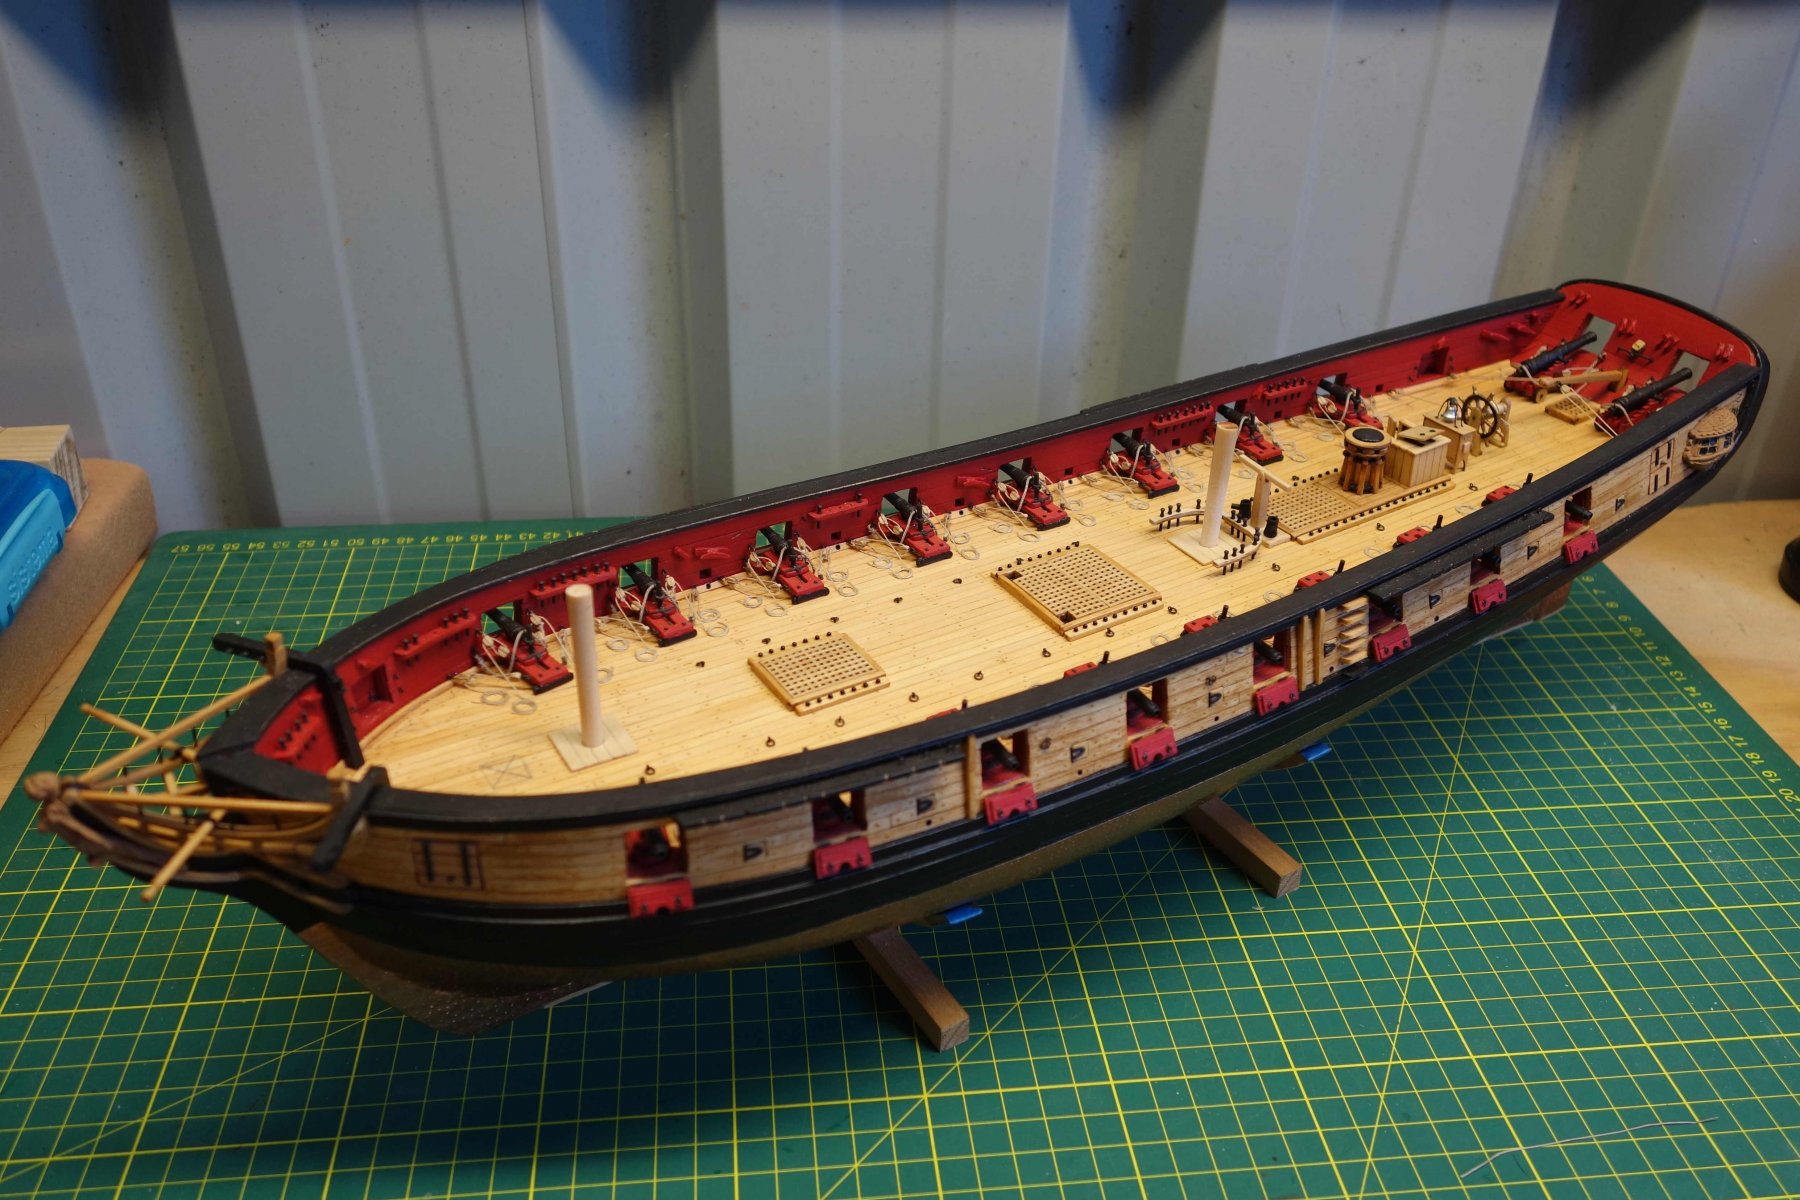
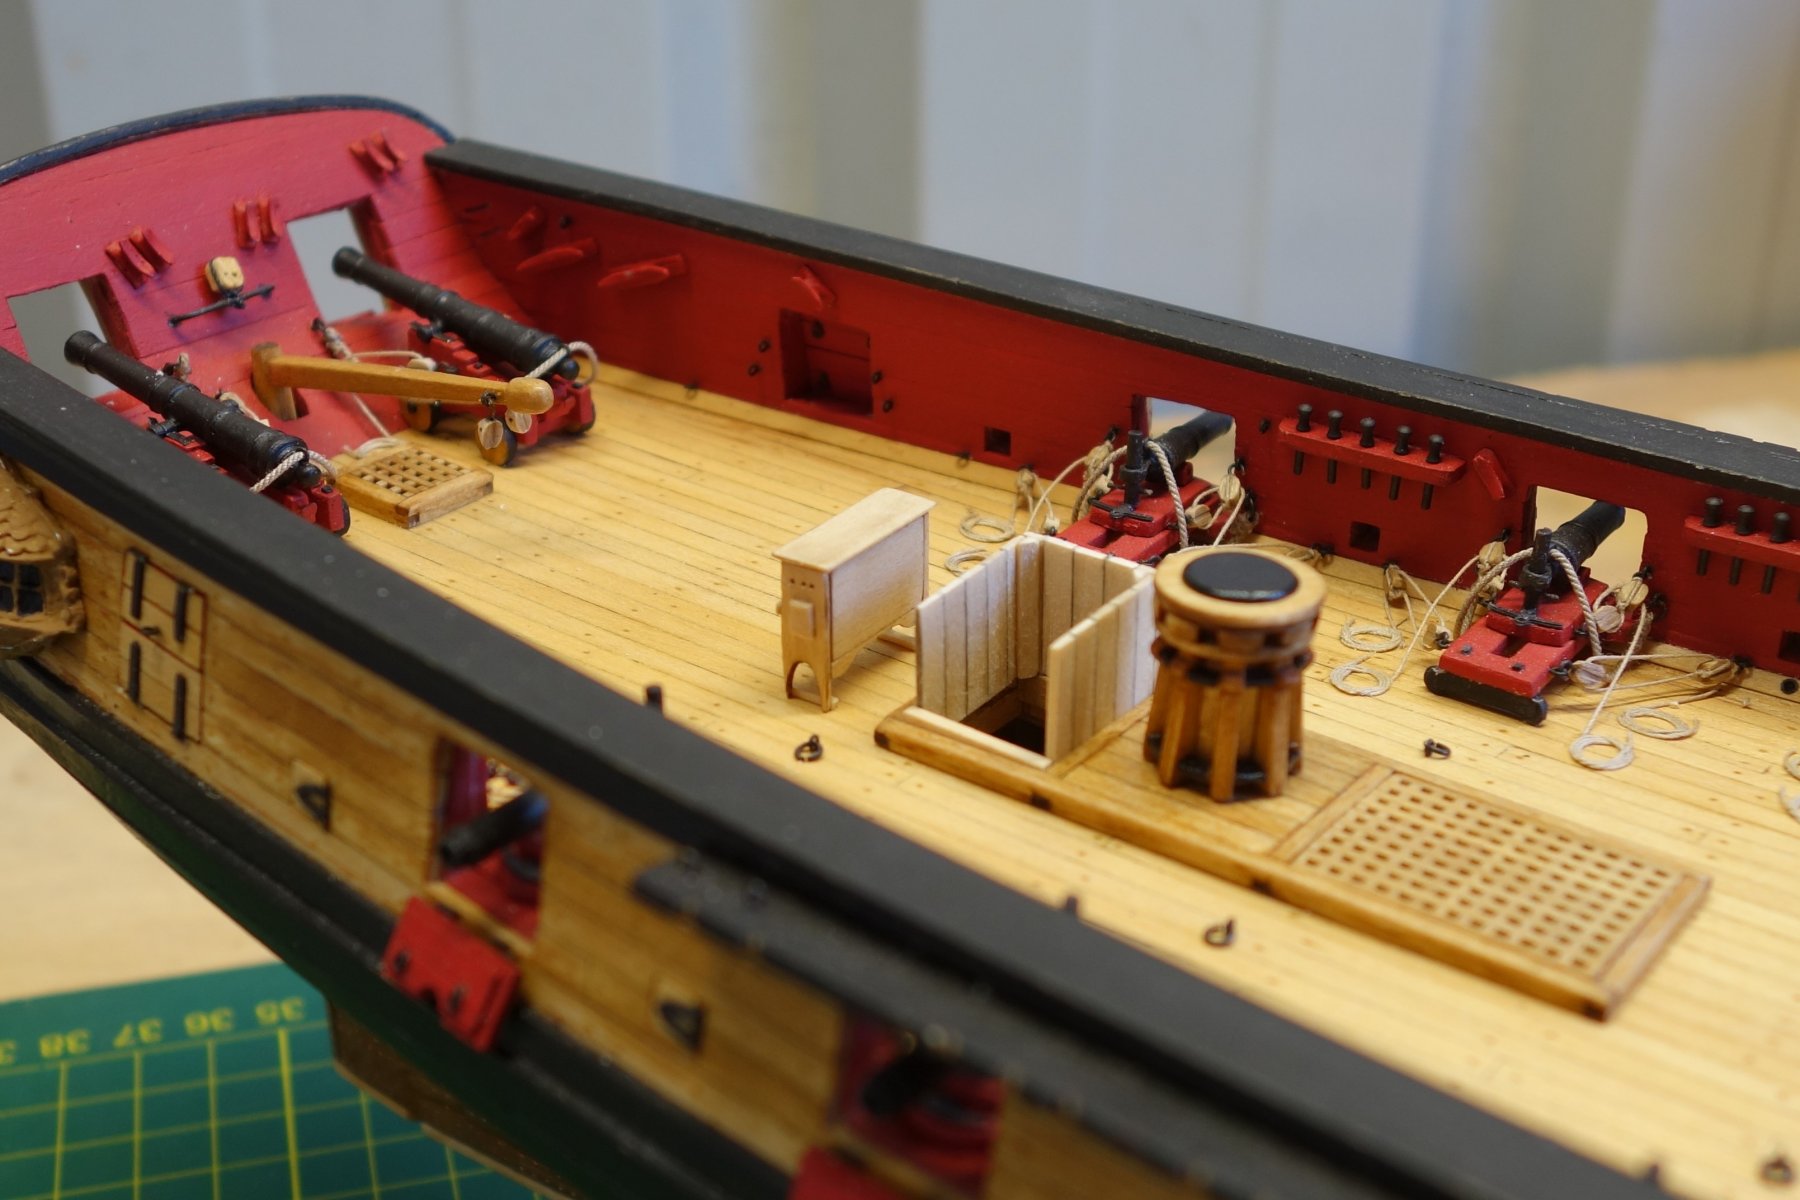
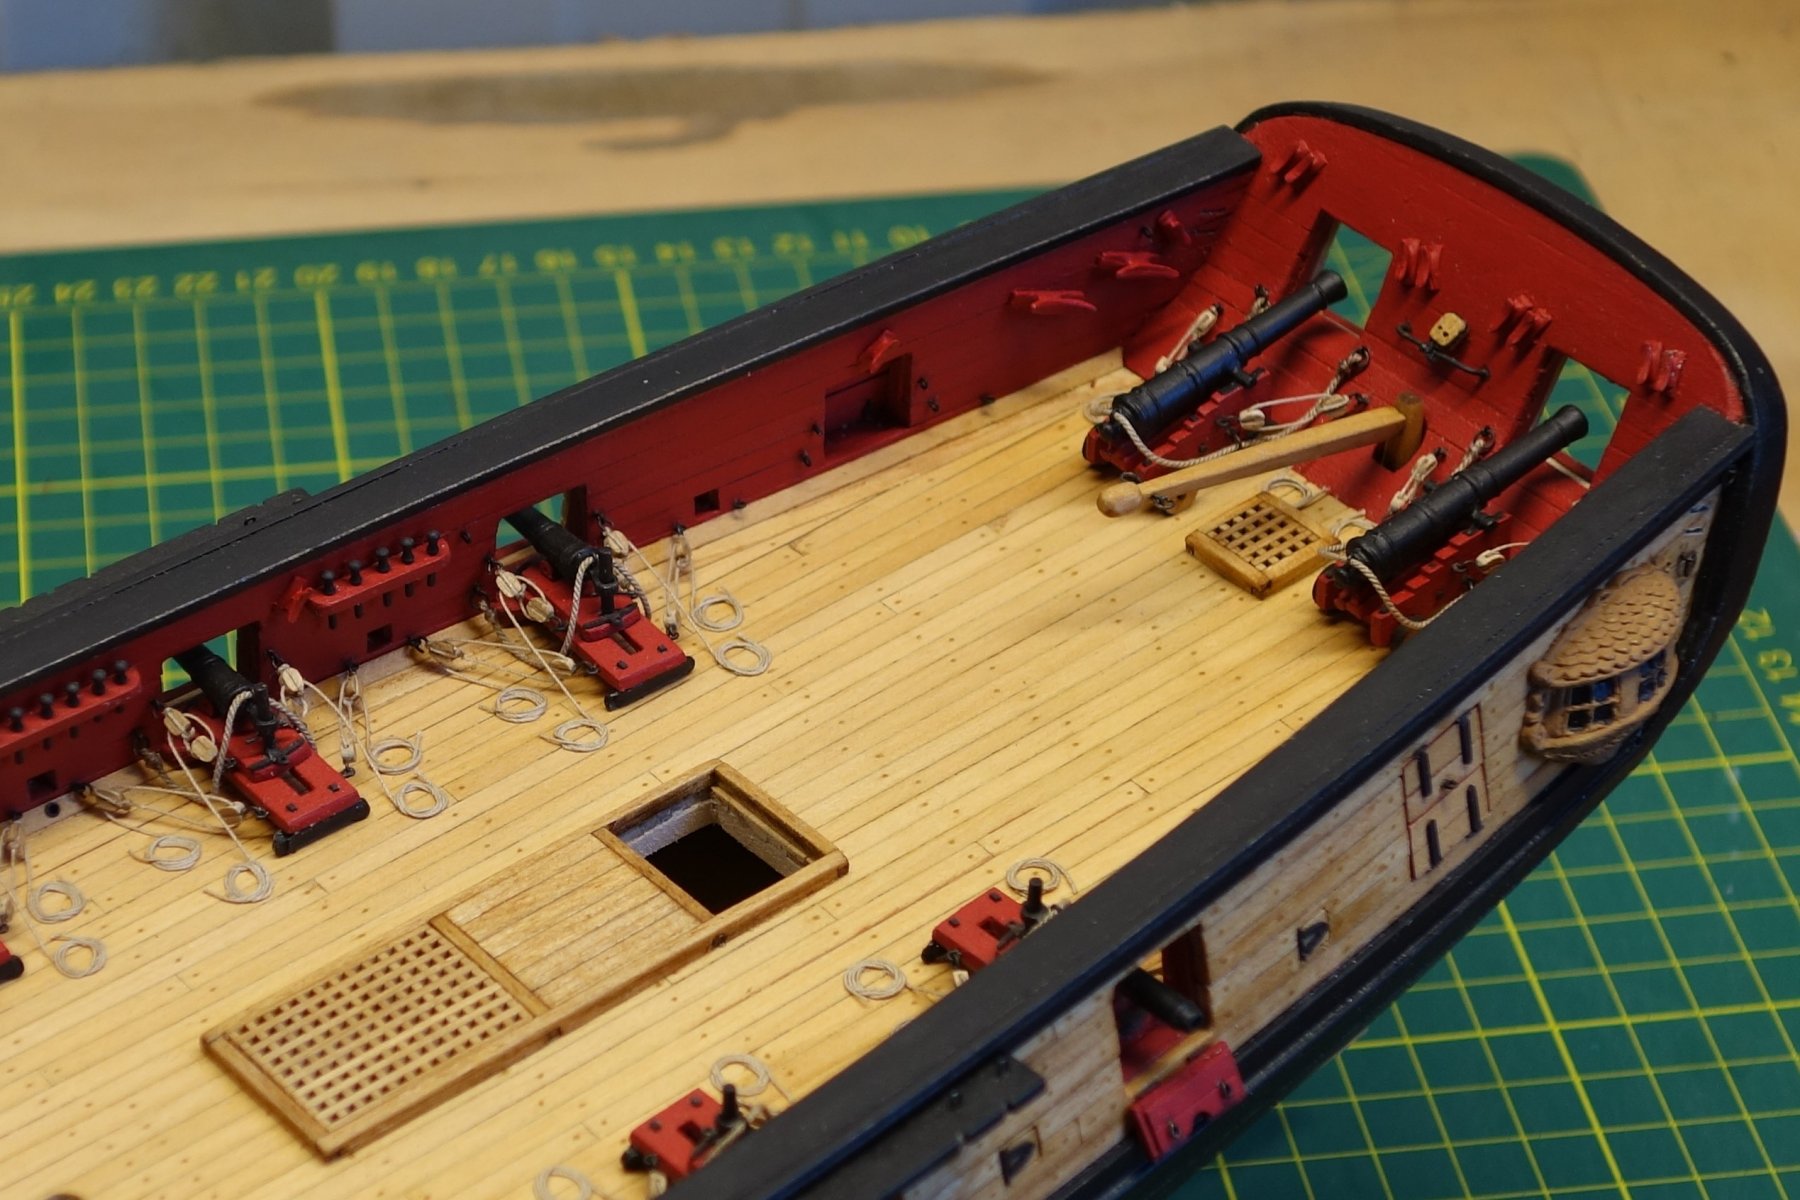
Just sharing some more photos of the fun I'm having with the deck fittings.
I've finished the capstan and the binnacle (no handles yet..). I'm pleased with the binnacle which turned out pretty good (but I'm biased... I made it....).
The ladder for the companionway is in and the companionway itself is in progress. The doors need to clear the cannon balls so I will need to make my mind up choosing the smaller or bigger ones. I'm leaning towards the bigger ones. They are in the mail today so I'll make up a strip soon. I also dry fitted the ships wheel. So far so good.
Peter

-
Thanks Christos,
the Hermione was on my shortlist before I decided on building the Syren so I have been admiring your work quietly on the background as well.
Also thanks all for the likes.
A little bit more progress on the Syren. I finished the rigging on the long guns, the tiller (not glued yet) and some of the hatches. I had a bugger of a time getting the colours of the hatches right as I wanted to make them just a tad darker to create some contrast.
I did a sample strip with the cannon balls provided in the kit but found them a bit on the small side. I ordered a batch of 2mm cannon balls on line and will make a second strip to compare how they look. Murphy's law will probably prove that the right size will be in the middle...lol.
Just a few photo's this time.
Cheers,


-
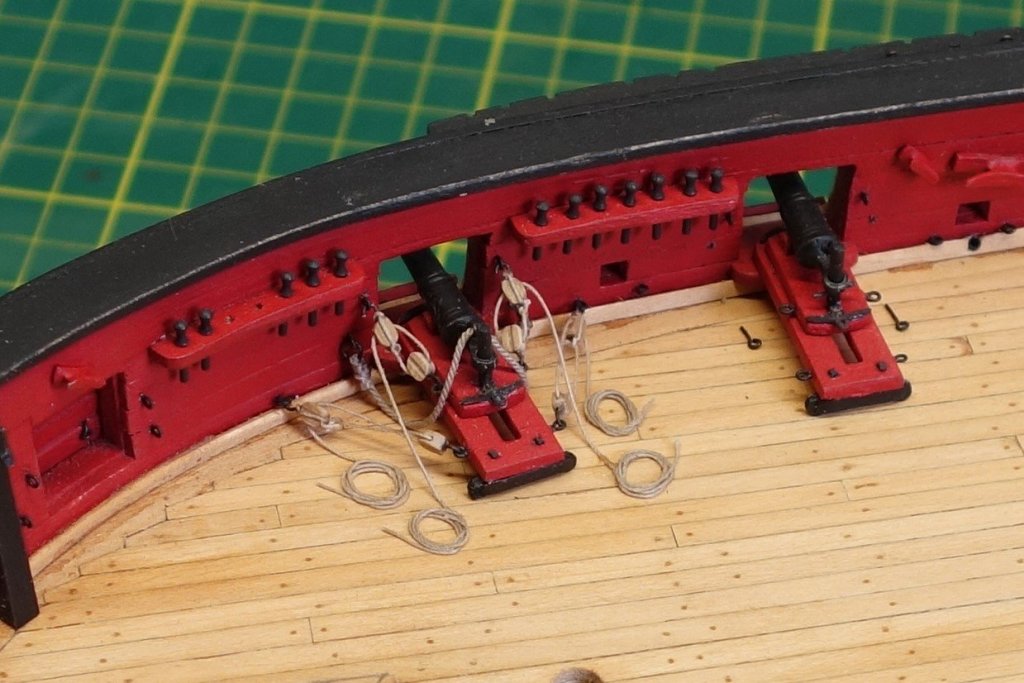
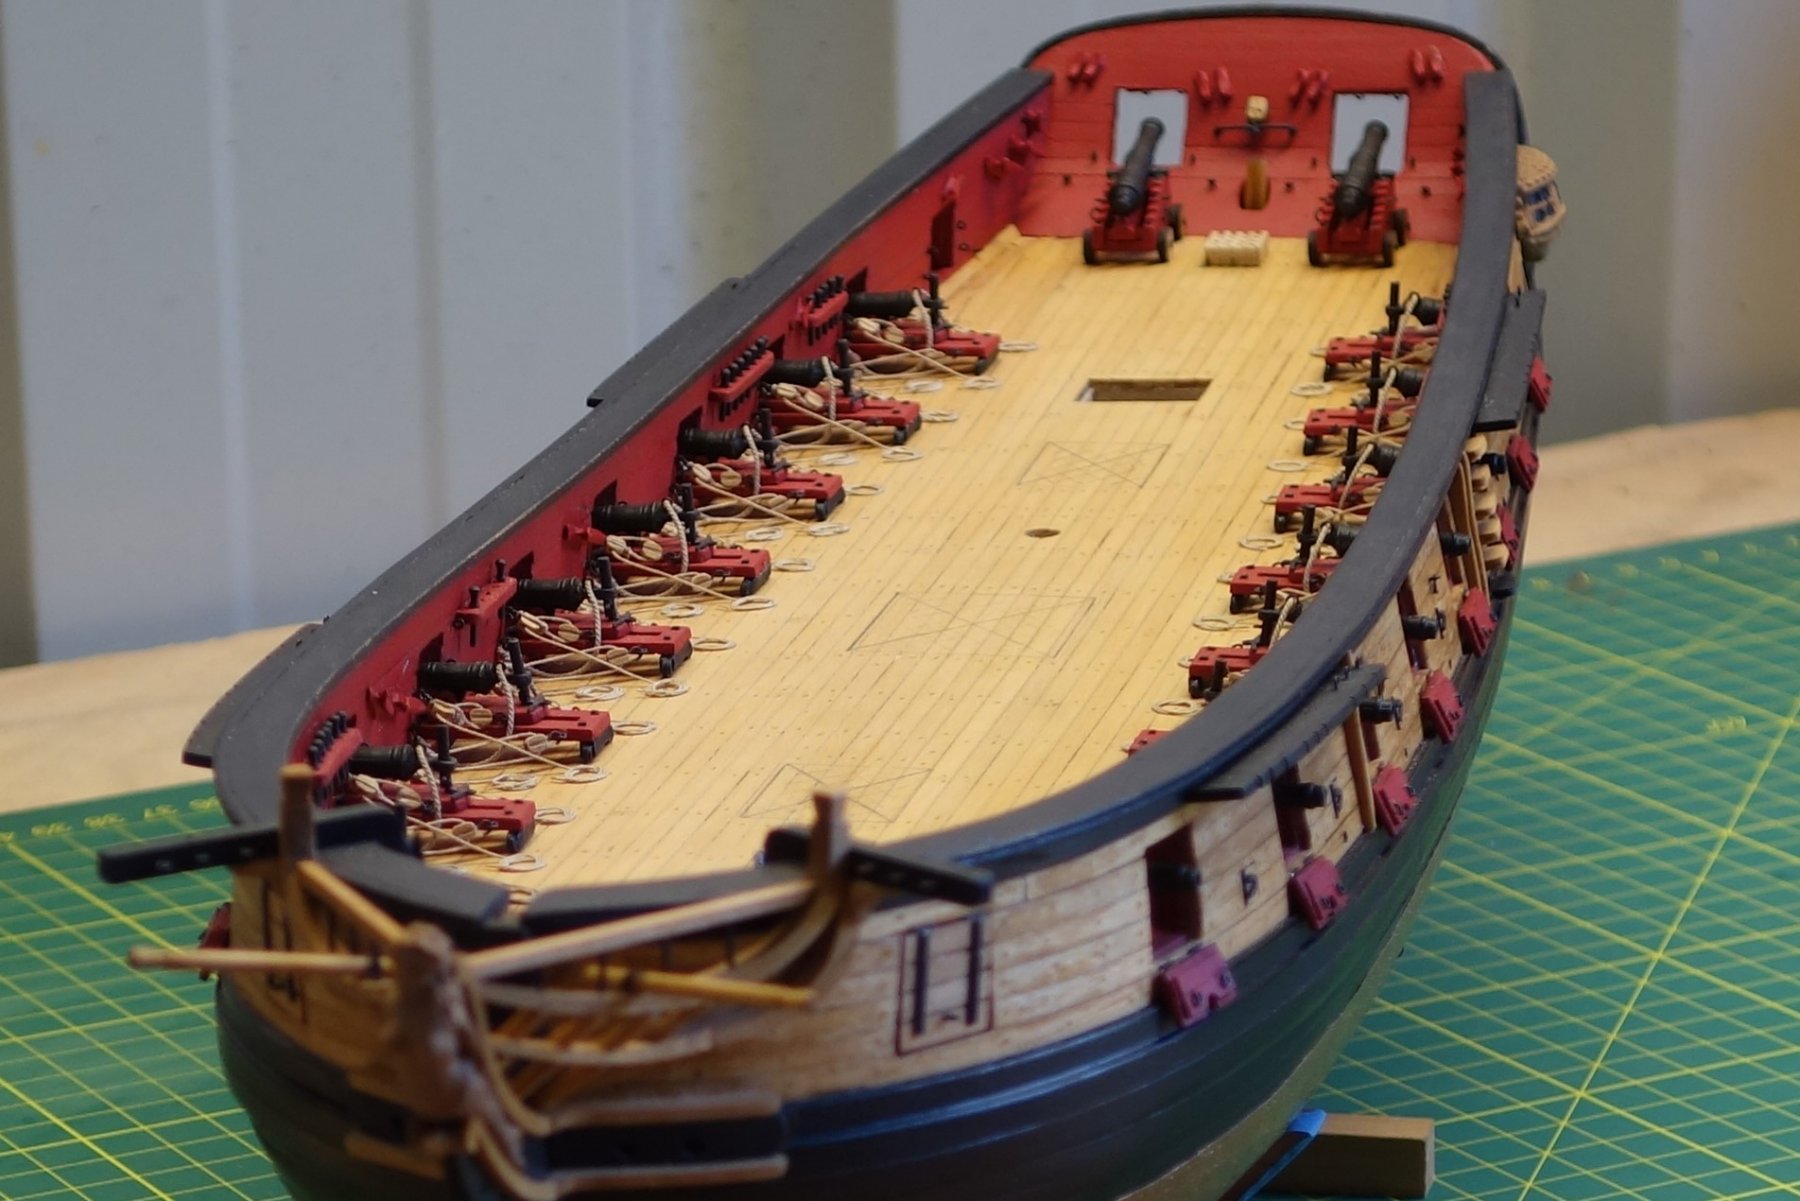
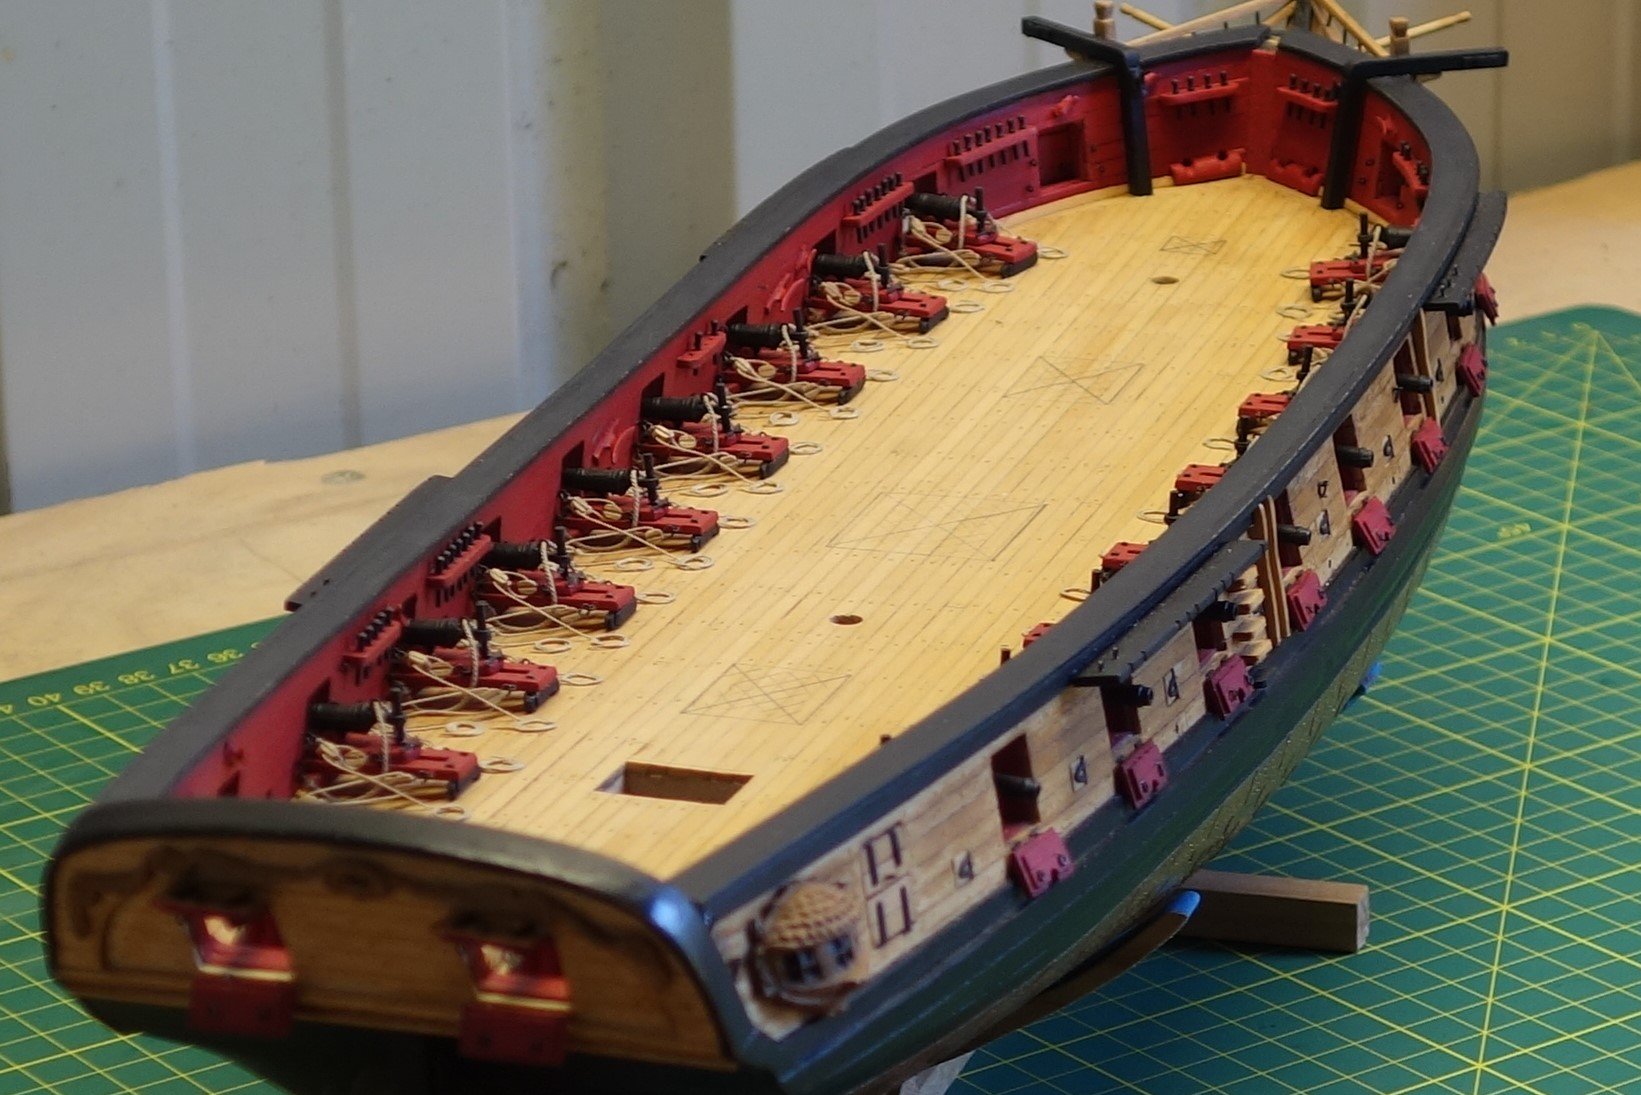
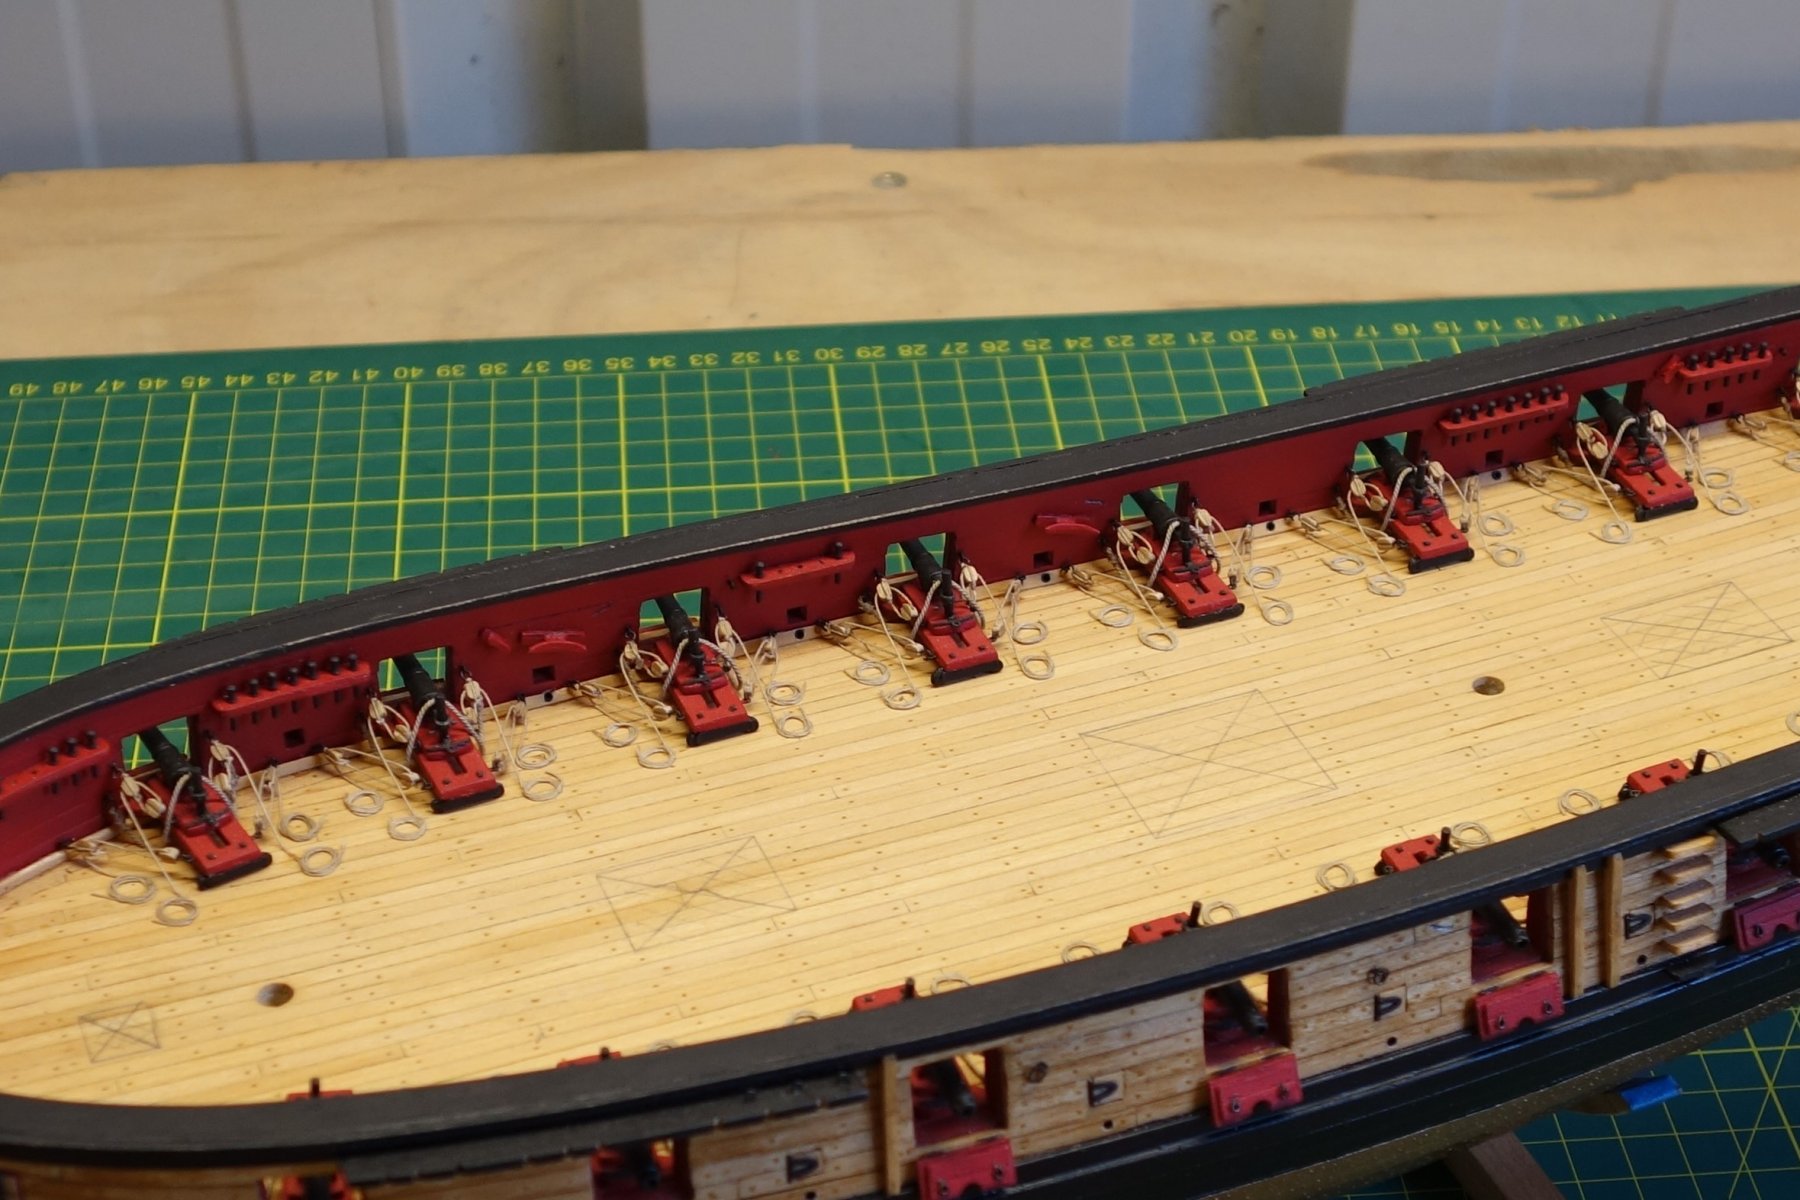
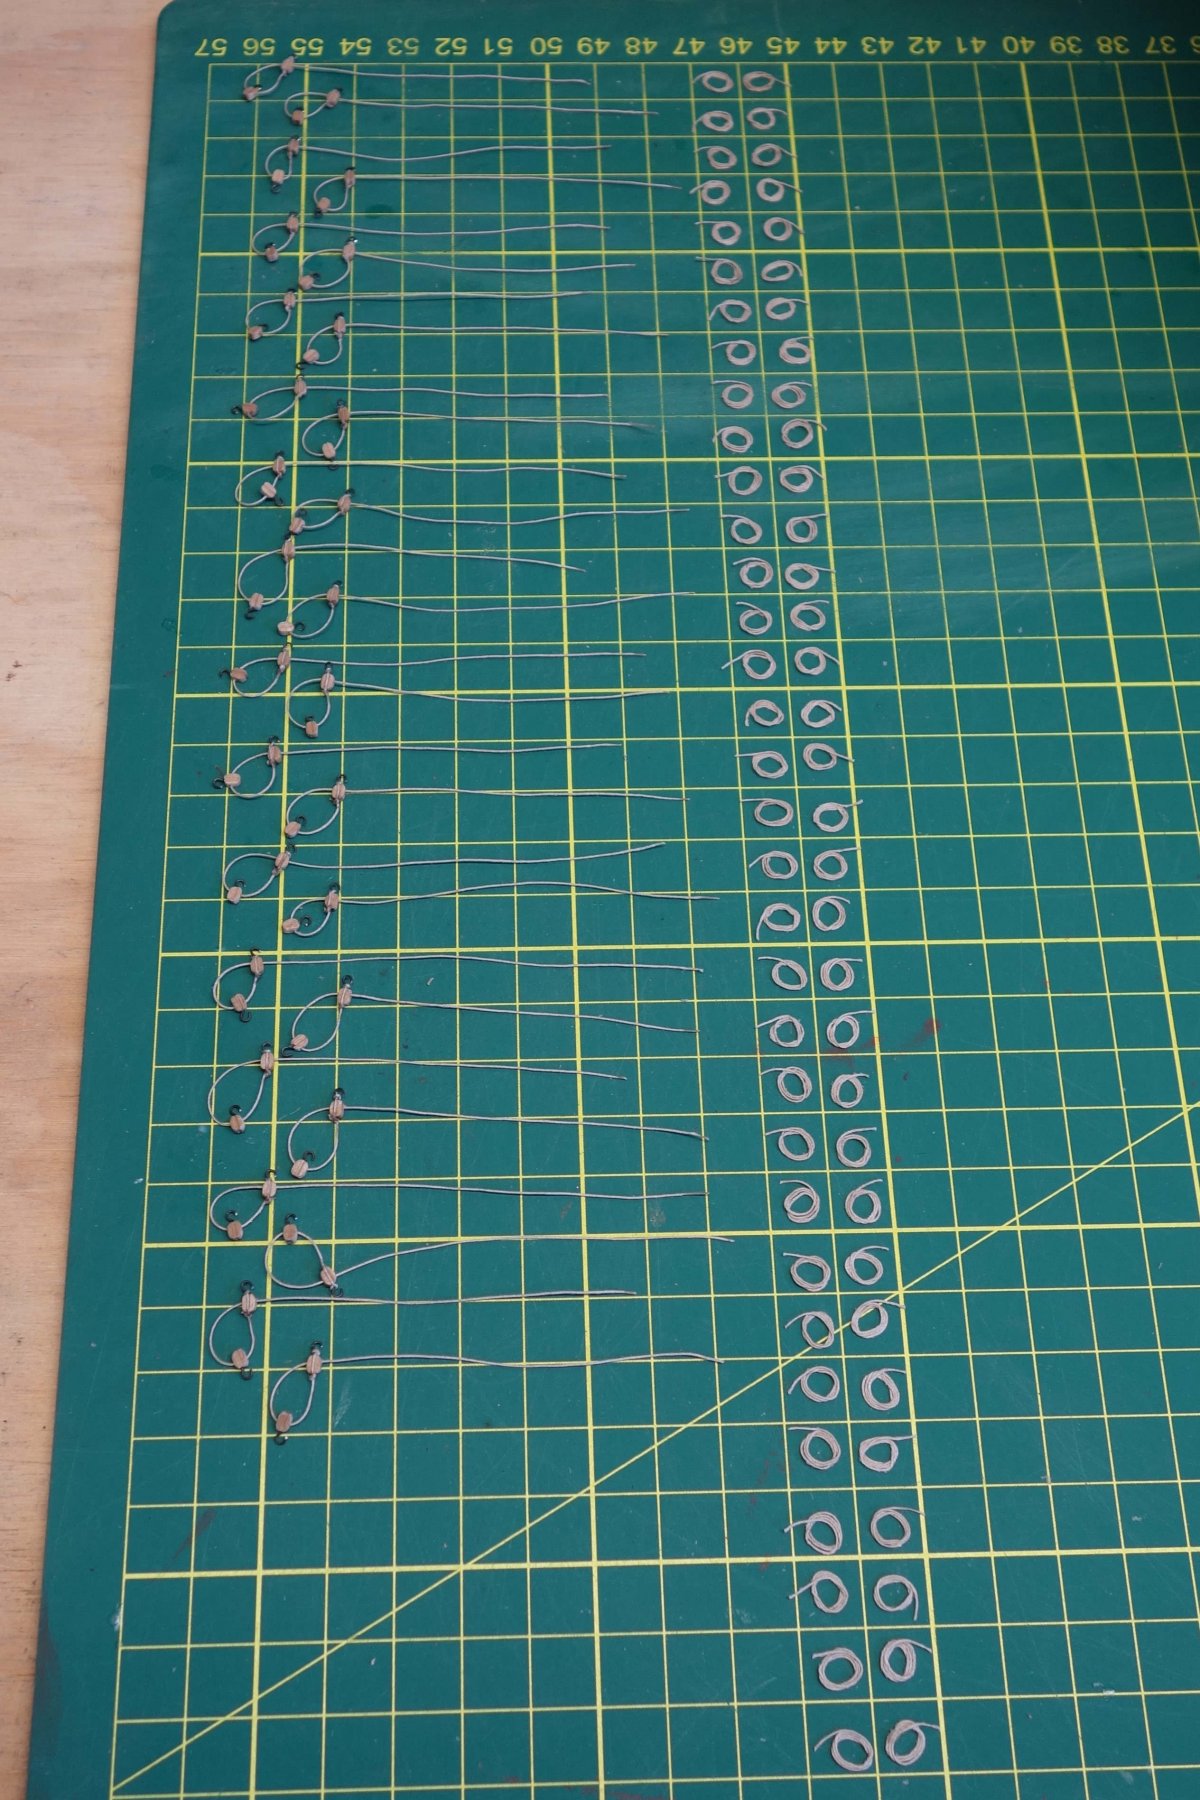
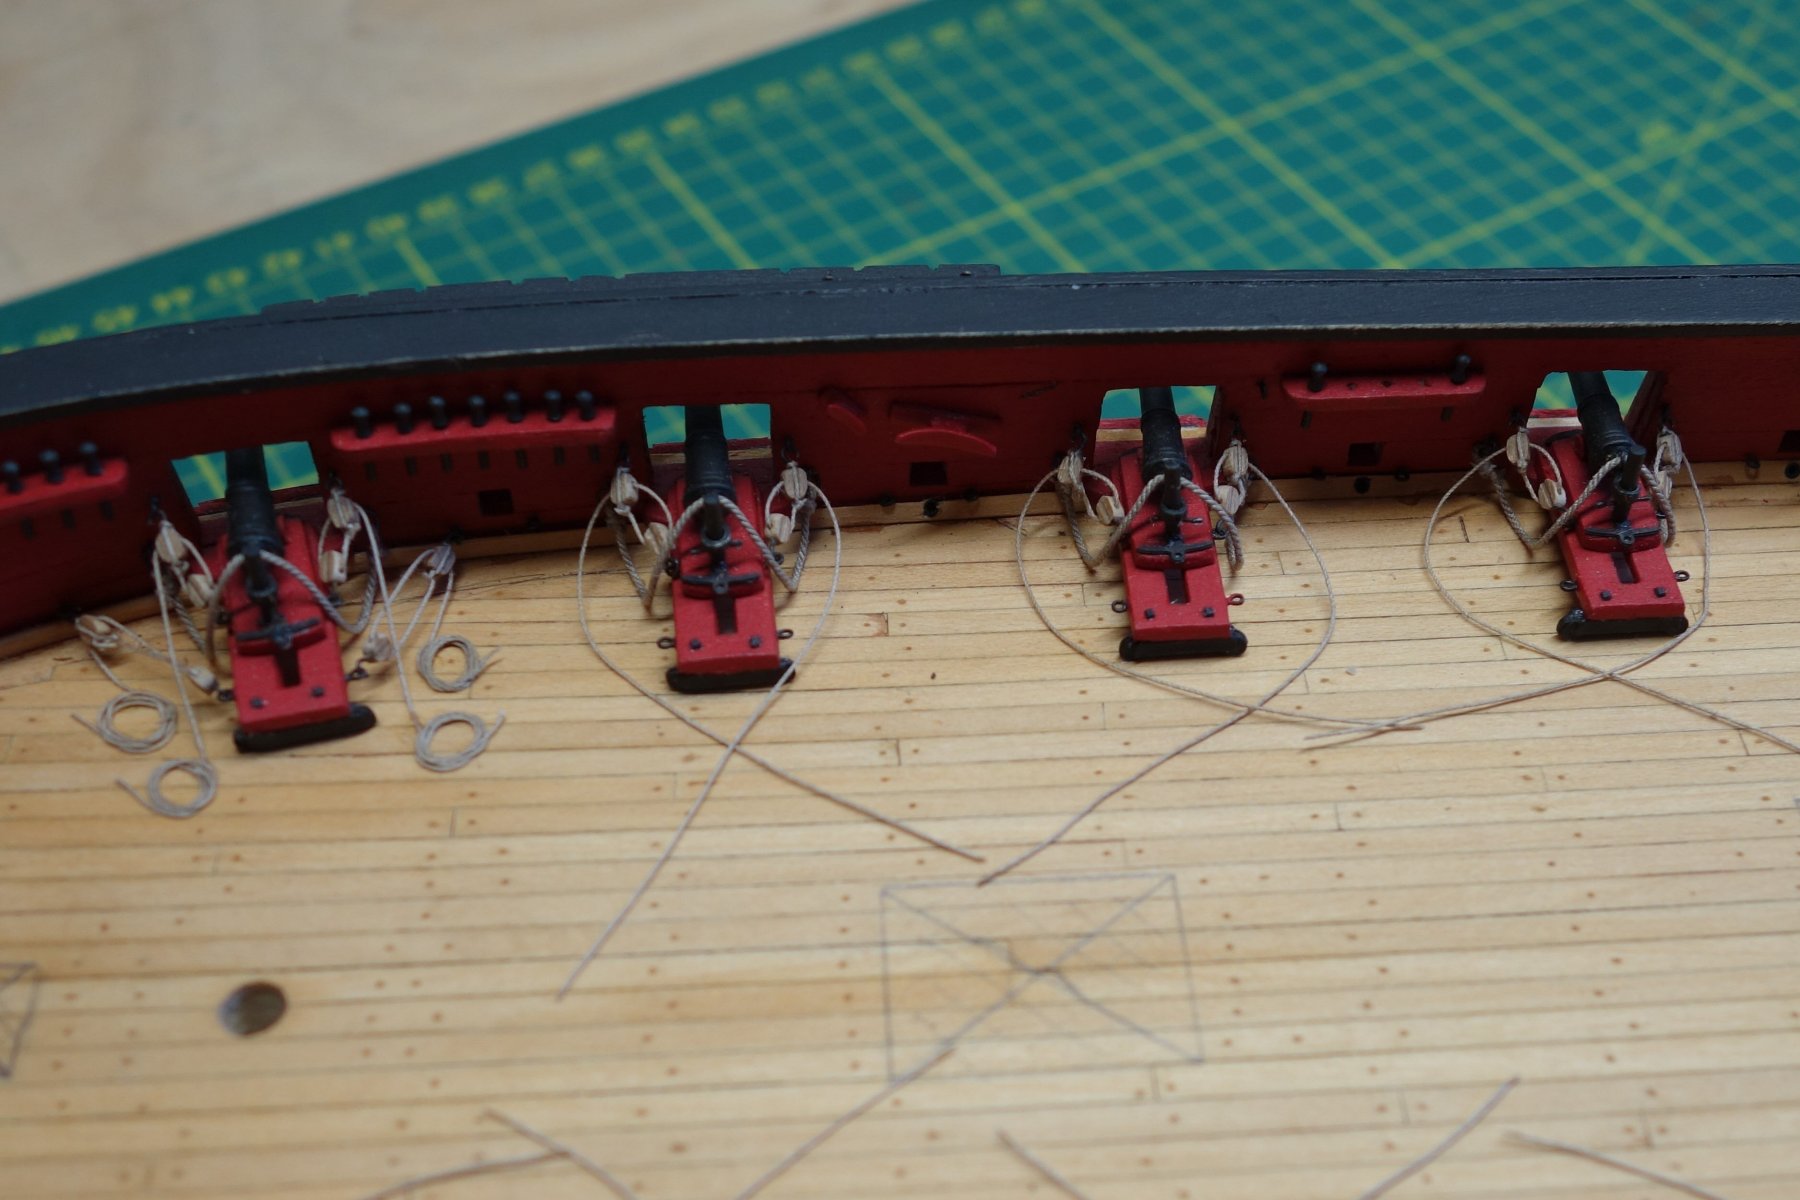
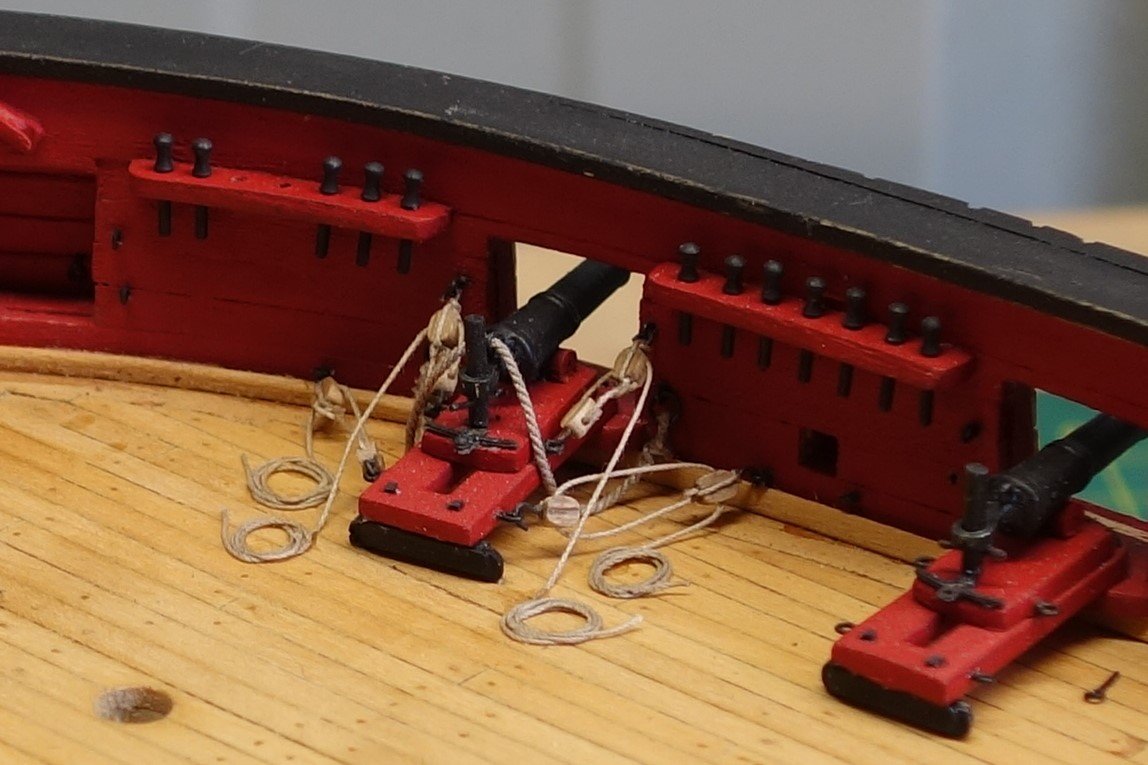
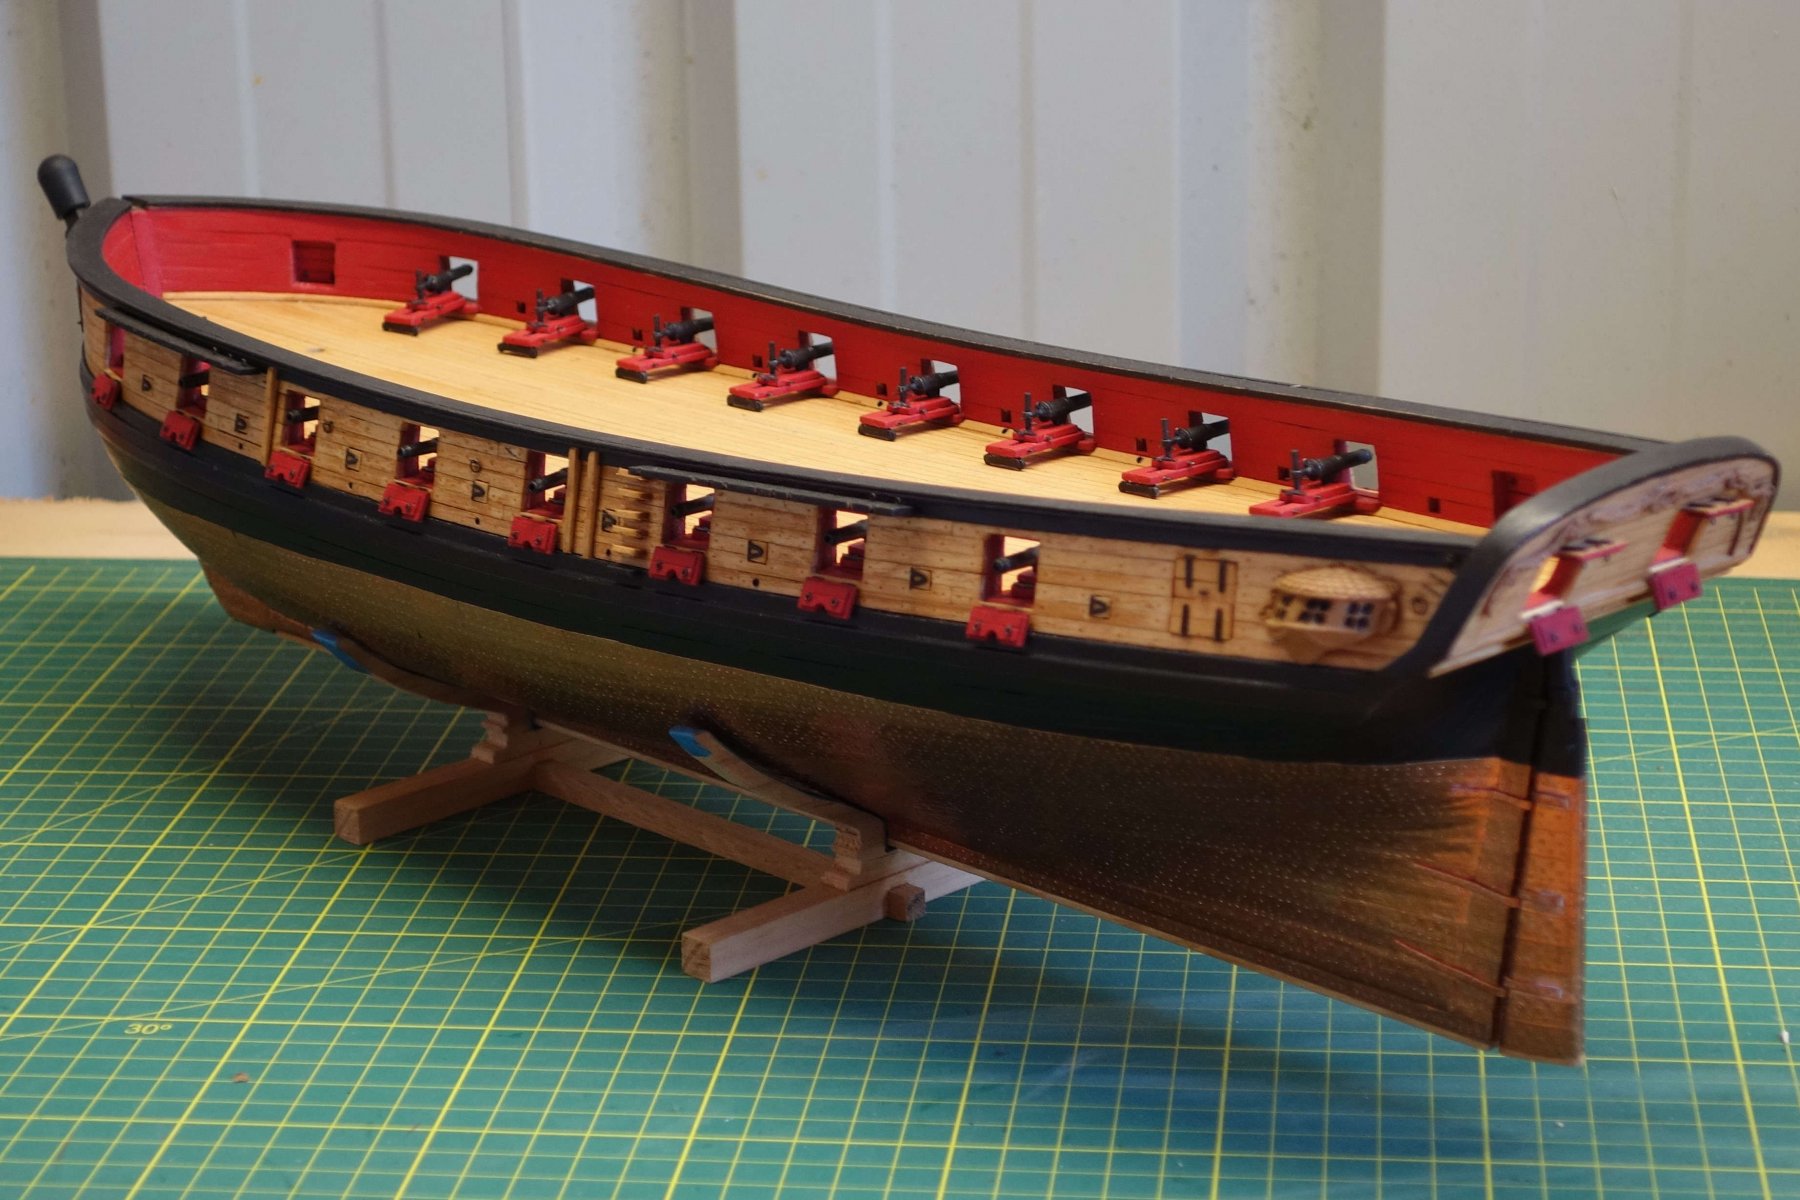
Well, I managed to get through the carronade rigging without any major drama. I had to re-do the rope coils a few times before I was happy(ish) with them (used quite bit of rope in the process). And of course a hook occasionally decided to part with a block while tensioning and had to be re-glued.
Some photo's.....

Just a note, The photo's came in back to front. (I didn't disassemble the rigging...)


-
Amazing stuff Thomas.
I must admit, your log was my main driving force to choose the Syren as my first attempt at an advanced kit. I simply love the look of your model, the attention to detail and the perfection in the execution.
I regularly go back to you log for ideas only to shake my head and realize I better keep it simple. Your skill levels are just out of this world.
Hats off...
-
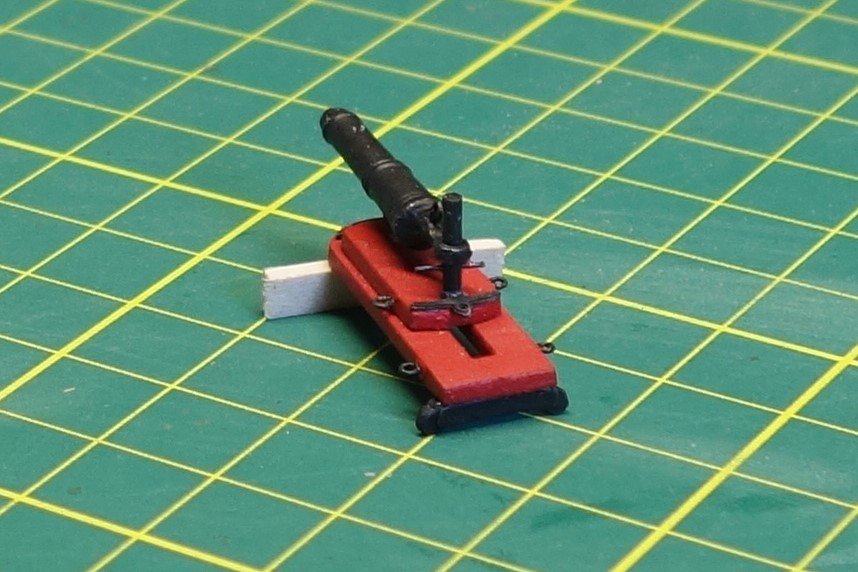
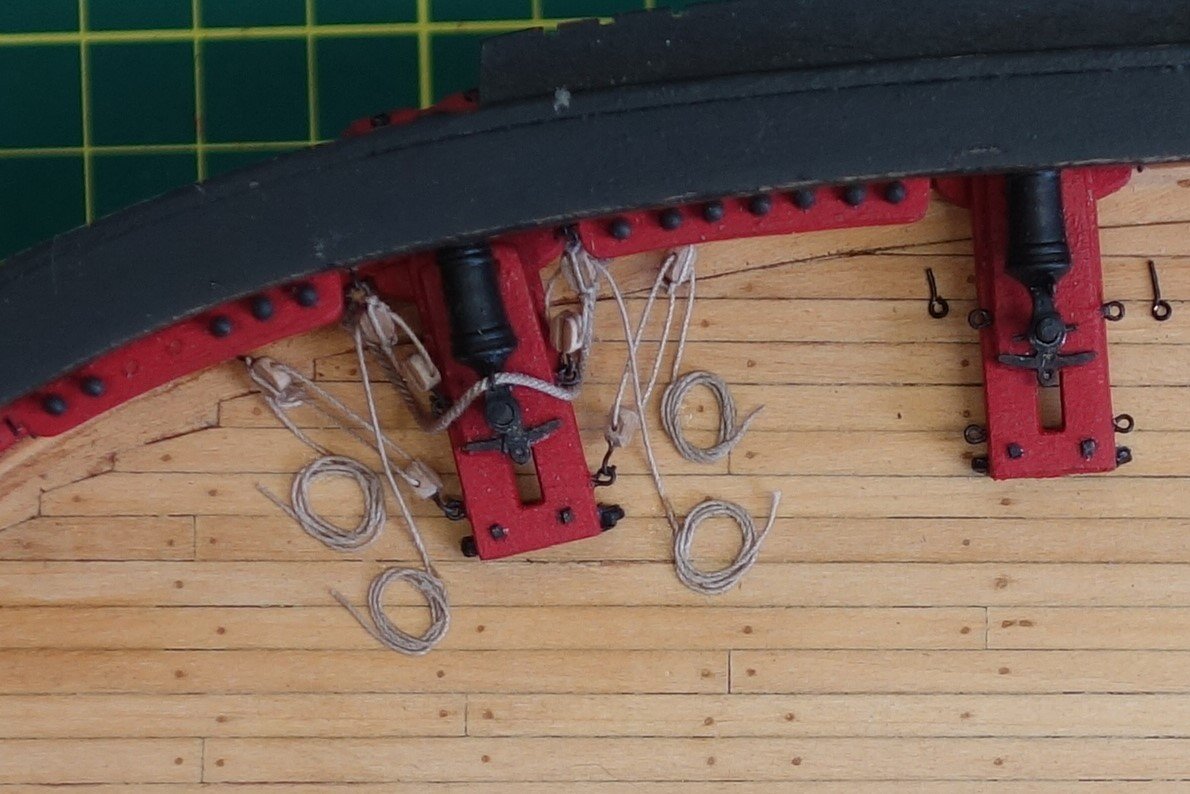
Thanks Jesse, Doug and all the likes.
Just a small update after finishing the rigging of the first carronade (only 15 to go....sigh). I now fully understand the feedback by some of this stage being a tad bit tedious. I tried to mix it up and start on some deck fittings but I am terrible with multitasking (the admiral nods very enthusiastic in agreement...), so I gave that up and will keep concentrating on the guns until they are done (or until I am done and have gone crazy....).
I don't get it how some modelers can even work on multiple ships at the same time.
Here are a few photo's.


- fnkershner, svein erik, Altduck and 8 others
-
11
-
Simply amazing.....
- Barbara Lange, Canute, Jack12477 and 1 other
-
4
-
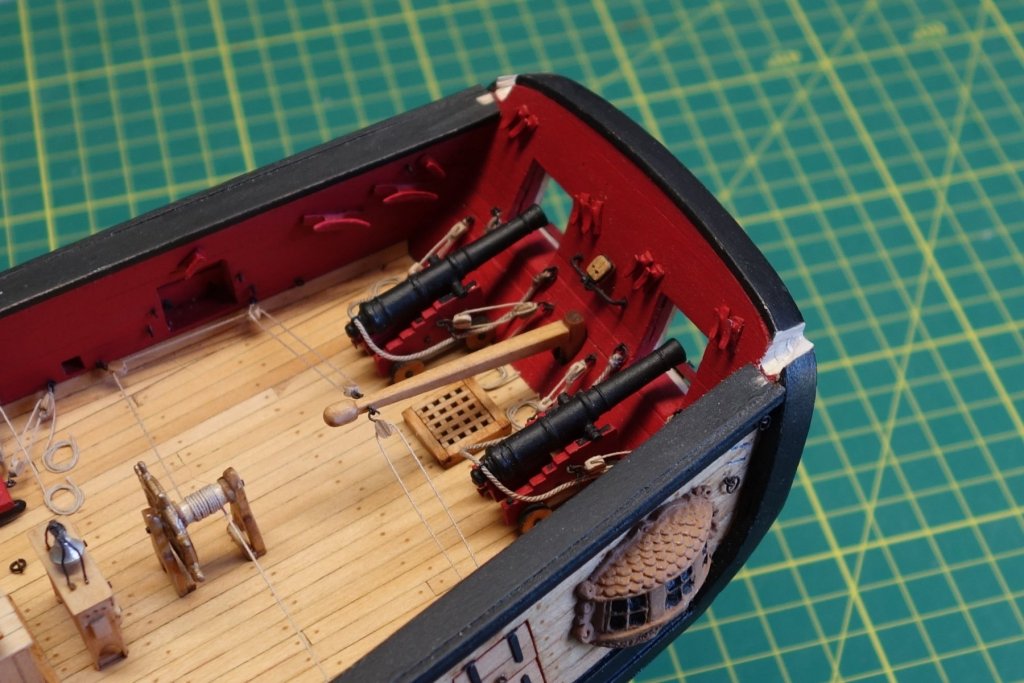
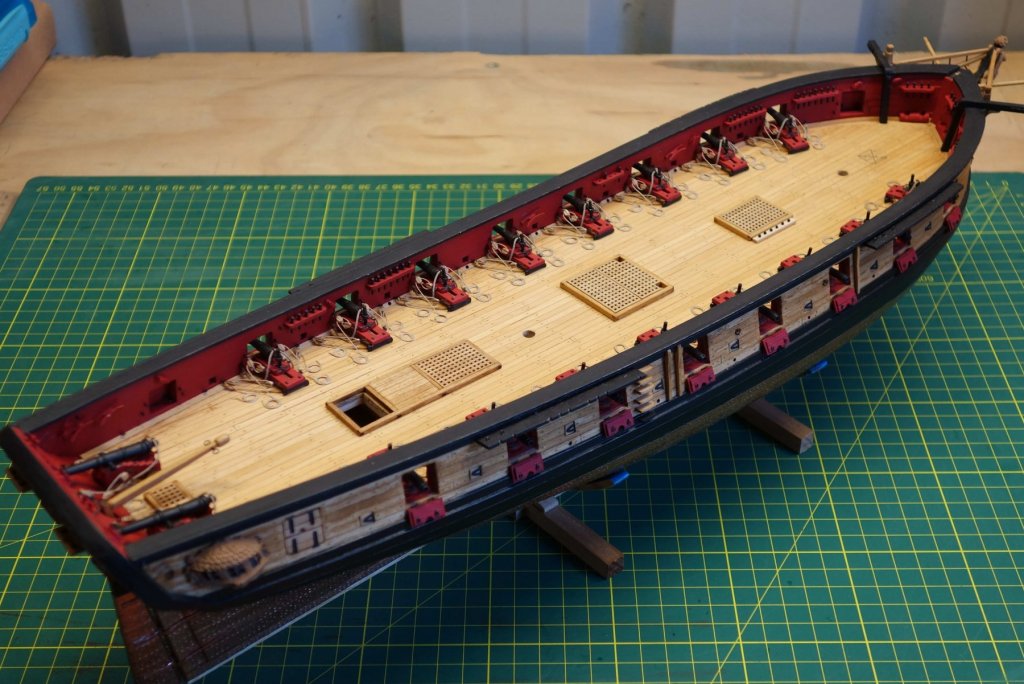
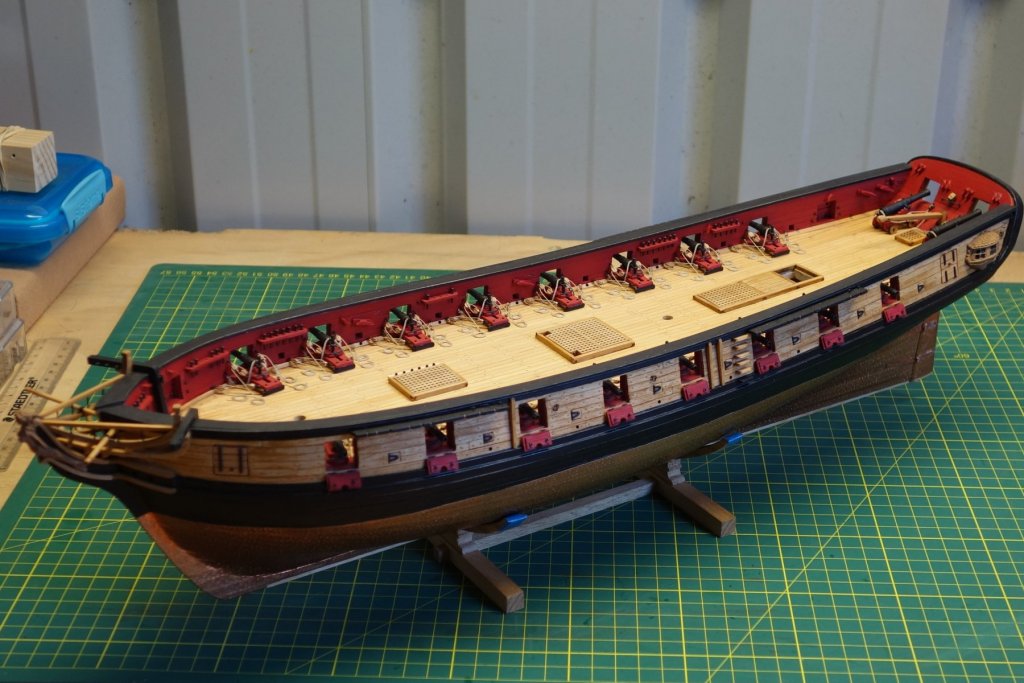
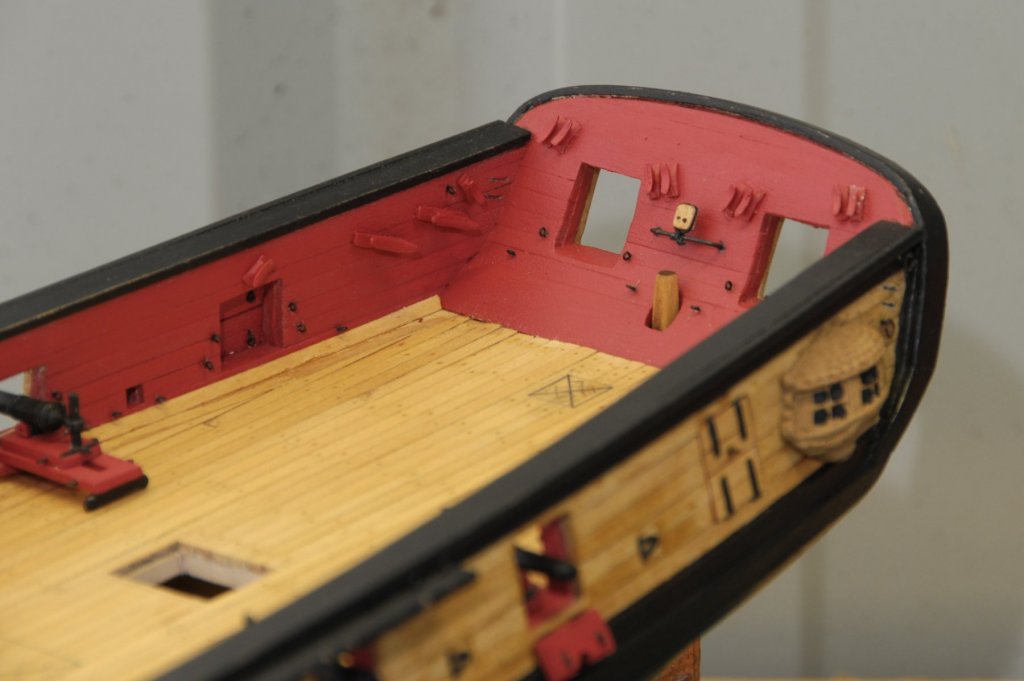
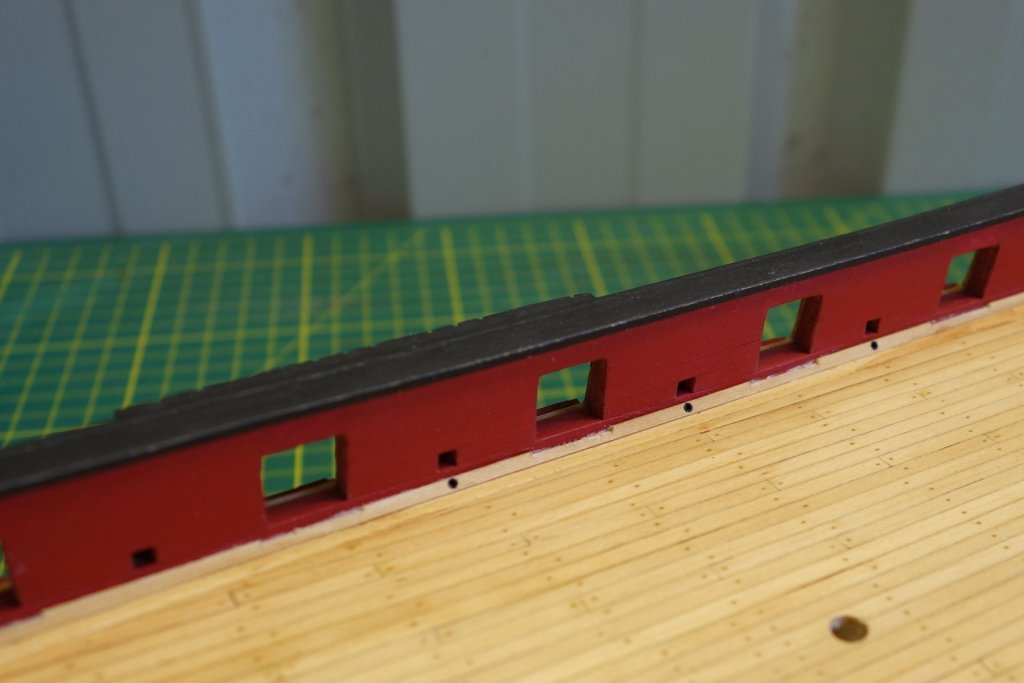
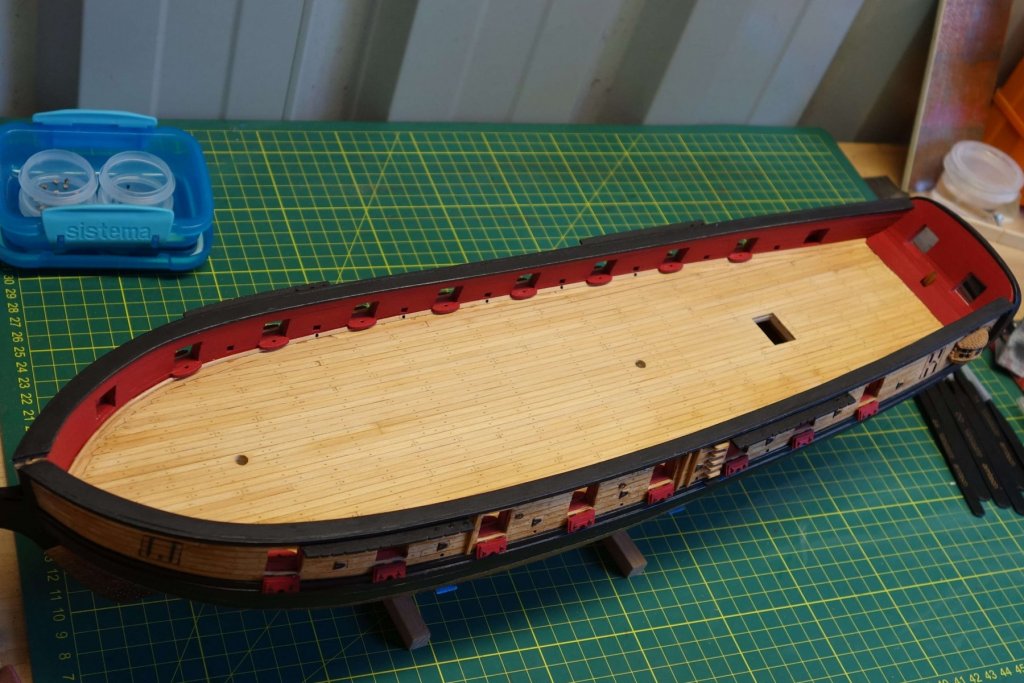
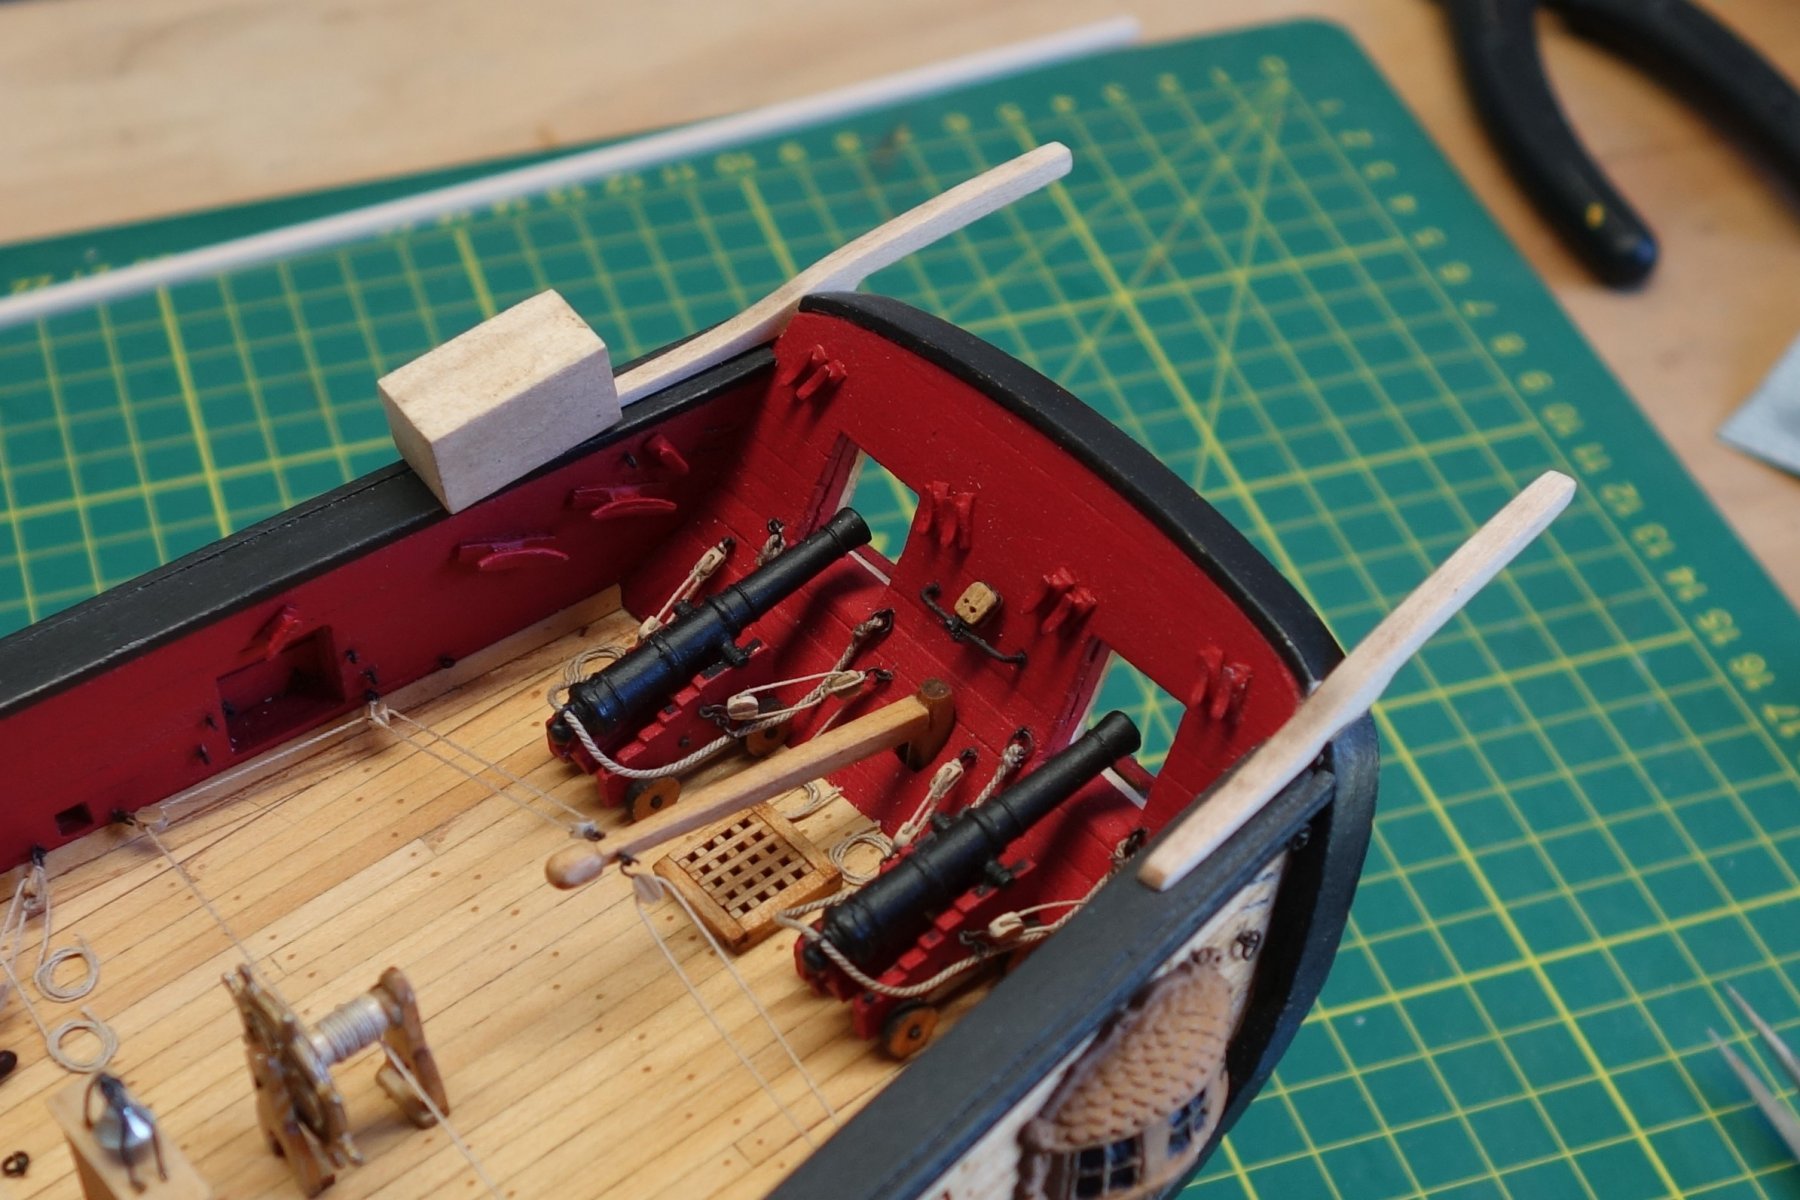
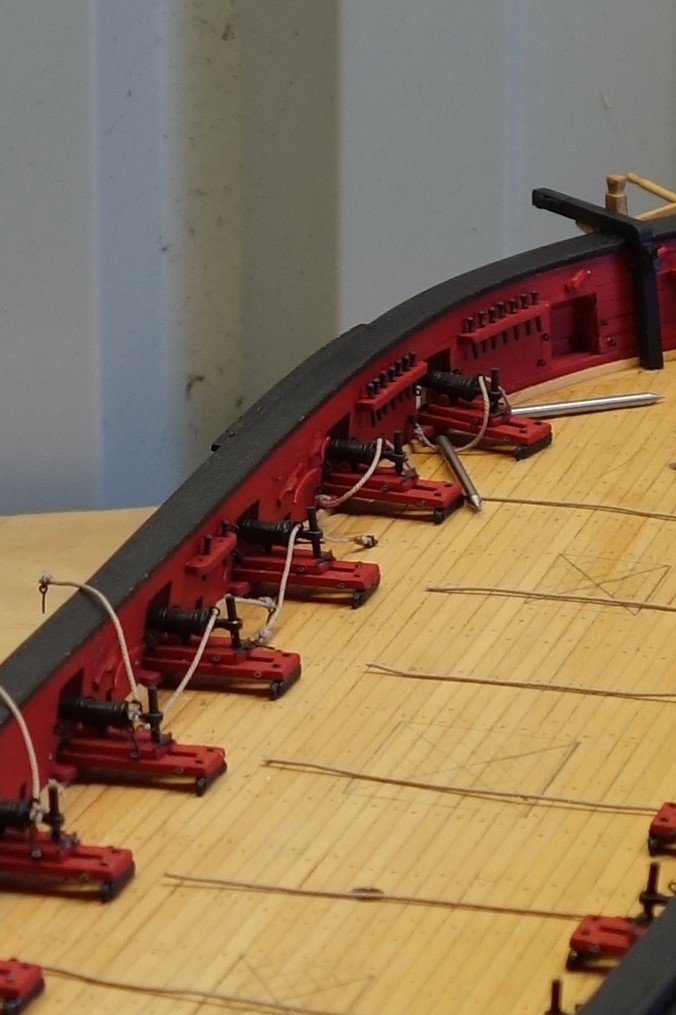
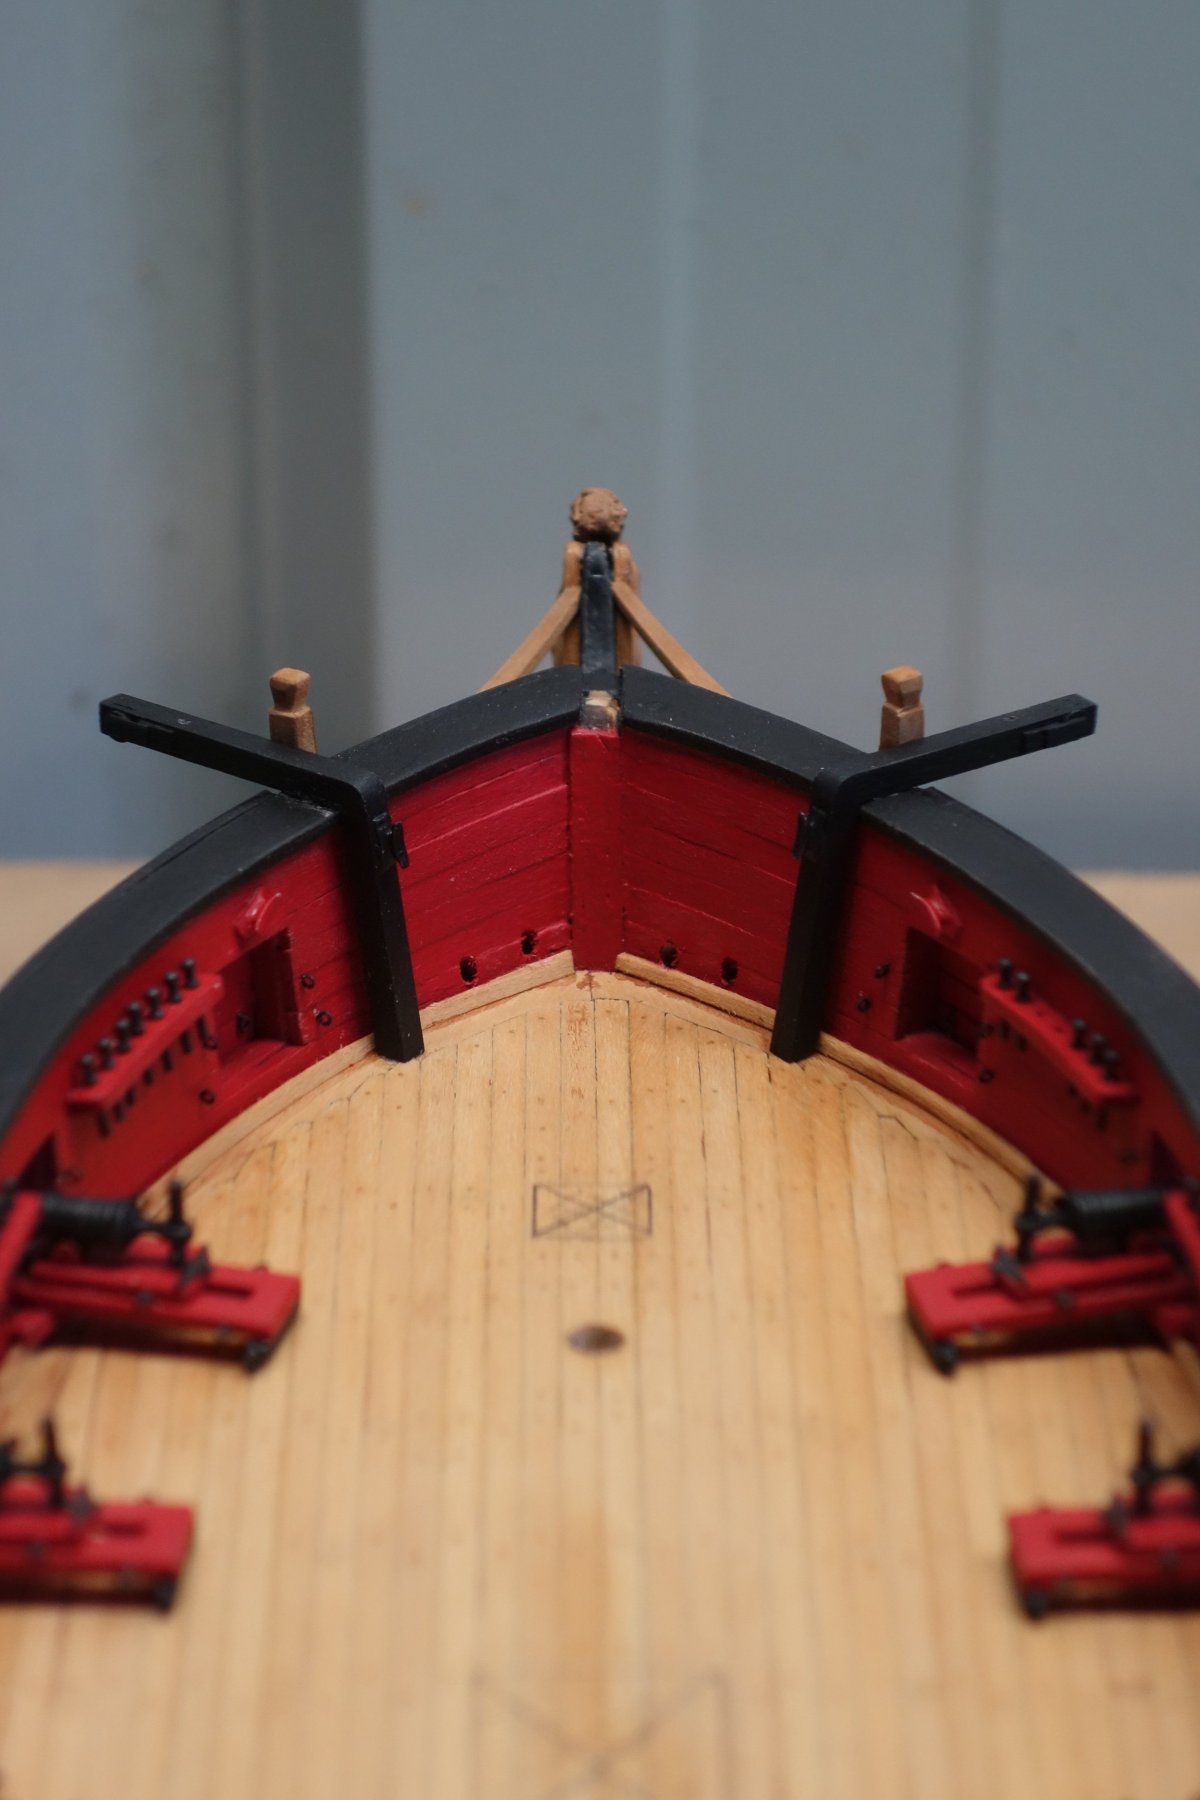
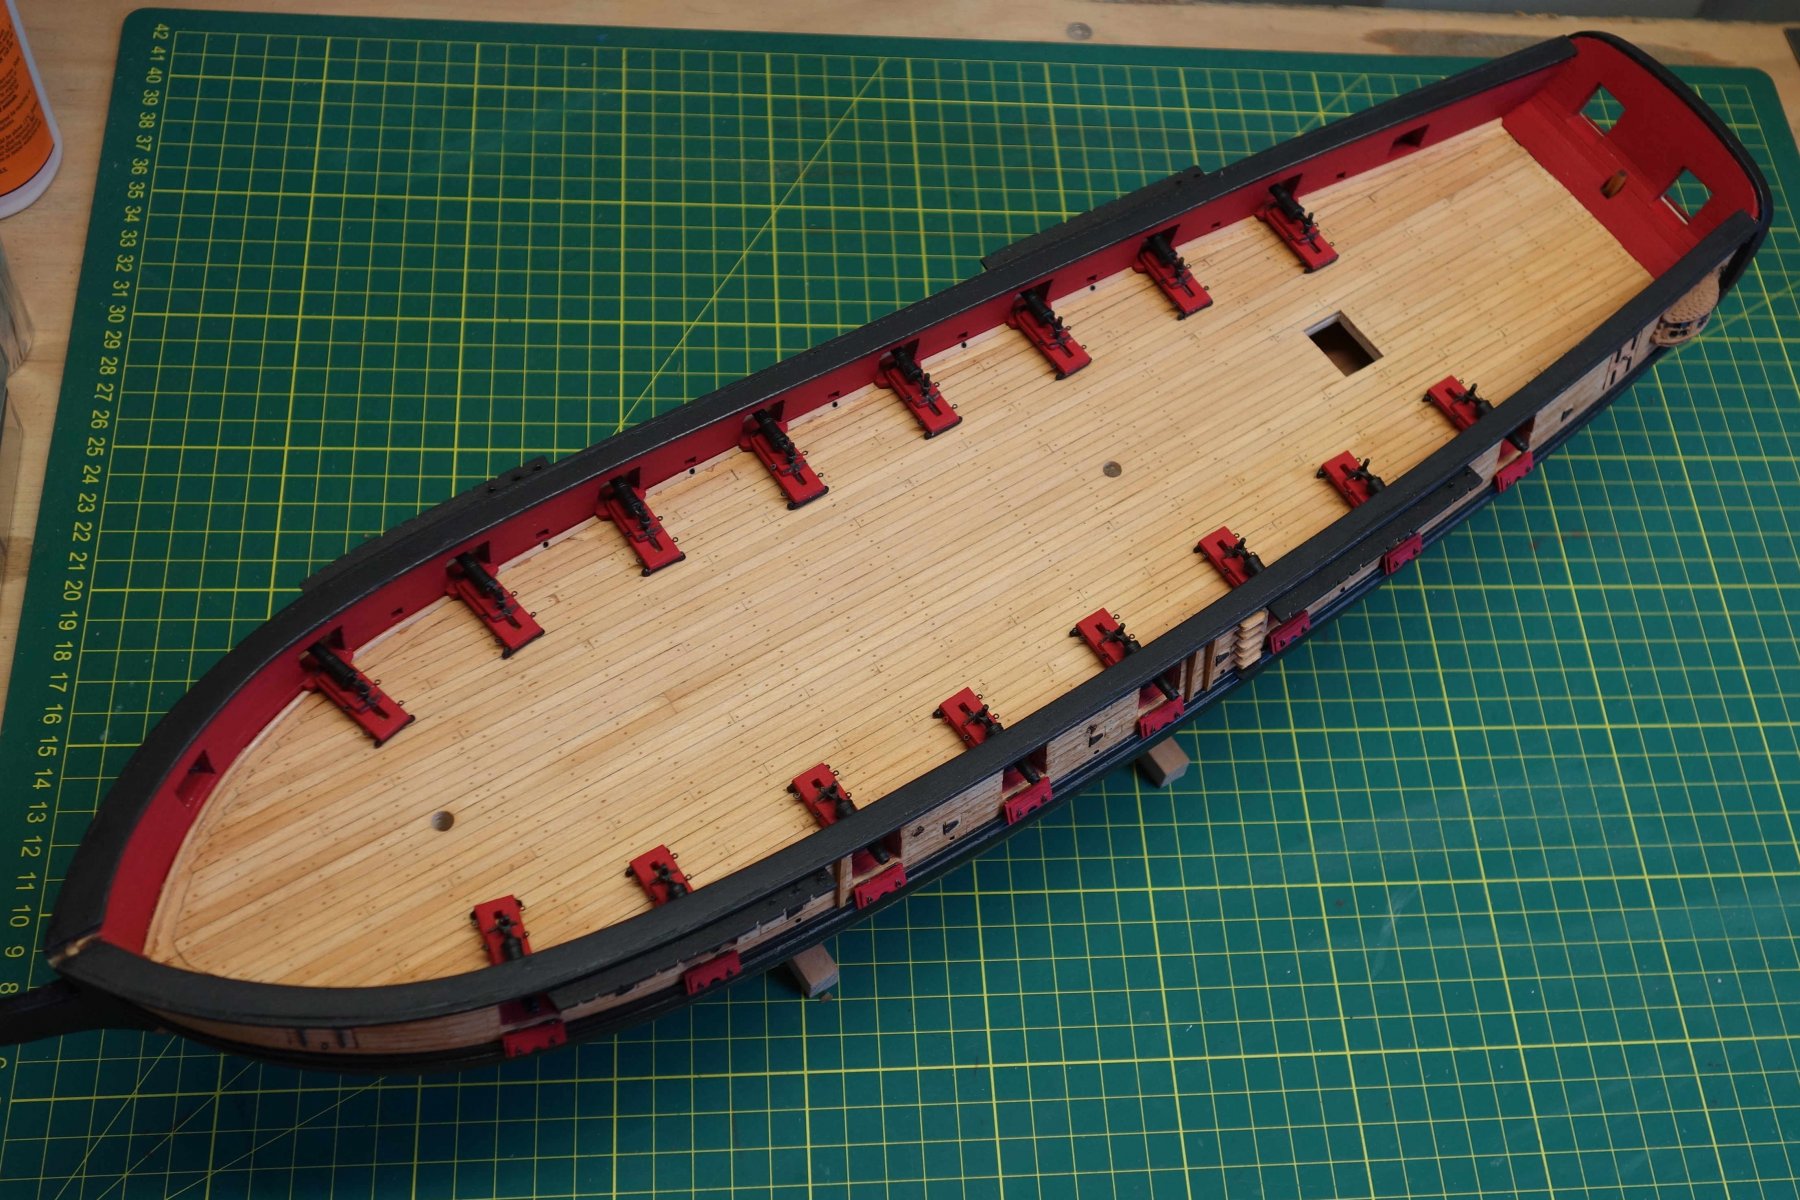
Some more photo's. I wasn't happy with the location and look of the inboard hawse holes so I added some guides to give them a more 'even' impression. I decided to paint them red. Looking at other logs, maybe keeping them the same colour as the deck may have been a better choice. Shaping these using a scalpel only was a bit of a challenge but fun to do. I don't think they ended up too bad (you can be honest if they do, to deconstruct and re making them is still an option...).
I also added the 2 12 pounder long guns and the bumpkins and started in earnest with making the blocks and hooks for the gun tackles. To avoid going crazy (the sort of crazy where you have long conversations with your dogs and ask them to help you look for blocks), I'll probably mix this up by making a start with some deck fittings as well.
Peter
- 1492, Ryland Craze, Altduck and 8 others
-
11
-
Hi Erik,
You probably already have, but study Chucks manual in depth. I read it 5 to 6 times and sometimes still picked up something I didn't see before. His photos show the order of placing the planks and where to end them to allow for the next one's. I wasn't very confident at this stage but got there in the end following the process outlines in the instructions.
Your model is looking great.
Cheers,
-
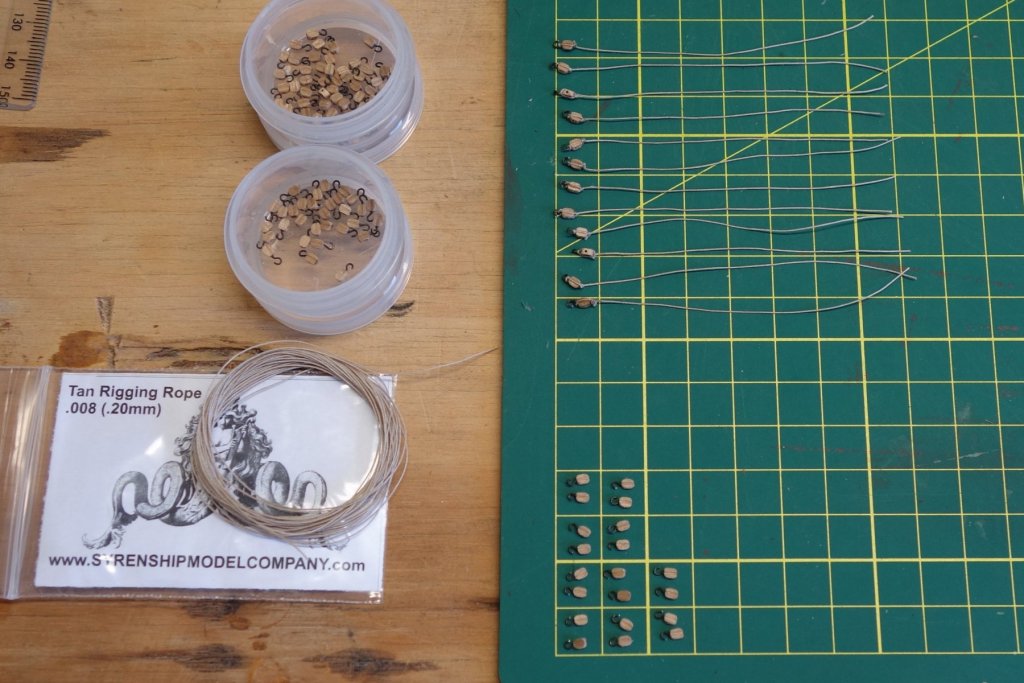
Thanks Steve and also thanks for all the 'likes'.
I originally decided to stay with the content of the kit and not to upgrade. But I finally couldn't help myself and I ordered some rope and some blocks from Chuck. So once that arrives I can make a start with the rigging of the carronades which should keep me quiet for a while.
I must also admit that I was originally a bit disappointed with the castings in the kit. But as I am applying some TLC with a file, sandpaper and some paint, I am pleasantly surprised with how they end up looking. Even the basswood I find great to work with.
Anyway, back to work (real work that is, not modeling...sigh).
Cheers, Peter
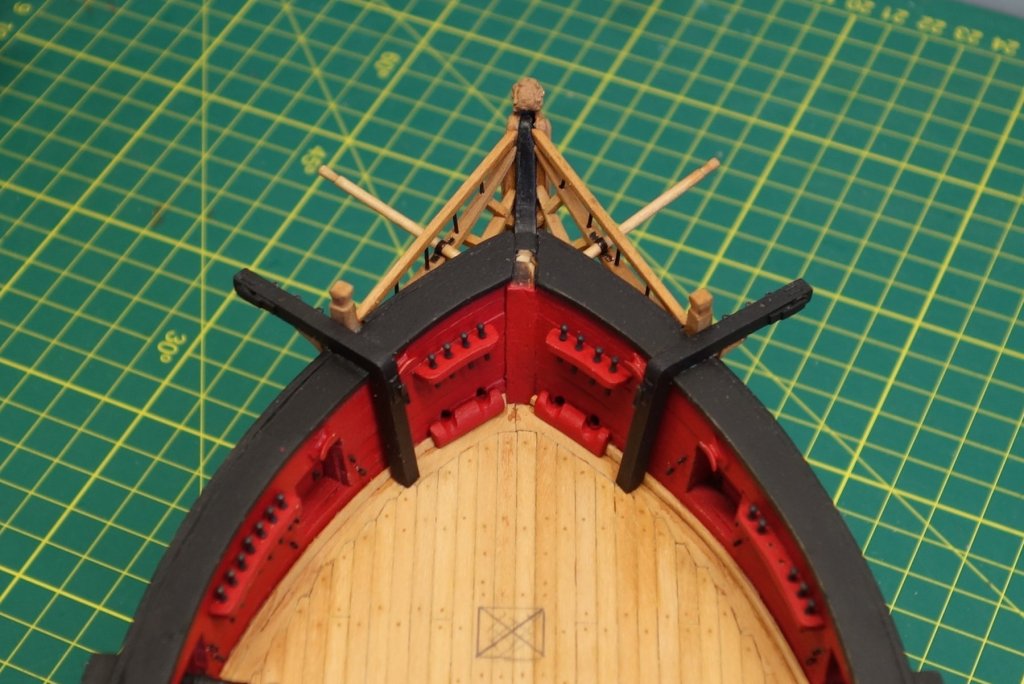
-
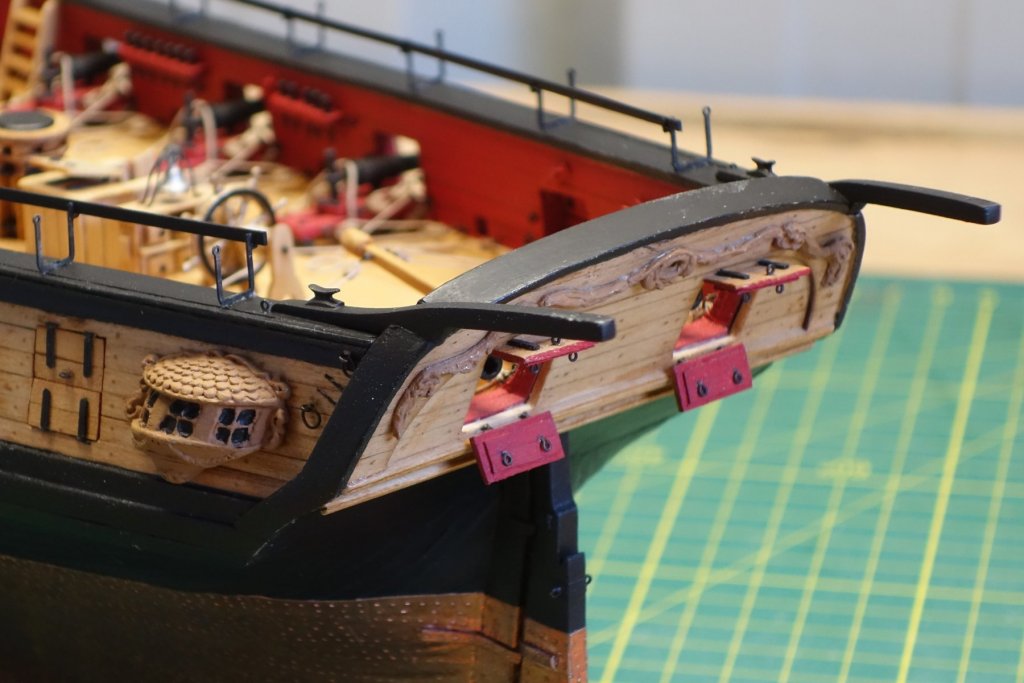
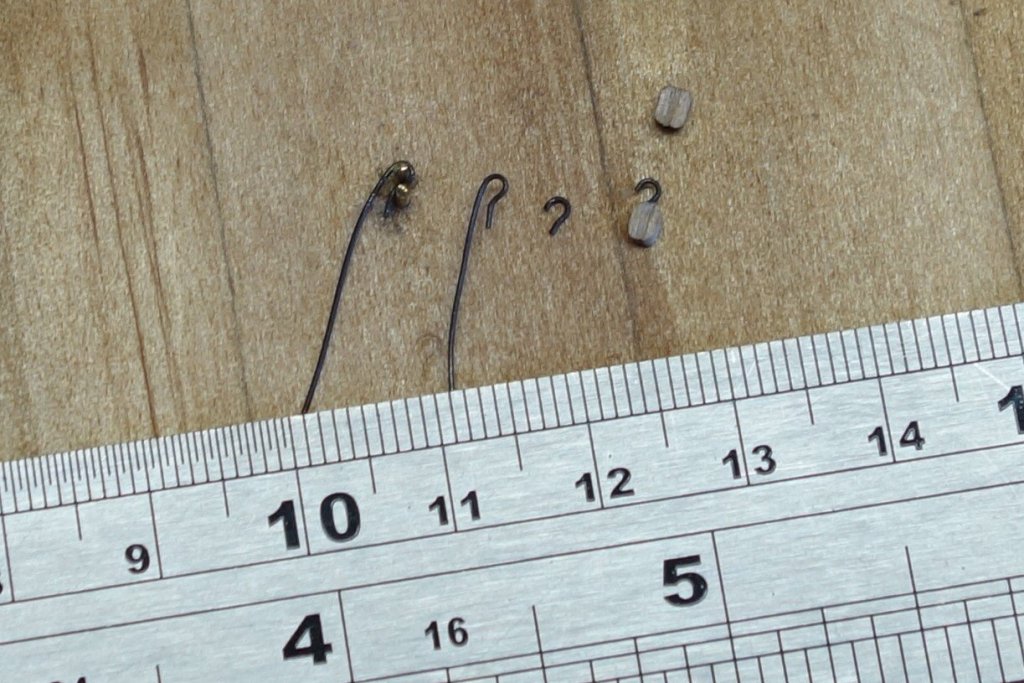
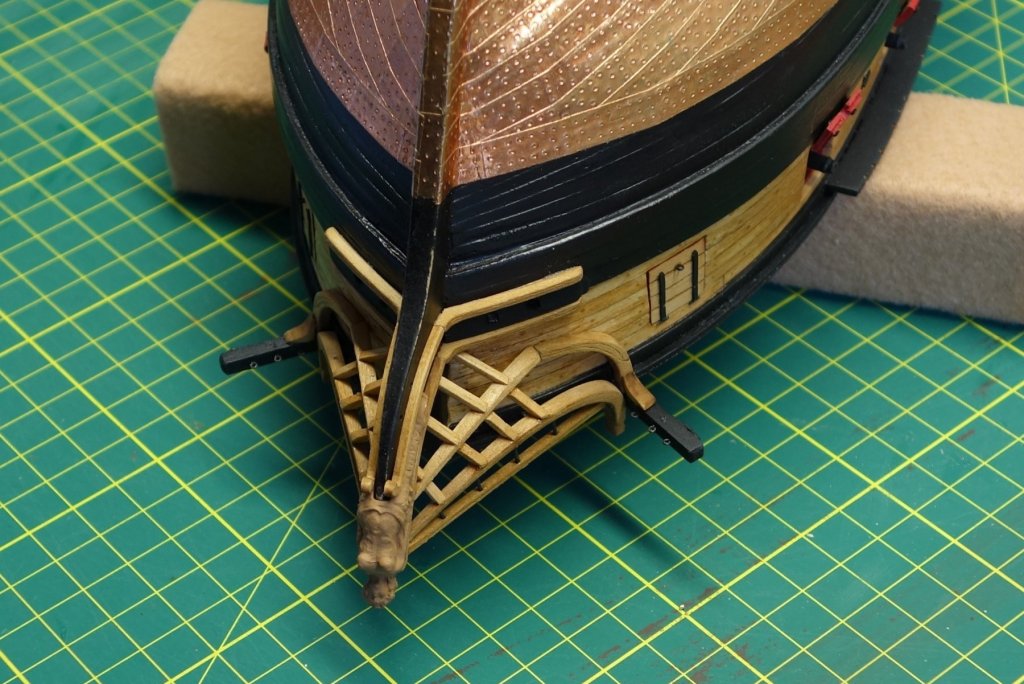
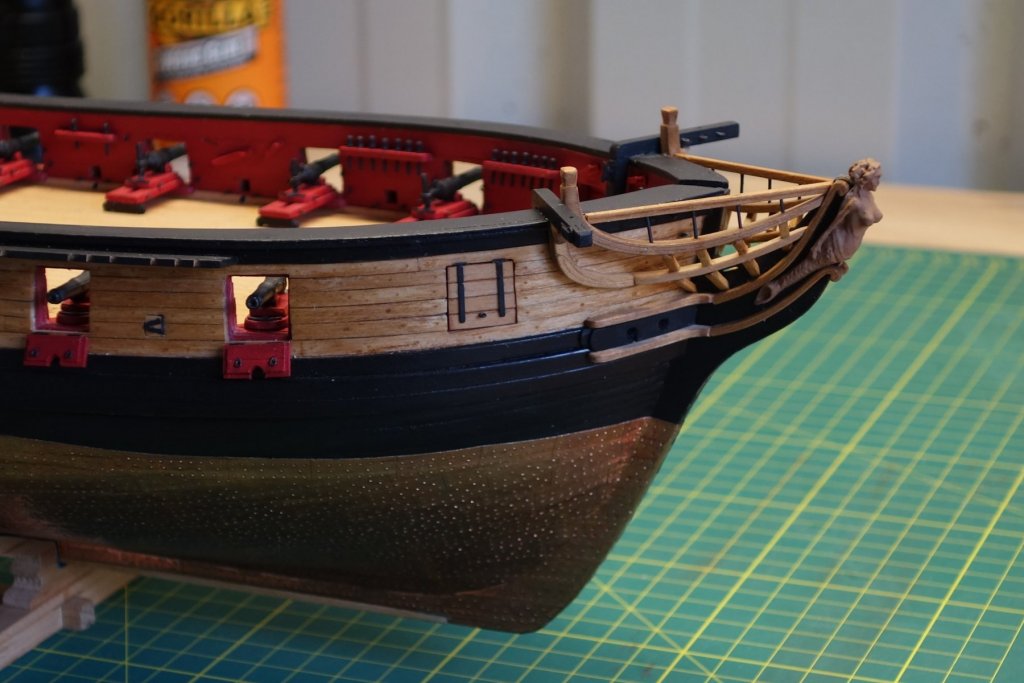
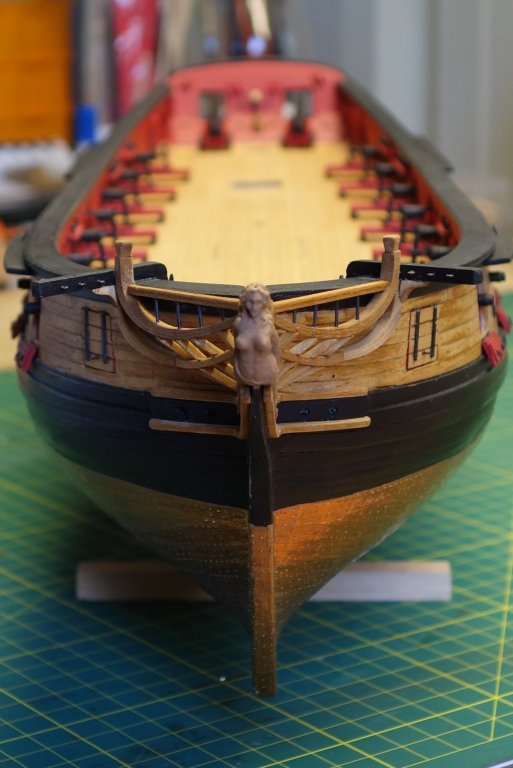
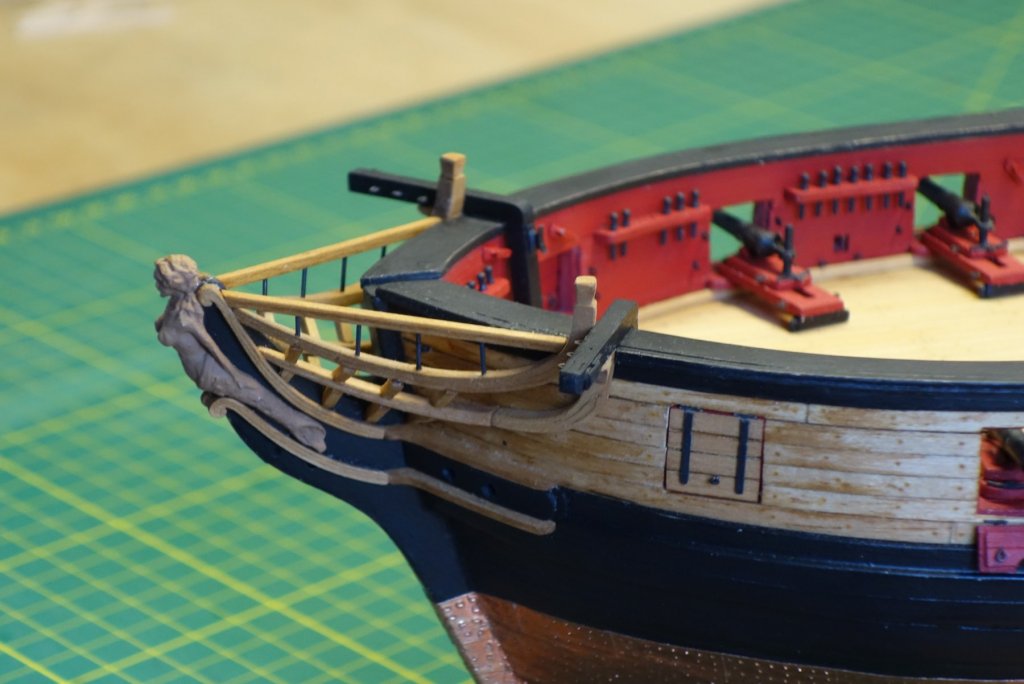
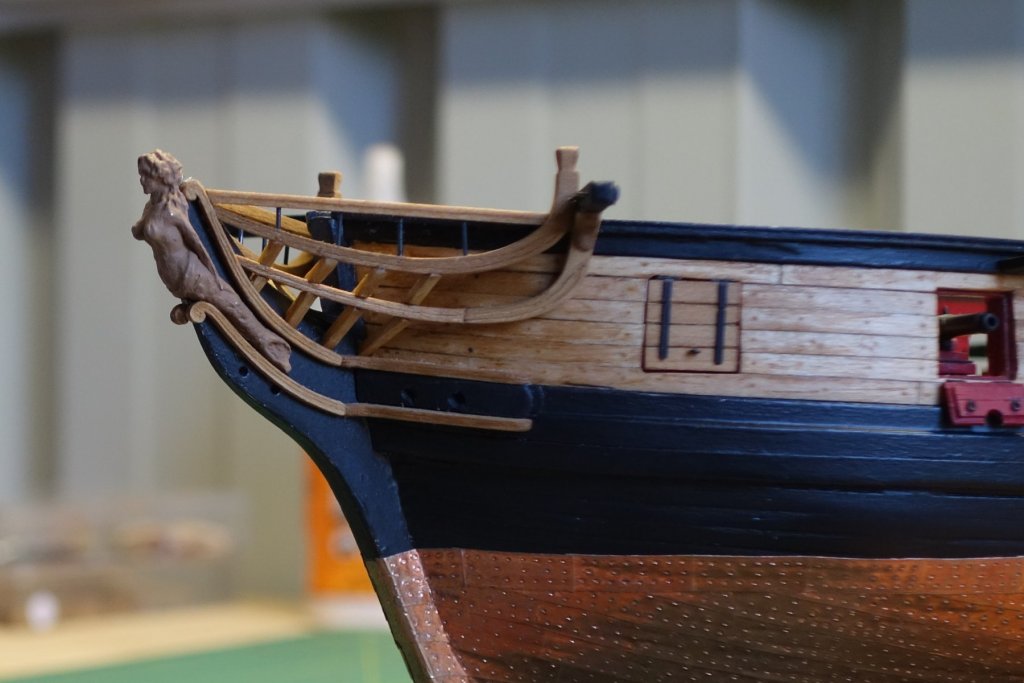
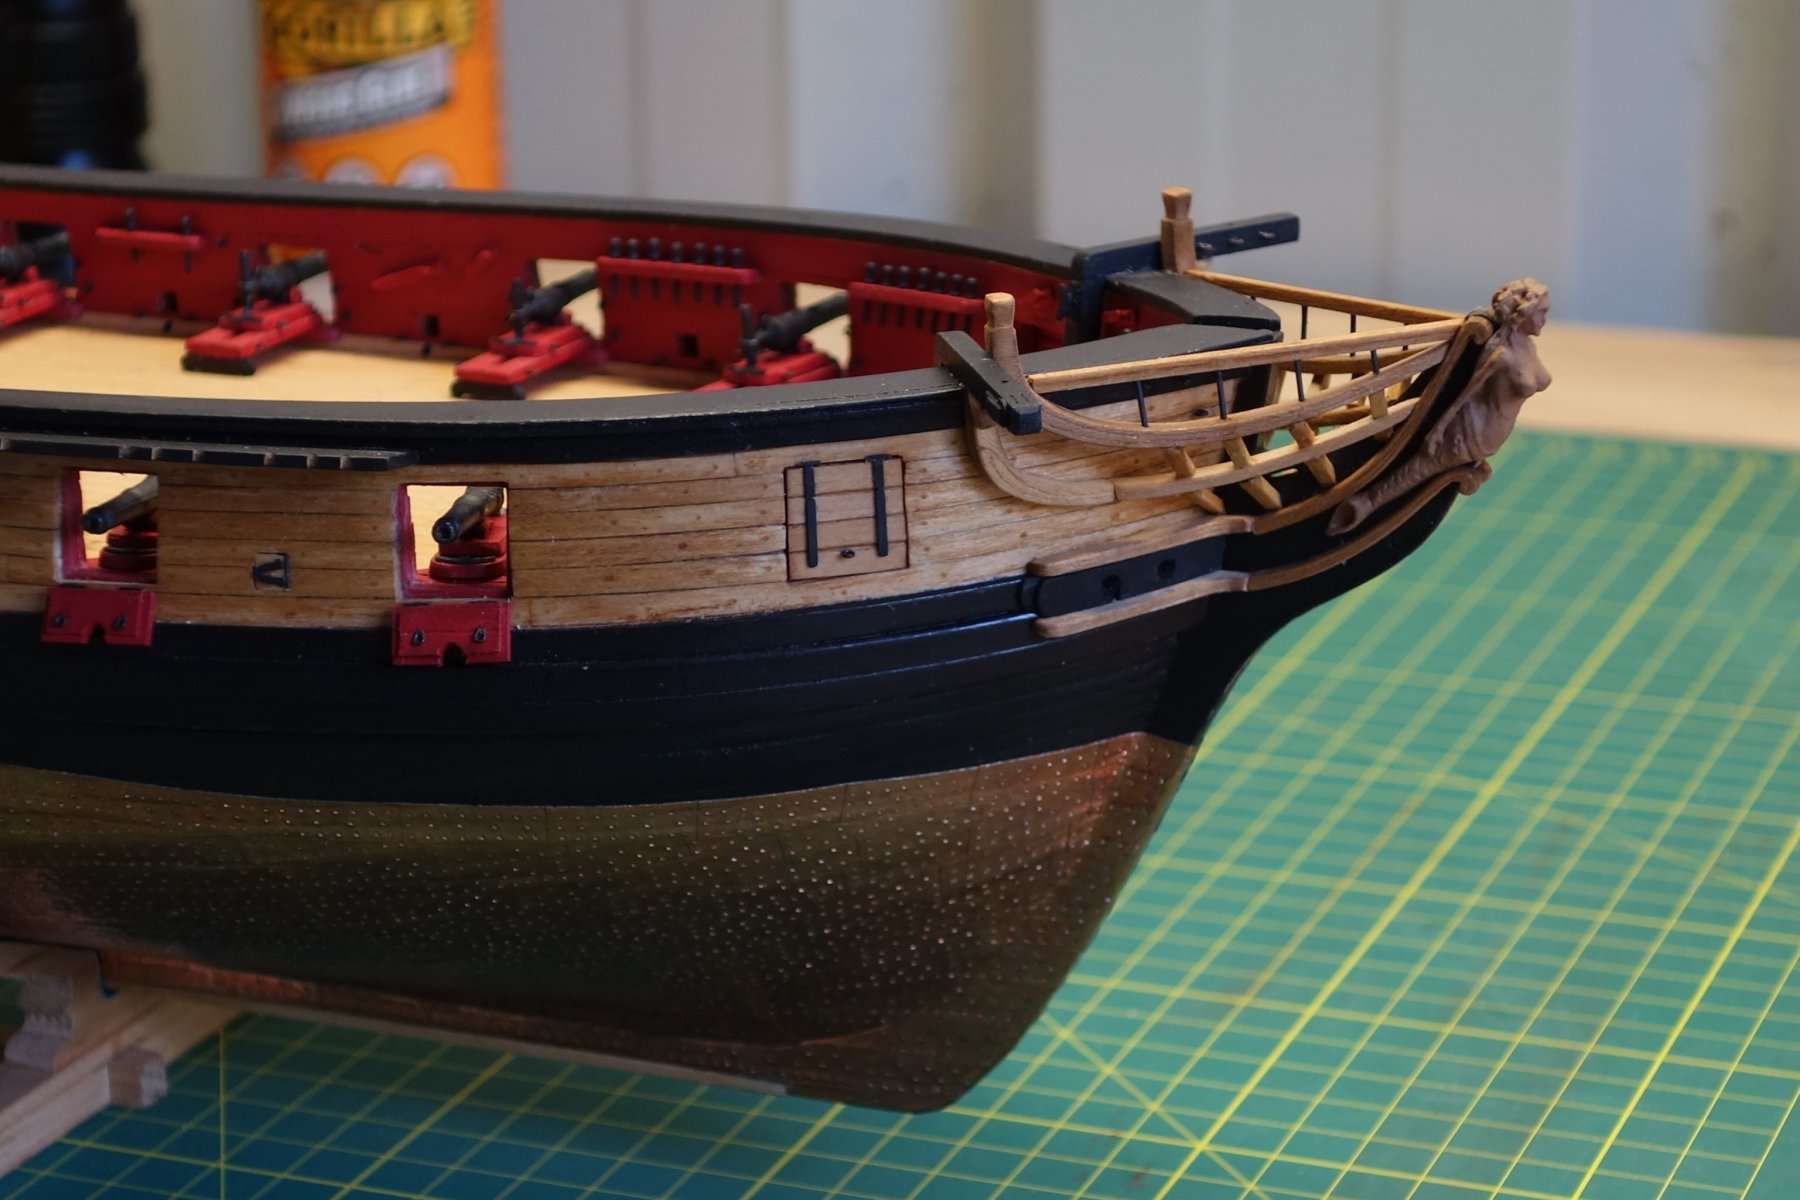
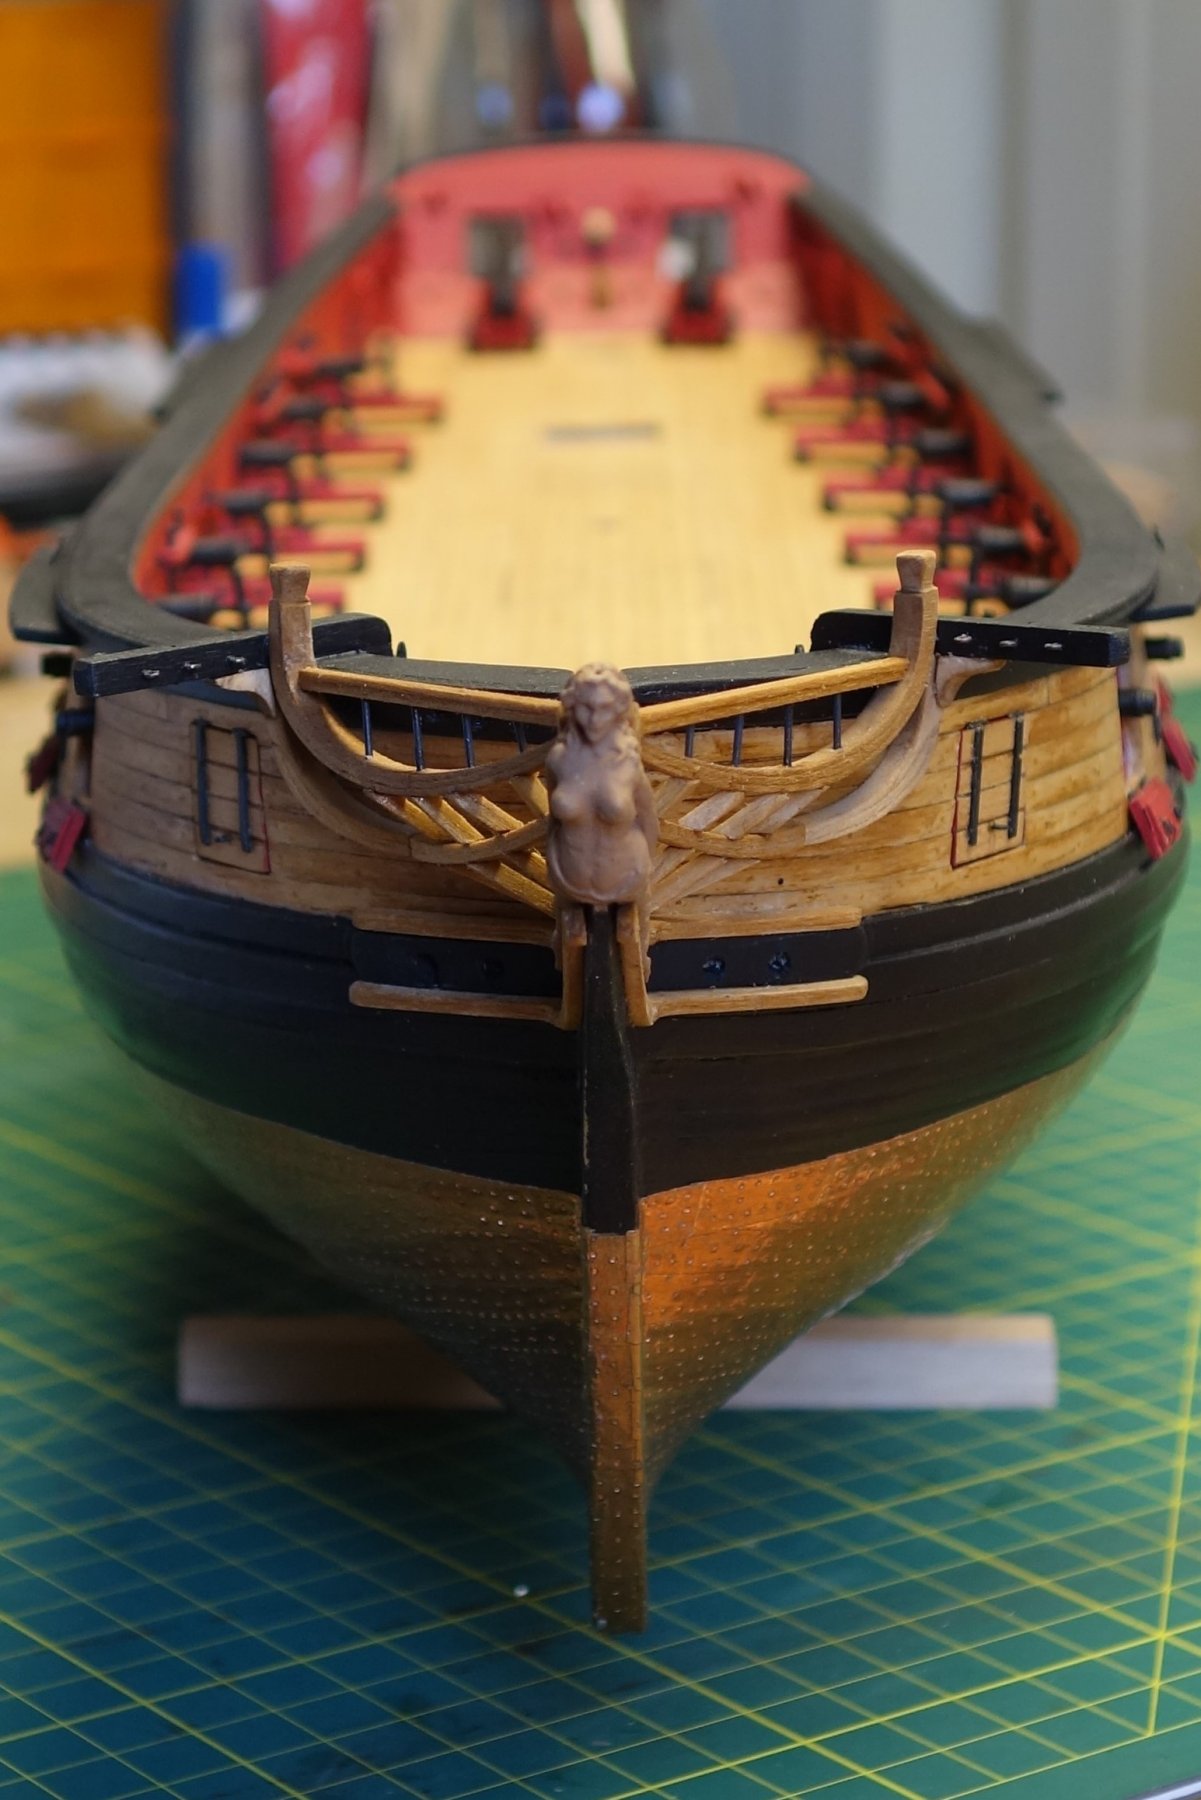
Time for another update. I got stuck into the head rails. Boy, that was a fiddly exercise, definitely the most tricky part of the build so far (in my case anyway). I think I got away with it. There are plenty of mistakes I can point out (and will be obvious for most of you on the forum), but overall I am pleased with the look.
For each head timber in between the rails there are a few in the bin and a few still on the floor bounced out of sight. The carvings are also a fit iffy.
I also want to give a bit of a plug to John Garcia from Model expo. I ran out of small eyepins and couldn't find them on line. When I asked John if I could buy them from model expo, he just asked for my mailing address and sent them to me free of charge. Now that is service...
 .
.
Now for some photo's.
Cheers, Peter

- svein erik, Nirvana, Dutchman and 14 others
-
17
-
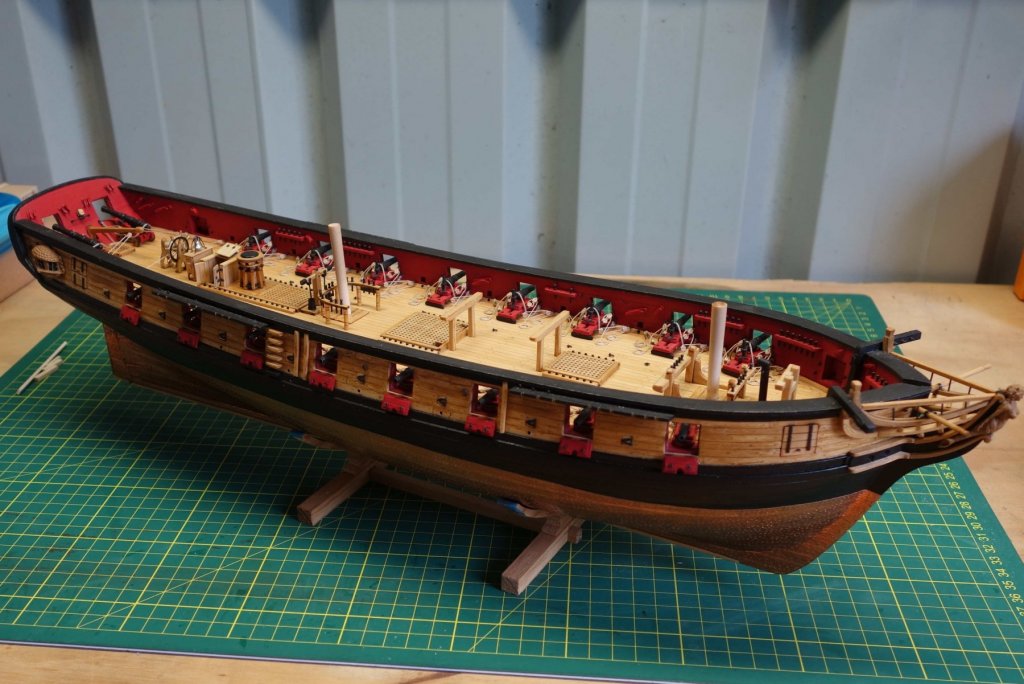
A bit more progress. I got as far ahead without doing the head rails and figurehead as I am comfortable with. So I going to bite the bullet and work on the head rails next. (either that or filing down 128x 2.4mm blocks for the gun tackles, I probably work on both...).
I had to do the pin rails twice. On the first attempt I rushed it a bit and placed them by lining up the top of the pins with the railing, placing them way too high. I used the pin locations on sheet 8 to line them up (and didn't check against other photo's, etc.). Some of the pins were butted up against the railing so you wouldn't be able to place a rope around the pins. So I took a breather for a few days and end up prying them off, cleaning the lot up and start again. The photo's show them at the corrected locations.
It's not a hobby where you want to rush things to keep things moving.

Anyway, here are some photo's.


- fnkershner, JesseLee, Tigersteve and 5 others
-
8
-
-
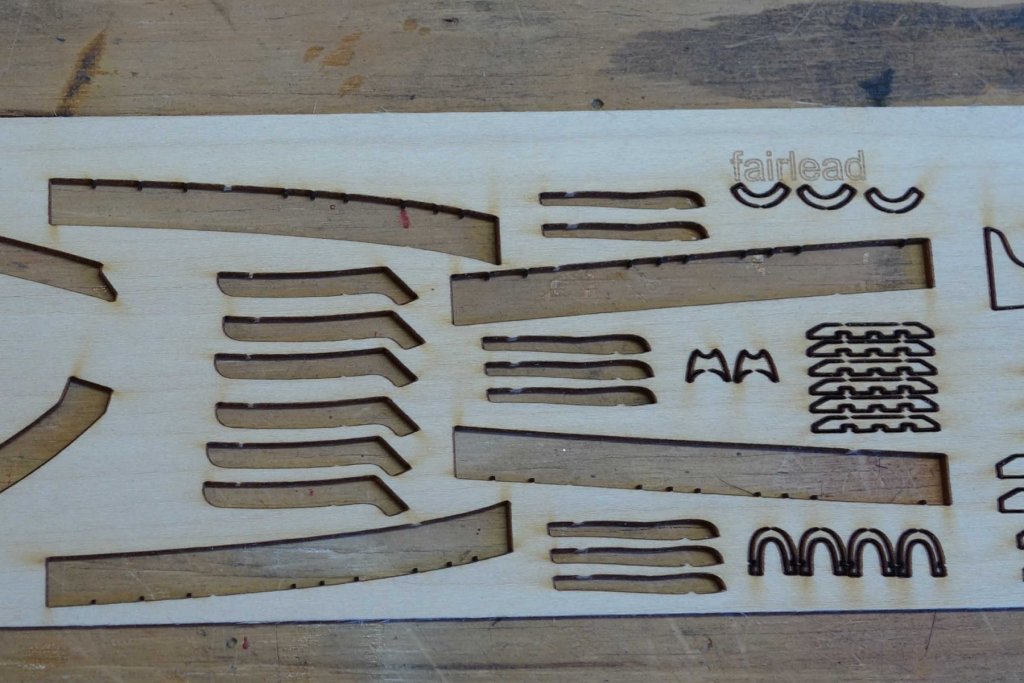
Hi Floyd,
I'm a bit late replying to your questions, but in case you haven't done the fenders yet I sent a photo of where they are on the laser cut sheet.
They are the 2 sets of 3 and 1 set of 2 parts on the left of the 'fairlead'.
Cheers, Peter
- fnkershner and Tigersteve
-
2
-
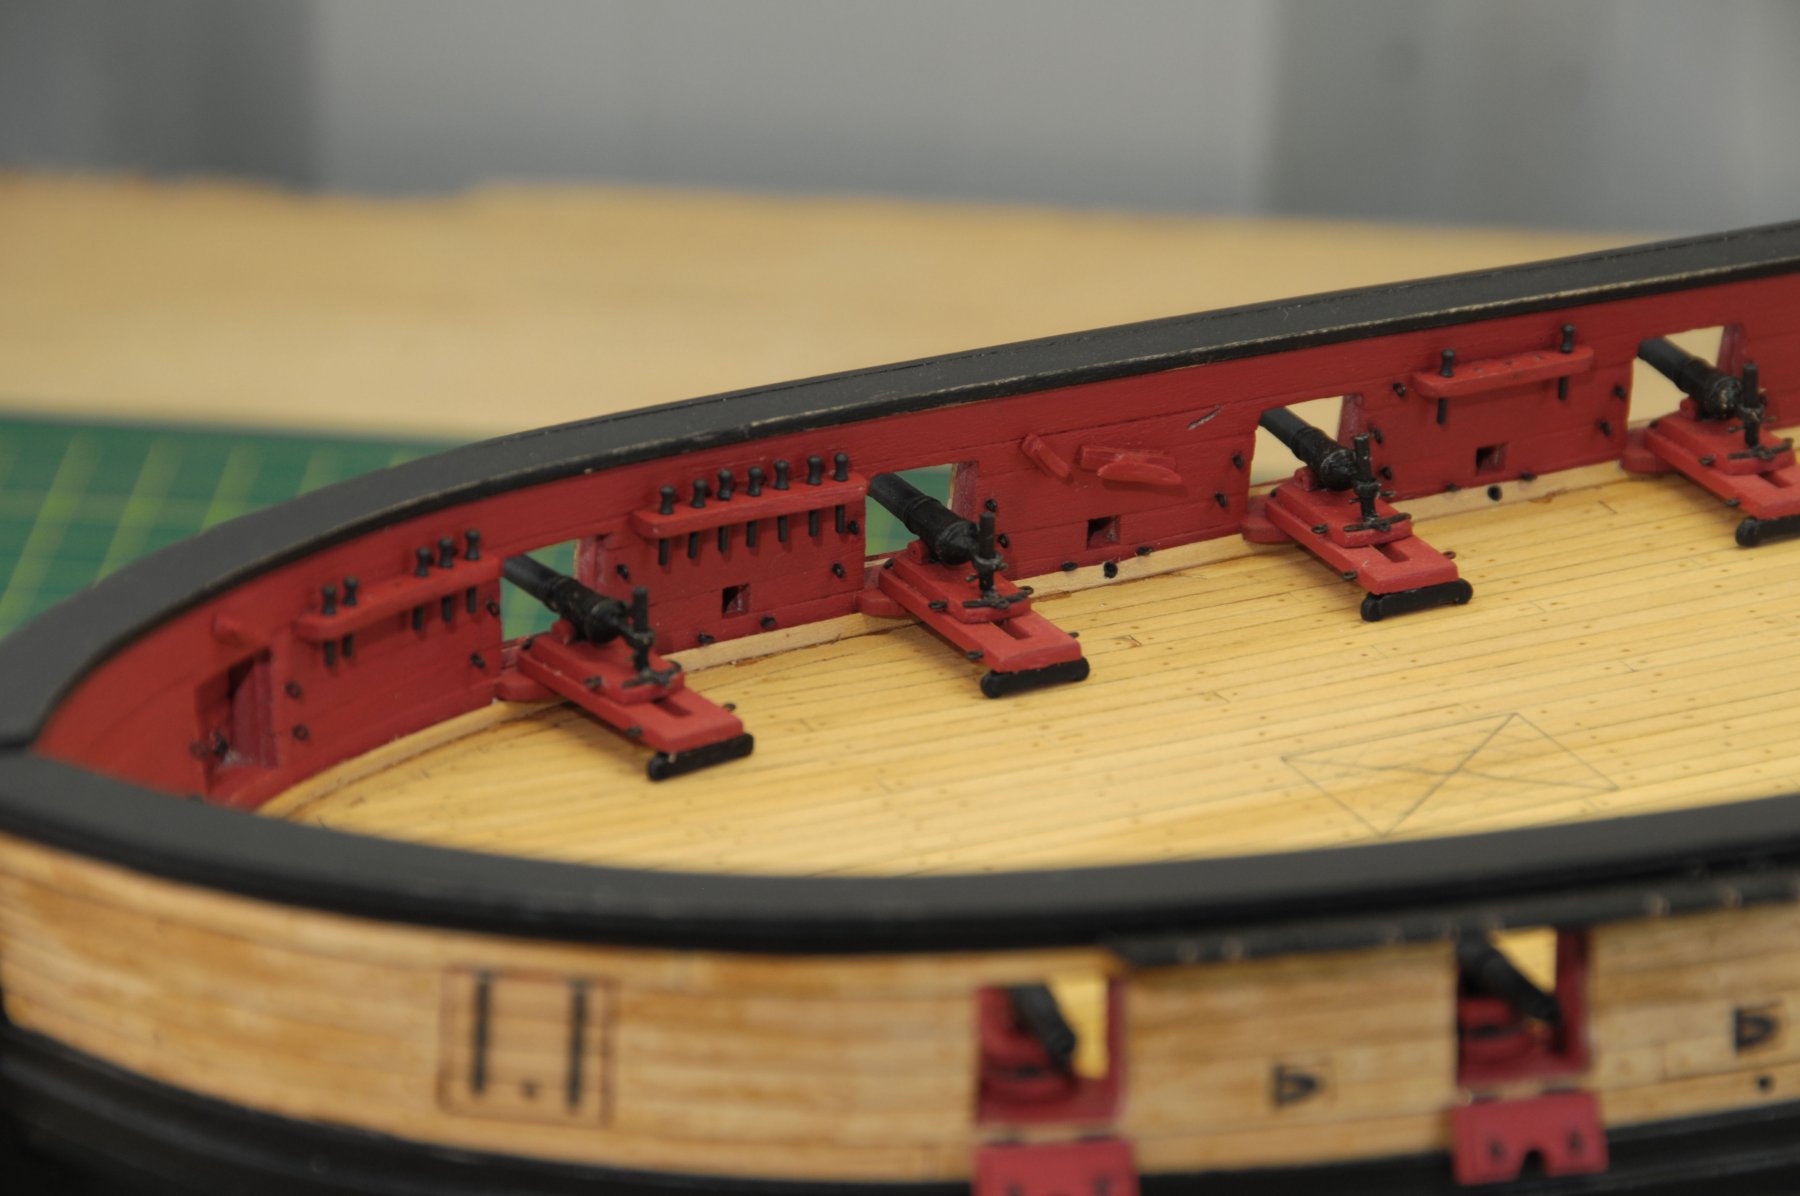
Another update. I haven't been confident to start the head rails yet so instead of this stage slowing me down, I decided to have some fun with the carronades and building them instead. At one stage I had all 16 sled components with the eyebolts and photo-etched part ready and glued together. I felt quit smug with myself lining them all up and did a final check against the instructions. Yep, I got it wrong. The eyebolts of the top sled were at the carronade side, not the photo etched detail side. DOH...
 So I had to pry the sleds apart, remove the photo etched part of the top sled and redo the lot. I was not in the mood taking photo's.
One thing I benefitted from is that I got into the habit of using the least amount of glue where no strength is required. Some parts of my build are not glued at all. So the sleds came apart without breaking any.
Anyway, enough dribble. Here are some photo's.


- paulsutcliffe, BenD, fnkershner and 6 others
-
9


US Brig Syren by Peter Bloemendaal - FINISHED - Model Shipways - 1:64
in - Kit build logs for subjects built from 1801 - 1850
Posted
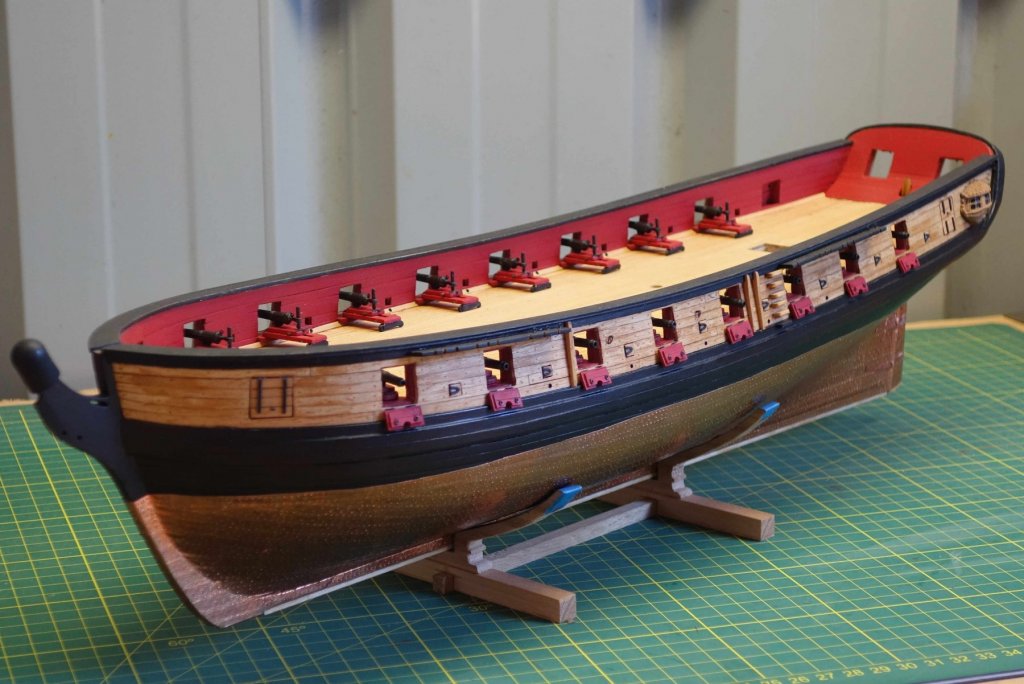
Thanks Steve, Jess & Alan and thanks for all the likes.
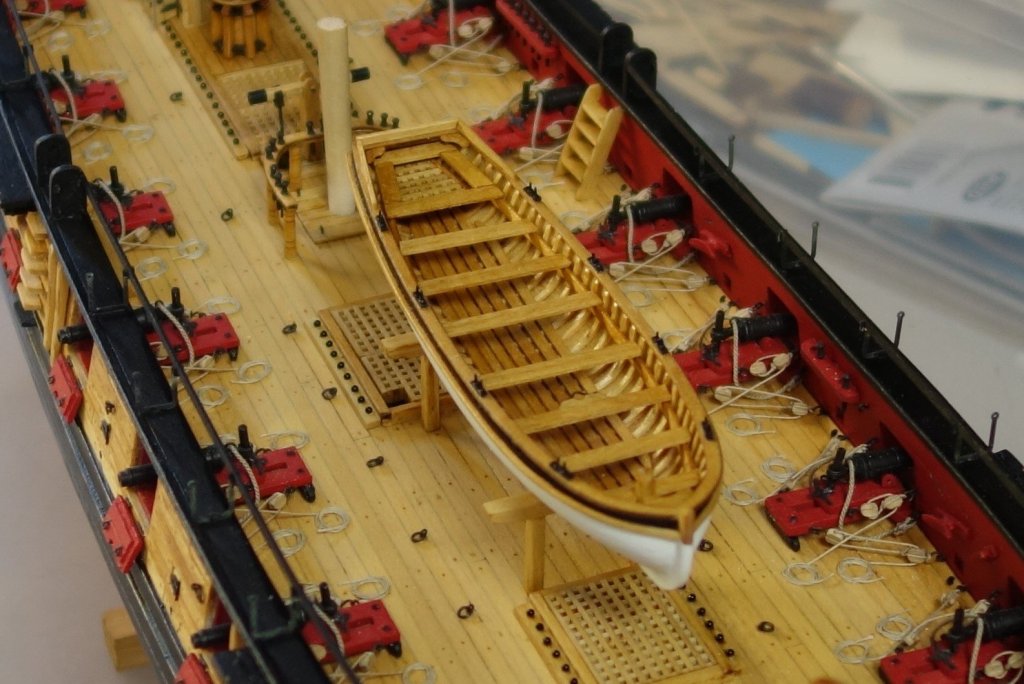
I managed to fix the steering so the lines now runs around the top of the drum. And the long boat is now completed as well.
I started placing the netting and spent 30 minutes patiently trying to thread a line through below the rigging line and pull it back out (through the netting!!) above the rigging line. After some choice words I went back to the instructions and found out the netting needs to be trimmed prior to lashing it....DOH. It looks like securing the netting is going to take me a while....lol... Very fiddly.
Anyhow, here are a few photo's.