
HOLIDAY DONATION DRIVE - SUPPORT MSW - DO YOUR PART TO KEEP THIS GREAT FORUM GOING!
×


hamilton
-
Posts
1,931 -
Joined
-
Last visited
Content Type
Profiles
Forums
Gallery
Events
Everything posted by hamilton
-
 Your work is always so neat and precise! She's looking great Bob hamilton
- 682 replies
-
- 5
-

-
- halifax
- lumberyard
- (and 1 more)
-
The deck house looks great Tim - are the side panels resin cast? Do they come as a single strip that you install behind the wooden framework? Or are they individual panels? hamilton
-
QUICK-FIND INDEXES to BUILD LOGS FOR KITS
hamilton replied to Dan Vadas's topic in - Index of all kits by brand and subject
This is great! Just to note - my Yacht America build is finished. Thanks for putting this list together - it is very helpful! hamilton -
Wow! I wish I had room to build a model of this size....though technically I do have the Constitution which is about this size, so..... This will be a very fun project to follow along with - and I'll be taking some crib notes for my future Flying Fish build! Have fun with this one Tim hamilton
- 55 replies
-
- 3
-
-
- cutty sark
- sergal
- (and 2 more)
-
Great choice with the black hatch coamings - I love the contrast with the deck and bulwarks. Beautiful work! hamilton
-
Just catching up here Bob - truly wonderful work as usual. The Halifax looks like a really fun project - and I'm also glad to hear you made it through the weather ok! hamilton
- 682 replies
-
- 4
-
-
- halifax
- lumberyard
- (and 1 more)
-
Beautiful work Jason! hamilton
-
question for sketchup users
hamilton replied to hamilton's topic in CAD and 3D Modelling/Drafting Plans with Software
Hi Ron: I've been test driving TurboCAD over the weekend and there is, indeed, a learning curve. I've been using Sketchup and so I'm having to both learn and unlearn at the same time! As an experiment I've started with a relatively simple example - the Monk "Curlew" centreboard sloop. I'm trying to model it in 1:12 scale and initially just determining how to set the scale was a challenge. Now I've reproduced (in 2D) the line drawings as well as a corrected transom and sketched the shape and taper of mast and boom. I have not made any attempts yet to experiment in 3D, but will work my way up there once I feel comfortable with 2D drawing - I'll read through the tutorial you link to above! hamilton -
question for sketchup users
hamilton replied to hamilton's topic in CAD and 3D Modelling/Drafting Plans with Software
Thanks Ron - just looked into DesignCAD and was pretty amazed by the price....significantly cheaper than most CAD software and figured for a newbie it was worth a try.....we'll see how it goes.......thanks again hamilton -
question for sketchup users
hamilton replied to hamilton's topic in CAD and 3D Modelling/Drafting Plans with Software
It seems like Sketchup is really for square things, or at least really regular things. The number of CAD options out there - not to mention price issues and complexity - make selection a difficult task for the novice....I may try out Onshape as Don recommends - free is always welcome! I'm definitely not in a position to drop a lot of money on this sort of thing....thanks all for the contributions to the post so far! hamilton -
question for sketchup users
hamilton replied to hamilton's topic in CAD and 3D Modelling/Drafting Plans with Software
Hi Per: Thanks for the tip - I followed up on it and have ow generated some 1:12 scale line drawings of the Edwin Monk Curlew just to get a feel for the software. Not sure how successful I've been.....I'll need to print the plans to find out.....thanks again! hamilton -
Hi there: I've just started experimenting with sketchup as a support for ship modelling. What I would like to do with it is to be able to make lines drawings and (if possible) templates for components - specifically frames. I don't know if all of this is possible - the lines drawing seems ok (once a bezier curve extension is acquired.... My question is if I want to print my drawings how can I do so in a particular modelling scale (1/4", e.g.)....I've seen no option for doing this so far and would be grateful if anyone could explain how this works - if it works....Thanks in advance! hamilton
-
She's looking great, Al! hamiton
-
Hi Jond: Very impressive. It's easy to look through this log and forget the scale - until you see a shot of the main sail on an ironing board and remember what an incredible project this is! Wonderful stuff - despite the difficulties of doing so, I hope you do sail her eventually - I would love to see some shots of that! hamilton
-
Hi Jason: Sorry I can't help with your question....but the model looks beautiful! hamlton
-
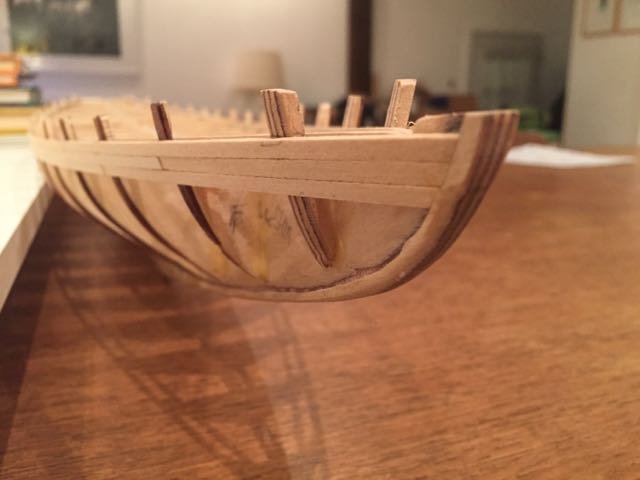
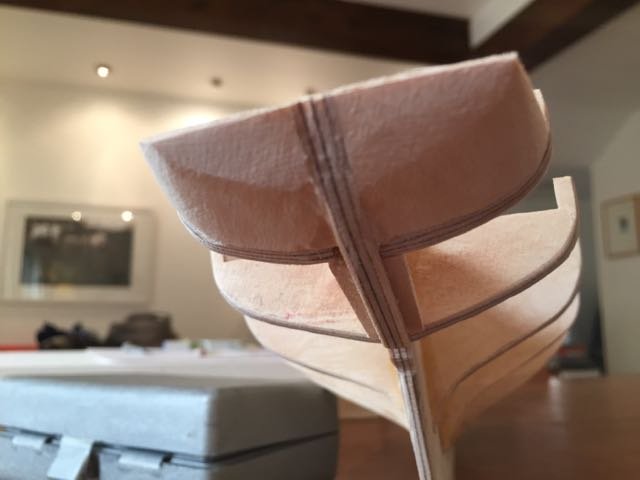
Hello all and thanks for stopping by! Keith -- yes, it is an issue - I can already see this trend happening at the aft end. I suppose I could have gone for wider strip wood and spiled the planks (certainly this would have been more correct!). But since the hull will be finished I won't mind this unless it becomes completely out of control and the planks start seriously misbehaving. I'll be taking a "plane" to the plank edges once it's done (that is a #10 x-acto blade) to smooth things out and then applying healthy doses of artist acrylic paste, which goes on nicely, dries very hard, sands easily to a nice eggshell finish, and takes paint evenly. We'll see how things go..... Jason - I've been silently following your Jason build - it is truly beautiful! This little BN build is easily missed! Especially when I take ten months off to do my actual day job and return to more sporadic work on the Syren!! Jond - I'm jealous! - I live on the other coast now and don't often get down East....love your great state of Maine, though - spent quite a bit of time there as a youngster down at Old Orchard Beach and environs, up North in Madawaska and around Bangor and down to Machias....it's a lovely lovely place. Have fun on the BN!! hamilton
-
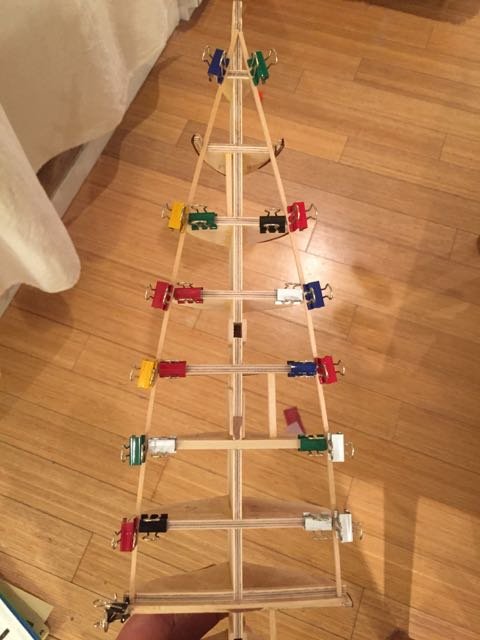
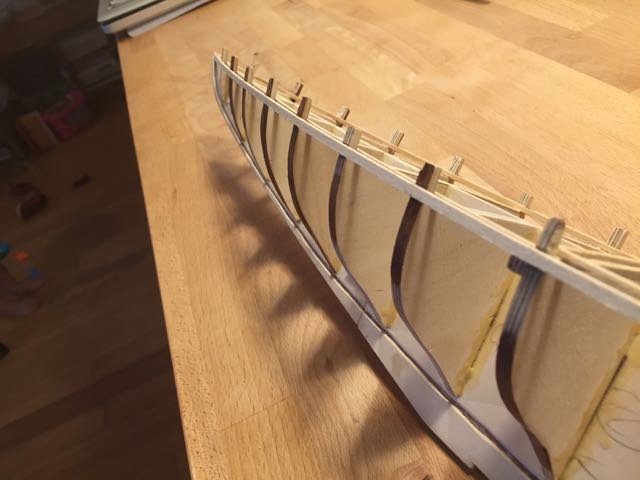
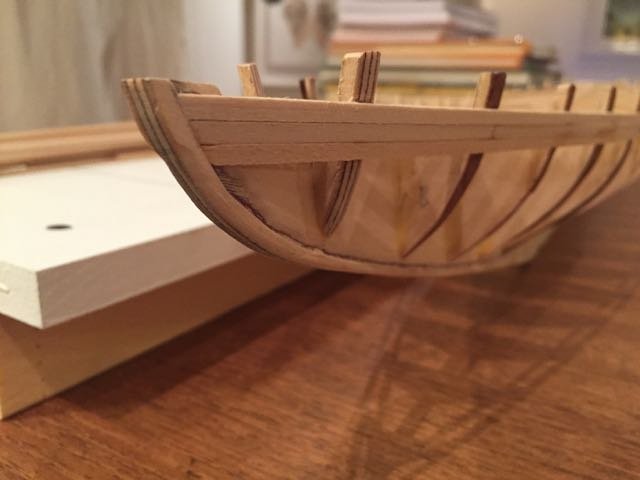
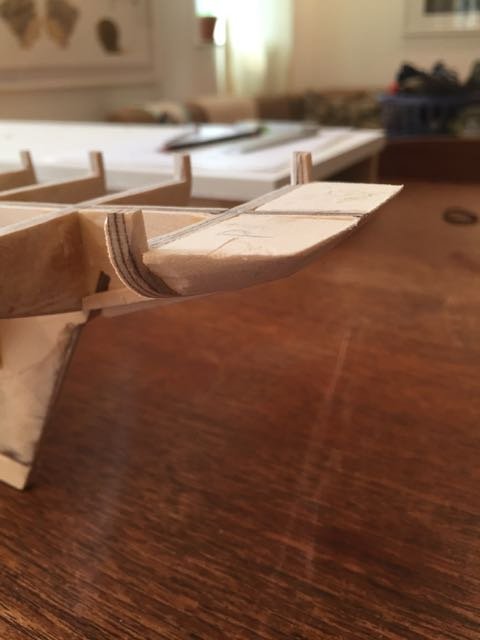
Hello there! I'm happy to say that I've officially gone (more or less) past the framework stage and am now planking the hull of the Bluenose! It's a very exciting time...particularly since I started this project about a year ago (when I first cut the out-of whack keel pieces and the bulkheads)....at this point it still looks a bit rough around the edges, but it's nice to feel like things are progressing. I installed the middle waterway strip on the fore deck and the main waterway on the aft deck and then began planking downwards from there - thee strakes completed tonight before I had to take care of some chores before bed and watch Game of Thrones. Tomorrow will be more productive, I think....here are a few photos. I'll likely not post more until the hull planking is done, unless there's something interesting to note in it....In the meanwhile - enjoy! hamilton
-
Thanks Grant and Steve! Yes I have to commit to these exercises, though they are uncomfortable and frustrating - probably more frustrating though to only have partial use of my finger...an 80% recovery would be fine by me while I sit here at 40%..... hamilton
-
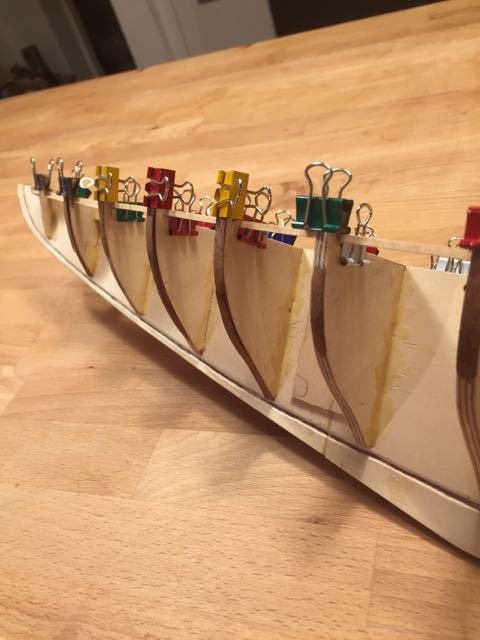
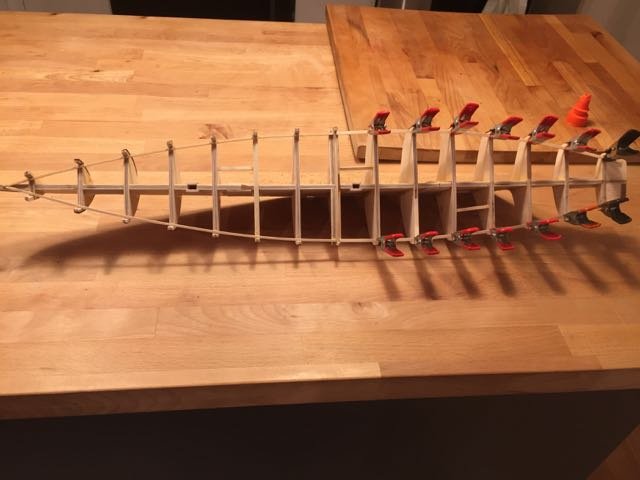
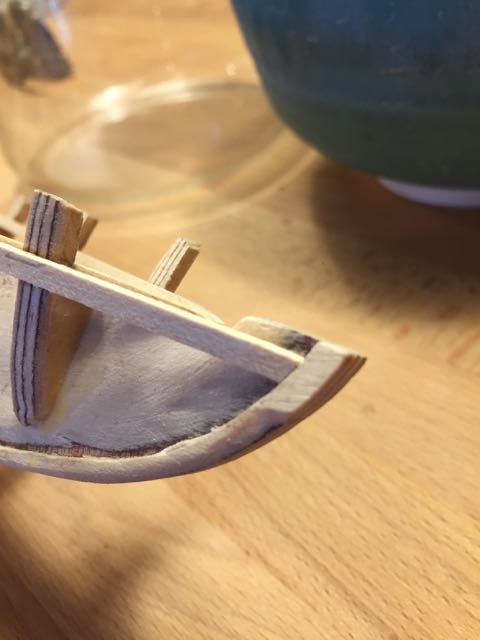
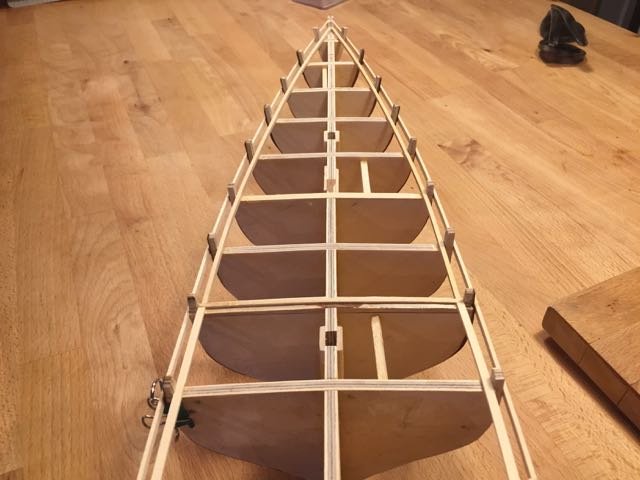
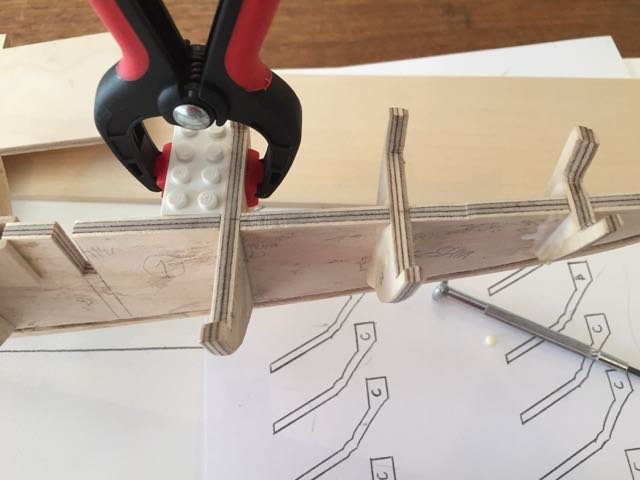
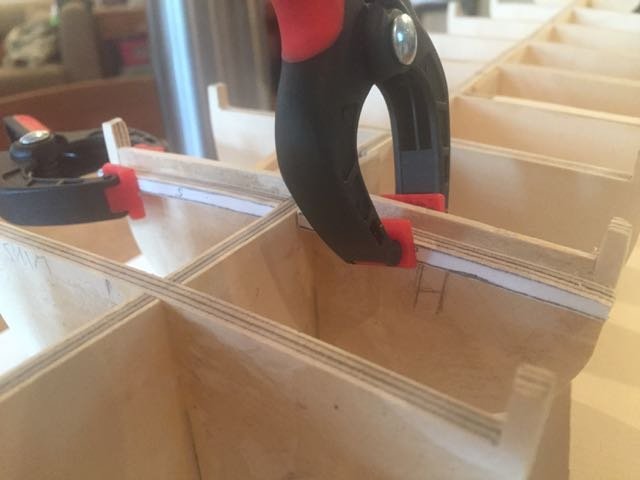
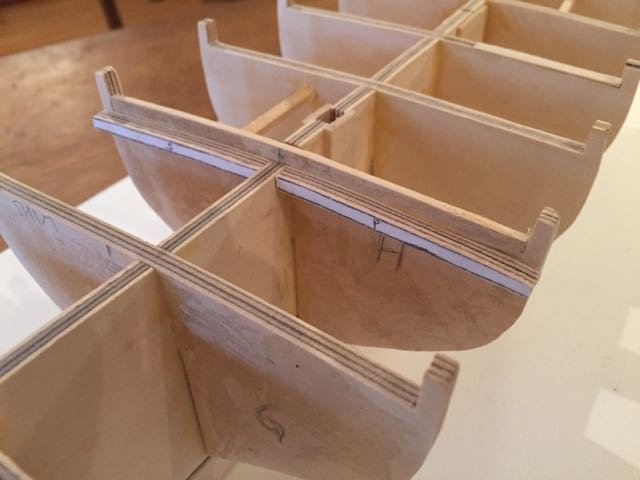
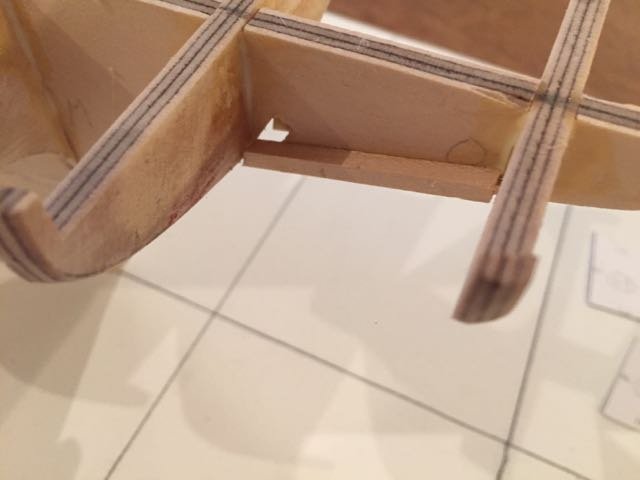
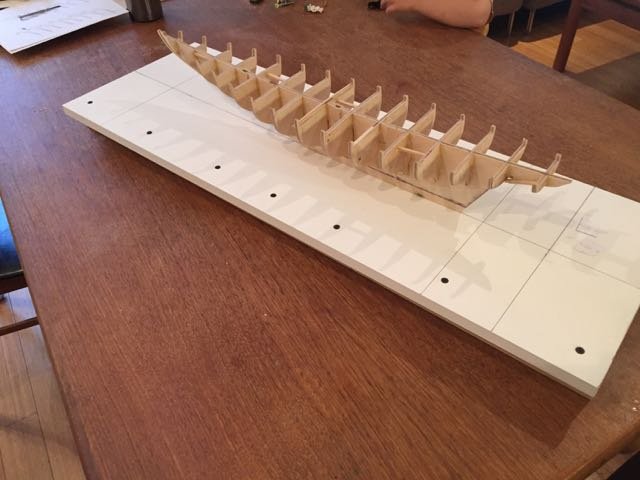
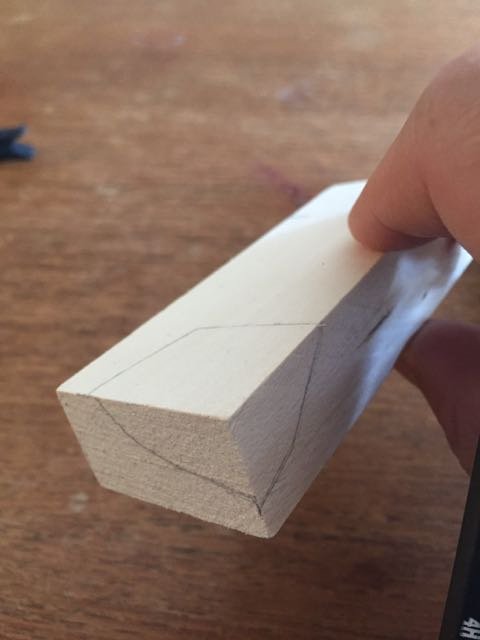
Well, this summer has been a bit of a bummer, modelling-wise...my hand injury slowed things down and then the surgery I had to fix the nerve damage slowed things down even further at the time of year when I usually get a lot of modelling done....The surgery was a "success", though I've learned that what this means to doctors may not be what it means to patients....I had a gigantic bandage and partial plaster on m left hand and upper forearm (I suppose to prevent me from any further stupidities), which finally came off yesterday....my left index finger (or frankenfinger, as I like to call it because of the crazy surgical scar) is still extremely stiff, and will require extensive and persistent exercise on my part to get as much movement back into it as I can....they were typically reticent to make any indications of what I could expect but right now I can bend the first joint at a right angle but I cannot make a fist that includes the index finger..... In any case tonight I finally got back to the Bluenose. Whatever work I've done on it recently has been dull and and not really worthy of documentation - though I have some progress pictures below. I've installed the bulkheads now, as well as the stern filler blocks and the false beam that acts as a landing place for the fore deck planking on a mid-ships bulkhead. The rest of my time has been taken up with adjusting the outboard edges of the bulheads and fairing the frames, reducing the width of the bulkhead extensions to the required 1/8" and (starting soon) fairing the bulkhead tops for the deck planking. I thought the tops were ok until I test fit the waterway strips this evening and discovered a lot of little adjustments needing to be made.... One thing I've learned so far in this venture into scratch-building is that I cannot cut as accurately as a laser cutter, and this adds a lot of time in getting things as fair as possible. For example, my work tomorrow will likely centre on tightening up the angles between the bulkhead tops and extensions - very fine knife and file work so the waterway planks will fit as snugly as possible....I'm really hoping that extra time and effort spent here at the foundations will pay off down the line.... Anyway, here are a few photos - not a huge amount of change since the last round, but things are moving and I can't be in too much of a hurry.... hamilton
- 250 replies
-
- 11
-
-
Thanks Wayne....hopefully the plans I've ordered from NMM give some indication of this.... hamilton
-
Thanks Russ - so the obvious follow-up is how can the total length of the keel be determined from the scantlings?....If there is a gun deck length of 106' and a length of keel for tonnage of 87' 9" (as is listed for 20-gun ships of the 1719 Establishment)....Or is there another calculation? Thanks again! hamilton
-
Just wondering if someone can fill me in on what "length of keel for tonnage" is and whether it is simply the full length of the keel or some portion of it....I encountered the term looking over the scantlings for the 1719 Establishment included by Lavery in his Anatomy of the Ship for the 20-gun ship Blandford..... hamilton
-
Wow - you're diving right in Peter. Looking forward to seeing this beauty come together hamilton
- 366 replies
-
- 4
-
-
- bellerophon
- victory models
- (and 2 more)
-
Hi Peter: Sorry I haven't been by for a while - have been in out of town for the last three months and then dealing with a hand injury.....nothing fatal to modelling fortunately! The America looks great (the Pickle too!) - the additions and improvements you made bring a lot to this kit - great work! I'm going to head over to your Belerophon page now - looking forward to another impressive build hamilton