hamilton
-
Posts
1,933 -
Joined
-
Last visited
Content Type
Profiles
Forums
Gallery
Events
Everything posted by hamilton
-
 Hi there: Glad you decided to start a build log for this kit - there are a couple on here, I think, which will likely provide some help as you go - though since you're aiming for a particular version, the help might be more in particular construction techniques rather than overall aspects of the vessel. Anyway, I've always admired the look of the Mars and hope to build her myself one day.....I'll follow your build with interest (though ten years is a very long time!) On another note, I've visited the Twente region a couple of times - both times staying in Enschede while visiting at the University of Twente. Good times! hamilton
 -
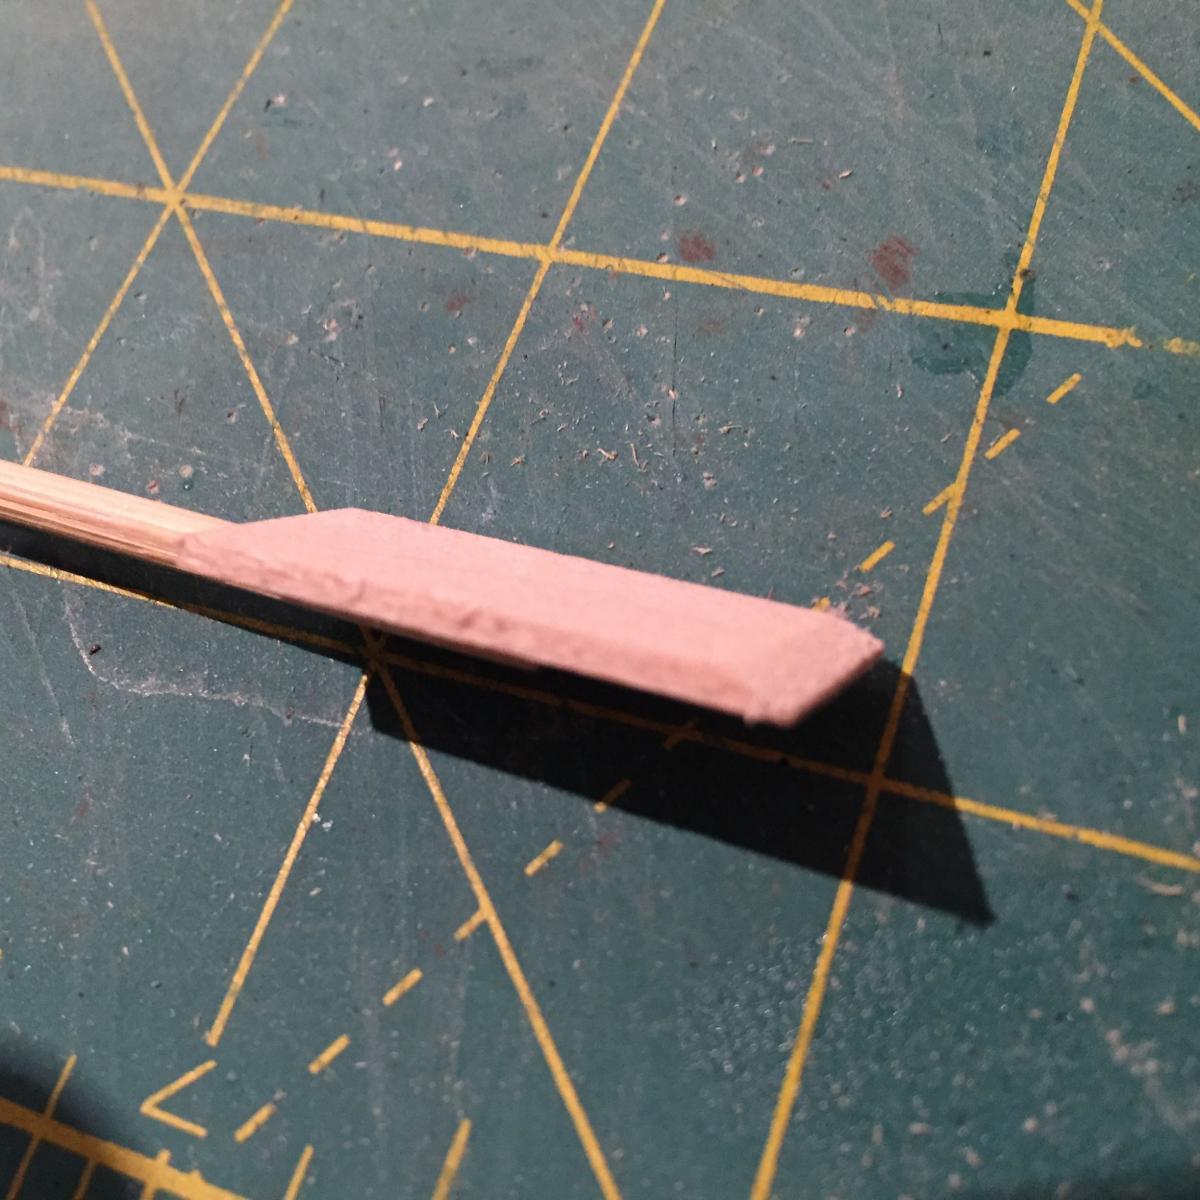
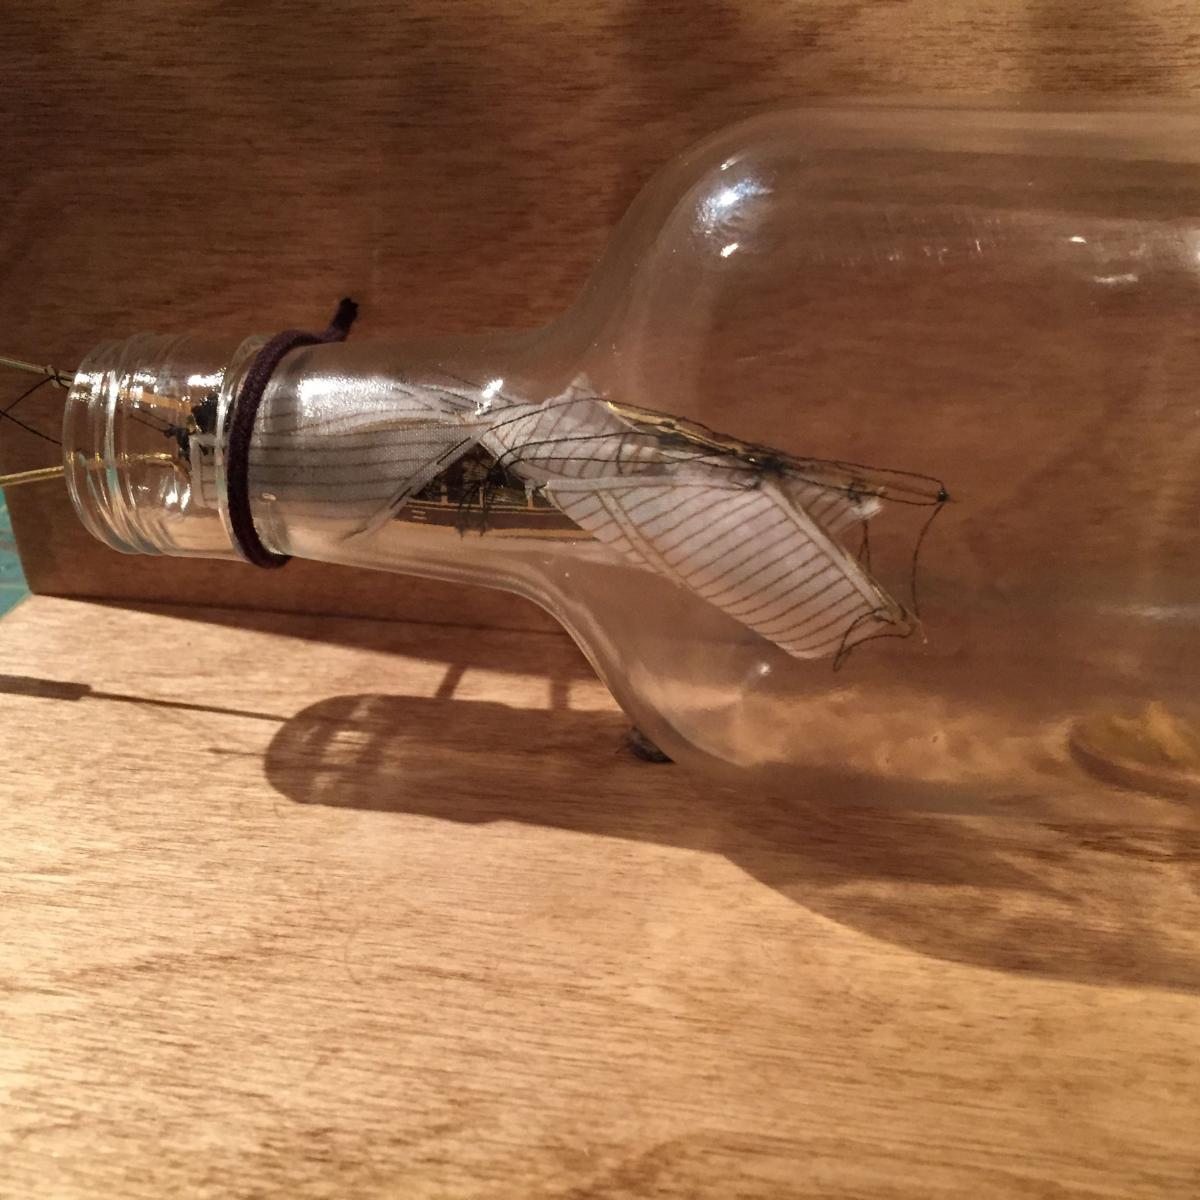
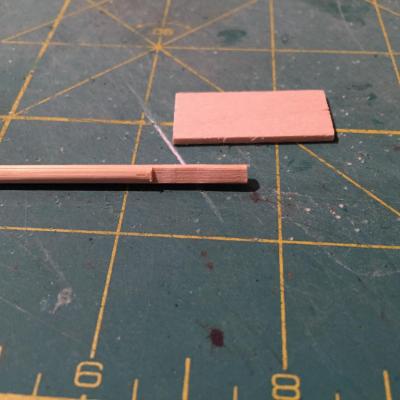
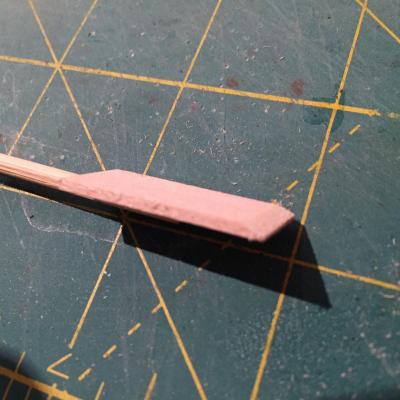
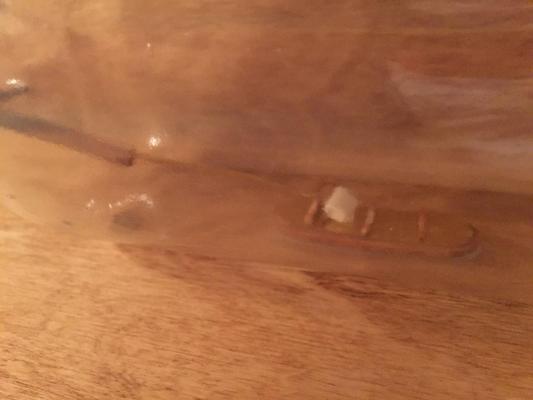
Thanks Danny: And on that note, I'll add an update on the Hannah build....I began this evening with the intention of fixing the Hannah on the stand (already in the bottle). I spent a bit of time considering the approach. I then made an initial attempt to manoeuvre the ship into the bottle. It is a snug fit, but with a little gentle pressure it actually goes in ok. I only moved the hull about half way into the bottle neck before retreating. Satisfied that I could actually get the thing in, I decided to make a little tool to apply the adhesive (I chose 5-minute epoxy again - more on this choice in a minute) to the stand. This turned out to be the only successful part of my evening's work.....Here is the tool - the filed down end of a bamboo skewer onto which I glued a short piece of 10mm x 1.5mm lime. I chamfered the end of the lime strip to ease the application. Here's the tool and here's my test of its reach and action on the stand - exciting stuff here, people! Once satisfied with the tools utility, I mixed up some epoxy dipped the tool in and applied it on the stand....it was a bit messy and the glass distorts the view to the point where I was unsure whether I was getting an even coat on the stand. I took a look down the bottle from the mouth and all seemed well, so I decided to go for it. In the build log I'm using as reference, the modeller mentioned using double-sided tape to attach one of the kit-supplied tools to the hull of the ship and thus be able to manipulate it in the bottle and onto the stand. The kit-supplied instructions mention making a rope sling using another tool supplied with the kit. I have not tried this (I might later) but decided to go with the other modeller's technique. Unfortunately, the only double-sided tape I have is wall mounting tape, which is very thick, though also strong enough to get a good leverage on the hull using the tool attached running alongside the stem. But in order not to have the tape stick in the rigging, I had to run it along the turn of the bilge from the bows to about 1/4 of the way back. What I did not notice until I drew the ship out again in failure was that the tape rose up from the hull enough to make it impossible to sit the forward part of the hull on the stand......mistake number 1. Anyway, blissfully unaware of this, I proceeded. On my first attempt, I accidentally wound one of the out threads around the bottom of the hull forward (it didn't get epoxied, thank god! but it did make it impossible to raise the masts) - mistake number 2. Still not noticing the tape issue, I pulled the hull out of the bottle just enough to untangle the out thread. I then began manoeuvring the hull back into the bottle. Here she is on the way in: At this point I had to drop my camera and focus all my attention on getting her onto the stand.....I actually wish I had kept the posts, which would have helped me to lock the hull onto the stand. The "V" stand I made is adequate, but when slathered in epoxy the hull slid around quite a bit and the tool, despite it's strong hold on the hull, did not allow much in the way of precise control. I did take a moment to pull the out threads and saw the masts come up quite gloriously (it was a momentary elation) before I finally noticed that the forward end of the hull was not sitting on the stand at all, and that it would never adhere to it as long as the tape was keeping the hull from contacting the stand. I drew the ship out planning on repositioning the tape, which is when I noticed: Mistake number 3 - the boom had detached from the main mast Mistake number 4 - the port side boom sheet had snapped Mistake number 5 - the main gaff had also become detached from the main mast Mistake number 6 - the aft port side canon had become unglued. Mistake number 7 - the line that runs through the foremast topsail had snapped on the starboard side Sheesh!! I decided I needed to step away from the modelling table for a bit (and write this post) so I could decompress and build up some positive energy to continue....I think that tonight I will simply do the following: 1. reattach the canon 2. reattach (with stronger thread) the boom and gaff 3. re-tie the port side boom sheet Tomorrow I'll tackle the topsail rigging (again!) and see about getting it into the bottle.... At this point (just to make a long post even longer), I'm a little concerned about the stand....it's epoxied in the bottle, so I imagine it's there for good. But now the lifts on the stand are slathered in epoxy.....I'm considering using slow-acting CA now to set the hull on the stand (despite my earlier misgivings about using it inside the bottle). But I may go with the epoxy again - except holding the thing straight while the epoxy sets will be a test of zen-like patience....on the other hand, will today's epoxy on the stand give me trouble when I go to try to put the boat on the stand at a later time? If anyone has insight here I would greatly appreciate it...... Long and the short - I can see that this is doable (which is important), but the goal line just receded significantly after today's modelling debacles...... And on and on... hamilton

-
Hi Tom: It's funny that you say the more you do the smaller it seems - this is definitely true! Wait till you get into the rigging! I also found the laser cut wood to be unevenly cut. Also - I suspect that a couple of the lifts might be mis-numbered on the plans - I can't remember which, but I would advise you to test their fit against each other before gluing them and making sure that the numbers correspond to the right part. There was one lift that should have been wider than it was given its placement and I think it was actually mis-numbered in the plans....if I hadn't been assembling as I went, I could have fixed this easily, but I ended up using some wood filler during and after the sanding of the hull to correct for this.....maybe your kit is different, though..... hamilton
-
Cutter Cheerful 1806 by rafine - FINISHED
hamilton replied to rafine's topic in - Build logs for subjects built 1801 - 1850
Hi Bob: Just caught up on your Cheerful - she's coming together very nicely. hamilton- 525 replies
-
- 1
-

-
- cheerful
- Syren Ship Model Company
- (and 1 more)
-
So far so good eh? The bottle that came with my Hannah was also a little foggy, though it's now too late for me to do anything about it and viewers will have to pretend that they're peering at the ship through a light mist..... I don't think you'll have any problems with the finishing on this tiny kit - given the scale and detail of those figures! I'll be following along here with interest hamilton
-
The deck and stern are looking great, Brett. And good on you for sticking with the 2mm planking - you're a braver man than I! hamilton
-
Hi Tom: Well there's not actually that much left to document, and I don't have many photos of the ship in process and none of the various construction stages.....as I say I'll try to get some good photos of the ship going into the bottle and to document that.... The keen-eyed among you will notice that I replaced the brass pins on the stand with some rough-hewn walnut strips shaped for the hull to rest upon. I thought this would make mounting the hull in the bottle a bit easier - someone (either here or in another place) compared putting the hull on the pins to a carnival game.....not really in the mood for that sort of finagling.......I'm going to have a try at getting her into the bottle this evening, so check for an update (good or bad) later. hamilton
-
Hi Brett Yes mine was double planked - making for a much easier build! Though I've seen some very nice planking jobs on the SF II, but it looks like quite a battle....You might try replacing the wood with two thinner layers that add up to 2mm - a 1.5 and a .5 or a 1 and 1.....I'm not sure whether this would cause construction issues down the road (do the bulwarks come as a laser cut piece?) but it would certainly make the planking easier.... hamilton
-
Weird indeed, Mike. And hello Augie!! Yes, that's the plan.....looking forward to more copper tiles! hamilton
-
Hi Brett: It's hard to tell from the profile photo, but do the bulkheads in question taper off towards the keel? I built the first version of this kit (the San Francisco) a few years back and can't remember this situation on that build (and unfortunately don't have documentation!) I believe you'll be adding the sternpost, keel and and stem as separate pieces, right? If so, then plank the whole thing - the final planks will bend up to land on the centre keel part at the stern, creating a little slot above the bottom edge of the keel into which you'll place the keel piece(s)....I hope this makes sense..... hamilton
-
Hi Owen: I've always been intrigued by this kit. Looks like you're doing a great job despite some of the limitations of the kit (2mm planking on a single planked hull? Yikes!) hamilton
-
Hi Rowan: Just read through your log - the Endeavour's looking really amazing - and I really appreciate the documentation of some of the more niggling processes (like the jig you made for the pilasters and your technique for the pintles and gudgeons). Thanks! hamilton
-
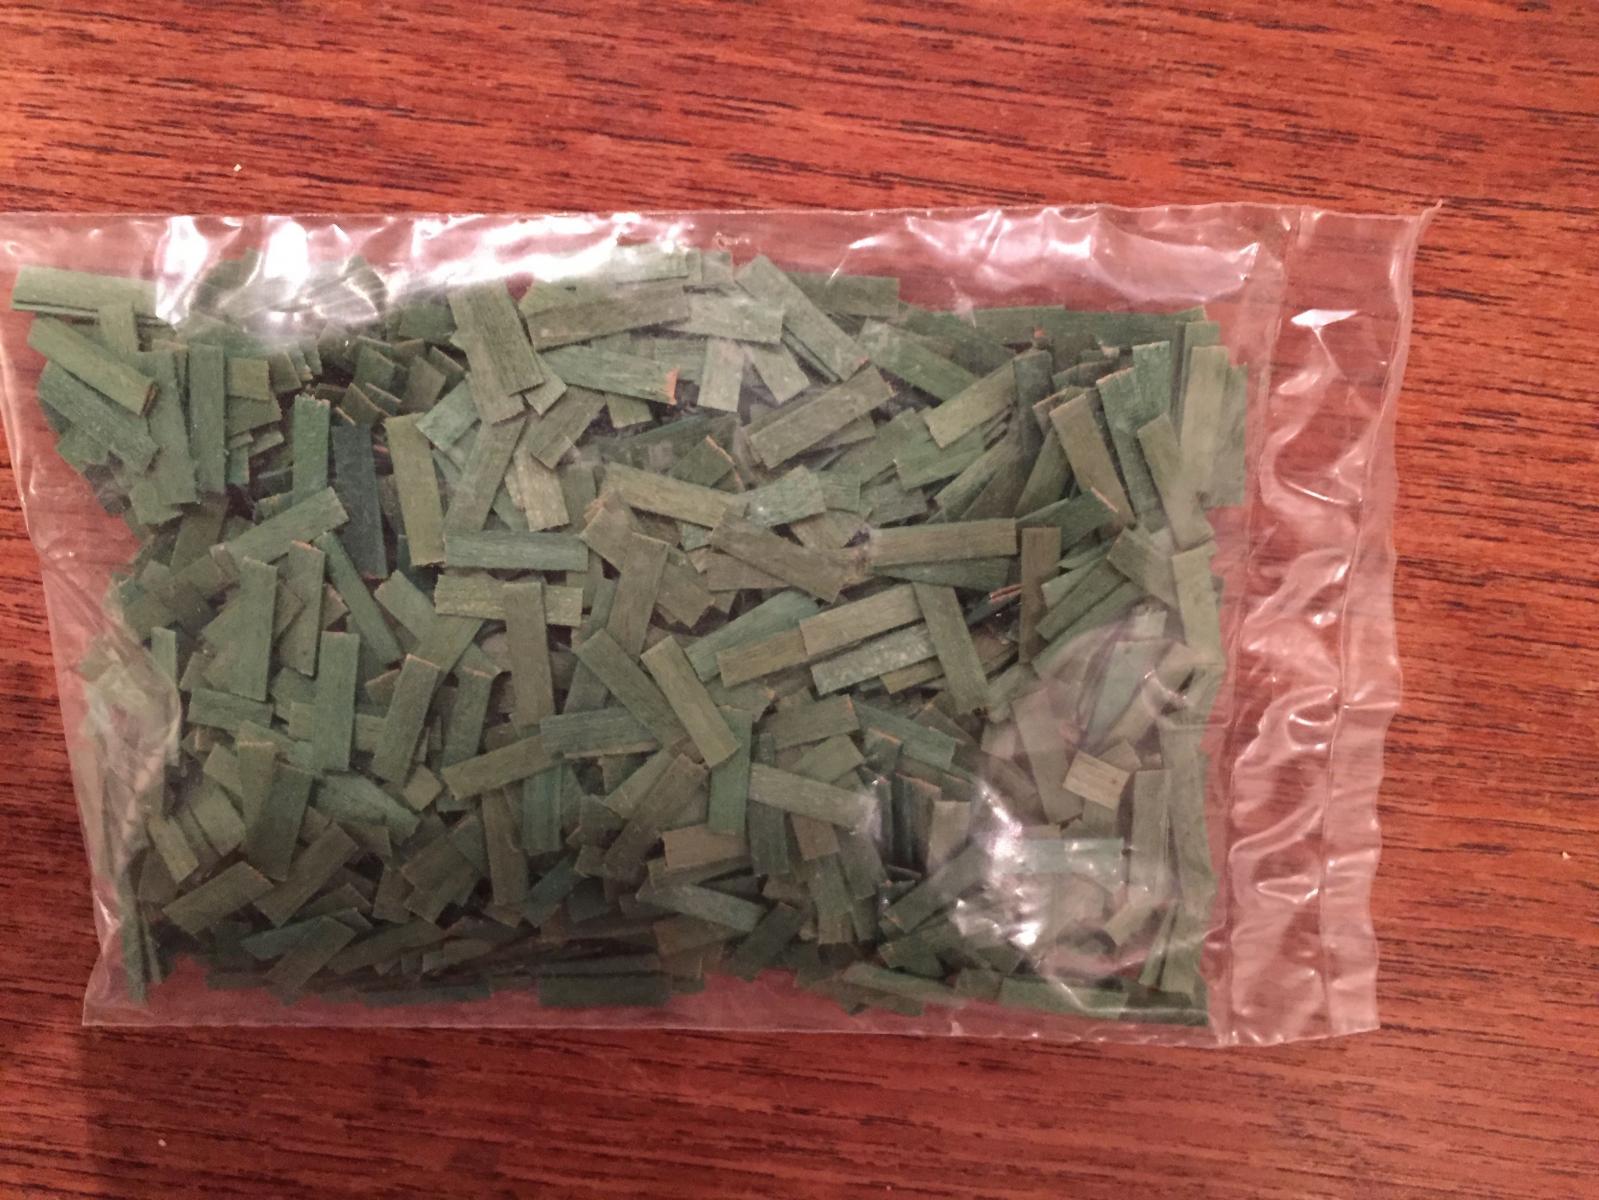
Hi all: In response to Jason's request for a photo of the green wooden "copper" tiles provided with the Mamoli America - here's a pic. The instructions say to layer these on one-by-one as you would with the copper tape (but with adhesive), with each tile lapping very slightly over the one aft and with each row up the hull lapping very slightly over the one next closest to the keel. I can't imagine this would result in anything other than a kind of clinkering of the tiles, which doesn't occur with the very thin and pliable copper tape. For finishing Mamoli suggests first layering on a coat of copper paint, then sanding it to let some of the green of the tiles come through, then coating it with green paint and wiping it with a cloth while still wet to achieve a verdigris finish..... Anyway, I guess the world is full of ideas....bye for now hamilton

-
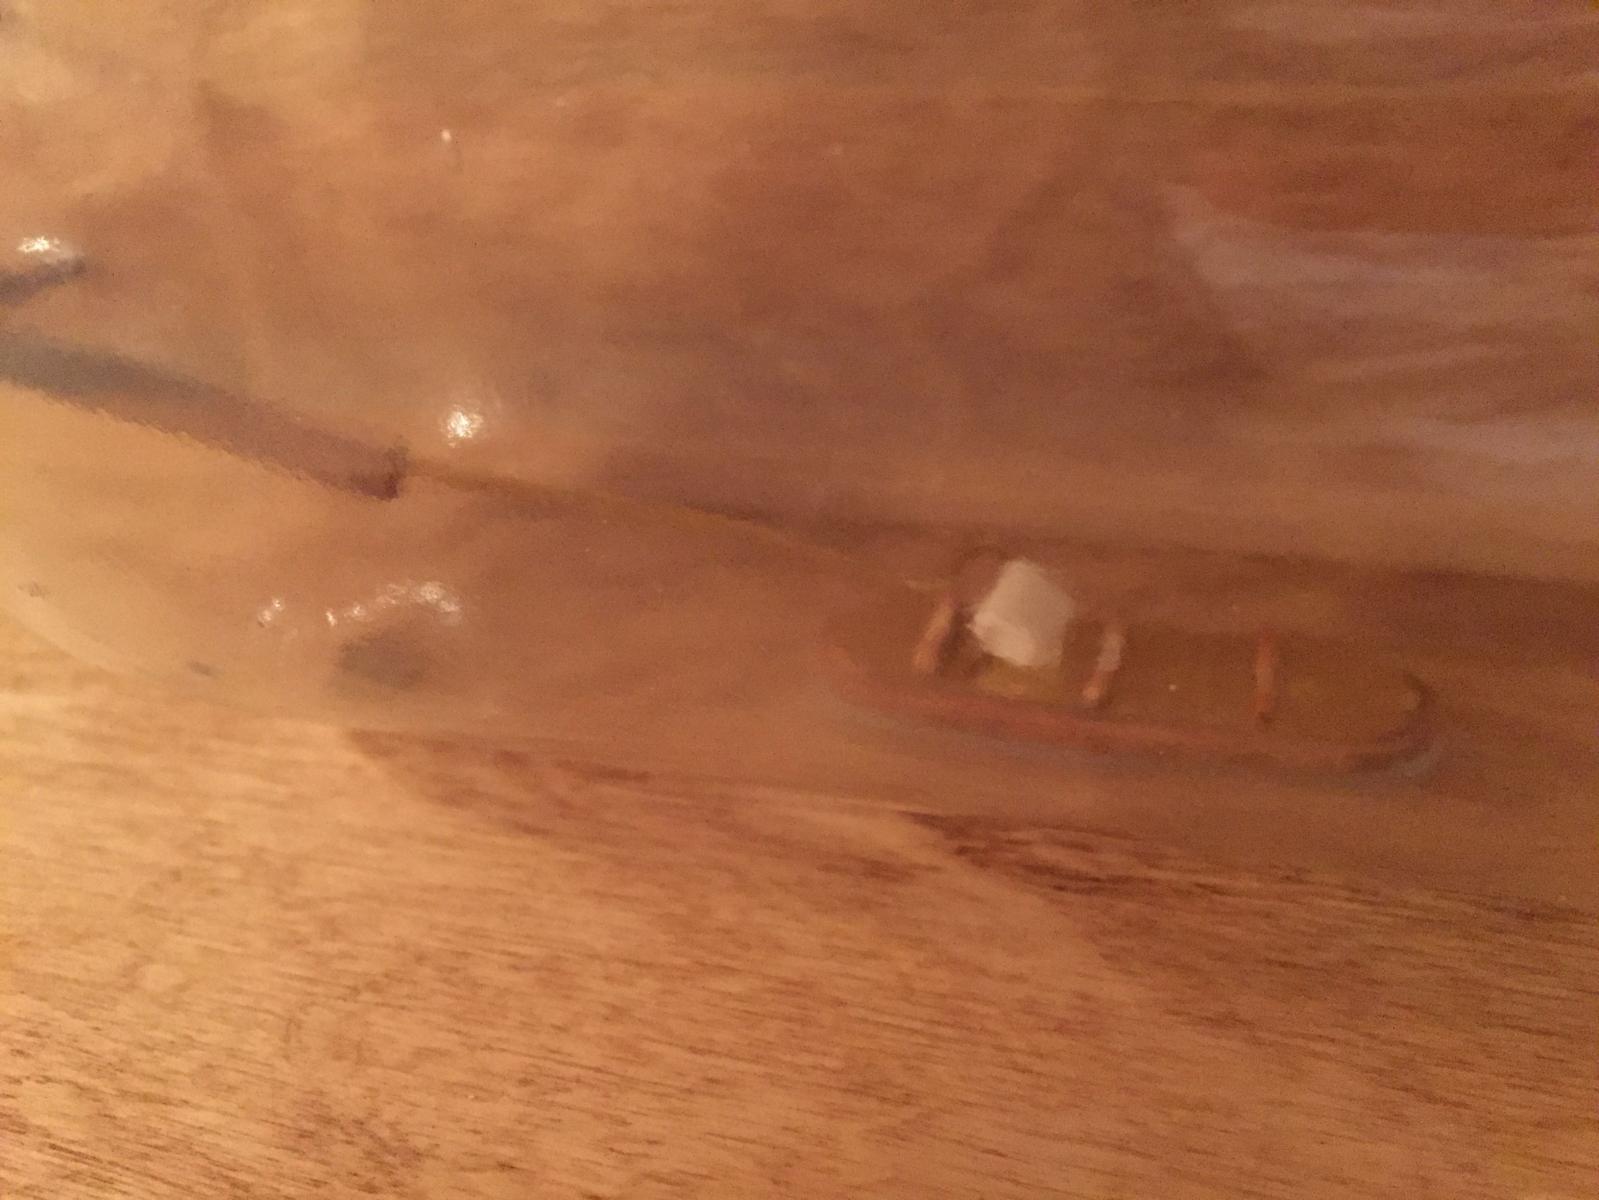
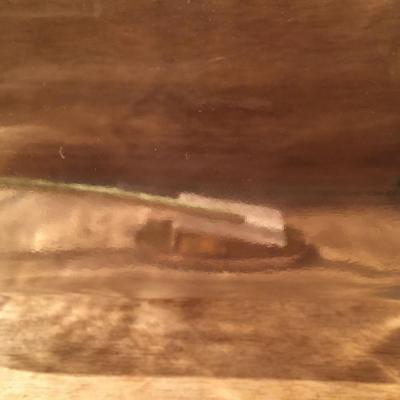
Thanks for the tip Danny! In the end I went for 5-minute epoxy (the stand is now in the bottle with one of the kit-supplied tools waiting for the epoxy to cure). It's a bit late for a build log, but I'll try to document the insertion of the Hannah into the bottle - if the moderators have no objection, I'll just do it here. Here's photo 1 (all I have for now) - and apologies off the bat for the poor quality - it's hard to get focus through the glass. Taking a cue from the fellow with the detailed log mentioned in another thread, I taped a cut out pattern of the stand on the bottle-stand underneath the bottle to mark the position of the stand, using the Hannah outside the bottle to gauge where it should be. I then wrapped a bit of double-sided tape around the applicator tool provided with the kit pressed it onto the top of the stand, laid some epoxy on the bottom, and gently eased it through the mouth of the bottle and into place. Some finessing was required to get the stand in the right position. I'm now going to leave the whole thing in there overnight and then (once the epoxy is properly cured over 24 hours) ease the tool free of the stand and draw it out..... The next step will be to figure out how to get the ship onto the stand.....as mentioned elsewhere (by me and others) the mouth of the bottle is very small and it will be quite a squeeze getting the Hannah in - at least that part corresponding to the quarterdeck area aft, where she's tallest (it's the height rather than the breadth that's the issue, and the masts and sails do not help here - though at least they're somewhat pliable....) I'll update this once the next stage is complete...... hamilton
-
Jonny - glad to hear it! My Admiral says exactly the same thing! With two on the go and (...let me think...) six on the shelf (!!) the chances of another coming through the door anytime soon are exactly 0! I've coppered a few hulls (Phantom, Kate Cory and Fair Rosamund) and the difficulty/simplicity seems to depend upon the shape and size of the hull, as well as on how true to practice you try to be. There are certainly some excellent examples of coppering on the forums here. It takes a long time and is quite repetitive (which is fine by me if I have some nice music to listen to or some thinking to do). For a very unique approach to weathering copper tiles see Alistair's (aliluke) Pegasus build log Nils - thanks for dropping by - it is a beautiful ship (and hopefully even my version will be ok). Mamoli's kit certainly has its quirks, but overcoming these is half the fun. Jason - thanks very much indeed - I'm a fan of your builds too - the Snake was really wonderful and I've been enjoying watching your Jason come together from a distance. The Caldercraft Diana is a dream kit of mine, though (apropos of my comment to Jonny) it's unlikely to grace my shelf for a while.....I don't have any pictures of the tiles ready to go, but I'll take one and post it here soon so you can have a gander.....And thanks for the vote of confidence - I have to say I enjoy it greatly when I come across a build log that walks people through the stages of doing something - particularly those often taken-for-granted elements of modelling that beginners may not intuitively understand. Thanks again all - spent tonight "working" on (more like staring at) the Hannah - tried for the first time passing her tentatively through the mouth of the bottle - it's true what many of said - it is too big for the bottle provided with the kit......I'm now considering how to proceed..... hamilton
-
Hi Johnny: Yes, I think the wooden "copper" tiles are pretty weird. They come in a really garish green, as well and I'm not confident that the finishing instructions provided would come out in the verdigris that appears on the photo on the kit box....I have a bunch of extra copper tape from a previous build so I'll use that I think. Hope you saved your 300 pounds! hamilton
-
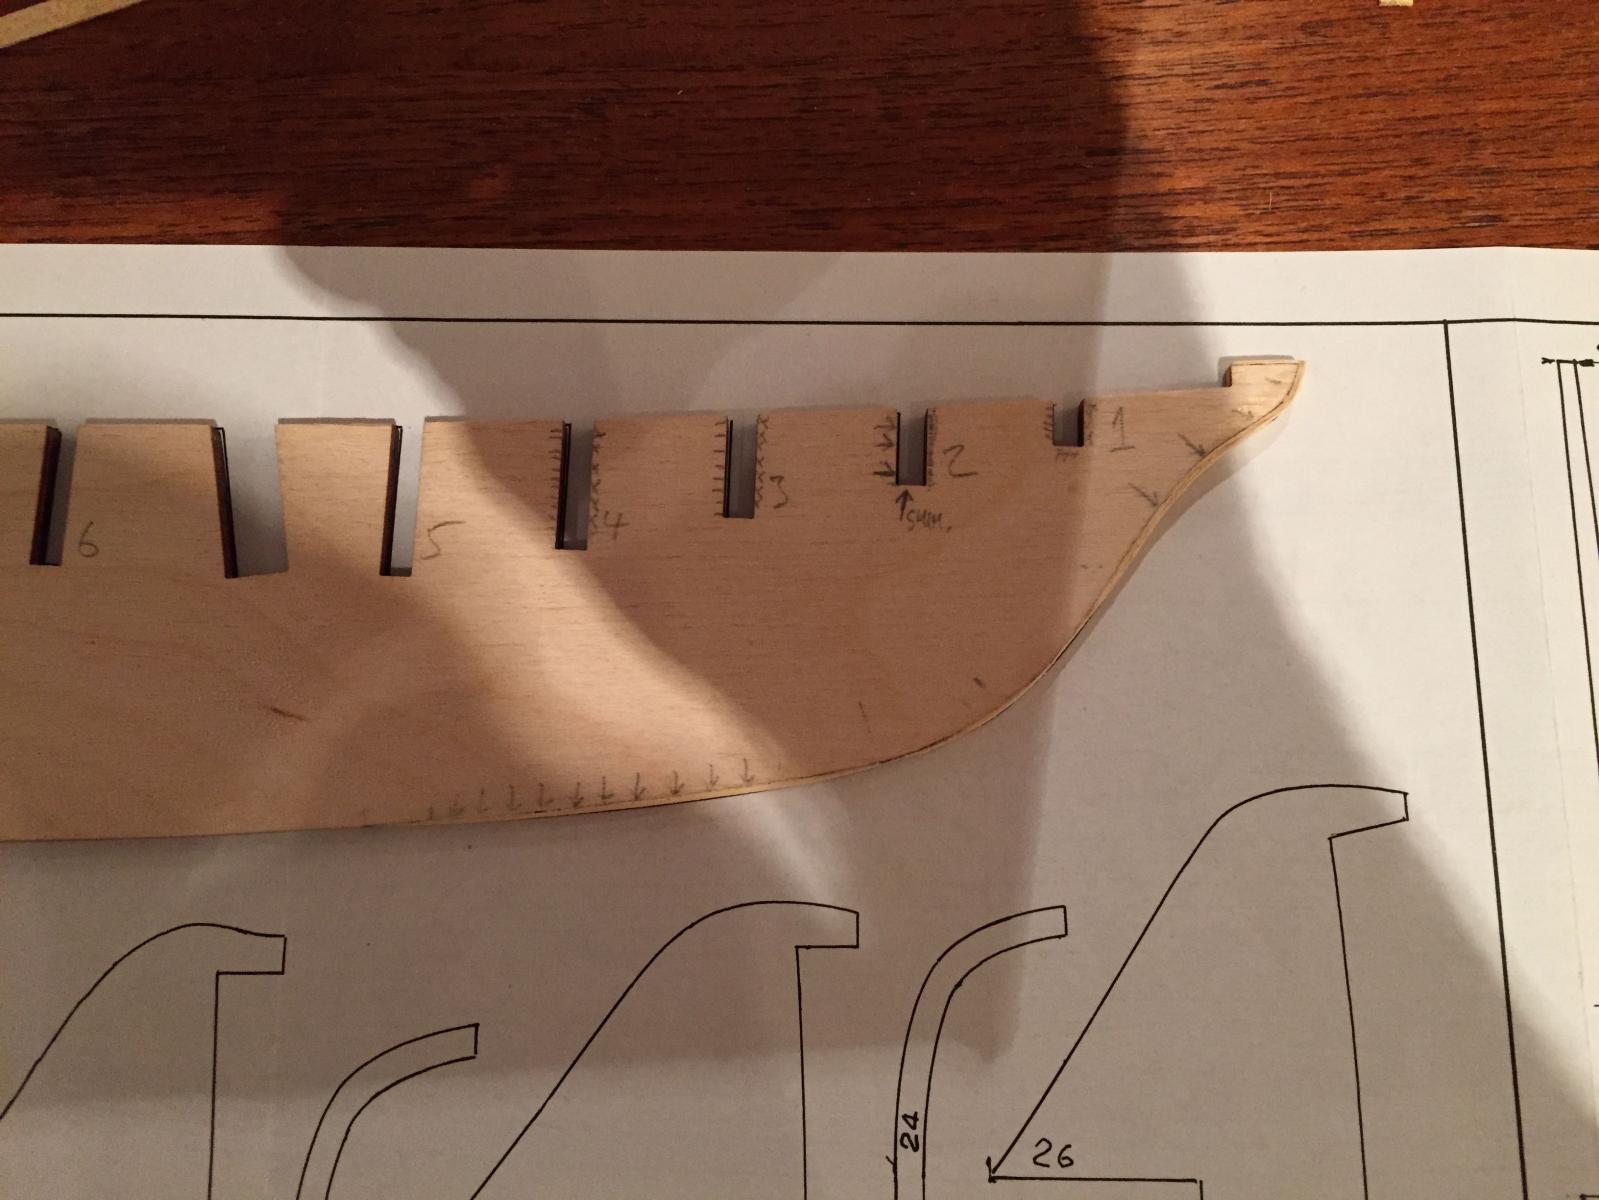
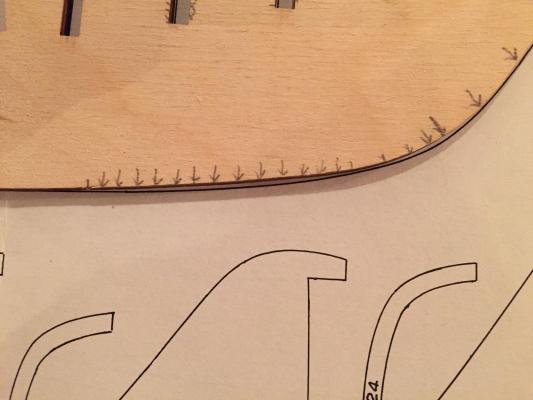
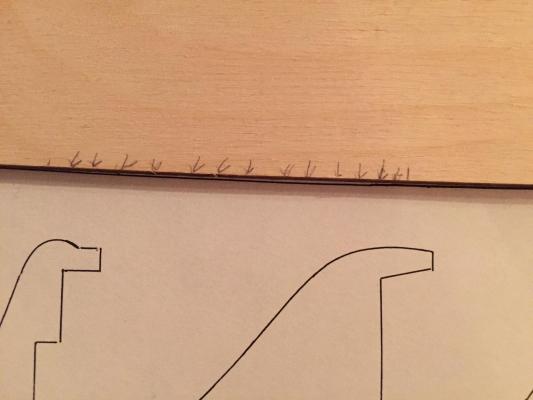
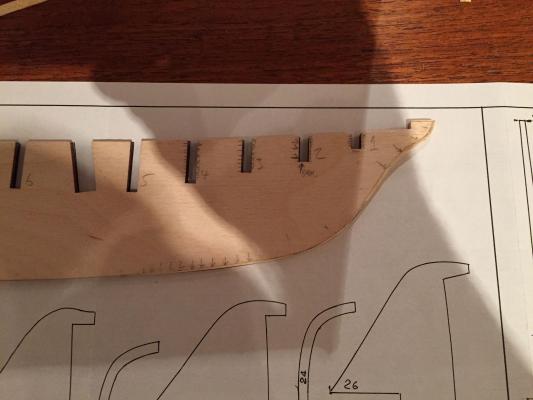
Hope I'm not inundating the forum with meagre progress, but here's another quick update on America. I spent the evening adjusting the keel edge up through the stem. There's more work to do in and around the bulkhead slots, and it's relatively slow going, so I guess I might have to lay off updating here until some more exciting stuff starts happening.... Anyway, these first shots show the areas of the keel that need shimming And here are the shims installed So now the keel edge aligns nicely with the drawing - more adjustments to come....yay! hamilton


-
Your AVS looks great, Brian - I really like the naming! You're not alone in this particular brand of nerd-dom... hamilton
- 831 replies
-
- 3
-
-
- Armed Virginia Sloop
- Model Shipways
- (and 1 more)
-
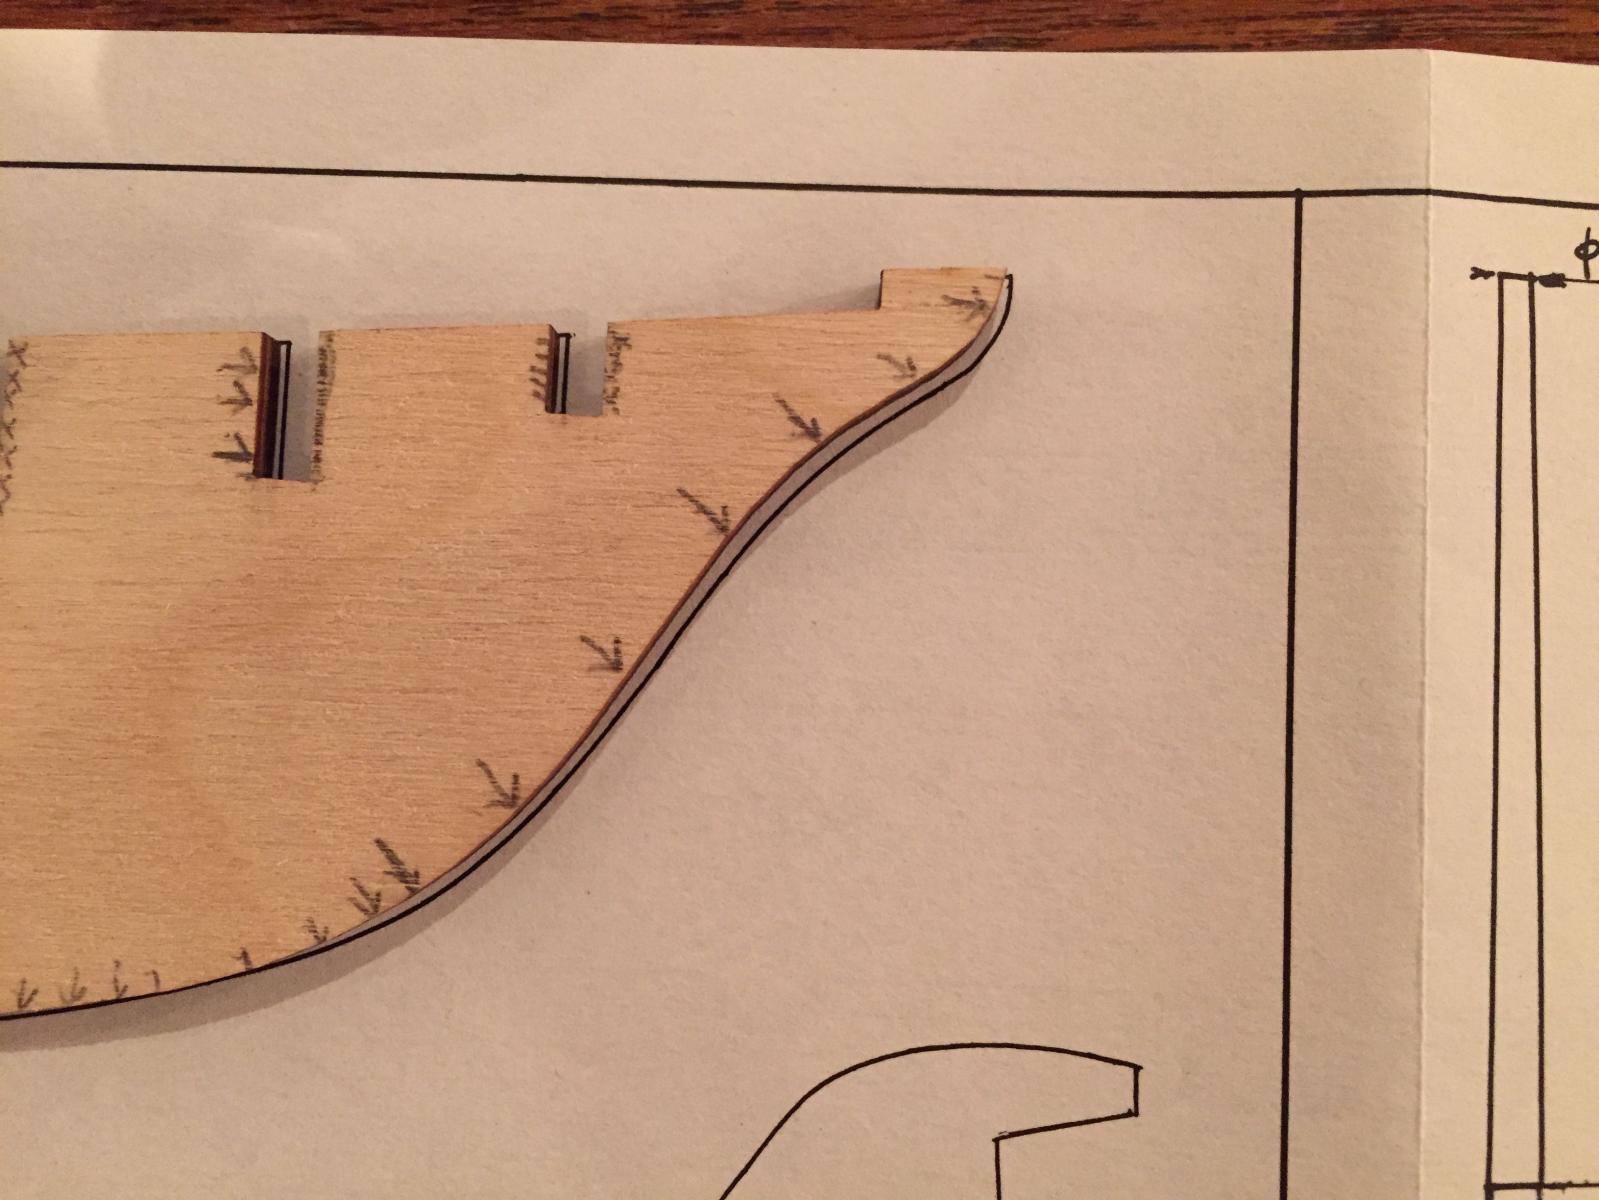
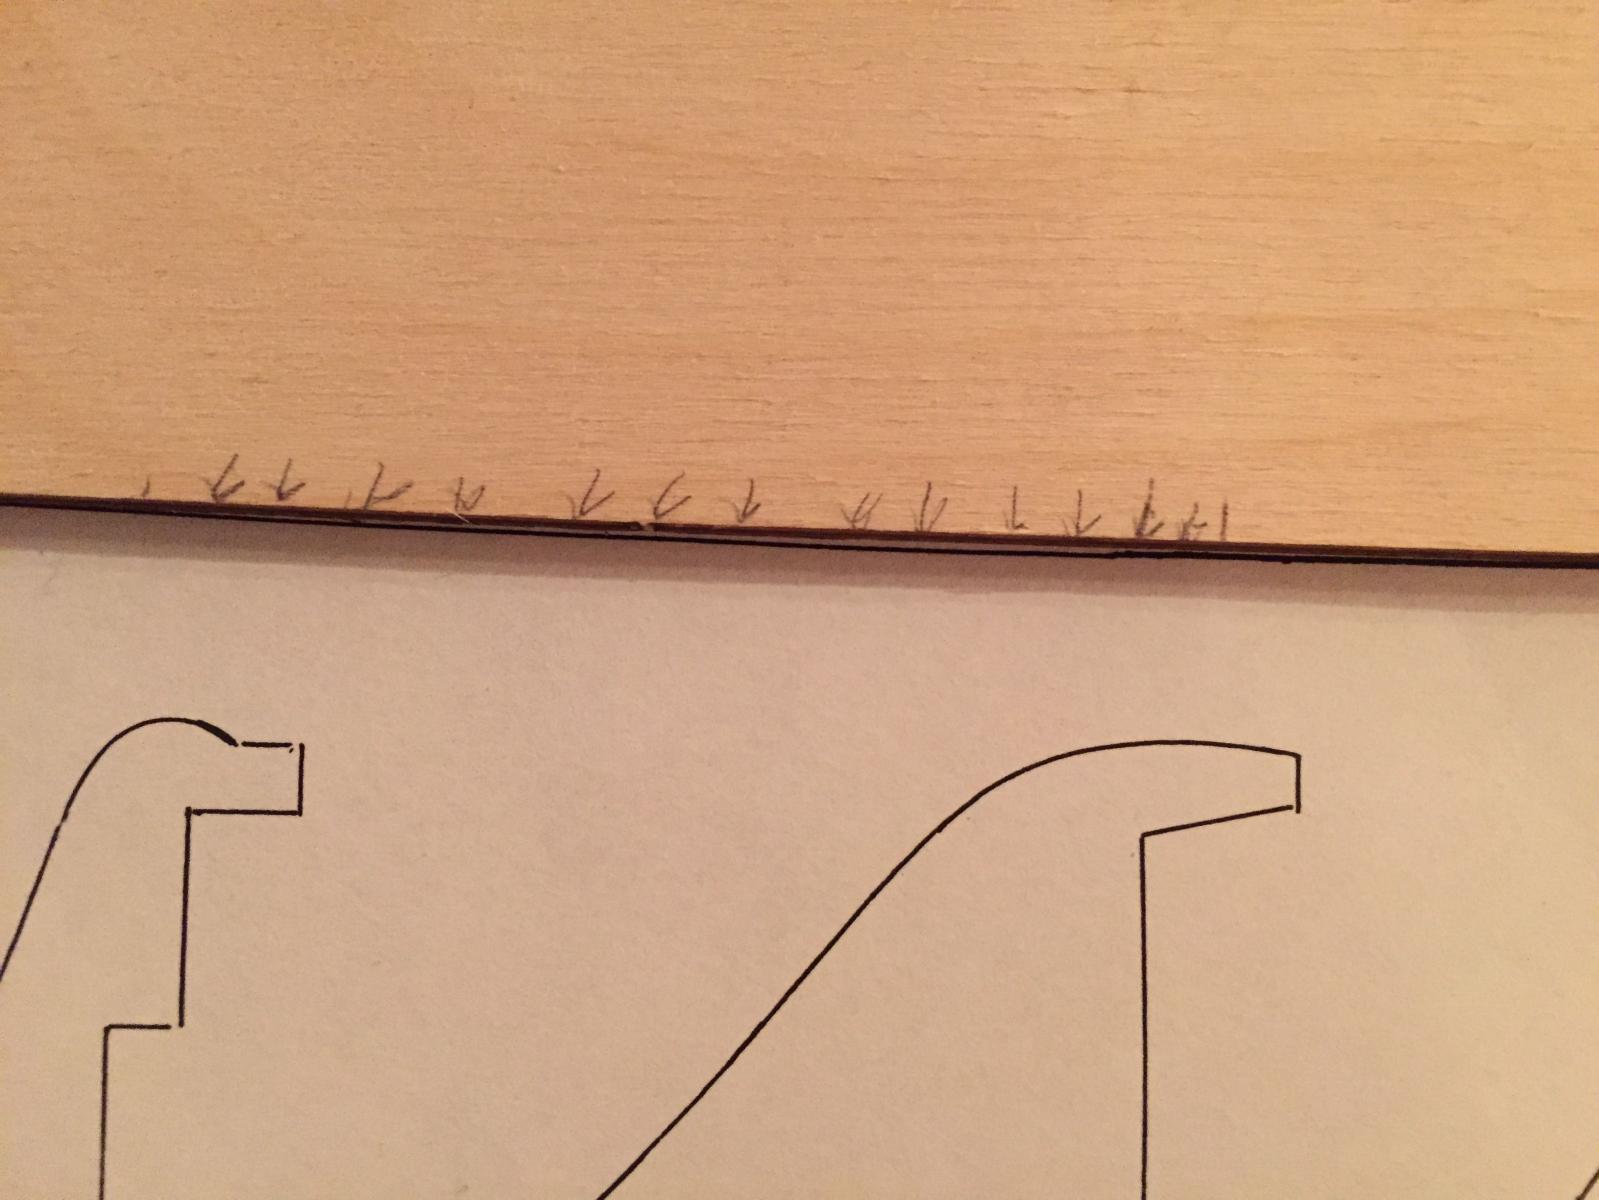
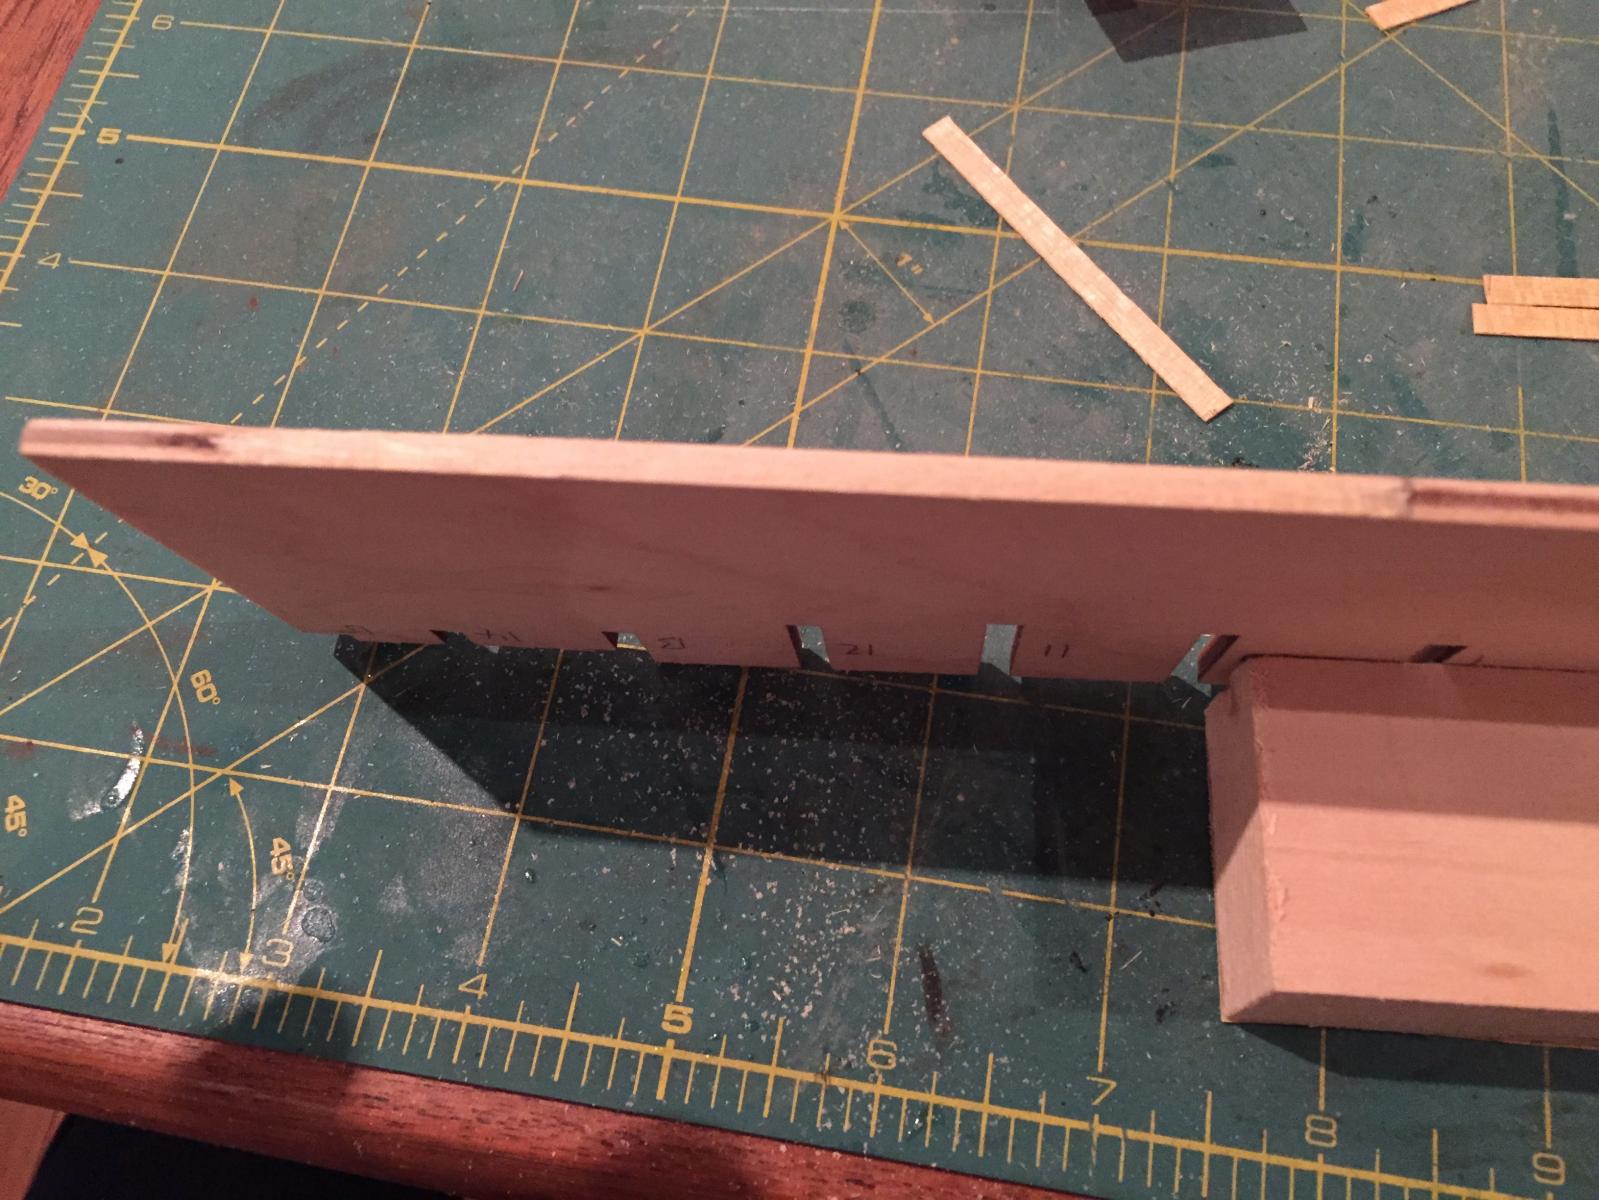
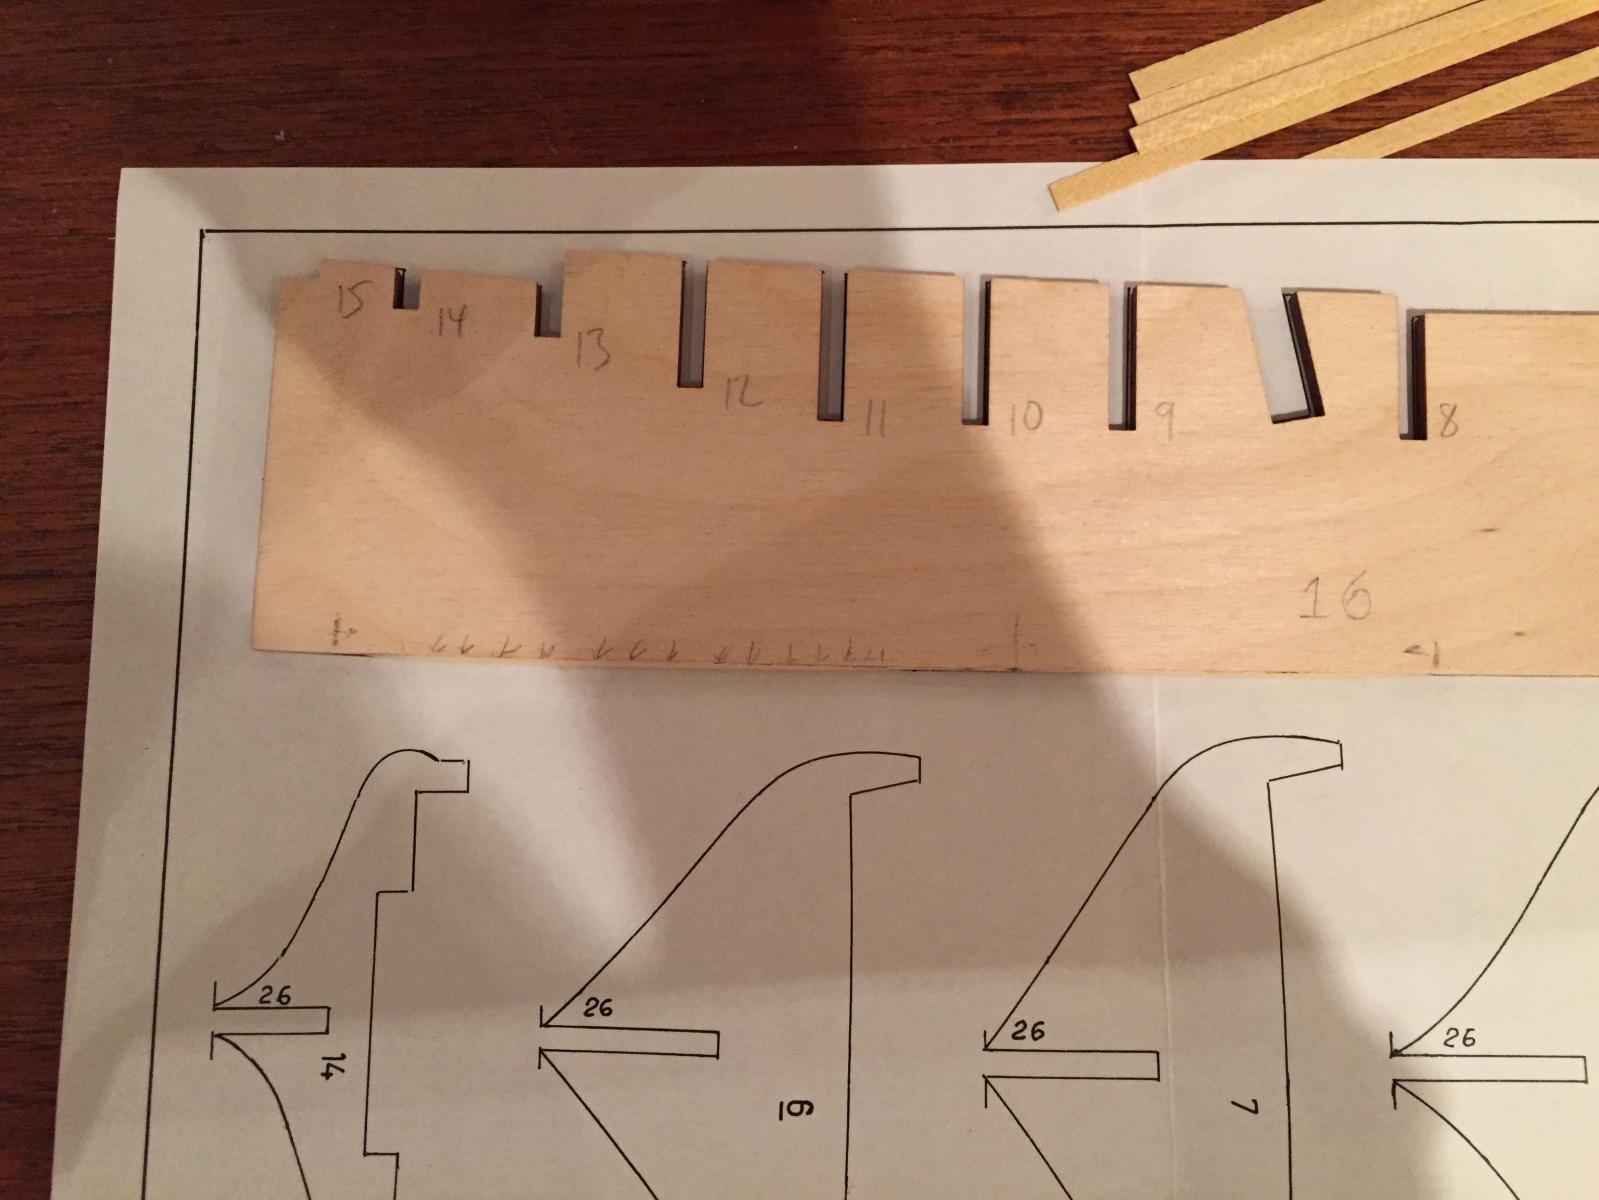
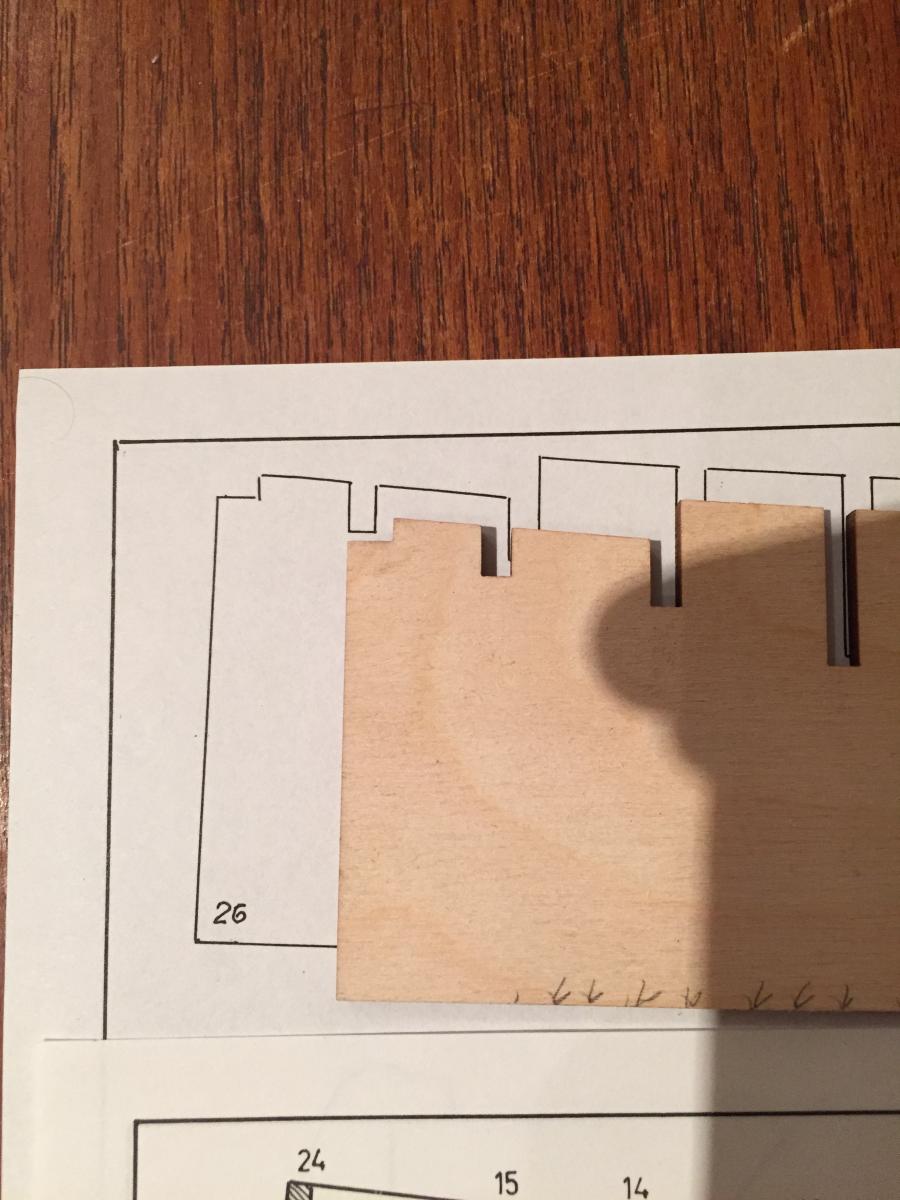
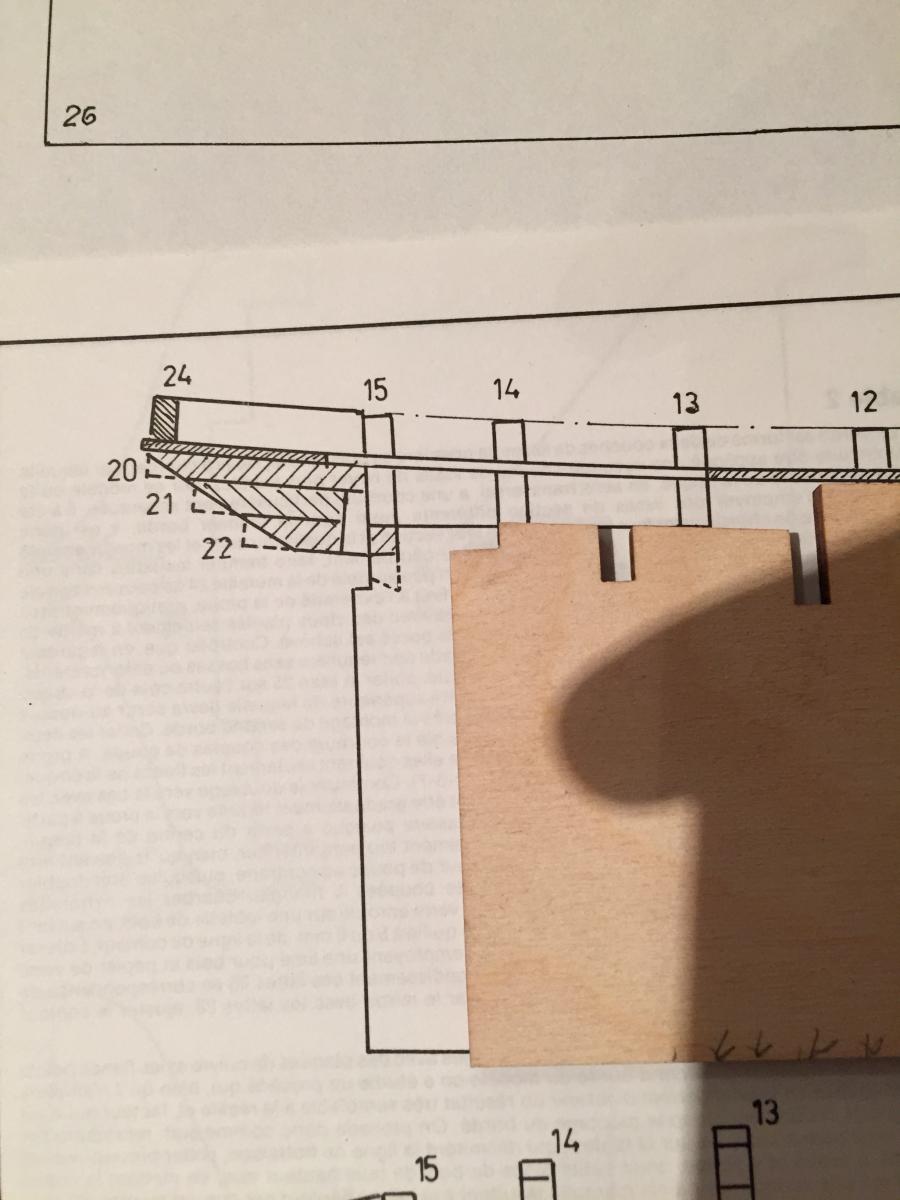
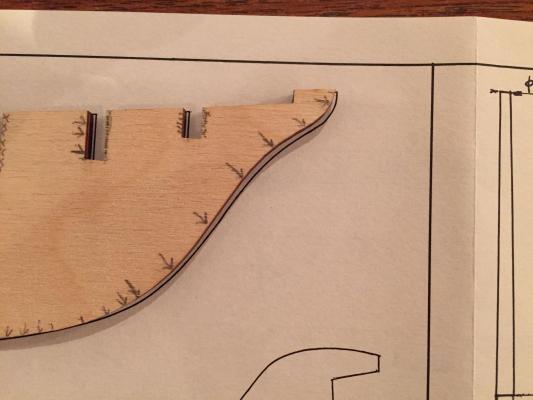
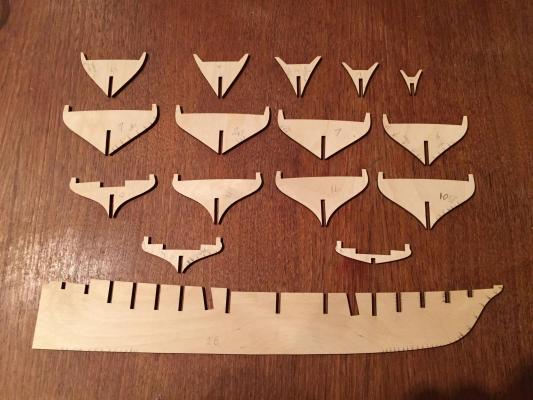
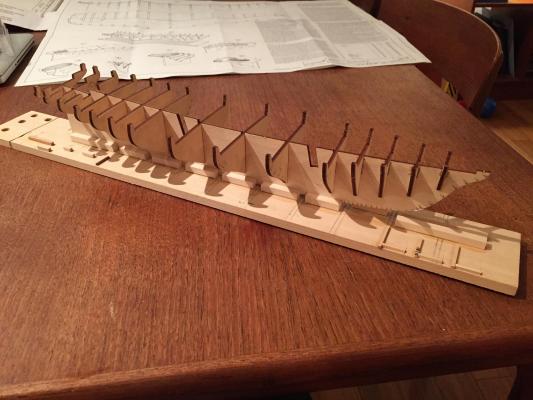
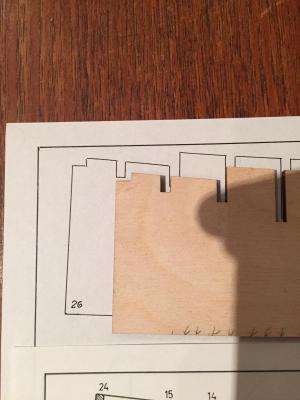
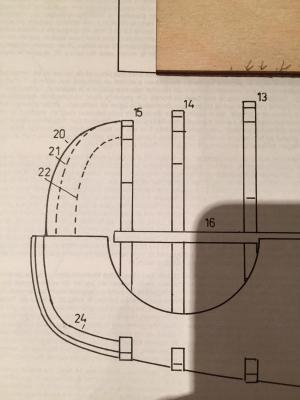
Thanks for the suggestion Don! But now this issue has been placed on the back burner due to other more near-term concerns..... Though I'm not yet finished the Hannah-in-a-bottle, I spent this evening doing a bit of preliminary work on America. This is my second Mamoli build, and since their fire, I'm assuming it will be my last. The first was the yacht Gretel, which built up into a very nice little model though I recall that the framework needed considerable attention. The same is certainly true of America. The laser cutting is quite good (mostly accurate to the plans) but there is a lot of shimming and trimming to do - most of the trimming will probably be done in the fairing process, but many of the bulkheads require significant shims along either one or both edges. More importantly, the centre keel is significantly off through the stem and in the forward part of the keel. In places along the stem about 1.5mm needs to be added to bring it into line with the drawings. This piece is also slightly bowed - nothing that can't be fixed in assembly. (As a side note, I've always wondered - if the laser cut parts on a kit are found to be quite inaccurate to the plans, does this through the accuracy of the plans into doubt? I suppose you have to take your reference from somewhere....) Anyway, I also test fit the bulkheads to the keel. They were all very loose fitting with a significant amount of play in them.....I'll add thin shims to the fore and aft faces of the bulkheads and the port and starboard sides of the keel to stiffen and straighten them. Between this work and some added brace strips between the bulkheads, the framework should come together nicely. Here are a couple of shots - nothing particularly exciting.... There is, however, one oddity that I've found - a discrepancy between the stern end of the centre keel and two drawings provided by Mamoli in their plan sheets. Here are a couple of pics of the keel piece next to the two drawings in question - you can see the discrepancy. The drawing showing the profile of the laser cut centre keel shows a part identical to the actual keel piece. But in the profile drawing of the assembled framework there are two discrepancies: 1.You see filler blocks 20, 21 and 22 in the profile shot - but also a mysterious white space like some kind of filler block between fillers 21 and 22 and bulkhead 15 - compare this plan view of the stern, where this filler is not indicated (though in the first drawing part 20 fits over this mysterious filler so maybe that's why.....). It seems that the mystery filler is there to provide the correct shape of the counter, but it's hard to say..... 2. This is less visible from the photos I have (sorry!) but there is also a discrepancy in the shape of the keel in the two drawings. Again, the drawing depicting the profile of the keel part is identical to the part itself, but the framework profile drawing shows a section at the top of the stern post that seems to be cut lower than the part..... In any case, I'll have to work through these puzzles as I assemble the framework - once the bulkheads are made to fit properly I'll see how the stern parts fit in - maybe an answer will come clear then. In the meantime, if anyone has experience building this kit and encountered this issue, I'd love to hear how you navigated it. Thanks a lot for dropping in and any and all feedback is, as usual, gladly accepted! hamilton

-
Hello all: I'm not sure if this is the right area for this question, but....moderator's I'm happy if you move this wherever you think it belongs. I'm at the final stages of building Amati's Hannah in a bottle and am nearing the point where I'll have to actually put the tiny vessel inside the bottle.... The instructions say to first fix the stand inside the bottle and then manoeuvre the ship onto the stand....my first instinct was to use CA to install the stand in the bottle, but I was nervous about crystalization of the CA vapours on the interior glass....I had thought of using a 5-minute epoxy, but wondered if this would produce the same effect? Can anyone tell me if the epoxy is the way to go, or if there is another adhesive I should use that won't have any adverse effects on the glass? Thanks very much in advance! And happy modelling to all hamilton
-
Well it's been almost 4 months since I finished the Fair Rosamund, but I obviously haven't put a stopper on the log.....it seems a little weird to be doing it so long after the fact, but I thought I would at least share some photos of the finished model. Overall, I enjoyed building this kit greatly, though I ended up spending some extra cash replacing most of the kit supplied wood (first and second planking and deck planking in particular). the laser cut pieces were very poor - well, the laser cutting was fine, but the quality of the wood was on the low end from my experience. Very soft and not very nice to work with. Many of the metal parts (the carronade stand and riding bitts, e.g.) I scratch built to much better effect, in my humble opinion, and I think providing wood stock for building these rather than supplying metal parts would have improved the kit. I also made some modifications on the cabin - not the overall design, but the finish and features. Finally, the plans, while for the most part decent, lacked precision in the rigging, and I had to do quite a bit of planning in advance to get things sorted out. I think if I had followed OcCre's rigging and belaying suggestions it would have ended up a tangly mess. Despite these criticisms, I think I would recommend this kit to a modeller who had a few kits under their belt and wanted to have a go a something more or less straightforward but that also provided some challenges in terms of modifications to the kit - nowhere near what I had to do on Corel's Greyhound, but not exactly an out-of-the-box build, as I had initially thought it would be......It does build up into what I think is a very fine looking model. And quite large - over 3 feet from the tip of the bowsprit to the end of the boom and about 24 inches in height from the base of the keel to the top of the main mast. Anyway, here's a photo and I'll put more up in the completed model gallery. Bye for now hamilton

- 69 replies
-
- 8
-
-
- fair rosamund
- occre
- (and 1 more)
-
Thanks Chris: Great suggestion - happens that I have an extra roll of copper tape lying around......Have to say I was kind of suspicious of these little "tiles", too..... hamilton
-
Hello there: This is just a placeholder for now, but I hope to dive into Mamoli's America kit in early September, once I've finished the Amati Hannah (in a bottle). I admit, I'll be happy to get back to building at a larger scale!! I've been more of a lurker and very occasional contributor here for the last year, since I finished my HMS Blandford (see link in signature). It has been an extremely busy time at work and though I've kept up with modelling (finishing the Fair Rosamund and now nearly finished the Hannah) there hasn't been much time for the more social side of things.....Hopefully the coming year will be a bit more relaxed (HA!) and I'll be able to maintain this log and be a more active contributor on the forums. For now, some brief notes on my impressions of the Mamoli America kit. Wood Not bad. At first I was concerned less with the quality than with the amount supplied. There did not seem to be nearly enough for the double planking and deck planking. But then I read the instructions, which provided some explanation, though not much reassurance..... Metal parts The mast hoops, mast coats, boom saddles, and many iron bands for masts and spars are supplied as pre-made metal parts. This is a relief for me, since my metal working abilities are non-existent. The parts seem to be well made and well dimensioned and though they look quite similar, the plans clearly identify each one. Plans/Instructions The plans are clear and complete, which makes the instructions more or less unnecessary except as a (frequently vague) guide to interpreting some of the drawings. There are a few parts/pieces missing from the kit - one of the blue plastic skylight windows and 4 of the 6 capstan whelps. The whelps I can make from scrap wood I think, but I'll have to replace all the windows.... There is also a particular oddity about this kit. The instructions state that the second planking should only go as far down the hull as the waterline, after which the second planking is replaced by small wooden pieces simulating copper plates. To my way of thinking this seems like a very difficult way to approach the planking of the hull, and if anyone who has built this kit can give me guidance here I'd appreciate it! I'm tempted to just apply the second planking to the entire hull. There's not enough material supplied in the kit to accomplish this, but given that the hull is "coppered" and painted it won't make much matter what material I use for the lower part.... Anyway, that's it - sorry for the lack of photos. I'll post some a little later hamilton
-
Thanks Dwaine! I'm thinking of going with maple, but I think I'm going to take stock of some wood replacements in a few kits I've got on the shelf and try to make a bulk order....... hamilton
-
Hi JPett (and other commenters) I just purchased this kit (couldn't resist another ME sale!!) and am very impressed. I've build a few Corel kits and have the Bellona on the shelf and this Berlin looks truly wonderful too. I, too am thinking of double planking the hull, mostly because my planking skills are not of the best.....the 2 x 4mm walnut supplied with the kit can easily be replaced by either 1.5 or 1mm lime plus .5 or 1mm walnut and would be more forgiving for those who are not as confident in their planking skills.... One interesting feature I noticed about the wood supplied with the kit is that the square stock they supply for the masts and spars is both pre-cut to length and pre-tapered, which is a very unique feature I've never encountered before. I also miss the deck planking and would like to plank the deck rather than use the method suggested by Corel. I'm assuming, though, that increased supports for the deck planking will be necessary (especially for the large main gun deck) so the planking doesn't sag....does anyone have any thoughts on this? Anyway, it seems that there are a few Berlin's waiting in the wings - if some people start in the near-ish future, I might move mine up in the schedule a bit to tag along. Thanks for posting this excellent review hamilton