


VTHokiEE
-
Posts
1,528 -
Joined
-
Last visited
Content Type
Profiles
Forums
Gallery
Events
Posts posted by VTHokiEE
-
-
8 hours ago, O-Nurse said:
my question would be do you think I'm on the right lines with my selection looking in the "some experience" section and possibly something from Caldercraft?
I would also consider getting the HM Armed Cutter Sherbourne by Vanguard https://vanguardmodels.co.uk/product/hm-armed-cutter-sherbourne-1763/
The owner of Vanguard (@chris watton) is on the forum if you run into any questions. I built the HM Alert as my first planked wooden ship and the material, instructions, etc were all very high quality.
- Keith Black, mtaylor, BenD and 4 others
-
 7
7
-
5 hours ago, Scottish Guy said:
Very curious question, how often is the internet available when you are building your own model?
Not the original poster but where I build my model (in my garage) was on the edge of my wifi signal and made it somewhat of an unreliable connection (solved it this week for different reasons). I know others build in workshops/basements/etc where the connection simply may be lacking regardless of the connection to the ISP.
- Scottish Guy, Ryland Craze and mtaylor
-
3
-
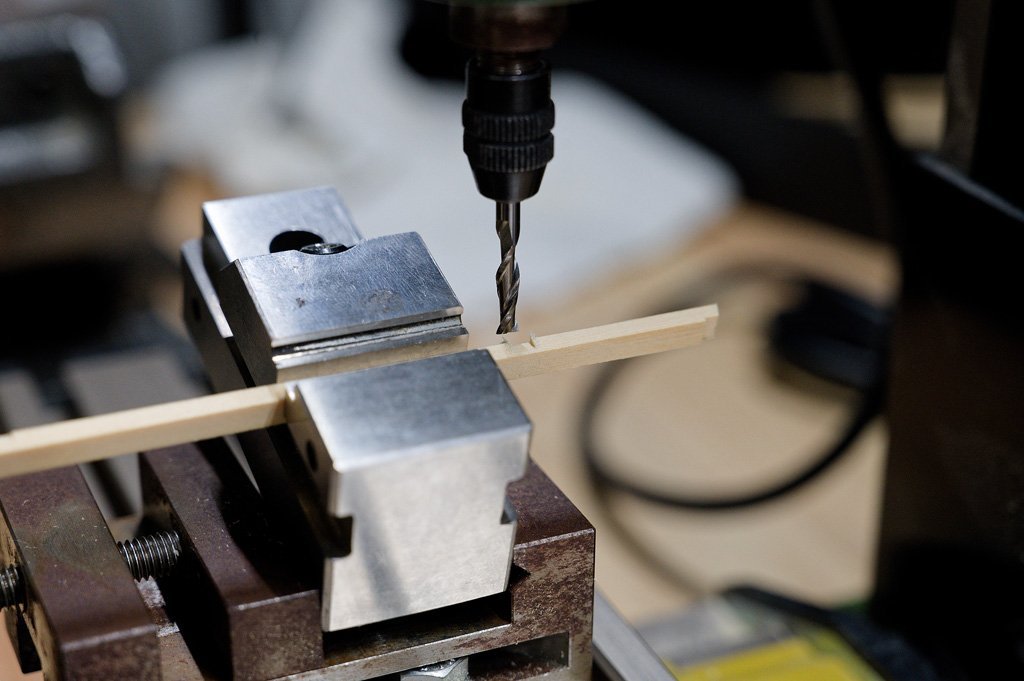
9 hours ago, hamilton said:
I assume I have to set the nuts for the machine screws into the keel assembly after shaping the
I simply tapped the keel and screwed the nuts into it. This method is referenced in the associated PowerPoint on their website.
I’m certain that you can do it other ways as well. Looking forward to your build!
-
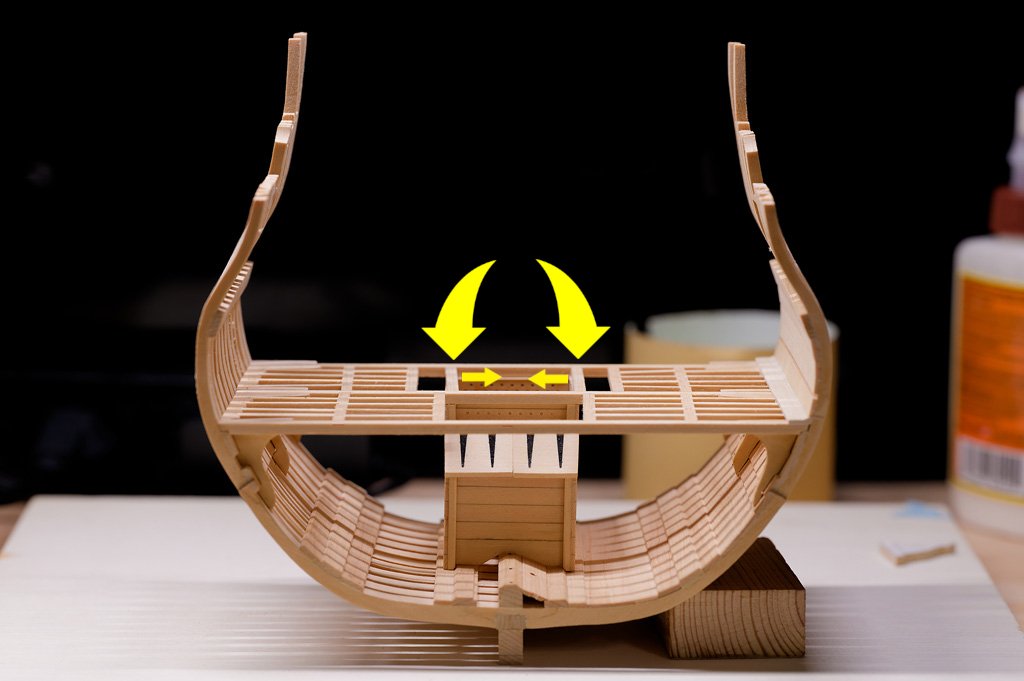
1 hour ago, Old Collingwood said:
Tim are you saying that the Two rectangular cut outs (indicated by the Two Large Arrows) should be moved inwards to line up with larger cut out further forward in yoy picture?
Almost, the side of the cutout nearest closer to the frames can probably stay put, but the interior side needs correction. Something like the below where the current carlings, in yellow, are moved closer to the green line.
 6 minutes ago, davec said:
If you used a glue that isn’t hard to debond, it might be worth considering redoing the lower deck.
This is on the tables as I used PVA, but I am a little concerned about accidentally doing damage to the frame joints when I try to soak to joints with IPA (there's probably a more a precise way to do it than what I have done in the past though). I probably should use a little less glue the future I think. I'll see how removing the carlings go and see what my options are - leaving the planked carling off is making a lot of sense though so I don't fight myself again with this and it wouldn't be visible in the end regardless. As I wasn't planning to add the pump on the unplanned side so leaving a visible carling there should be fine.
I probably should try to address the large grate size though, I need to re-read the practicum and look through the TFFM Vol 1 to see if I can get a more accurate idea for where the carlings should be placed.
- tmj, Ryland Craze, GrandpaPhil and 2 others
-
5
-
Thanks @davec @Old Collingwood @glbarlow
I was happily continuing with the build when I unfortunately ran into a snag. There was a comment in @tlevine build log for the cross section "Do not measure off the practicum. Unlike the drawings in TFFM, these drawings are off scale by up to +/- 6%." Unfortunately, I re-read this caution late and now I am faced with an issue to resolve. I used the template provided on page 7 for the lower deck framing and realized that though the scale provided was measuring accurately the template would not fit the deck (it was too small). I made an executive decision to start at the provided centerline, place the carlings as indicated and continue on - this will prove to be an unfortunate mistake.
EDIT: The actual mistake was that I placed the template at the edge, by the frame, and measured out from there which allowed for too much space around the centerline. Based on measurements trying to correct this mistake if I actually had measured in from the centerline it would've been fine.
I placed the upper deck clamps, planking and spent some considerable time shaping the waterway.

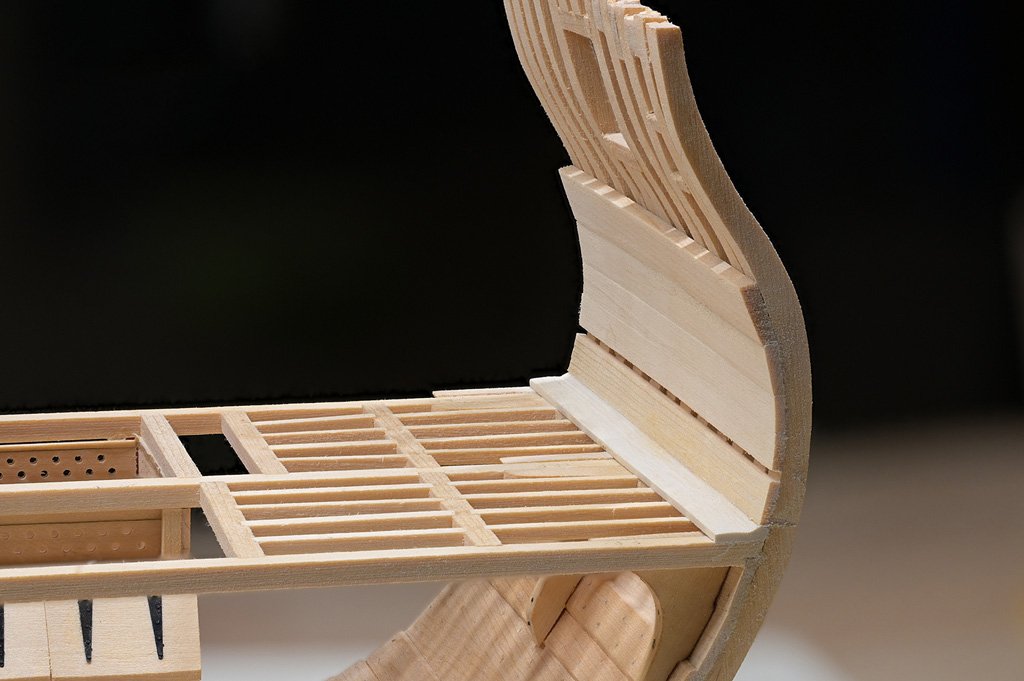
I then started to think about the pump tubes and noticed that the carlings are not in the correct places. The most problematic are the interior ones in the aft - they landed right on top of the well and provide no space for the pump tubes to go into the well. This also means that the lower deck hatchway will be too large, but I can live with that mistake - I could also probably live with the error on the planked side in the aft and simply pretend that the carling was in the correct place. However, this error will not look right on the unplanned side and it will imply that the pump go through the well wall.
I think the best plan is to use some IPA and remove the most offensive two carlings, use filler (huge crossed fingers here) to hide to wrong scores, then carefully file new scores by hand (start crossing my toes here), and add the carlings back in.
-
I can only give you my experience with the second book. I bought Ship Modeling Simplified: Tips and Techniques for Model construction from Kits by Frank Mastini when I was getting my first kit because it seemed to be highly recommended. The book wasn’t expensive but I didn’t really use it very much and I only read about a 3rd of it.
This forum simply provided more knowledge in a more searchable form than I found in the book. The forum has great examples of so many components of construction in build logs and many general questions answered in the other forum areas that I passed the book along to make room for others in my library.
- Canute, Scottish Guy, Ryland Craze and 1 other
-
4
-
-
I looked at several instructions for Mamoli kits and while they all had the CM descriptor only one (instructions for the Sâo Miguel ART. MV21) had a label for CM and that label was in Polish only (it was removed from the English translation portion of the instructions). It stated: CM – sklejka 1,5 mm which using Google translate, appears to translate as plywood. That translation makes sense for, at least some of, the parts that I saw labeled as CM.
Hope that helps.
- mtaylor, GrandpaPhil and Gregory
-
3
-
42 minutes ago, glbarlow said:
brush application of Doc OBrien’s Rusty Brown weathering powder
I really should get some weather power - your cannons (as well as everything else) look awesome. I have to stop looking before I convince myself that I need an airbrush as well.
You have done a remarkable job with your Winchelsea!
- Rustyj, FrankWouts, Ryland Craze and 1 other
-
4
-
Looking forward to watching your build - really hoping to follow it up eventually.
- FrankWouts, Ryland Craze and Rustyj
-
3
-
13 minutes ago, glbarlow said:
I’ve never seen a Nikon lens with f/40, interesting.
The minimum aperture for Nikon macro lenses is typically f/32, but as you focus down to 1:1 the effective aperture is smaller.
-
9 hours ago, jpalmer1970 said:
I'm also finding difficult to judge how much excess to leave on the piece with the scroll saw - I realise you need to be close enough so you don't have to do too much sanding to shape but at the same time you need to have enough excess to make sure you are not going to end up with an undersized piece. No doubt I will get better at this when I start cutting out the dozens of pieces that make up the frames!
Very excited to follow your build as I have considered doing the Hayling Hoy as well as a first scratch ship.
I think that how close you get to the line probably depends on the part. My experience with the frames on my cross section was that I should have left a a good bit more on the parts than I did to account for fairing (maybe leaving 1-2 mm? outside the line to account for fairing), but this is probably also due to my inexperience building and raising the frames. I imagine (hope?) that as I get more scratch work under my belt I can get closer for the frames at least.
Looks great so far!
- jpalmer1970, AJohnson and mtaylor
-
3
-
- mtaylor, Thukydides, jpalmer1970 and 1 other
-
4
-
@glbarlow Thanks a lot - there have certainly been a lot of challenges to overcome, not certain that I've quite "mastered" any yet though :-).
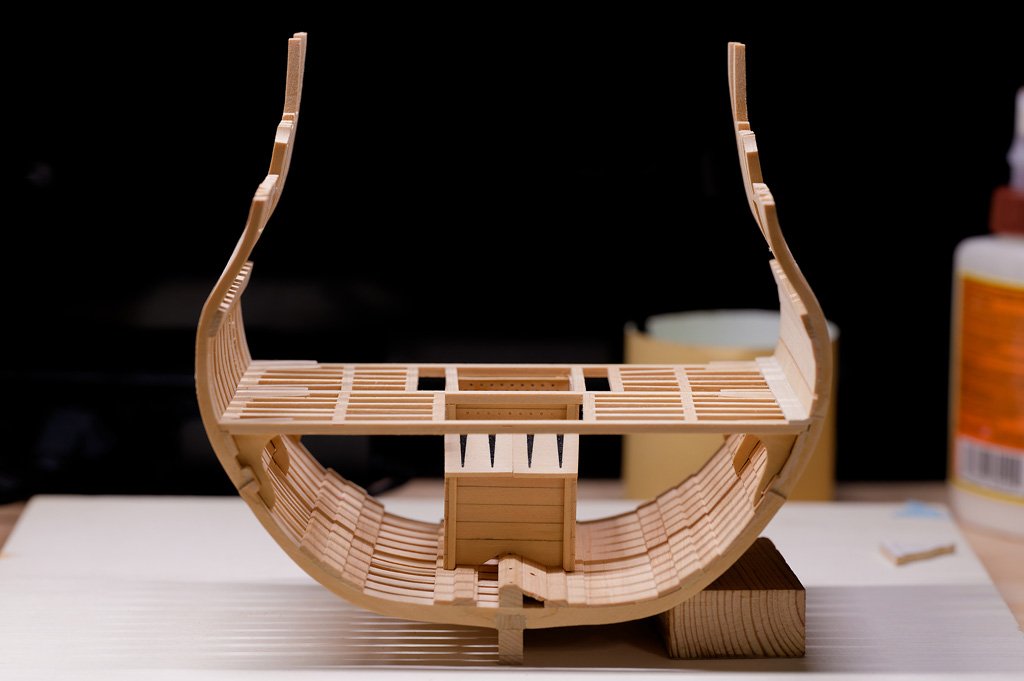
I've been continuing work on the lower deck framing and while not perfect I'm happy with how the cross section is shaping up. I struggled for a little bit trying to determine how to score the mortises (joints?) for the ledges and carlings until I recalled my mantra for this build - go re-read TTFM book 1 and of course there was a nice tip for how to easily make pseudo joints which I attempted to follow. The picture thats follow show how I set the angle for the score on beam and then the finished cut.

I did my best to get the matching score aligned, but they are slightly off - though it isn't very noticeable until you really start staring at the deck and I think it will be even less noticeable when the upper deck is added (though I will have to be more exact there).
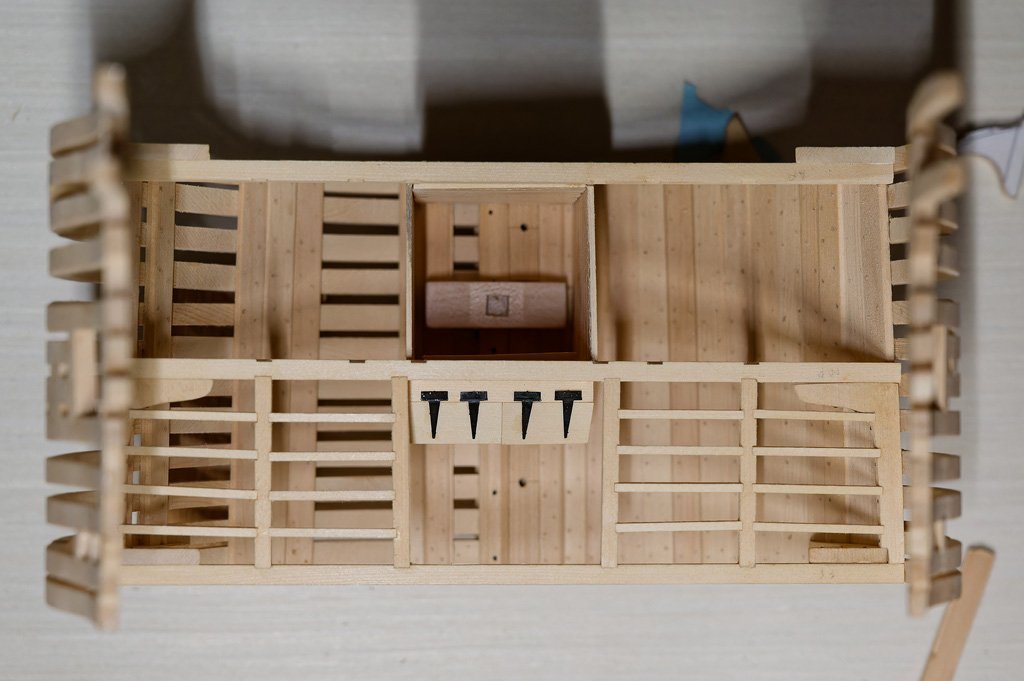
I have to add the center hanging knees and lodging knees before finishing out the deck framing, but here is where I currently stand.
- jpalmer1970, Knocklouder, MEDDO and 19 others
-
17
-
 5
5
-
-
6 hours ago, JacquesCousteau said:
I think part of the reason I've been so slow with sanding is that the plywood dust seems to set off my allergies more than basswood has
Dust can trigger my allergies as well - I tend to use a mask as well as a shop vac positioned near the sanding zone to try to keep the air clear.
I think there are some other air filtration units that can be effective for this as well, but having the shop vac on (and wearing ear protection) has helped a lot.
- JacquesCousteau, mtaylor and Canute
-
3
-
On 3/21/2024 at 2:13 AM, JacquesCousteau said:
has noticed anything that I'm doing wrong in the photos,
I can’t say that I see any wrong but I do think your stern could probably use some more fairing. I added the counter after I had faired the stern further (which I believe @tlevine did the same looking at the original build log).
I used a bunch of Emory style boards (from the cosmetic section of a general retailer) to do a lot of the fairing and recall really having to work a lot on both the bow and stern. You’re doing a good job!
- JacquesCousteau and Canute
-
2
-
52 minutes ago, tlevine said:
I remove the tape as soon as the last coat has been applied to prevent paint adhering to the tape.
That’s a good tip that I wish I knew earlier. Very cool project!
- robert952, Ryland Craze, BenD and 2 others
-
5
-
-
Looks like you’re off to a good start! I’m so impressed with people who can juggle multiple builds; for better or worse I find that I can only focus on one thing at a time (but darn if some other kits in the garage aren’t calling my name every time I walk out there). Looking forward to seeing what you do with this build.
-
8 hours ago, tlevine said:
Don't worry about the stain. You know it's there but unless you point it out, nobody else will see it.
Thanks and I'm certain that you're right. It wasn't a deep stain so I was able to scrape some off gently with the back of an #11 blade, but I'm not doing anything further to ensure that I don't make things worse in an attempt to make them better.
On 2/13/2024 at 10:36 PM, Old Collingwood said:Thet look smart - they really set off the woodwork.
Thanks OC, appreciate it!
- Old Collingwood, tlevine and mtaylor
-
3
-
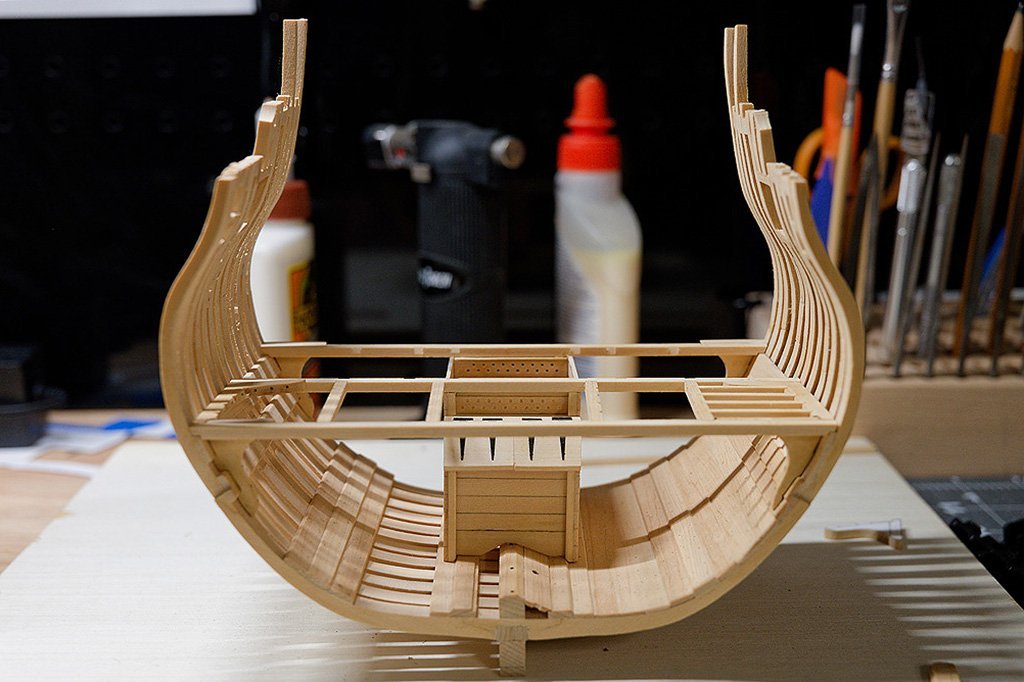
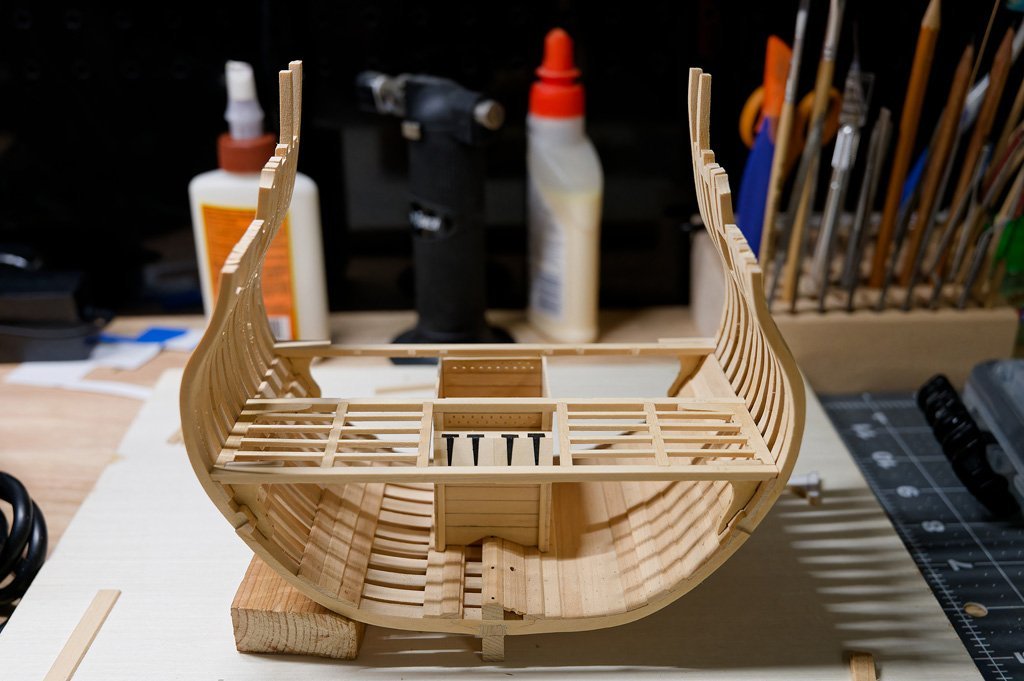
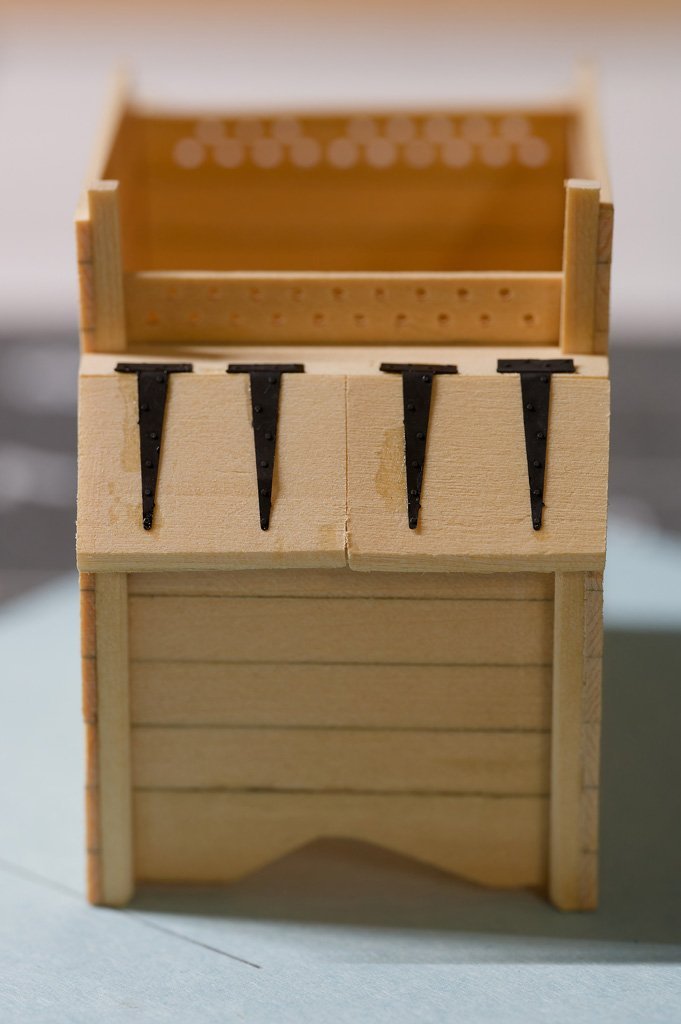
I ended up buying the hinge PE set by Mathos Models (I picked up both A and B sets so I can "always be prepared") and I think they worked out well. Unfortunately the bolts became much harder to see after blackening (I assume this is a shadow thing) and I made a CA glue stain (which thankfully is less noticeable no than when I took these pictures). The well and shot locker goes back into storage while I frame out the lower deck.
-
On 1/6/2024 at 1:20 PM, oakheart said:
says its finished and the pdf has downloaded but there is no sign of the file?
Small update - oakheart helped me debug an issue (thank you!) where the PDF creation was taking longer than the timeout value specified and did not actually create the file. I have updated the releases to incorporate the change.
Apologies that I still haven't gotten around to getting the releases signed - life can be unexpected and full sometimes.
- Ryland Craze, oakheart and mtaylor
-
3
-
She’s coming along really nicely!
- AJohnson and Thukydides
-
2

Gunboat Philadelphia 1776 by tmj
in - Build logs for subjects built 1751 - 1800
Posted
Looking forward to your build! Should be a very interesting take - have fun!