


realworkingsailor
-
Posts
3,091 -
Joined
-
Last visited
Content Type
Profiles
Forums
Gallery
Events
Posts posted by realworkingsailor
-
-
-
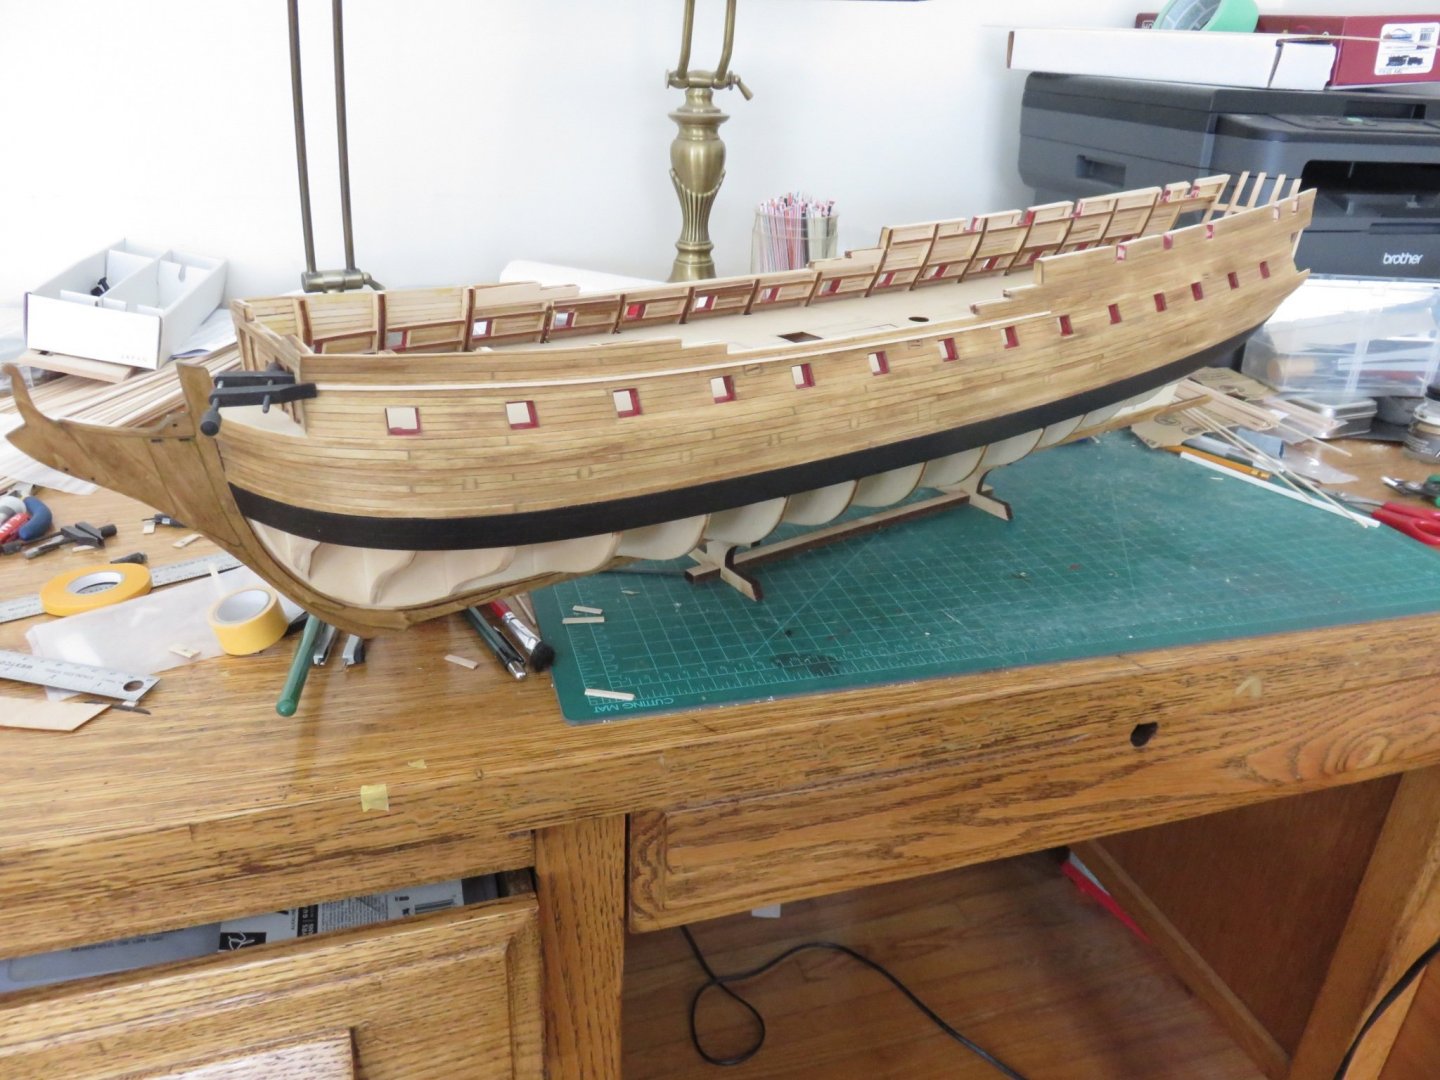
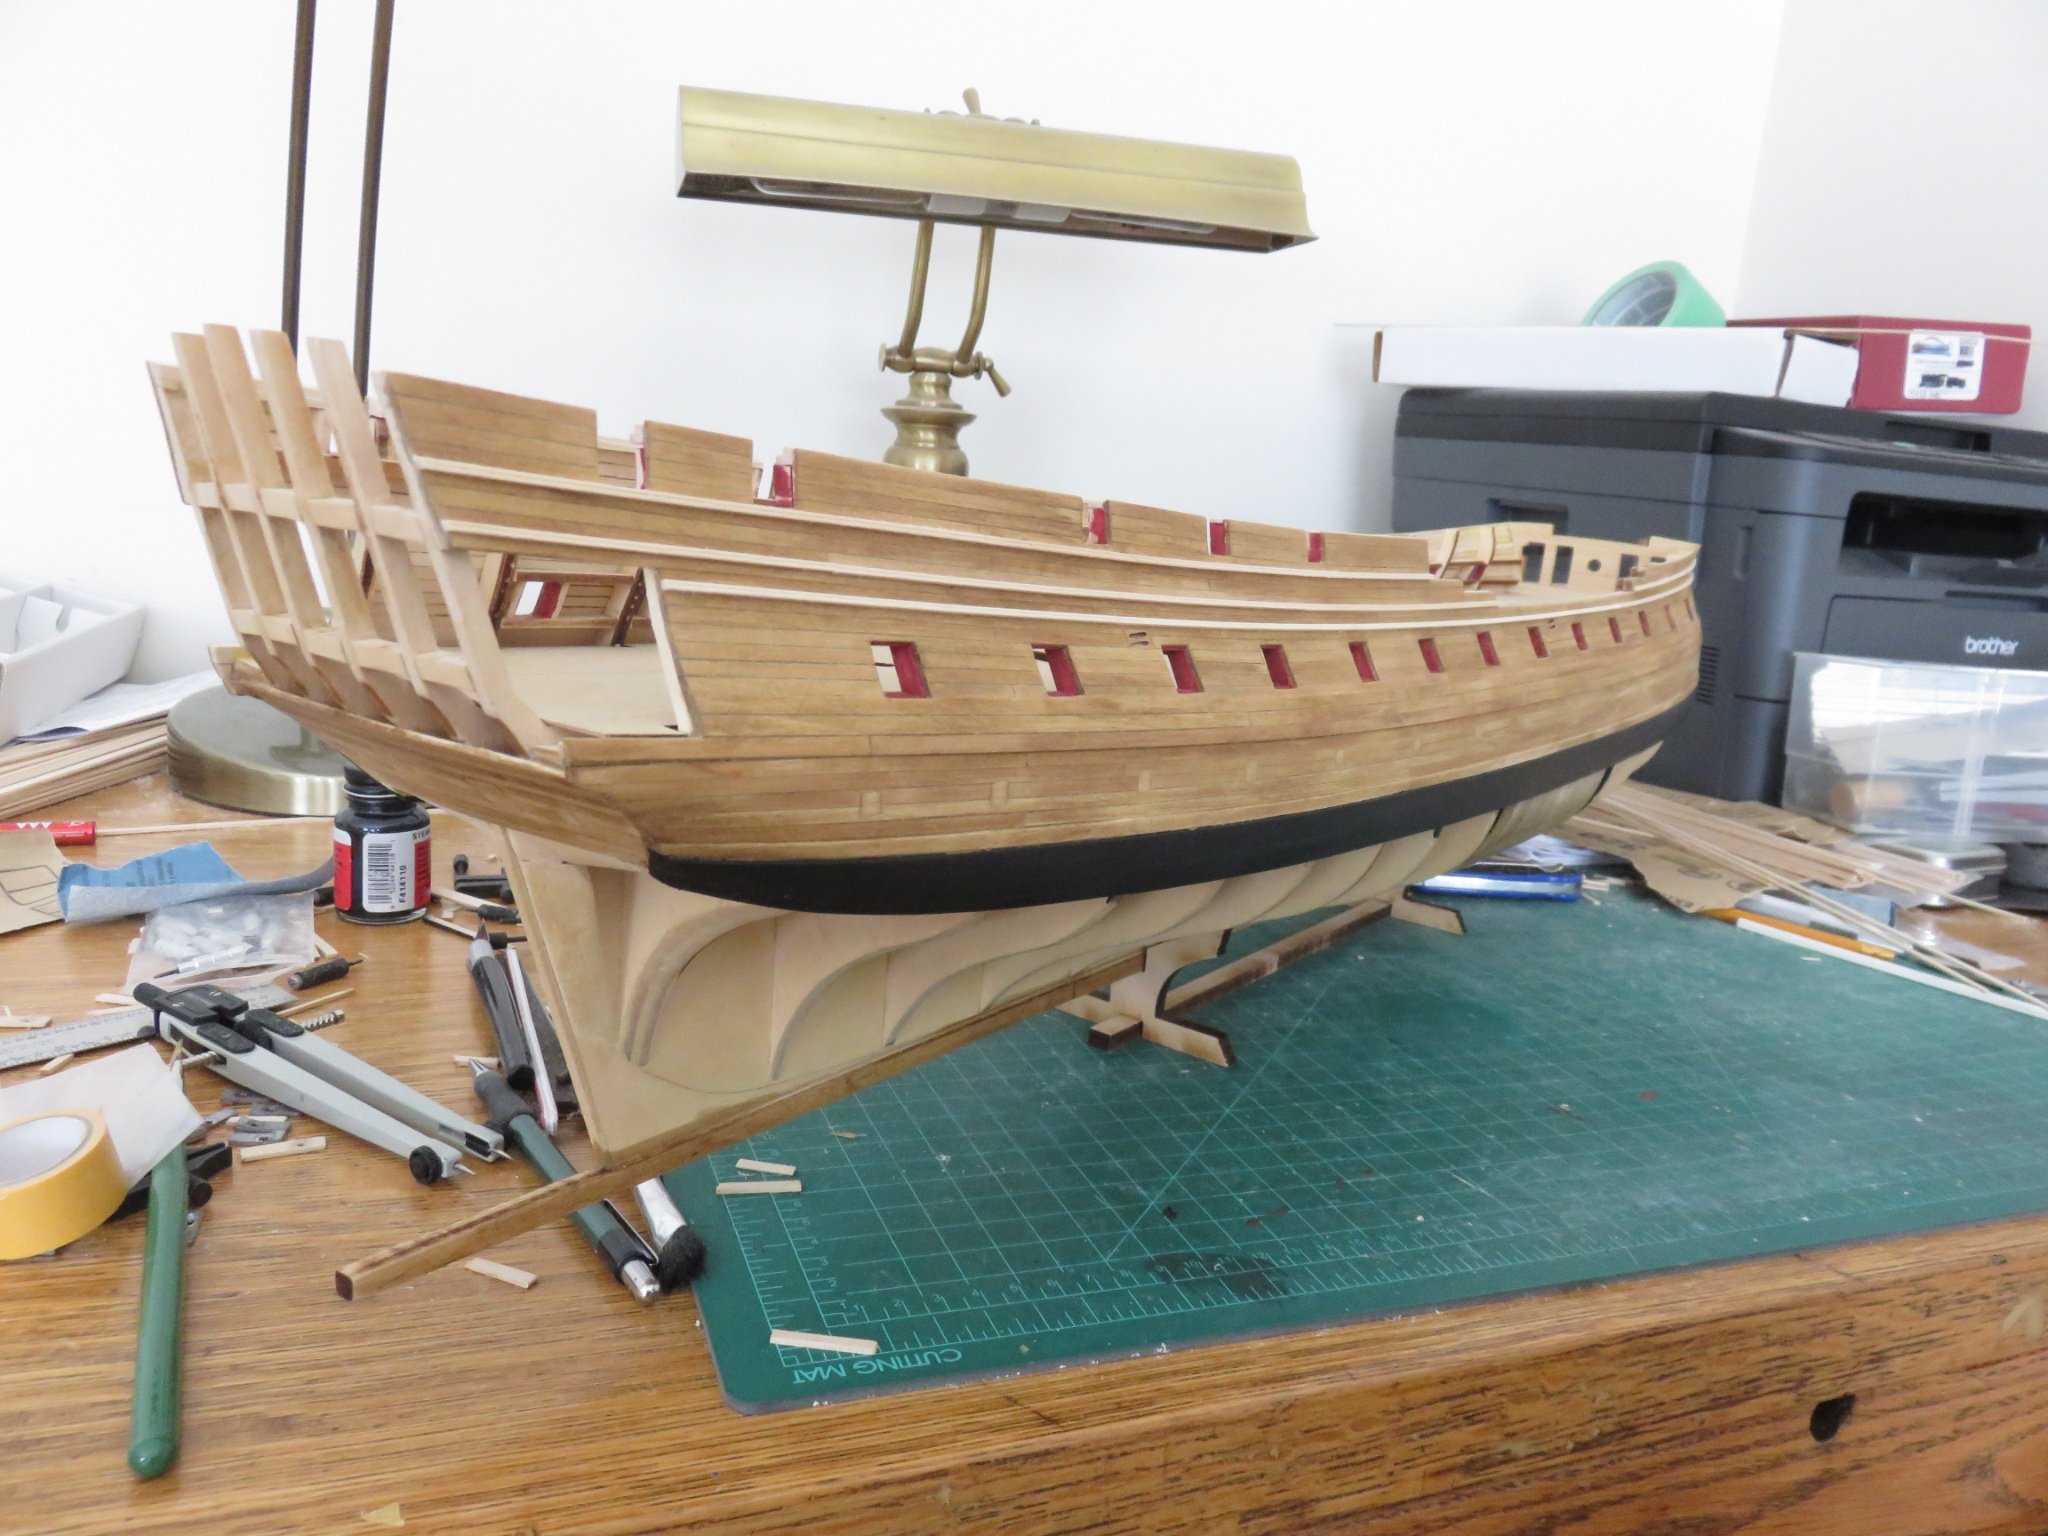
Still having some issues uploading photos, (same error message keeps popping up... frustrating), but I've managed to get two pics uploaded today. Before Christmas, I wanted to post an update as I had completed the first belt of planking on the port side. After a little debate with myself whether or not to start the first belt on the starboard side (and a pause for Christmas), I'm still not sure what I want to do with the reveal on the starboard side, so in the spirit of giving myself more time to think about it (aka procrastination), I have now completed the second belt on the port side. As it is now, I'm going to finish off the port side planking before returning to the starboard side.

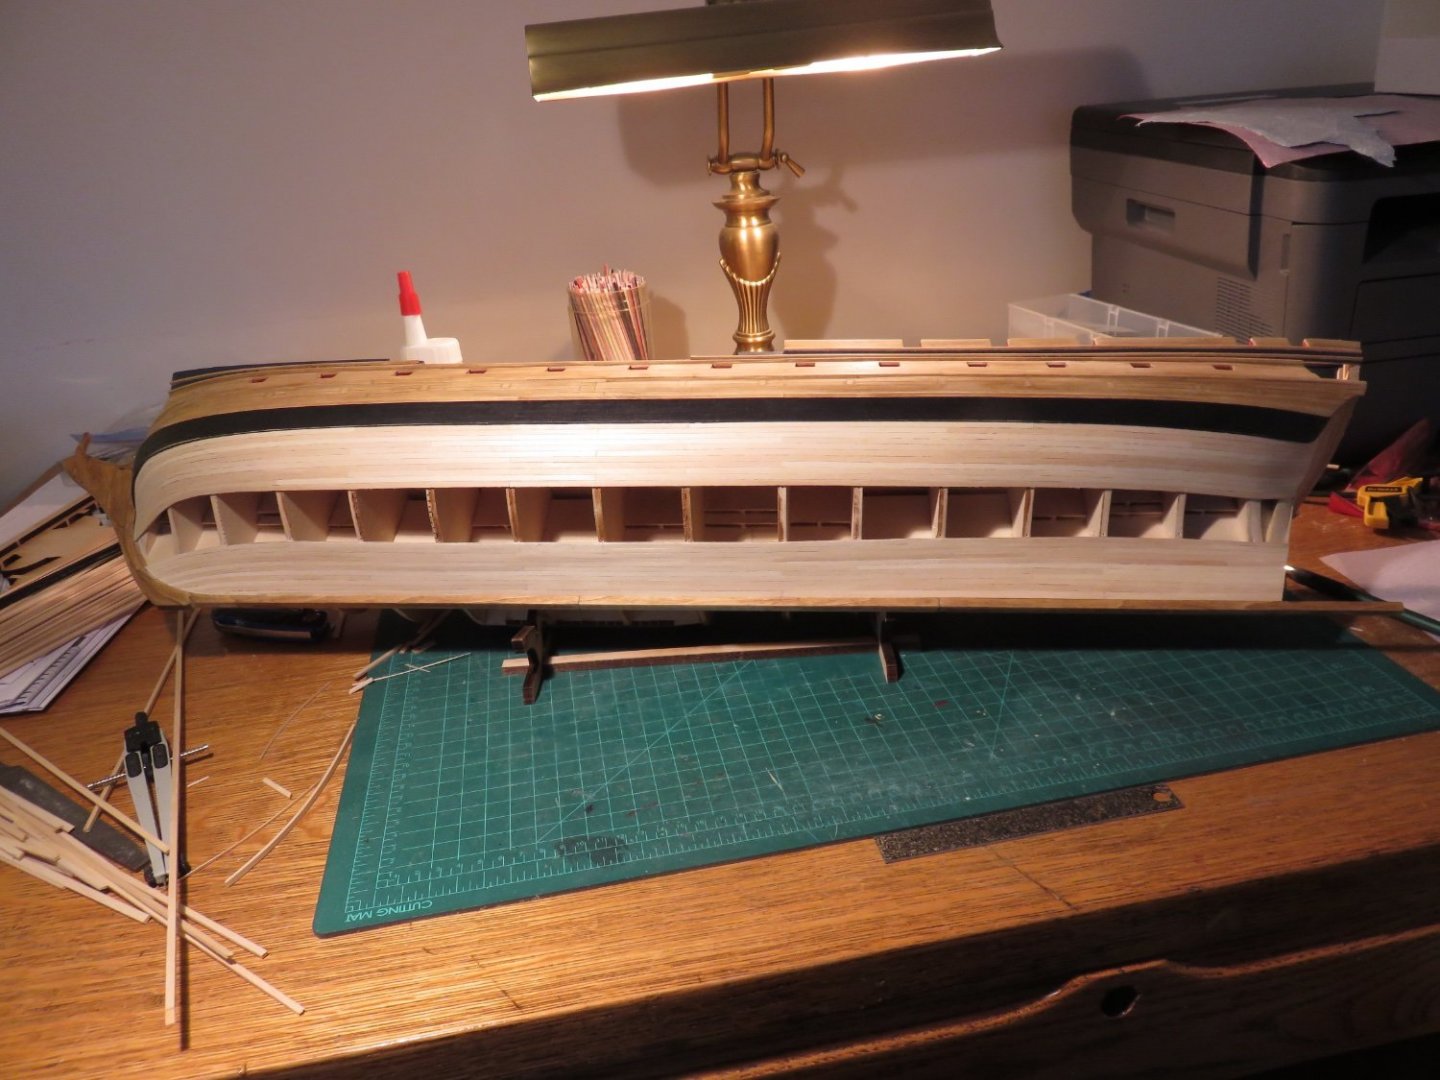
I'm managing between two and three strakes a day (provided I've made enough pre-spiled ones for the bow). Slow but steady work.
Wishing everyone a Happy New Year, and a safe and prosperous 2022.
Andy
-
7 minutes ago, flyer said:
Hi Andy
Nice to hear from you again. The Confederacy really looks a beautiful subject and your work looks fine (as usual).
One question remains: Every time I see that kit I wonder about those large holes in the hull between the great cabin and the quarter galleries. This is hardly according to the original plans. Doesn't it distort the look of the finished model or don't you ever notice it when looking in, through the windows?
Anyway, keep up the good work!
Peter
Thanks Peter! It’s great to hear from you too!The only thing I can attribute the large hole for the quarter galleries, is simply the way Chuck designed the kit. Looking at finished photos of other builds and the prototype, it doesn’t seem to cause too many visual issues as far as I can tell. I’m sure if someone felt like it, they could frame in a smaller doorway if they so chose.
When I finally get there, if I feel it looks a bit odd, then I’ll go with my usual trick of fogging the inside of the window “glass” with a bit of dullcote. (Lets light through, but no peaking!)
It does make me wonder, though, if the outermost lights on the stern should be blacked out, as opposed to clear glass….
All things to think about.
Andy
- EricWilliamMarshall, mtaylor and flyer
-
 3
3
-
Thanks everyone for the likes and comments!
On 12/10/2021 at 3:20 PM, gjdale said:The blue looks good Andy. I think your choice of colour scheme will make a nice point of difference to other Confederacy builds out there.
Definitely that was the idea. I've looked through many logs, and everyone seemed to be doing largely the same thing. I want mine to stand out a little bit. At least until some future Confederacy builder decides to copy me, (which I don't mind at all), at least I will be able say I was the first, but for now I'm the "only".
On 12/10/2021 at 2:21 PM, David Lester said:That's looking great, Andy. What a beautiful ship.
David
Thanks David, I'm doing my best. The Confederacy is a particularly graceful subject. The more I'm planking, the more her lines really start to show through.
On 12/13/2021 at 3:23 PM, Trussben said:Nice to see you back with a build log Andy.
Thanks Ben, it's been a while. I needed to get myself back in the right headspace, not just for ship building, but logging it too. I think my passenger car blog (down in the shore leave section) helped quite a bit in that regard.
Well, I wanted to post a bit of an update, but when I went to upload an image, it came back with an error and "upload failed". I guess I shall have to wait until things get sorted out... hopefully soon.
Andy
-
Thanks everyone for the likes and comments!
On 12/7/2021 at 2:53 PM, WalrusGuy said:I'll be following with a lot of interest! I am also building the Confederacy (currently halfway through the planking below the wales).
Your model is looking fantastic! 🙂
I've had a browse through your log. Your build is looking pretty good too. Best of luck with the planking!
On 12/7/2021 at 3:52 PM, gjdale said:Looks great so far - had a chuckle over the doggy incident!
That's about all anyone can do, really. I guess I got lucky, she didn't try to eat any of the pieces (unlike poor BE with his Sphynx...)
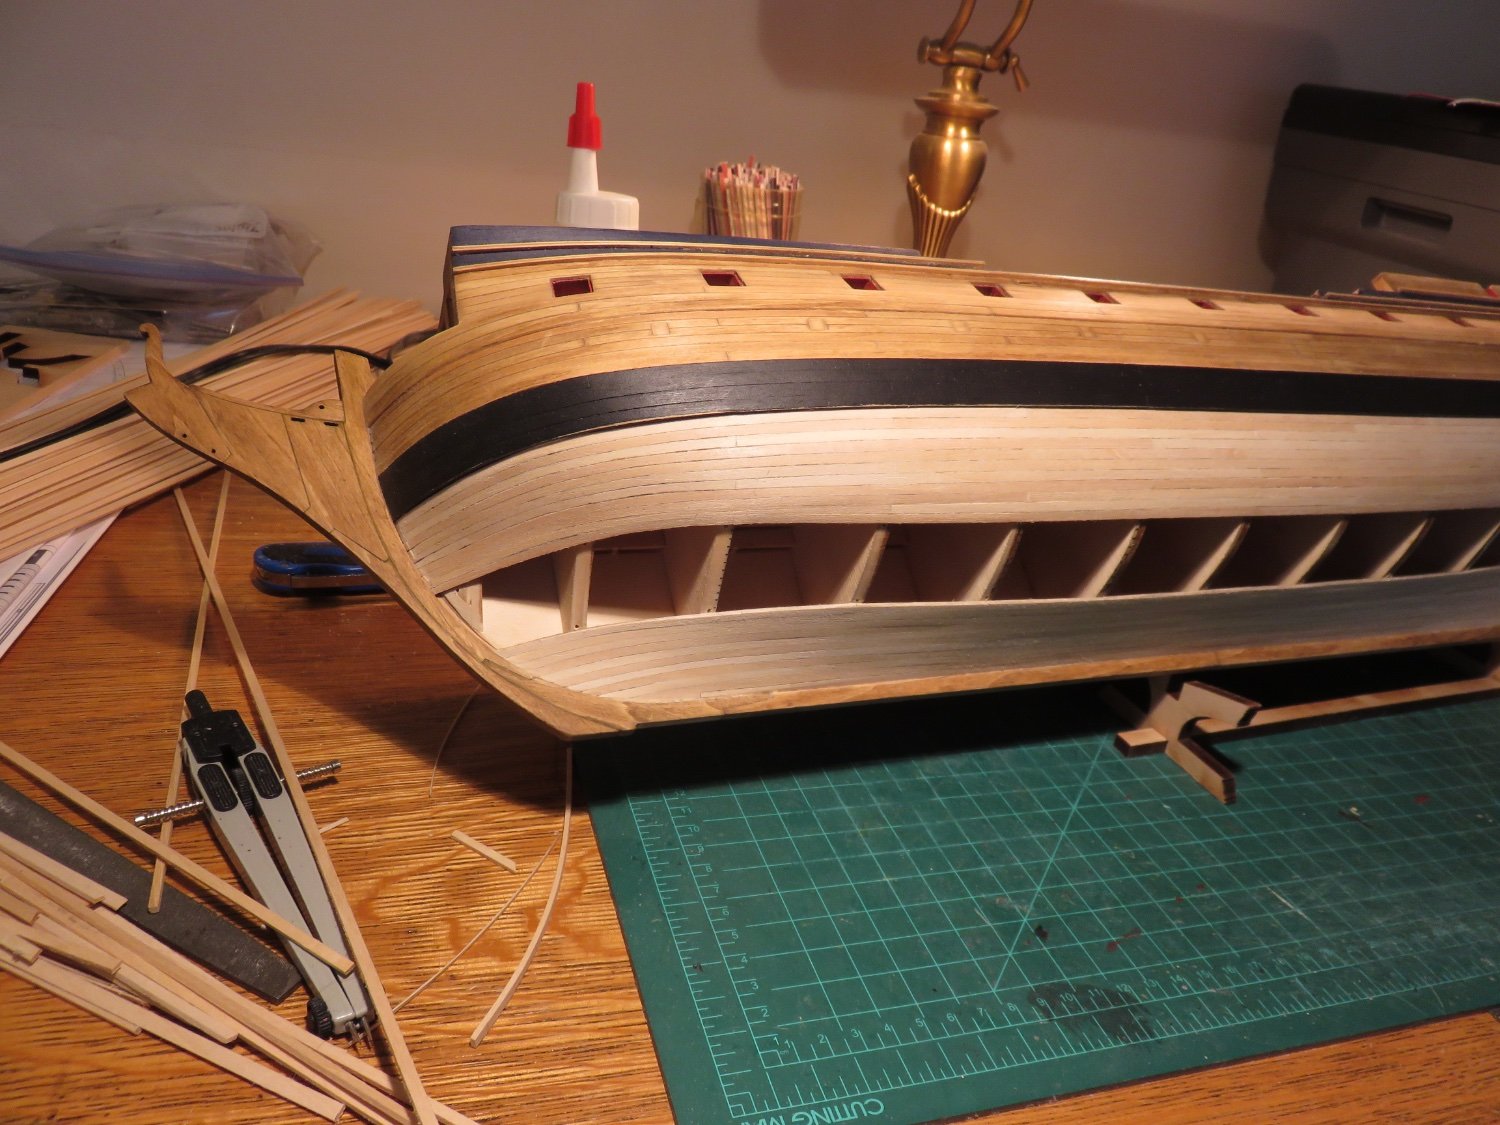
A small update to share. I've decided to deviate a little with the colour scheme. This goes against what I've read about the prototype's possible colour scheme (hopefully I don't get sent to boat-jail for blasphemy🤞).
I've gone with a dark blue for the area of the hull between the mouldings:
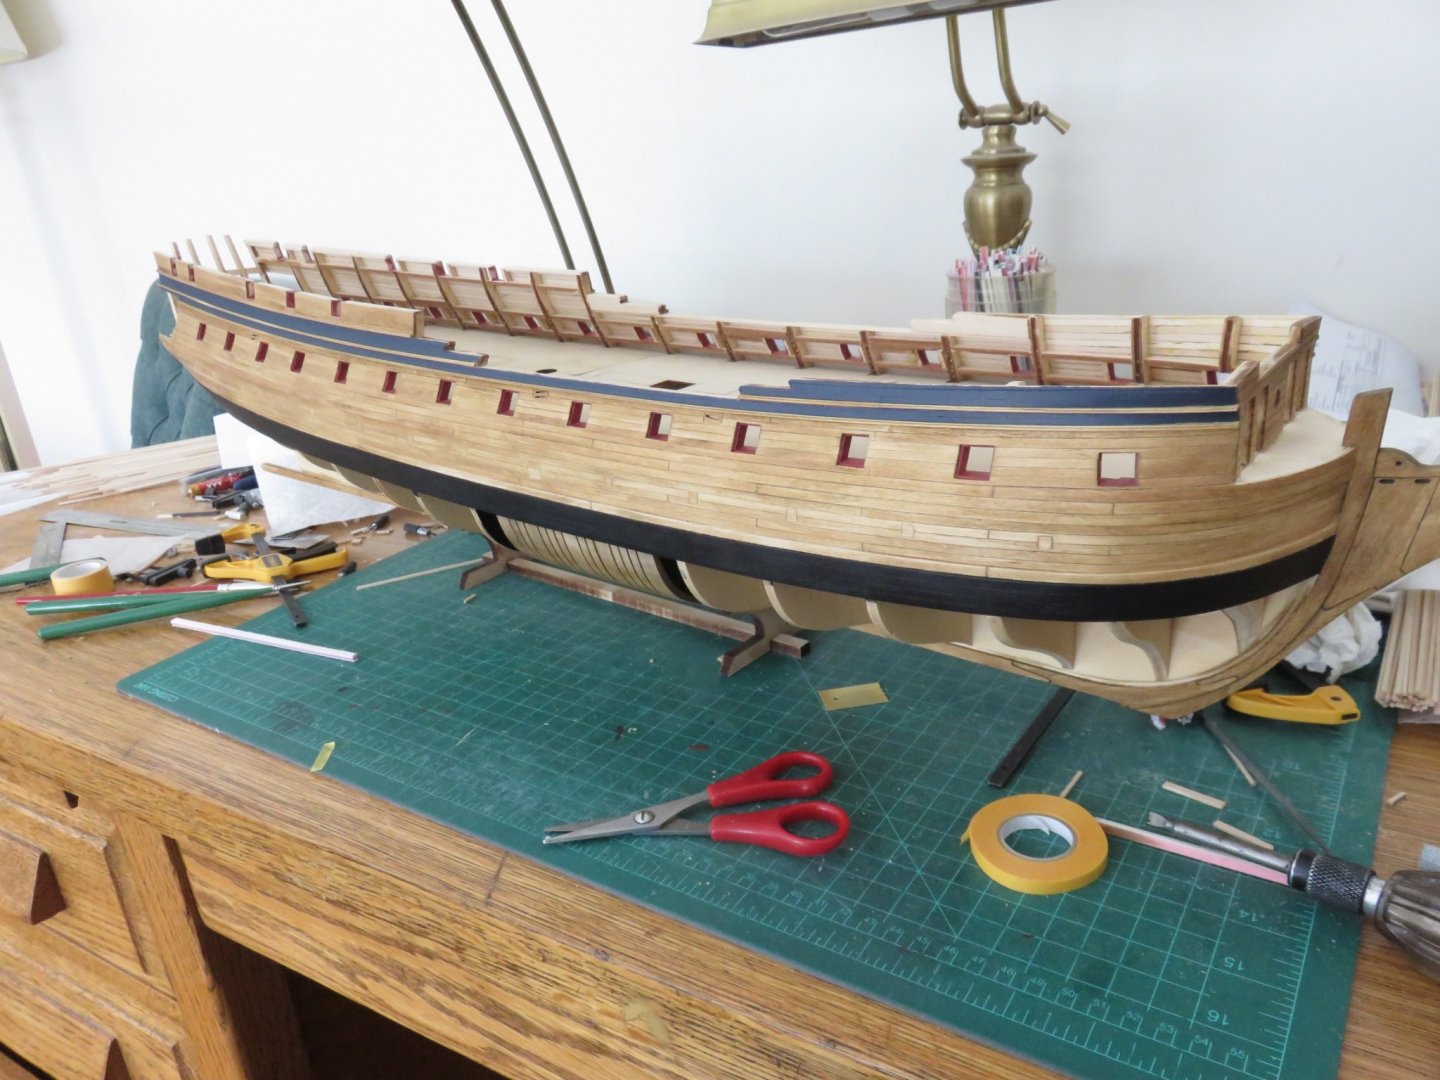
The official name of the colour is Polyscale "C&O Enchantment Blue". I think it compliments well with both the Golden Oak stain as well as the red from the gun ports; Polyscale "NYC Pacemaker Red" (I know, I'm using "railway" colours, but they're what I have on hand).
I had thought to return to black for the QD bulwarks, but I've since decided against that, and I think I will leave them as is. I think the black would have muted the dark blue too much. On to paint the port side.
Andy
-
I can't quite remember when exactly I bought this Confederacy kit, probably sometime around 2012 or 2013. It sat for a long time in the closet, virtually untouched, except for the manual. I think I may have the most well read manual out there, (With tongue firmly planted in cheek; I think MS could do a little better job on the binding, it wasn't really designed to stand up to the rigours of repeated readings 🤪).
I finally started started picking away at this build some four or five years ago, between other projects. Progress has been largely sporadic, with more than a few backwards steps being taken. On many occasions the self-critic took over and the kit was shelved for months (or most recently for almost two years). For many reasons (of which, the above is just one), I've avoided a build log until now. I'm at a point where I'm satisfied with my progress so far, and I hope that the worst of the back stepping is now over.
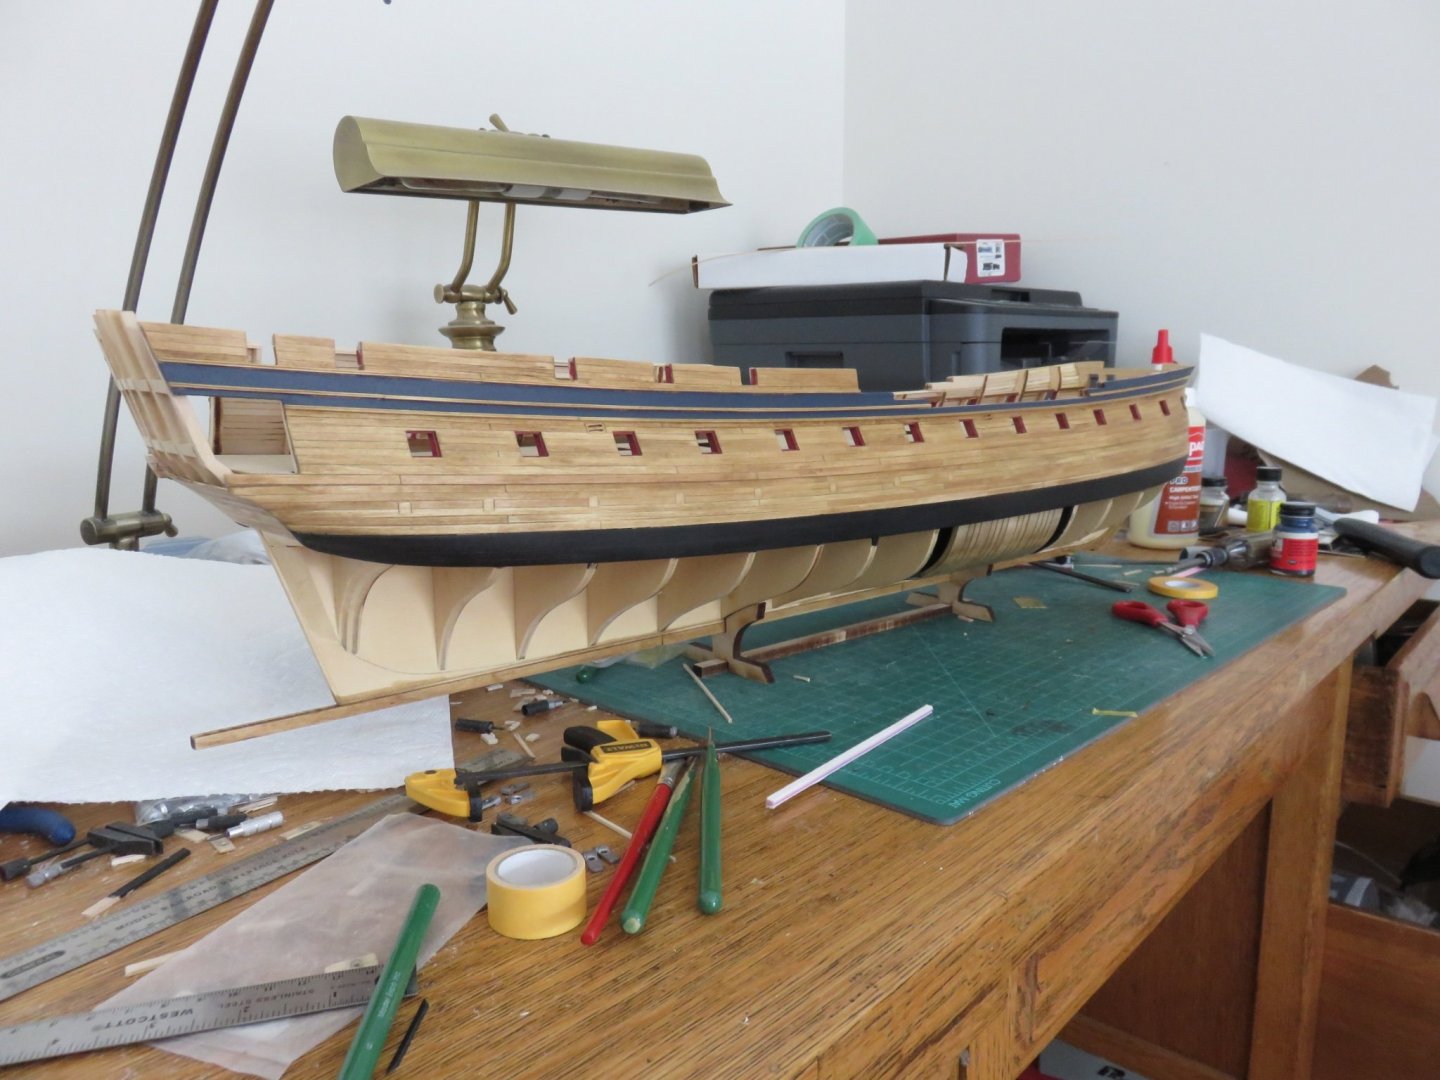
I have completed the planking from the wales upwards and I'm now in the process of adding the first beaded moulding strips.
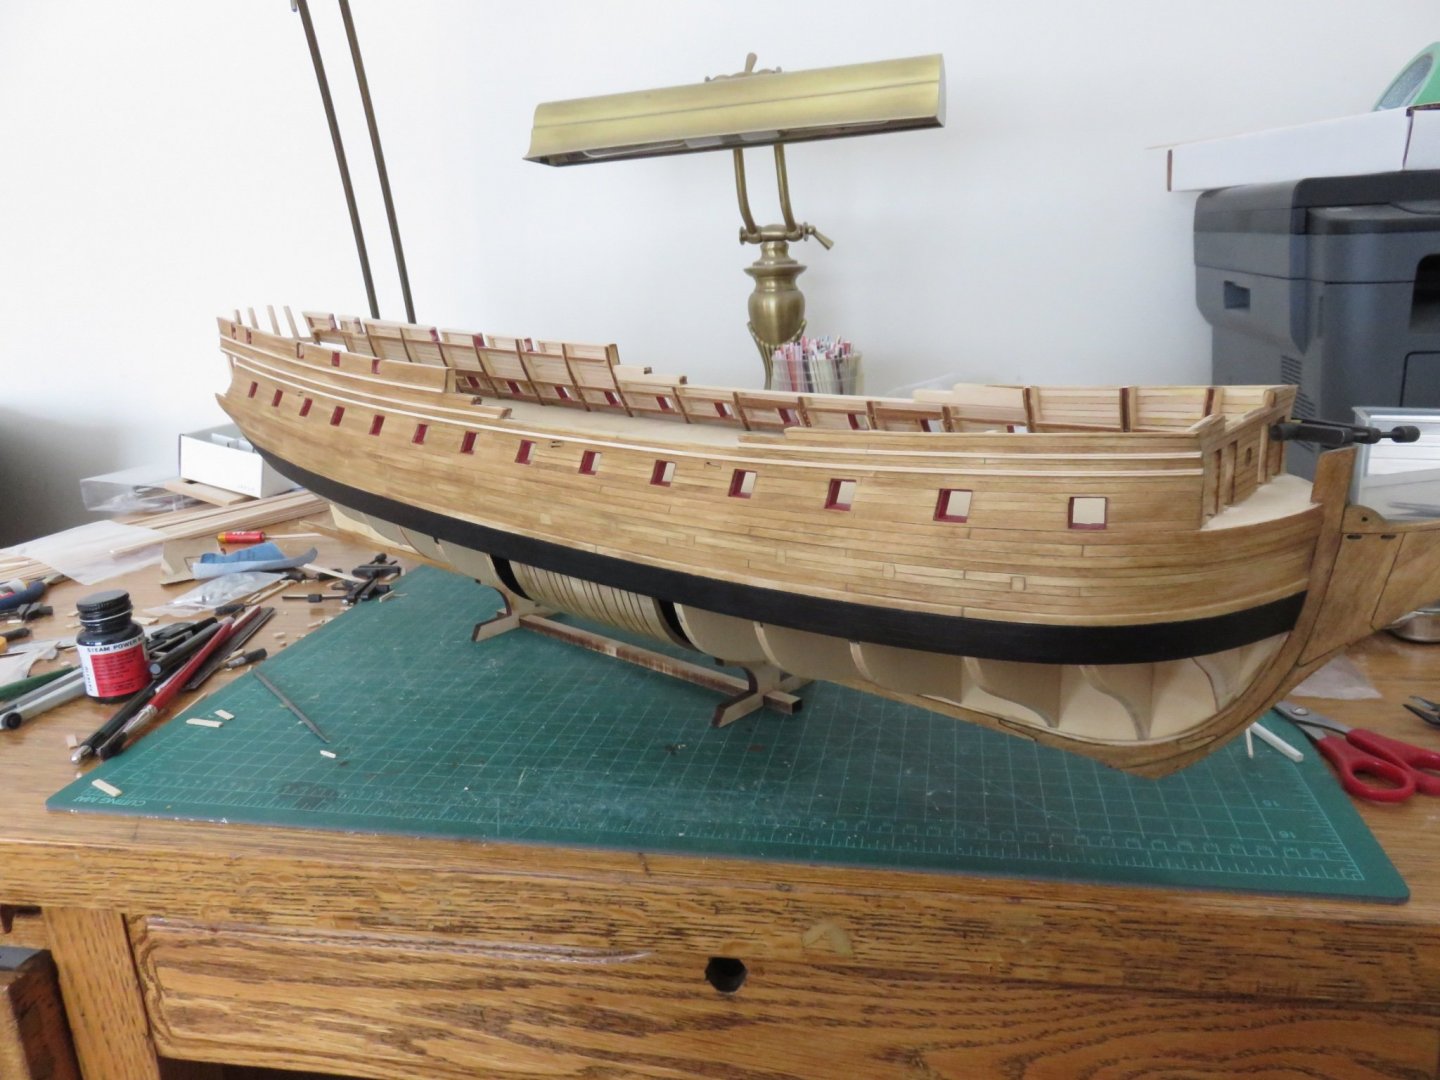

The starboard side mouldings have been added, and the port side is in progress.
If things look a little wonky with the stern light window frames (cills and lintels), it was due to an unfortunate incident involving the large nose of a curious young german shepherd, that decided to investigate the stern, while work was being done on the other end of the ship. The interloping nose went undetected until the work required a shift in position... I'll leave the rest up to your imaginations.. but suffice it to say, it wasn't pretty. Pieces where quickly gathered up, and splintered wood glued back together. Before the time comes to attach the transom, everything will be revisited and correctly re-aligned.
I've used Minwax Golden Oak stain for the planking above the wale, with some Polyscale acrylics that I had kicking around, for the black wale and the red gun ports.
Andy
- mtaylor, Blue Ensign, dvm27 and 10 others
-
13
-
If I may suggest, when building with styrene, consider building in layers. Start with a 0.010” or 0.015” outer layer, and work inwards. The thinner stock will make cutting easier and more accurate, the subsequent heavier layers only require more general window openings.
Have a look to see how I built my CPR coach:
Andy -
1 hour ago, Roger Pellett said:
Is the ore coming from Quebec pelletized like that shipped on Lake Superior, or unrefined “natural” ore? If it’s unrefined that might account for the lack of self unloading equipment.
Most of the ore I’ve seen heading up the lakes out of Port Cartier, Pointe Noire and Sept Iles was pellets. Those mines also ship concentrate ore, but mostly for overseas markets. The concentrate ore can be finicky for SULs, depending on moisture content, but I did get out to the CSL Spirit, when it was involved in the transshipment operation out of Pt Noire, and it seemed to run alright through the gear, no hang ups and not much mess in the tunnel.
Algoma holds pretty tight to their contract with Dofasco, who still have cranes at Hamilton, so for them SUL equipment isn’t entirely critical. I wonder if the yard they signed with initially in China hadn’t run into financial difficulties if we’d be seeing more Equinox 740’ SULs by now.
Andy
- mtaylor, JKC27, thibaultron and 1 other
-
4
-
5 minutes ago, JKC27 said:
@realworkingsailor Thanks for the info Andy. Surprised the new CSL builds went old style plus more hatches too on the Trillium ships. I'm sure the cargoes are similar between CSL and Algoma so the likely doesn't play into the design.
What ship are you on?
Bulkers need bigger hatches (hence fewer) in order to accommodate shore unloading equipment, as opposed to SULs. If you look at the CSL St. Laurent or the CSL Welland, you’ll see a similar number of hatches to the Equinoxes.
Sadly I’m not on any ships anymore (except as a passenger), was forced to give it up because of my eyesight (more specifically, lack thereof).
Andy
-
The Algoma boats use a “Macgregor” style quick acting cleat, along with square section rubber seals (similar in cross section to a 2x4) running in a U channel under the lip of the hatch cover. These seals mate with a compression bar set on the hatch coaming. Very similar to the arrangement found on deep sea ships with hydraulic hatches. This allows for fewer clamps per hatch cover (labour saving!), but does require a more rigid structure.
All the CSL new builds retained the now 70 year old system of Kestner clamps and small seals on the hatches. The seals are simply a 3/4” wide by 1” deep strip of rubber, keyhole shaped in cross section, held in a narrow groove in the underside of the hatch cover, these seals mate only to the flat top of the hatch coaming. This system is structurally lighter, and allows for more flexing, but requires more clamps per hatch (about 33% more), hence more labour intensive.
In the current corporate drive to control costs (read cut crews), I can’t, for the life of me, figure out why CSL didn’t really do any (major) innovation on the deck arrangement on their ships. Technically, they are well designed ships, efficient engines and cargo handling equipment, but they’re trying to run a 70 year old style deck with less than 25% of the crew (as compared to when the Kestner clamp was the latest and greatest….. circa 1947).
Andy
- Roger Pellett, druxey, thibaultron and 2 others
-
4
-
 1
1
-
7 hours ago, wefalck said:
I could bend the story from IC powered tractors back to steam-powered farm implements by mentioning, that another big US American farm-machinery manufacturer, John Deere, bought out in 1956 a well-know German manufacturer, who started off with farm machinery in 1859 and then took up building portable steam-engines (locomobiles) in 1878 to become the biggest manufacturer in Europe. In the early 1920s they began to develop the IC powered tractor and the Lanz 'Bulldog' was successful well into the 1960s in its various variants, including road tractors that took over the role of steam traction-engines for heavy haulage.
I consider the Lanz bulldog and the British made Field-Marshall "honorary steam tractors". They're also great "party trick" tractors, the Lanz because it can run without the single cylinder engine completing a full revolution, and the Field-Marshall because of the unique method used to start the engine.
And just for good measure, some steam:
Andy
-
On 7/23/2021 at 4:17 PM, ccoyle said:
Further to my observation about my hometown's rodeo, here's some images from this year's follow-up event, the "Hit 'n' Miss Engine" show.

As near as I can determine... Left to right:
J.I. Case model LA (1940-1953) or model 500 (1953-1956)
IH model 650 (1956-1958)
IH-McCormick Super W6 (1952-1954)
Allis-Chalmers styled WC (1938-1948)
Massey-Harris possibly model 44 (1947-1953)
Andy
- Canute, popeye the sailor and mtaylor
-
3
-
1 hour ago, Egilman said:
Andy, it seems labor intensive until you remember what they were replacing.... A man with a horse and a single cutting plow.... That rig could do in 5 minutes what it would take a standard plow 30-60 minutes.... The Nuffield and Fordson tractors are showing why they were a revolution in farming, with a dual blade plow, (and the Fordson three point floating hitch) they could do in 5 minutes what the Fowler rig took 10, without the setup, and do it with only one man instead of a minimum of 6....
Absolutely. Not arguing that it wasn’t an improvement over the older method. Although I thinks there’s an old joke about having a good team of horses and the old farmer could just sit at the end of the field yelling “gee”
or “haw” every now and again.
I’ve done some ploughing myself, with an IH 384 and an ace bottom plough. No matter what, ploughing is a time consuming (but satisfying) process.

Andy
-
I haven’t yet been able to locate a clip from the BBC series, but I did find these YouTube videos of Fowlers ploughing. You can see how labour intensive, and time consuming this style of ploughing is (as evidenced in the second clip that momentarily jumps to a little bit more modern equipment in the form of a little red Nuffield, and a grey Ford 8N).Andy
- Edwardkenway, mtaylor, wefalck and 2 others
-
5
-
5 hours ago, wefalck said:
However, this is not a 'tractor', but rather a 'ploughing engine' as it does not pull the plough across the field directly, but rather by cable and winding drum:
I seem to recall an episode in the BBC Historic Farm series (can’t remember which season though, Victorian or Edwardian), where they demonstrated ploughing with one of those. Amazing to watch, but plenty of opportunities for the judicious mechanical removal of misplaced limbs!Andy
- mtaylor, popeye the sailor, Edwardkenway and 2 others
-
2
-
 2
2
-
 1
1
-
-
1 hour ago, Kevin said:
thank you Jason, i stopped doing it when i was slated on a FB group, comments like how i should have left it to someone who knew what they were doing etc, kind of upset me in a way, im not sure if the confidence will return, and if it does i certainly will think twice before showing others
I can think of many choice colourful words to describe those miserable FB trolls, but I will refrain from using that sort of language here.
You have absolutely nothing to be ashamed of. I have quite enjoying watching your progress to date, especially knowing that the (high) quality of your build efforts is something that I could possibly achieve, had I the resources (read $$, or €€ or ££) to attempt it myself.
Chin up, and know that I’m among the people here on MSW that wish to see to see you succeed (even if it’s only in experience, it’s 100% worth it!)
Looking forward to your continued progress when you’re ready to resume.
Andy
-
12 hours ago, druxey said:
I was terrified of trying to cast in metal, but when I finally tried ( in pewter) I found it was not so difficult. RTV moulds are similar to resin casting ones. The only thing with a two-part closed mold is to provide air escape vents. A regular propane torch is fine for melting the metal.
Just spent a little time perusing what was available on the Micromark website. A few different casting metals with different melt points, definitely want to avoid anything containing lead, though...... maybe something to consider looking into in the fall.
Out of sheer stubbornness, though, I will have to try to salvage at least one of the castings I received.
Andy
- Canute, Egilman, Old Collingwood and 2 others
-
5
-
2 hours ago, druxey said:
Could you mold and cast from the 'good' queen post?
Metal casting is a little outside my skill set, unfortunately. About the only type of casting I feel remotely capable of even attempting would be resin, but I’m not sure how strong the resulting parts would be.
Andy
-
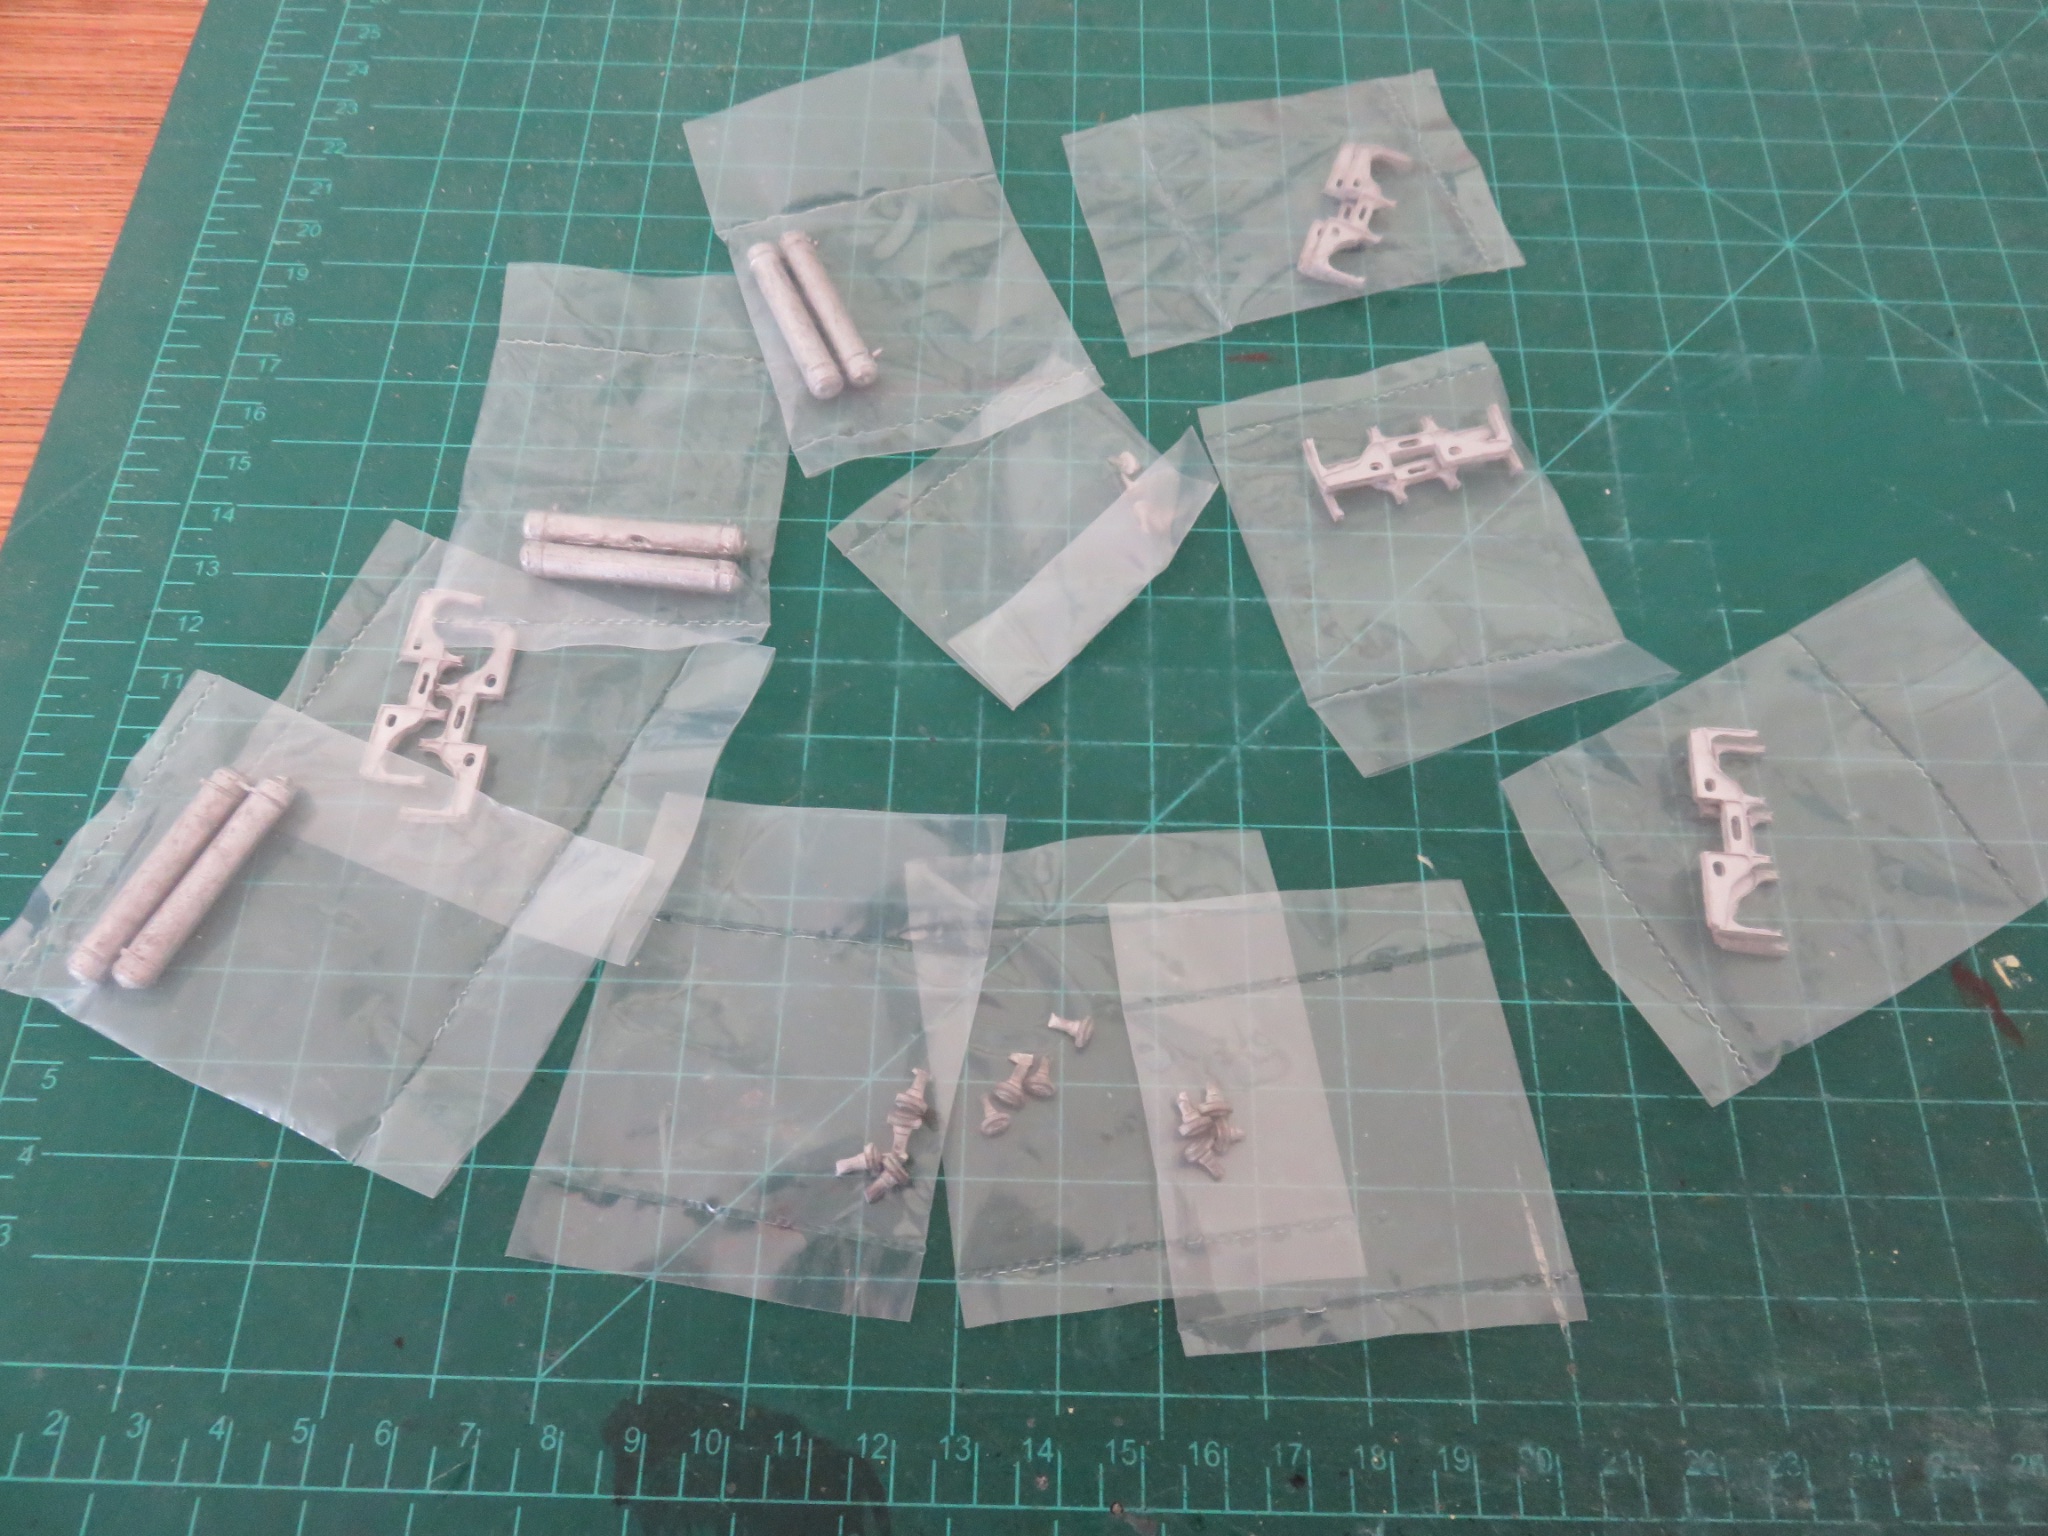
So a small package arrived in the mailbox today. All the parts I'd ordered from LaBelle have arrived safely. (Yay-ish). Looks like the replacement queen post castings have similar issues as the one noted in a previous post. I suspect at this point the law of diminishing returns has struck and in all likelihood the casting molds are not in the best shape, since all the queen post castings are consistent in shape. I really can't hold this against LaBelle, if these are the molds they bought off of BCW, it's about as good as I'm going to get, and they have their own product lines to worry about. The other detail parts (vents and tanks) all look ok, though.
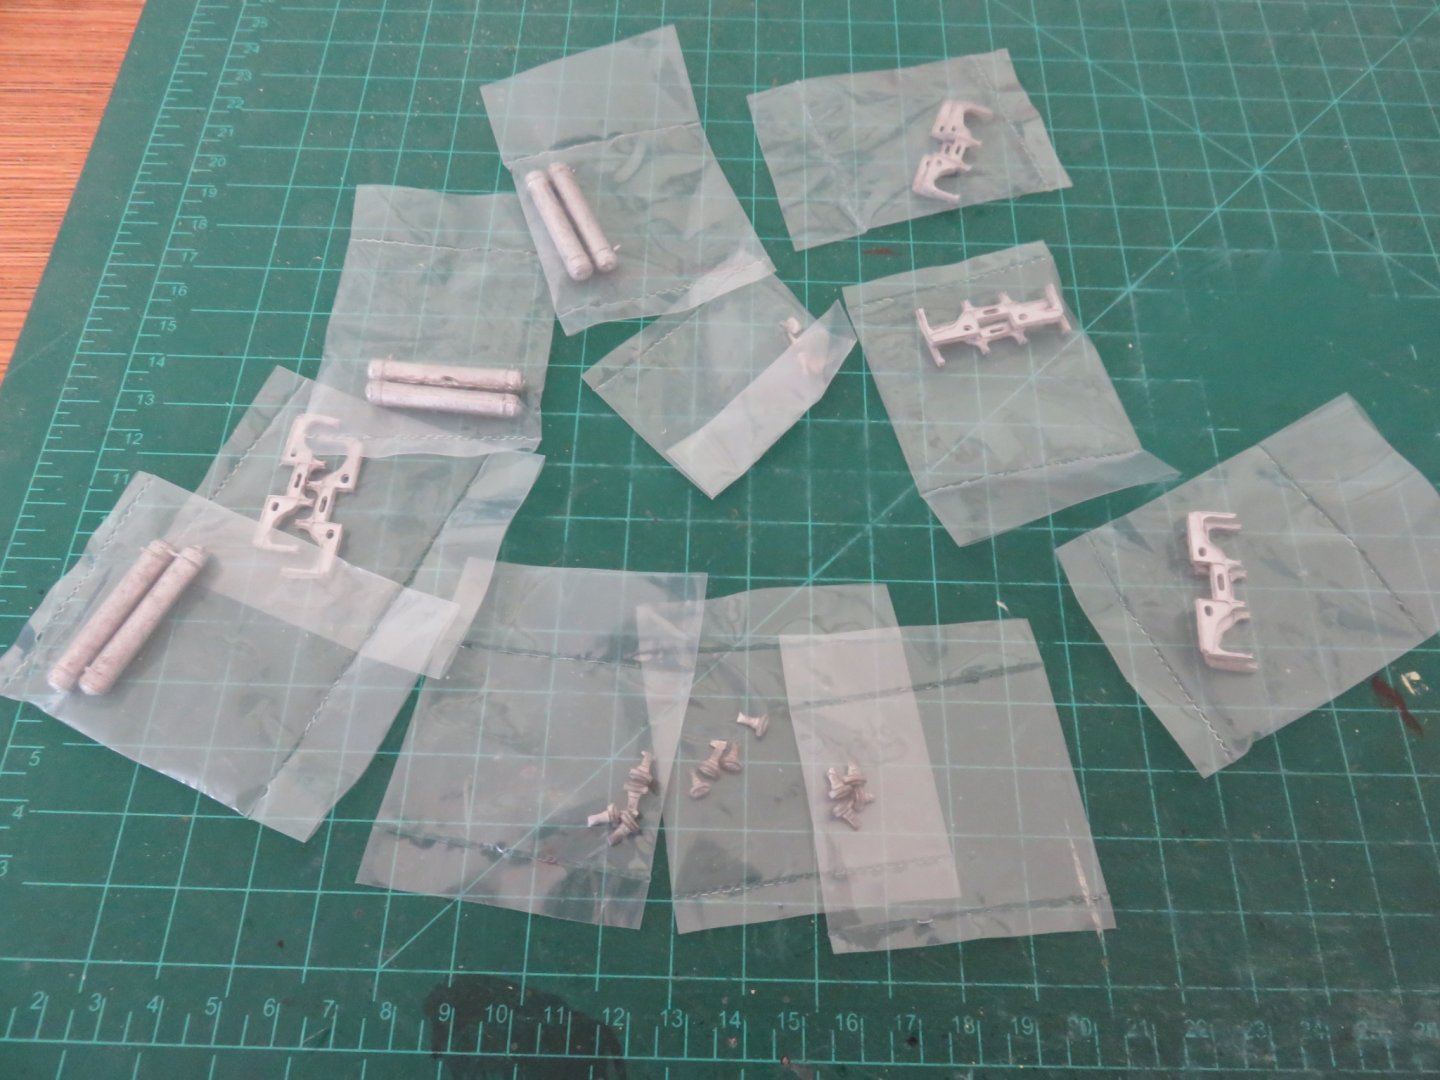
It looks more promising that I may be able to clean up the queen post castings a bit and with careful filing, and restore them to a shape closer to the older original casting (which I'm now going to have to forsake using as it will be needed as a master reference). Of course all this comes just as the weather has begun to turn summer like, so I've got some time to consider my options.
Andy
-
“Believe me, my young friend, there is nothing - absolutely nothing - half so much worth doing as simply messing about in boats.”
Kenneth Grahame, The Wind in the Willows- Jack12477, Edwardkenway, RichardG and 9 others
-
12
-
-
Hi Denis!
Thanks for your generous compliments. The BCW Sparrows Point Kits are modern kits (laser cut components, PE parts, etc). The major assembly is pretty straight forward, and should be reasonably simple for anyone with a modicum of experience. As for trucks, research, especially if photographs are available, is your best friend (along with the Walthers website). Make sure you have a Kadee coupler height gauge too!
If you want a suggestion for your diorama, look into getting a couple pieces of styrofoam insulation board (the dense pink of blue stuff, not the pressed white pellet stuff). You can layer and carve it to quickly make 3D scenery (ditches, embankments, hills). Your trains can be shown living IN the scenery rather than simply plonked on top of it.
Kalmbach publishing has many inexpensive books on scenery techniques to help get you going.
Good luck!Andy
- Blackreed, Canute, Edwardkenway and 4 others
-
7
-
8 minutes ago, Canute said:
Andy, what filler did you use on the roof joins. Looks good.
Hard to think those queen post castings would ever match up.
That chonky queen post is basically junk, there’s no saving that bad casting.
I used Squadron white putty. It bonds reasonably well enough to wood and very well with plastic and resin. It sands easily, but I recommend having good ventilation and/or a respirator when applying, and be sparing too.Andy
- Egilman, Old Collingwood, Blackreed and 5 others
-
8


Confederacy by Realworkingsailor - Model Shipways - 1:64 - Frigate
in - Kit build logs for subjects built from 1751 - 1800
Posted
Thanks everyone for the kind comments and “likes”!
BE and BW, I’m glad you guys also like the blue. I was a bit worried at first that it may prove to be a somewhat controversial colour choice, but I’m pleased with all the positive responses.
Andy