Mirabell61
-
Posts
7,418 -
Joined
-
Last visited
Content Type
Profiles
Forums
Gallery
Events
Everything posted by Mirabell61
-
 What a lovely Project Bob, I love old steamboats, will be following along as you go... Nils
- 348 replies
-
- 2
-

-
- pequot
- cable ship
- (and 1 more)
-
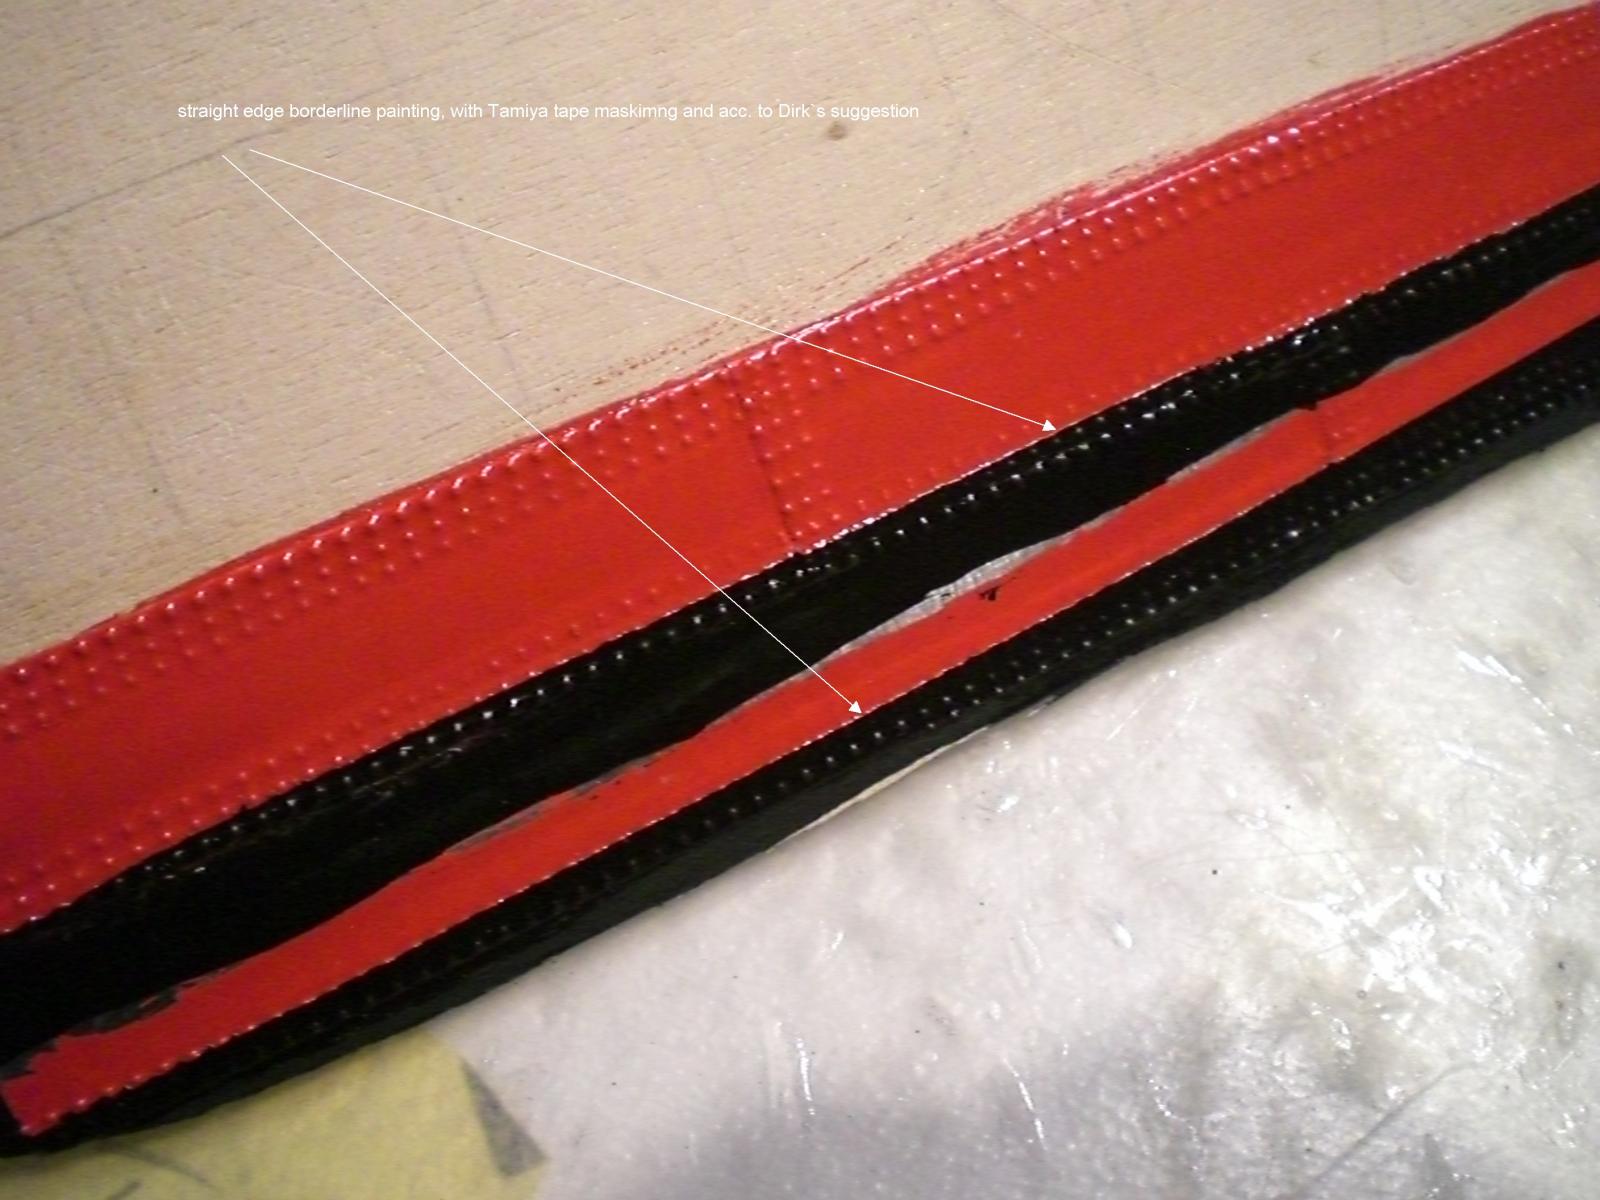
Hi Dirk, I just wanted to give feedback on your borderline painting suggestion. I made two samples, both straddling / crossing directly over the rivet-rows, and wow no "paint creepers" anymore It worked perfectly, I`m very thankful for your advice on this painting tip... Nils

- 2,625 replies
-
- 15
-
-
- kaiser wilhelm der grosse
- passenger steamer
- (and 1 more)
-
Hi Glenn, very interesting model and impressive metal parts as well. Will love to see when you get to mounting the steam engine and Boiler. Wish you all the best with your steam riverboat. The large scale will give you lots of space for finest details Nils
-
Thank you Tadeusz, for sharing all those lovely Pictures, it`s been a delight to go through them Nils
-
Thank you very much Lawrence, for that fine appreciation, glad you like the build... Nils
-
thank you so much for you Kind and appreciative words Mike and Crackers, also many thanks to all the "likes" Nils
- 2,625 replies
-
- 4
-
-
- kaiser wilhelm der grosse
- passenger steamer
- (and 1 more)
-
Hi Sherry, you really are doing a great Job on your first scratch built model.... the well built "San Felipe" is looking so fine, well done ! Nils
-
Cutter Cheerful 1806 by rafine - FINISHED
Mirabell61 replied to rafine's topic in - Build logs for subjects built 1801 - 1850
good looking Details Bob, Nils- 525 replies
-
- 3
-
-
- cheerful
- Syren Ship Model Company
- (and 1 more)
-
very nice Progress Michael, I would also leave the brass as is..., perhaps a clear varnish over it for protection only Nils
-
Many thanks for your word Patrick, Nils
- 2,625 replies
-
- 3
-
-
- kaiser wilhelm der grosse
- passenger steamer
- (and 1 more)
-
Hi GG I held those fab cabin walls, your post in in Boyd`s log) for his own Bounty build, but in this case the credit goes with you....., great looking interior wood work Nils
-
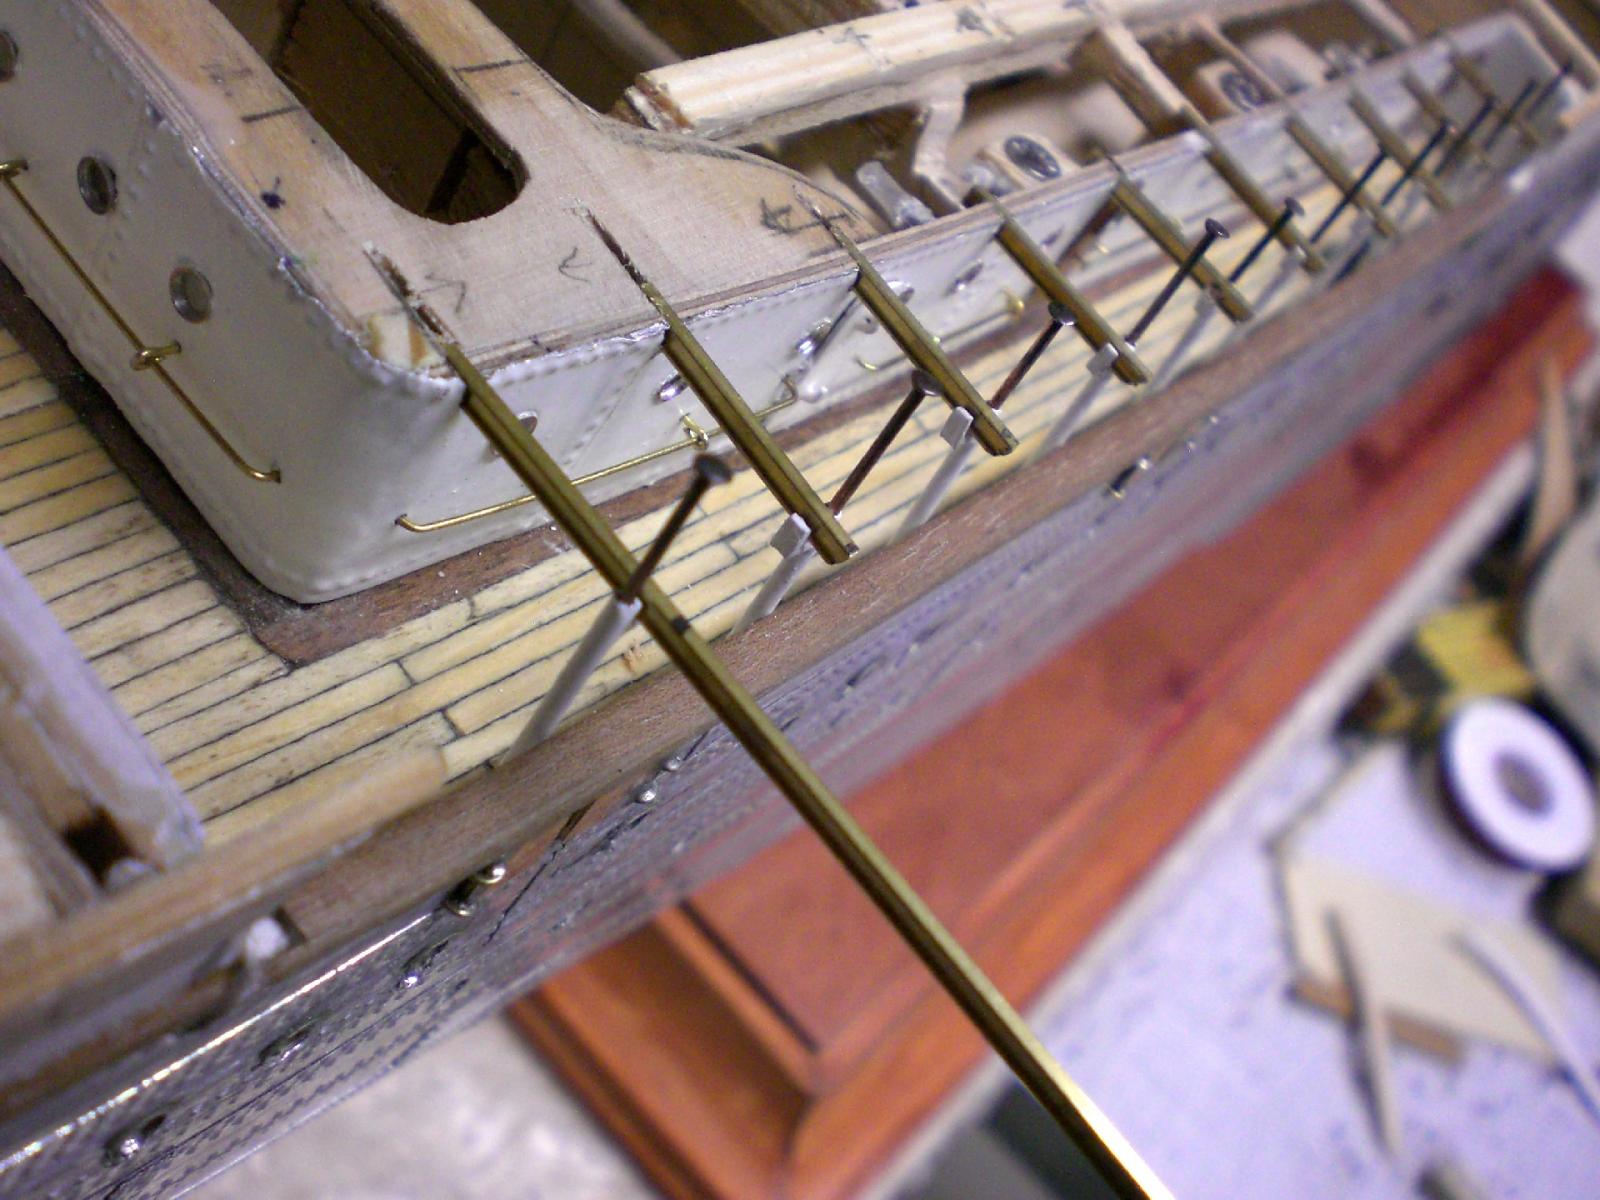
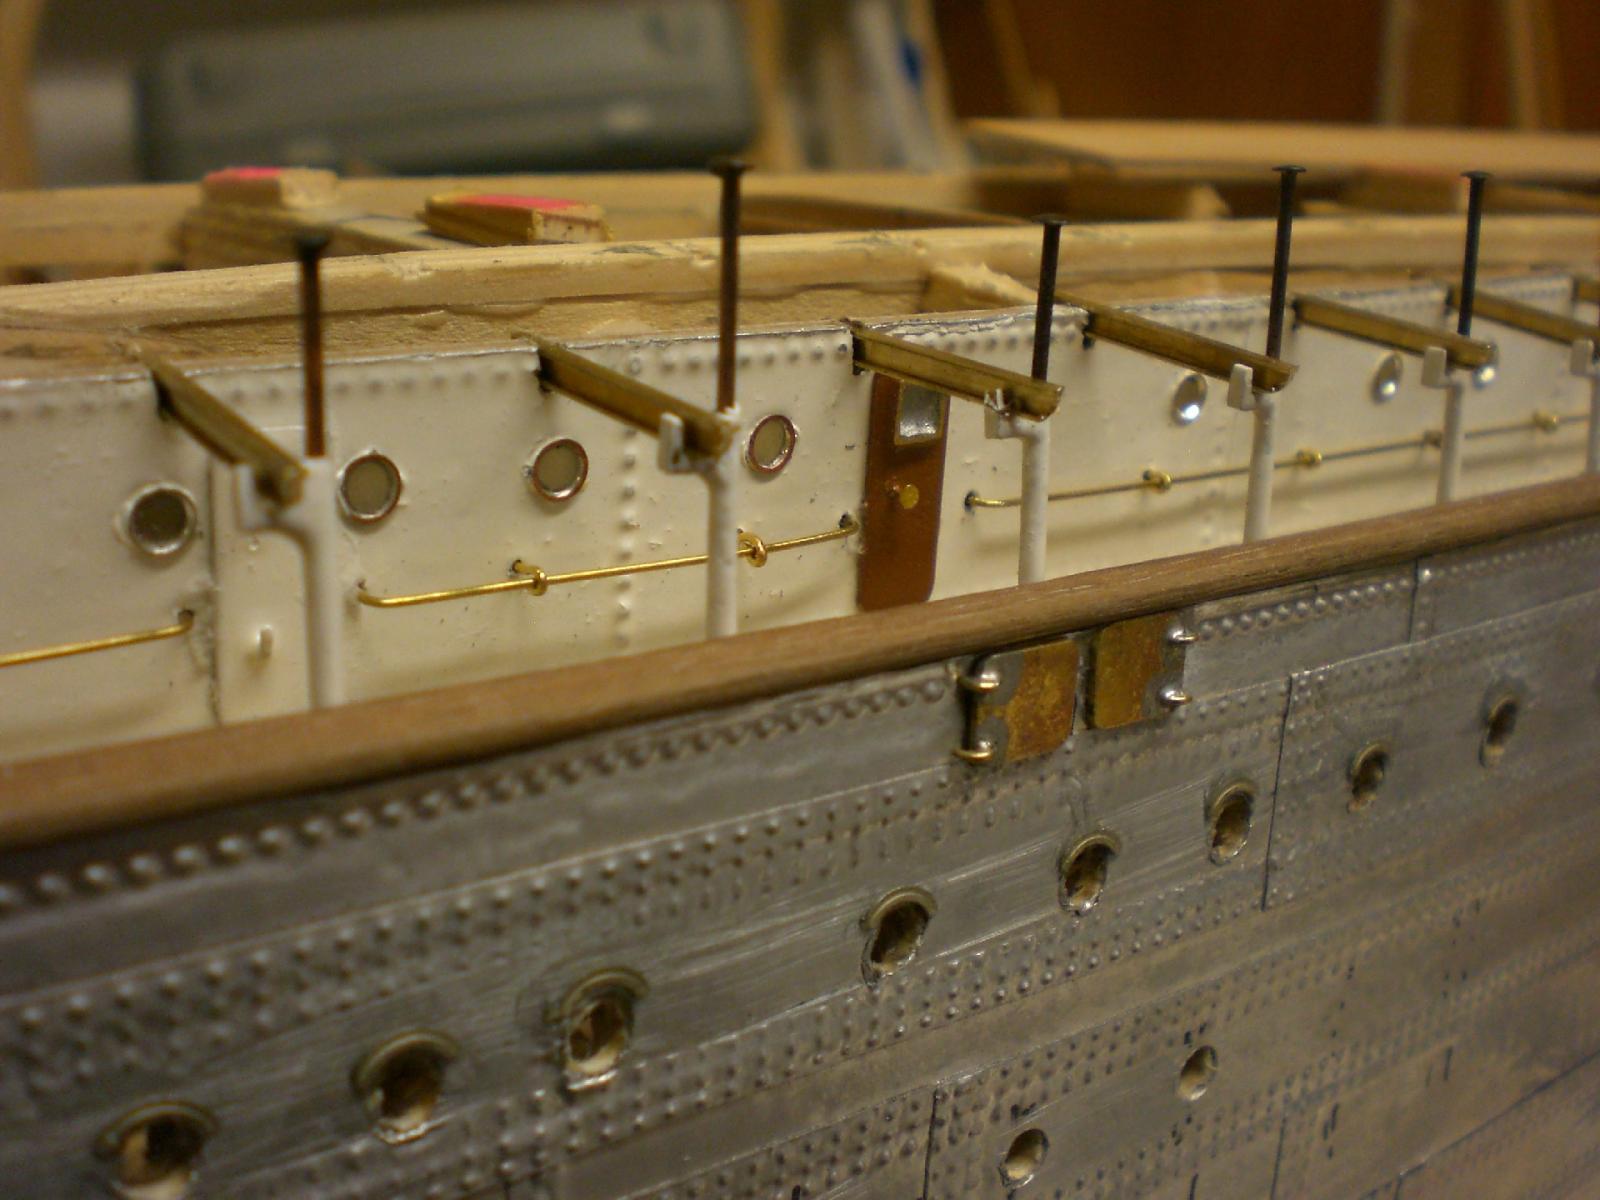
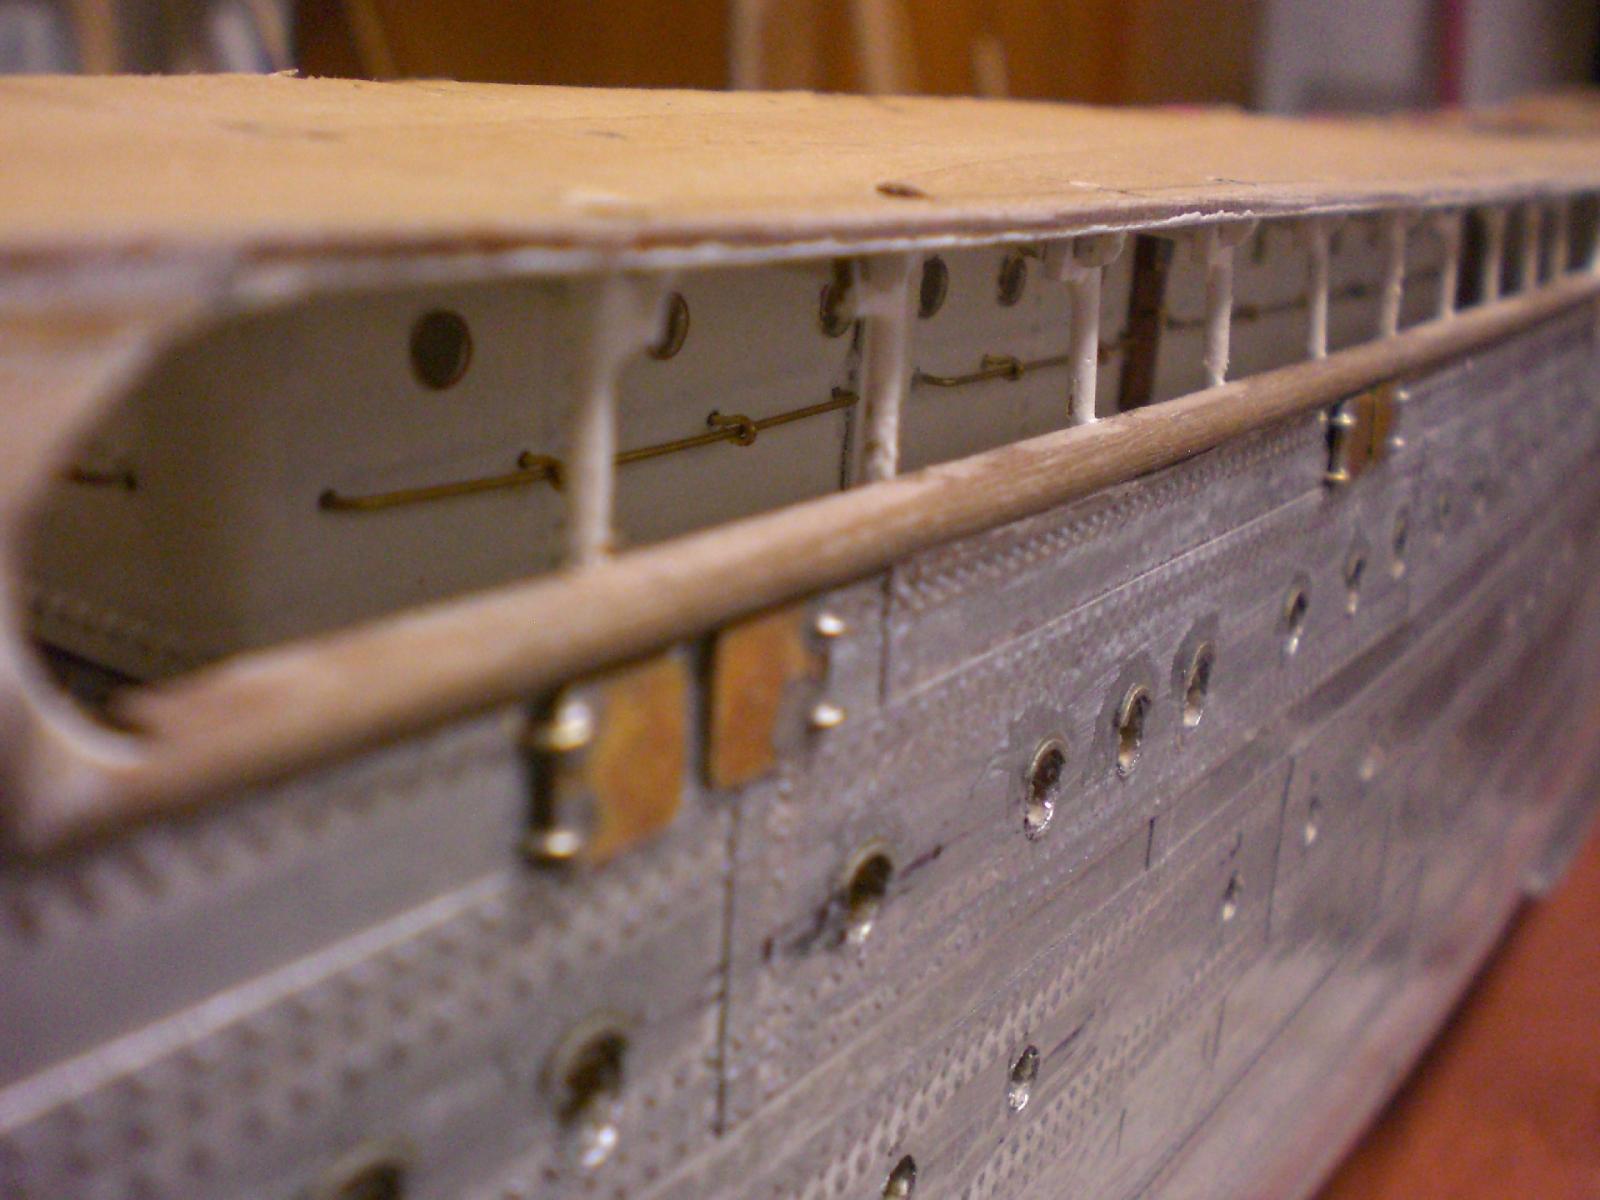
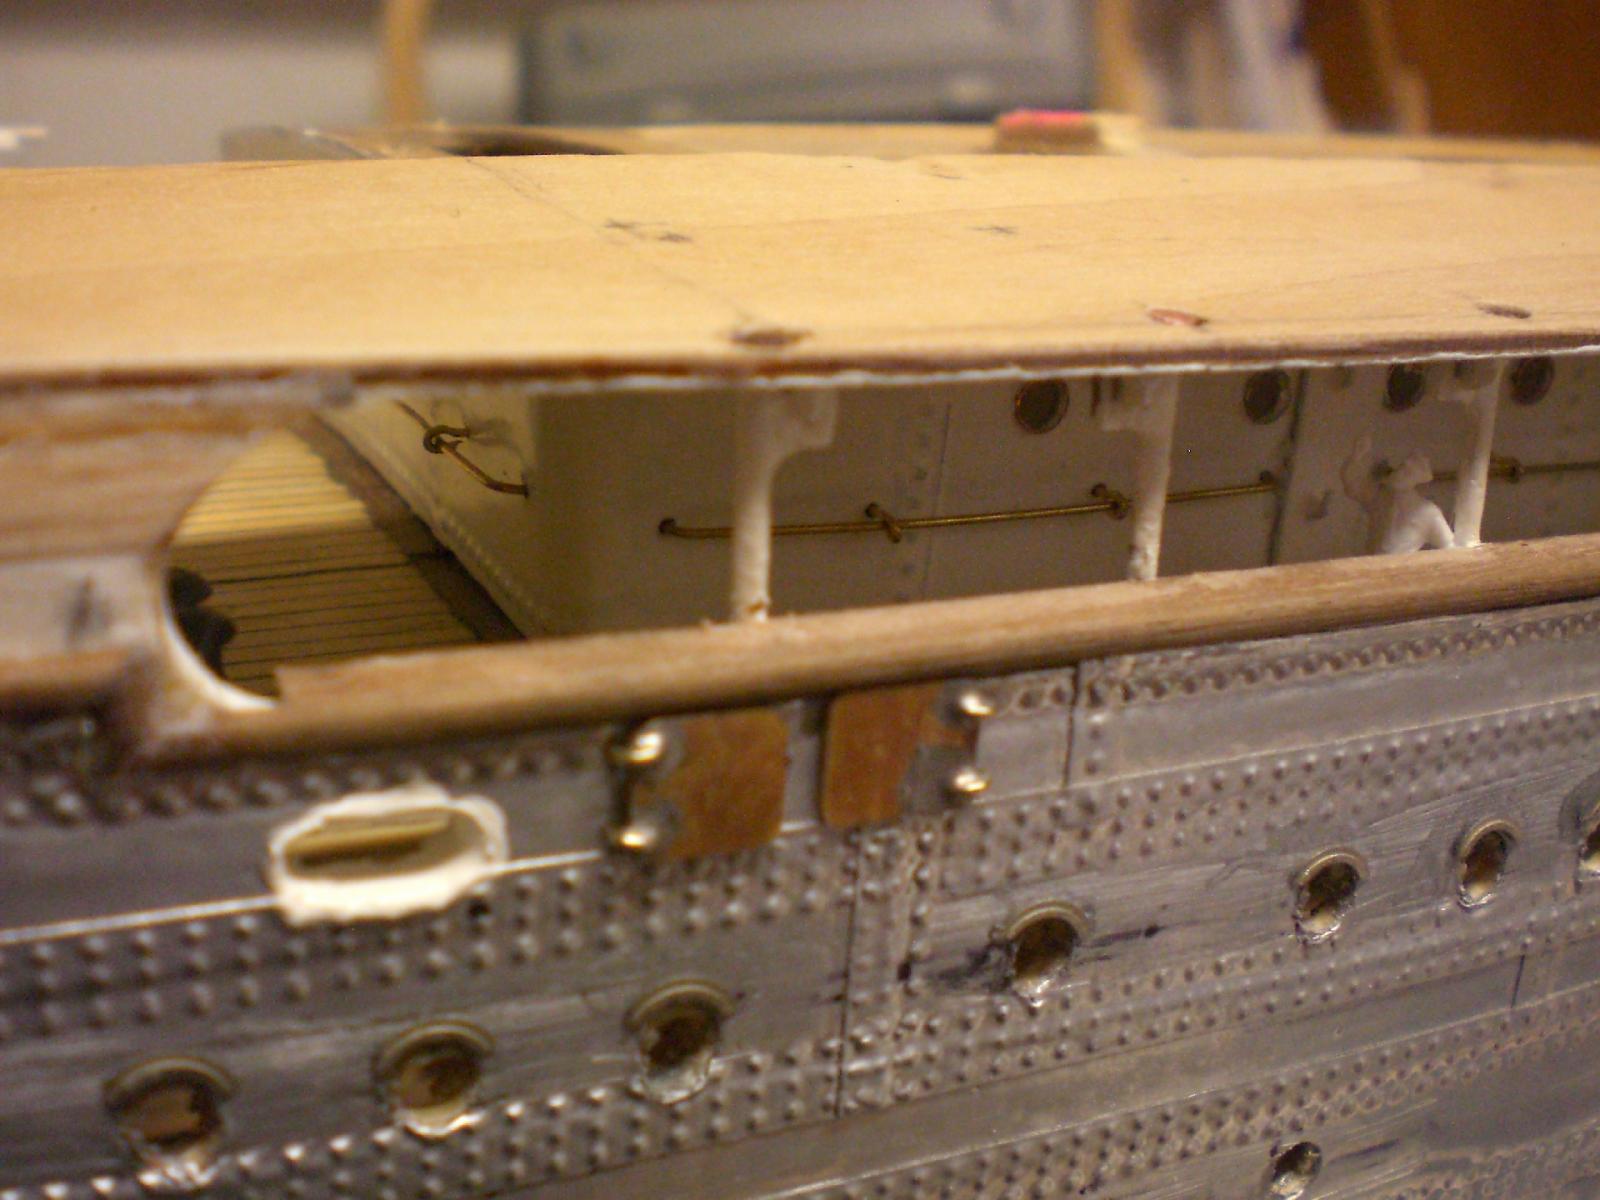
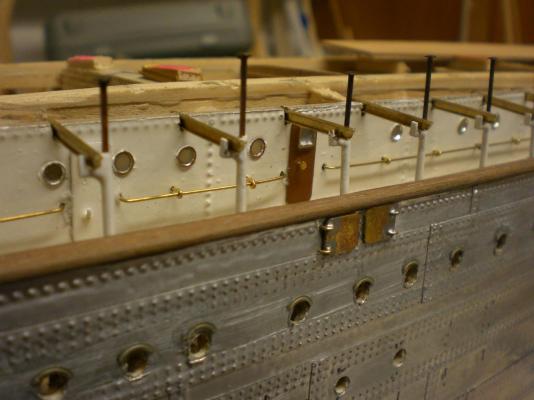
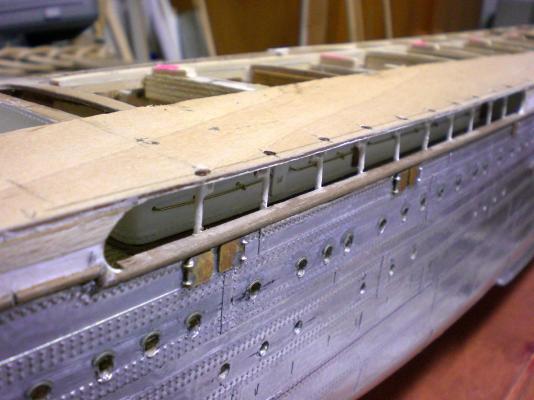
Build log part 24 Here is a little update.... Nils dry fitting the supporting I-beams for the promenade deck in this area The 10 stachions per side are small brass tubes where the copper pins go through, the pin-heads are interlocked within the deckstripes above, and are hidden by the (to be glued on) coamings of the deck planking later on the white primered scupper / throughpass in the bulwark is for the mooring cables when the ship is at the kay. There are three of these on each ships side


- 2,625 replies
-
- 30
-
-
- kaiser wilhelm der grosse
- passenger steamer
- (and 1 more)
-
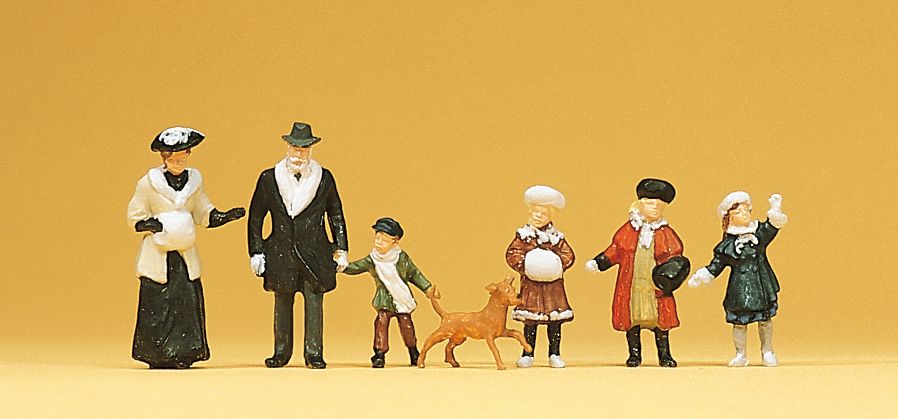
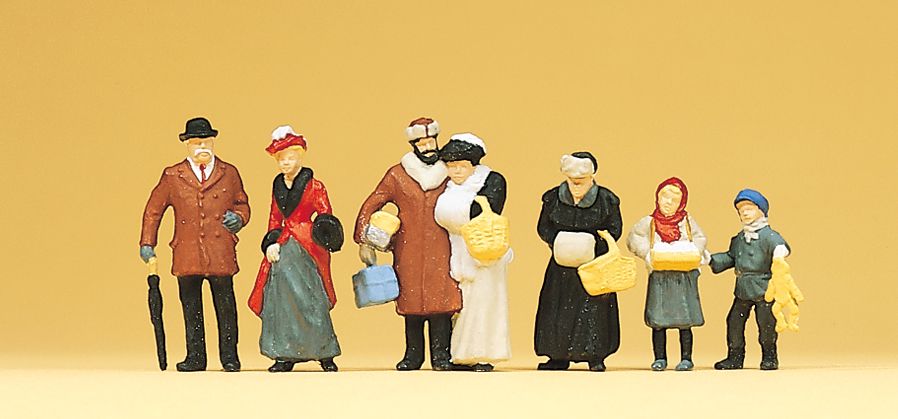
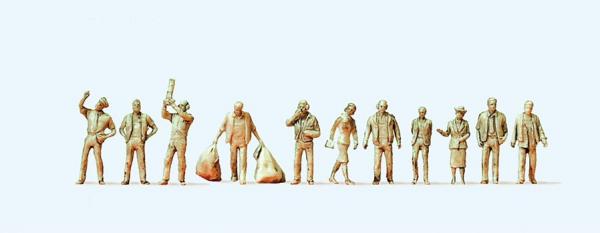
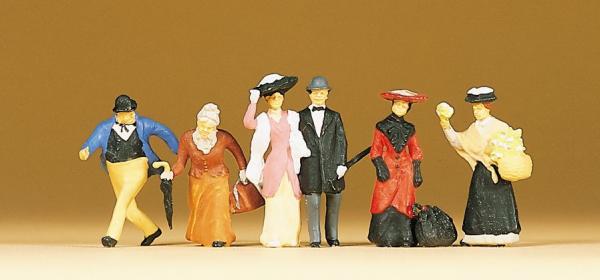
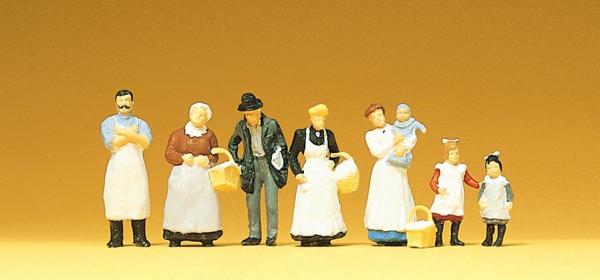
Hi Dan, your kind help with the 1:144 Preiser Figurines is very much appreciated. Thank you so much. I found these when I started my log (for dimension checks), unfortunatly these are all airline- ground crew- or passenger related, but it helps me to evaluate bulwark hights etc... These are the ones I am currently using in scale 1:144 : The following pics, borrowed from the web, show, from Preiser, unfortunately only available in scale 1:87 (HO scale) what I am after, if they were only in scale 1:144 ,... either painted or unpainted, to date my search was in vain though..., and Preiser has not answered my request yet Figurines in turn of the century fashions.... Would love to scatter some of this type on my decks... Nils


- 2,625 replies
-
- 10
-
-
- kaiser wilhelm der grosse
- passenger steamer
- (and 1 more)
-
Hi Michael, sounds like we shall be seeing quite some fine Wood- and metalwork out of your Workshop... Nils
-
Thanks very much Greg, The model is displayed in a glass case in my work room, I`m glad you like it Nils
-
very nice Fitting out on deck Peter, that opening companionway is just lovely.... Nils
- 293 replies
-
- 1
-
-
- pickle
- caldercraft
- (and 1 more)
-
A good start Mark, wish you furtheron much fun and success with this lovely model Nils
- 652 replies
-
- 1
-
-
- royal william
- euromodel
- (and 1 more)
-
Hi Dan, fantastic looking and built Details, you really have an eye for These Special touches. In what scale are your Preiser figurines ? For my KWdG I`m looking out for 1:144 figurines in 1900 turn of the century fashions. Preiser has beautiful Solutions though ,but they are only in scale 1:100, what a pitty Nils
- 108 replies
-
- 4
-
-
- andrea doria
- ocean liner
- (and 1 more)
-
Hi Dan, thanks for dropping in and coming aboard the "Pamir" I`m glad glad that you enjoyed the build log, together with the "Gorck Fock II" model These were my first two tallships. I also very much enjoyed your super looking dioramas Nils
-
Hi Micheal, Piet and Dan, many thanks for Kind comments and suggestions for the painting, that is very much appreciated. Also many thanks to all the "likes" Michael, the trimming line bits are tapered a Little bit and then jamed and squeezed into the insert tubes. After that they will be cut off at the "porthole face" and then sinked in a bit. It`s the first time I do it this way (instead of portholes with flange) because the actual ship`s portholes were flush with the hull`s skin Piet, You seem have a lot of experience with the requirements for model painting. There is probably o lot of "learn by doing" involved in your techniques, and thanks so much for sharing this Dan, thanks for your sharing your method with the "rubber cement", that technique is also and absolute worth a test Trial, will Keep in mind...., thanks for sharing Nils
- 2,625 replies
-
- 4
-
-
- kaiser wilhelm der grosse
- passenger steamer
- (and 1 more)
-
Hi Piet, just read your log and can feel with you how you went through ups and downs as from the fastening of the gunport doors hinges omwards. But congrats here, you are well managing a good solution every time, and the "Surabaya" is looking better with every update. The deck pic in aft direction Looks great Nils
-
Hi Peter, thanks again for your Input here... yes you are so right...., I believe there are at least three aspects of the paint Job, one is the paint-type itself with choise of color, then the way of applying it, and just as important, the way of following tips and tricks (provided These are known) to achieve a good looking result. I have for myself not gained enough experience with the painting in order to avoid unnecessary risks with the paint Job. Nils
- 2,625 replies
-
- 5
-
-
- kaiser wilhelm der grosse
- passenger steamer
- (and 1 more)
-
Very nice and neat work Mike, the standing treenails remind me of the fresh harvested cornfields (Maisfelder) I saw, when walking the dog this morning Nils
-
ancre Le Fleuron by cabrapente - FINISHED
Mirabell61 replied to cabrapente's topic in - Build logs for subjects built 1501 - 1750
Super build ! Nils -
Very nice Gloucester schooner Giorgio, also the paint scheme is looking good... Nils