
whitejamest
-
Posts
209 -
Joined
-
Last visited
Content Type
Profiles
Forums
Gallery
Events
Posts posted by whitejamest
-
-
Thanks very much Aliluke, I appreciate it. I think you will enjoy the Vanguard boats a lot. You get a lot of fun in a small package. Your HMS Fly is looking fantastic, and I've pulled up a chair.
-
That's very attractive as well Gregory. How fragile do you find a patina like that is? Does it rub off to the touch?
And is that just one night's exposure in a bag with eggs?
- mtaylor and thibaultron
-
 2
2
-
I would, for various reasons, love to be able to reject this method out of hand. But I have to admit that is one of the most attractive copper patinas I've seen on a model...
- _SalD_, thibaultron and mtaylor
-
3
-
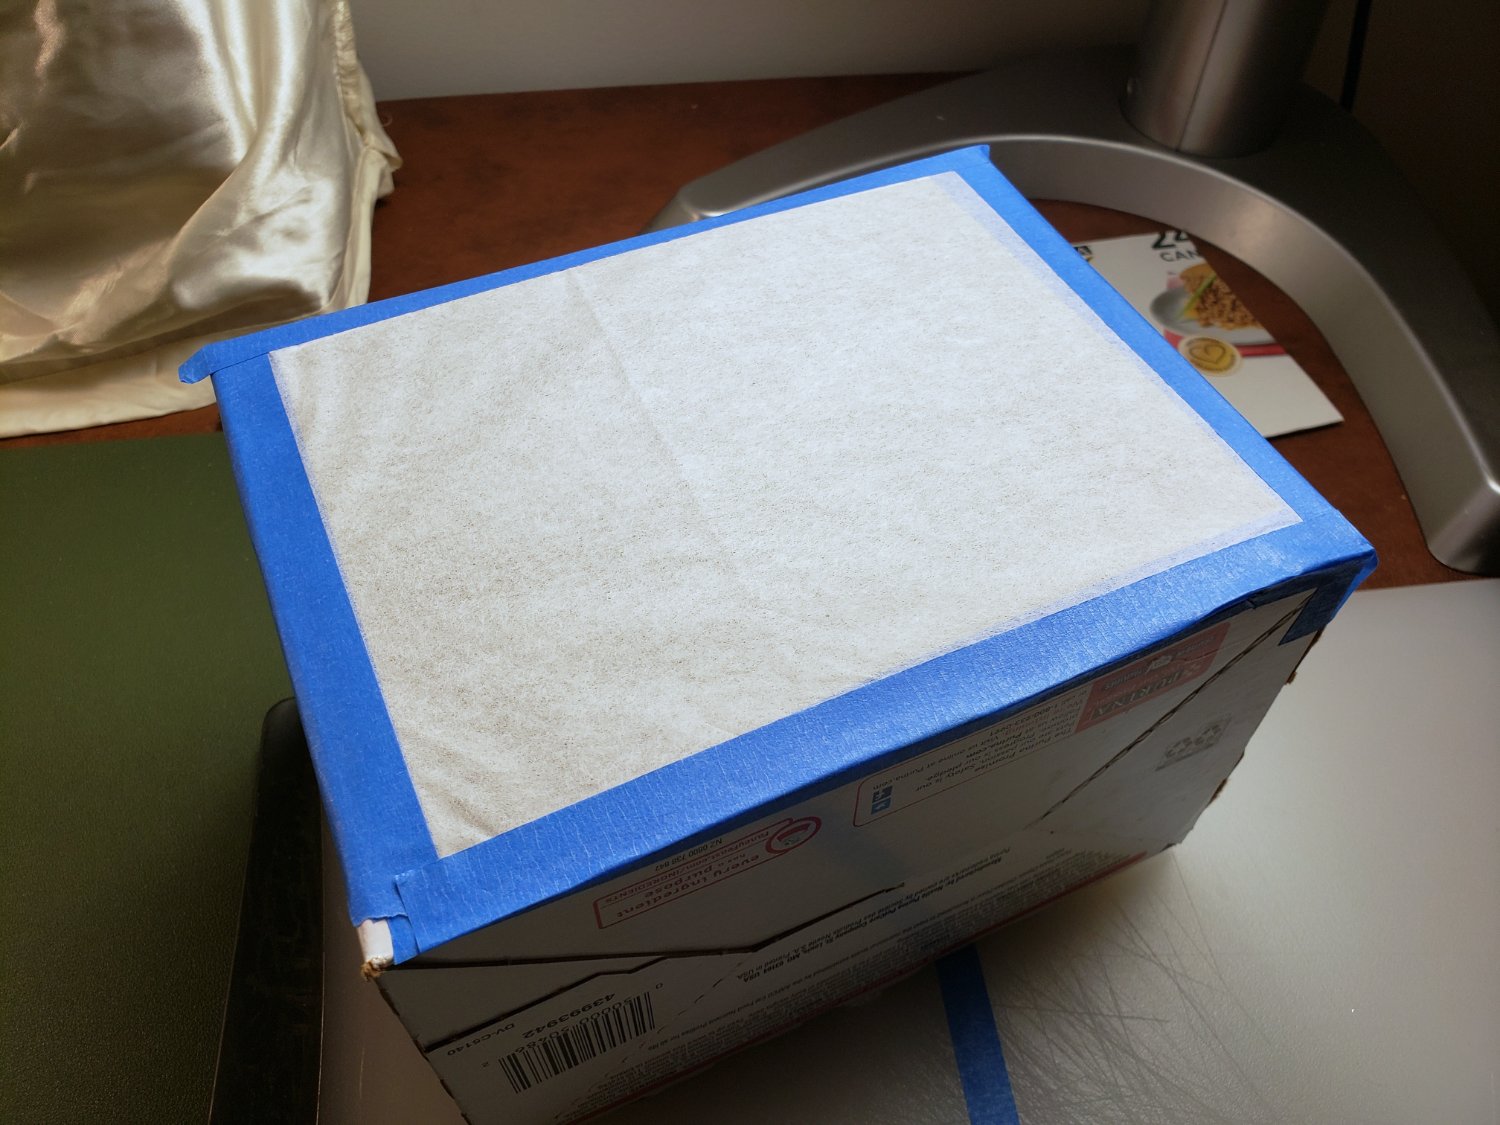
I've only just started working with silk span myself, but the process I used (as demonstrated by others on this site) helped with wrinkles.
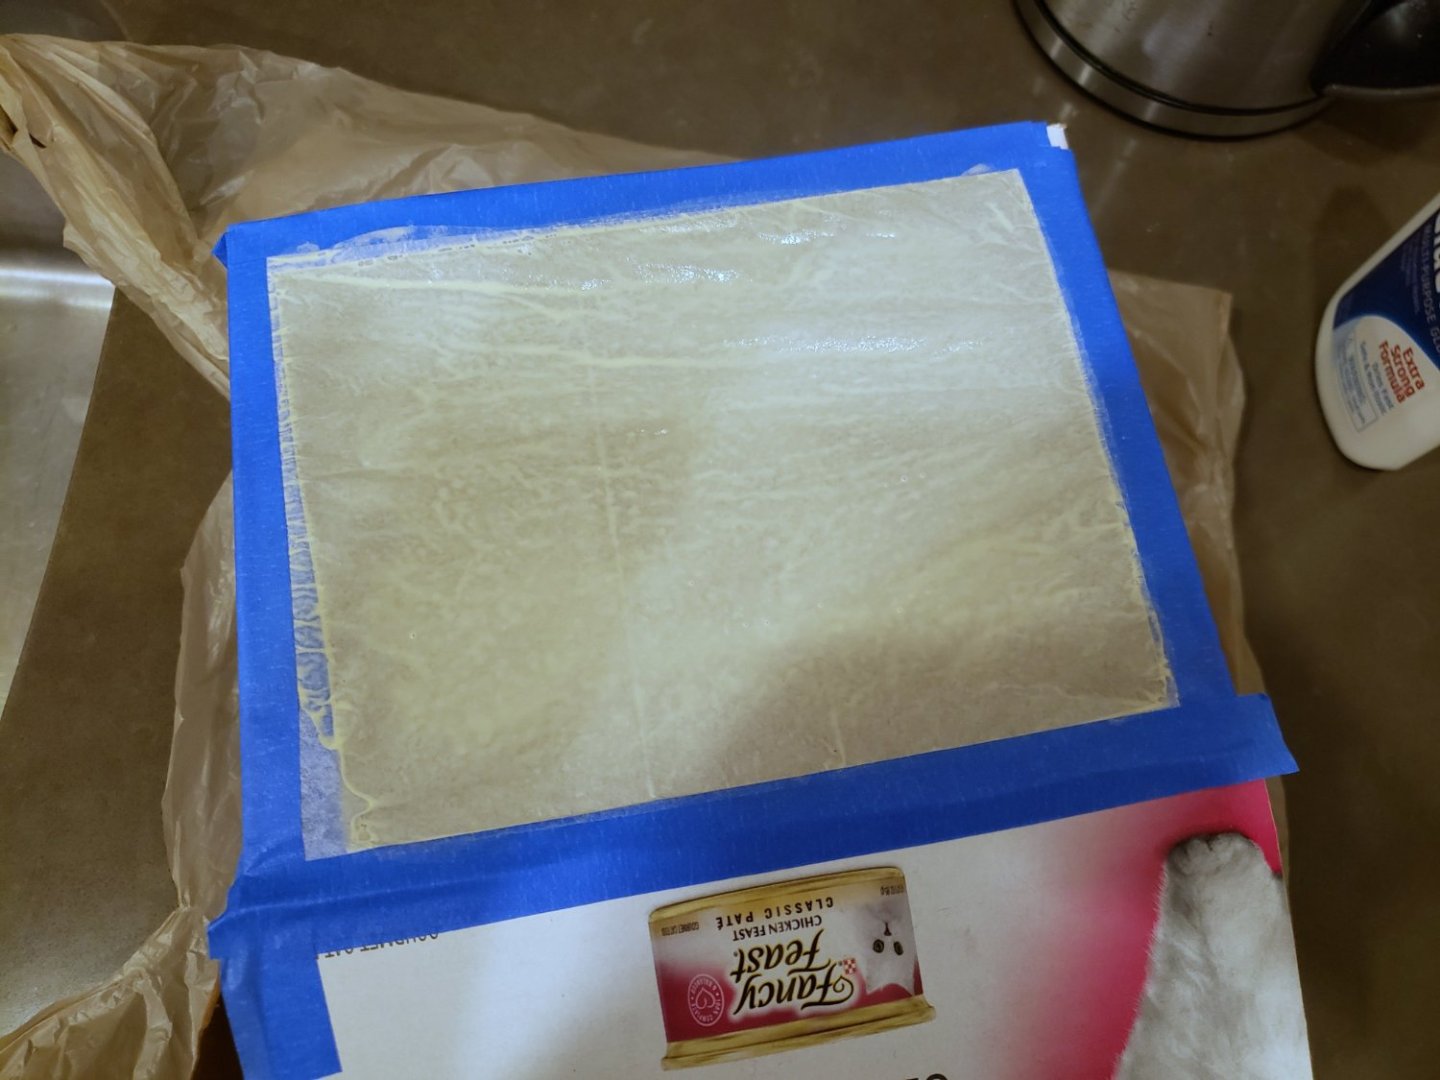
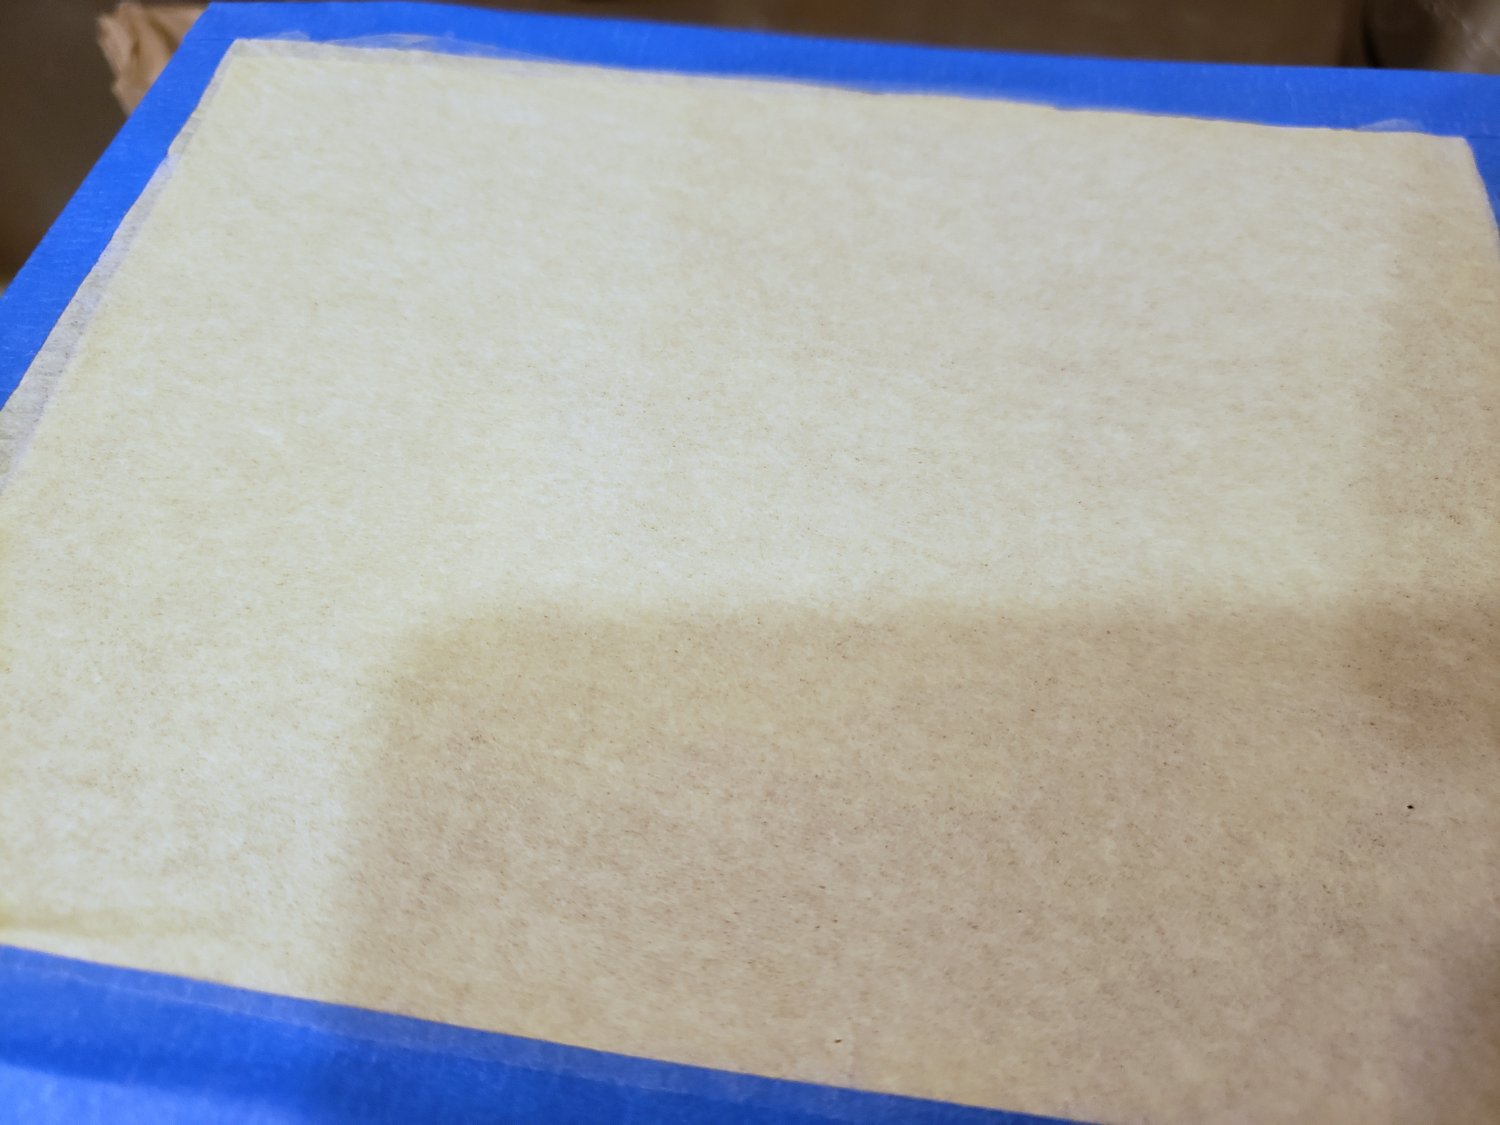
I took two layers of the silk span (because it was thinner than I had anticipated) and taped them to a cardboard box with a hole cut out. You can see in the first photo below a crease from being folded in its package is still visible.
Then I brushed on a very watered down mixture of white glue and beige paint, from both sides.
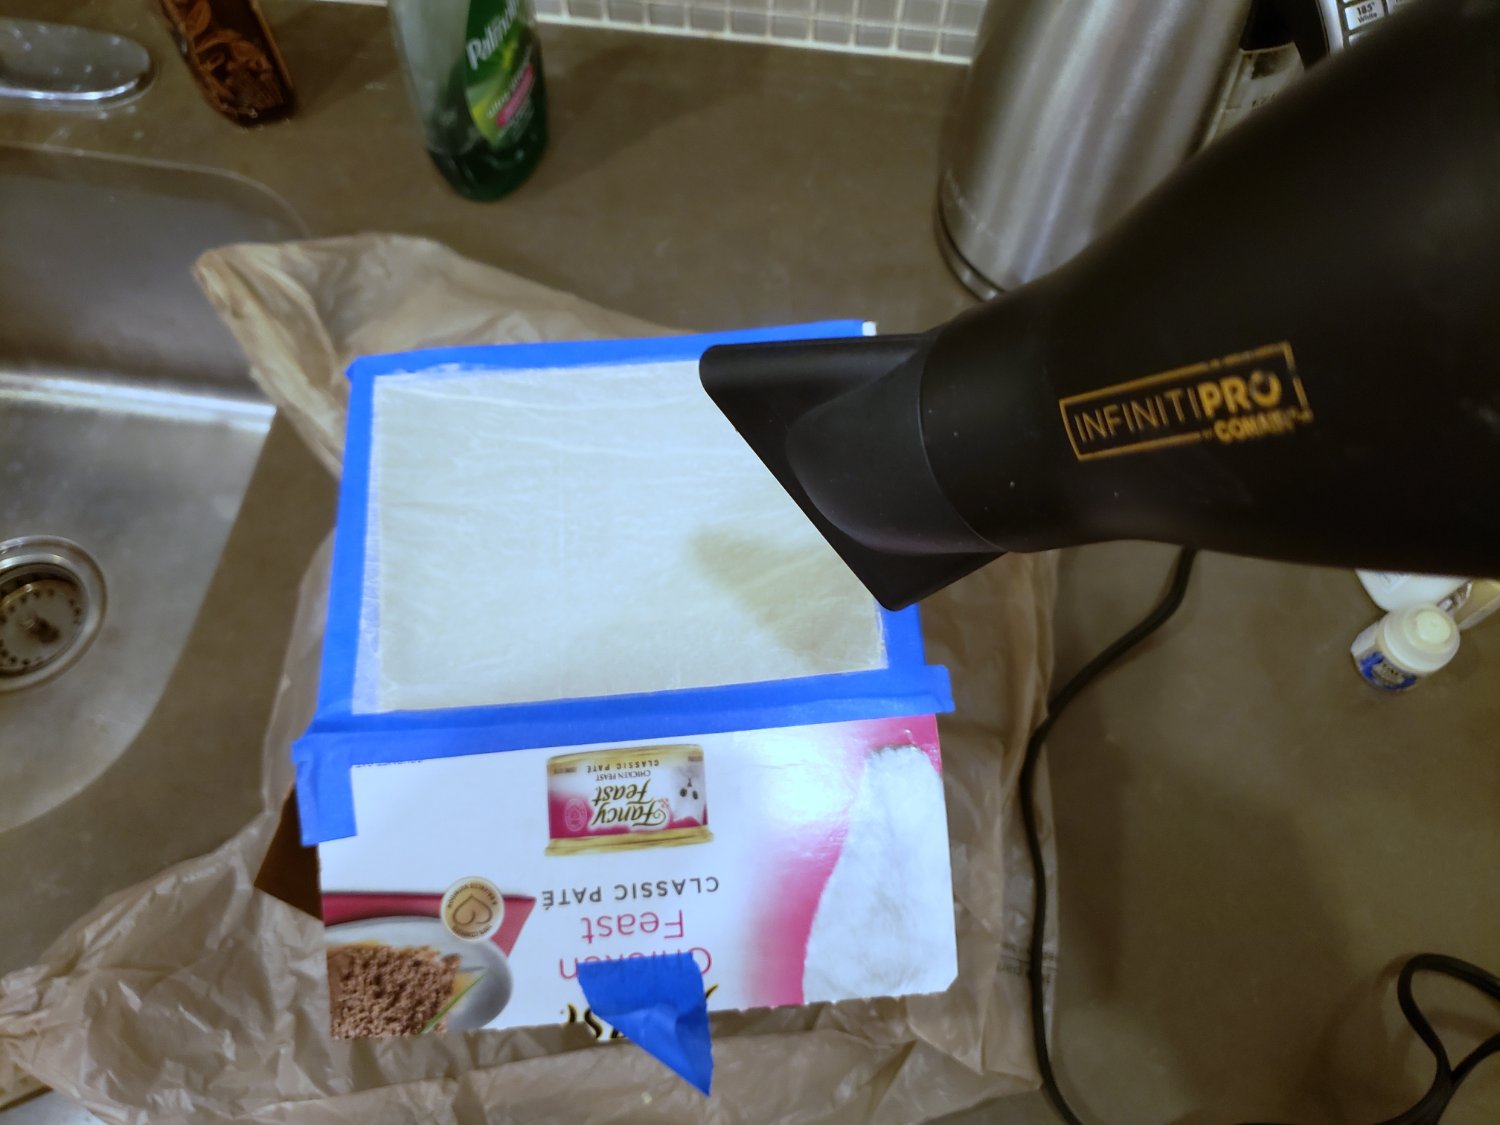
Then I used a hair dryer on the hottest setting. This dries the glue/paint mixture quickly and causes the silk span to contract, which pulls the wrinkles smooth.
Don't know if that is helpful but it worked for me.


-
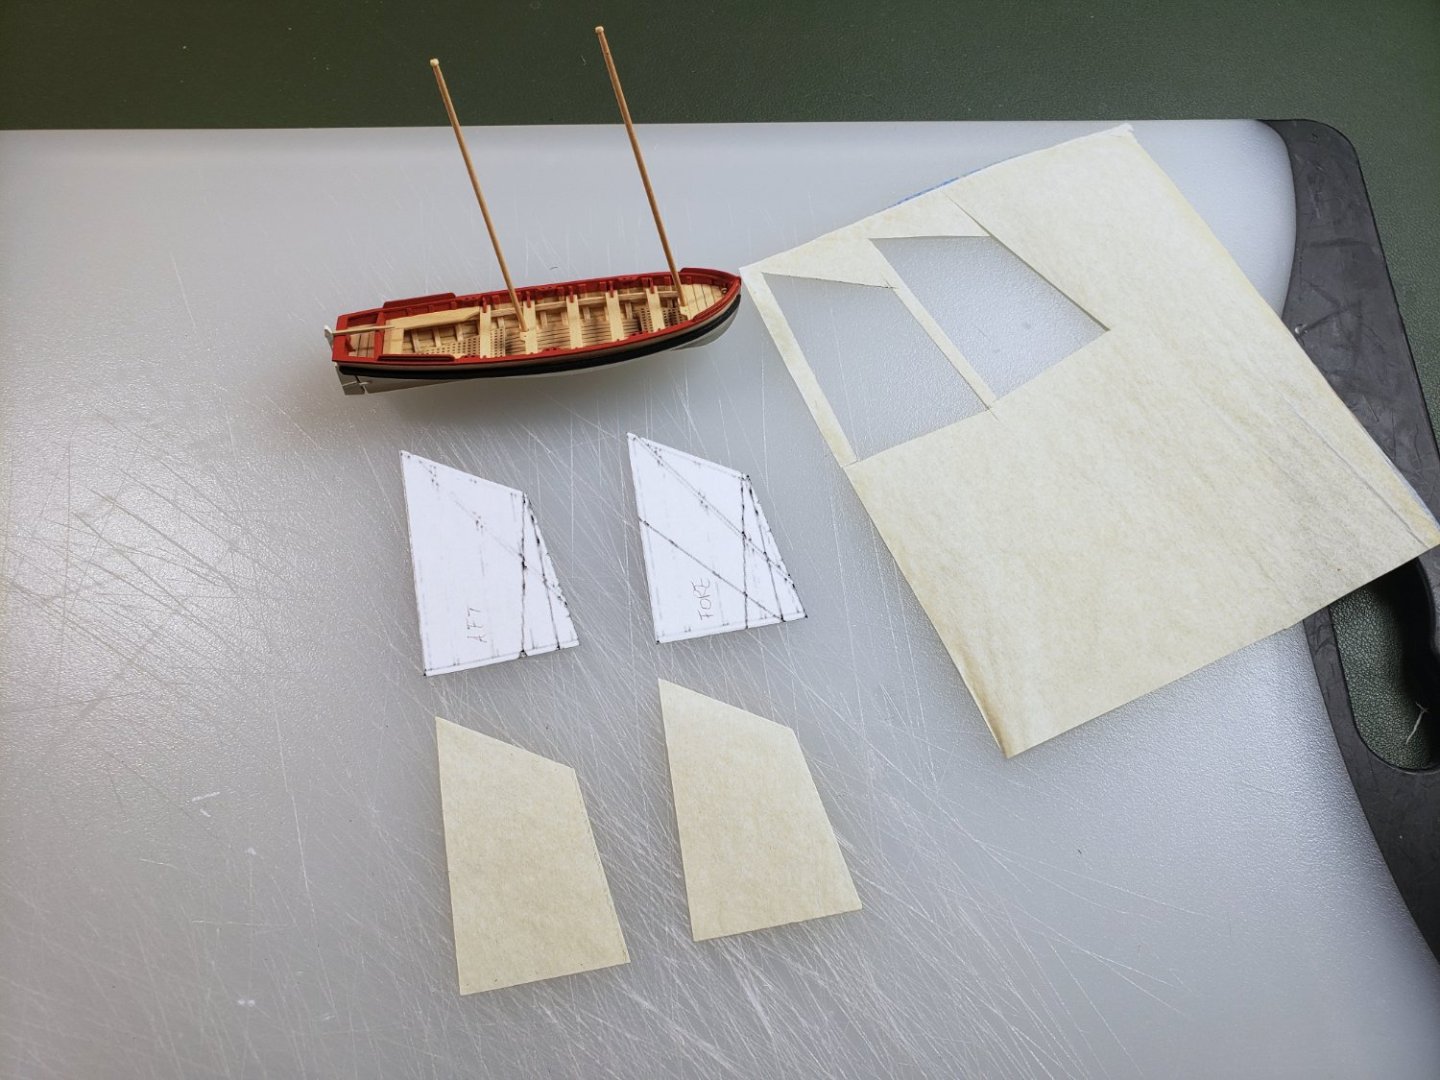
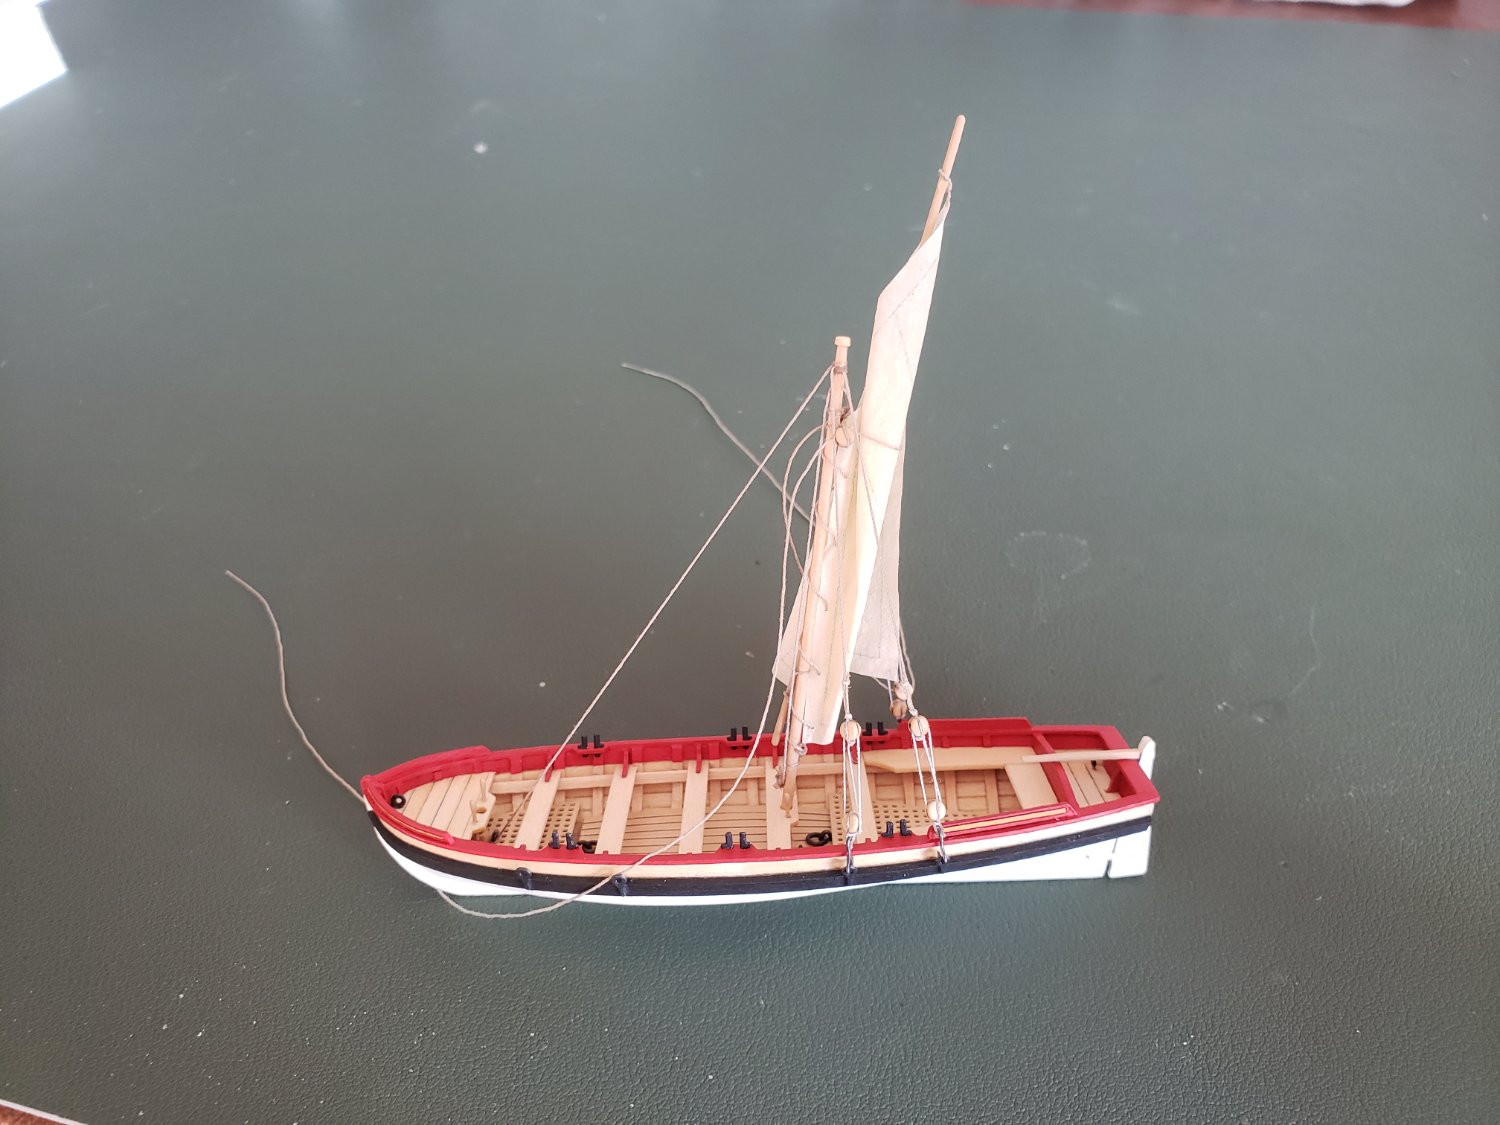
Another quick update to this little side project. I have now:
- attached the rings to the wales to secure the shrouds
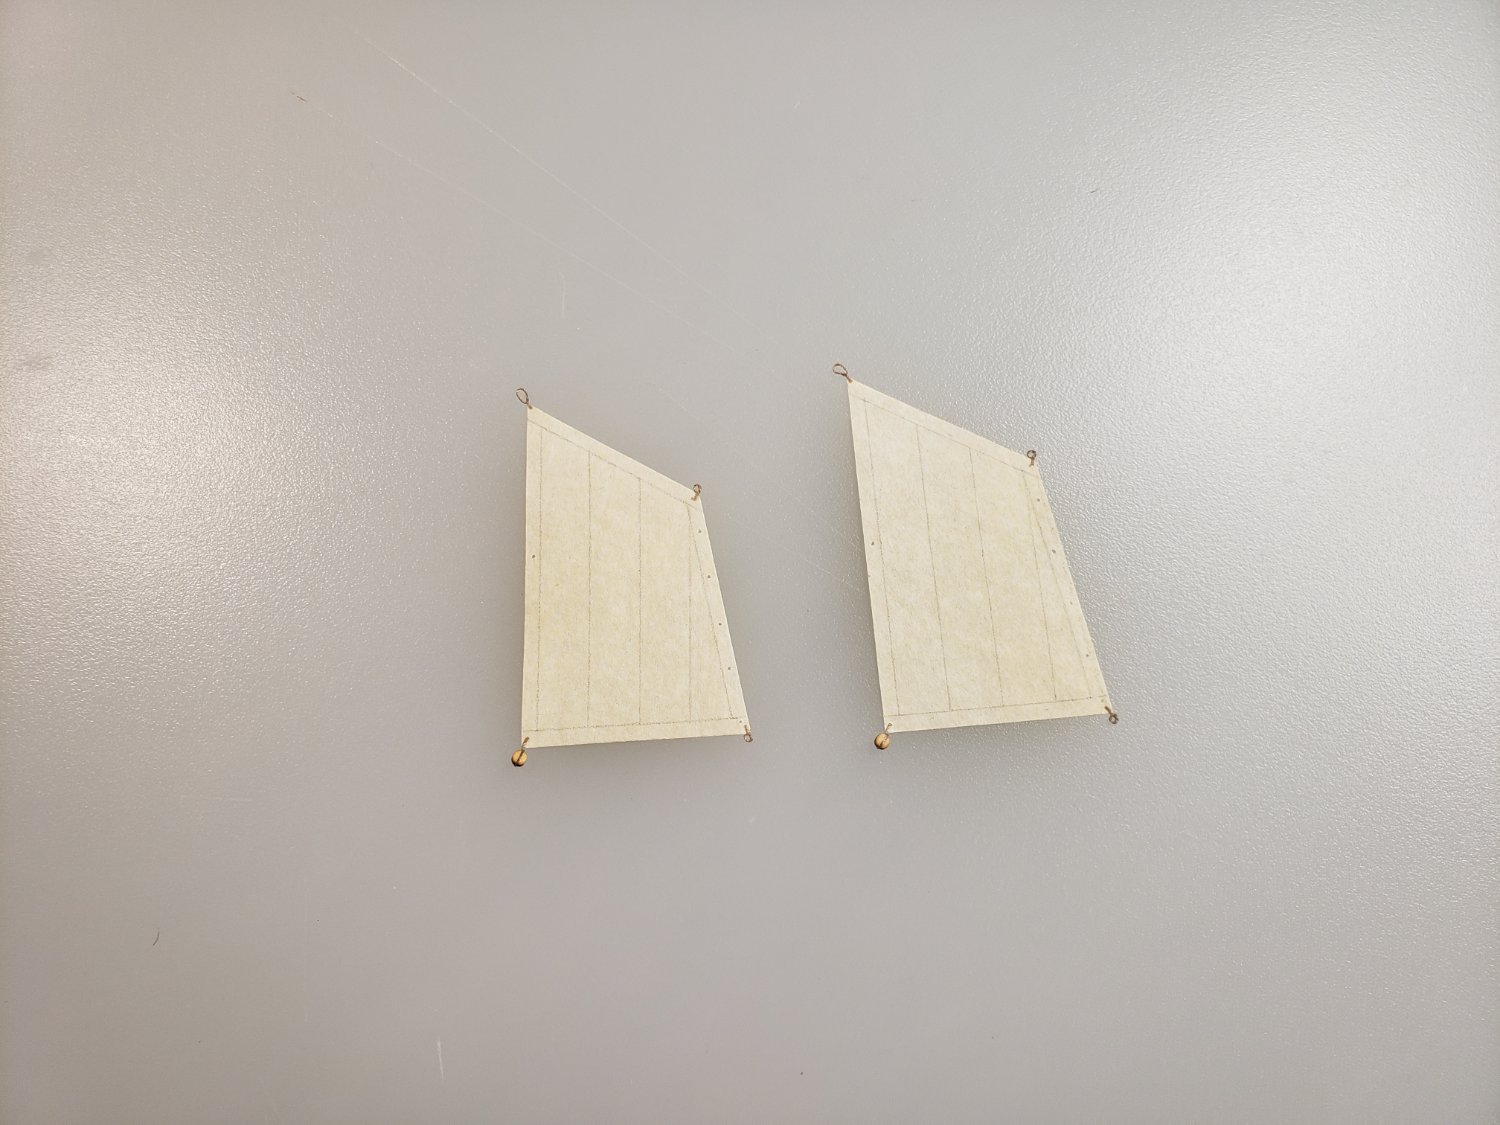
- painted the sprits and attached them to the masts and sails
- brailed up the sails
- rigged the masts off the boat
- fashioned hooks for the lower shroud blocks from black wire, and attached the blocks to them
- glued the aft mast in place
- rigged its forestay and shrouds
I still need to belay the brail lines to their respective pins, and then I'll move on to the foremast. The sheet lines will be the last ones I rig. I'm still trying to decide exactly how I'll do that. I've been looking at some of the modern replicas of Bounty's launch, and thinking I might add belaying pins to the stern cap rail to belay the sheets.
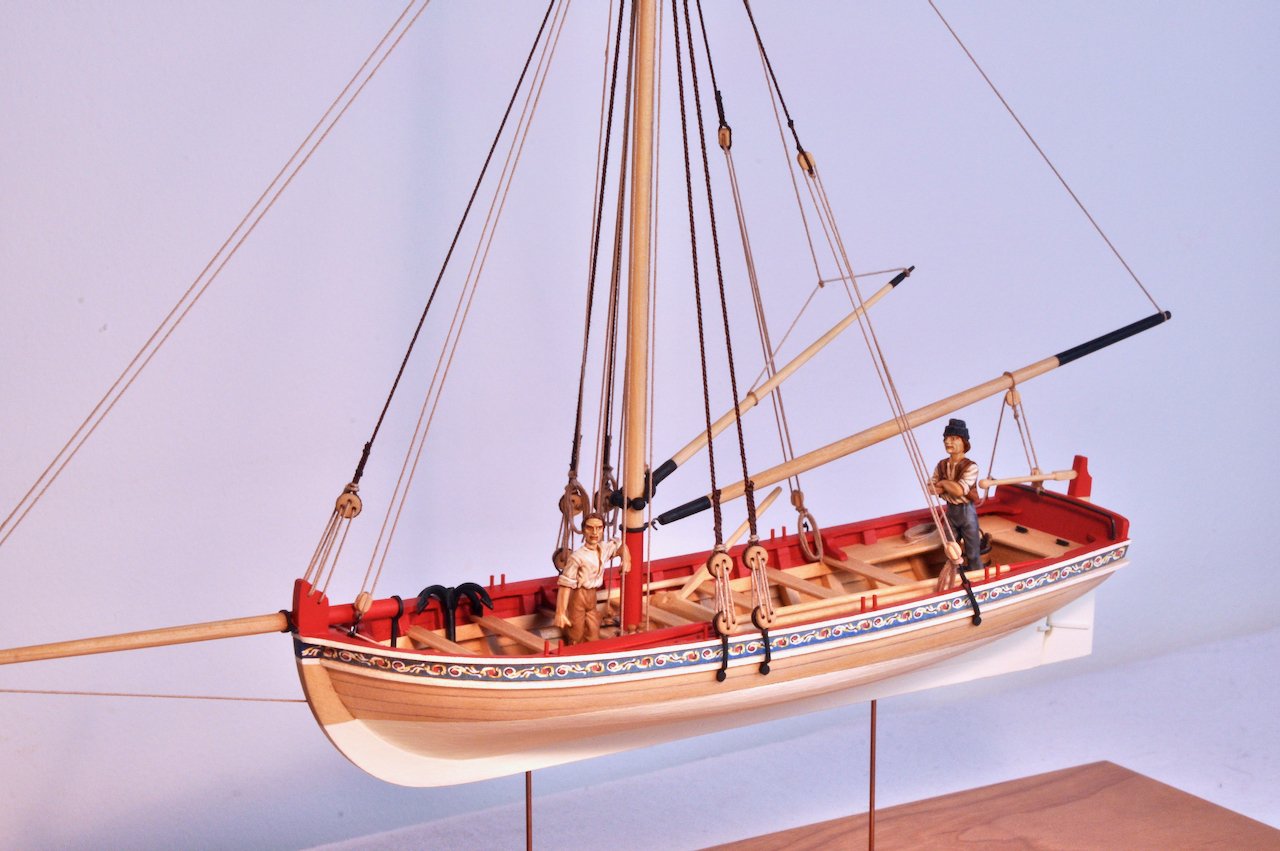
My intention is that the sails should look as if they have just been briefly taken in while the boat pulls up alongside the speedy, perhaps for a figure to be climbing up the side ladder. So I don't want the sails to be fully furled, which I think for a spritsail rig involves removing the sprit from the snotter that secures it to the mast, and then tying the sail tightly around the mast. I've never attached sails to a model before, so this has been educational.
- KARAVOKIRIS, BobG, Gregory and 9 others
-
12
-
Looking great, very sharp indeed.
-
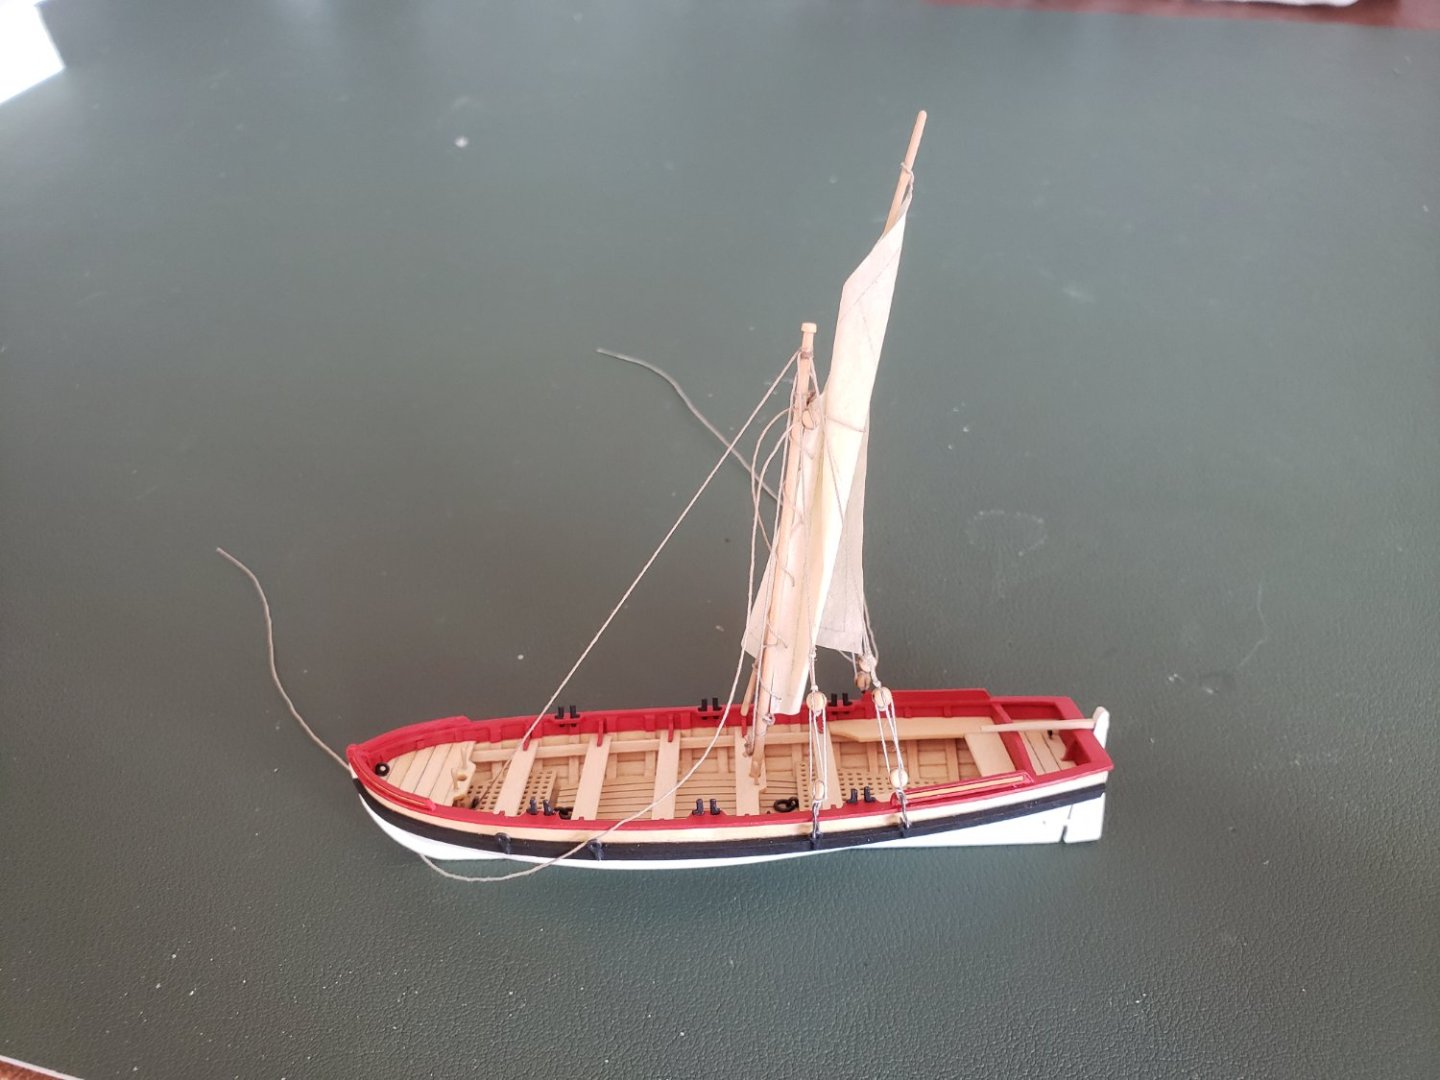
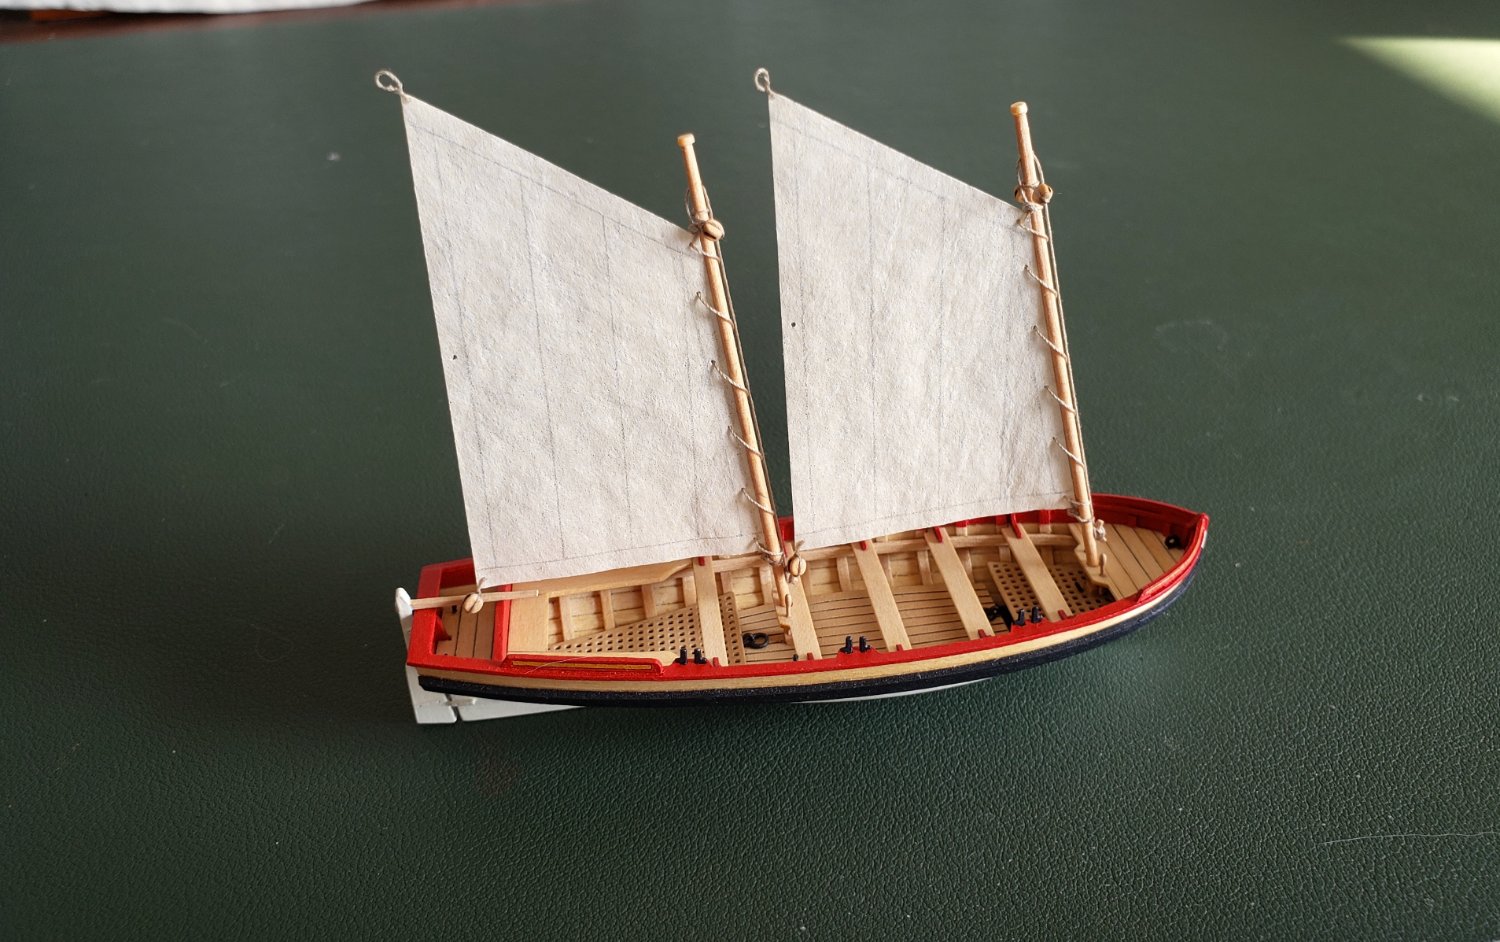
Progress: I have attached blocks to the masts for the brails, added cleats to tie off the halyards, and sewn the sails onto the masts. I've set the masts in their steps just to get a sense of how everything is fitting together at this point, but not glued them in place. Before I do that, I will need to attach the sprits, brail up the sails, and attach the shrouds and forestays.
So I've got a ways to go. But it's exciting to see things coming together.

-
There are a lot of options for non toxic wood filler, and things that are a lot easier to use than bondo. Bondo is great for heavy duty applications, but something that dries that hard can be problematic to sand, when the wood around it is so much softer.
Personally, I like to use Goodfilla wood filler. It comes in a variety of colors. It dries decently hard and gives a nice finish, and also it is not so crumbly or brittle. That makes it easier to apply very small amounts of it in tiny crevices and not have it crumble away as it is sanded down.
When I need something softer I'll just use Elmers brand filler - though note that stuff is much more crumbly.
- mtaylor, John Ruy and DonBMichigan
-
3
-
Over the last couple weeks I have been slowly working on the sails and rigging of this little yawl. I've never worked with silkspan before, so I am taking my time and doing some experiments.
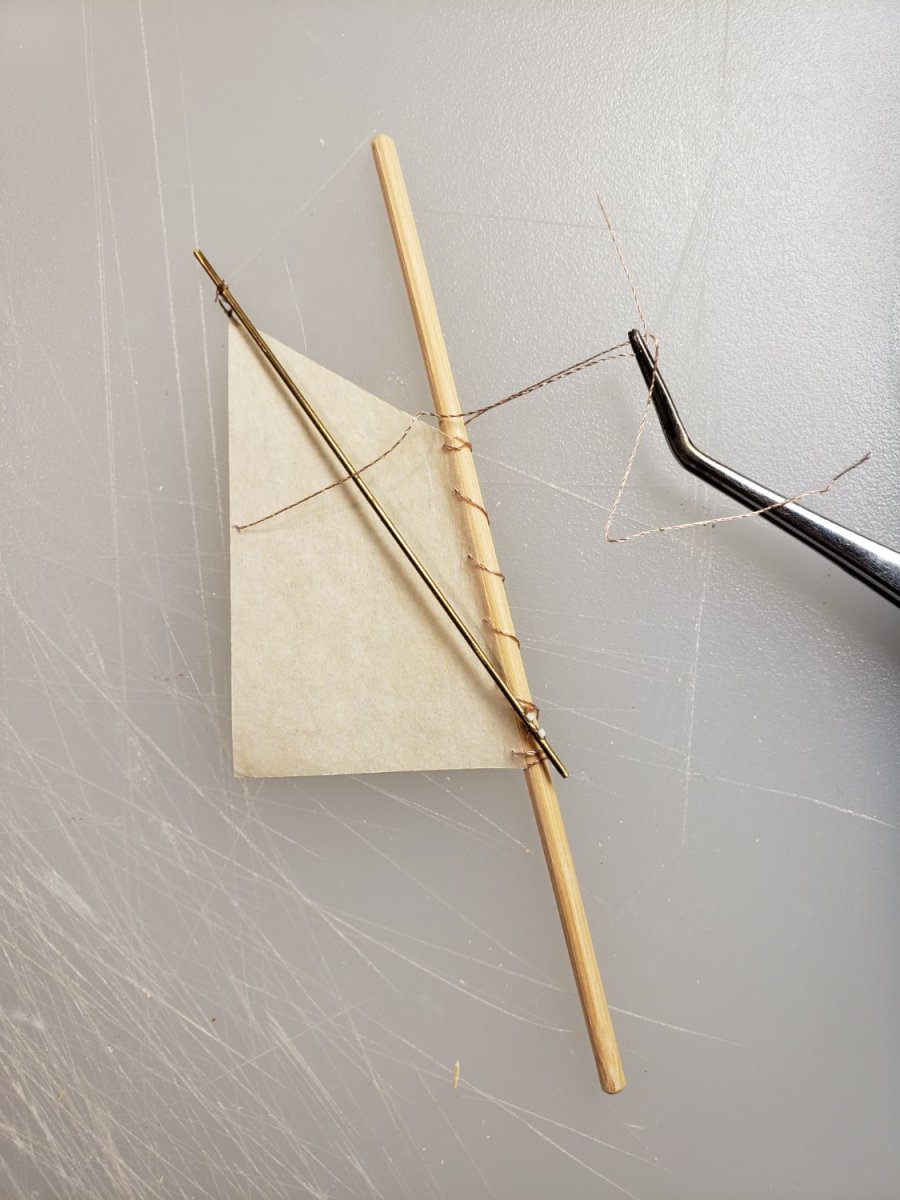
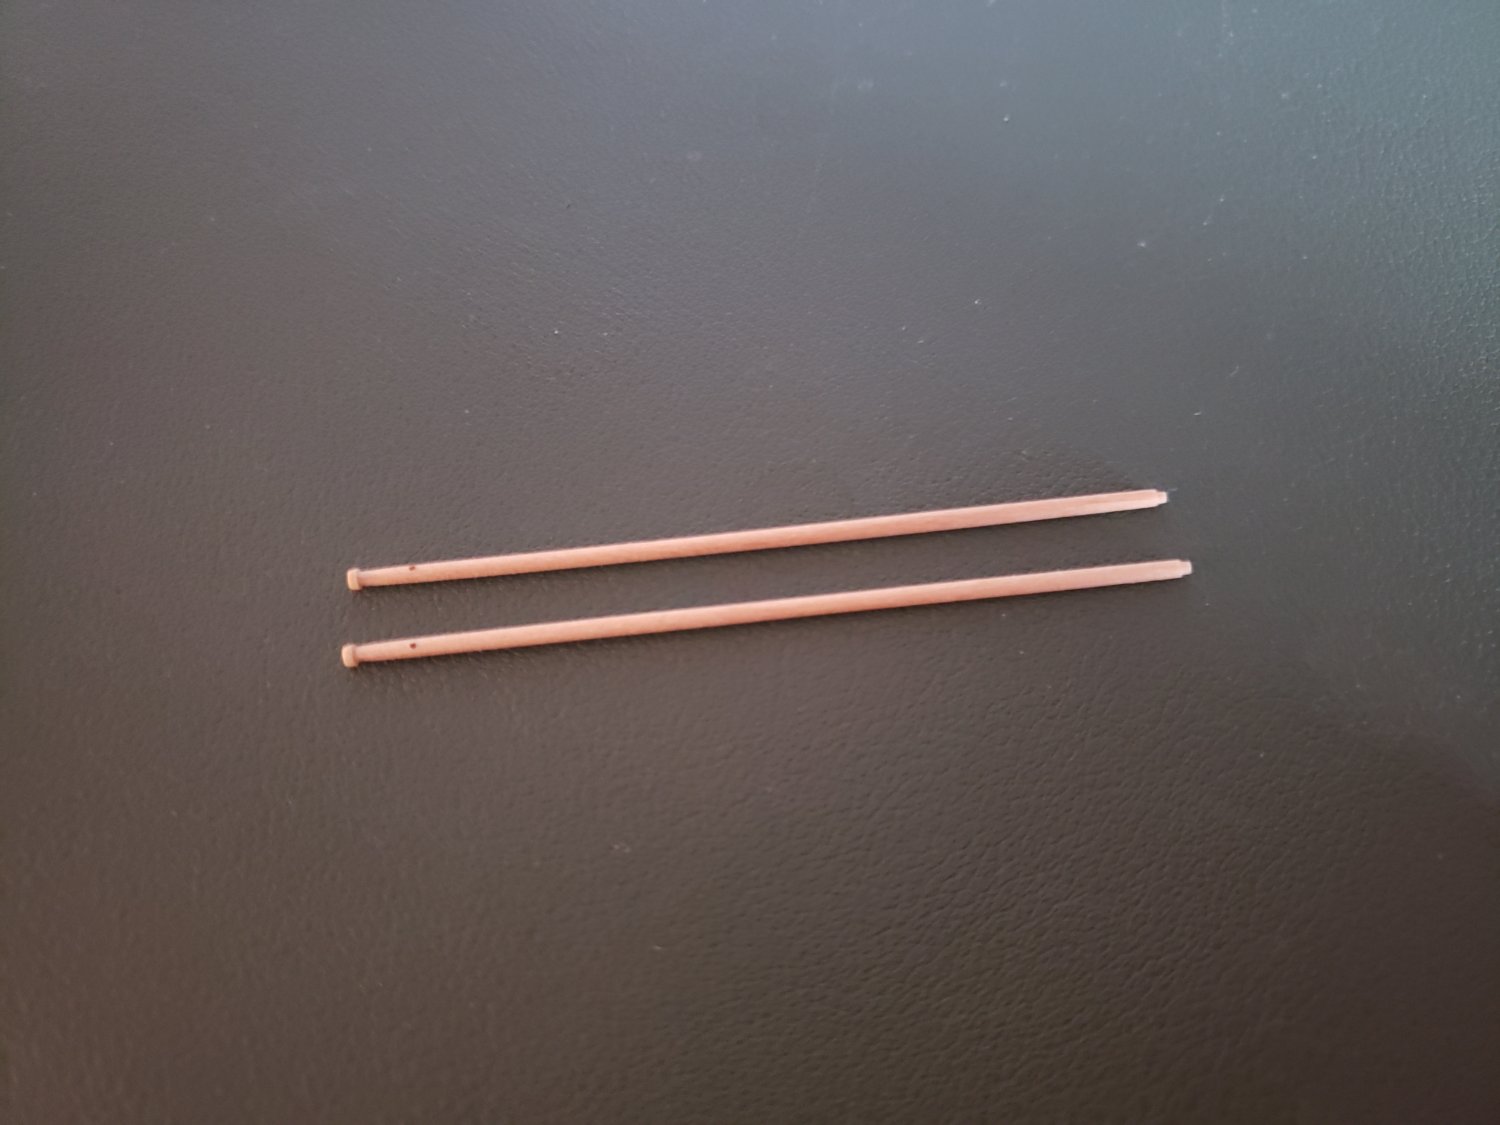
For the sprits, I decided there is no way I am going to be able to sand down a wooden dowel to scale thickness without breaking it, so I am using brass rods, with chocks added in white plastic. I'll paint them to match the basswood in color as closely as I can.
I made a test sail cut from the same sheet as what I hope will be the final ones, and sewed it onto a bamboo skewer in place of a mast. I attached the sprits and brails, wetted it and brailed it up to see how it would behave. I was pleased to find that there was no sign at all of the silkspan layers threatening to delaminate. I held the assembly in front of a space heater for a minute or two, and after it quickly dried it held its shape well.
(Note: that is not the rigging threat I will be using on the final version.)
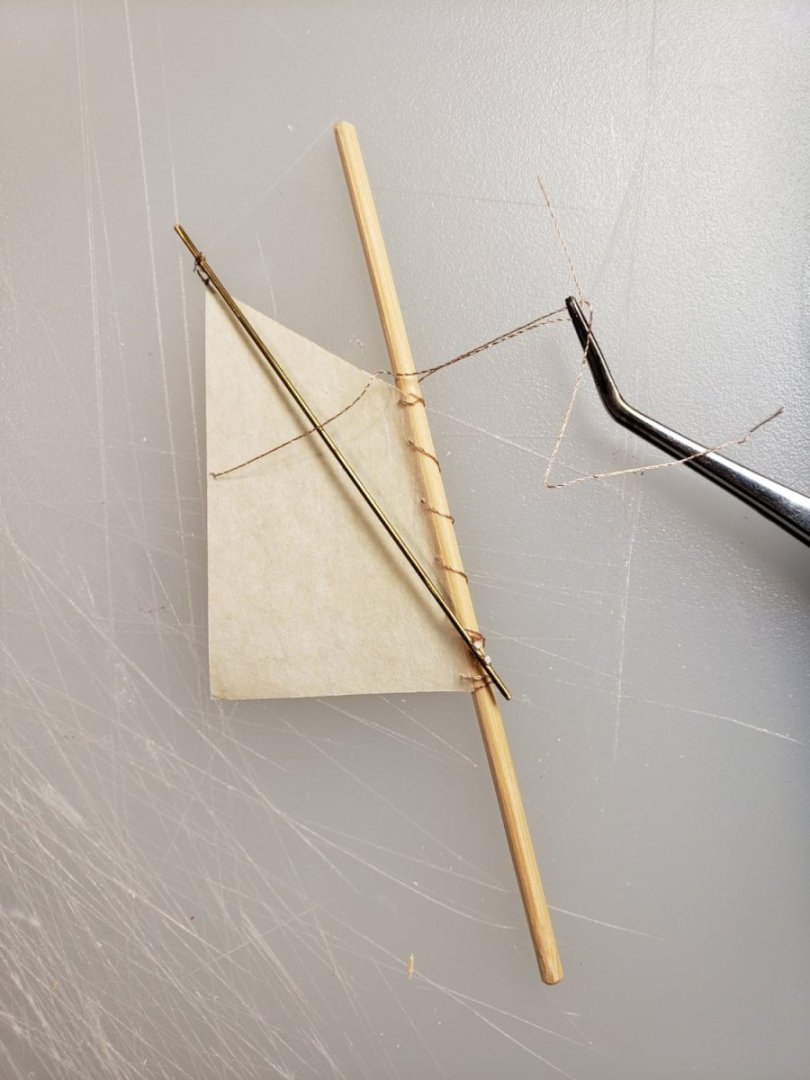
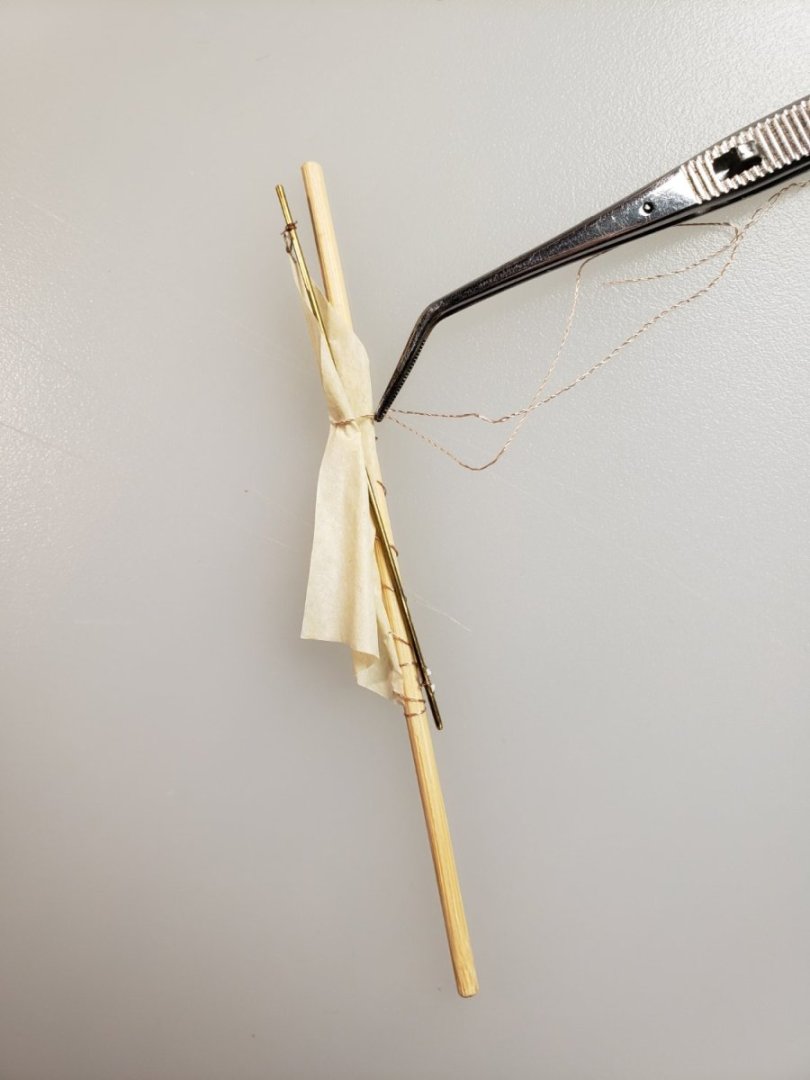
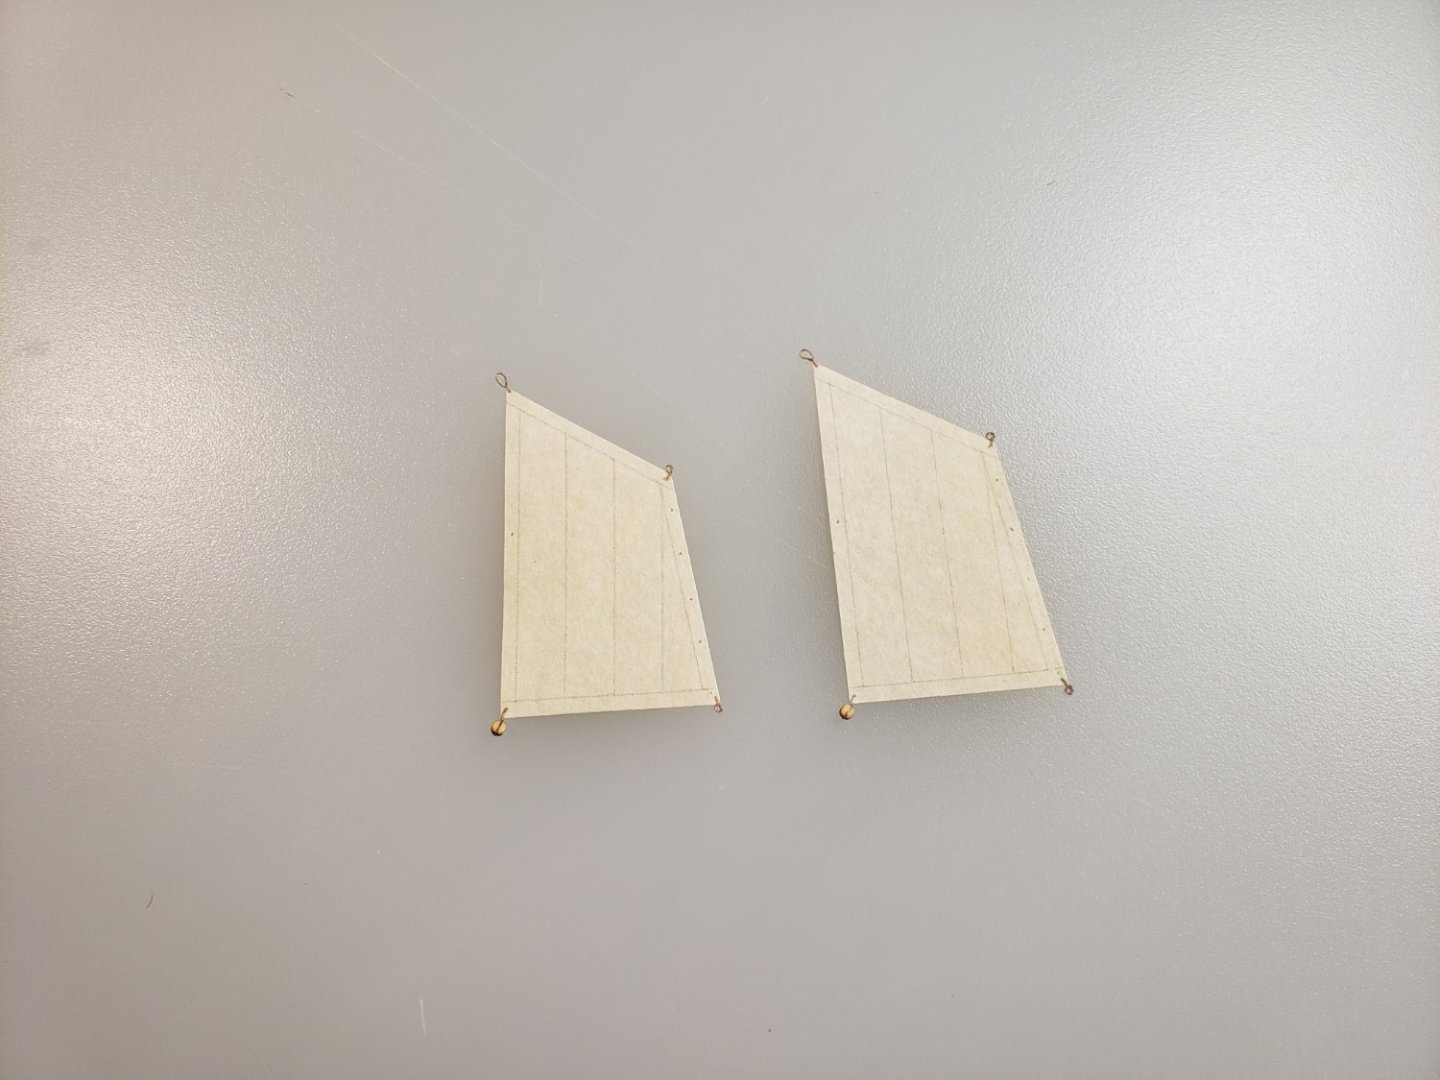
I think this could work. Now, back on the 'real' sails, I have added seam lines, blocks and bolt ropes.
I'll be traveling over the next couple weeks, so I won't make more progress very soon, but look forward to working more on the masts when I get back.
- PhillH, ccoyle, Blue Ensign and 6 others
-
9
-
My understanding is that red paint was just one of the cheaper ones to produce. Iron oxide is not hard to come by. This is the same reason why barns and other structures were commonly painted red for so long. You're going to have to repaint bulwarks exposed the elements fairly often, so you're not going to get fancy.
- Keith Black, mtaylor and Gregory
-
3
-
With the boat itself pretty much complete, I've now started in on the rigging. This will be my first attempt to model sails, and I think it's a good opportunity to learn. The sails for this little yawl are as small and as simple a I am likely to encounter, so I may as well get some practice now. Eventually I would like to equip the Speedy with sails - or so I say at the moment, before I have a sense of what that really entails...
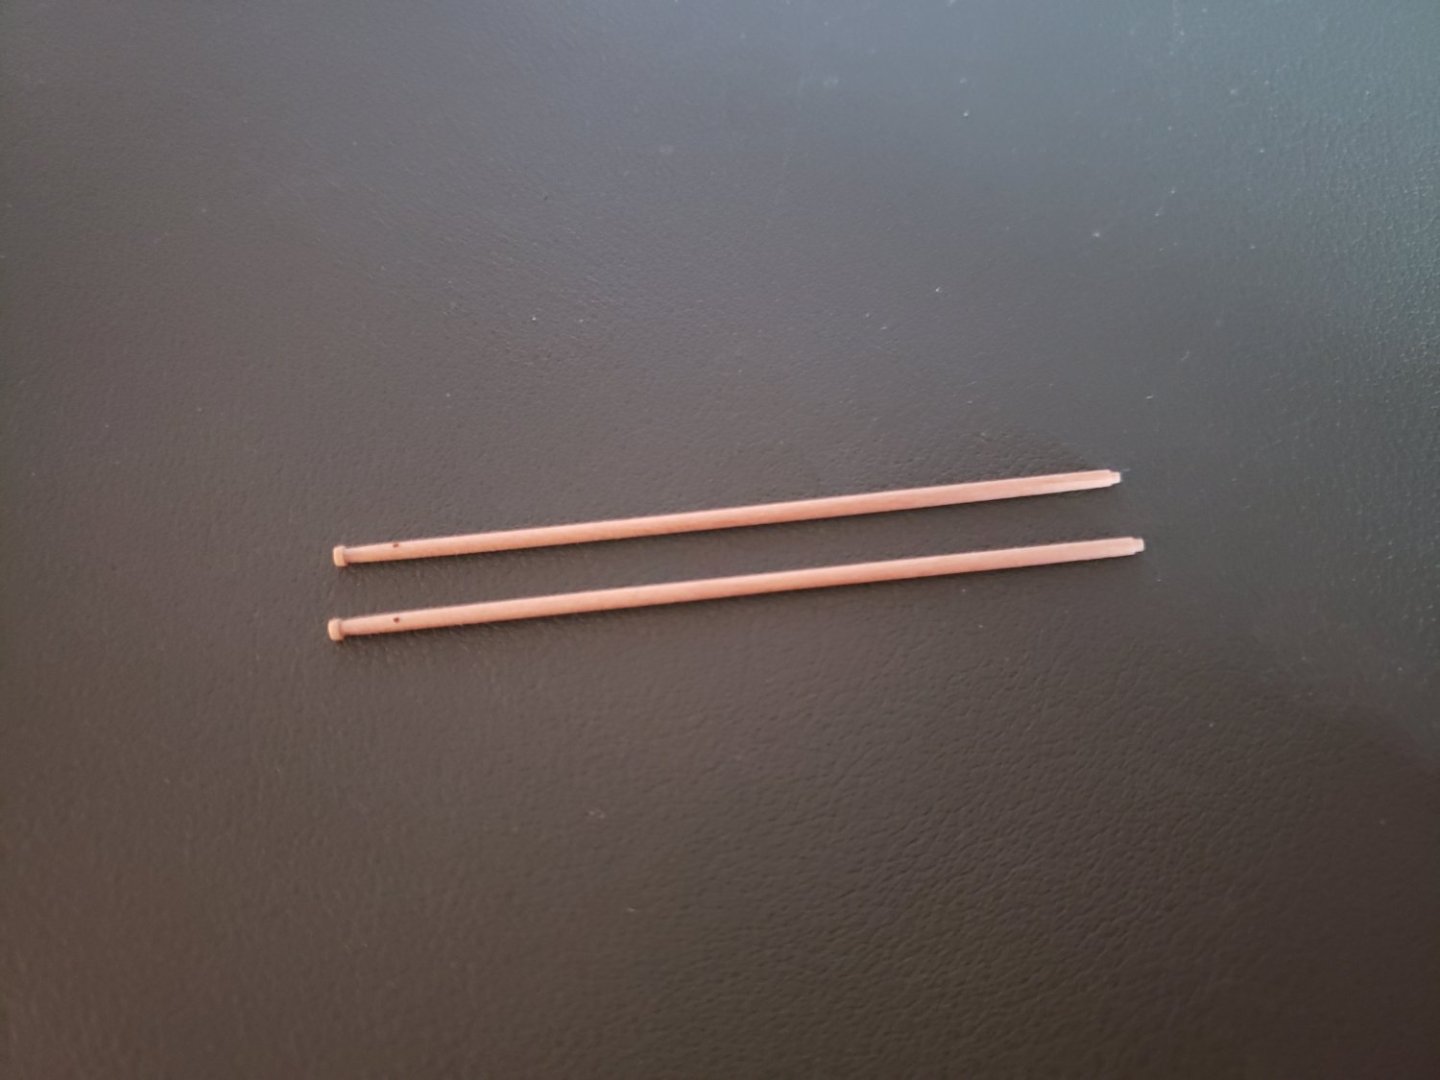
First up, creation of the masts. I didn't have any appropriate dowels for these, thin as they are, so I took a couple of the spare oars from the 1:48 Model Shipways longboat kit (I am a packrat and retain odd scraps of materials for weird amounts of time) and sanded them way down to the right thickness. I drilled just one hole in each for the lifts, not attempting to really simulate a sheave, since I was worried about breaking the wood. The second hole would be pretty well hidden anyway. I cut small feet at the base, and added caps at the top, following the appearance and measurements in the AOTS: Pandora book.
For the sails themselves, I've seen many logs recommending silkspan, so I ordered some online. I figured that these sails are so small and thin, I should get the thinnest possible option, since the silkspan is sold in different weights. It turned out that was probably a bit too thin. After some experiments adding diluted paint and glue to it, it was still way too translucent. So for the next round I laminated two layers together, and I think the result is better.
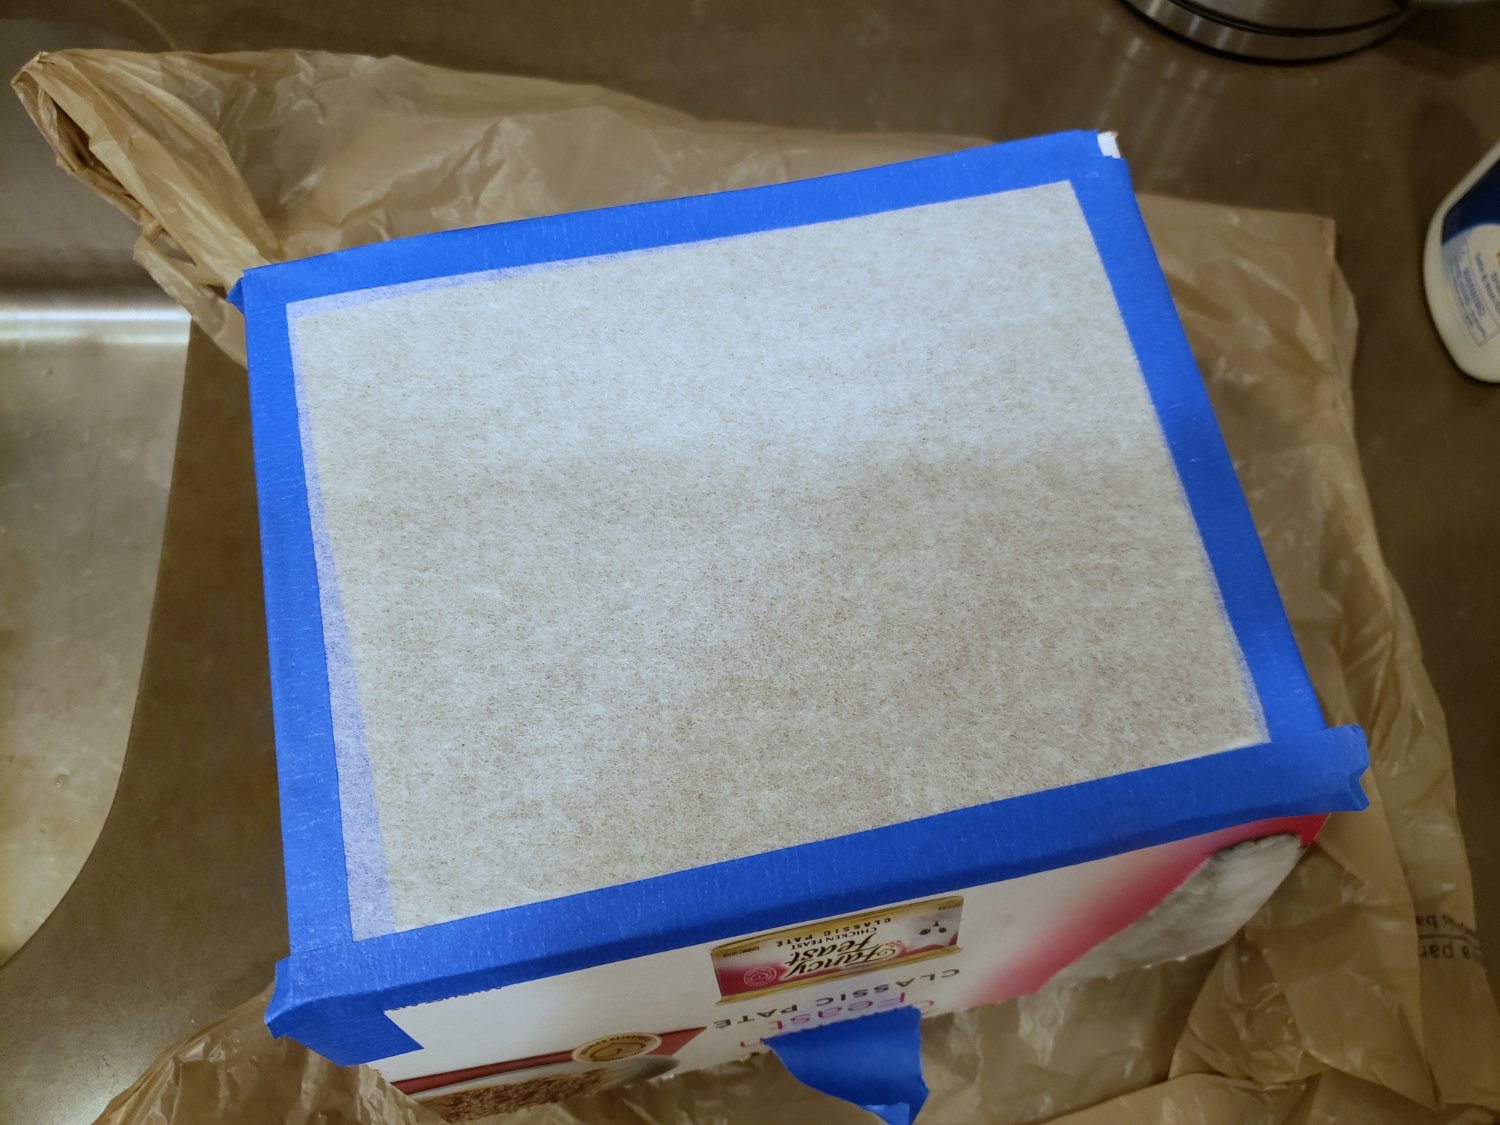
My cat was kind enough to donate a used box of Fancy Feast (very important to use the Chicken Pate here folks, not the chunks in gravy) and as I have seen in other logs, I cut a hole in it and taped two layers of silkspan over it.

Then I painted onto the layers of silkspan a diluted mixture of a light beige paint and Elmer's white glue. It was very runny and looked blotchy, and I was worried the silkspan would tear. It seems so much like tissue paper, but it is much tougher, and all was well.

I borrowed my wife's hairdryer to hit it with hot air, which dries the silkspan out pretty quickly, and causes it to contract and tighten, smoothing out the surface nicely.

In just a couple minutes the silkspan was nice and taut and dry, and I was able to cut it out of the box.

I used the plans for the yawl in the back of the AOTS: HSM Pandora book for templates, and cut out the sails. I haven't quite decided how rigorous I will be in trying to simulate seams. I intend to display the sails furled, so those details might not be very visible, whereas doing it badly would genuinely detract. I will do some more experiments on scrap. The masts in this photo are not glued in place yet, just sitting loosely in their holes.
- Dfell, Blue Ensign, Oldsalt1950 and 8 others
-
11
-
A beautiful result, with a great deal of visual interest for such a small piece. All the extra work you put into it to enhance the details really paid off.
- Blue Ensign and mtaylor
-
1
-
 1
1
-
-
Hm, they do look a bit rough and chunky. Sorry to put you down a false path, but thank you for posting detailed photos of them.
- mtaylor, Ryland Craze and Blue Ensign
-
3
-
-
Thanks very much to everyone who commented and liked. I appreciate the encouragement.
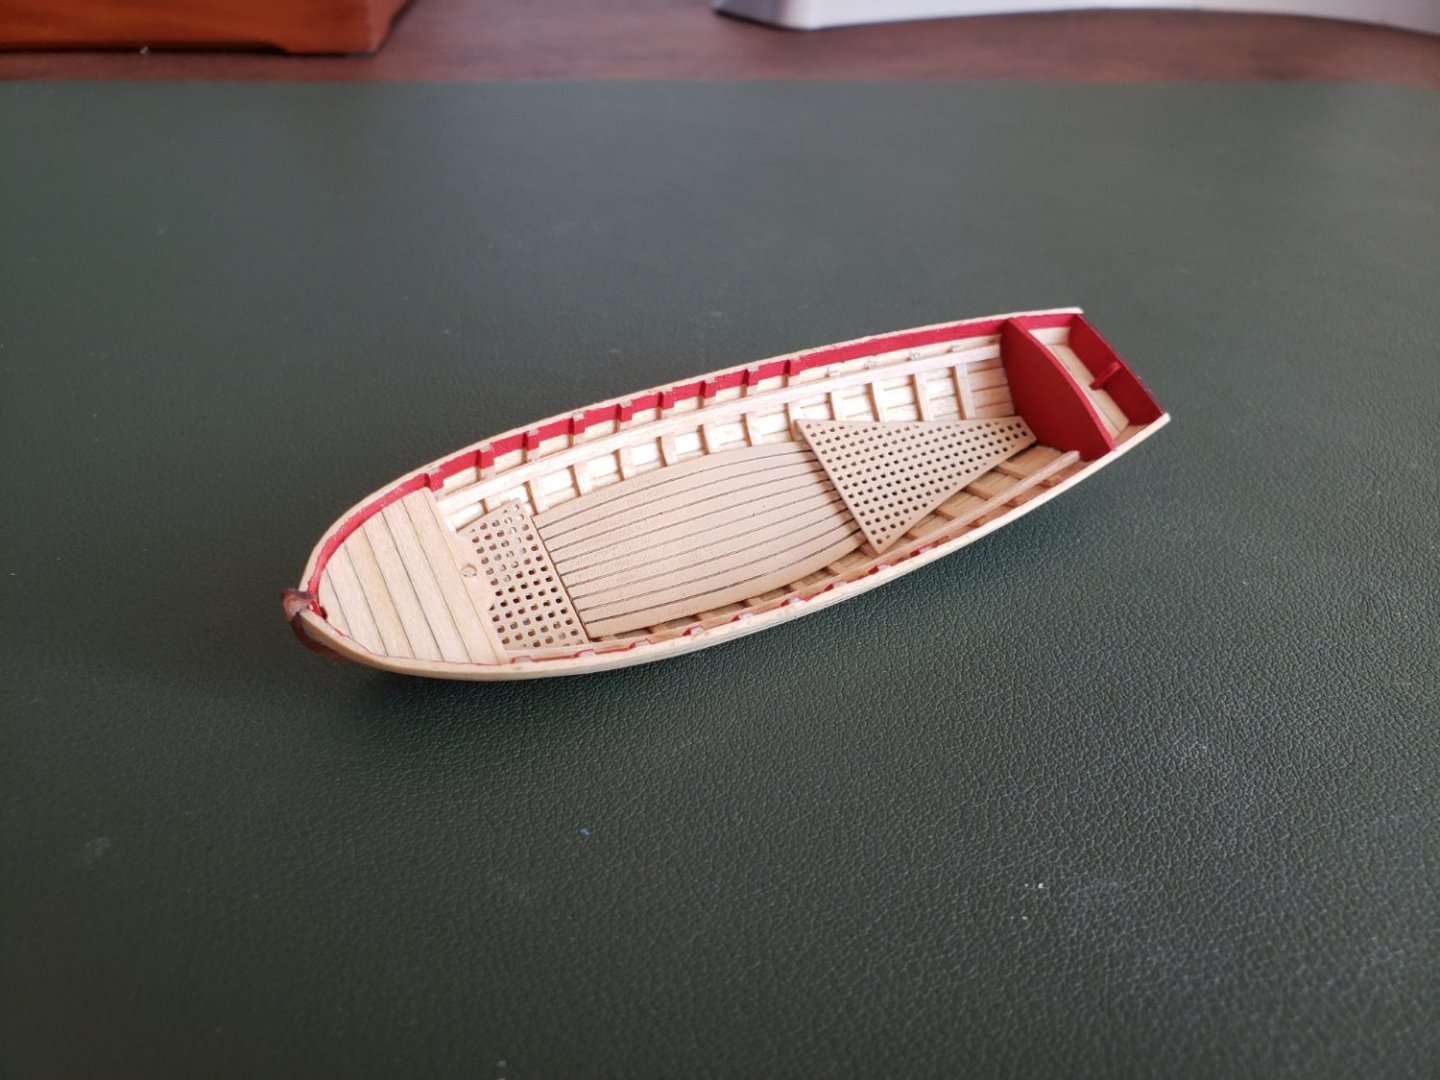
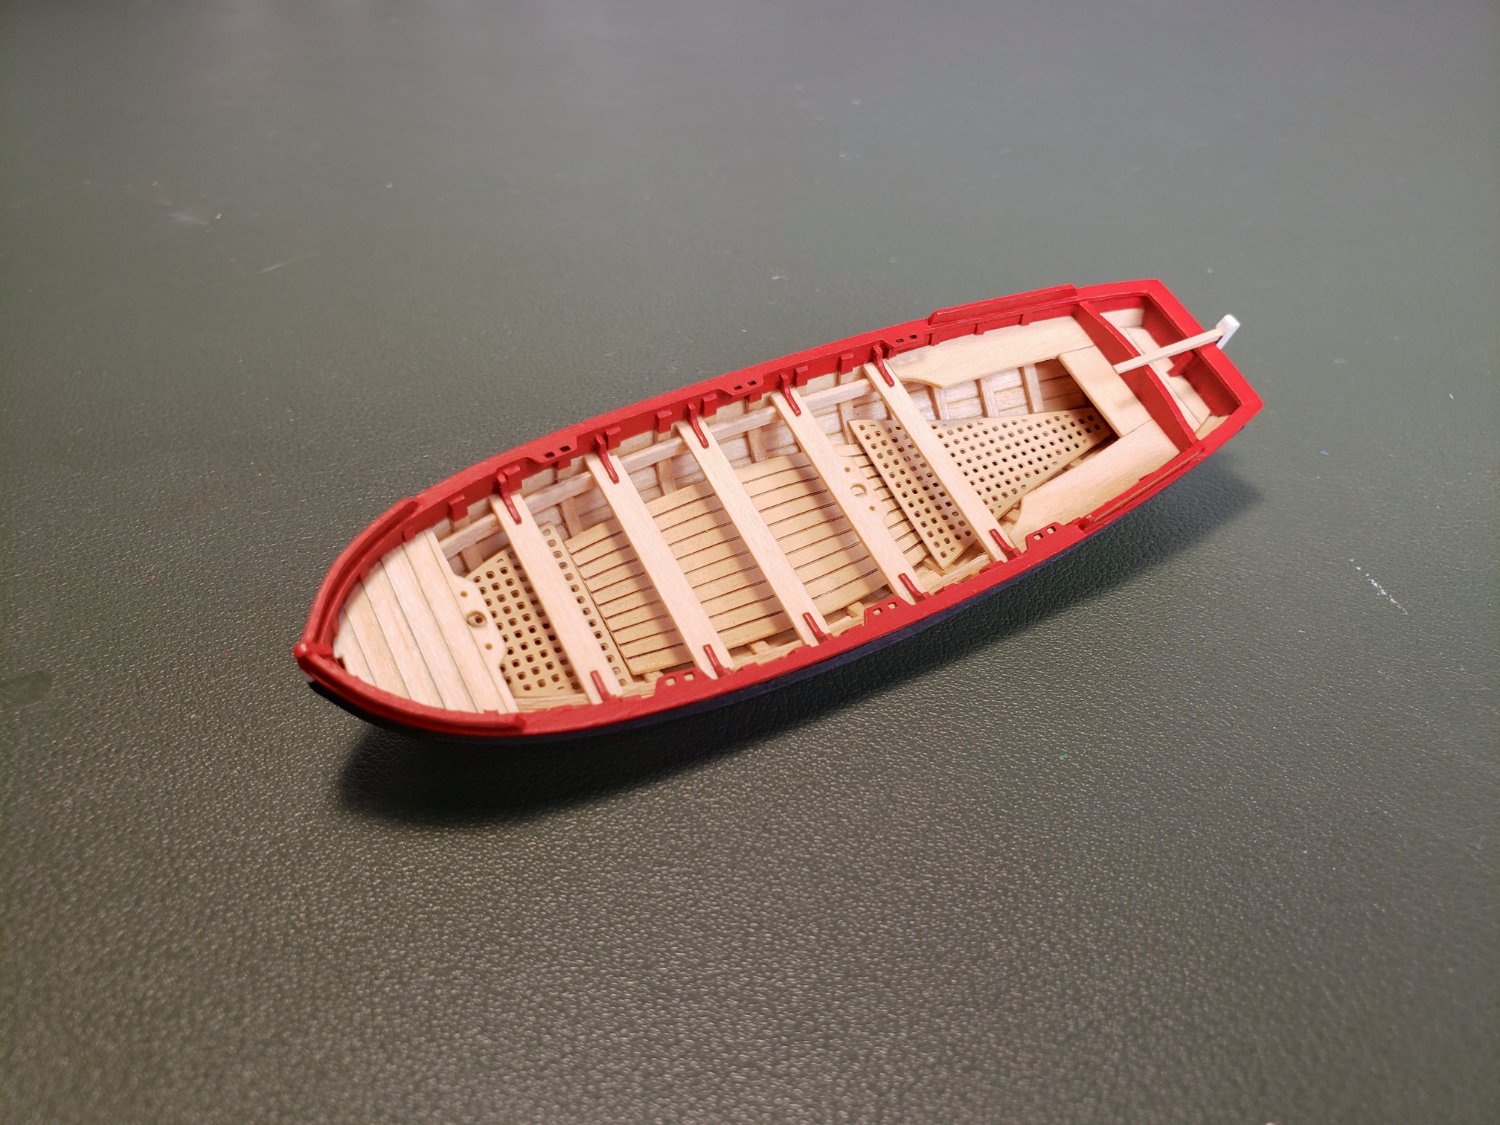
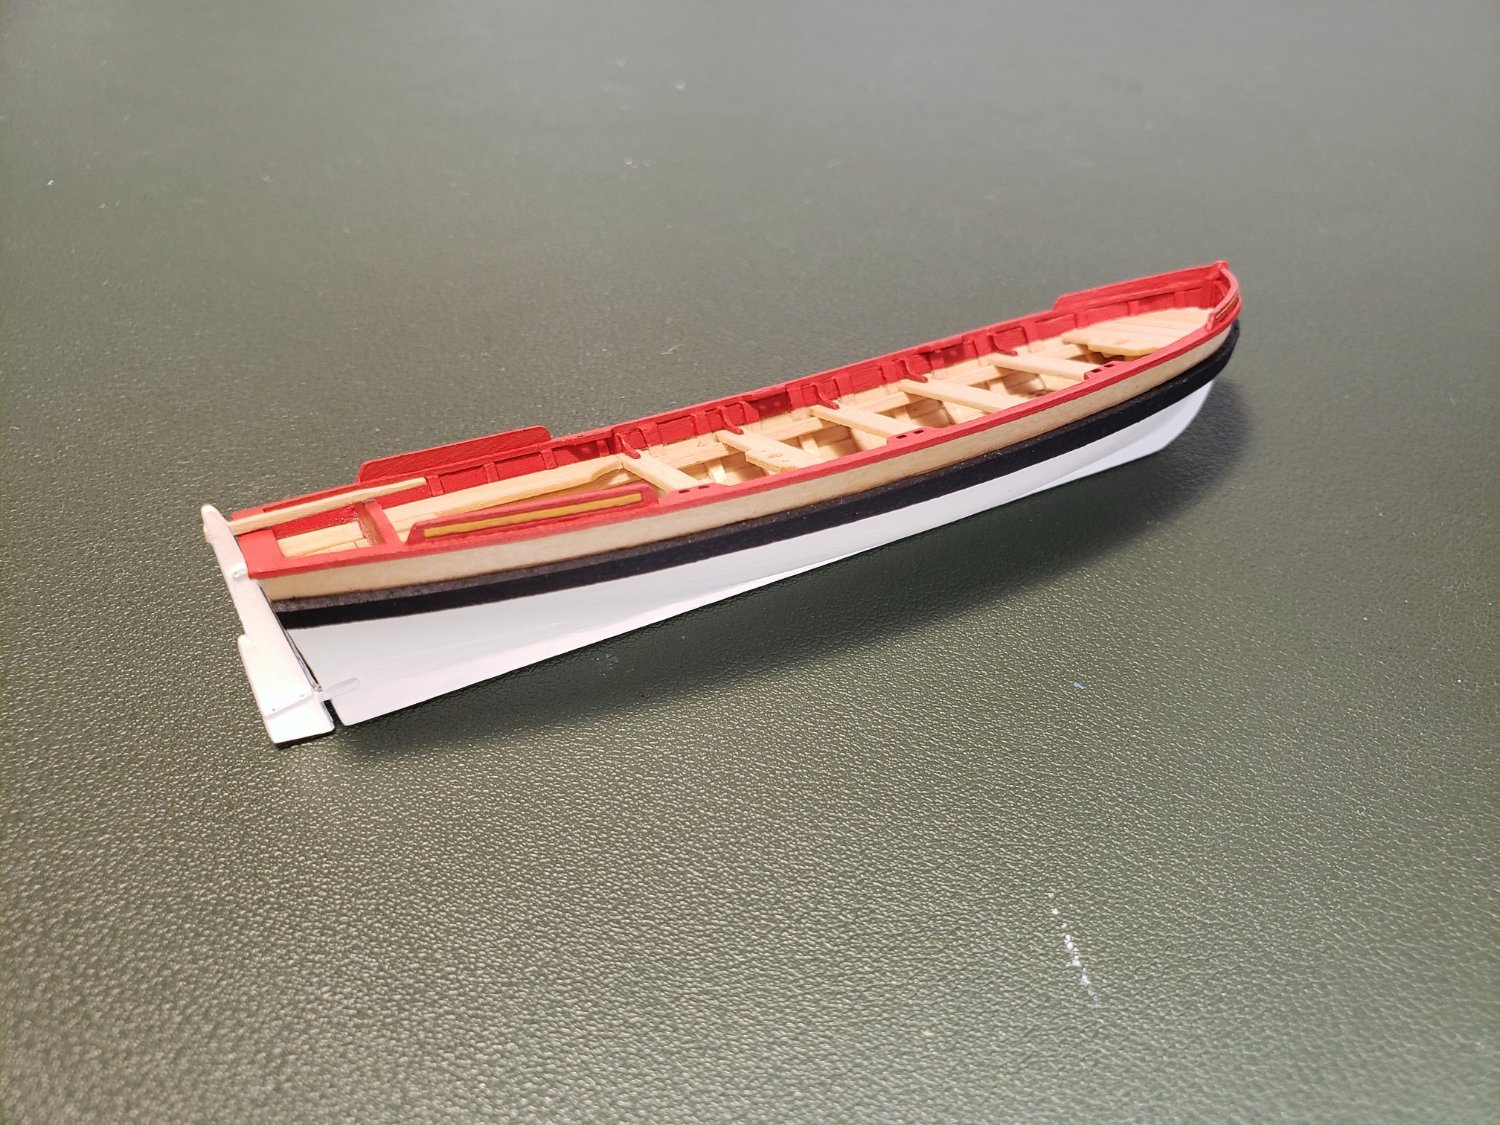
With the addition of some more details, I am getting pretty close to finishing the kit, as supplied - though there will be a lot more to do if I do indeed follow through on plans to rig it. These really are neat little kits. For such small subjects, there is a lot of work that goes into them, and plenty of scope for obsessing over little details.
I added the tops of the frames above the bow platform and the stern benches, to make it look (hopefully) like they are continuations from below.
I've added the cap rails and the knees, painting each after installation. It's certainly a mercy to have these laser cut. If I were doing this all over again, I would have been better about sanding down the thickness of the frames where they meet the rails, so they don't stick out. Advice for fellow travelers.
Splash guards have been added to the bow and stern, with yellow detail lines on the outside. For the bow guards, the instructions show them stepped back from the stem, but following the diagrams in the back of "Anatomy of the Ship: HMS Pandora", I've moved mine to butt up right against the stem. It seems to me like they would be more useful in keeping waves out in that position anyway.
I painted the top of the white portion of the outside before adding the wales, so that I didn't have to mask anything. The wales themselves were soaked in boiling water and bent to shape, and the top and bottom edges painted black before installation. I actually then ended up painting the outside surface with matte varnish first, so I could sand it smooth to reduce fuzz, and then painted that surface black too. The uppermost strake of the hull was left as exposed wood.
For the rudder, the kit comes with a one piece rudder/ tiller in pear wood, which then gets sandwiched between photo etched brass facings with the hinges on them. Pretty convenient as far as I was concerned. You just need to take care to make sure you fill in any gaps between wood and brass so it doesn't look like separate pieces. The tiller I painted to blend in with all the basswood I've used.
I still need to install the oarlocks and several ring bolts, provided in photo etched brass. Then I can technically say I've finished the kit and take a breather before pushing on.


- Oldsalt1950, BenD, jpalmer1970 and 8 others
-
8
-
 3
3
-
The frustrations of this kit would utterly defeat me, so I am taking all the more enjoyment in watching your meticulous progress.
-
A lot of fantastic looking work here. I am working on Vanguard's 22 foot yawl right now, drawing heavily on your excellent build log for guidance, so I have a sense of how tight these spaces are!
As for the question of rowing figures, I'm not sure how precise a fit these would be scale-wise, but it is an option worth considering:
https://www.stonewallfigures.co.uk/shop/28-mm-napoleonic-navy/sailors-rowing/
28mm is a gaming scale, and depending on the manufacturer's whims could work out to somewhere between 1:64 and 1:56 or so. I have not purchased anything from Stonewall Figures before, so I couldn't say if their models tend to run on the small or large size for the scale.
- allanyed, mtaylor and Blue Ensign
-
3
-
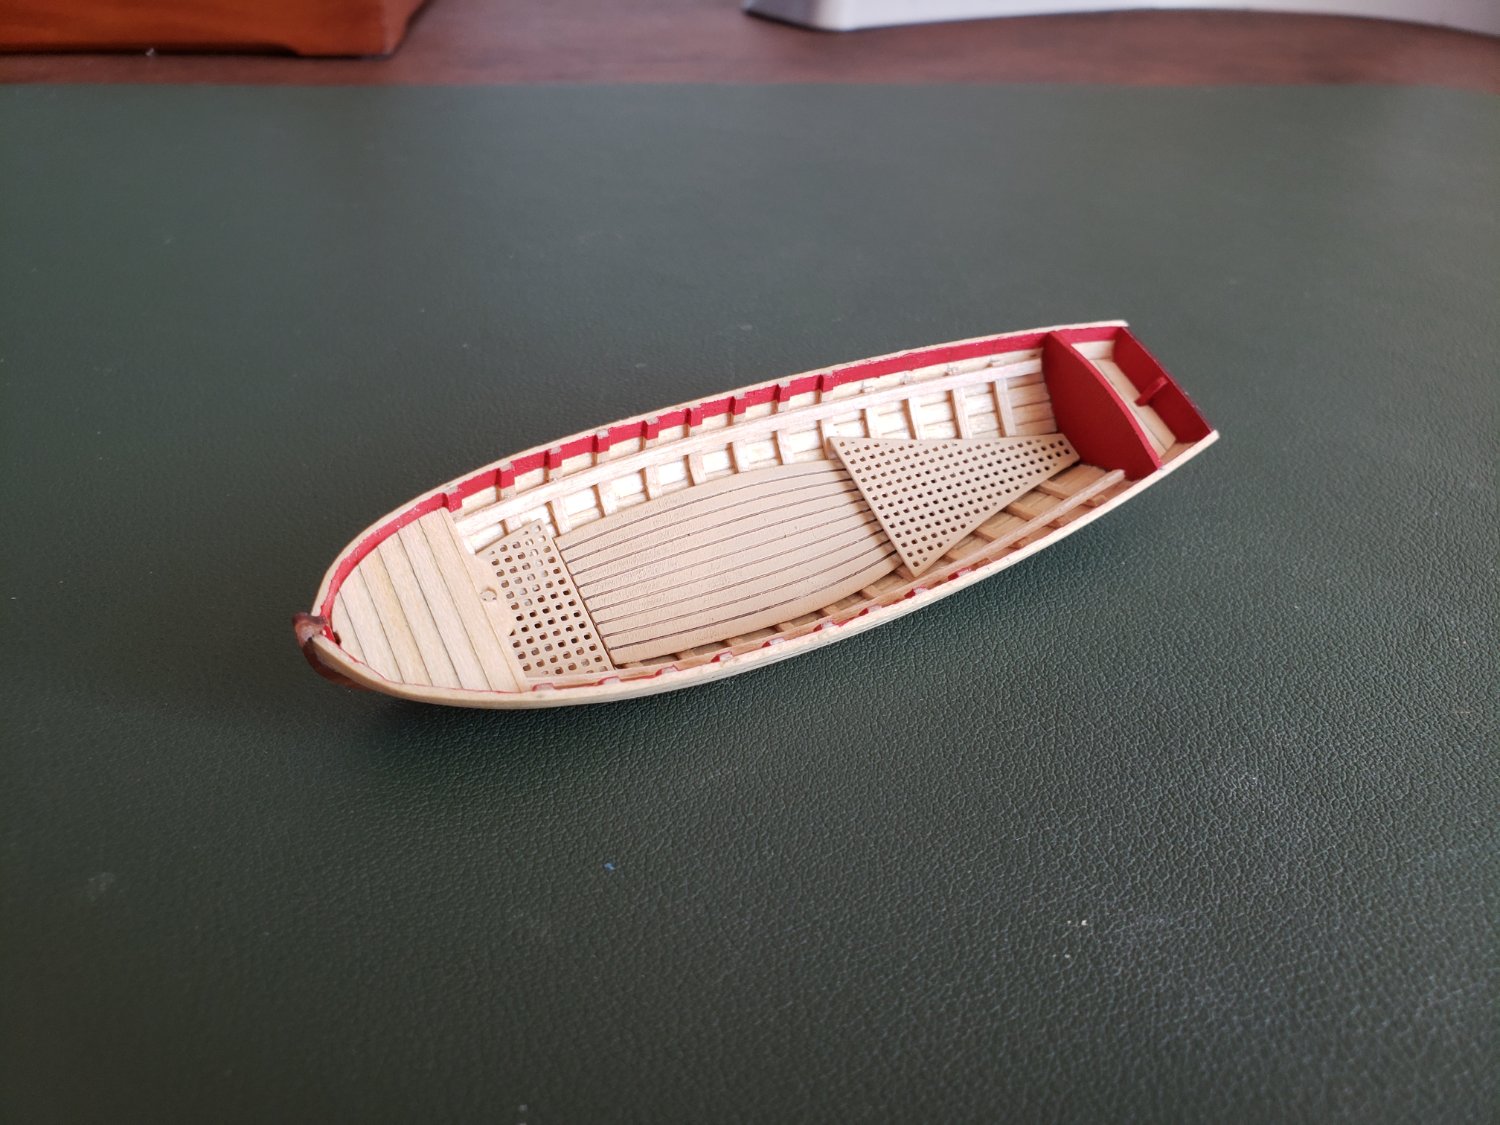
-
Work on the little yawl continues, with the addition of the thwarts. These again are remade from basswood. To check their placement, I scanned the images of the yawl in the back of the Anatomy of the Ship: HMS Pandora book, scaling them up to the size of the model (I think I simply had to double them, if memory serves) and printing the image out as a template. I also then found that I needed to reduce the size of the bow platform, which fortunately I had not glued in yet. So I took one plank width off the front of it and reshaped it to fit the bow curve. None of that would have been a surprise to me had I read Blue Ensign's excellent build log a little more closely, as he describes the exact same issue in detail...
Next up I will be adding the knees to the thwarts, and the continuation of the frames above the bow platform and the benches in the stern.

- KARAVOKIRIS, PhillH, Prowler901 and 8 others
-
8
-
3
-
-
Thanks for the kind words Glen, I have admired your work on Flirt, Cheerful and Winchelsea. And if you go back to rig Flirt I will certainly be mining your log for tips. I agree that Derek's build log is a gold mine for anyone working on Speedy.
On the subject of standing on the shoulders of the more capable, I have found @Blue Ensign's rigged version of this little yawl very inspiring, and am eager to make an attempt in the same vein. Between his photos and descriptions and the images in the back of the Anatomy of the Ship volume for HMS Pandora, I have some good guidelines for how to rig this boat. What I do not know is what exactly sprit sails such as this boat would carry would look like when furled.
Does anyone happen to have any good images of furled sprit sails?
-
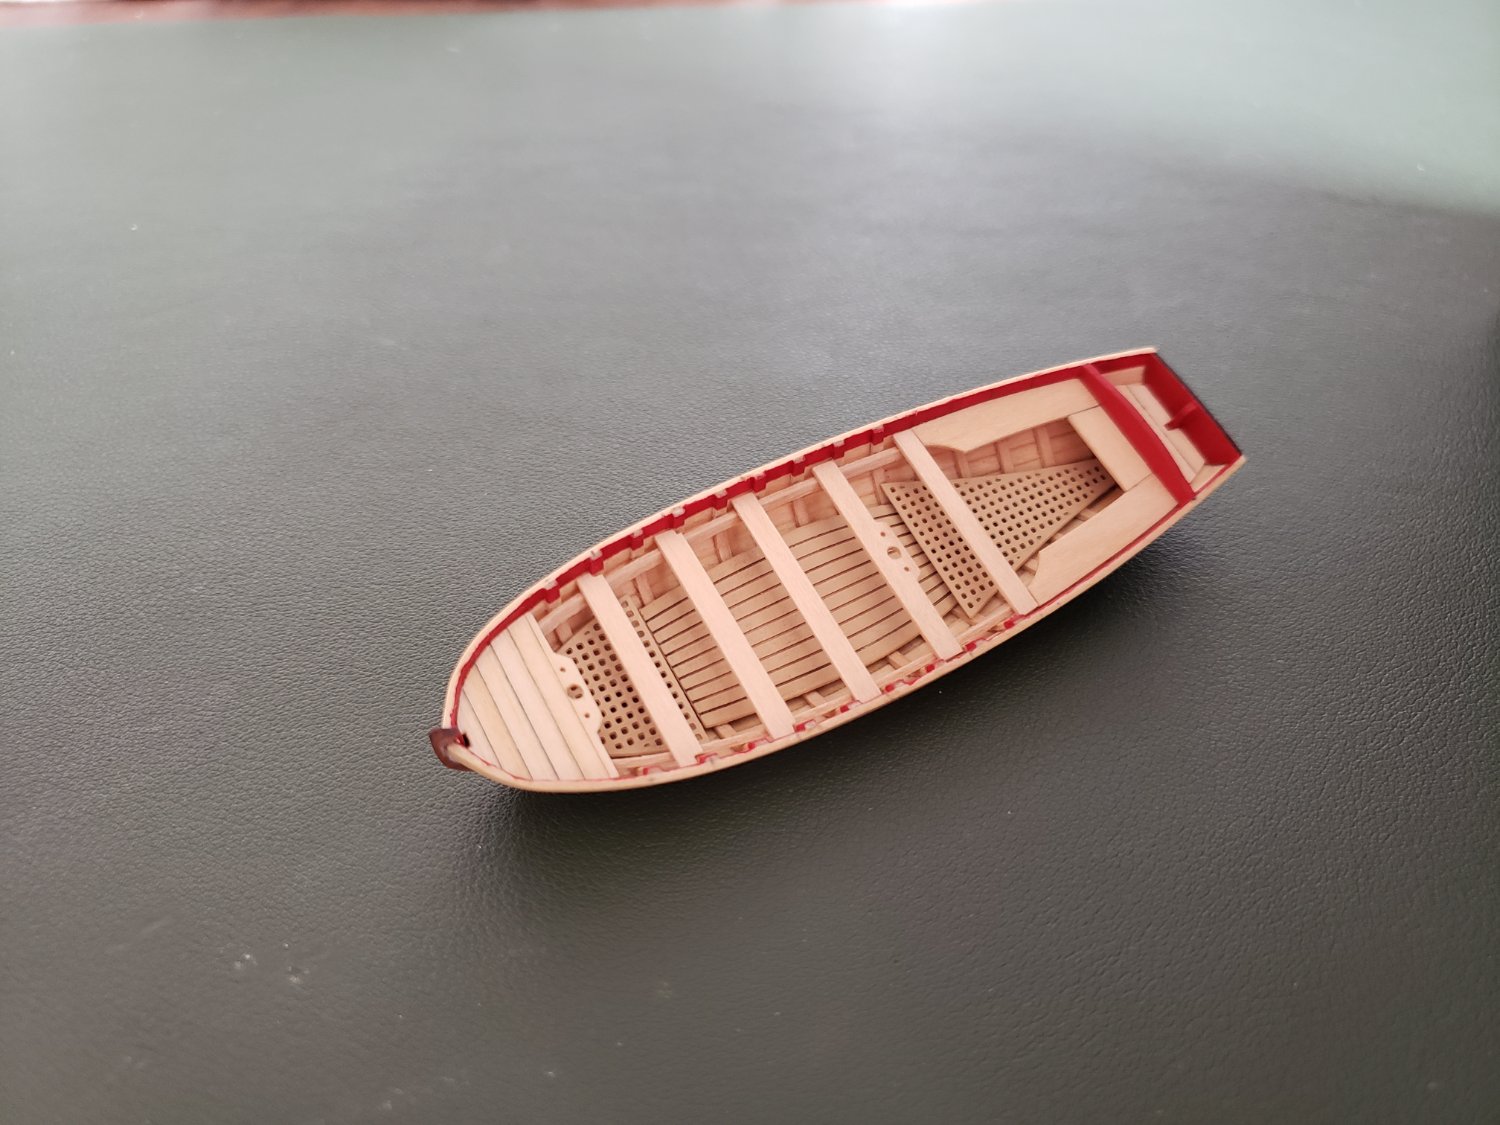
Moving things along, I have now painted and added the brass photo etched deck pieces, as well as the seat support strips and the bow and stern platforms. Those I remade from basswood to match the rest of the planking. I just glued planks together, traced the shape of the laser cut pear pieces, and then glued braces to the underside before cutting and shaping. I also "painted" super glue around the perimeter of the mast hole, on the under side of the bow piece, to help discourage splitting. It will still be a fragile point though.
Next up I will be working on the thwarts.
- usedtosail, Blue Ensign, Dfell and 4 others
-
7
-
Looking very sharp, and it's good to see her underway again.
- Bill Morrison and mtaylor
-
2


Sloop Speedwell 1752 by Chuck - Ketch Rigged Sloop - POF - prototype build
in - Build logs for subjects built 1751 - 1800
Posted · Edited by whitejamest
That is a very beautiful model indeed. Personally, I have a stronger interest in smaller scales than larger ones. Partly just for the dazzling effects of extreme miniature, but also partly because there is only room for so many 1/64 scale kits, let alone 1/48s.
A 3/32 scale Speedwell in Syren Ship Models quality would be awfully hard to resist.