


John Ruy
-
Posts
1,250 -
Joined
-
Last visited
Content Type
Profiles
Forums
Gallery
Events
Posts posted by John Ruy
-
-
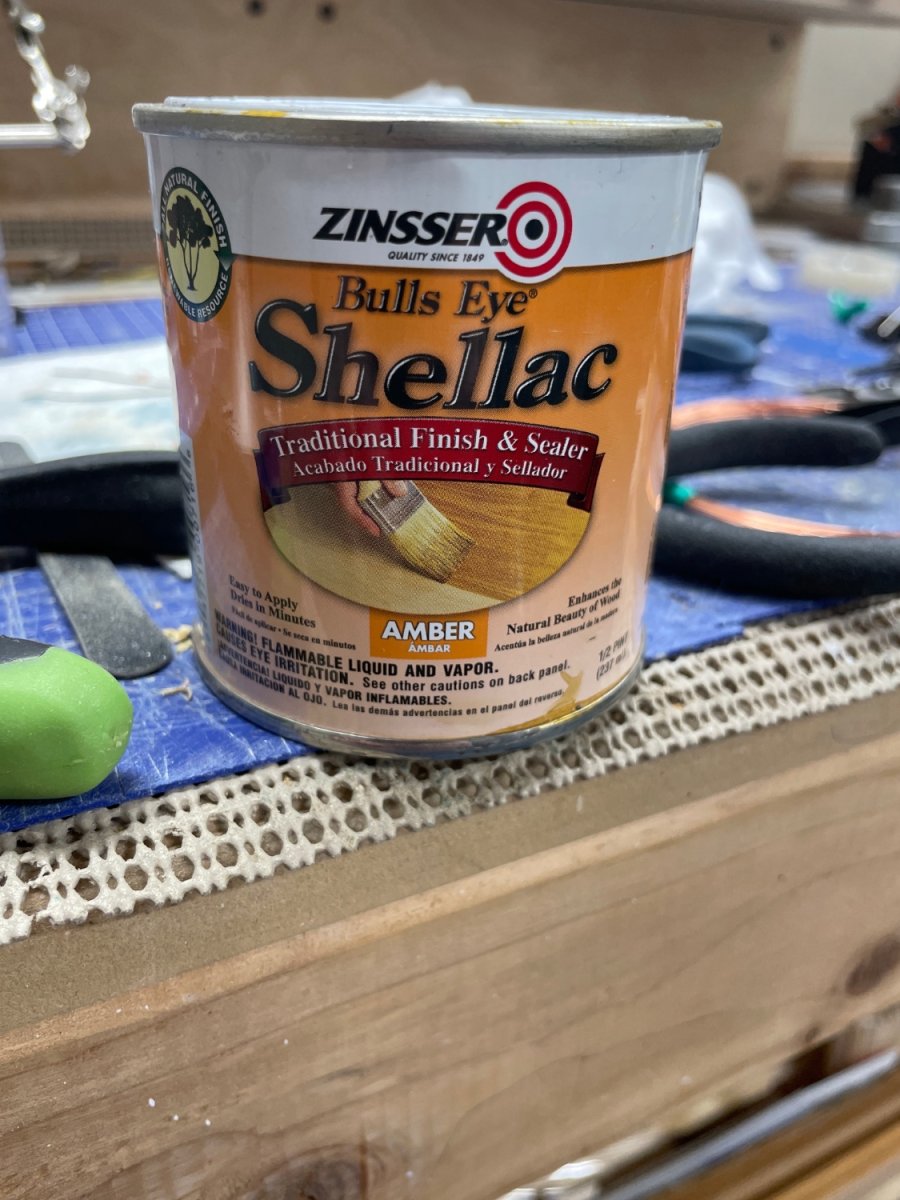
Tony,
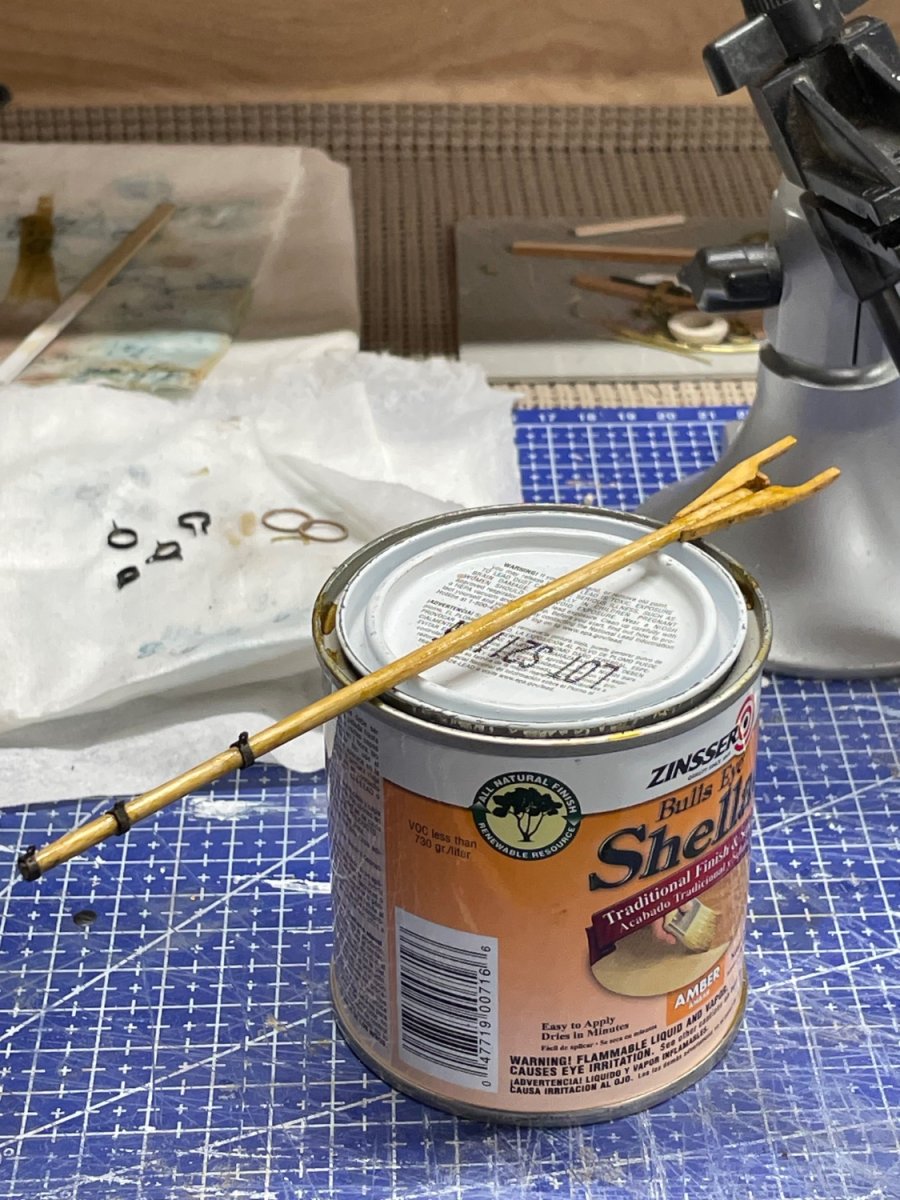
Here’s the Shellac I use. Found in our local hardware shops. Don’t know about the UK.
John

- Canute, Tony28, Ryland Craze and 1 other
-
 4
4
-
Just a thought, you might try Amber Shellac. It seals the wood and (I think) gives it an oiled look. Small parts glue down well with CA Glue. I use it on parts designated to be Natural Oiled.
Try it on some scrap wood before you put it on that beautiful deck.
John
-
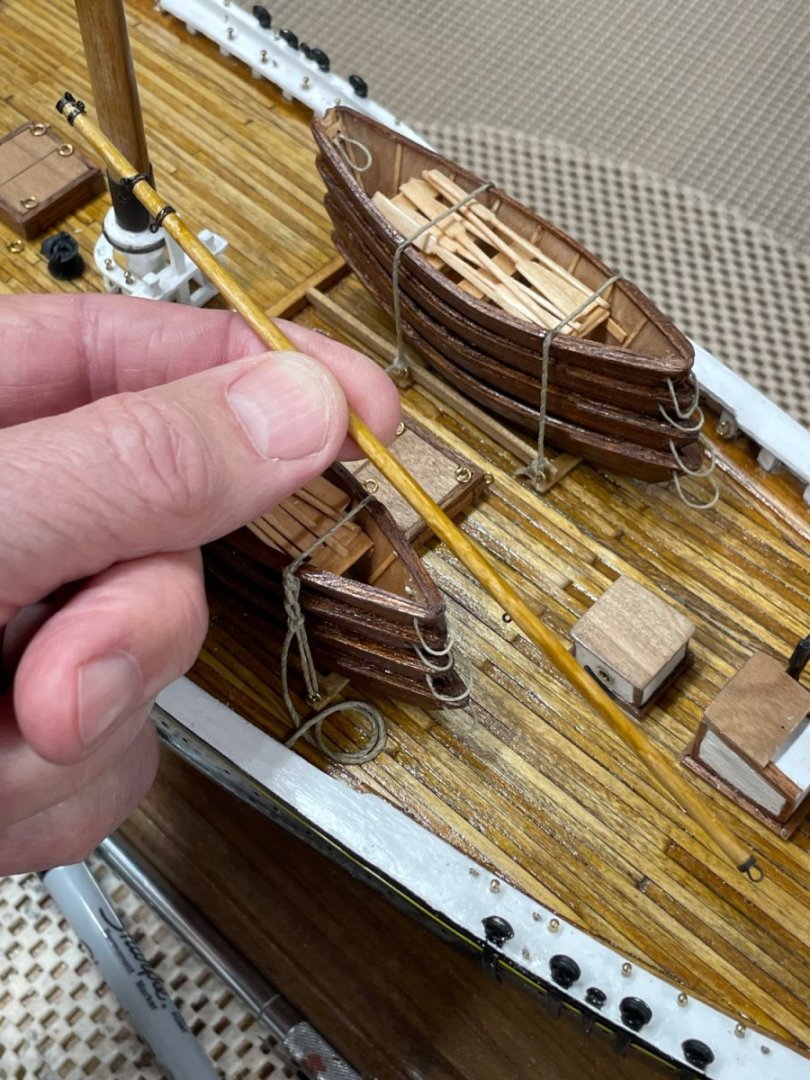
She is really starting come alive now, with all the details. The fun is about to begin with rigging.

Looking good! Cheers 🍻
- Keith Black, AJohnson, mtaylor and 2 others
-
5
-
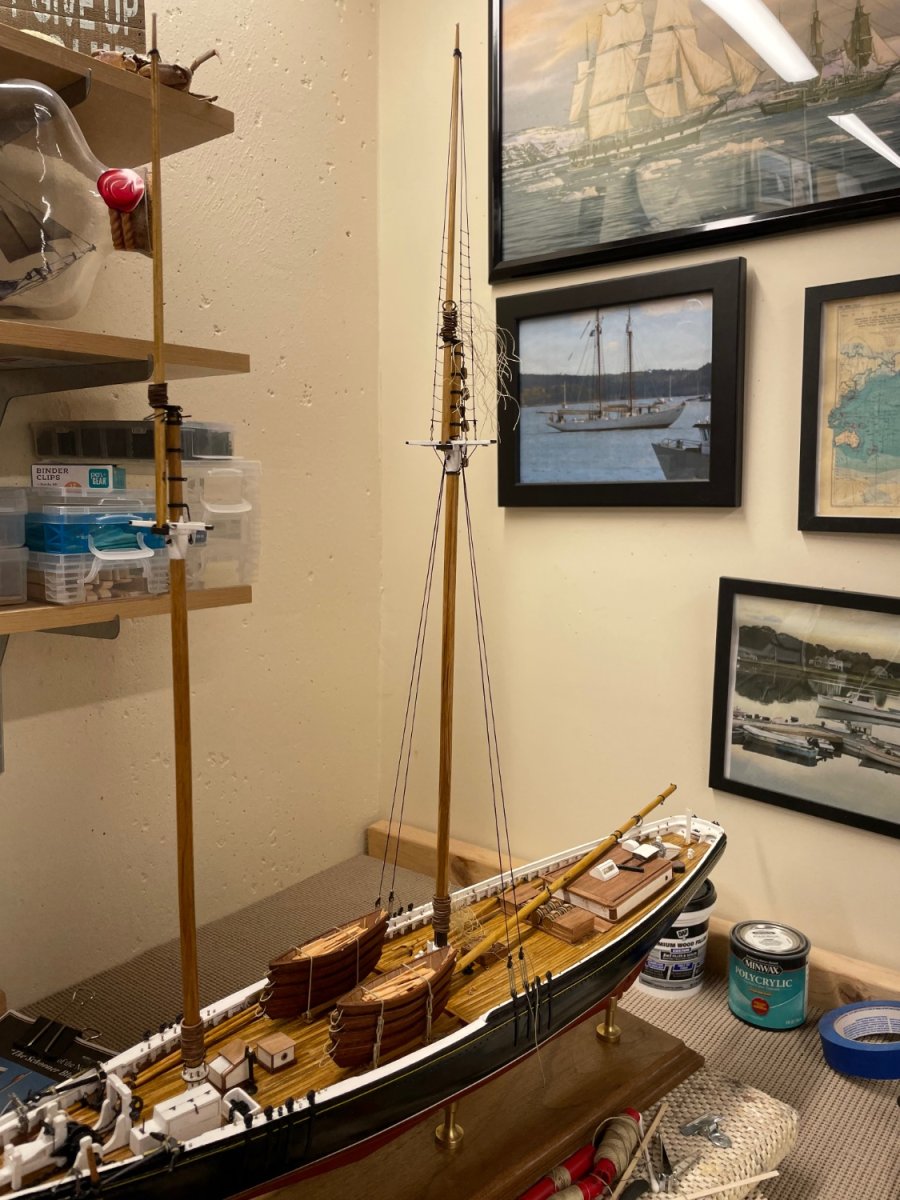
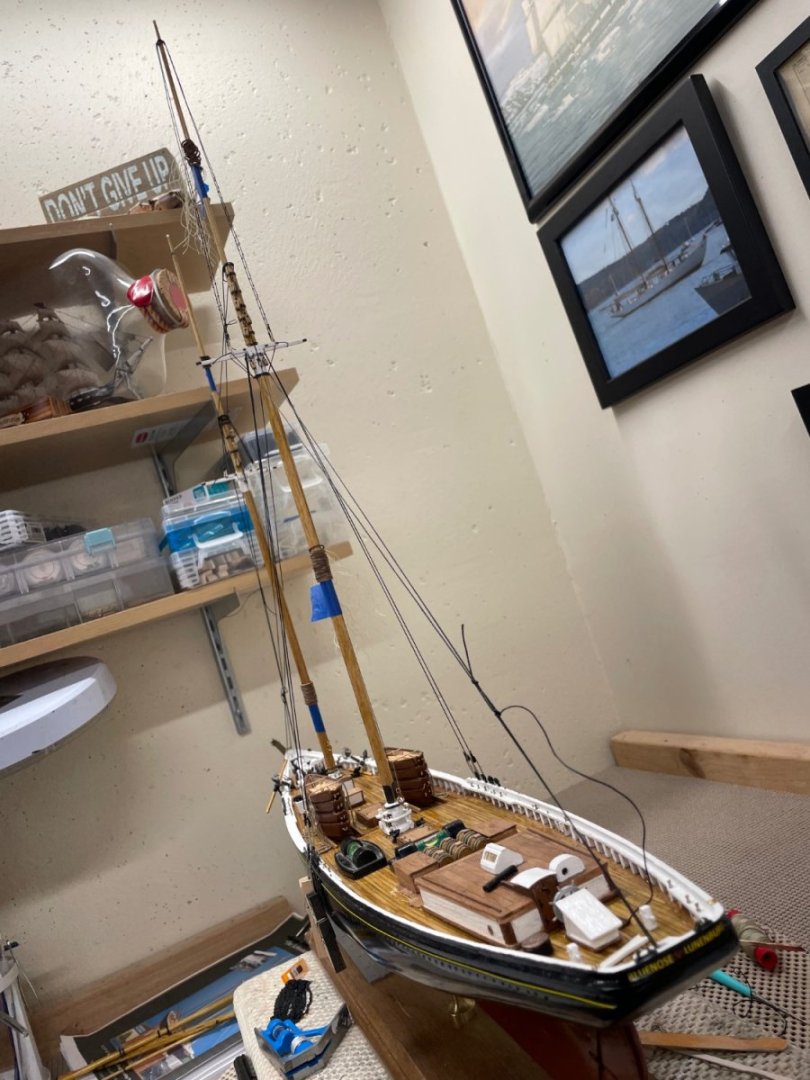
Setting the Main Mast…
I came across this Discussion on Stepping the mast. Many thanks to @HardeeHarHar for starting this thread, it was perfect timing for my next task. Many good ideas, from which I devised the following process.
On my last couple of builds I have avoided glueing the mast when first step them. Two things here: 1-The mast can be removed to work on the details and 2- It allows the Plumb and Rake of each mast to be set by the rigging. The following process is my take away from our discussions.
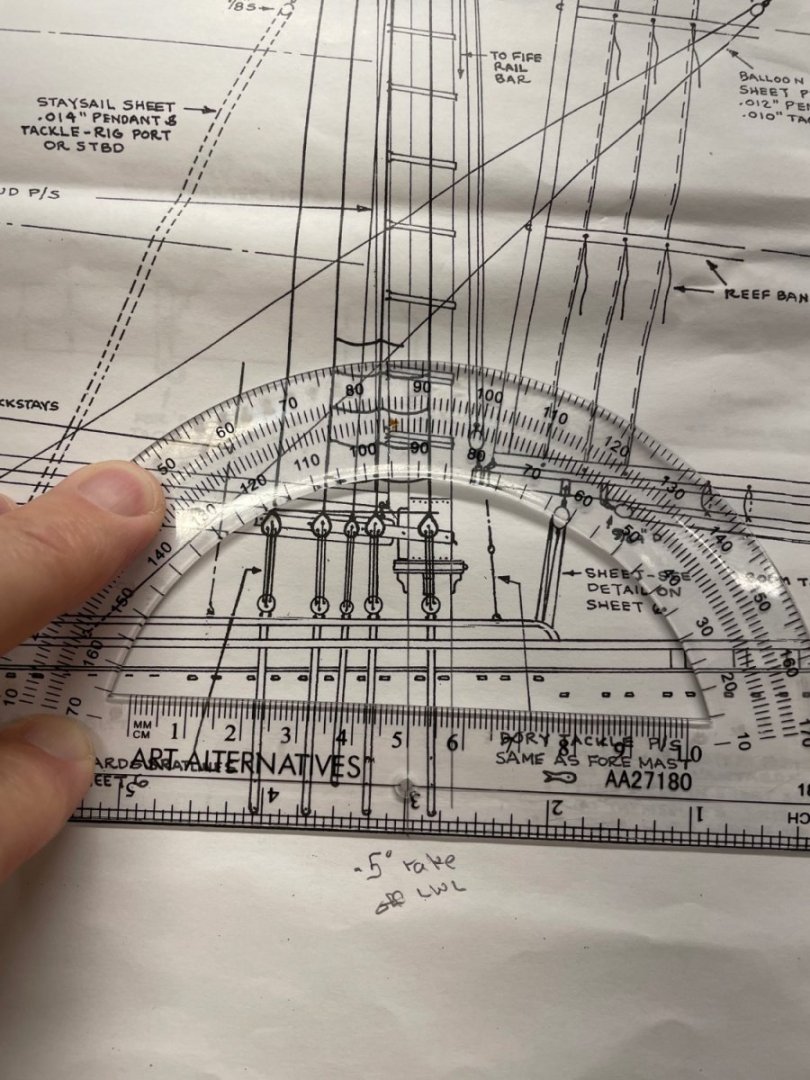
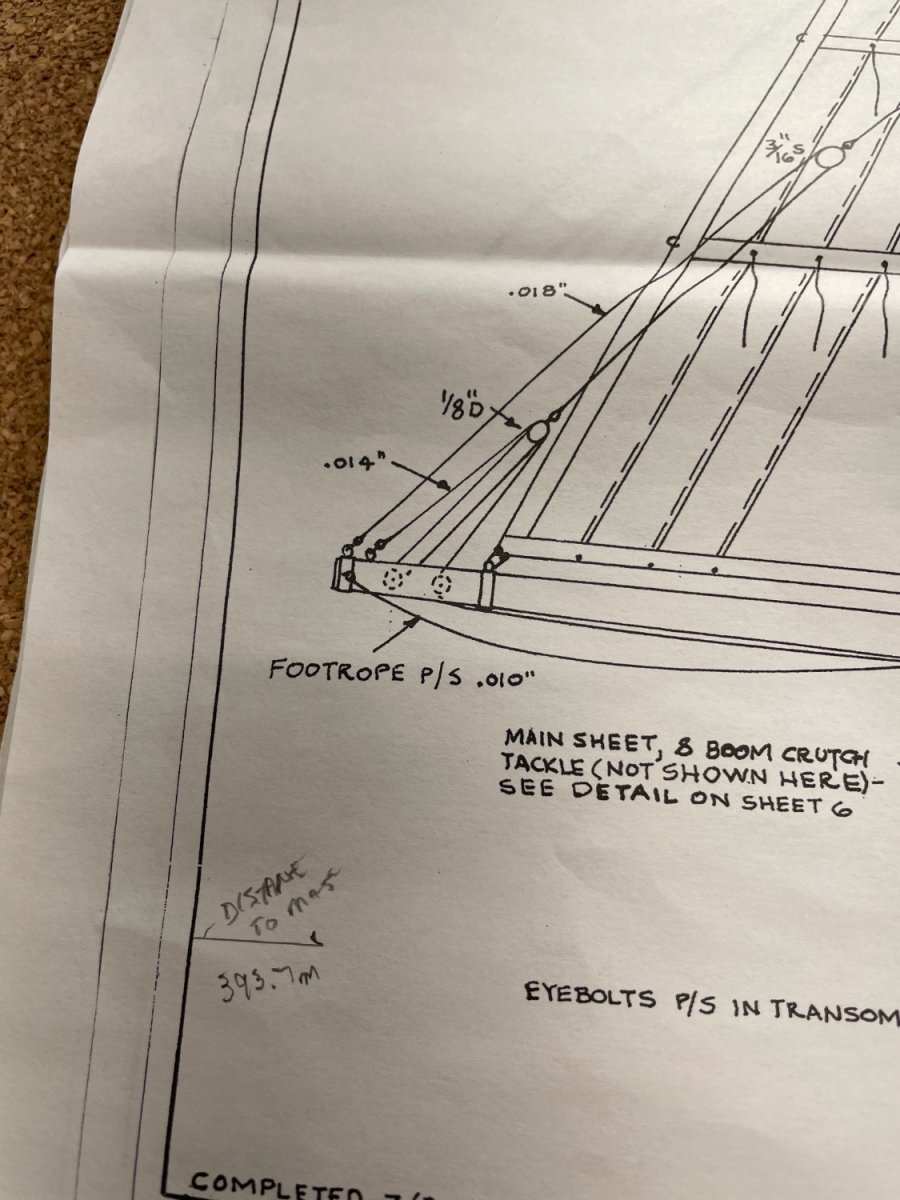
Using a Protractor I determined the rake of the mast.
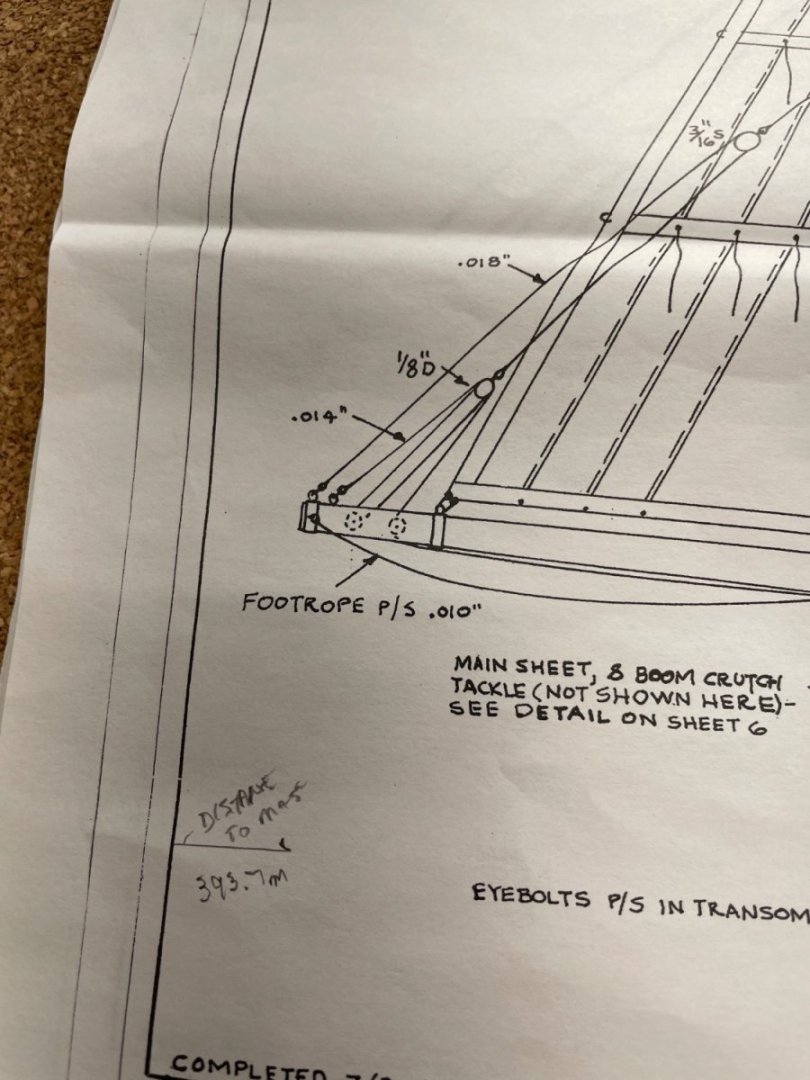
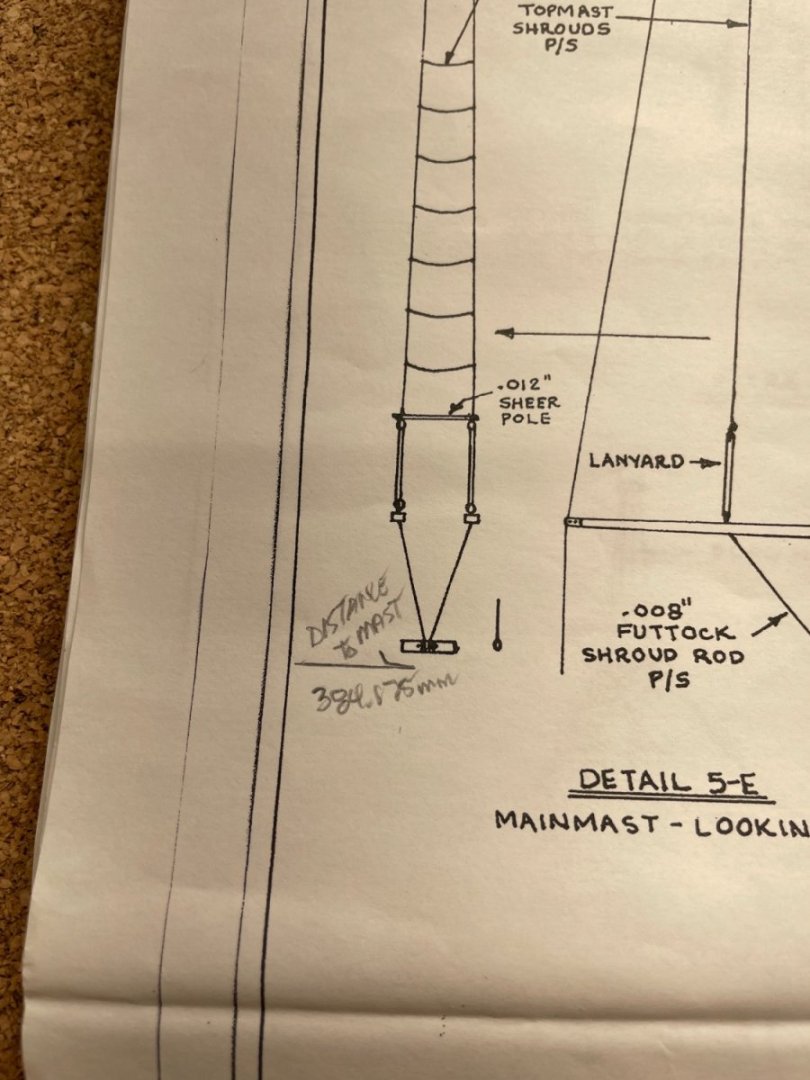
I then measured the distances to the mast from the edge of the drawing ✍️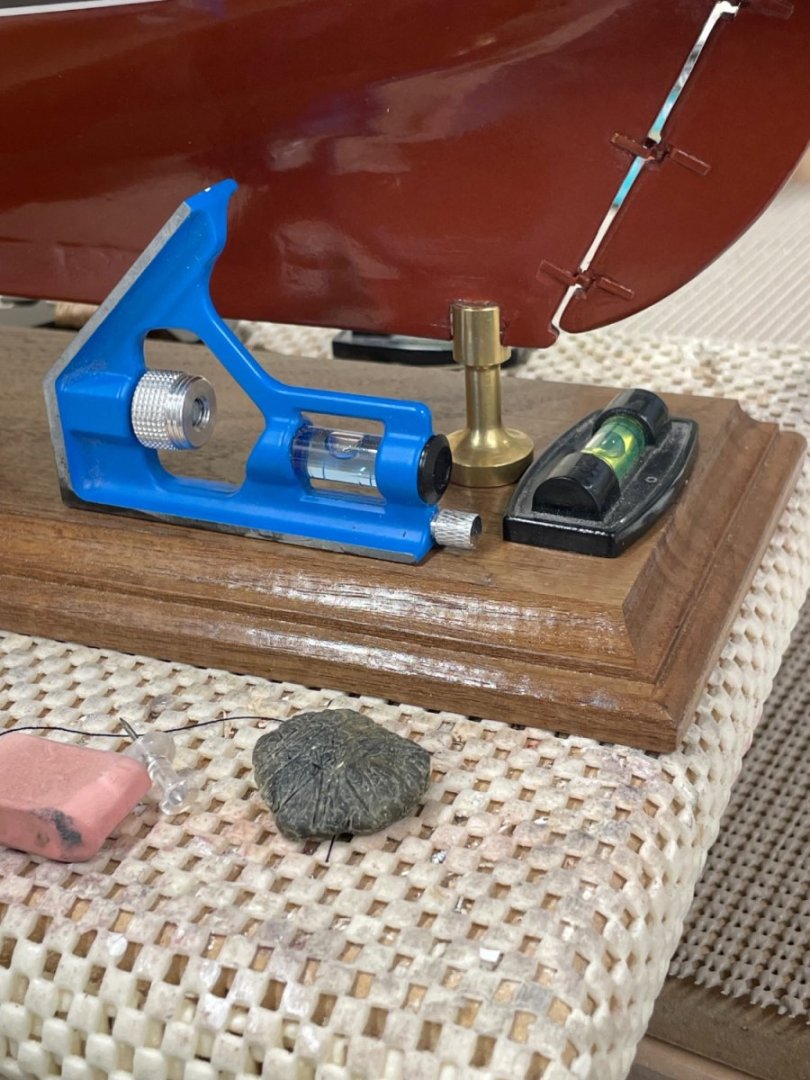
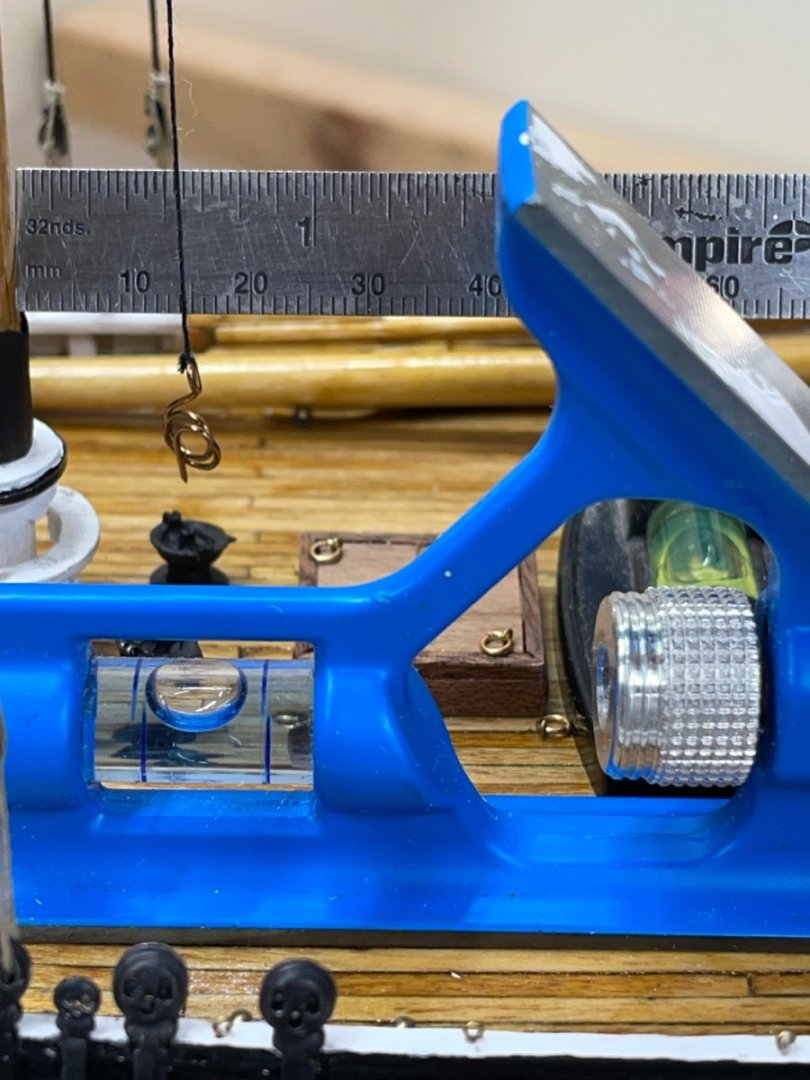
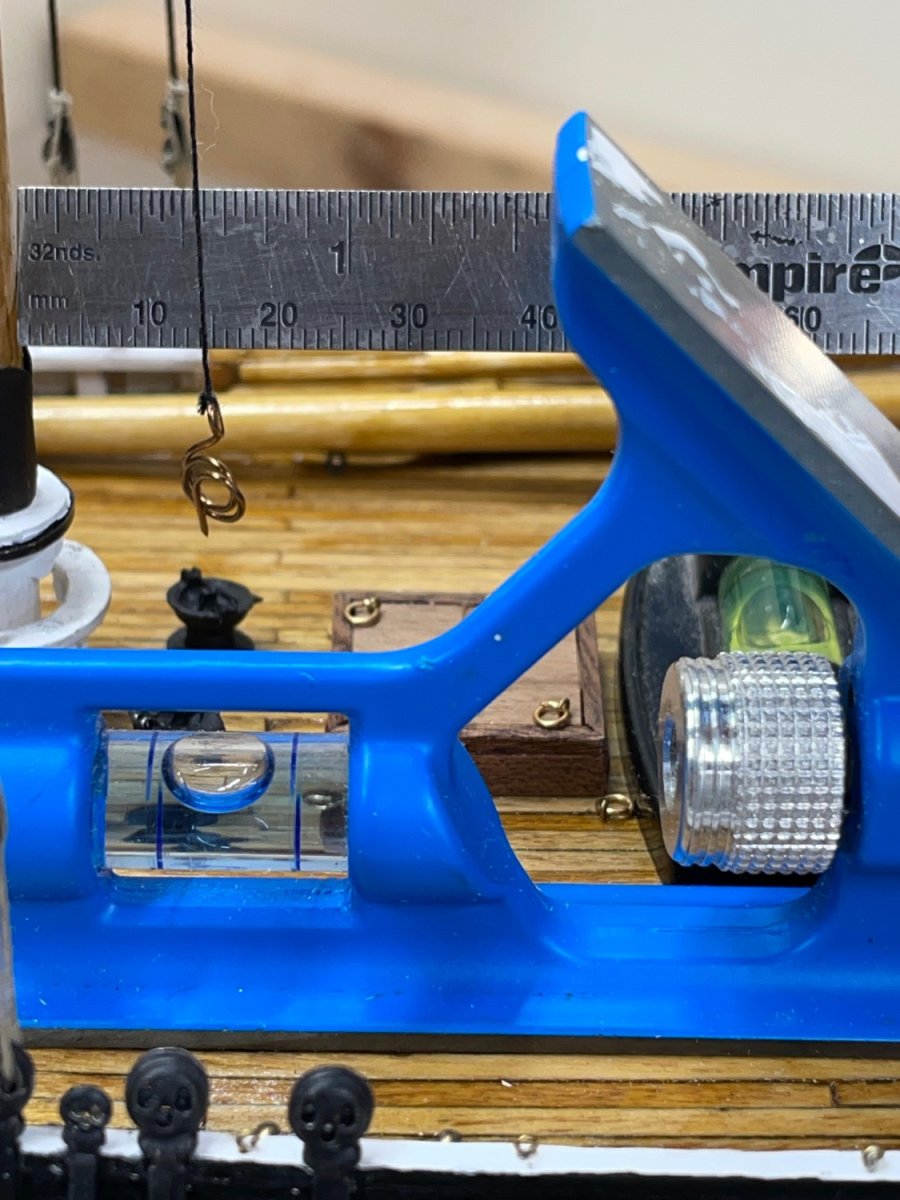
I then verified my build board to be level.
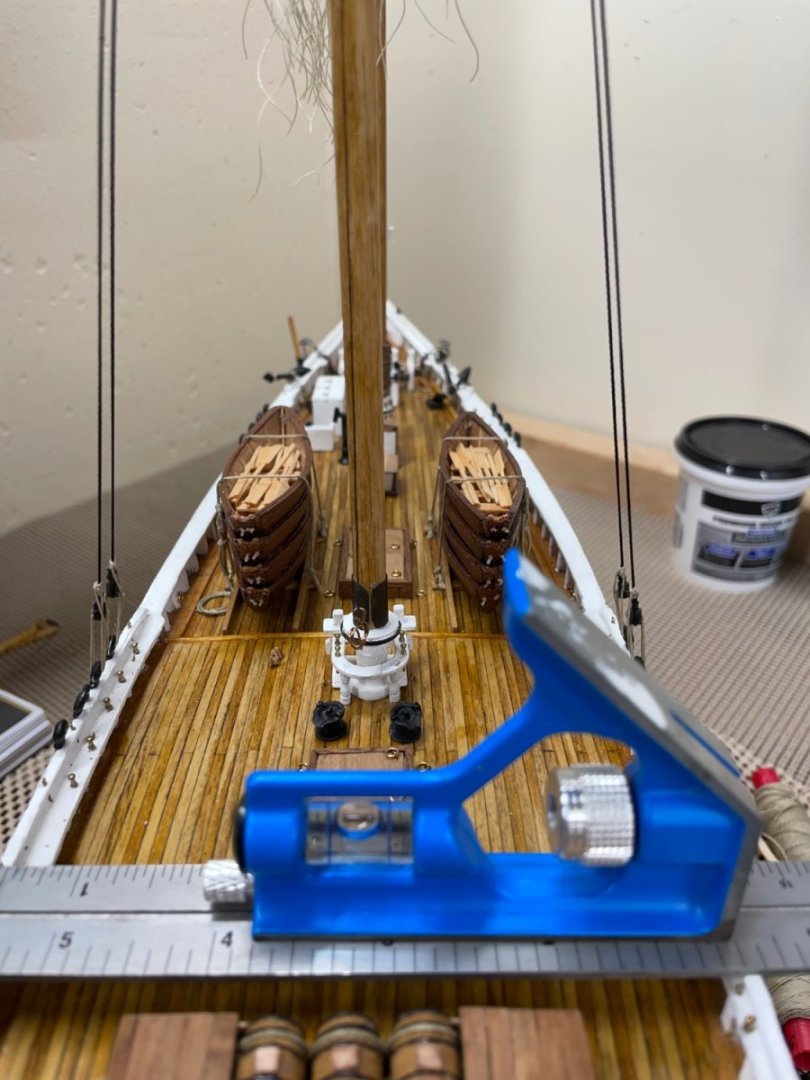
I used wedges under my base to compensate for the mounting.

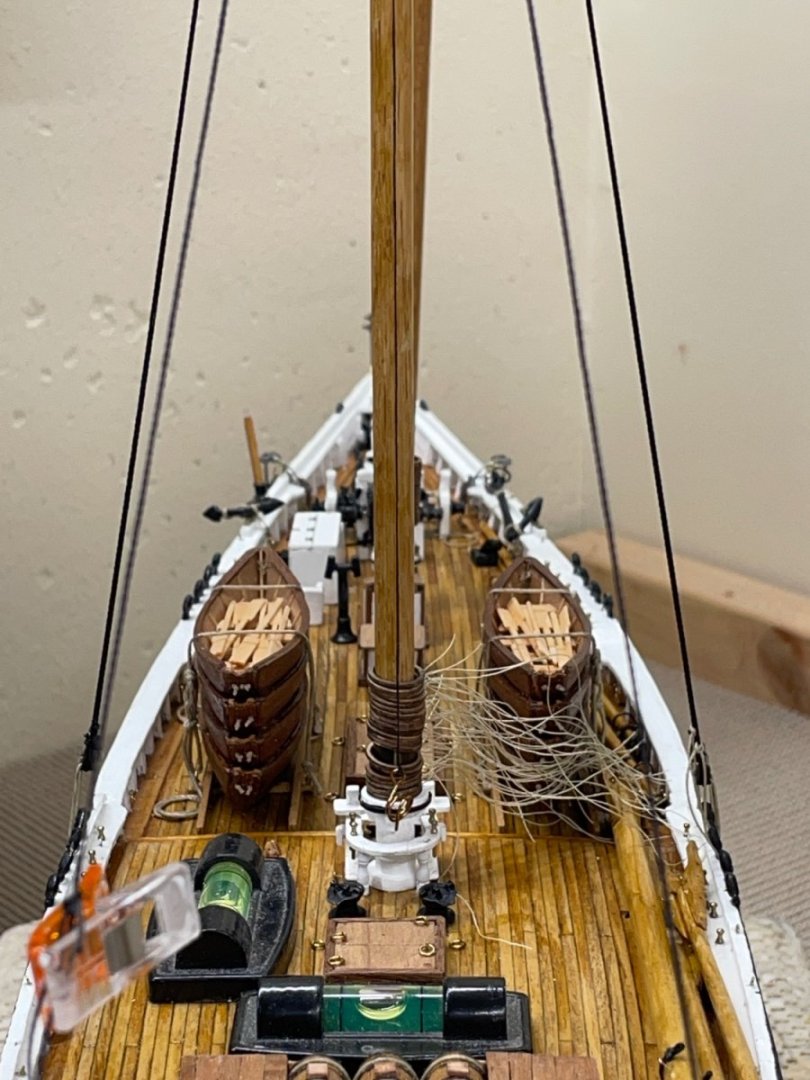
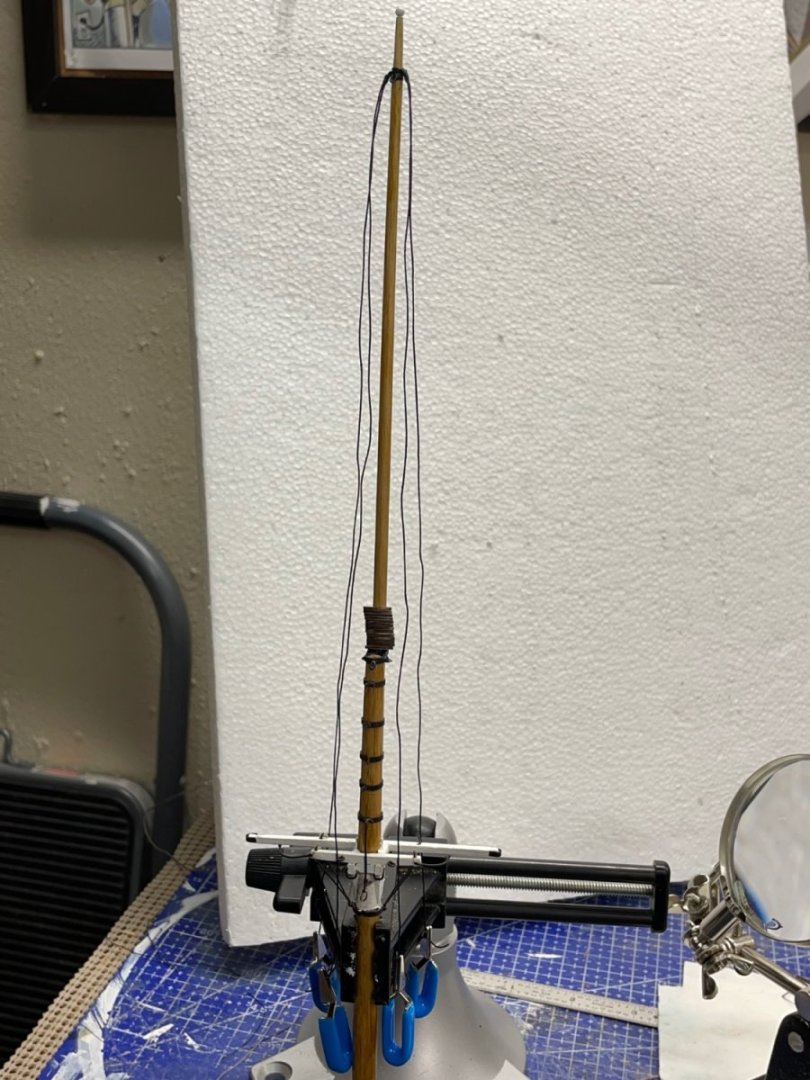
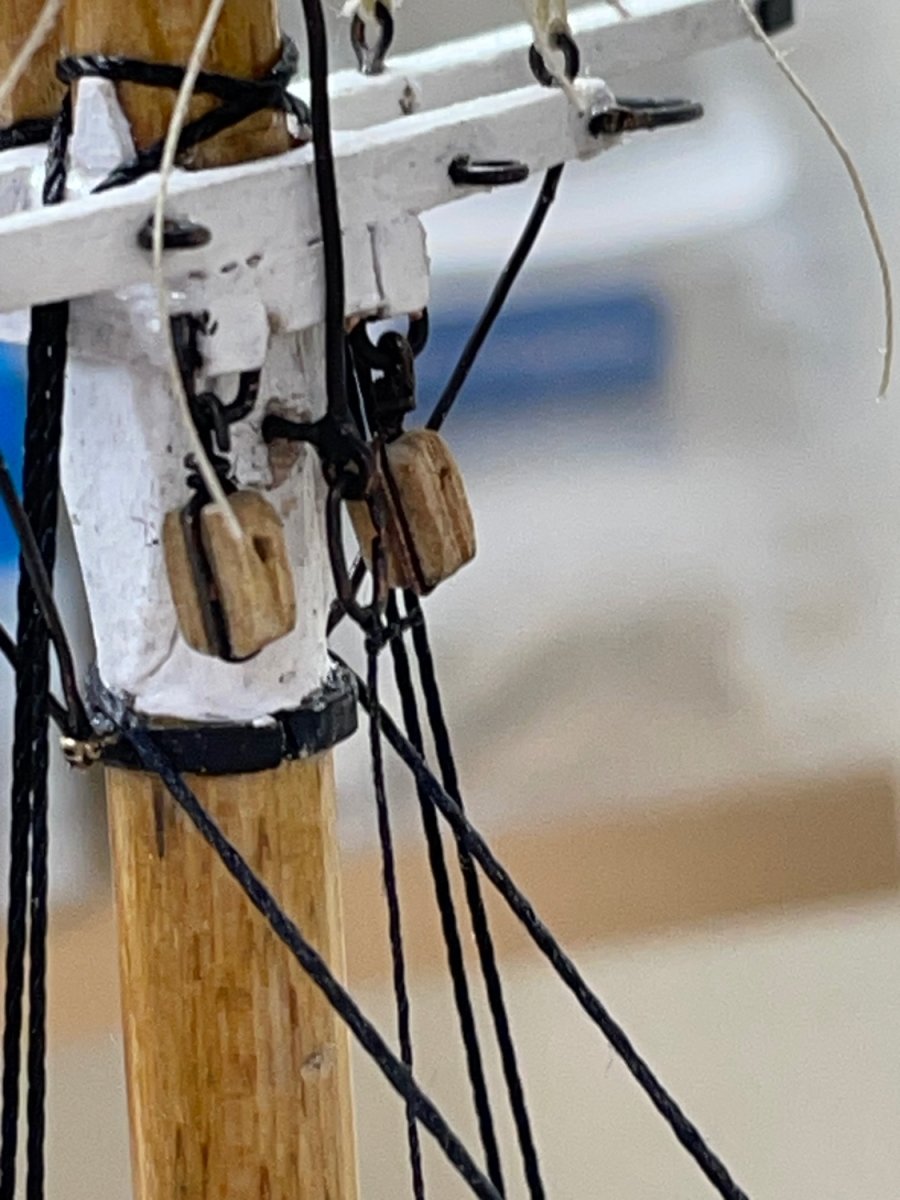
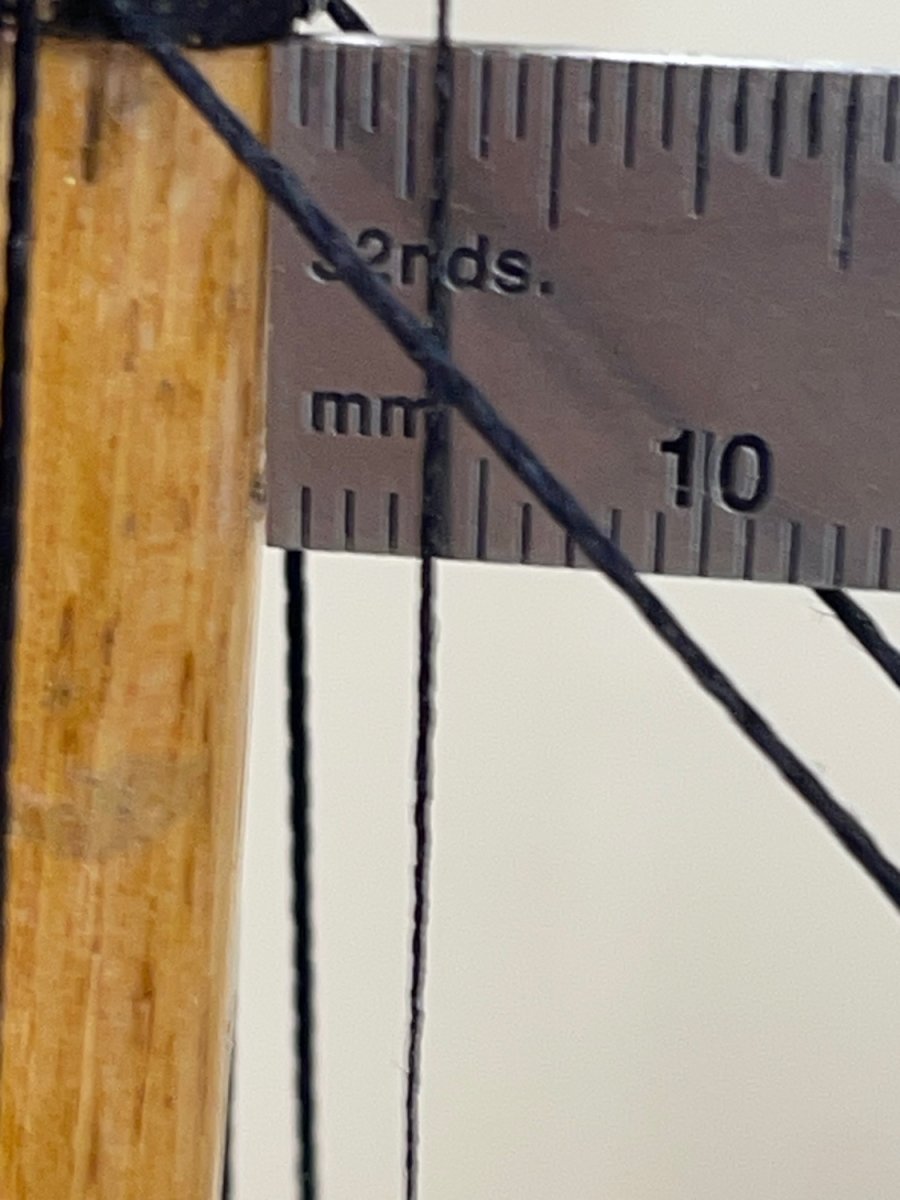
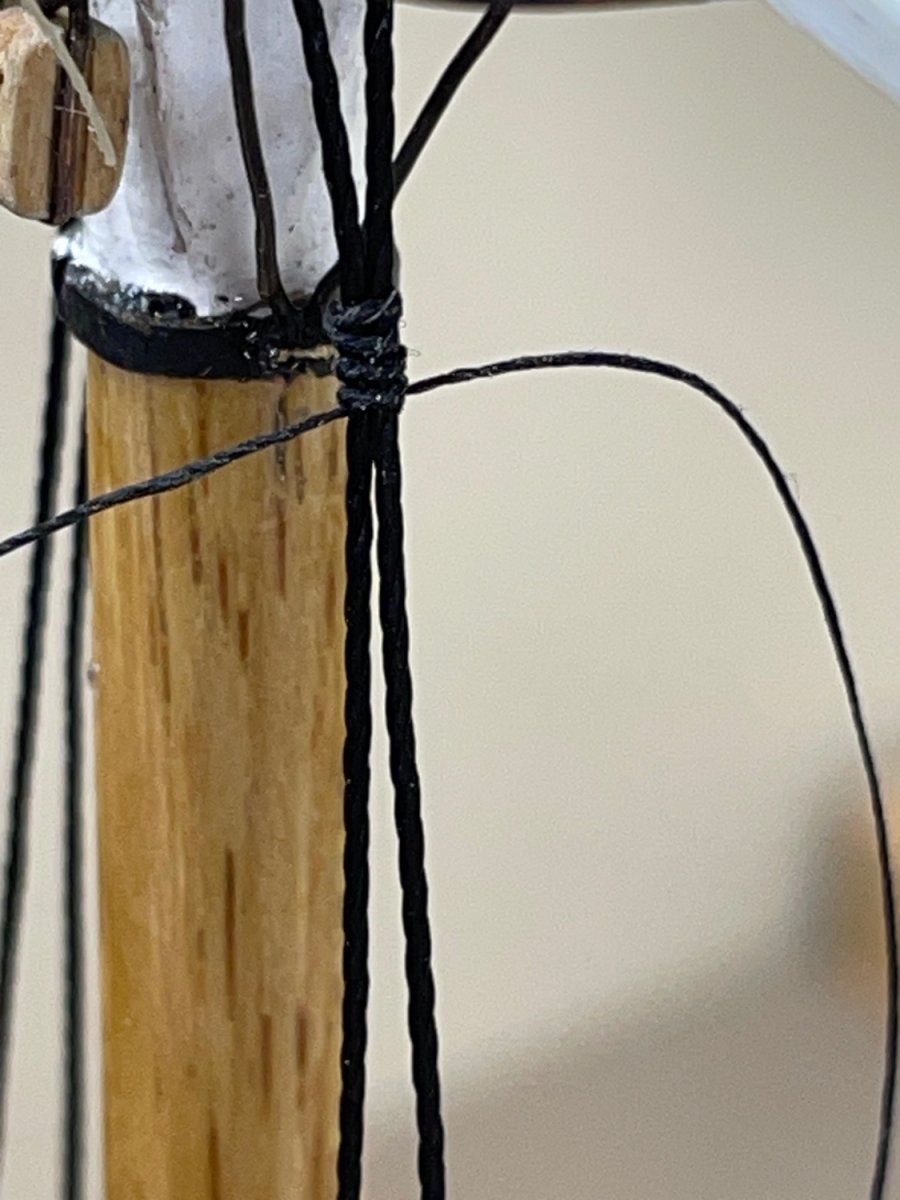
I hung a home made Plumb Bob from the Throat Halliard Eye to the aft of the Trestle Tree.

Compensated the 4mm distance at the top. I used two temporary stays to adjust the rake and adjusted the port and starboard shrouds for the Plumb.

Main Mast is now set to add stays and Shrouds. The only thing I would do different is set the Fore Mast first. I’ll have to that before adding the permanent Main Stays.
Cheers 🍻
-
50 minutes ago, HardeeHarHar said:
Thanks for the response John, I greatly appreciate it. Now I can worry about rigging a ship with wobbly masts!!!!
I hear ya…. Your Plumb Bob idea works great.
If you look closely the Fore Mast is not Plumb. Using this method I did tighten up the port side shrouds and brought the mast up straighter. Slight adjustment over the eye ball 👁️.

Rake can be measured as well. 🤪
Depends how much you want to “worry” about it and will it change as the model ages (probably). LOL 😆
- AJohnson, HardeeHarHar, mtaylor and 1 other
-
4
-
Hi Brian,
Often had that worry myself, eyeballing it just isn’t good enough as I improve my skills. I like the plumb bob idea 💡 sounds like it should work. I’m working my Bluenose Main Shrouds right now and I’ll give it a go.
As for gluing in the masts, it was recommended to me (bluejacket instructions) to not glue in your masts and let the standing rigging do its job to hold everything in proper alignment. This way down the line when your historic model needs restoration the masts can be removed. That said the mast alignment is left up to your tensioning of the shrouds and standing rigging. This is where I think your plumb bob idea will come into play, you should be able to calculate the required rake as well. Just hang the plumb bob from the aft of the trestle tree and use your best geometry. Of course we will have to be sure the deck is leveled up.
cheers 🍻
John
-
3 minutes ago, GGibson said:
Wow, you must have had the lines pretty taut for a deadeye to snap like that!
Thanks Greg… Not tight at all. I May have cracked it with a reamer, cleaning the holes. I just hope I have an extra, it would not be fun making one from scratch. 😬
John
- Glen McGuire and GGibson
-
2
-
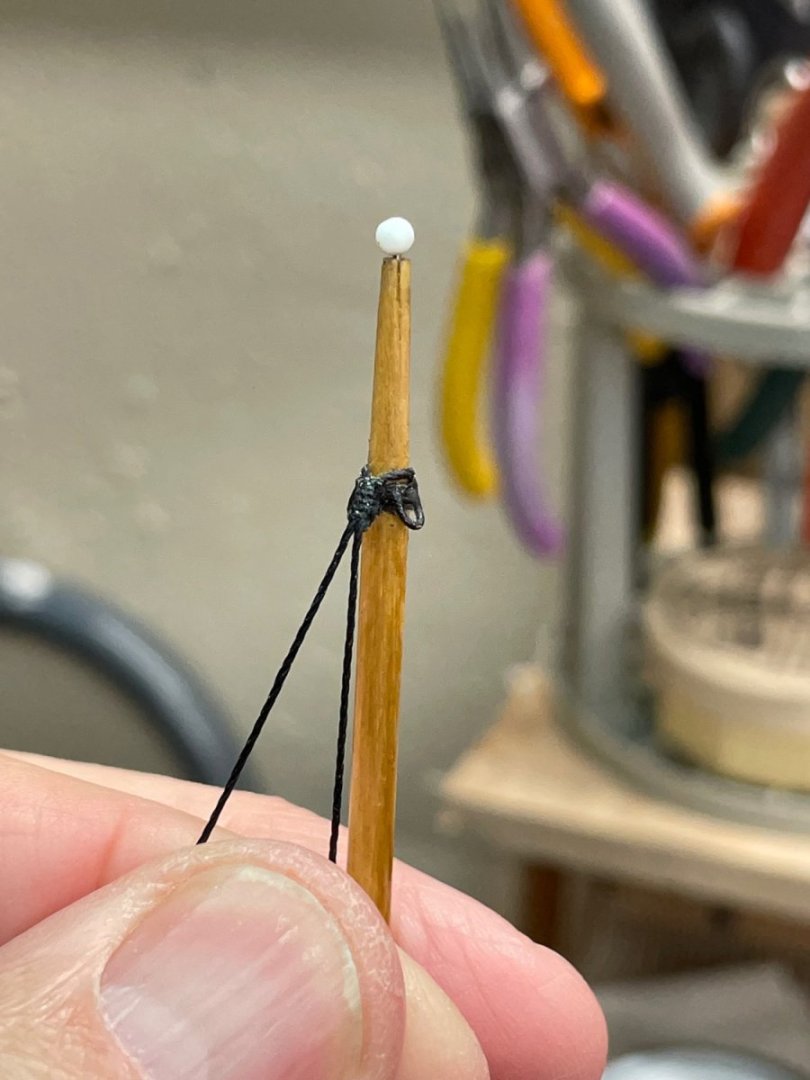
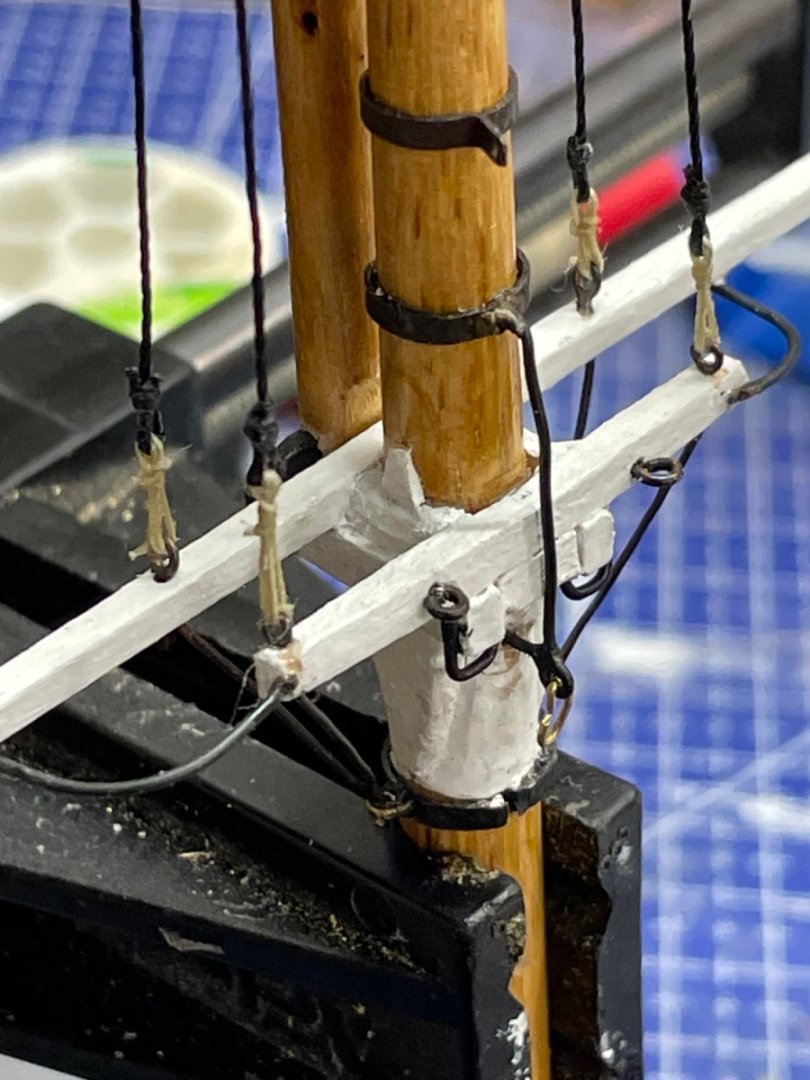
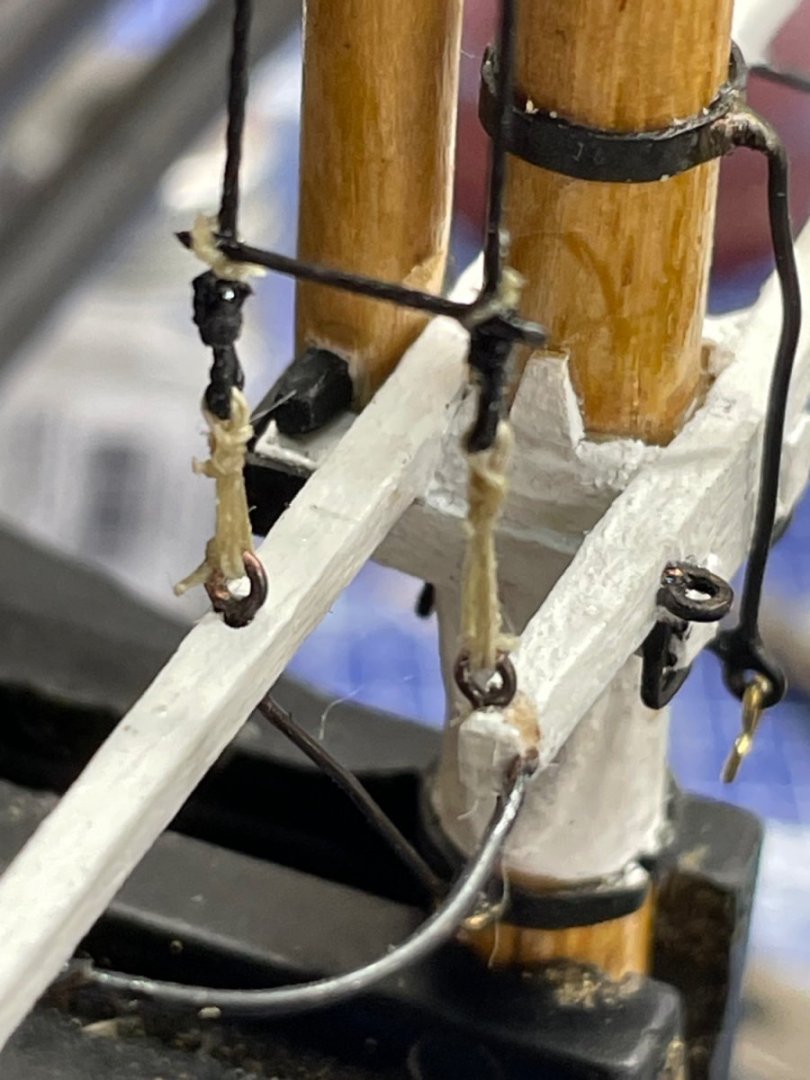
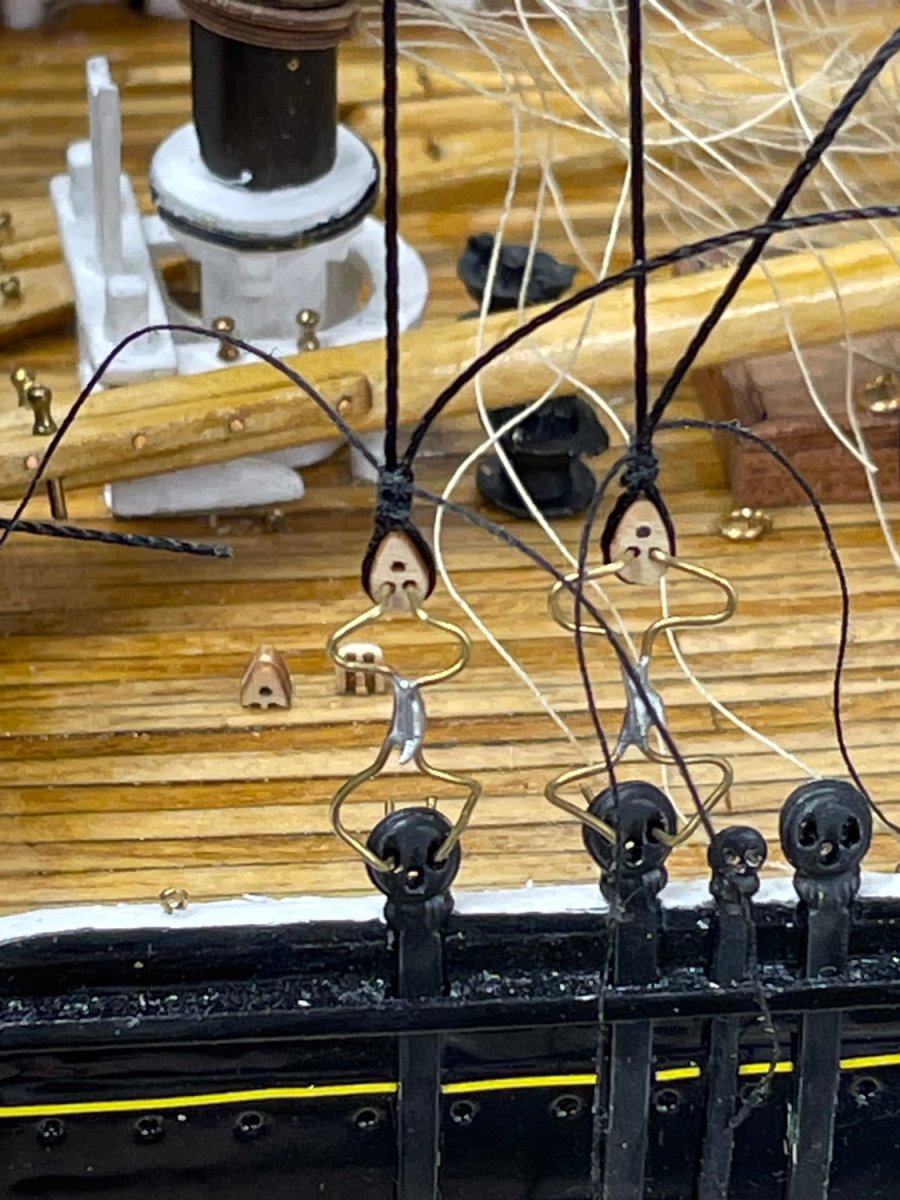
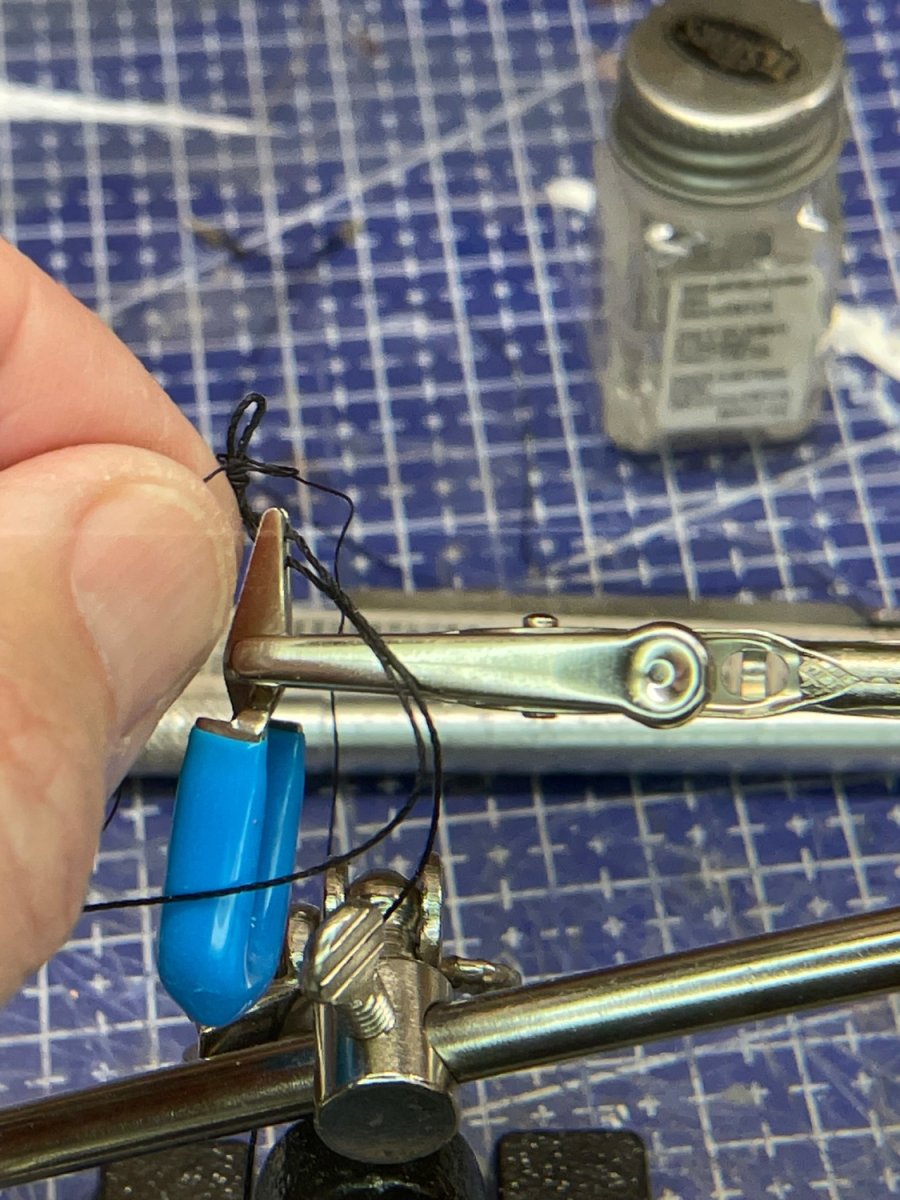
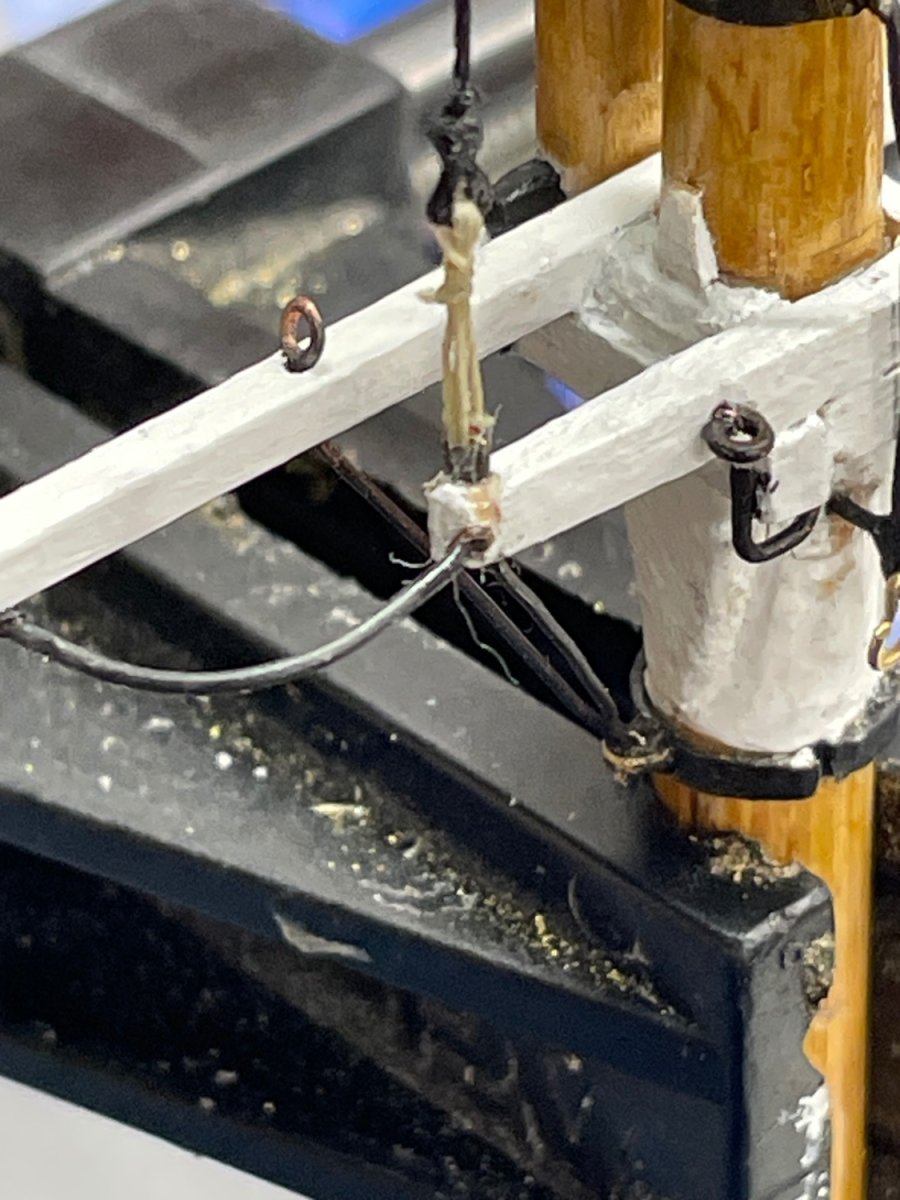
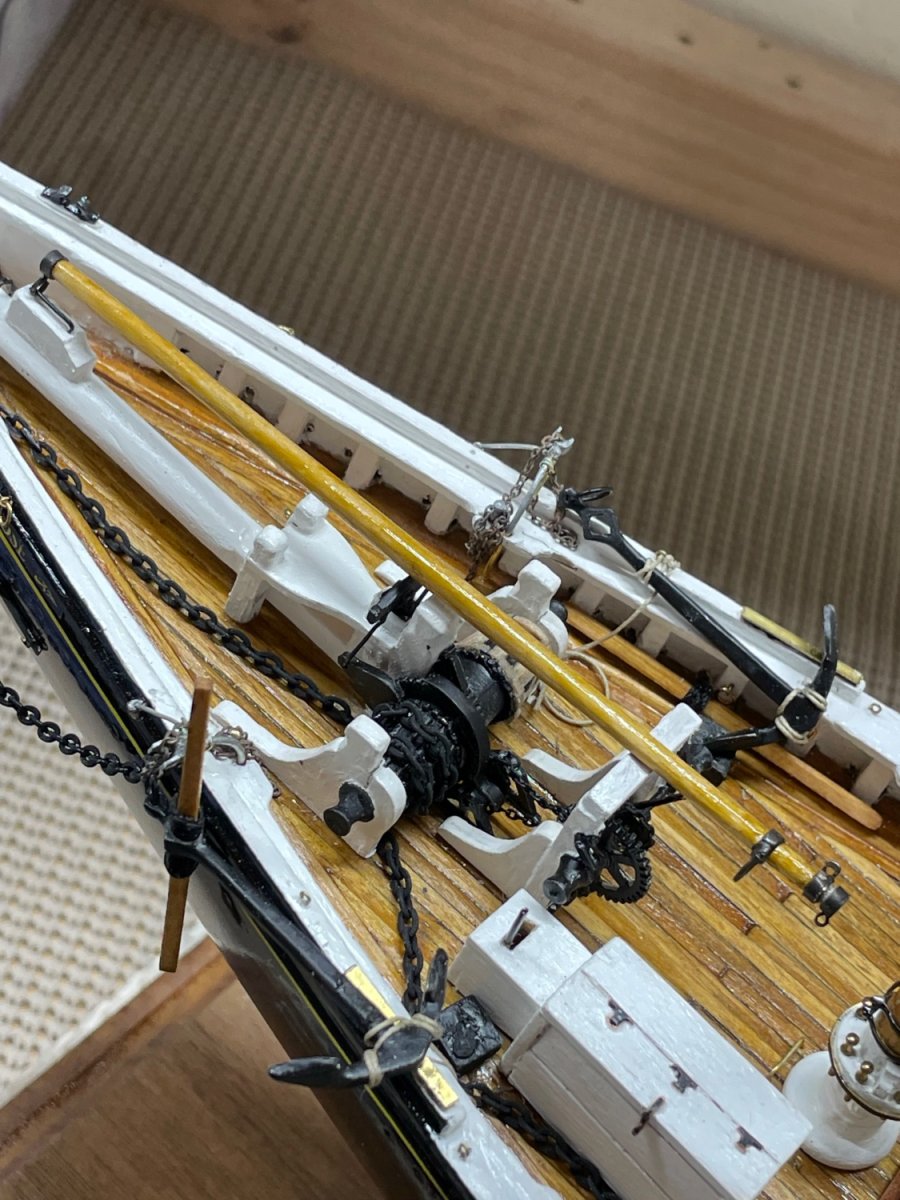
Lower Shrouds Main Mast…

Shrouds over Main Mast…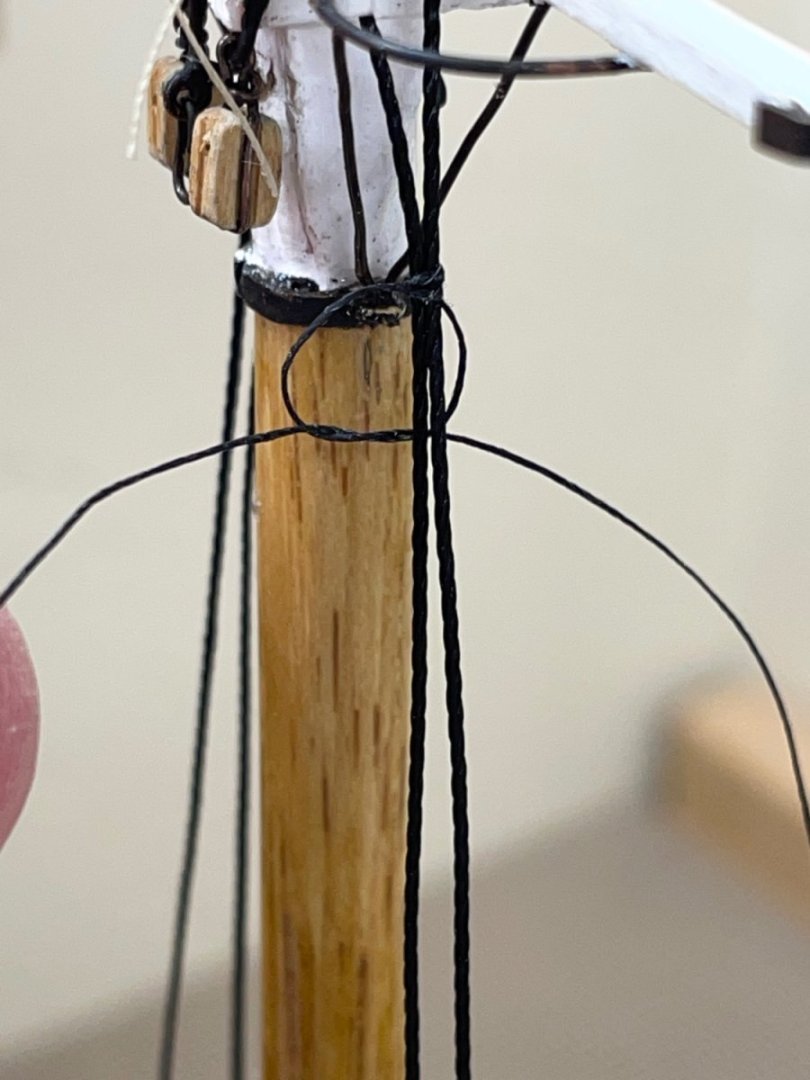
Seize Shrouds with series of half hitch knots alternating outside and in.

Six knots…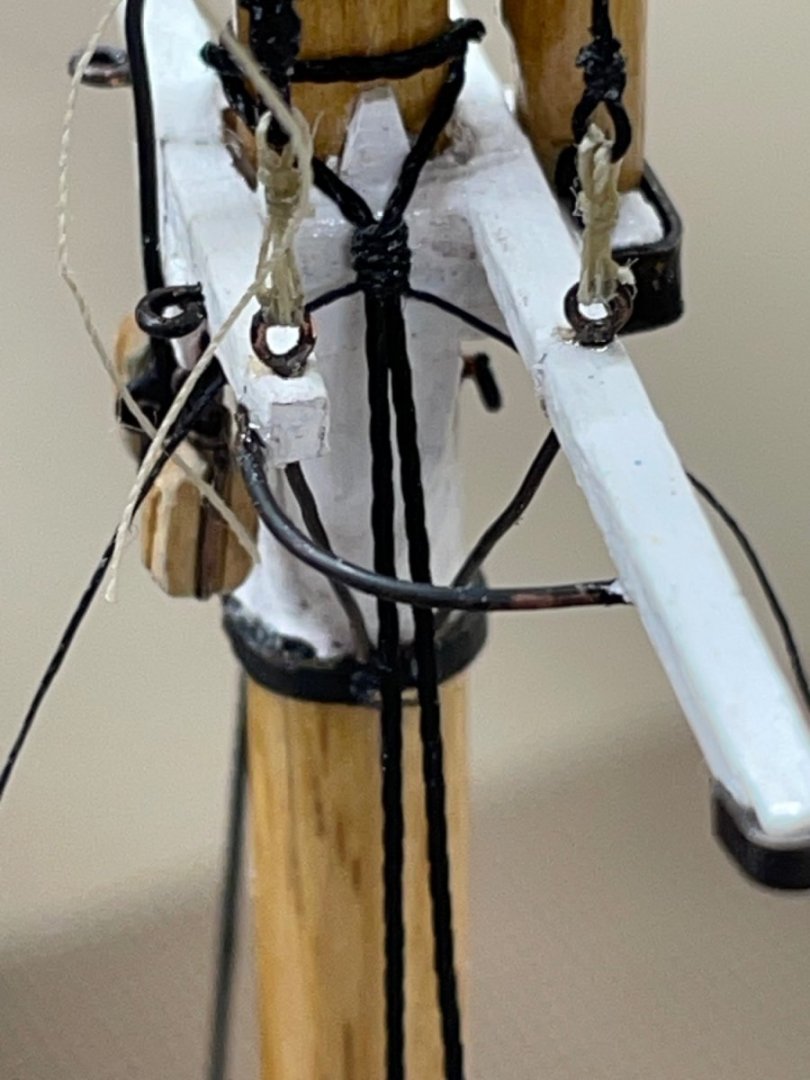
Slide up to proper height, repeat other side.
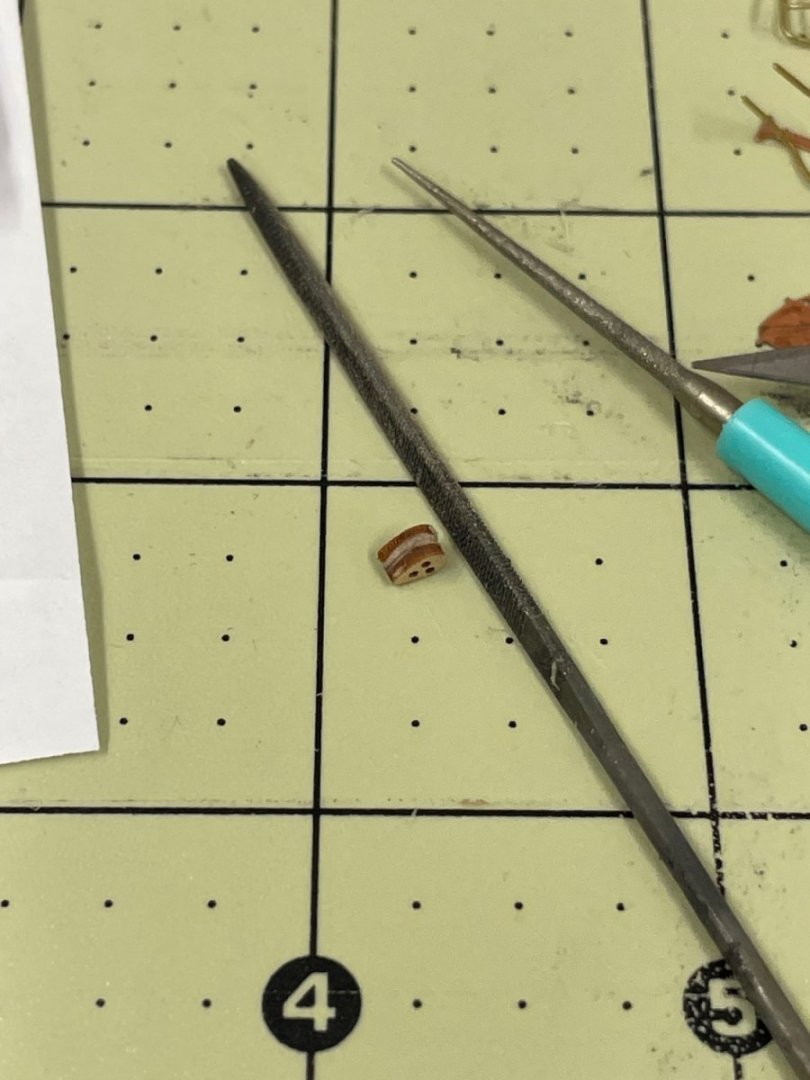
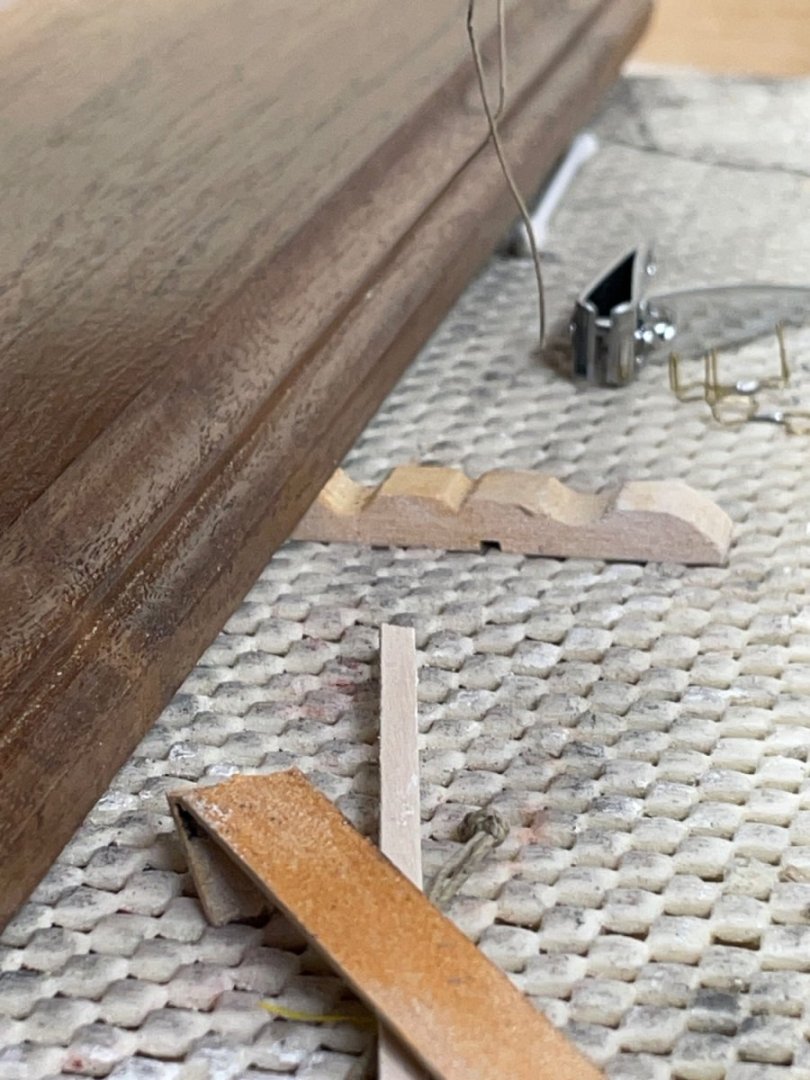
Laser cut Deadeyes need grove filed for shroud to attach.
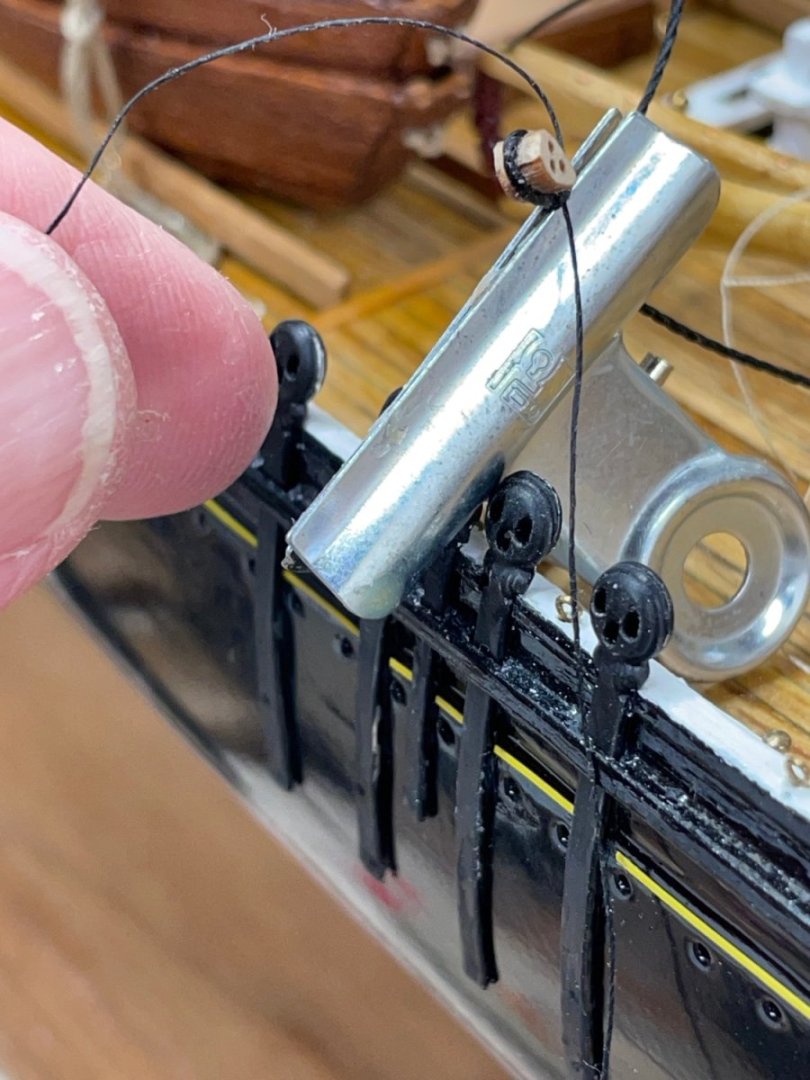
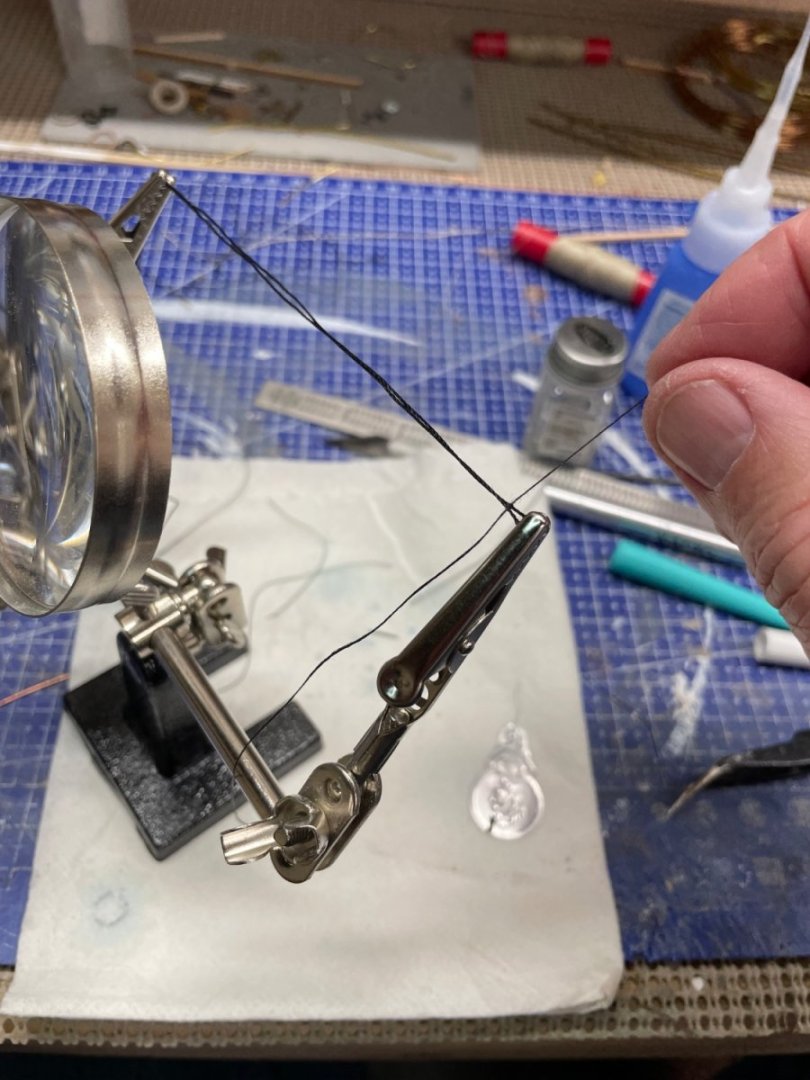
Seize Shroud with waxed thread. Do not glue until length is adjusted.
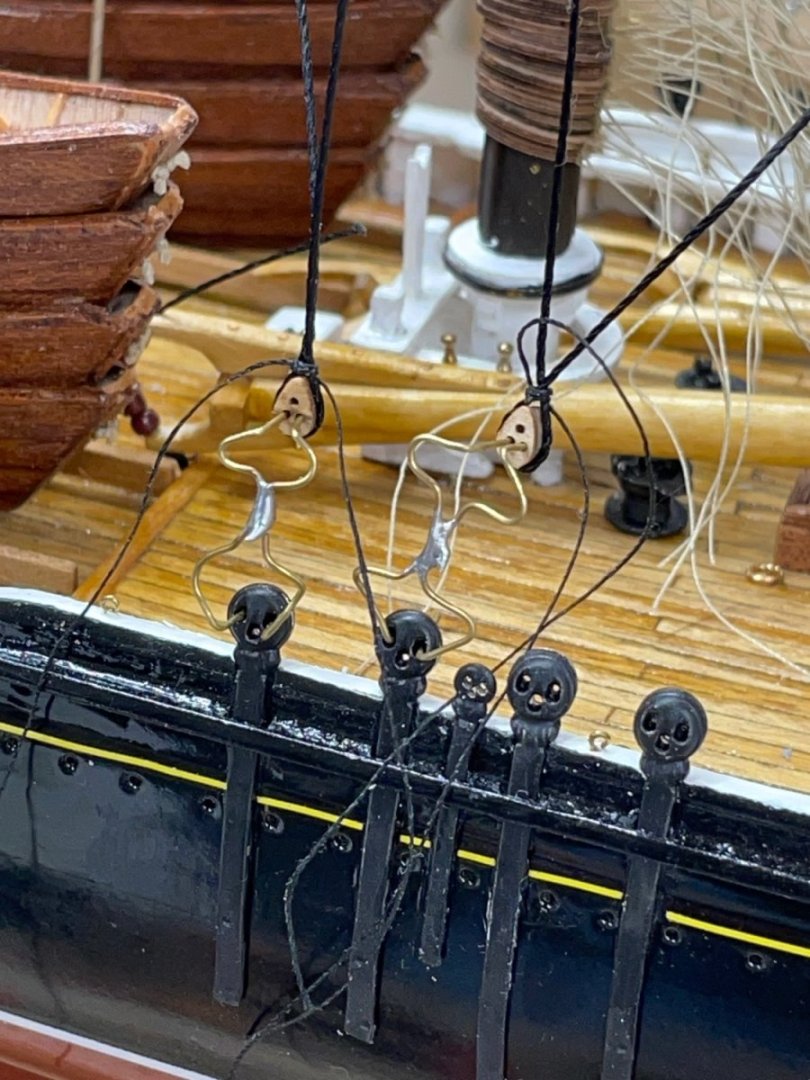
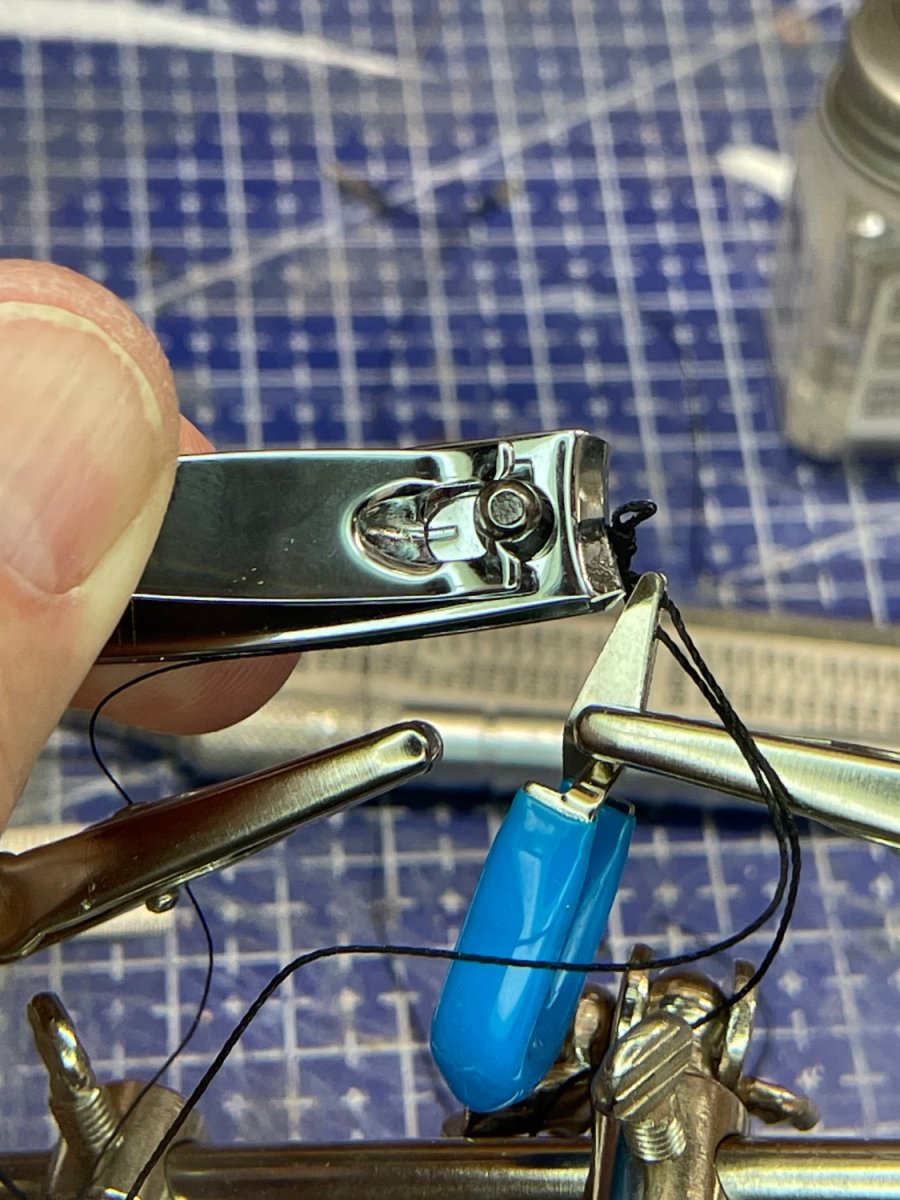
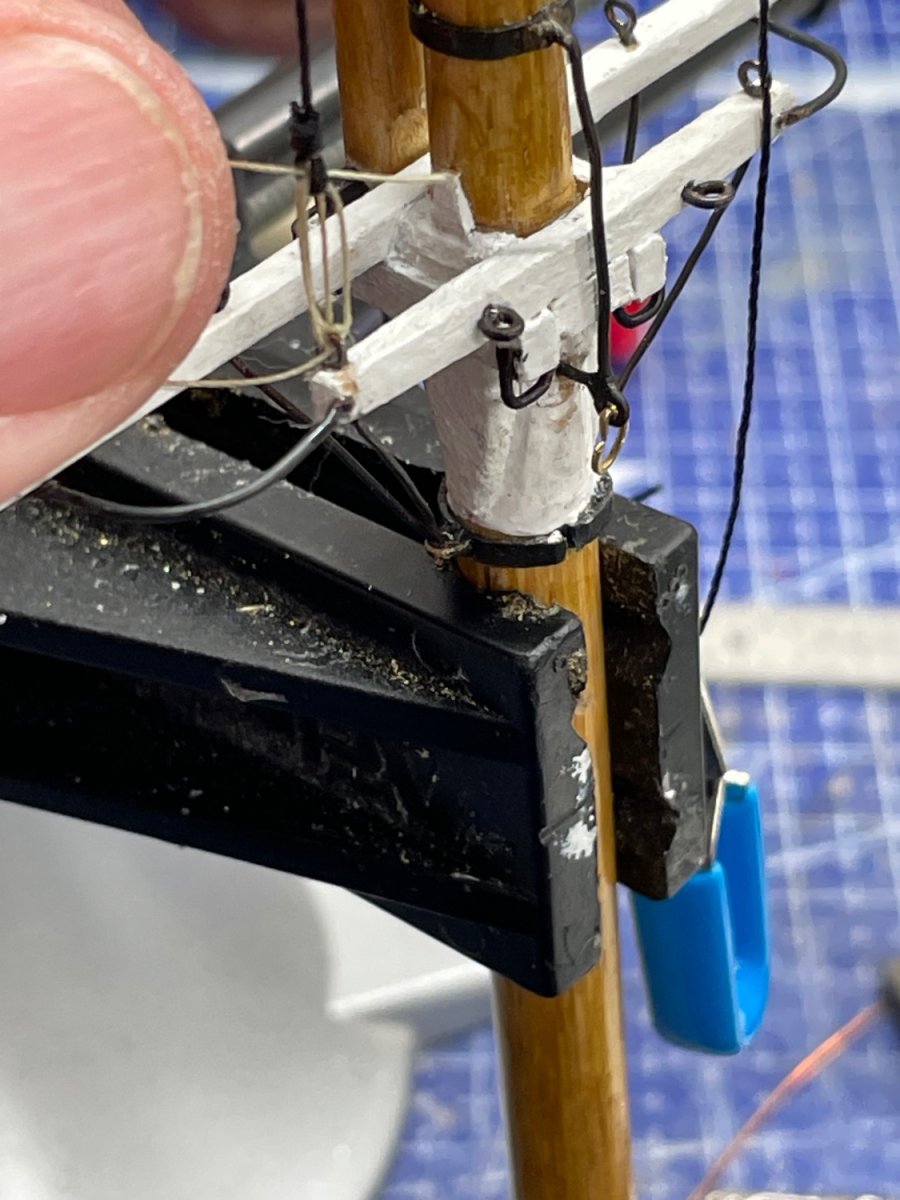
Home made wire jig adjusted to 15mm between deadeyes.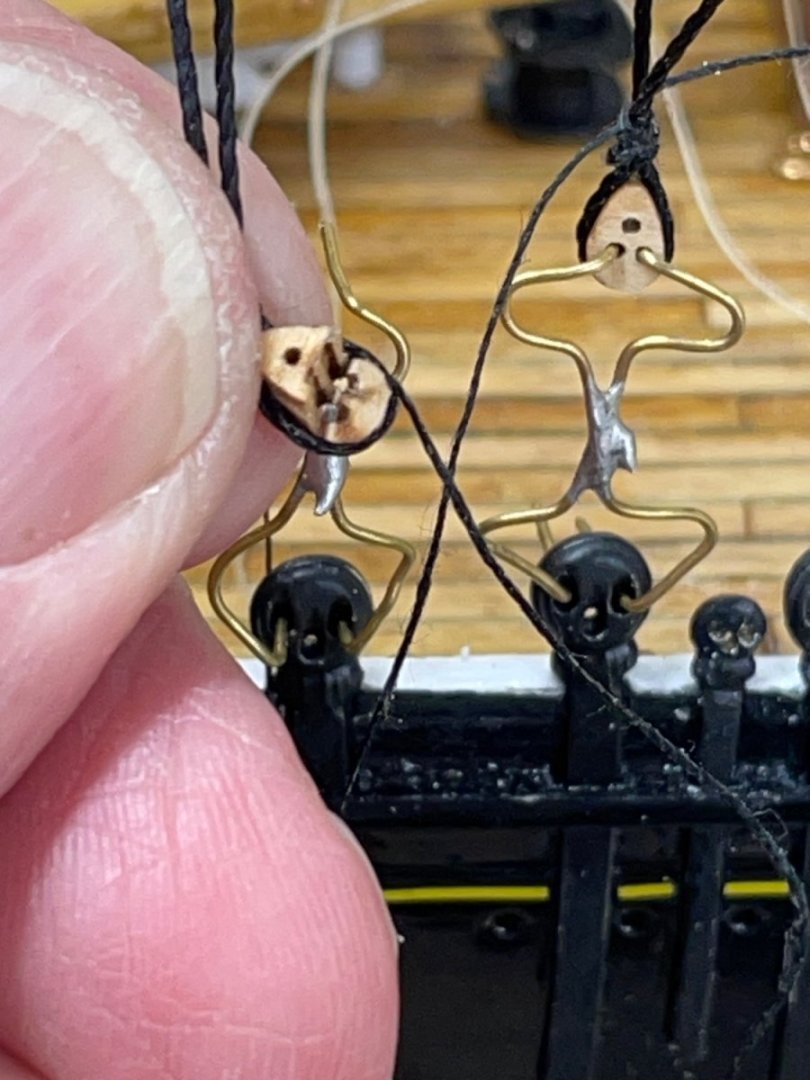
Hate it when this happens. Let’s hope there are extras. 😬

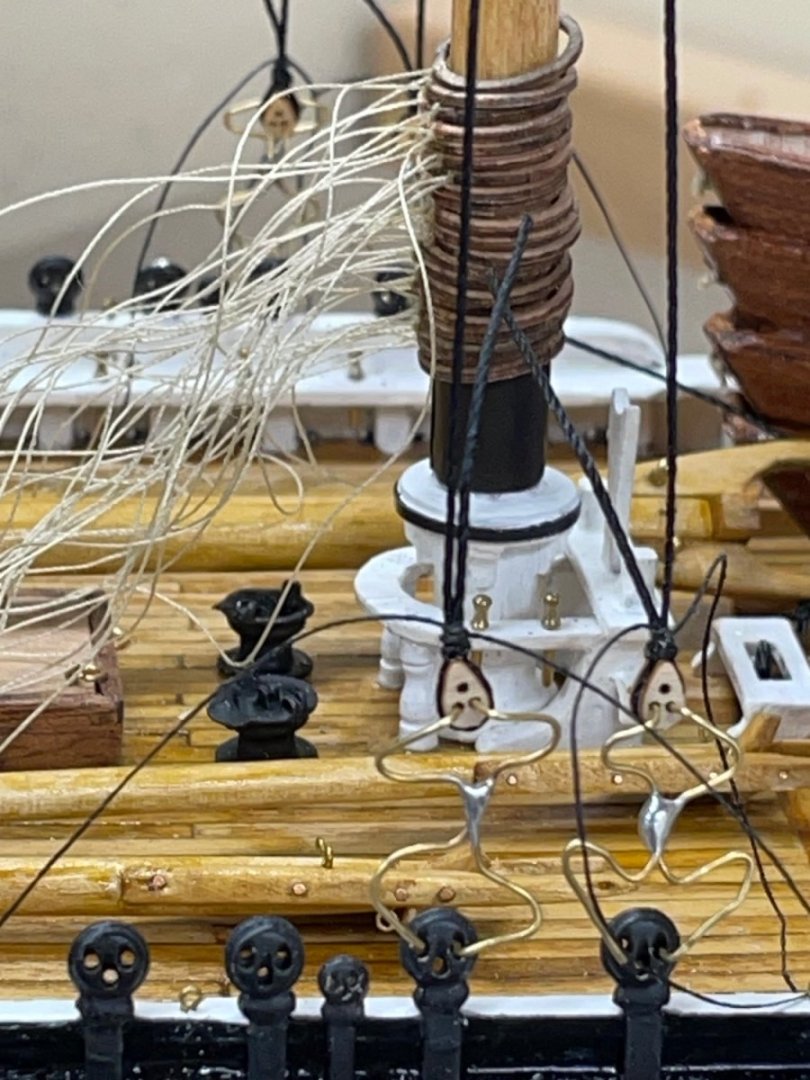
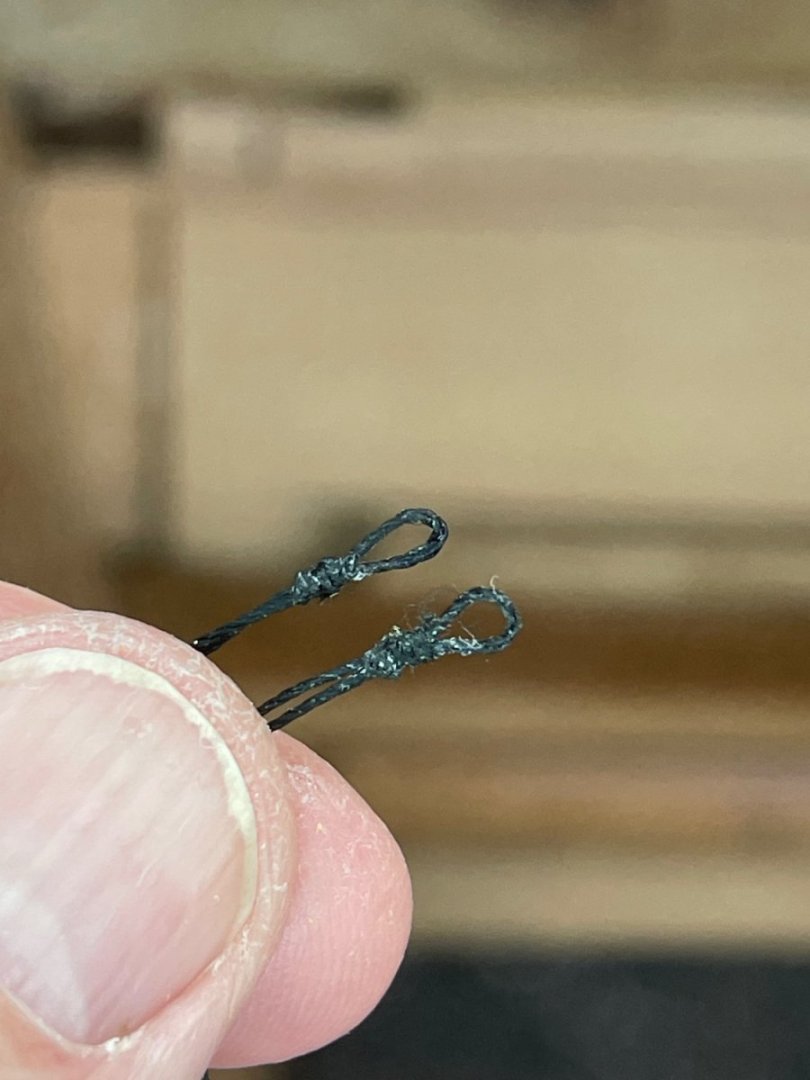
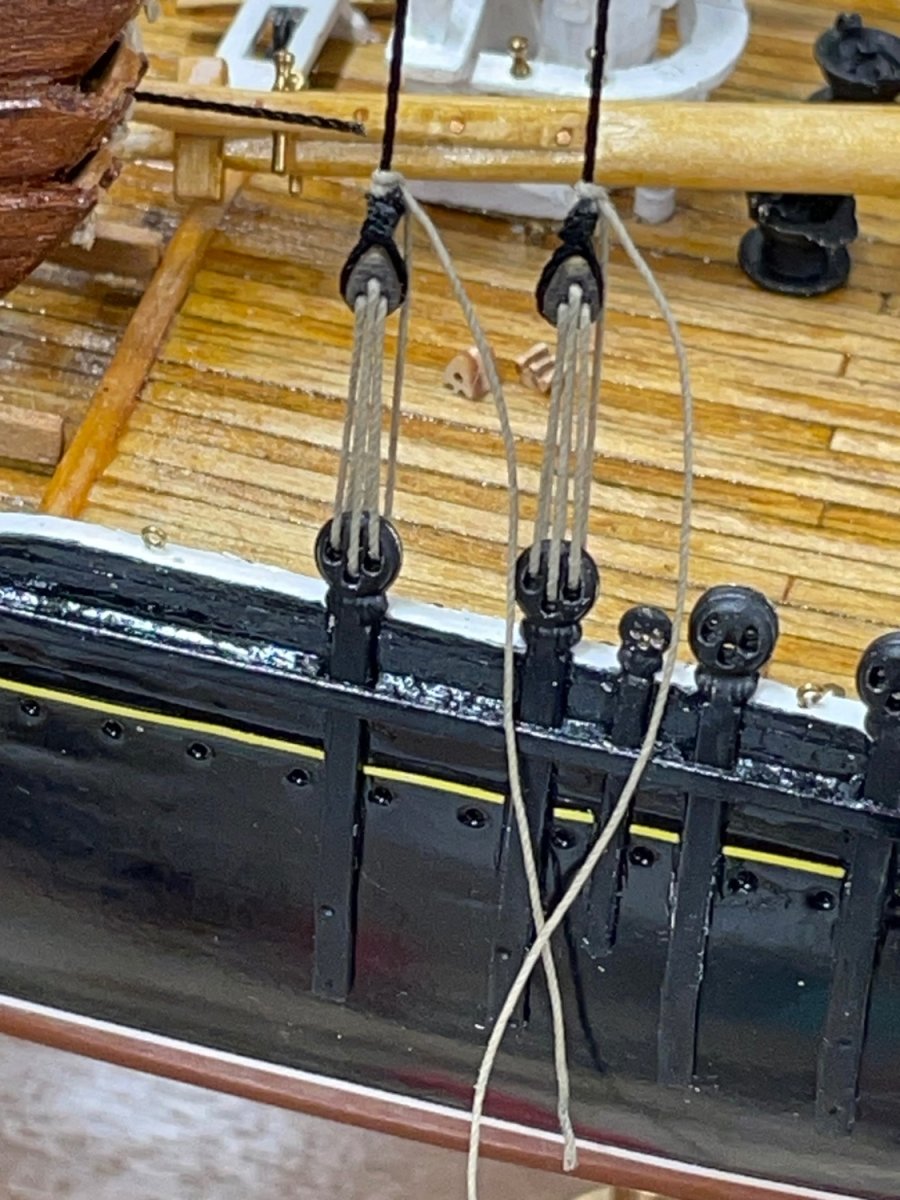
Lower Shroud Upper Deadeyes Seized and glued in place.
Thread lanyards through deadeys. Be sure to maintain proper tautness and centered mast. Easier said than done.

Glue these Seized Shrouds so they do not come unraveled.
First two Lower Shrouds completed.
Cheers 🍻
- Bryan Woods, KurtH, Knocklouder and 3 others
-
4
-
 2
2
-
1 hour ago, Knocklouder said:
Having the time of my life, rigging is just around the corner lol.
That’s what it all about… Looking real good. 👍
John
- Glen McGuire, Knocklouder, KurtH and 3 others
-
5
-
 1
1
-
On 12/9/2023 at 3:28 PM, Knocklouder said:
Feeling good about my model today
Excellent progress there Bob. She’s really starting to take shape. She will be sliding down the ways ready to be rigged, before you know it. Cheers🍻
- Keith Black and Glen McGuire
-
2
-
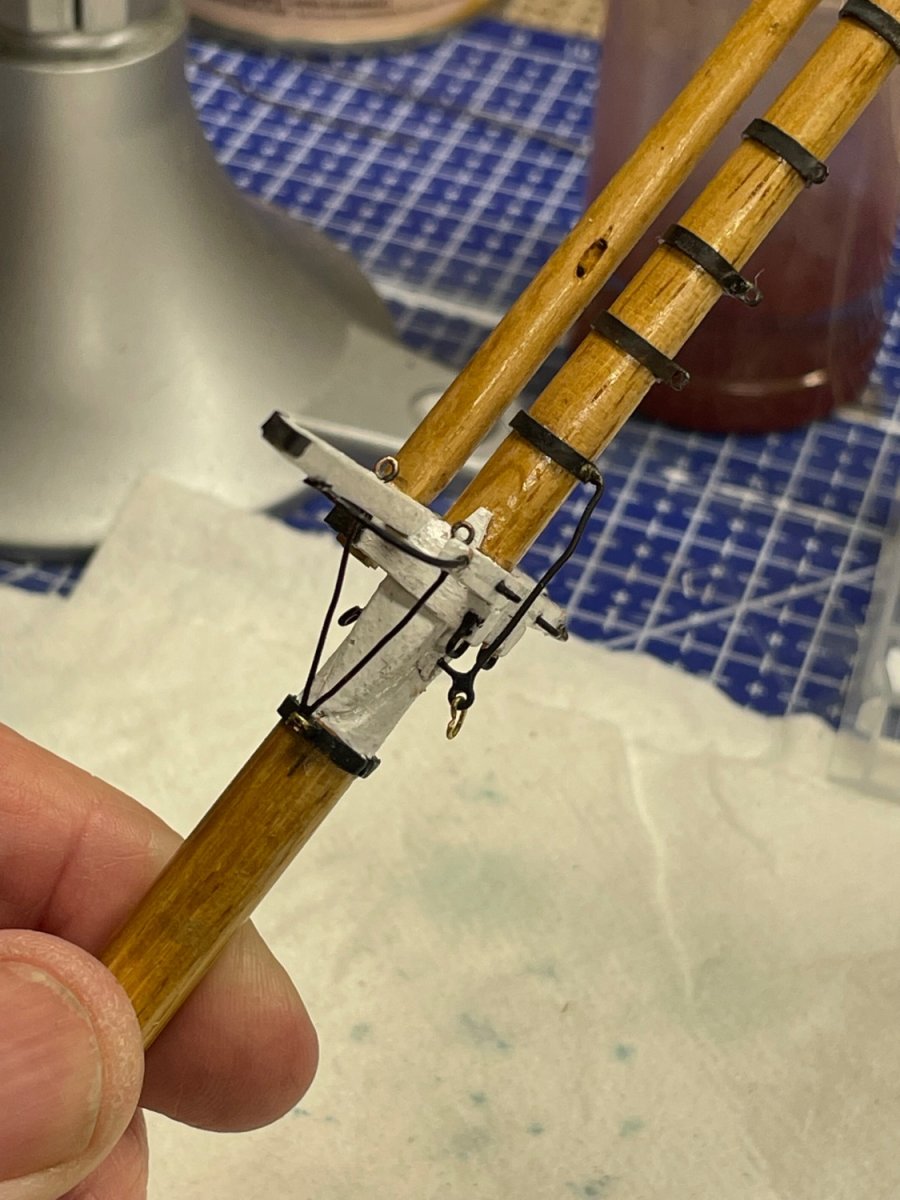
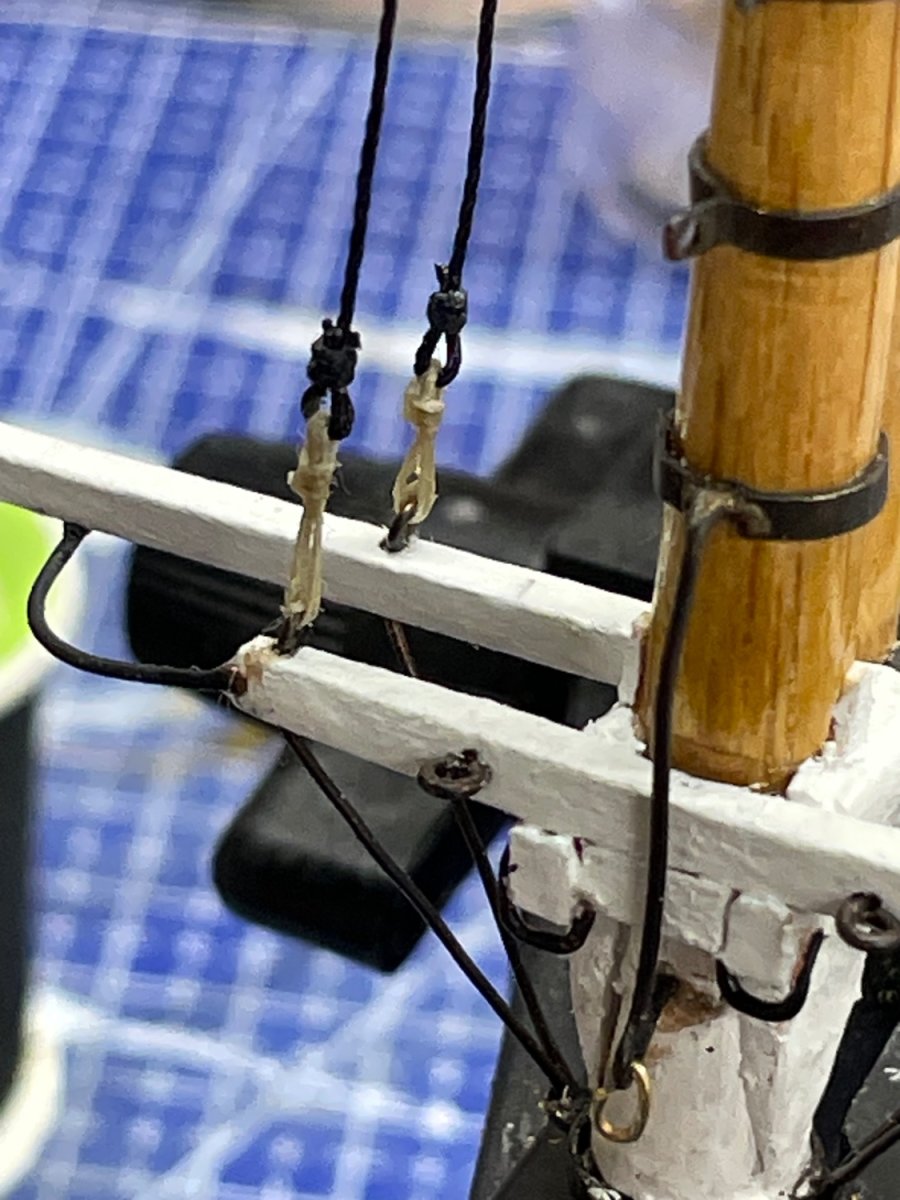
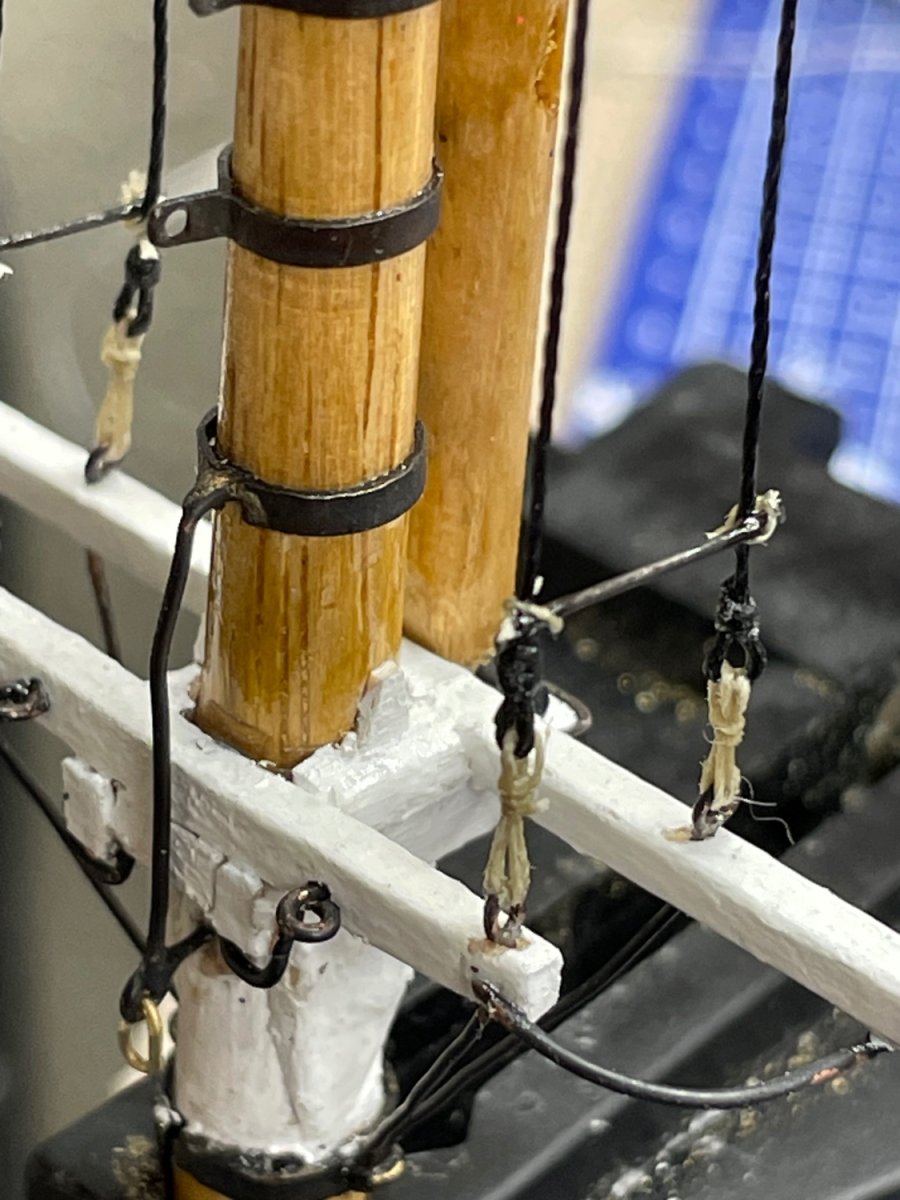
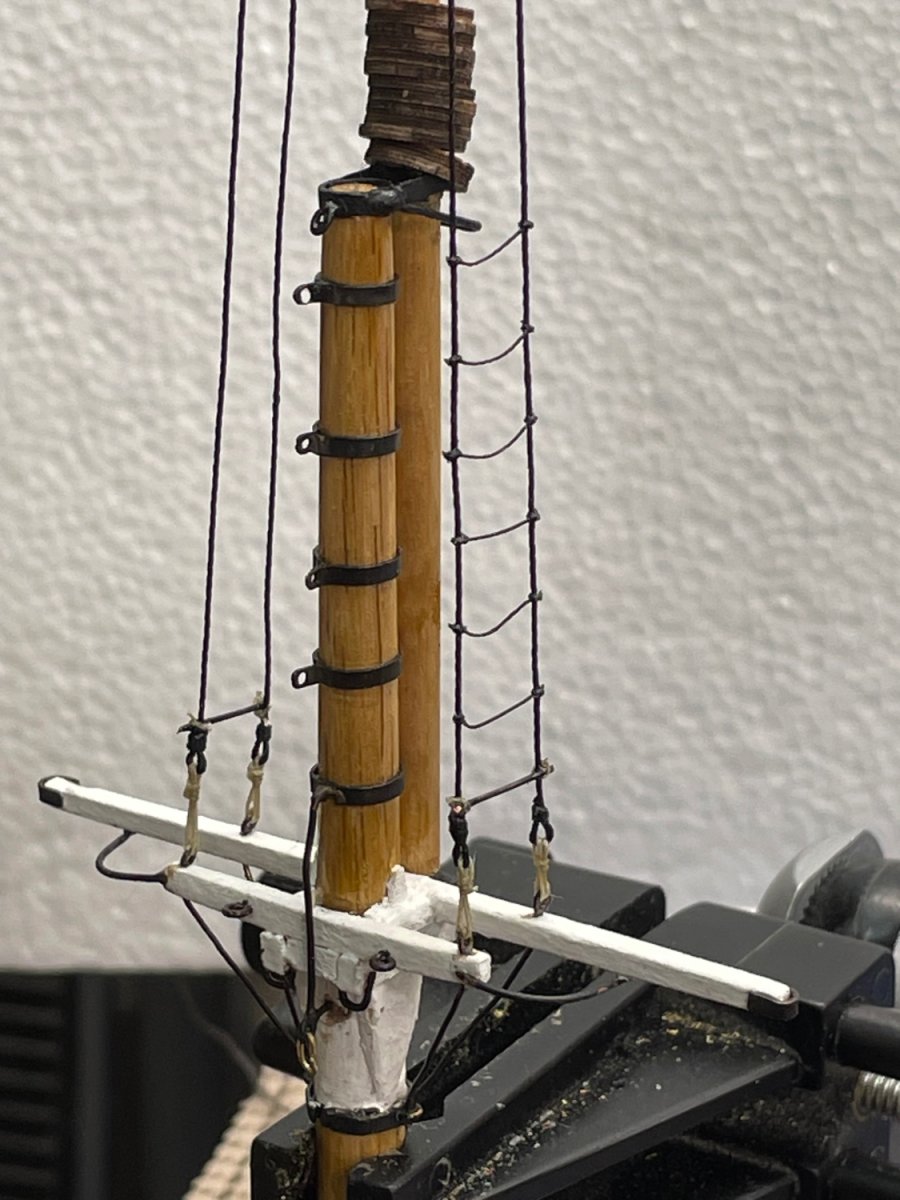
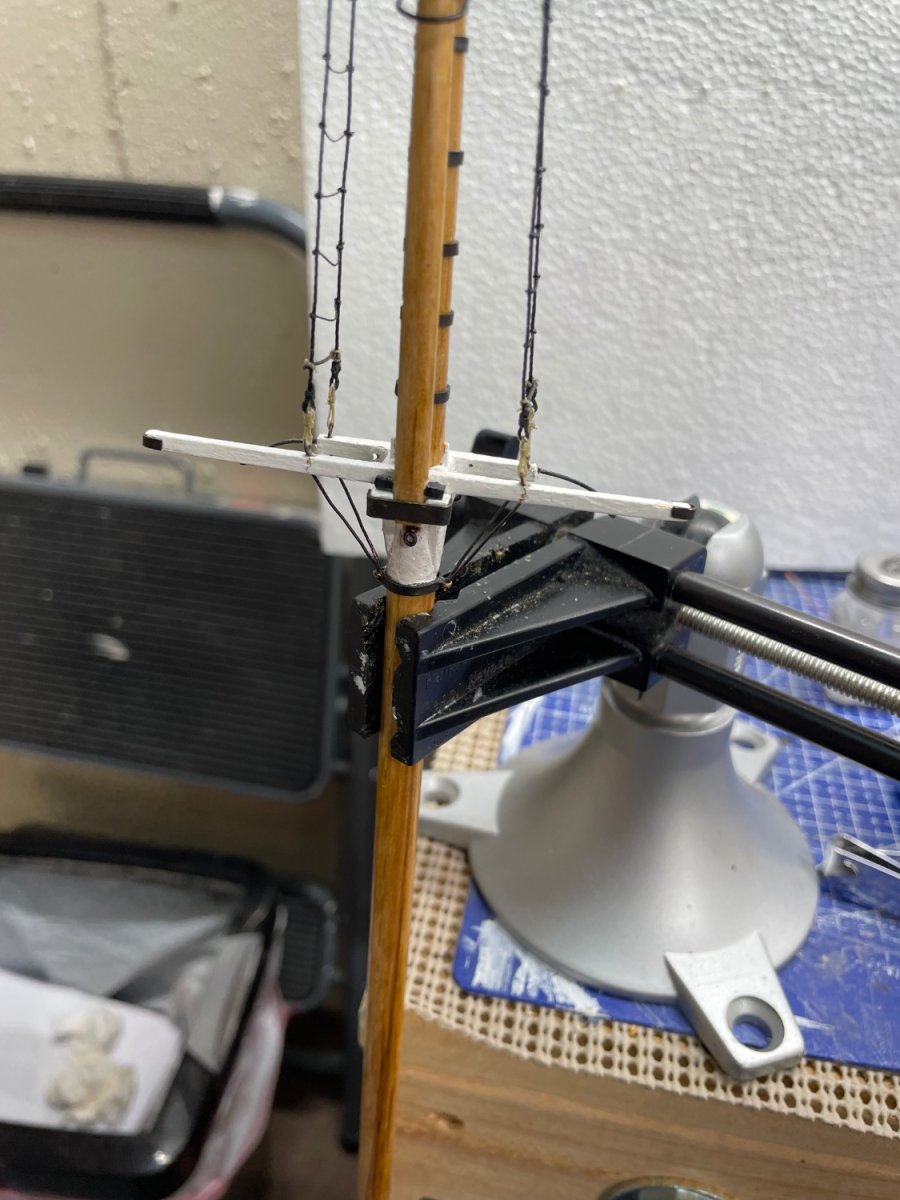
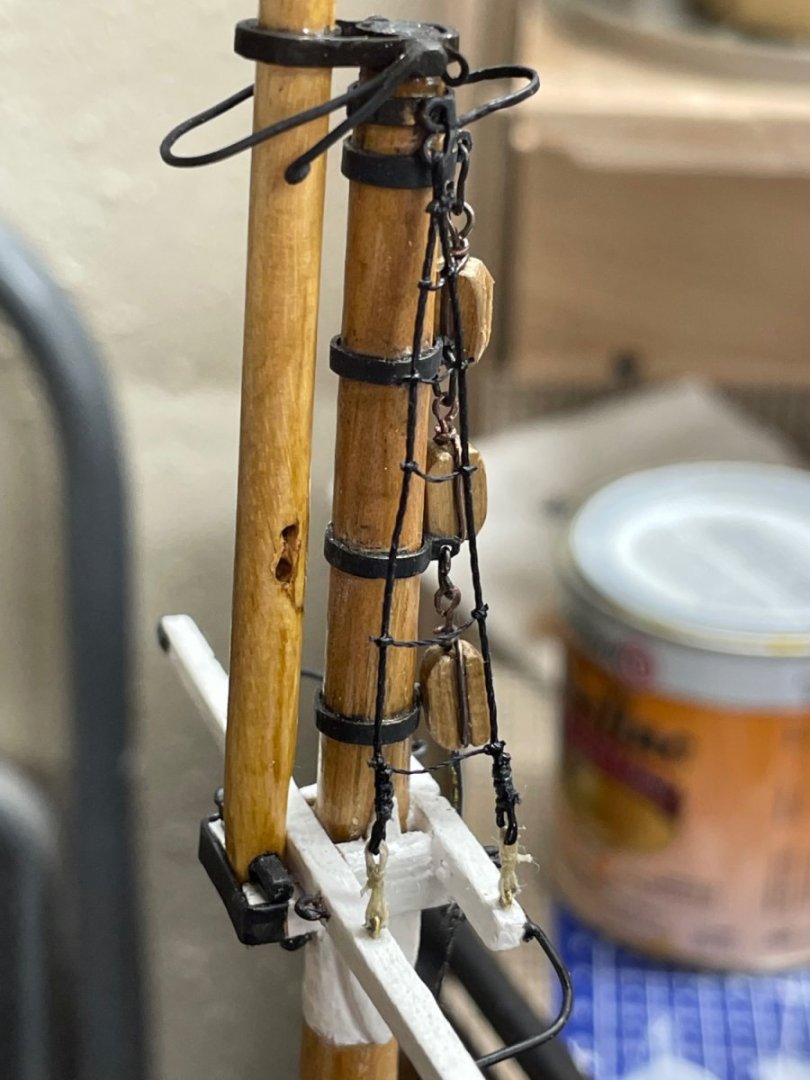
Main Top Mast Futtock Shrouds…
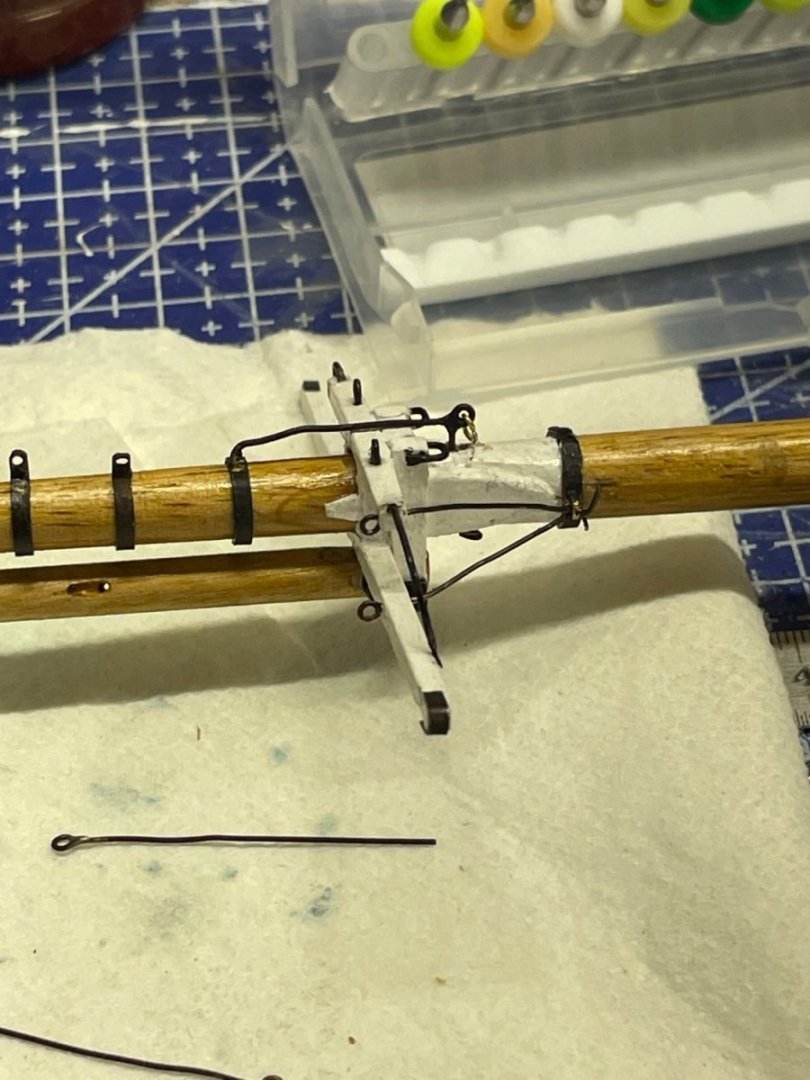

Main Upper Shrouds…

Lanyards…


Main Upper Shroud Rat Lines…


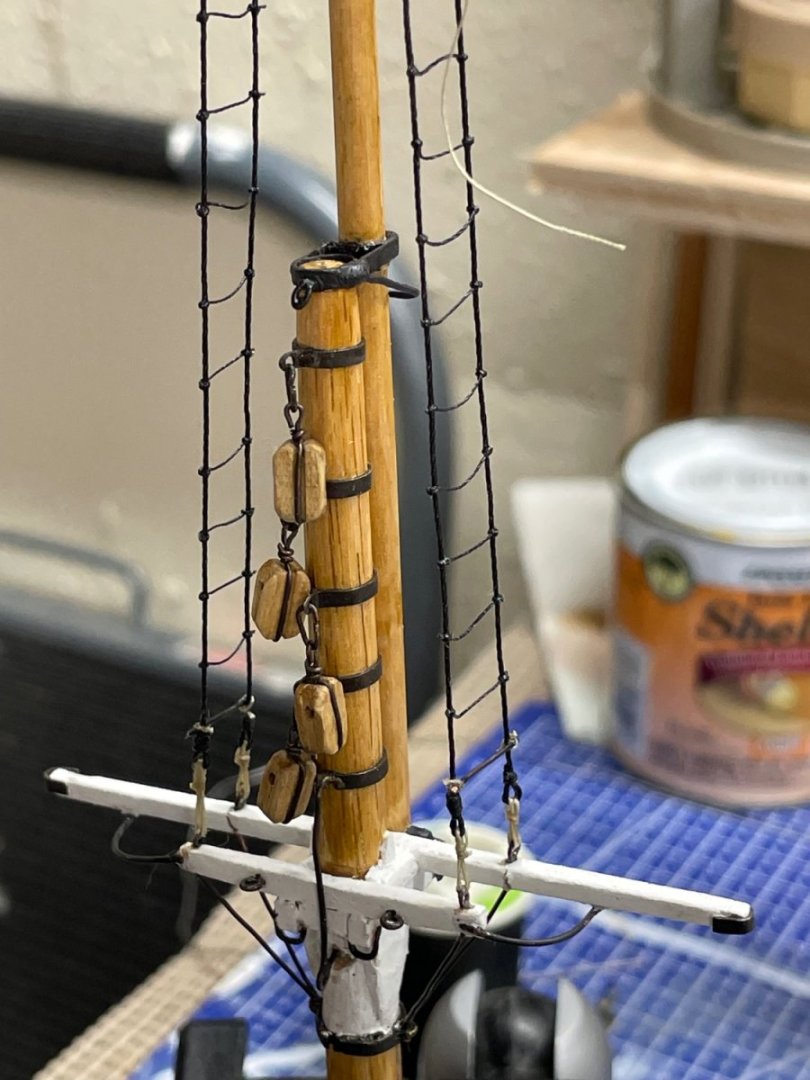
Oops 😬 This is what happens when your vice is not mounted. Reached for my coffee and found my Main Mast on the floor.
Certainly a panic moment, but a little CA glue and it’s like it never happened….
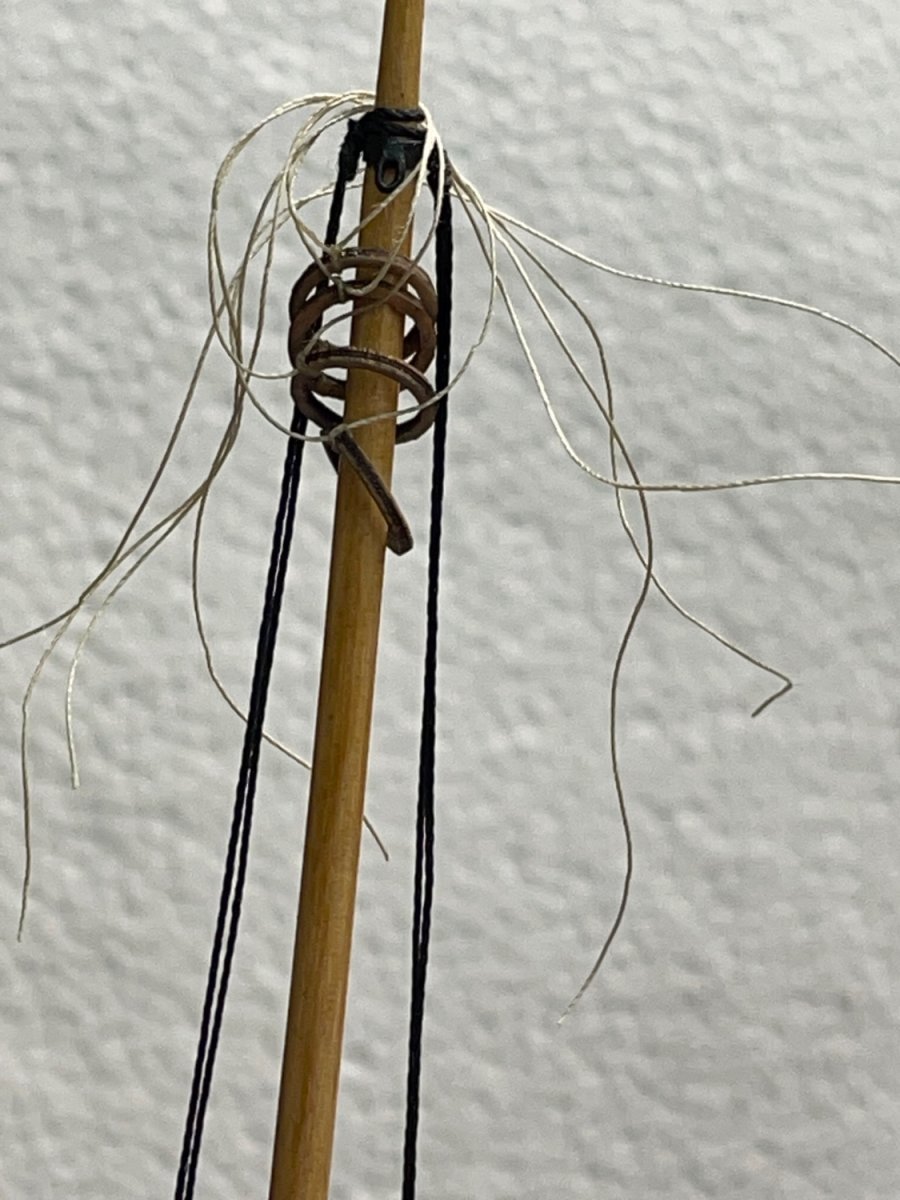
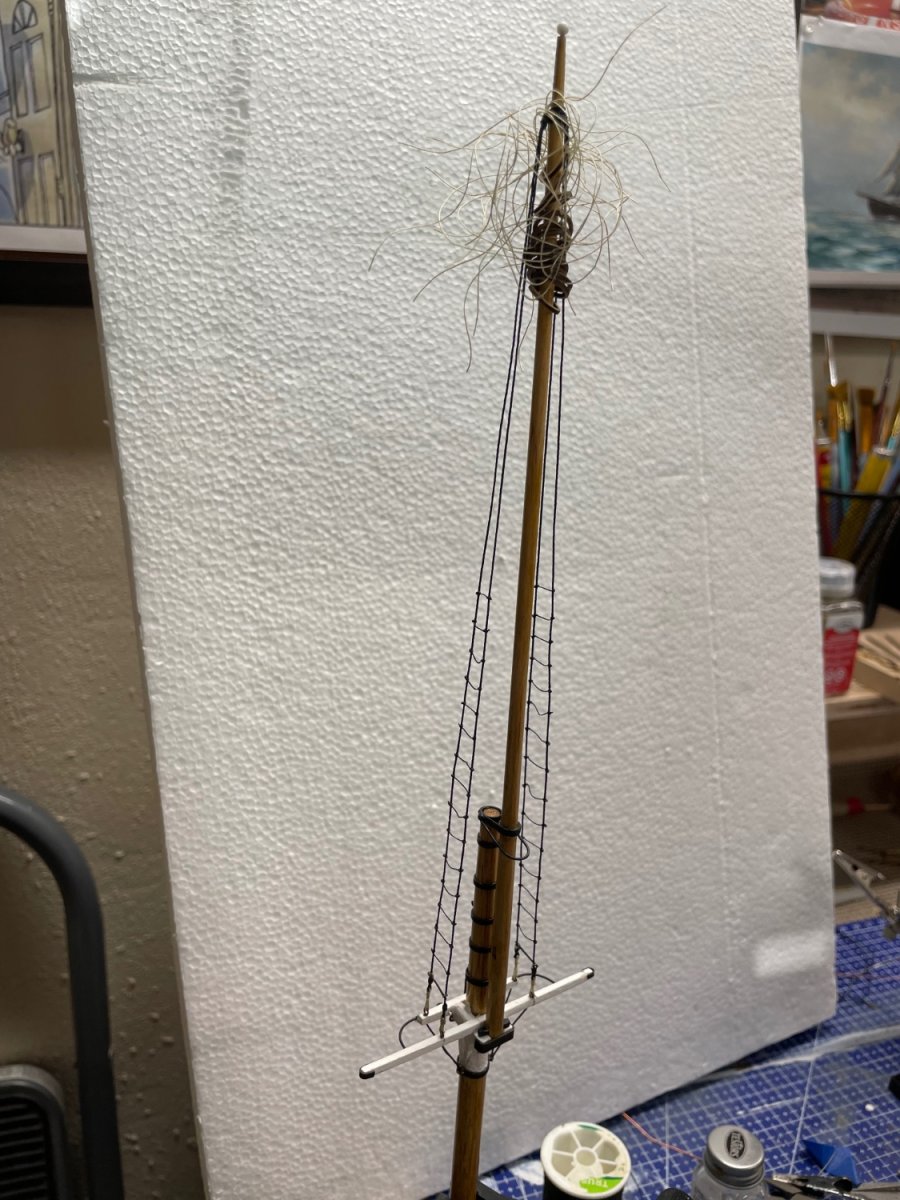
Adding ties to the Mast Hoops to tie down the sails latter.
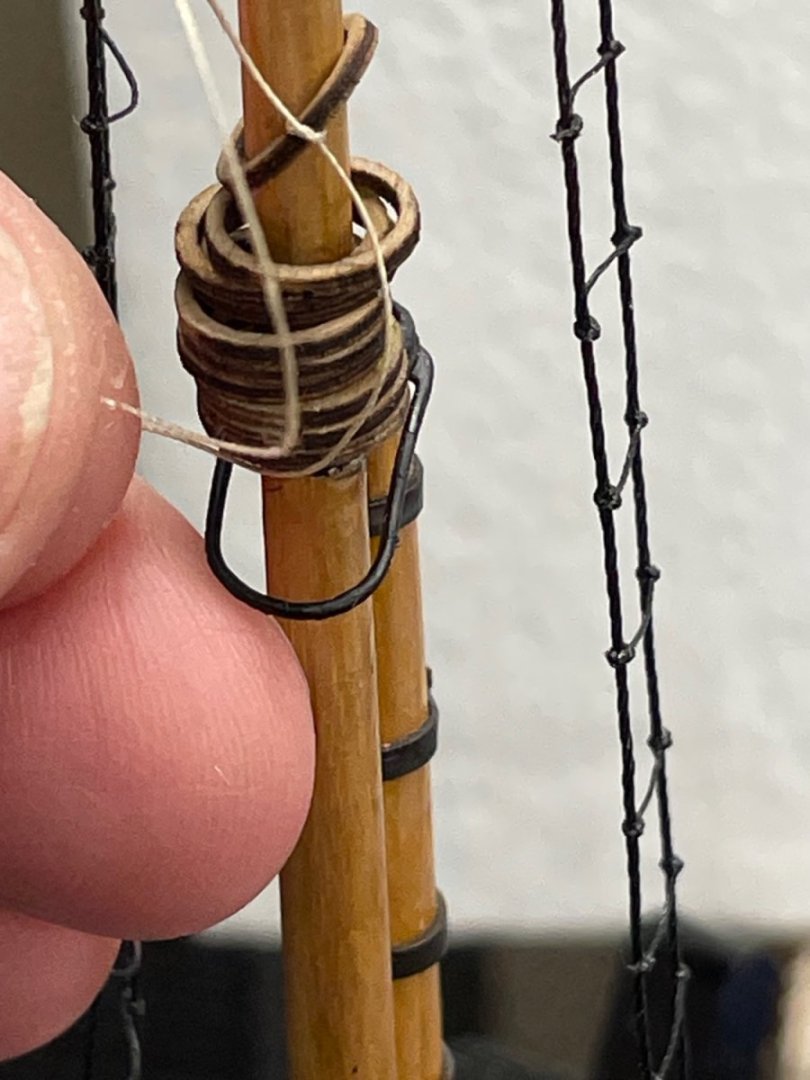
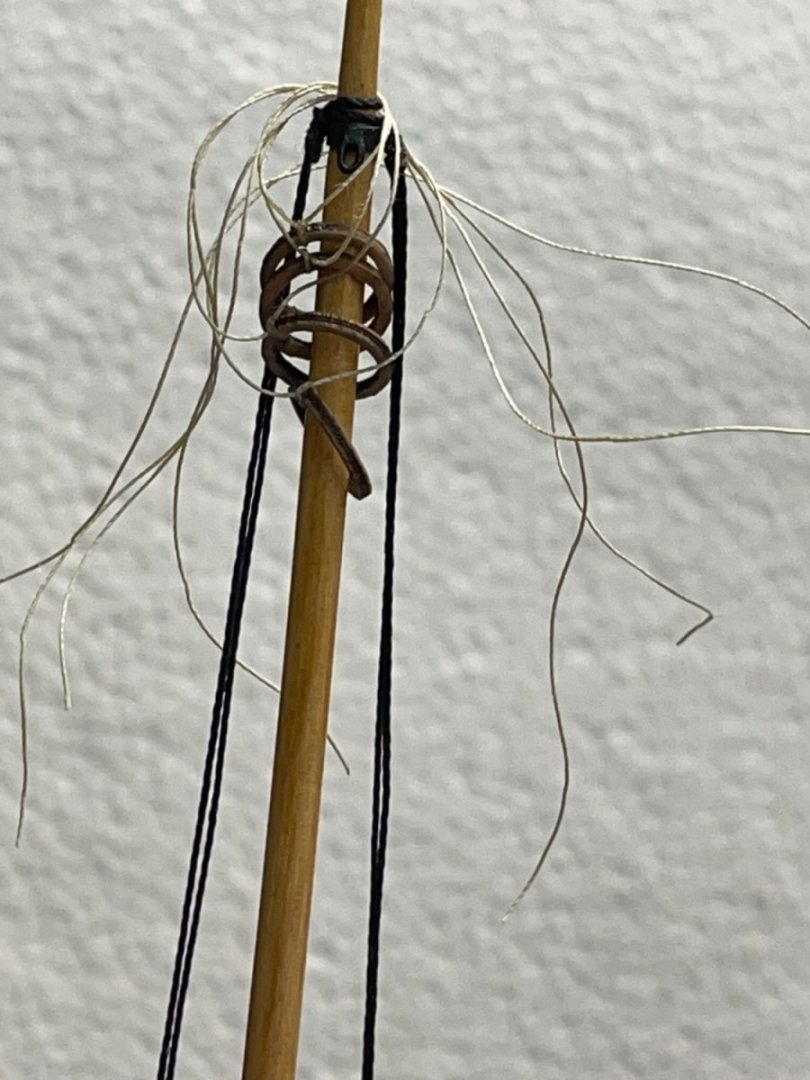

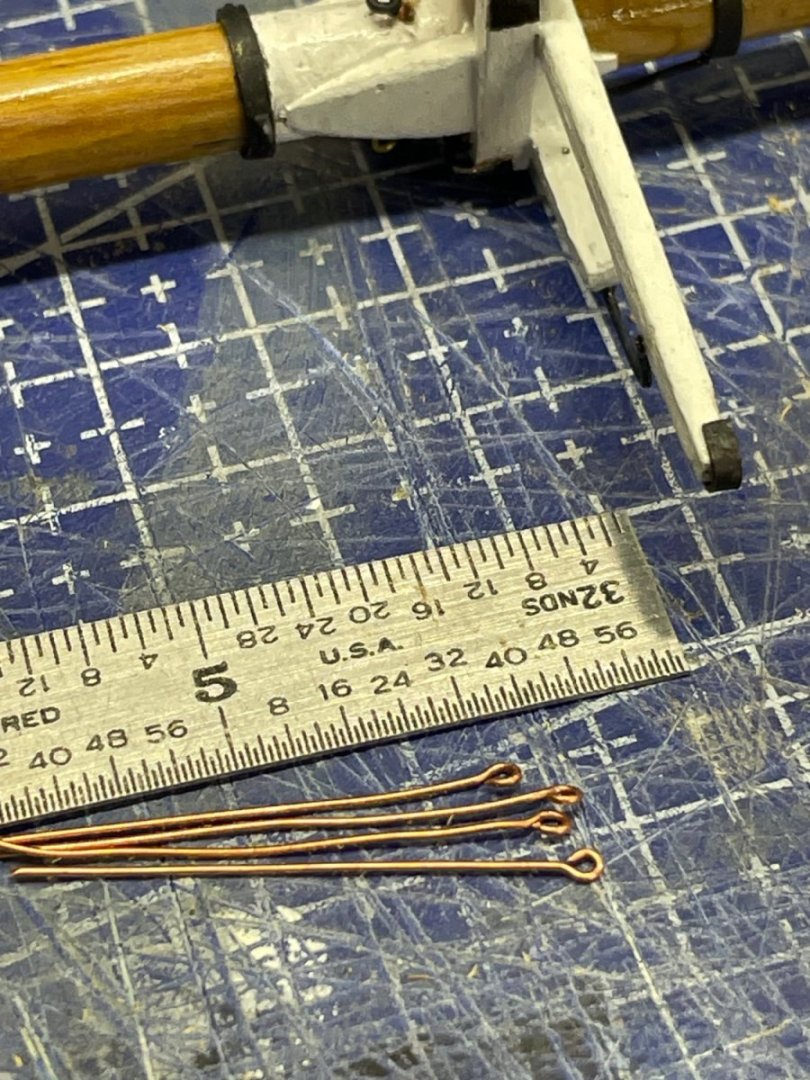
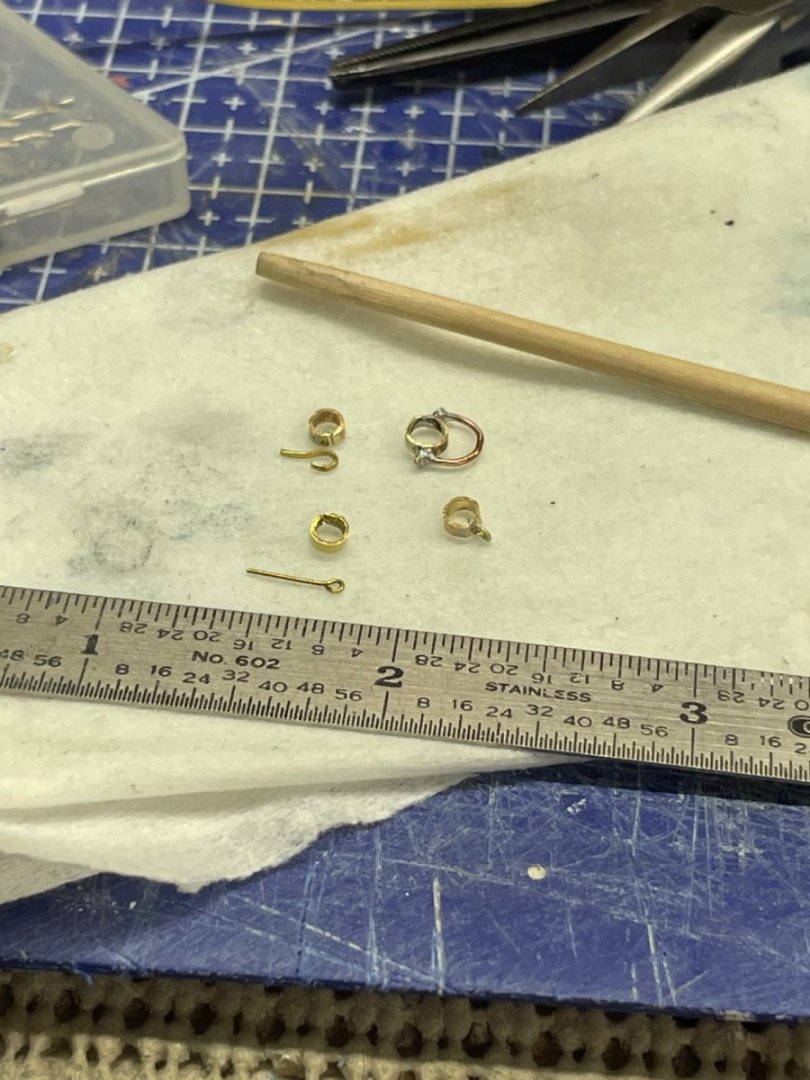
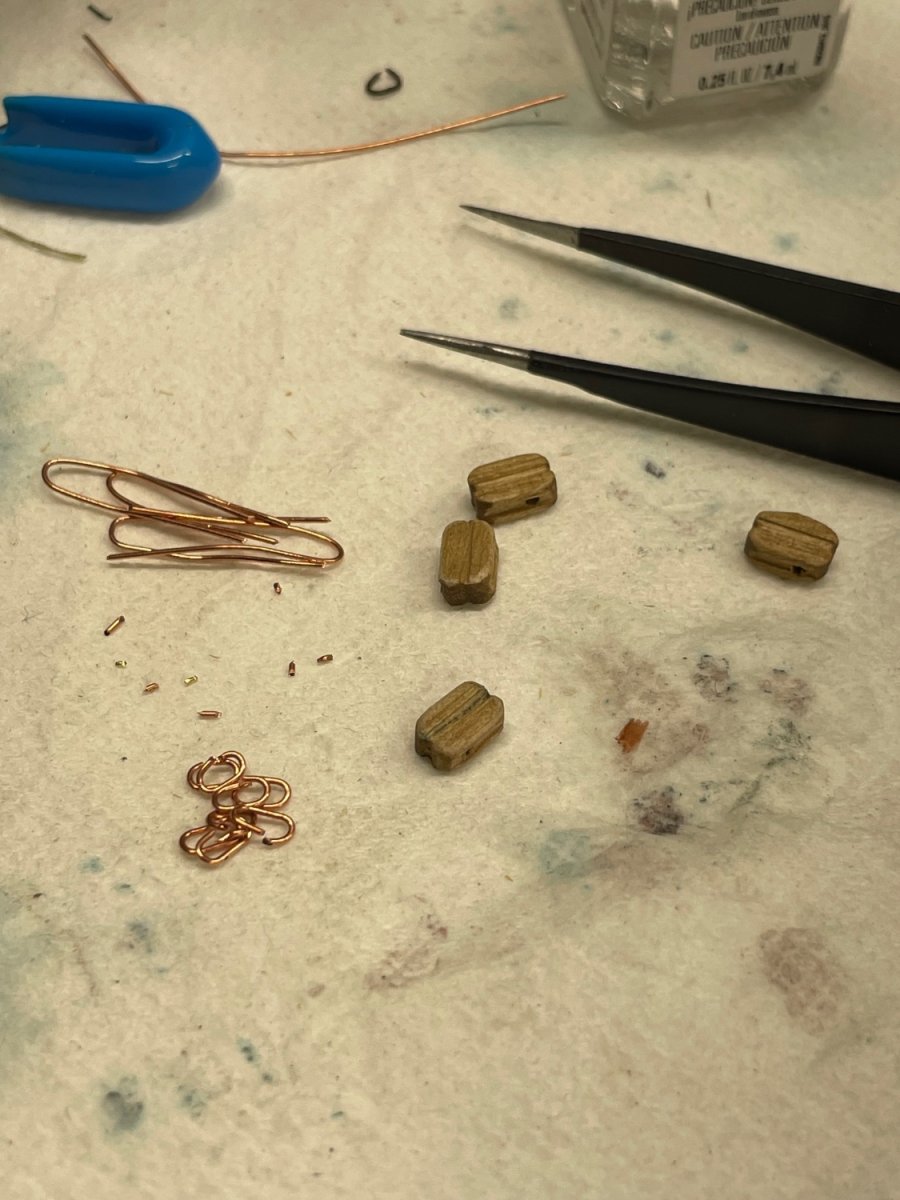
Links for hanging Blocks…
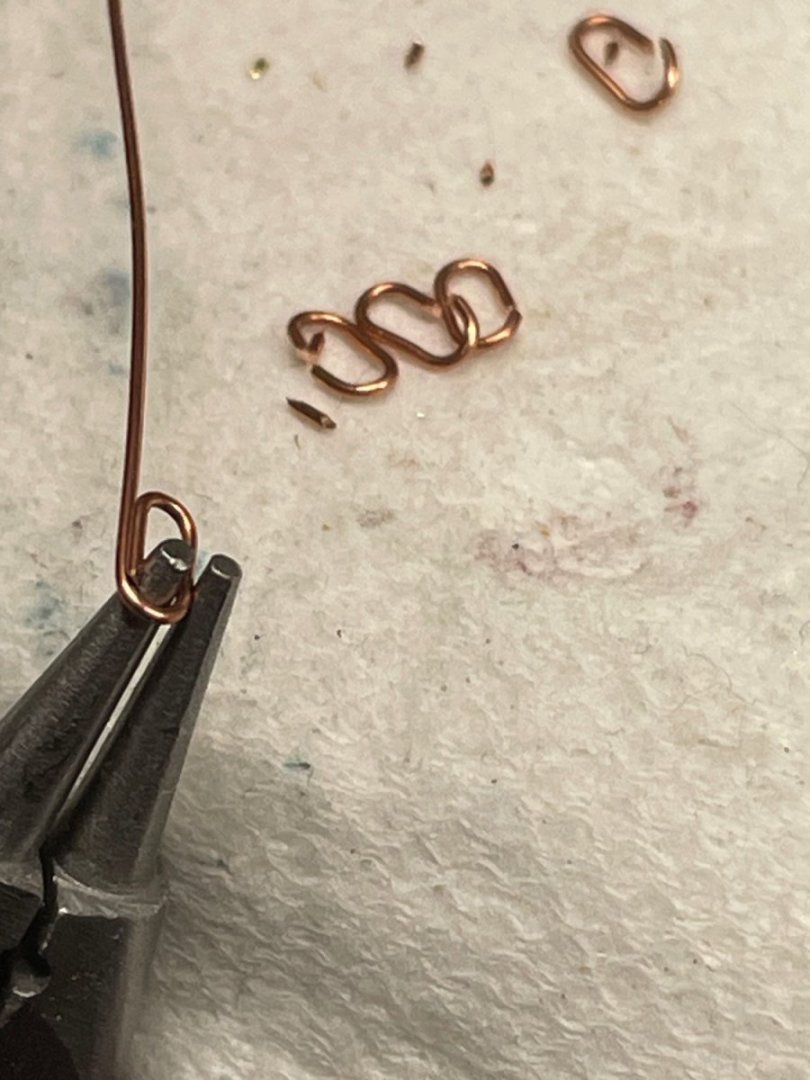
Stroping Peak Halliard Blocks…

Onwards…
Cheers 🍻
-
-
Ok… All that said, back to my First Steps.
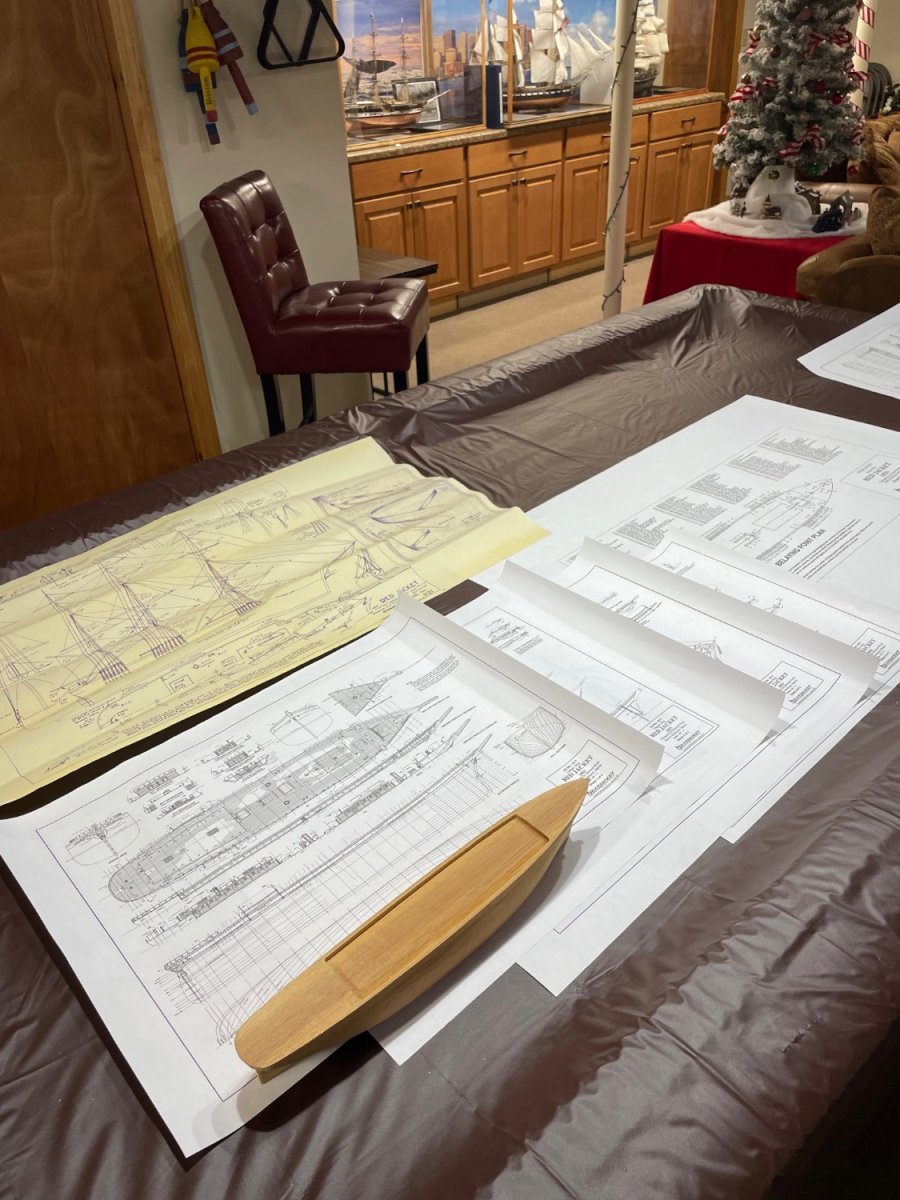
I purchased the Bluejacket Shipcrafters plan set for the 1853 Red Jacket. I then had Staples copy the plan sheets at 50%. This reduced the scale to 1/16”=1”. These plan sheets also give me a lot more detail than the original Marine Model Company plan sheet.

Cheers 🍻
- Ryland Craze and GrandpaPhil
-
2
-
21 hours ago, BAR553 said:
I asked him for a pic or two of the finished model for my mom…..I couldn’t imagine a detailed build log.
Bless you my friend. It will be a pleasure for mom and I to follow along.Bruce,
Welcome aboard my friend. It will be my pleasure to take on this build for you and your mom. I am sure your Dad, being a craftsman, always wanted to find the time. Time is what it takes, this little boat will probably take me a year or so to complete, but worth the journey.
Welcome to Model Ship World. 🌎
John
-
8 hours ago, Cornhusker1956 said:
John
Thanks for the link and I too will be following. I have provided a link to my cousin whose father owned the kit. Even this early I know the kit is in the right hands.
David
David,
Thank you, for the opportunity to honor your cousin’s father with this build. As I said earlier I love rescuing these forgotten model kits. It’s good to know it’s not a random eBay find or from an unknown estate sale. I hope, some day my unfinished kits will find will find a home on MSW.
John -
27 minutes ago, Rick310 said:
Good luck with your build. Nic’s (Mr Bluejacket) model of the Red Jacket is beautiful!! Maybe Nic can send you pictures. I use his model as a reference for my Flying Fish!
Rick
Actually, Nic @MrBlueJacket has a full build log of the Red Jacket I’ll be referencing it as I proceed. It would be a good reference for your Flying Fish.
-
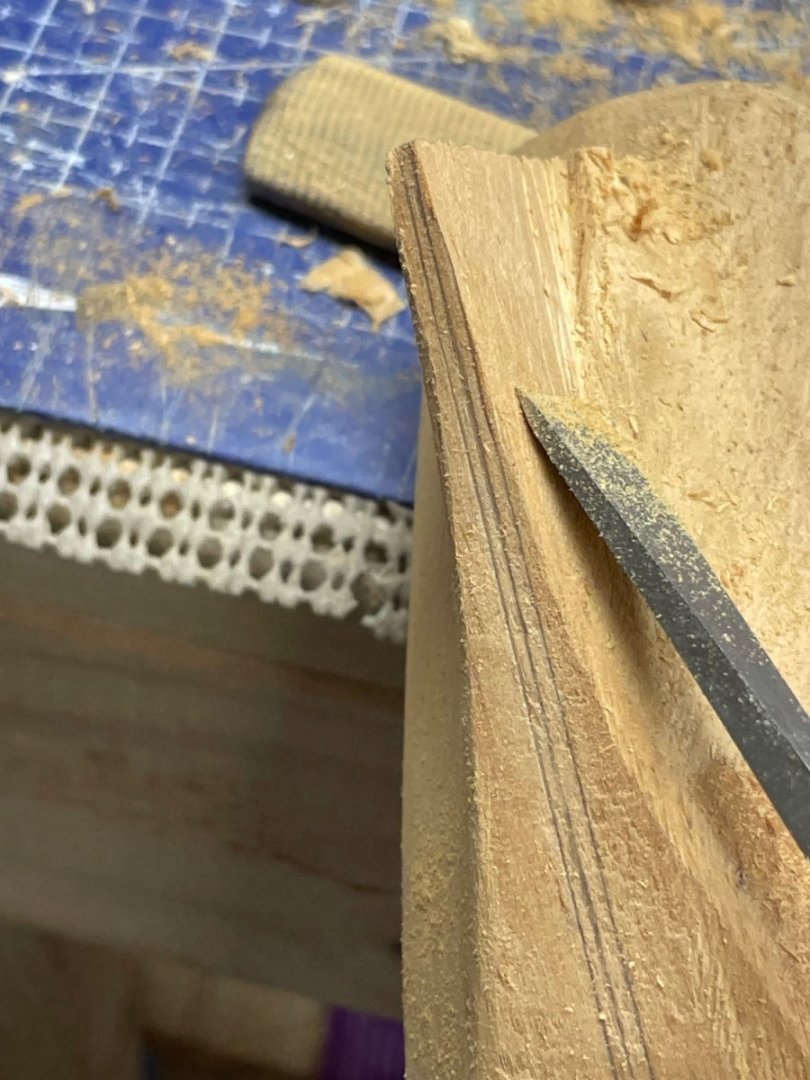
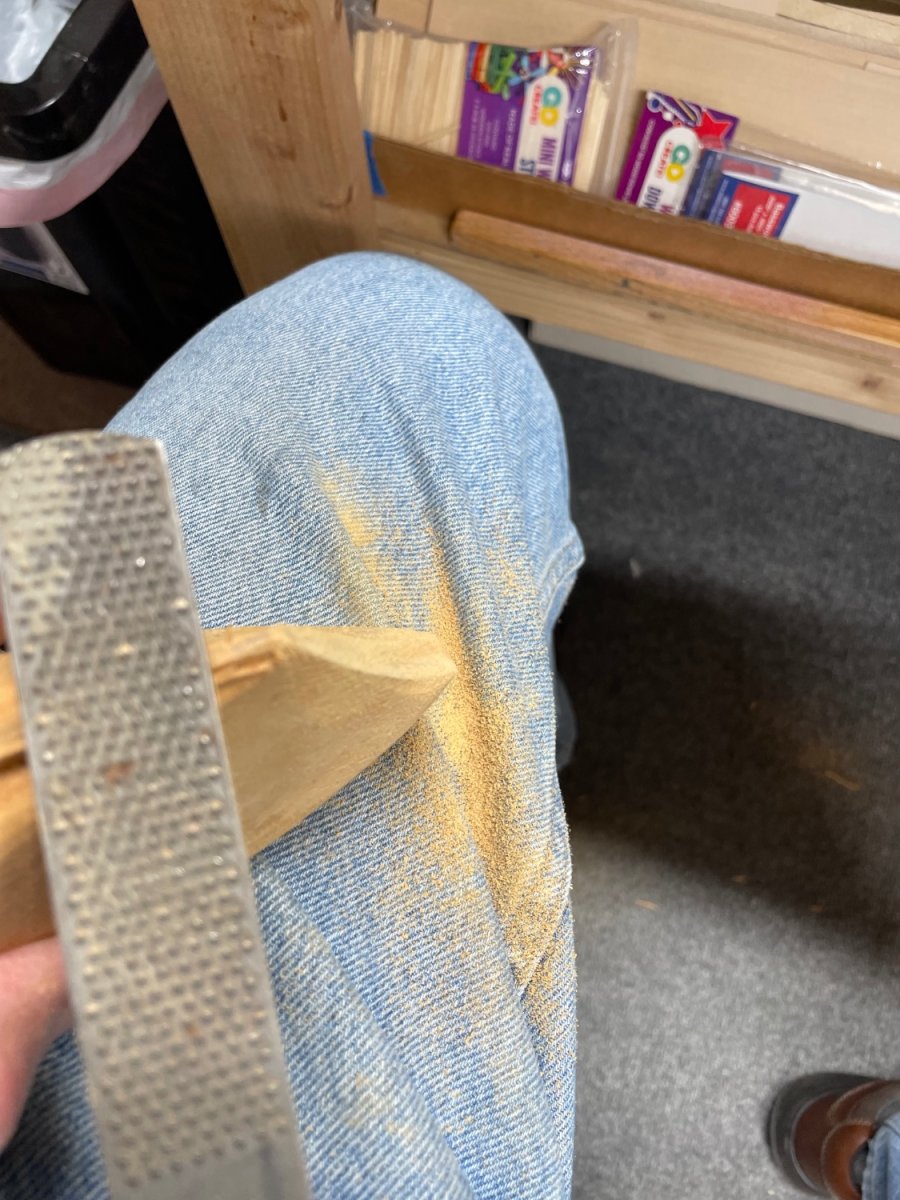
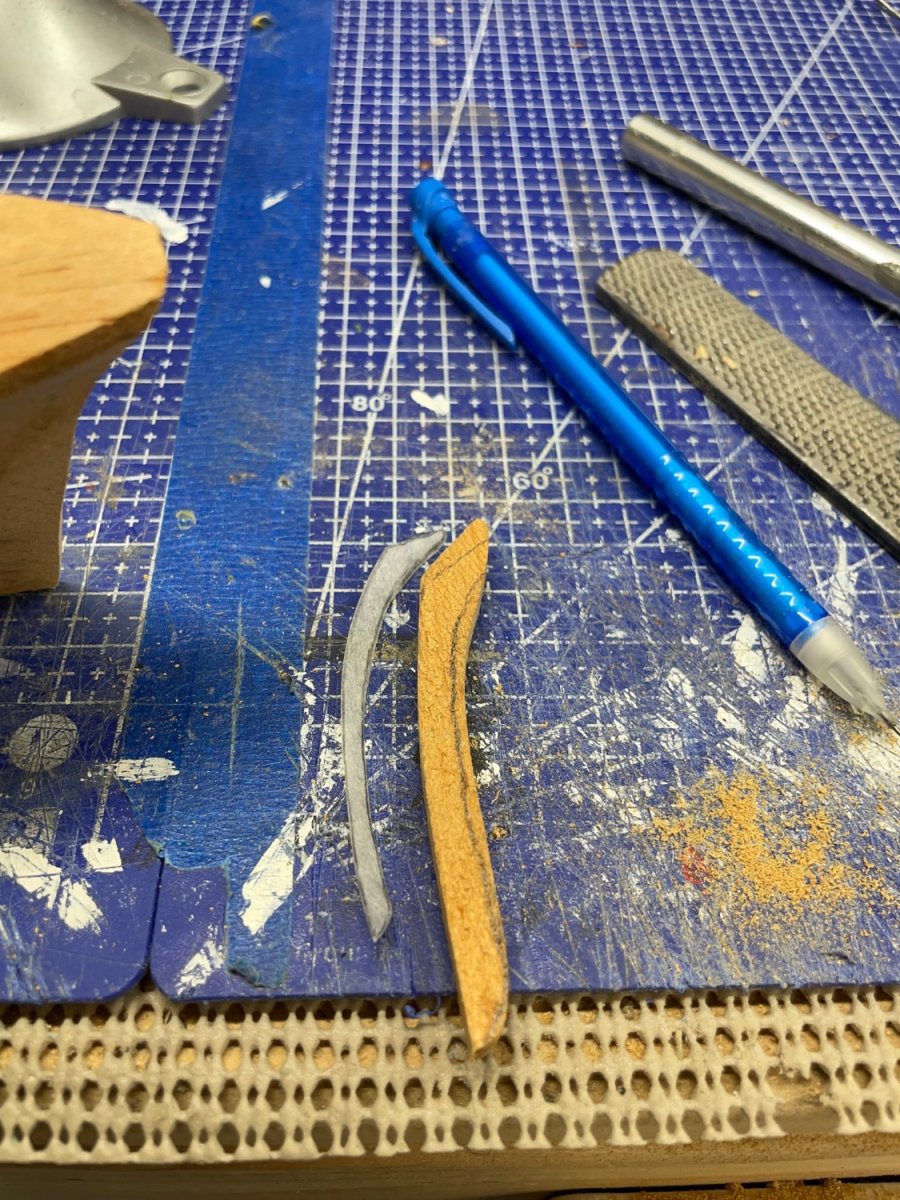
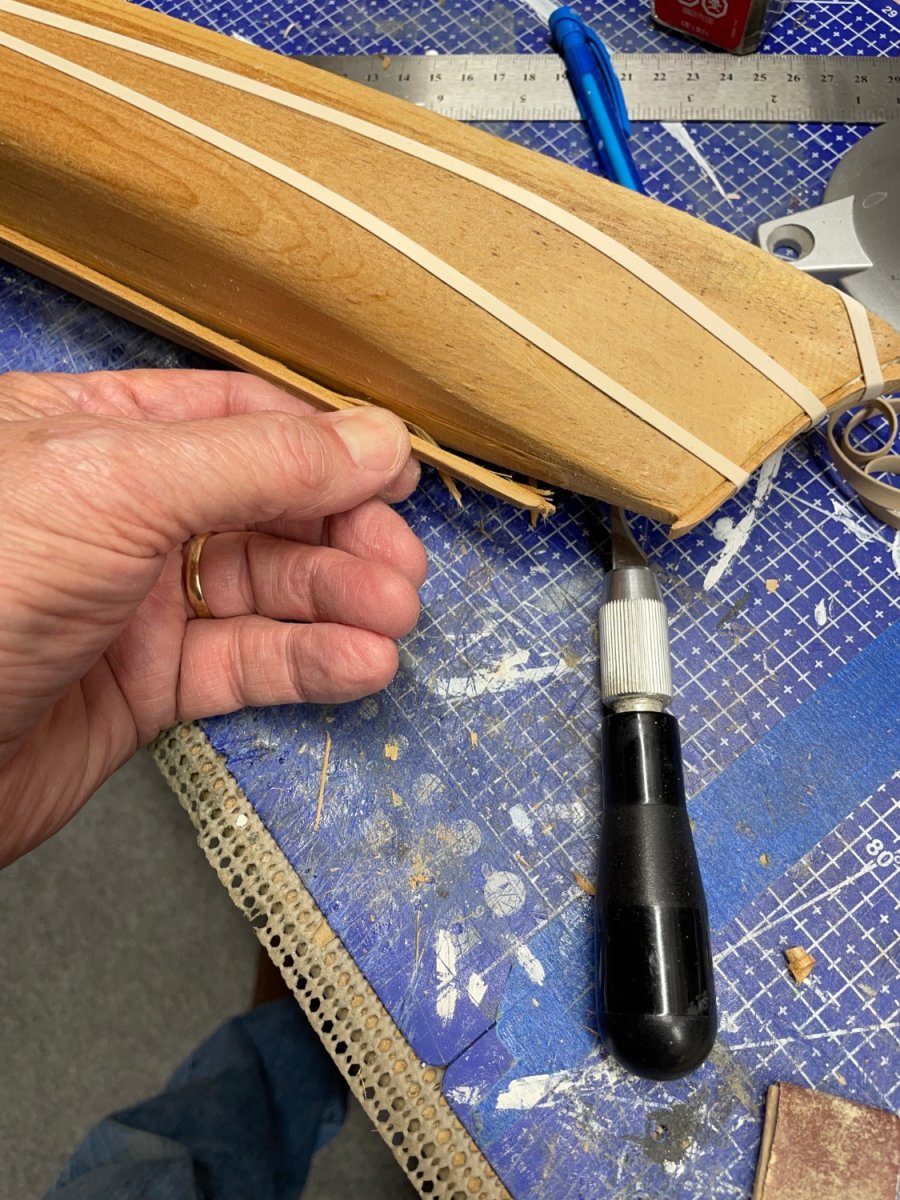
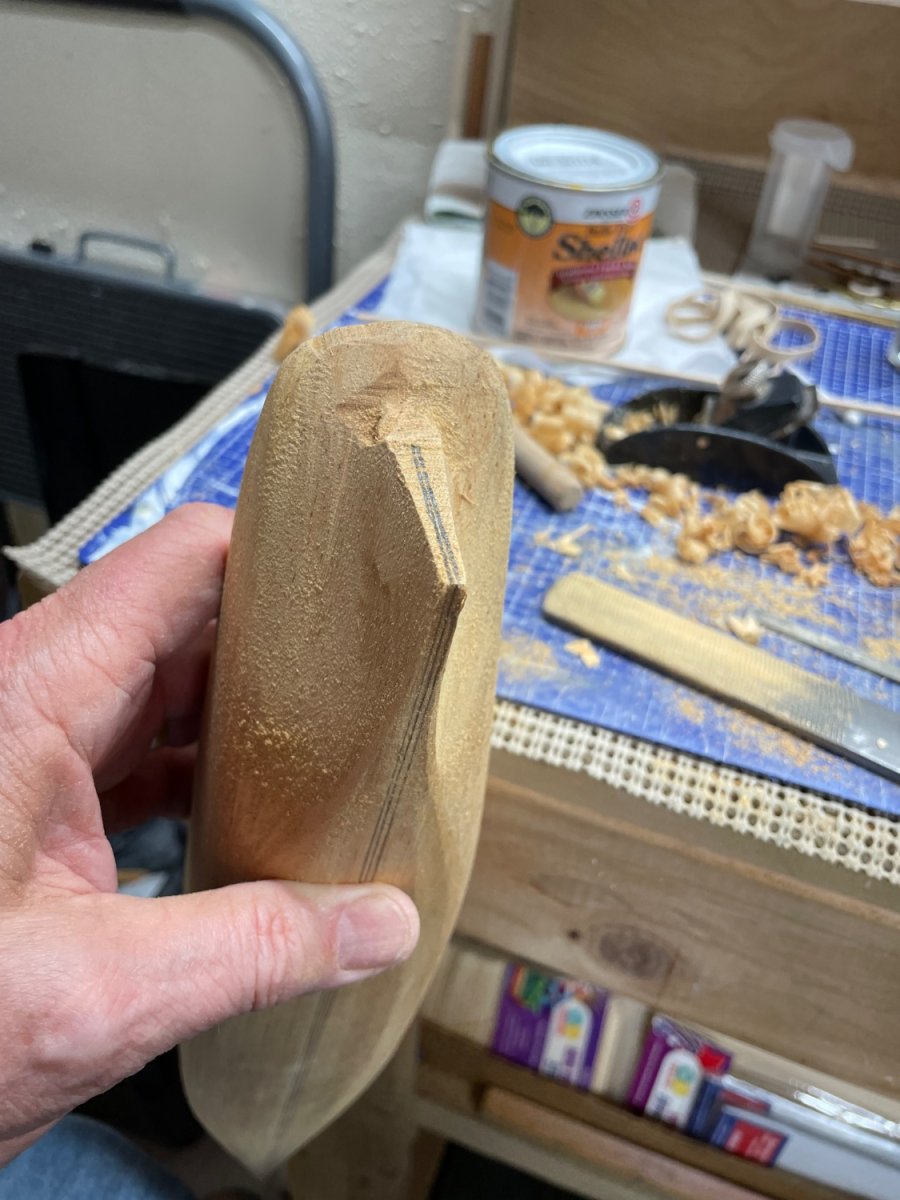
Shaping the Solid Wood Hull…
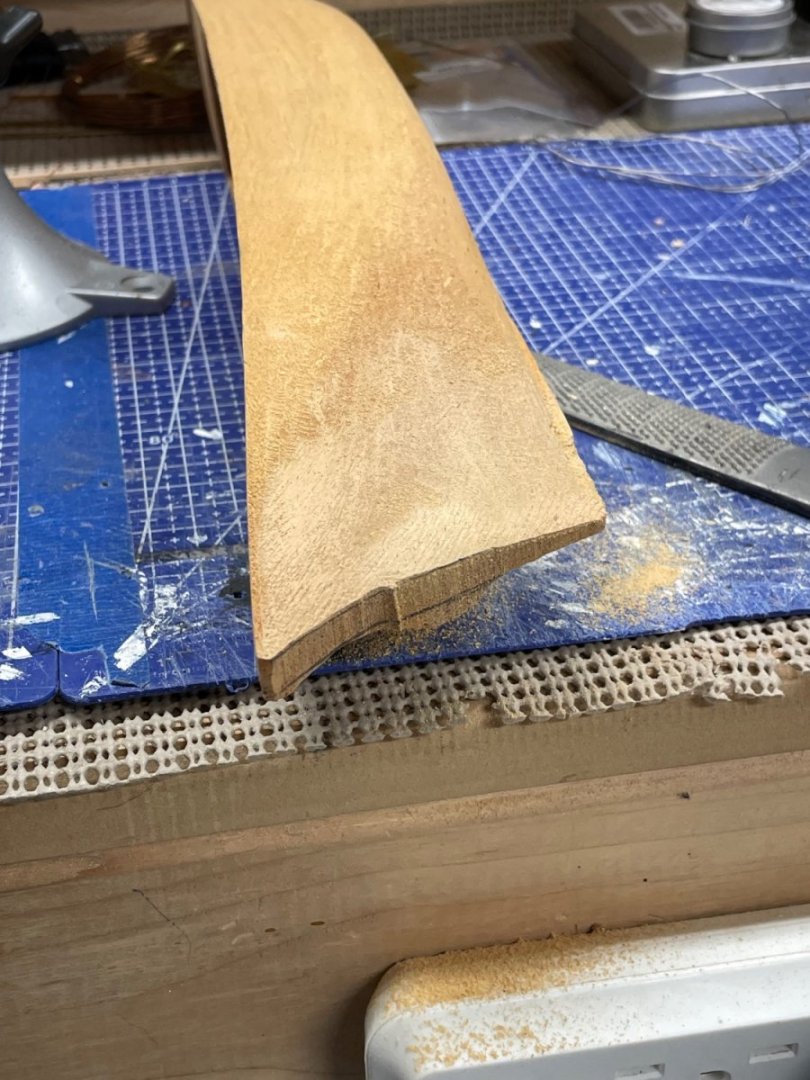

Using a Wood Rasp to cut down the Pre carved bow…

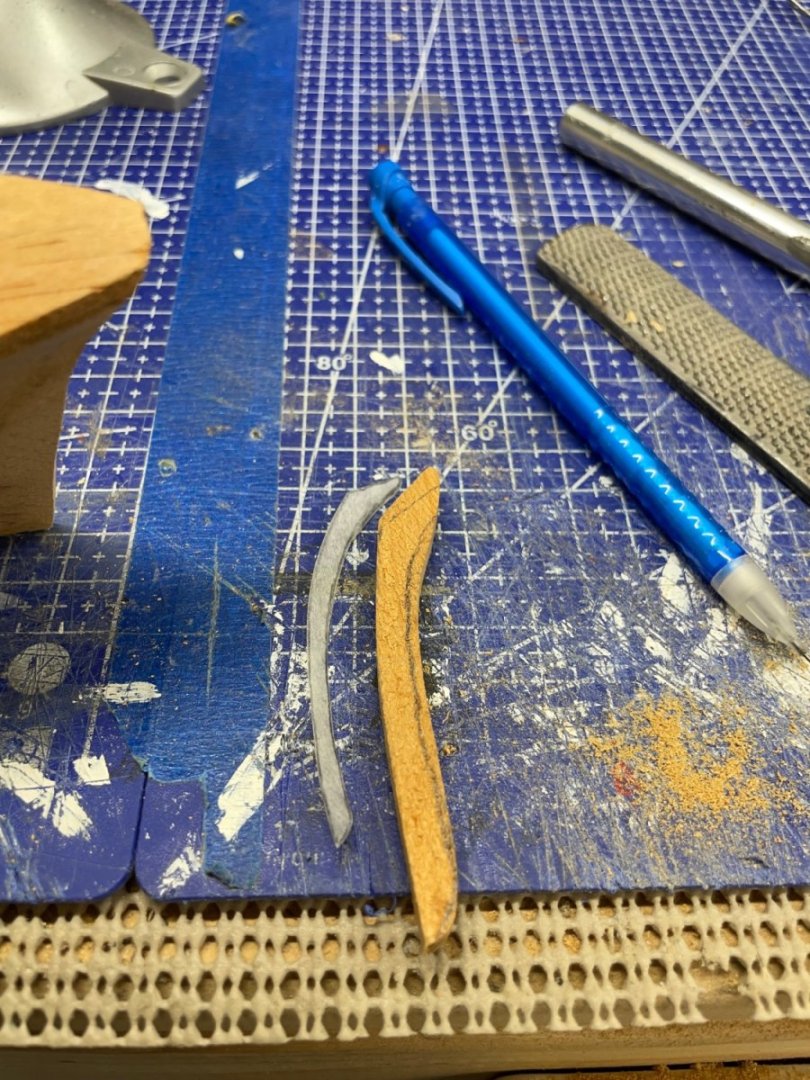
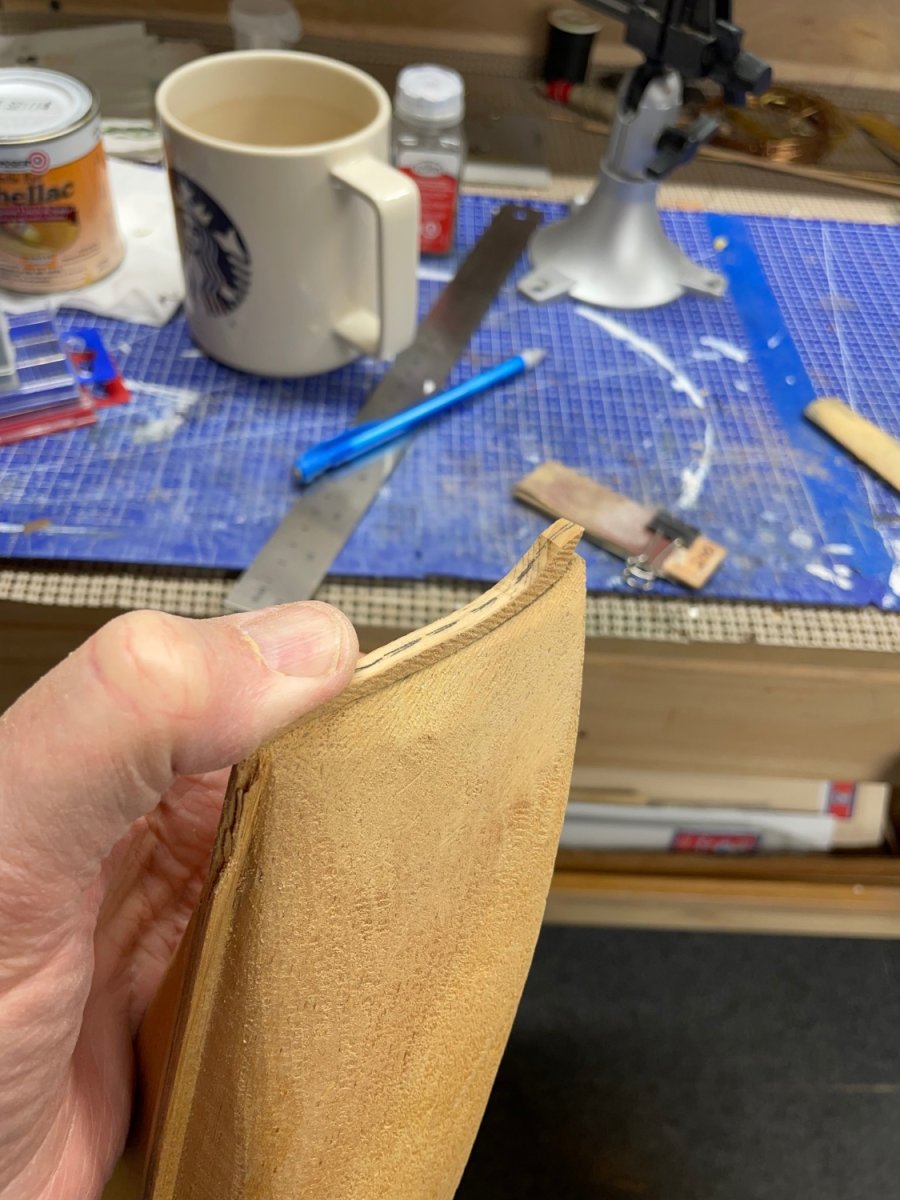
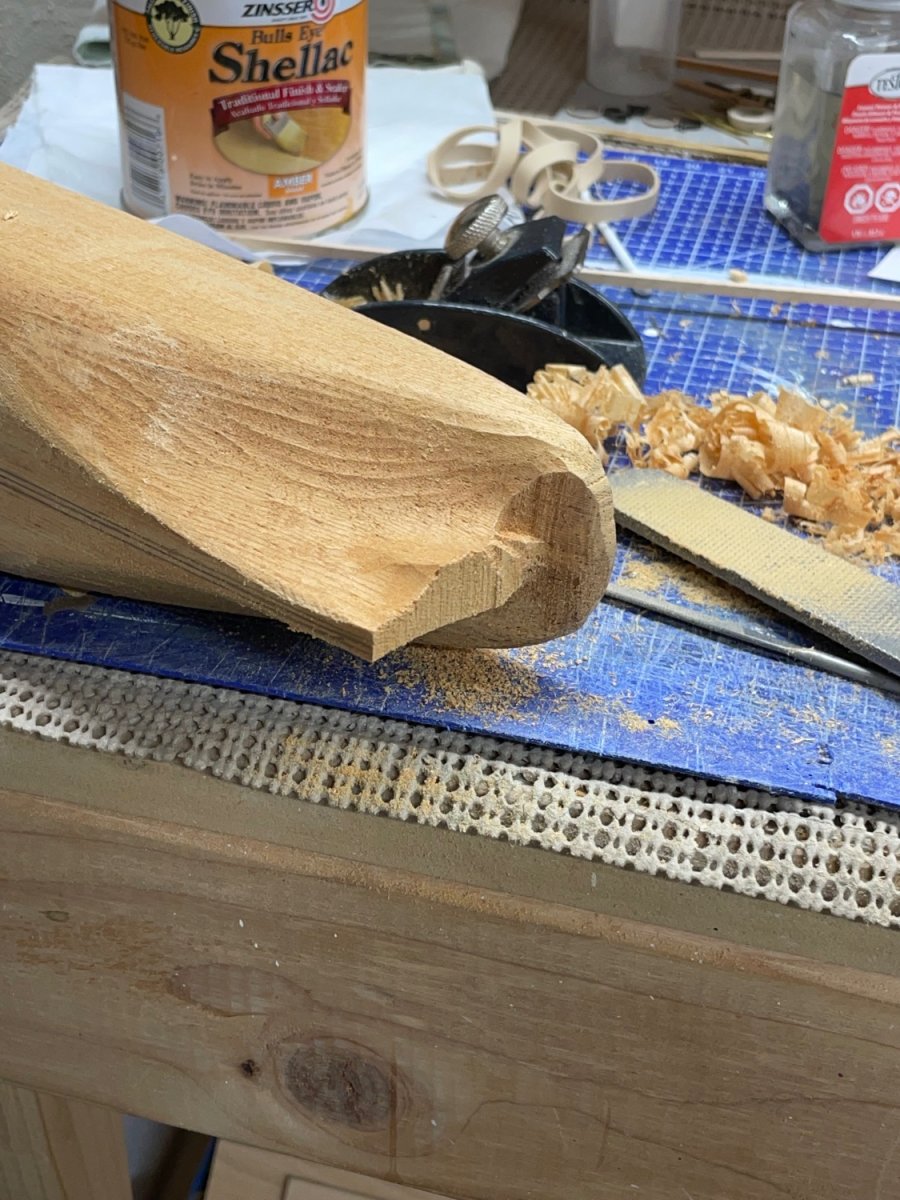
Shaping the Stem…

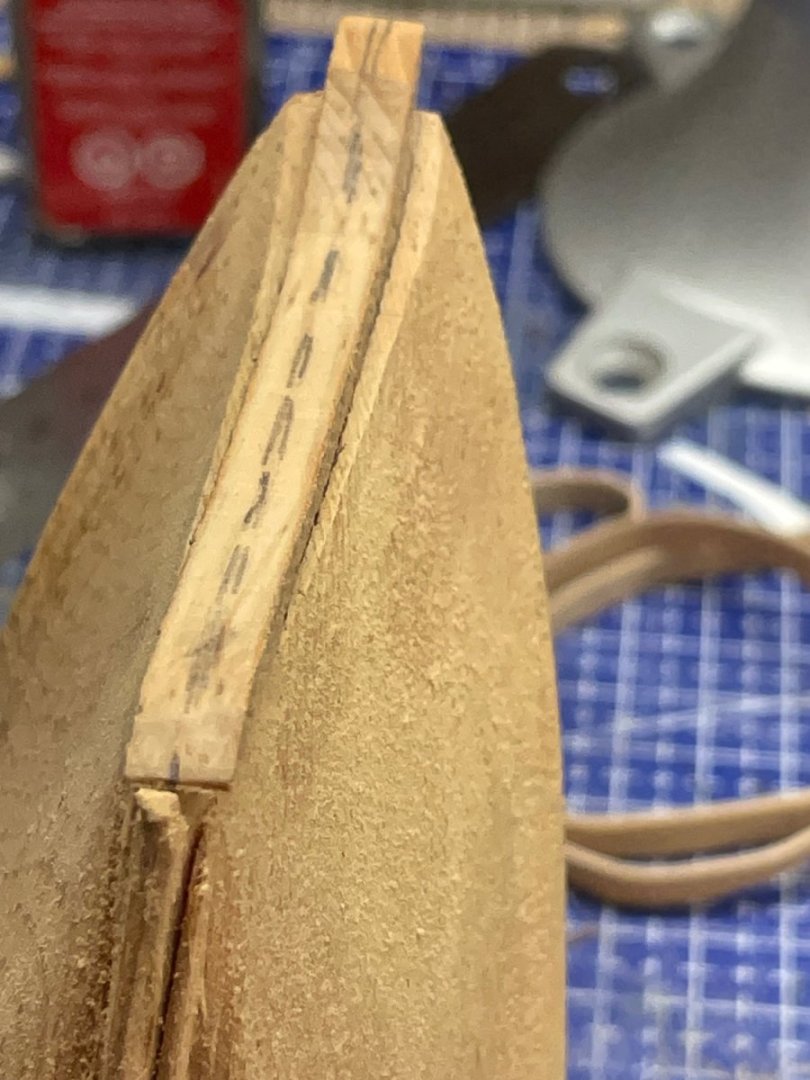
Fitting the stem piece… The Hull needs a bit more shaping.

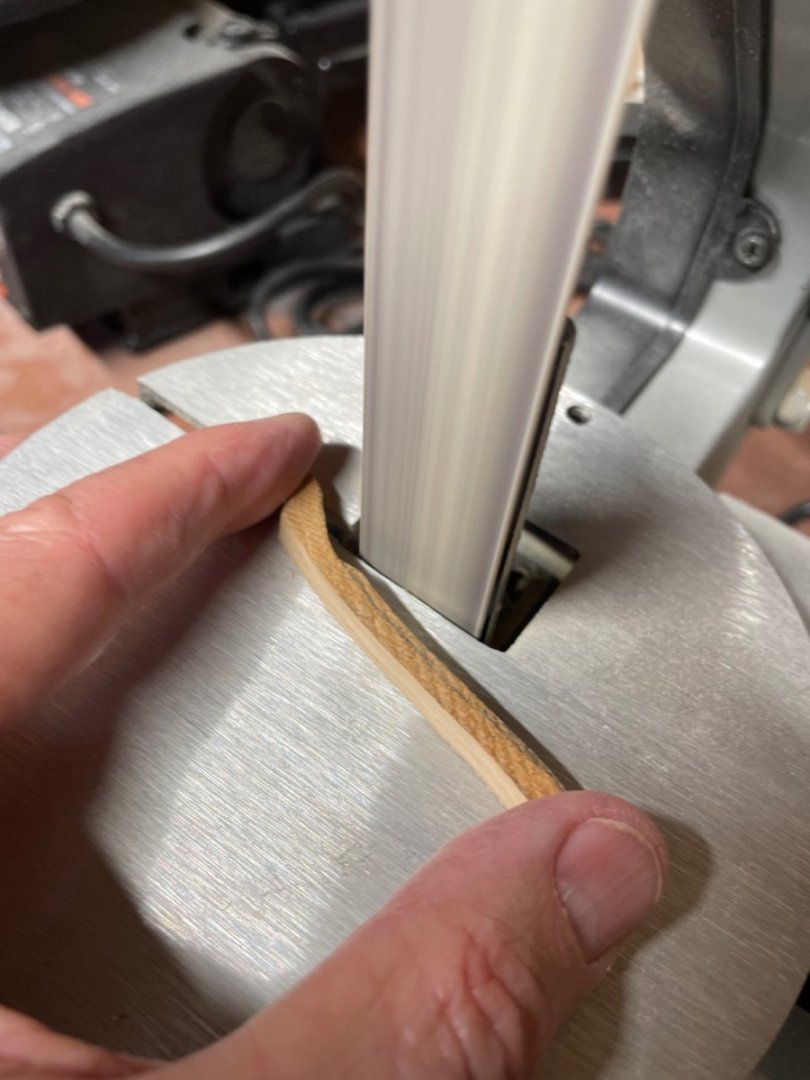
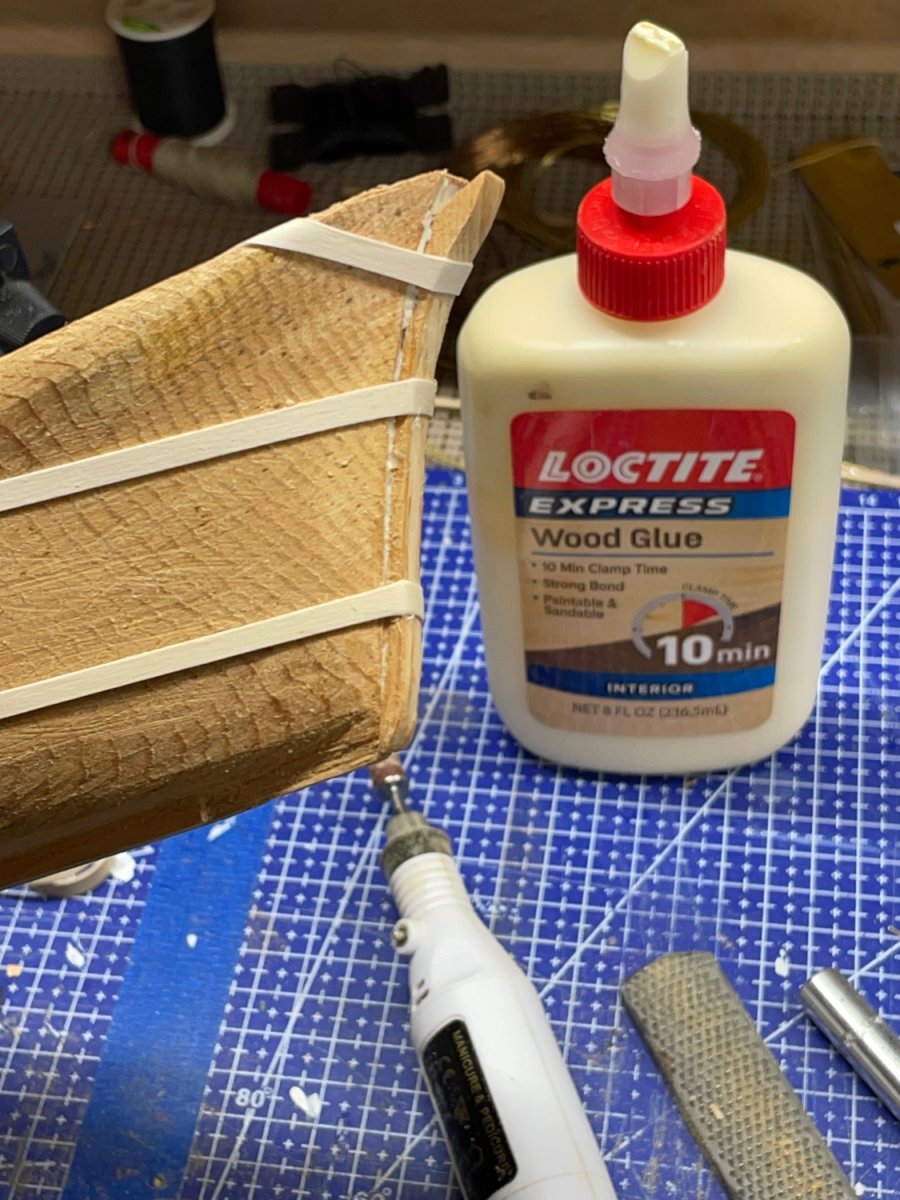
Using PVA glue and rubber bands to attach the stem piece.

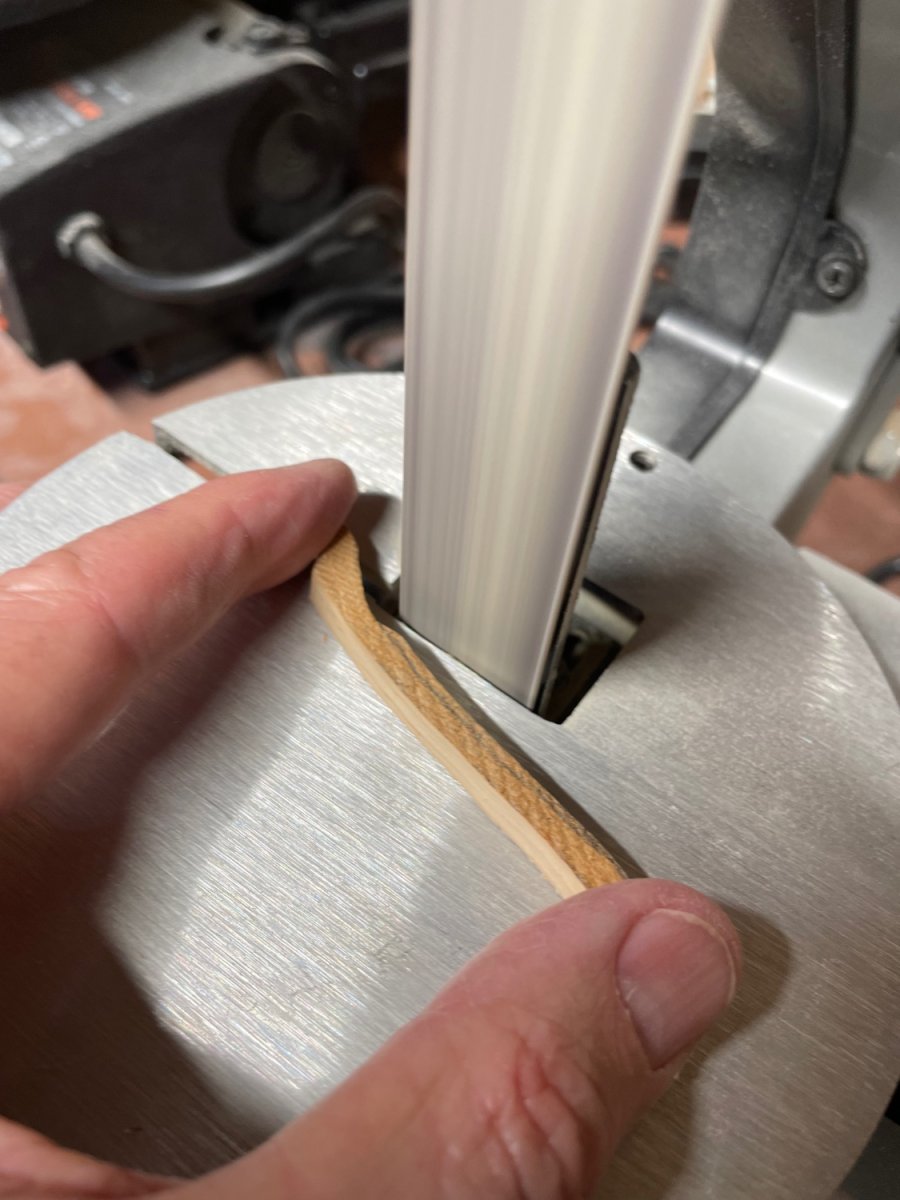
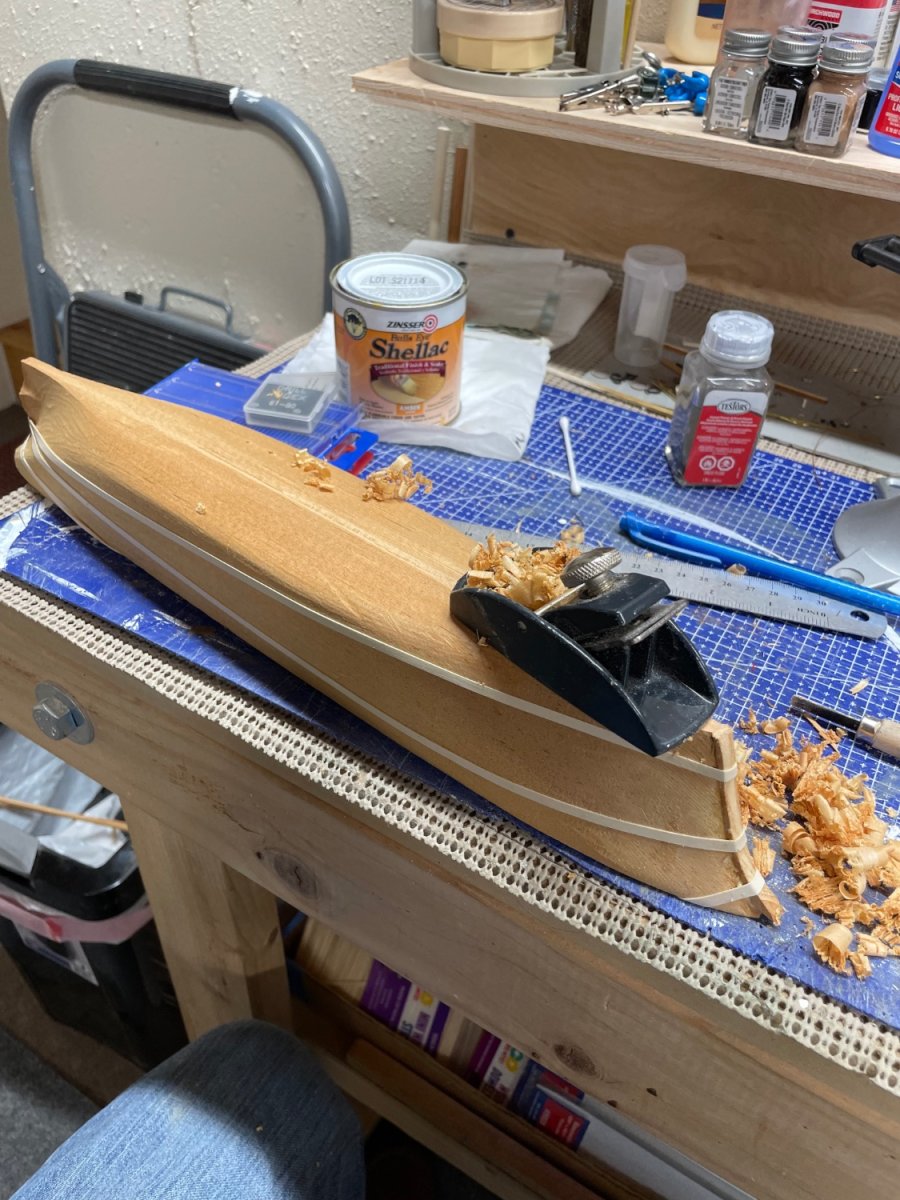
Removing the pre carved keel to install my own of Basswood. I will have to properly shape the hull before reinstalling the keel.


Flattening the hull fit a new keel.


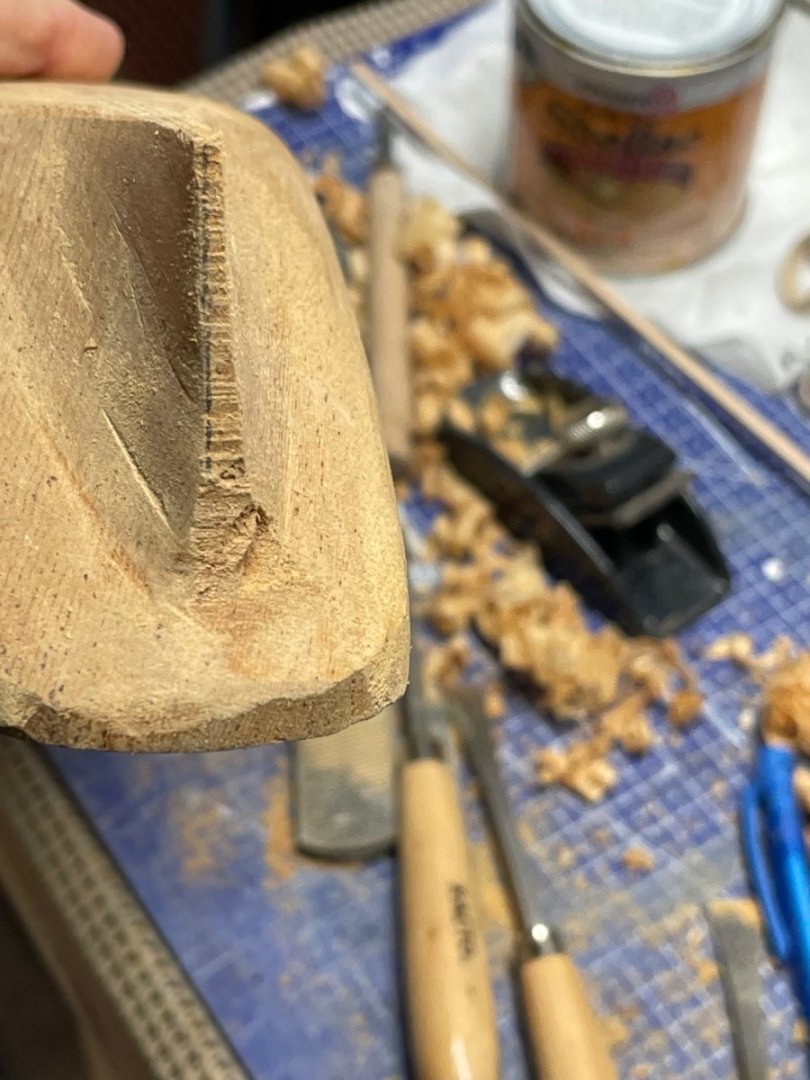
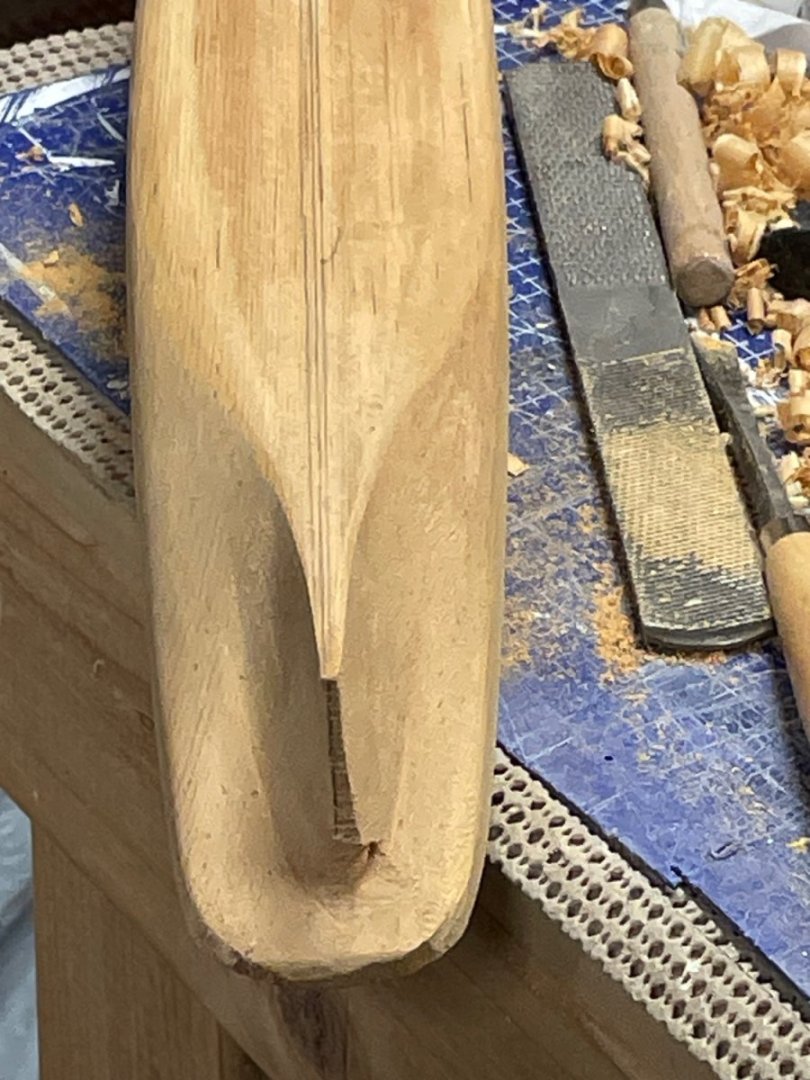
Working on the stern shape for fitting the rudder and stern post.
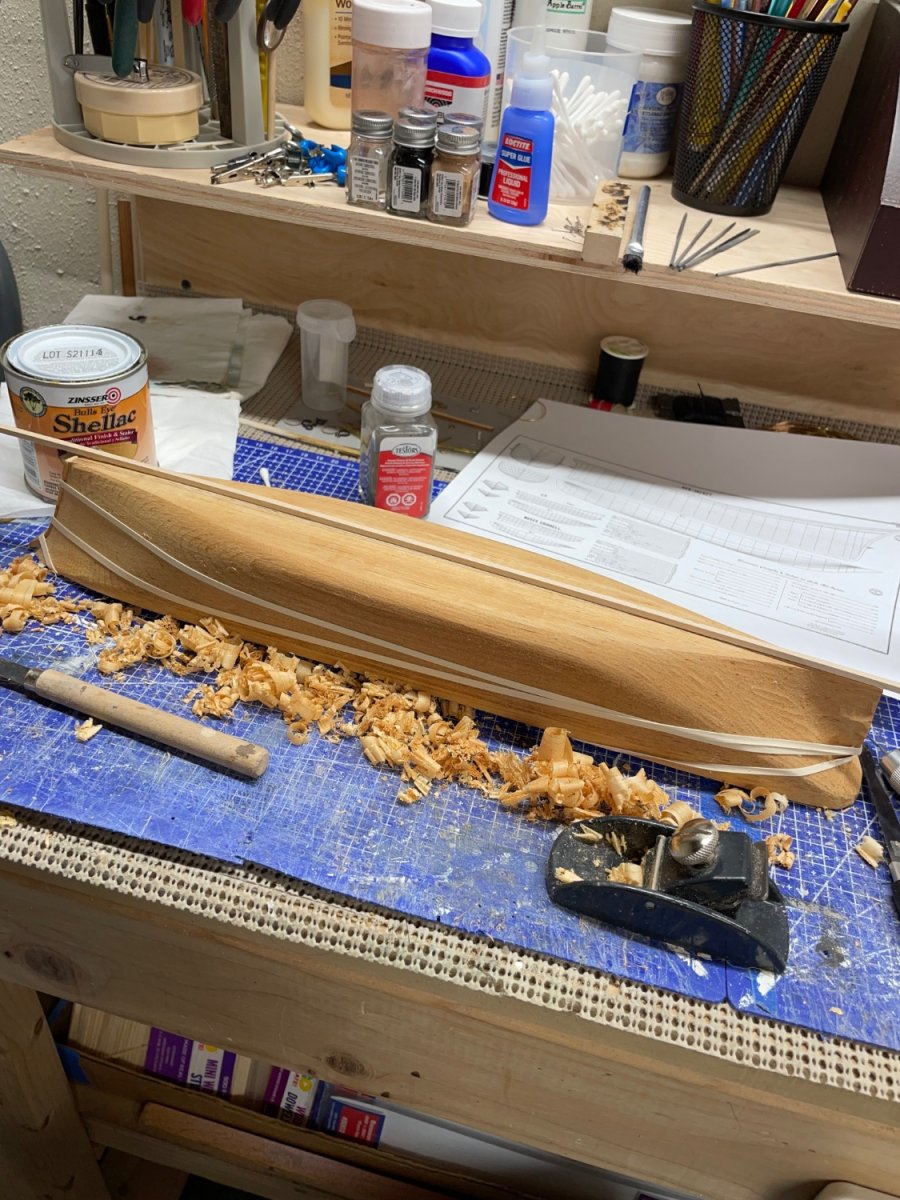
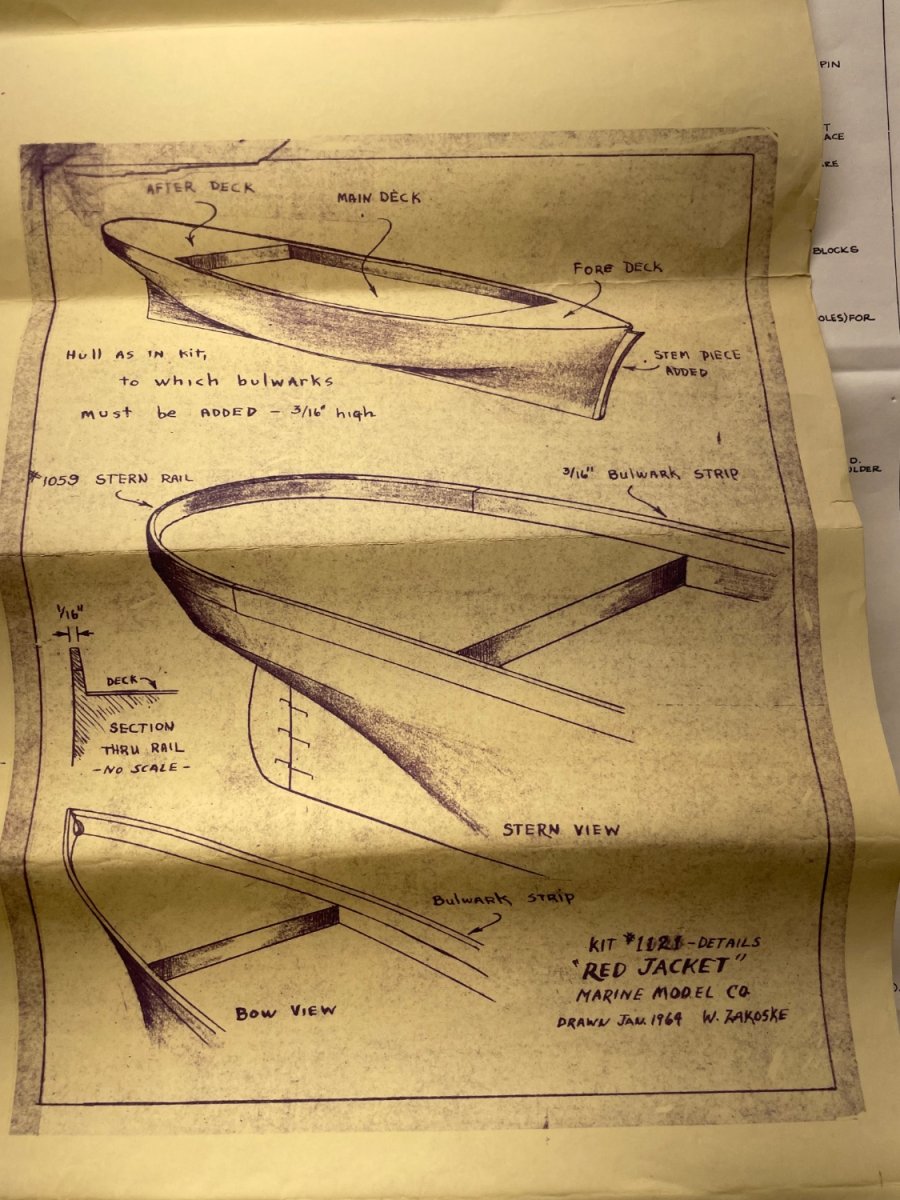
Lots more Hull shaping to do. However, I am finding the blue print (yes only one) is not adequate, I have no Profile drawings. They also show no pin rails for belaying rigging. 🧐

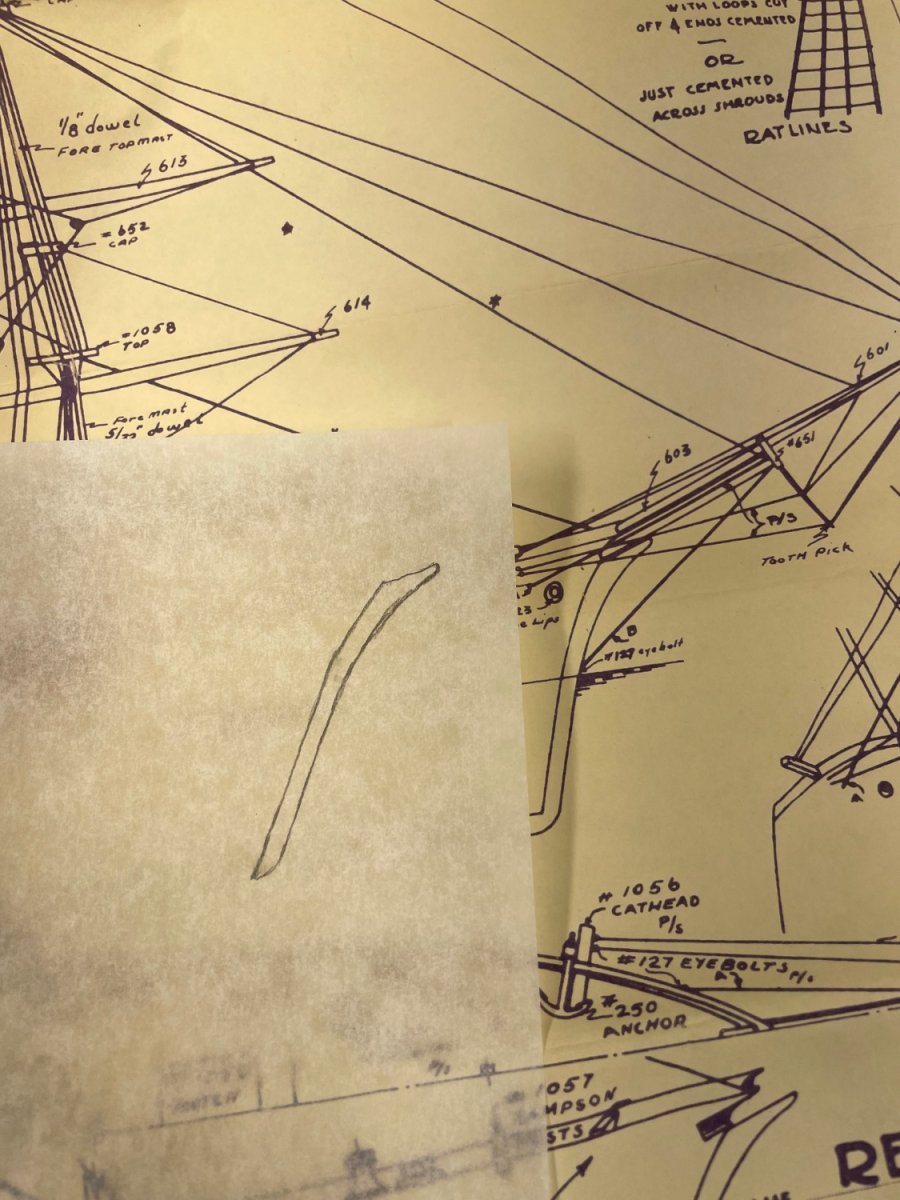
This additional drawing at no particular scale is offered for placing the bulwarks.
These drawings provided just are not acceptable for the kind of accuracy I intended for the Red Jacket.
So I went to the internet to locate some decent plans. And what do I find, but a MSW Build Log by our friend @MrBlueJacket Bluejacket Shipcrafters have an excellent set of plans (5 sheets) for The Red Jacket.
This project just got more interesting 🤔. I’ll have change it to a kit bash. The Bluejacket - Red Jacket drawings are at 1/8”=1’. While this kit is 1/16”=1’.
The challenge will be to build in “all” of the detail at 1/2 the scale. Wish me luck.
Cheers 🍻
- Ryland Craze, hof00, GrandpaPhil and 3 others
-
6
-
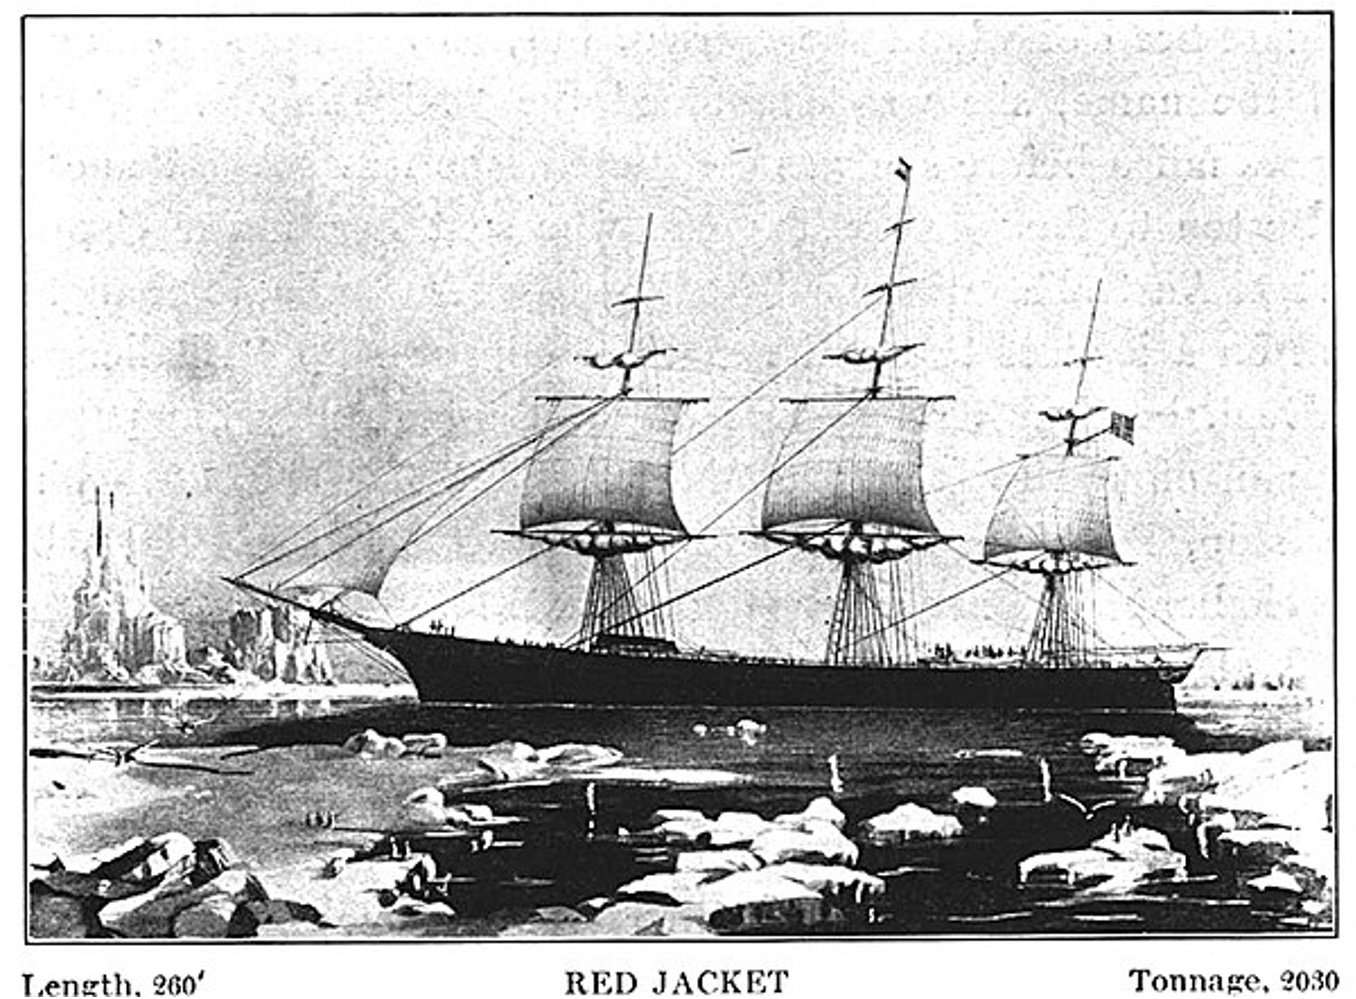
Some History…Note: She was built right here in Maine.
Red Jacket was a clipper ship, one of the largest and fastest ever built.[2] She was also the first ship of the White Star Line company. She was named after Sagoyewatha, a famous Seneca Indian chief, called "Red Jacket" by settlers. She was designed by Samuel Hartt Pook, built by George Thomas in Rockland, Maine, and launched in 1853, the last ship to be launched from this yard.[3]
Name
Red Jacket
Owner
Seccomb & Taylor, Boston
Builder
George Thomas, Rockland, ME
Launched
2 Nov 1853[1]
United Kingdom
Owner
Pilkington & Wilson
Operator
Acquired
1854
Notes
In the immigrant trade; became an Australian and Indian coastal freighter, 1861.
Owner
Wilson & Chambers, Liverpool, 1868
Portugal
Owner
Blandy Brothers, Madeira Islands
Acquired
1883
Fate
Driven ashore in a gale, 1885.
Notes
Hulked, became a coal barge in the Cape Verde Islands.
General characteristics
Class and type
Clipper, designed by Samuel Hartt Pook
Tons burthen
2305 tons
Length
251 ft. 2 in., or 260 ft. 109m
Beam
44 ft..
Draft
31 ft
History
Red Jacket left Rockland under tow, and was rigged in New York. Her captain was a veteran packet ship commander, Asa Eldridge of Yarmouth, Massachusetts,[4] and she had a crew of 65. On the passage to Liverpool, she averaged 14.5 knots (26.9 km/h) for the latter part of the voyage, with sustained bursts of 17 knots (31.5 km/h).
A Collins Line steamer arriving in Liverpool (which had left New York two days before Red Jacket) reported that Red Jacket was just astern. As she entered the harbor, tugs tried to get lines aboard the clipper but she was traveling too fast. Thousands, alerted by the Collins Liner, watched as Eldridge shortened sail and backed the vessel into its berth.
On this voyage, Red Jacket set the speed record for sailing ships crossing the Atlantic by traveling from New York to Liverpool in 13 days, 1 hour, 25 minutes, dock to dock.
A few days after the Red Jacket’s arrival in Liverpool, the accuracy of the ship’s log—and thus the integrity of her captain—was questioned in a letter to The Times of London, arguably the world’s most important newspaper at the time. The letter came from a highly authoritative source, Lloyd’s of London, but was signed only with the author’s initials. It prompted a fierce rebuttal the following day from a second correspondent who also did not disclose his name, but was clearly American. Three days later, the final word in this correspondence went to Asa Eldridge himself; The Times printed a letter from him (sent in his own name) in which he patiently explained why the original correspondent was wrong in his interpretation of the ship’s log.[5]
At Liverpool, the Red Jacket had her bottom coppered and cabins fitted out for the Australianimmigrant trade. She was purchased by Pilkington & Wilcox and other Liverpool investors with registry changing on April 24, 1854. (Most secondary sources say that the vessel was bought by the British a year later, copying a mistake made by earlier historians.) She was then chartered by the White Star Line for a run to Melbourne, Victoria. Under Captain Samuel Reid (who owned 1/16 of her), she reached in Melbourne in 69 days. Only one clipper, James Baines, ever made the run faster.[citation needed] On 13 June 1859,[6] whilst on a voyage from Liverpool to Melbourne, she collided with the British merchant ship Elizabeth Walker, which sank. Red Jacket rescued the crew of Elizabeth Walker, which was on a voyage from Buenos Aires, Argentina to London.[7][8]
Red Jacket served in the immigrant trade until 1867, when she became an Australian and Indiancoastal freighter.[citation needed]. In May 1871, she ran aground at Cantick Head, Orkney Islandswhilst on a voyage from Calcutta to Dundee, Forfarshire. She was refloated and completed her voyage.[9]
Fate
In 1872 Red Jacket became a lumber carrier from Quebec to London, joining the clippers Marco Poloand Donald McKay, which "ended their days" in the transatlantic Quebec timber trade,[10] She collided with the Eliza Walker in 1878[dubious – discuss], which sank; Eliza Walker′s crew were rescued.[1] On 29 January 1878, she put in to Plymouth, Devon in a leaky condition, her crew refusing to proceed. She was recorded as a collier on a voyage from Newcastle upon Tyne, Northumberland to Genoa, Italy.[11][12] In 1883, Red Jacket was sold to Blandy Brothers, a Portuguese shipping company in the Madeira Islands as a coaling hulk. She dragged her anchors in a heavy gale and was driven ashore on 16 December 1885; the sale of her wreckage fetched just £113.
from Wikipedia- Ryland Craze and Knocklouder
-
2
-
8 hours ago, Dr PR said:
Harold Underhill's "Masting and Rigging the Clipper Ship
Thanks Phil… I just ordered it, sounds like it will be very useful. You know how these Vintage blueprints can be lacking in detail. I am all about the detail. 🧐
Cheers 🍻
-
36 minutes ago, Knocklouder said:
Good luck on your journey on this one. I follow along, always nice to see a master whip up another wonderful build, I am sure Cornhusker will love it.
.my man.
Welcome aboard Bob. This one should be real fun. But then, they all are…
Cheers 🍻
- Knocklouder and Dr PR
-
2
-
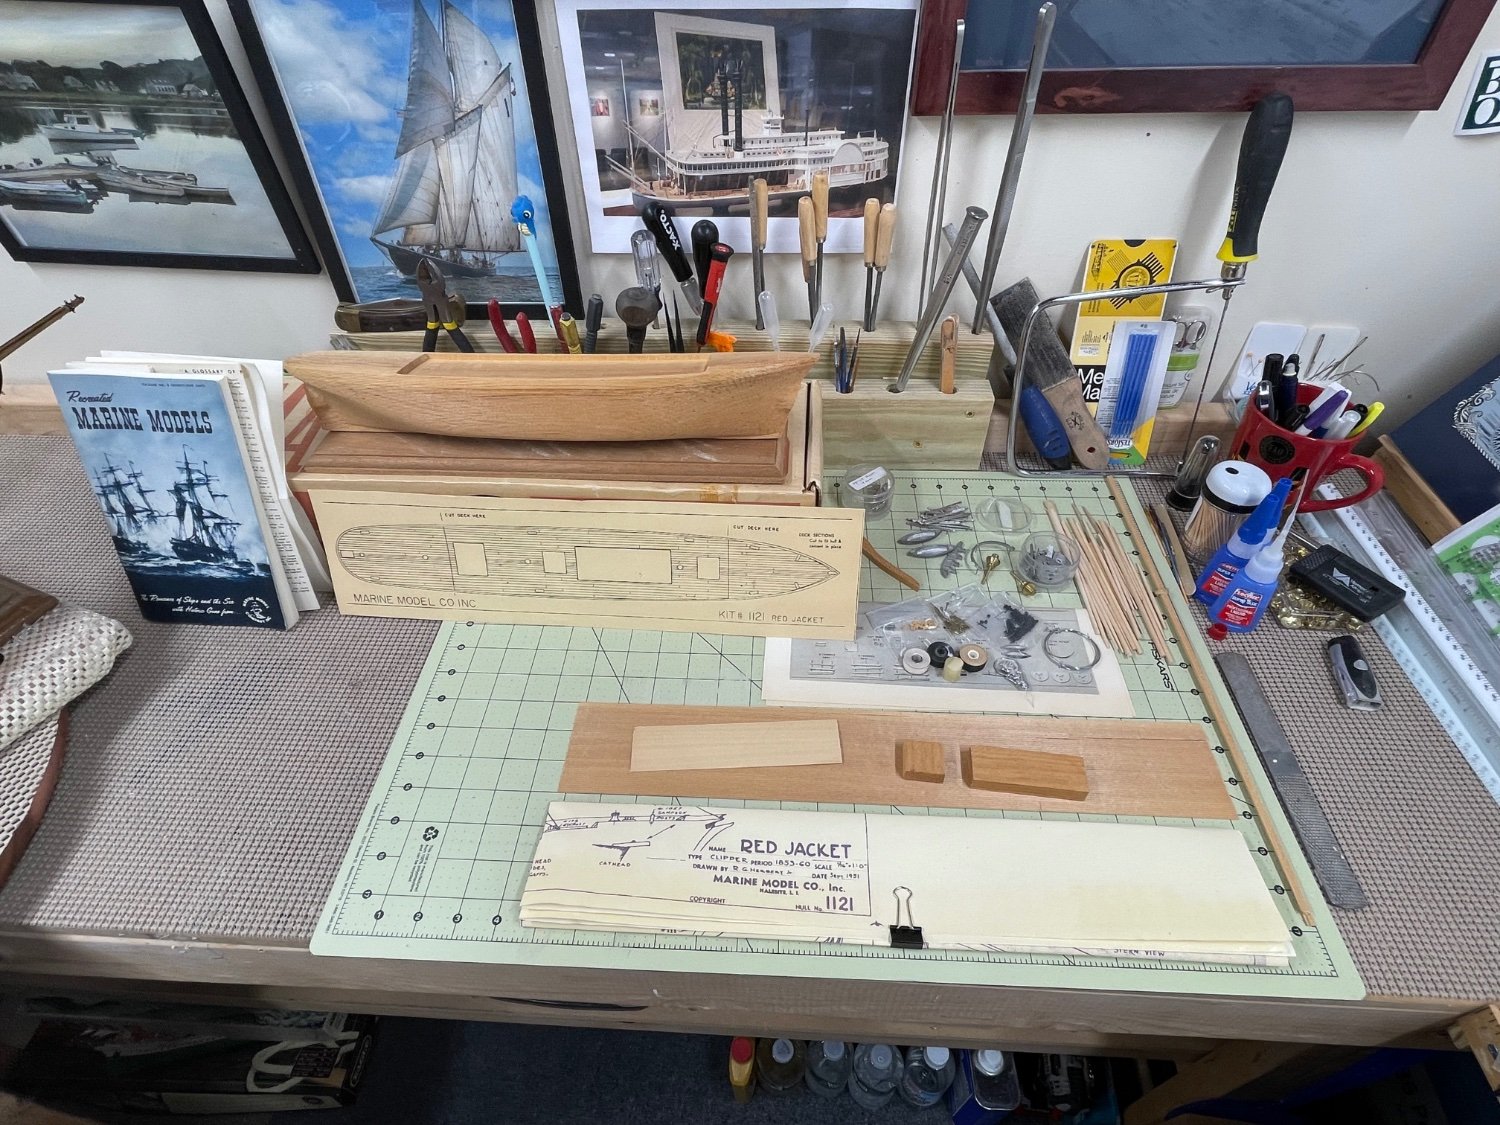
Picked up this vintage kit from @Cornhusker1956 back in August. Here is the build log, I promised.

I do have a soft spot for these old kits. My first wood ship build was the Charles W Morgan by Marine Model Company. I built that kit in 2020.

The date on the blueprint is 1951. This kit seems to have survived well and deserves to be rescued.
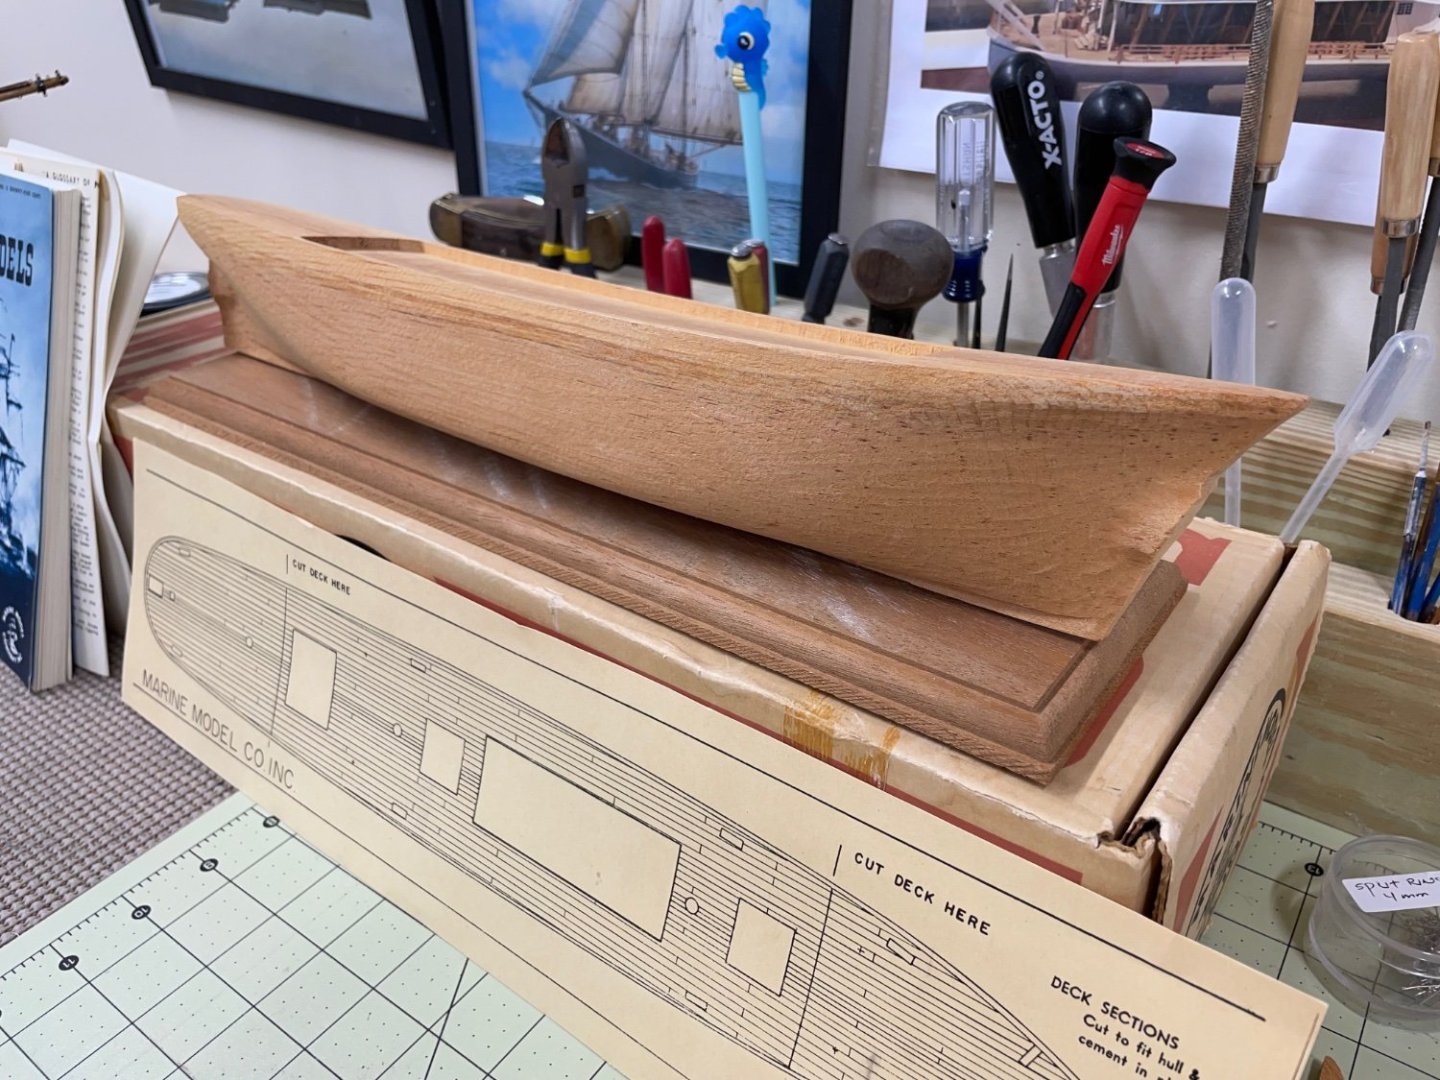
This is a solid hull kit so my first order of business will be to get this “pre carved” hull into proper shape from stem to stern.
Many thanks to @Cornhusker1956 for entrusting this little beauty to me.
Cheers 🍻
- Ryland Craze, GrandpaPhil, hof00 and 4 others
-
7
-
24 minutes ago, GGibson said:
Masts and fittings are looking great, John! Great work. Wish I would do as well on soldering. Guess it's sorta like the "how do you get to Carnegie Hall?" question... Practice, practice, practice... Carry on, sir! 👍🏆
Thanks Greg, add patience and attention to detail. 😆 I’m still learning new technique every day. You can do it. 👍
- GGibson and Glen McGuire
-
2
-
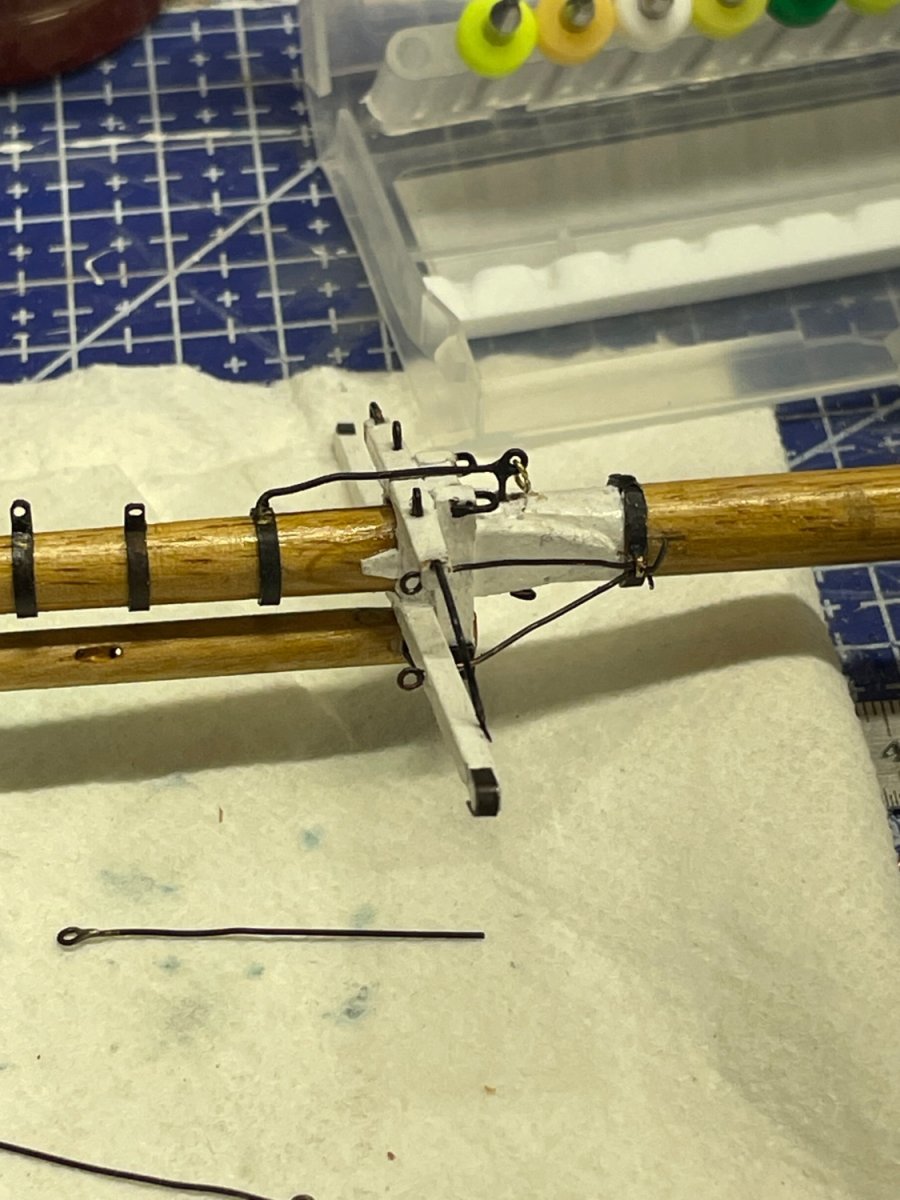
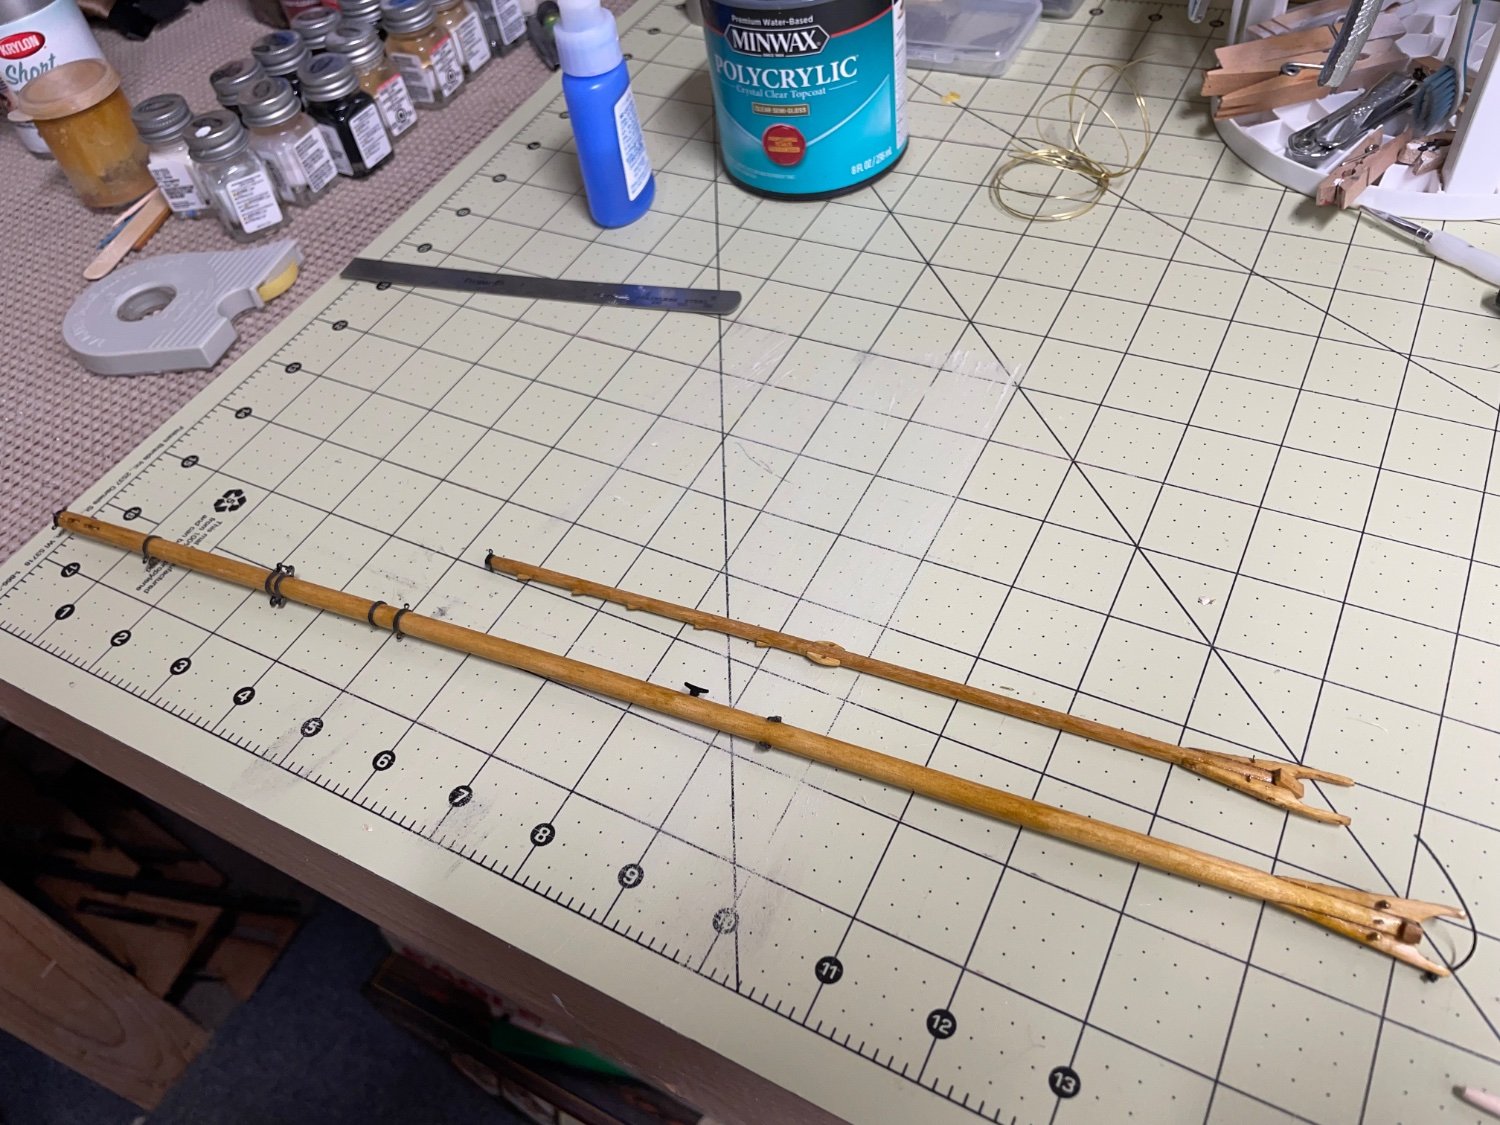
Main Gaff…

Main Gaff completed…
Fore Boom…
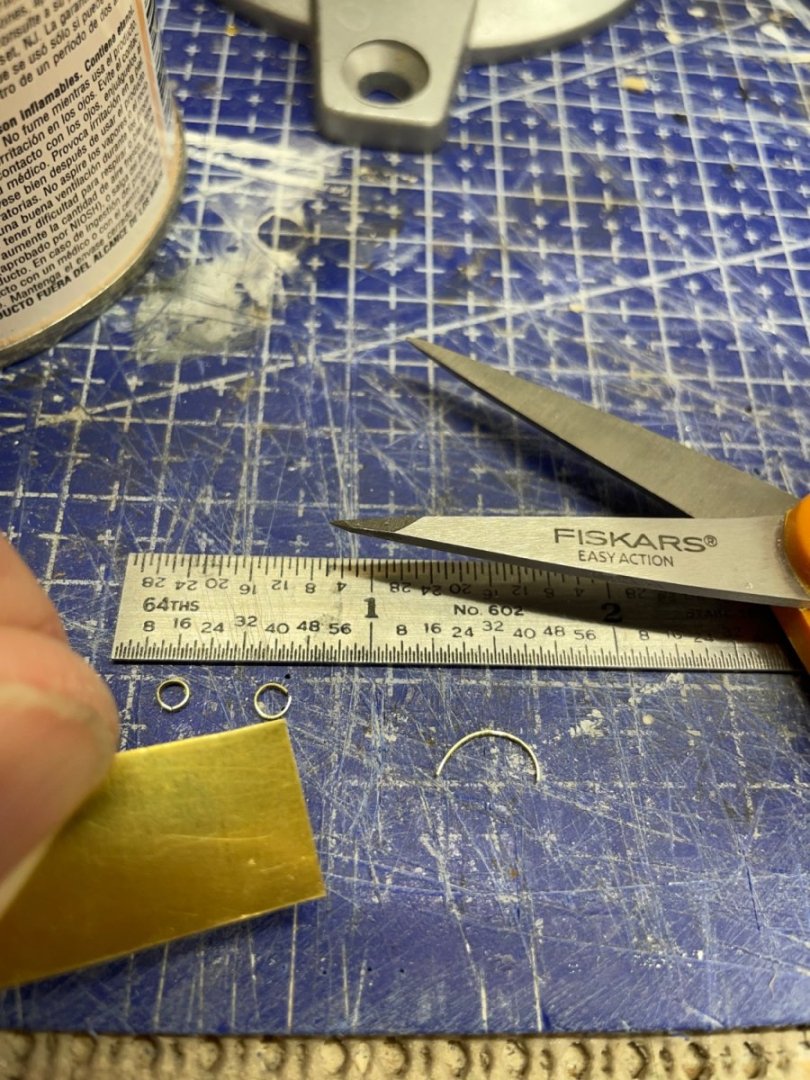
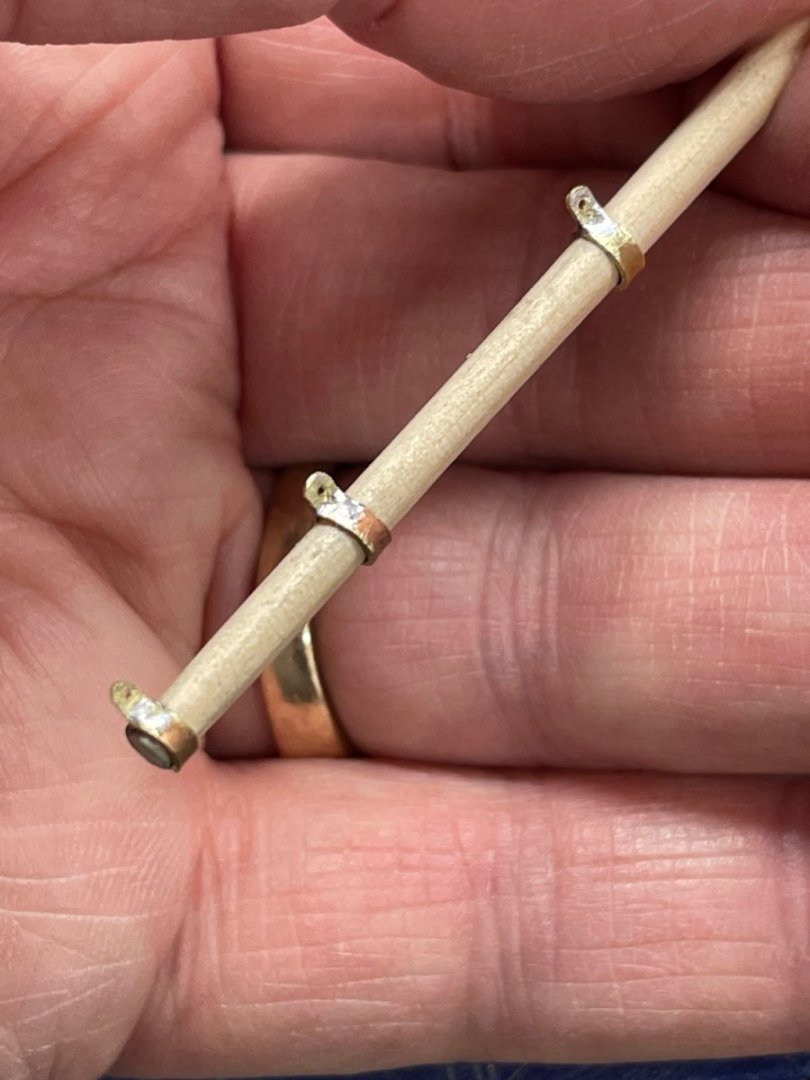
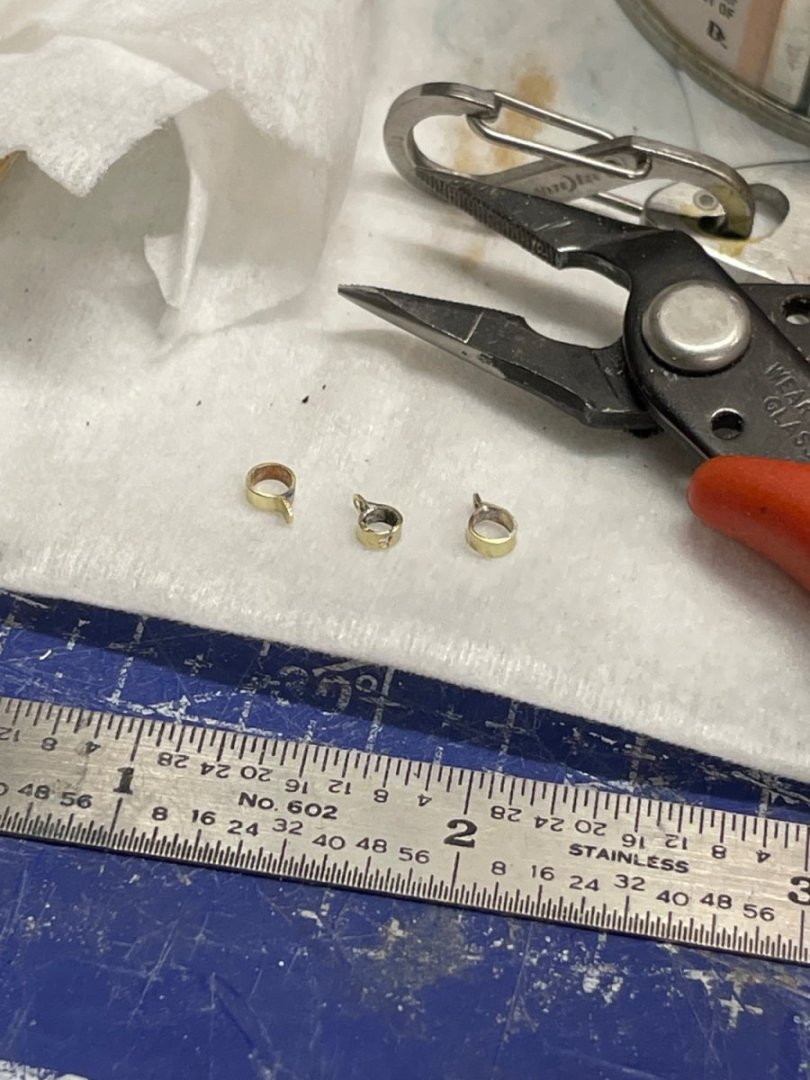
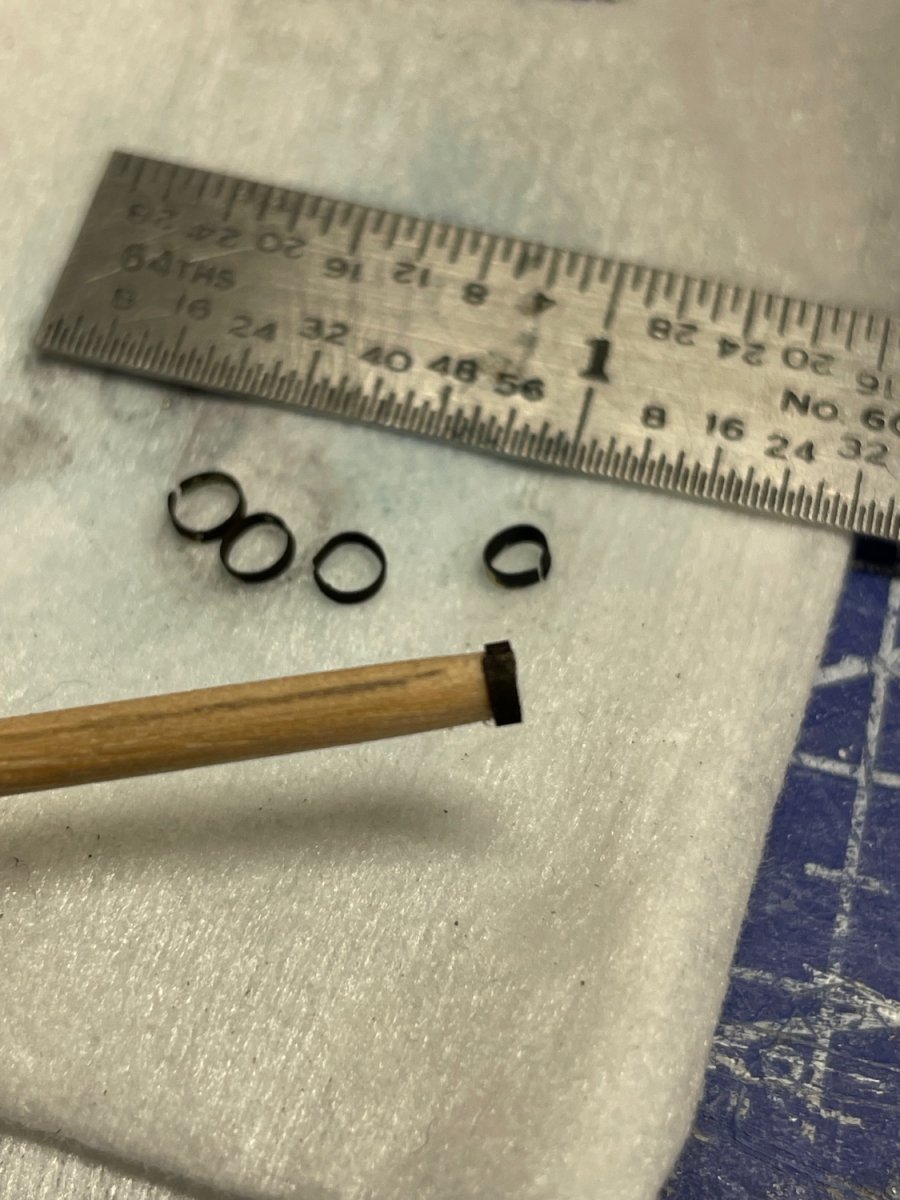
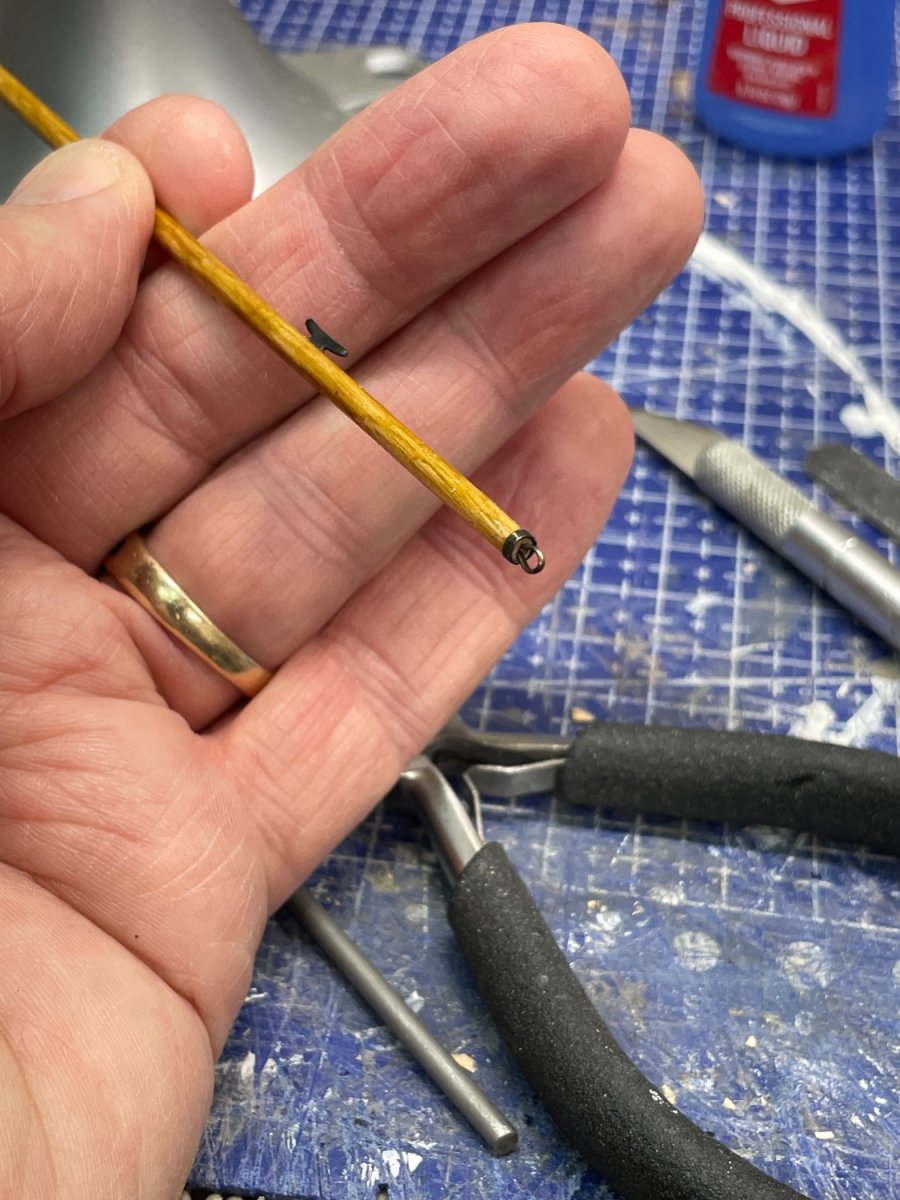
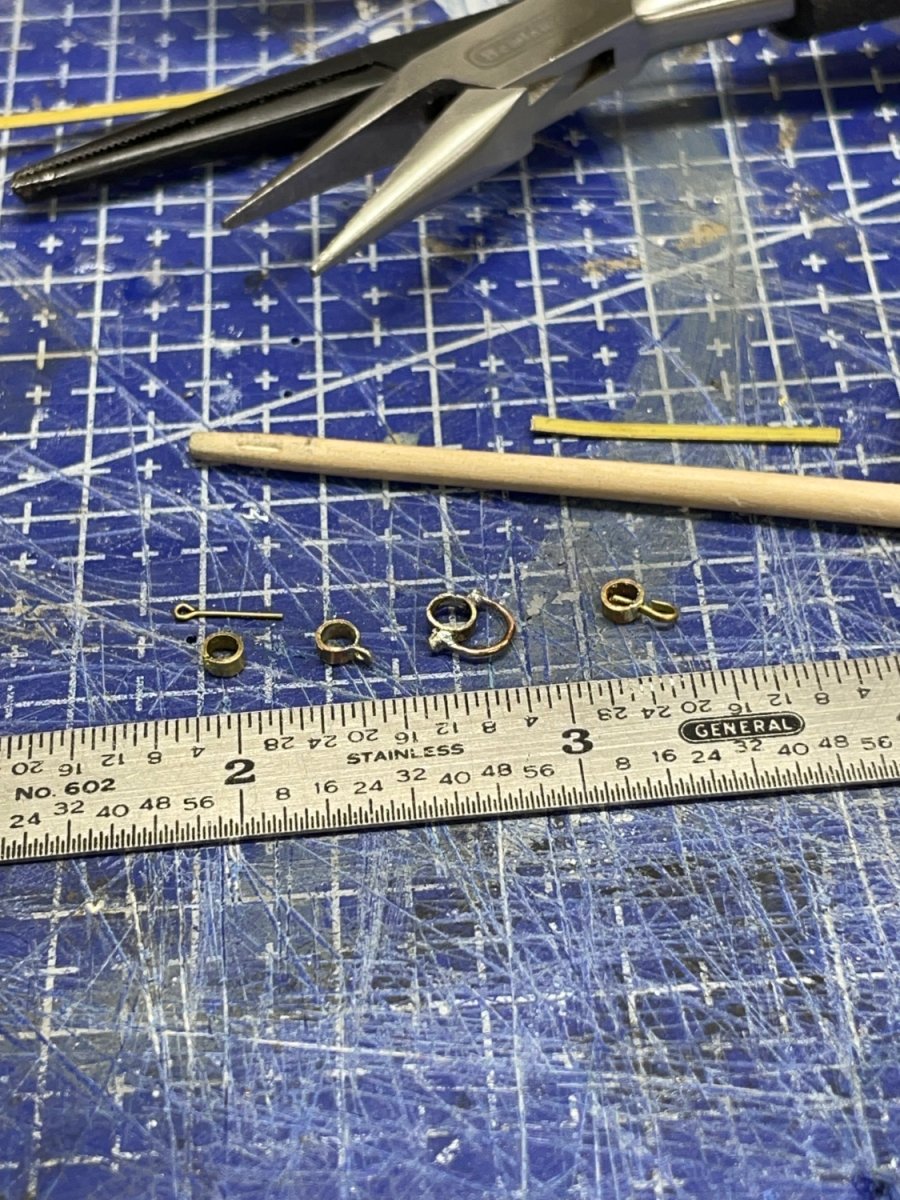
I cut thin strips of brass, these Eye Bands are the smallest thus far.


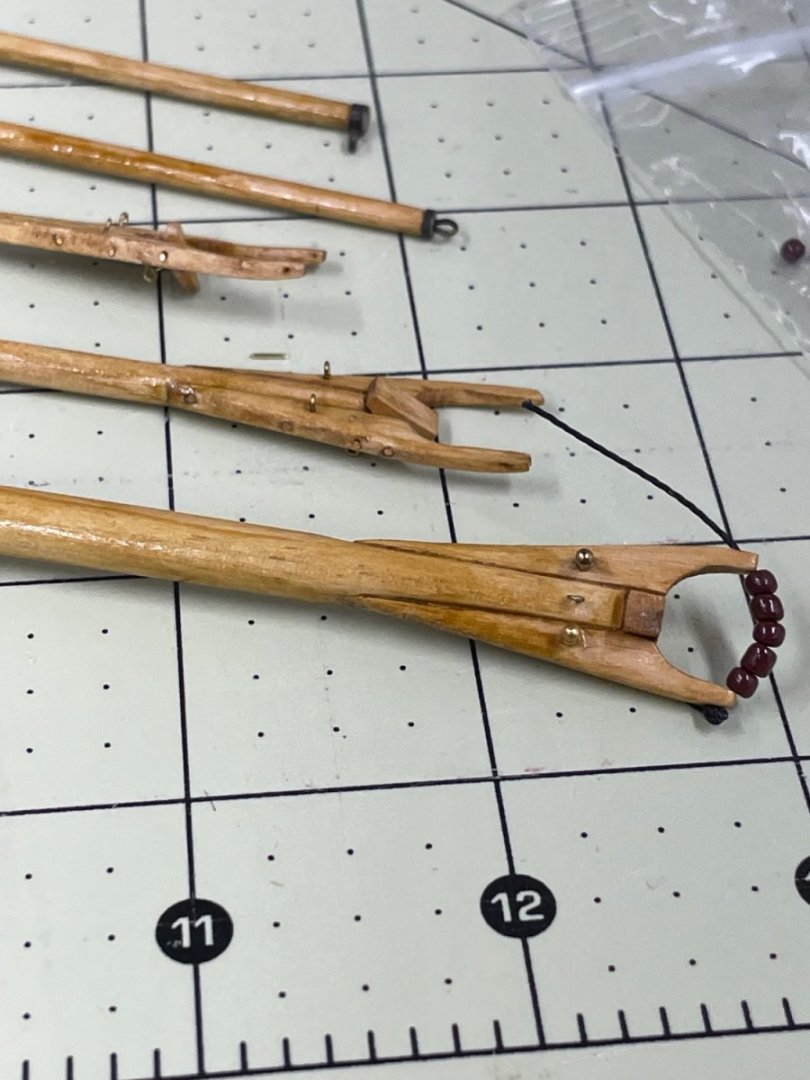
Fore Boom completed.Fore Gaff…
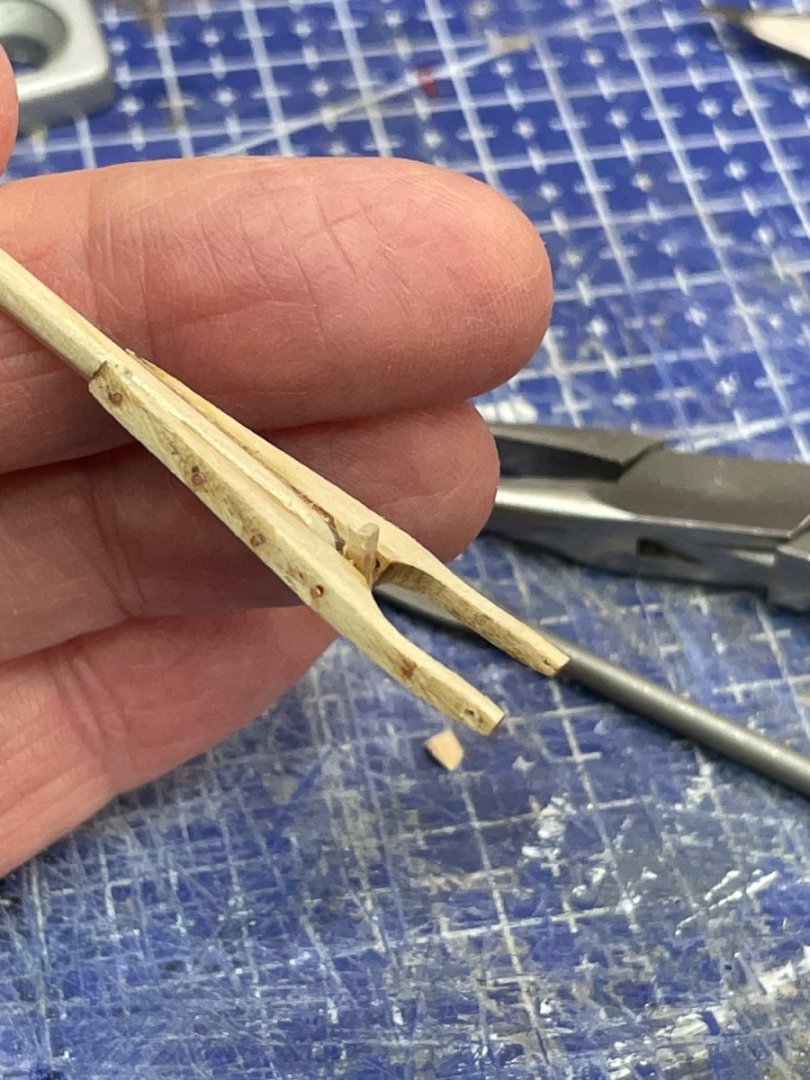
Fore Gaff Jaws
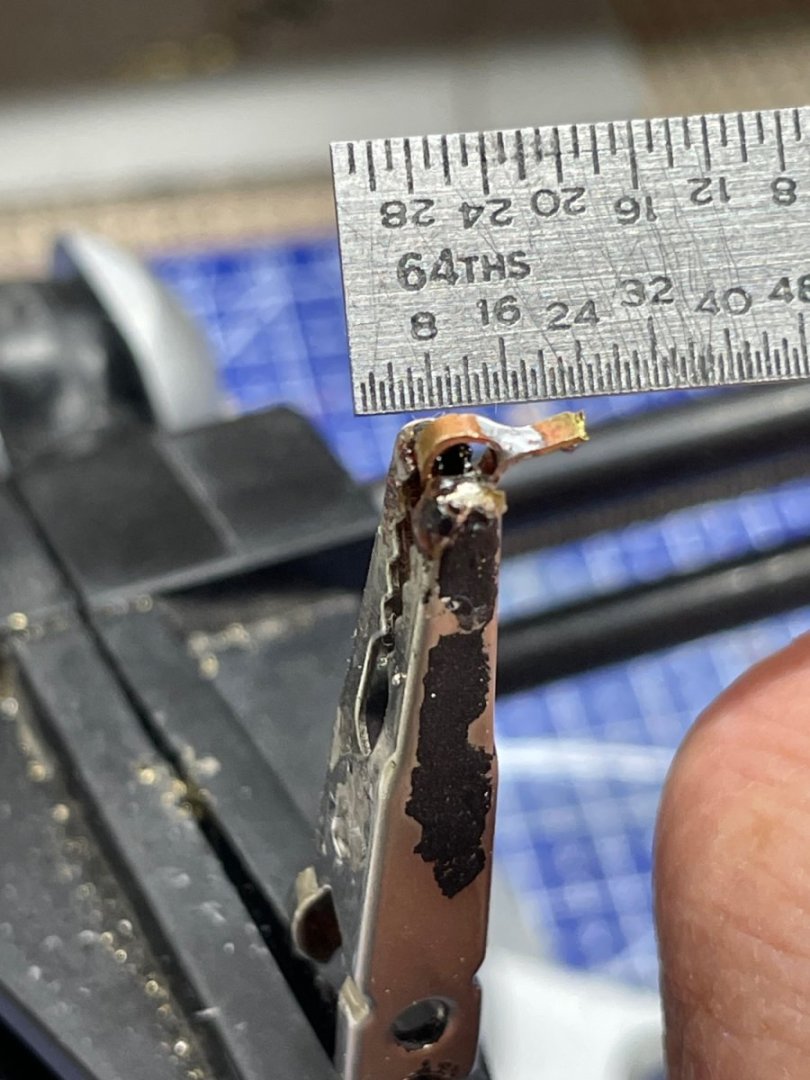
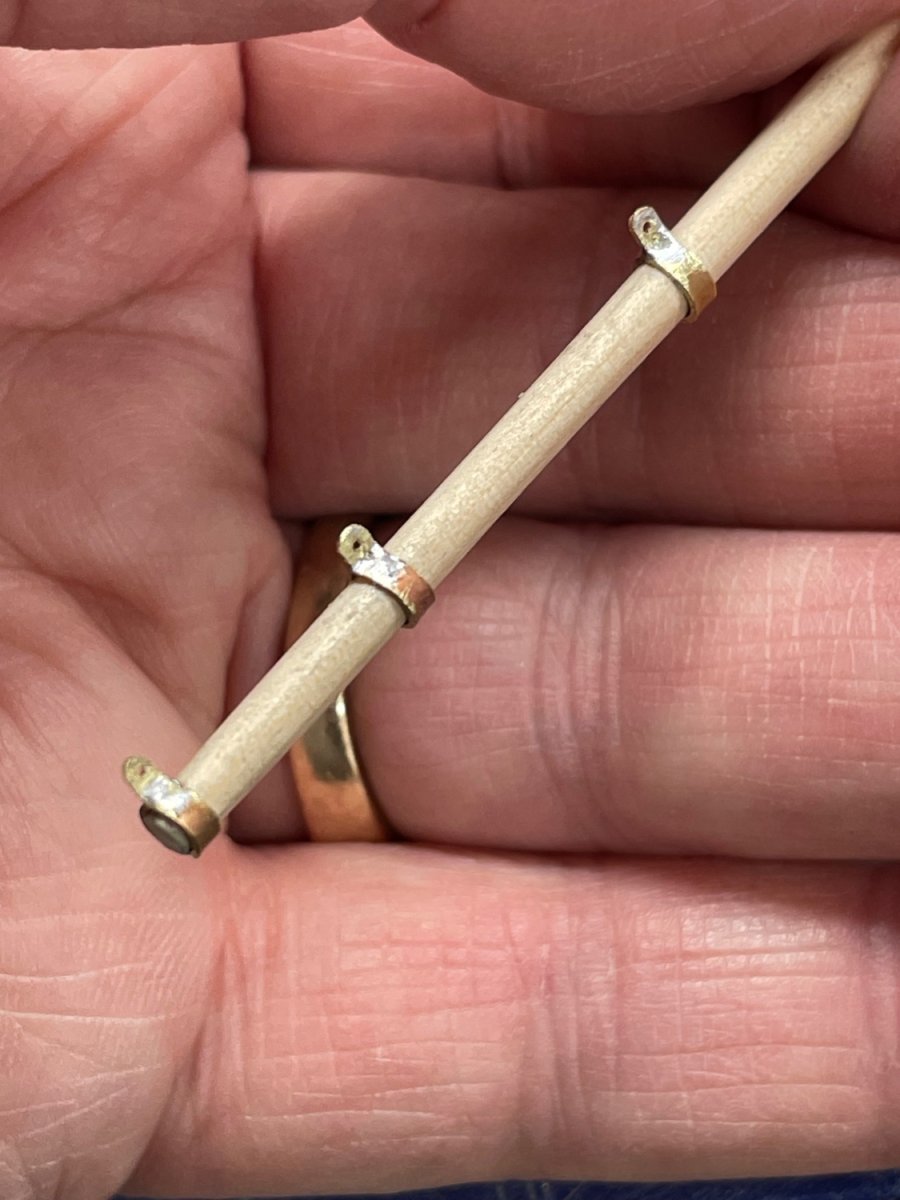
Peak Halliards Bands soldered
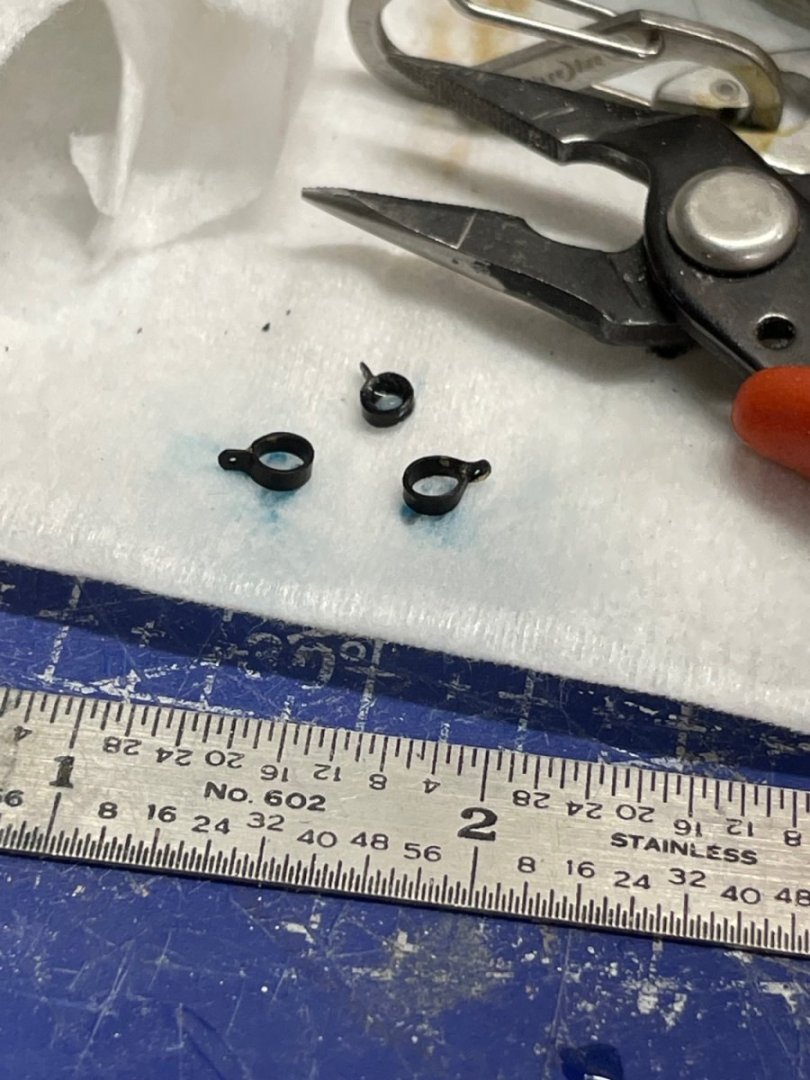
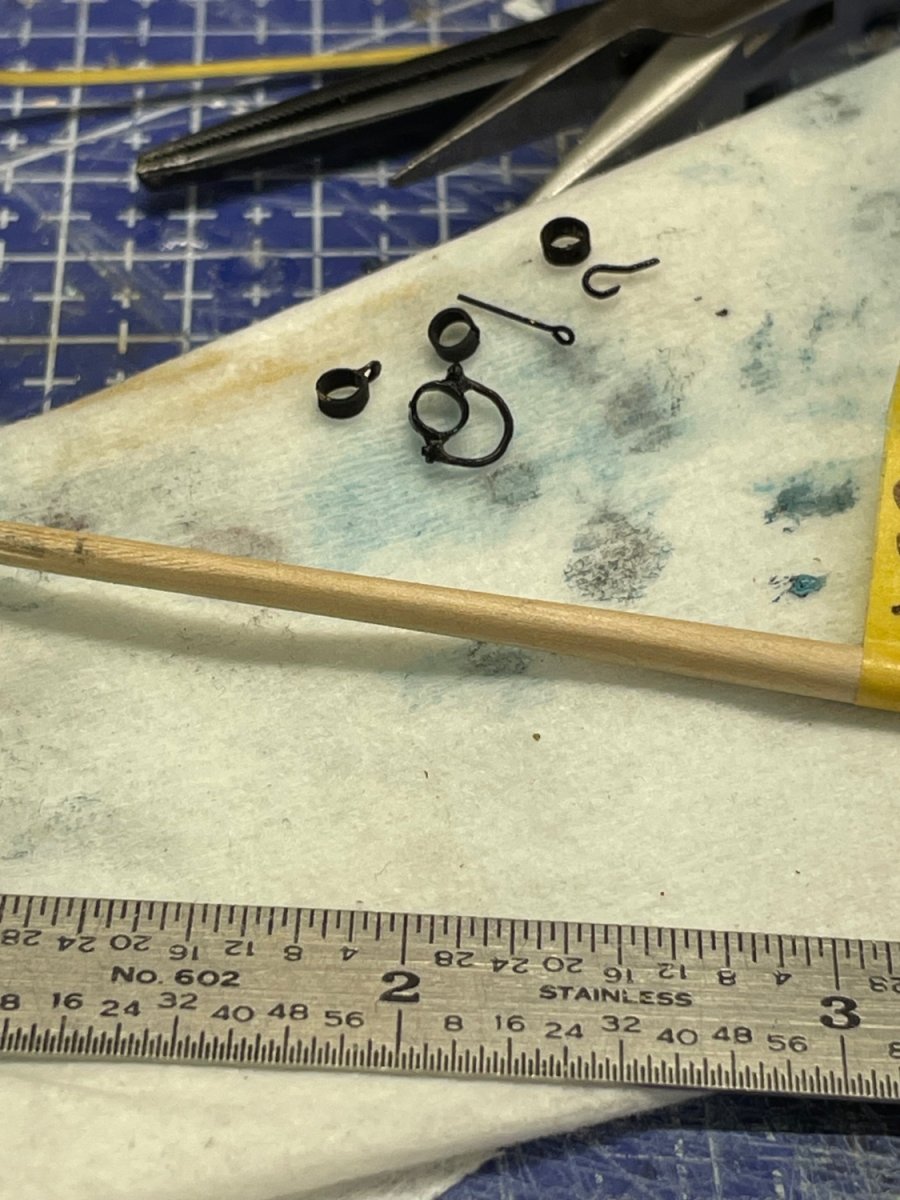
Bands blackened
Fore Gaff completedJib Boom…
Jib Clew Band


Jib Sheet Band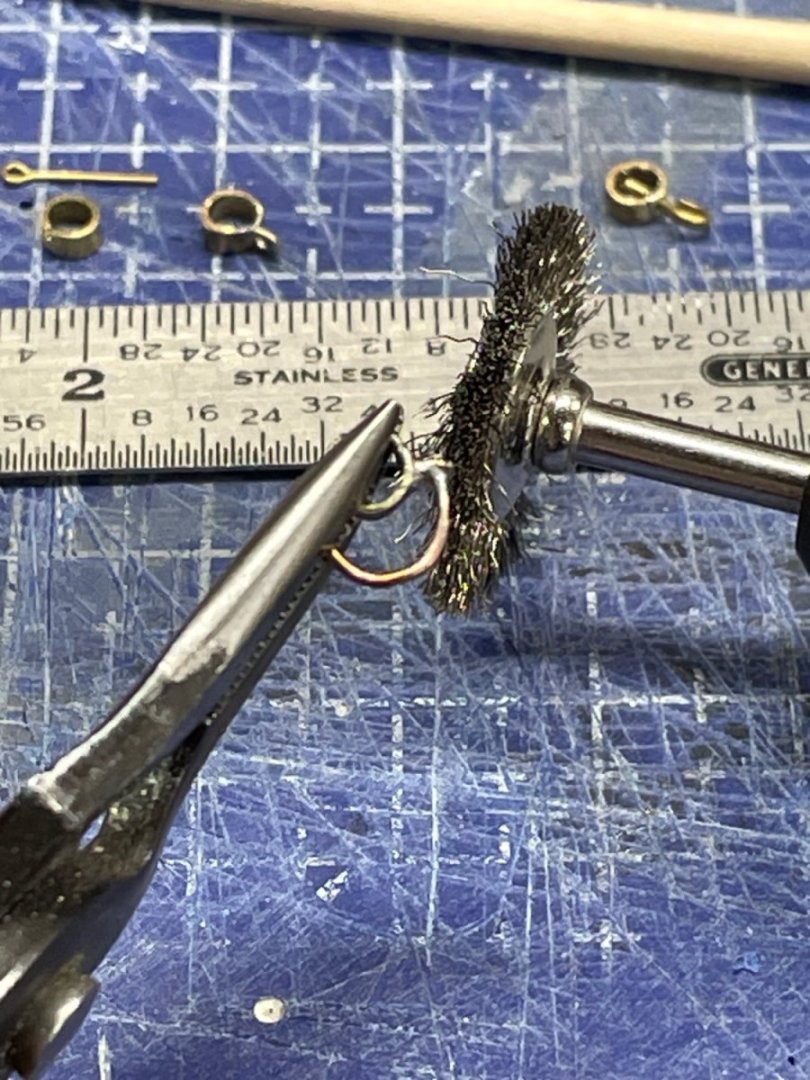
Cleaning up solder
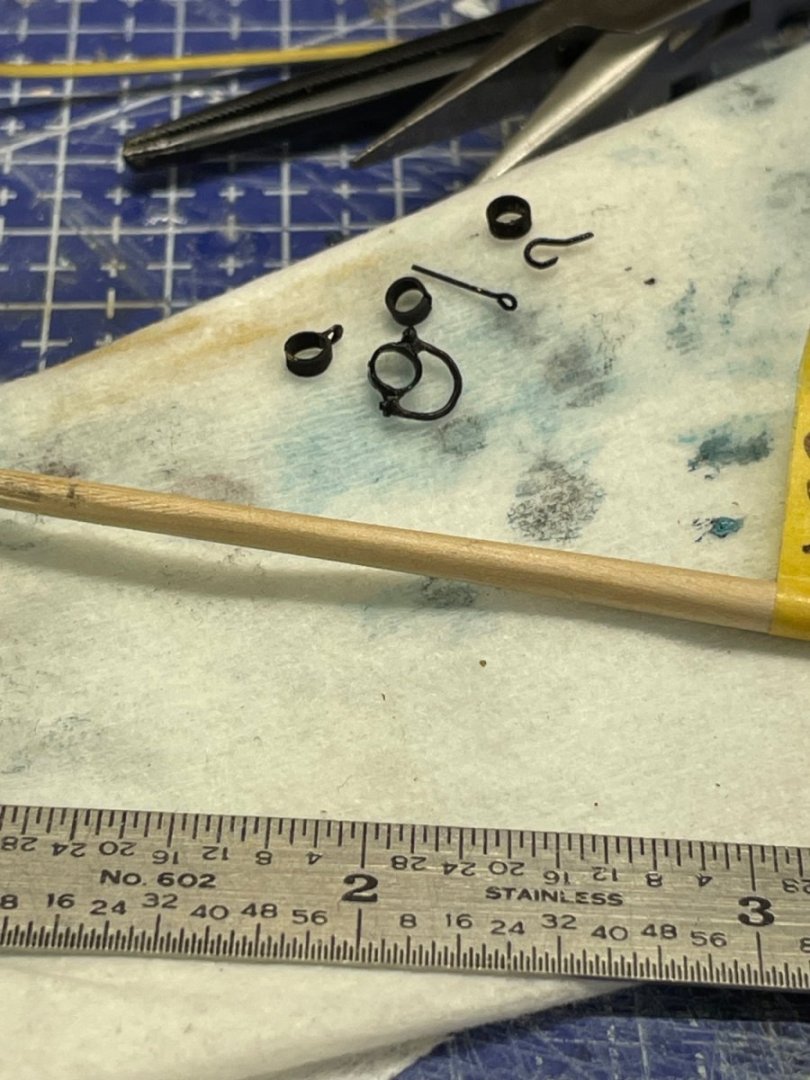
All bands blackened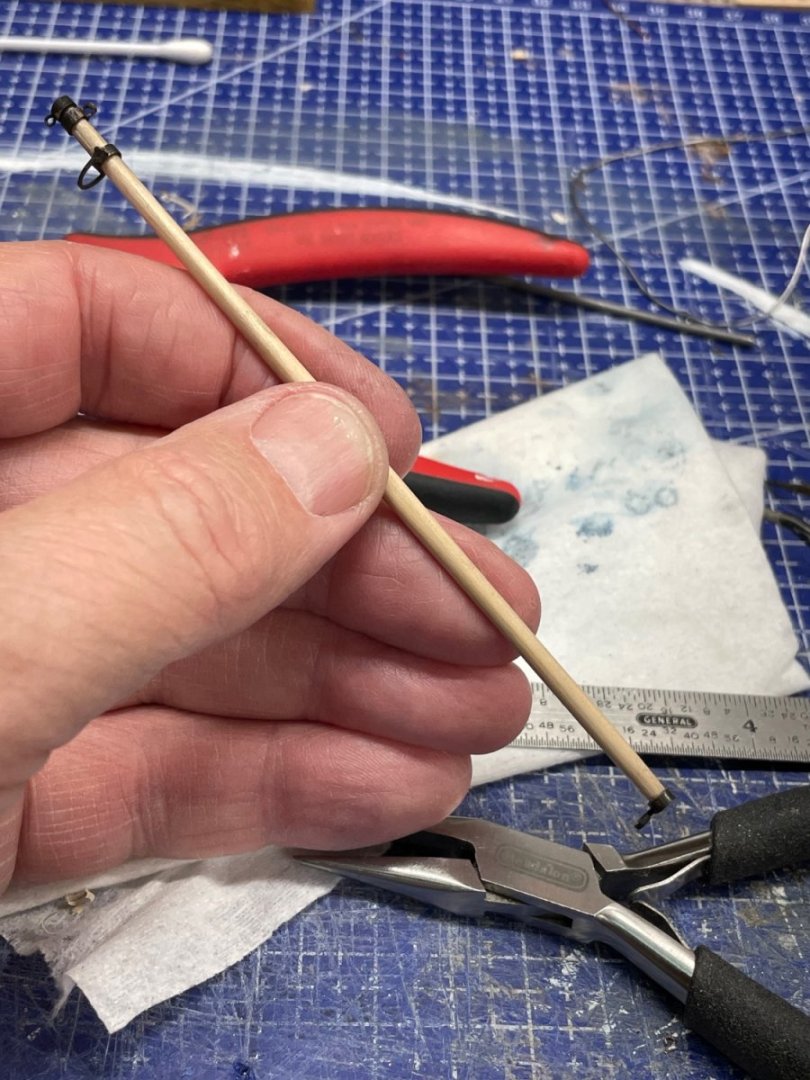
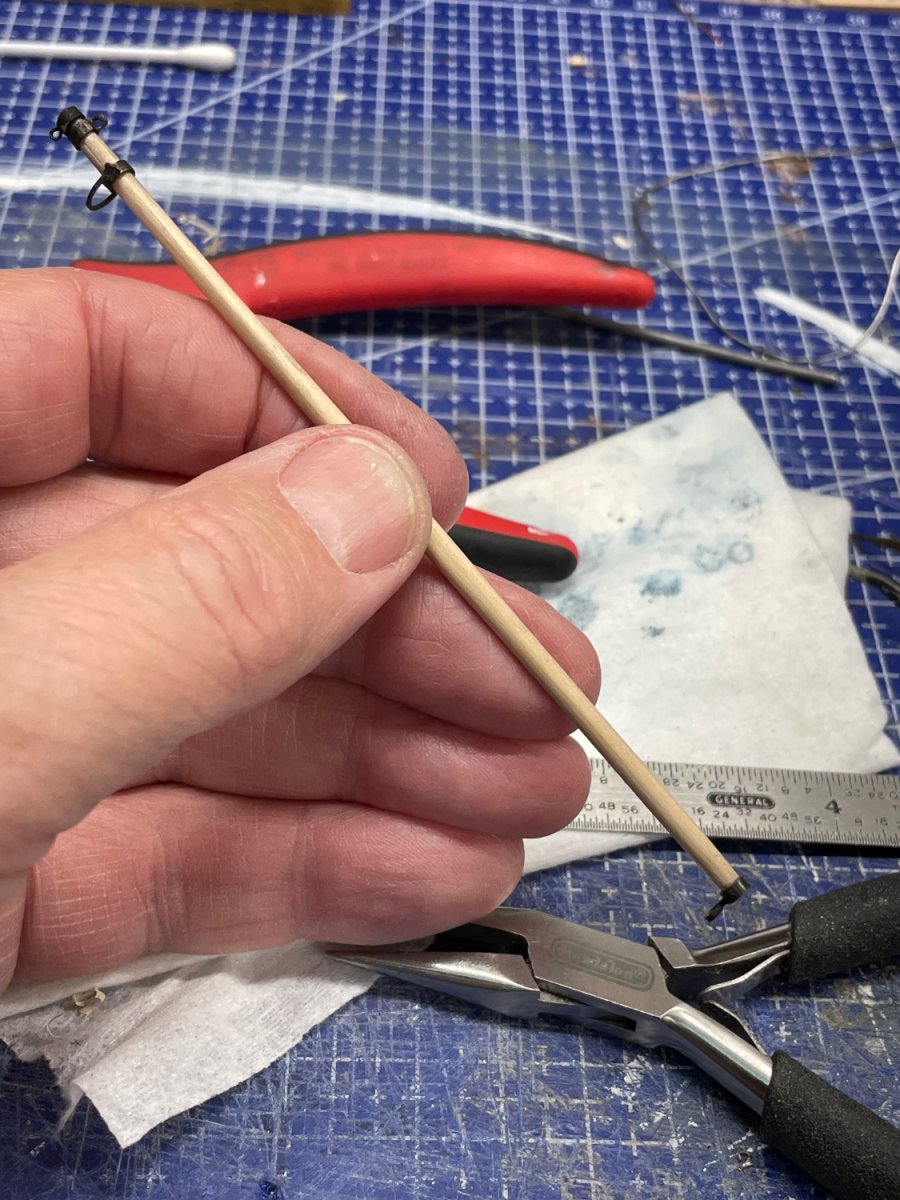
Hardware complete on Jib Boom
Jib Boom completedAll 5 Booms and Gaffs completed
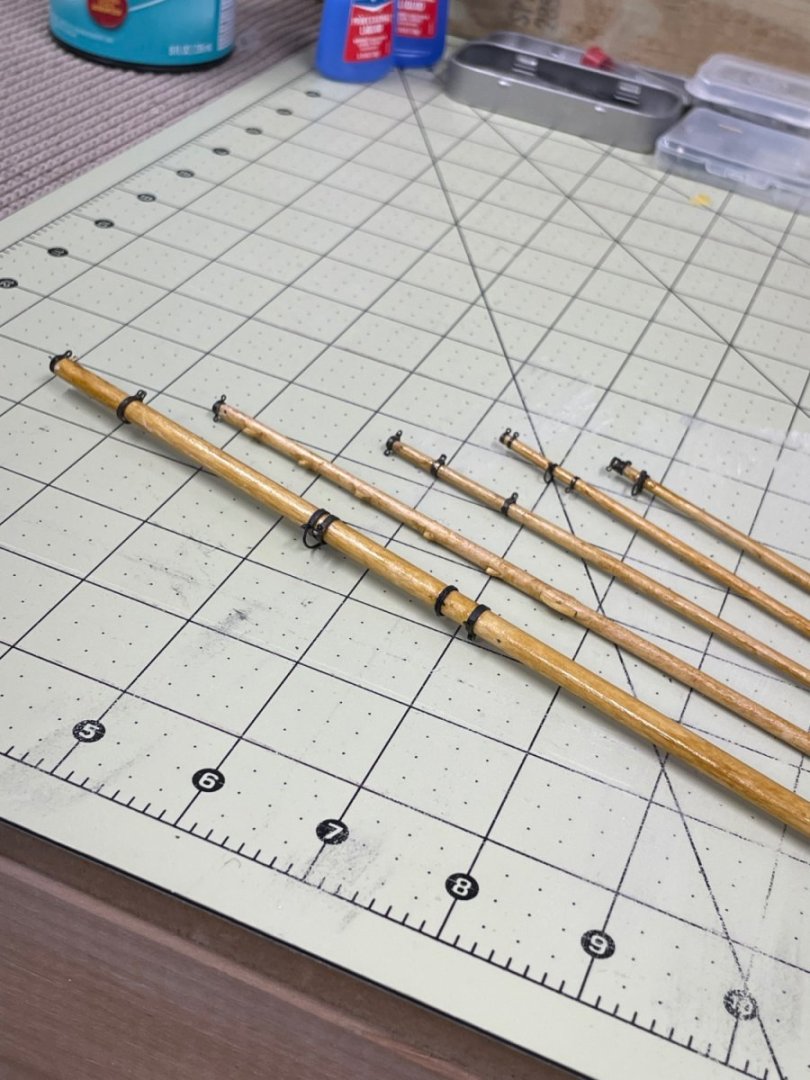
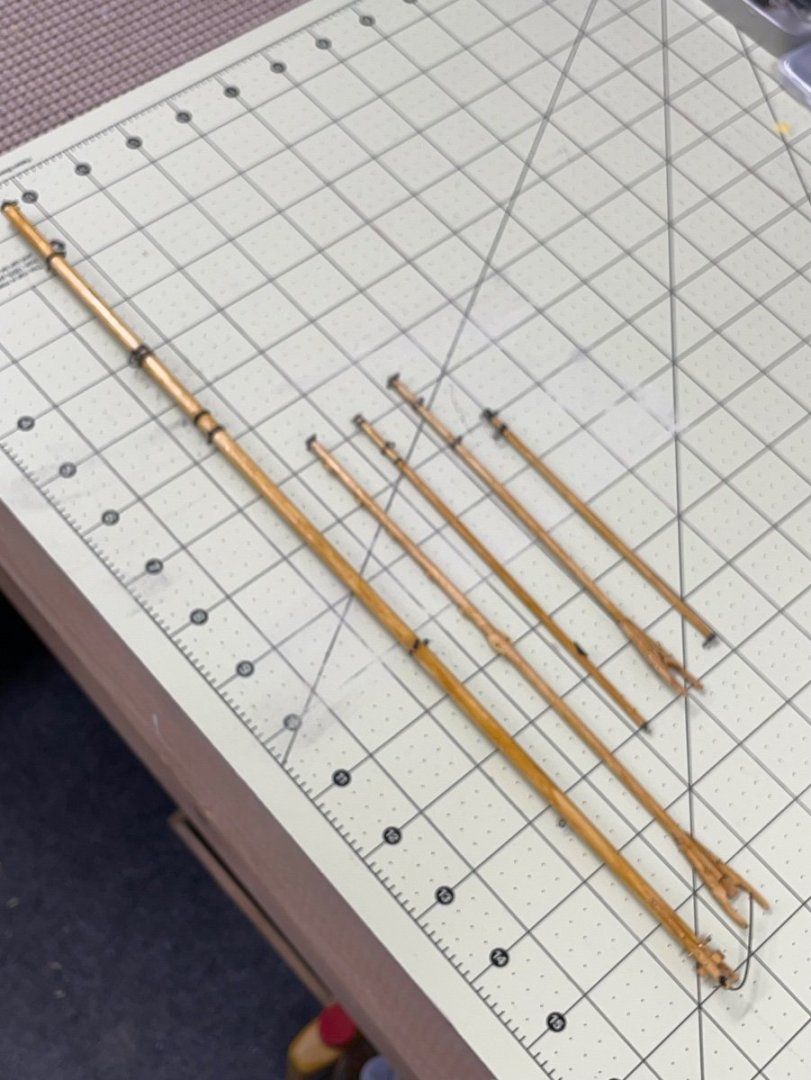
I think we are ready to start rigging and sails. Woo Hoo! 🍻 -
9 hours ago, Dr PR said:
While handling them for soldering five disappeared into the void (12.5%). Another broke while I was inserting it into a 0.013 inch (0.33 mm) hole in the hatch.
I’m with you Phil, seems like parts keeping getting smaller and then slip right from my fingers and disappear to be found months later.
Again, impressive work. The details matter. 👍
John


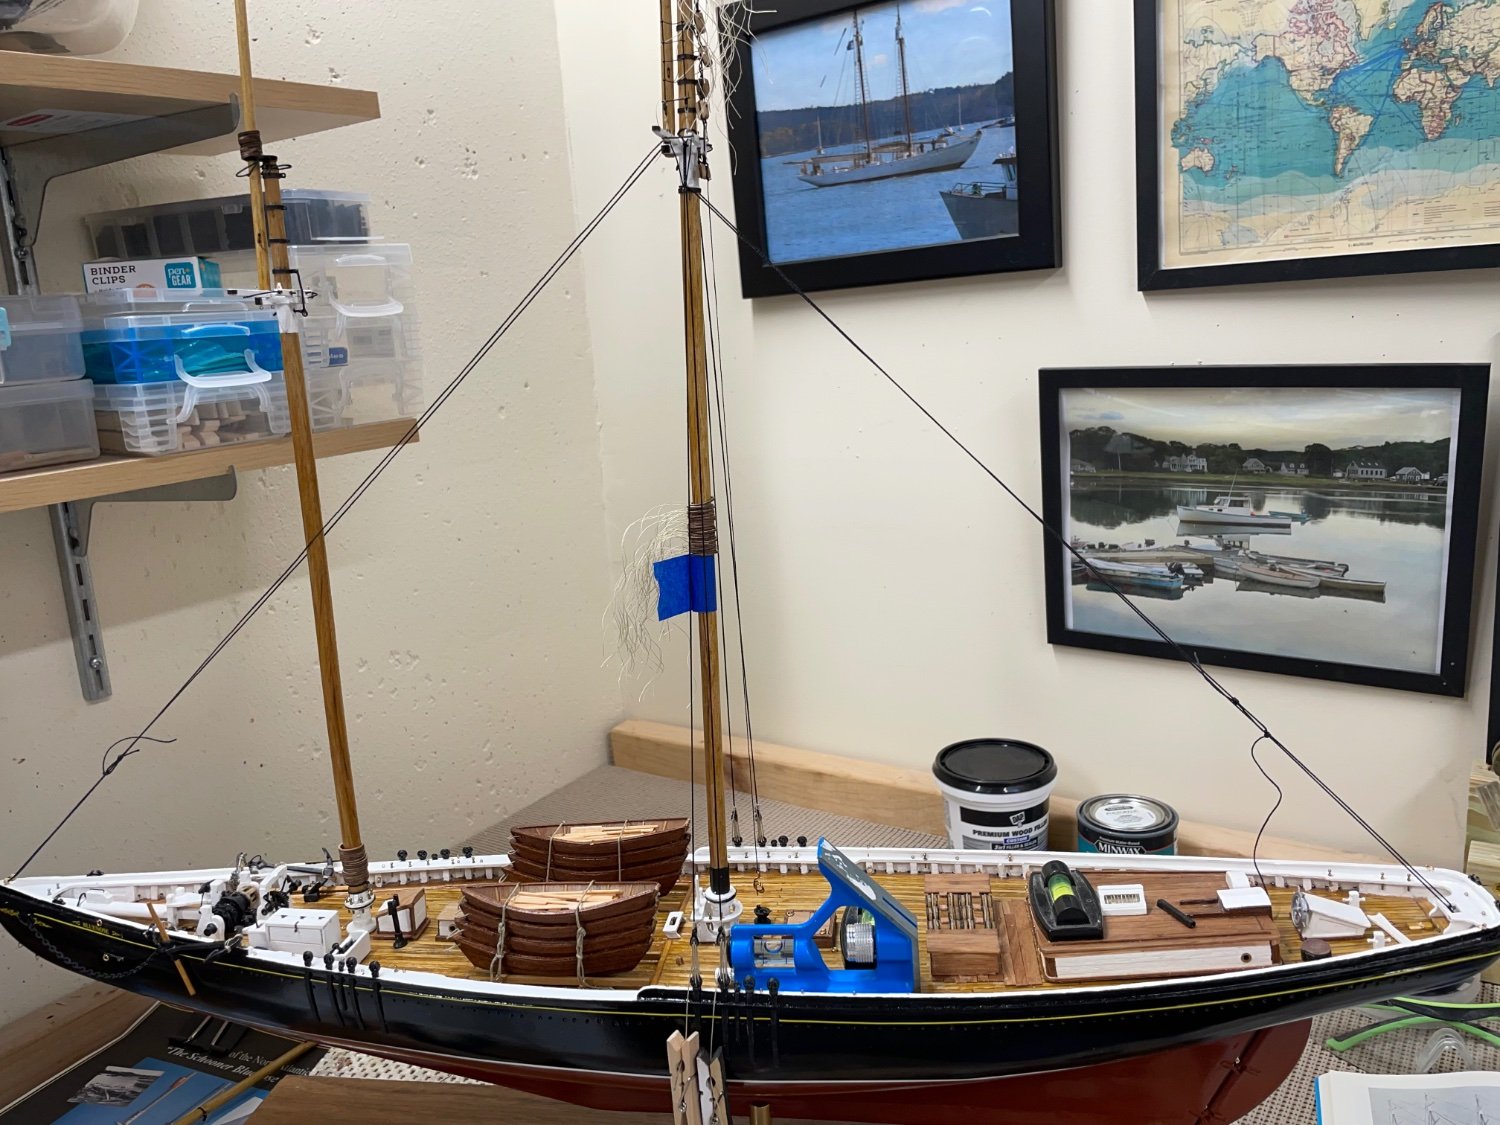


1921 Bluenose by John Ruy - Model Shipways Kit No. MS2130 - 1/64 scale - Canadian Fishing Schooner
in - Kit build logs for subjects built from 1901 - Present Day
Posted · Edited by John Ruy
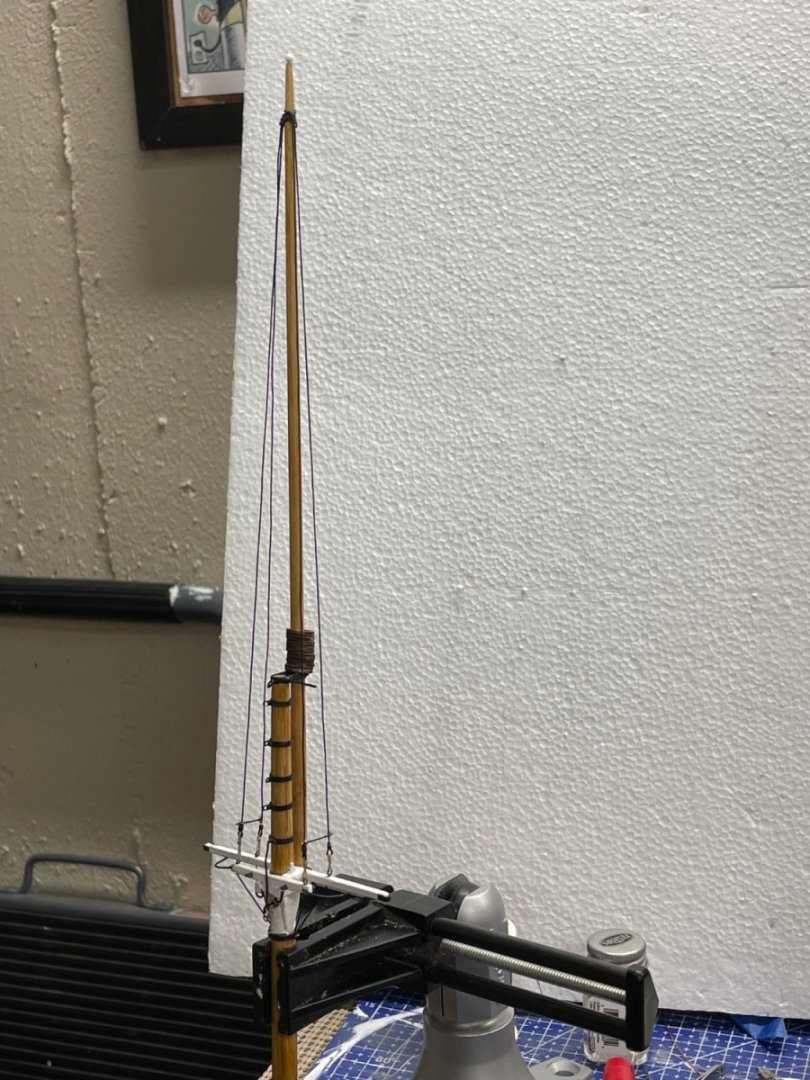
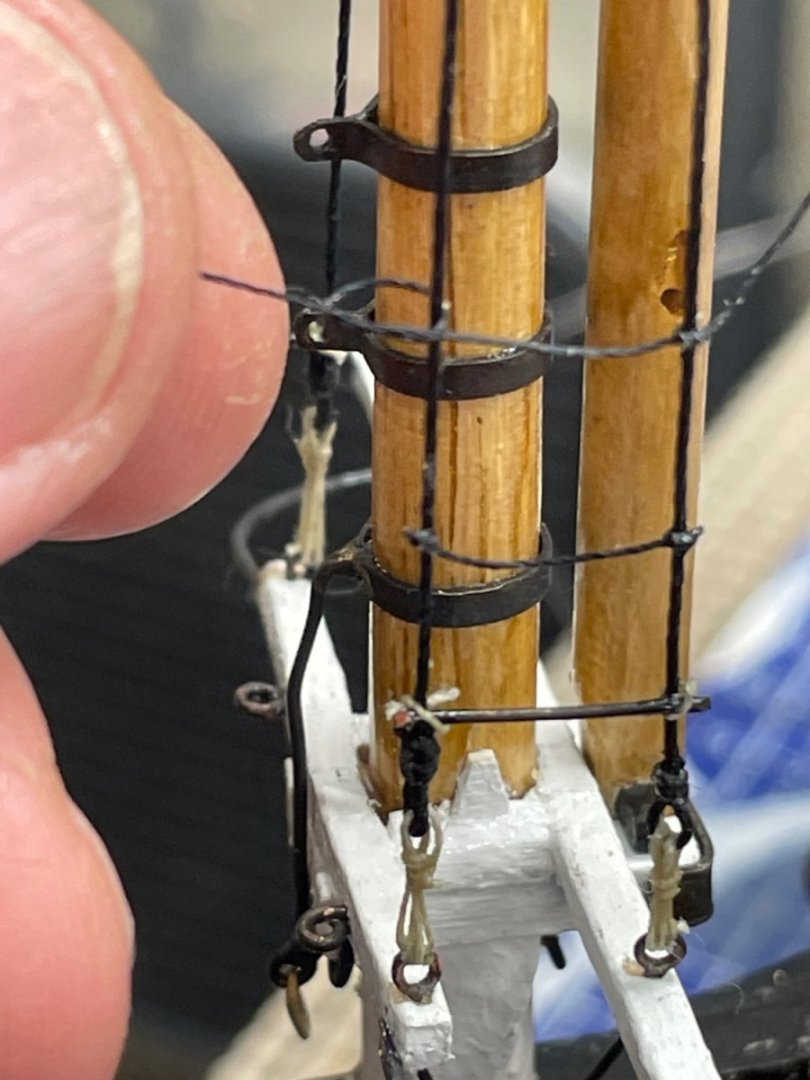
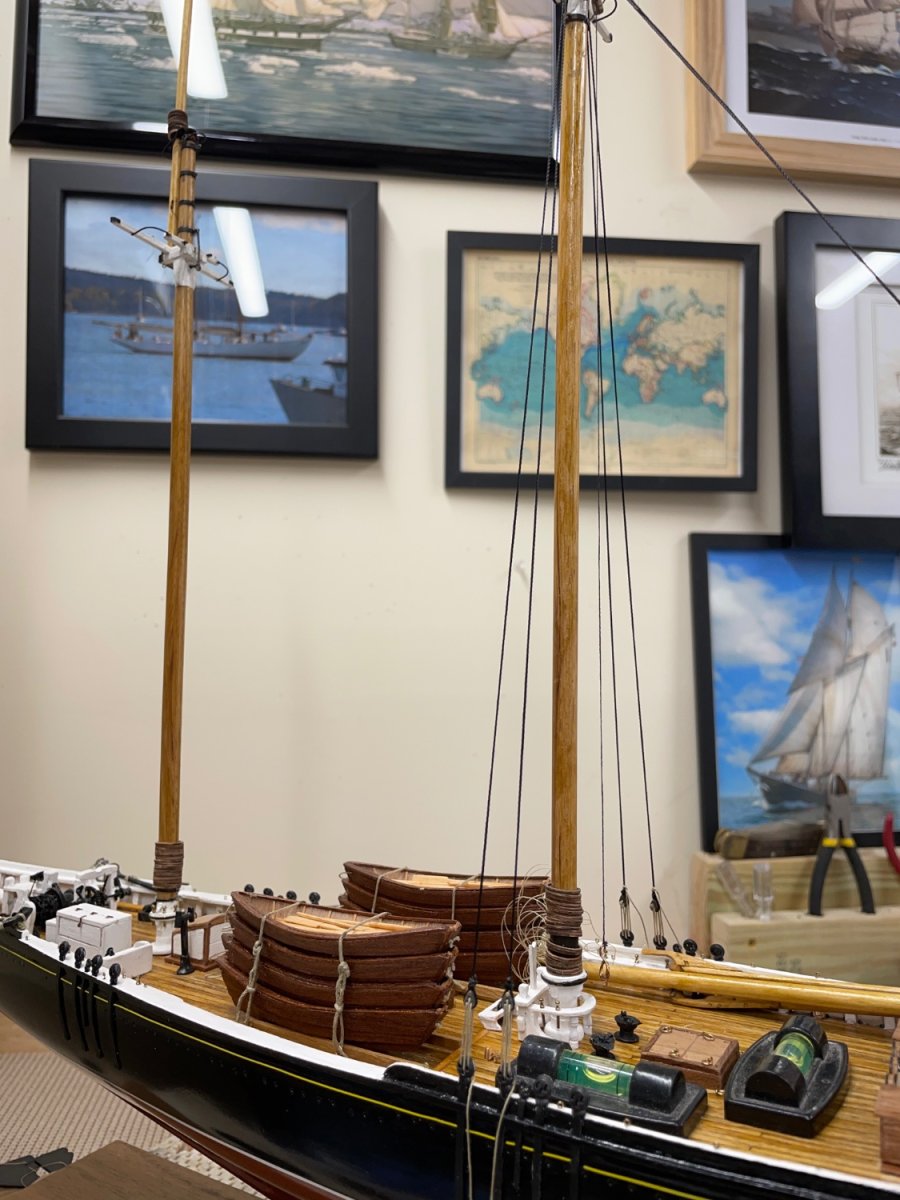
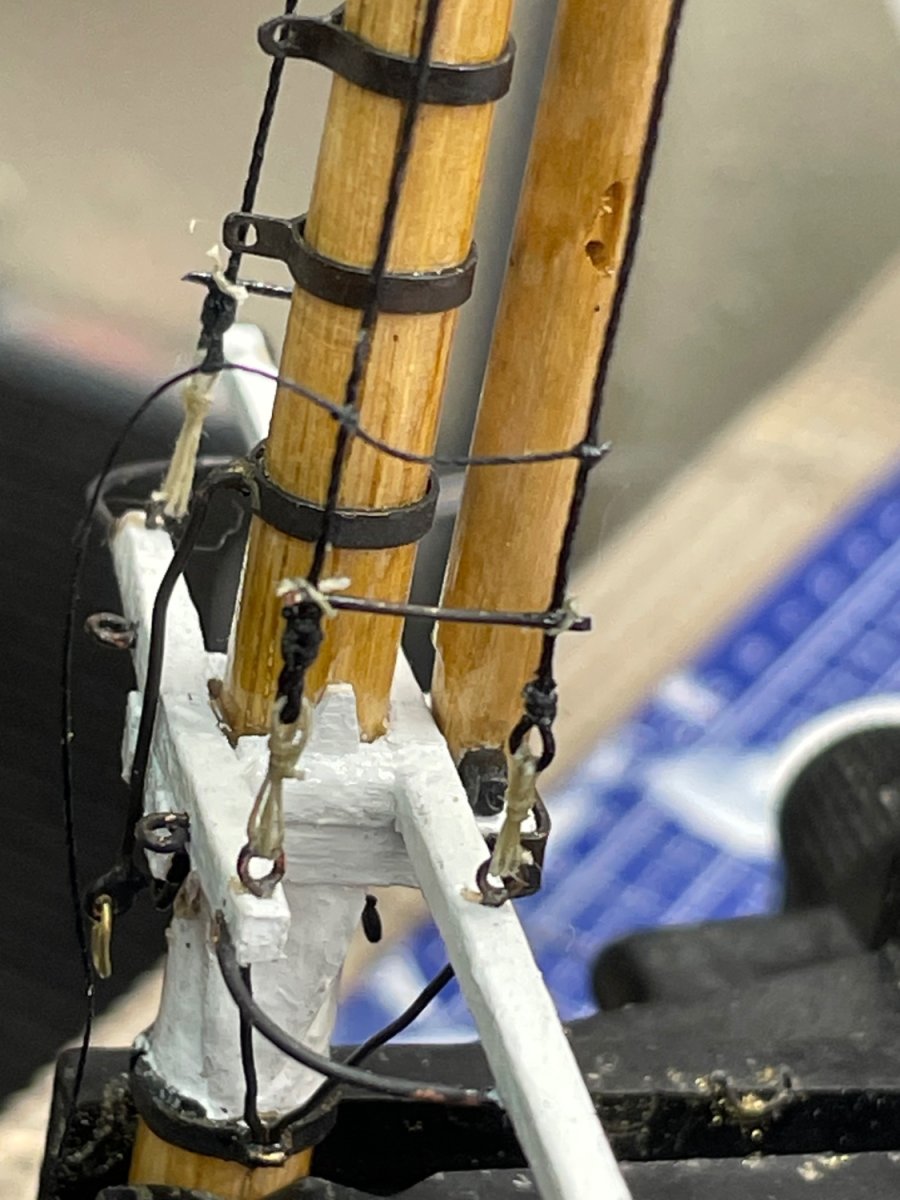
Setting the Fore Mast…
Before setting the Fore Mast, I will complete some additional details while I can work with the mast unmounted.
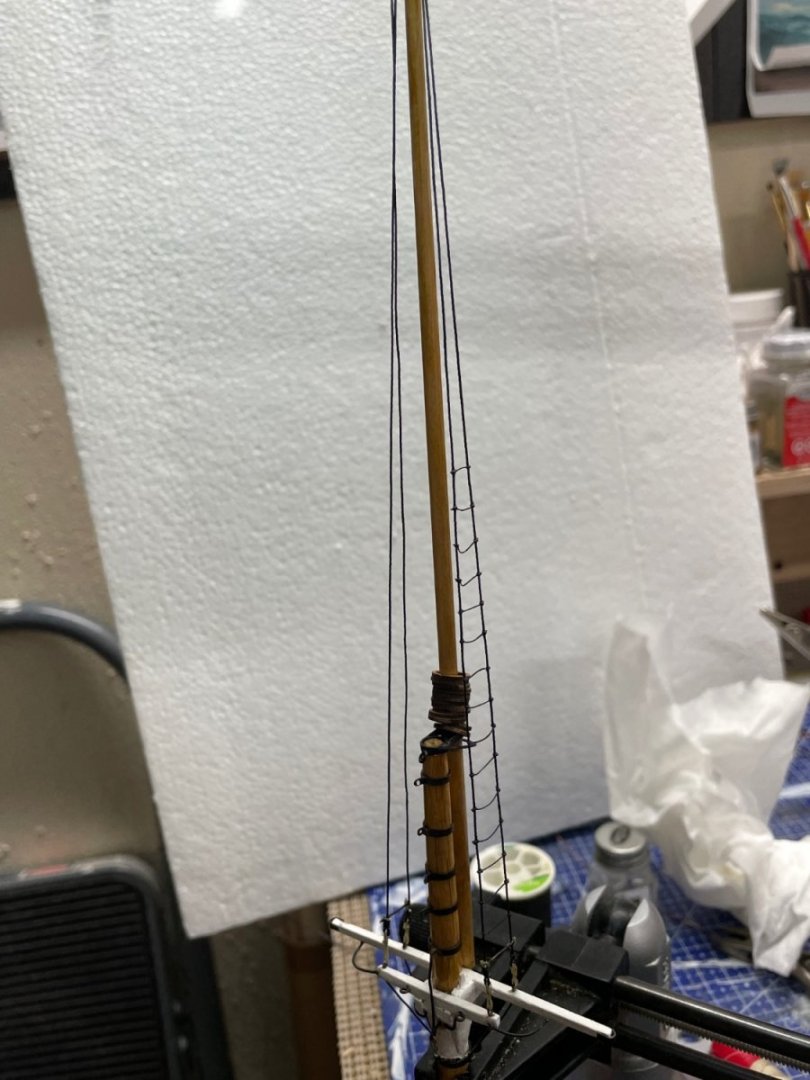
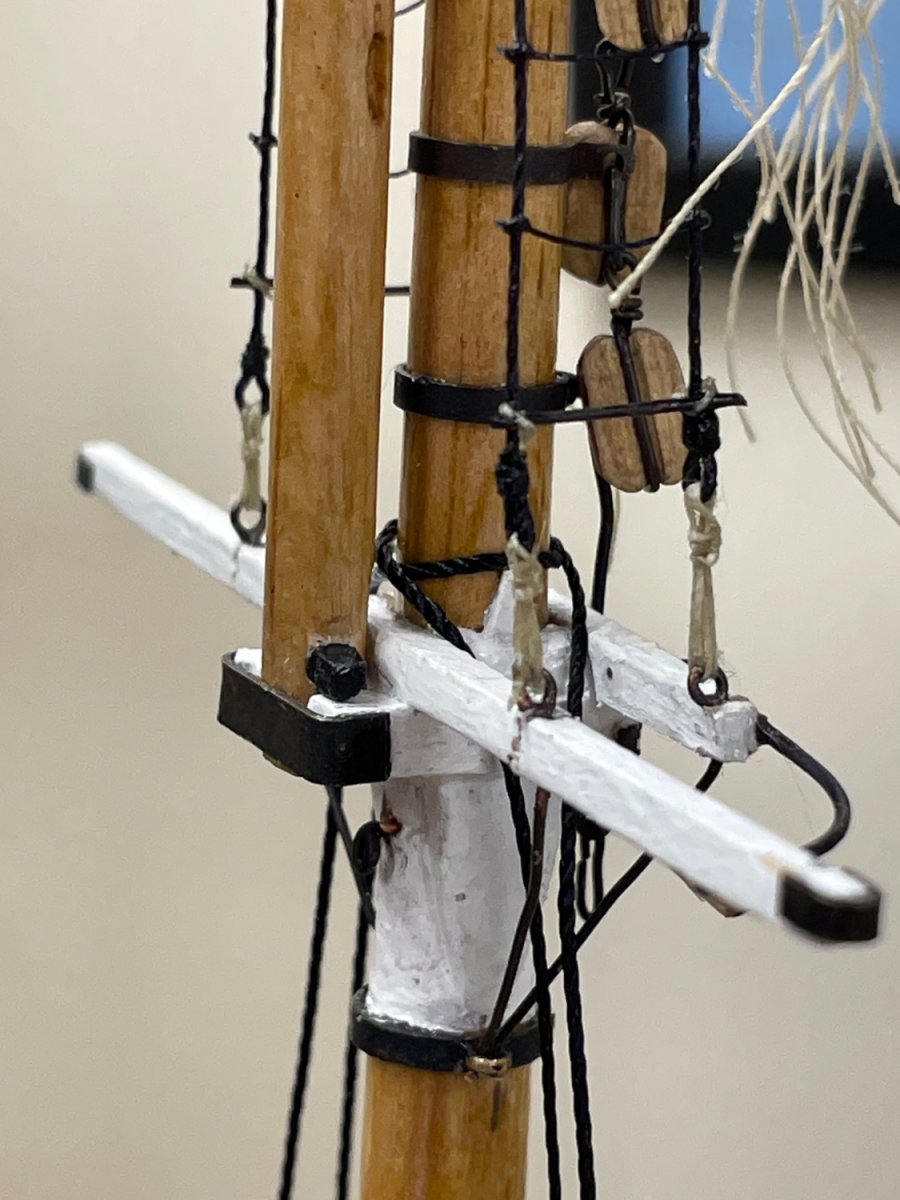
Spreader Lifts…
Lanyards…
Ratlines…
Completed Topmast fittings…
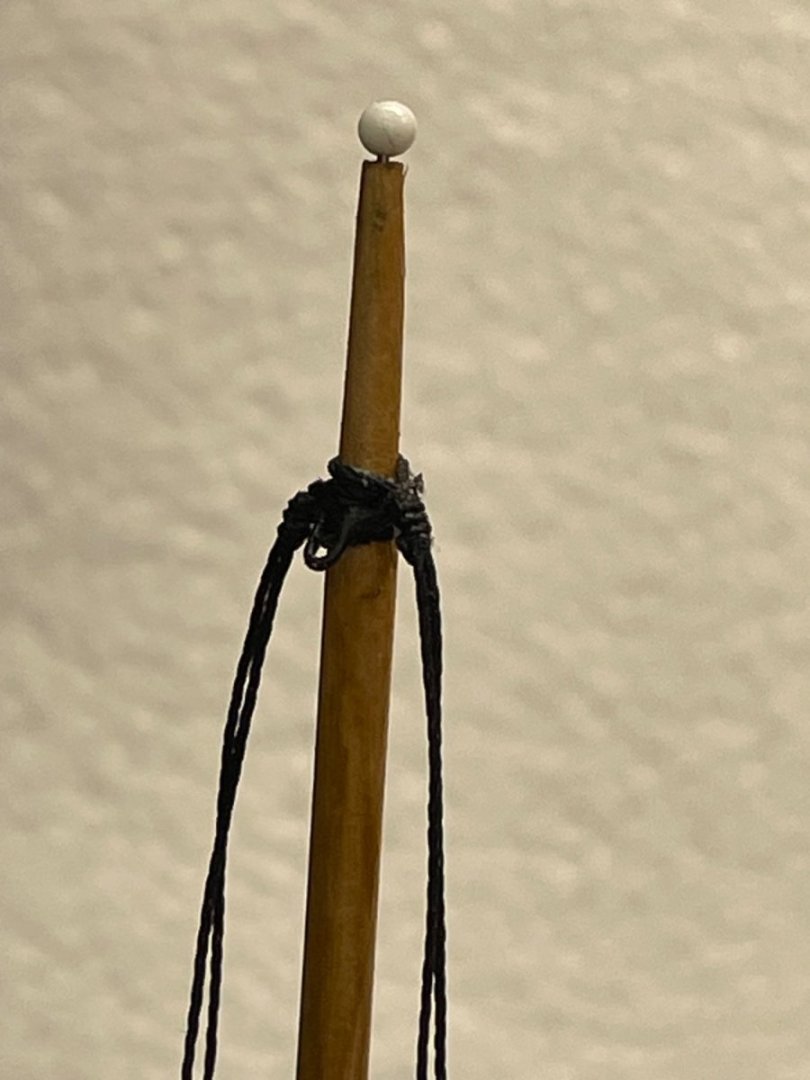
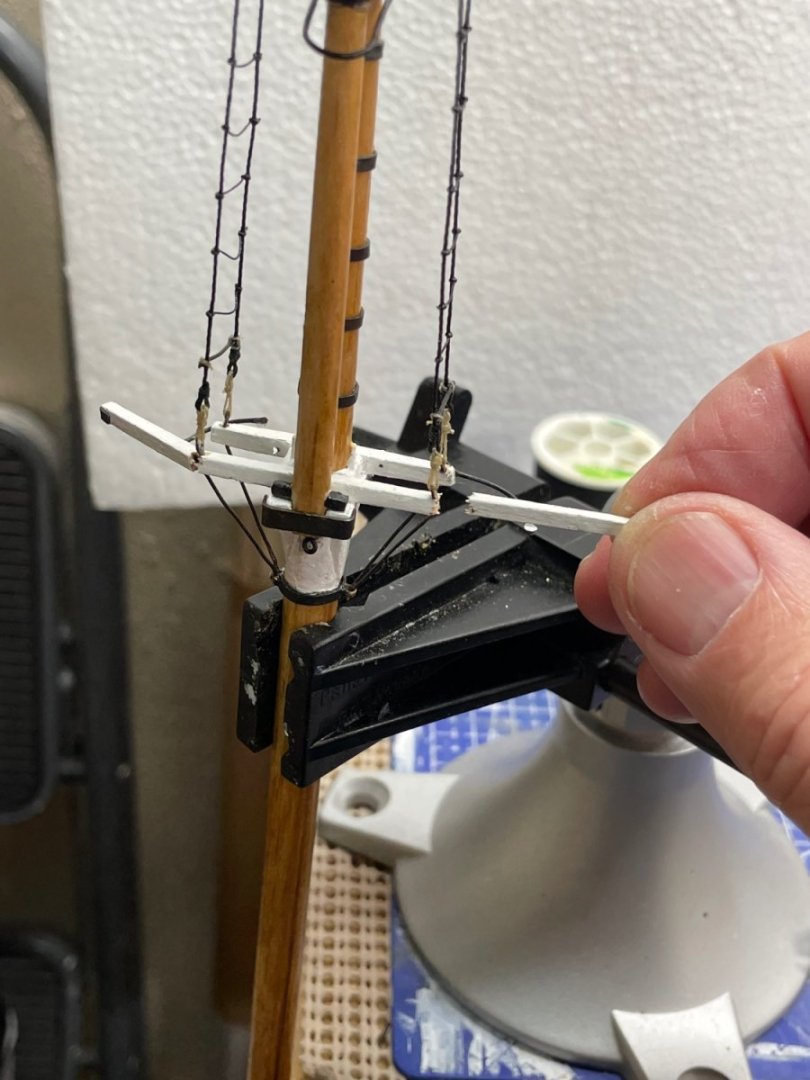
Setting mast 1% rake with Plumb Bob with temporary stays.
Now ready to complete Lower Shrouds with temporary Stays in place.
Cheers 🍻