BANYAN
-
Posts
5,964 -
Joined
-
Last visited
Content Type
Profiles
Forums
Gallery
Events
Everything posted by BANYAN
-
 I agree Henry, the foremost shrouds were served and the rest simply tarred with Stoholm Tar or the like according to several sources. The rules which drives the 'guidance' as stated by Steel, Lees, Marquardt etc, which is what Marc was asking about, state clearly that it was only the leading shroud leg of each leading (foremost) shroud pair per mast where chafe was likely. That said, anywhere where chafe was likely from other rigging, sails etc would also have been further protected in some manner, usually rope serving or, as seen in some merchant and smaller vessels, using baggeywrinkles. cheers Pat
 -
Hi Mark, I didn't place a like as that is news one cannot like Big decision mate, but probably for the better; a great learning experience none-the-less. Have you thought of using this as the base for a wreck diorama or similar where trennel counting isn't so important? Hate to sdee all that effort totally wasted. cheers Pat
-
Marc, also try Marquardt's Eighteenth Century Rigs and Rigging as he also includes European detail in addition to Steel's tables. With Steel the tables are difficult but I am starting to get my head around them. From what I have determined via Steel and Lee's the Masting and Rigging of English Ships... for English ships at least, the leading leg of every set of shrouds (i.e most forward of each of the Fore, Main and Mizzen) were served all the way down and the after leg of these, and all other shroud pairs were served about 8 feet, or 1/4 of the length. where the fit around the mast. I hope this helps? cheers Pat
-
Wefalck, that is a stunning diorama; very well executed. It almost makes me feel that I am walking around Volandam (spelling?) in winter - though I think your's is from a different area? cheers Pat
-
Great to see you making some further progress on this little beauty Russ cheers Pat
-
Nice work Danny, an excellent result. I may have missed itbut what are you using for the glas - mica? Looks excellent! cheers Pat
-
Pedrsistence pays off -that is is serious shaping Mark with excellent results. cheers Pat
-
Hi Keith and thanks for looking in and your prompt Actually, I have made some progress - the mizen is stepped and shrouds in place. While I am remaking the boom, I am also making the Gaff to put in place (working from stern to bow in placing the masts. Should only be a weel delay as the boom is mostly remade now - should be finished by the end of this week all going well. cheers Pat
- 517 replies
-
- 1
-

-
- Endeavour
- Artesania Latina
- (and 1 more)
-
Thanks all for looking in and for the words of commiseration and advice. I am well progressed with the jib now (photos soon), I am just about to add the bands and wolding etc. the other positive of all this is that I had the preventer sheave and stay sheave in the bees the wrong way around in the original - someone is perhaps trying to tell me not to accept 'close enough' Danny, I thought of you when it happened. Unfortunately, I have not yet made a base board, and as I have already stepped the mizzen and rigged the shrouds I have to turn her upside down in the lap to allow for the mast - I will definitely heed the advice though cheers Pat
-
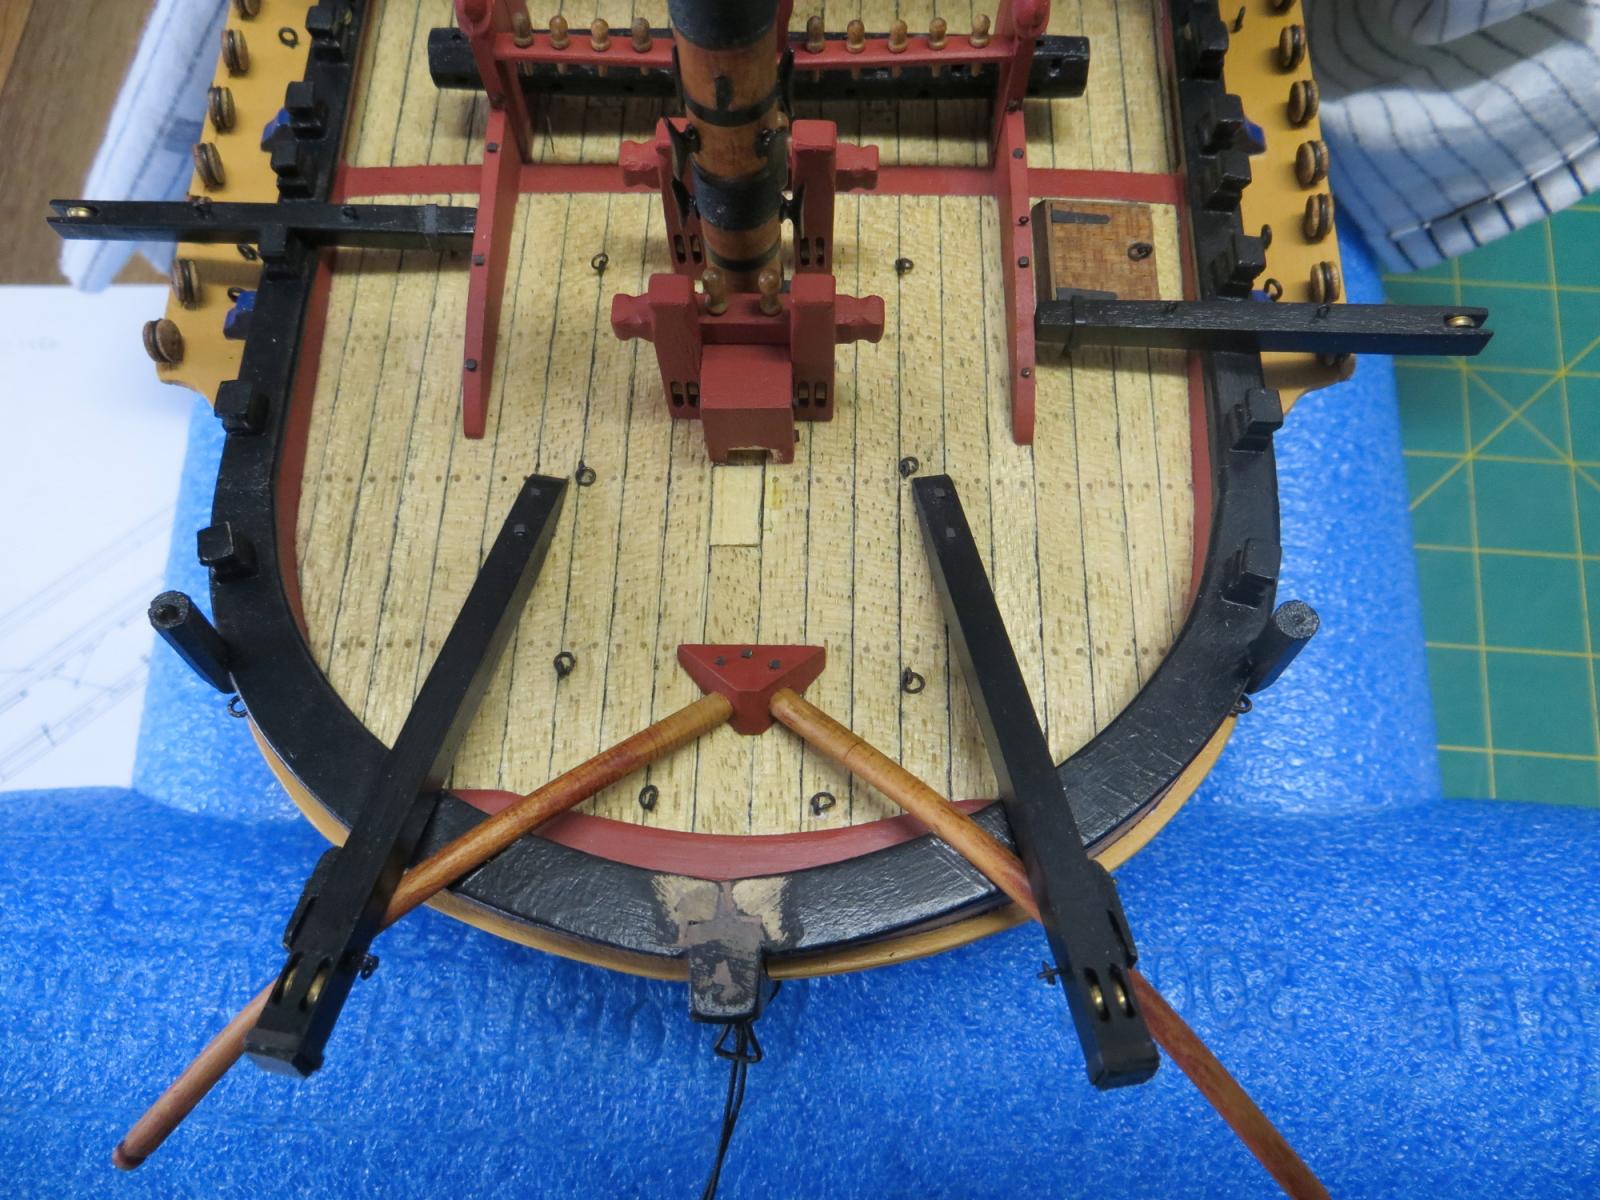
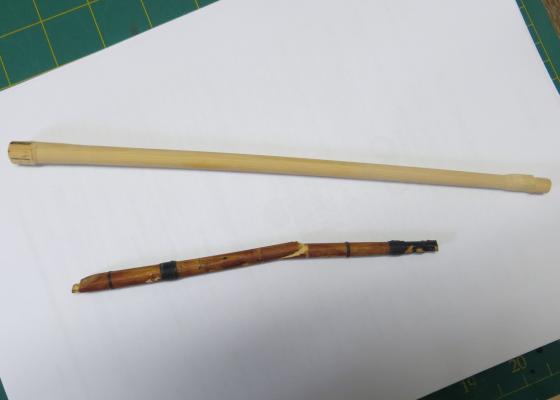
And just as I was getting a roll on with the rigging ---- Disaster (well a minor disaster) I don't know how many times I have read of this, and despite taking care, I still managed to drop my Endeavour while working on her in my lap - Bow first. While attempting to refine the patch up on the mizzen deadeyes that had come adrift from their chain plates, I had to try to turn the model upside down to get at the bottom of the channels. Well, some how or another I relaxed my grip, and in one of those surreal slow-motion events I saw her heading towards bow first. Despite my efforts I was not quick enough! The one small positive is that as she went plumb straight down all the impact was taken by the jib boom and as I had some rigging on it, appears to have absorbed all the damage. The boom was broken in half and no other damage from the drop. however to get the inboard end off the model, I had to prise some of the deck planking away. The attached shots show the initial deck repair (some aging to add but almost all will be covered by the new boom. the other shot sows the shaped boom after bending into the required shape. Oh well, something had to happen eventually; I just hope there are no more. cheers Pat

- 517 replies
-
- 1
-
-
- Endeavour
- Artesania Latina
- (and 1 more)
-
Seriously nice work Remco; a great looking stove. Druxey; subtle cheers Pat
-
Hi Gary very nice work; be careful though, too cute and Mr Jones may need an attire change to something more frilly cheers Pat
-
Hi all, I have had practically the same experience as Wefalck with the dental loupes. I bought a pair via eBay (Chinese) but find them near impractical to work with. I am not sure if the medical variety would do any better. Wefalck, if you find a decent set of clip on magnifiers could you let us know please?. I would like a pair for my normal glasses as well as for use with safety glasses but have the same issue re the clip-on mechanisms. Everything I have seen so far either has cheap and clunky clip mechanisms. A set oof clip ons with variable (2x and 3.5x) equal on both side that could flip up out of the way, and that can be used on both reading and safety glasses would be the best of both worlds. However, most of the stuff I have seen is the cheap polished plastic type magnifiers that (for me) do not provide a nice clear working environment that would allow comfortable working over longer periods. We will probably have to settle for interchangeable magnification inserts but a decent glass magnifier would be great. There are now cheap variable / adjustable reading glasses that have a adjustable settings for each eye available in Australia, I wounder if that sort of technology is transferable to the magnification type glasses/visors etc? These are not the ones I have seen, but a similar concept: http://www.gizmag.com/eyejusters-adjustable-glasses-developing-world/22734/ cheers Pat
-
Excellent work Remco, very authentic look andf feel to it - Congrats on such a remarkable job. Now, I have a BBQ that needs some brick work done..... cheers Pat
-
Very nice Gary and a big huzzah to Mr Jones for his clothing (and the slop bucket ) cheers Pat
-
"Don't be too hard??? Gary, that excellent work and a fine example of good craftsmanship! Going to add the slops bucket ? cheers Pat
-
ROYAL CAROLINE 1749 by Doris - 1:40 - CARD
BANYAN replied to DORIS's topic in - Build logs for subjects built 1501 - 1750
Hi Doris, the level of finish and quality on this model is superb. I hope you are entering this in a competition as if it does not win a prize I don't know what would - absolutely beautiful work! cheers Pat- 883 replies
-
- 2
-
-
- royal caroline
- ship of the line
- (and 1 more)
-
Coming along very nicely Ron, the next layer of planking will seem like a doddle after that cheers Pat
-
King Planks.
BANYAN replied to Ganymede's topic in Building, Framing, Planking and plating a ships hull and deck
Hi Patrick and Mark. The reference I used was Planking Techniques for Model Ship Builders by Donald Dressel. On page 103/105 he discusses the king plank "which will run into the hatches and mast locations, as well as any other obstruction down the middle of your deck. It should run right down the middle of your deck with its centre matching the centreline.." He does not provide any guidance as to its width etc. Harold Underhill also mentions the king plank in his Plank-on-Frame-Models volume 1, but also does not provide any guidance for size etc. David Antscherl in Volume 1 of his excellent series HMN Swan Class Sloops 1767-1780, also discusses the king plank on page 270 under the heading - The centreline plank. "I have shown this as a 12" wide untapered plank (The modern name is the king plank). remember that it is 3" thick, standing 1" proud of the deck flat. The pillars for the upper deck beams will tenon into it. The plank's edges champher down to meet the flat of the deck, and it tapers in thickness by 1/4" aft of the ladderway to meet flush with the mizzen mast partners. Note that the plank butts against the hatch head ledges and mast partners...." I know I found some additional information that informed me that the king plank was wider than the deck planking width. I had no real rule-of-thumb but I went for 3/4 the width of two plank (e.g if planks were 6" wide, then the king plank would be 9" but I STRESS I have no evidence to support this; simply what I chose at the time. I also could not find any information as to whether the plank should be a continuous piece between obstruction or fall into the same 'length rule' as for deck planking (based on the period in which the ship was built). As I had several centre line obstructions (masts, hatches, etc.) I chose to use a continuous length between each obstruction. As Mark Taylor points out, this probably had a construction aspect related to it so the less joints the better. I hope this helps a bit? cheers Pat -
King Planks.
BANYAN replied to Ganymede's topic in Building, Framing, Planking and plating a ships hull and deck
Hi Mark and Patrick, Sorry was a bit distracted last night but should get to it later today - haven't forgotten. cheers Pat -
King Planks.
BANYAN replied to Ganymede's topic in Building, Framing, Planking and plating a ships hull and deck
Great question, I used it for my Endeavour deck planking as my research at the time indicated it was in use at that time but I do not recall where I read it. I'll have another look at my library this evening to see if I can find it again. I'd also be interested to see if there was any 'rule of thumb' re its dimensions in relation to the remaining planking. Cheers from another Patrick. -
Thanks Greg, sorry I wasn't overly clear. It was more a question to myself noting the finish you achieved when I mentioned the Cap. I was referring to simulated leather insert in the hole in the Cap. You said you used copper which you have obviously cut then flanged. I am going to try the same with my paper today. Sorry for misleading you. One thing I have noticed (you have also brought to my attention, is that I have the leader sheaves in the bee the reverse way around so that my topmast stay and preventer will be the reverse fitting. I don't how this happened as I was sure I had it right; I think when I disassembled it to fix the original Cap (which I snapped) I must have put it back the wrong way. I think that rather than disassemble it and risk even more damage I will simply leave it be. The more learned rigging people among us may explain why the preventer or stay should be one side or the other? I will sit on this for another day or so before resigning myself to live with it or not ? cheers (oh yeah! 5 nil, 5 nil, 5 nil ...... how sweet that is :) ) Pat
-
Thanks for the feedback Greg; that copper came up very well. I have used brown paper which I brushed with stain then dullcote to stiffen it; but I have only done the strip on the boom. I'll post a photo soon. I was wondering how to go about the cap The netting was done in the nick of time lucky you're a fast worker. The netting looks excellent; I'll have to take a look at their site - any particular scale? cheers Pat
-
Nice work again Greg! What did you use for your simulated leather in the cap? Nice work on the netting also, did you hand make it? It is a really nice scale. cheers Pat
-
La Venus- stern decoration
BANYAN replied to RKurczewski's topic in CAD and 3D Modelling/Drafting Plans with Software
Very nice work; a great enhancement for a model and appears the way to go in the future for scratch and 'bashed' kits cheers Pat.