


ERS Rich
-
Posts
689 -
Joined
-
Last visited
Content Type
Profiles
Forums
Gallery
Events
Posts posted by ERS Rich
-
-
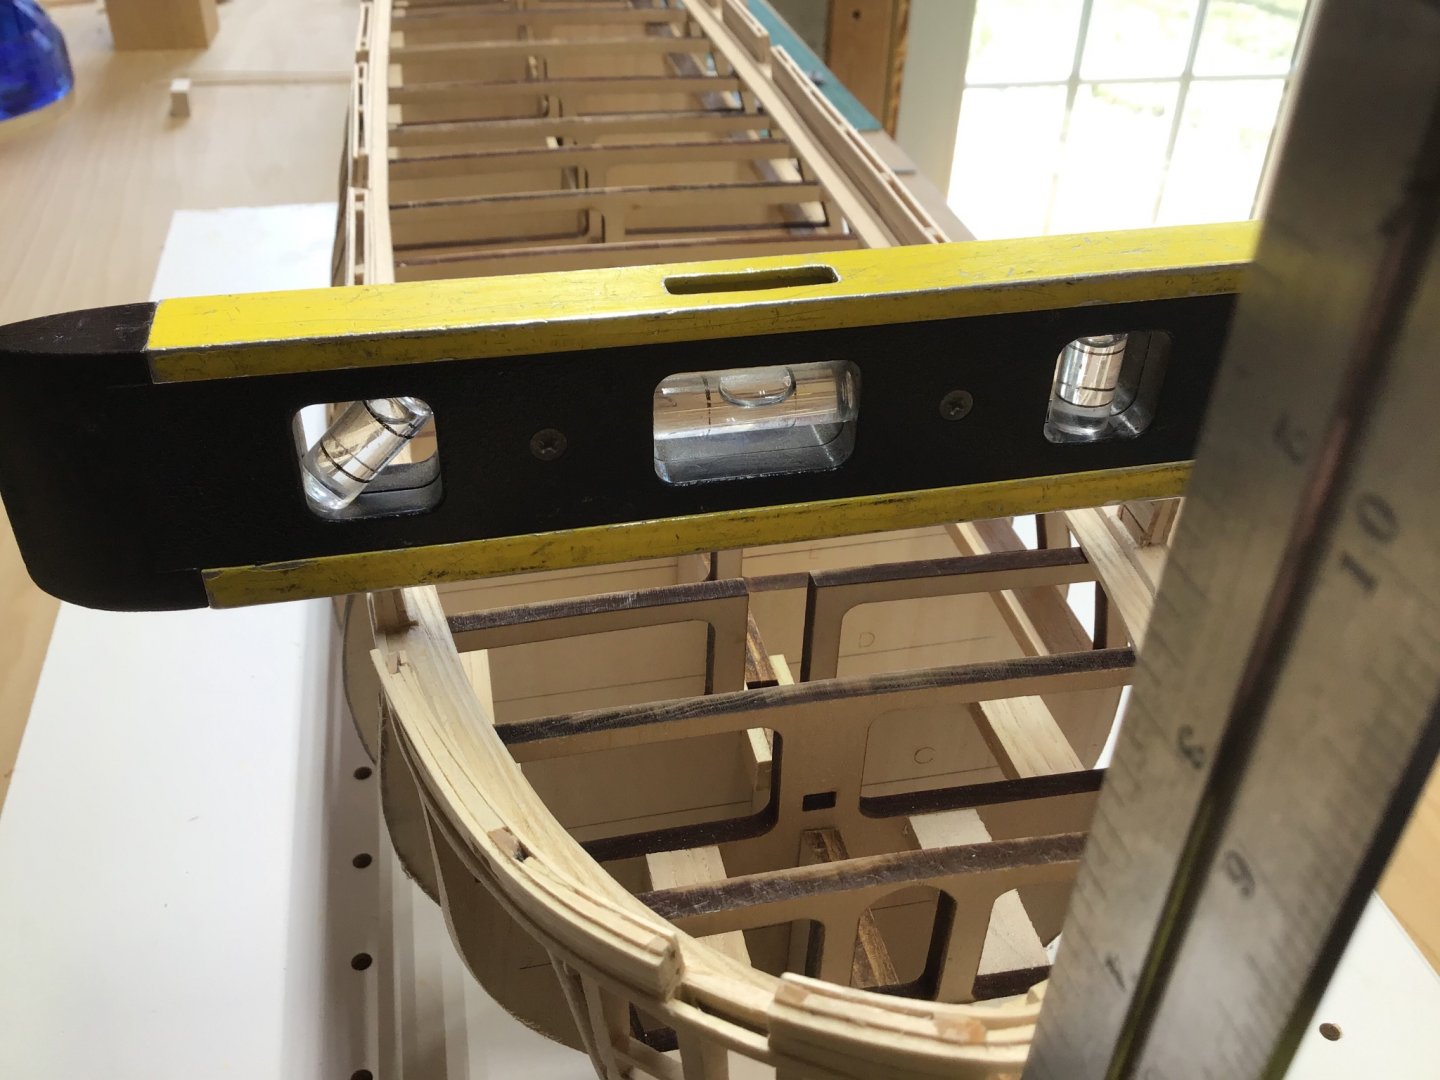
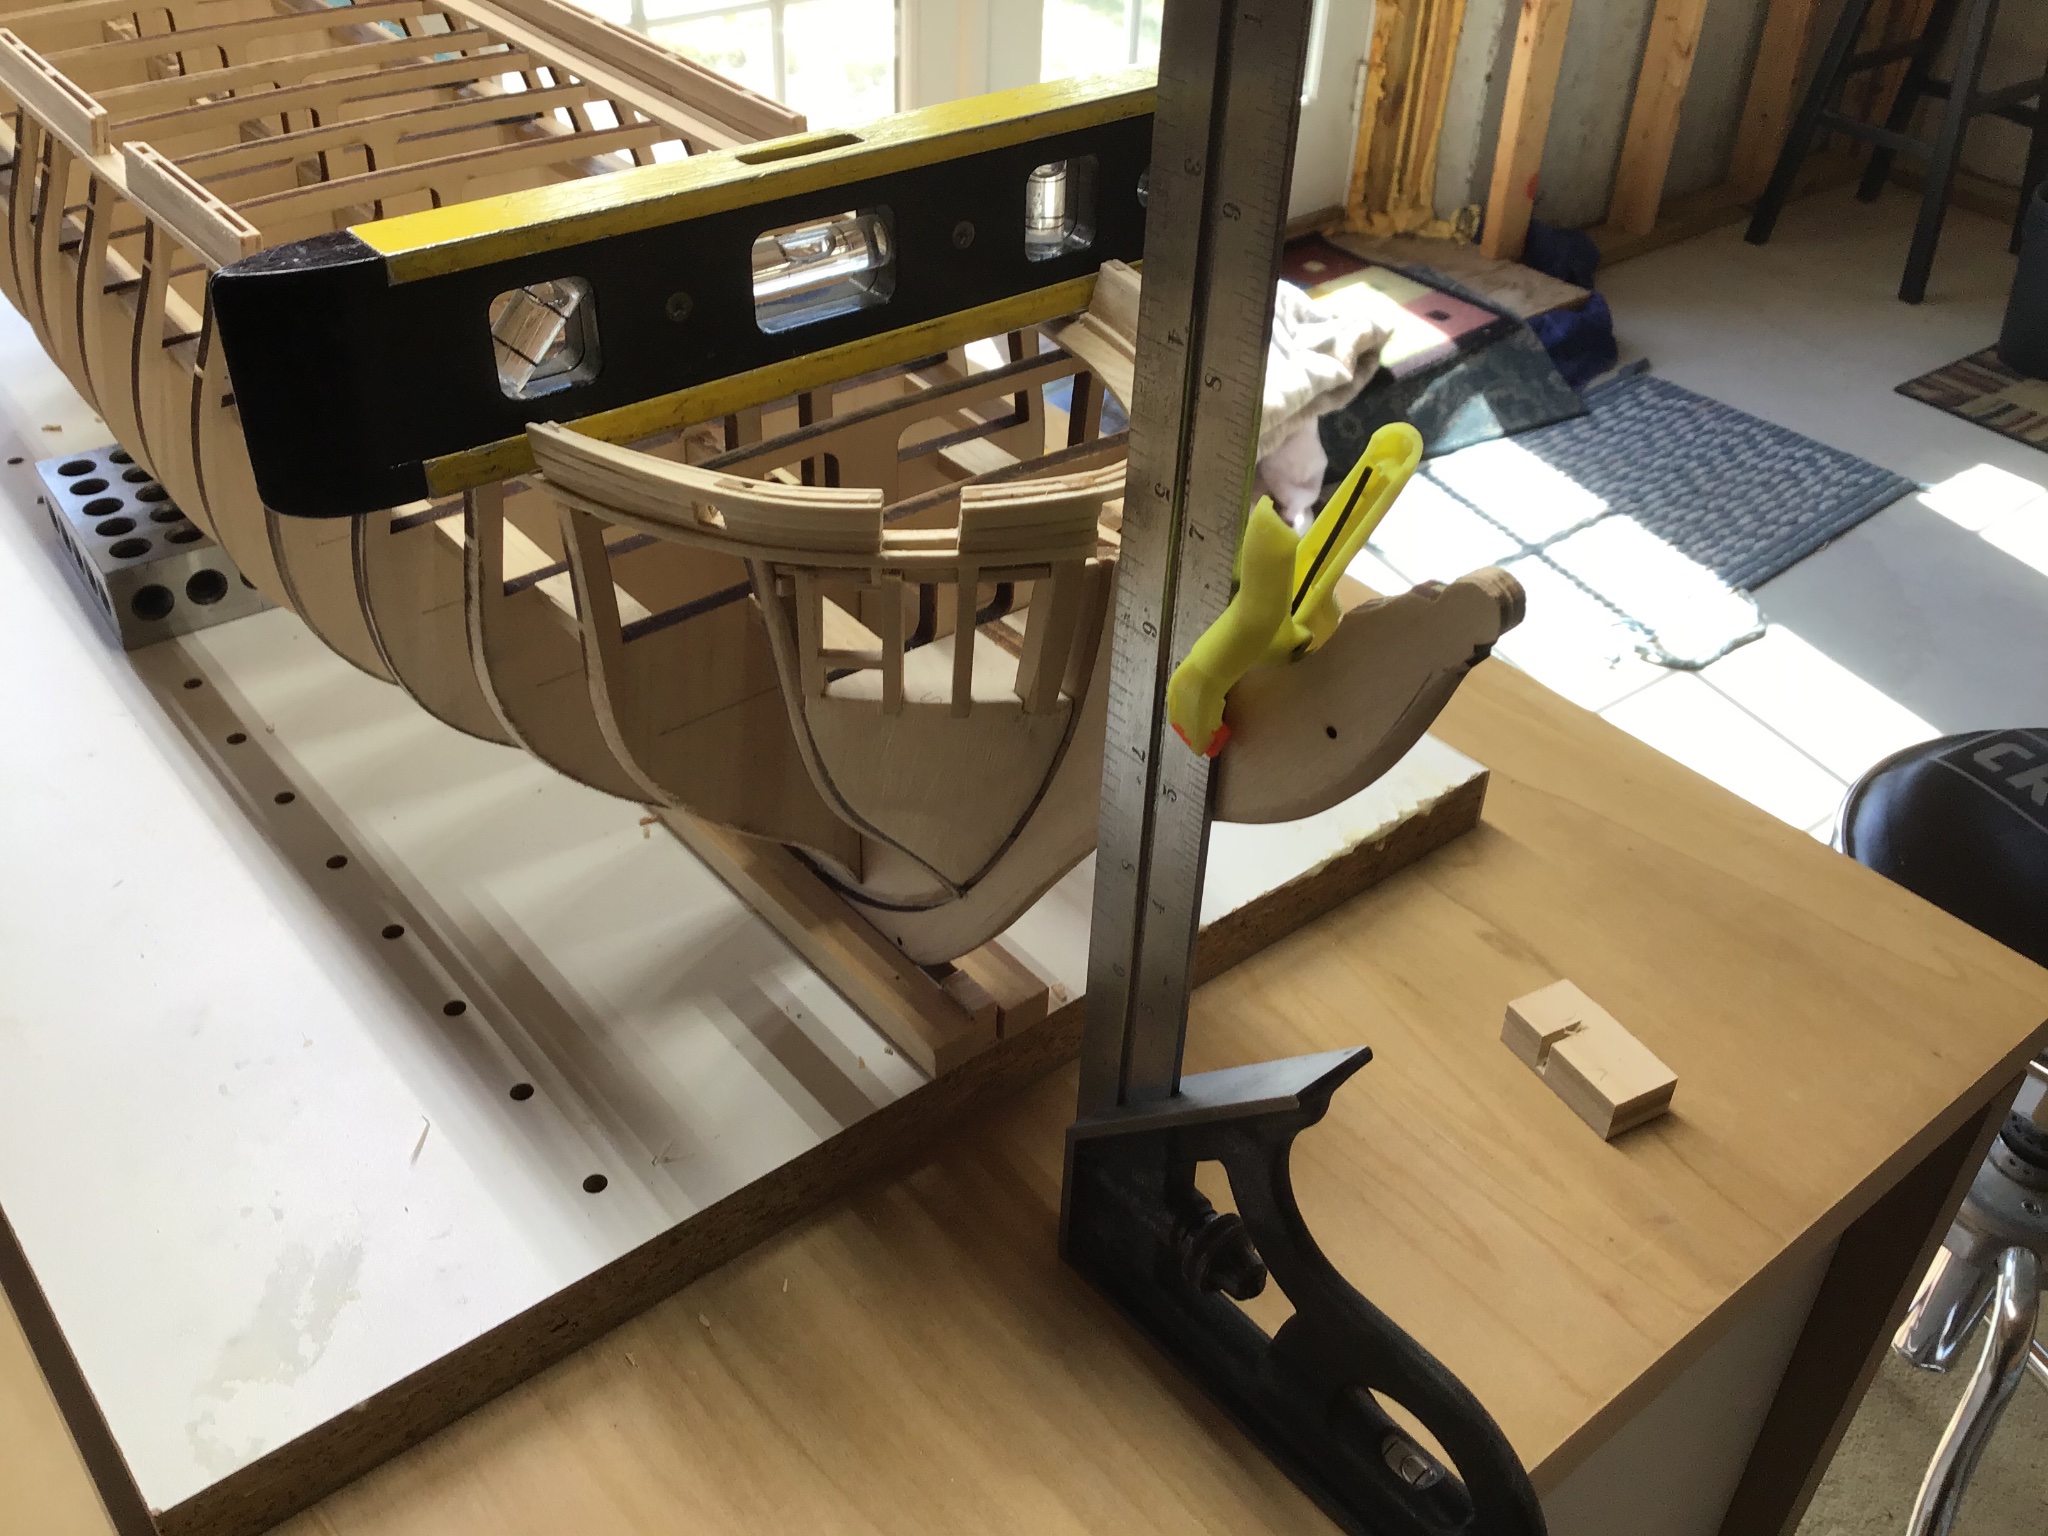
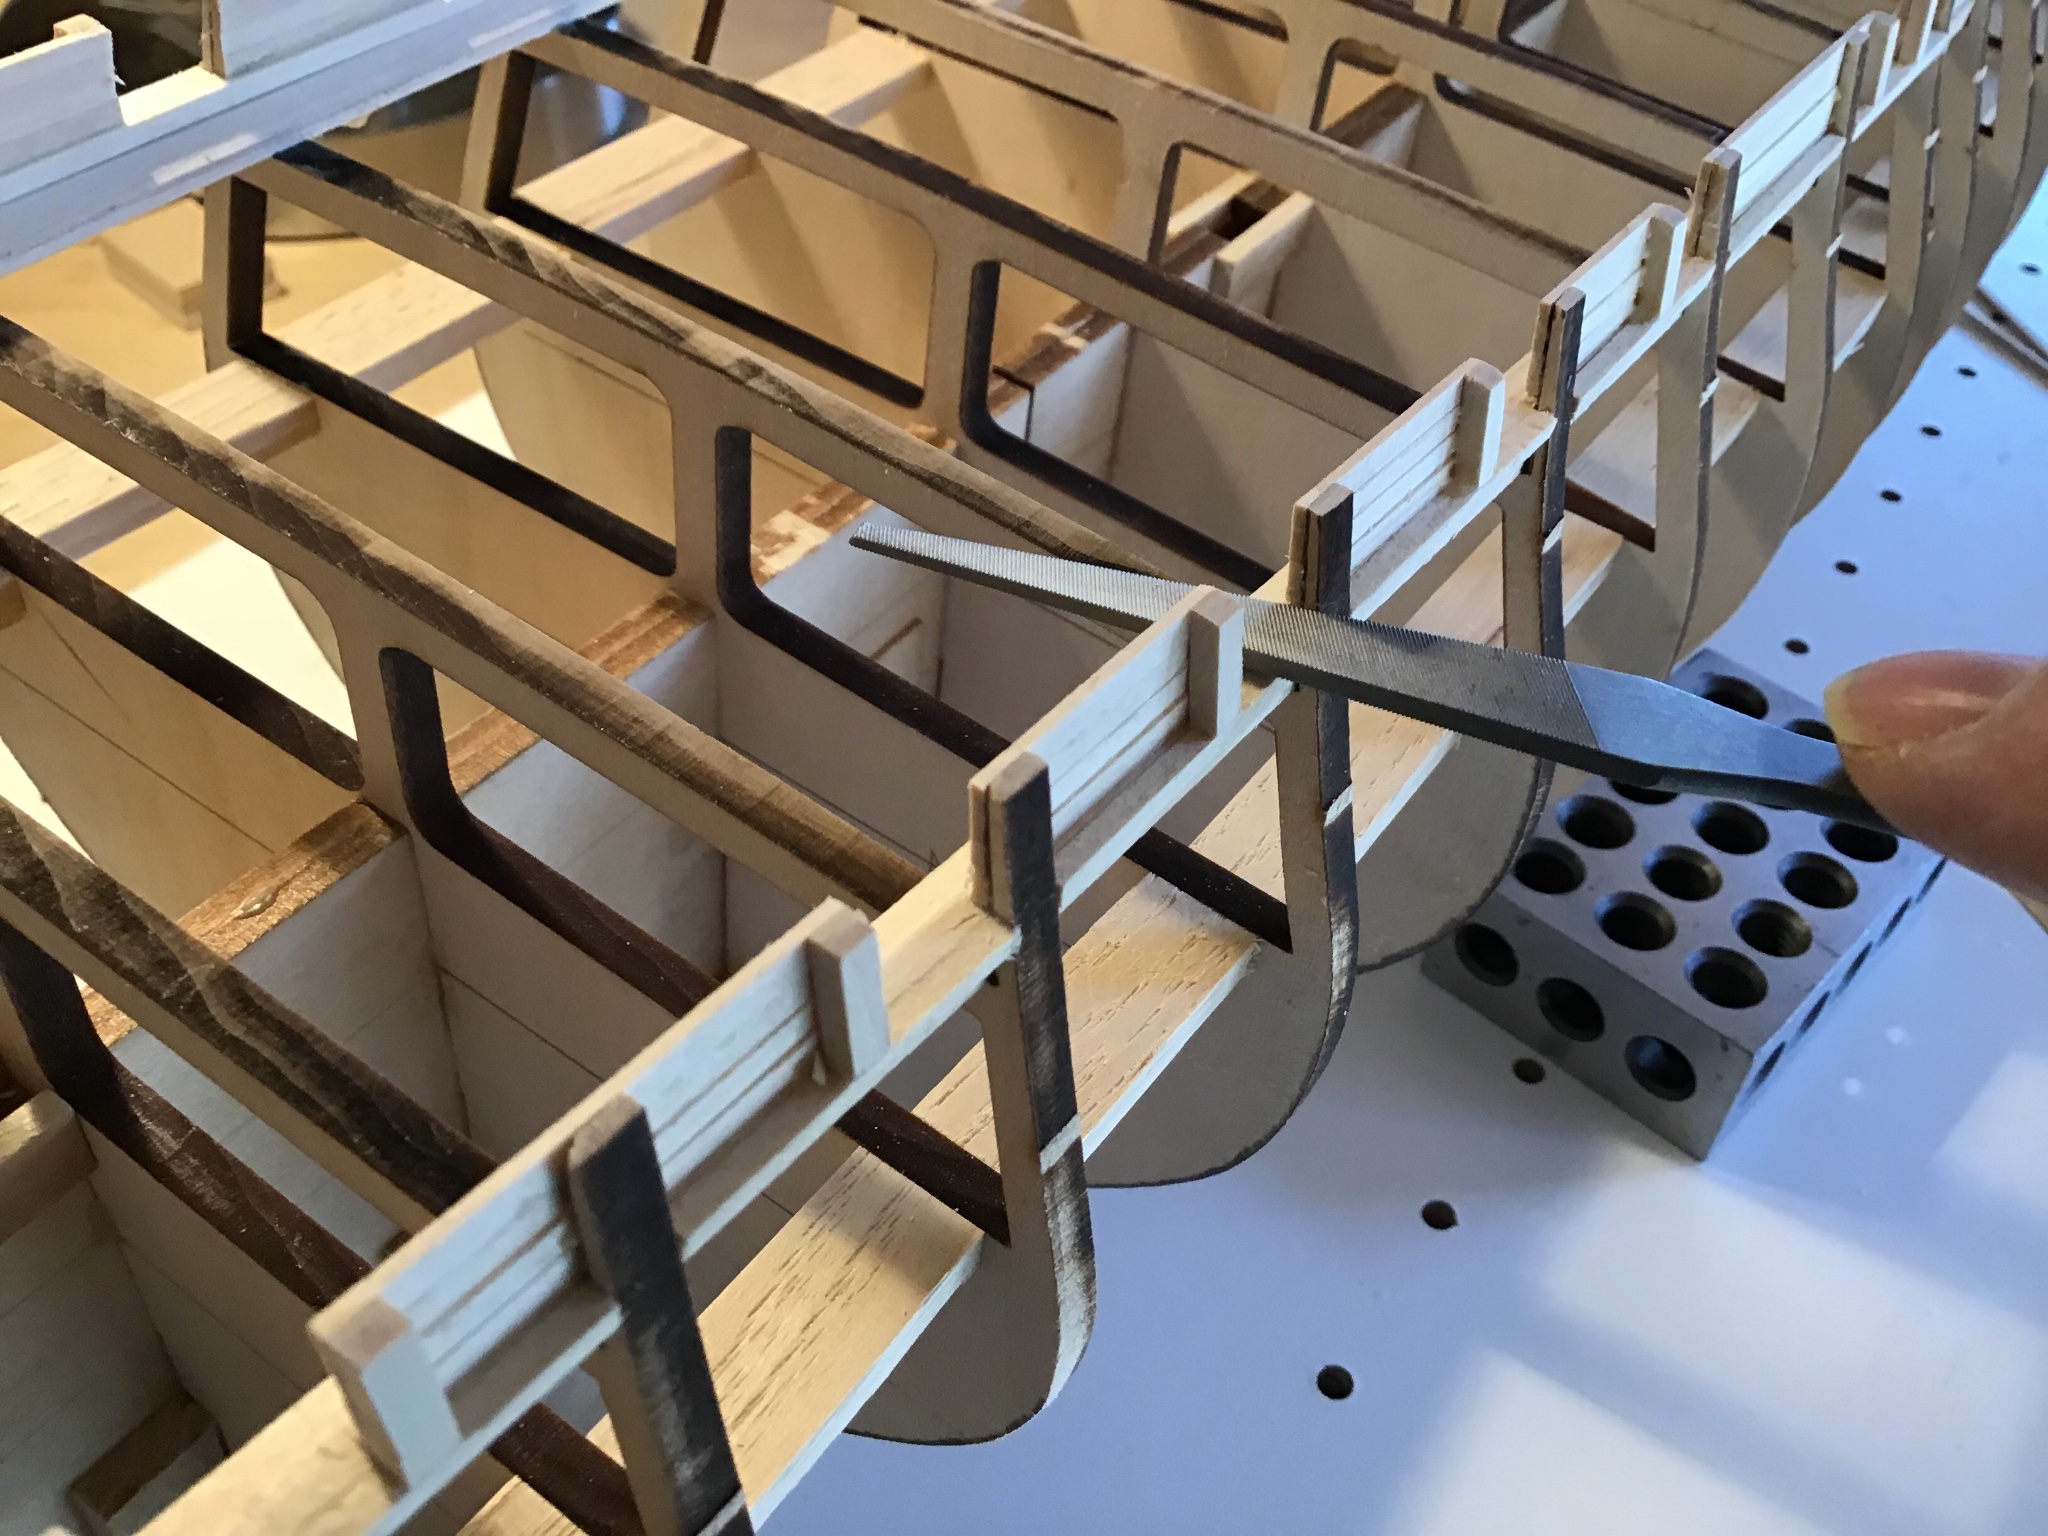
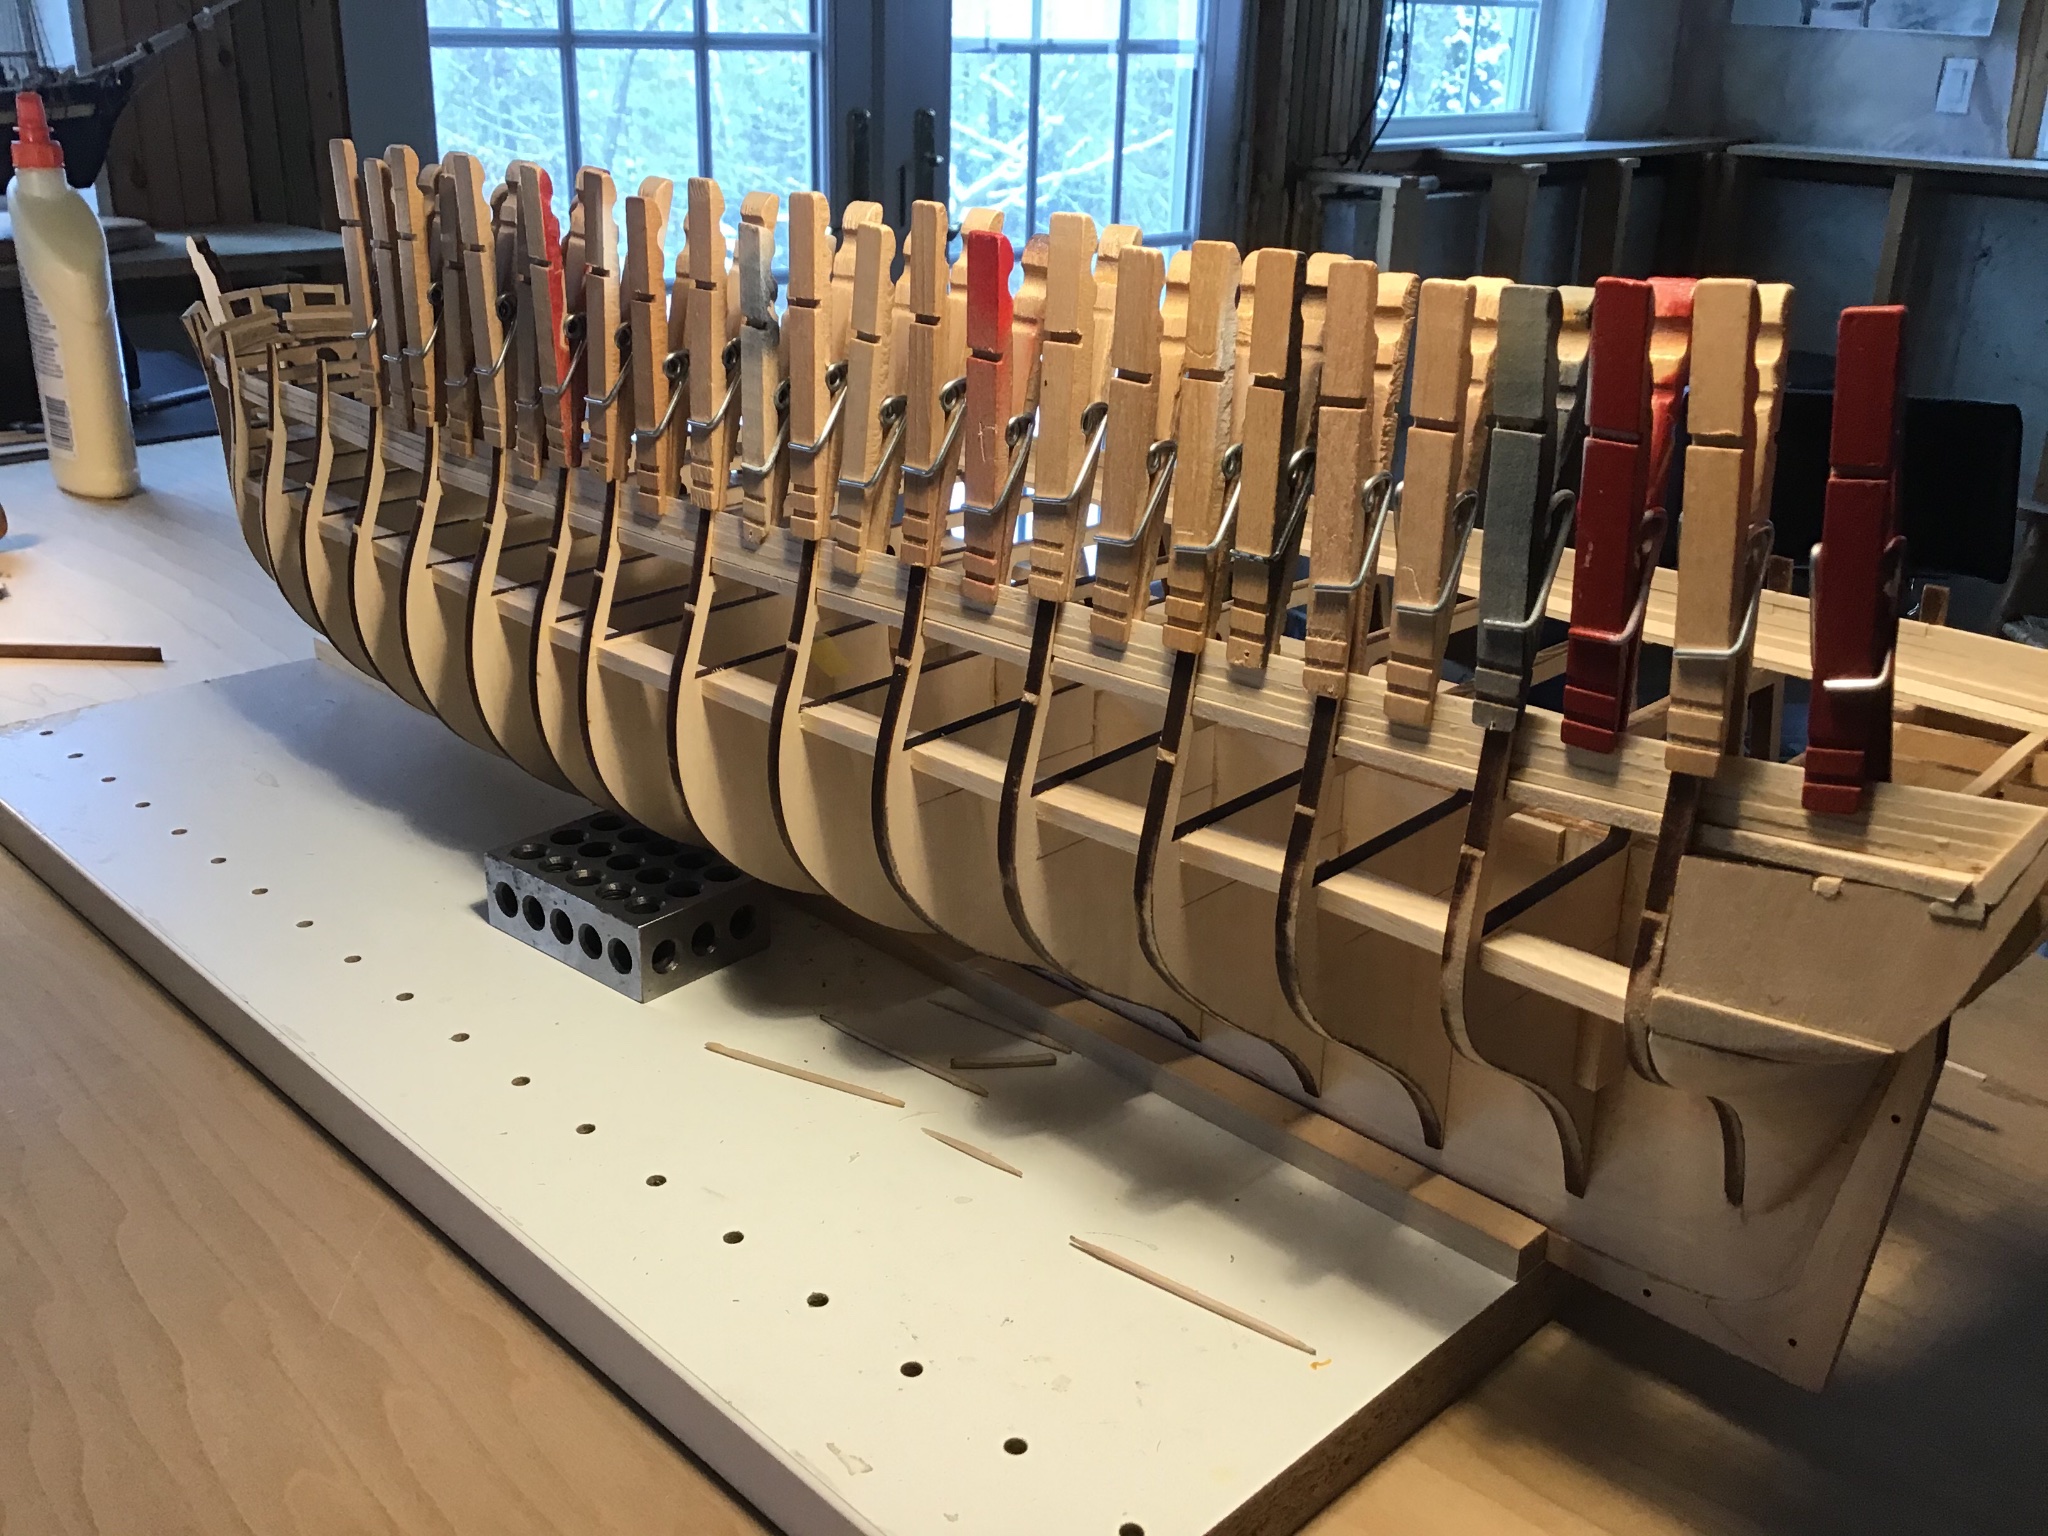
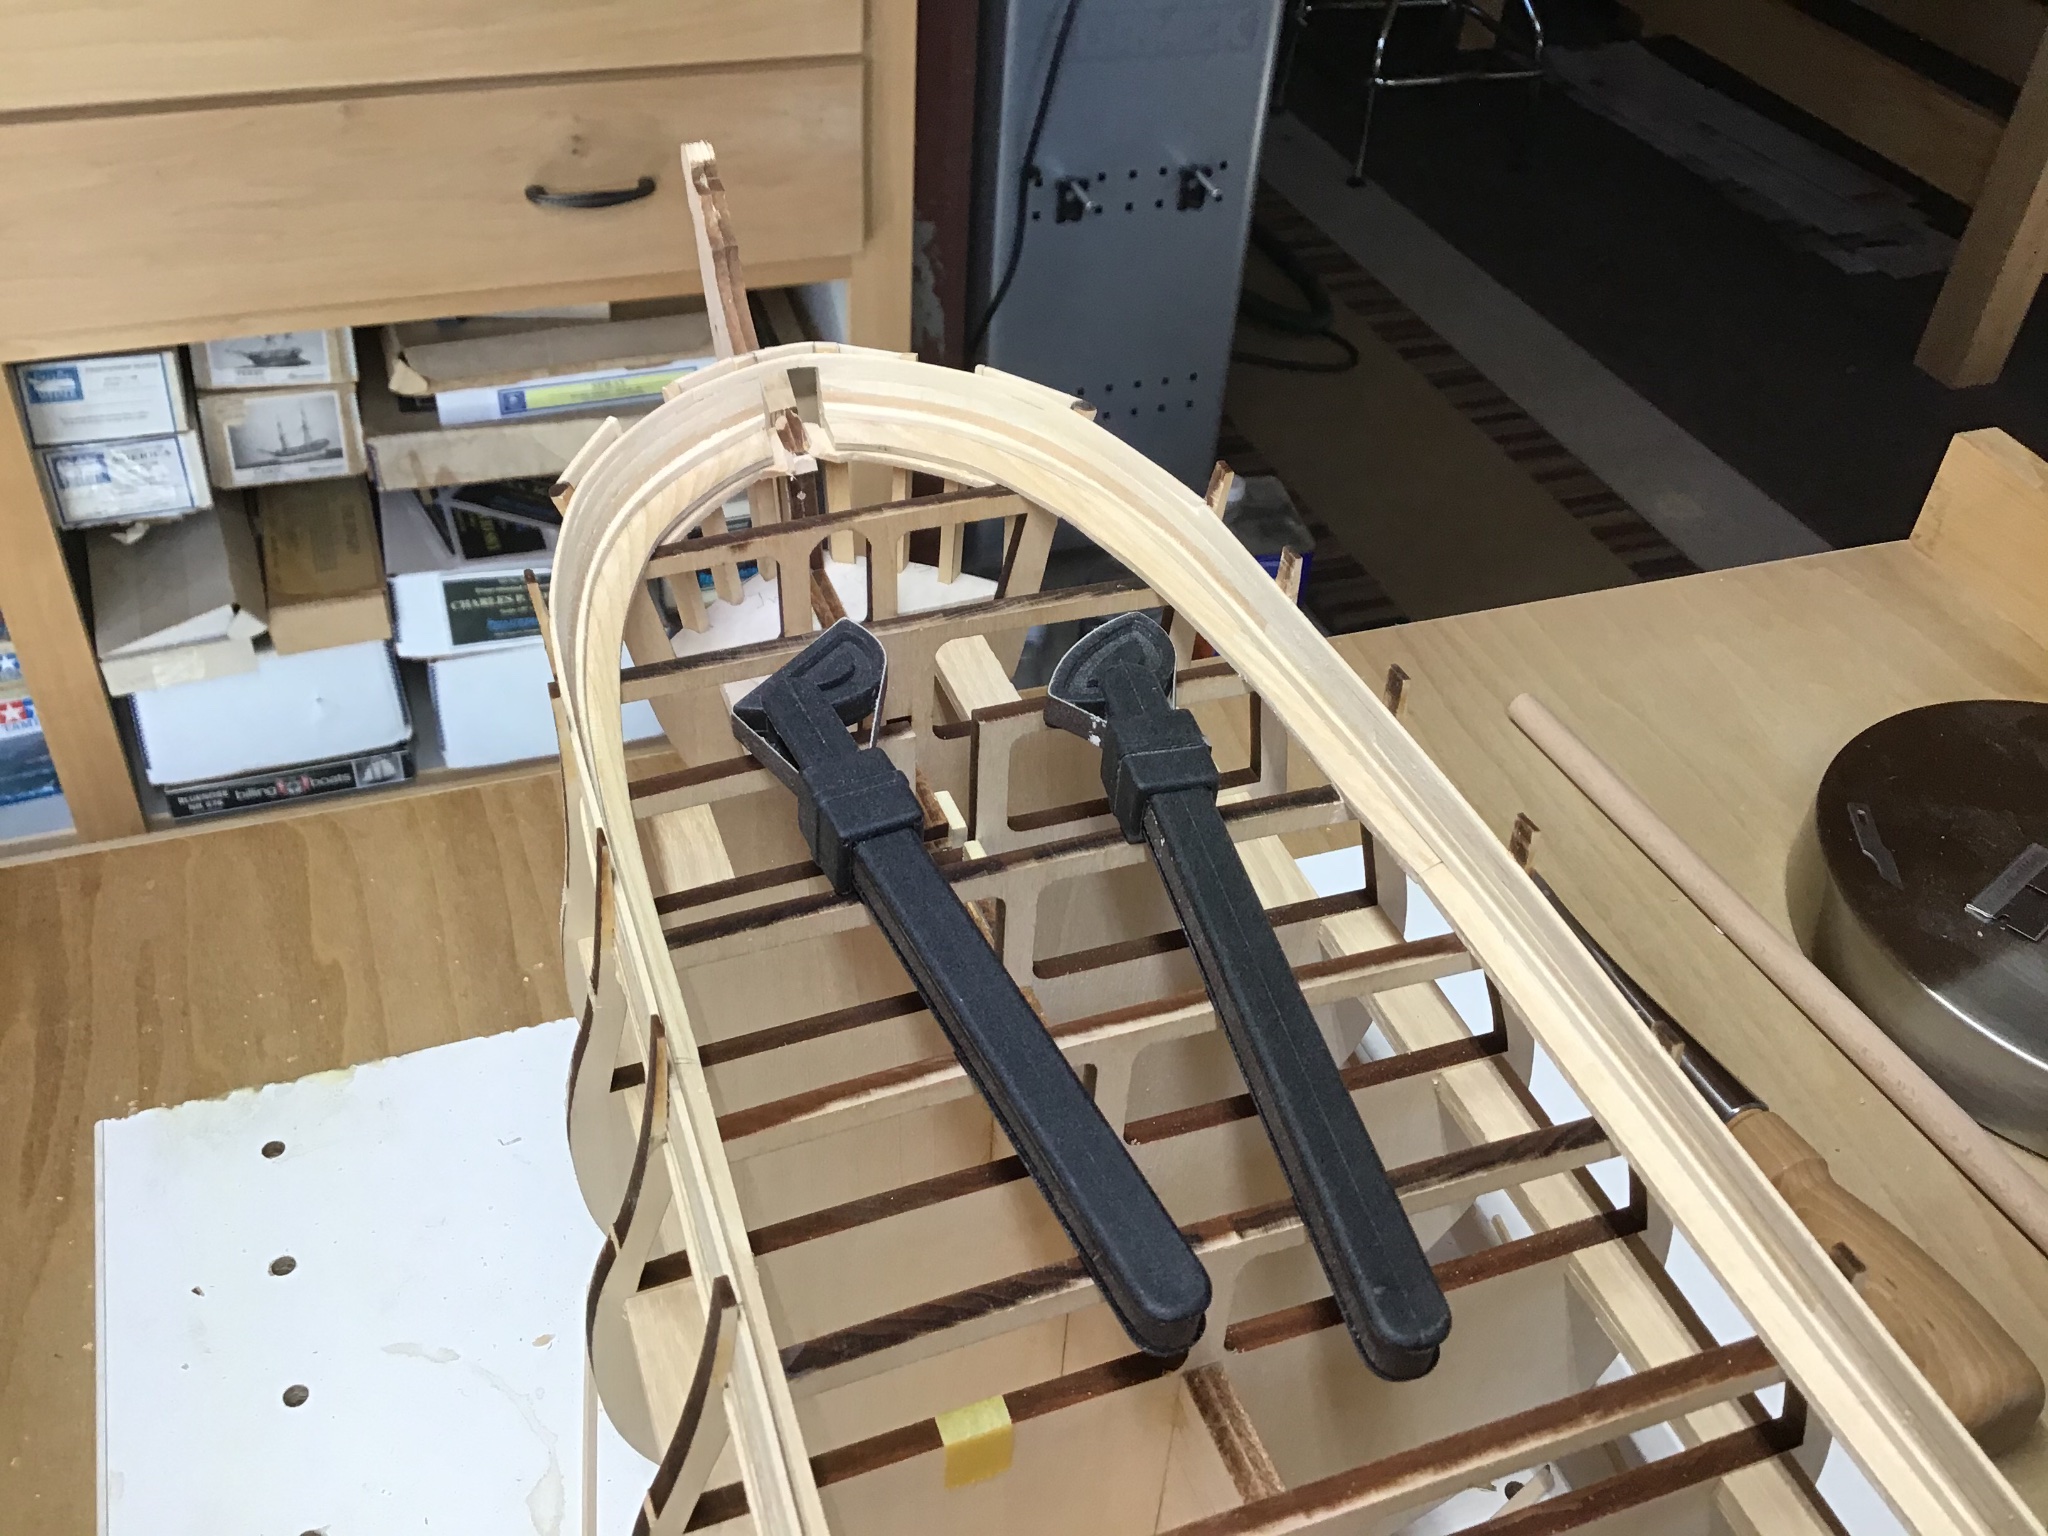
Leveling the Bulwarks
Using this setup to level the heights of the bulwarks athwartship, port and starboard.
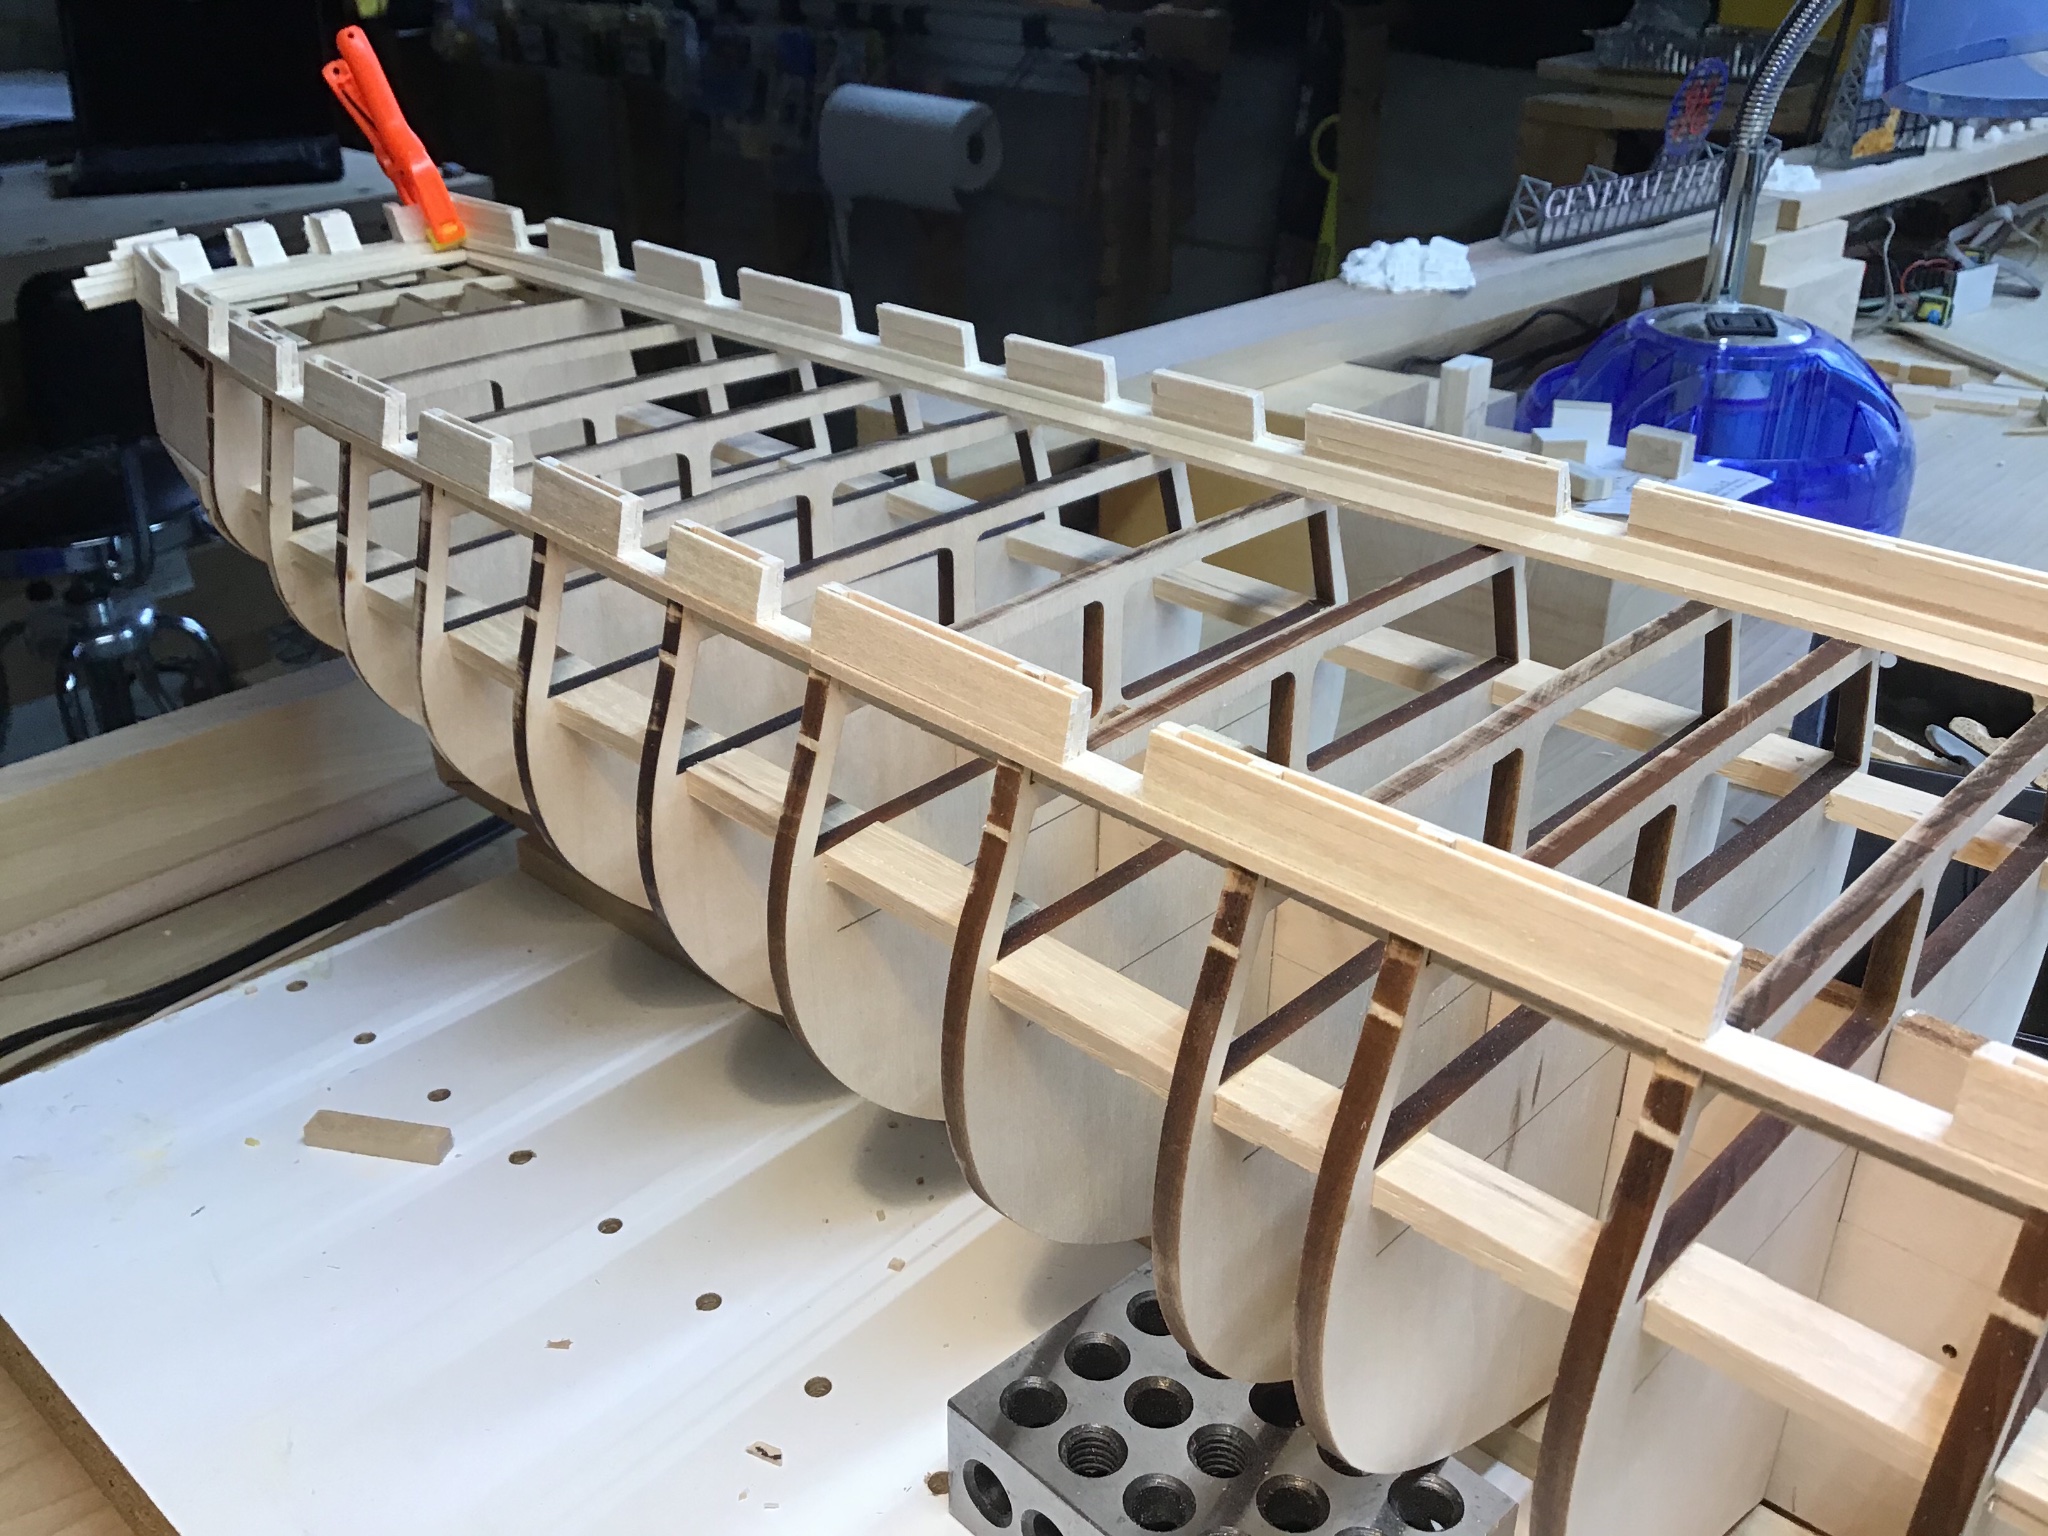
First photo shows the combination square sitting on the bench top, with the stem clamped to it. My bench is level. The torpedo level shows the first set of sills are level.
Second shot shows torpedo level on next set of bulwarks aft, and port side is a little high, so will file it down.
And will proceed aft along the bulwarks and repeat.

-
Hello and welcome to the forum. I’m originally from Norristown and miss the pizza! Good luck with your first project. A ship with a single mast is a great place to start! Always around to answer a question.
- Keith Black and mtaylor
-
 2
2
-
Hello Reynard, welcome to the forum. Always available to answer a question. Have a great day.
- Keith Black and mtaylor
-
2
-
Hello and greetings from Boston, USA. Always open to answering a question. Have fun and happy springtime!
- mtaylor, Keith Black and Edwardkenway
-
3
-
Hello, the paint, shading, and rope work is convincing. Sometimes I get tired of processing wood and your work shows there is an alternative.
Thank you for taking the time to post.
Have a good day.
-
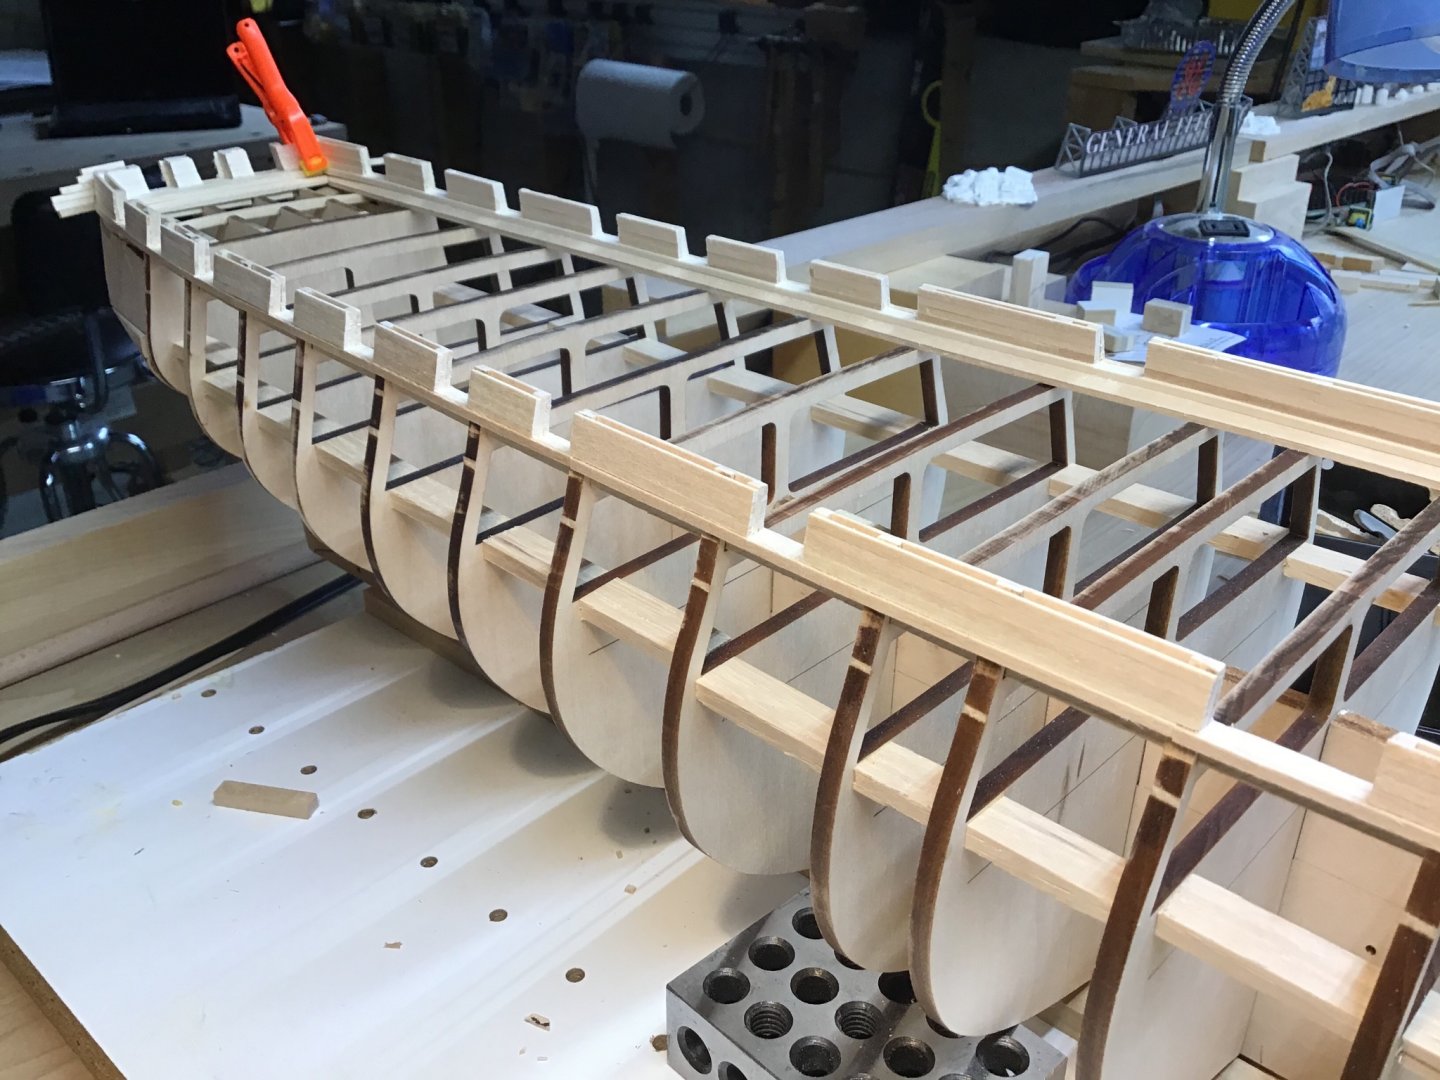
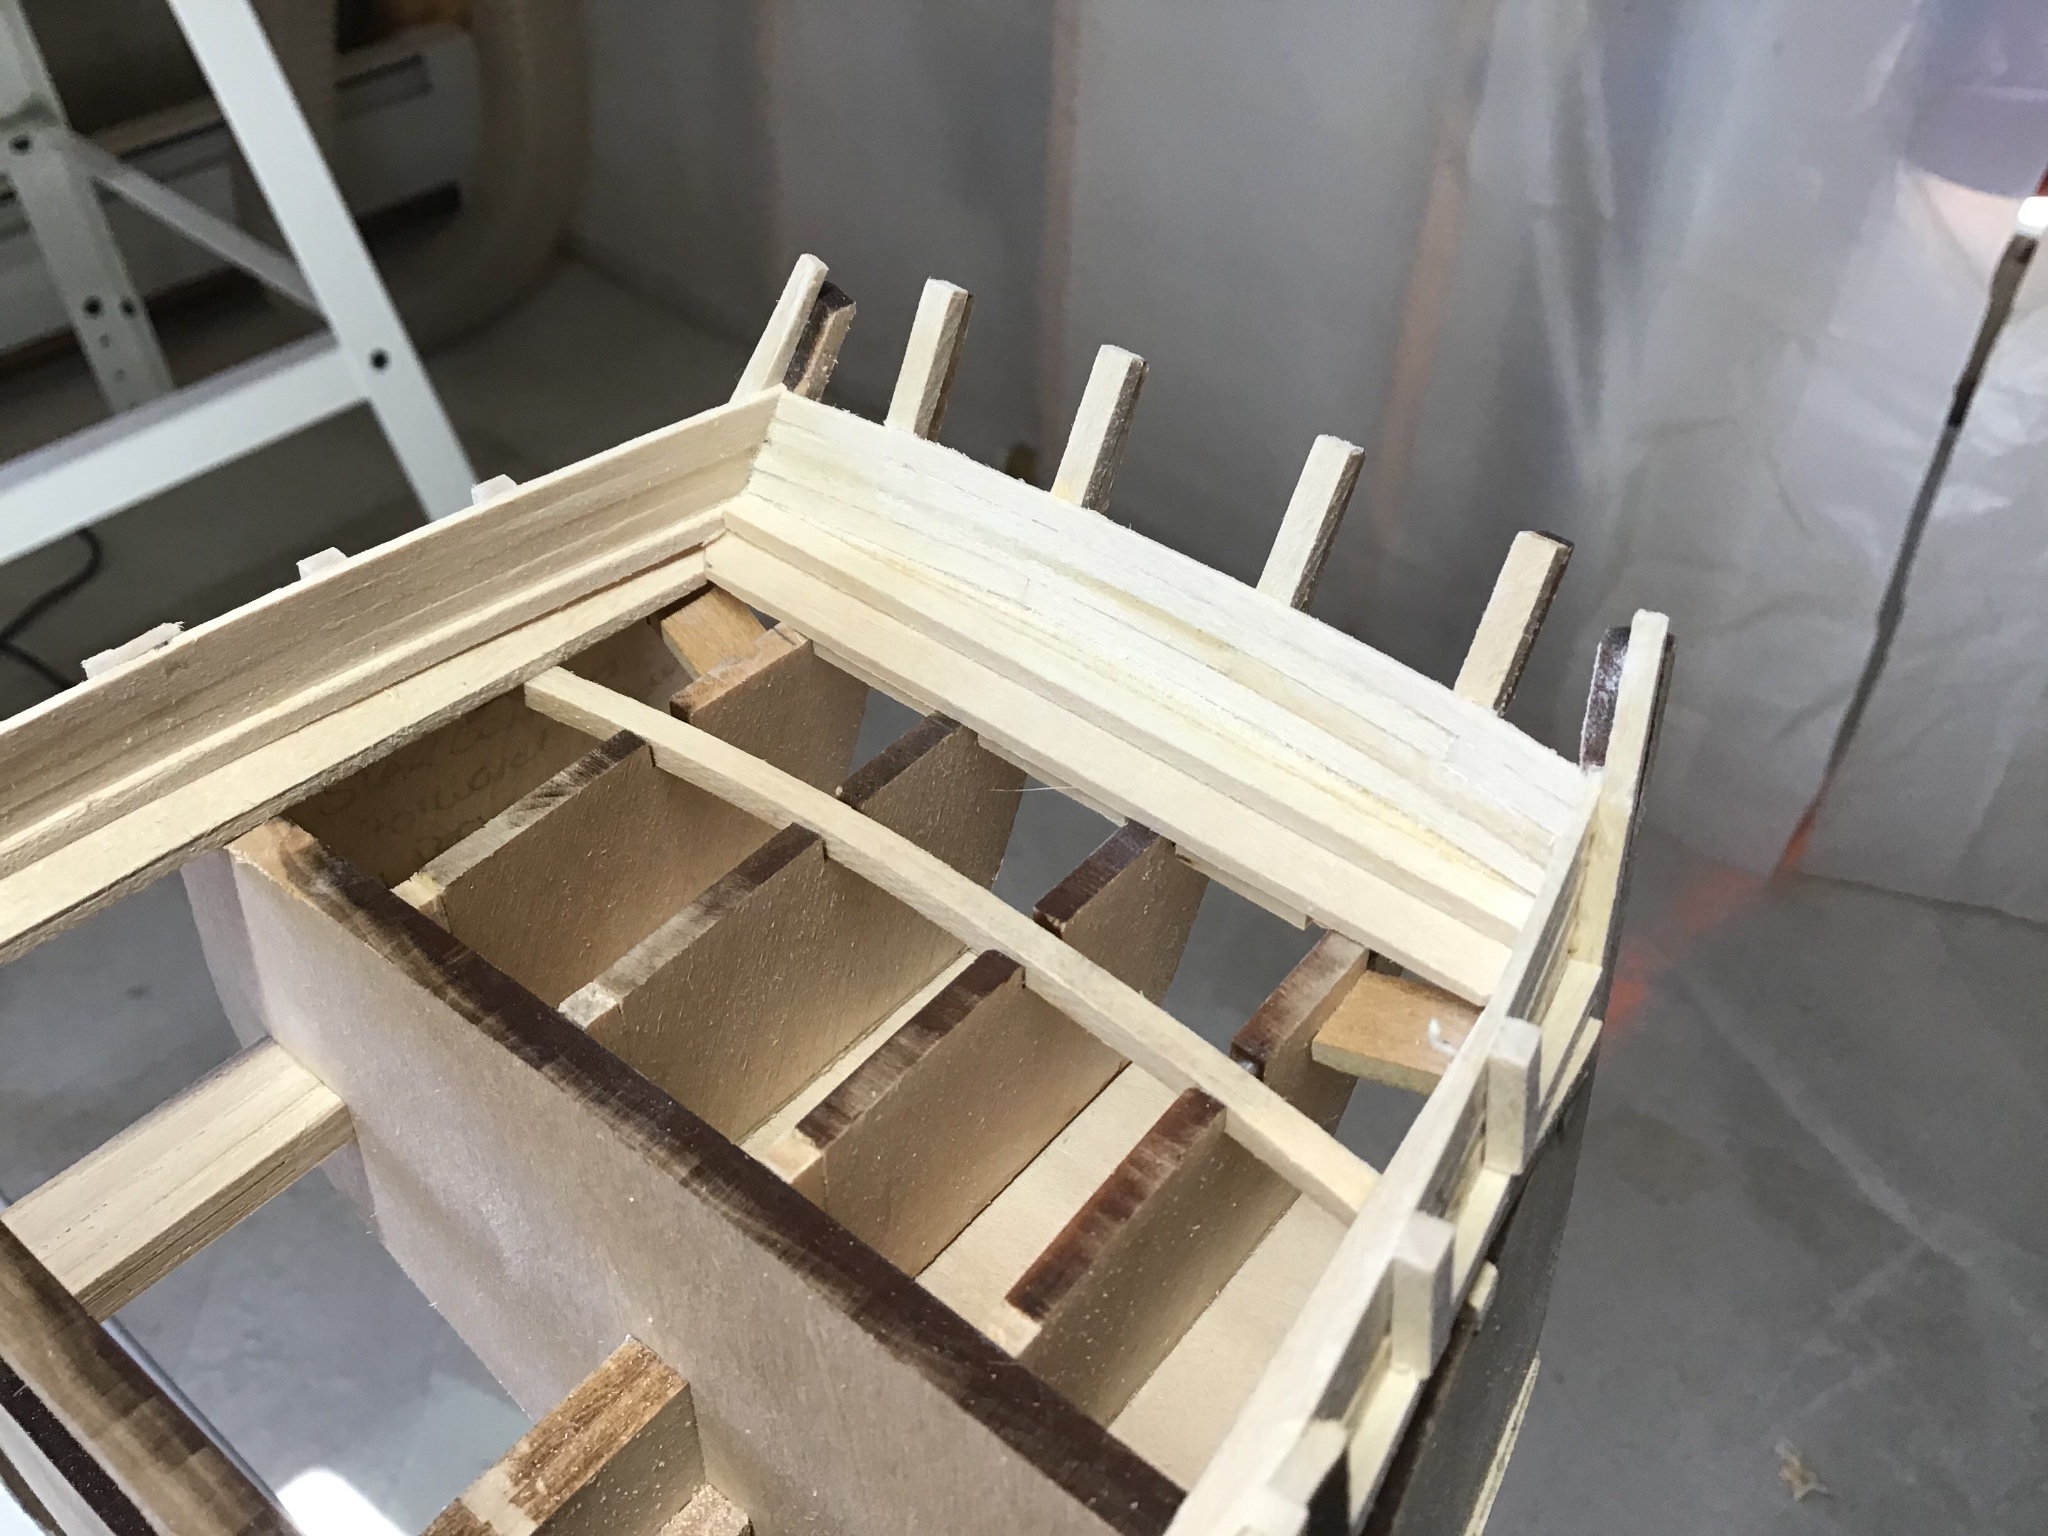
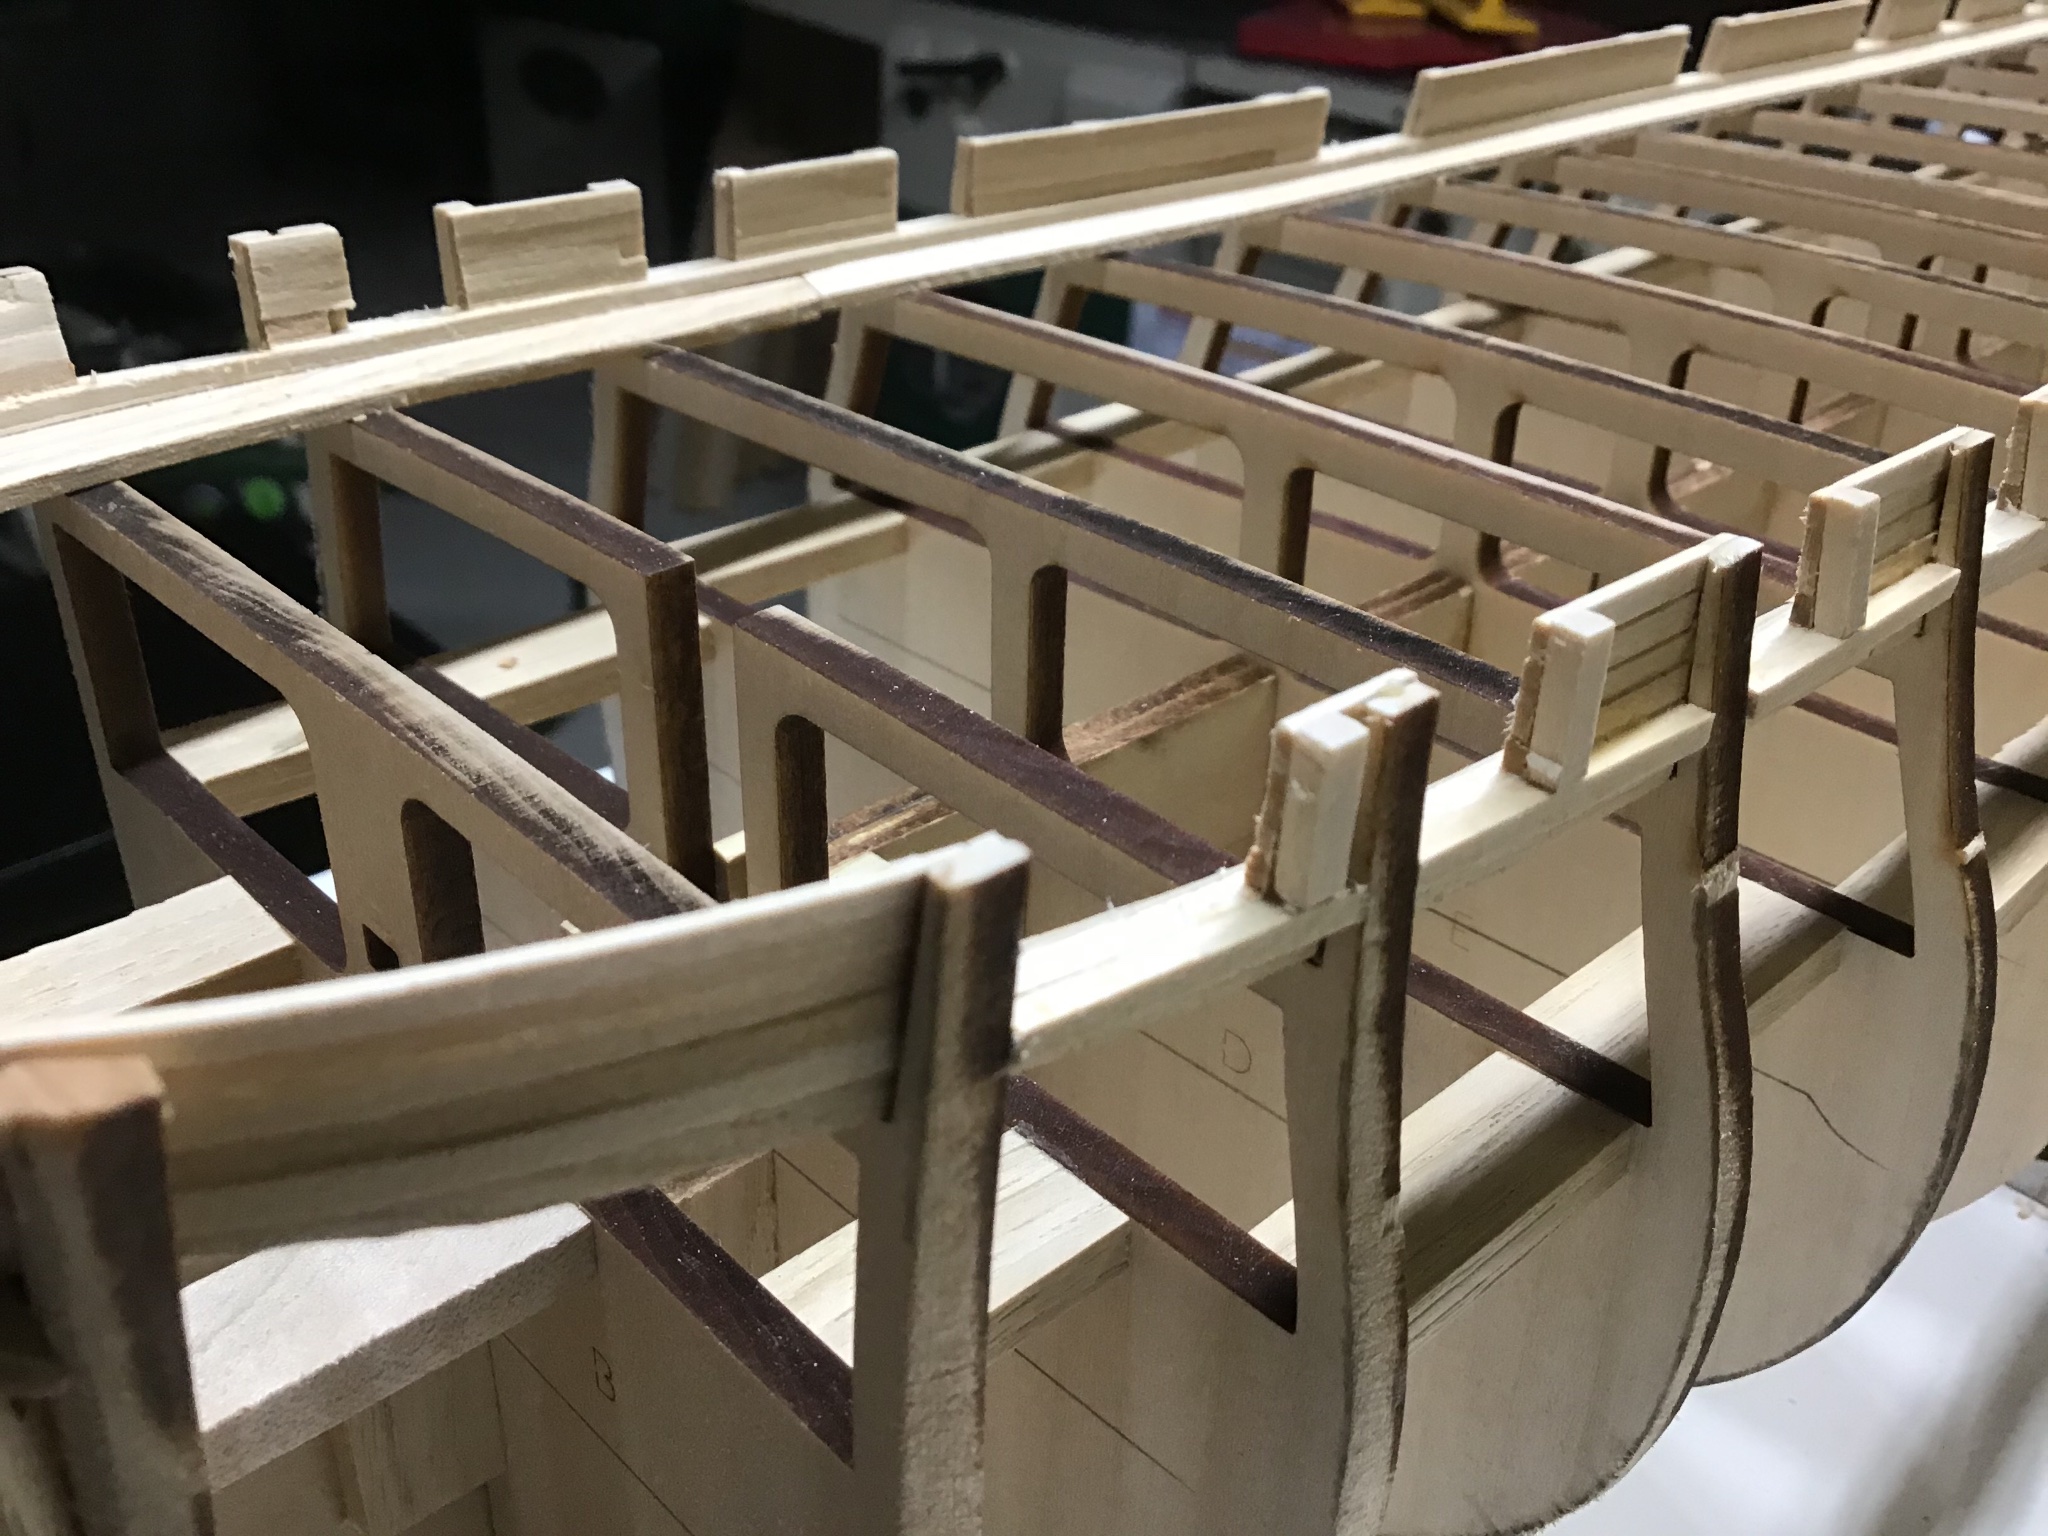
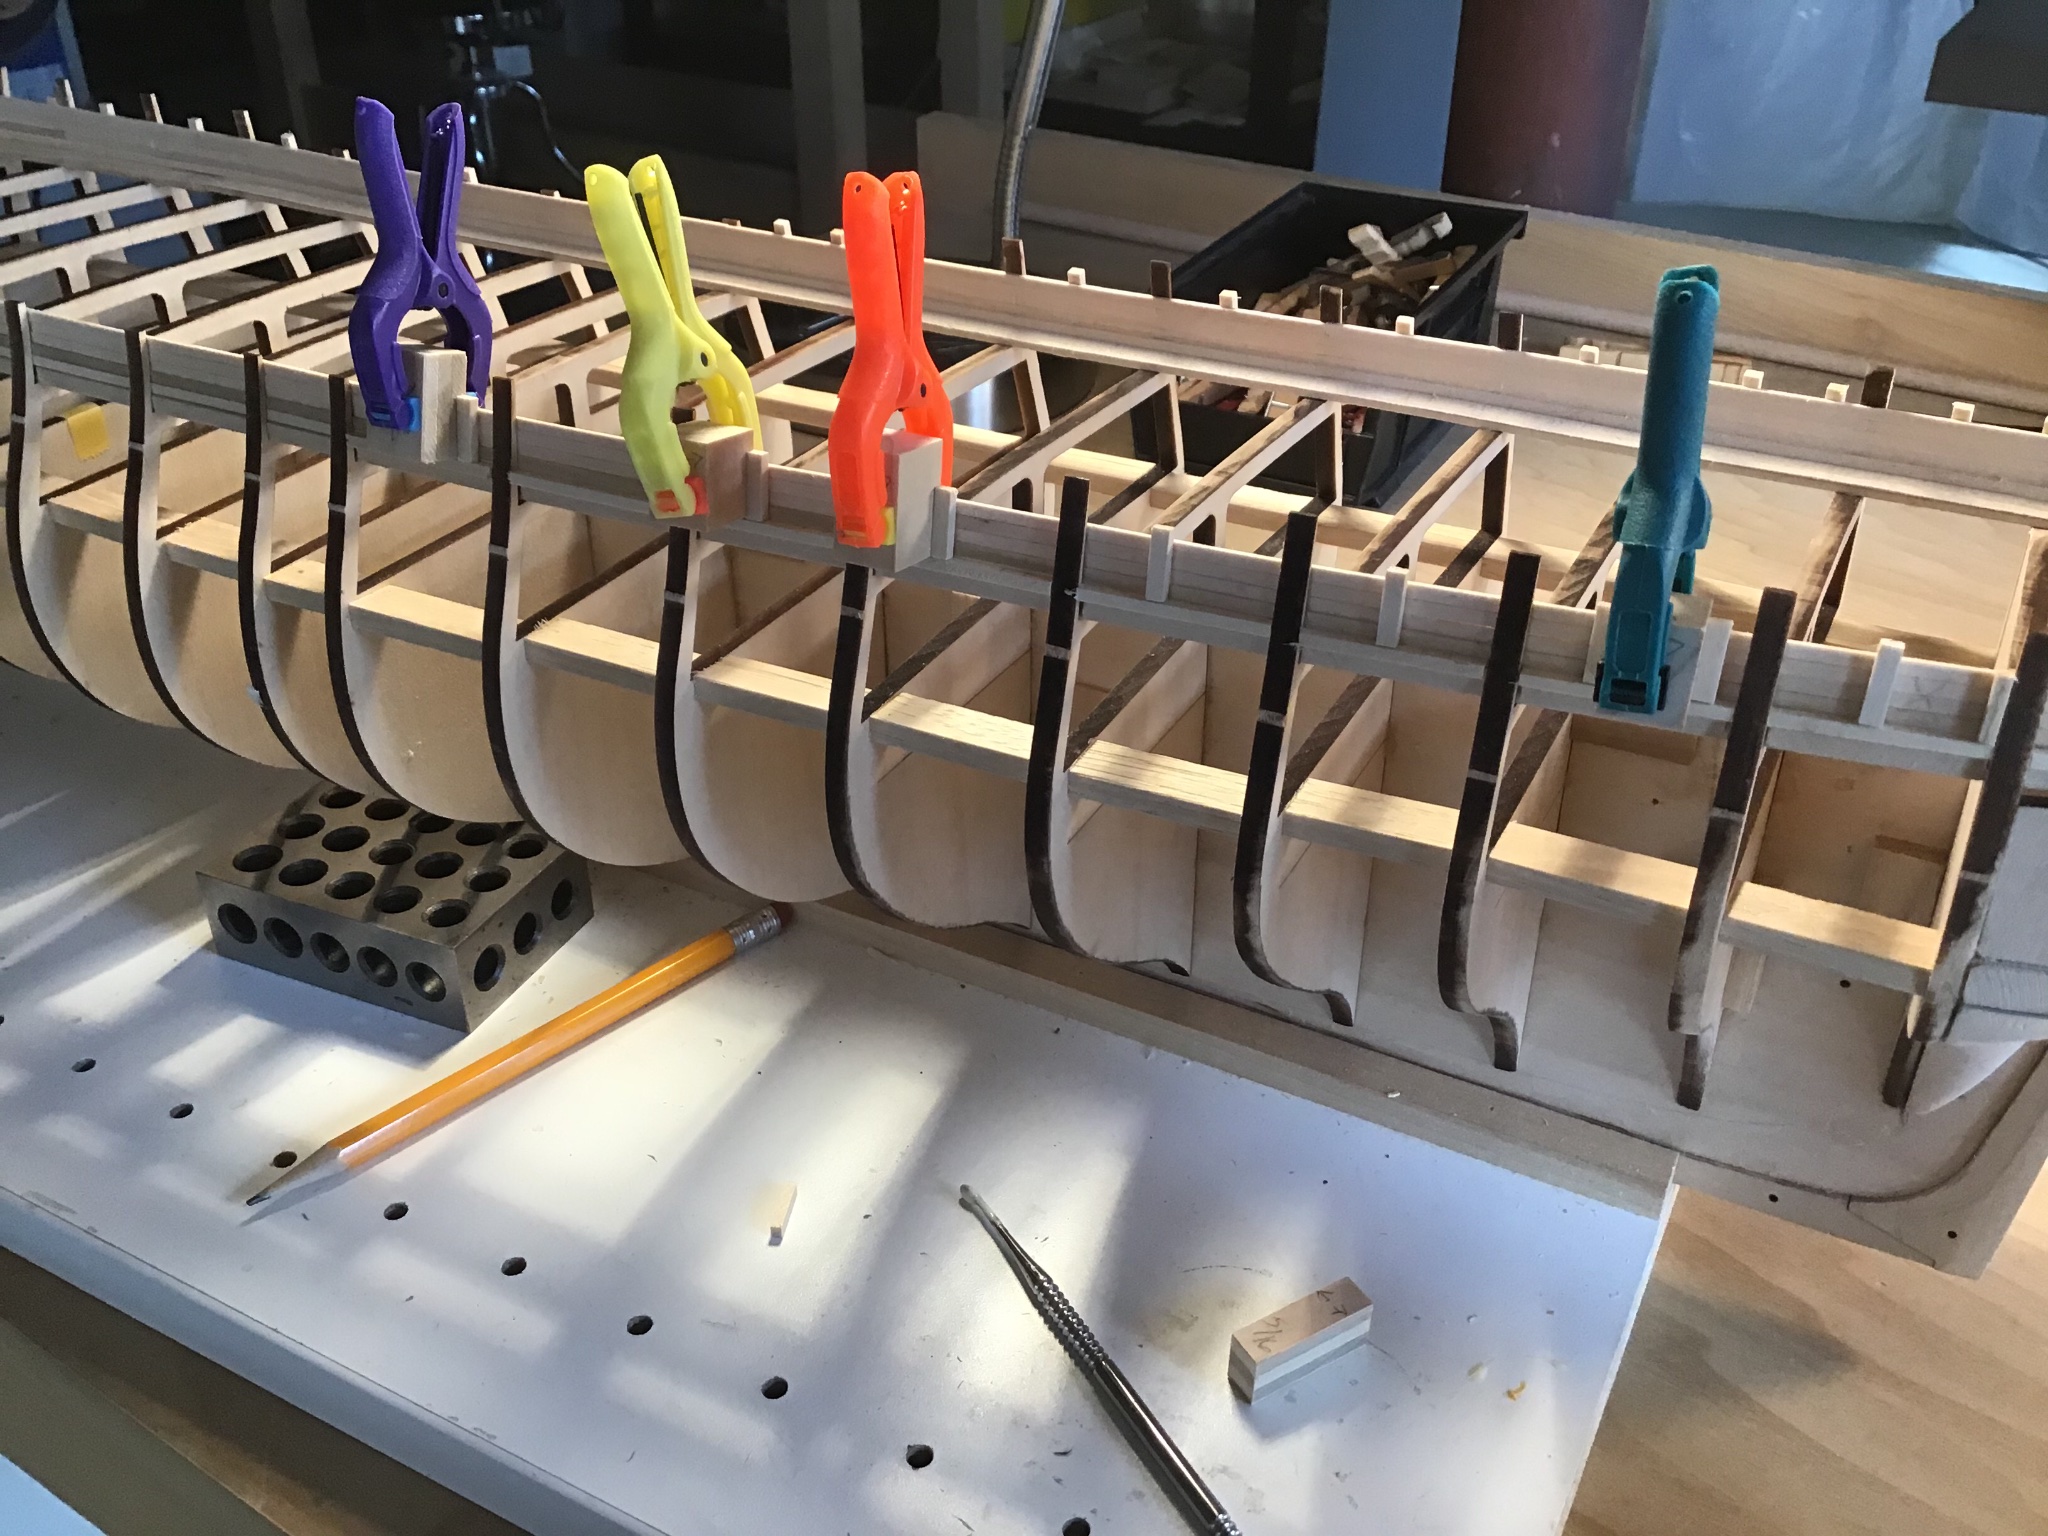
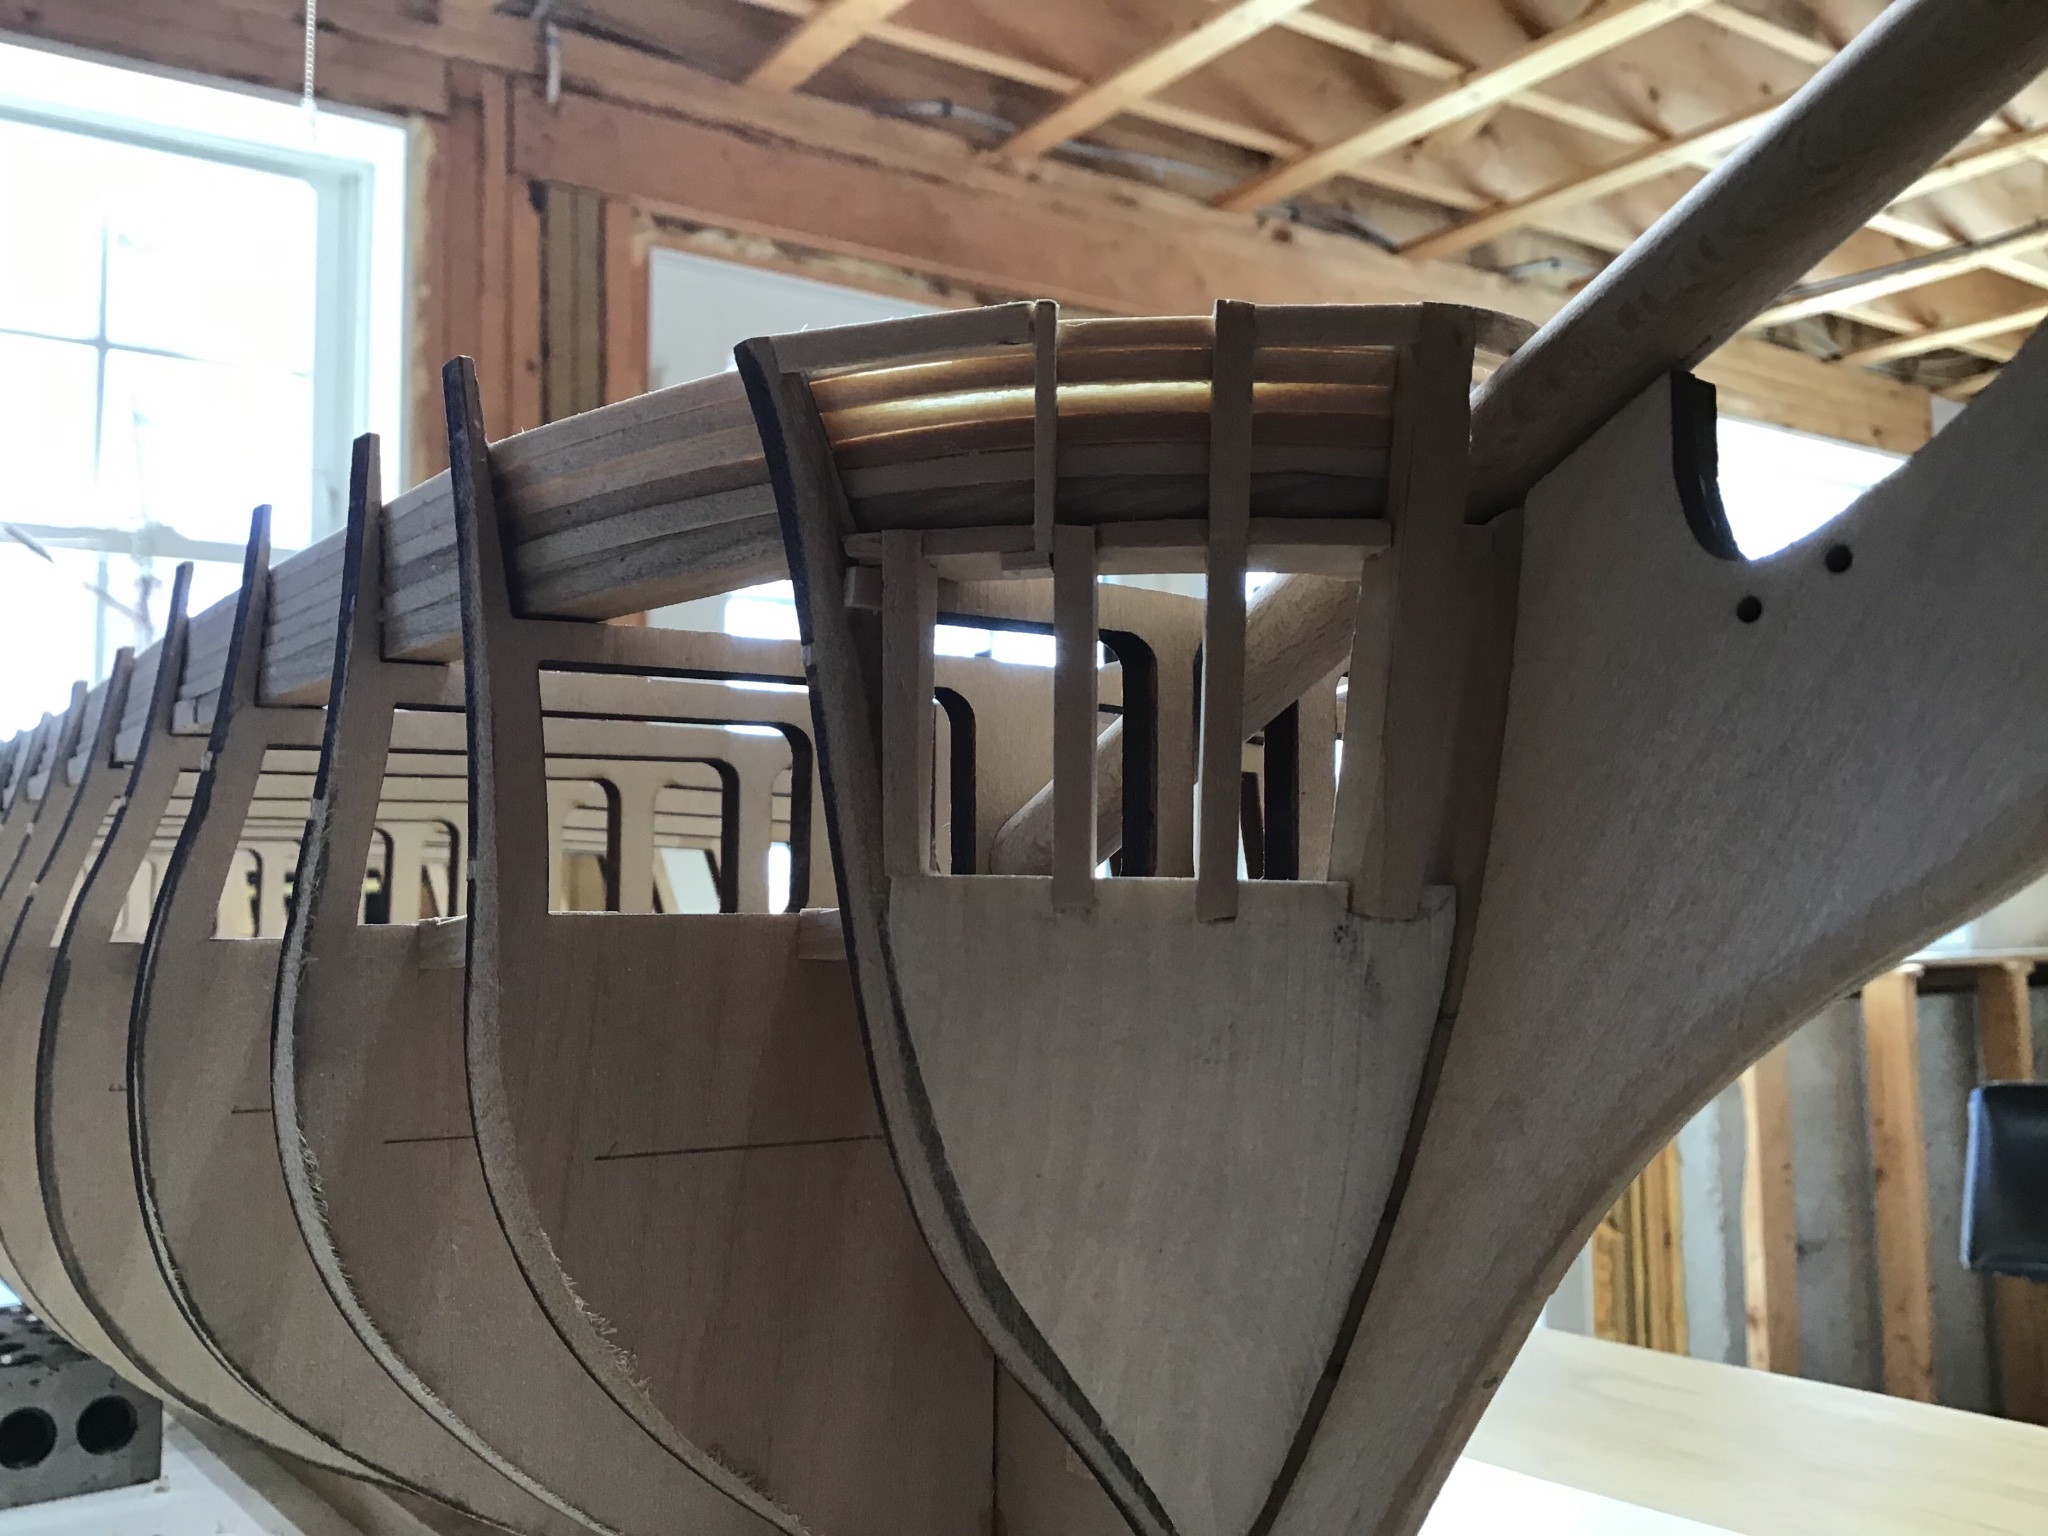
Bulwark Completion
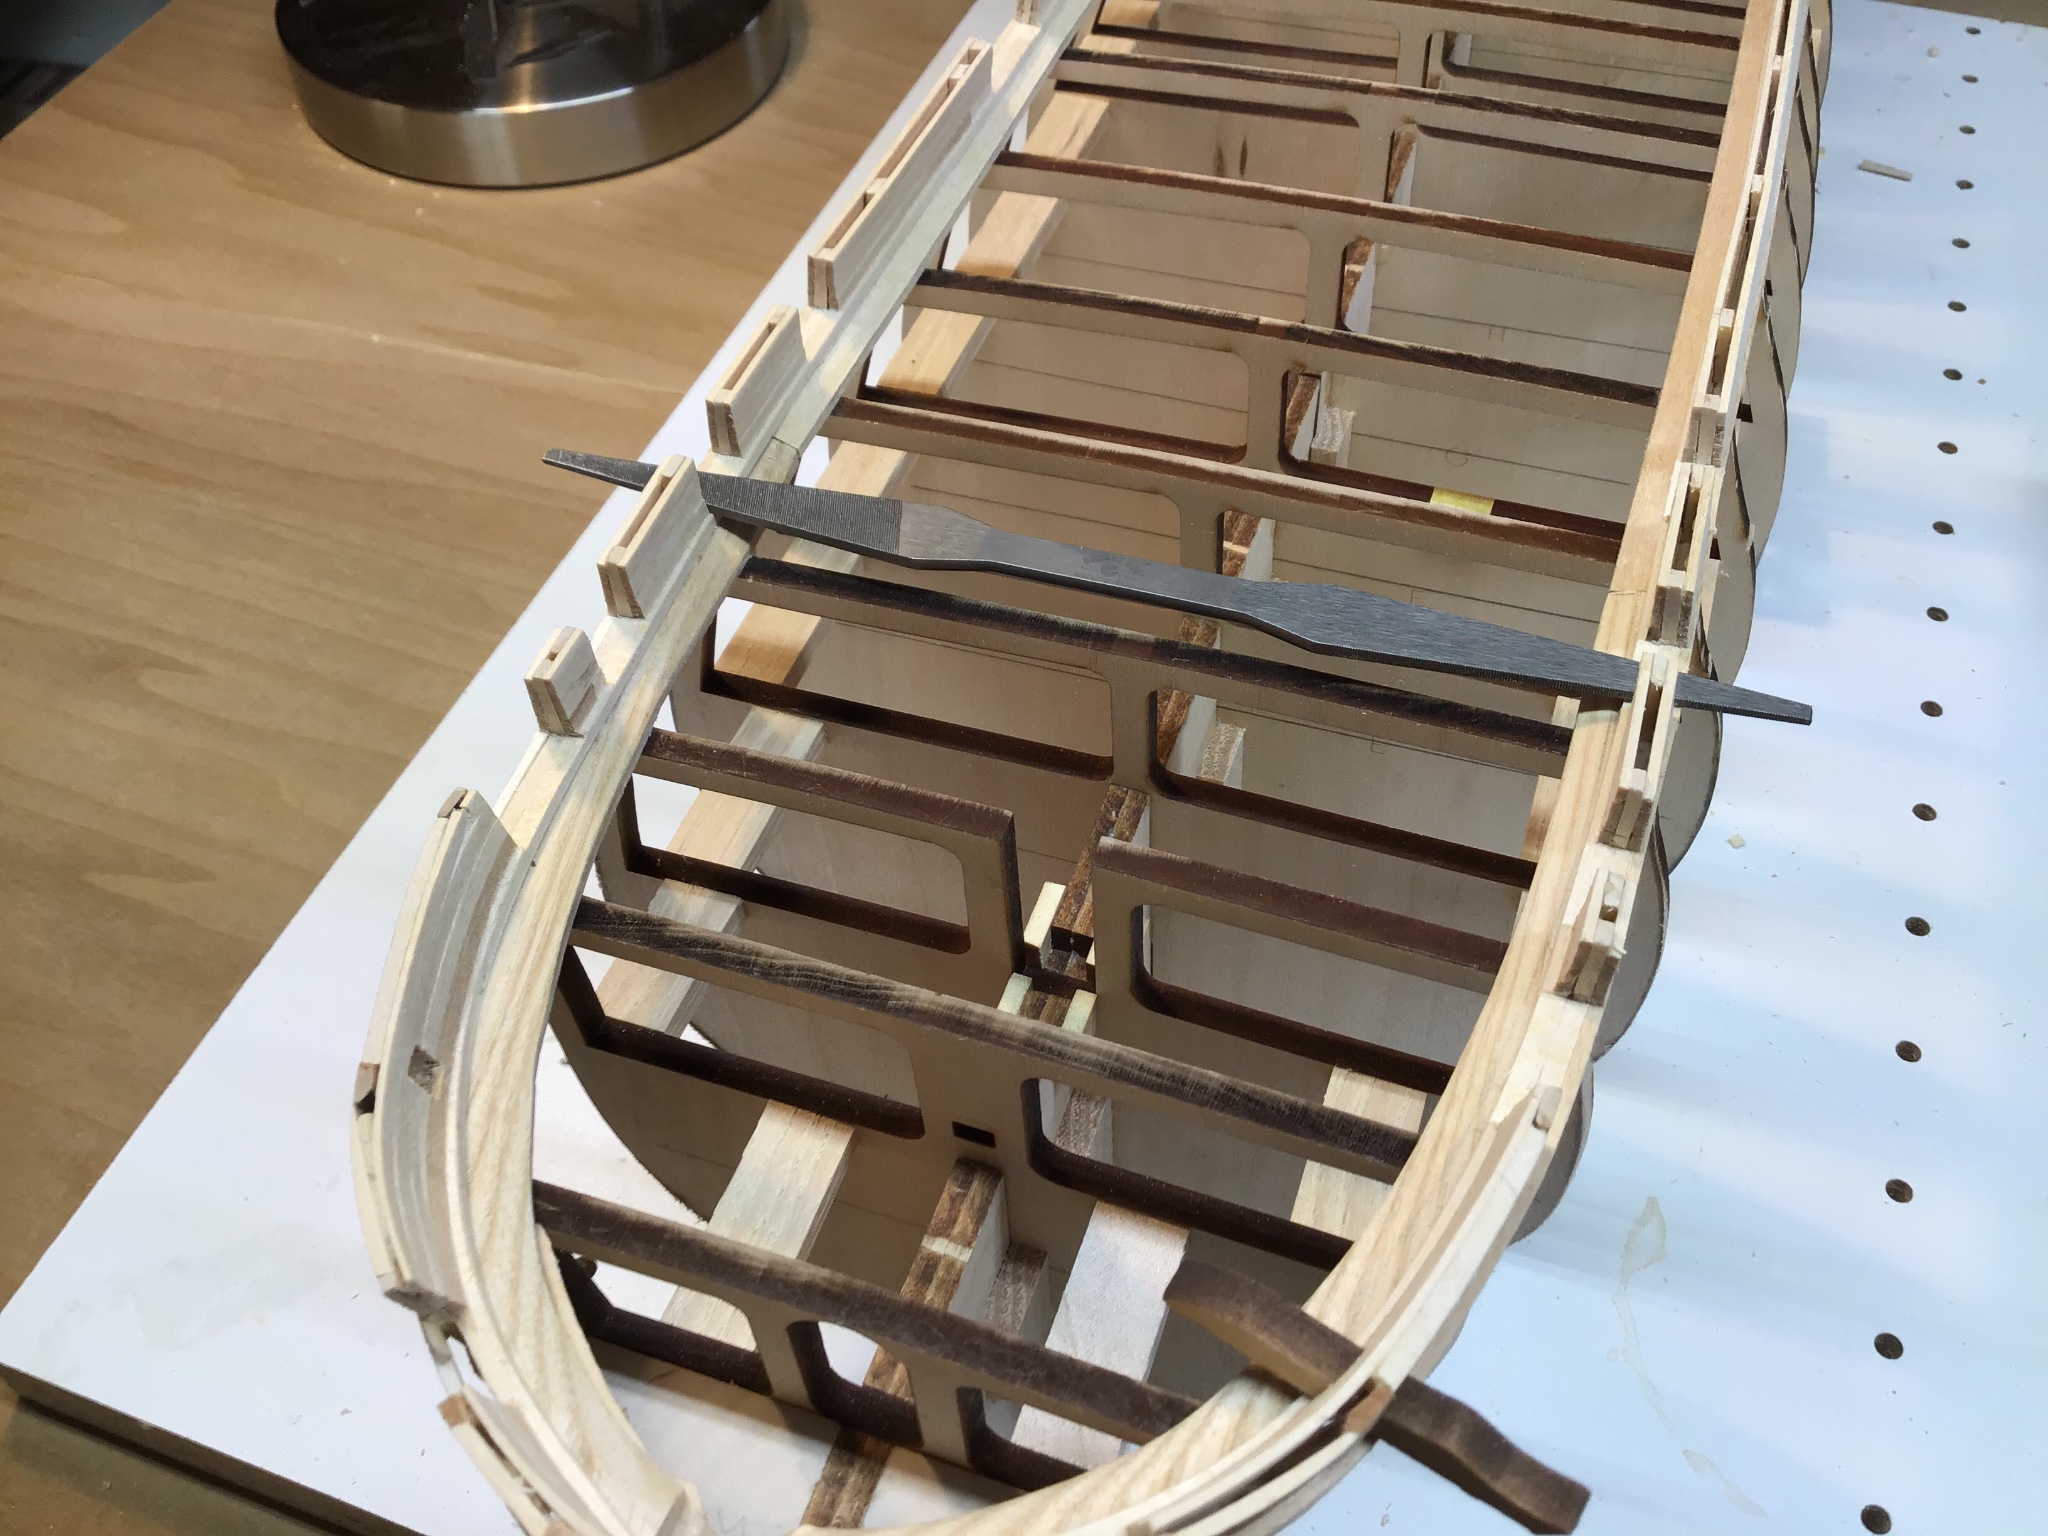
Wrapped up the bulwarks. Installed over 120 planks to complete the inside of the bulwarks.
Methodology pretty simple. Measure width with the calipers and cut planks with the Byrnes saw.
Used the pattern file to smooth the gun port edges. Also laid the file across the sills, from side to side, to even the sills. See second photo.
At the bow it was time to fair the bulkhead extensions. Essential to steam bend the bow bulwark planking.
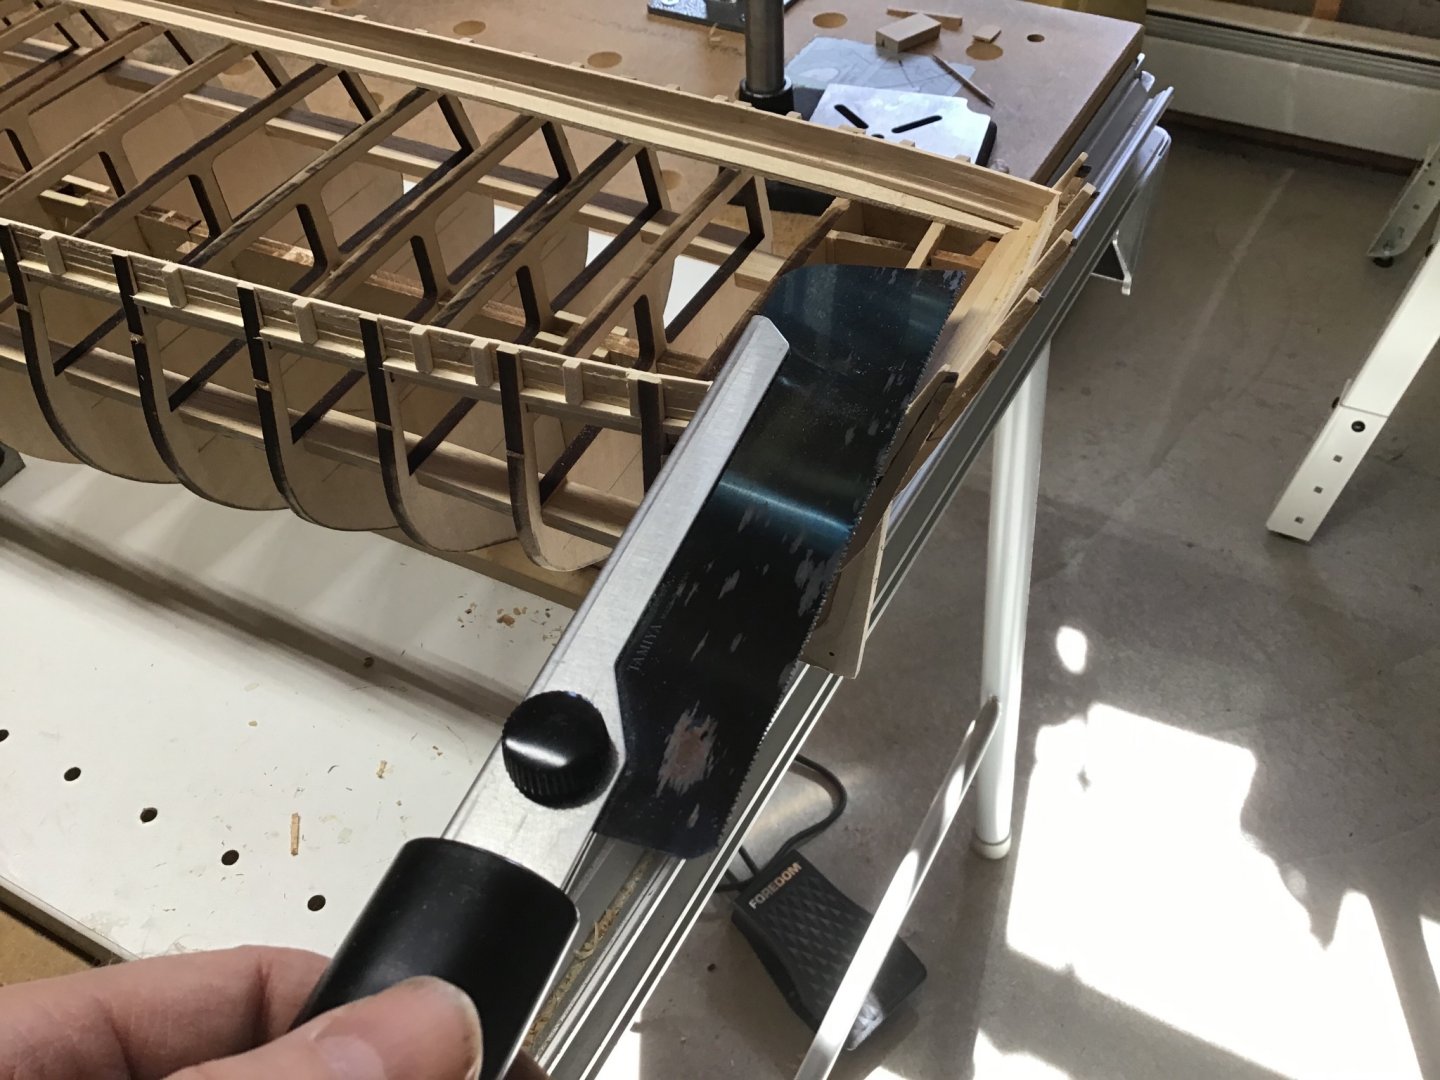
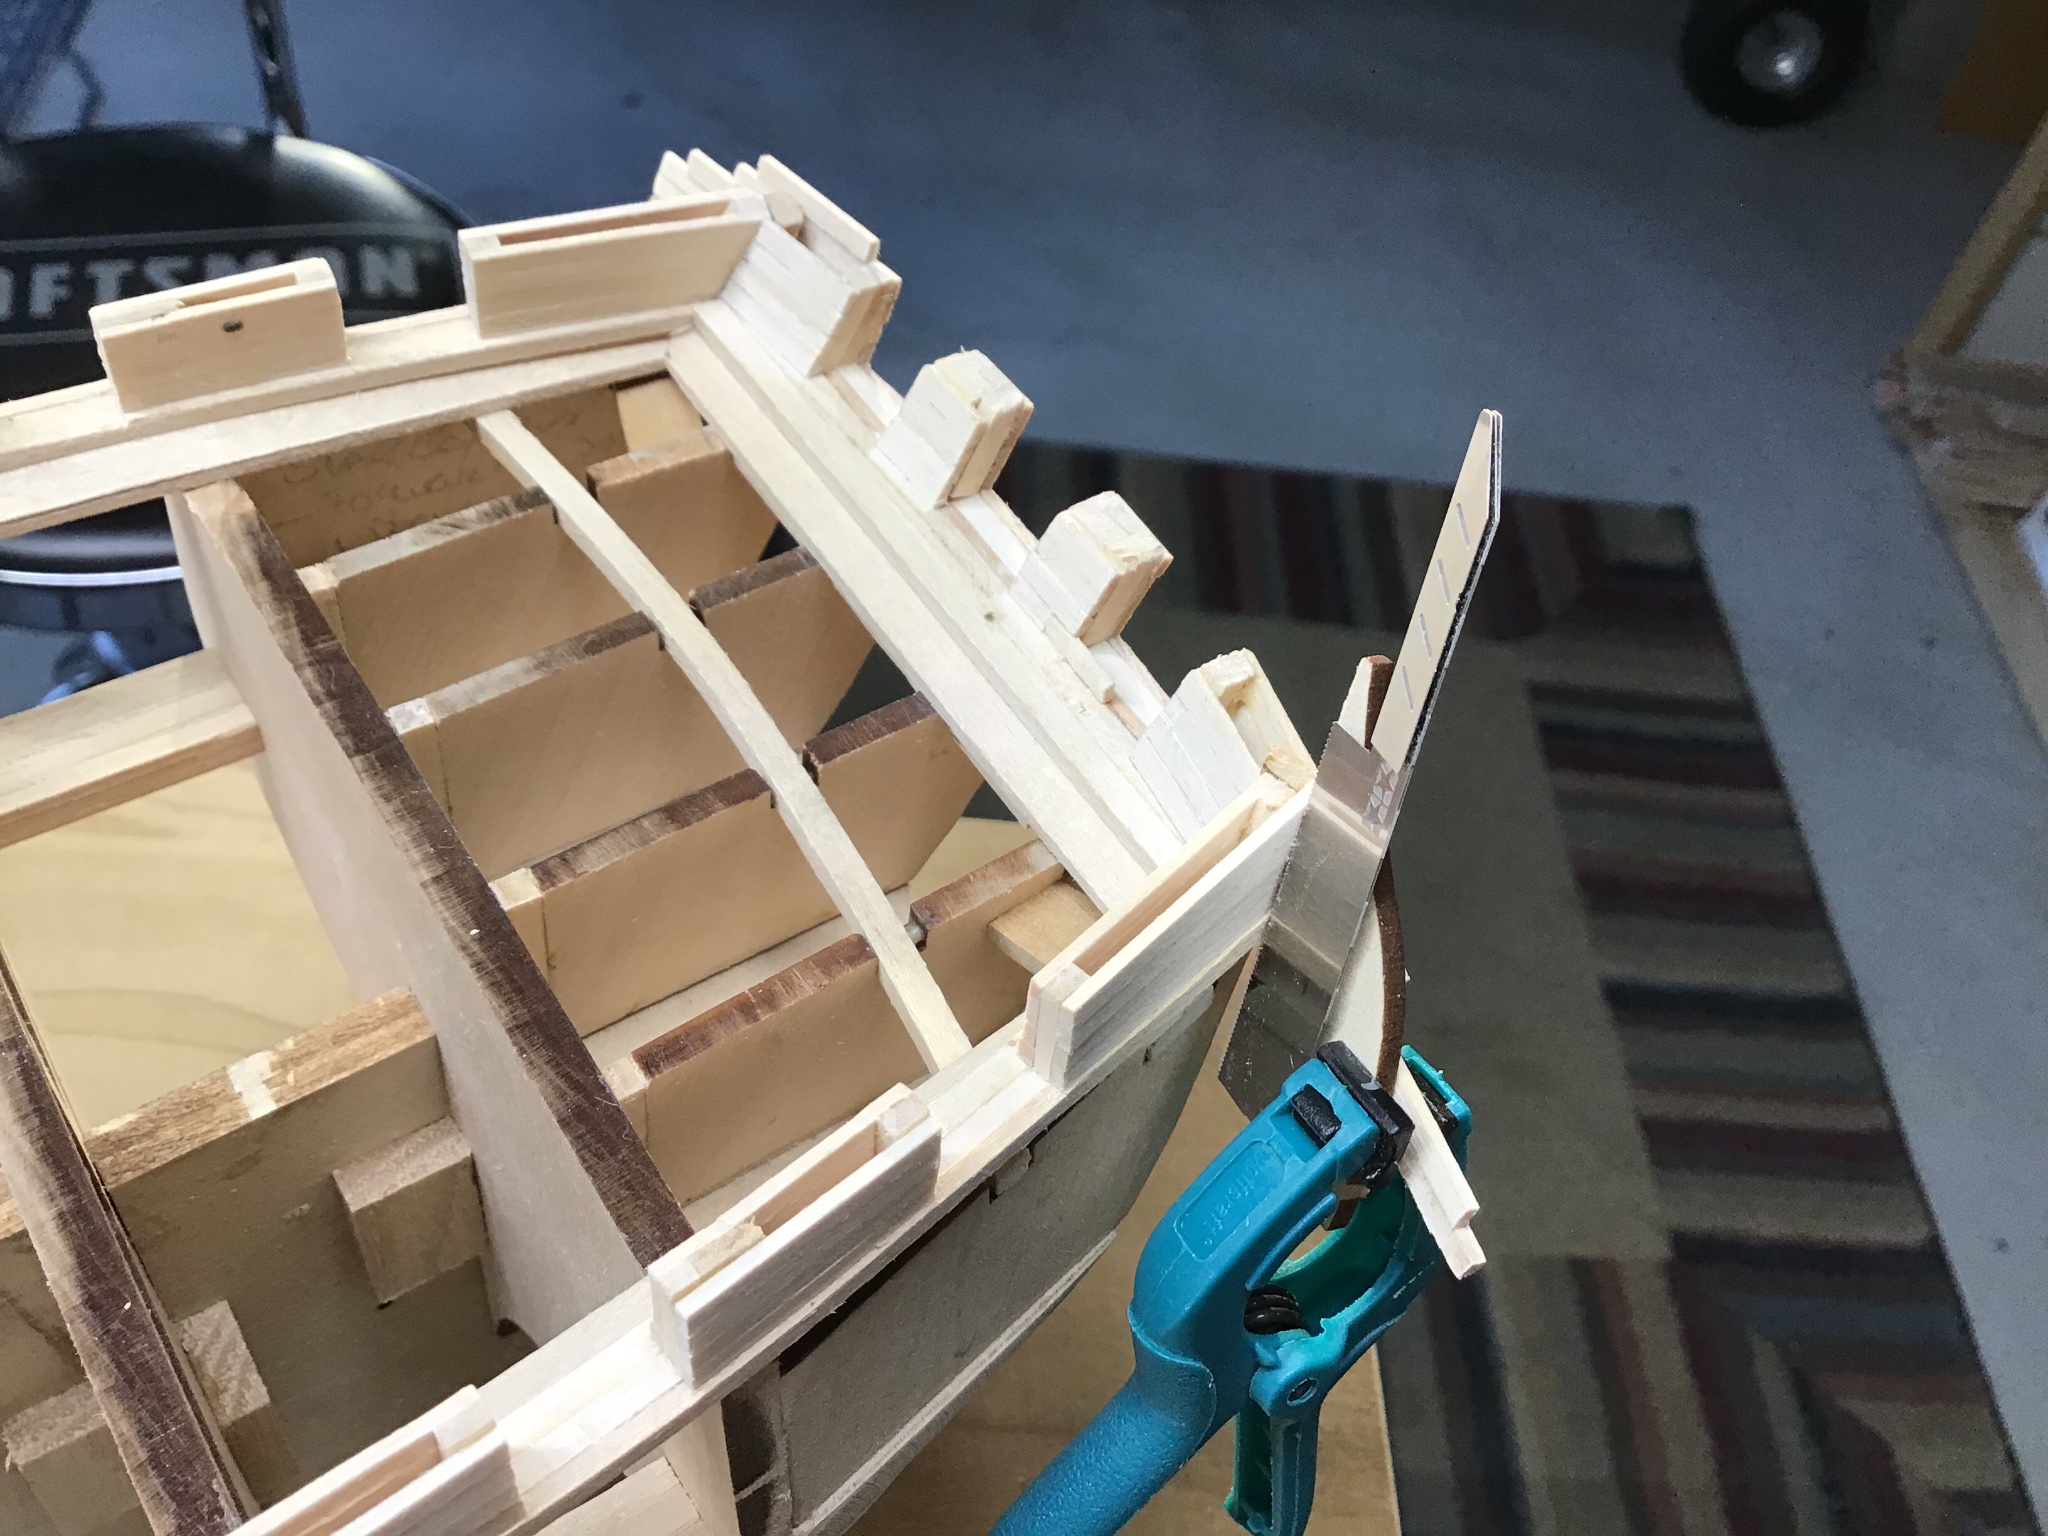
Spent some time thinking about the stern bulwark planking and the port and starboard counter extensions. To get the correct angle, made the planks extra long, clamped the extensions to the planks, then used the mini saw to cutout the ends of the bulwark planks and the planksheer. See the photo with the blue clamp.
Along the way cutout the openings for the catheads. Cut inside opening first after framing, then planked over the outside, and cut inside out. Little holes are visible, from drilling to get started with removing the waste from the opening.
Overall I’m happy with the result, however found I made a mistake as the planksheer port and starboard side aft are out of alignment vertically a little less than a 1/16”. I think it will be covered by the stern galleries.


-
This looking nice....now the USS Perry, no longer the USS Putty!
Cheers!
-
Hello, a really nice ship model. I like the look and feel overall and the deck in particular. Enjoy your rides, still a little early, but today is a warm day in Massachusetts. We’ll be riding soon.
Have this kit on the shelf and will use your work for guidance. Thanks for posting.
-
Hello, greetings from Massachusetts!
Welcome aboard and I’m always open to answering a question.
Cheers!
- mtaylor and Keith Black
-
2
-
Greetings from Boston USA,
Stereo microscope! Wow!
Thank you for showing how it’s done.
Would you happen to know where one could purchase a Jewelers Lathe?
Cheers
- mtaylor, Keith Black and lmagna
-
3
-
Final coat of furniture paste wax is also an option....easy to apply, ready quickly, a traditional wood finish, looks good....
Coating wood with plastic, that’s what poly is, seems incongruous with a ship model, and I hate the hazardous waste....
My personal preference is shellac or stain under acrylics (painted finish) or stain/wax (unpainted finish).
Cheers
-
Hello,
When shipbuilding in all things, I pick the color that appeals to me....
One of my professions is cabinet making, so based on my work with pine, 1 or 2 look ok....
And we know in real life, based on the finish, how old it is, and how well it’s maintained there is no one true mast color....
Therefore I just pick what makes sense to me....
Thank you.
-
-
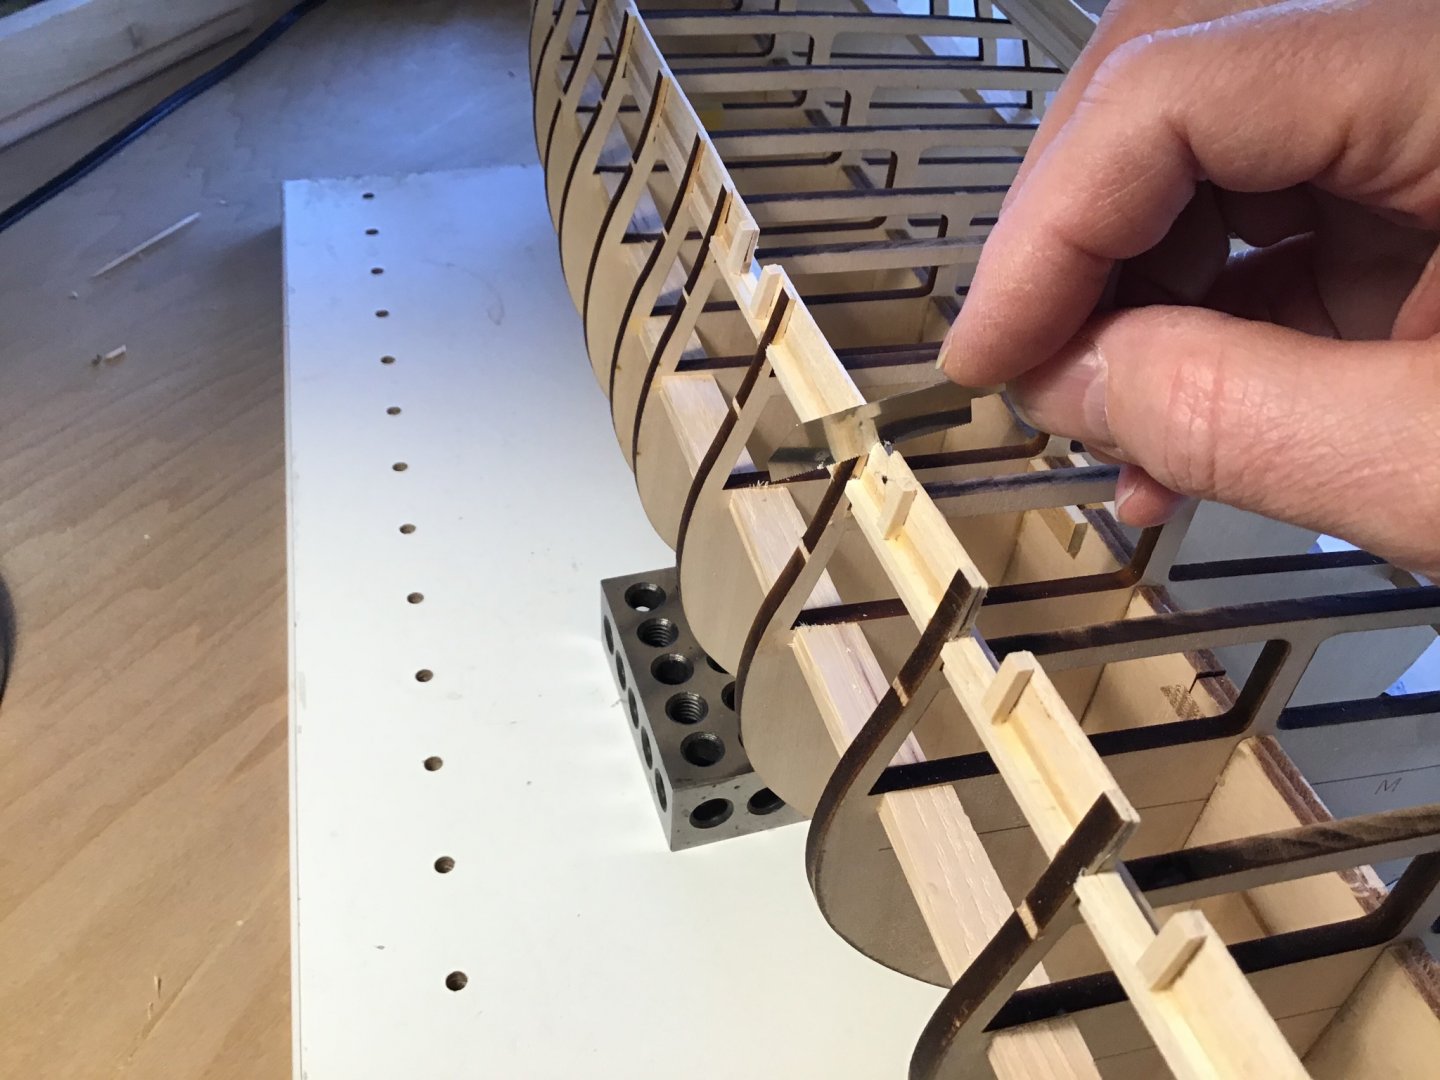
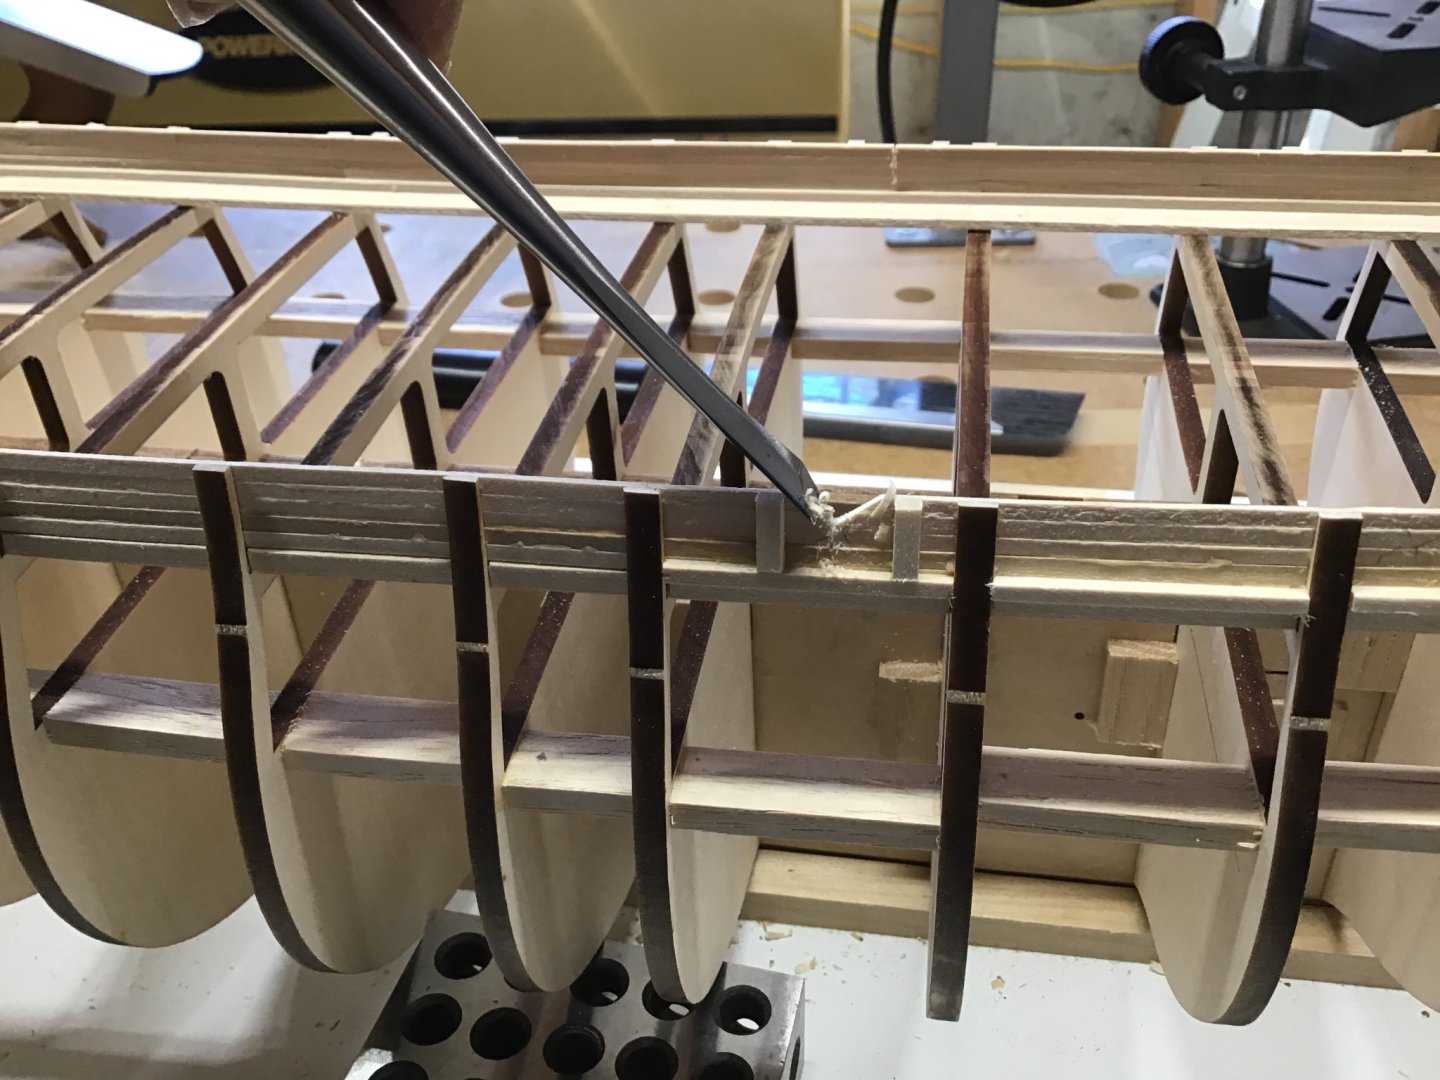
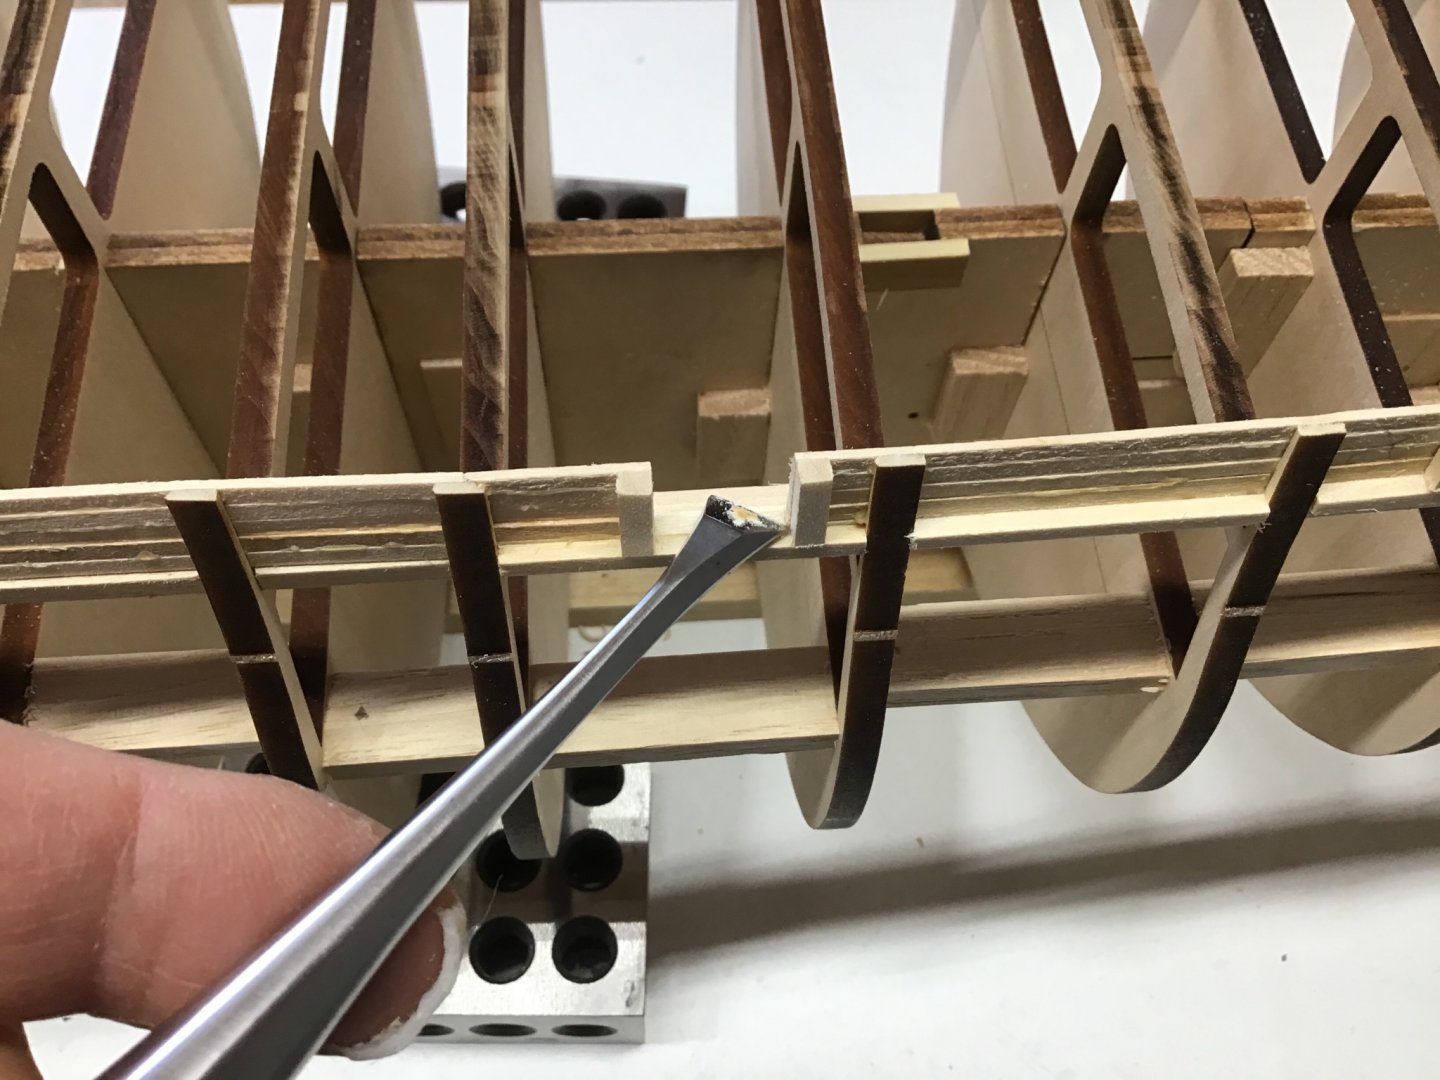
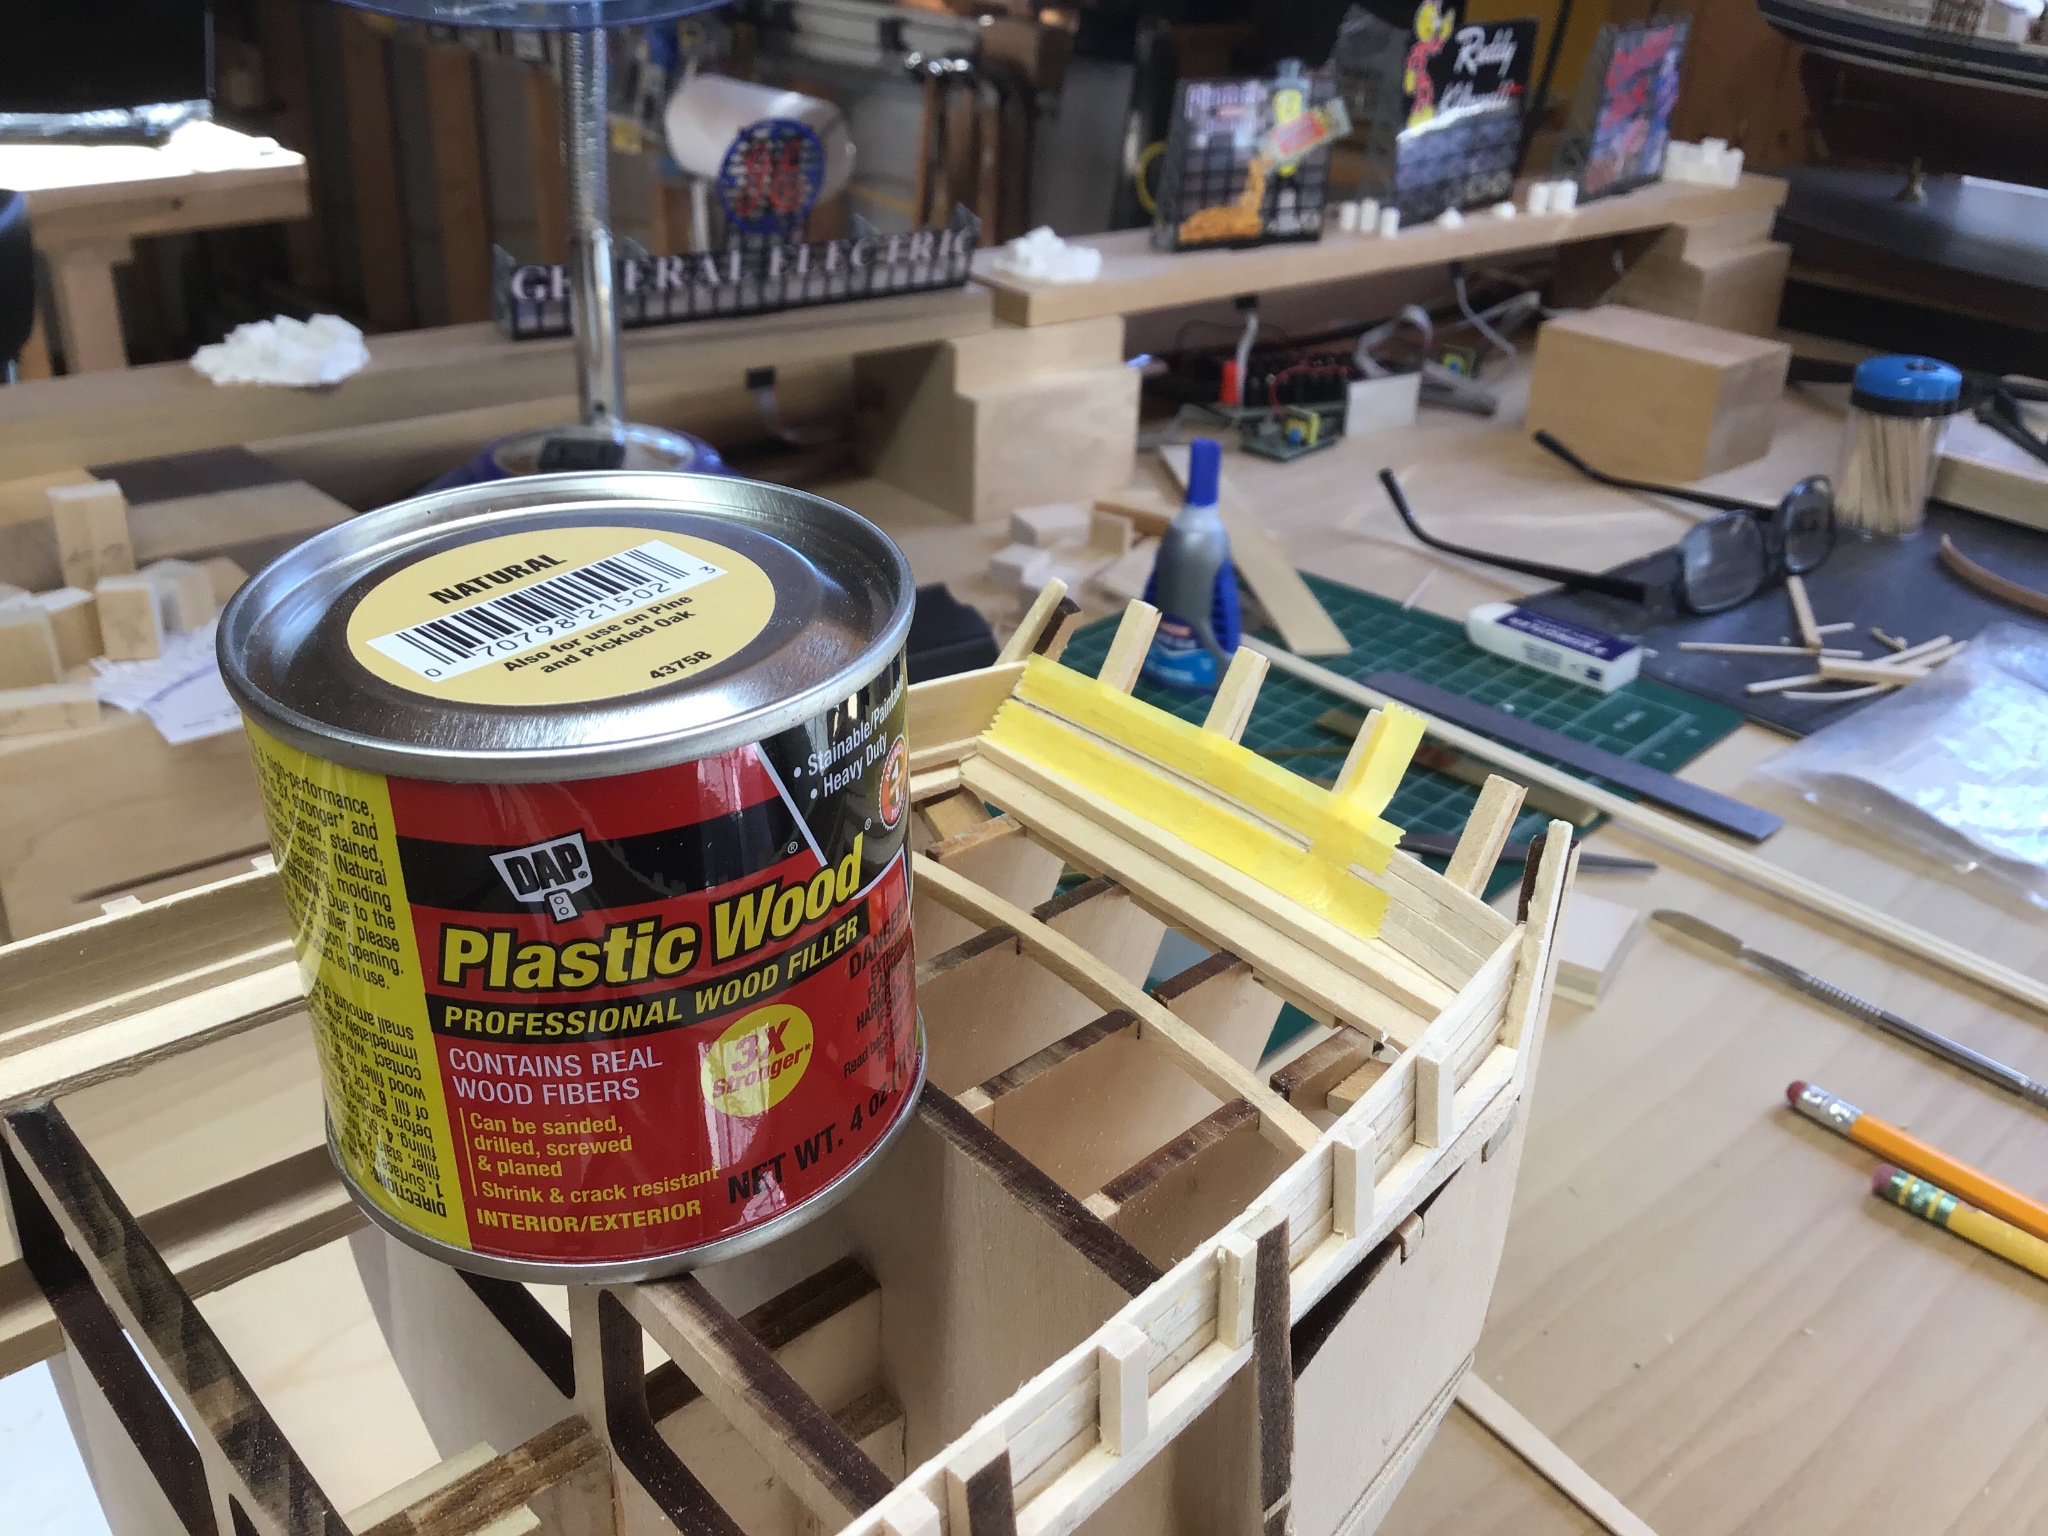
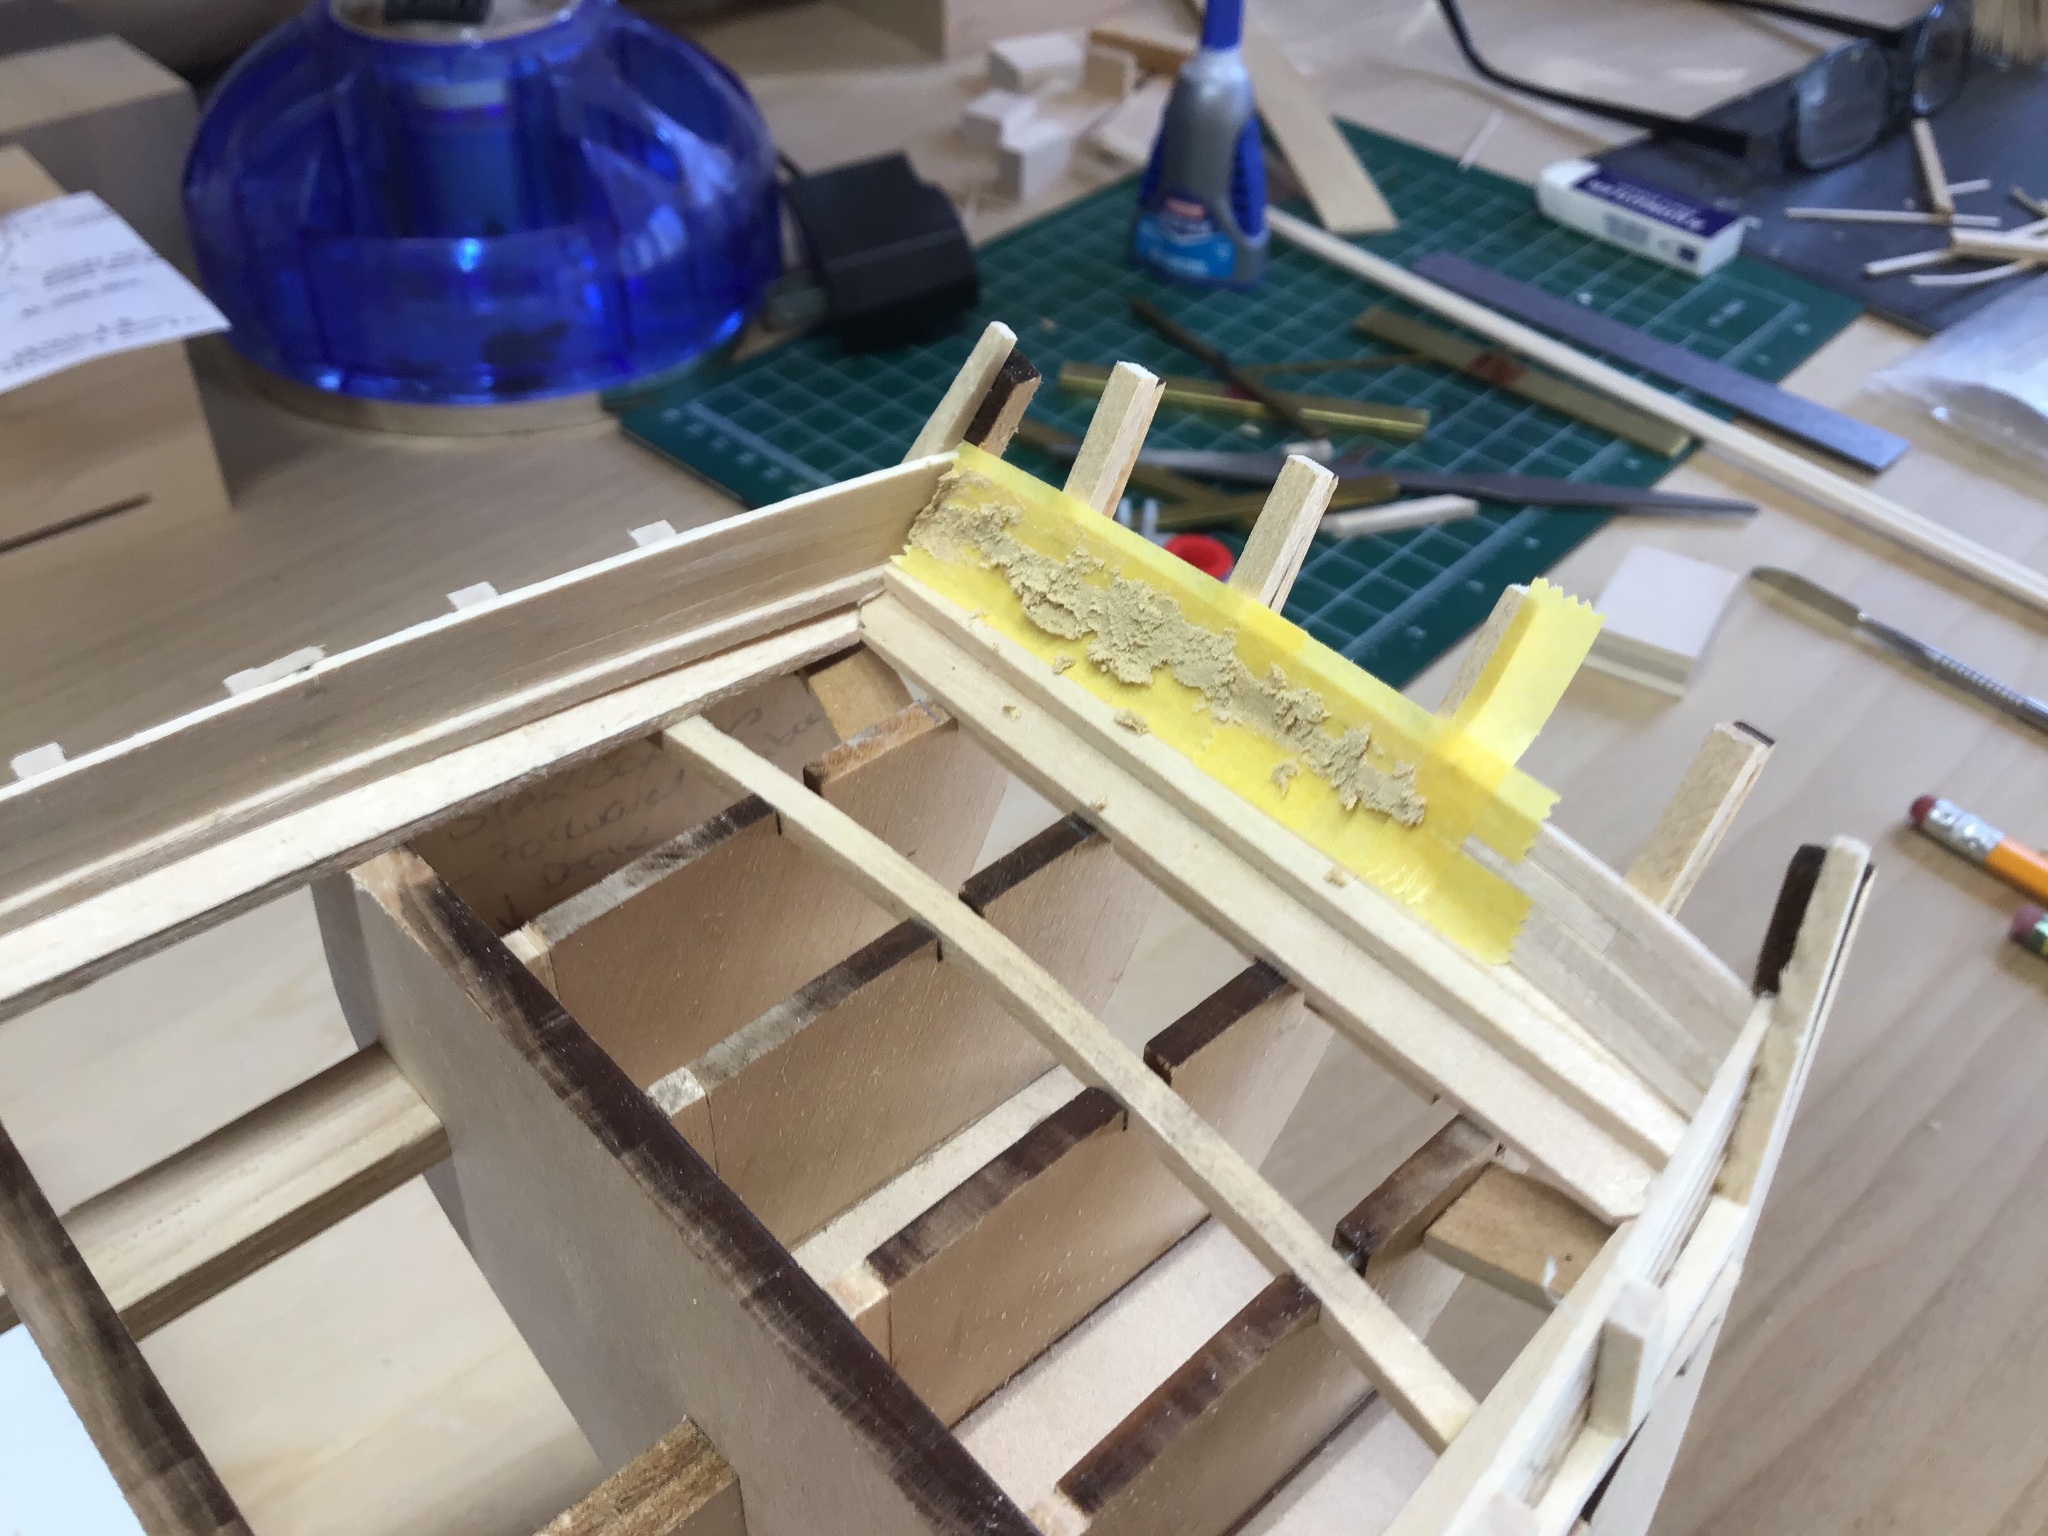
Gun Port Cleanup and Bulwark Prep
Some gaps to fill in the bulwarks. I avoid sanding whenever possible. Mask the area. Fill with plastic wood. Peel masking tape before drying. Remove chunks with chisel and smooth with sandpaper.
Last few ports were cut with a Tamiya mini saw. I like to chisel for the practice, however, going forward will use the mini saws.
Pattern file used to smooth gun port sides and sill. Safe sides are helpful.
Tip: when working the gun port sides, cut and file from the inside out to avoid tearing the wood fibers on the bulwark board ends.
Tamiya razor saw used to cutoff extensions.


-
-
-
Hi,
Just jumping in here.....I’ve lived through this. 🤔
The general issue here is the planks are not tapered at the fore and aft ends.....so say at the aft end the plank needed to be pulled toward the keel to fit against it’s upper neighbor....notice instead of sweeping up aft into the stern, the shape is a frown...notice at the bow, the plank is sweeping up....
The garboard plank is generally thin amidships and fat at the bow....
Here was a big idea that helped me understand what can be done with a plank....a plank laid across the bulkheads can only be naturally pressed down onto the neighboring bulkhead (plank sweeps up), or twisted. Planks cannot be pushed up or down towards the keel or deck because that will warp the plank.
So if you find the plank needs to be pulled down, say towards the keel, to fit against it’s neighbor, the plank must be tapered.
If a plank is laid and there is a gap, the planked can’t be pushed up or down to close the gap, a filler piece or stealer is needed.
So what to do here and now?
While the result may not be idea, you can still get a great result with what you have.
Have to go with a painted hull. Hull planking does not need to be perfect, because it will be viewed from above and down. And the interior of that boat is where the action is, the viewers eye will be drawn towards the interior.
Plank the remainder of the hull with short pieces. At the stern it looks like it will be wedge shaped planks.
Try dots of CA on the bulkheads and carpenters glue on the edges.
Is there a stem piece? Install if there is.
Next sand the hull to smooth the plank edges. Easy with 150 grit, then 220. Vacuum the hull and clean it up with rubbing alcohol.
Next fill in the gaps. I like to mask around the gaps and fill with plastic wood - DAP. Go with very small amounts of filler. The last thing you want to do is cover the hull with a layer of filler. A pain in the neck to sand it all off.
I would then prime the hull with rattle can shellac. Rub it out with steel wool. You’re going for a relatively smooth surface, no major depressions. Mask and fill again.
At this point I like to use something called Gesso. Artists use it to seal canvas prior to painting. It’s an acrylic with fine gypsum. It’s cheap and easy to apply. It gives a uniform surface.
Then mask and paint as normal.
Looking forward to seeing how it goes. Thanks.
- Knocklouder, Jonny 007 and tonio
-
3
-
On 2/27/2021 at 9:21 AM, Hubac's Historian said:
Thanks, Michael. Kirill and Dafi are very talented, and I watch those guys as well. Nice tip on the bobbin thread. I remember when sewing stores used to be a thing, and thread was easily obtainable and discernible, in person.
The other thing that I wonder about is what type of CA glue - super thin?? - and whether you wait to fix with glue until all of your lines are up and set, so that you can adjust tension. The worst, for me, is when one line going taught causes another to slack, when it shouldn’t be.
A way to deal with the taunt line makes another line go slack problem....rig the line to the belay point, then run the line over the side and weight it with a clip.....this allows for adjustments, after all lines are rigged fix them to the belay point....
Cheers!

- Archi, EJ_L, Heinrich der Seefahrer and 2 others
-
5
-
Looking good Daniel....deck markings are nice!
-
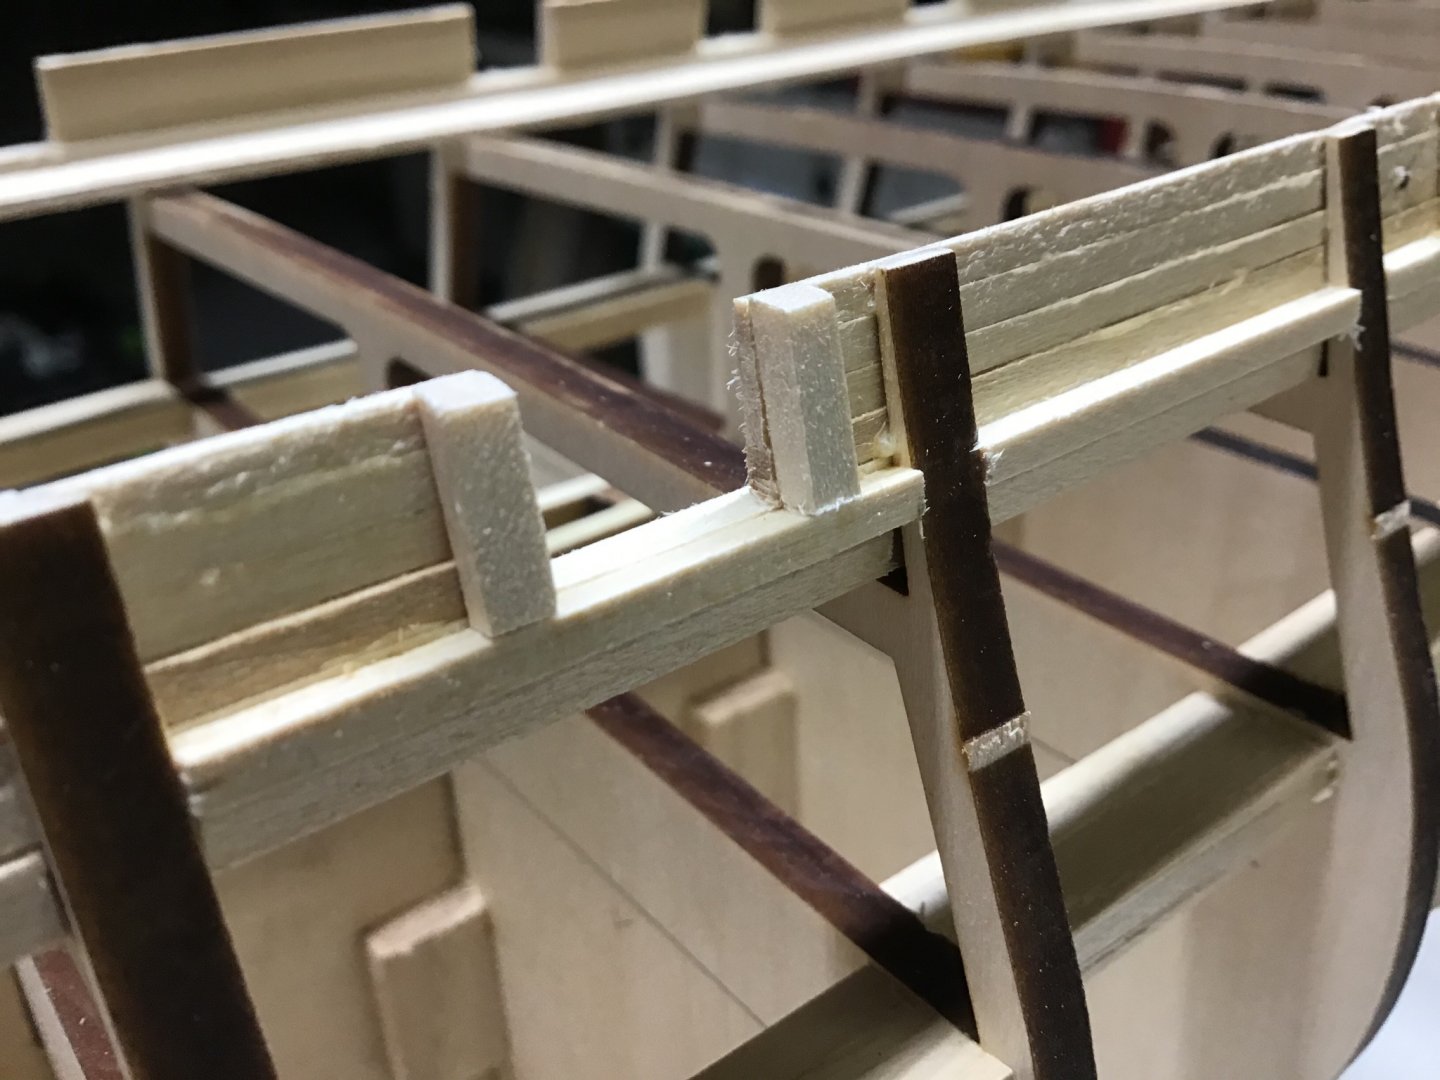
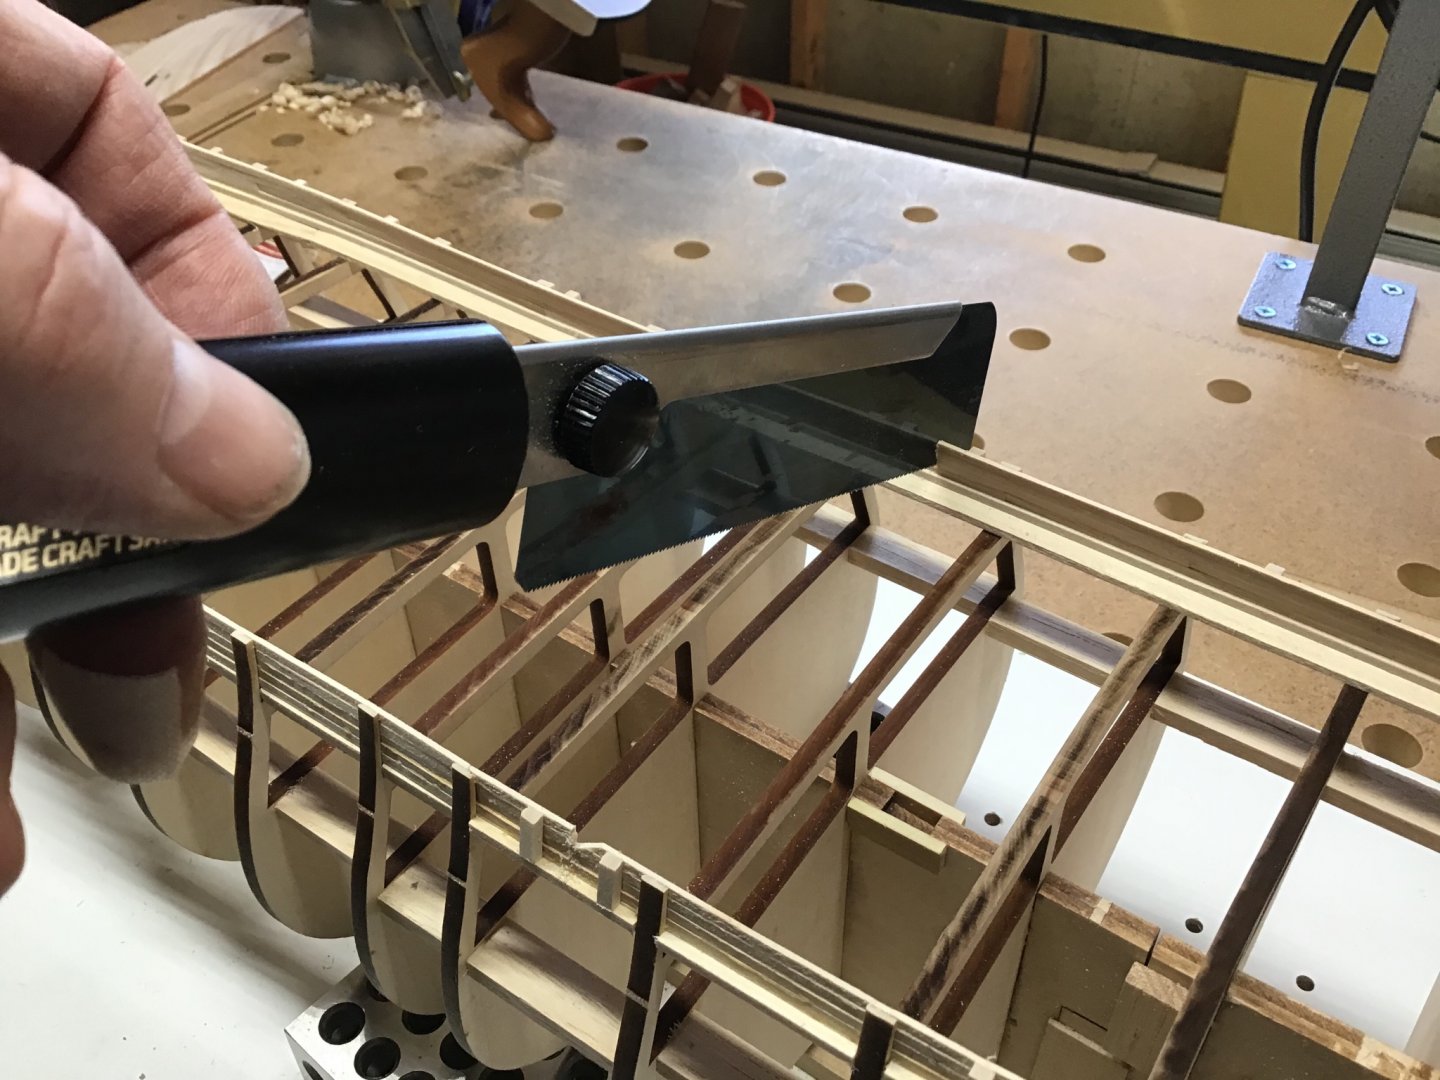
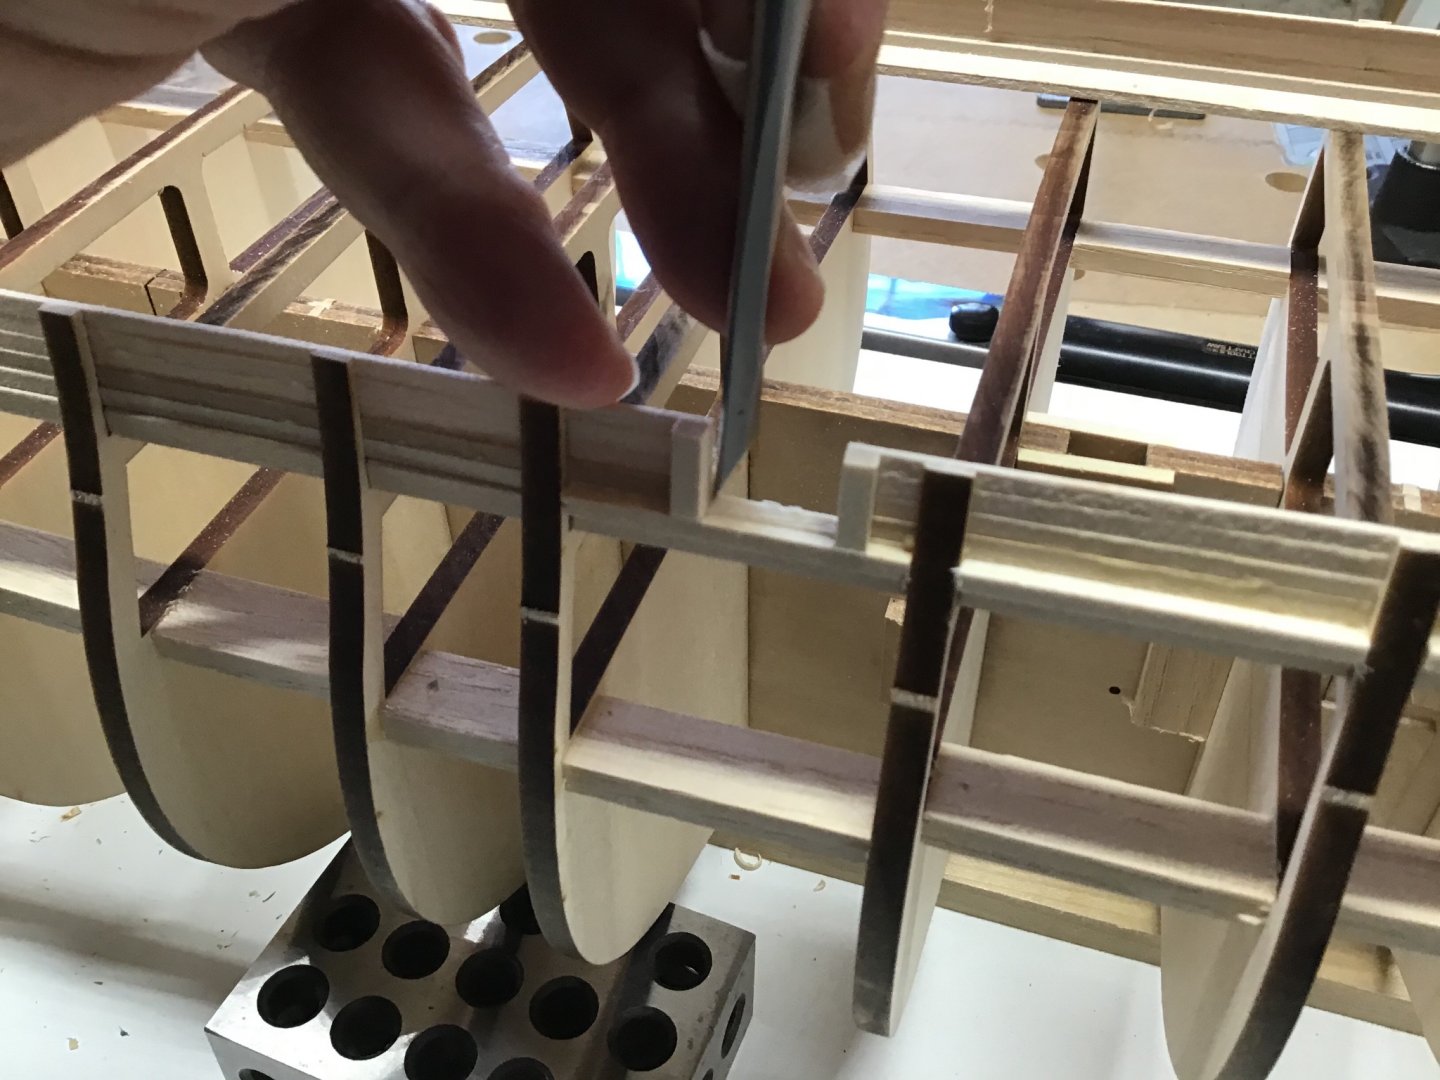
Cutting Out the Gun Ports (continued)
After cutting about a dozen, you get into a rhythm, and start to notice what works.
Noticed that the chisel is most effective, bevel down when cutting towards the post. First cut down vertically along the post. Then scoop out the wood with the chisel bevel down cutting towards the post.
Since the bottom bulwark plank was just fixed with glued at the bevel extensions, and not glued to the planksheer, just scooping out along the post from top to bottom was enough to get the waste cutout to pop out.
The previous saw cuts were unnecessary.
The chisel, also bevel down, can be levered off the post, from the corner out, to square up the bottom corners and shave the sill flat.

- GuntherMT, WalrusGuy, usedtosail and 3 others
-
6
-
Hello Paul, welcome!
- Keith Black, mtaylor and JeffT
-
3
-
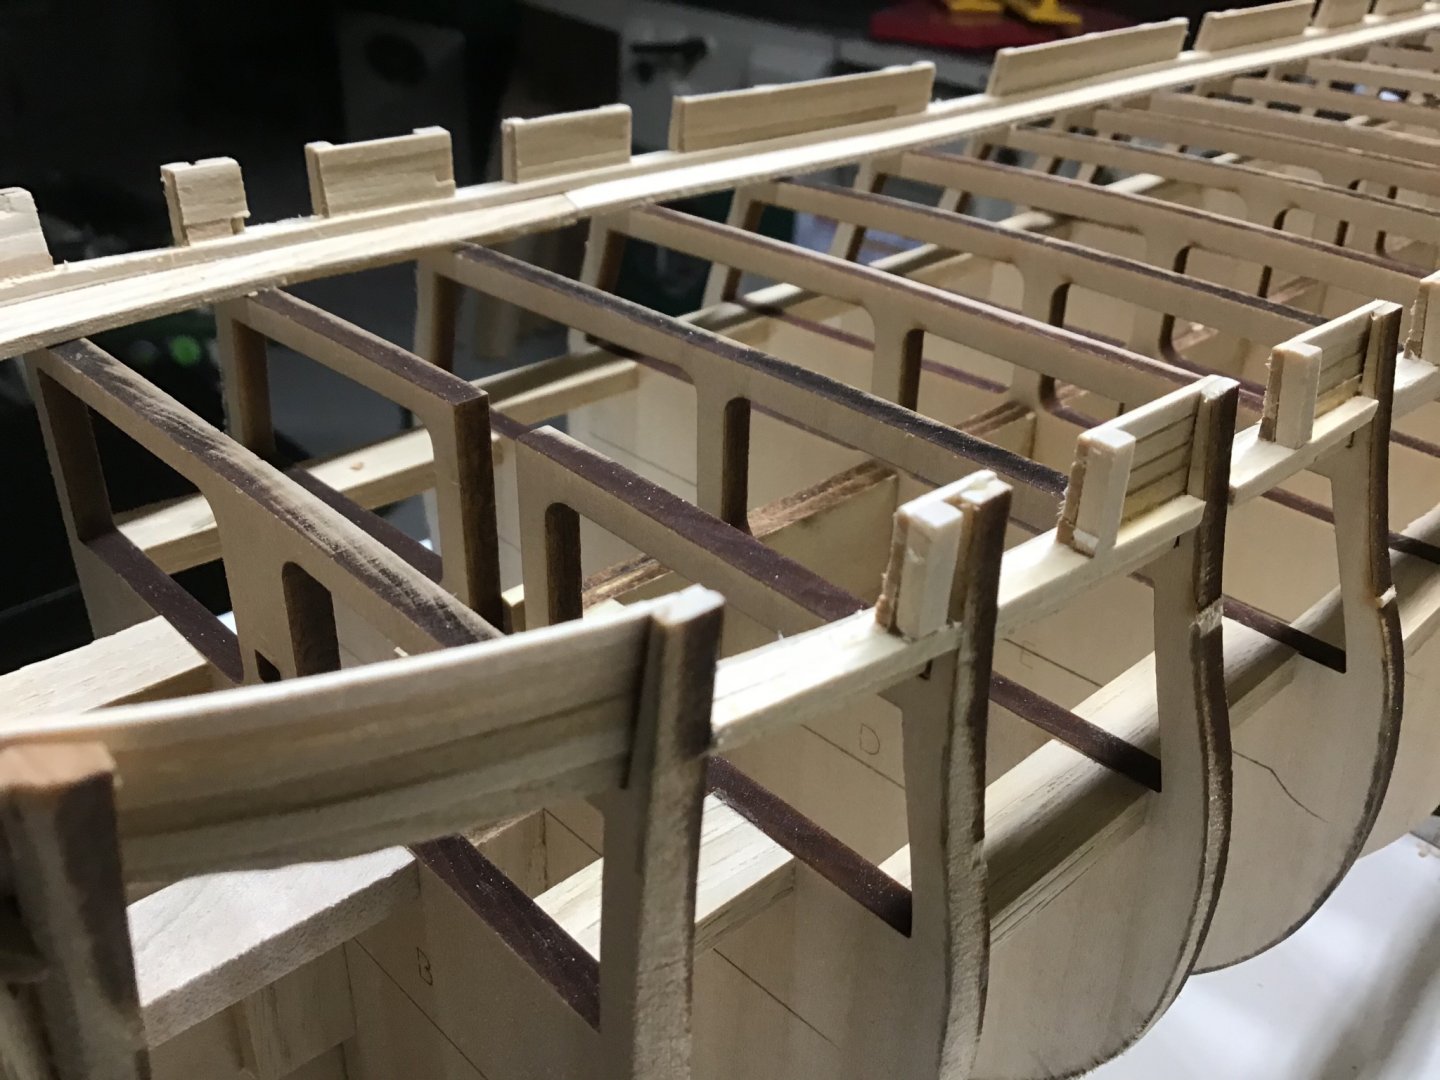
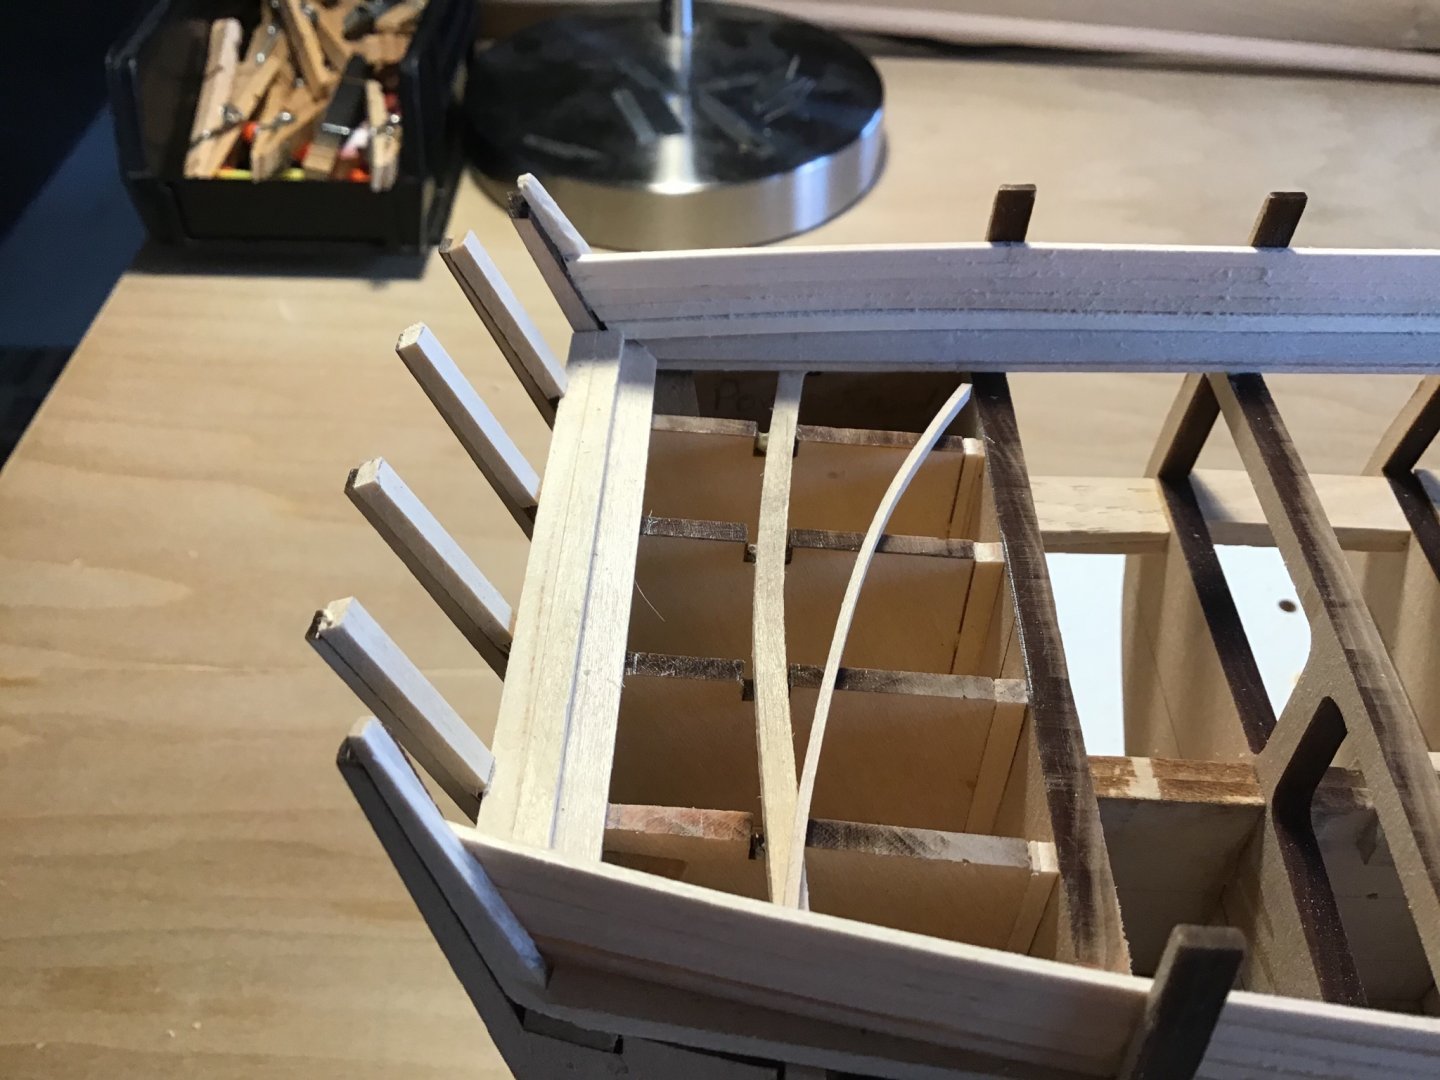
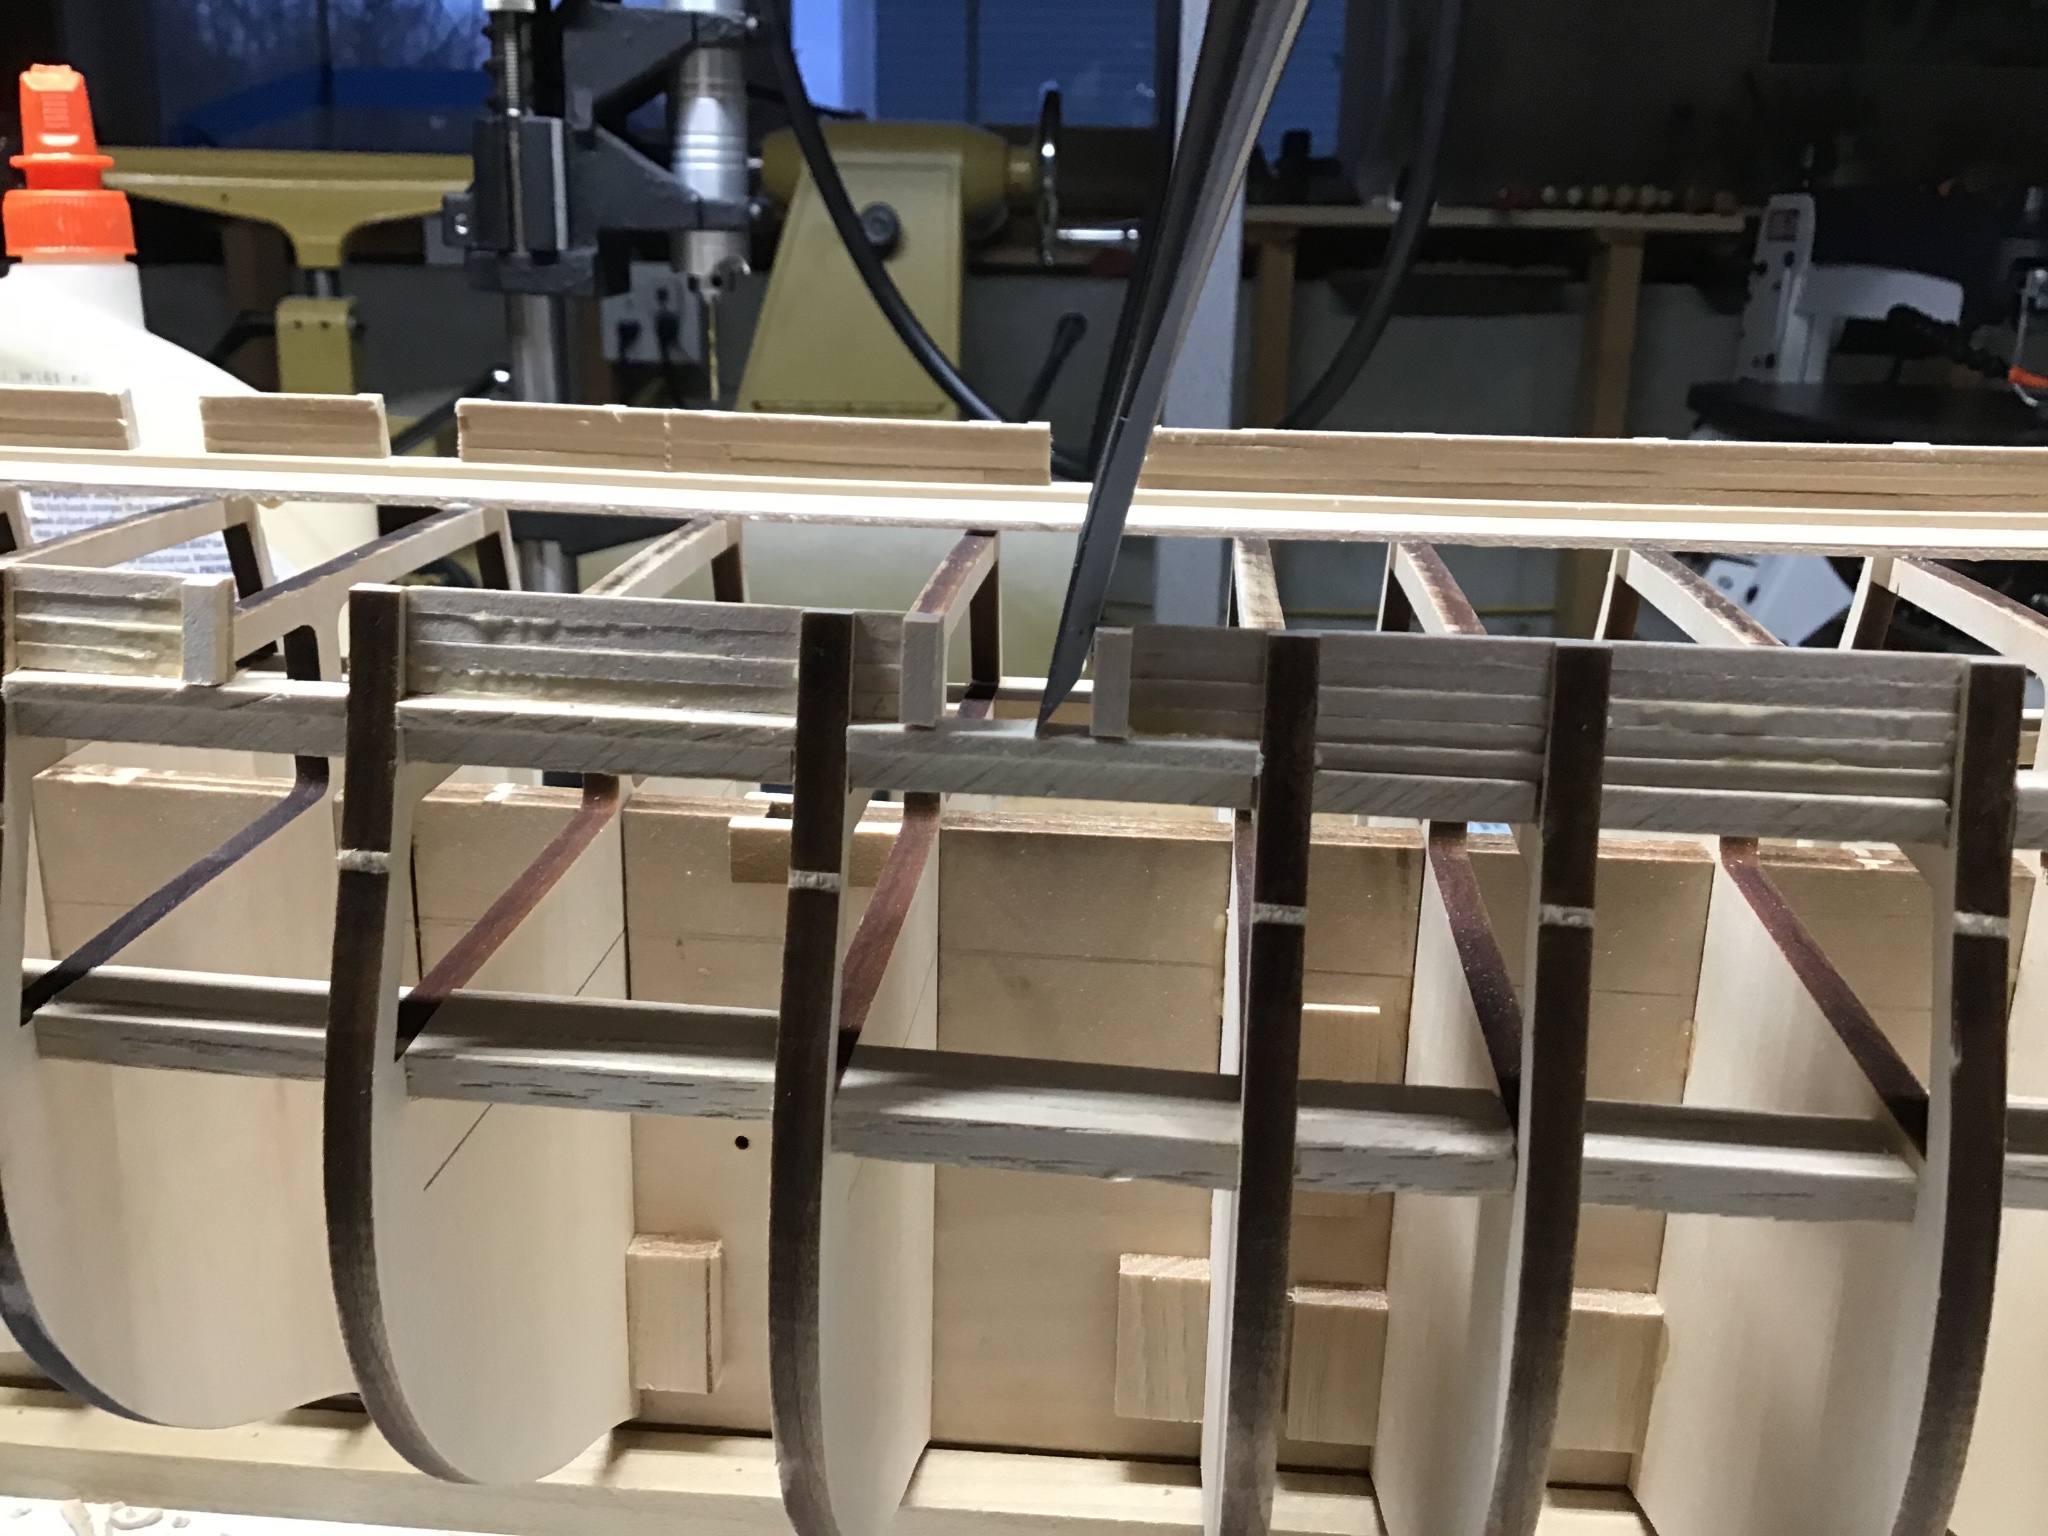
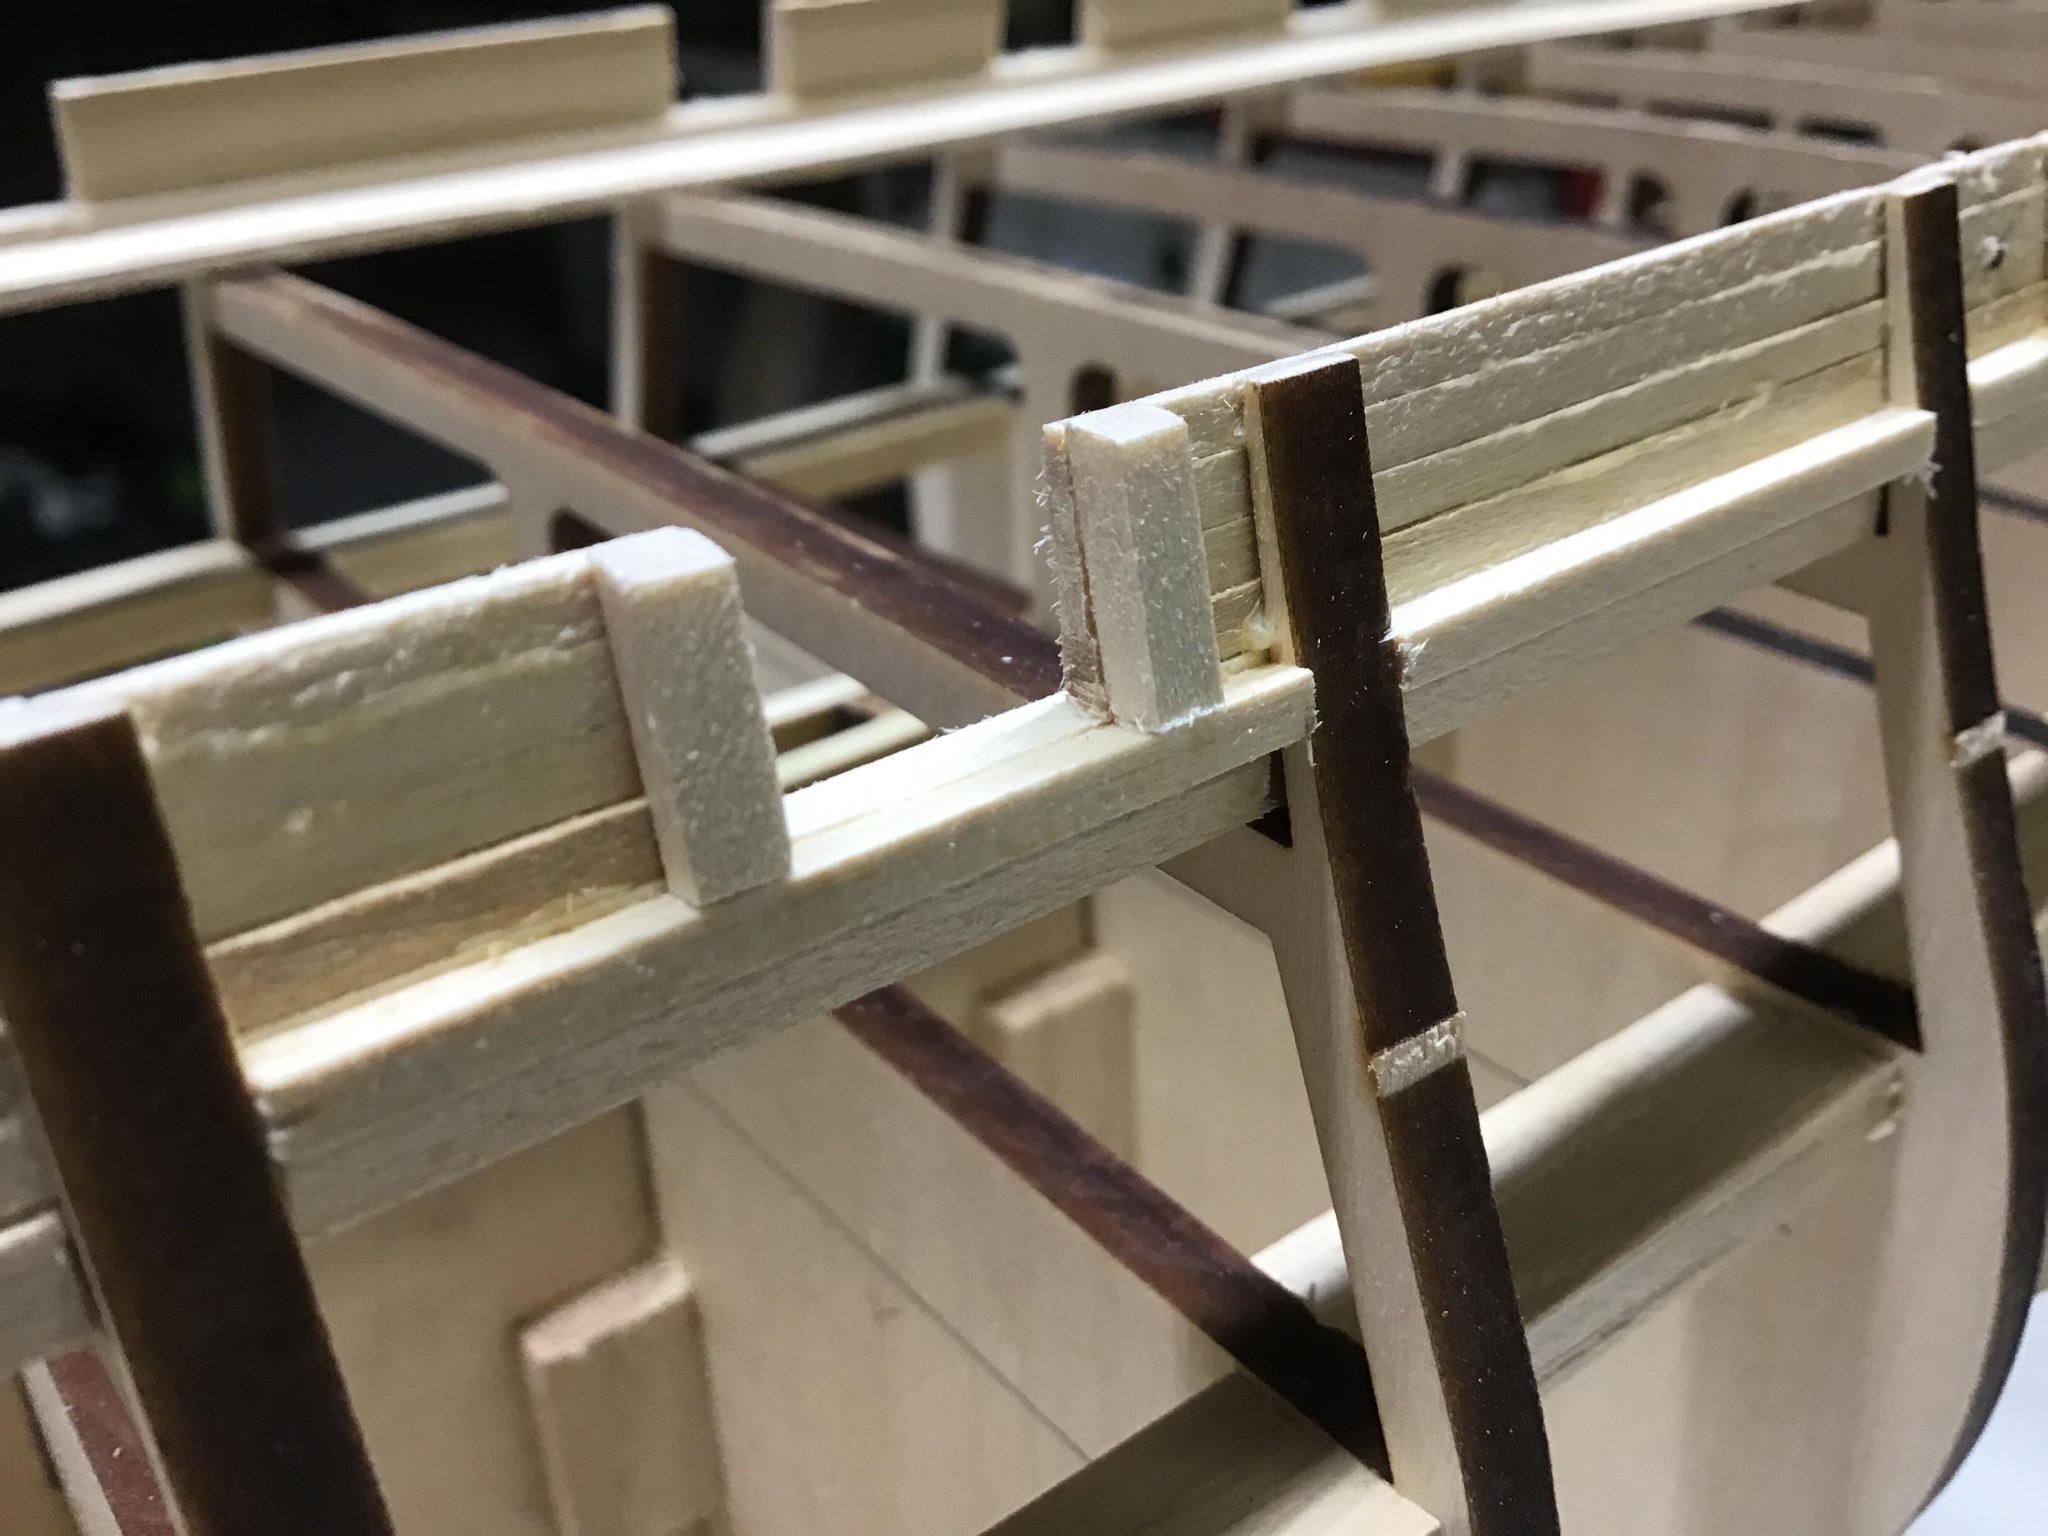
Framing and Cutting Out the Gun Ports
Frame the upper gun ports by installing the sill boards and side frames. Sills span the bulkheads and are glued to the planksheer side.
Sideboards were made on the Byrnes table saw, with the sliding table. Quick work.
Spacer blocks were made on the table saw to help with the gun port side board installation. The blocks ensure the side boards are parallel to the bulkheads. Also used a set of brass ripping gauges from Micromark.
A must to get port to starboard gun port spacing consistency.
Tip: be sure to apply adhesive to the bottom of the gun port side frame board, as well as the side against the bulwark board, this avoids unsupported bulwark boards after cutting out the gunport.
Cutout the ports by first sawing down the center of the opening being careful to not cut into the sill. Chisel out the waste with a fishtail chisel.
Fishtail excels here. Final cuts should be very thin!


-
Thanks Sea Hoss.
Cabinet making was my last full time gig.....so accumulated the full size machines to support that business.
And watched Norm Abraham, that guy had everything!
-Rich
-
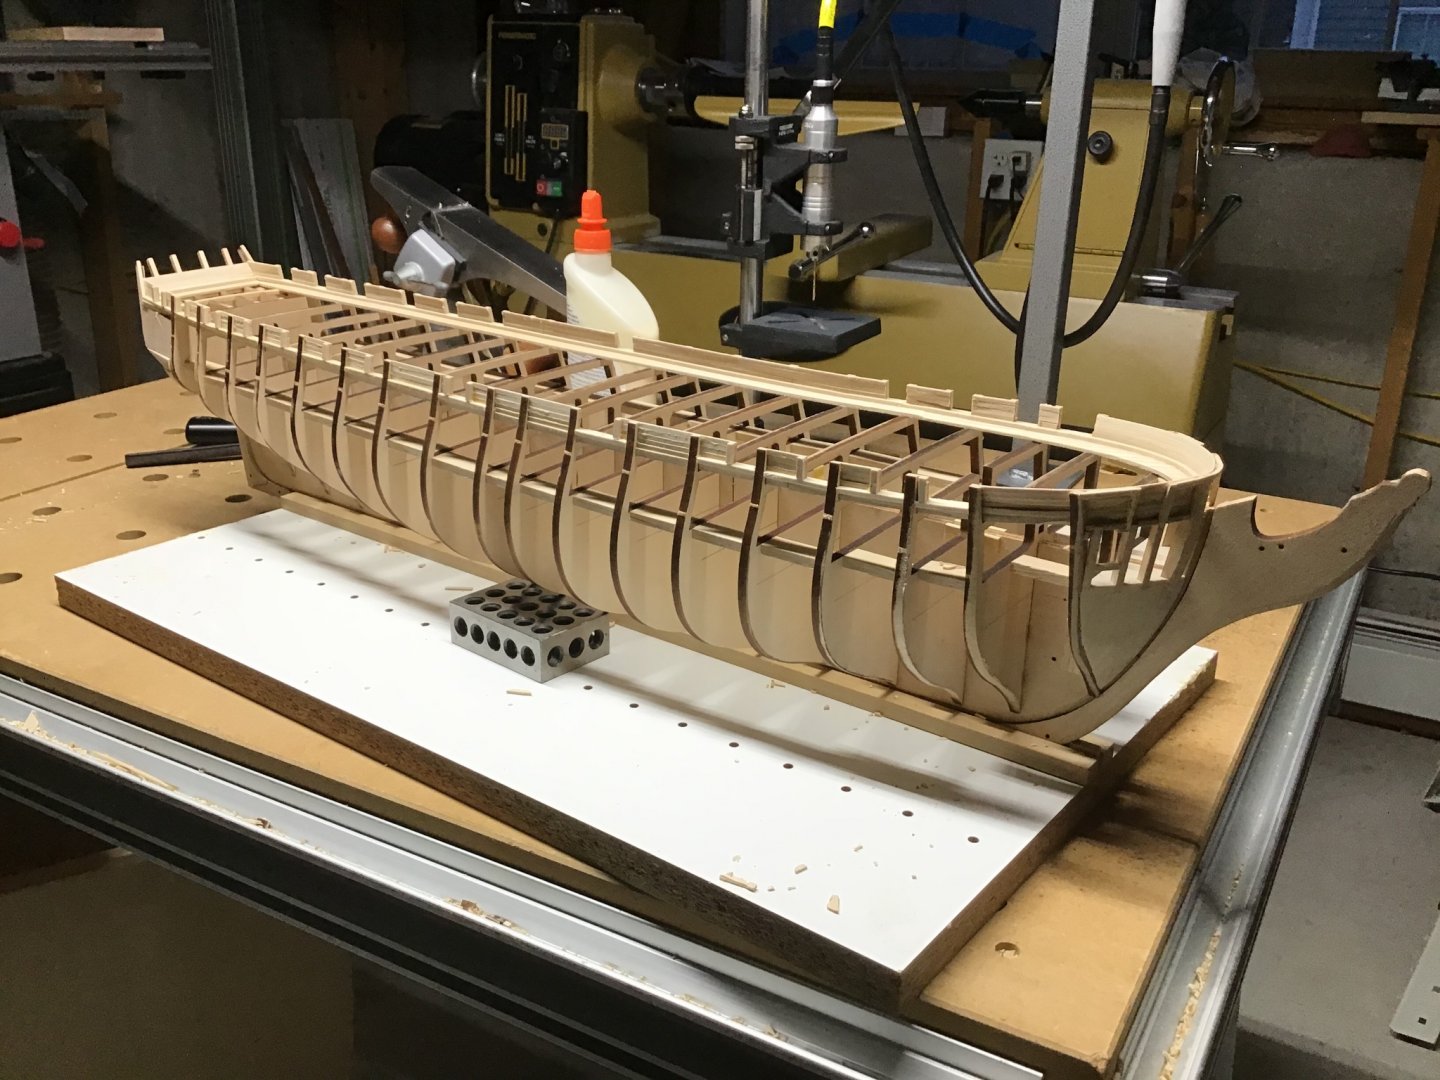
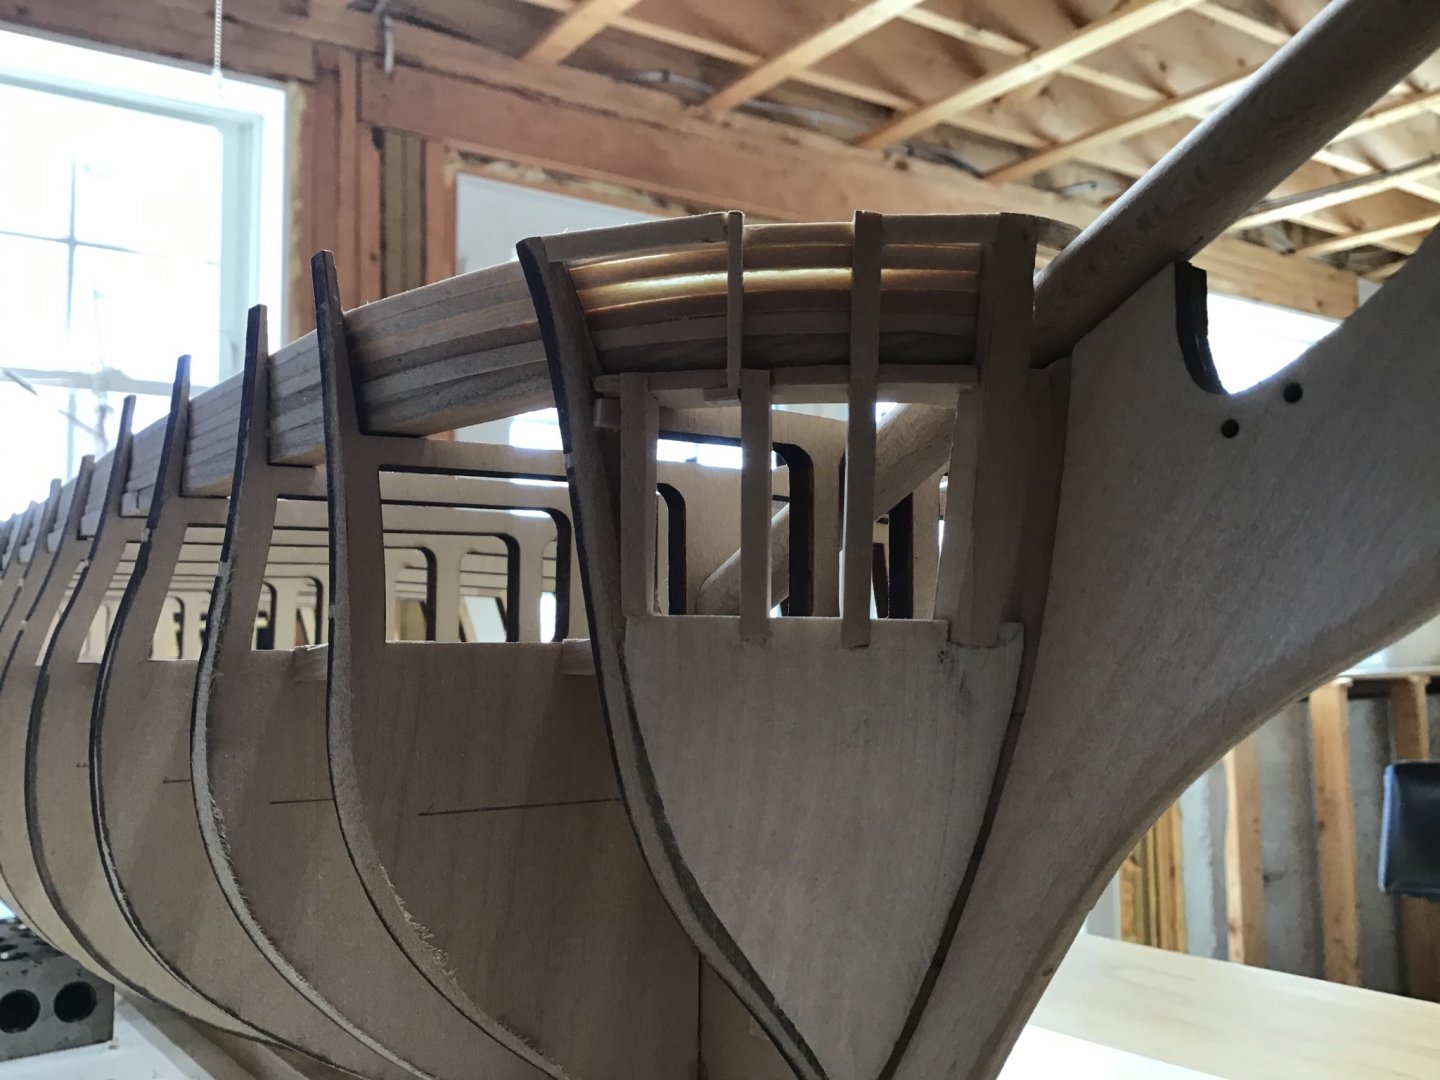
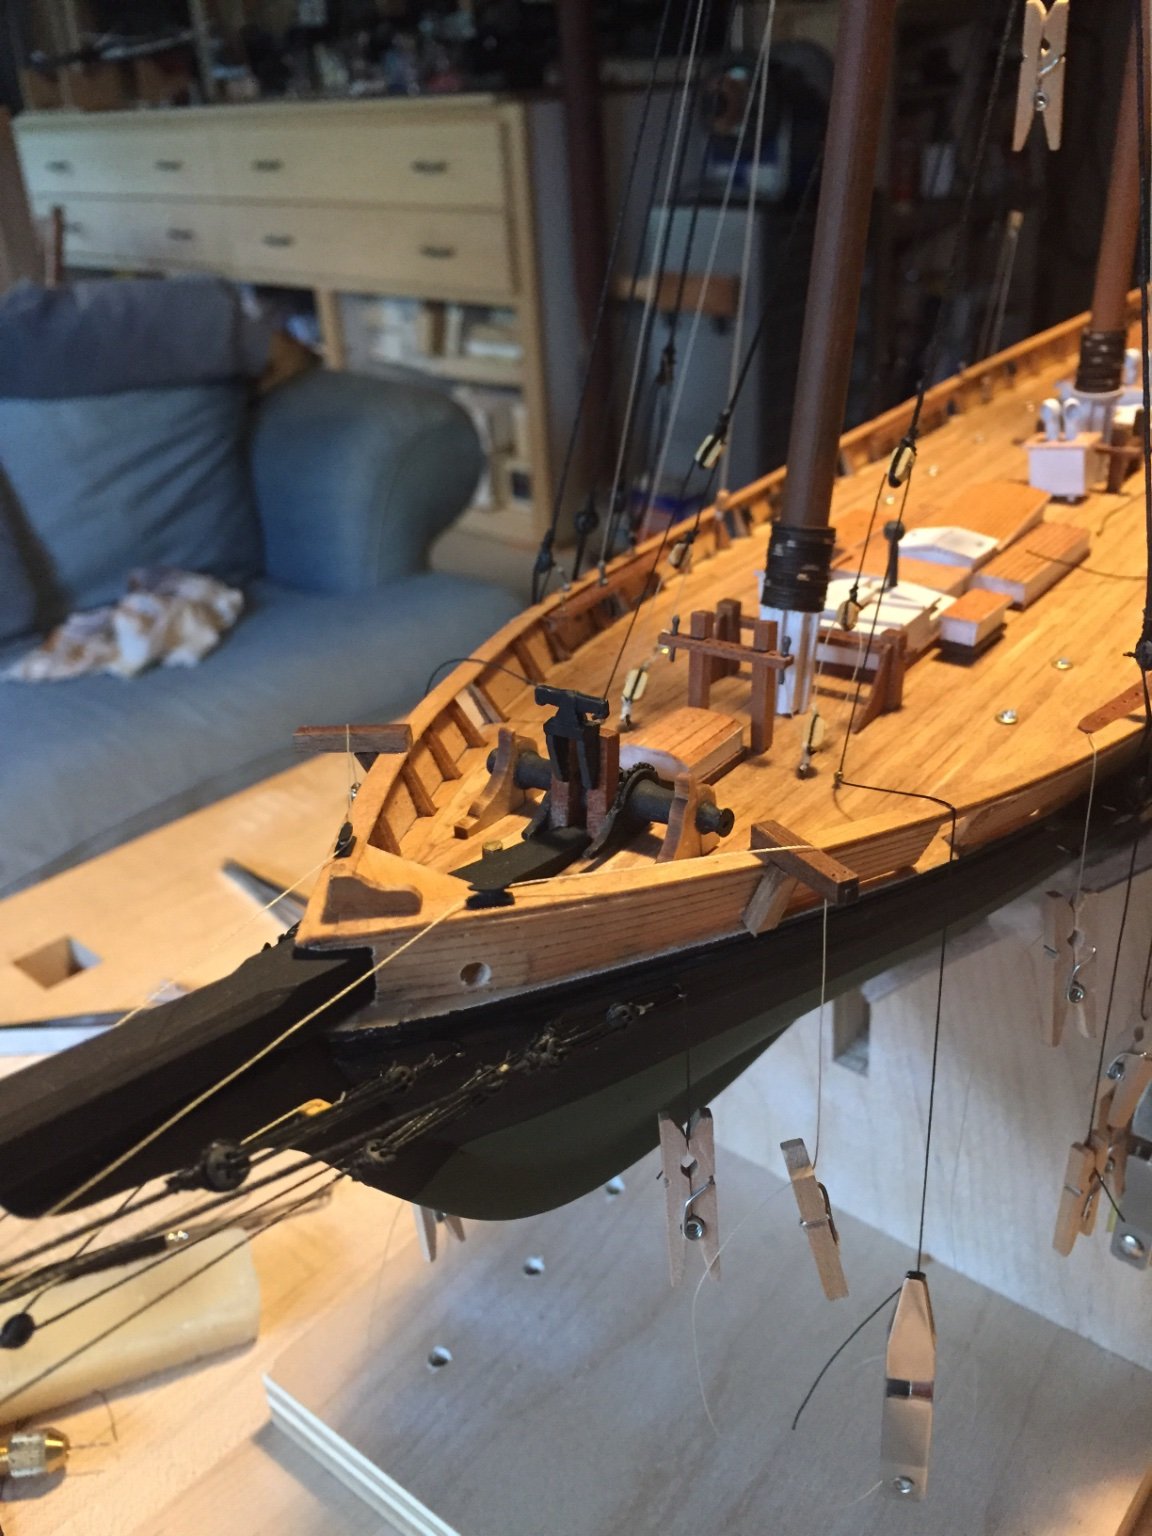
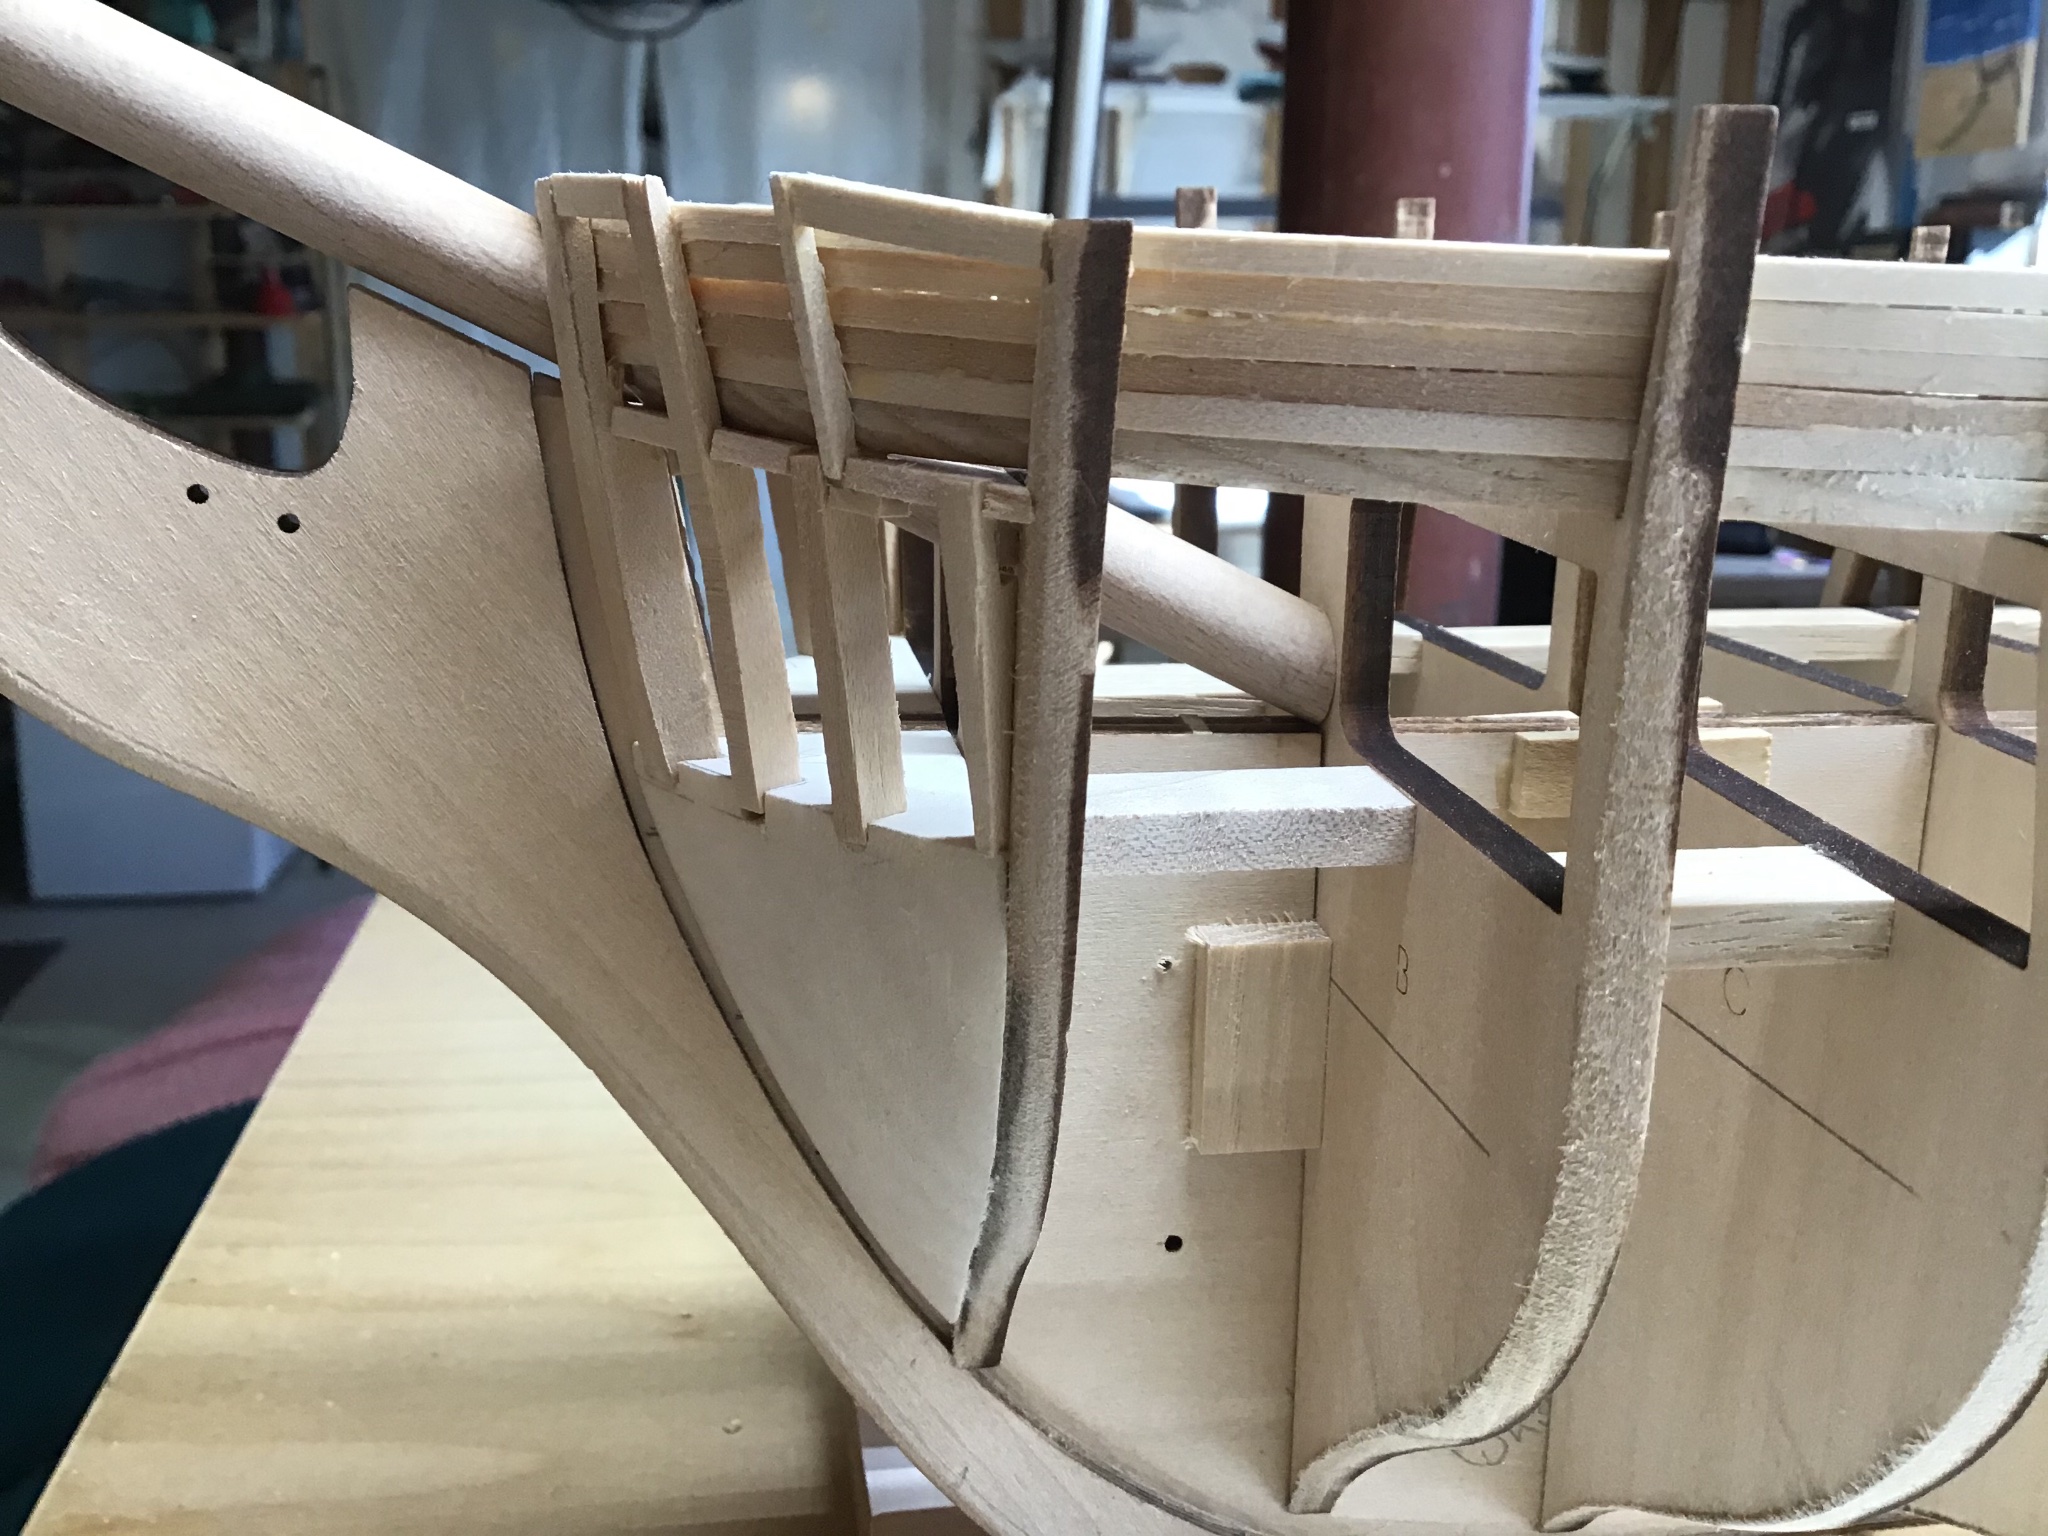
Inner Planksheer/Bulwarks and Bowsprit Prep
5 strakes are above the waterway, the planksheer and four inner bulwark.
For the planksheer rounded off the upper inside edge, used butt joint joinery, and did not notch to fit 100% against the bulkhead extensions.
Inner strakes consisted of planks spanning up to four bulkhead extensions with staggered butt joints.
Tip: make sure inner bulkhead extensions are flat.
Reused the cedar template as a moulding for steam bending to shape the bow planks. Planks “stair stepped” around the bow, and were sanded smooth with Amati sanding sticks. Used plastic wood, pressed in from the outside to fill gaps.
Added strips, padded, to inboard face of stern transom extension to reduce the inner curvature. Stern bulwarks turned out ok, at this point there is a step at the planksheer level, it should be a bevel between the waterway and the lowest bulwark plank. Will probably leave as is.
Bowsprit was cut to fit the notch in bulkhead B.
Bulwarks consist of inner and outer planks, with framing pieces in between for the gun port sills and sides. Next is installing the framing and the outer bulwark planking.


USS Constitution by ERS Rich - Model Shipways - 5/32
in - Kit build logs for subjects built from 1751 - 1800
Posted · Edited by ERS Rich
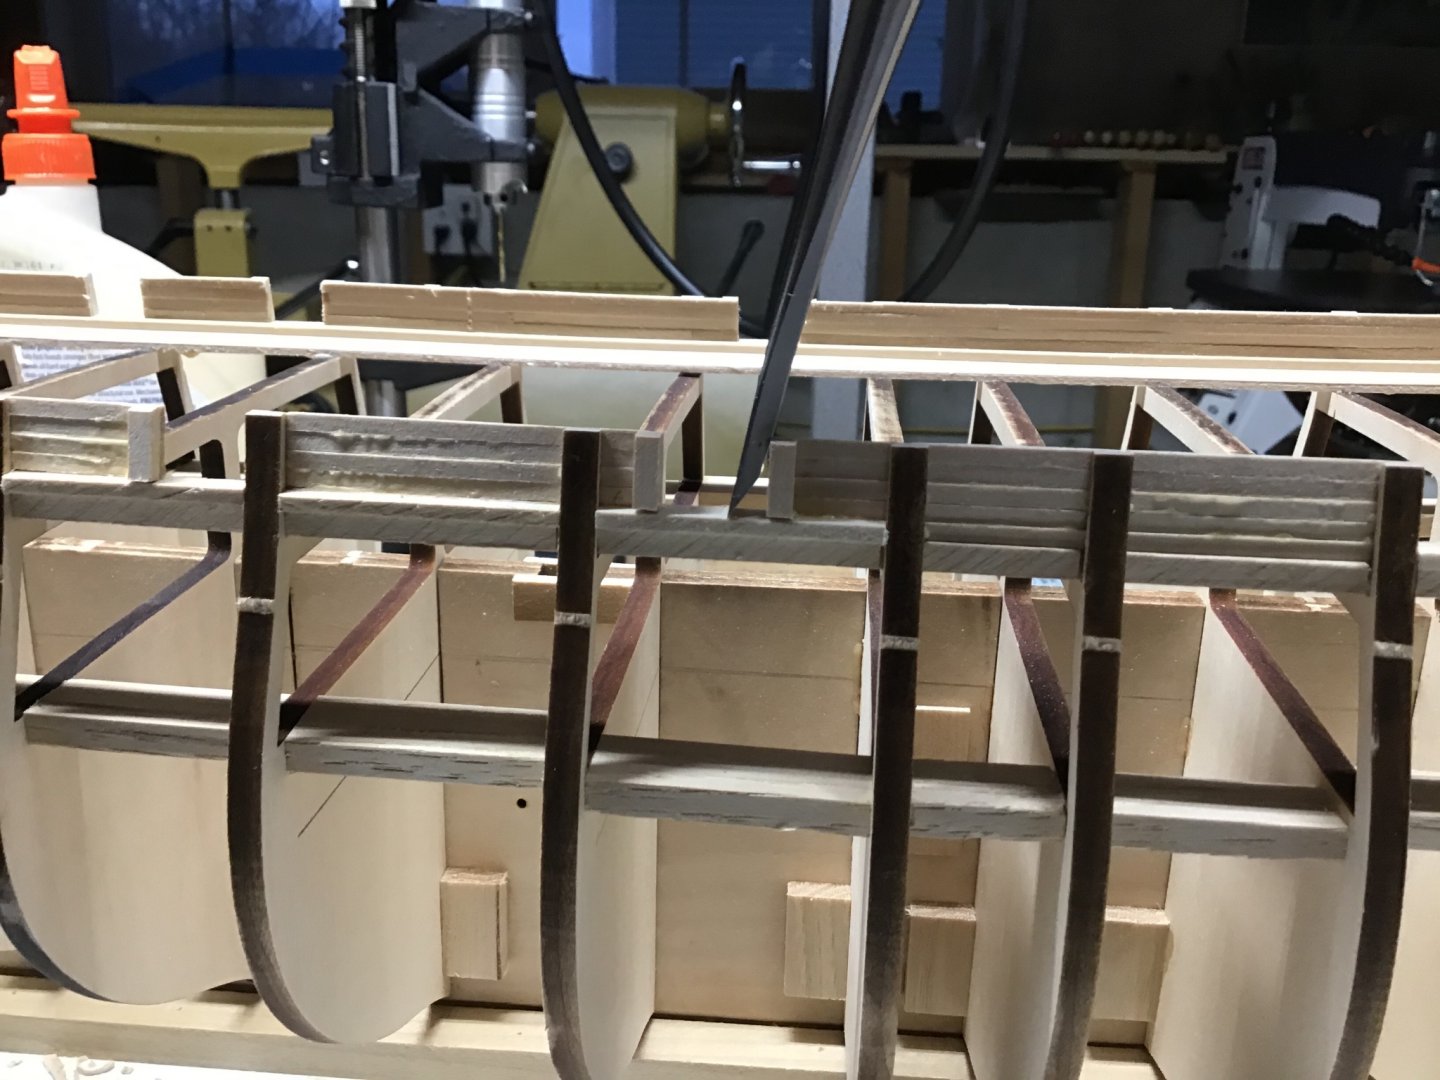
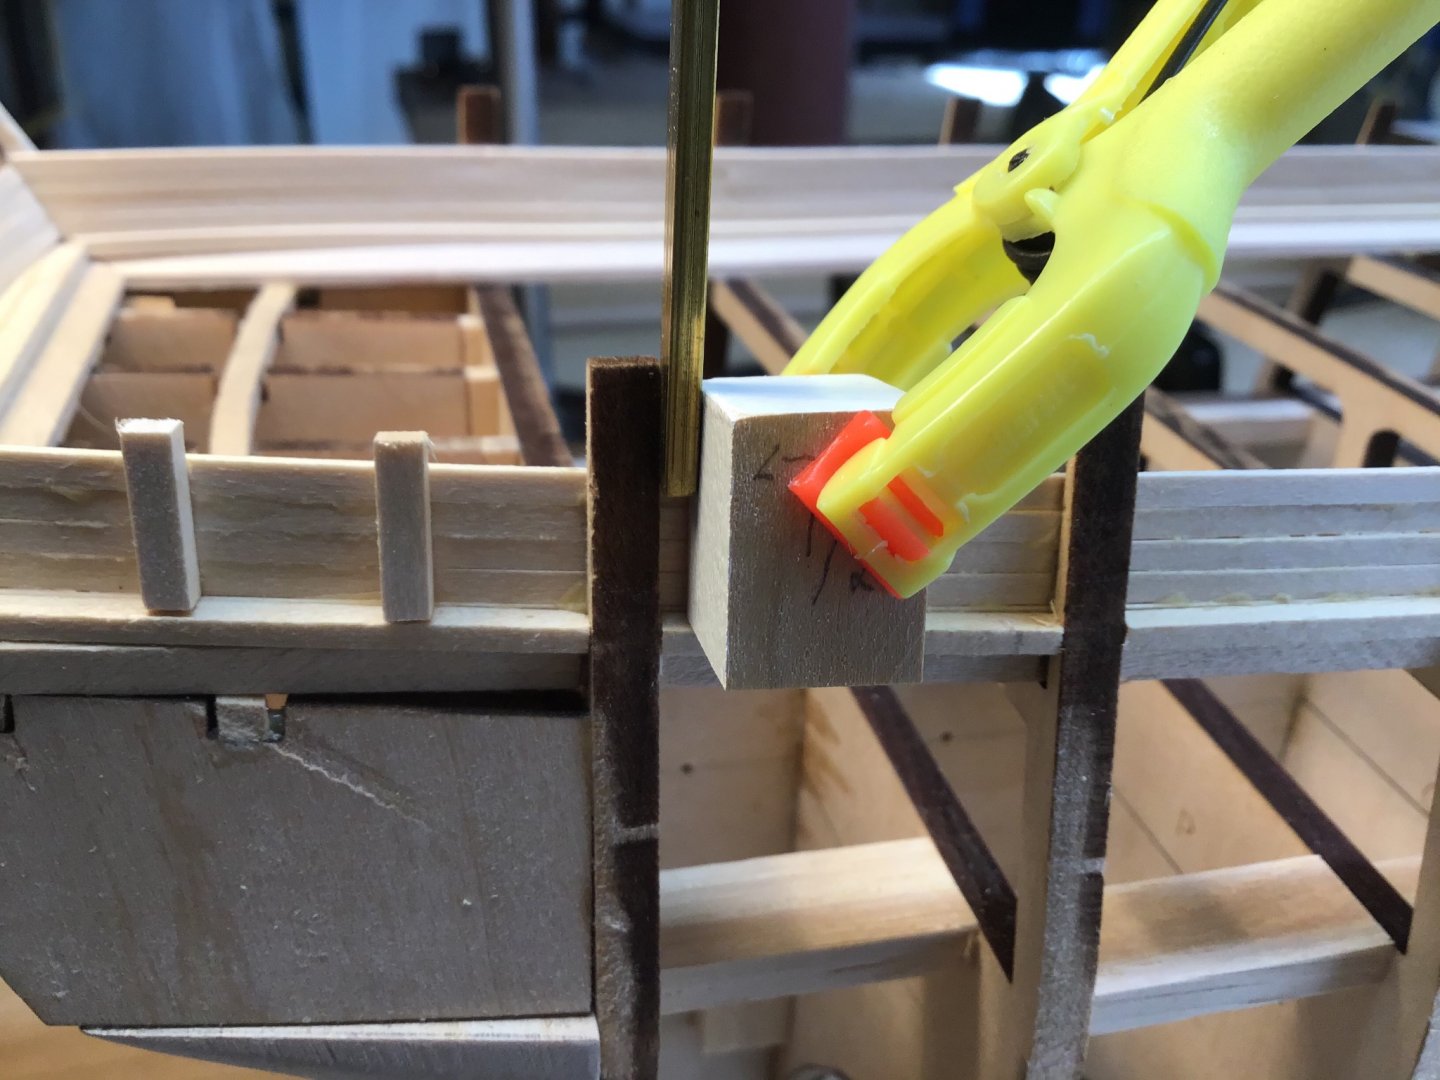
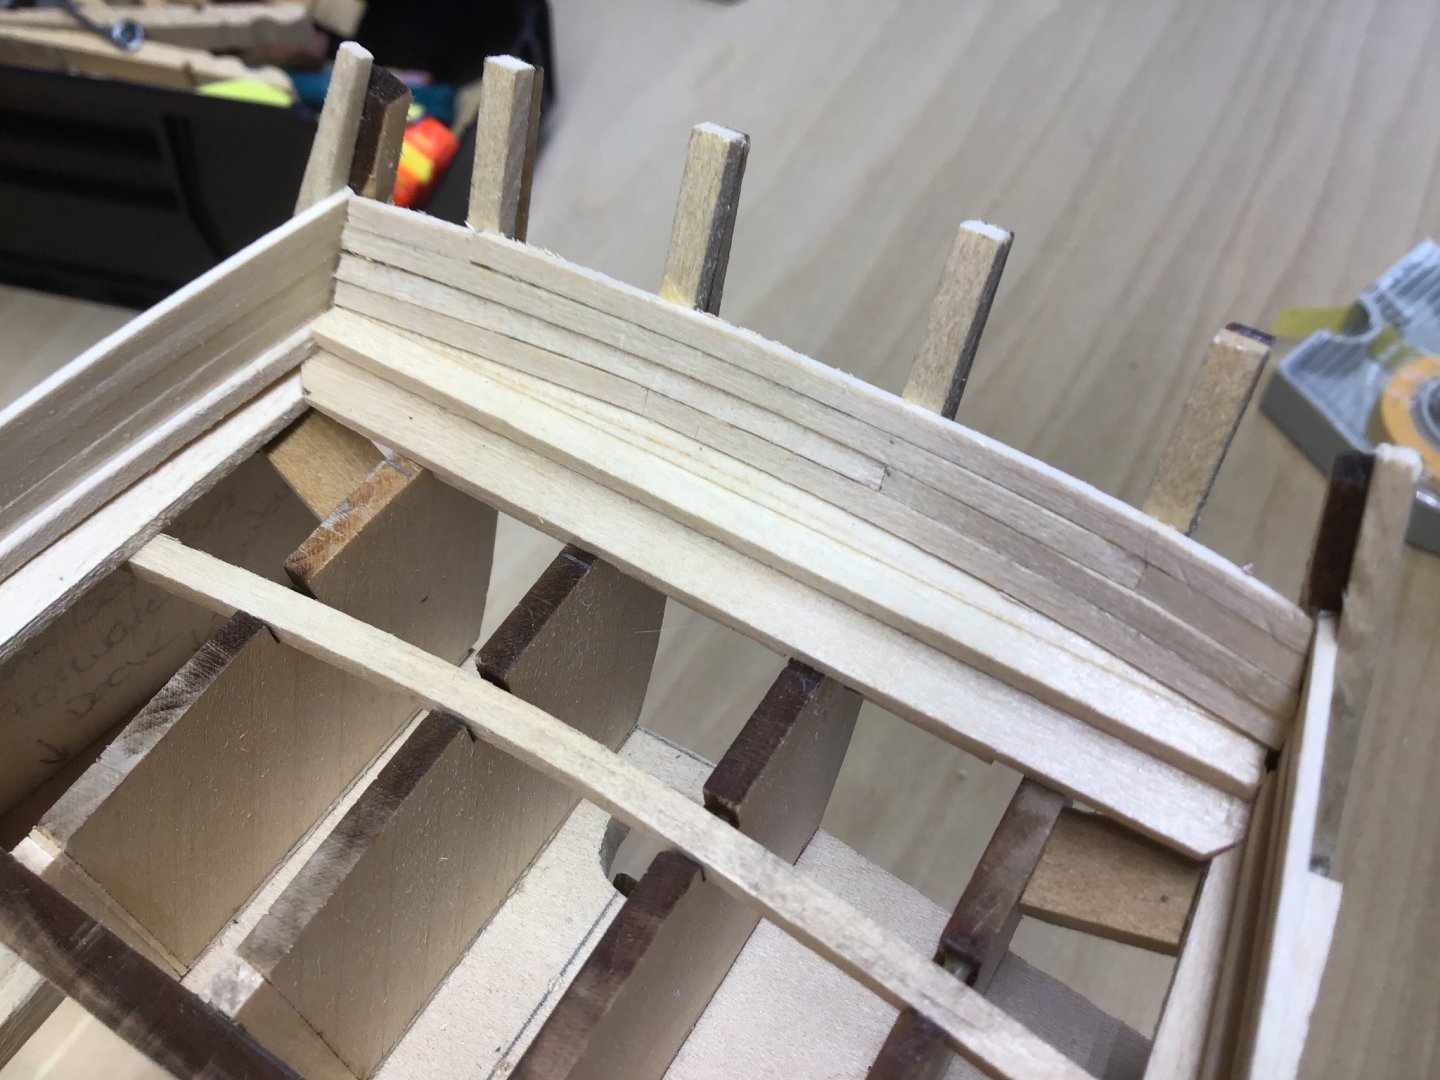
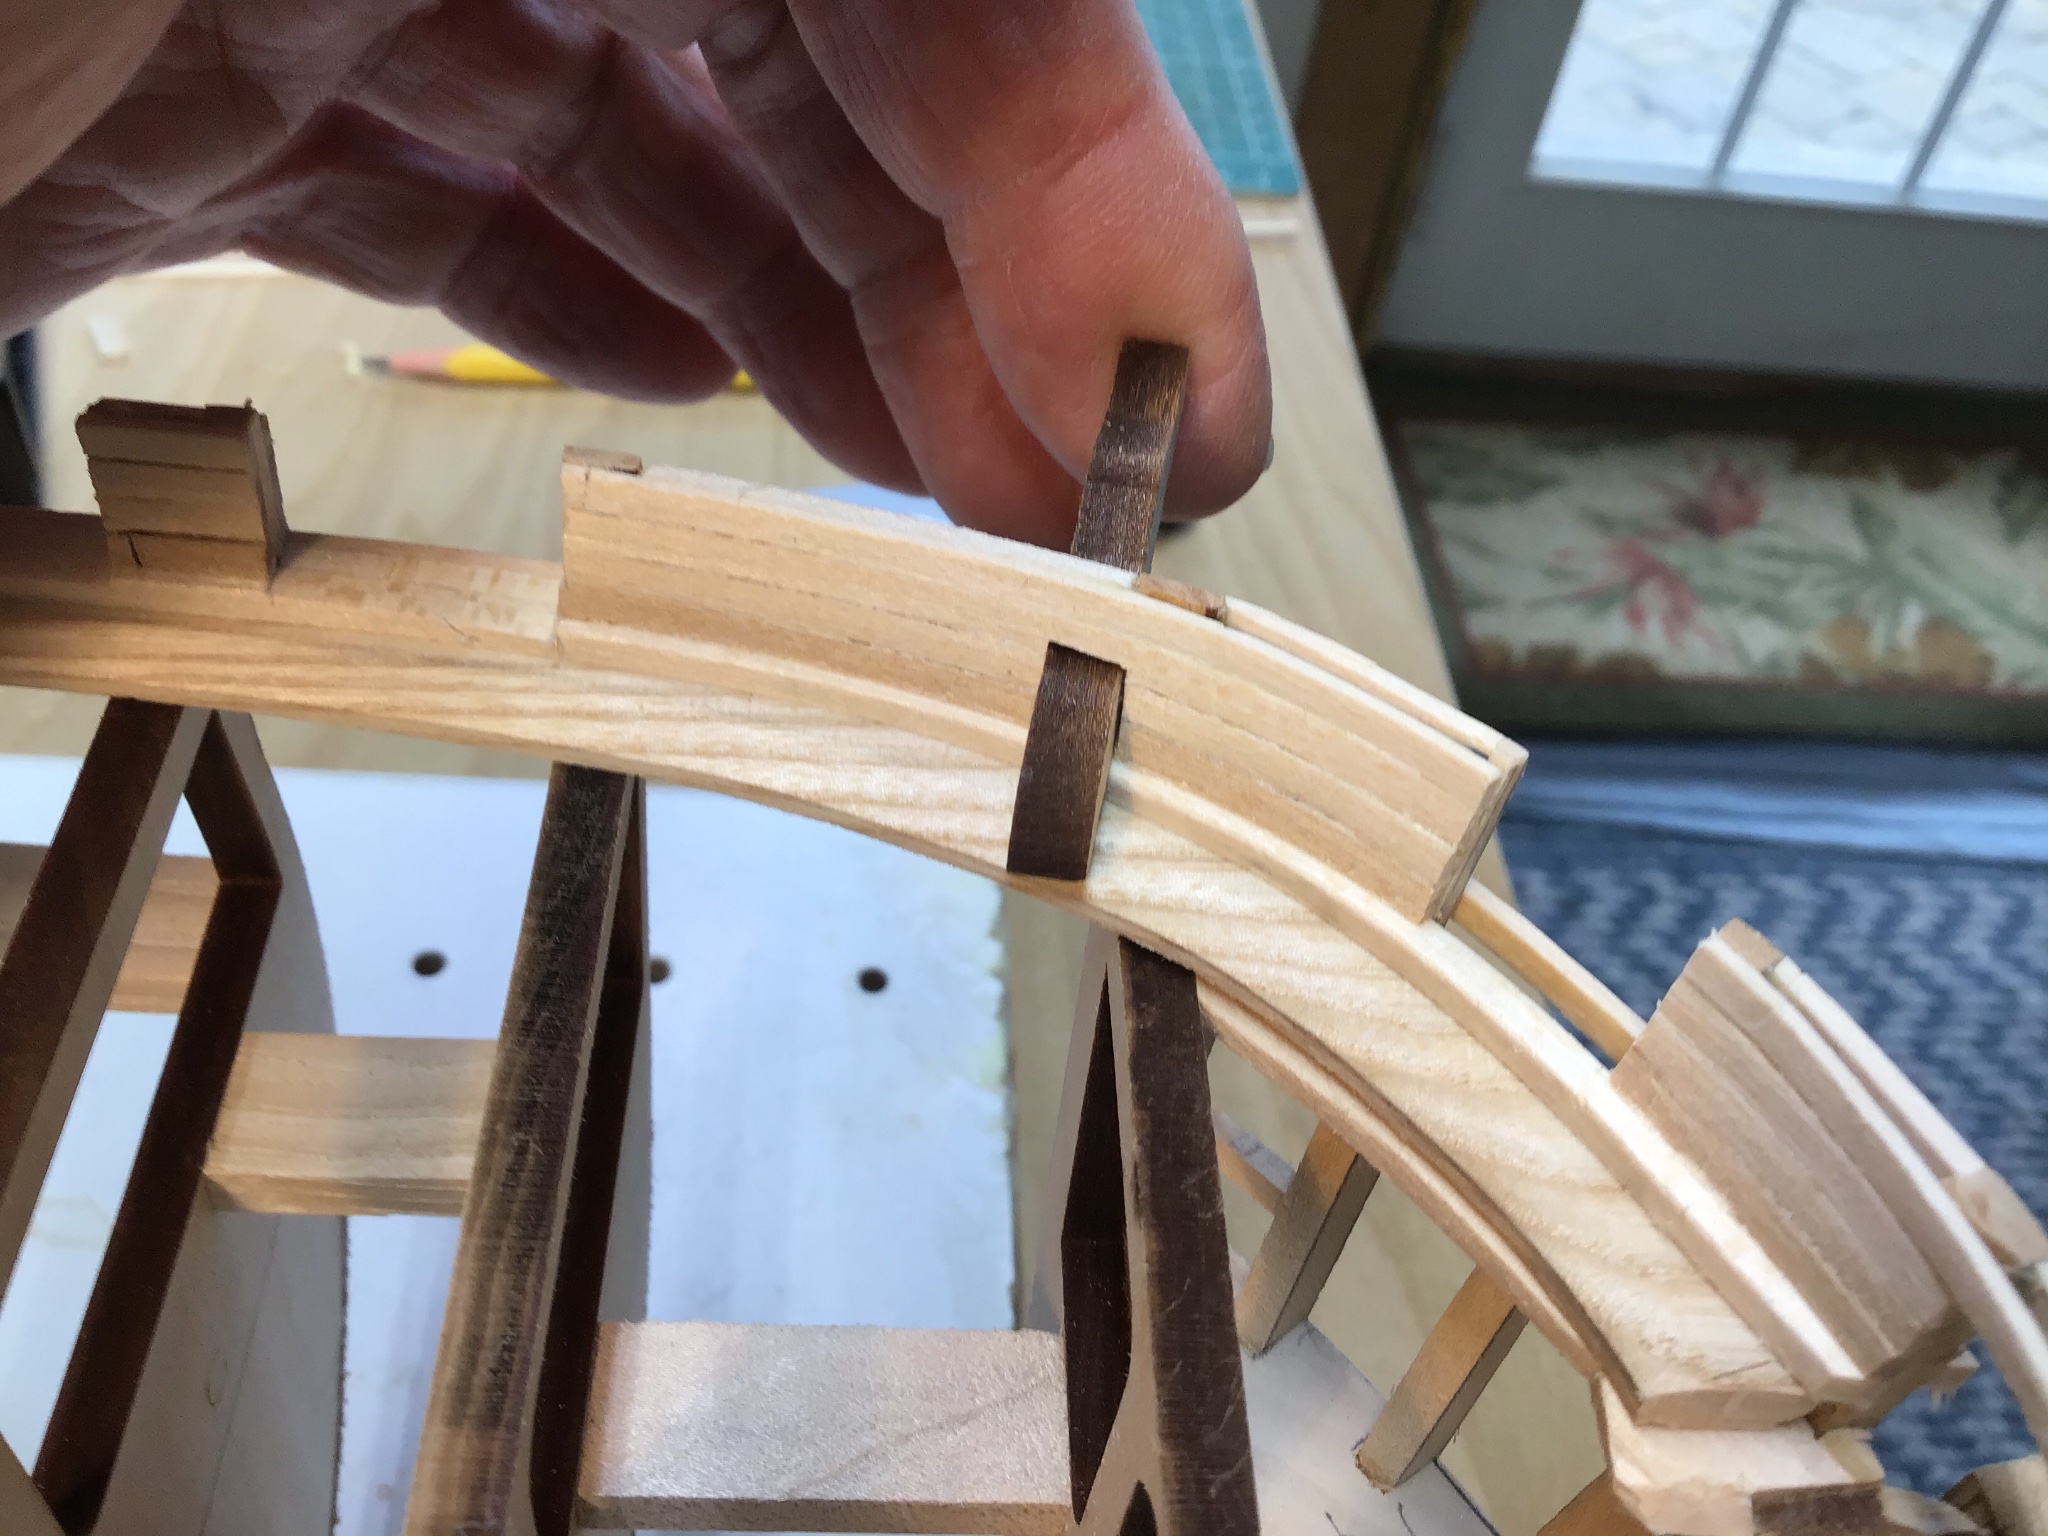
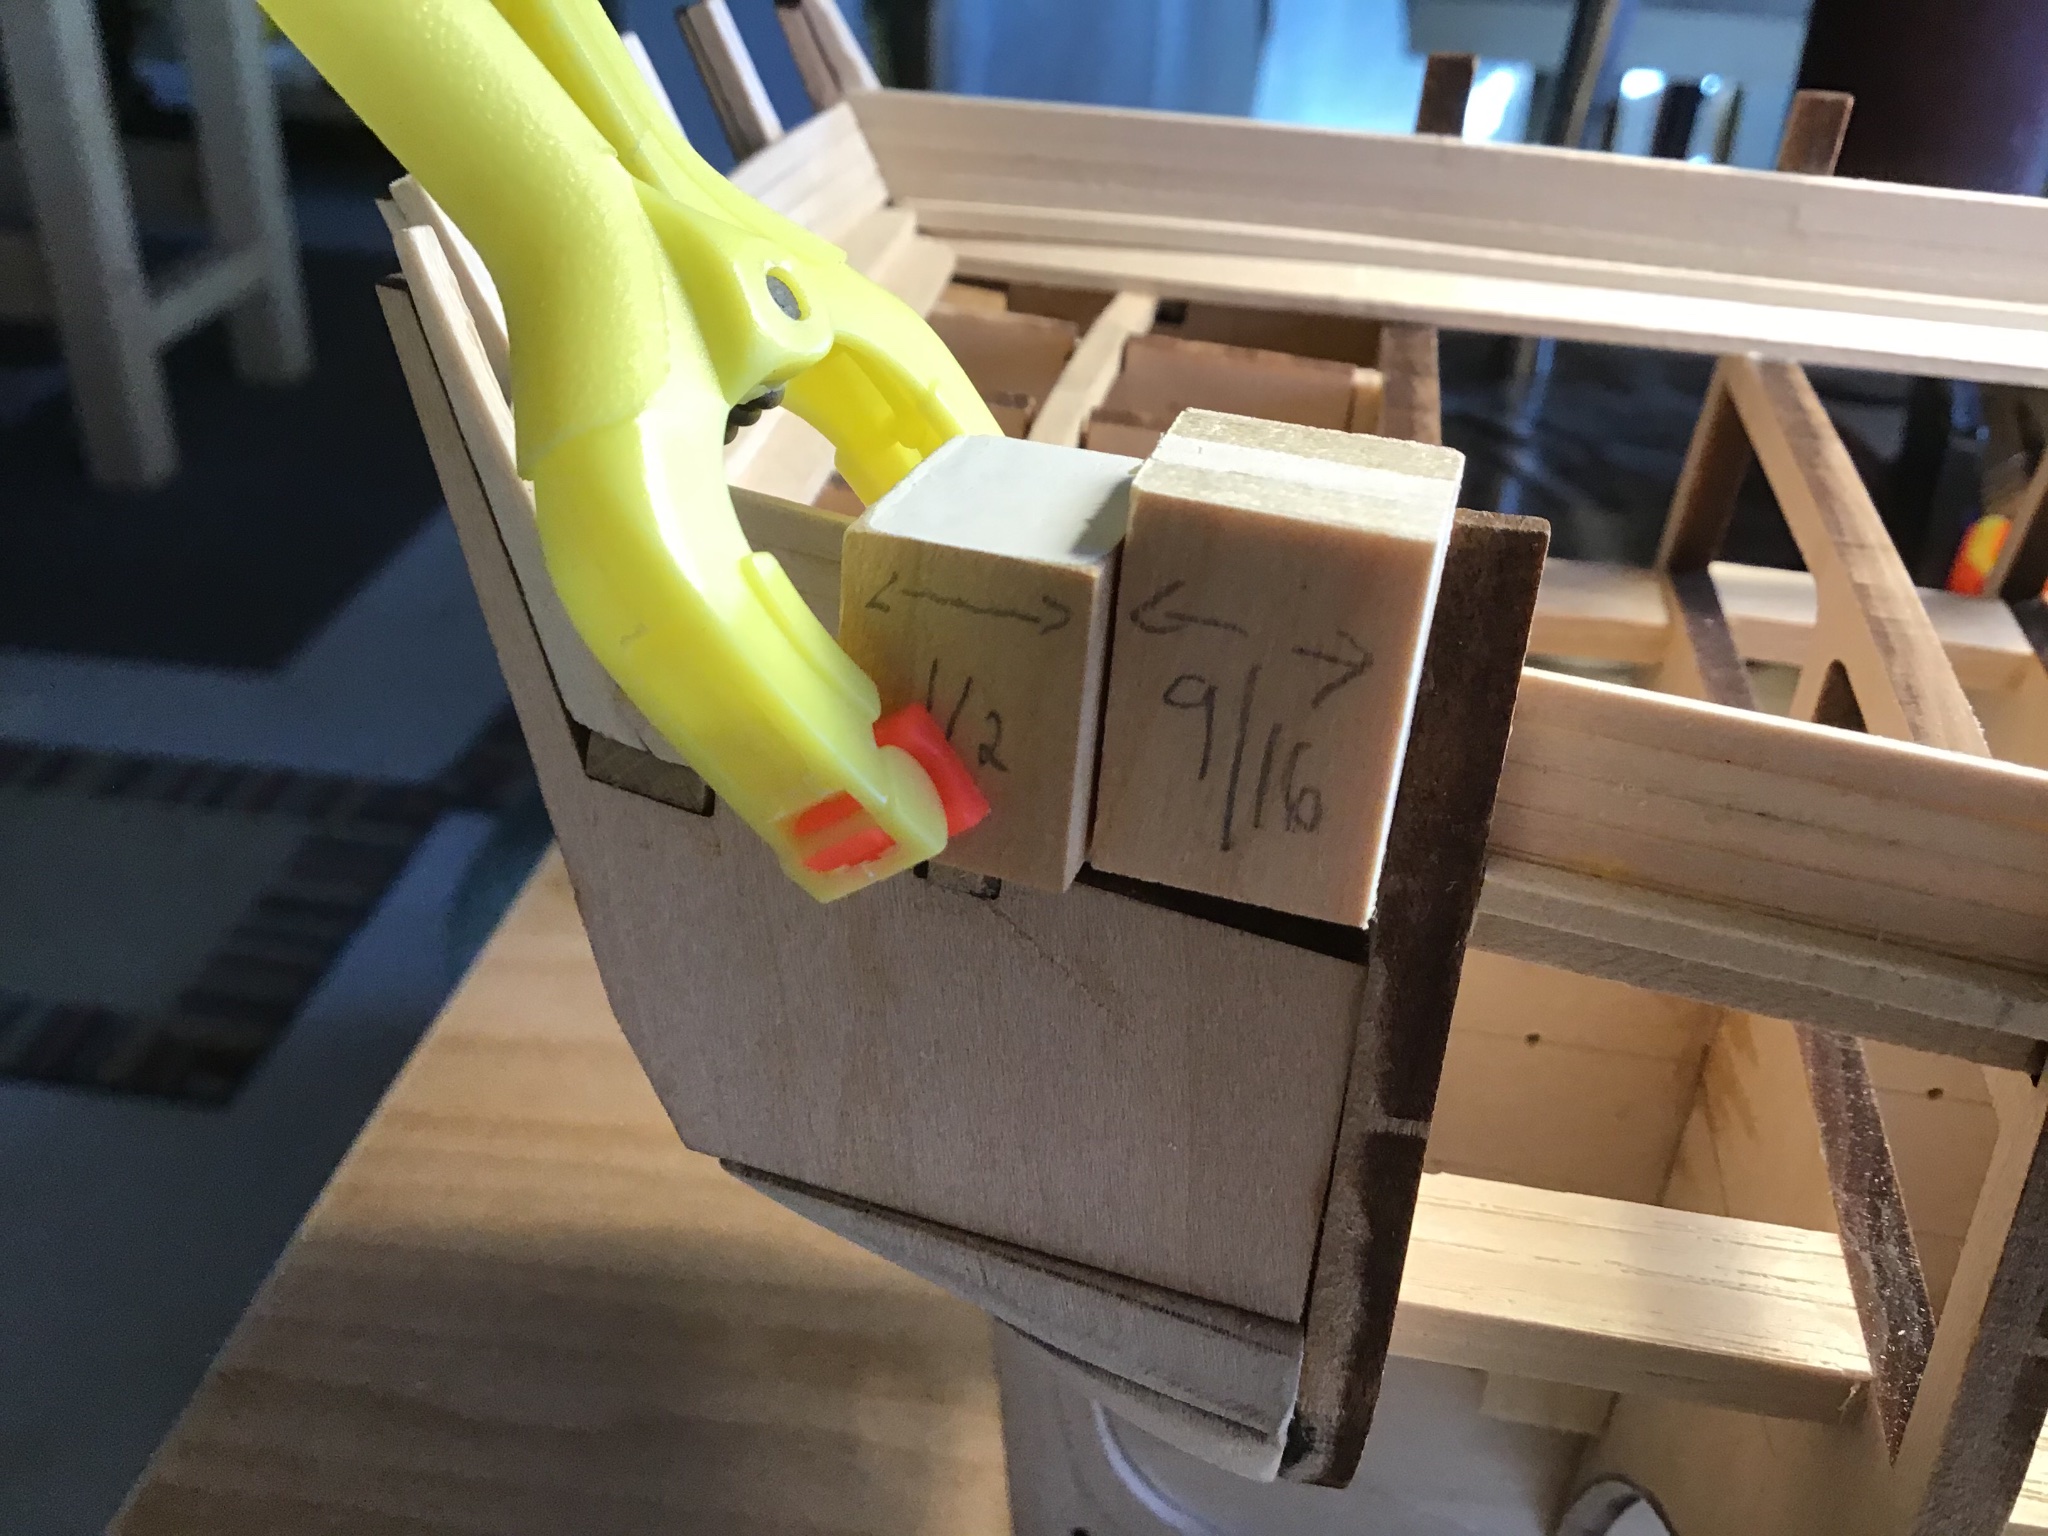
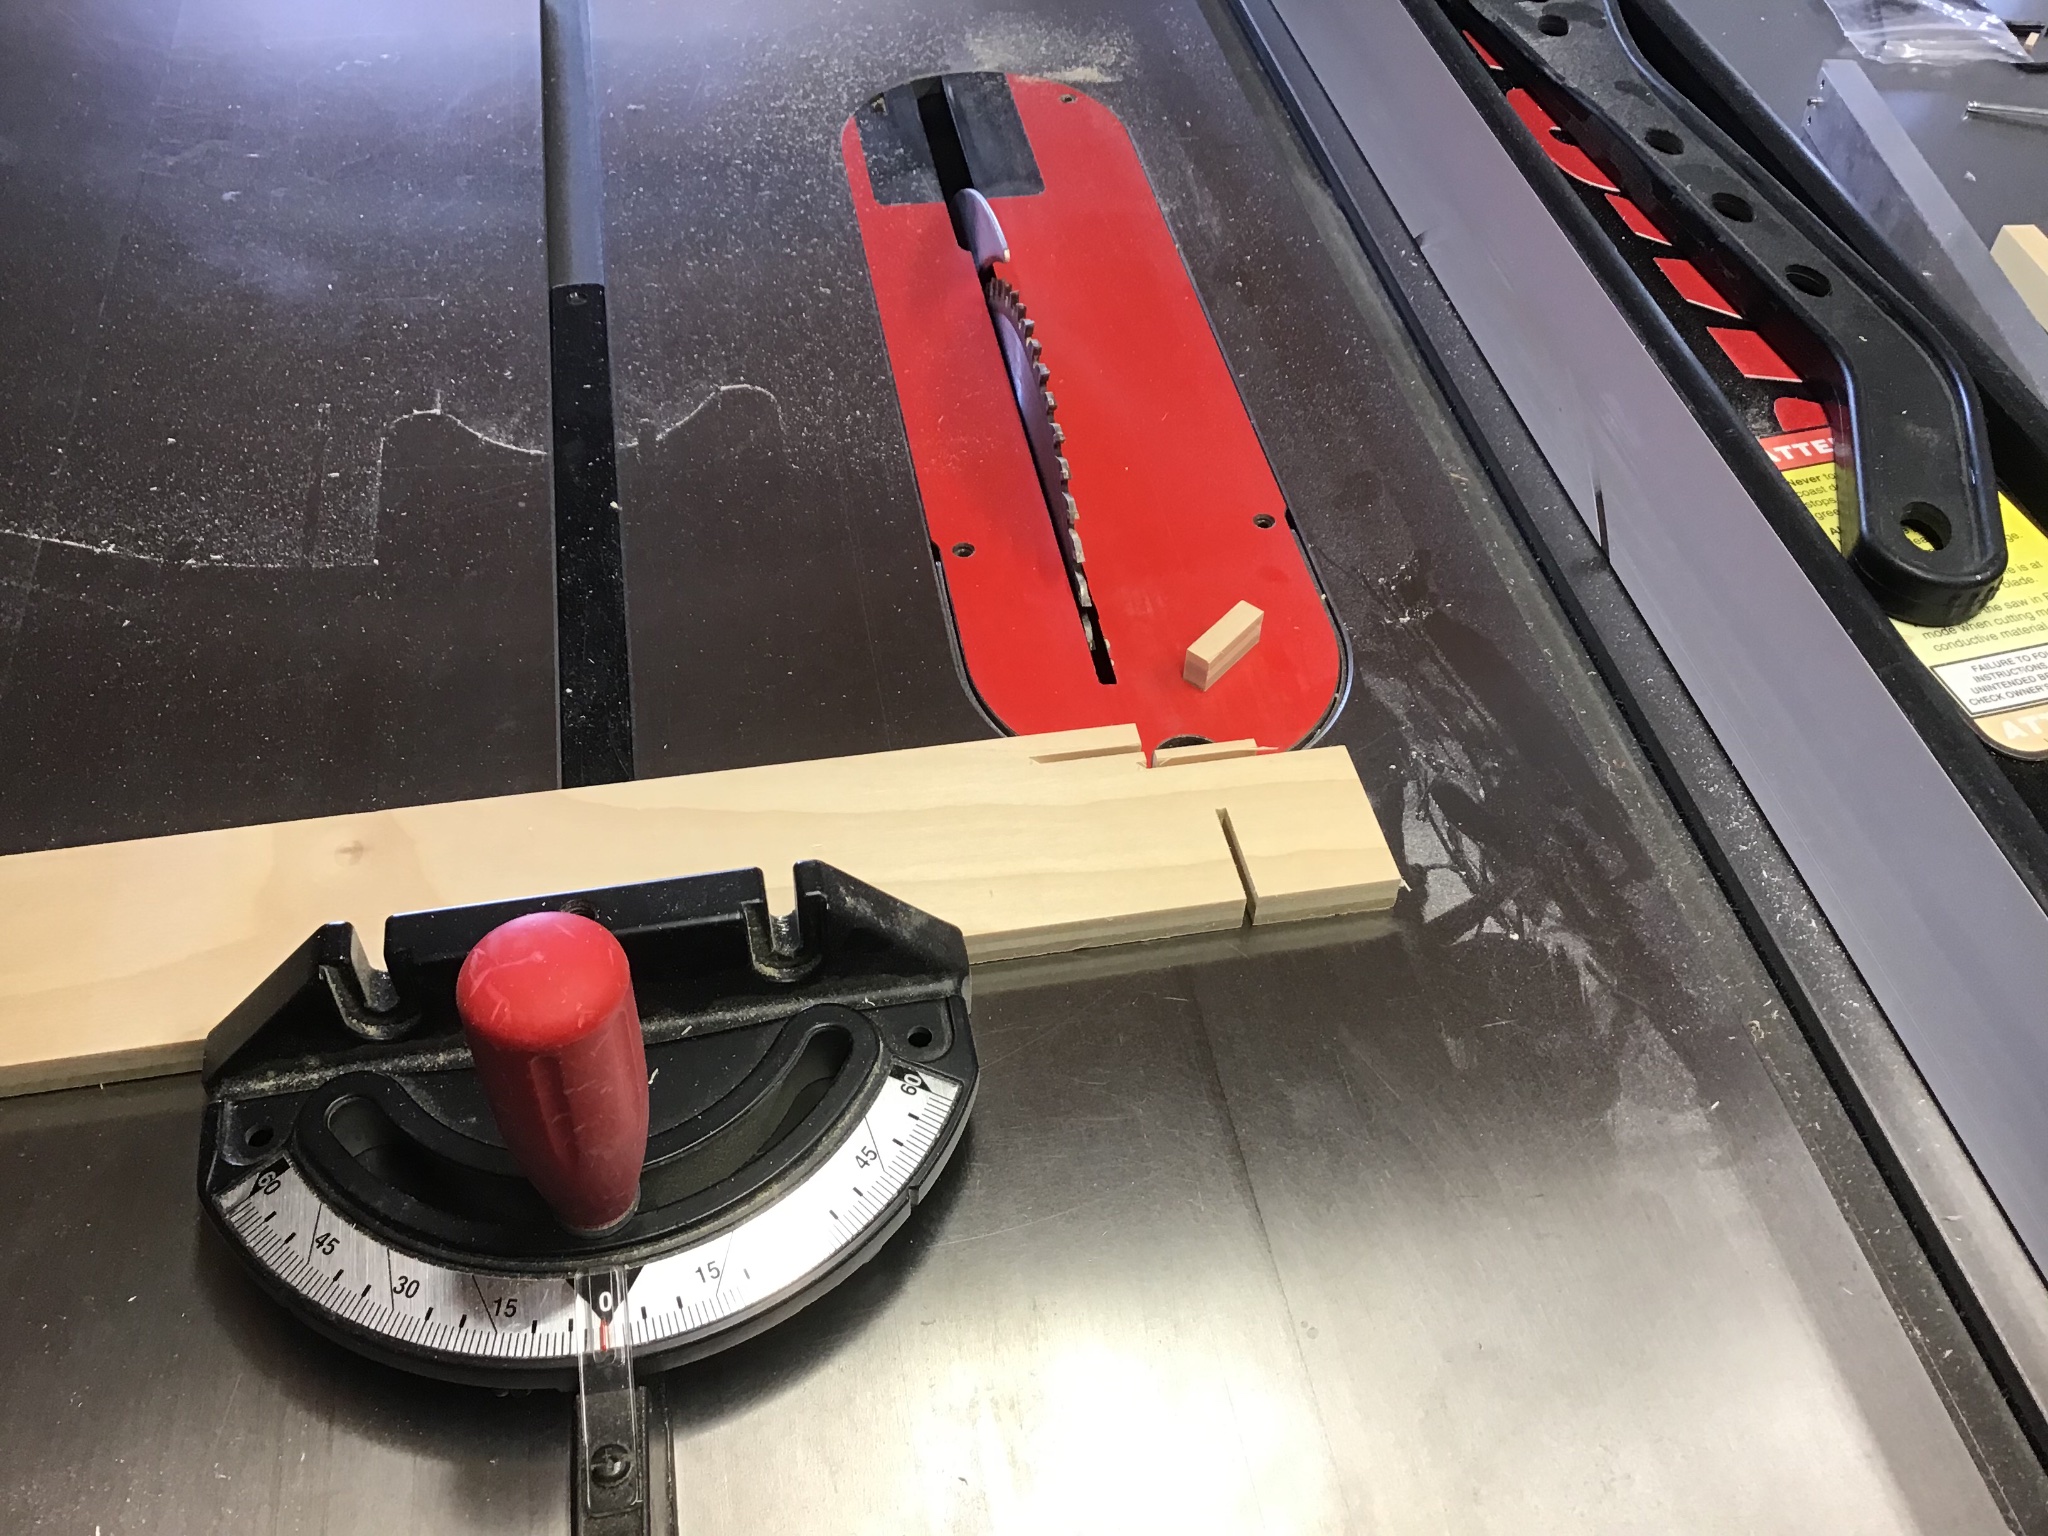
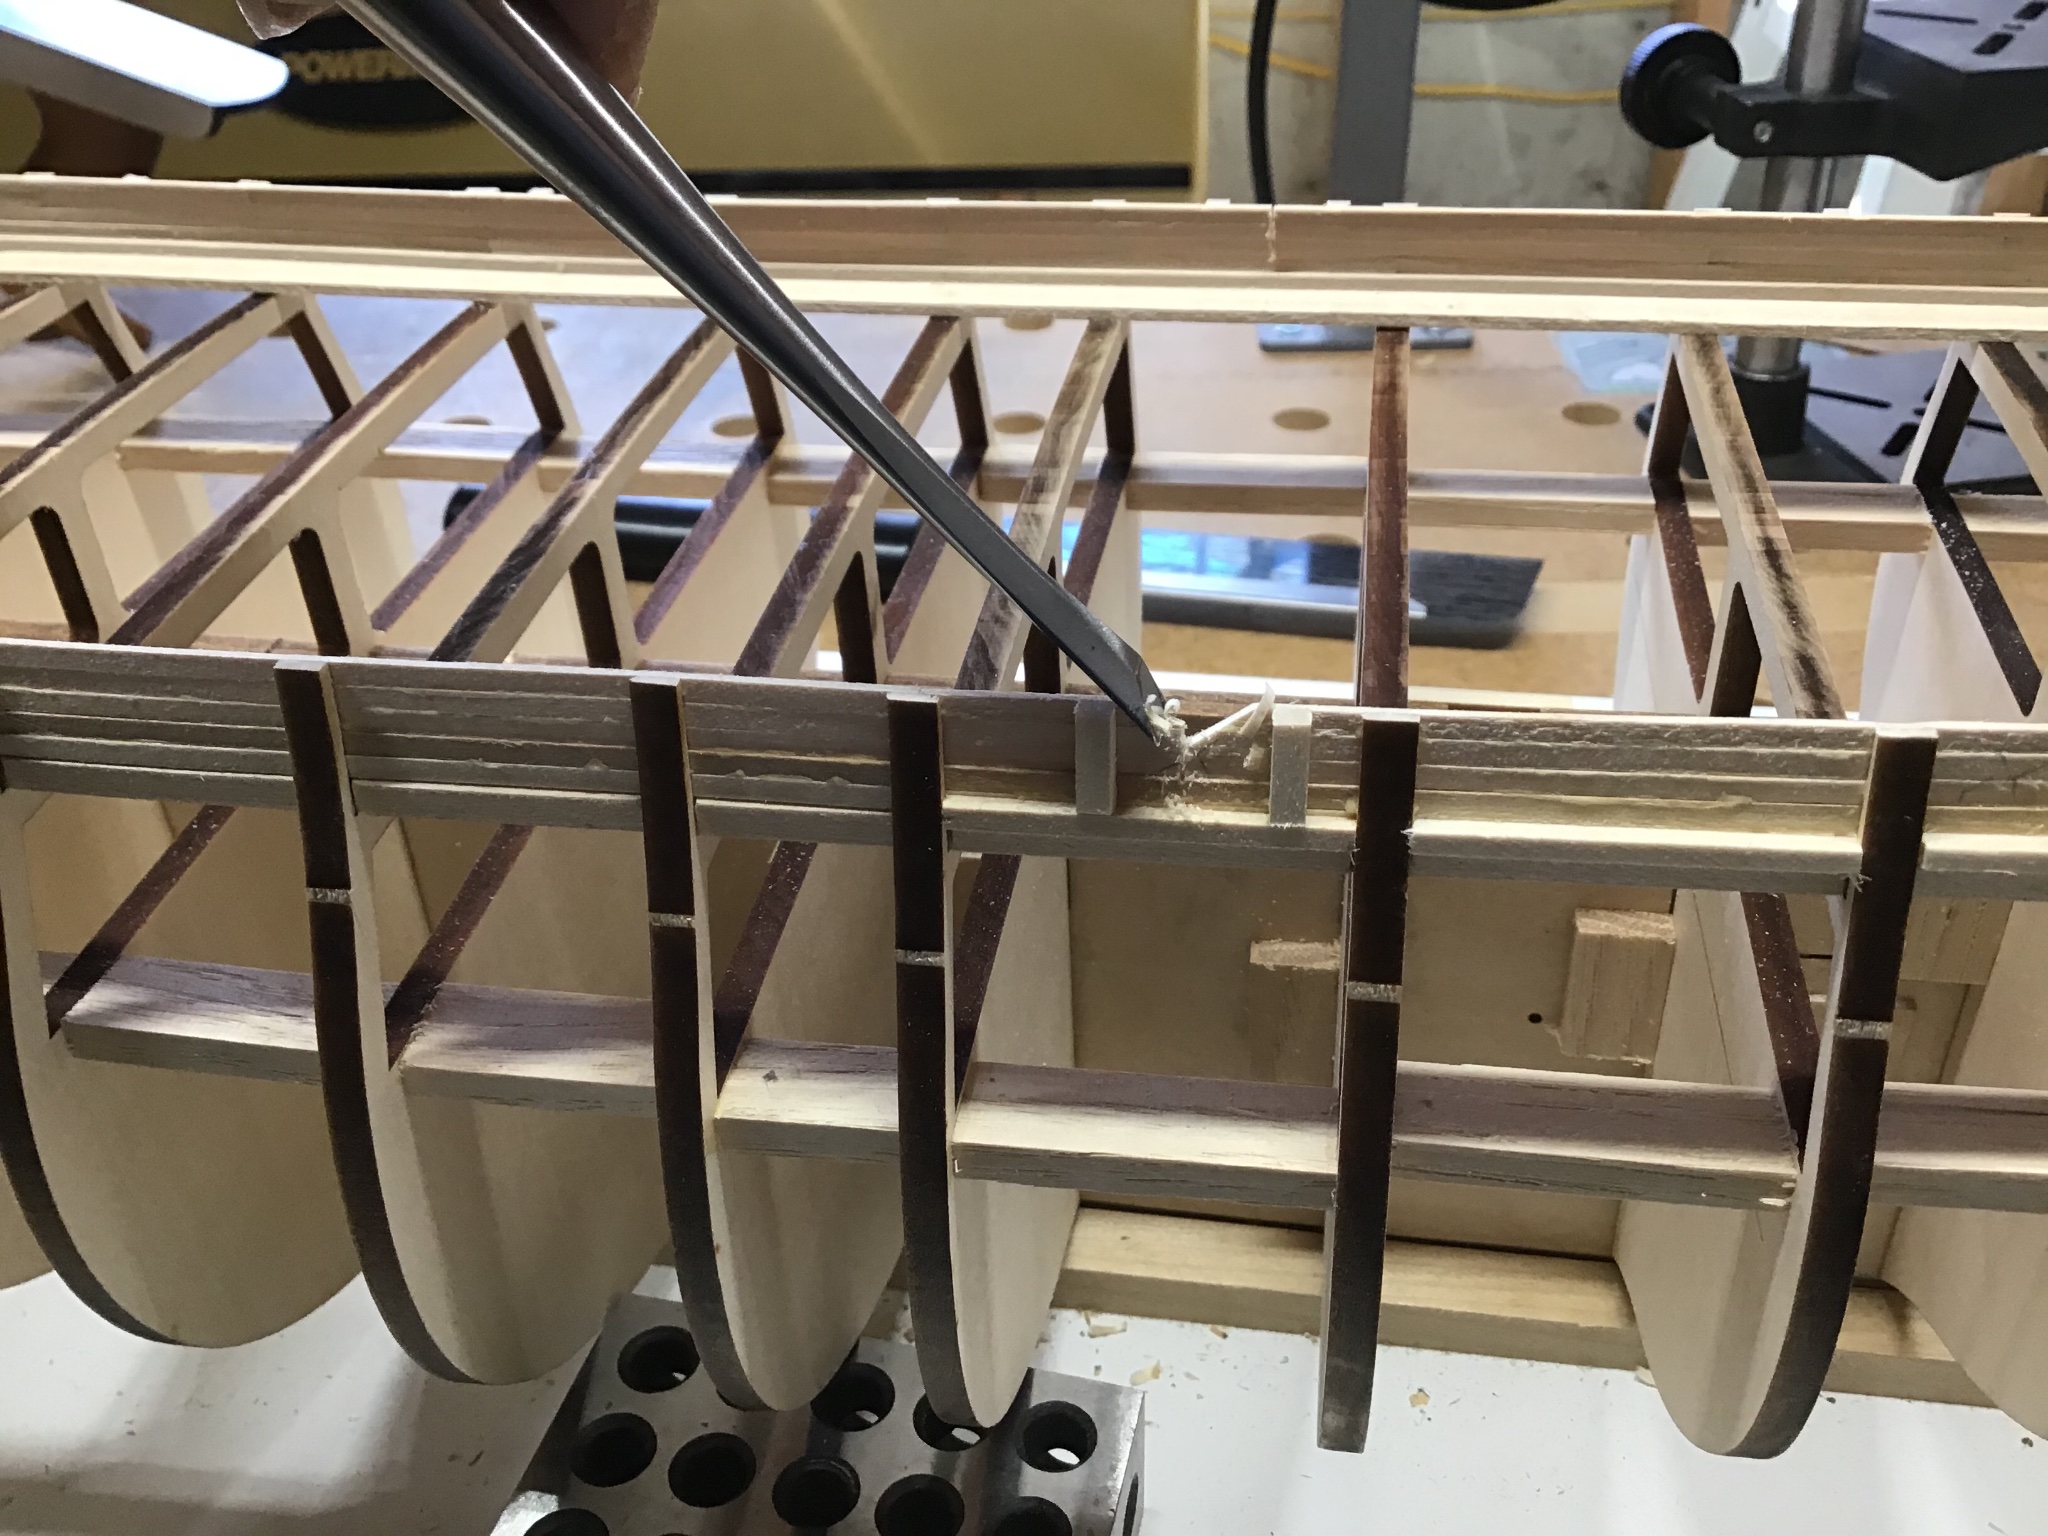
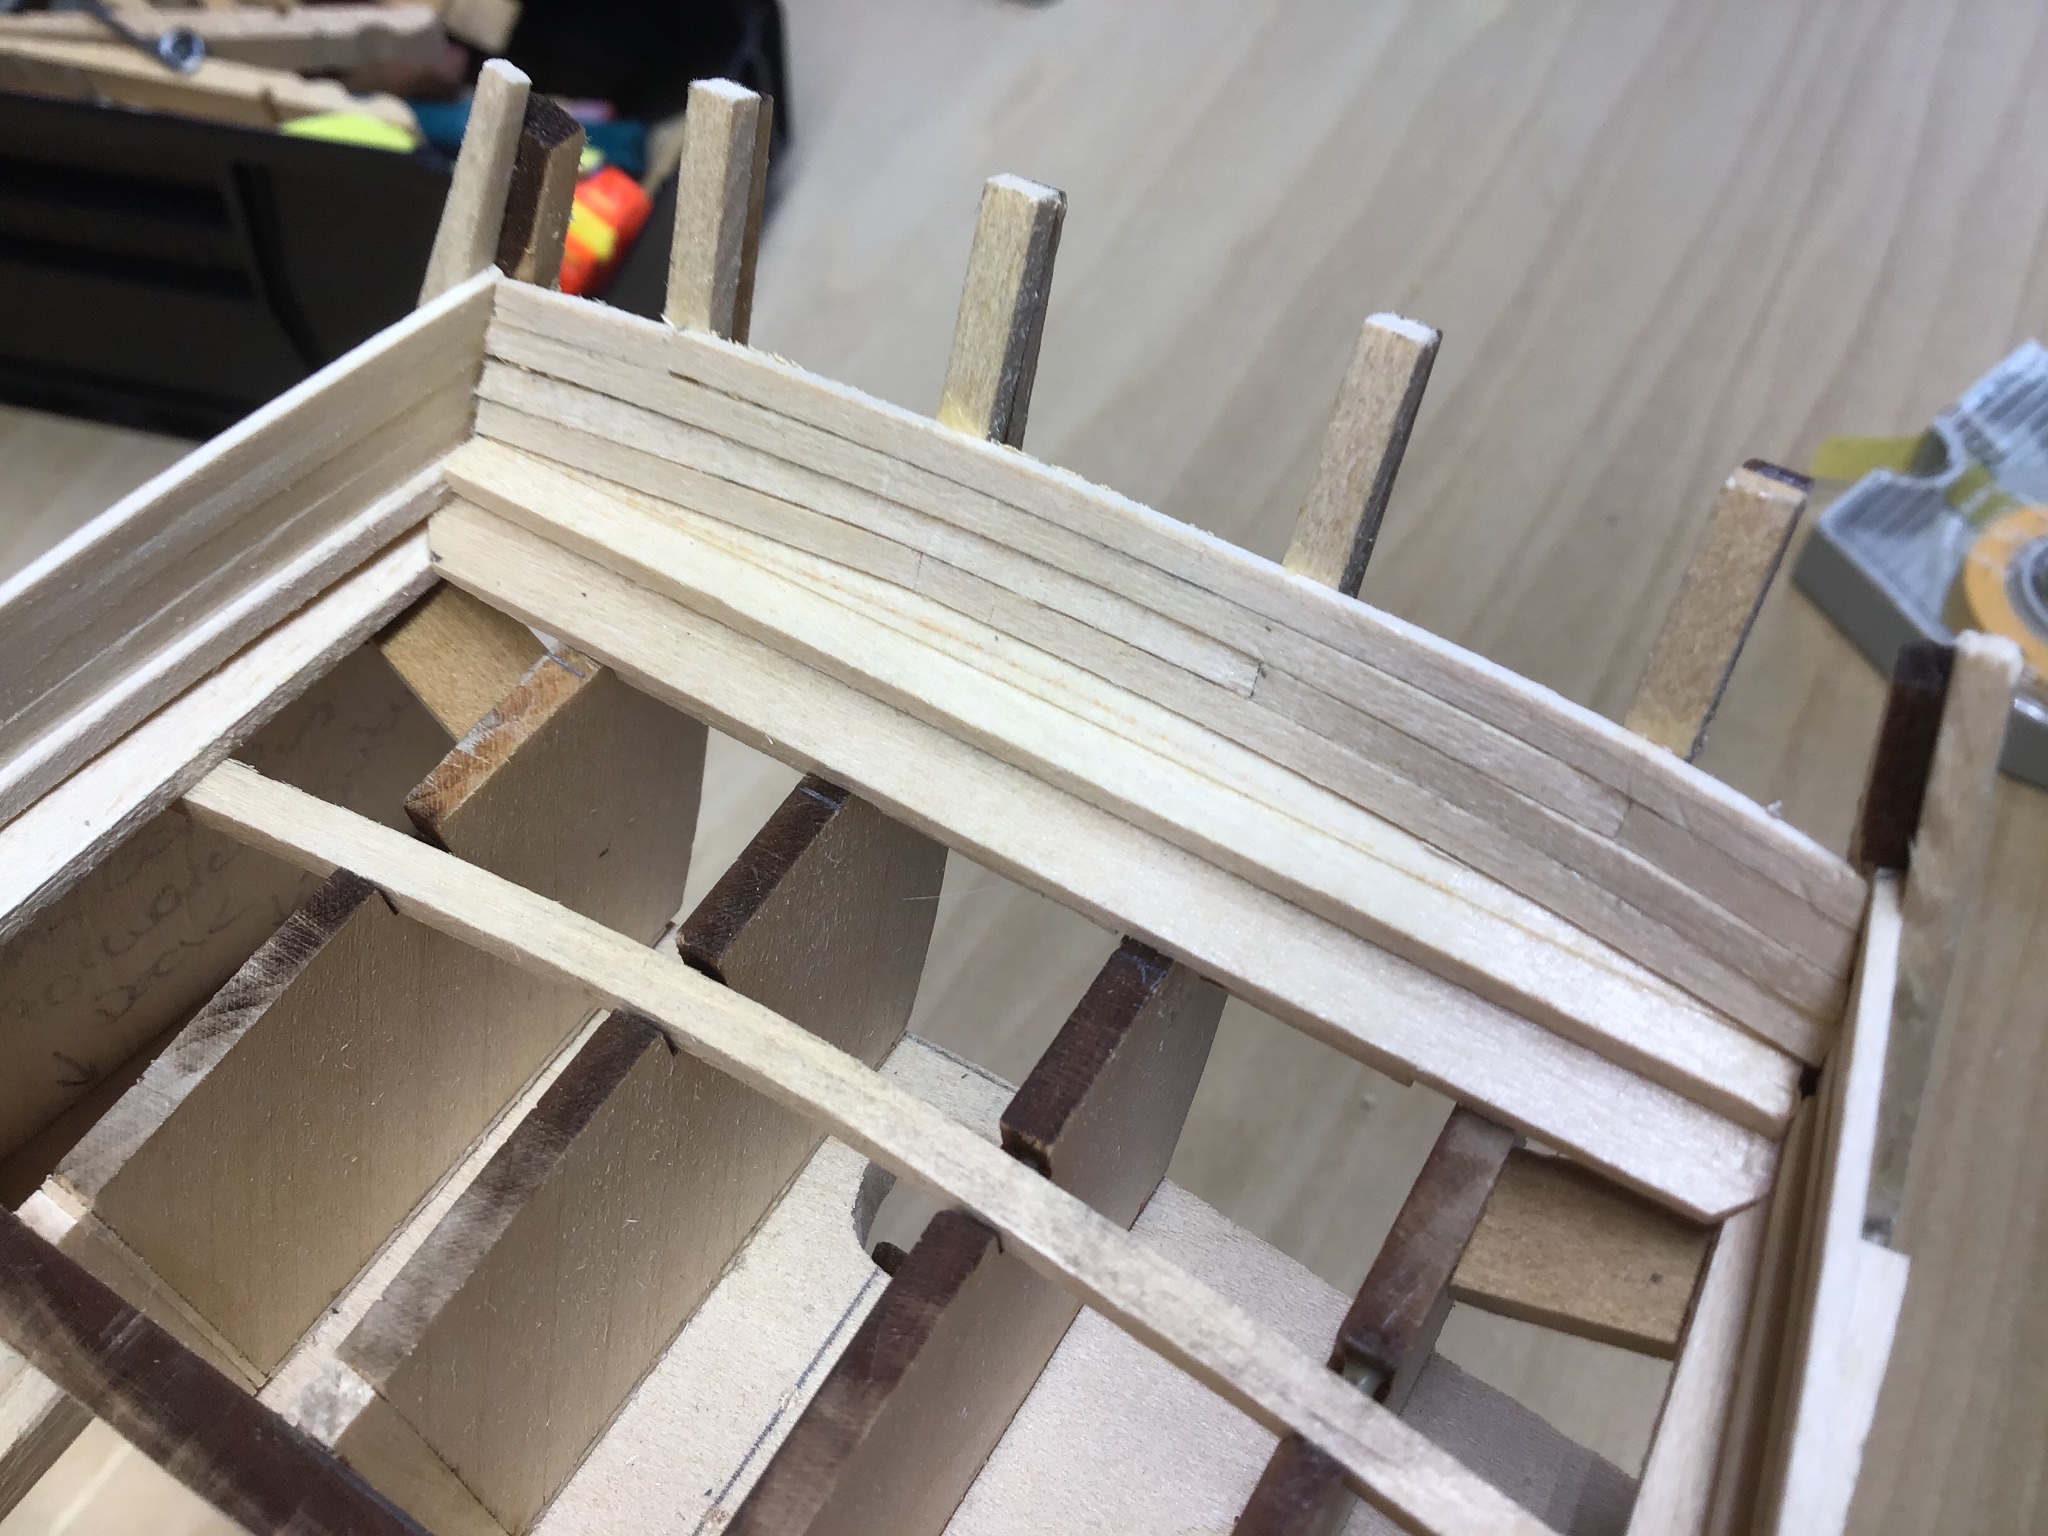
Lower Gunport Upper Sills
Measured, cut, and dry fitted sills.
Then glue and install in assembly line fashion.
Used a spacer block 17/32” wide for uniform spacing from the bottom of the planksheer to the top of the sill.
Sill between bulkheads A and B required a bevel cut, so used the protractor as a guide for marking the board.
Aligned the mitre gauge by lining up the line on the board with the table saw slot edge.
Last photo shows sills installed. They are the boards below the plank sheer.