


DocBlake
-
Posts
1,811 -
Joined
-
Last visited
Content Type
Profiles
Forums
Gallery
Events
Posts posted by DocBlake
-
-
I just bought it! Are the plans amenable to enlarging to 1:24 scale? (You know what I'm thinking!)
- Landlubber Mike, Canute and mtaylor
-
 3
3
-
-
-
-
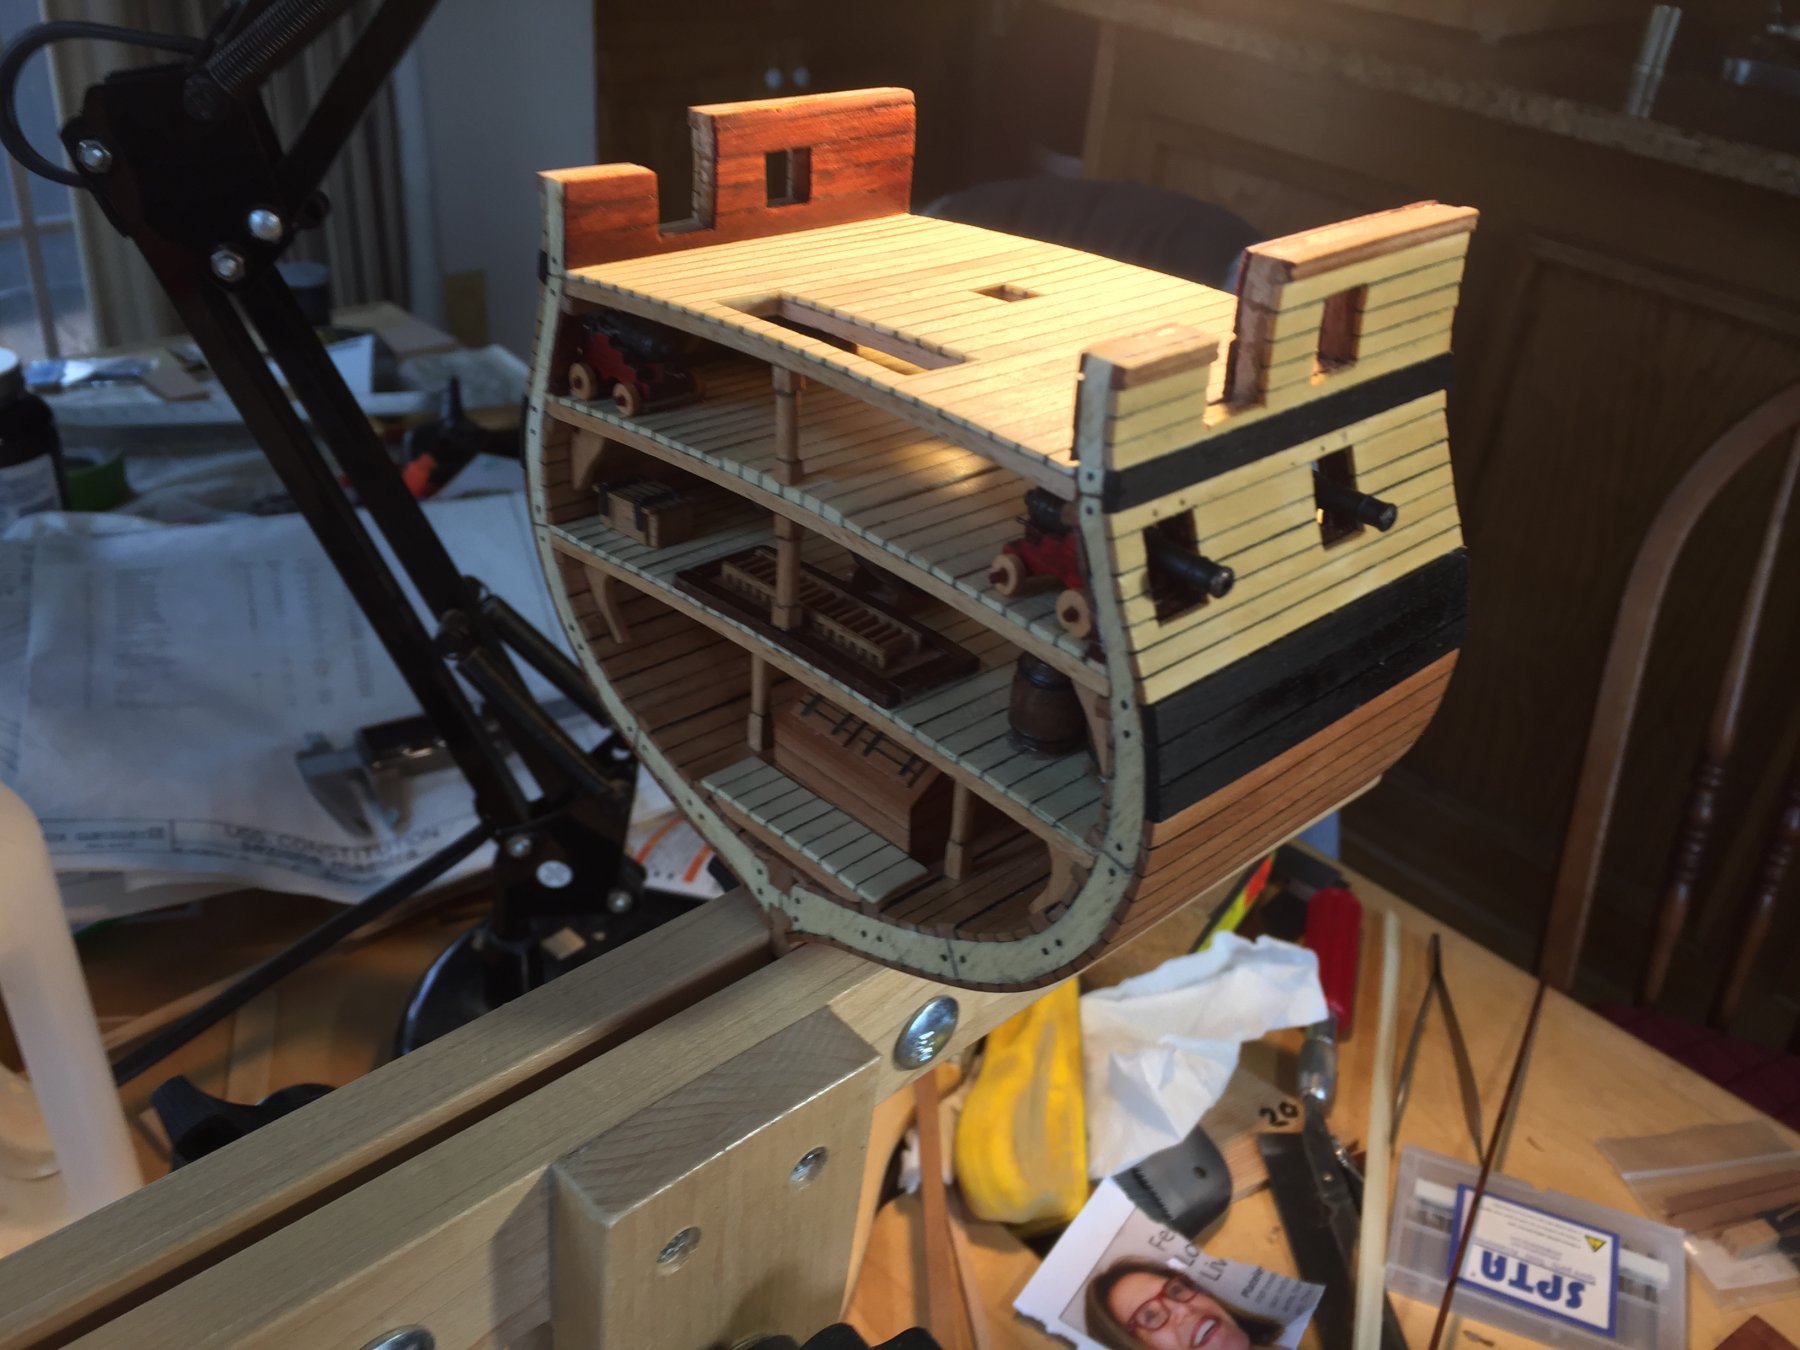
Progress to date. The upper deck has been framed and planked, with the passageway opening to the gun deck framed out. Ladders will lead below. The inboard bulwark planking is bloodwood. Next up is to fit the cap rails and frame in the entryways on either side of the cross section. I also need to fabricate new wooden carriages for the carronades, install the rosewood trim around the stairway opening and place the stanchions for the rope rail. There is a bitt with belaying pins that needs to be remade and installed. Then I turn my attention to the outside of the hull. If you look closely you can see the holes where the pins fixing the gun port lids will attach.

- Jim Rogers, lmagna, md1400cs and 8 others
-
11
-
Since you changed the scale, you will be unable to use the ridiculous piece of stamped metal AL provides for the transom! I'll be watching closely. After the fabulous job you did on your Rattler, especially her transom, I'm sure you'll come up with a killer solution. In my case, I had to resist the temptation to do too much back there. This was a simple ship that began life as a merchantman. There wouldn't have been elaborate carvings, for example. I wasn't even going to include quarter badges, but in the end, I opted in. This should be fun to watch.
Here's that stupid transom and the first step in my replacement:

-
Has anyone had any experience with Alaskan yellow cedar?
- mtaylor, Seventynet, Canute and 1 other
-
4
-
I've not had the opportunity to work with Alaskan yellow cedar, but I did buy a piece to experiment with it a bit, especially since Chuck and Syren are stocking it in billets. My first impressions are that it is very fine grained, and has a nice yellow-cream color that resembles boxwood. It's soft, but not as soft as basswood. I'm interested in other people's experiences with the wood. What do you use it for? Does it stain and finish well or is it blotchy like pine can be? Is it suitable for frames in a POF model? All answers appreciated!
Chuck: You've probably had the most experience. Can you weigh in?
- thibaultron, Seventynet, Canute and 3 others
-
6
-
I'm a little late to the party, but I'll be following along. Very interesting modifications, Lou. This will certainly be YOUR vessel!
This kit is very similar to both Sultana and Halifax, but at this scale would have actually been smaller than Sultana which Harold Hahn called "the smallest of them all".
I didn't think a boat that tiny could carry the planned armament, so I am building "Clio" in 5/16" scale, so she's larger than Sultana, but smaller than Halifax. The hull is interesting to plank. If you have any questions, just ask. I learned the hard way!
Great work so far, and impressive research!
- popeye the sailor, Piet, mtaylor and 2 others
-
5
-
Glad your back, Ken. Just getting her covered with the first planking is all you need. It looks good!
The second planking is more difficult, but I used 1/32" thick planks; much harder to edge bend than veneer. I ended up using a steam iron for edge bending after tapering the plank at the bow. The stern presented even bigger problems. If you have any questions you have about my experience planking this weird little boat, please ask!
-
Thanks, Kurt!
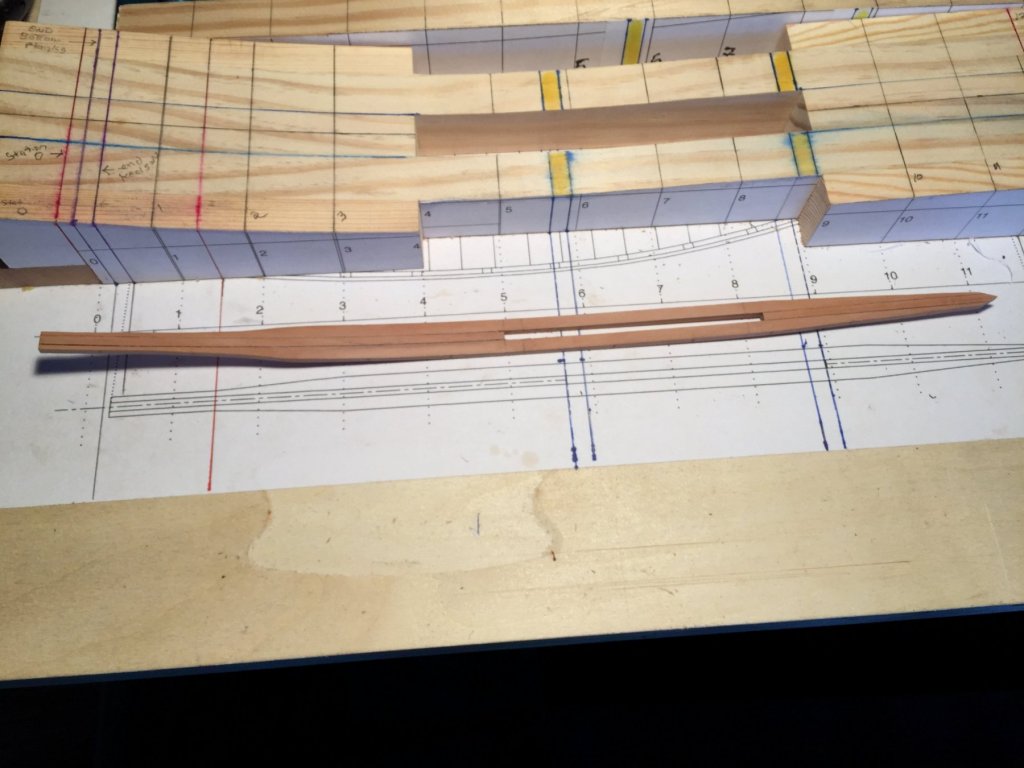
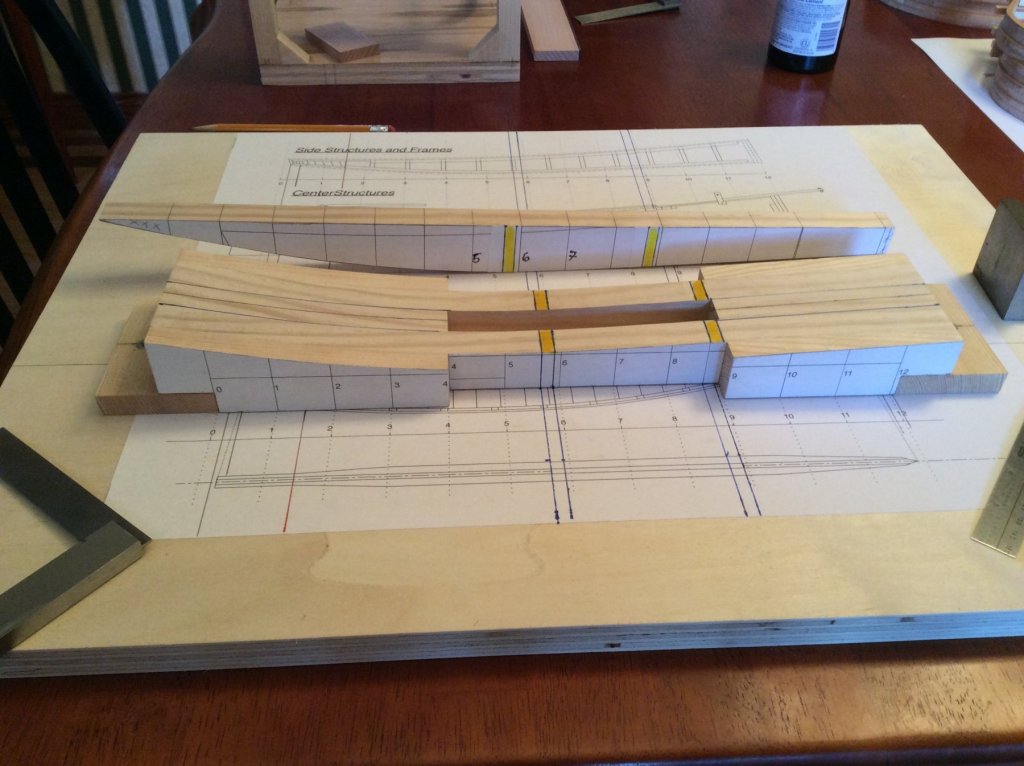
I cut the keelson to it's final shape. This was harder than I thought it would be because of the curve in the piece. I probably could have done a better job, but the critical part is how the keelson fits in the notched of the station template, and how it relates to the chines so that the bottom planking is flat. I can live with the keelson as it is!
- Seventynet, thibaultron, Tigersteve and 4 others
-
7
-
-
Thanks, guys!
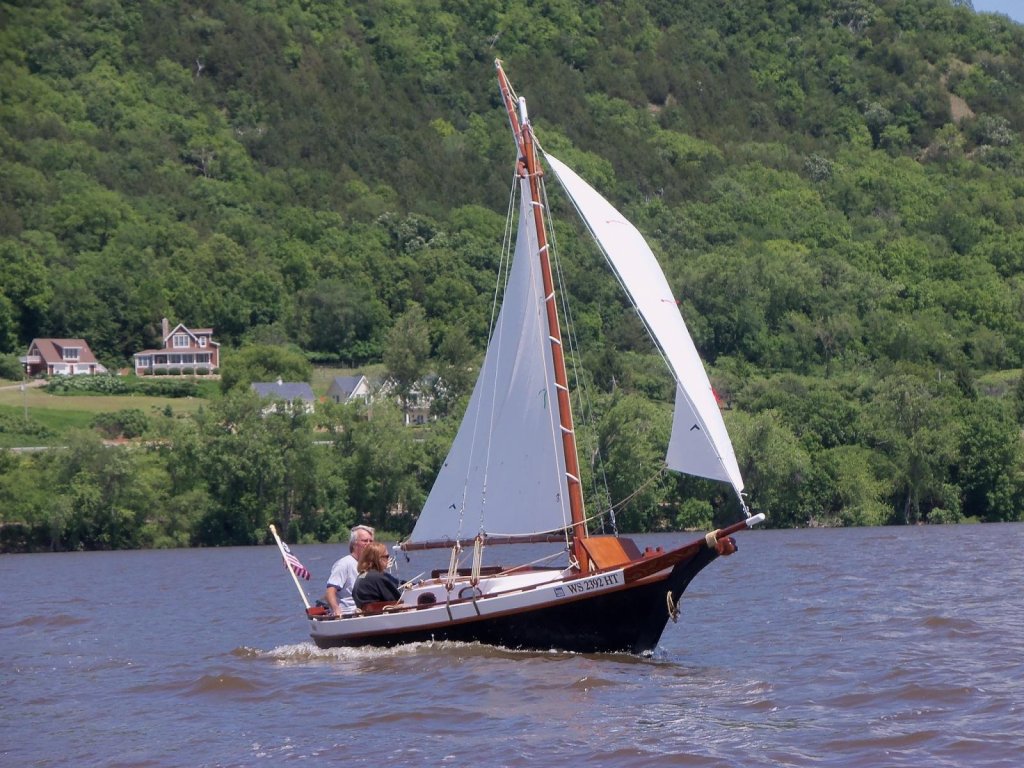
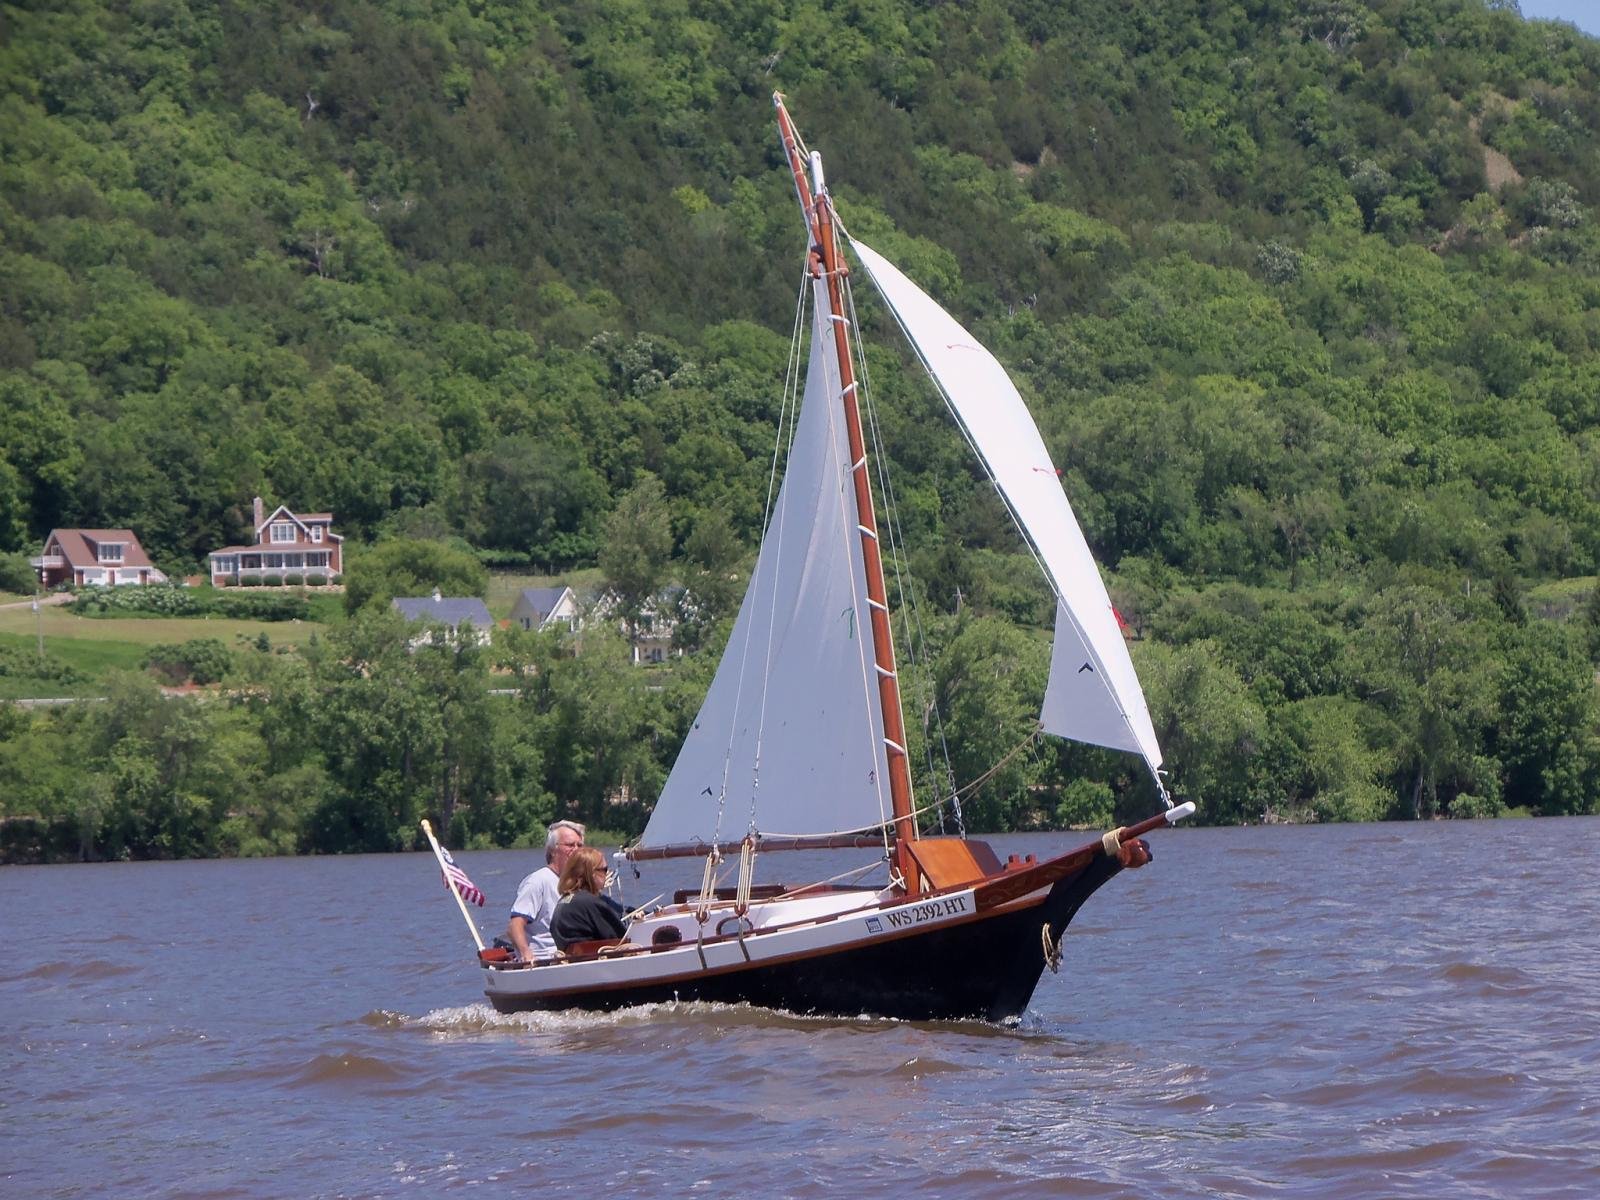
Chuck: it was a great day sailing on Lake Pepin, on the Wisconsin-Minnesota border.
- mtaylor and thibaultron
-
2
-
Thanks for all the "likes" guys!
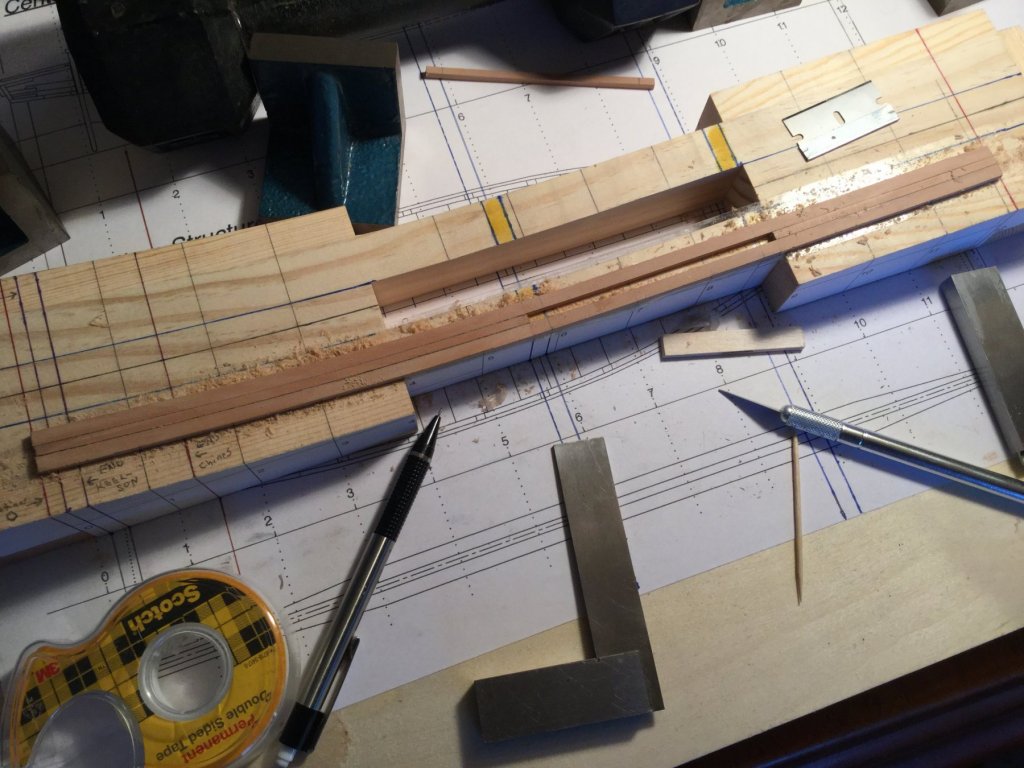
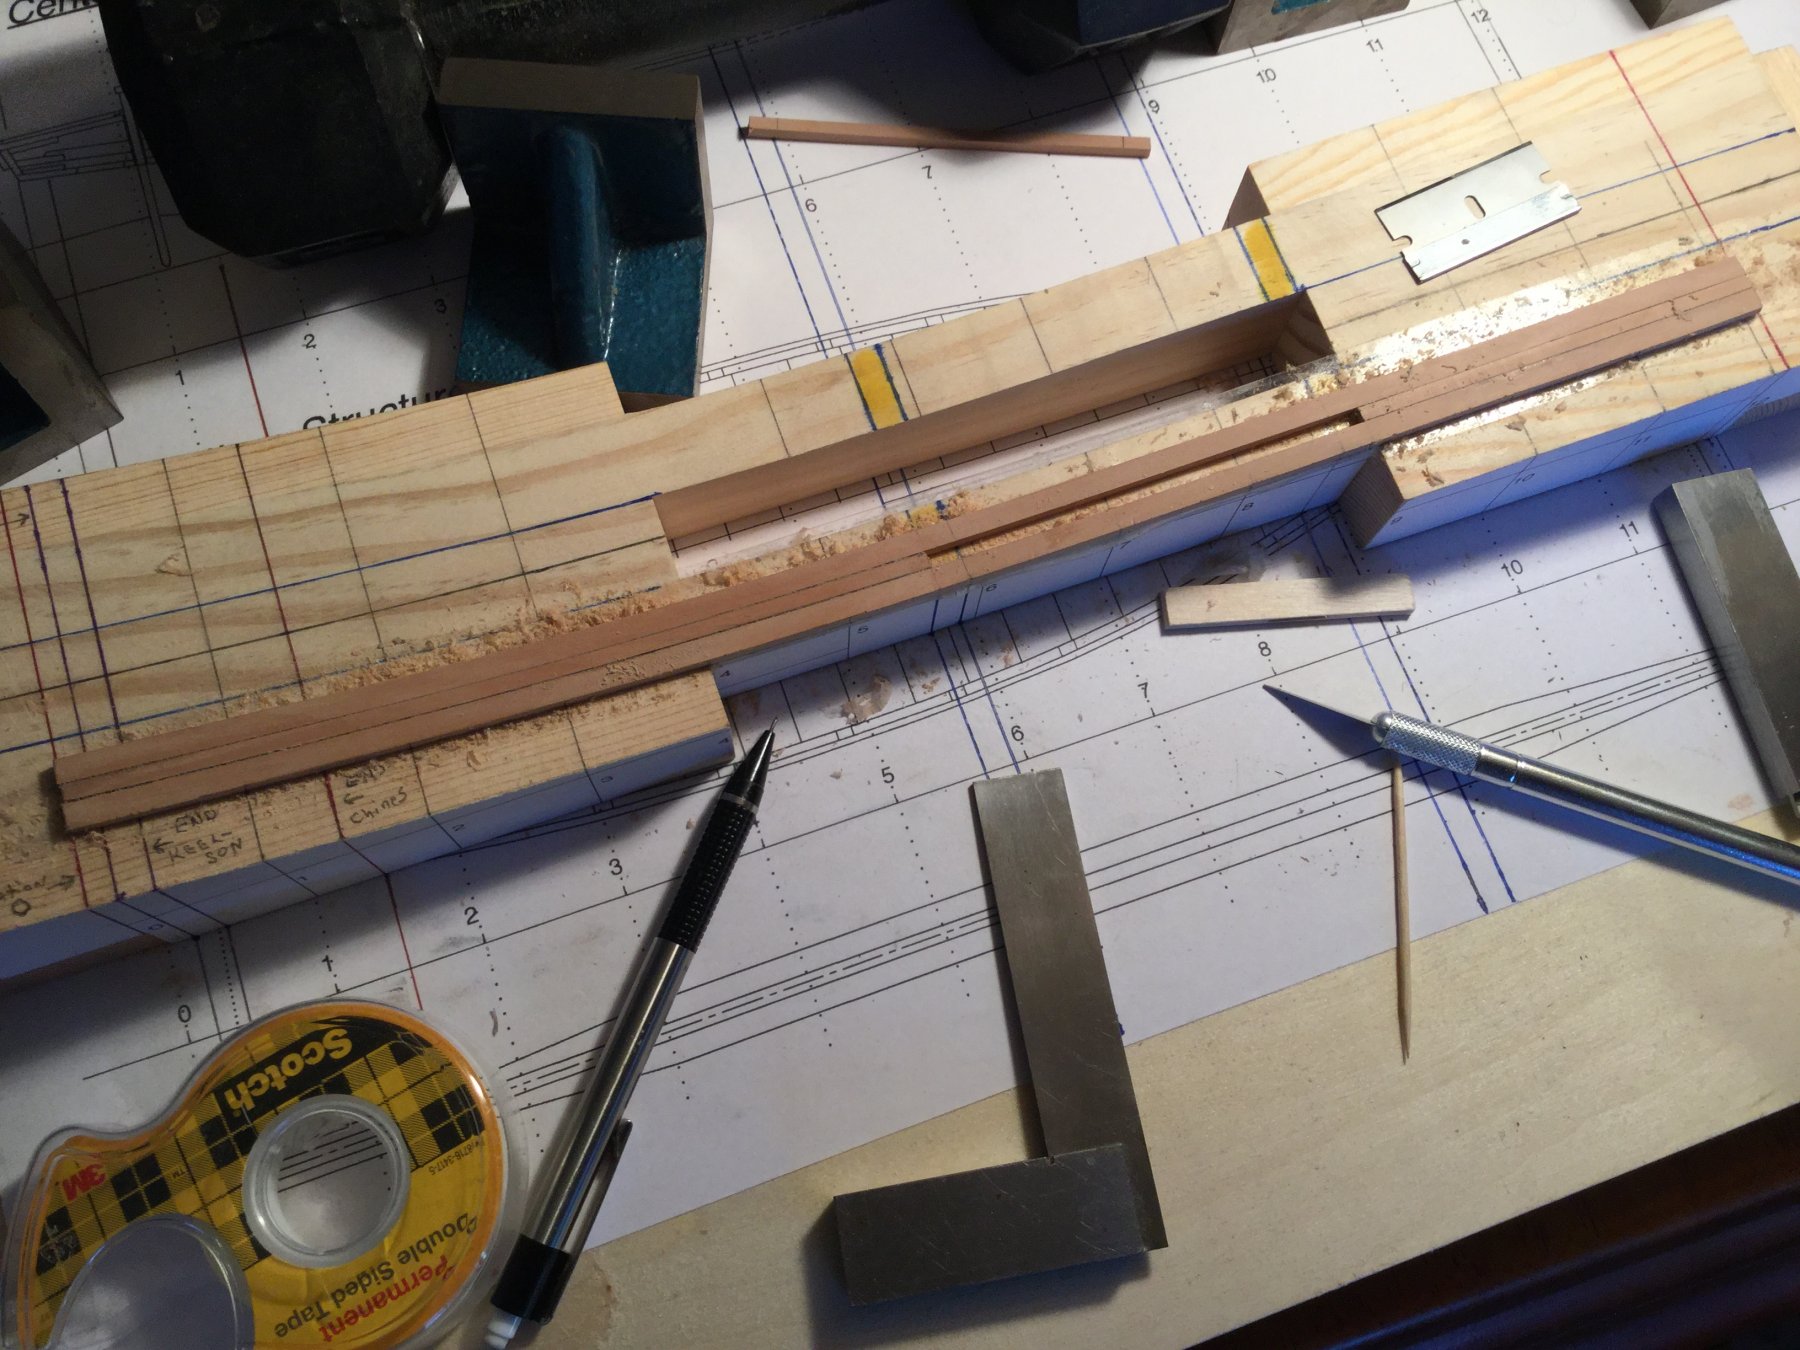
The next step is to glue up the keelson blank out of the three parts I just finished bending. The center timber had the centerboard slot removed based on the slot's location drawn on the side timbers. The plans call for gluing the pieces together, then placing them in the press between two sheets of waxed paper. Too much to go wrong there, so I reached for my trusty two-sided tape and laid tape down wider and longer than the blank would be. After the first side timber was fixed on the tape, I glued the center and opposite side timber to each other. I weighted the setup in the press and let it dry overnight. This morning I scraped theblank with a single edged razor blade to remove any glue residue. Now I'll shape the keelson to finished. I've actually built my own gaff-rigged sloop in real life and this is just as much work! That's the Admiral and I sailing her!
- JpR62, BenF89, Ryland Craze and 8 others
-
11
-
Beautifully done. A real masterpiece! I can’t wait to see what you do next!
- John Allen, Mirabell61, mtaylor and 3 others
-
6
-
Had a great time in Manitowoc over the weekend!
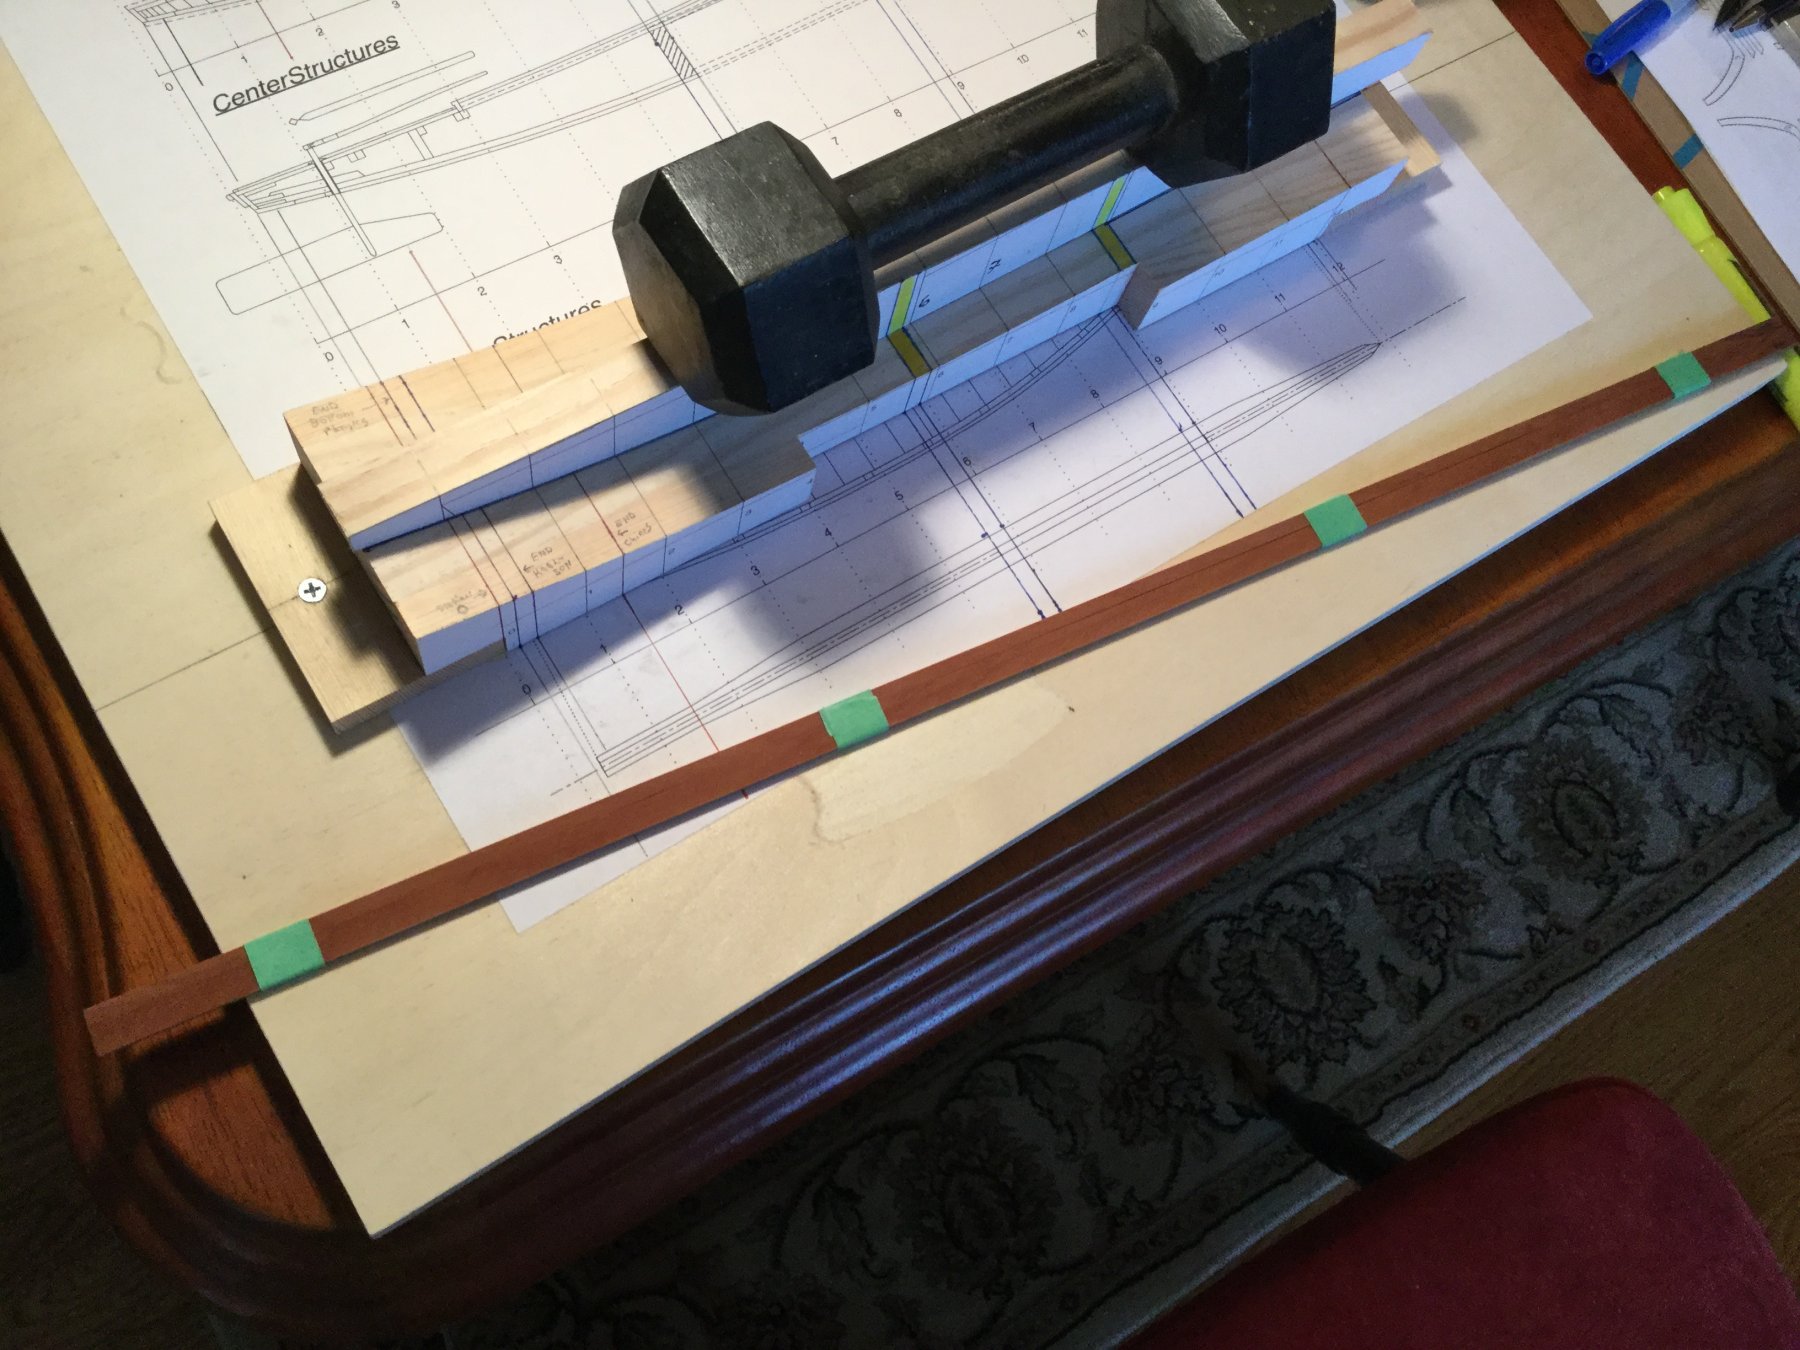
A while back I made a plank soaker out a piece of 1" threaded PVC pipe, with a cap cemented on one end and a screw top on the other. The keelson is made of 3 parts of 1/8" thick stock - I used swiss pear. Two pieces are 3/16" wide, and the center piece is 1/8" wide. After soaking over night I ganged the three side by side, secured with painter's tape and placed them in the press with weights to hold down the top piece. The assembly will sit 24 hours to dry.

- tlevine, Tigersteve, kurtvd19 and 6 others
-
9
-
I purchased a piece of alaskan yellow cedar 7" X 2" X 24" to play around with. I'll see what others do with it, now that Chuck is supplying it. It does look nice!
Good job on your AVS thus far!
-
I think the coppering looks great, Bob!
- Old Collingwood, Martin W, Canute and 1 other
-
4
-
The hatches look great, Jon. Good choice of wood!
-
She's looking great, Bob!
- Martin W, popeye the sailor, Canute and 1 other
-
4
-
Thanks guys.
Kurt: Looking forward to chatting with you at Manitowoc. I did enter my 1:32 POF Armed Virginia Sloop in the completion.
- thibaultron and mtaylor
-
2
-
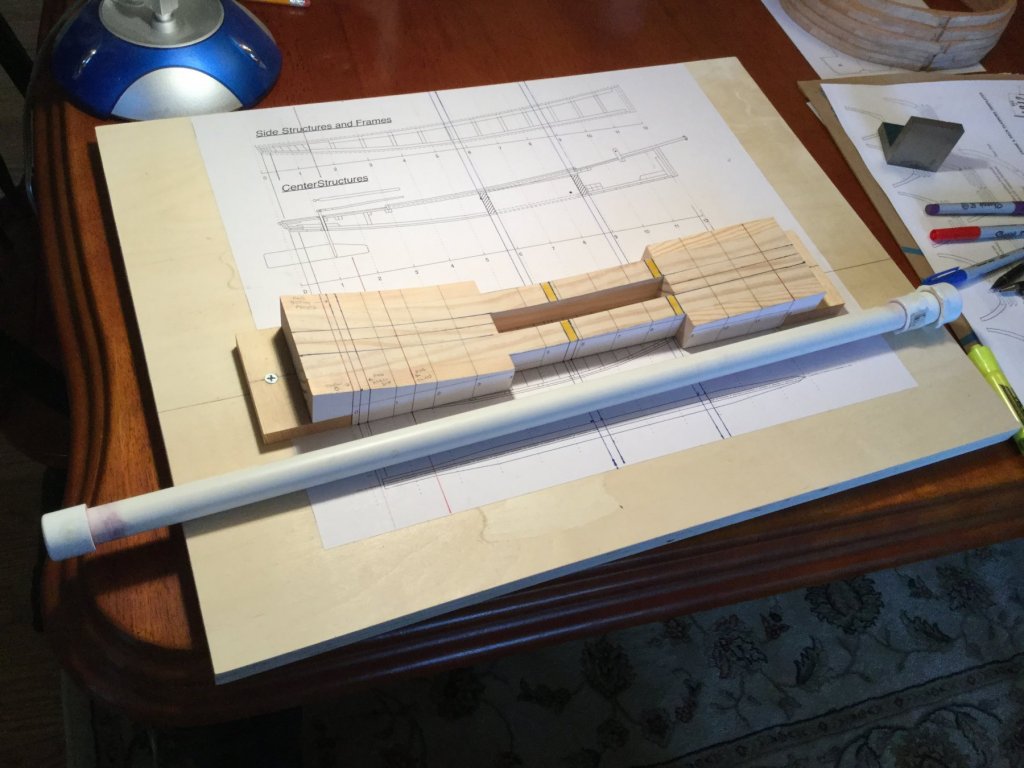
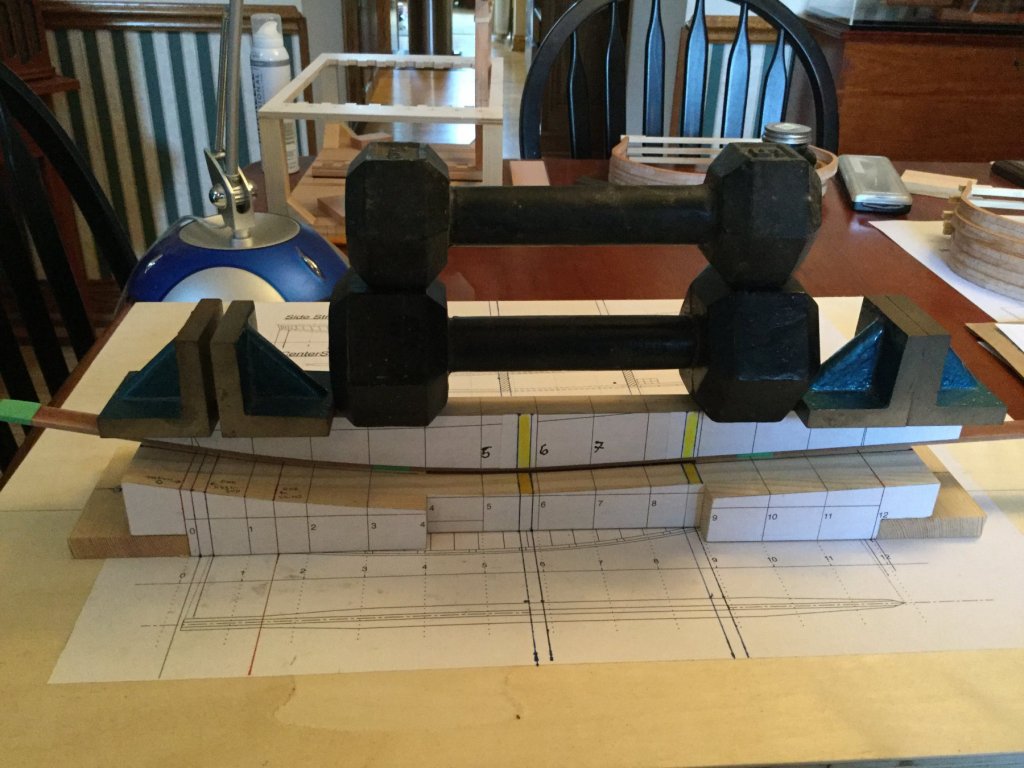
The jig was screwed to the build board and all the necessary marking were laid out to accommodate the centerboard slot in the keelson. Fashioning the keelson is next
- Ryland Craze, Tigersteve, kurtvd19 and 5 others
-
8
-
-


Royal Navy Ship of the Line Cross-Section by DocBlake - FINISHED - based on Mamoli's "Constitution" - 1:93 scale
in - Kit build logs for subjects built from 1751 - 1800
Posted
I added the cap rails after cutting them out of ebony and rounding the edges over. I the used swiss pear to line the two sides and the threshold of the boarding portals on either side.