


DocBlake
-
Posts
1,811 -
Joined
-
Last visited
Content Type
Profiles
Forums
Gallery
Events
Posts posted by DocBlake
-
-
-
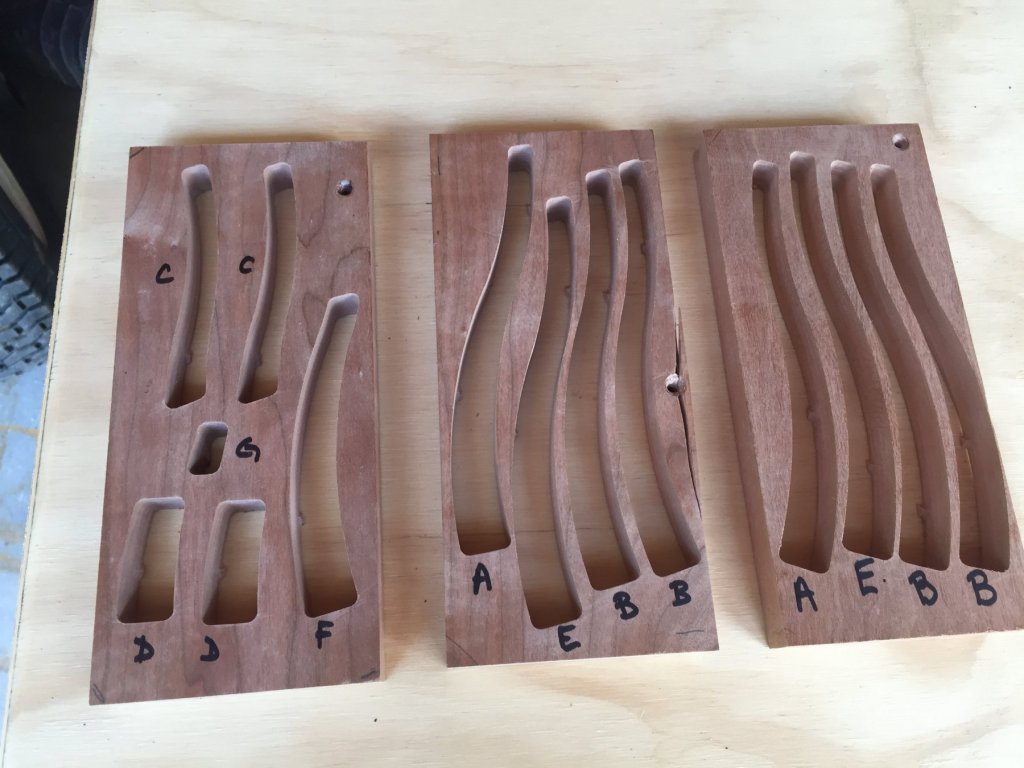
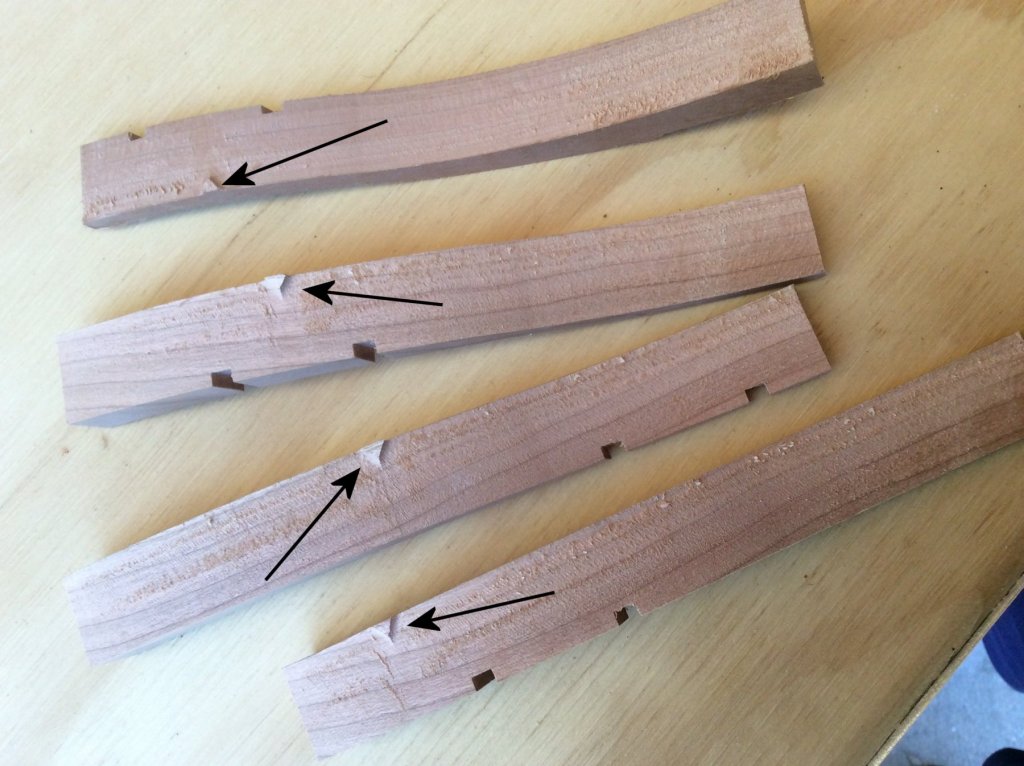
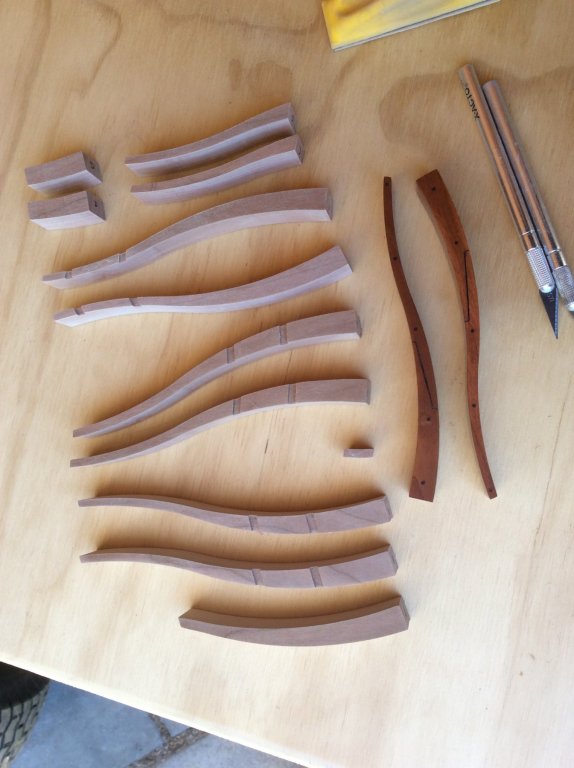
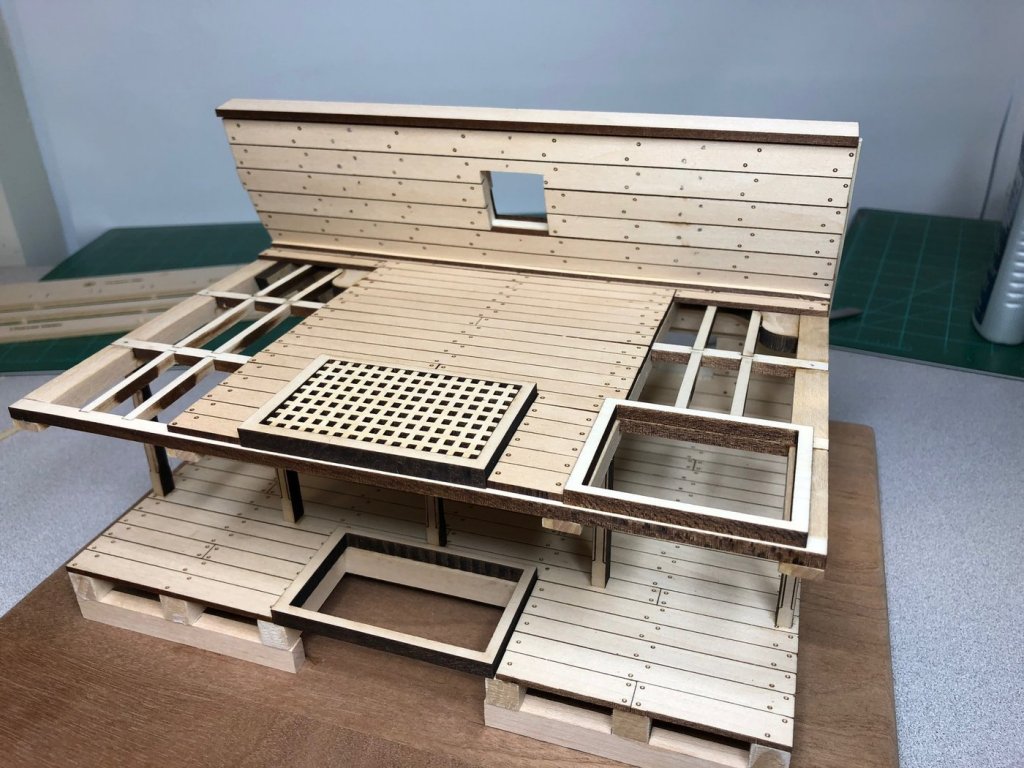
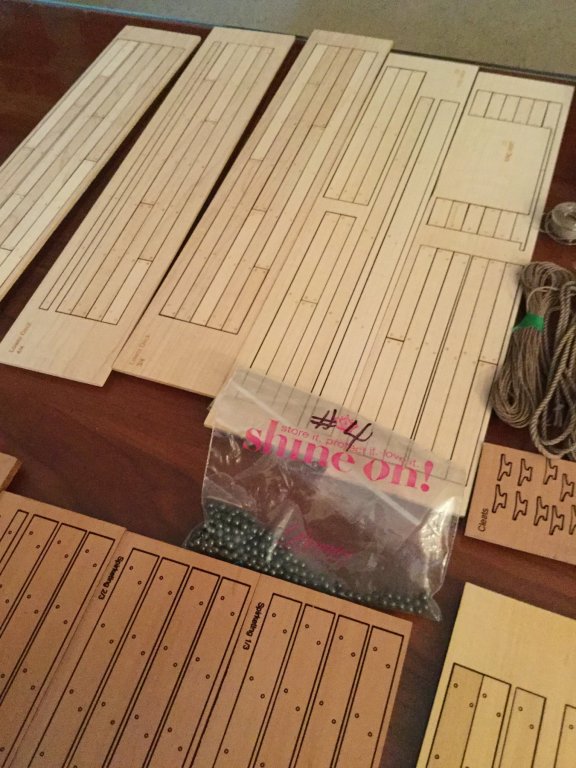
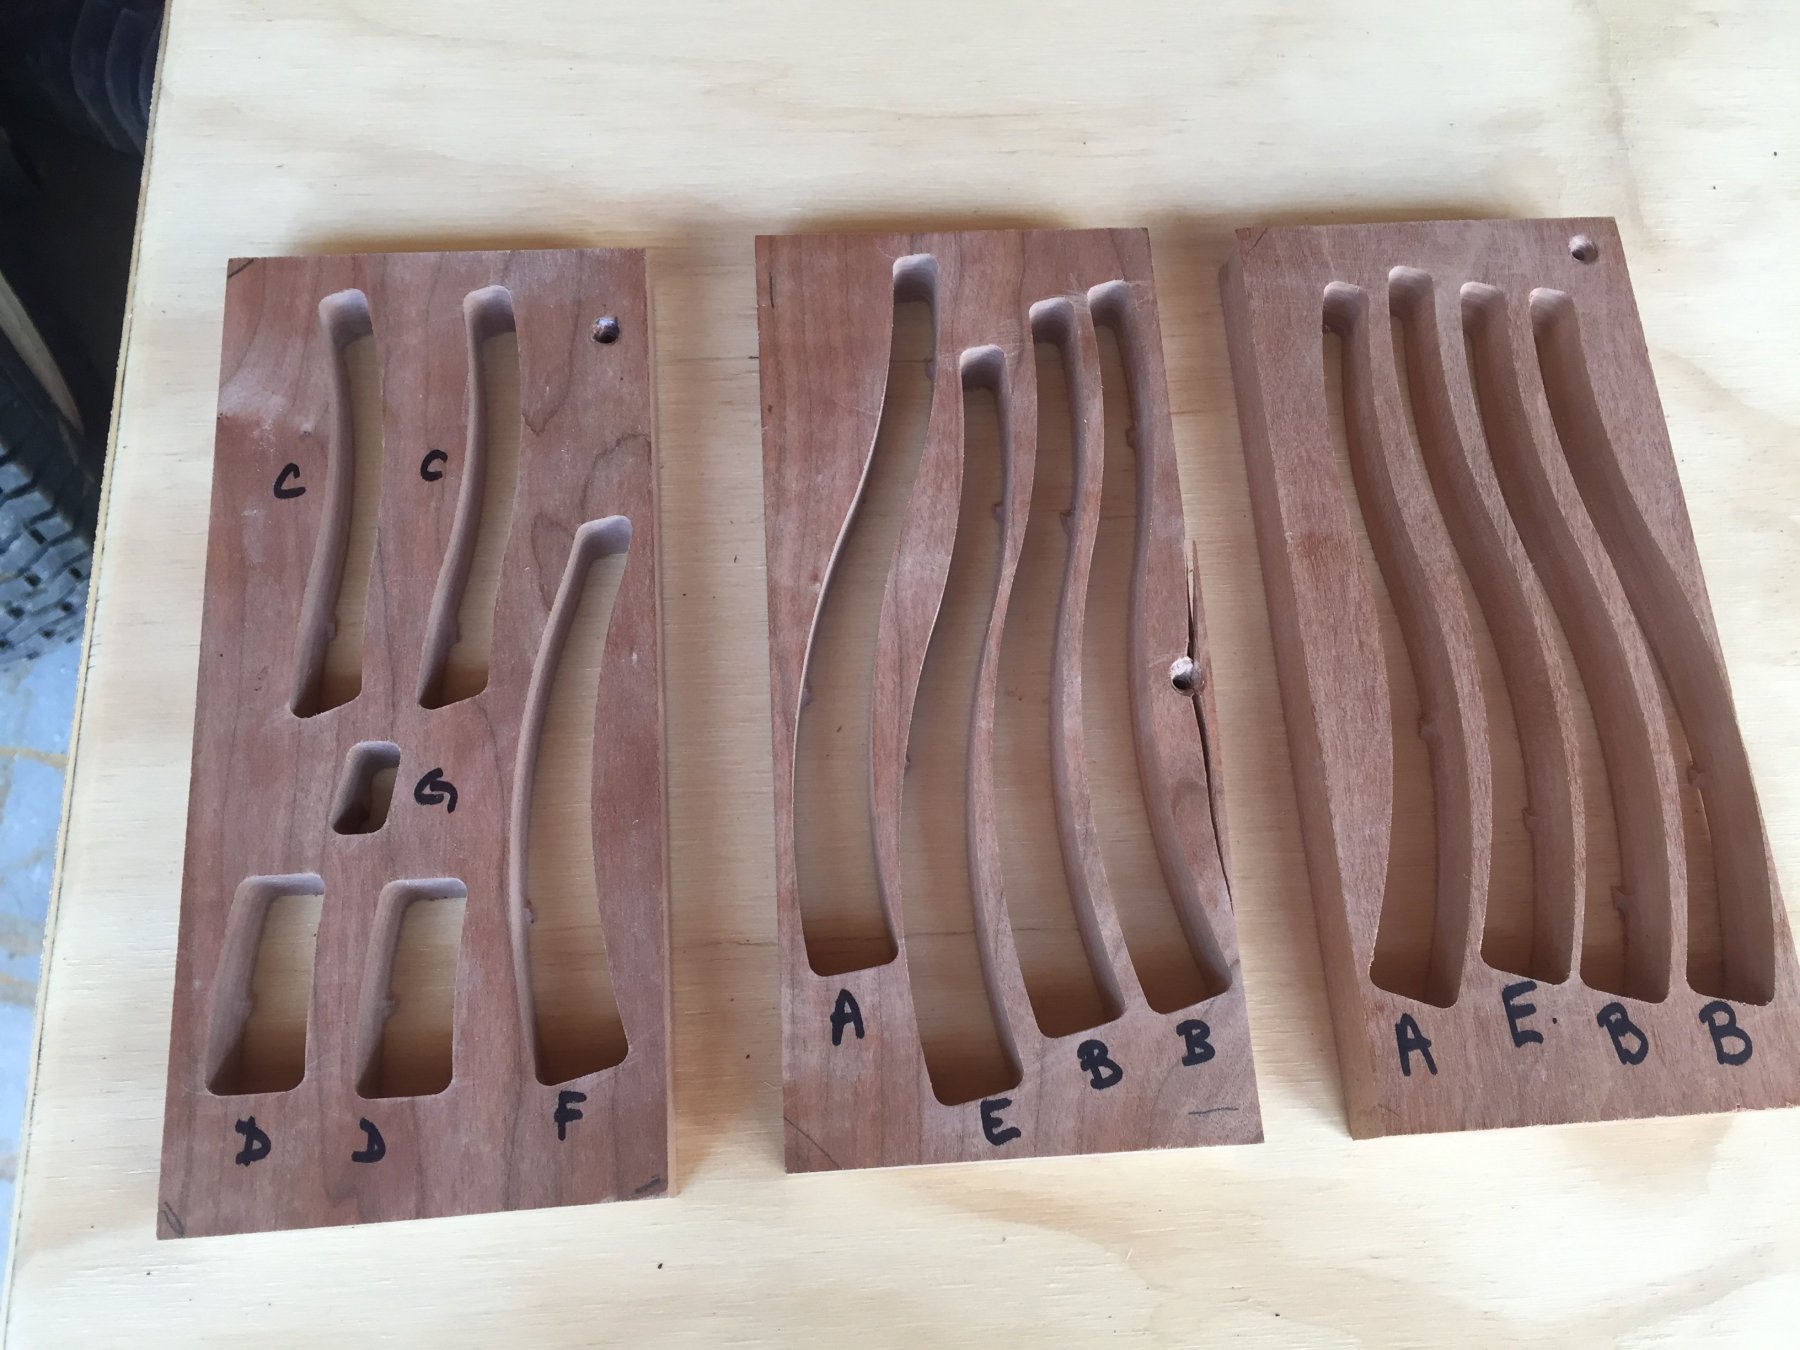
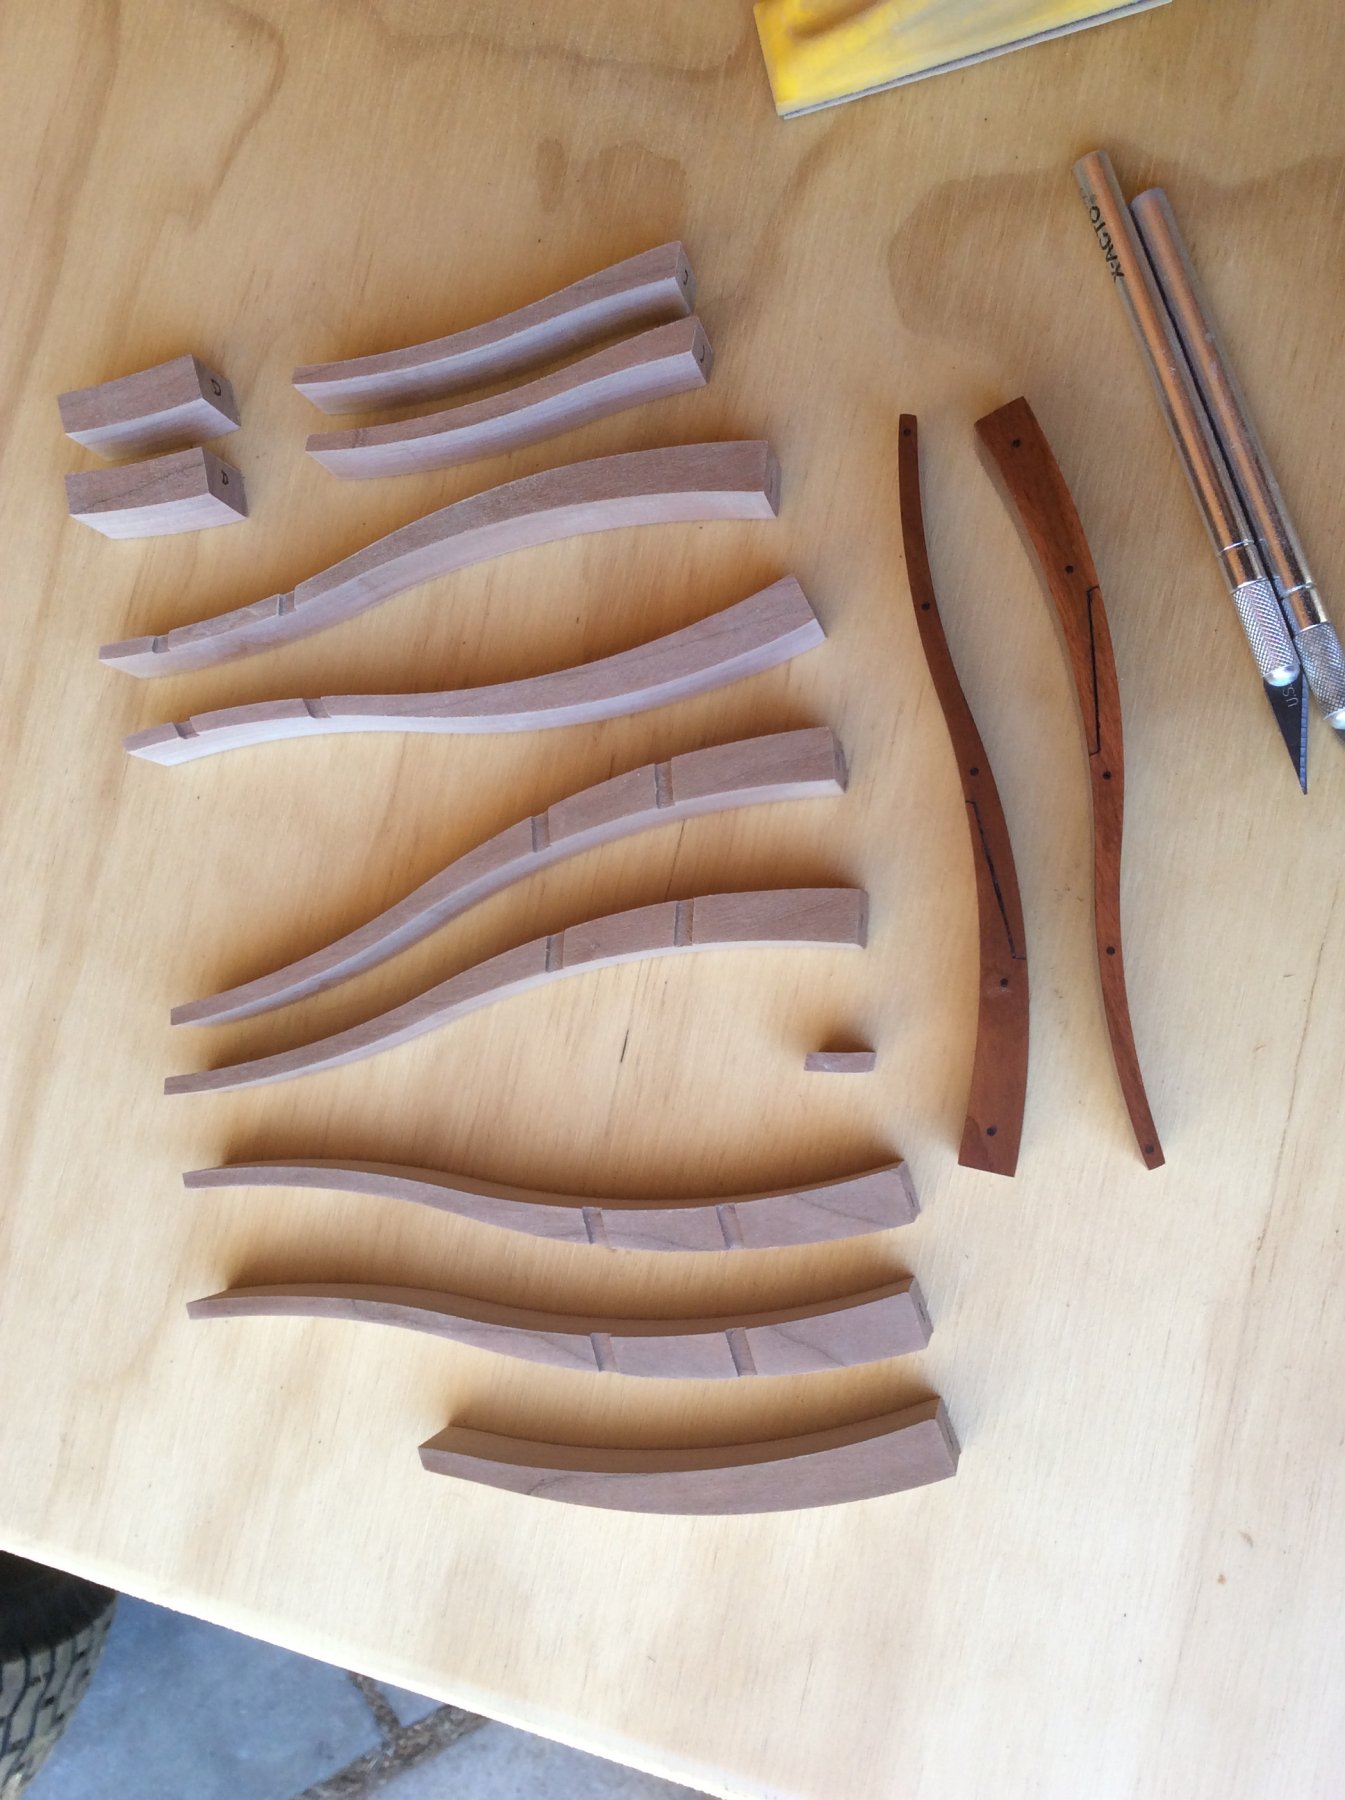
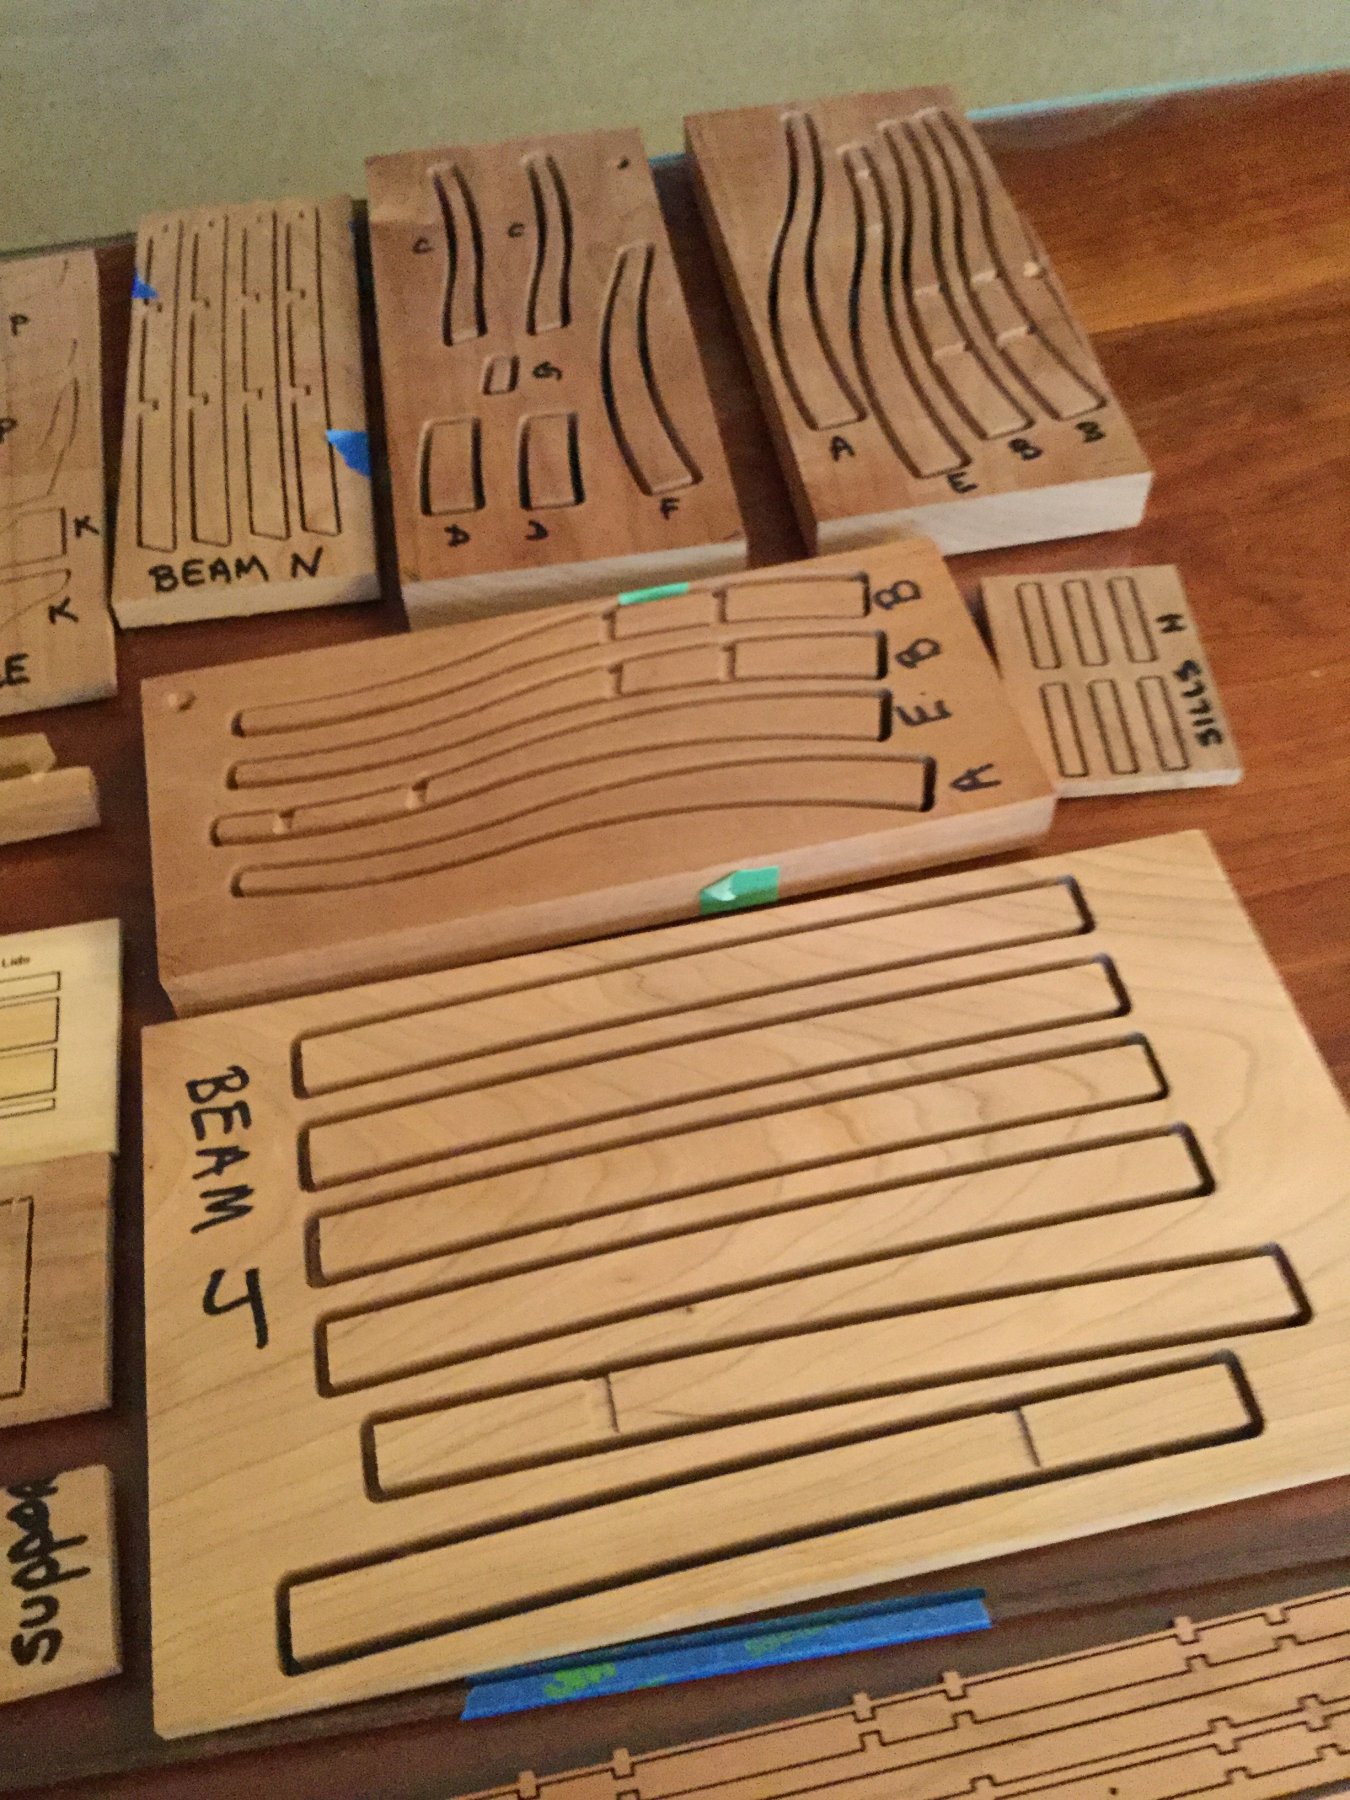
Most of the framing including the hull and deck framing is made of cherry. It's too bad that so much of it will be covered up, but it isn't expensive and it was just easier to cut the parts all at the same time from a limited number of billets, seen or not! The hull framing is 3/4" thick, actually 3/4" WIDE on the model. After CNC cutting, you can see that each piece is held in the 3/4" billet by 2 tiny triangular tabs (arrows). Very easy to remove and clean up the frames. I worked on those while the build board was drying (I glued a rosewood border around a beautiful piece of curly bird's eye maple I had). I also scribed scarfs in the two end frames as well as simulated bolts. I then gave these two a wipe of boiled linseed oil to even out the color.
- Tigersteve, jct, coxswain and 17 others
-
 20
20
-
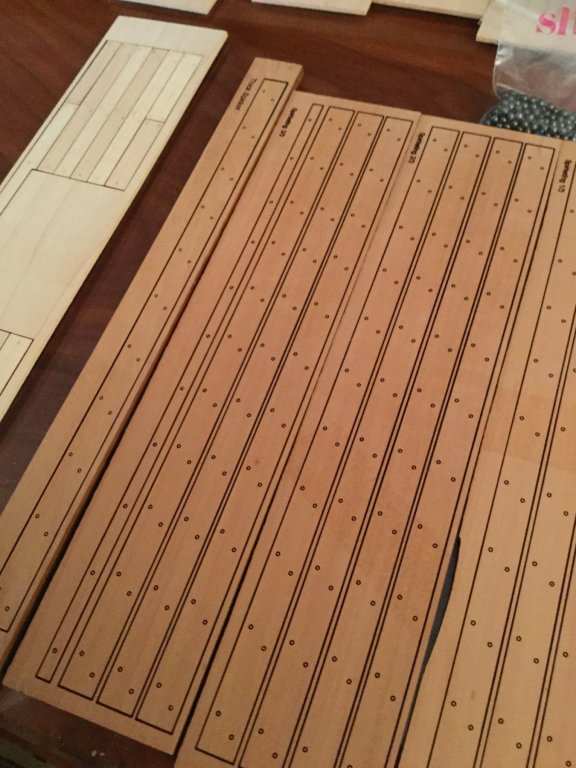
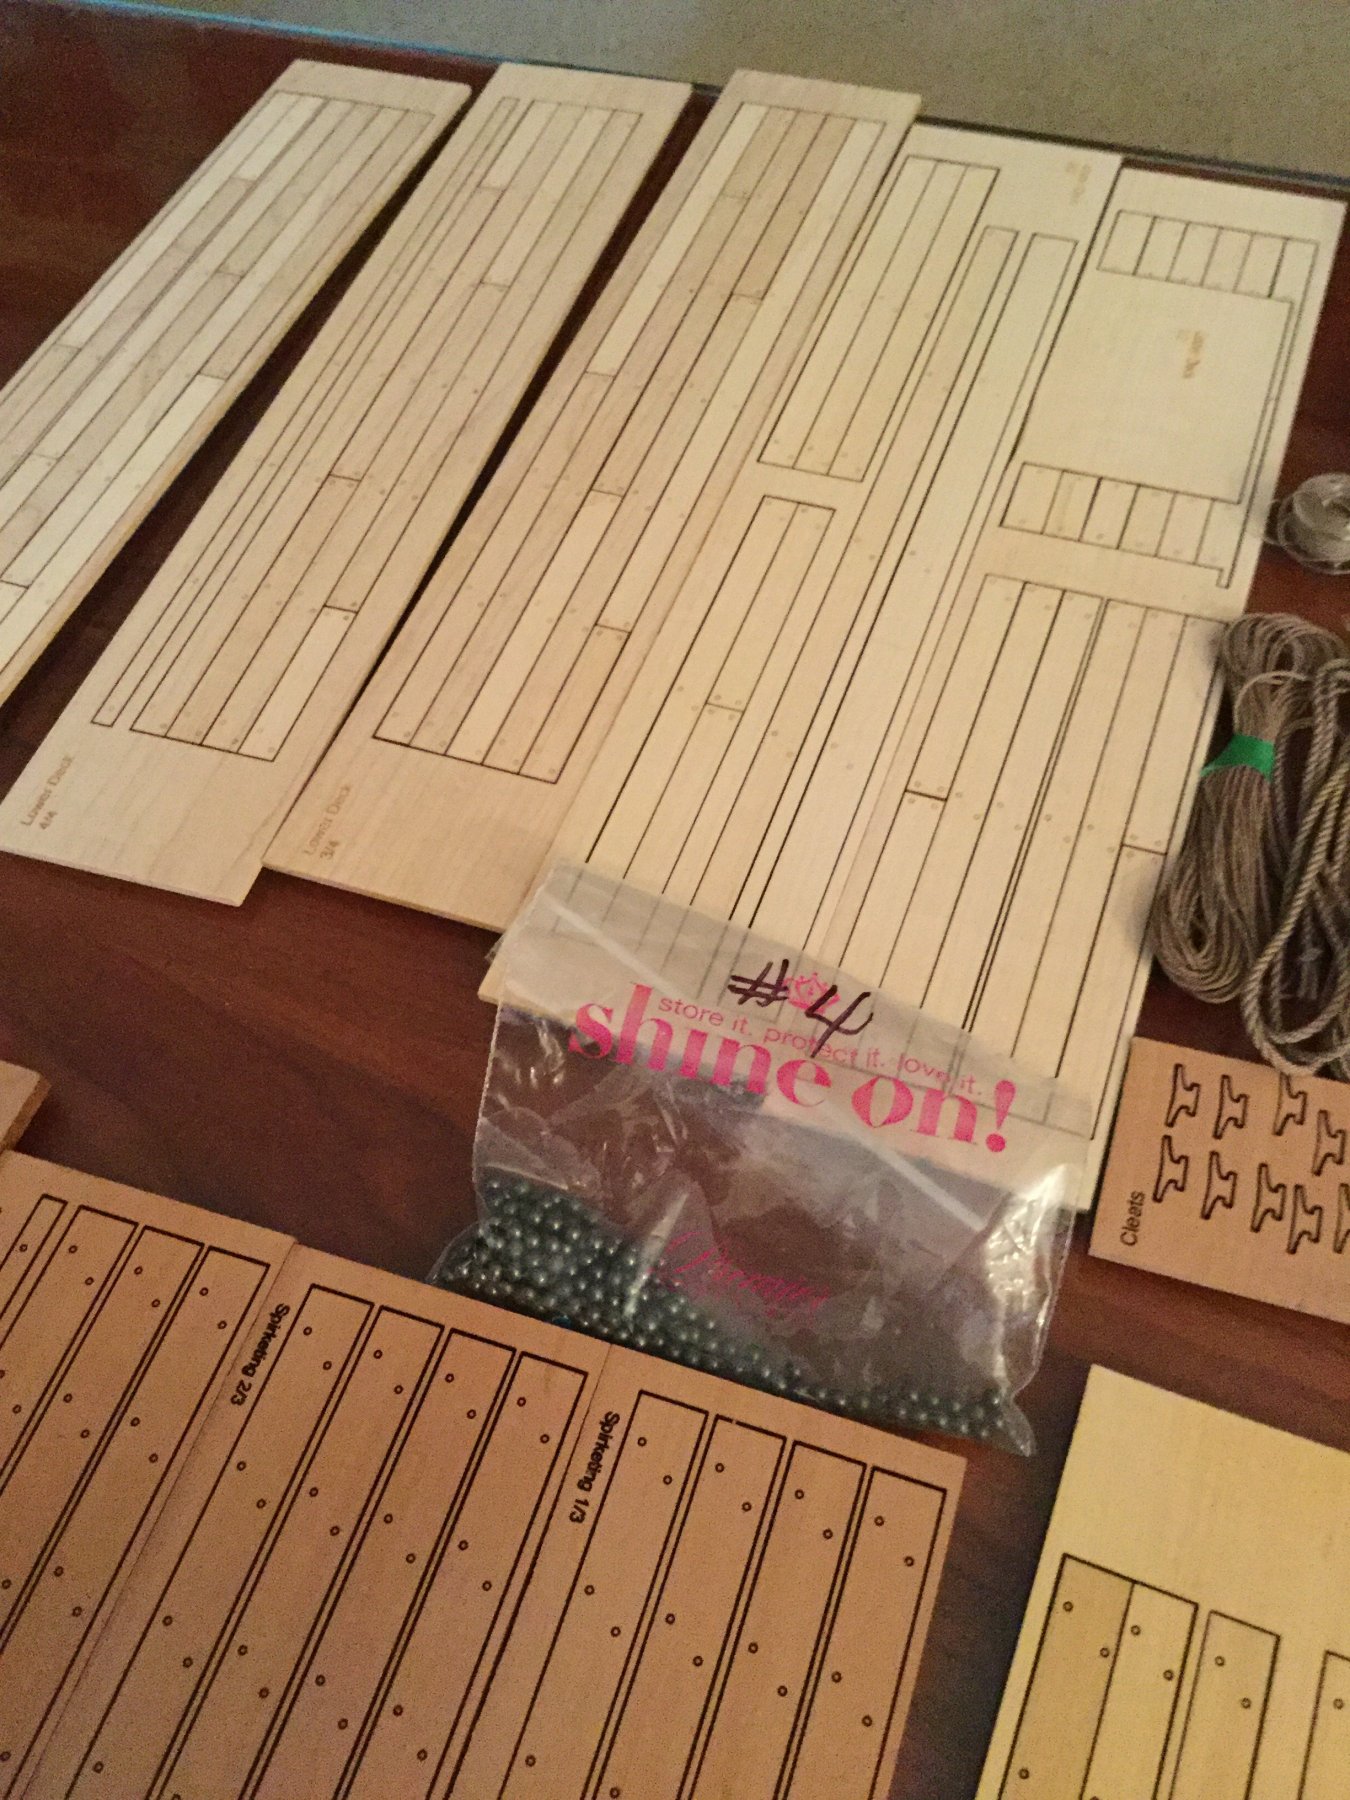
After a lot of prep work getting the plans into a form CNC and laser could utilize, a prototype was built of basswood and poplar. The point here wasn't to have a perfect model, but rather to proof the plans and our dimensions and make sure the pieces all fit! We will obviously clean up the laser char on the finished models. The hull frames were CNC cut from 3/4" stock. The treenails are surface etched, but deep enough to allow finish sanding and still be visible. We plan to leave the laser char in between planks to simulate tar.

-
-
This will be my build log for a 17th century Royal Navy Battle Station. The station is loosely modeled after a 4th rate ship of the line, HMS Mordaunt, launched in 1681. It is based on the excellent plans drawn by Jeff Staudt, and the model kit itself is one of three produced in collaboration with two modeling friends.
I'll be adding background information and details on research and development of the kits is as the build proceeds. Here is a reprint of the message I posted when I received my kit:
On 6/27/2018 at 11:01 AM, DocBlake said:17th Century Naval Battle Station
Several months ago a couple of my modeling cyber friends and I decided to do a joint venture project. One of us owns a CNC router and laser cutter, so we started to look for a project that was interesting, but doable for guys like us with no experience. After some searching and discussion, we settled on Jeff Staudt's 17th Century Battle station as our subject. Jeff's plans are freely available for scratch building, so we decided to go ahead. We are NOT going into the model kit business! This is for our enjoyment only! Here's a link to Jeff's plans:
http://www.modelshipbuilder.com/e107_images/custom/Battle Station Practicum - 1-32 Practicum.pdf
This project takes a bit of a different approach and uses some techniques not generally seen in the hobby. We plan to build not just 1 but 3 examples of a 17th century battle station based upon Jeff Staudt's plans. The models will be in 1:32 scale and exhibit the following features:
- Use of both CNC and laser for the fabrication of parts. In some cases parts may be fabricated using a combination of both tools.
- Over 200 parts - all architecturally dimensioned for perfect fit including the planking. Very little manual cutting, sanding, or shaping.
- Experimental laser etched details to include properly scaled treenails and the use of laser char to simulate plank caulking.
- Paint-with-wood. Entire model built from various custom milled hardwoods. No paint or stains will be used.
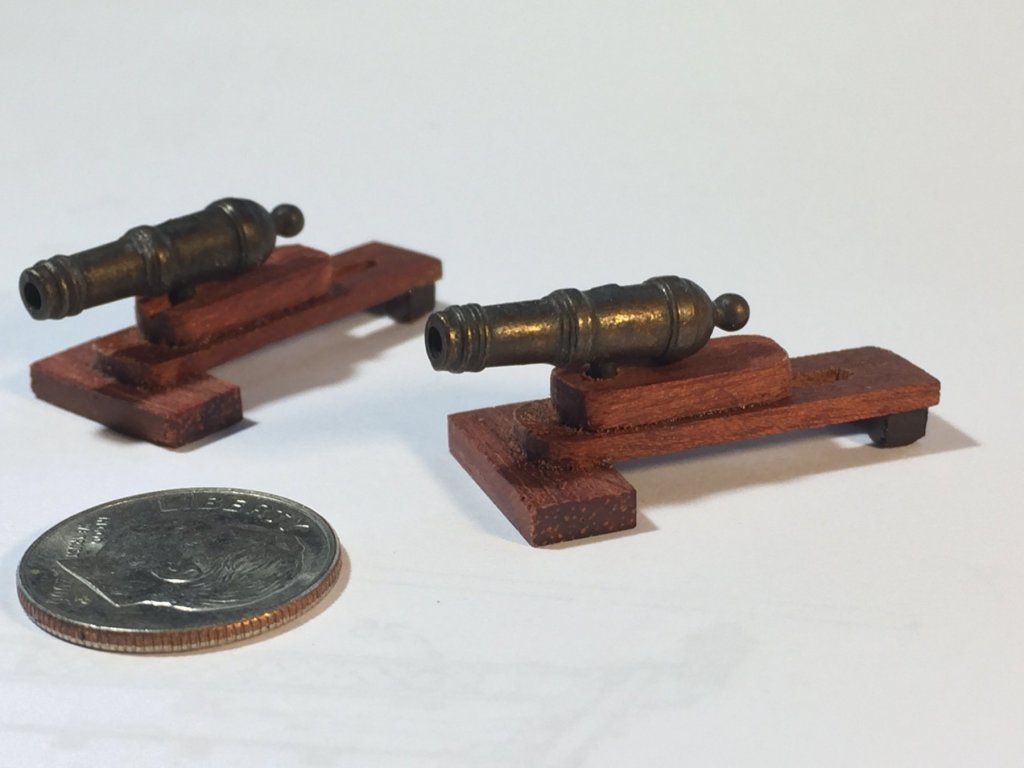
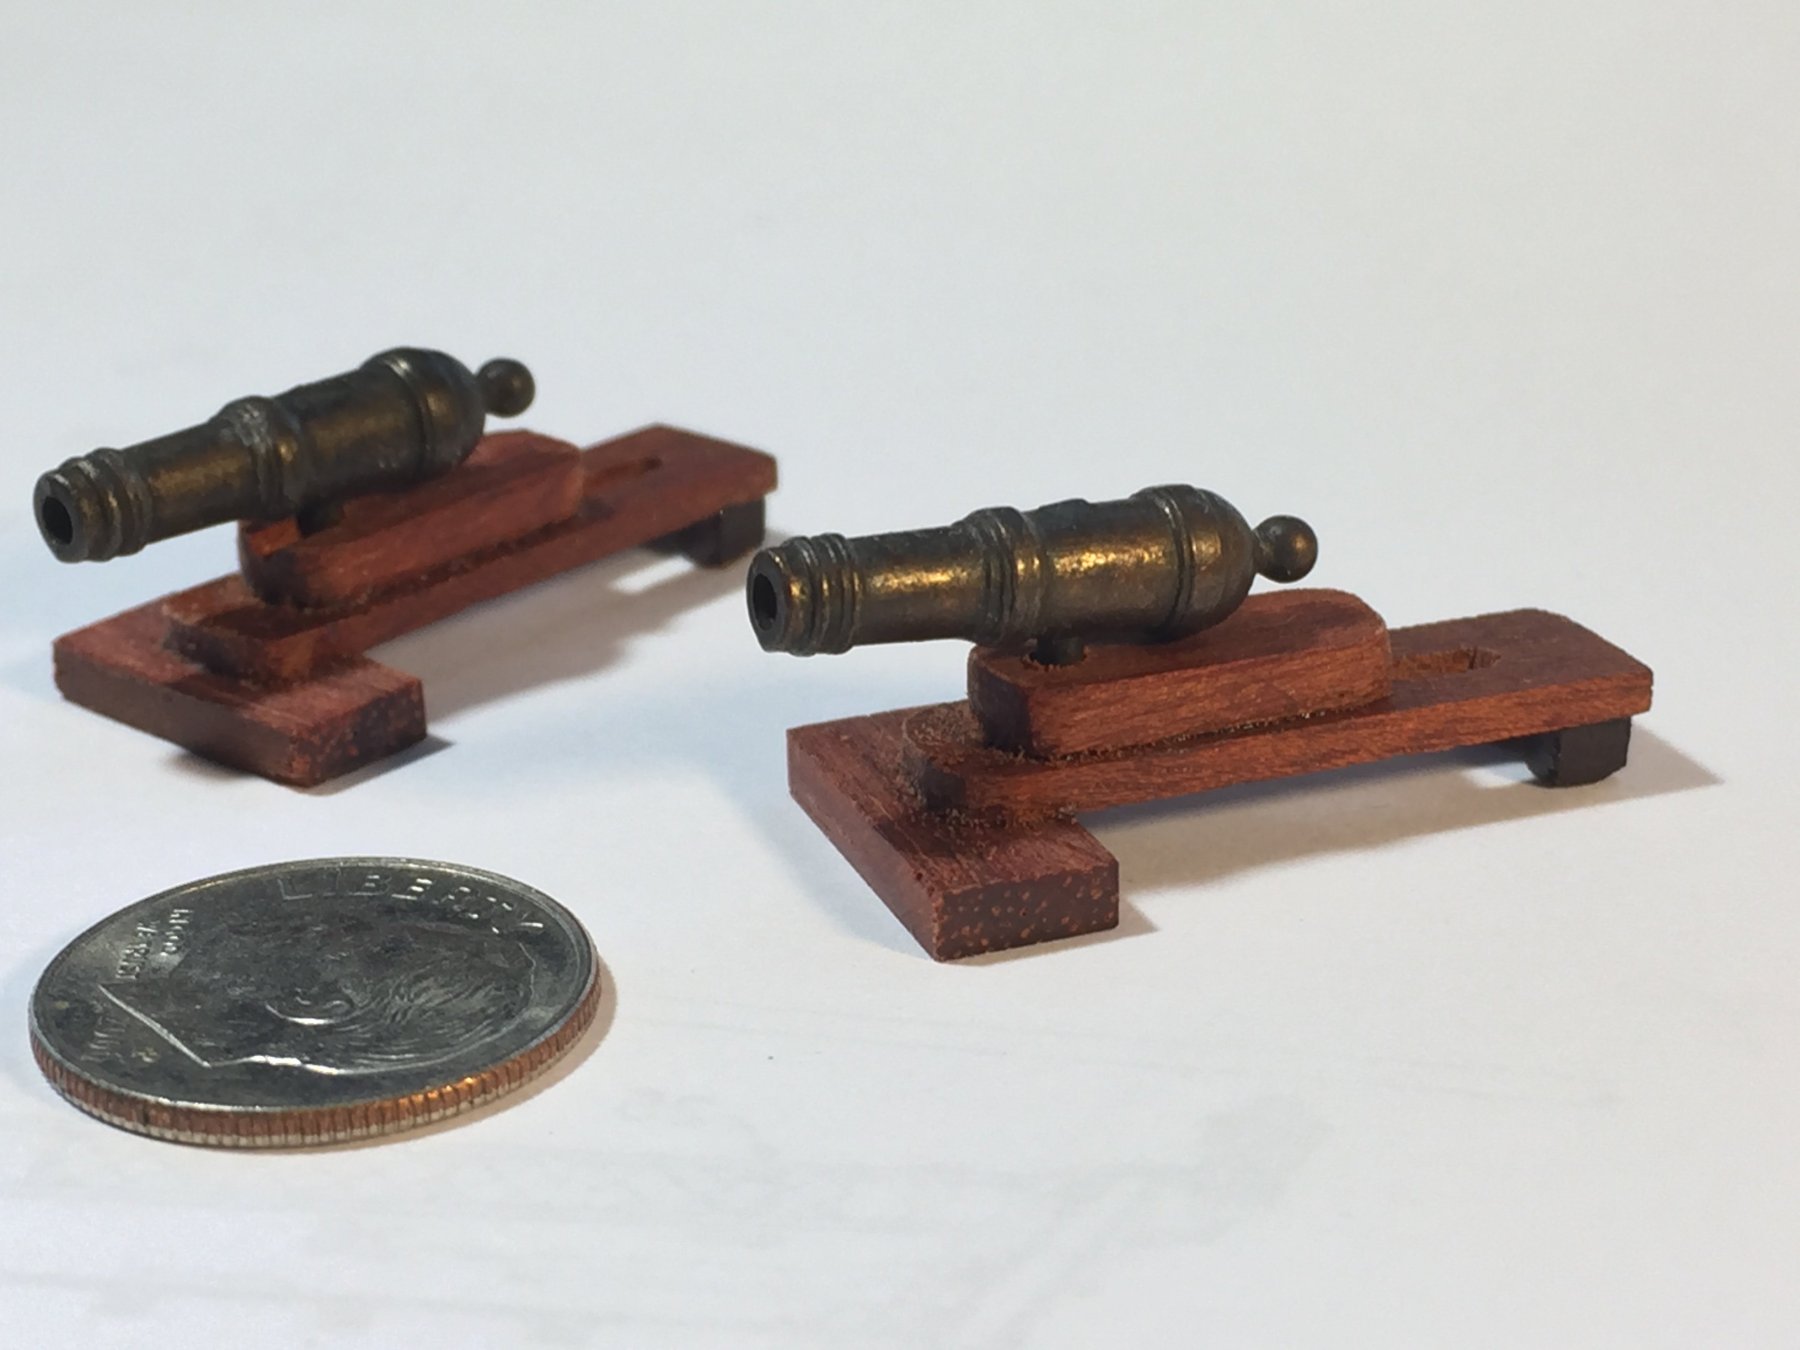
- Hand turned brass cannon and custom fabricated metal work.
- The use of Google Sheets for real-time collaboration of technical details such as part numbers, dimensions, machine specs, etc.
- Much more ...
Prior to starting to produce the kits, we did a bunch of work up-front to include:
- Imported all of Jeff's drawings into CAD software, cleaned them up, made corrections where needed
- Rendered each of the parts for either CNC cutting or laser cutting... or in some cases both
- Test cut prototypes of all 200 parts in poplar and basswood
- Assembled the prototype taking extensive notes and making updates to the design where needed
- Created a spreadsheet of all 200 parts to enable selection of hardwood types, machine method, and grouping
- Selected, sourced and milled the various hardwoods necessary for 3 separate models.
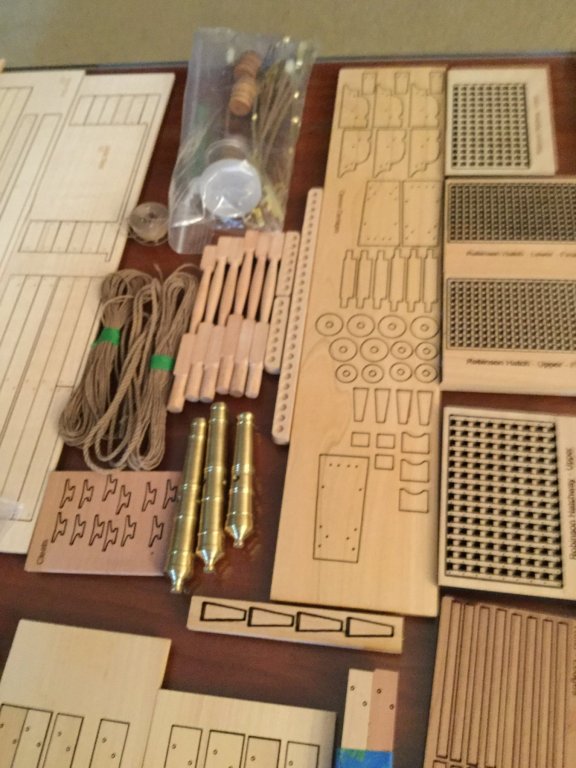
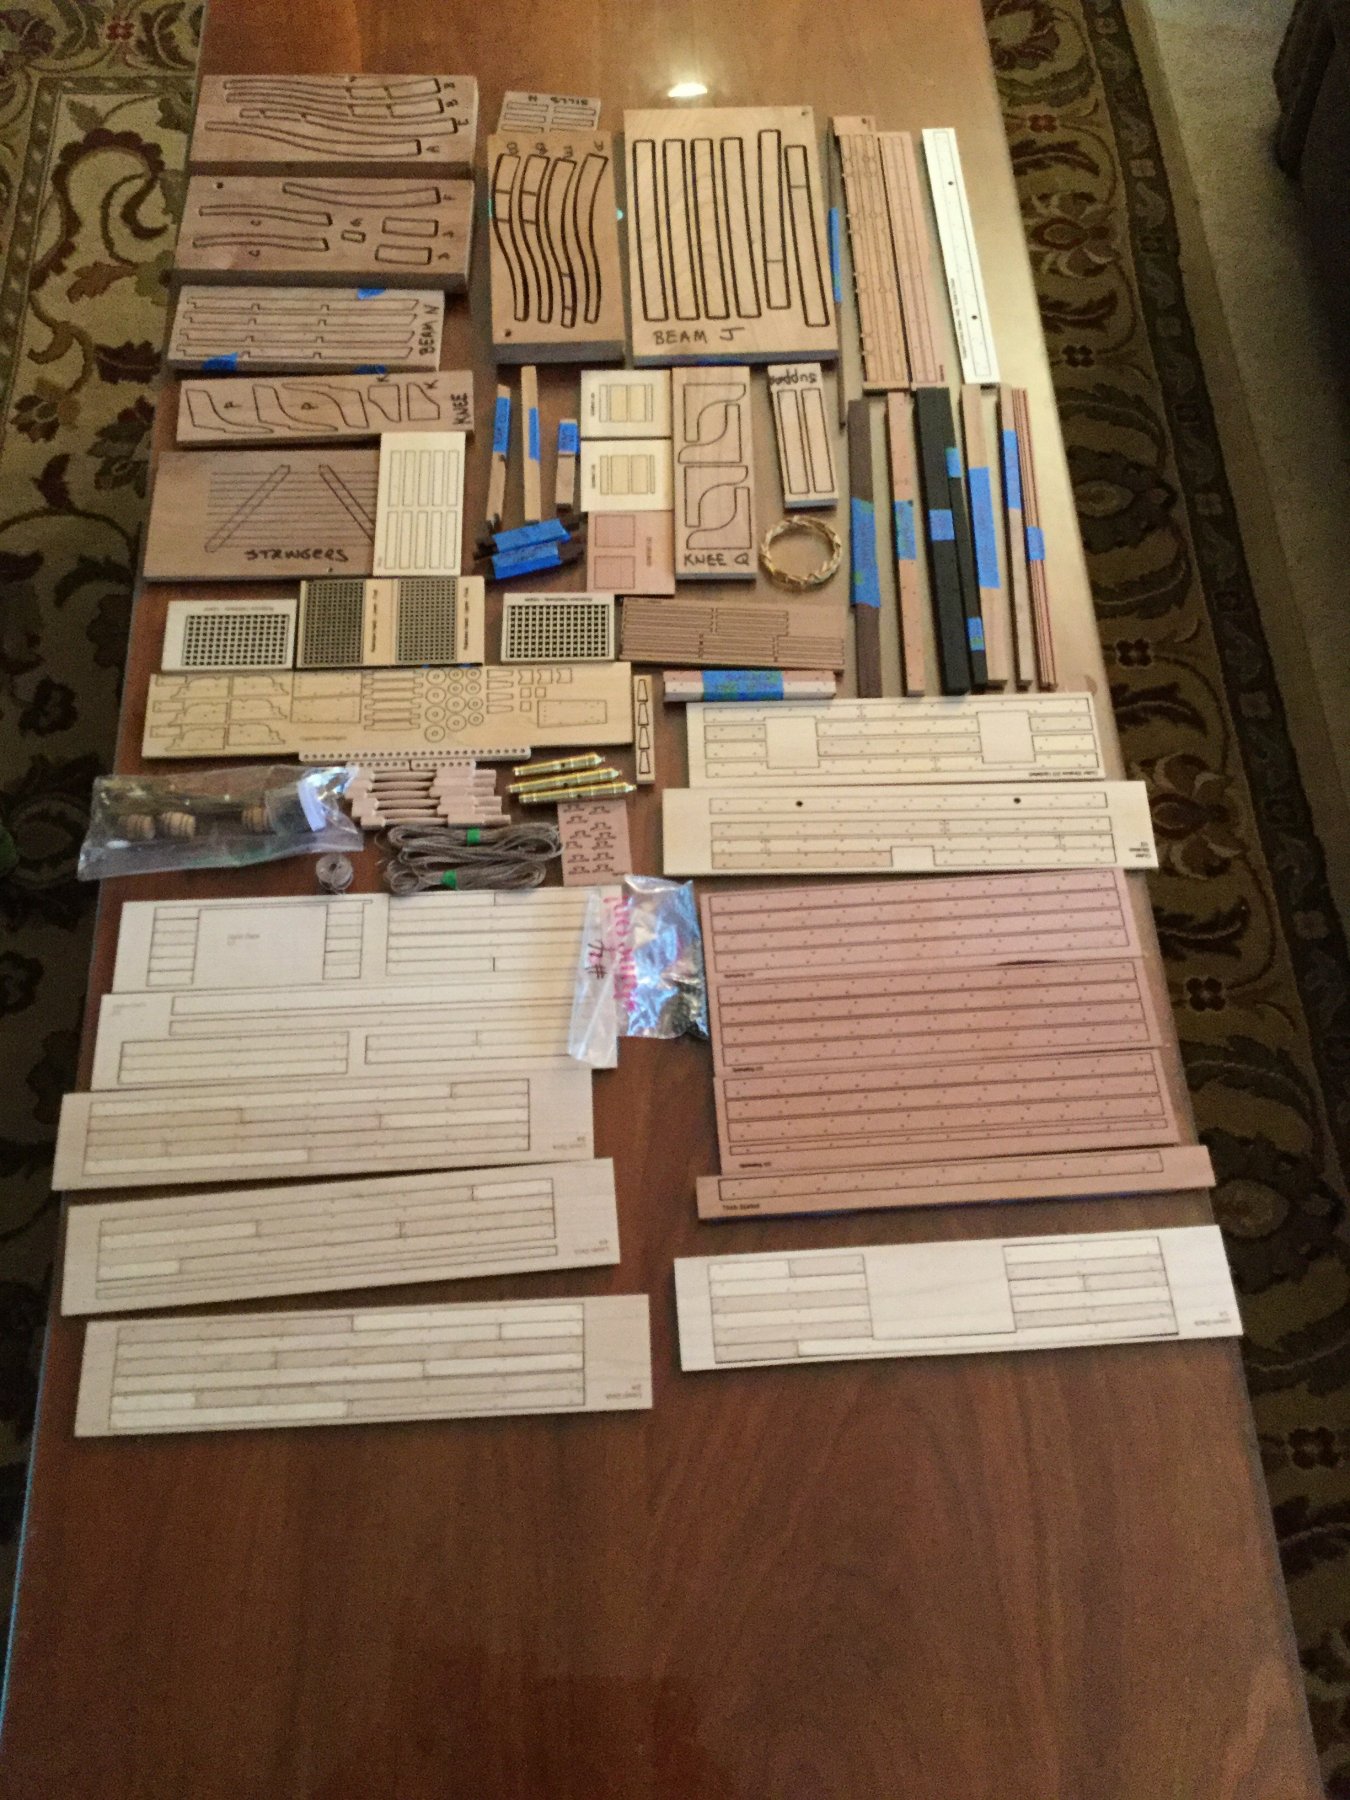
I'm pleased to report that I received my version of the kit today! It weighs nearly 6 pounds and includes various hardwoods, including cherry, hard maple, swiss pear, boxwood holly and ebony. There are hand-turned brass cannons and custom fabricated metal parts. Although similar, the three kits do have several options to differentiate a builder's model from the others if he chooses. There is even a CNC produced 3D carved gun port wreath of osage orange!We're excited to share the build experience with you. Our logs will outline our building process, and also some background information and photos that help explain how we got here. Enjoy!Note: Although this Battle Station was designed to represent no particular vessel, it's layout is very similar to the HMS Mordaunt, a 4th rate British Ship of the line of 46 guns, launched in 1681. We choose to name her Mordaunt, with a little artistic license!Time to start the build!


-
-
-
-
-
-
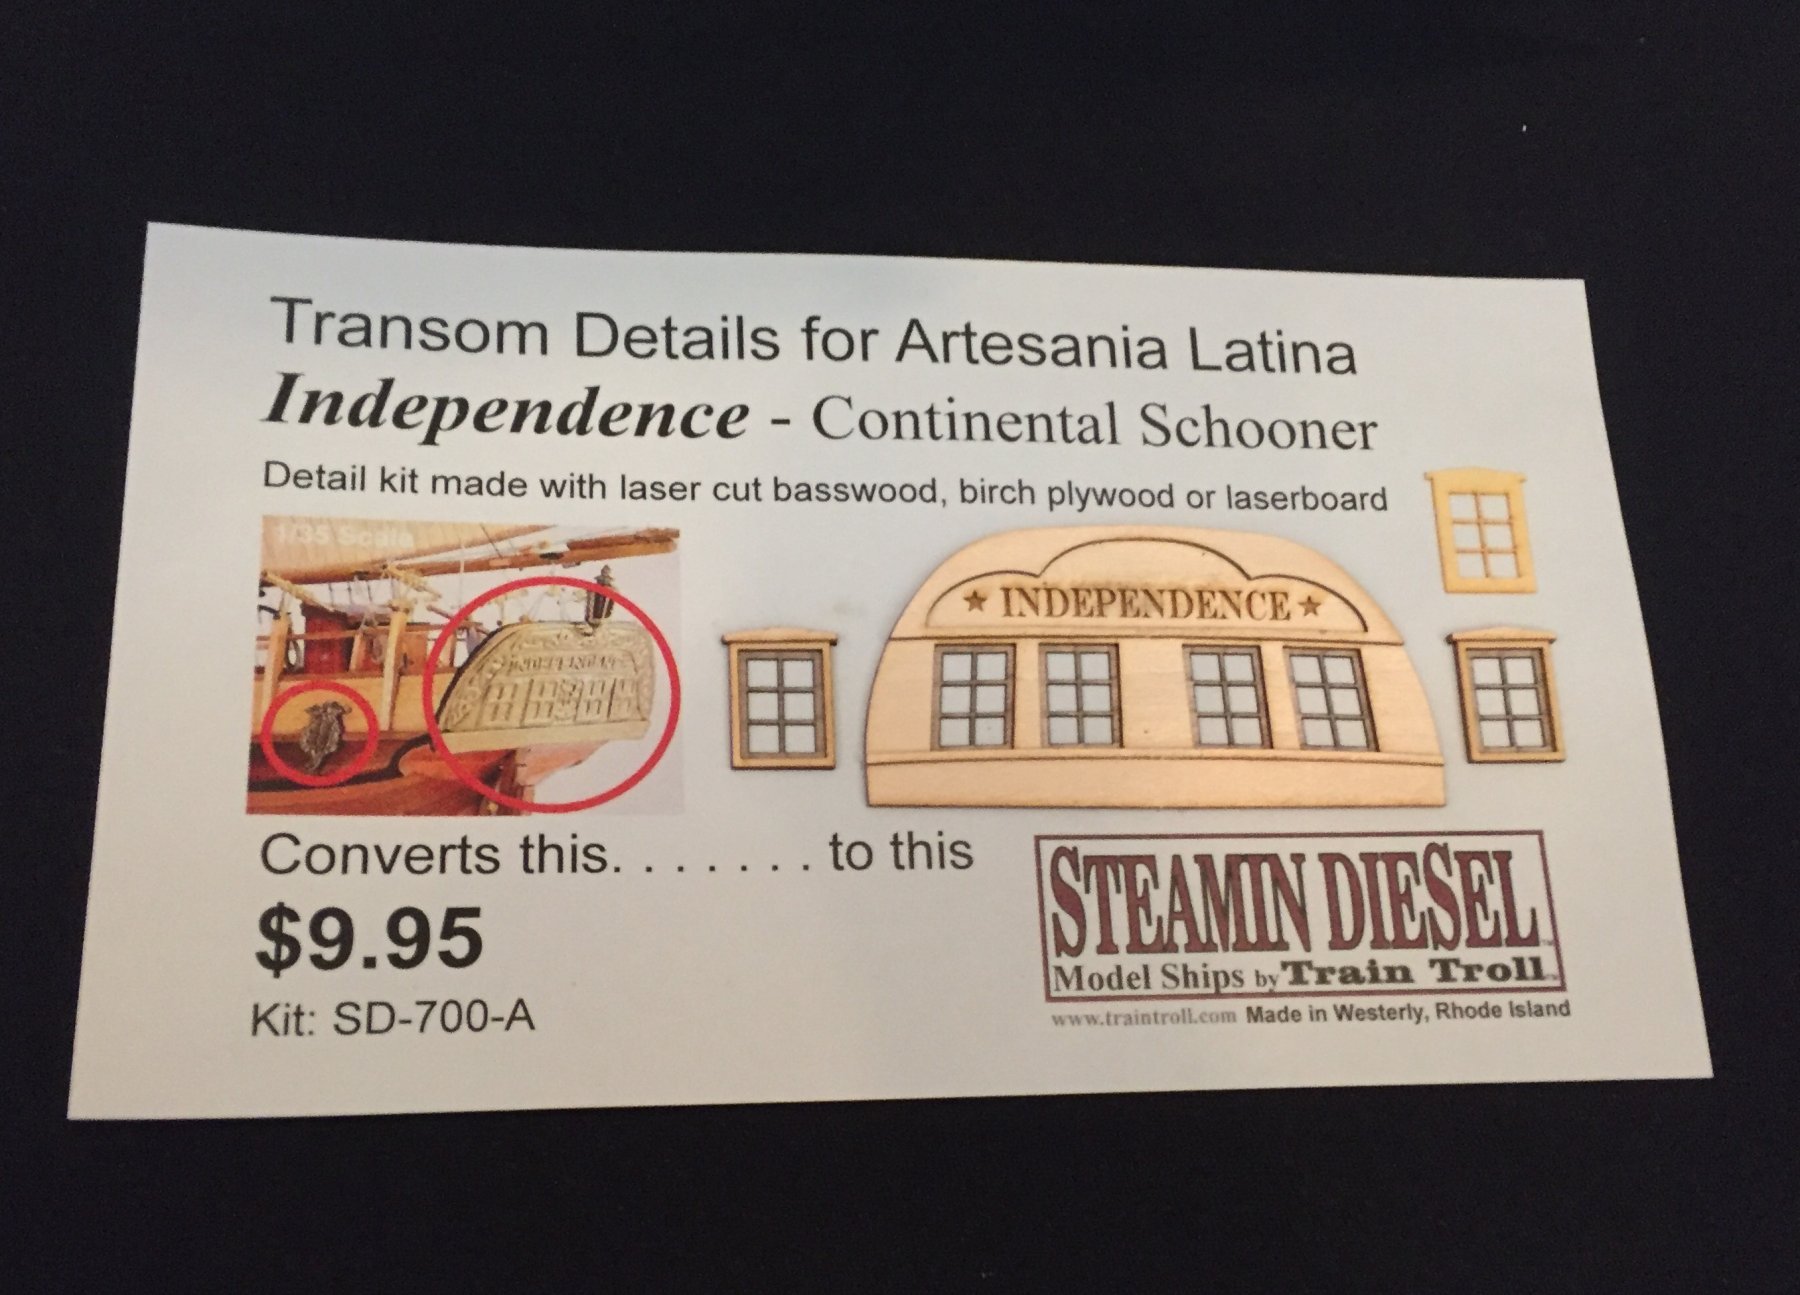
Ken and Lou: Another option for the transom:
An aftermarket fix for the horrible stamped metal transom and quarter badges that come with the kit! I spend a fair amount of time rebuilding these areas, and while I'm happy with the results, this would have made the job far easier. Only $10.00!
The transom piece is reversible so you don't have to use the name "Independence". Available at http://traintroll.com./
Quarter badge windows included!
Well worth it if you plan to build this model!
- mtaylor, Captain Poison and OrLiN
-
3
-
-
-
The planking is looking good Lou. The only way to do it is just do it! The first planking will teach you a lot about how the screwy hull shape wants to take the second planking!
-
-
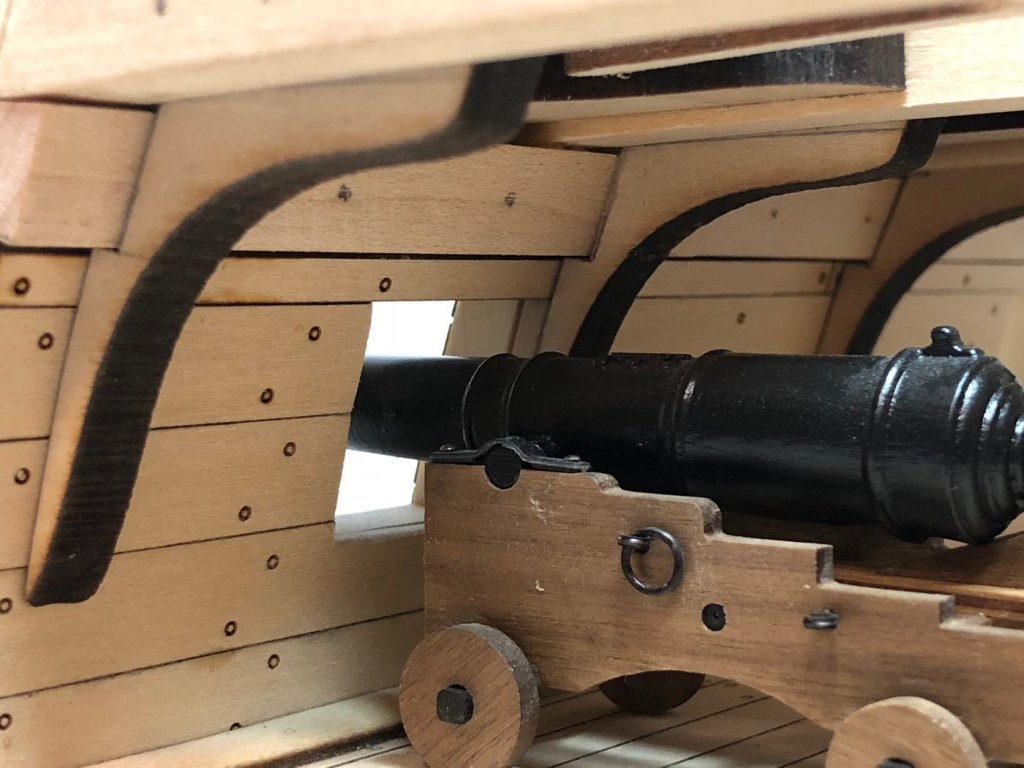
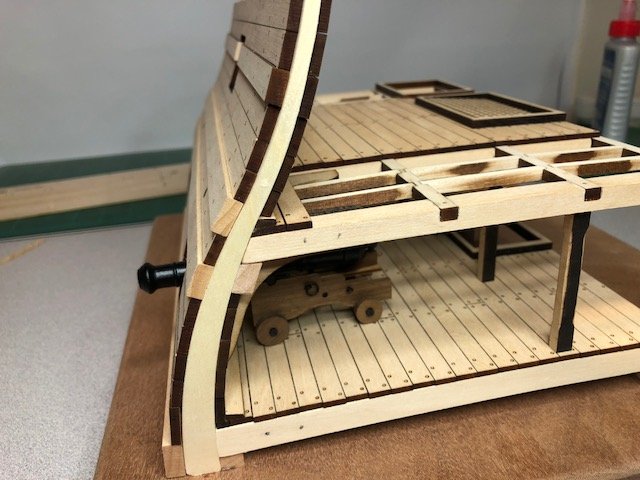
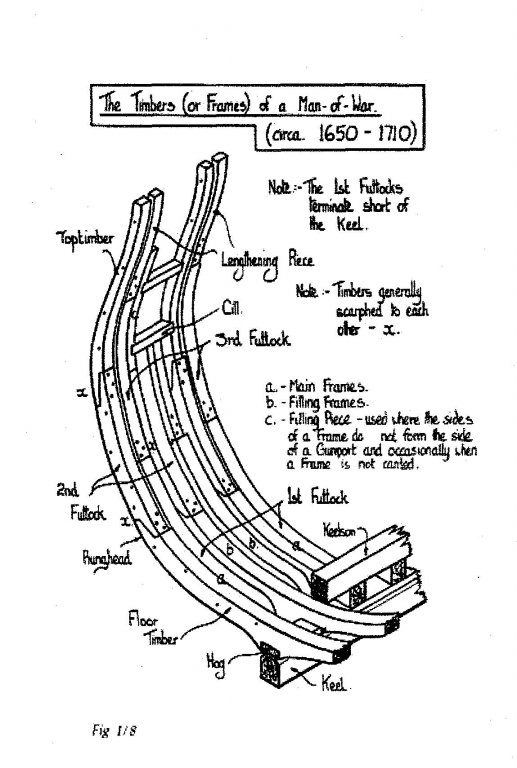
In looking through my copy of Goodwin's book "The Construction and Fitting of the English Man of War ,1650-1850" , I found that late 17th century British ships had a scarf in the framing at the weather deck level and bolts holding the futtocks together. I plan to replicate that for a build I'm starting. My question is how big would the bolt head have been? Goodwin doesn't say, and I couldn't find an answer in Steel's book either. The image is from Goodwin's book.
-
-
-
-
-
The carronades for the upper deck are cast metal, and are the same design as currently in use on the real ship. These were introduced during the 1927 refit of the Constitution and are not original to the ship. I opted to rebuild them in the style used for the British 36 pound carronade dubbed "the Smasher". I plan a minimalist approach (no rigging or fittings) because of the small scale. The wood is better than cast metal, anyway. I also completed the woldings on the stub mast.
-
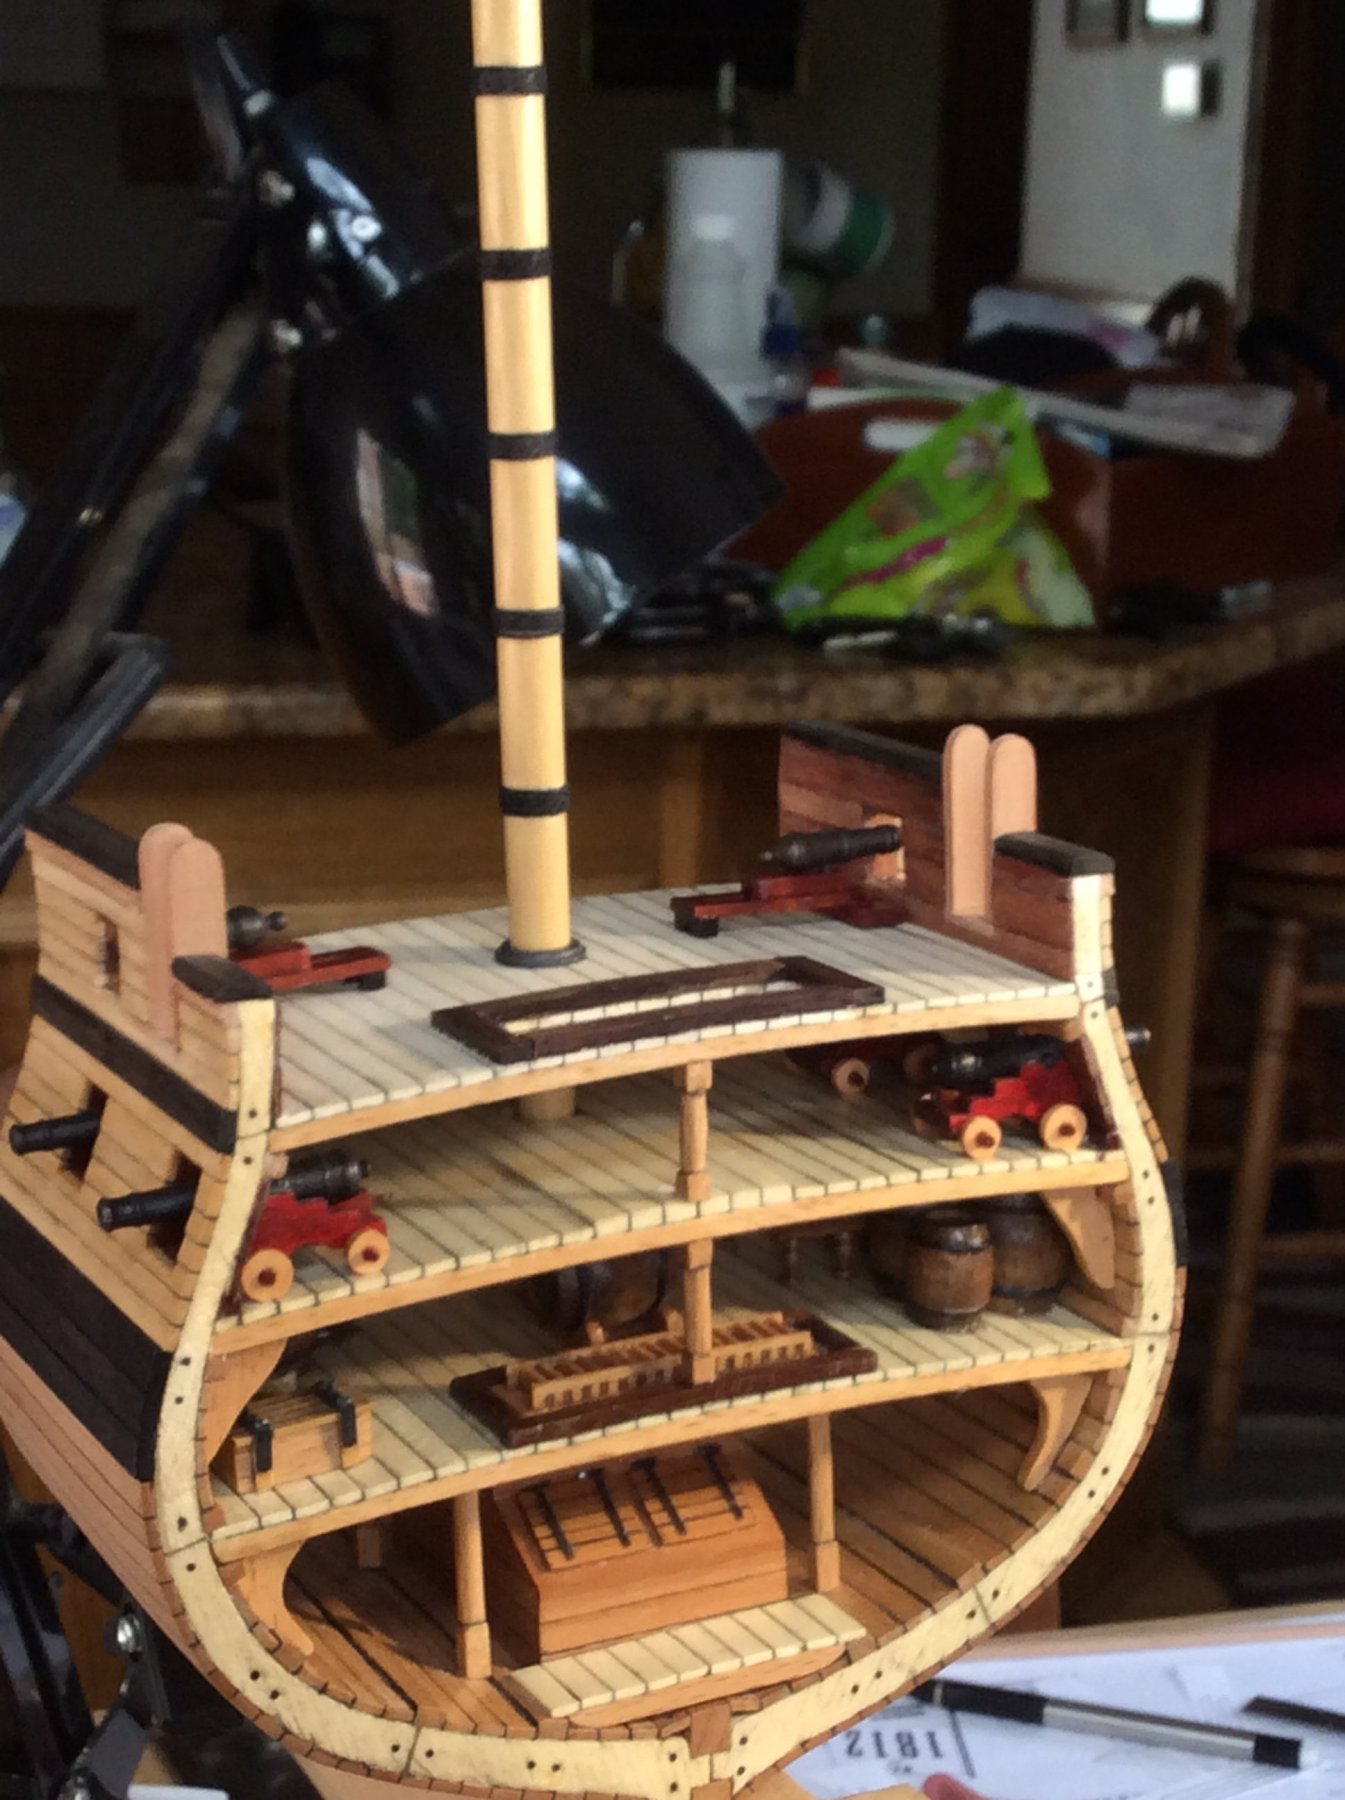
A great project would be a stern section including a great cabin, magazine, light room and filling room in a larger scale, say 1:32
- dvm27, MEDDO, thibaultron and 7 others
-
10
-
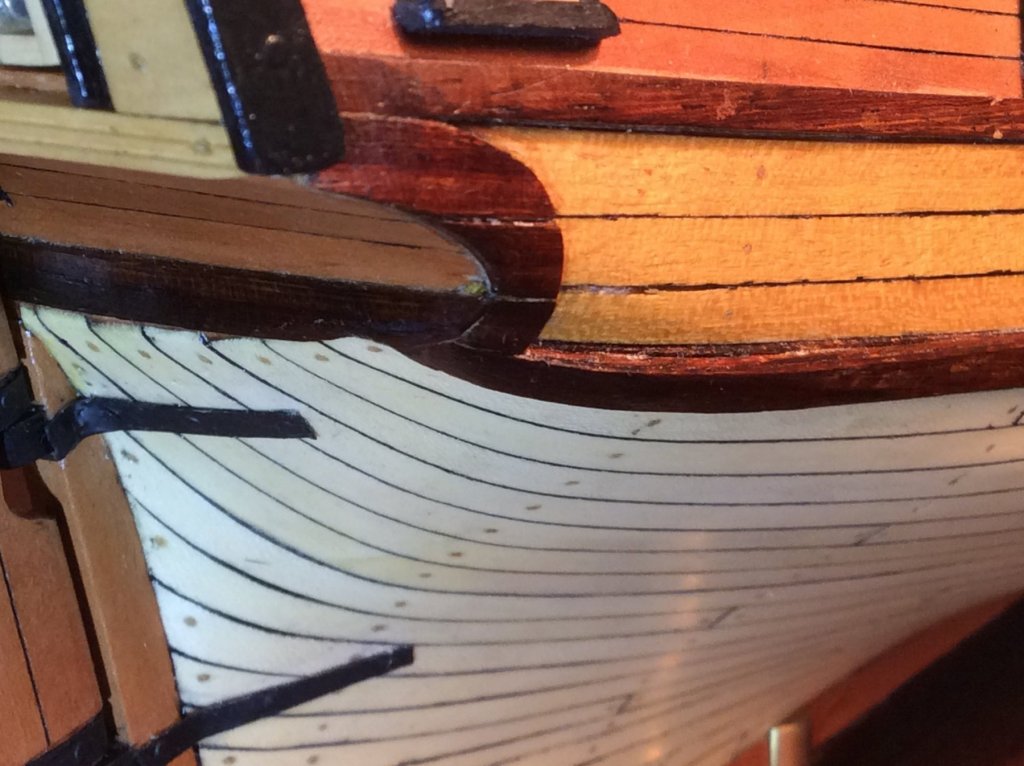
Thanks, Ken! The fashion pieces caused a lot of heartburn! They form a compound angle so carving them from a single piece of wood would be difficult. Sculpey wouldn't look right, so here's what I did. I installed the taffrail and simply made the fashion piece in 3 pieces, each one onforming to one of the planks between the wales and running back to the taffrail and the counter. Turned out OK. Here's a photo and I link to how I did the windows.
-
-
-
-
Great job David! The little boat turned out nicely.


17th Century Battle Station from HMS Mordaunt by DocBlake - FINISHED - 1:32
in - Build logs for subjects built 1501 - 1750
Posted
I finished up the build board. I had some beautiful curly bird'seye maple so I cut off a piece and framed it with some rounded over 1/2" X 1/2" east Indian rosewood. It turned out pretty nice!