
MORE HANDBOOKS ARE ON THEIR WAY! We will let you know when they get here.
×

Gregory
-
Posts
3,108 -
Joined
-
Last visited
Content Type
Profiles
Forums
Gallery
Events
Everything posted by Gregory
-
 Did the article have the capstan information?
 -
Byrnes Table Saw making a 1mm by 1mm strip
Gregory replied to CharlieZardoz's topic in Modeling tools and Workshop Equipment
Has anyone mentioned blade height? I wouldn't have the blade height much higher than the final thickness, and also at low RPM.. -
If you decide to glue them, just some white glue in the hole should keep them in place, but allow for easy removal if you need to later.. Meanwhile your cutter is really looking great!
- 436 replies
-
- 2
-

-
- vanguard models
- alert
- (and 1 more)
-
Just found this in another discussion:
-
What sources could we check in this regard?
-
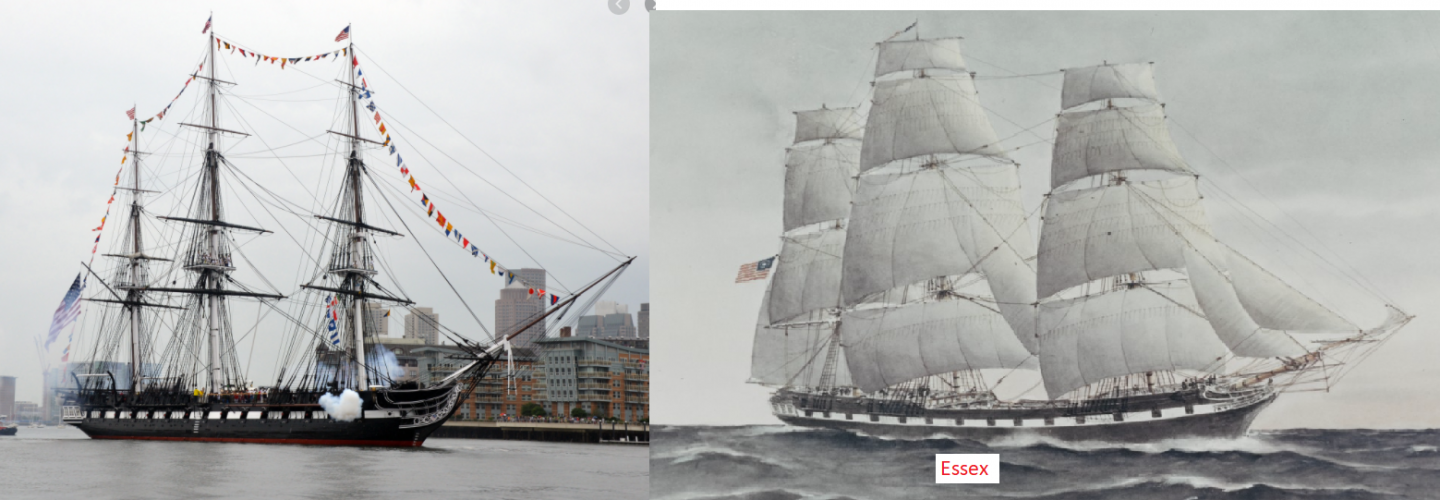
Someone mentioned AOTS, which is 32-Gun Frigate Essex (Anatomy of the Ship, which would be the best source, depending on your budget. Not cheap, but Googling shows copies for less than $50.. While there are those who would argue the details, the general arrangement of the Constitution might be an option. There are lots of resources for Constitution rigging plans.
-
It may not always be the case, but I have never found CA to work well on, say, two varnished surfaces unless they were roughed up. I have had success with laser char as long as the loose stuff was removed.
-
CA needs porous material to work well. If the char is preventing penetration of the grain, it might be a problem.
-
Have you checked out the pricing at Cornwall Model Boats ? Even after shipping costs, the price can be very competitive..
-
I've been told the flat coils might have been used for inspection, but not on a working ship. I have never seen a contemporary model or illustration with the coils. Here is what you see on brig Niagra Another method is called frapping, as seen here on Victory. I think the coils are a modeling convention from who knows where. In the end, it is how you choose to present your work.
-
I was just putting that out as an example of what it cost to ship USPS. Did you see the part about: But thanks anyway, for your help...
-
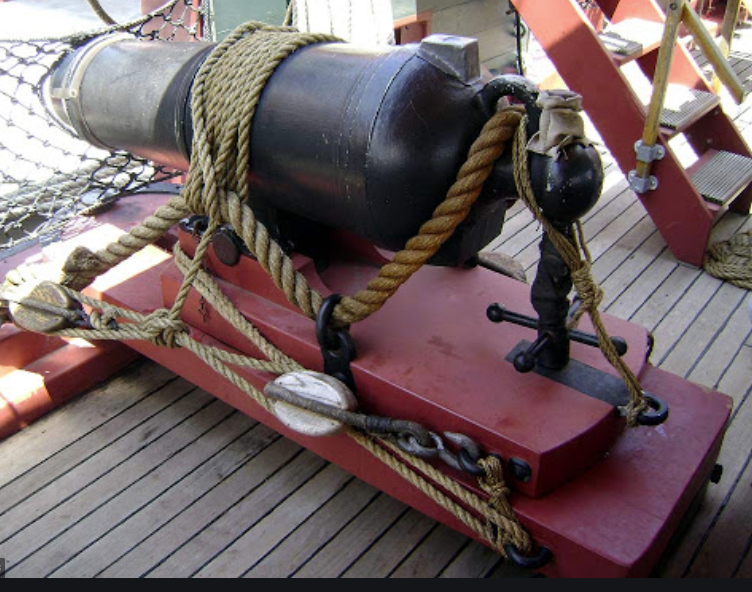
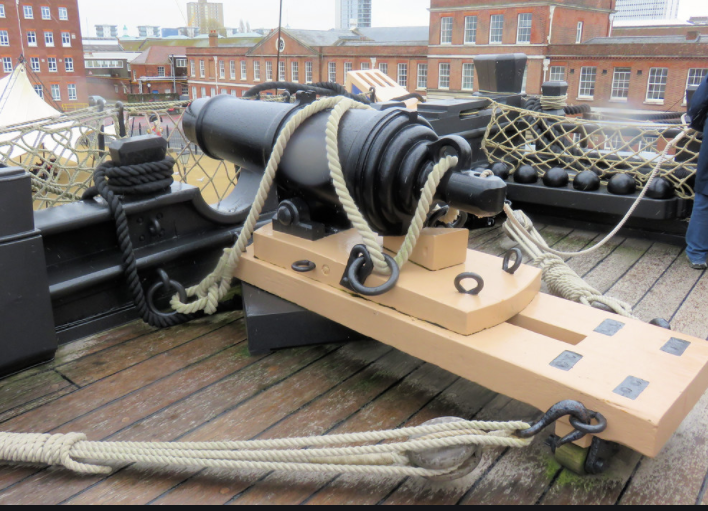
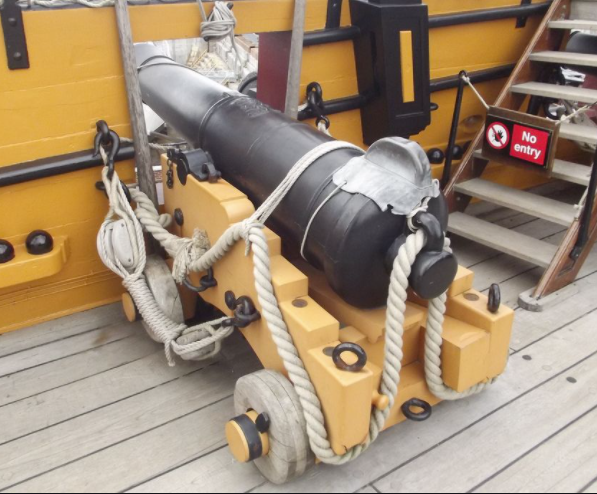
I think that ringbolt may be for when the gun is mounted on a rolling carriage. These carriages only swing from side to side, and are moved and secured by the tackles that are shown.
-
Have you considered US postal service. I have shipped large packages with them Often. ModelExpo uses USPS and Chuck at Syren does also.. While your actual numbers may be different, I calculated a 30x8x4 inch package at 5 pounds from VA to CA would cost $26.70. 2-day Priority.. Postage calculator.
-
Which ringbolts are you referring to? The carronade carriages are fixed on pivot points and do not move backward from the bulwarks.
-
Can someone have pity on a landlubber and tell me what the " hair bracket " is? You can imagine what Google came up with.
- 1,784 replies
-
- 2
-

-
- winchelsea
- Syren Ship Model Company
- (and 1 more)
-
I apologize if I'm being too much trouble, but I'm thinking of the end like this: Once I see the end of the box, i can tell you what I have in mind.. Thanks
-
Thanks!
-
Do you have a picture of the box ends? I want to verify something from my youth?
-
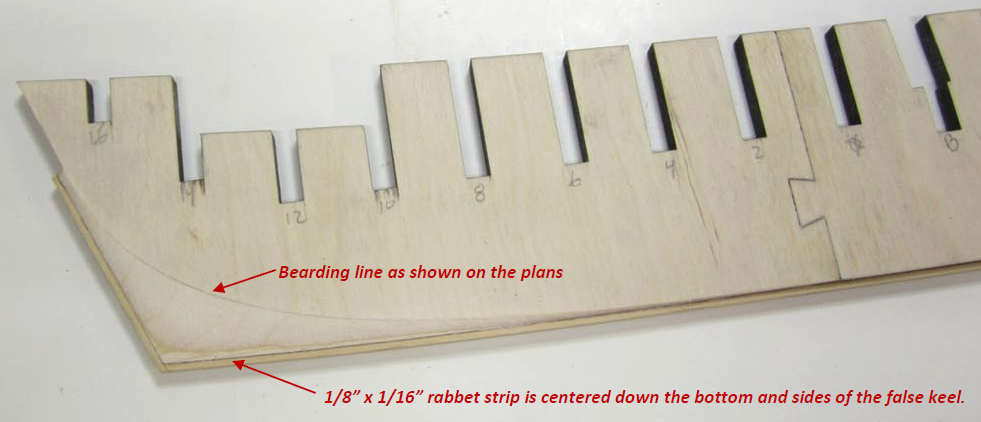
There is also the option when building a POB kit, of using an offset strip a'la Chuck, down the center of the backbone .. Image from Chuck's Cheerful instructions. Notice the groove created by the rabbet strip, that serves as the rabbet at the stem. Of course, kits that haven't provided separate parts for the stem, keel and sternpost, would not lend itself to this method.
-
This is far above anything available in a kit. Beautiful work.. I don't think it would be unreasonable to try to recover some of your development cost in your pricing structure before the cheap knock-offs show up. I know there is already a lot on your plate, but perhaps sometime in the future you could offer headrail upgrade kits for kits like Syren and Confederacy.
- 1,784 replies
-
- 1
-
-
- winchelsea
- Syren Ship Model Company
- (and 1 more)
-
Here is a basic drawing from some of the ModelShipways kits. The idea, is that the final planking fits flush with the keel and stern post. So the depth depends on the thickness of your planking material and whether or not you will be doing single or double planking.. For instance, if the keel piece is 3/16 and your total planking material is 1/16, you would want the bearding line and rabbet to be recessed 1/16 on each side of the keel piece. Regardless of the thickness of the keel piece, the depth of the bearding line and rabbet needs to be the thickness of your planking. There is tapering to be done, but you have to refine that as you go along.
-
I helped out in a school cafeteria for a while. Even though we are talking about simple dishes that the staff had prepared hundreds, if not thousands of times, if a supervisor came through, and you did not have the recipe nearby, you would be severely reprimanded.
-
Reading them, is sometimes the only way to determine they are useless..😄
-
Topsail schooner sail plans and rigging
Gregory replied to Dr PR's topic in Masting, rigging and sails
Now, if you would kindly show all the lines and their belaying points...😁- 104 replies
-
- 6
-
-
-
- schooner rigging
- Topsail schooner
- (and 1 more)
-
I see you answered your question, but keep in mind, you can do as much or little as you see fit. While my decking would not survive a test of realistic accuracy, I got everything as close as I could within a mm or so, then used the waterway to fill any gap. P.S. Let me add one more thing. When I glued my off the deck planking onto the false deck, I used yellow glue. I had to take few minutes of smoothing and pressure with my fingers until the glue started setting up, which it did pretty fast - 5-10 minutes

