
HOLIDAY DONATION DRIVE - SUPPORT MSW - DO YOUR PART TO KEEP THIS GREAT FORUM GOING! (Only 36 donations so far out of 49,000 members - C'mon guys!)
×


AJohnson
-
Posts
2,028 -
Joined
-
Last visited
Content Type
Profiles
Forums
Gallery
Events
Everything posted by AJohnson
-
 Good to see you back in the shipyard Mike! 😁
 -
A great looking Eagle Dan! 👍
-
Well done Brian, a big thing ticked off! Looking good! 👍
-
Also this image here from the ground of the damage also shows the front two windows as "shiny" compared to the rest. Sgt. James Allen Ward, V.C. – new pictures of Wellington Mk.Ic L.7818 AA-R | 75(nz)squadron (wordpress.com) I won't put up the image as it has copyright. of 75(NZ) squadron.
-
Hi Andy, Glad to see there are more "Detail" mad folk out there! 😁 You are right about the windows they were factory fitted and later painted out or replaced with possibly solid panels; in later versions being omitted completely. I think the advantages of seeing out the windows was offset by how well they reflected searchlights / Moonlight! 😨 Regarding the particular "Wimpey" above, where Sgt. Ward went out along the wing to put the fire out, then if you look closely the two forward most window panels are still clear. It is hard to discern initially but if you look closely you can see the alloy geodesic structure through the window, and the surface of those two panels has a slight reflective sheen the ones to the rear don't. So you can have a bit of both if you want! These are opposite the Navigators and Wireless op stations, so they might still have been considered it useful for those two to have a view so they could see the engines/wings. The "painted" out ones look to me more like they have been replaced by a different material (thin panels (maybe ply?) as they don't follow the same profile as the front two. But at 1/72 scale I think painting out the clear parts will be fine! 👍 As you say it is really hard to pin an exact look to an individual air-frame unless there are stacks of photos in "walk around" fashion on a particular day.
-
Here's the interior of mine, basically Everything behind the cockpit bulkhead is not seen, especially if you do the version with the painted in windows. 🤦♂️ But you might be mad and like daft details like me! 😆
.jpg.1f75830fdd261801d919b95dc2892d02.jpg)
.jpg.83e0434d1c8d57924a955aa3976b89fe.jpg)
.jpg.95881d69ace2d28ad3ccc030087531c4.jpg)
- 174 replies
-
- 15
-

-

-
Hi Andy, I will be following along, I built this kit a couple of years ago. A fine model and no real issues with building it. My only comment is that there is loads of internal detail in the kit (basically all the stuff above the bomb bay floor) that is simply not seen when the fuselage is glued together. So depending on how much you like “hidden” details you can skip a lot of it. (Not sure but I think the instructions mention something to this effect, but can’t remember now.)
-
Another very neat sub assembly completed Graham. Having cleaned up a few Caldercraft anchor castings myself, I can see the effort you have put in! 👏
-
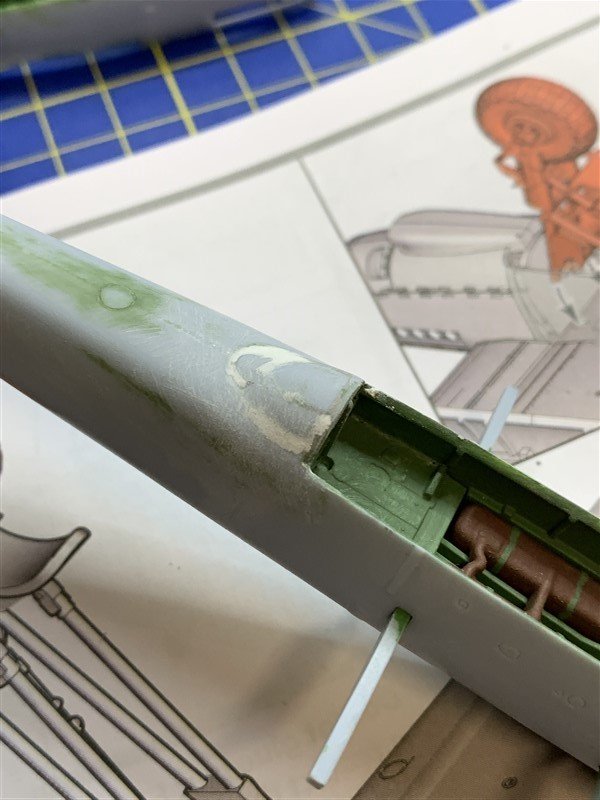
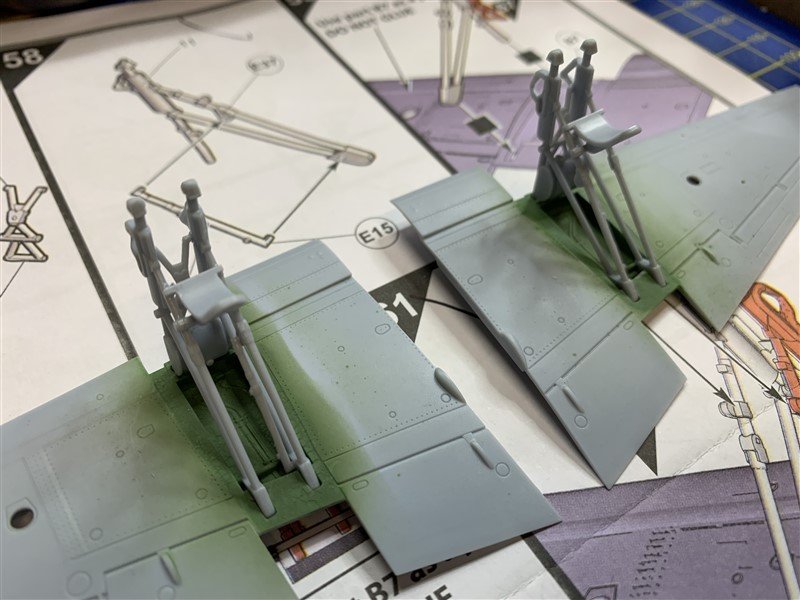
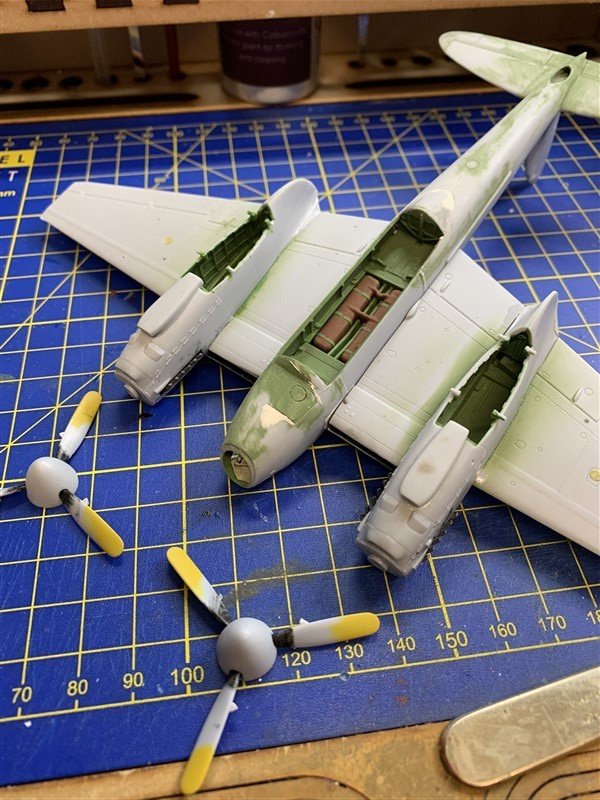
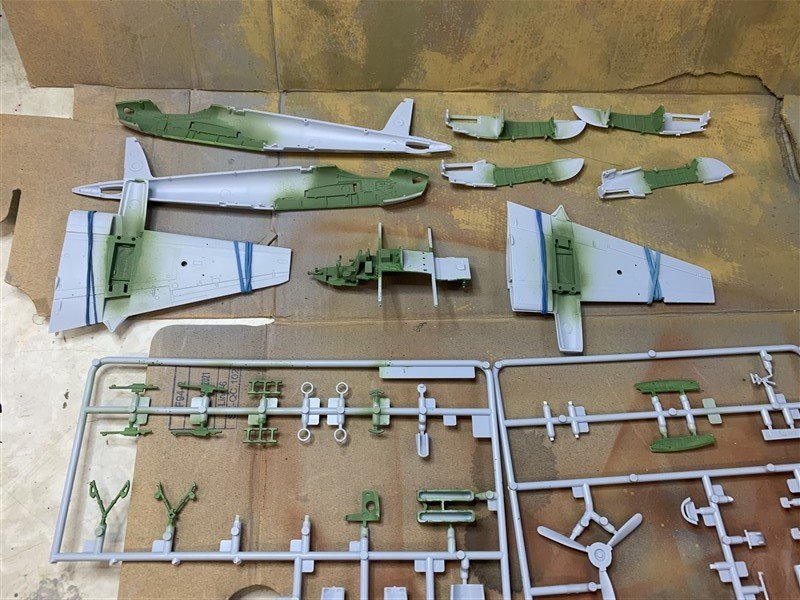
Only being able to have intermittent bashes at my Mossie, as the Admiral keeps coming up with end of Summer garden projects to get it ready for the autumn/winter! 🤨 The rear bomb bay fairing has been built up to rectify the TT.35 part included in the kit, still a bit to do before I'm done with that, but final sanding and filling will require an overall undercoat to assess the final bits and pieces that need attending to; such as around the crew hatch is one area I'm not happy with yet. The kit is definitely in its "Ugly Duckling" stage, with filler visible etc. The undercarriage was quite fiddly, plenty of little parts, but using the underwing sections as a jig, as per. the instructions it went smoothly. Engine nacelles completed and attached to the wings, no filler needed apart form a tiny run of plastic putty into the wing seems will be needed. Wings not attached yet, I will make sure I'm happy with the finish of those and the fuselage first, so the last bit of possible filling/sanding will be the wing roots. Thanks for looking in. 👋

- 50 replies
-
- 15
-
-
Hi Lyle, You are making great progress and your Bounty will soon come to life with the the mast and yards. Opinion on the ageing of sails, my only advice or caution is to do the minimum initially and temporarily mount the sails to see the overall effect before committing to too much “grubbiness”. Weathering of scale models is a fine balance and I have overdone it on many occasions 😏. Seeing the original vessel/aircraft or vehicle from the same distance to make it appear the size of your model will knock back details; including colours and shades/tones. Once you have finished your model you will be viewing it from a distance of some feet most of the time and the sails (if mounted) will be the first things your eyes will be drawn to. Hope you don’t mind me saying that, just my humble opinion and others may disagree, you are making a lovely model.
-
Hey Brian, nice catch! 🎣 The cannons are coming along fine, they are tedious to rig, I remember being relieved to finish the ones on my Bounty and I only had four! 🤣
-
Nice details added for the tops and the iron bands and reinforcement details for the lower yards, really lifted the level and looks. 👏
- 310 replies
-
- 2
-
-
- Diana
- Caldercraft
- (and 1 more)
-
Hi, Sorry, I've been trawling my followed threads and missed some pages back in my feed including this log. Did you take the plunge and strip back your planking? Hope you still plugging away at the old Greyhound. It's okay to take months if not years breaks in builds - if your hearts not in it, then that is a sign to do something else until it is. 😉
-
Nice to see another take on “Endeavour”. I have the Caldercraft one awaiting its turn and each time a see a build log I get a guilty pang! Really good planking! 👍
-
How about a half built dusty CC one! 🤣 sorry…..
- 1 reply
-
- 3
-

-
-
Welcome to MSW Gill
-
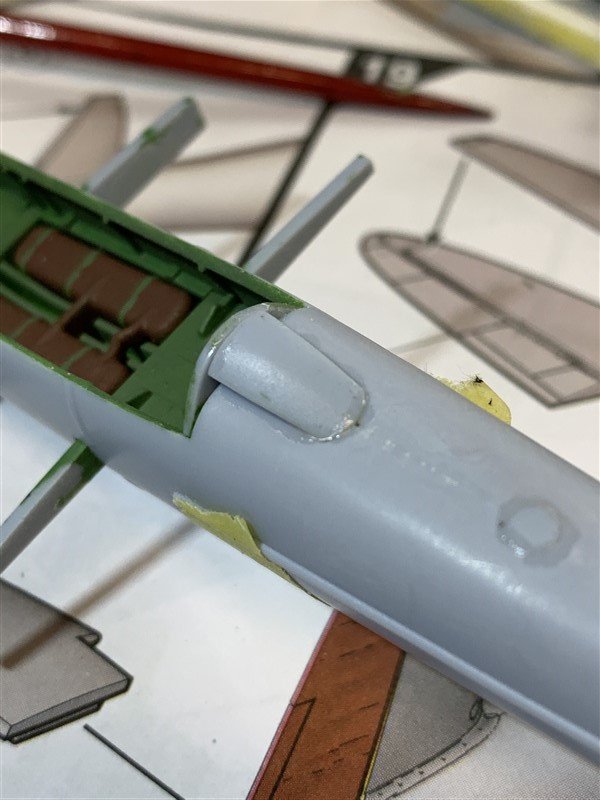
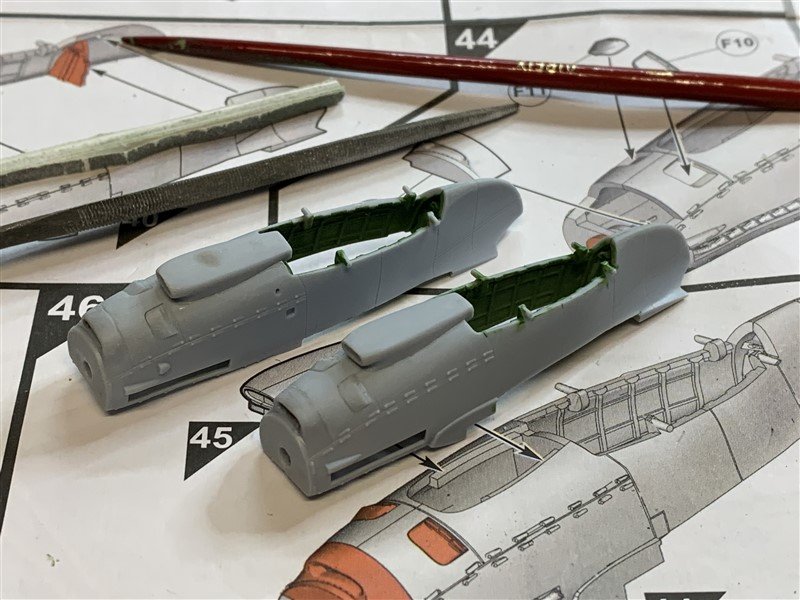
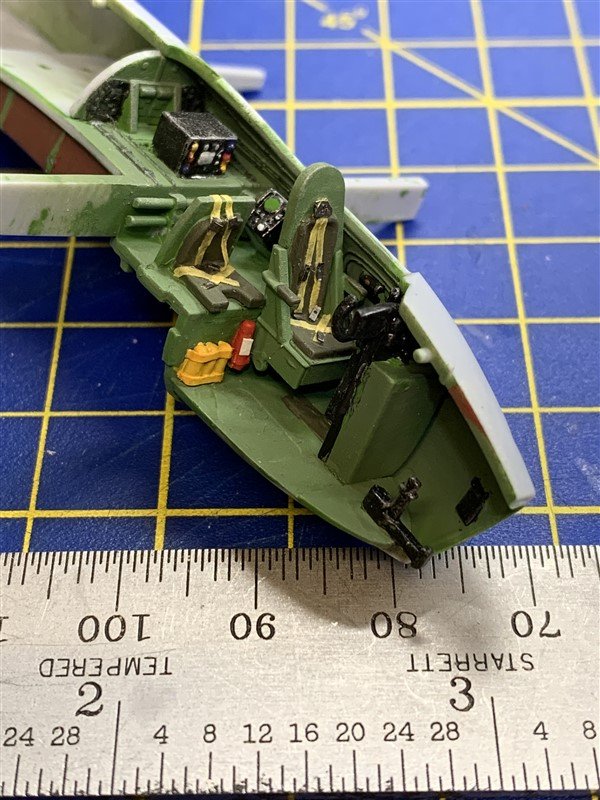
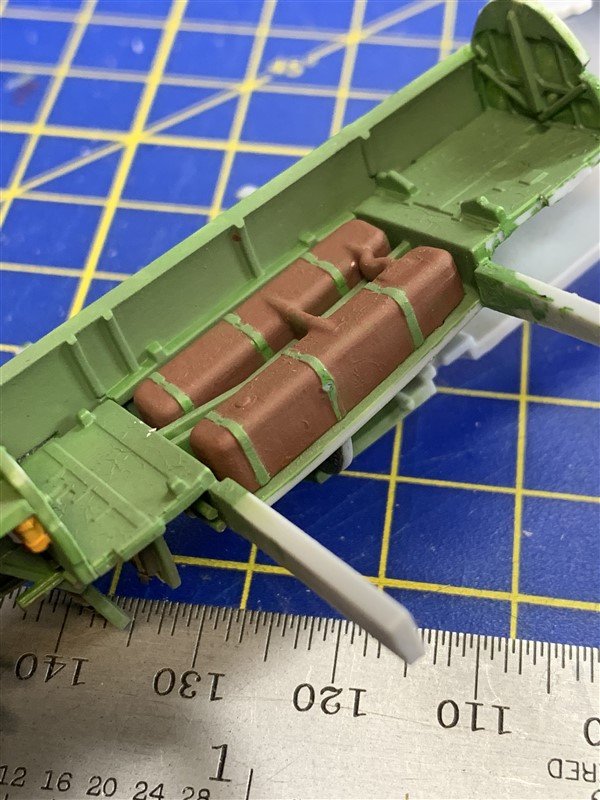
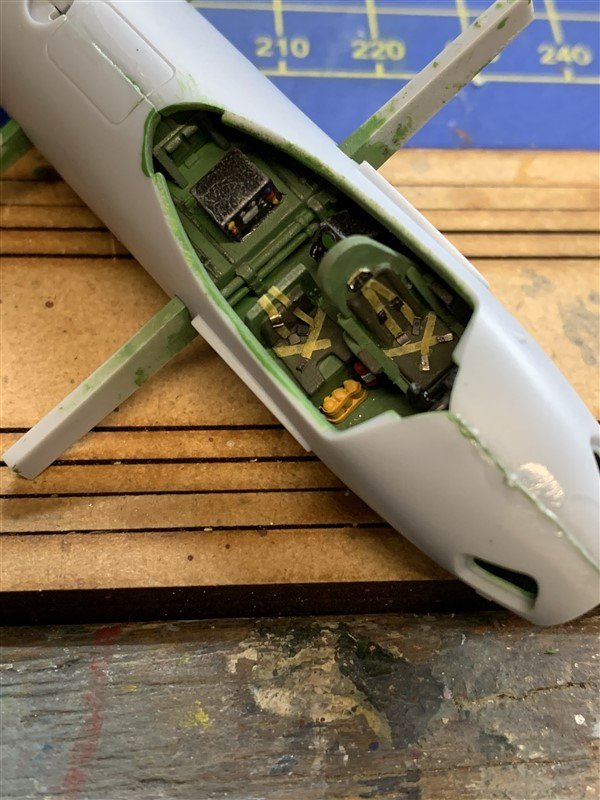
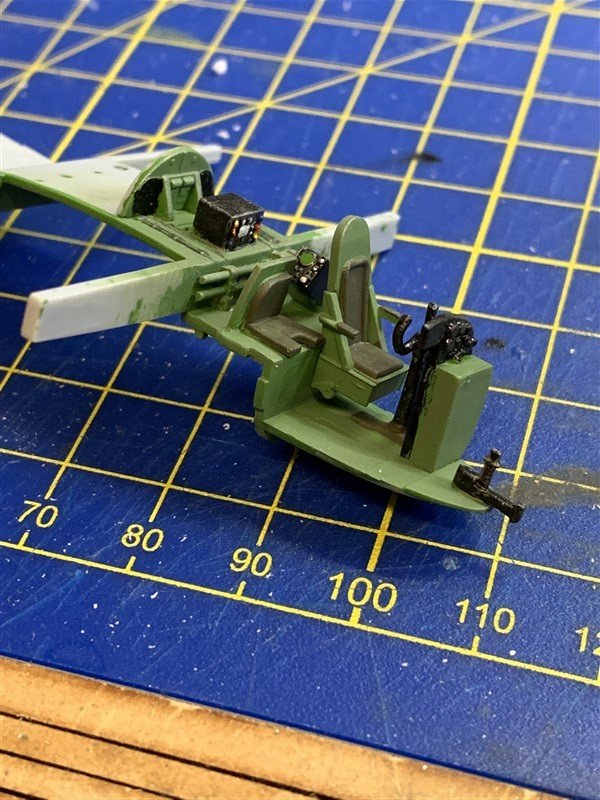
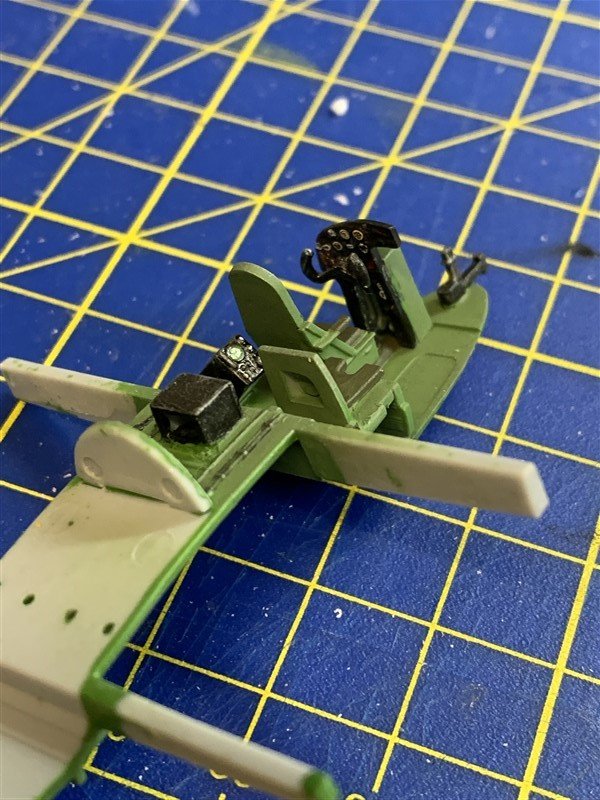
Cockpit completed. Added Tamiya tape seatbelts, with spare PE. off-cuts for buckles etc. Also added flare canisters and fire extinguisher, made from spare styrene rod, tape and paper and yes when closed up hardly any of it will show! 😆 On the underside, the fuselage fuel tank added, this will also not be easily seen once the bombs and racks go in, but we know its there! Next up glue the fuselage together and sand/fill, won't bore you all with that update, but will show the tails assemblies going on and the bomb-bay bulge fix that will be needed to make this into a B.XVI Mossie and not a TT.35 Mossie! Thanks for the likes and comments guys! 😁
- 50 replies
-
- 14
-
-
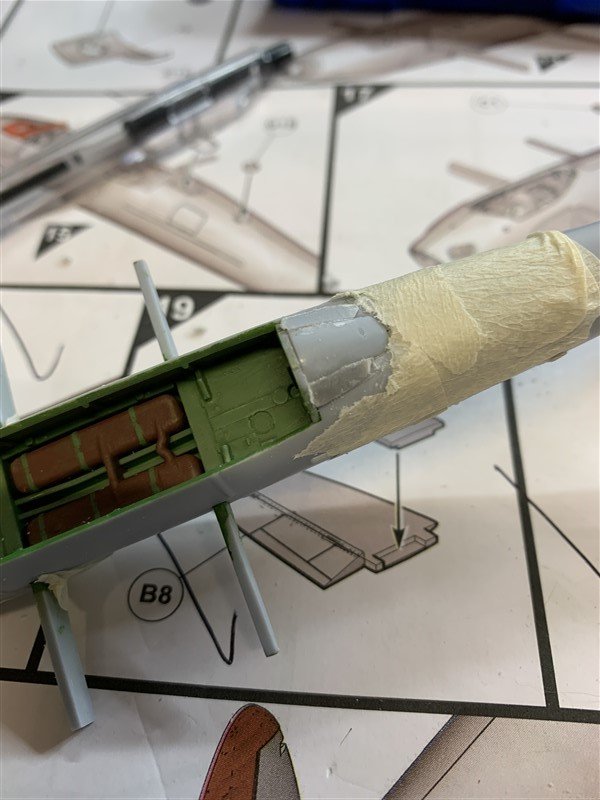
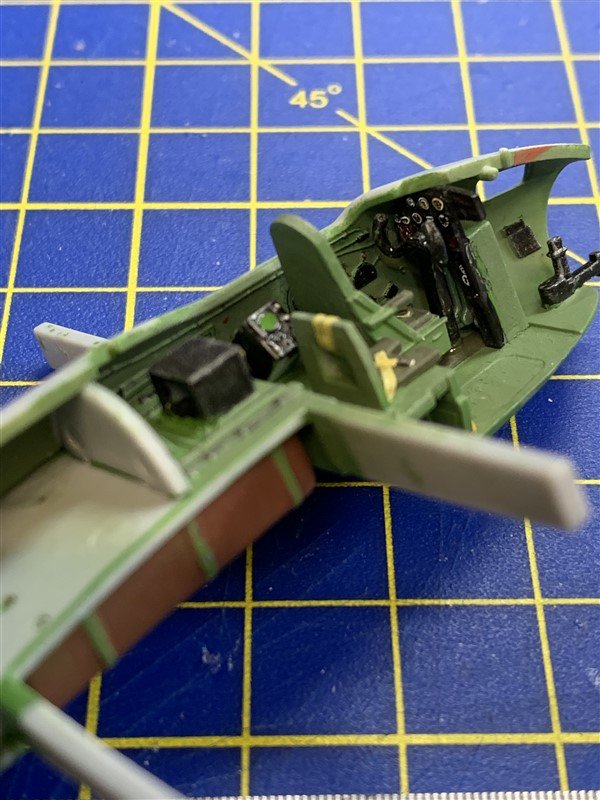
Short update to show progress so far on the interior. I've not had as much time as hoped this last couple of weeks, but got down to a little cockpit detailing today and spraying loads of things green. Need to add some seatbelts and the centreline fuel tank before I can close up the the two halves. I might add the flare cartridges and fire extinguisher just in front and below the Navigators seat, but not much more, as with the framed canopy in place, not a great deal of detail is going to be visible at this scale.
- 50 replies
-
- 13
-
-
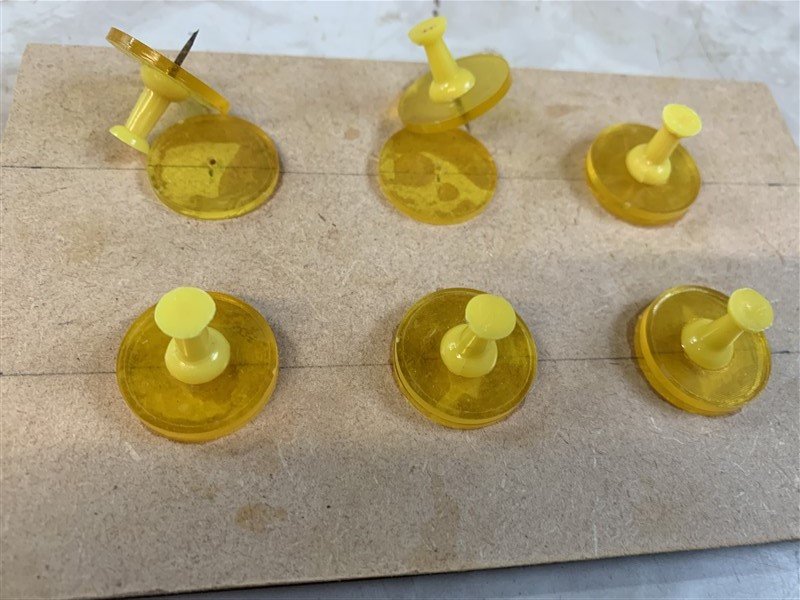
Hey Brian, Doing coils is a pain, I've tried a few techniques and came across this one somewhere on MSW using little chips/counters that you "sandwich" the coils around a pin. I use wet thread using a diluted PVA solution, so (hopefully) the coils stay together, trapping the end down the centre hole and then wrapping the thread around the centre pin. Letting all dry before separating. Made a board so I can do six at a time, hope this might be of help also.
-
A very striking pair, well done!
-
F-86F-30 Sabre by Egilman - Kinetic - 1/32nd scale
AJohnson replied to Egilman's topic in Non-ship/categorised builds
Looking very good, keep plugging away when you can EG 👍 -
Excellent progress, looking smart!
-
Well prior to MSW, the only ones I did were the “Vintage Car” series you cut out from the back of Weetabix boxes as a kid but that was a long time ago!

- 93 replies
-
- 10
-
