Thukydides
-
Posts
775 -
Joined
-
Last visited
Content Type
Profiles
Forums
Gallery
Events
Everything posted by Thukydides
-
 Those are pretty nice looking hanks. I will have to take a look at that tutorial as I am going to start to need to do these soon.
- 148 replies
-
- 2
-

-
- Vanguard Models
- Cutter
- (and 2 more)
-
Welcome back. Good to see you at it again. The damage sounds incredibly frustrating. Good job on sticking with it and getting the repair done. You might want to take a look at the crutches as I can't tell for sure from the photos you have, but the bottom of the should connect to the curved piece on the side (I forget it's name). There appears to be a gap on your pictures.
-
Alternatively you could portray her as one of her sister ships. I believe Daphne, Galatea, Ariadne launched in 1776 and vestal in 1777 were coppered at launch. I know for sure Perseus and Unicorn built by contract in 1776 were. Also I believe you can buy carronades from Vanguard which if you wanted to add wouldn’t be very hard, especially if you didn’t bother to build up the bulwarks. If you did this you would want to use the early sliding bed ones. At the end of the day most people looking won't know anyways 😄.
- 96 replies
-
- 1
-
-
- Sphinx
- Vanguard Models
- (and 1 more)
-
Just as a note, if you are displaying her as coppered (like she was in 1781) then you should know that at that time she was also given carronades around the same times as many of her sister ships were. She appears on a 1782 list saying she was armed with 6 12pdrs on her quarterdeck, but then later in a 1793 she is not on a list of carronade armed ships. Sometime before 1799 her bulwarks were built up on the quarterdeck and forecastle (likely when she received the corresponding armament, but it is impossible to know for sure). So given your time period I would guess the most correct armament would be just the 6 12pdr carronades on the quarter deck, with correspondingly built up bulwarks, but you could probably also make an argument for adding the 2 to the forecastle as well. EDIT: I should add both the 1779 and the 1794 establishment lists say that 20 gun ships should be equipped with 8 12pdr carronades, 2 on the fore castle and 6 on the quarterdeck, though in reality many ships did not adhere to the establishments.
- 96 replies
-
- 2
-
-
- Sphinx
- Vanguard Models
- (and 1 more)
-
I have never painted silk span before, but I imagine you would want to stretch it while wet to make sure it drys taught. You could take a look at this video where the person doing this doesn’t use a frame, but stretches it while wet so it dries flat. It is also potentially you could be painting the layers while the previous layer is still not fully dry. This is a big no-no in acrylic painting as you reactivate the previous layer and make your surface less smooth.
-
Thanks. Yes it is a bit of a pain, but I have found it looks way better, though as mentioned I still havn’t come up with a methodology I am completely happy with. I need to do a bit more experimenting. With regards to the scale figure, I do indeed have one. If you scroll back up to Log #68 you can see me discuss how I painted him.
- 500 replies
-
- 2
-
-
- vanguard models
- alert
- (and 1 more)
-
Very cool, it seems it is a similar story to the one that washed up in Cape Ray earlier this year.
-
Always good to see another alert log. It is a great kit, I think you will enjoy building her.
-
Great job David. I like the busier look on models. All the pictures you see from the era, the ships looked very cluttered and so I feel you need at least a bit of clutter to make it feel authentic.
- 148 replies
-
- 2
-
-
- Vanguard Models
- Cutter
- (and 2 more)
-
Thanks to everyone for all the encouragement. I am wondering if any of you might be able to offer some advice on my current dilemma. I have been thinking and have decided I need to figure out what spare apars I will depict. I may need to drape rope coils on top of things and so before things get too cluttered, now would be the time to add the spare spars. Goodwin lists the following spars/masts in addition to the normal ones. 1) storm topgallant mast 2) storm gaff 3) driver boom 4) mizzen mast 5) outrigger 6) mizzen yard My questions with regard to this are as follows: 1) would the ship have carried all of these? 2) would they have carried any spares of the regular yard or would they have jurrie rigged something from the above list. 3) would the storm gaff and driver boom have used the same jaws as the regular ones (ie if they needed to swap the boom out they would have attached the jaws to the new one) or did they have their own set permanently attached? Basically I am trying to figure what of the above list I should depict on the deck.
- 500 replies
-
- 4
-
-
- vanguard models
- alert
- (and 1 more)
-
Welcome to MSW. Starting a build log is the first step to success. Starting out can be quite overwhelming, but if you keep at it you will gradually learn the vocab and the skills to succeed. Treat every step like its own project, this is a marathon not a sprint and I suspect that given you are a similar stage of life to me that you should expect your build time to be measured in years not months :).
-
That is some really nice clean work.
-
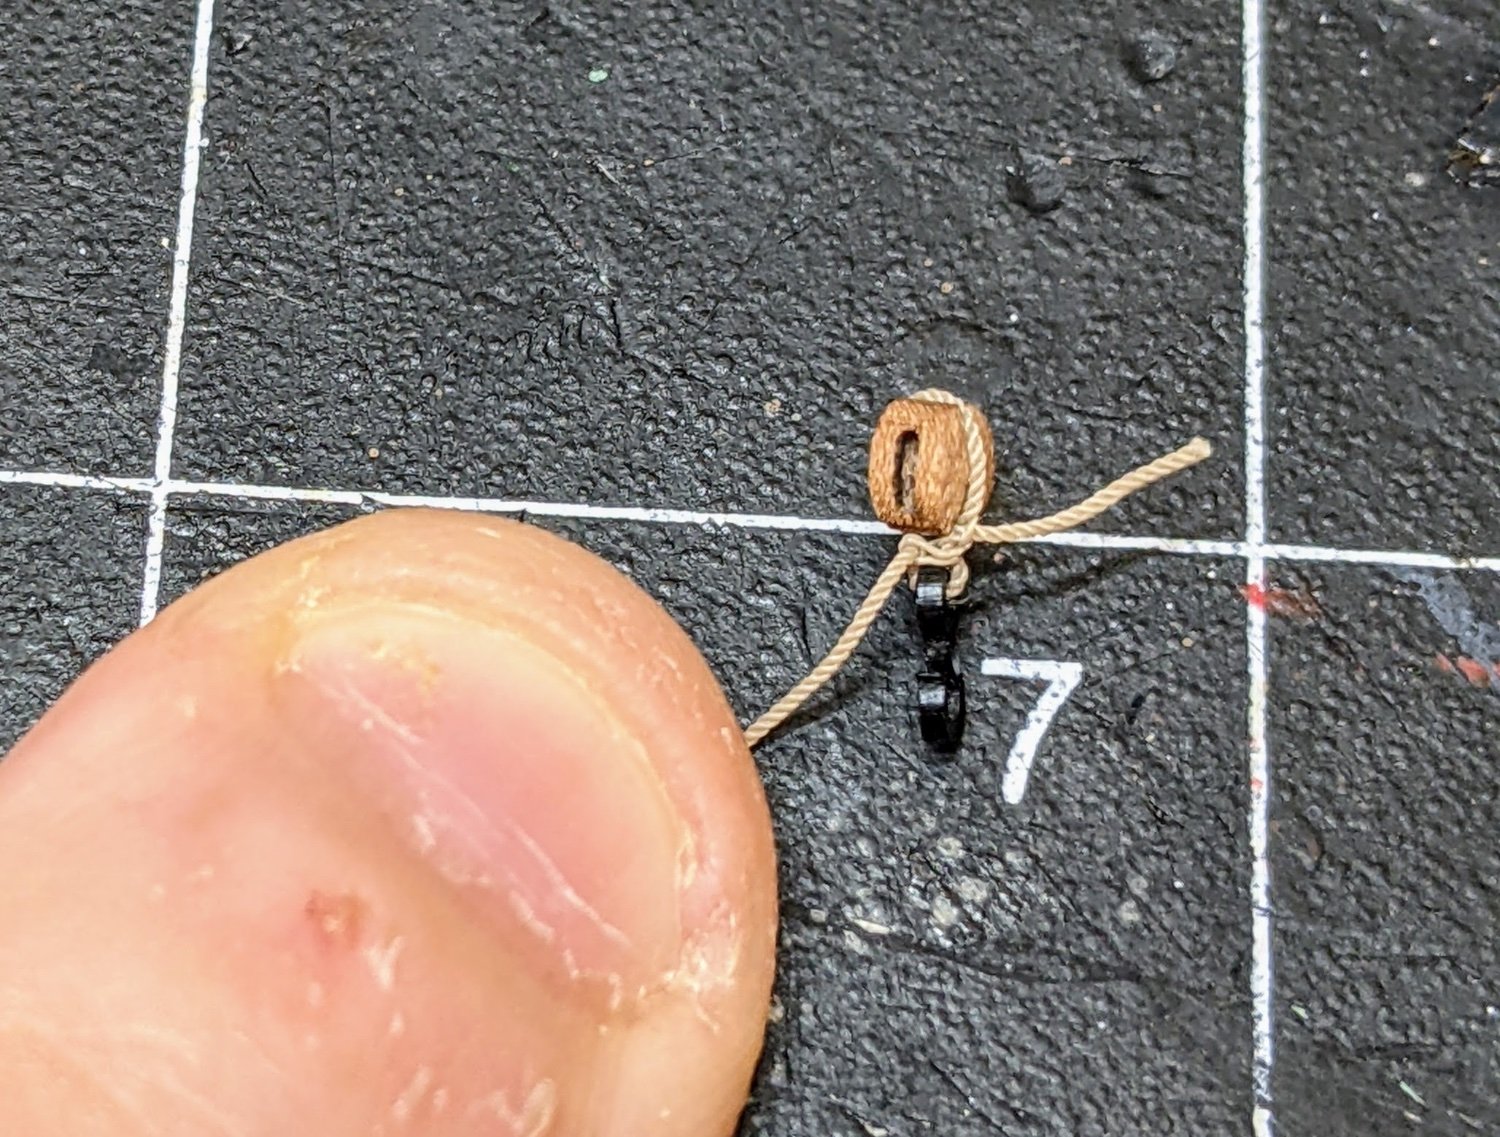
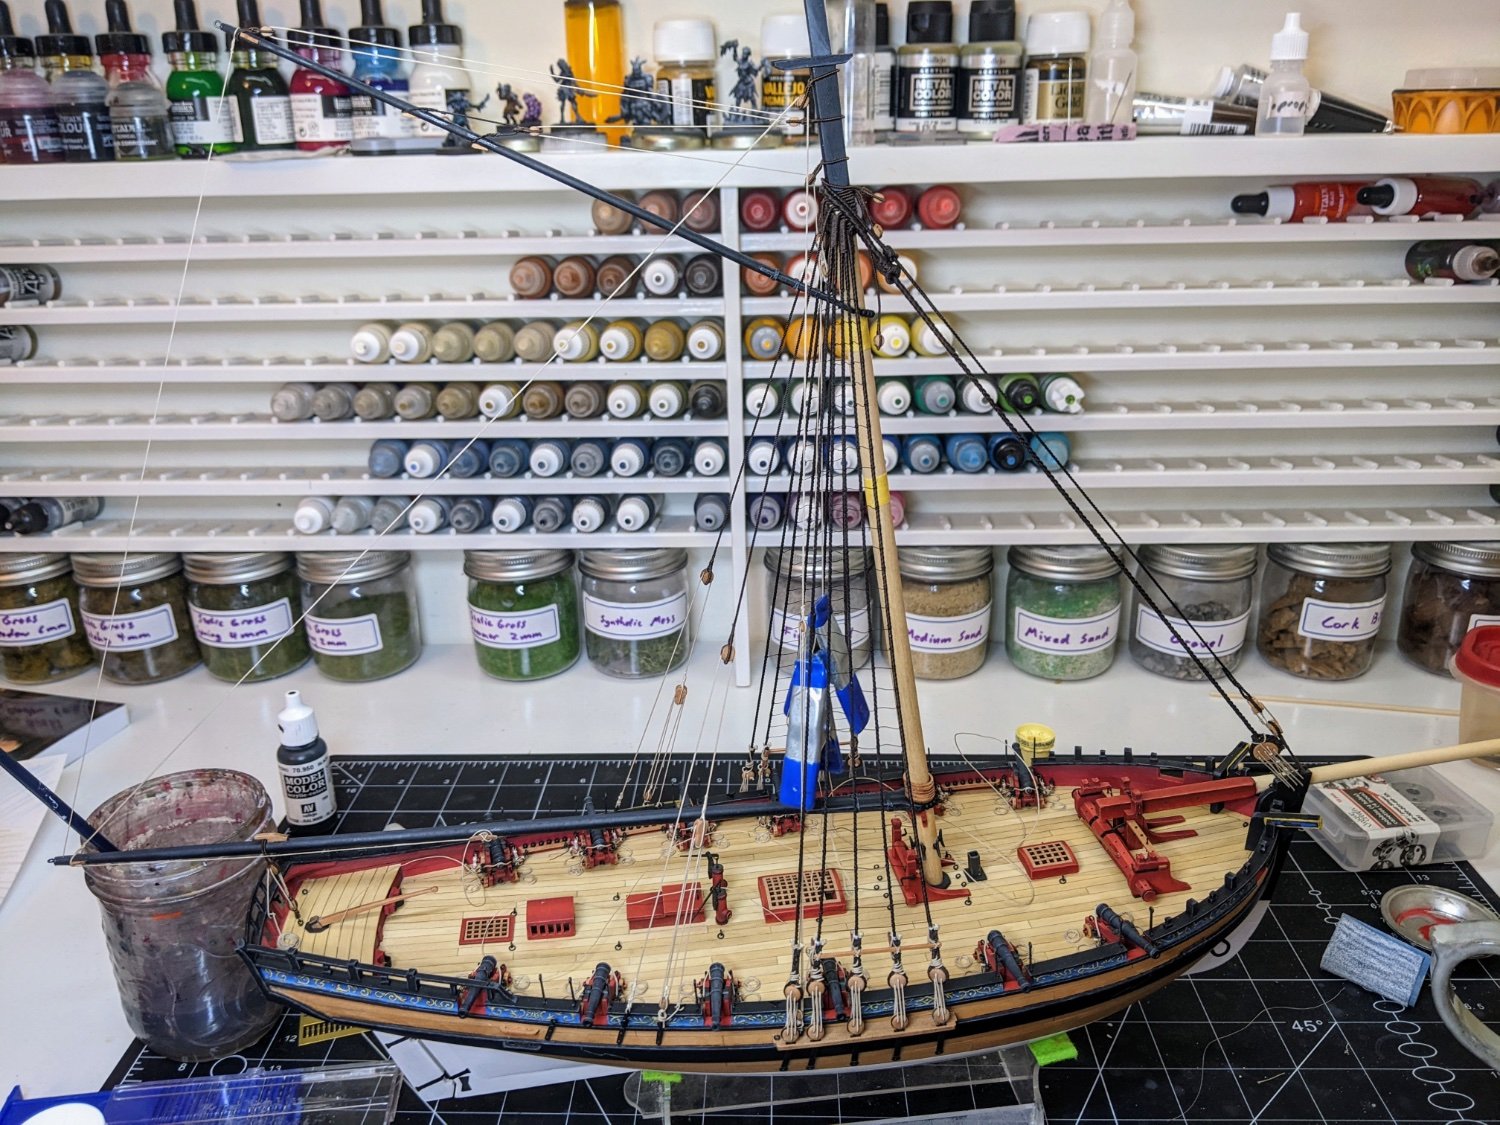
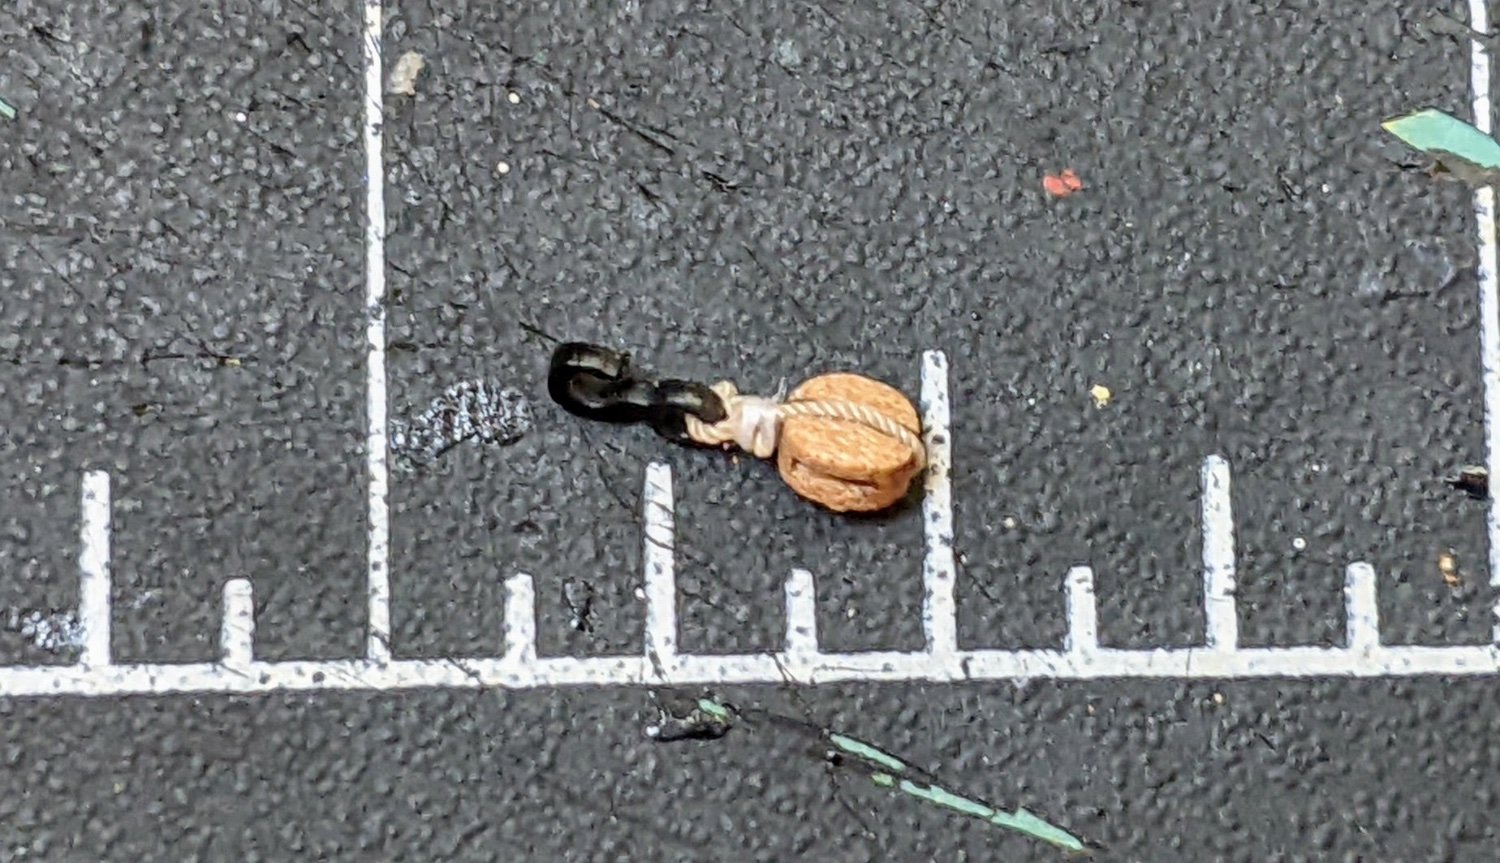
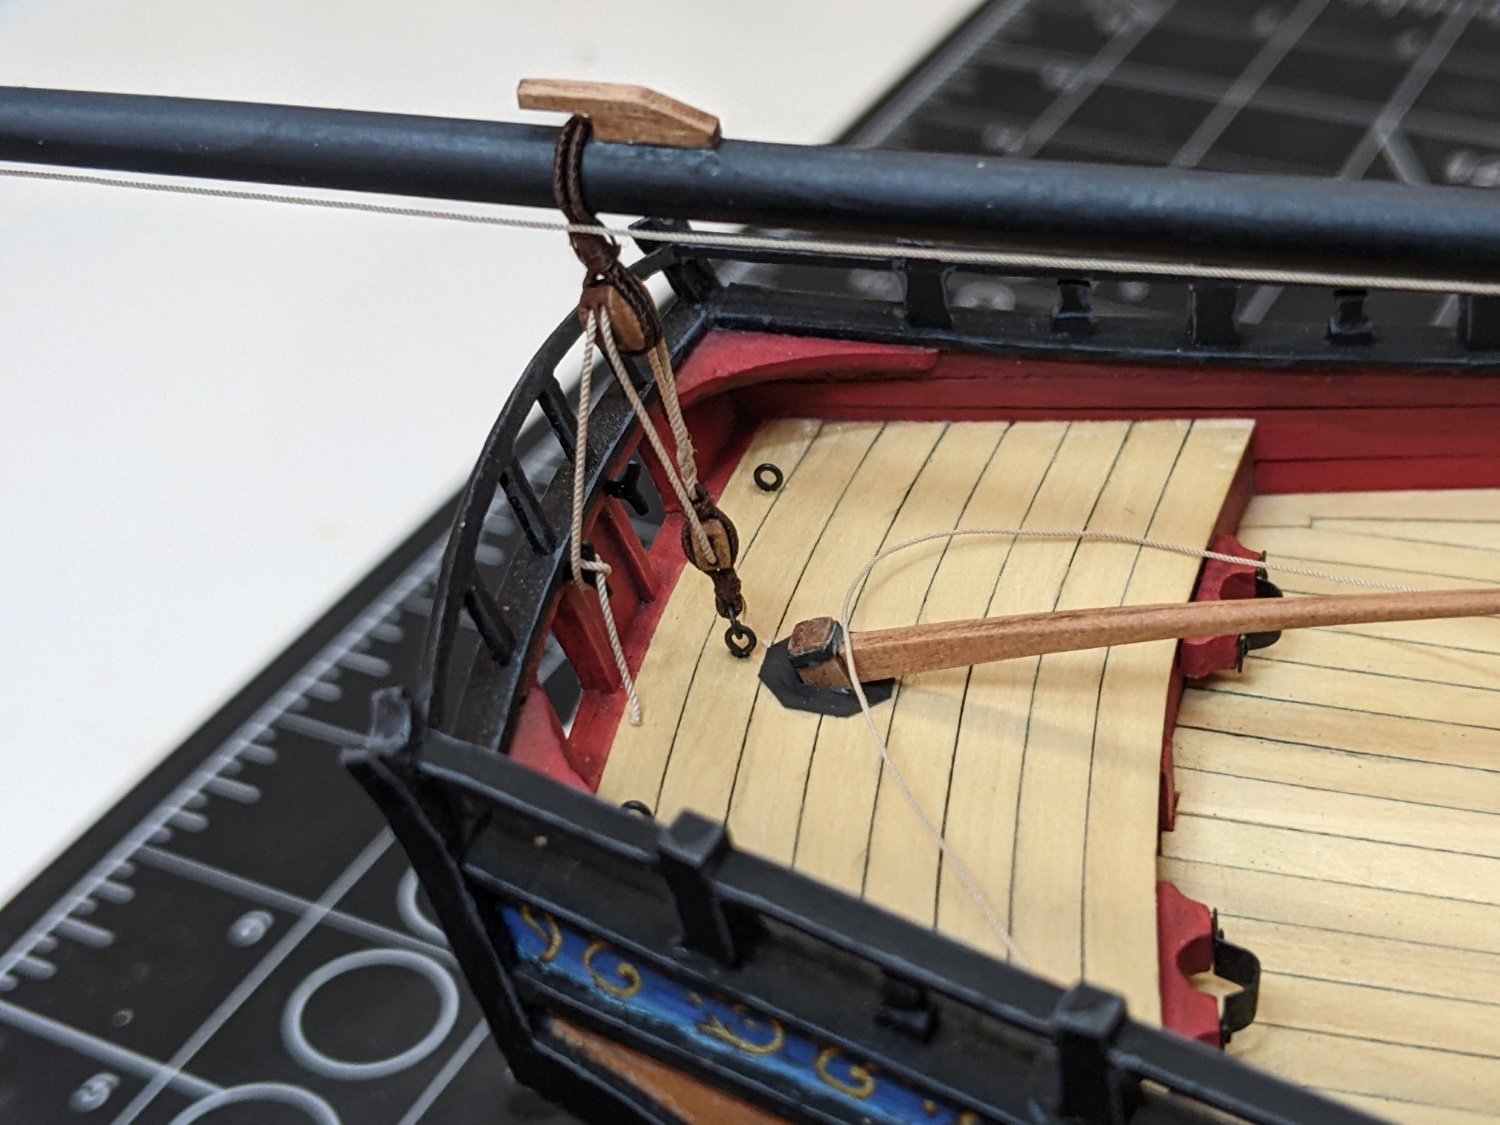
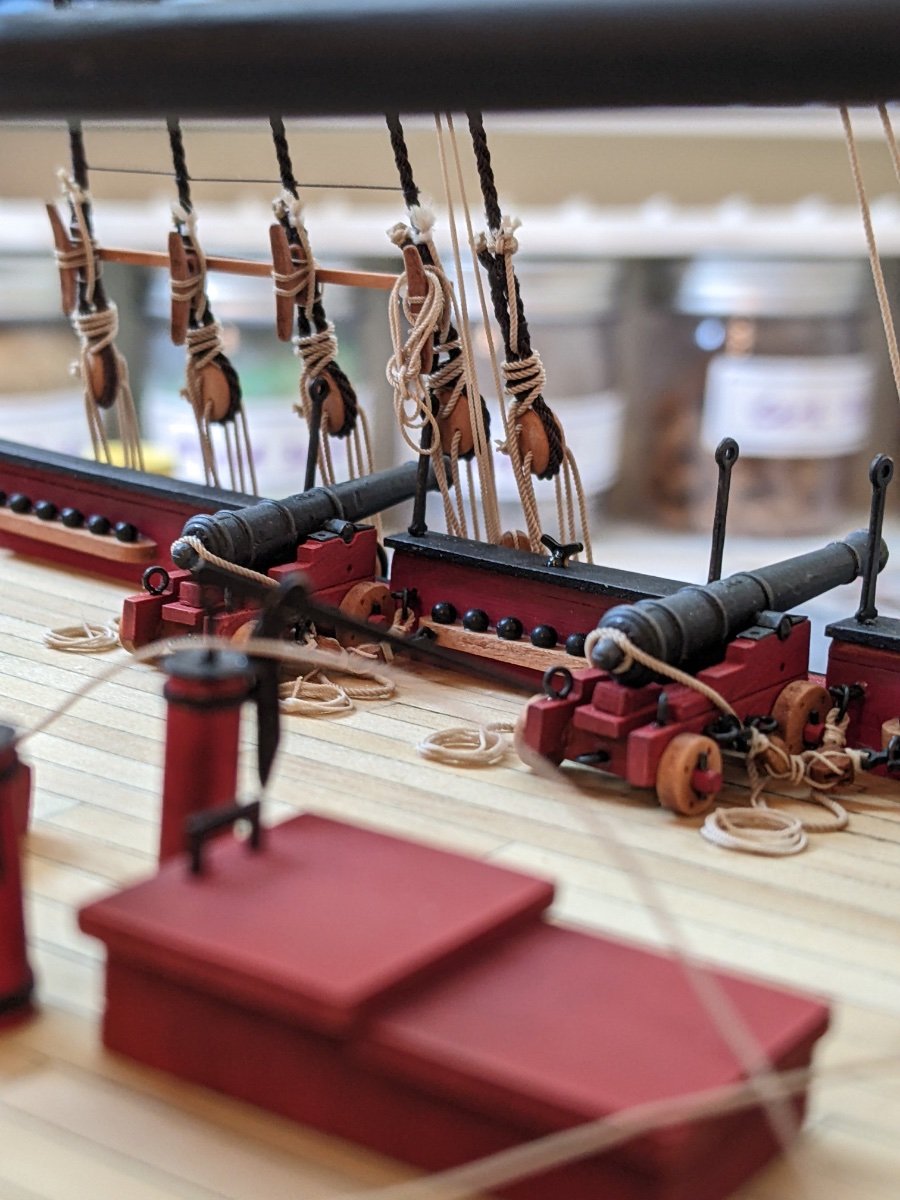
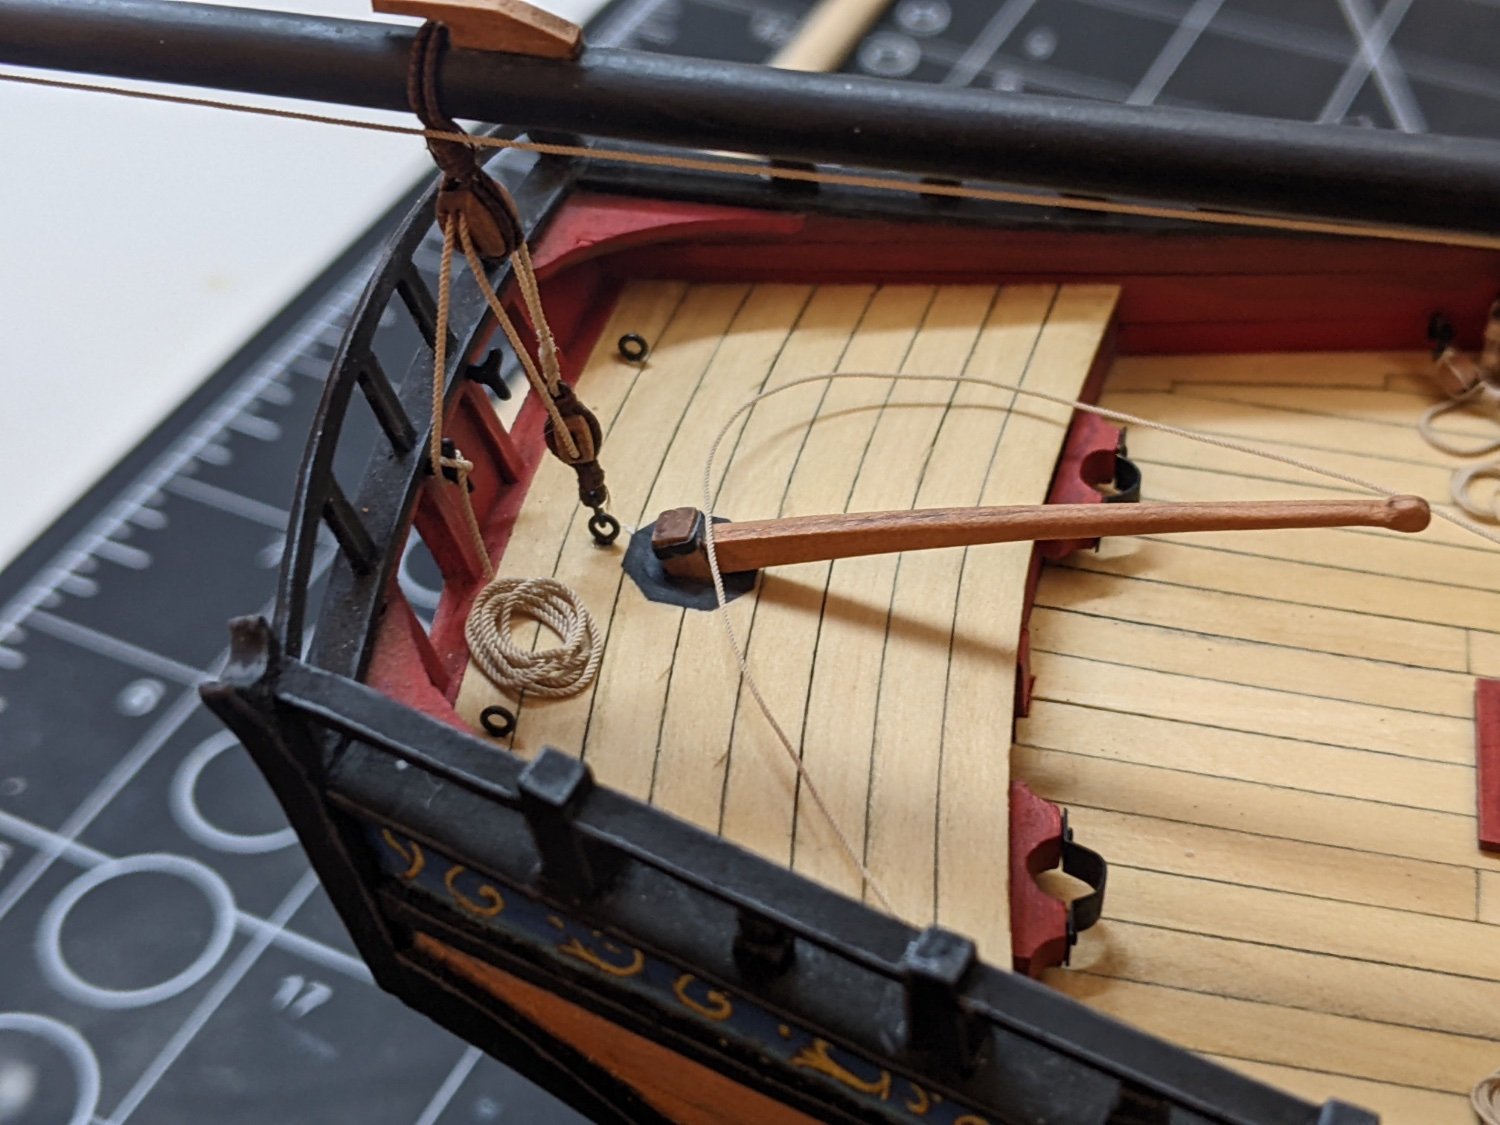
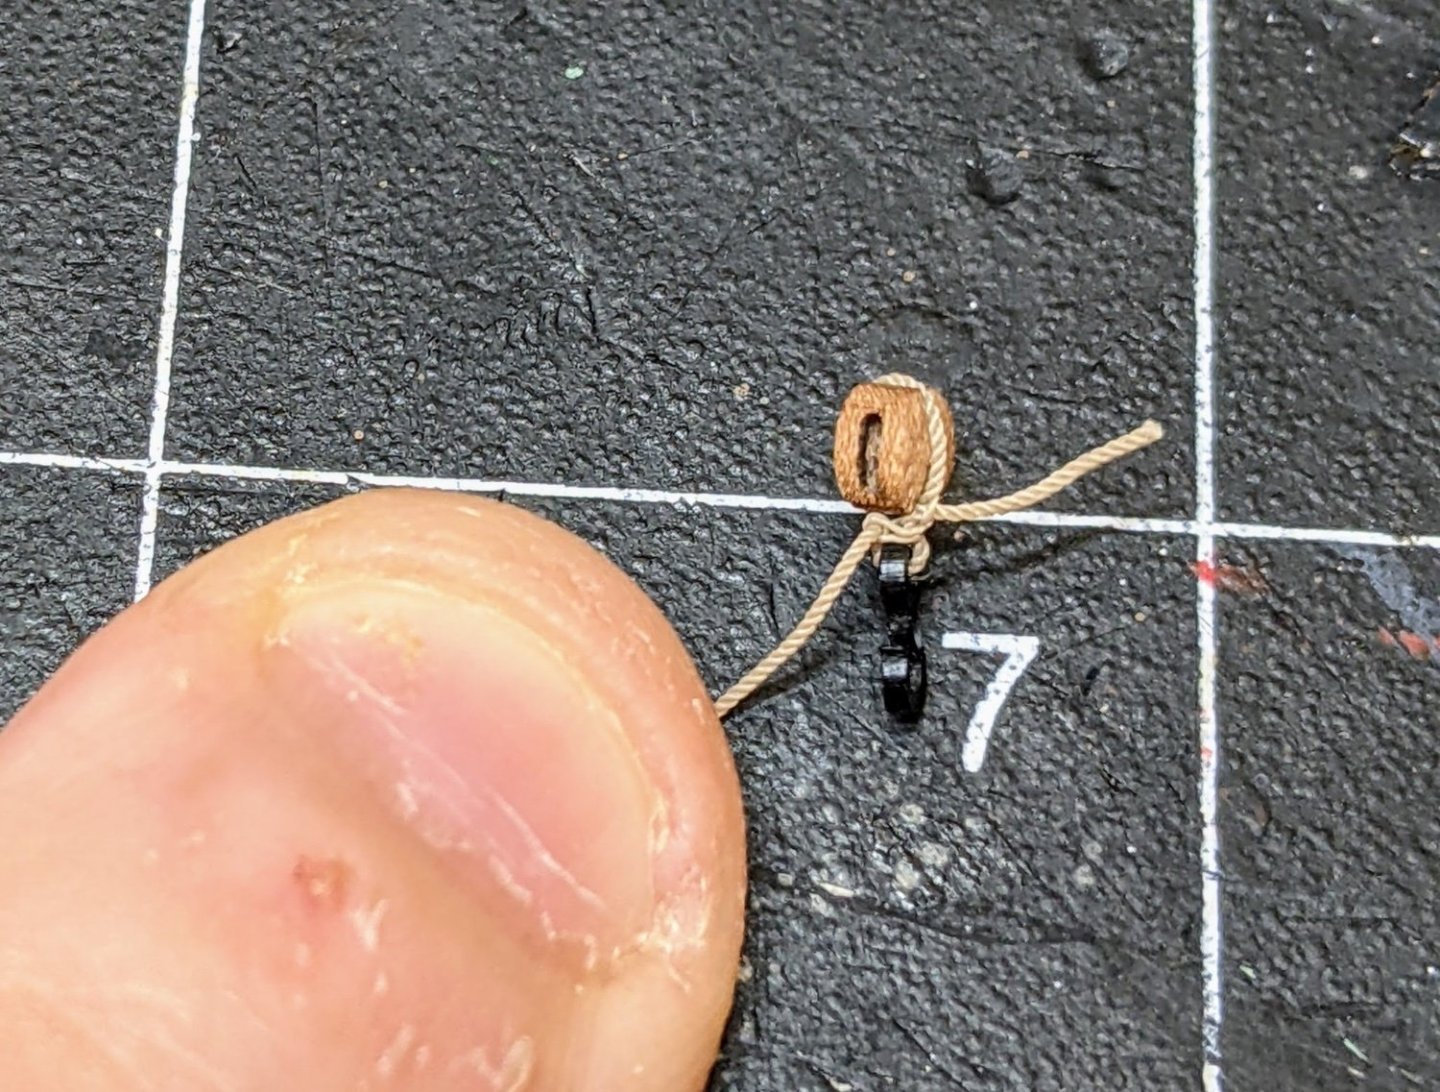
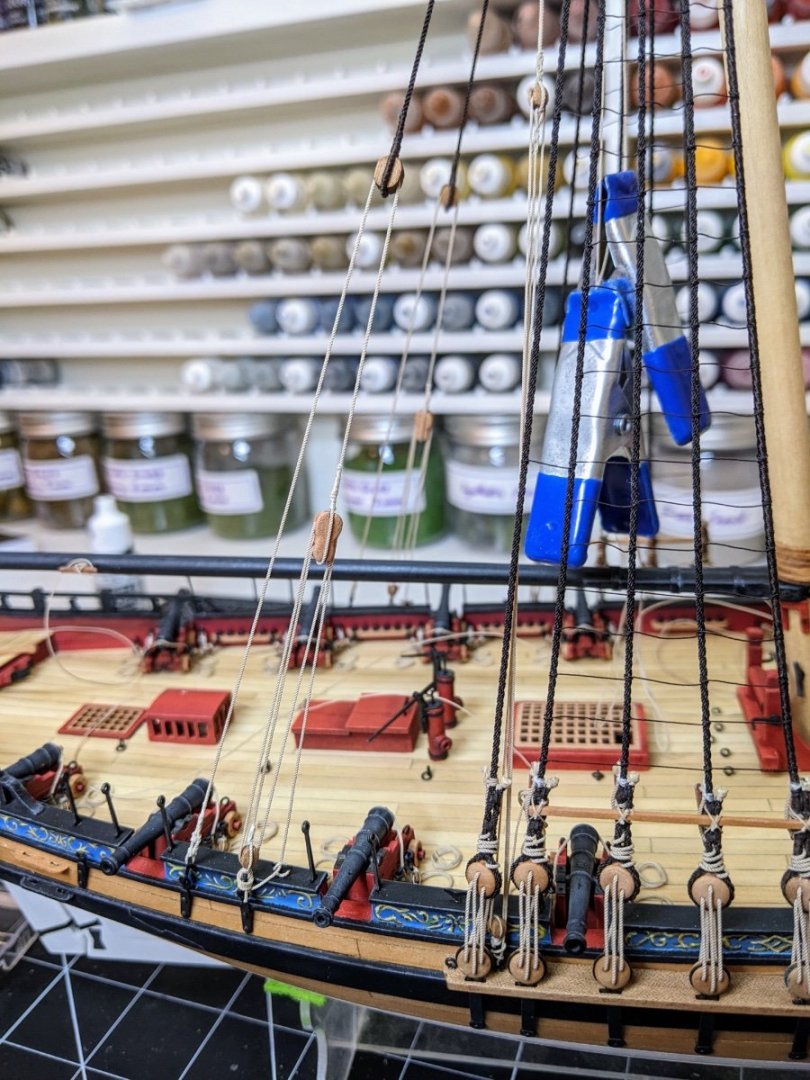
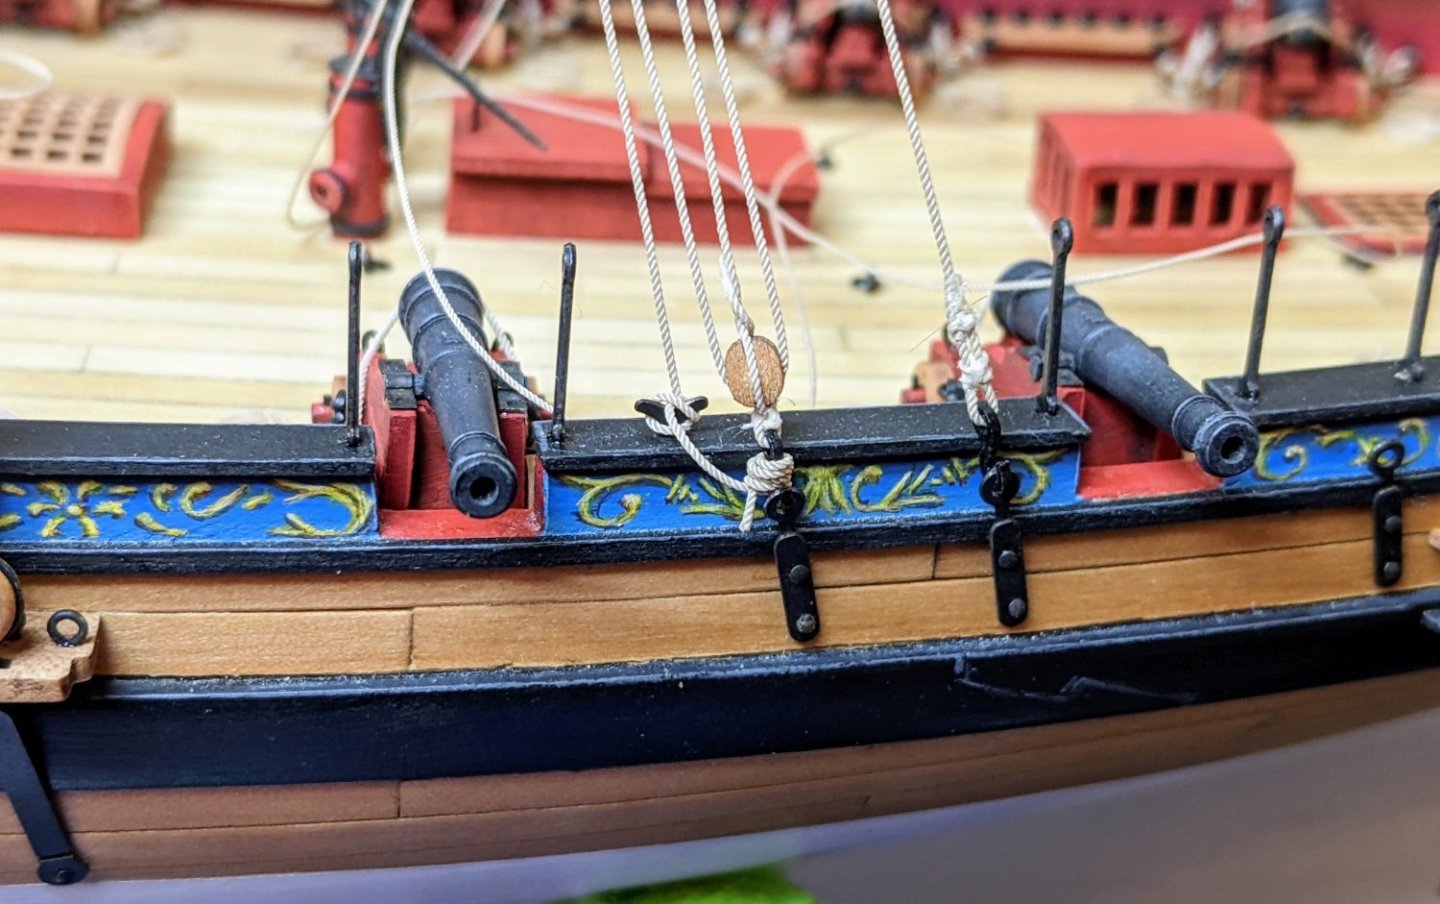
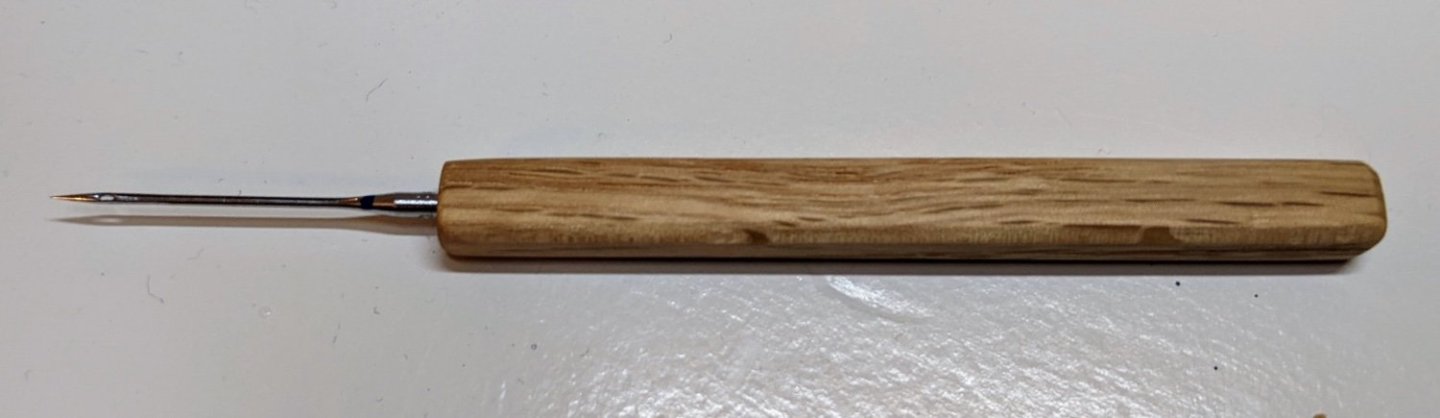
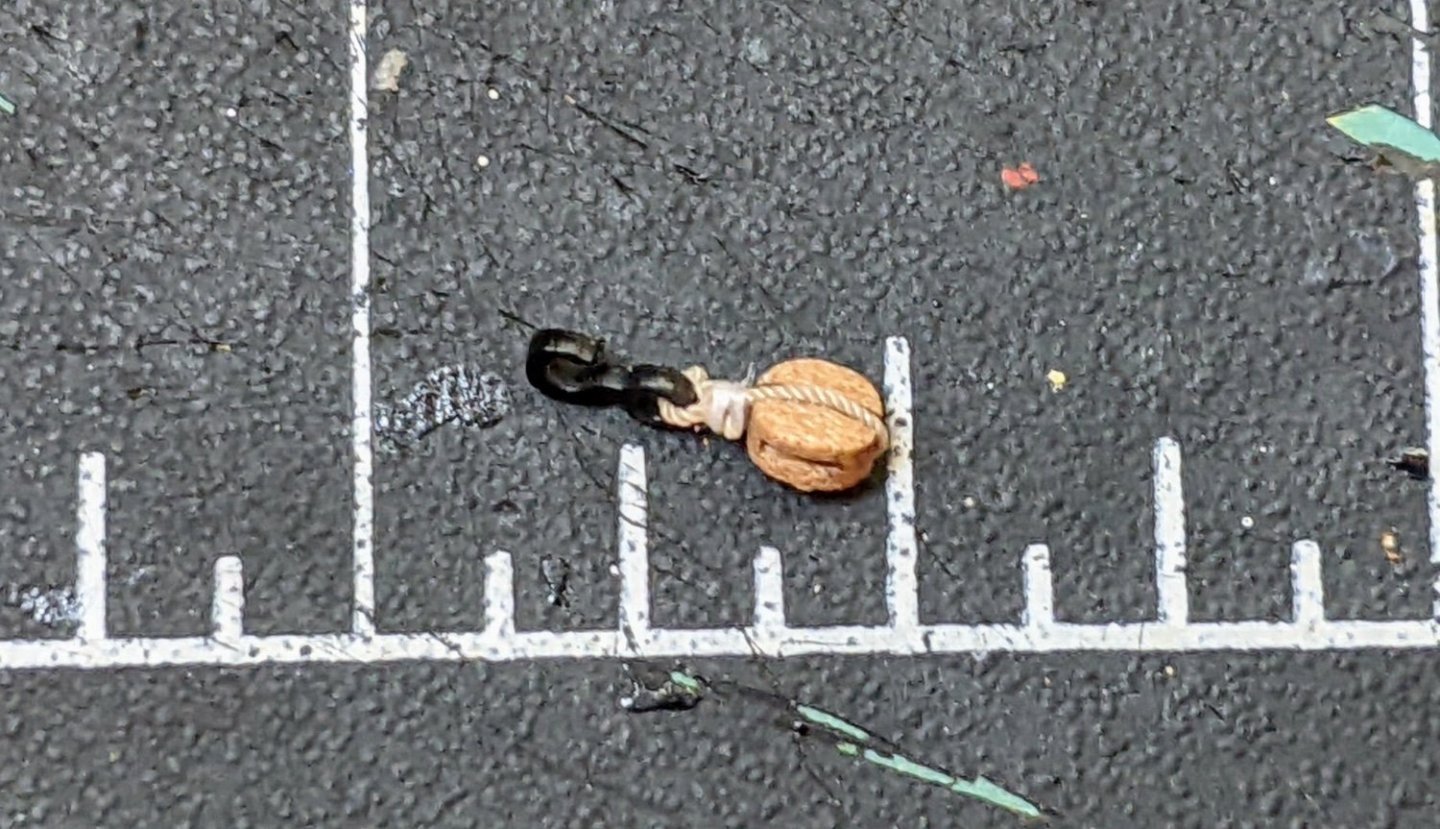
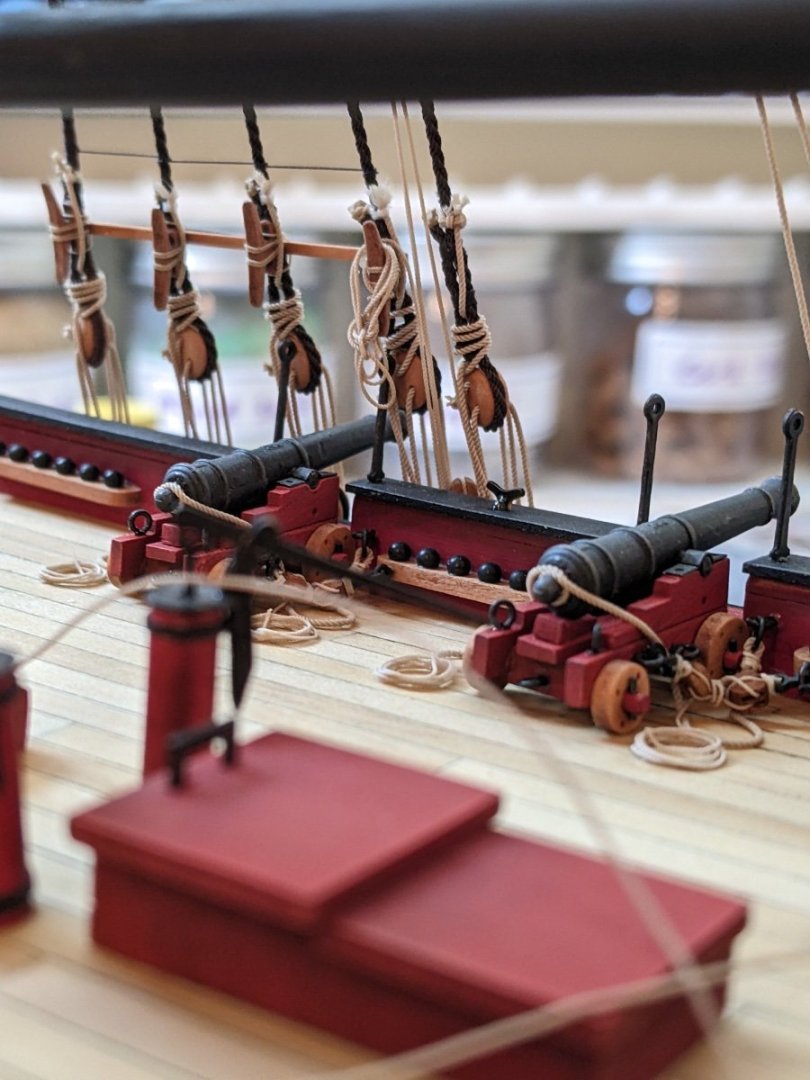
Log #72: Tying Off Lines Thank you to everyone for stopping by and for all the likes. First off I would like to show off the new tool I made. I discovered that machine sewing needles are better than hand ones for splicing as the hole is closer to the point. So I just made some handles out of spare wood I had lying around. I used standard needles in sizes 70 and 90. The hole on the 70 is not big enough to get whole ropes though, but once you split apart the strands it works better as it is about 0.25mm thinner than the size 90 one. The size 90 one is pictured below. With all the principal lines in place for the boom and gaff, the next step is to tie them all off. I started with the boom tackle as this one was obvious and has no impact on other lines. I decided to leave a bunch of extra rope in a loose coil after tying it off on the cleat. So step one was to cut the line short and super glue the end to the deck. I then separately made the coil. I am still playing with the method for making these and will probably give a more detailed explanation of what I do when I am confident I like my process. For the backstays I belayed them to cleats on the rail and then wrapped extra rope around the base of the block. I continue to play around with the best way to secure hooks to blocks and I have a new method I am trying out. I arrange the line similar to the previous way of doing it, but I splice the ends into each other and secure it in place with fabric glue. You can see the end result below seems to look less bulky than my previous attempts. For the boom toping lift, Goodwin indicates this should be belayed to a pair of single blocks hooked on to the starboard channel. I did a bunch of thinking at this point as I am planning on including the topgalant stays and so wanted to make sure that they would have a place to belay to. In the end I secured the fall to base of the lower block, but then hung the extra on the nearest shroud cleat. You can see how I used the eyebolt inbetween the last shroud and the standing backstay to leave the sternmost one for the topgallant backstay. My rope coil was not the best, but it looked close enough that I decided to chalk it up as a learning experience. Also being behind the shrouds it is not really that visible. And that brings us up to date. Next I need to secure the inner and outer ties for the gaff and then I will move on to setting up the topgallant.


- 500 replies
-
- 27
-
-

-
- vanguard models
- alert
- (and 1 more)
-
I don’t know how you manage to design and build so many ships so quickly. She is a very interesting looking ship with the drop keels and bow chasers.
-
USS Constitution by mtbediz - 1:76
Thukydides replied to mtbediz's topic in - Build logs for subjects built 1751 - 1800
Those pumps look really good, great job on the metalwork. -
You are right, that is very possible. At the end of the day even if we think marshall made the decorations up, what do we replace it with. In the absence of other primary evidence I would say what he makes up is more reflective of a likely scheme than anything I could come up with.
-
So will you be tapering th plates to achieve this? I am struggling to visualize how this would work?
-
Fantastic job, she looks lovely. Congrats on having another build done. Do you have any plans for what you want to do next?
- 122 replies
-
- 2
-
-
- Artesania Latina
- Pen Duick
- (and 1 more)
-
I know at least for sphinx the painting was based on perspectives done up by draughtsman based on the plans. Now where Portland was launched prior to the paintings it is possible a model of it existed or that marshall actually saw the ship in question, but it is possible he used some creative license with the decorations.
-
It is interesting how in the pictures above there are sunk in straps around the whole rudder, but then the pintles are bolted to those straps. Was this a uniquely Dutch thing or was it used elsewhere? One thing that is unclear to me from all this discussion is if the overlap needs to be such that the lower plates (those closer to the keel) overlap the upper plates (those closer to the waterline), then how do you keep the plates parallel to the keel as practically speaking doing plates from the keel up is not easy due to having to slip the next row under the previous one.
-
There is a 1768 contemporary model that shows the attachment for the flag staff, It is hard to tell from the resolution on the RMG site, but there is clearly a loop of rope so there must have been some sort of pully so it could be raised or lowered. I suspect not a full block as they likely would have depicted it if it was, more likely just a metal hoop or maybe a sheeve in the staff itself? https://www.rmg.co.uk/collections/objects/rmgc-object-66316 https://www.rmg.co.uk/collections/objects/rmgc-object-533928 Edit, actually on second reading it seems the model was made in 1974, so probably not a great source
-
Just as long as you replicate my later versions not the earlier ones . Some of them are frankly awful, but this model was meant to be a learning process so by the time I am done hopefully I will somewhat know what I am doing. As an update, this is what I have found works the best at this point (an update from my previous post where i detailed my method) is to do as follows: Use a needle to pull the whole rope through itself at the starting point. Split the pulled through strands into the three segments and use super glue on their ends to make sure they don't unravel. Weave each of those ends back and forth through the rope pulling them through with a needle. Ideally you want to weave between the strand not through them, but this is sometimes hard to achieve given the small scales. Pull everything tight and while left under tension coat the splice with watered down fabric glue and leave to dry for a few hours. Use a fresh blade to cut the ends off and then cover the splice with a watered down coat of matt varnish. In all stages use the smallest possible sewing needle that will allow you to get the rope or strand through the eye.
- 500 replies
-
- 7
-
-

-
- vanguard models
- alert
- (and 1 more)