allanyed
-
Posts
8,149 -
Joined
-
Last visited
Content Type
Profiles
Forums
Gallery
Events
Everything posted by allanyed
-
 Very nice work for a first build Sparkov For the future note that the gratings did not have openings adjacent to the head ledges or coamings, but rather had a solid edge as in the drawing below. I find it easiest to make the grating so it has this solid edge then make the head ledges and coamings to fit. Allan
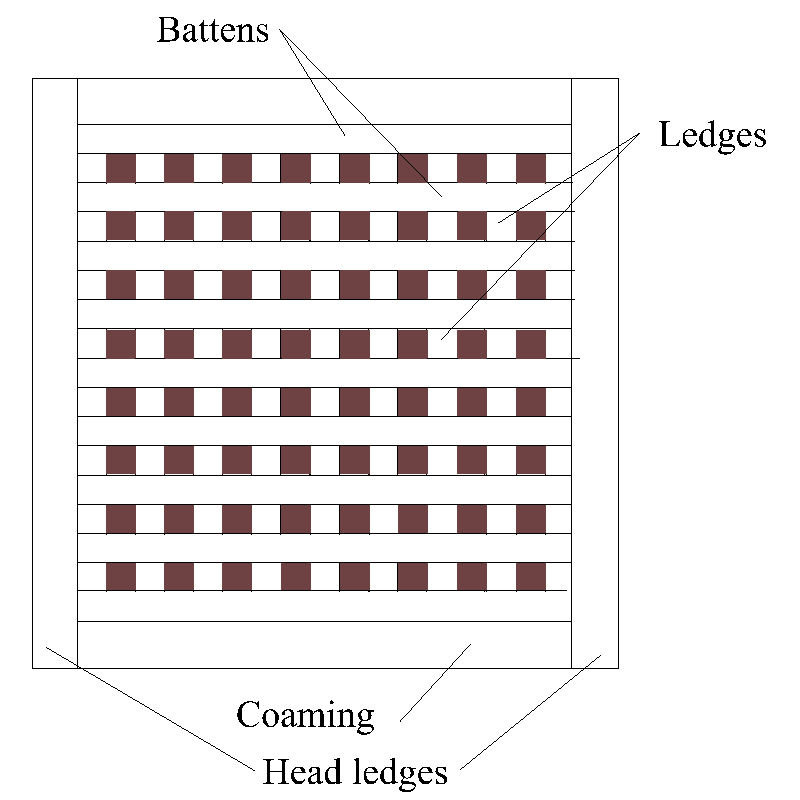
- 11 replies
-
- 1
-

-
- victory
- billing boats
- (and 1 more)
-
Tiziano, I agree with Johann that the pictures on making the knees is great. I will be using this in the future! Thanks Allan Sono d'accordo con Johann sul fatto che le foto su come fare i supporta sono fantastiche. Lo userò in futuro! Grazie Ciao amico Allan
-
Your research continues to impress! Good to know about the launches after 1783 which I THINK is the year shown in that paragraph. Great find. Allan
-
I have seen magnificent models with the lower planking made with holly that gives the impression of white stuff instead of paint. If going for a copper bottom look, consider Swiss pear. Supply was likely white bottomed when launched in 1759 but probably copper bottomed sometime later possibly when converted in 1786, so the choice is yours if you want to go that route. Allan
-
Great idea and really great execution. Allan
-
To learn really good and useful techniques that will carry over to future builds you may want to consider one or more of the three kit beginner series designed by David Antscherl. https://modelexpo-online.com/Model-Shipways-Shipwright-3-Kit-Combo-Series_p_5465.html I wish this kind of quality and expertise were available when I started building. Allan
-
3D Printing Cannons in Resin
allanyed replied to thibaultron's topic in 3D-Printing and Laser-Cutting.
I know very well the work that you have done and the willingness to share with the members is stupendous. I think the fifteen shown above are more than anyone else has offered in any pattern, let alone just one pattern. If others feel we need additional calibers/lengths, it would be great to see them provide them to the membership as you are doing. The more the better. You mentioned the differences in the Armstrong and Armstrong Frederick, members should know that you also changed the badge to George 3 on the AF pattern compared to George 2 on the Armstrong pattern as it should be. Allan -
Chaos For many, it is a good idea to study contemporary information to compare with what a kit offers. Research by members here often surpasses the research done by many kit designers and they are willing to share their knowledge so a great source of help. Regarding terminology, the following may help a little. Allan
-
Tiny "precision" drill press
allanyed replied to Ron Burns's topic in Modeling tools and Workshop Equipment
So am I. My oldie is near the end of its life as I used it for milling for quite a few years before I could buy a mill so the bearings of course are well worn. With a new press on my wish list your review will be helpful. Thanks in advance Gregory Allan -
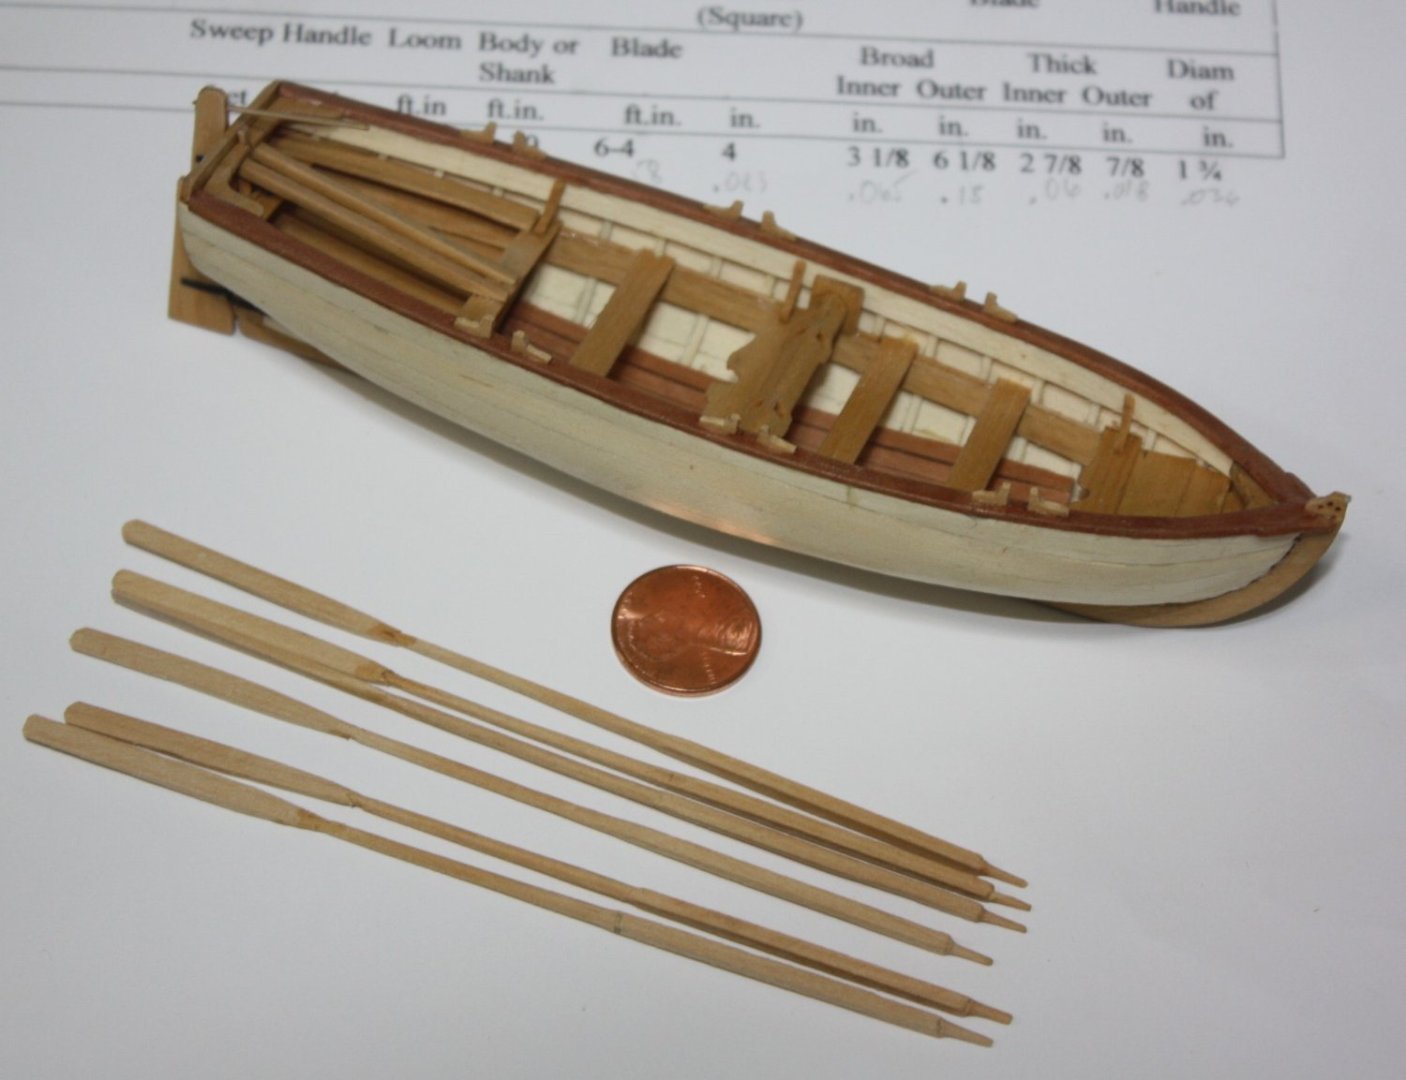
Hi Richie For a first build it looks like you have taken a lot of pride in your work. Learning how to get great planking takes practice and yours is really pretty good, especially as it appears you took care to reduce the breadth of the planks as they approach the bow. The species of wood and thickness of the material will have an effect as well. For ship's boats planking my go-to is holly. From W.E. Mays book on ship's boats, the bottom planking was typically about 1.125" thick on longboats. (0.6mm at 1:48) I tend to go a tad heavier so I have some material for sanding the planked hull. Allan
-
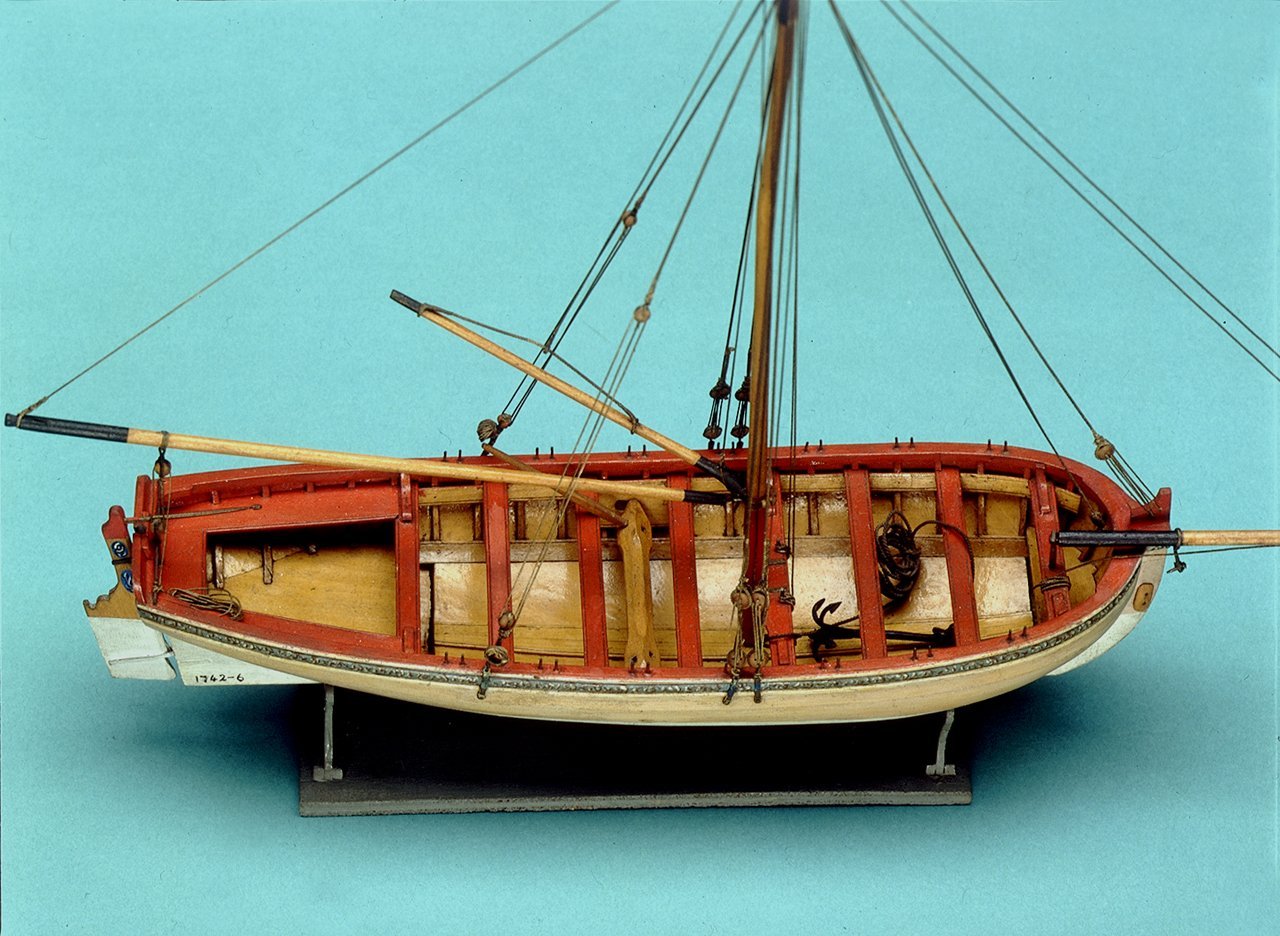
Beautiful build! Probably just terminology but ships' boats did not usually have cap rails. They did have gunwales that were quite thick to support the parts where the oars sat. Below is a group of typical gunwales from plans at RMG. You can see them in the RMG Collections site by typing in the ZAZ number in the search box. You can see how thick the gunwale is on the contemporary Medway longboat model below and at RMG as well. https://www.rmg.co.uk/collections Allan

-
A very warm welcome to MSW Barry. Allan
-
Hi Phil, How do they do when you form the octagonal portions in the center of the yards and the octagonal and square sections on the masts? Thanks Allan
- 396 replies
-
- 2
-
-
- Idea
- Bright Idea
- (and 1 more)
-
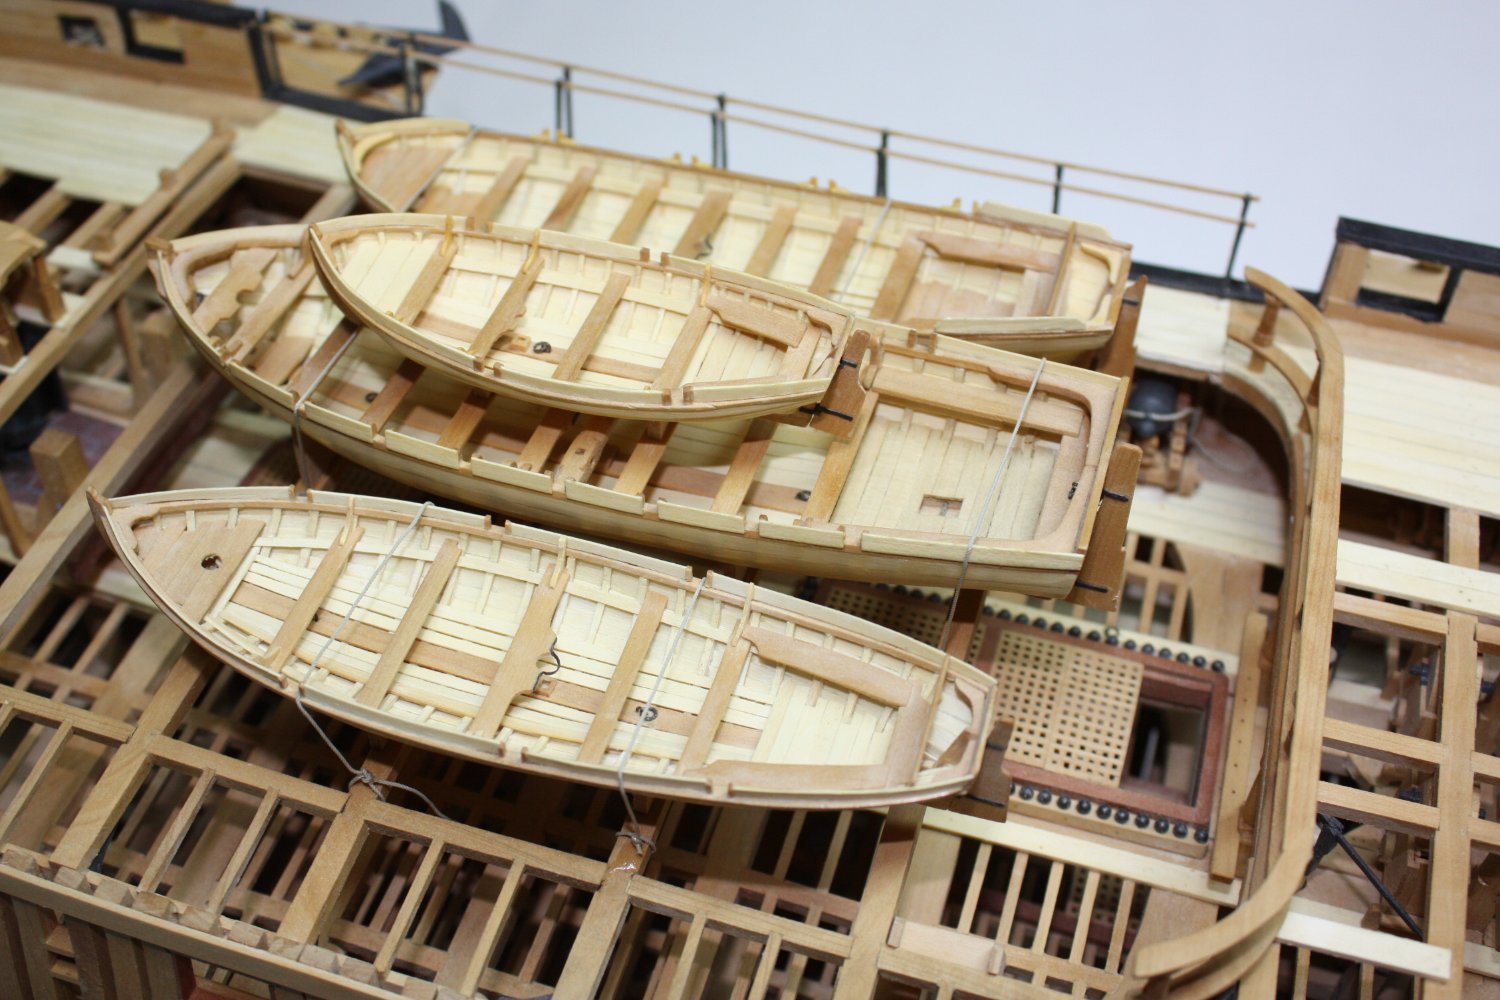
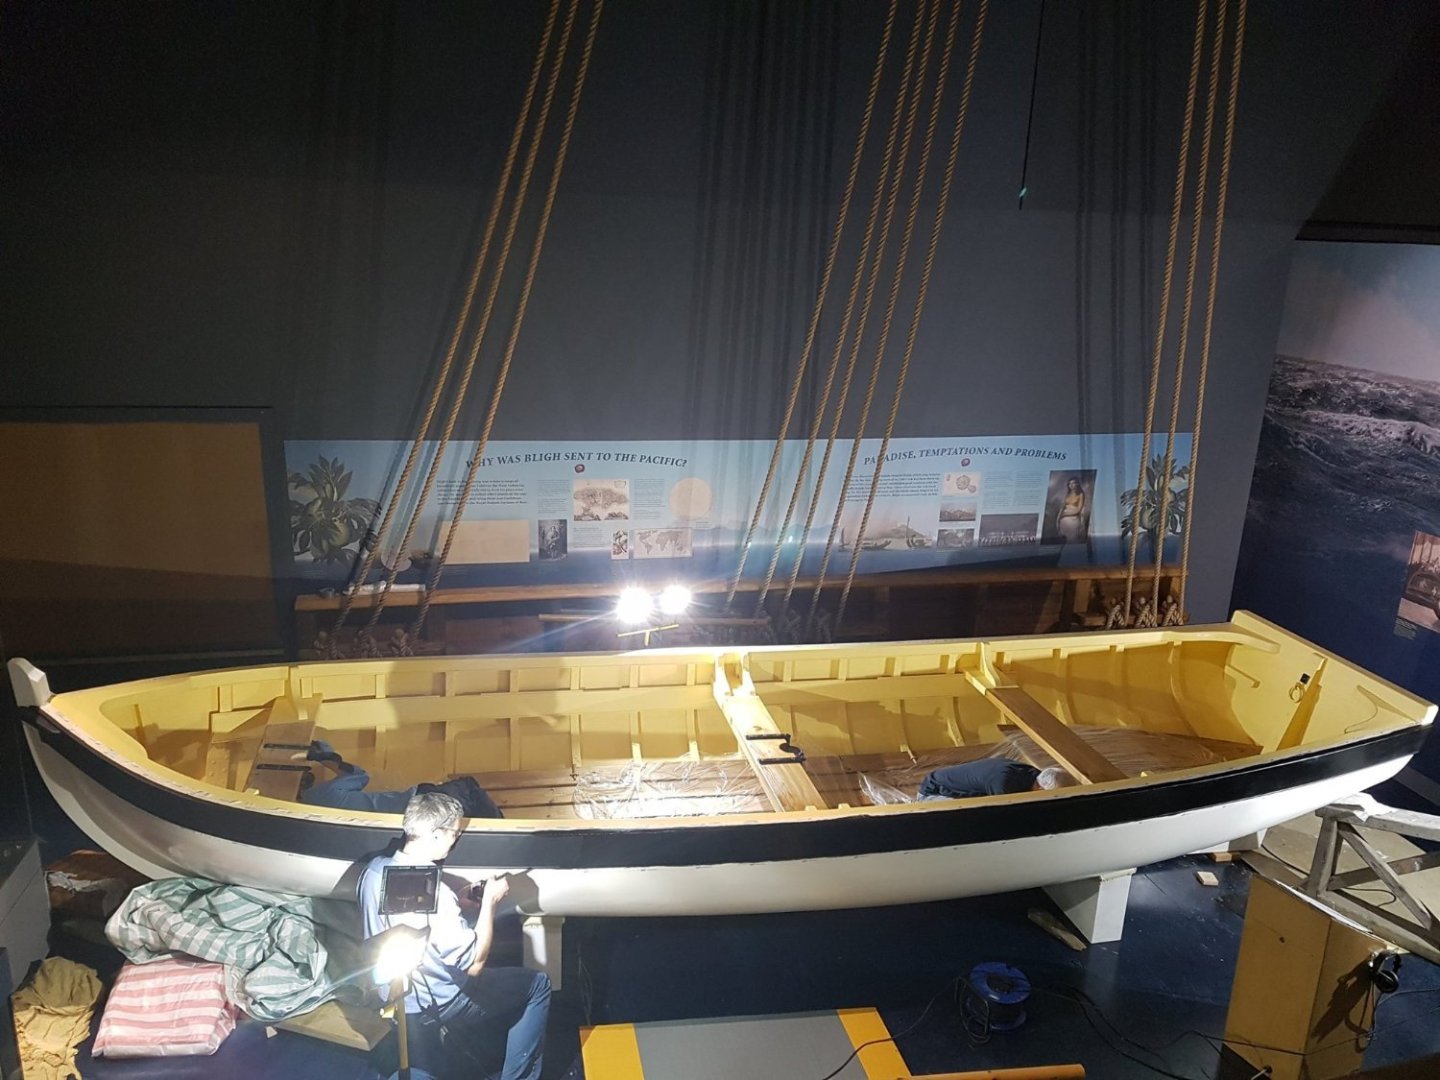
Did you spile or prebend the planks via the method in Chuck Passaro's video series on You Tube? If they are pre-shaped you don't need to force the planks or any clamps. Forcing the planks (edge bending) usually causes lifting and is a difficult thing to fix. The ship's boats in the photos below were planked without the use of clamps. Allan

- 36 replies
-
- 1
-
-
- First Build
- Endeavour
- (and 1 more)
-
Welcome to MSW. Looking forward to your build log. Allan
- 11 replies
-
- 2
-
-
- victory
- billing boats
- (and 1 more)
-
Mal A different take on this, hope you don't mind. Most, not all, contemporary models do not have sails. I have done models with sails if requested but more often than not do not include them as they block much of the details of the rigging lines. Look at photos of rigged models on the RMG Collections site to see what you like best, then go for it. If you do go with sails keep in mind there is no cloth in existence that is to scale. Most kit sails look more like burlap and take away from the look, IMHO. For example, if the heaviest canvas is used for a sail it has a thread count (TC) of about 50. At 1:48 scale that is a TC of 2400. At 1:64 it would be about 3200, neither of which I have ever been able to find. Silkspan is a great alternative and there is an excellent booklet for $5 at SeaWatch Books on sail making. Volume 4 of TFFM is loaded with information on rigging a model that you may also find helpful. Allan
-
This is great, and thanks for all the pics. A good day for me learning yet another vessel building technique! 😀 Allan
-
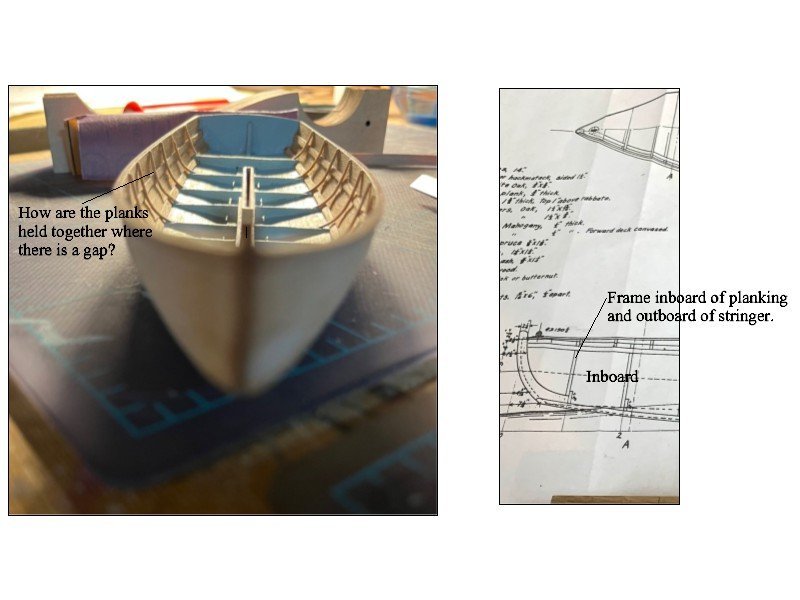
Thanks Reverend Colonel The slots for the stringers of course makes sense, but I thought the planking would still go outboard as shown on your plans. (See below) If the planking is not attached to the frames what holds the planking together? You mentioned full size boats are built this way, do you mean stringers lie between the frames and planks like your model or are they built like the plans you posted? This is a totally new technique for me and I am curious to see more on how this all works without the planking coming apart on a full size boat. Allan
-
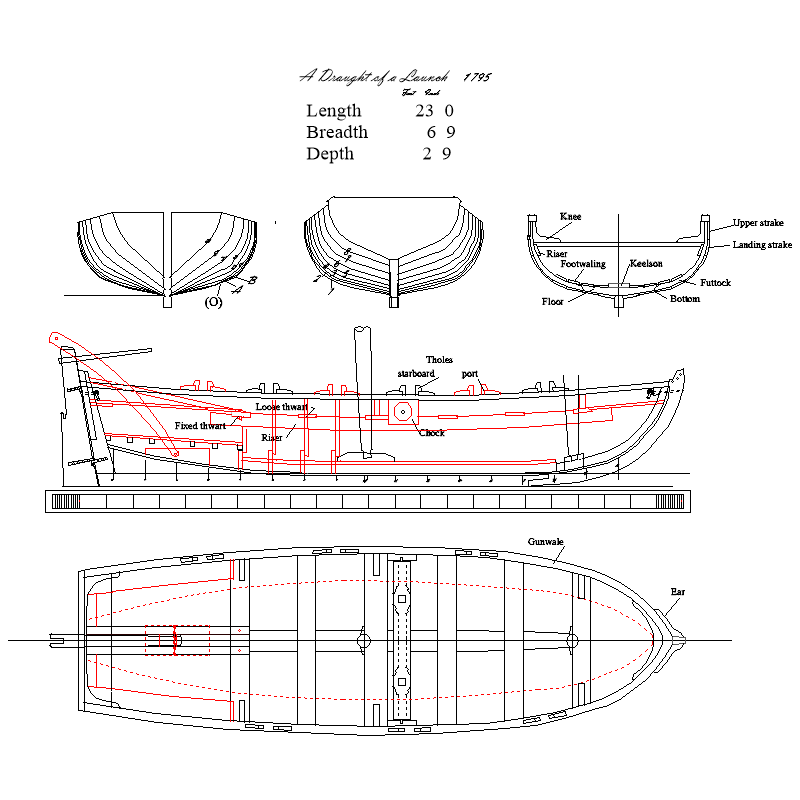
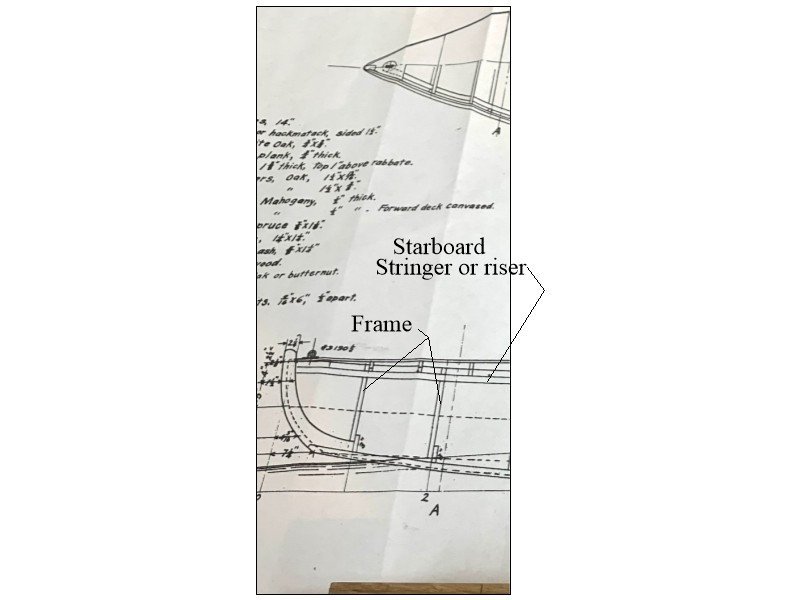
I may be wrong, but normally the frames are outboard of the stringers or risers as the planks are formed around and attached to the frames. In your photo the planking from the turn of the bilge to the top have a gap between the planking and frames so are not supported by anything. The drawing (from your post) below shows the inboard of the starboard side and the stringer can be seen as being inboard of the frames rather than outboard. Hopefully the photo below showing the riser, frames, and planking will explain better than my jibberish.😀 Allan
-
Well said Papa! Hi John She continues to be a lovely build, kudos. I never realized Bluenose had pear shaped deadeyes combined with round ones. I cannot find plans or photos of Bluenose or any other vessel ever having that combination. Very interesting. Allan
- 282 replies
-
- 2
-
-
- Bluenose
- Model Shipways
- (and 1 more)
-
Thanks for posting the video Beez. Seeing the end results confirms all the bad reviews have been correct, or possibly understated. Allan
-
If you don't mind resin instead of wood, do a 3D drawing (or have a friend do it😀) and have it printed. Allan
-
Hi B.E. The model continues to look great! I really like that the rudder pintles and gudgeons are to scale unlike most other kit rudder hardware. Allan
- 648 replies
-
- 3
-
-

-
- Indefatigable
- Vanguard Models
- (and 1 more)
-
The English term (not American) for these pieces are port rigols. These are described on page 190 in Goodwin's the Construction and Fitting of the English Man of War. Another interesting note is the Nelson chequer wherein the outside of the lids were painted black. Under Nelson's influence this became universal in the RN by the end of the 18th century. Allan
- 33 replies
-
- 1
-
-
- Victory
- DeAgostini
- (and 1 more)
-
Hi What do you mean by trim? The wales are as shown on the drawing above. You can see the relative thickness of the wales and the thick stuff above and below the wales. Thick stuff is what they actually called the planks next to the wales on contracts and scantlings from Steel's Elements and Practice of Naval Architecture and The Shipbuilder's Repository 1788. In reality they were top and butt or anchor stock not straight strakes of planking but that is for another day. As to the size of the materials they supplied I thought that might be the case. They don't seem to do any research on these kinds of details so the material they provide is way out of scale. If you are looking for a realistic look, this is nothing some sanding can't fix, especially at the bow where they reduce so they are the same thickness as the rest of the planking as they reach the rabbet. The below is from a contract for a 74, so the thickness is less than would have been on Victory, the scantlings for which are given above. Still, it gives an idea on how this worked. THICKSTUFF under To have 6 Strakes of Thick stuff under the Main Wales: the Upper Edge of the Upper strake to be of 6¾ inches in Thickness the MAIN WALES lower edge of the 3rd to be 5⅝ inches & the lower edge of the sixth Strake to be 4 inches in Thickness. THICKSTUFF on To have One Strake upon the Main Wales of 6¾ inches in Thickness and 1 foot 1 ½ inches broad, the lower edge of the Strake upon MAIN WALES to be 5 ¾ inches thickness & to wear off to 4 inches thick at the Channel Wales. Allan
- 33 replies
-
- 1
-
-
- Victory
- DeAgostini
- (and 1 more)