yvesvidal
-
Posts
3,644 -
Joined
-
Last visited
Content Type
Profiles
Forums
Gallery
Events
Everything posted by yvesvidal
-
 That is so true. Building out of paper cards adds a considerable level of difficulty to the model. It is unfortunate because of lot of very interesting and rare models are available in cards only. Yves
- 9 replies
-
- 3
-

-
- Japan
- Wind-Class
- (and 4 more)
-
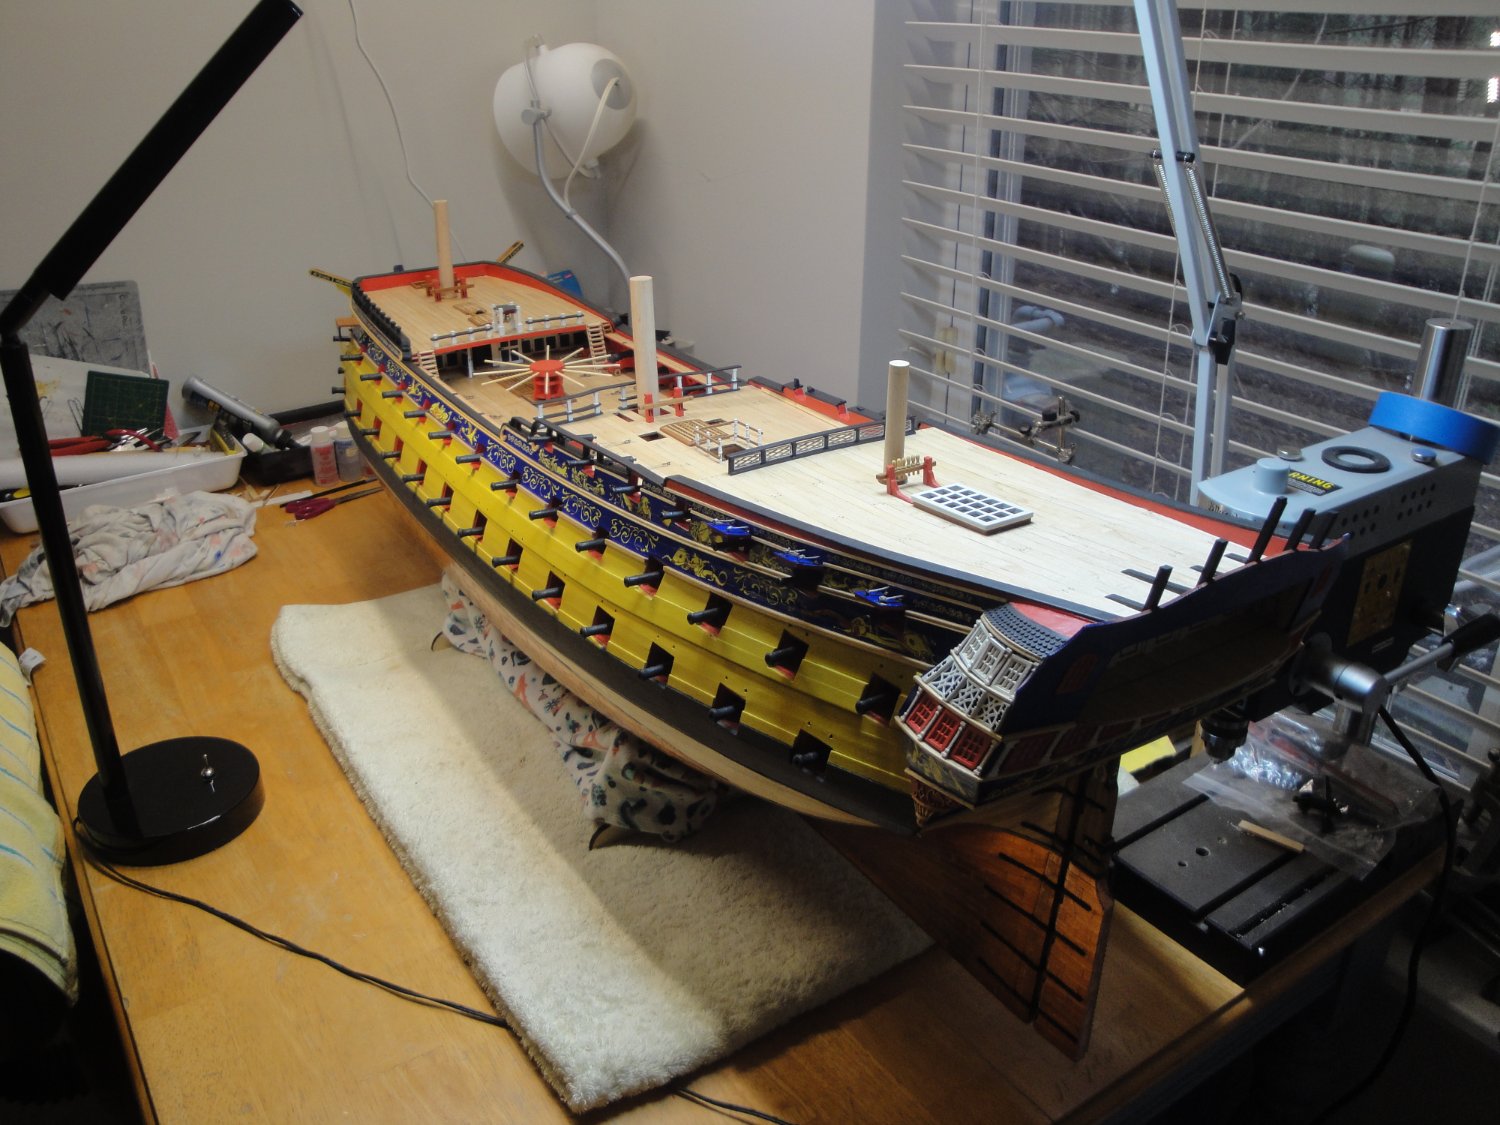
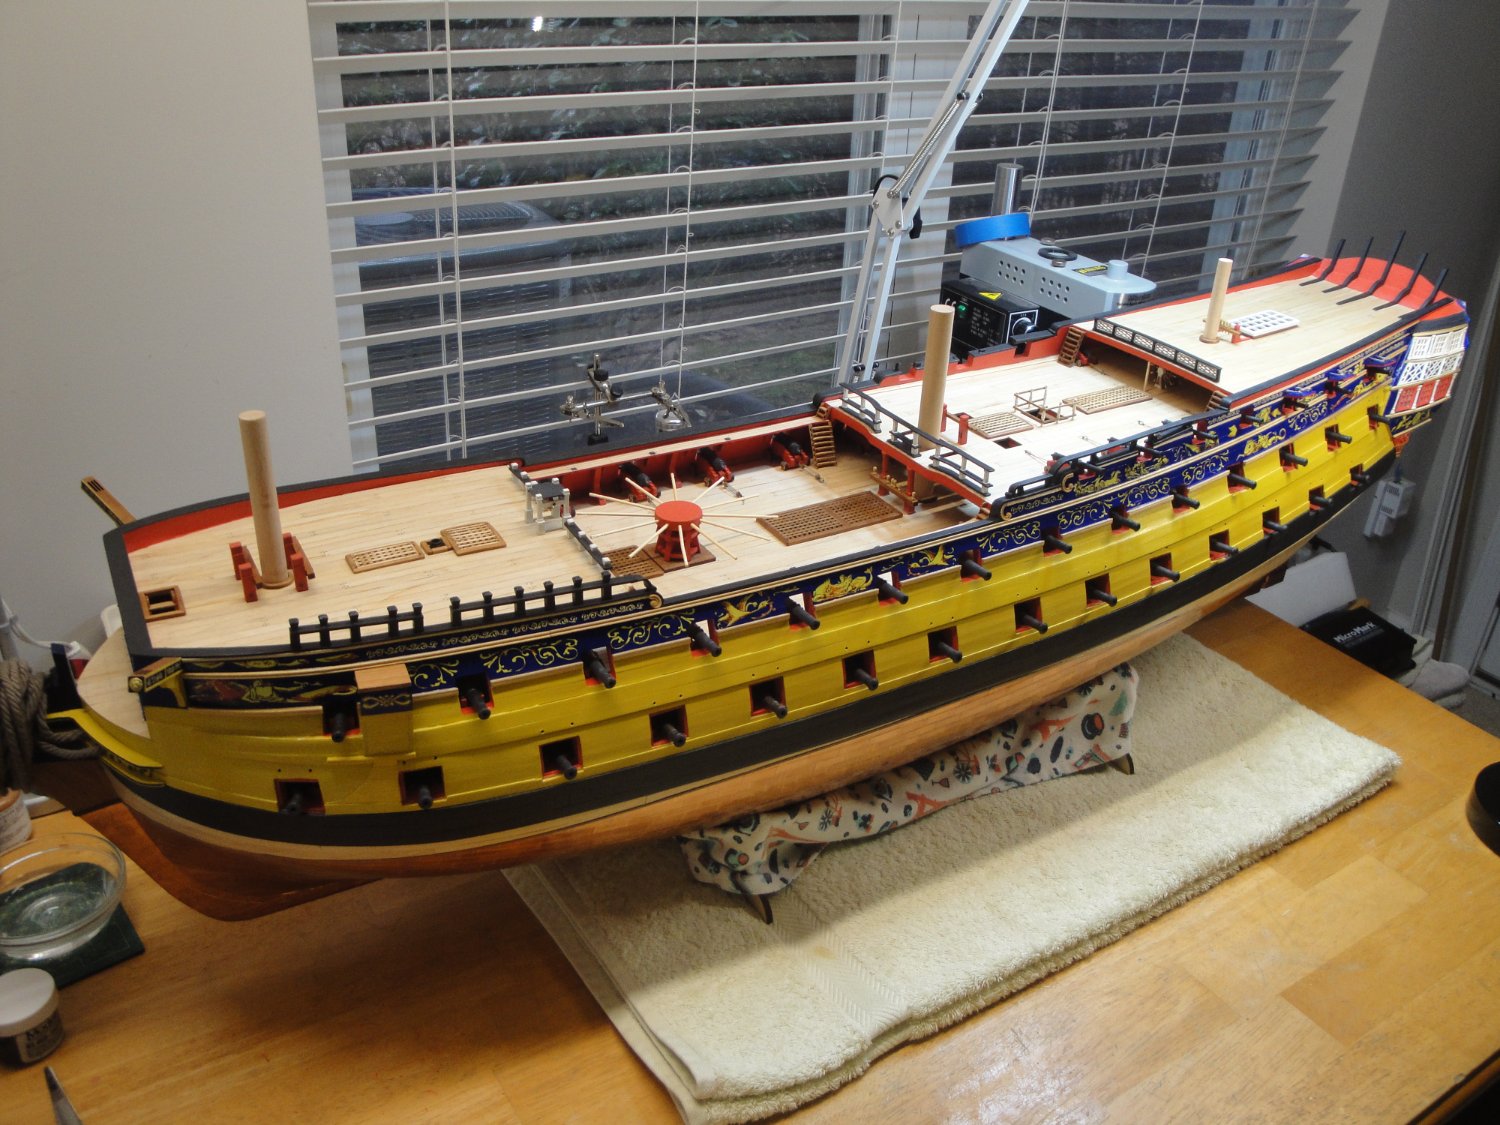
Oh, I forgot to mention it, but the model weights about 19 pounds at this stage. It may reach 20 pounds, when all is said and done but most of the parts left are made of light wood and should not contribute much to the mass of the model. Not exactly easy to move around.... Yves
-
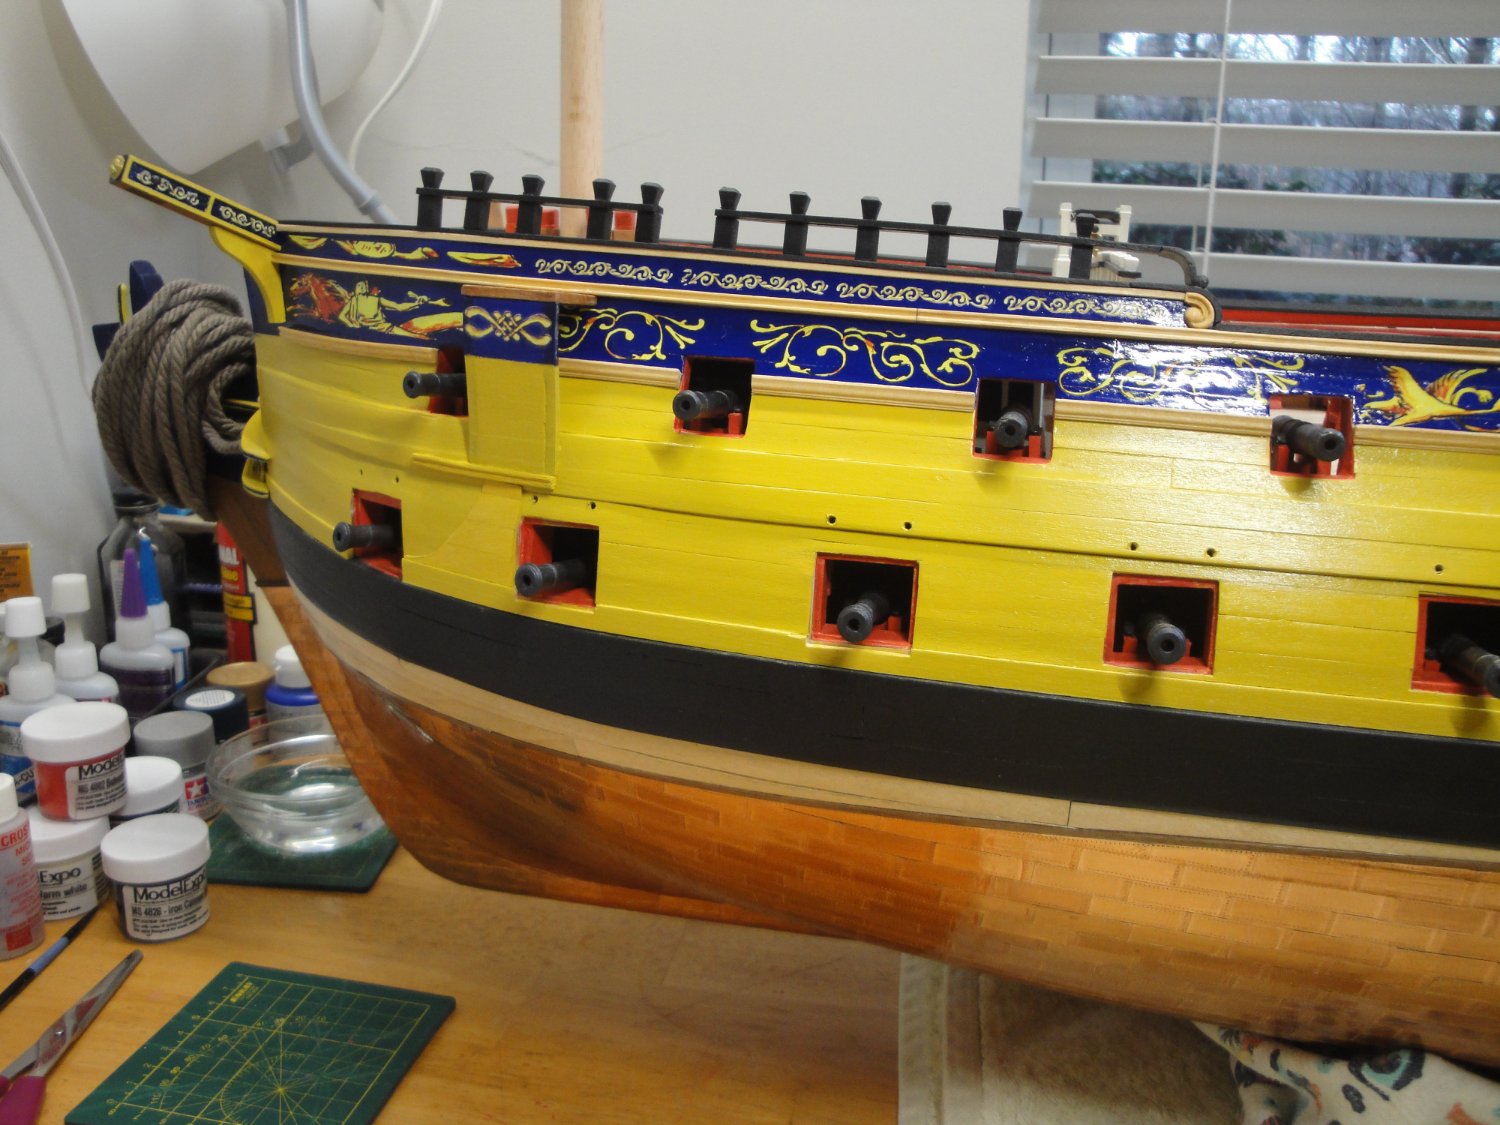
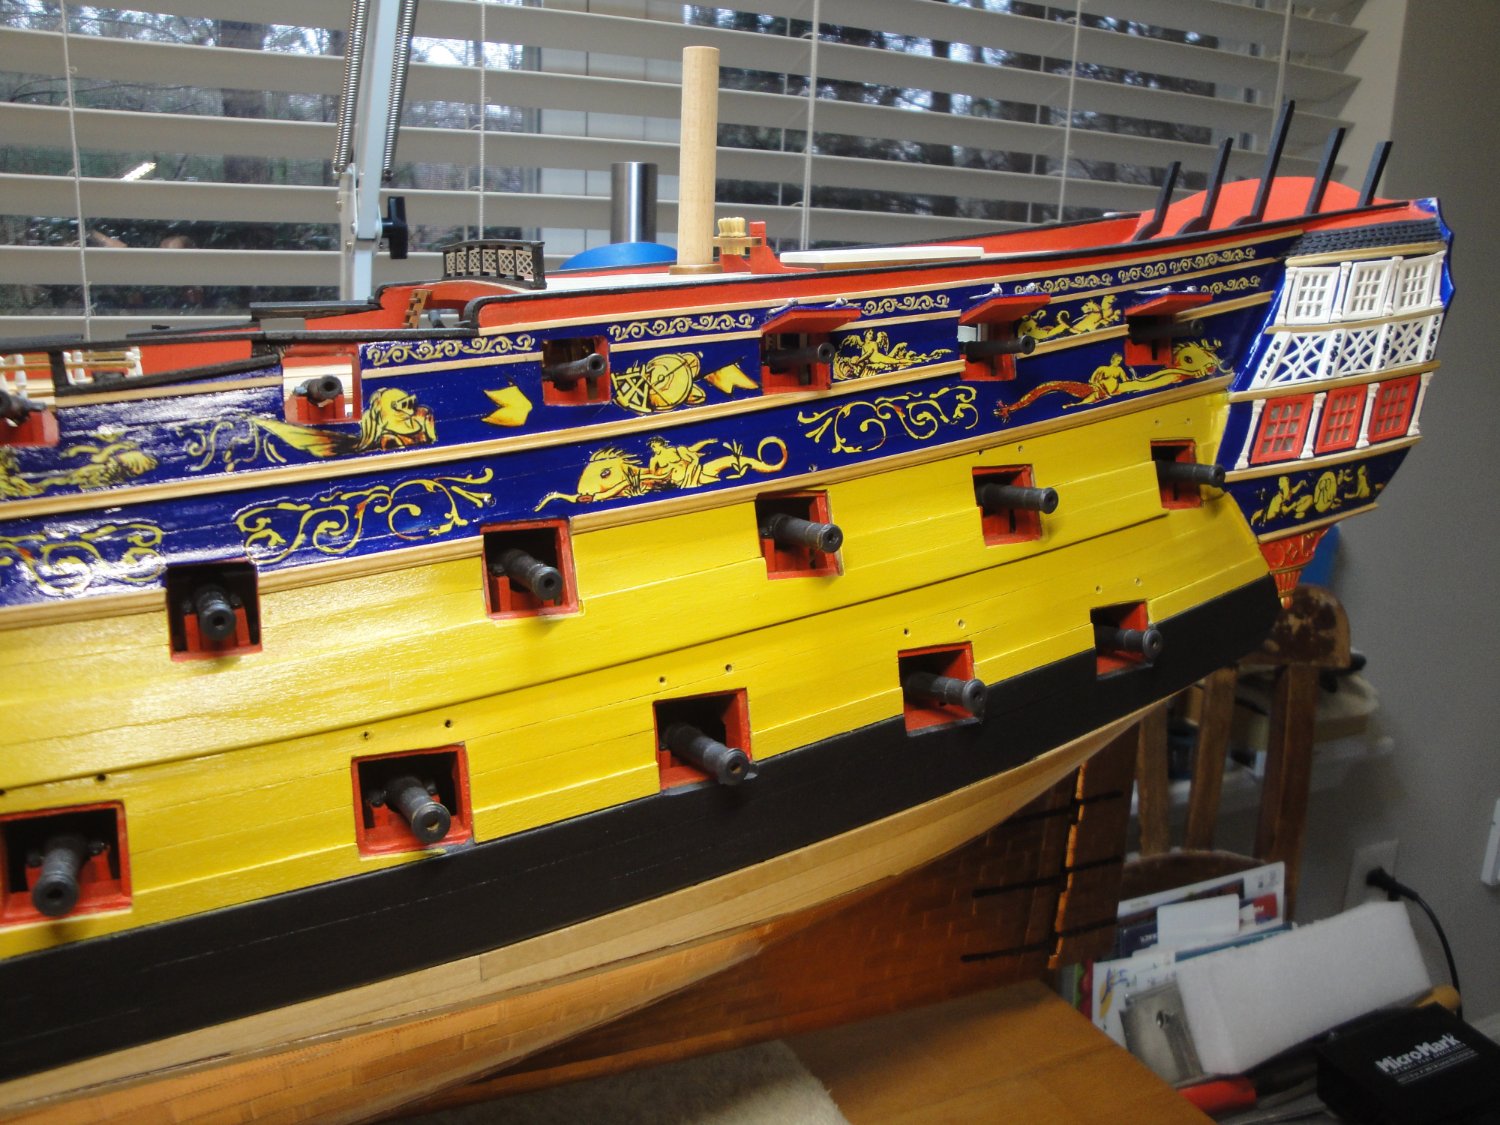
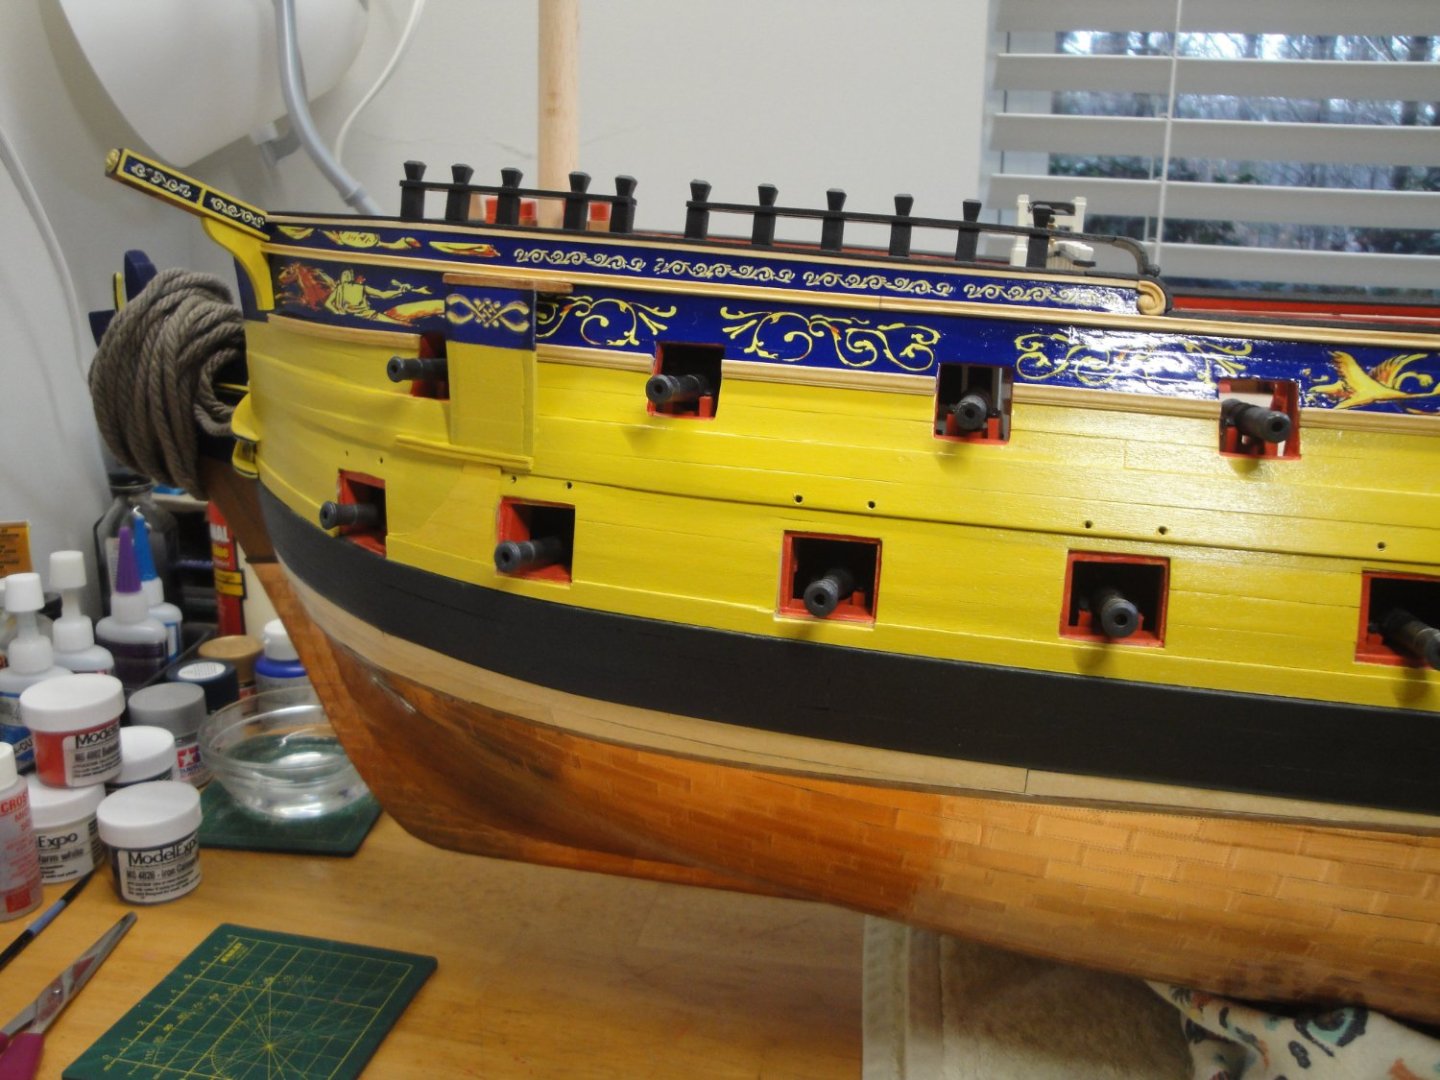
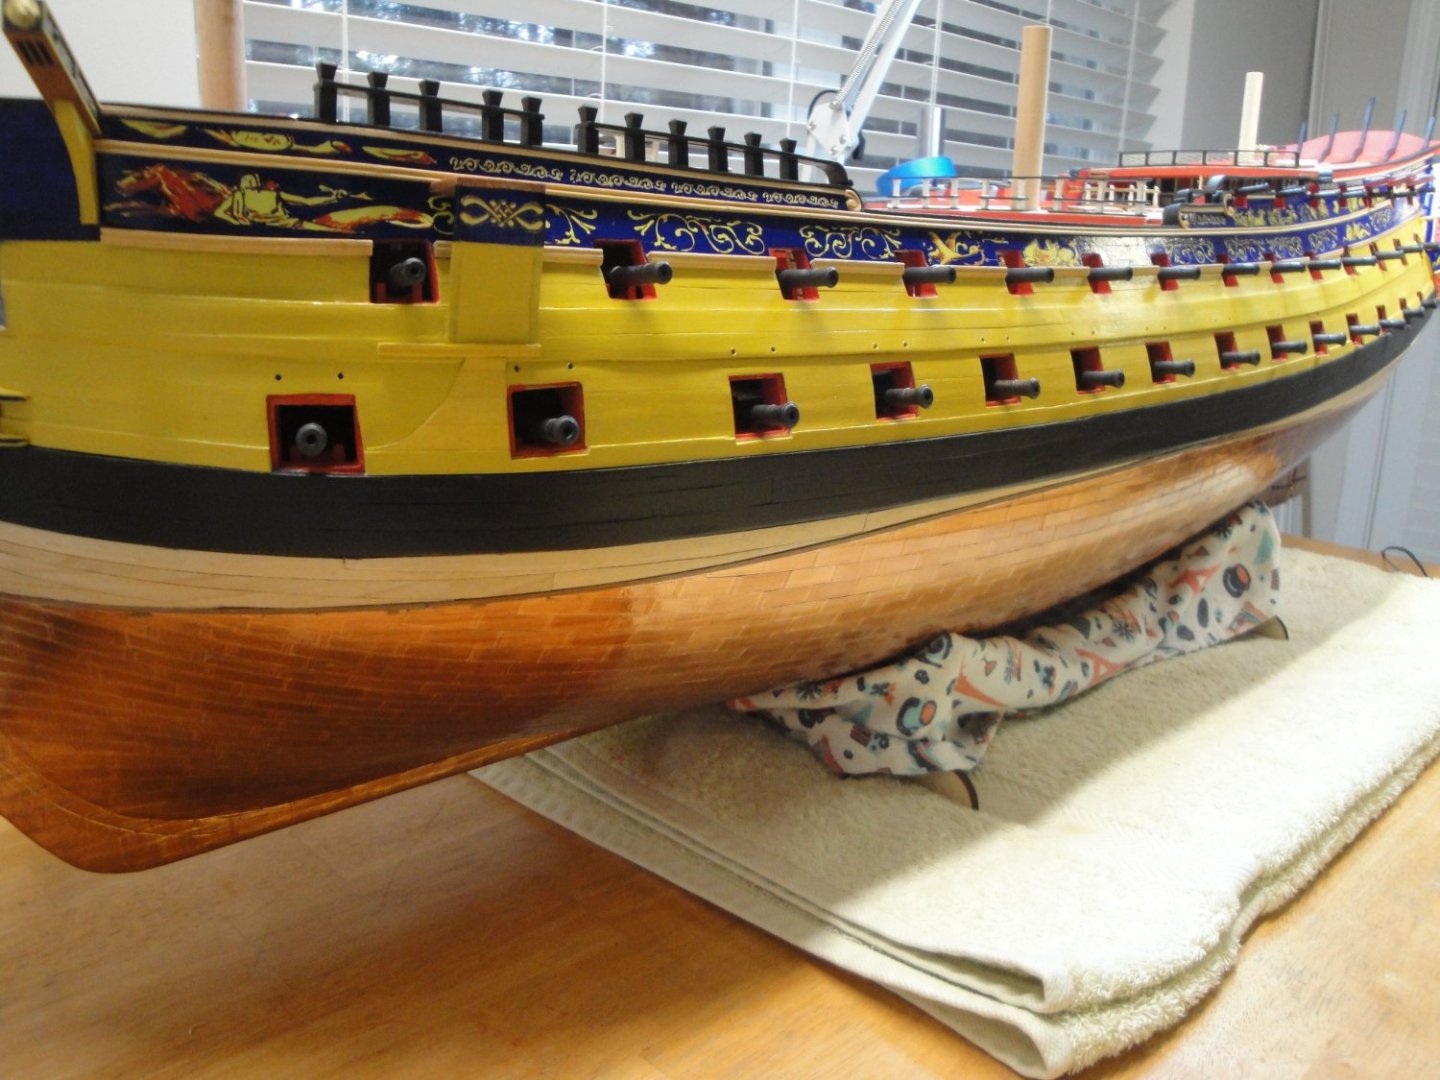
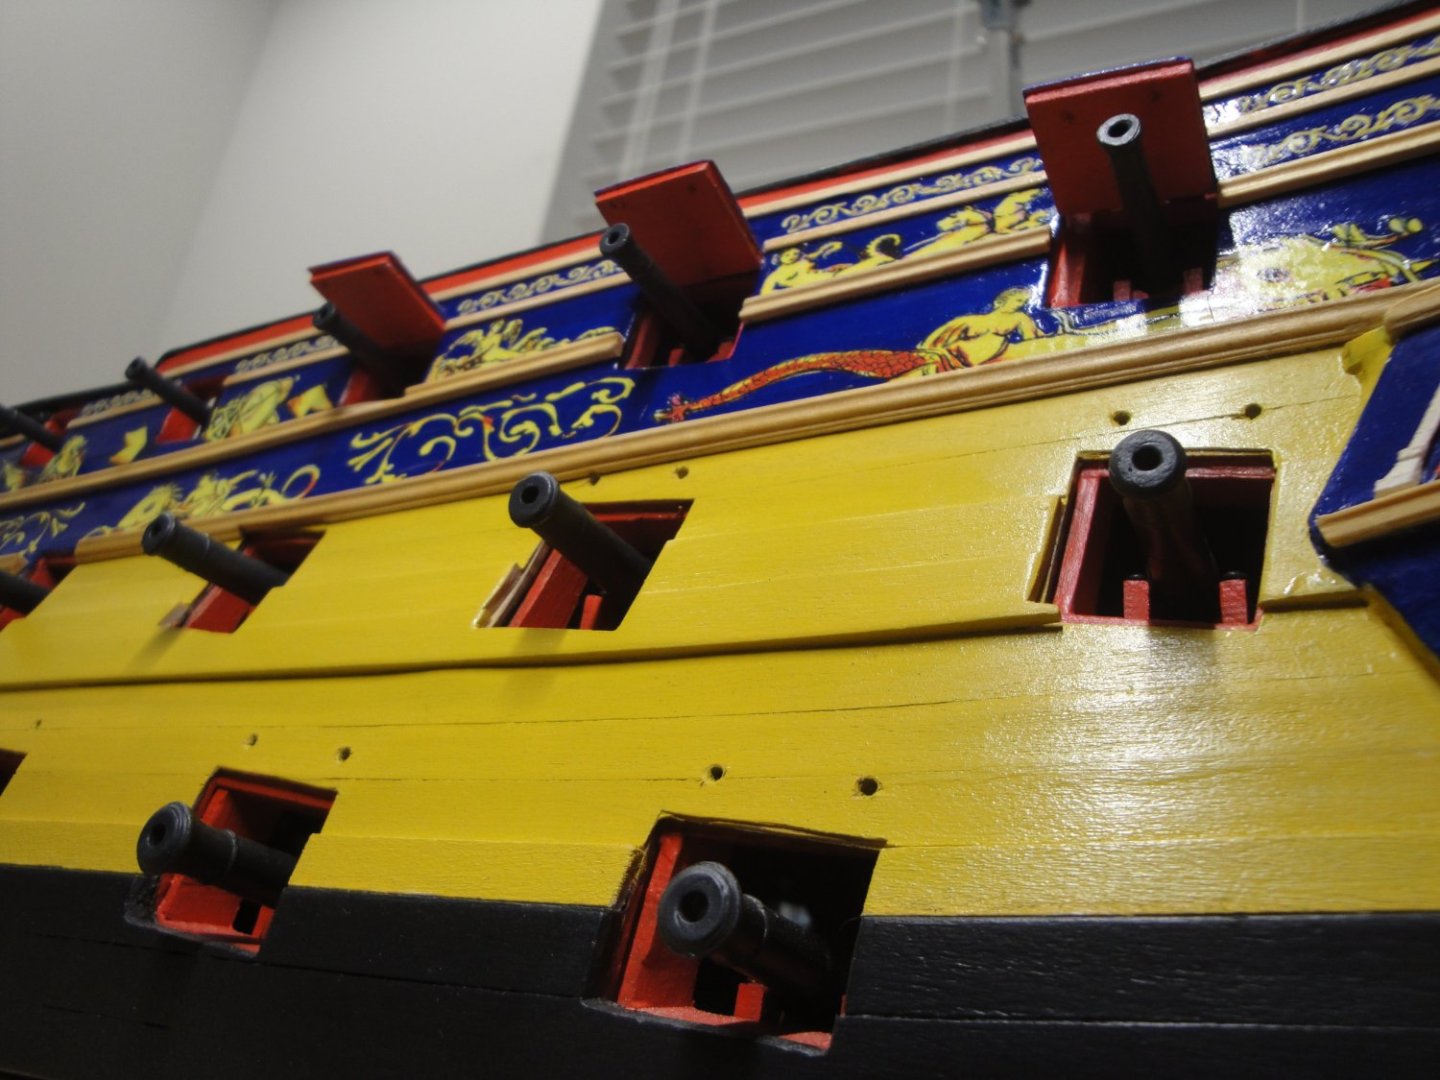
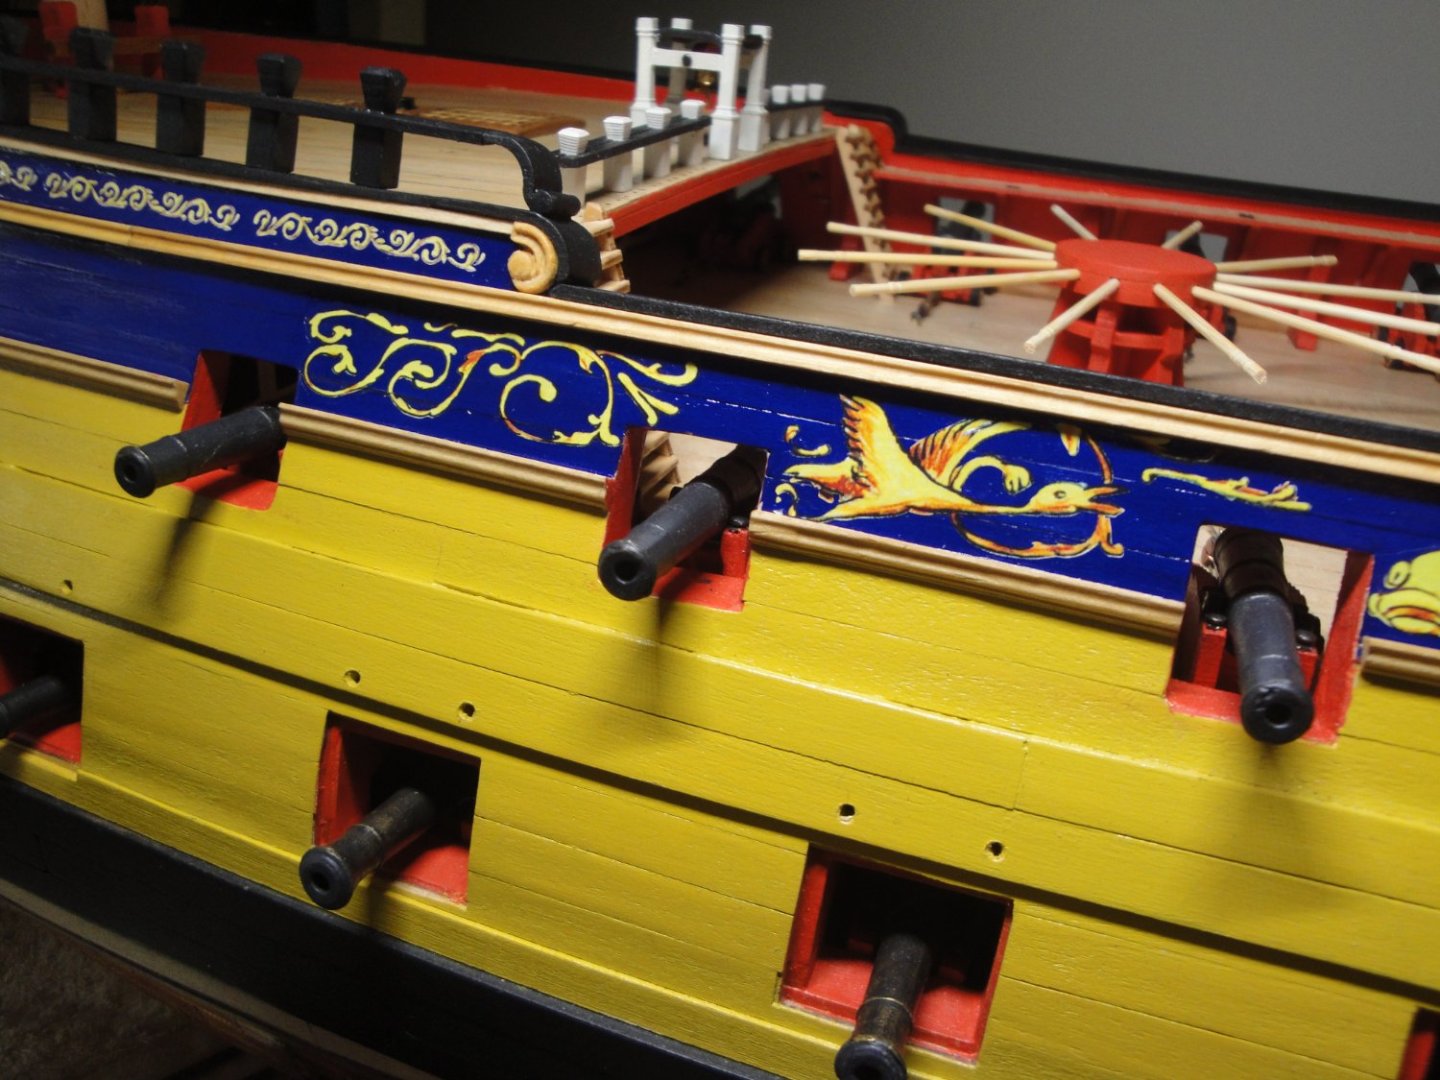
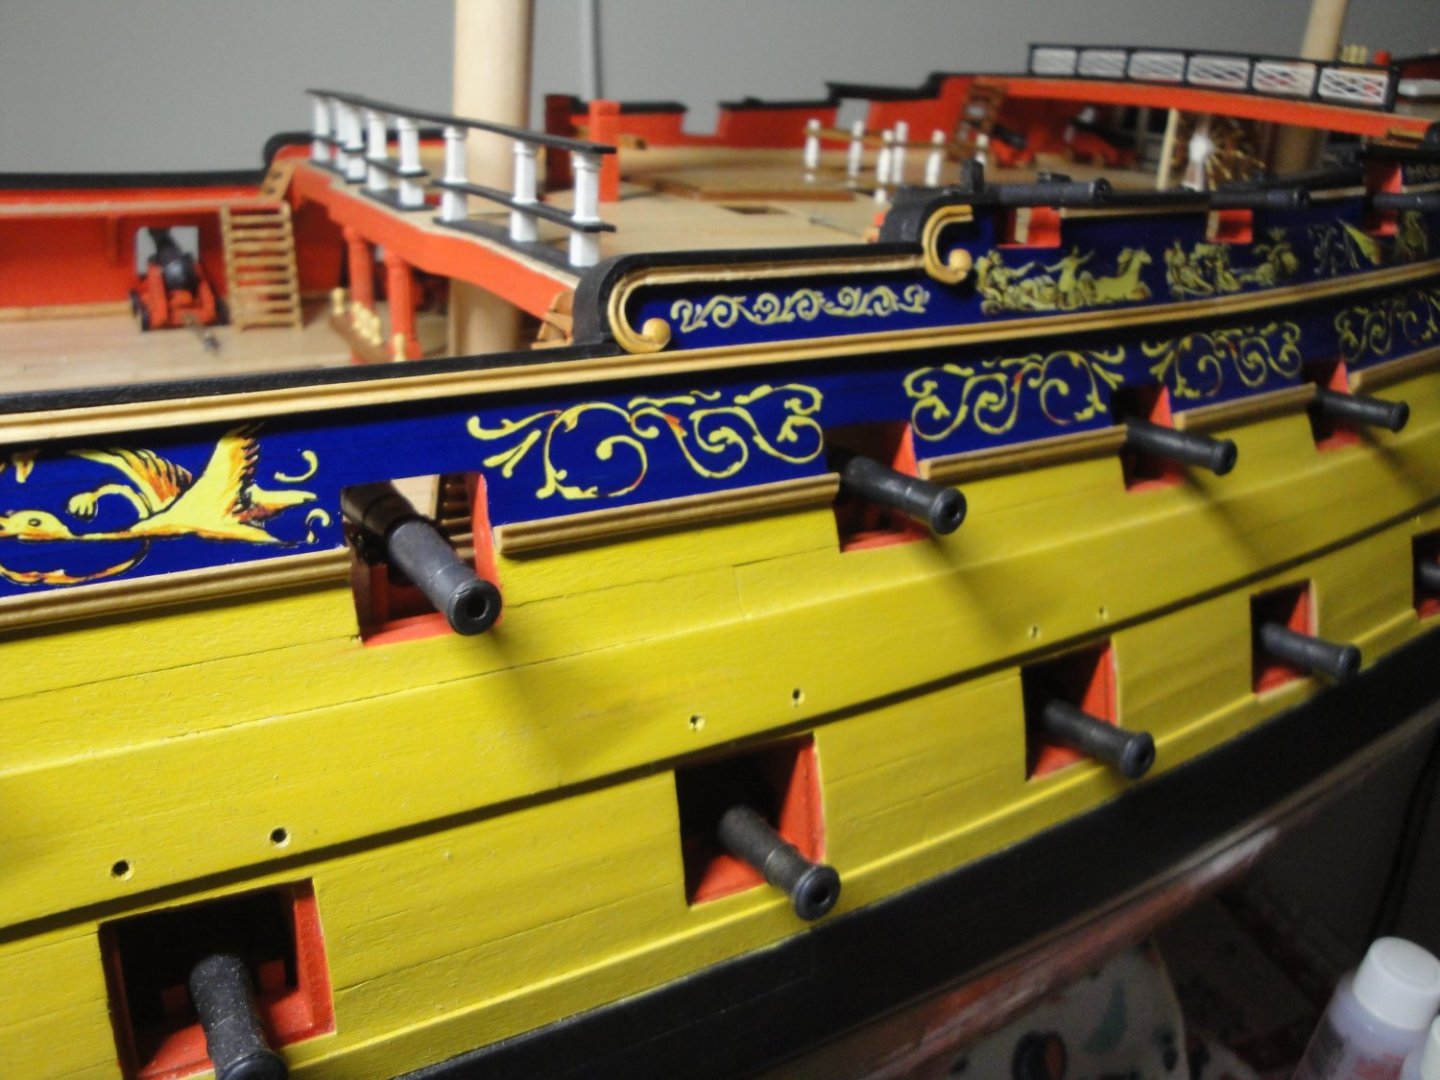
So after a few weeks of work, the port side is pretty much completed. I still have some wood joinery to do and correct some painting mishaps, as well as installing the 18 gun port lids that are still missing. The upper gun port lids have been built and installed: what a royal pain in the ****, to build them and install them correctly. Overall view of the Port side of Bellona: Now, the same has to be done on the starboard side..... Wish me luck !!! Yves


- 507 replies
-
- 17
-
-

-
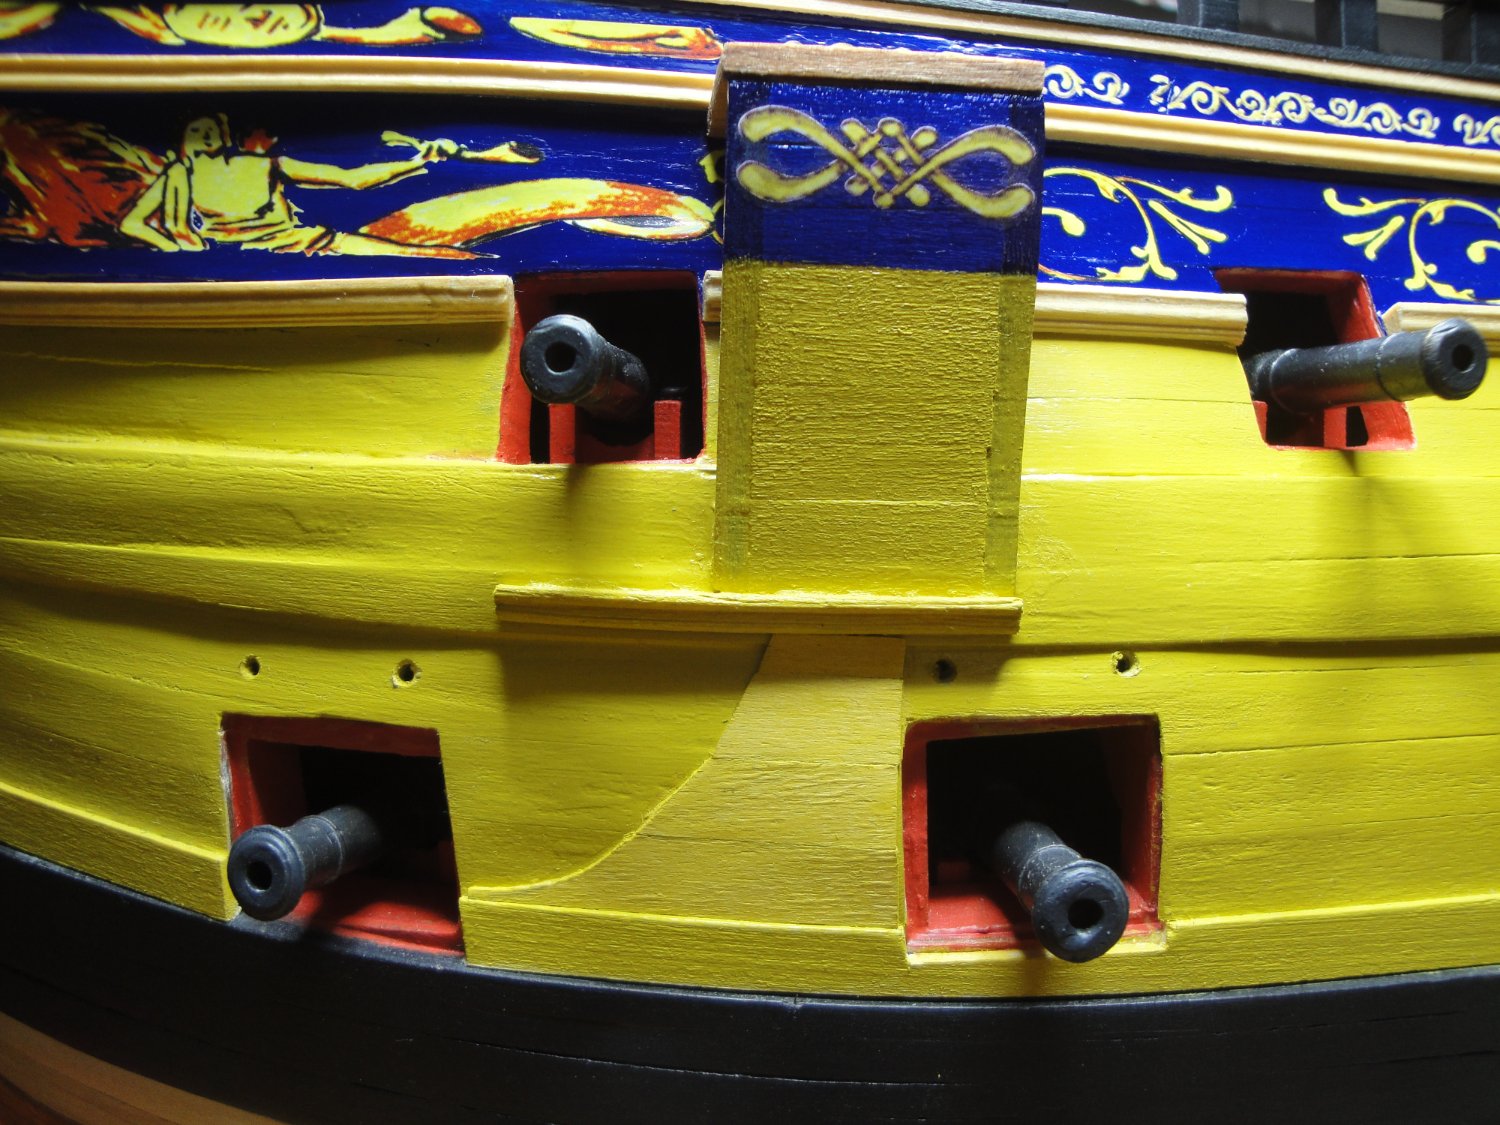
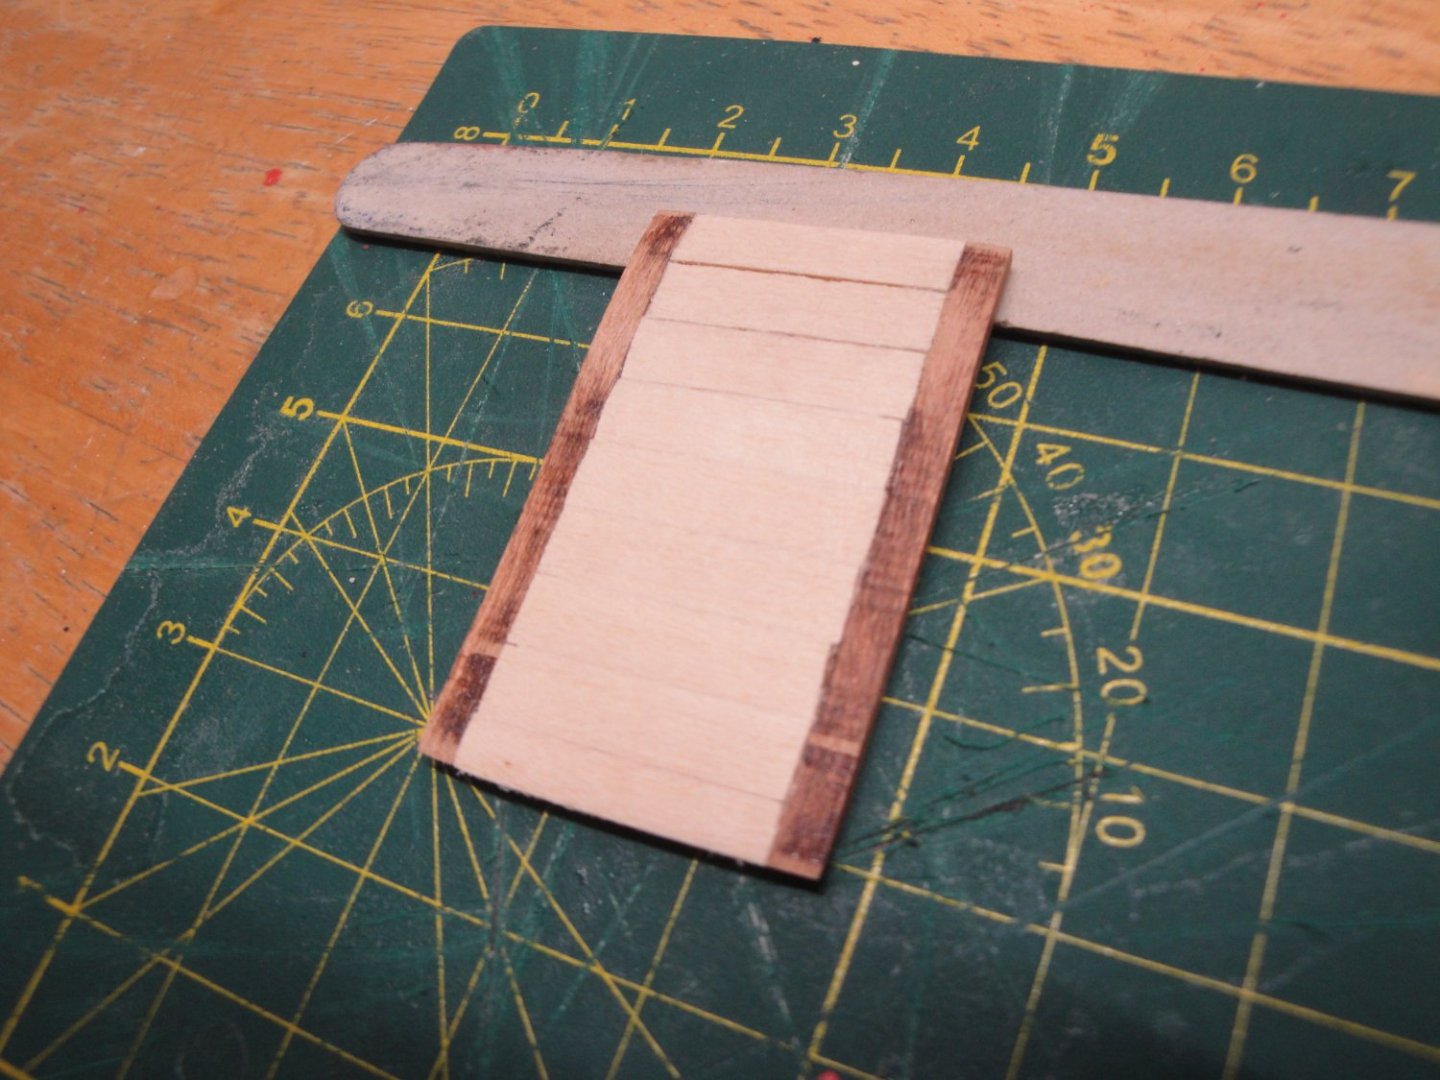
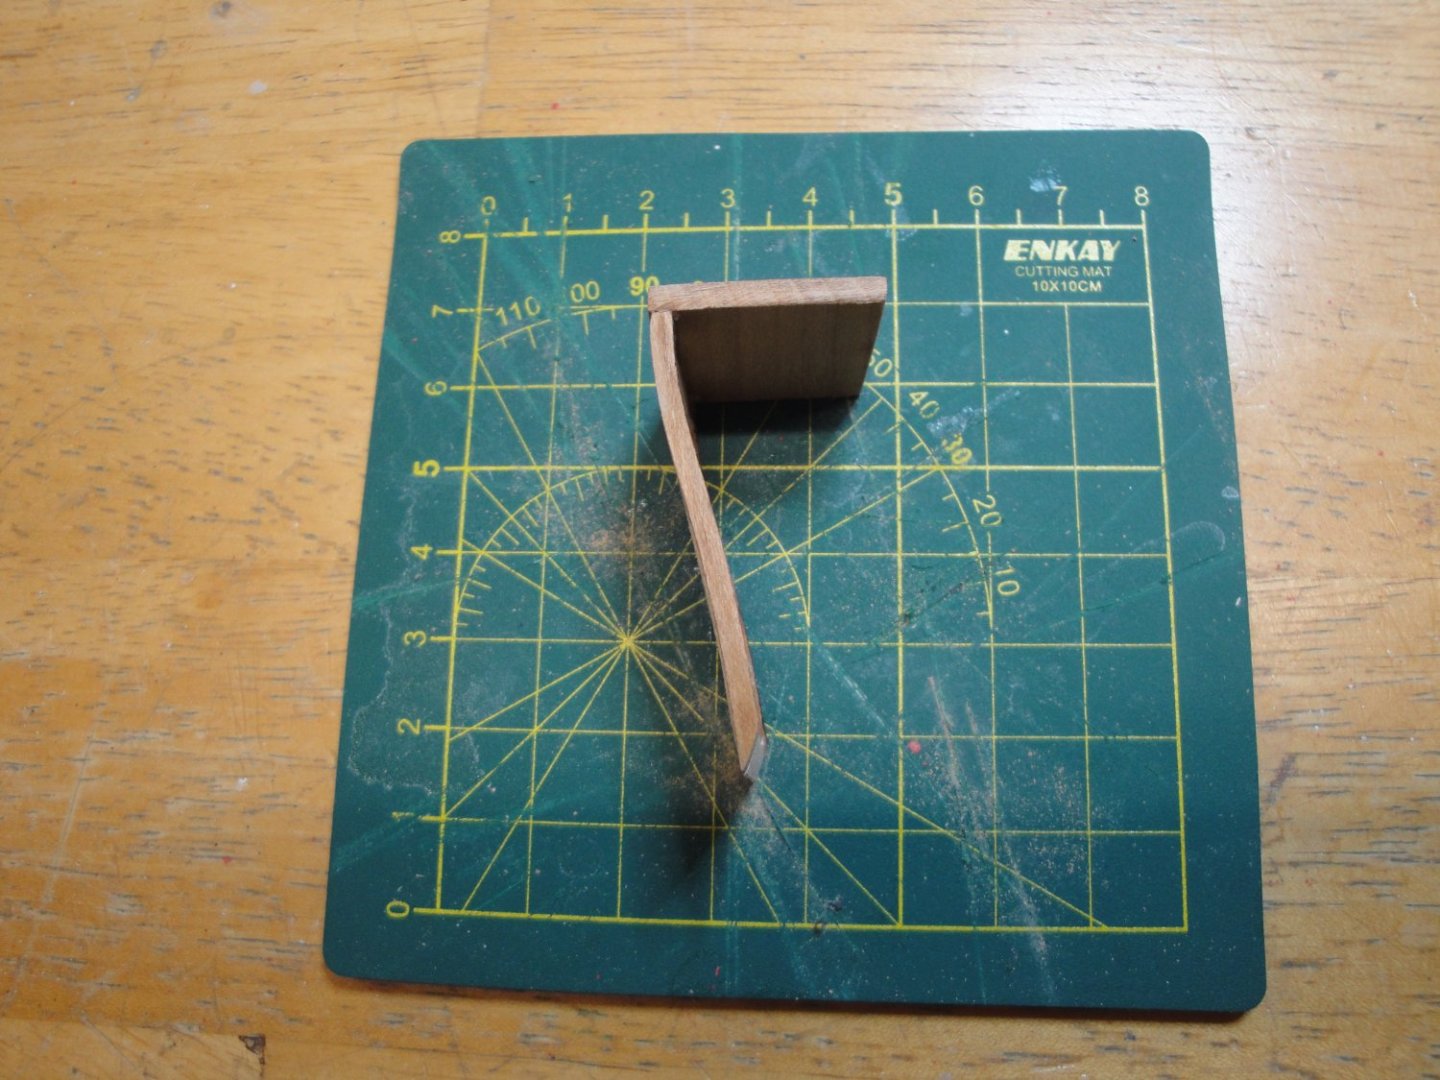
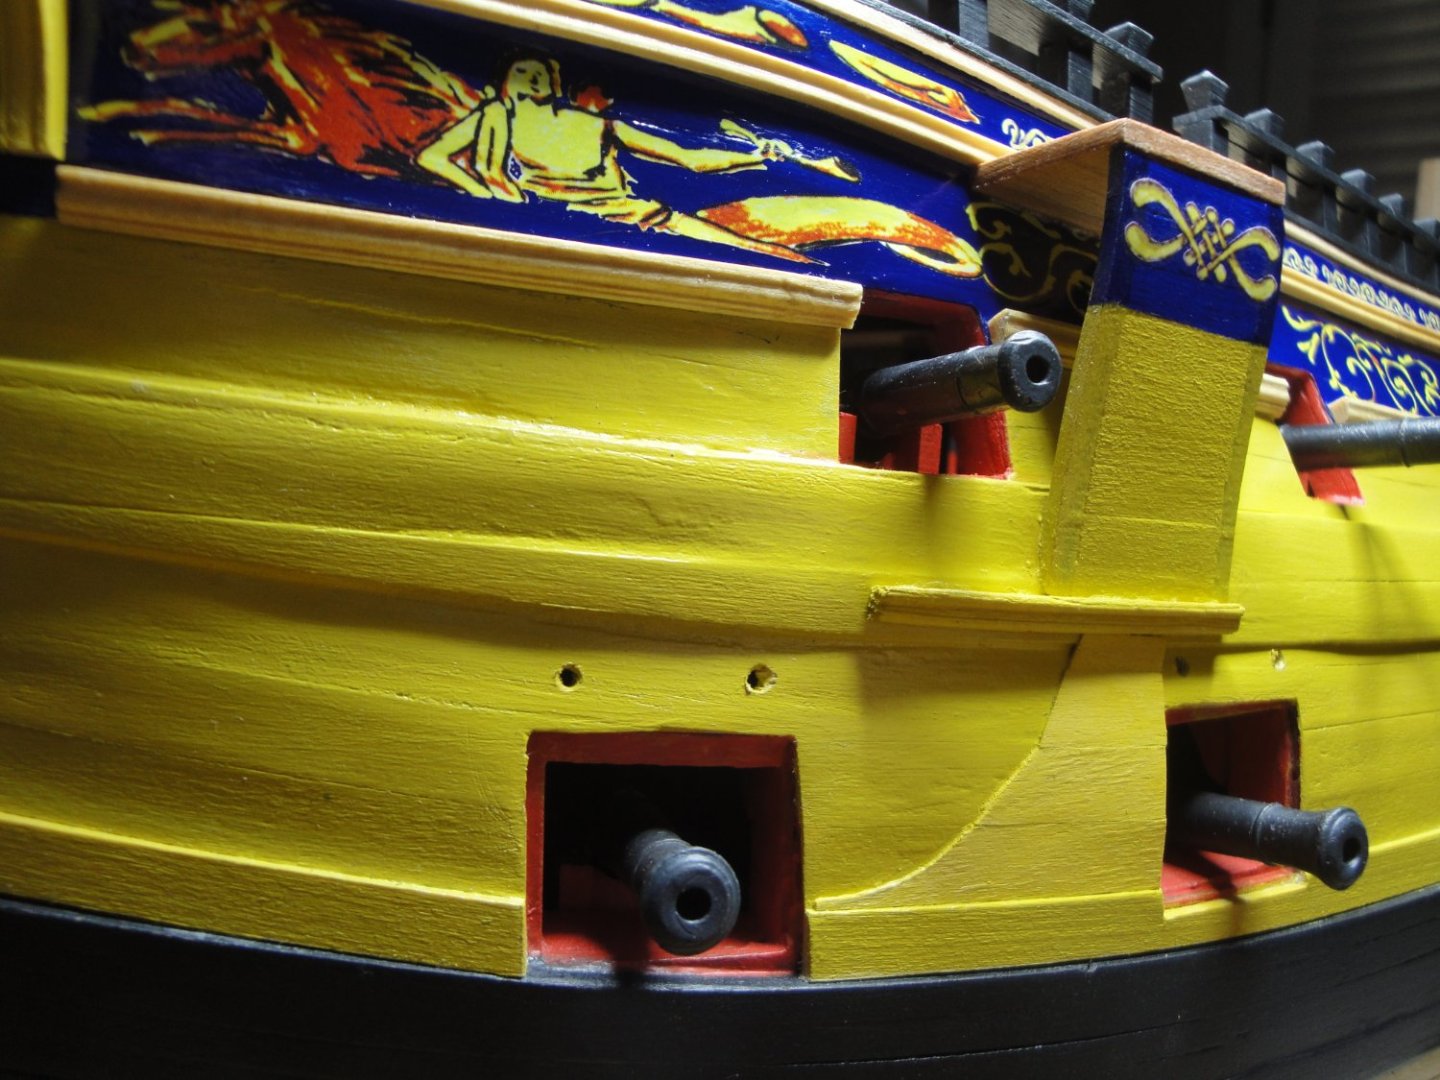
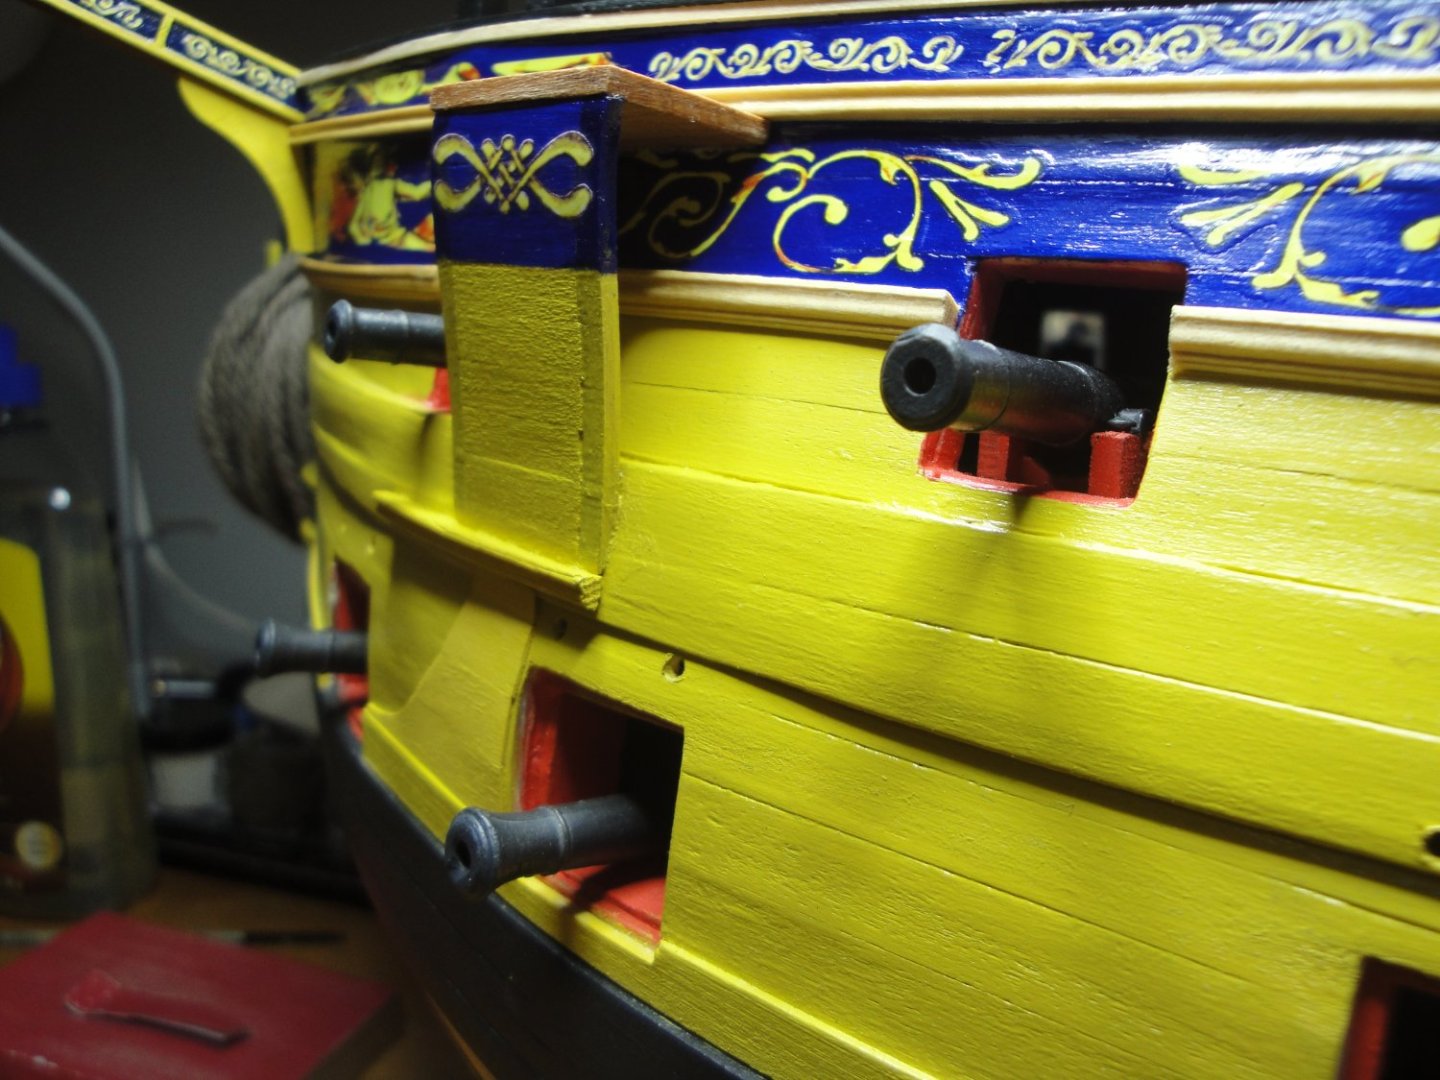
The bolster to protect the hull from the damaging effect of the flukes of the anchors, is not very well defined in the kit. A piece of plywood is provided to be glued between the two curved cherry parts, but it is not realistic and plywood does not bend easily, at least in my world. Instead I created the bolster by gluing 2 x 3 mm basswood strips cut at 20 mm long. The top part of the bolster is a section of the channel, cut from the main front channel. I will not be representing the channels on my model, since they are not equipped with holes and the kit does not offer any bolts, chains and deadeyes. Besides, I really like the smooth shape of the hull and do not want to compromise it with additional and poorly depicted features. The kit only provides instructions and parts for the upper section of the bolsters. However, using the Anatomy of the Ship, one can see that there is more to it: Yves

- 507 replies
-
- 10
-
-
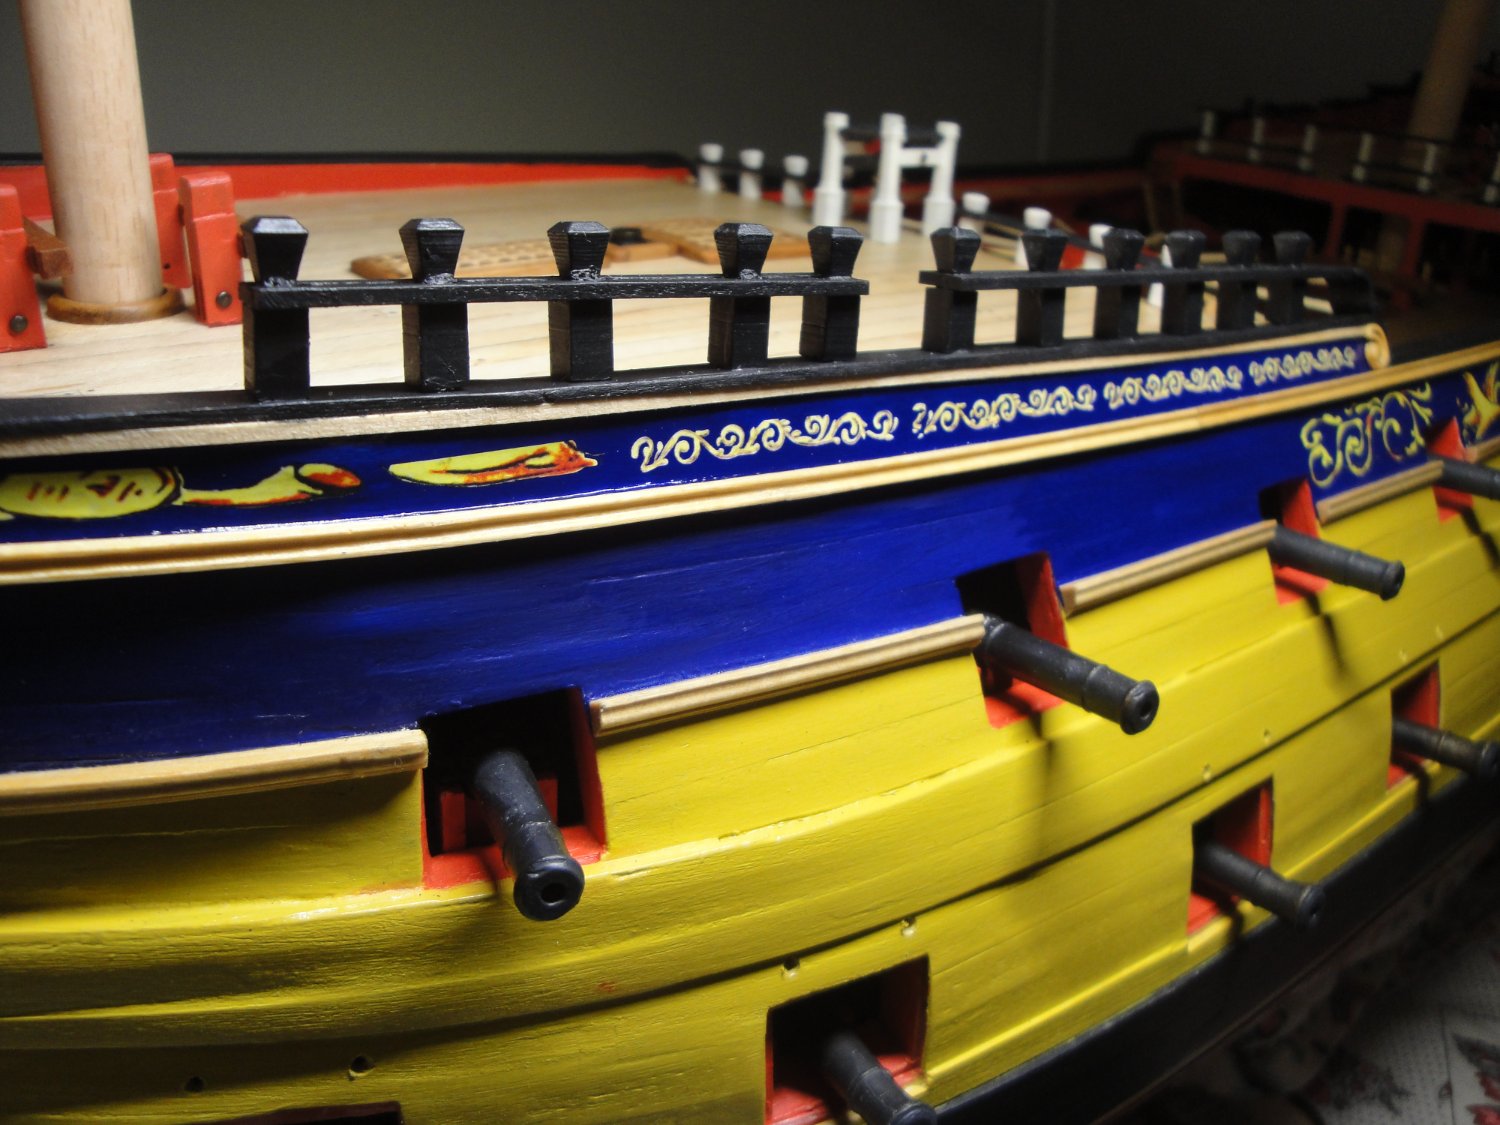
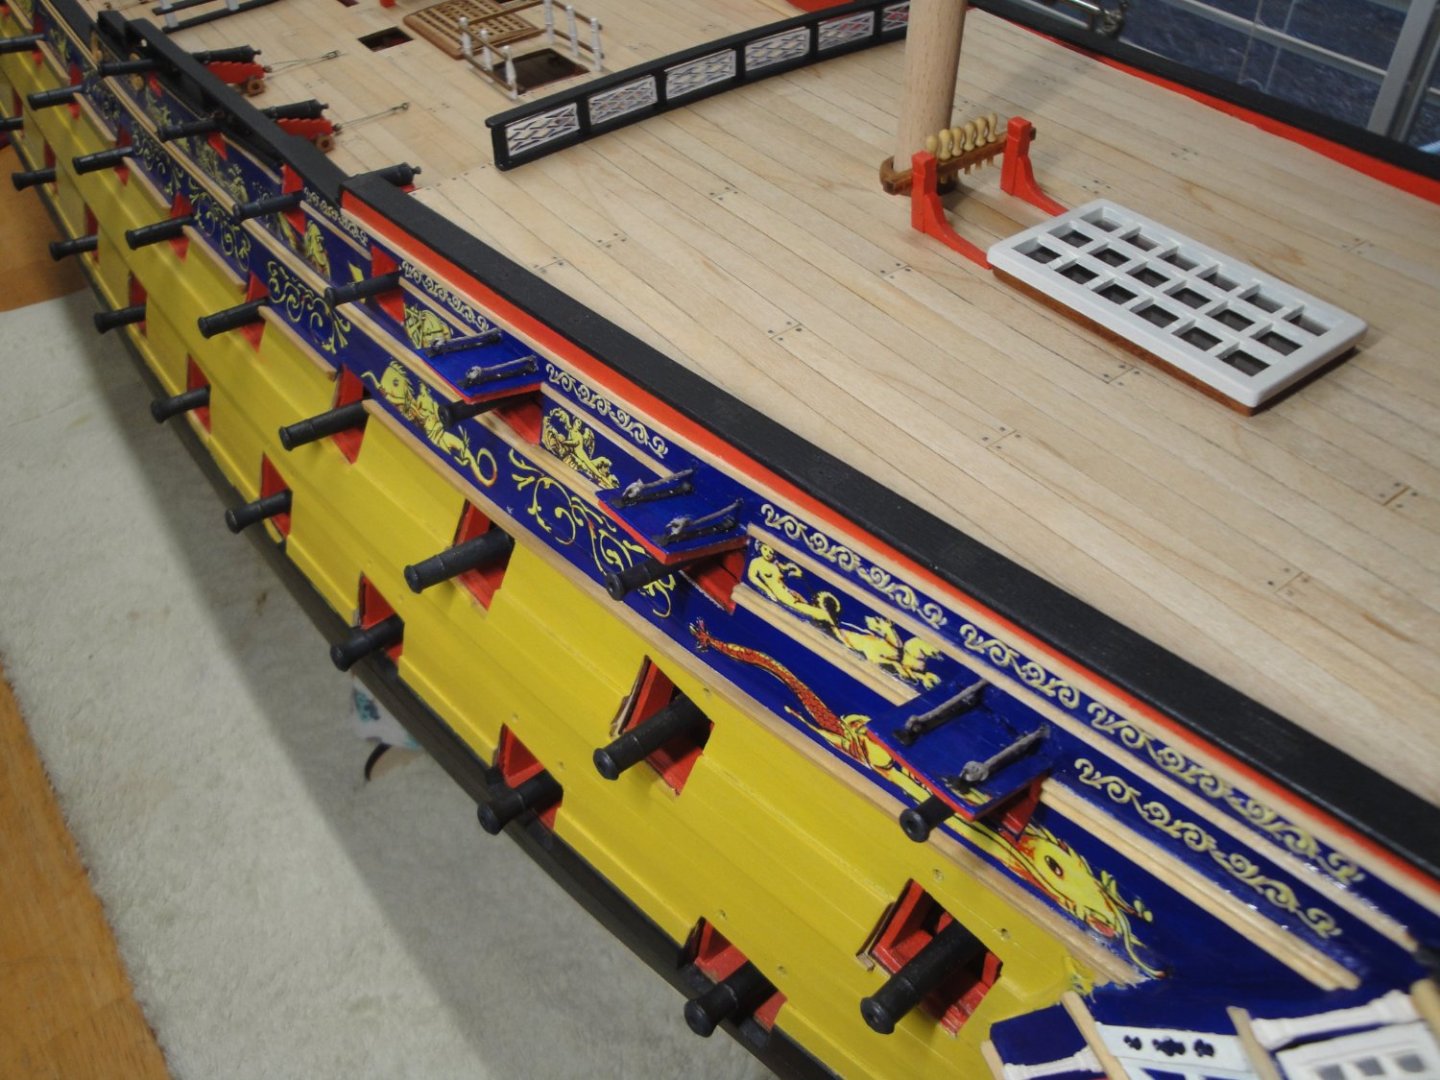
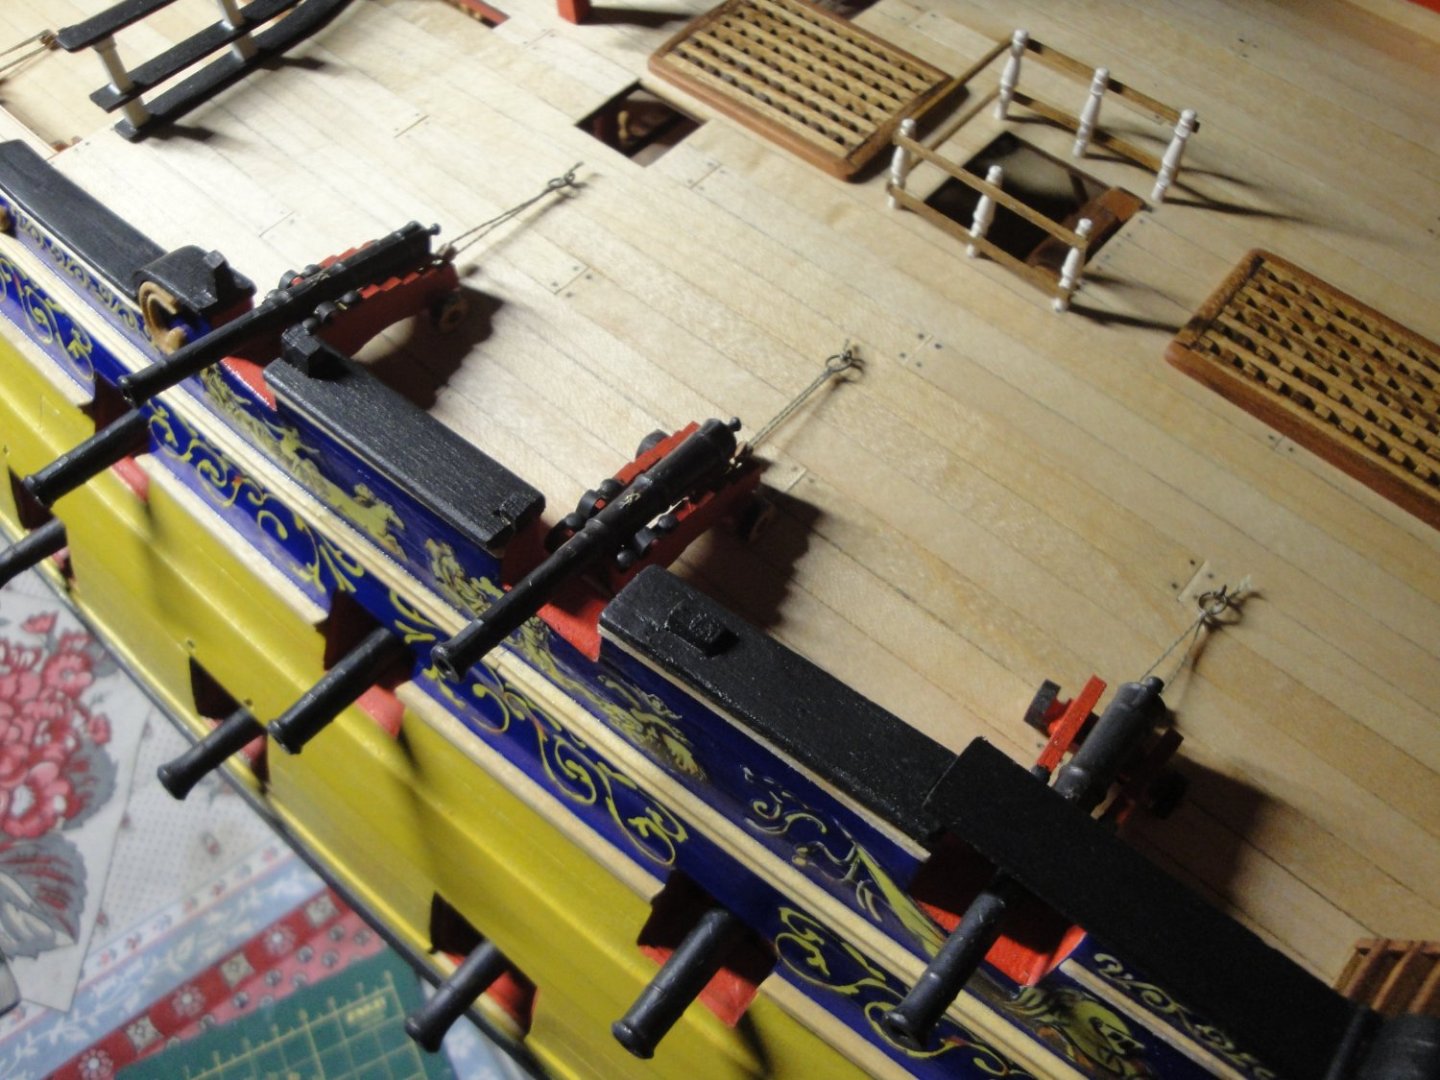
Wow, times flies. It has been a month already. I have not worked much and was distracted by various things. However, I managed to make some progress on the Port side of the hull: There are quite a few decals to install, after finishing all the woodwork with various small strips of wood (not provided in the kit). I debated using the 2 x 3 mm strips (included in the kit) and decided against them, as they are too large and too thick for some of the wood rails. Instead I went with 1.5 x 1 mm strips. The decals are placed using MICROSCALE SET and SOL chemicals. Then, a couple of coats of Future Floor is brushed to seal the decals and to protect them from handling. The surface is treated with Future Floor before applying the decals, since we need to have a glossy surface for optimal adhesion of the decals. Above, the Forecastle railing has almost been completed on the port side. I will work on the bow, before finishing the railing in the front. The small pounder guns have been completed. A total of 70 guns were put together: it was quite tedious and there is no room for mistakes or losses. In fact, CAF Model does not provide a single spare parts for these guns: 280 wheels, 140 axles, 70 brass barrels and numerous other parts with absolutely zero spare parts. If you loose a wheel, you are on your own. If you break an axle while sanding them to make them fit into the wheels, you are on your own again. It is regrettable that on such kit, there is no room for errors. Yves


- 507 replies
-
- 11
-
-
-
Jeff, It is funny you mentioned the Bismarck waiting in the queue.... I do have the Mikasa, Bismarck and now Yamato in my queue. I think I need a couple more lives to finish them all. YVes
-
Nice little fishing boat. And the BB technique of two halves for building the hull, is always a great help for beginners and intermediate modelers. You are progressing very well. Yves
-
What a gorgeous yawl, on that cover. Nothing can be more perfect than this.... Yves
- 84 replies
-
- 1
-
-
- Corsaro II
- Corel
- (and 1 more)
-
USS Cairo by Zetec - FINISHED - 1/50 scale
yvesvidal replied to Zetec's topic in - Build logs for subjects built 1851 - 1900
Great work, so far. Yves -
My experience (and others...) is that the Vallejo primer should be avoided on brass and PE parts. It works very well on plastic, but will peel from PE/brass parts in a very frustrating way. You may want to verify your painting, before going any further. Yves
- 166 replies
-
- 2
-
-
- Maine
- BlueJacket Shipcrafters
- (and 1 more)
-
I wish CAF Model would use the same technique for their window panes, instead of the CNC machined wood. These windows are very sharp, especially at this scale. Yves
- 488 replies
-
- 10
-
-
- Indefatigable
- Vanguard Models
- (and 1 more)
-
Your work on the rigging of this ship, is incredible. I am wondering if you have not sailed the real thing..... You are a perfectionist. Yves
-
I wonder if it was typical to paint the figure-heads on period ships, or is it only applicable to that specific vessel? I am not too sure what to do with my Bellona figure-head..... All gold, wood painted or fully decorated? Thanks for any info you may provide. Yves
- 488 replies
-
- 5
-
-
- Indefatigable
- Vanguard Models
- (and 1 more)
-
Well done Kevin. Now back to the Enterprise to warm you up a little bit more.... Yves
- 38 replies
-
- 3
-

-
-
- Lady Eleanor
- Vanguard Models
- (and 1 more)
-
Ah, I knew that would come one day 🙂 Multiple reasons: I am lazy I do not know where the frames are exactly. I like slick models and I am not a supporter of the porcupine approach showing every nail and rivet. I find that sometimes all these nails (and wood nails) are overwhelming and distracting for the overall appearance of the model. I am not done with the heresy and scandalous approach: I will not be showing the channels on my model..... 😱 Yves
- 507 replies
-
- 13
-
-
-
Super explanations. You truly are a Master Modeler. Yves
- 114 replies
-
- 1
-
-
- Pride of Baltimore II
- Model Shipways
- (and 1 more)
-
Amazing work on a very difficult subject, with a very delicate material. Fantastic. Yves
-
Impressive work and excellent printing. Yves
-
Kevin, I think you proved beyond doubts, that you are ready to go back to working on wood models. Yves
- 38 replies
-
- 3
-
-
-
- Lady Eleanor
- Vanguard Models
- (and 1 more)
-
I hate when they do that kind of molding. It reminds me of the old Revell kit from the late 60's-70's where everything was injected in one single part. Yves
-
WOW!!! What a harsh winter. Yves