MORE HANDBOOKS ARE ON THEIR WAY! We will let you know when they get here.
×


yvesvidal
-
Posts
3,550 -
Joined
-
Last visited
Content Type
Profiles
Forums
Gallery
Events
Everything posted by yvesvidal
-
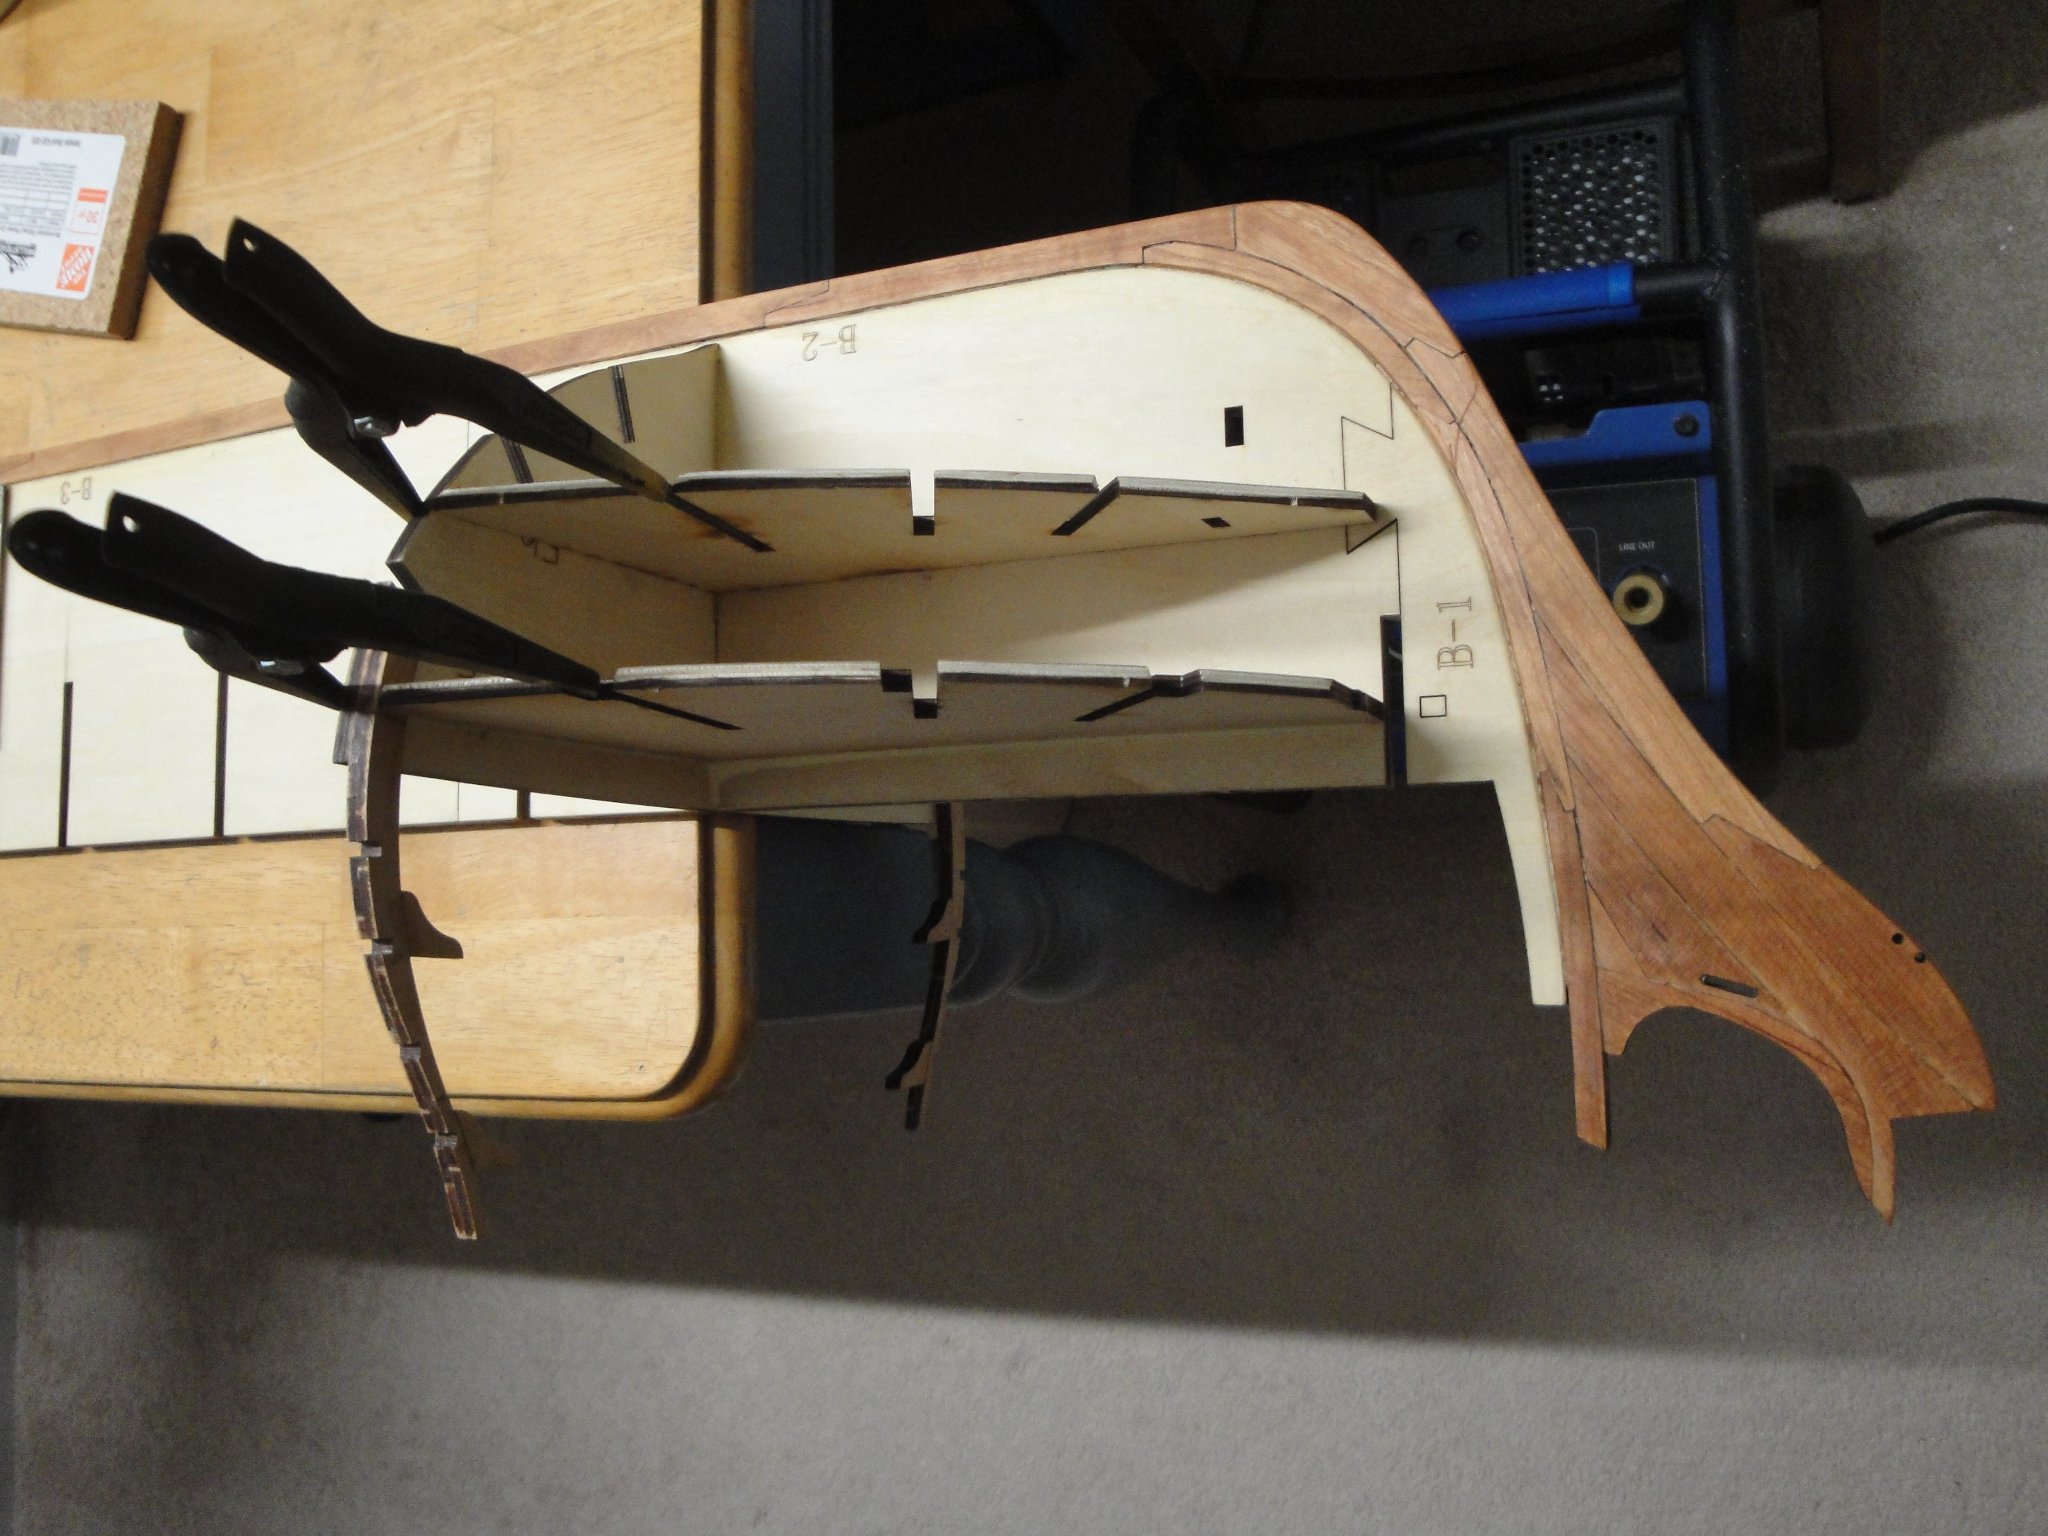
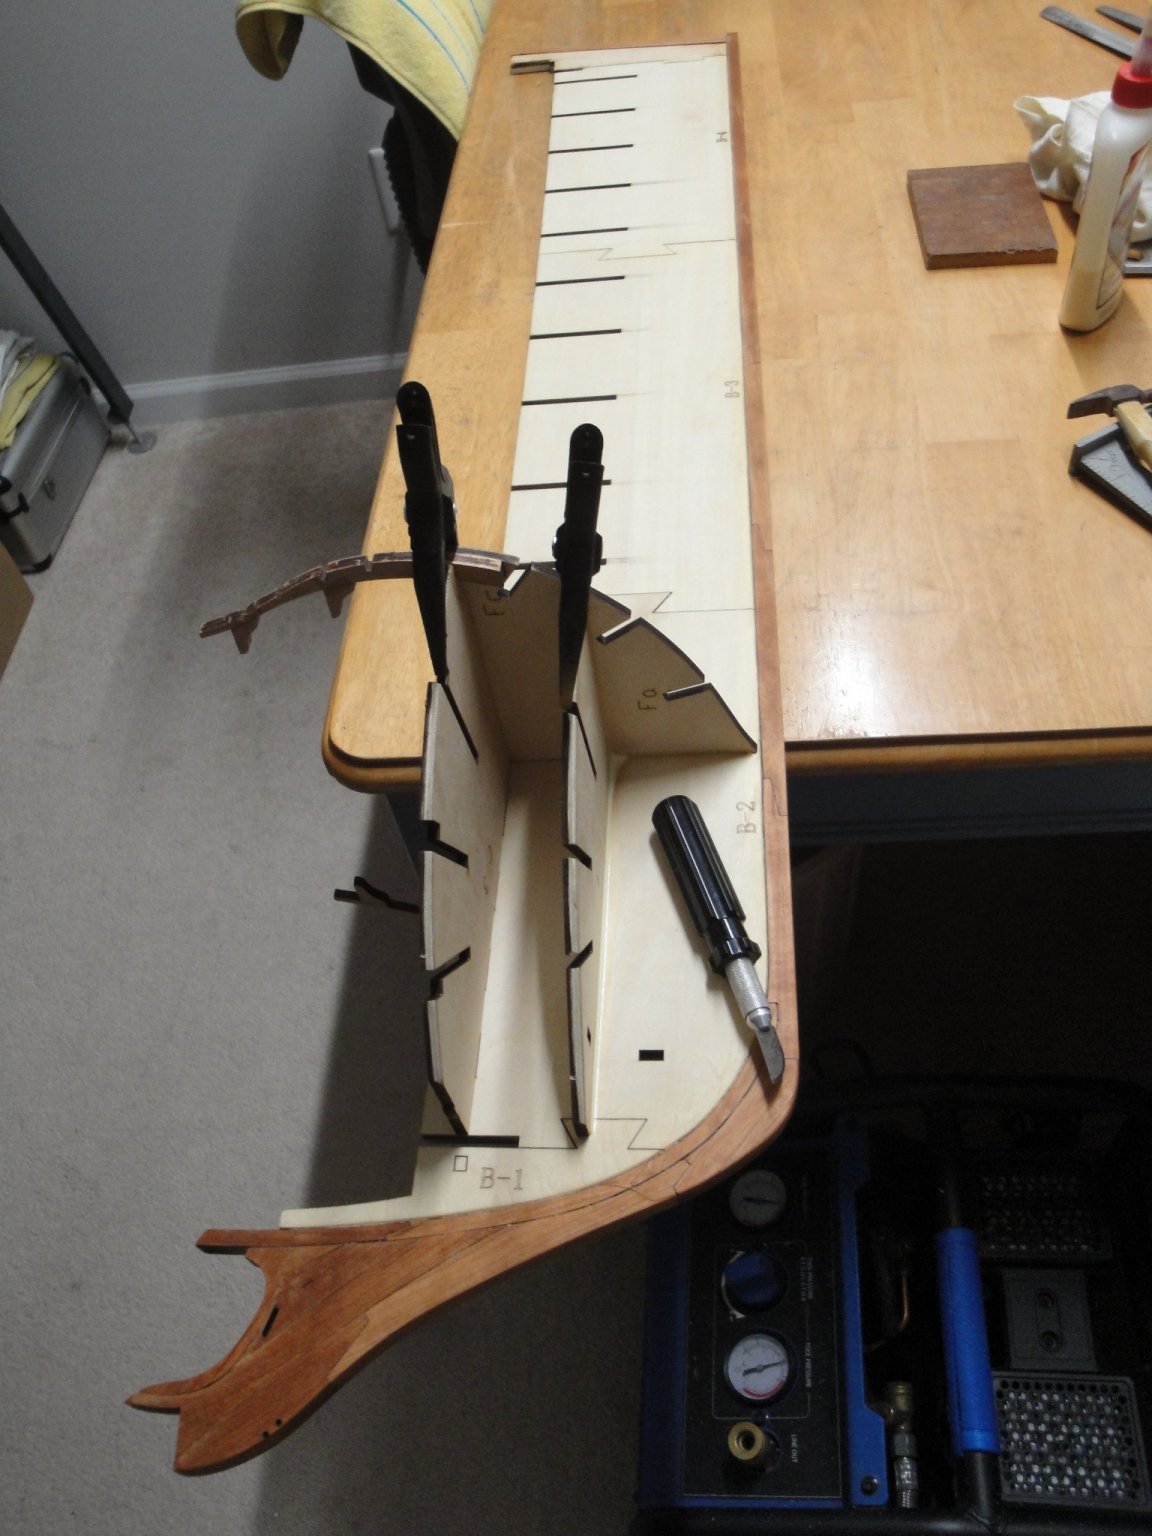
 A few progress with the assembly and installation of Bulkheads 4, (5 was already in place), 6 and 7: On the port side, I started smoothing the hull:. All the upper parts are made of cherry wood. For the bulkheads #2 and #3, it is difficult to complete them correctly as I did not glue the extensions using the plan, before installing them on the spine. Fortunately, Tom from CAF Model provided me with the distances between the top of the "horns" for all bulkheads. Before gluing the bulkheads 2, 3 and 4, you should really attach the upper extensions, before installing them against the spine. The documentation is not exactly clear regarding this problem. For Bulkheads 5 to 18, it is easy and you just have to glue the extensions to the main plywood piece using the plan and then glue the completed bulkhead to the spine. For the stem, it is not so easy and the shapes of the Bellona stem are very tortured and unusual. I hope that the deck parts will fit correctly, into that cavernous hull. These are only provided with Session #2 and Session #3. Yves

- 507 replies
-
- 12
-

-
Alan, at least, you are making some great progress. That hull looks great. Depending what you want to do, pay very close attention to the way all the decks are fitting. You can see that the Deck #4 (Galley/Funnel) is being too long and protruding out of the hull. It depends which ship you want to depict of course. I reduced the length of mine by a few millimetres so it would not be too obvious. All this preliminary work will pay off later on. Yes, after some primer on the hull, you will have a better picture of what needs to be corrected. I used two cans of primer, with putty in between. For the warping, make sure you stay at 60 degrees for the bed. No more no less. Yves
- 460 replies
-
- 5
-
-
- Finished
- Flower-class
- (and 1 more)
-
A nerves wracking operation..... You did well. Yves
-
Incredible work on that great kit and boat. Yves
-
Great picture !! Modern art ? Remains of some prehistoric creature? I love it. Yves
-
Incredible work Neil. Yes, there is no substitute currently, for a resin printer. Yves
-
A submarine build is always most appreciated, on this forum. Herb, we are welcoming you. Yves
-
Most definitely: the slower the curing, the harder it gets and the more it bonds. Always try to go with the 24 hours curing time..... Yves
- 460 replies
-
- 6
-

-
-
- Finished
- Flower-class
- (and 1 more)
-
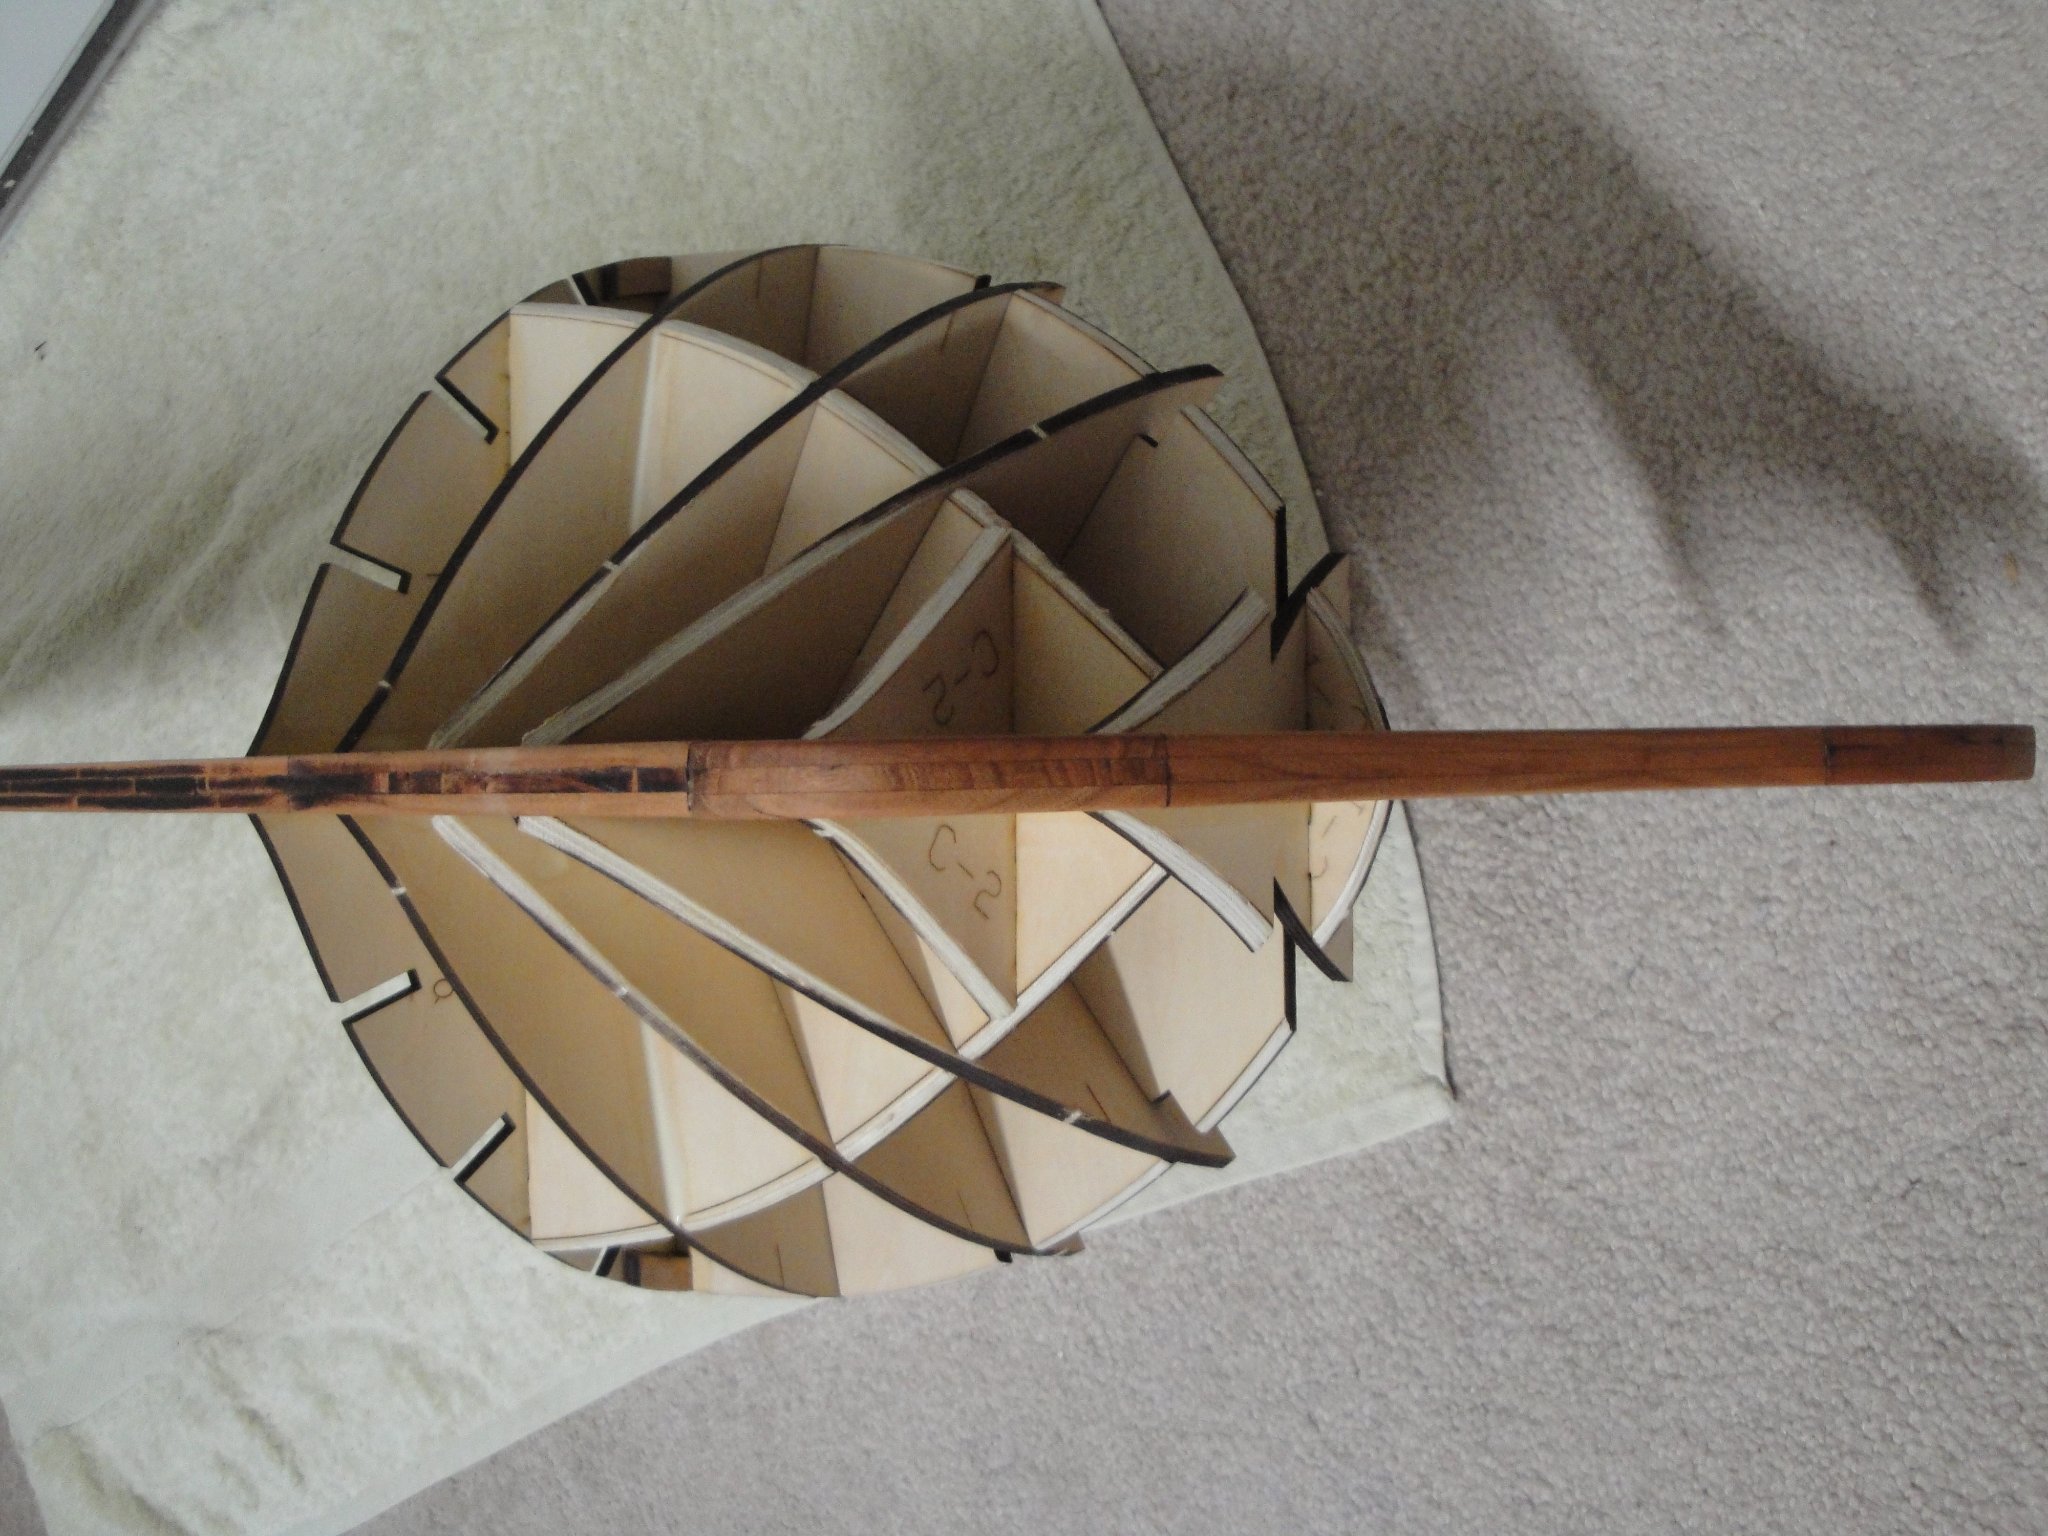
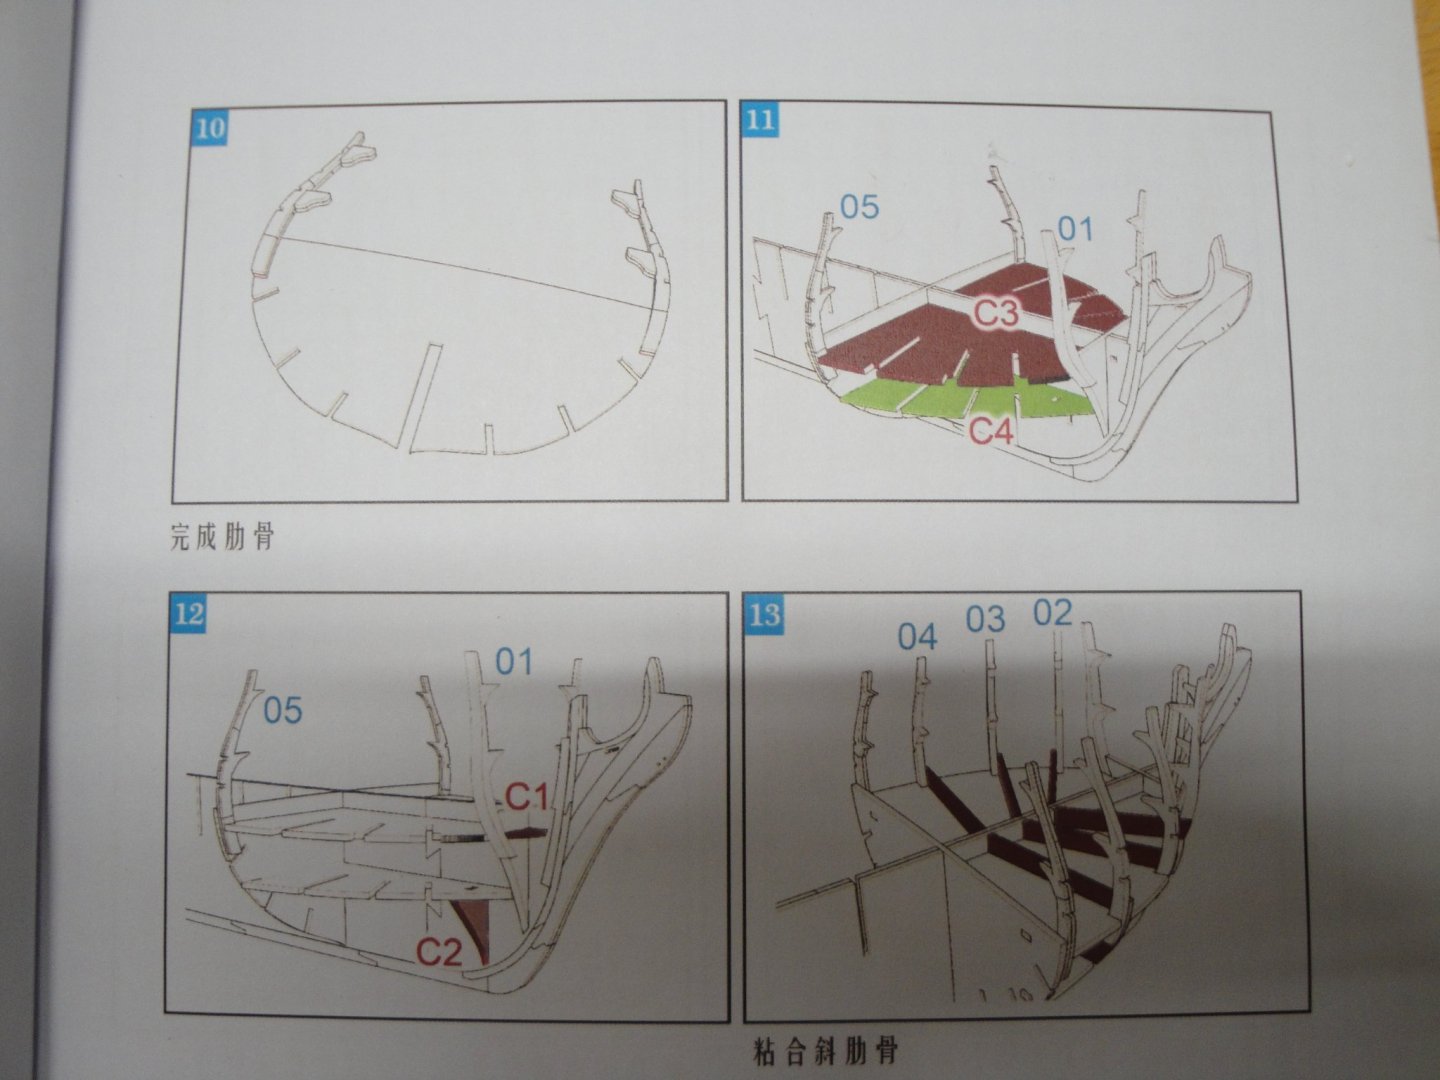
I completed Steps #12 and #13. That stem is massive and ultra solid. Did I mention heavy ? For the following steps, I think I am going to divert slightly from the instructions. I am still debating a solution that works and allows me to start shaping the hull, without installing the "horns" on the bulkheads. I am too afraid of breaking them. Yves Yves
-
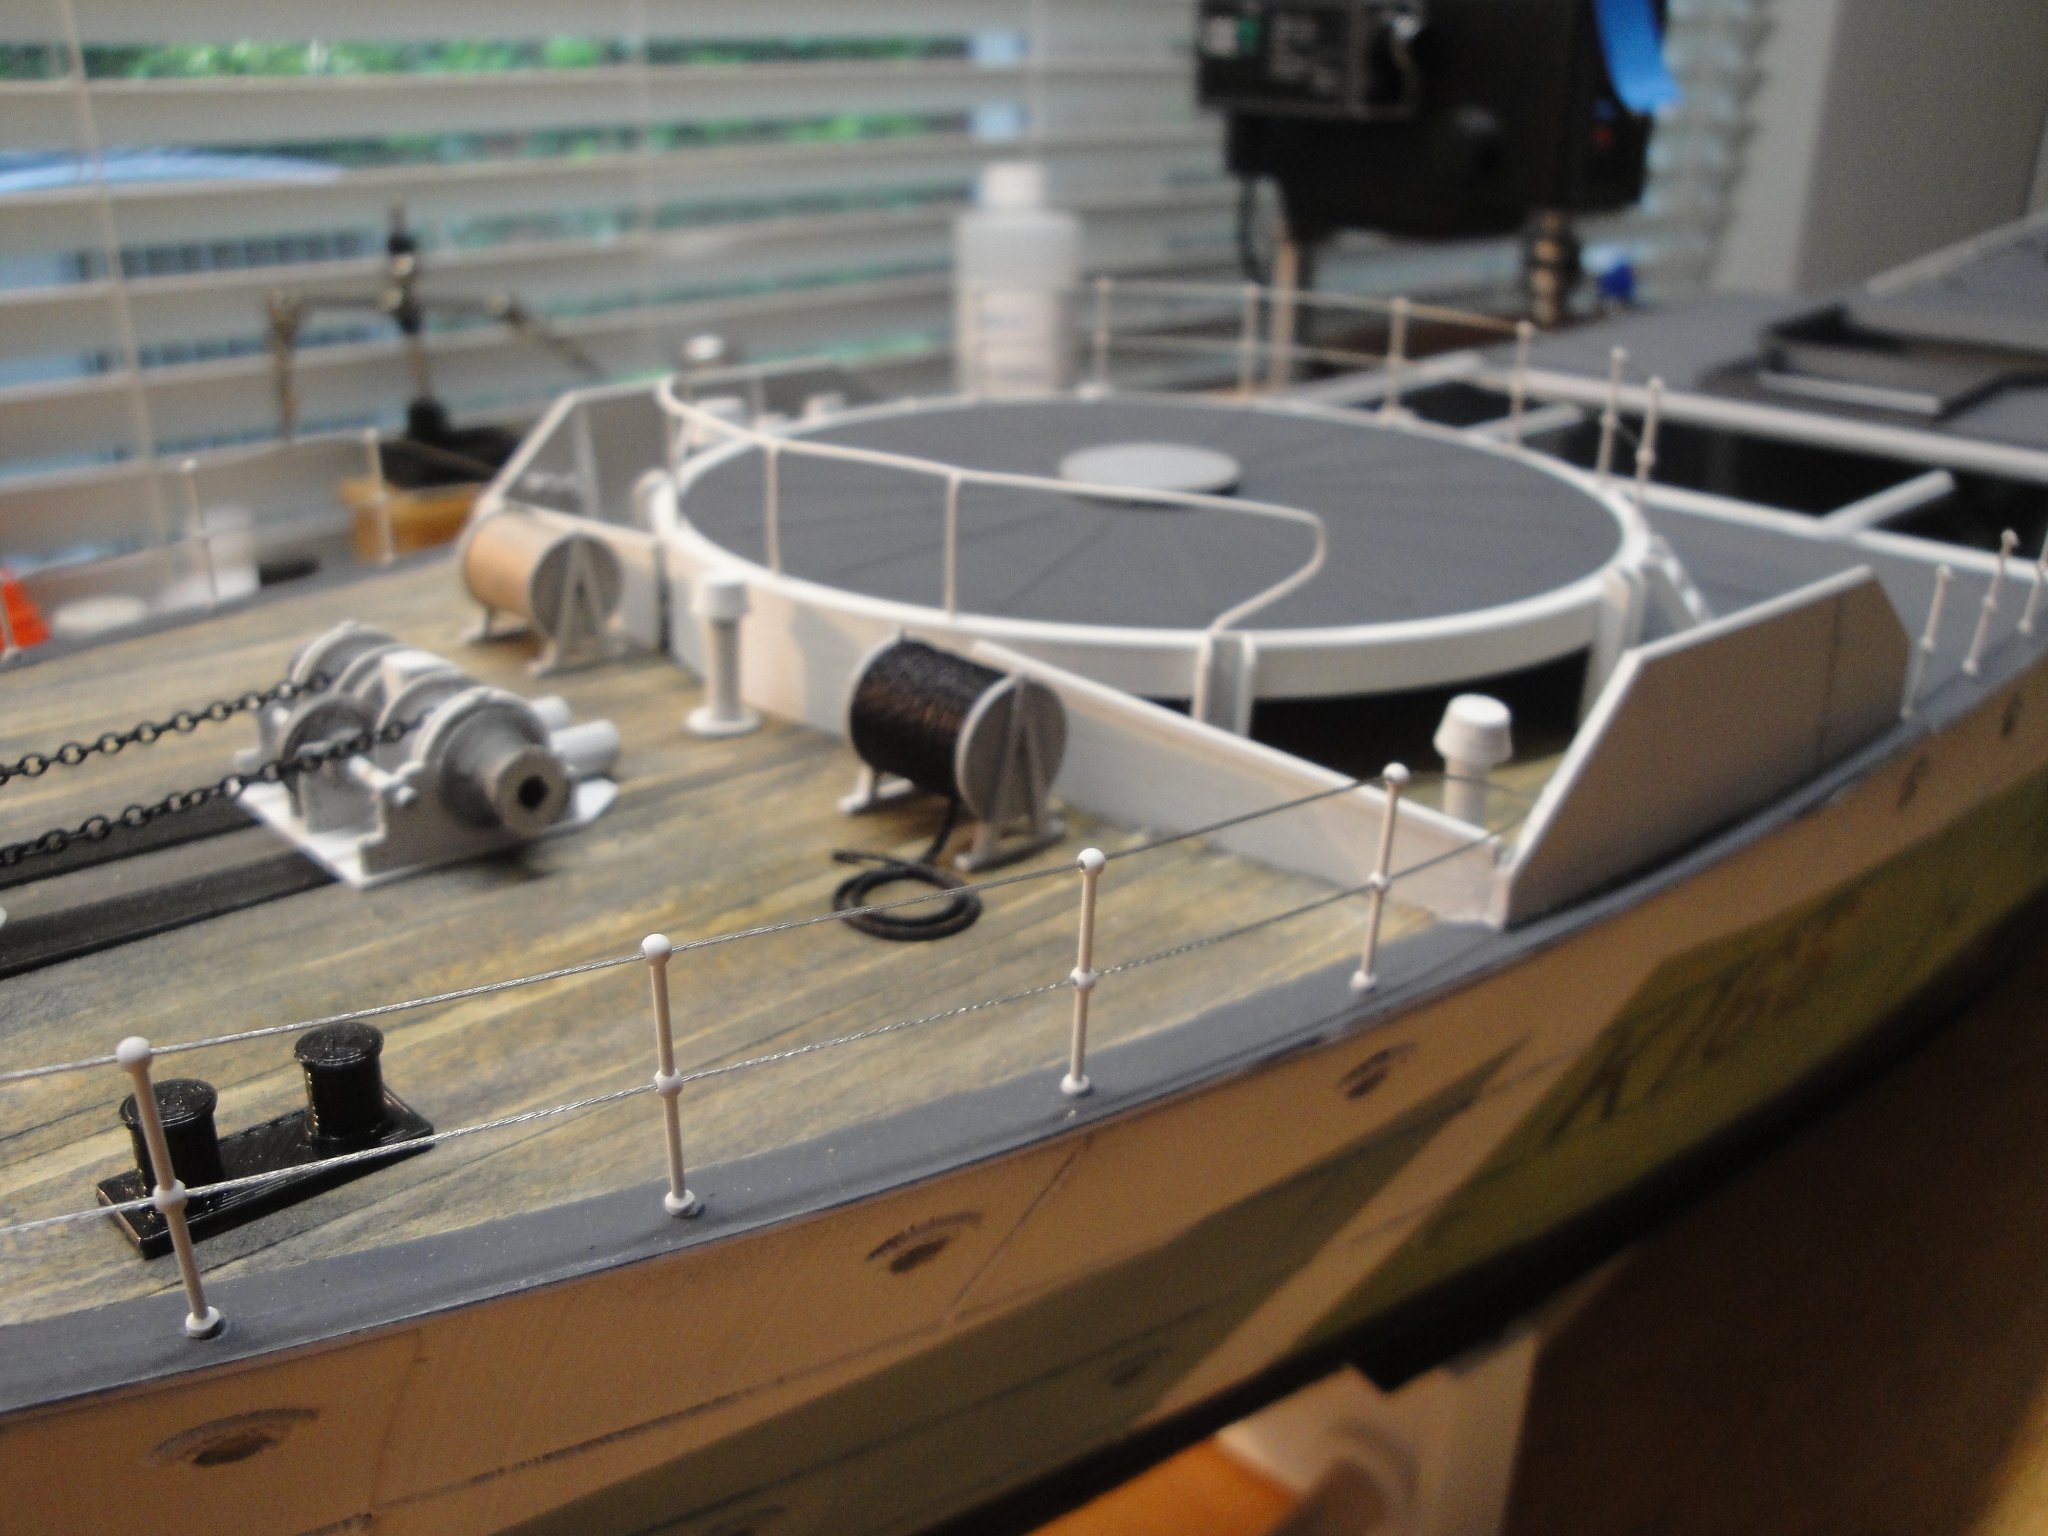
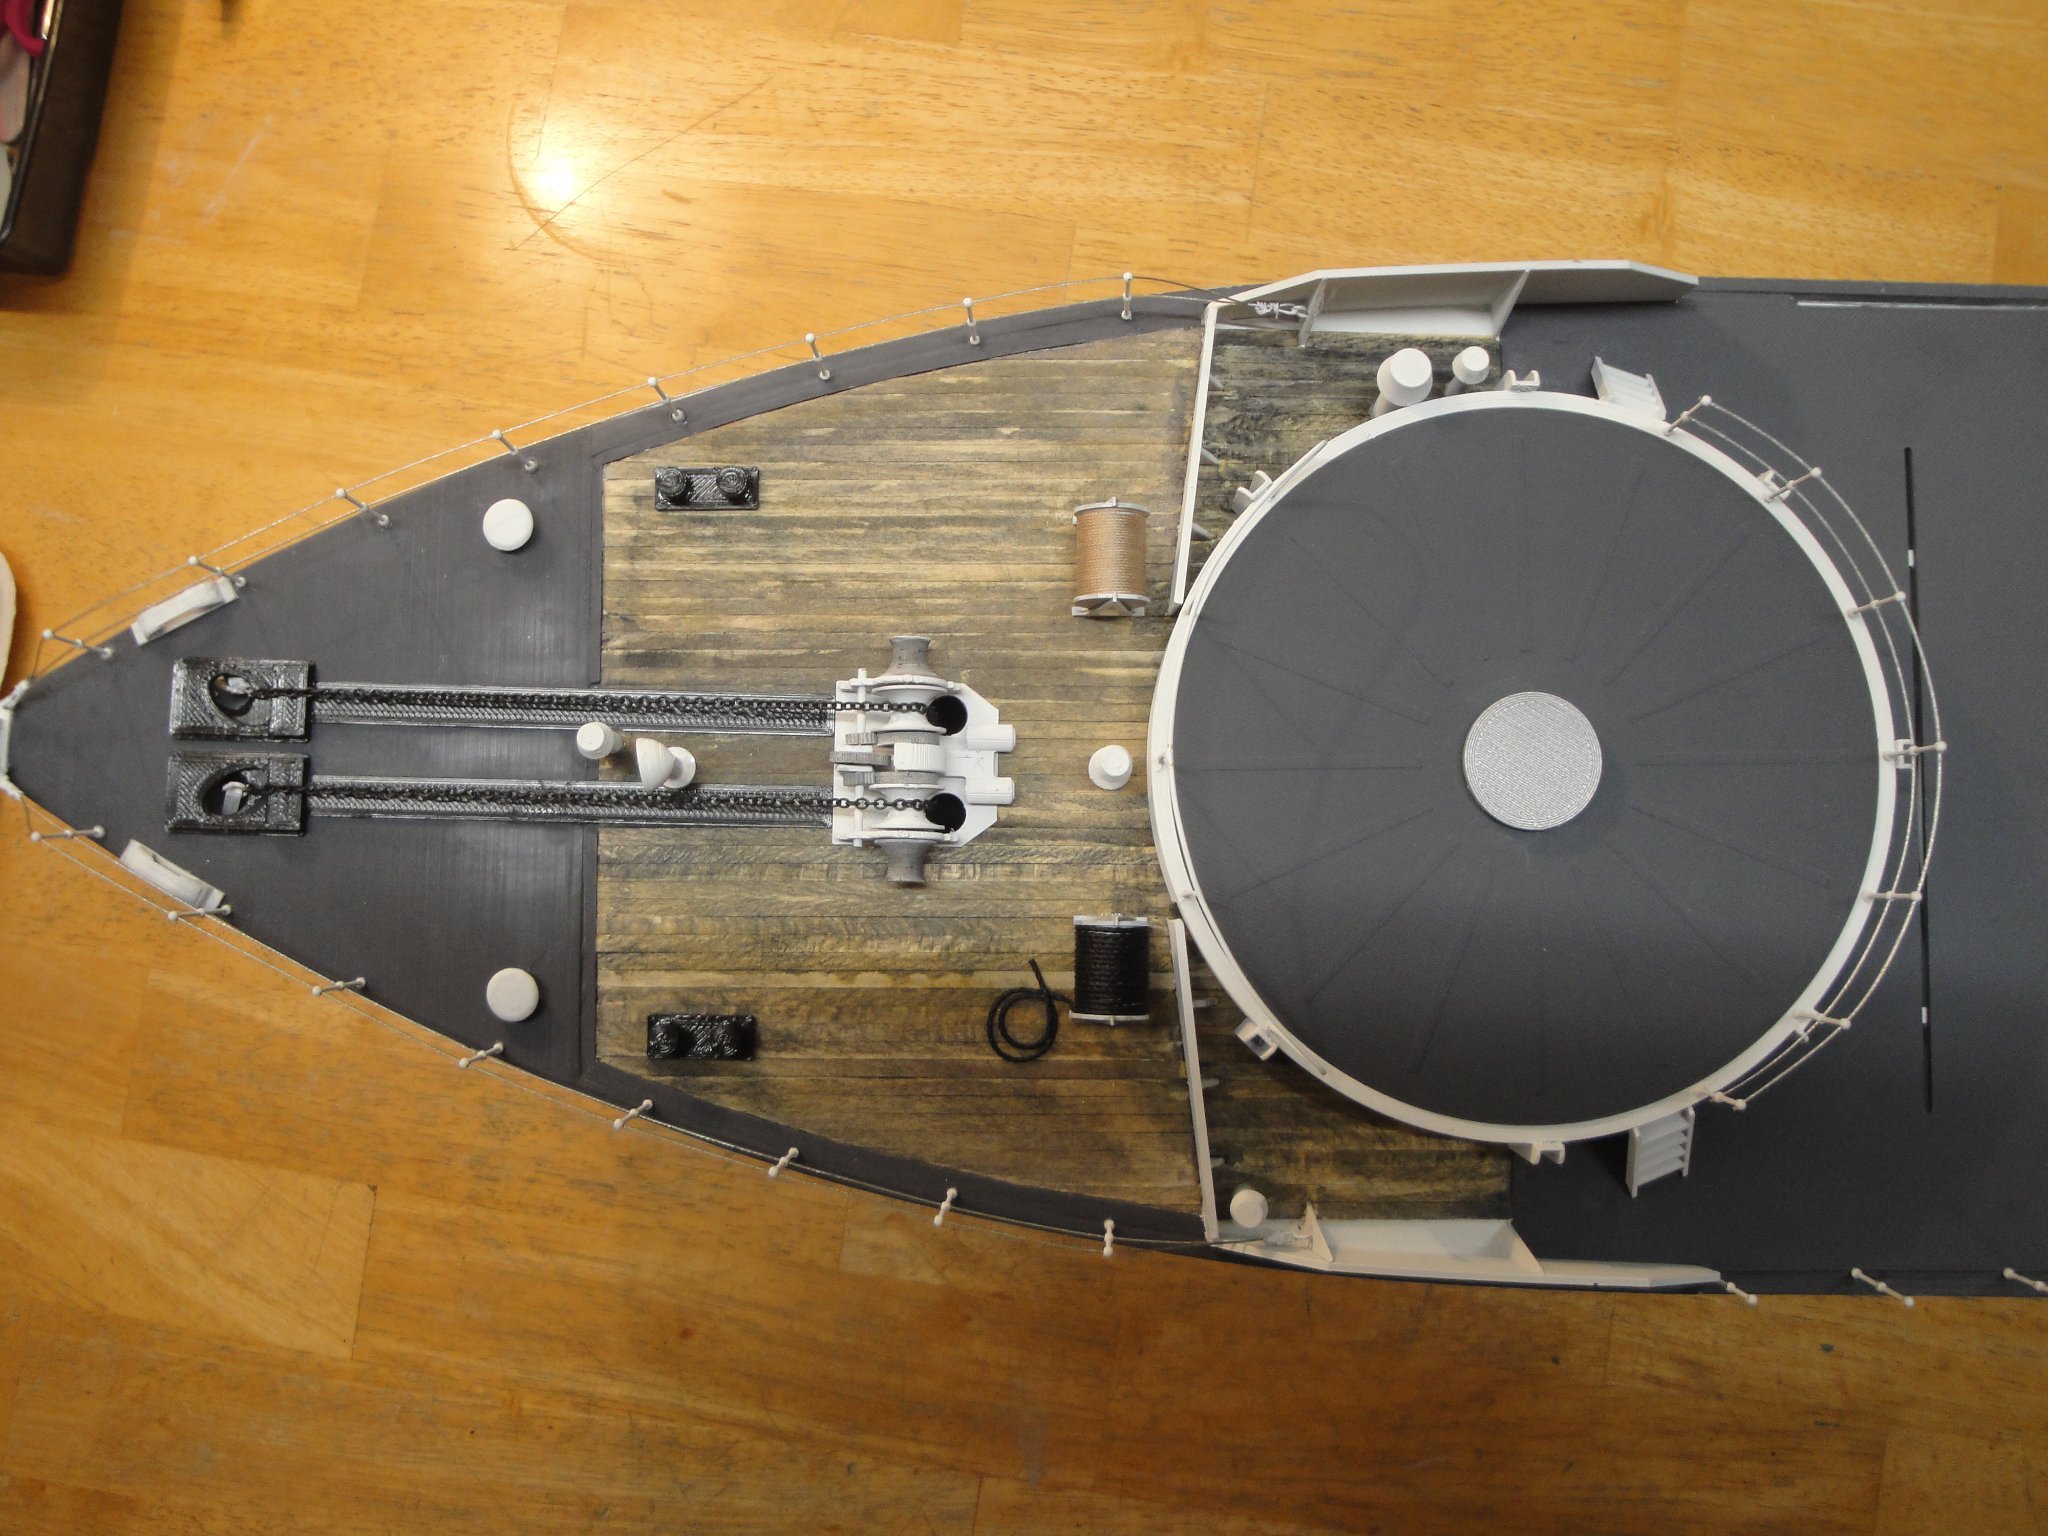
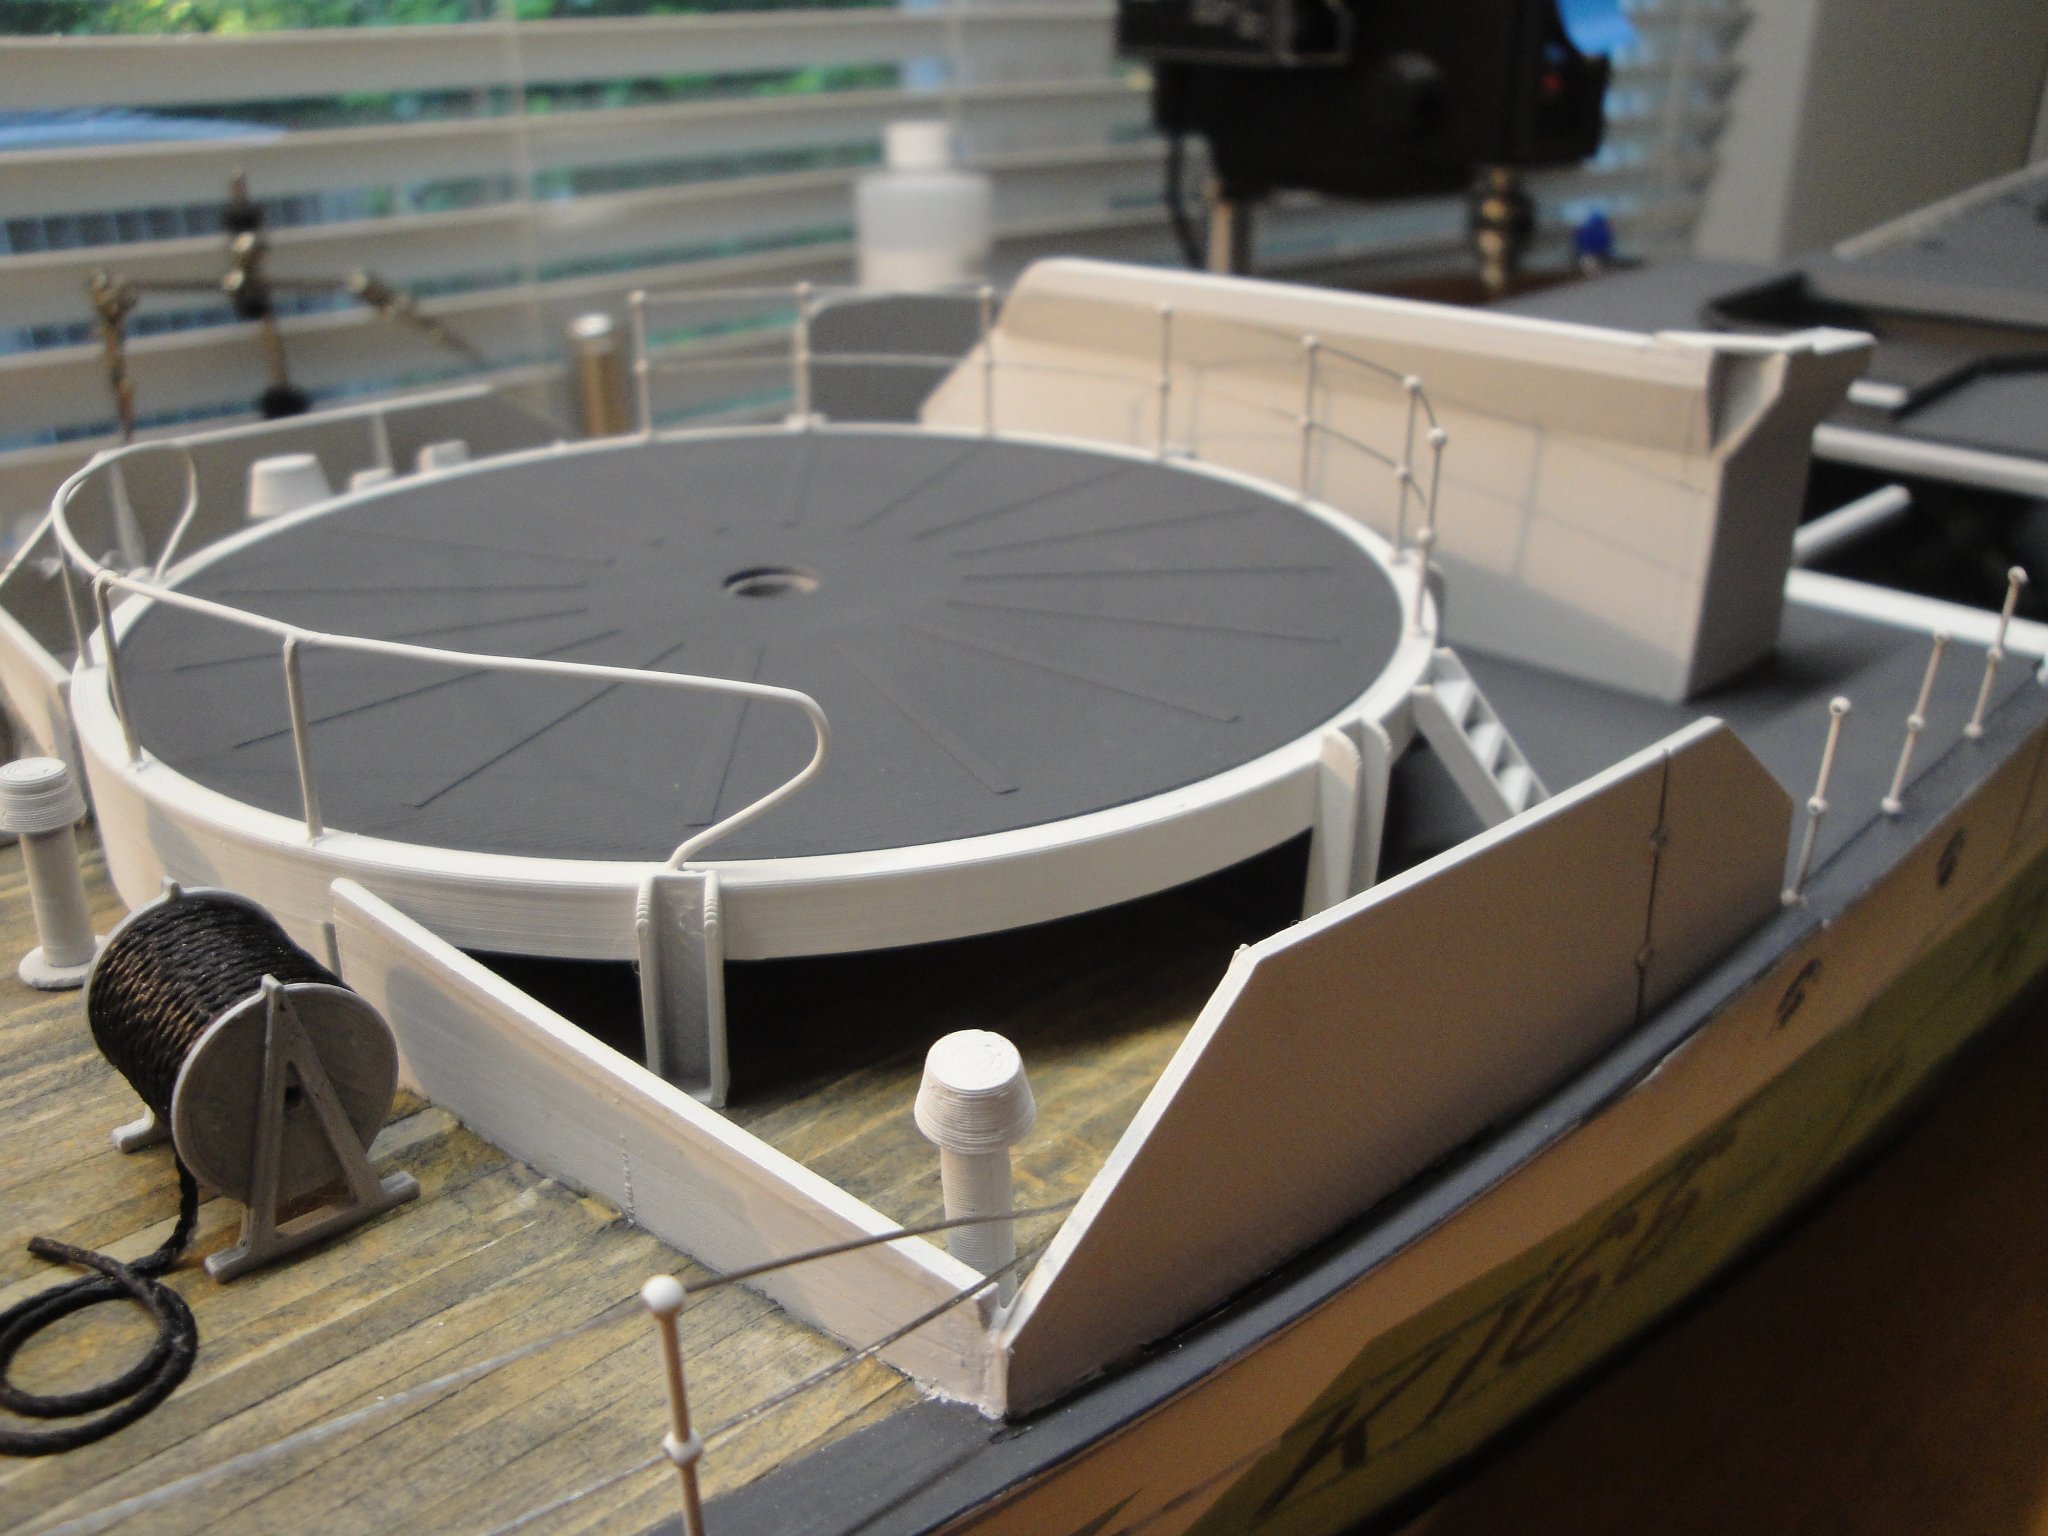
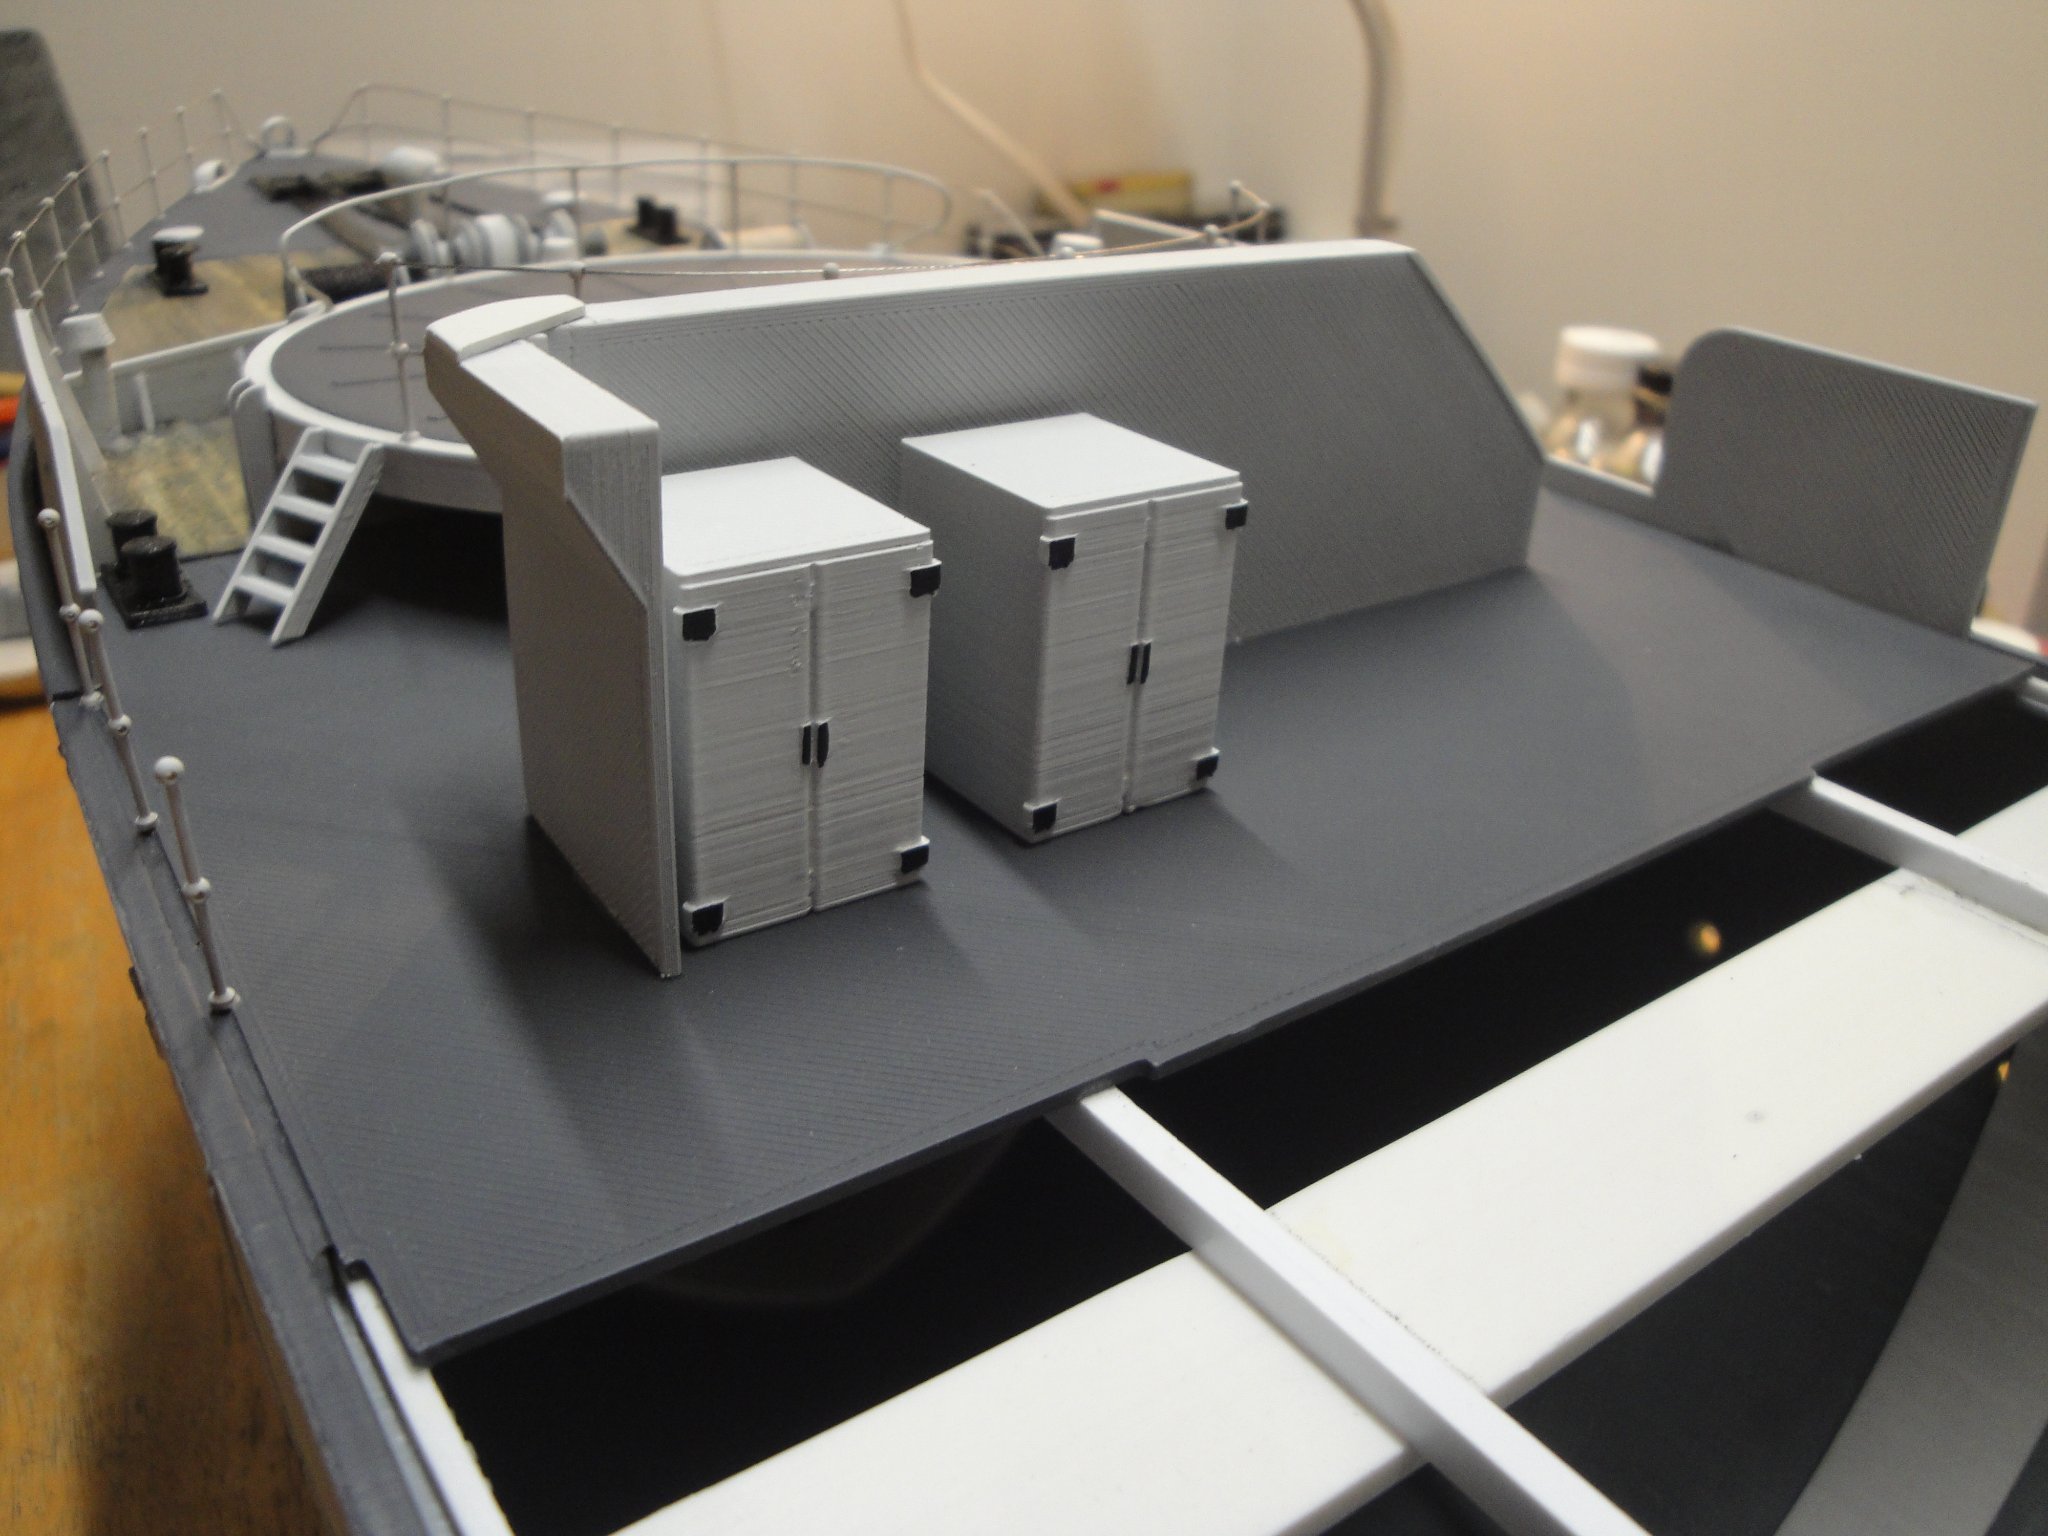
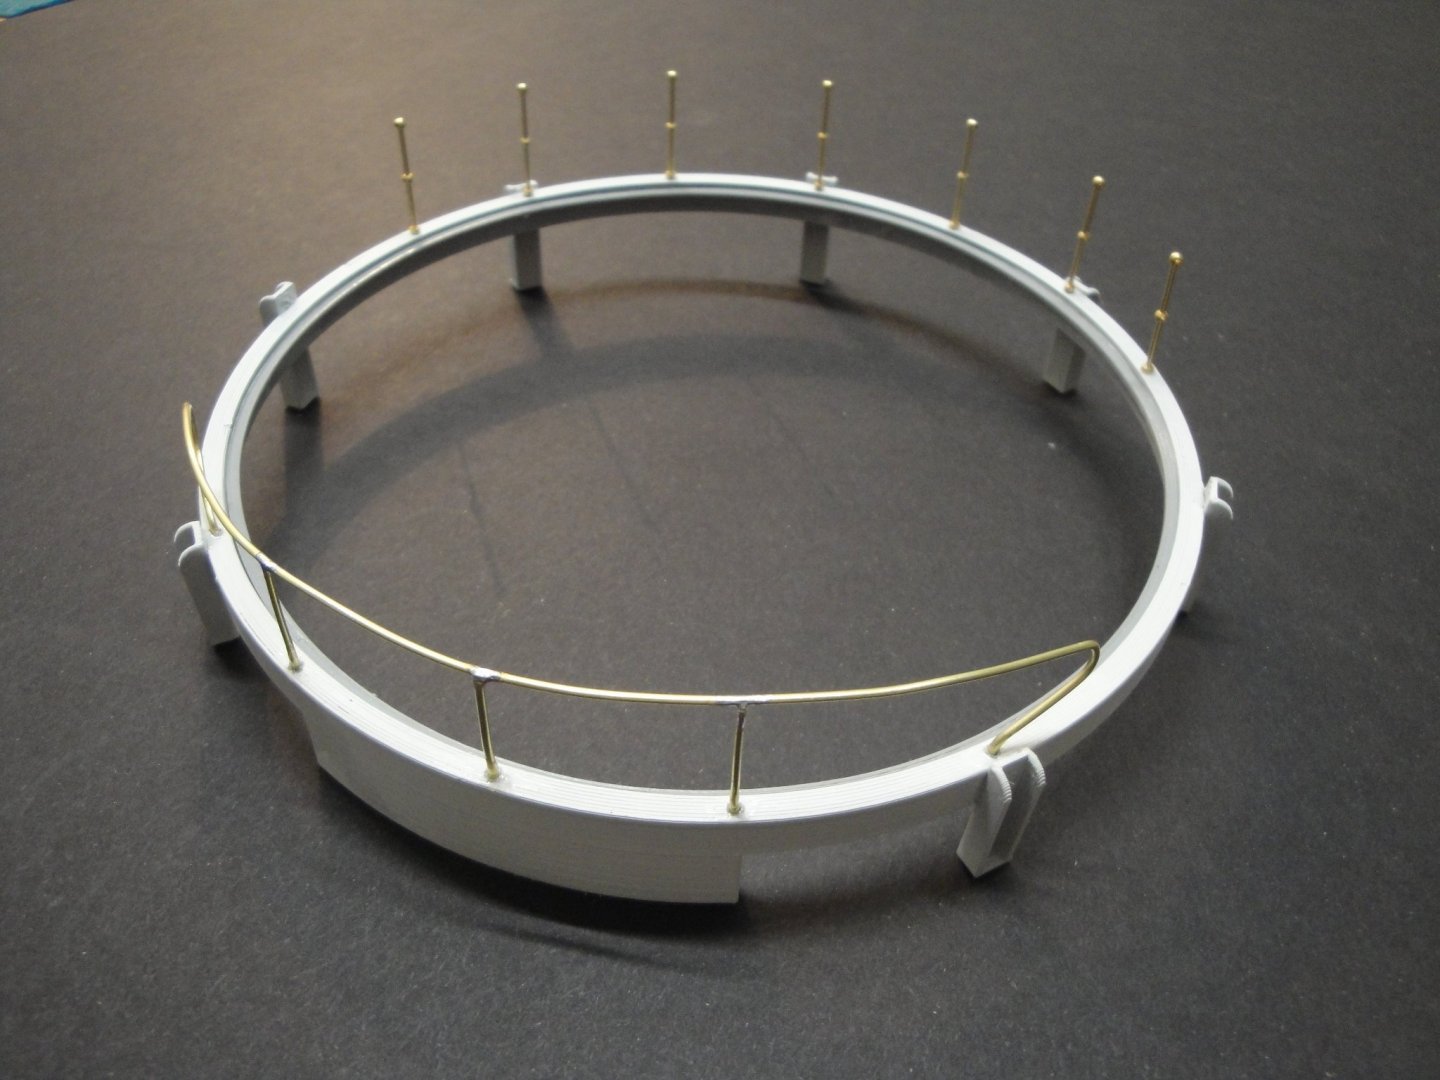
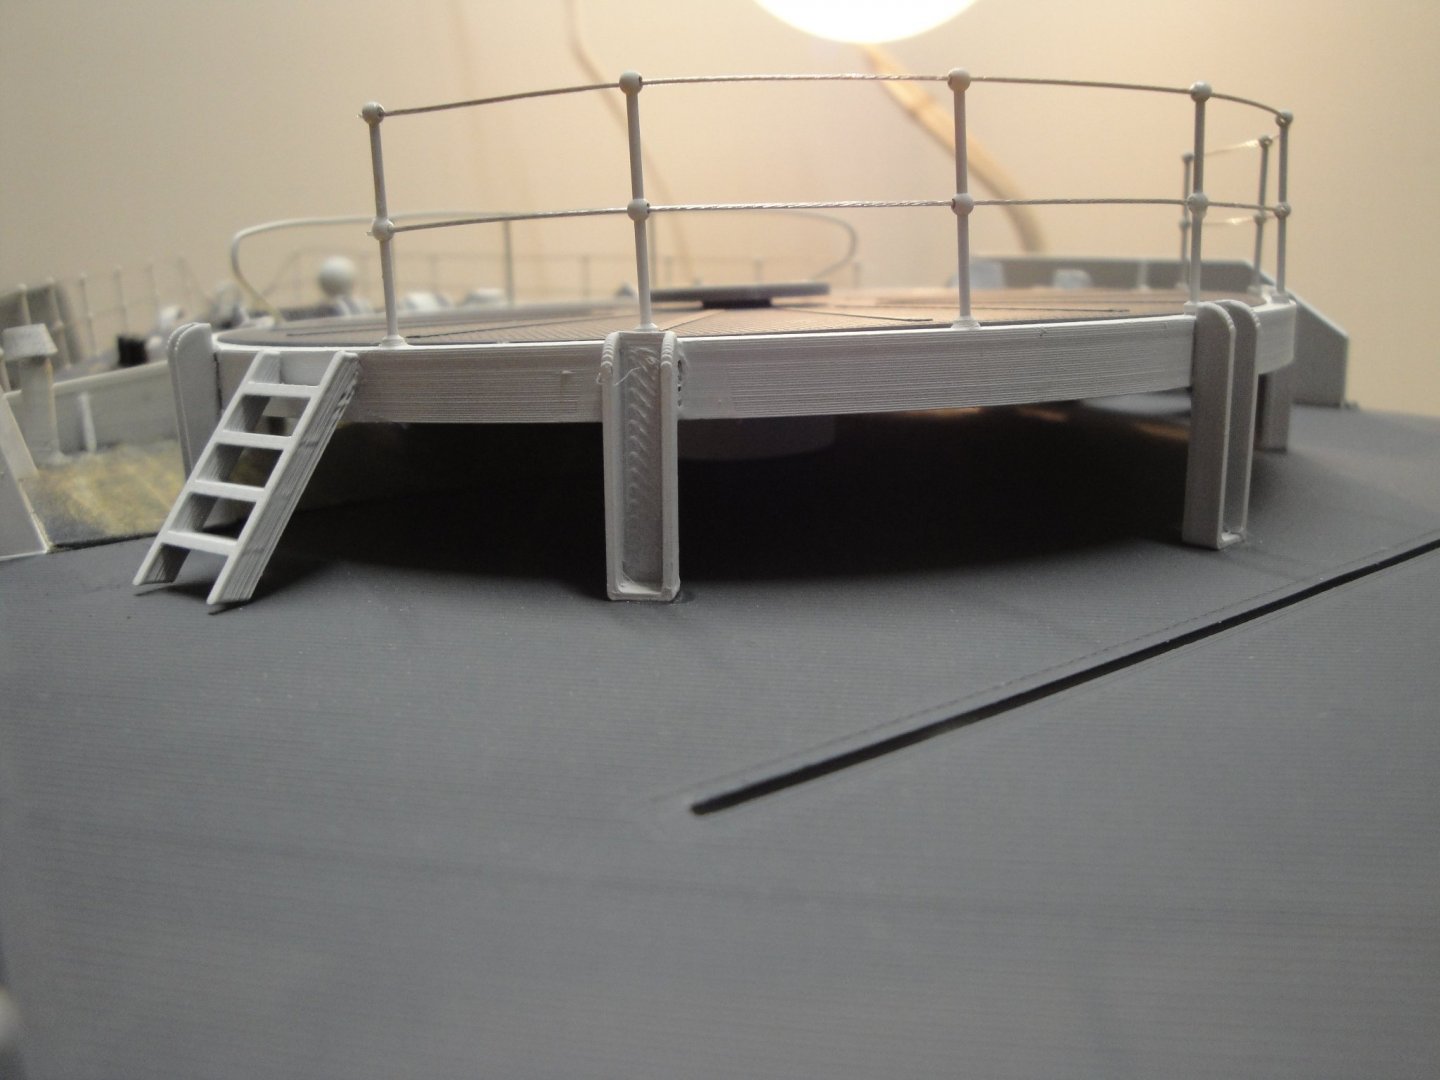
I thought a little update was overdue. There we go: working on Module #2, the 4 inches gun and blast shield deck. Very smooth transition from the wooden deck to the metallic deck. Nobody will stumble.... Here, I have added seven stanchions and some 0.9 mm brass wire to create the guide that prevents the gun from firing too low. The parts are soldered and then glued. Painted and assembled. Installation of the Blast shield. The kit provides a straight and too wide shield. From archives pictures of the Snowberry, I have reshaped that shield and added a corner and side walls, by printing a 30 mm long blast shield (from the kit). It looks a lot more realistic and prototypical: Hope you all like it so far. Next is the Hedgehog, which is ultra simplified in the kit to the point of being a disgrace. None of the rockets are represented..... :-( I don't know what I will do.... Yves


- 321 replies
-
- 18
-

-
-
- Finished
- Flower-class
- (and 1 more)
-
I use Gesso a lot, doing some art paintings on the side. No need to spray it, it is self leveling and very easy to apply with a brush. You can get it at Jerry Artrama or Dick Blick for a small amount of dollars. It comes in white or black. I use the Liquitex but any brand should work fine. However, I still would go with a good automotive primer with filling capabilities. It sticks better than Gesso, which is designed for canvas, first of all. Yves
- 460 replies
-
- 7
-
-
-
- Finished
- Flower-class
- (and 1 more)
-
I have used the same Vallejo Acrylic putty with success on my Corvette. Just make sure it dries completely before doing anything to it. Yves
- 460 replies
-
- 6
-
-
- Finished
- Flower-class
- (and 1 more)
-
If my memory is correct, the Model Shipways plan only shows three planks for the "King Plank". At least that is what I did on my model. A very wide plank in the middle and two smaller ones on the sides. Yves
-
Valeriy, I hope you are not going to paint those cowls.... They look incredible in brass. Yves
-
Rattlesnake: Excellent choice and a ship with a lot of pedigree. I will be following your Build log. Yves
-
Superb model. You did a great job and the allure of this little smack boat is very well rendered. Yves
-
Alan, This is superb. That hull is looking very good and you should not worry too much about the imperfections. Mine has plenty and once it is sanded, primed and painted, it will only be a bad memory. I think your cat wants to go sailing.....but he needs the stern. RCing that model will add another level of complexity but the kit is truly designed for that purpose. I have a little pond near by, but it is full of frogs, turtles and a blue heron. I do not think I am welcome there and thus my model will be static. To give you an idea, I spent a lot of time sanding that hull. Yes, seam lines are missing but who cares....? I also sprayed two cans of primer on the hull itself, before getting to a decent results. That plastic as you mentioned is really unpleasant to work with and I suppose the goal of this PLA material is to produce finished products. It is not styrene or polystyrene. Yves
- 460 replies
-
- 7
-
-
- Finished
- Flower-class
- (and 1 more)
-
Few weeks or few months ....? You are gifting your children with wonderful masterpieces. I hope they will treasure them and care for them as you did during their construction. WE (the People of this Forum) need a TITANIC build Log. Please..... Yves
-
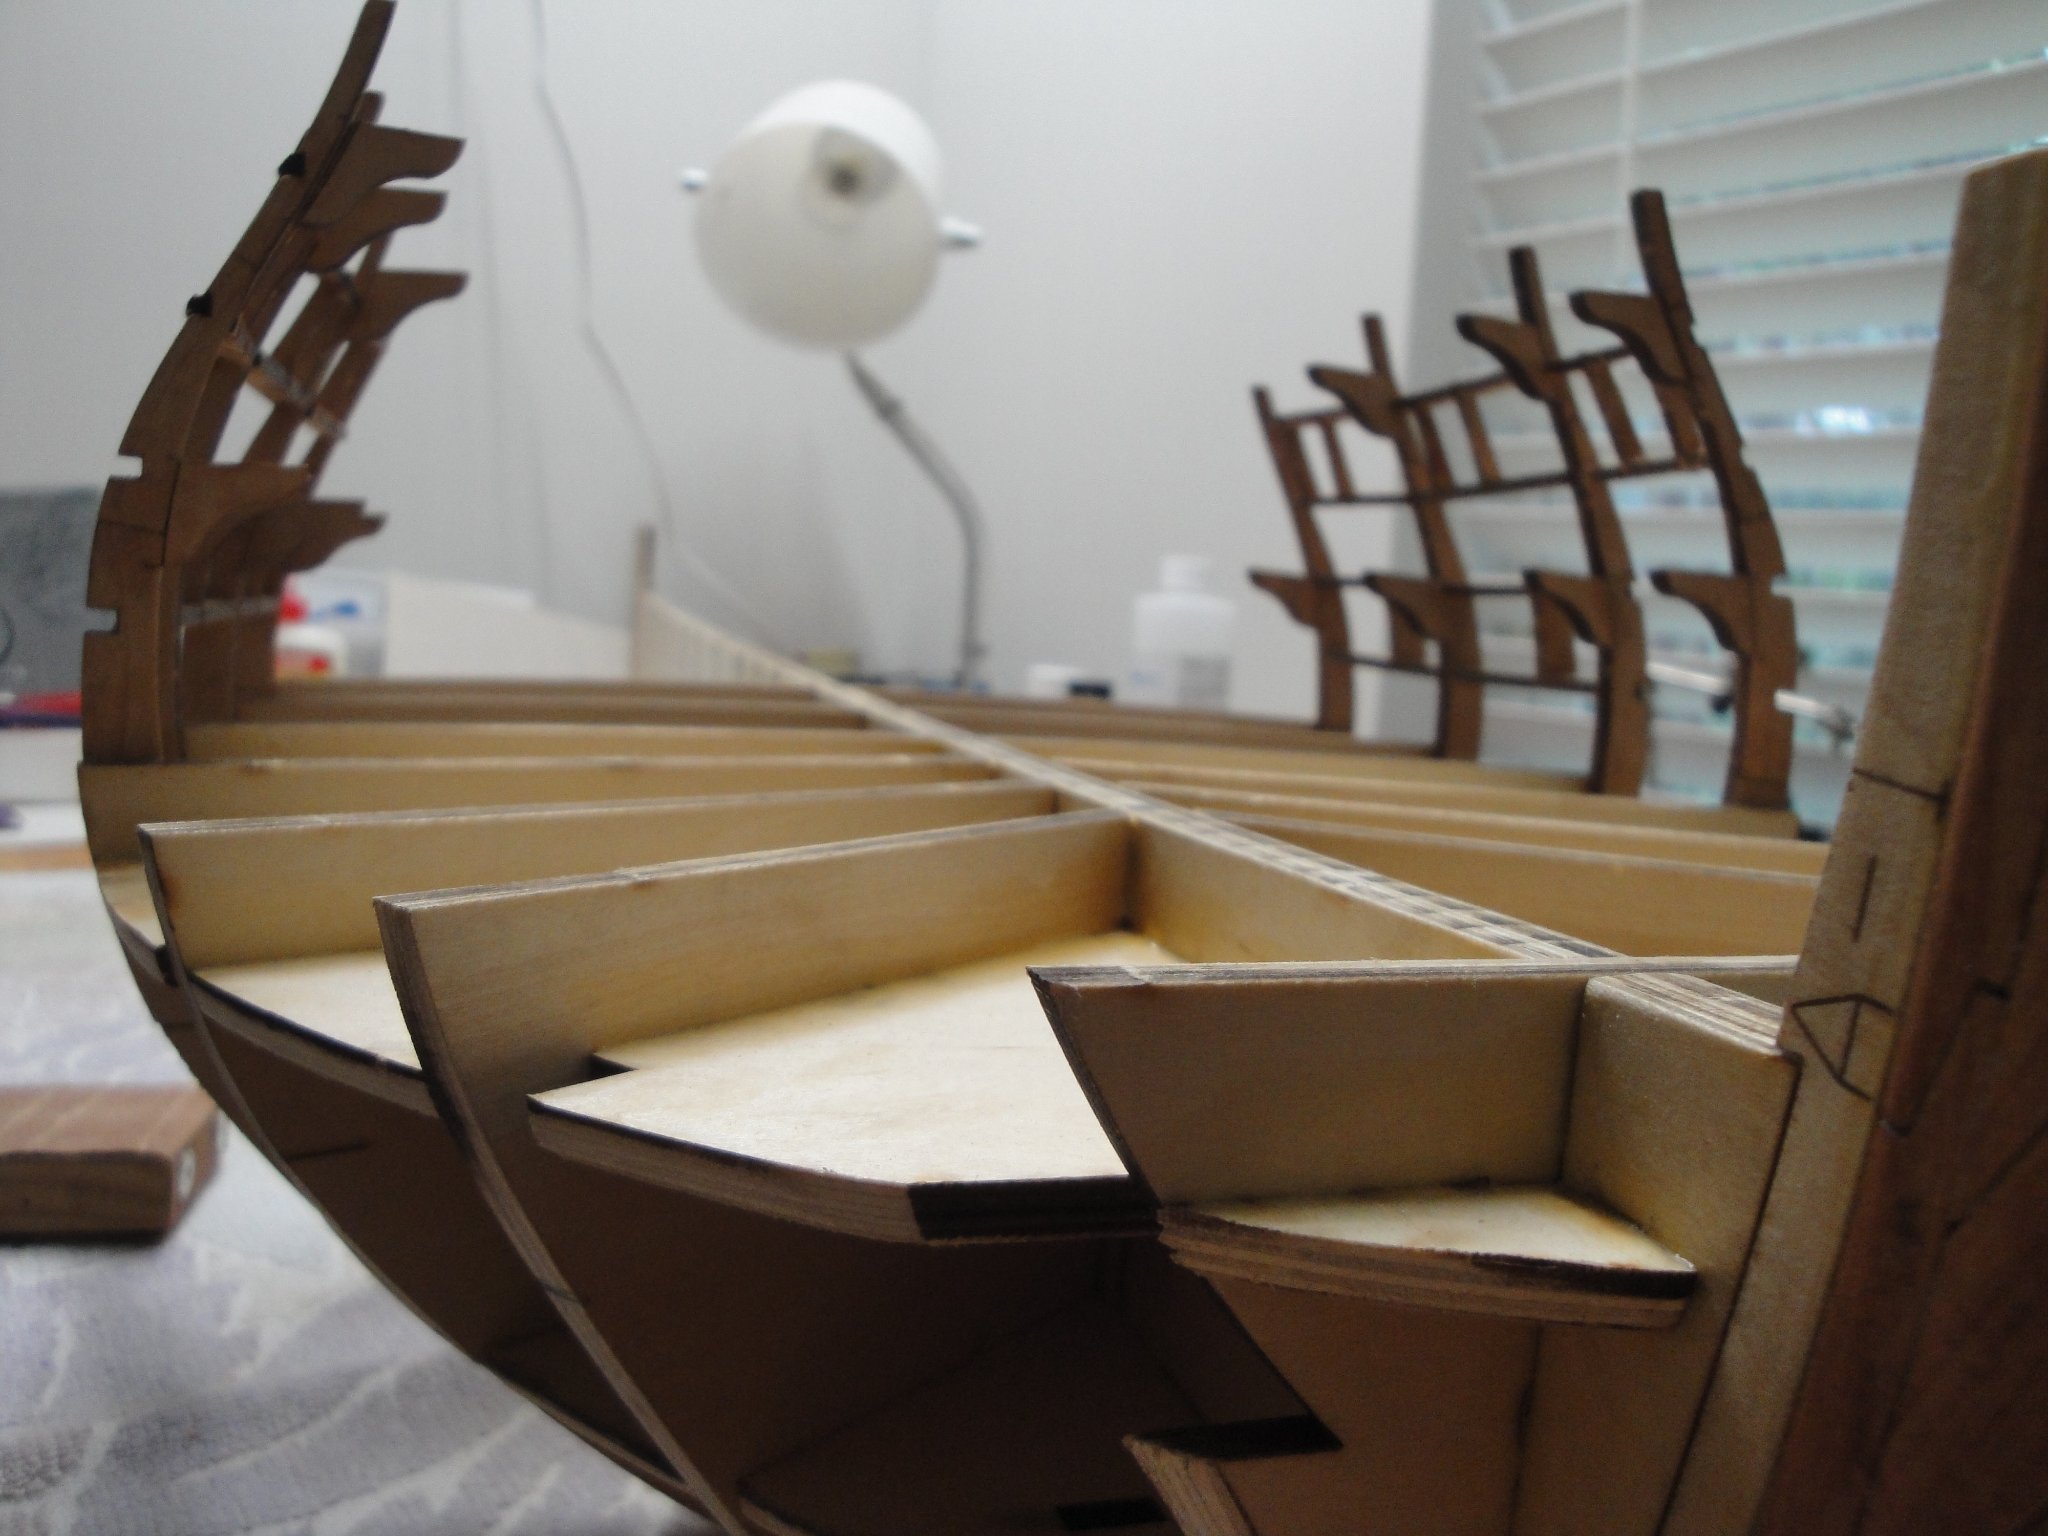
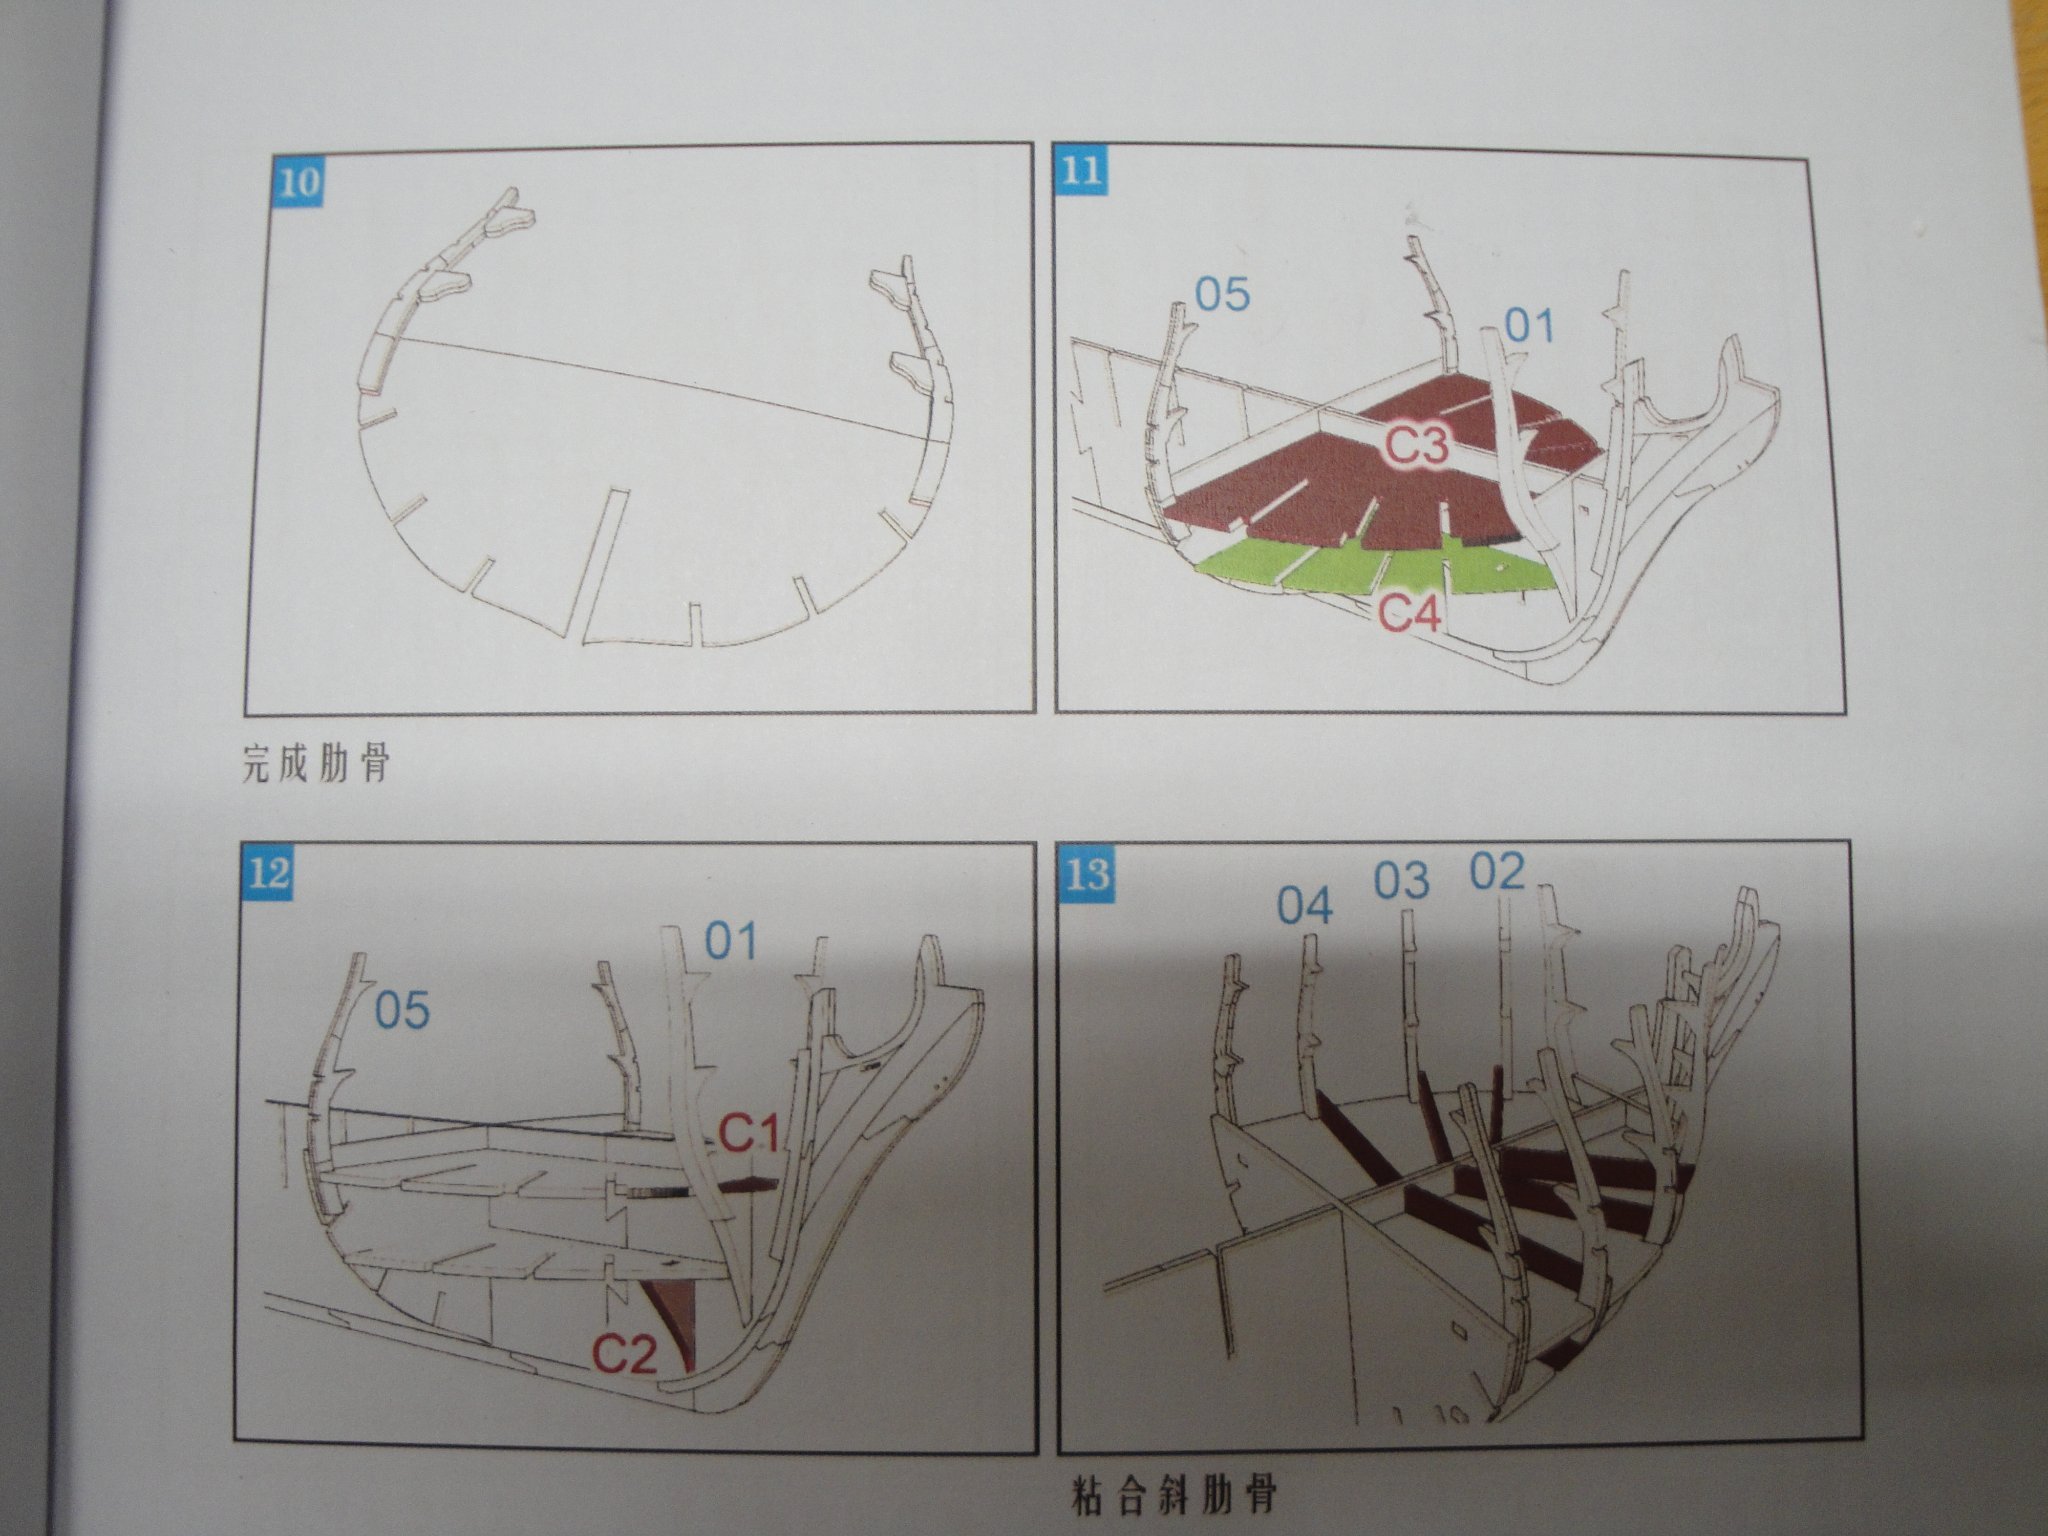
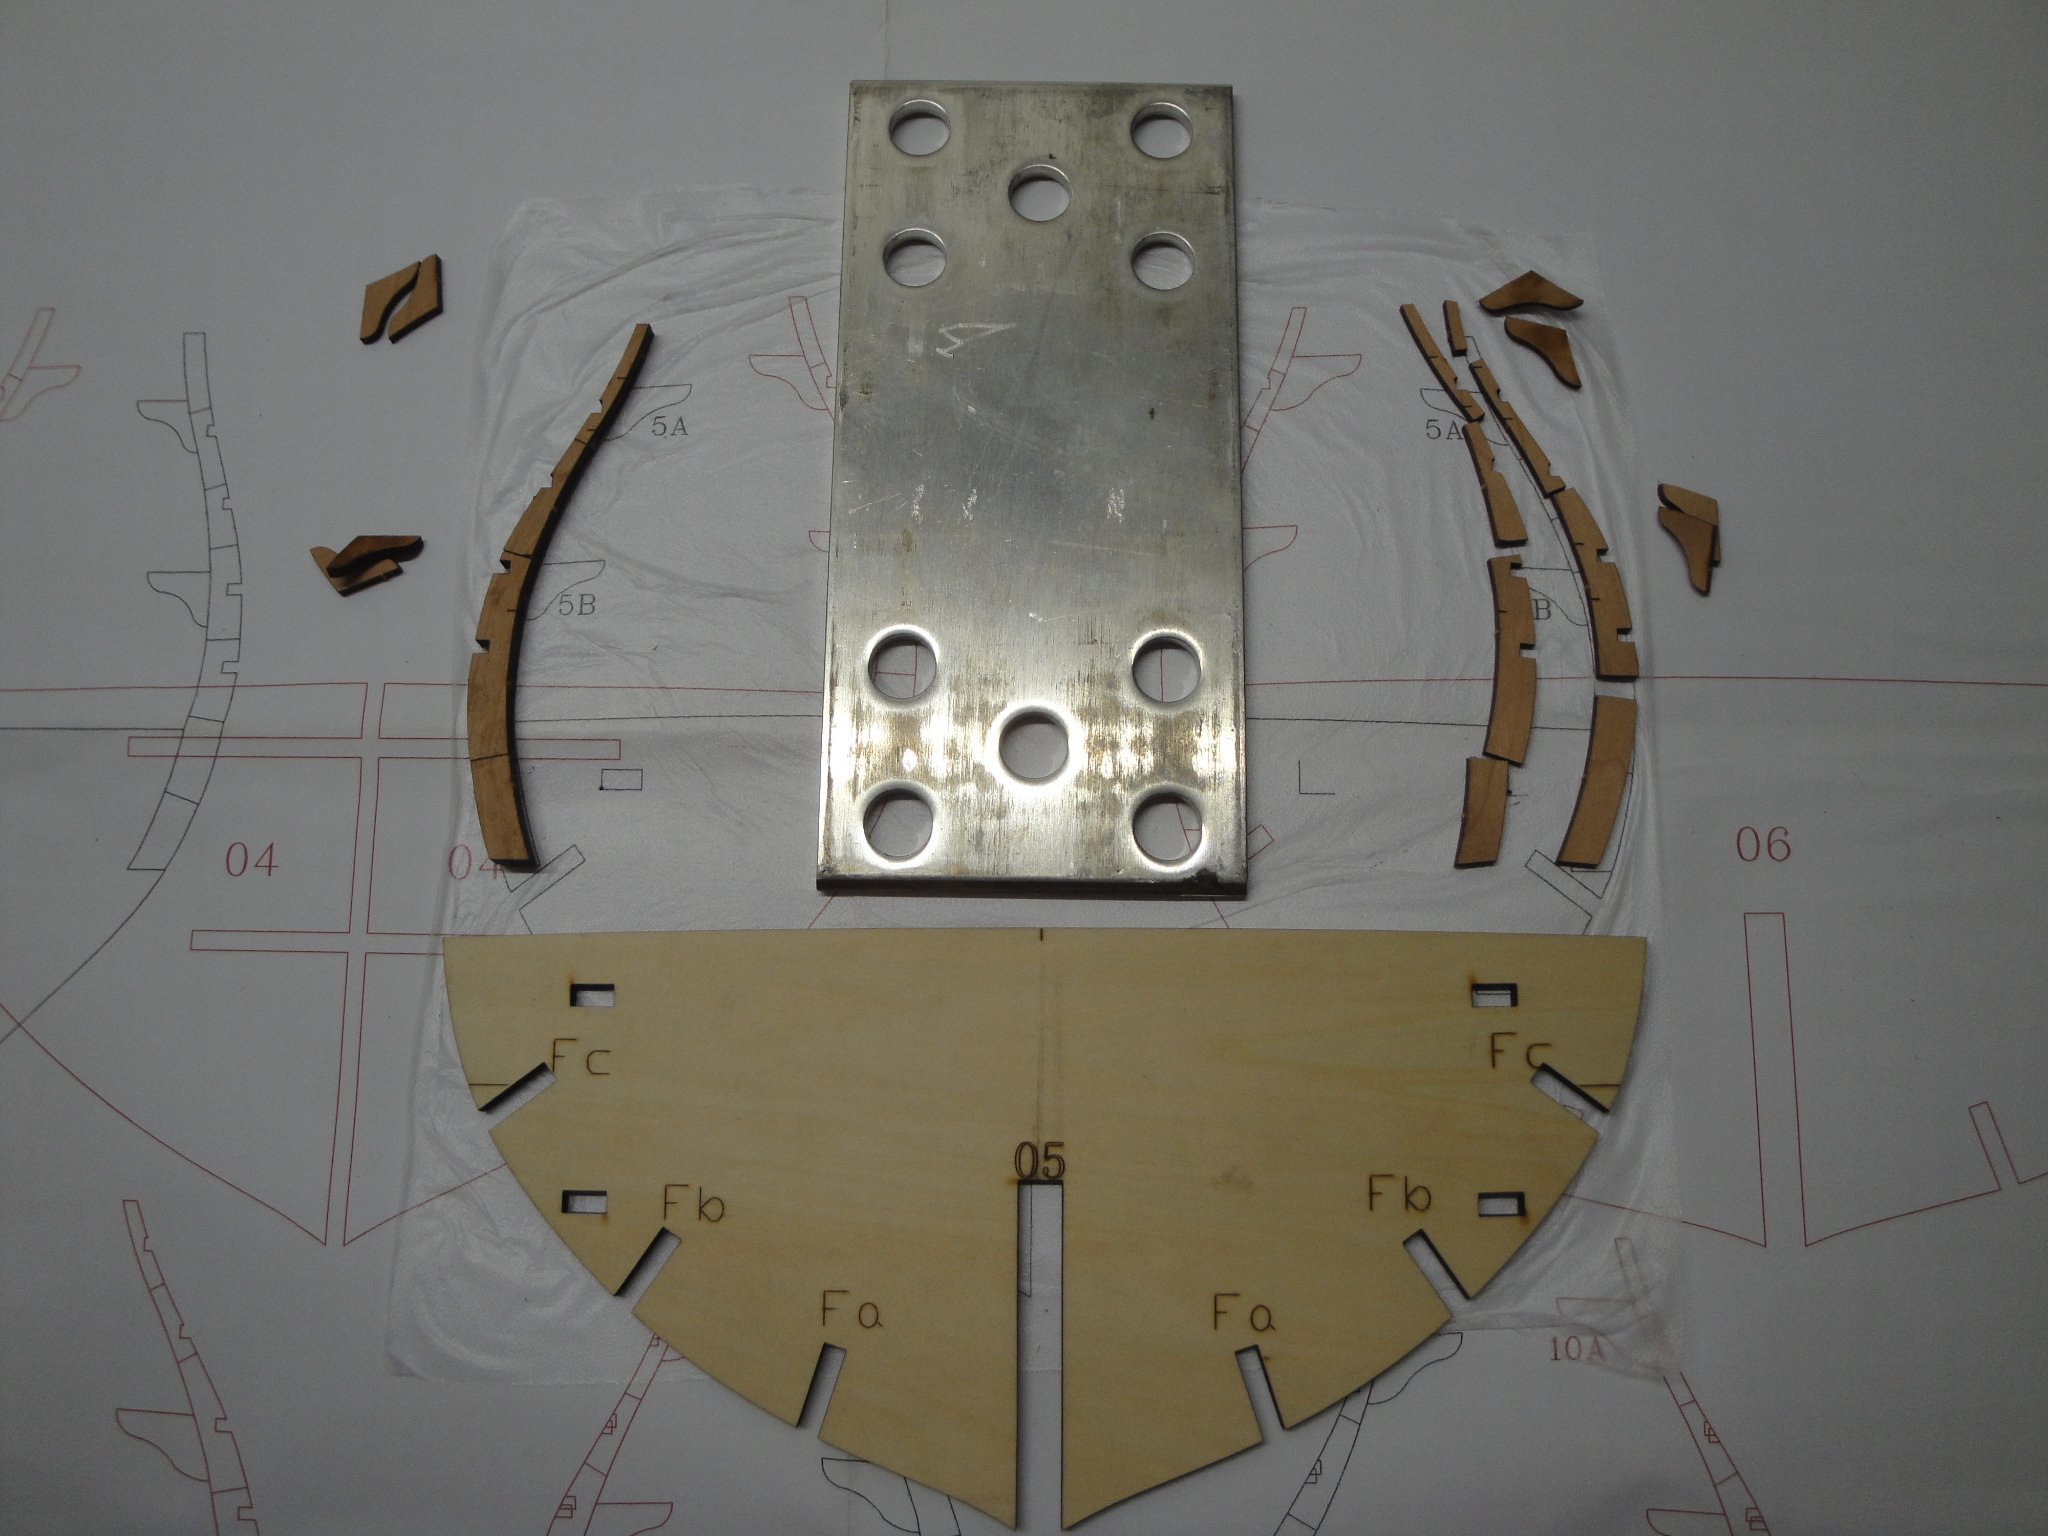
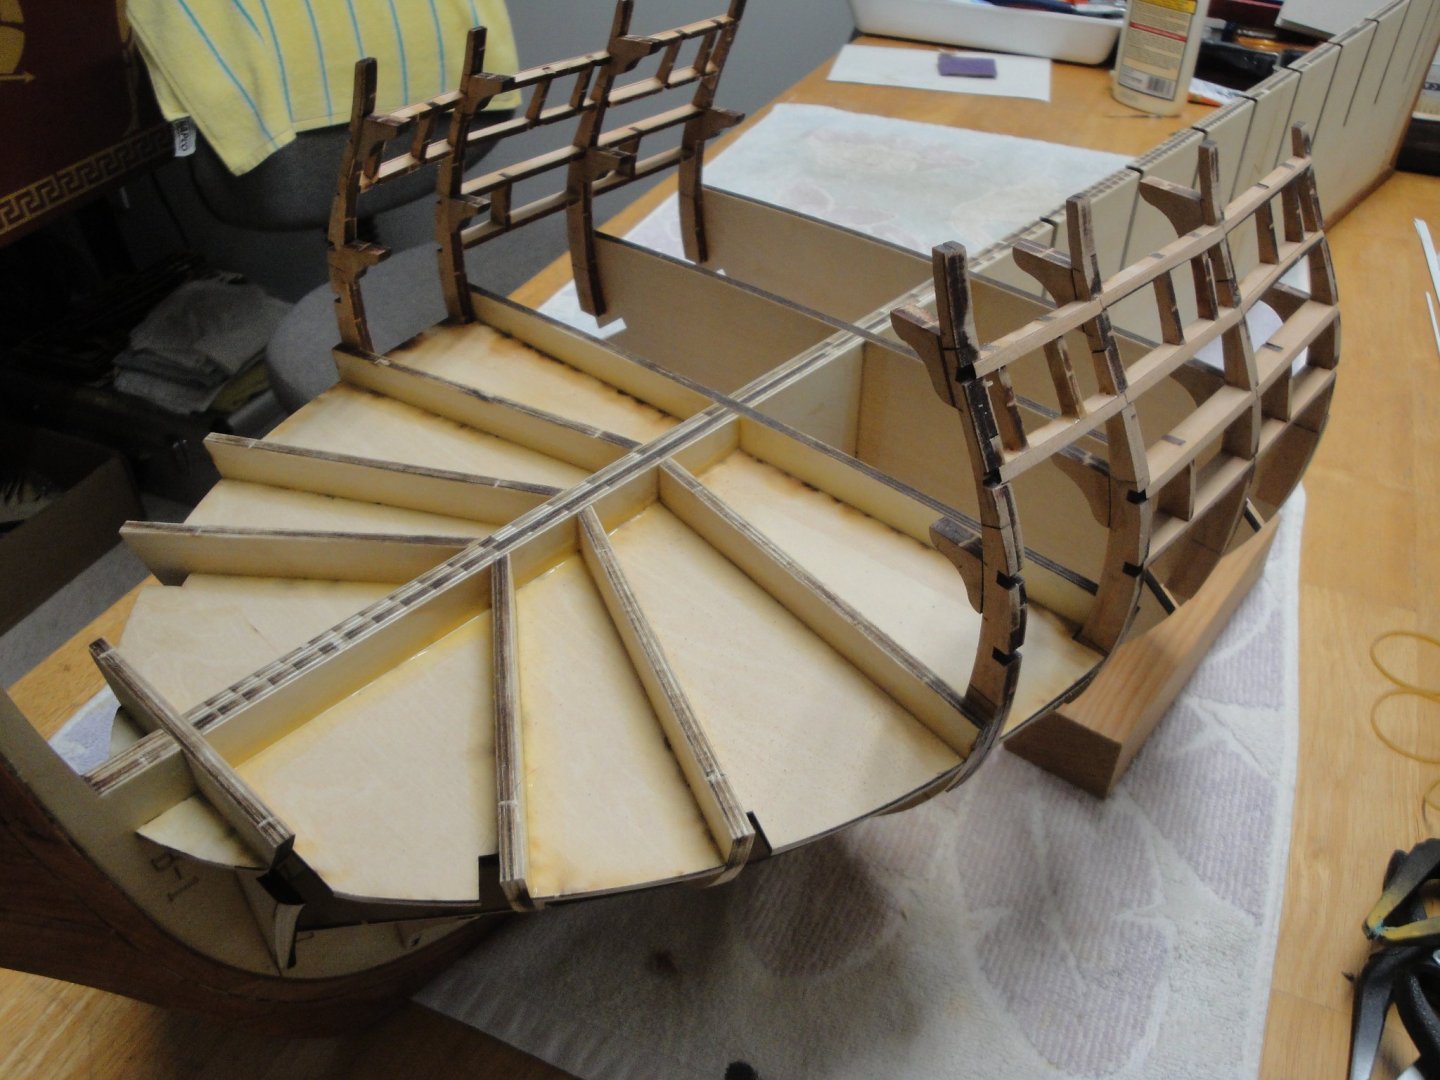
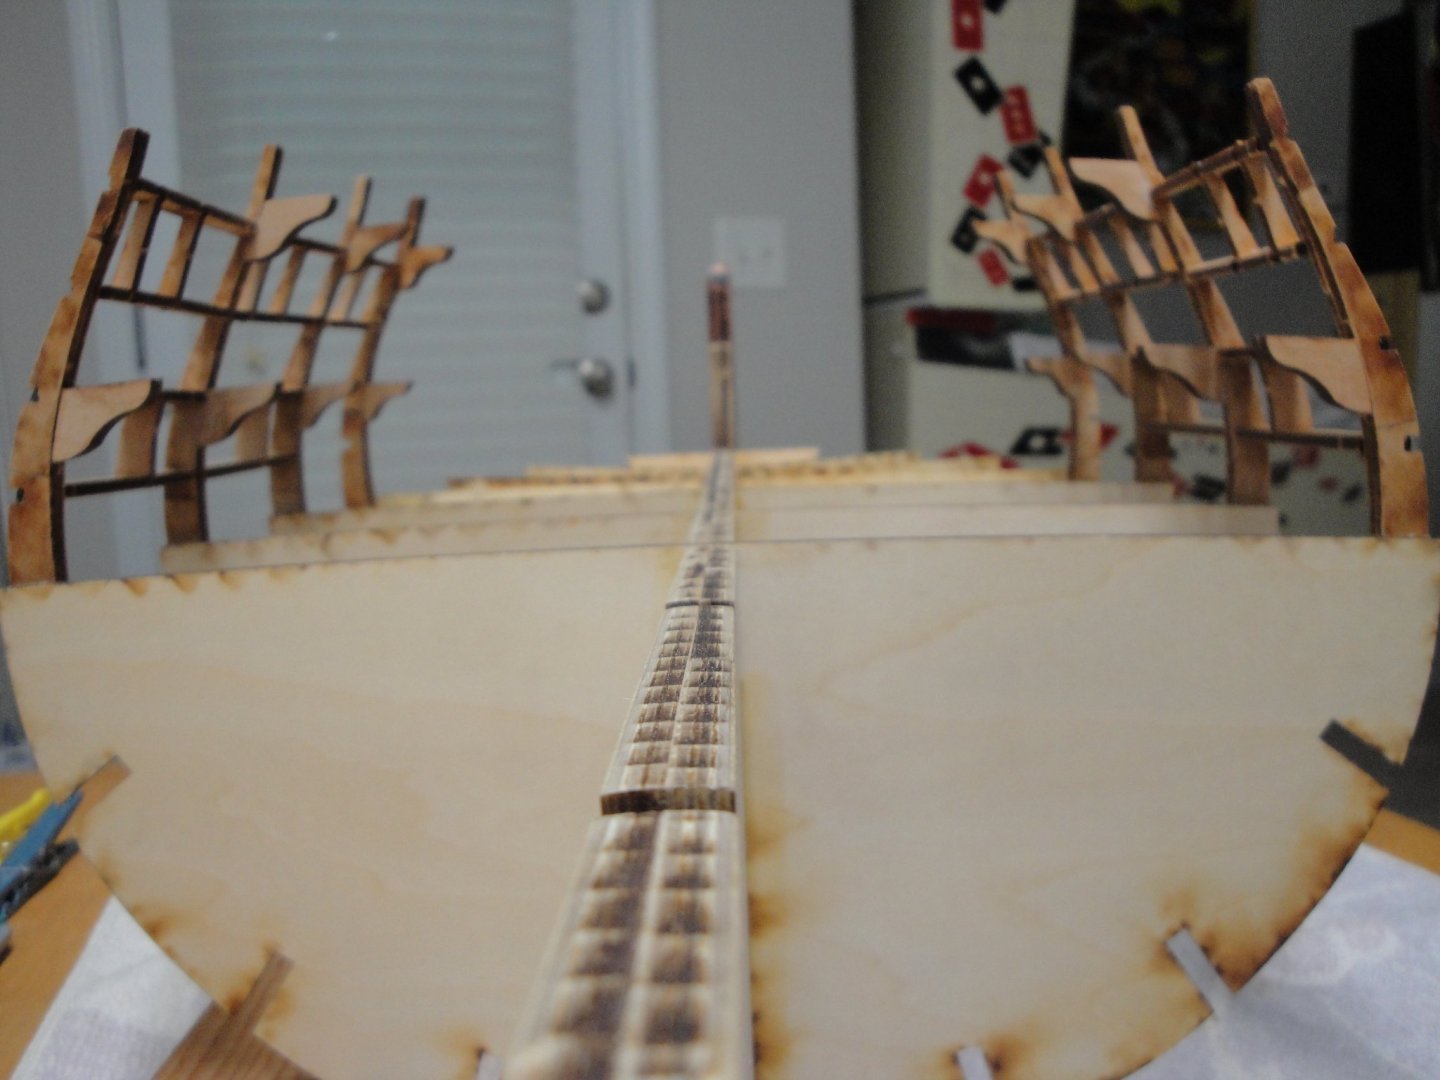
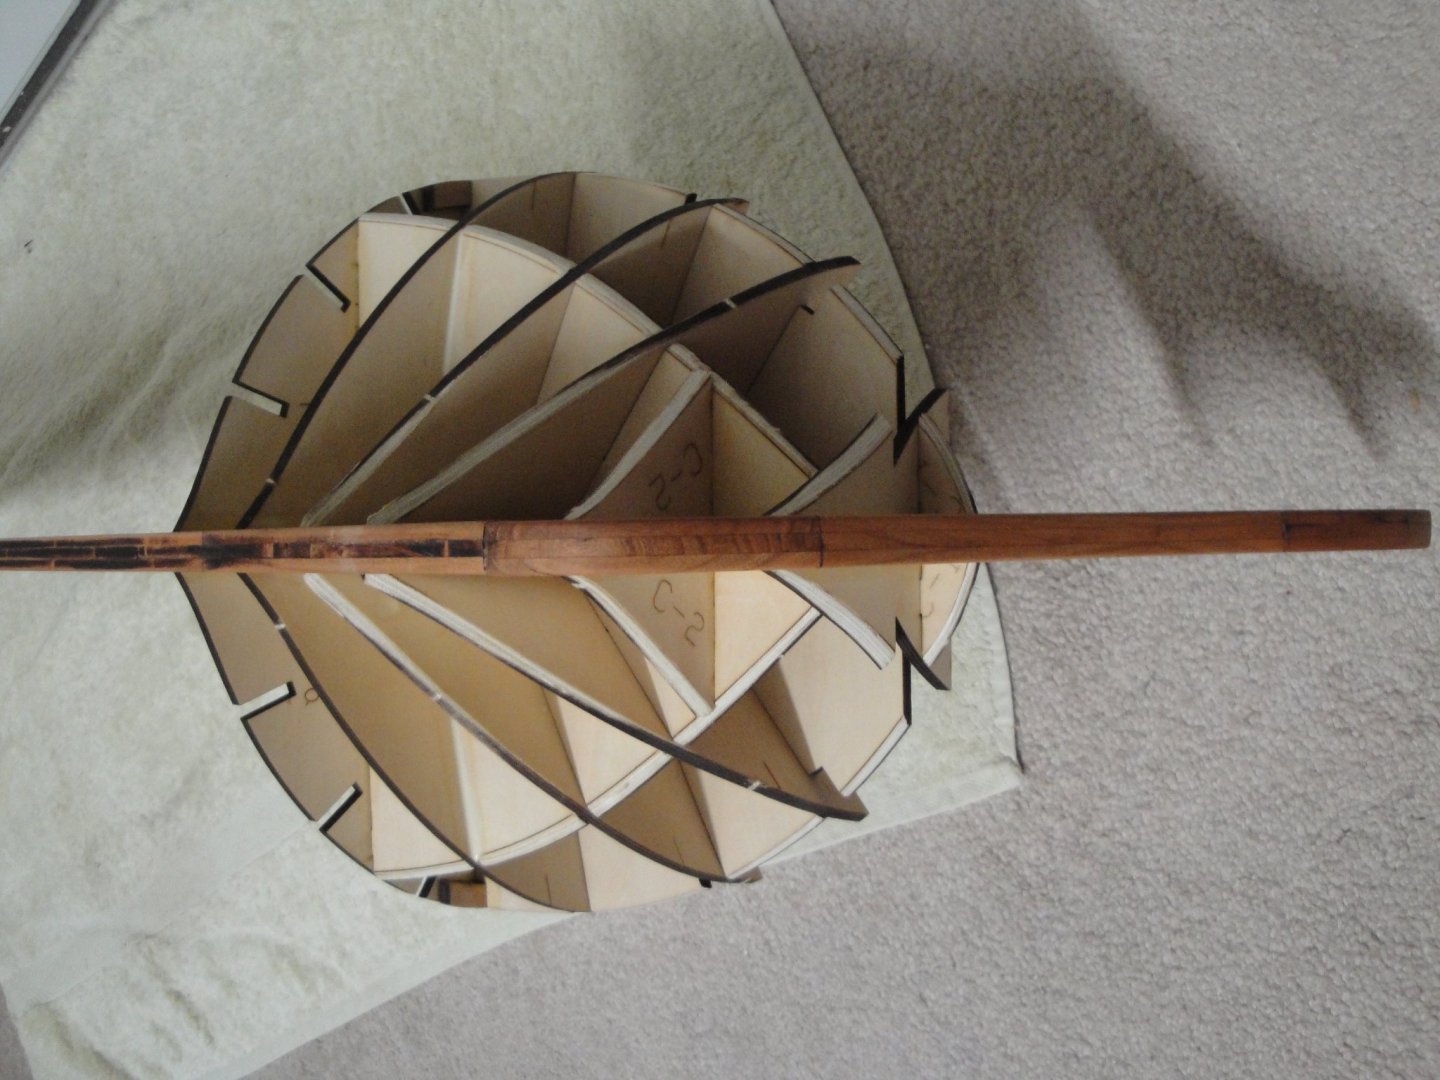
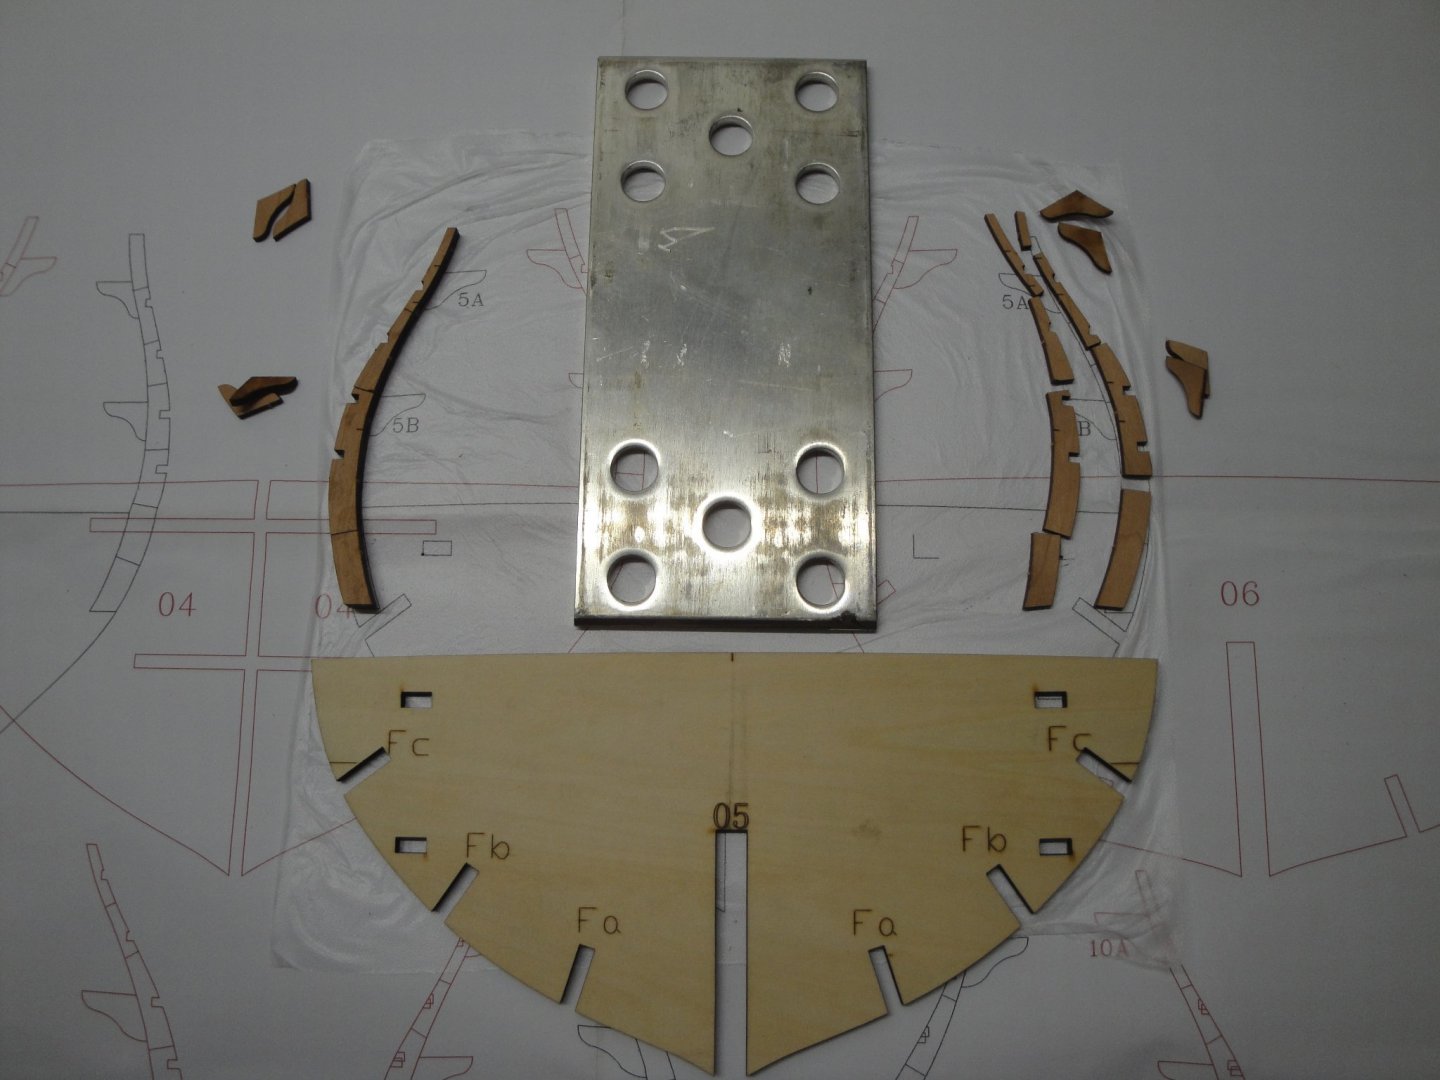
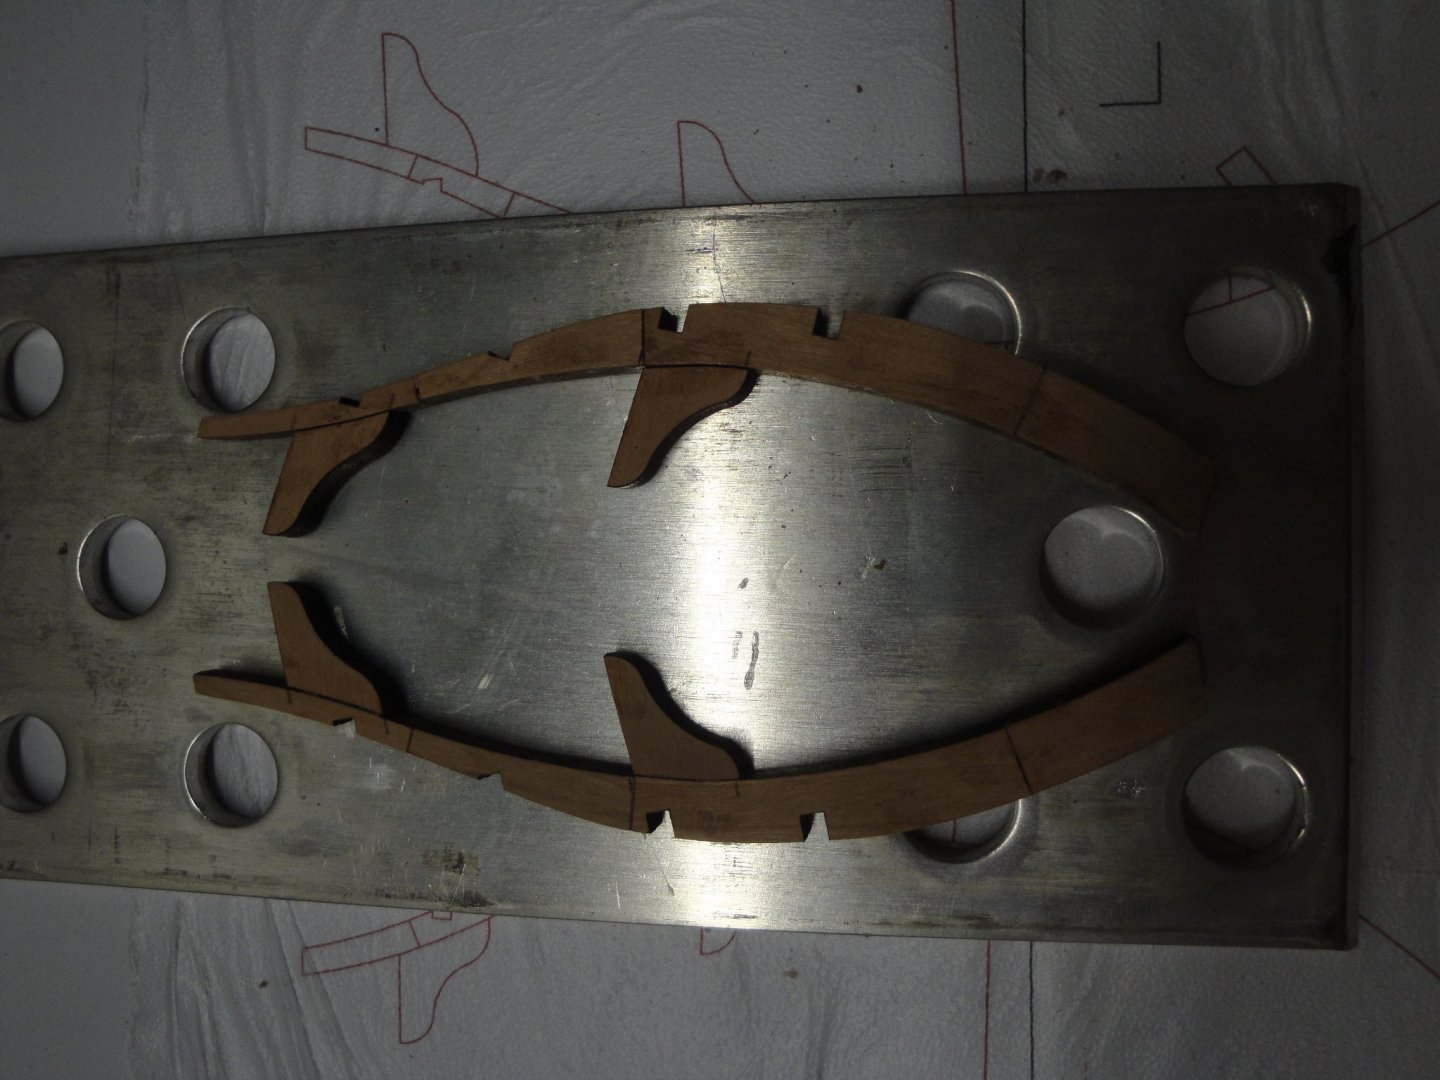
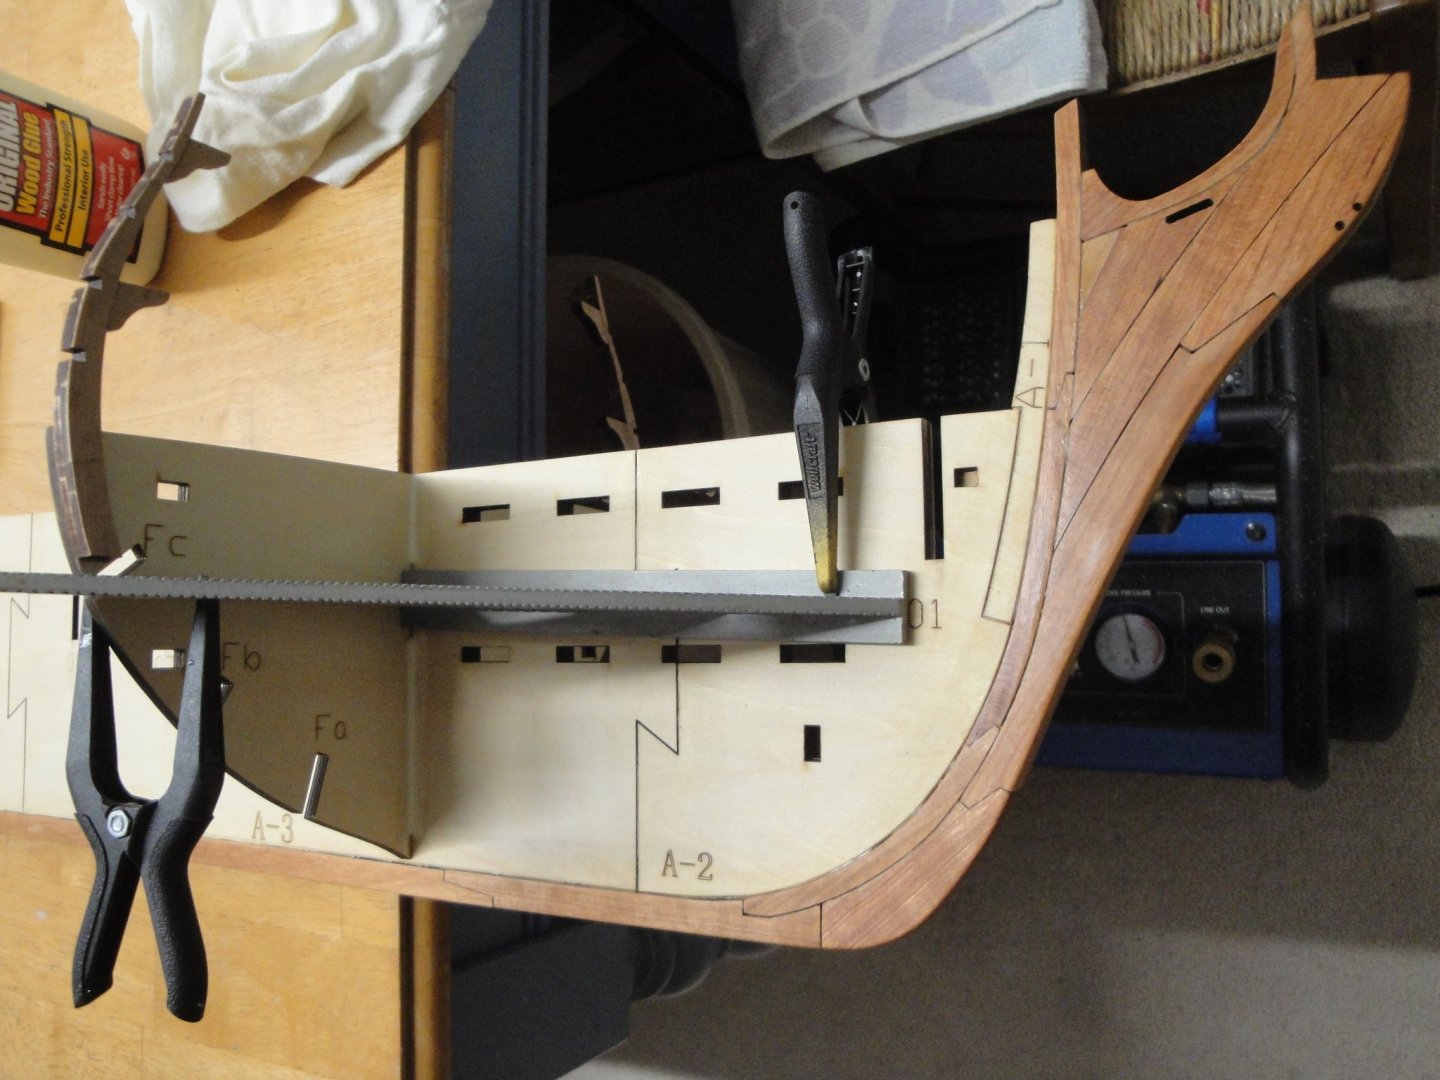
Moving along with Steps 10 and 11: I built the Bulkhead #5. You really have to be careful about the small parts, where to find them and how to piece them together. It is a real puzzle. If you decide to detach parts too early from their wood sprues, you are toasted. The manual and the drawing of the parts location is your only chance of success. Once you have gathered all the right parts, the assembly is a breeze. It is like gluing a puzzle or building a Lego. The fit is perfect and everything is well thought out by the kit designer(s). These two "bones" can be glued to Bulkhead #5. The manual only displays pictures. It is like building an IKEA furniture, in a way. I wished they could have put some text and recommendations in plain English to help with the novice builders like me. All the little parts are made with cherry wood. Bulkhead #5 is now glued to the spine: I have oiled the stem and keel and really like the color and the silkiness of the cherry wood. It brings a nice distraction from the plywood and make the model so much more precious. Moving along with more parts.... That model is going to be HUGE !!!!! Yves


- 507 replies
-
- 13
-
-
Same stuff with Speedpak with E-Bay. You pass the USA customs in China, before loading on the plane or the ship. No need to carry it, if it does not pass the customs. Yves
-
Wow, you have been quite active !!! Maybe you should start another Build Log for your Arizona. Very impressive kit and all these metal parts make it very precious and beautiful. Yves
-
Beautiful hull. Great shape, a la Herreshoff !!! Yves
- 127 replies
-
- 2
-
-
- Bowdoin
- Arctic Exploration
- (and 3 more)