


Mike Y
-
Posts
1,520 -
Joined
-
Last visited
Content Type
Profiles
Forums
Gallery
Events
Posts posted by Mike Y
-
-
-
-
-
This summer I had a perfect plan - send off the family to their parent/grandparents in July, and enjoy the hobby in the evenings. "Ha ha oh come on" said my work life, and I ended up with a series of business trips instead
 Some of them were good though, can't complain.
I am still making the "Tosti-style" clamps.
Drilling the holes on a mill:
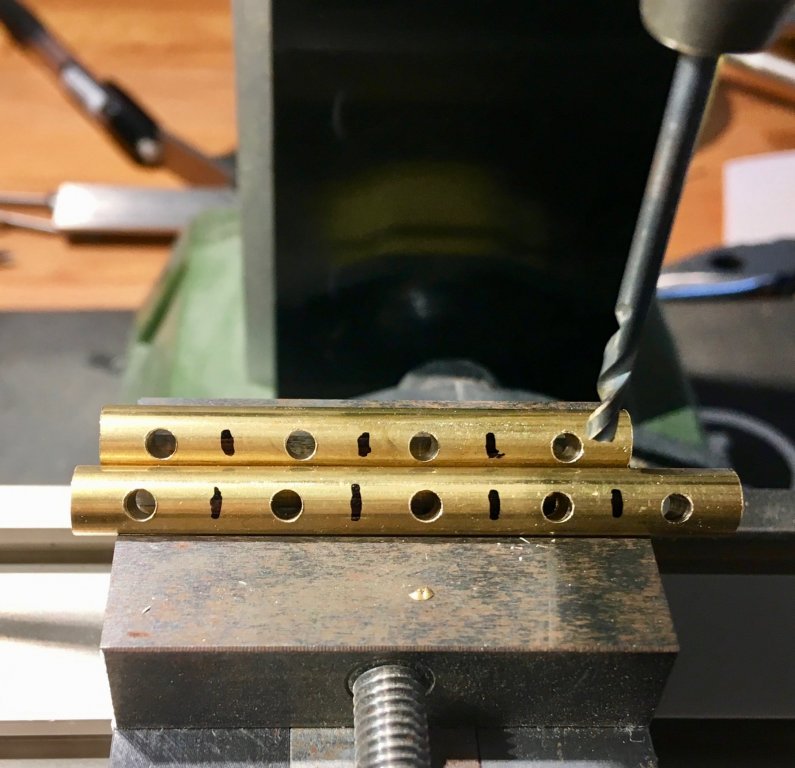
To prevent the drill bit from slipping to the side of the rod - I flatten it with a file first:

That method is simple and works well enough.
Thread is tapped manually, no problems with that approach:

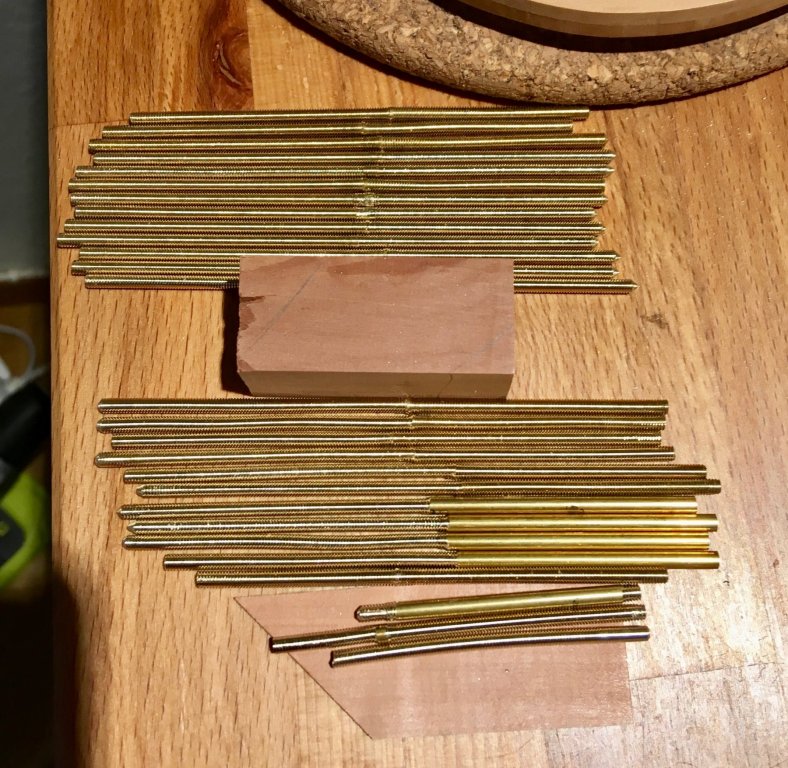
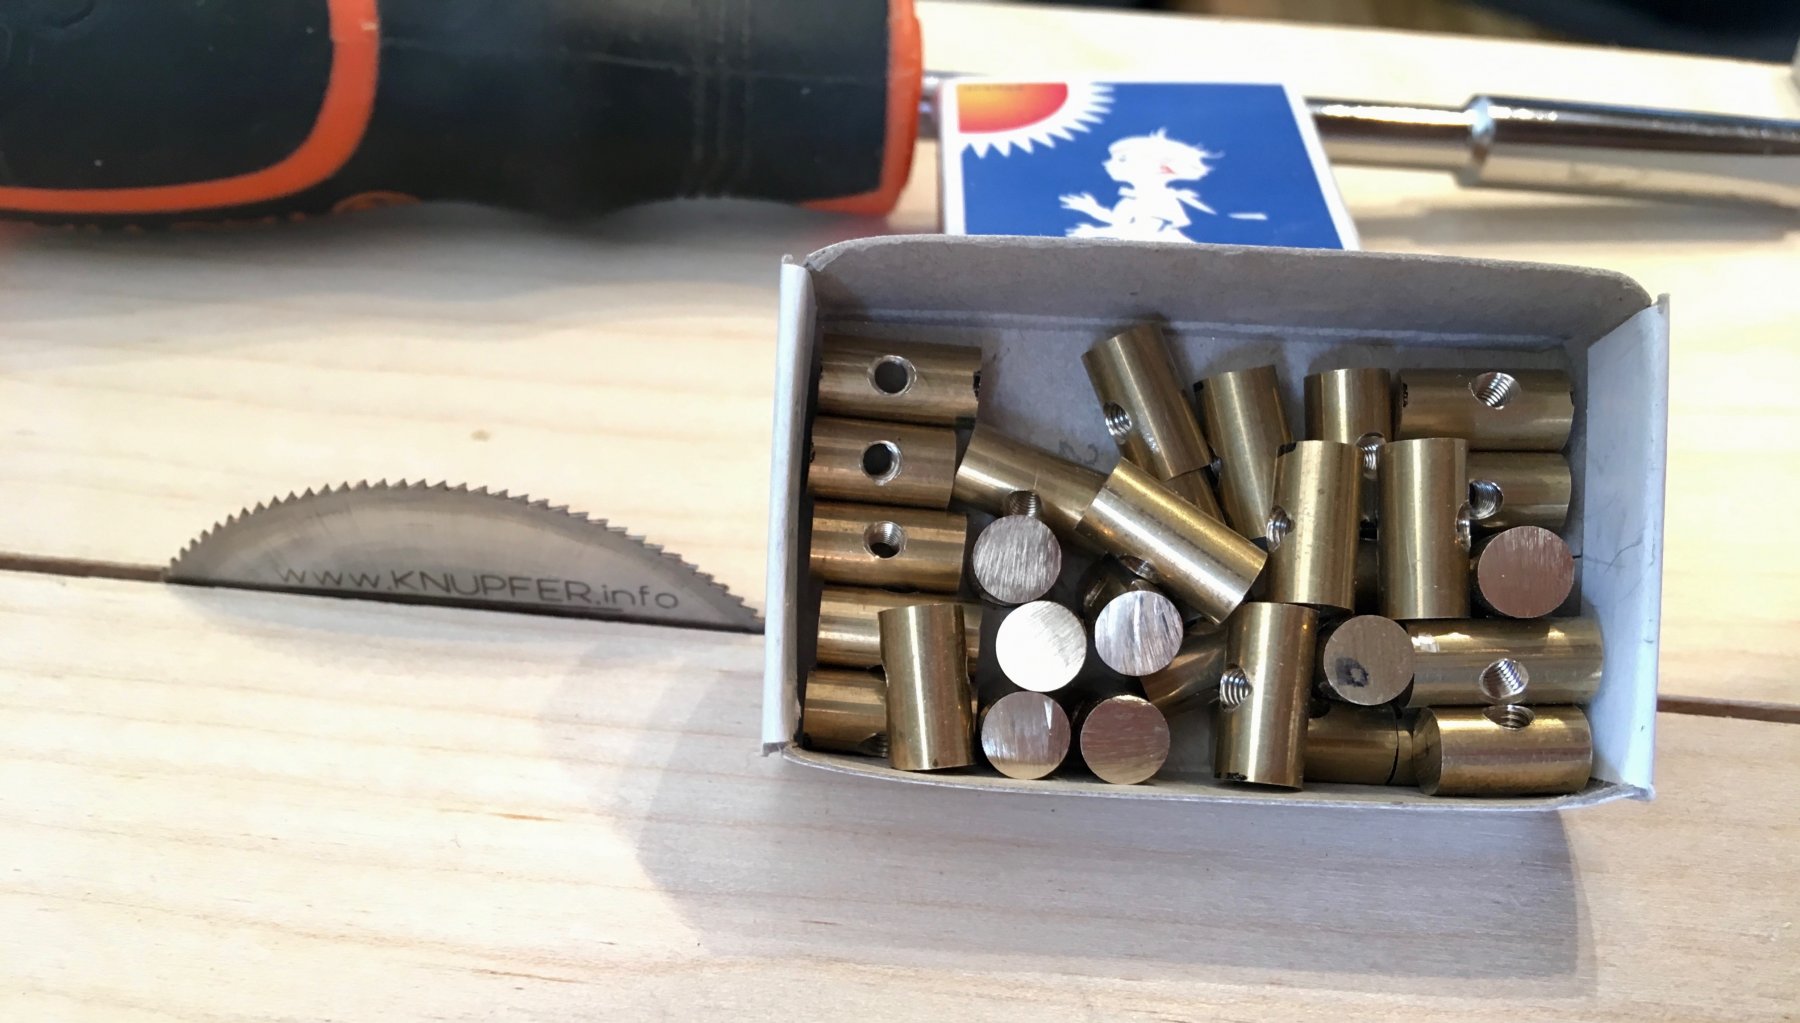
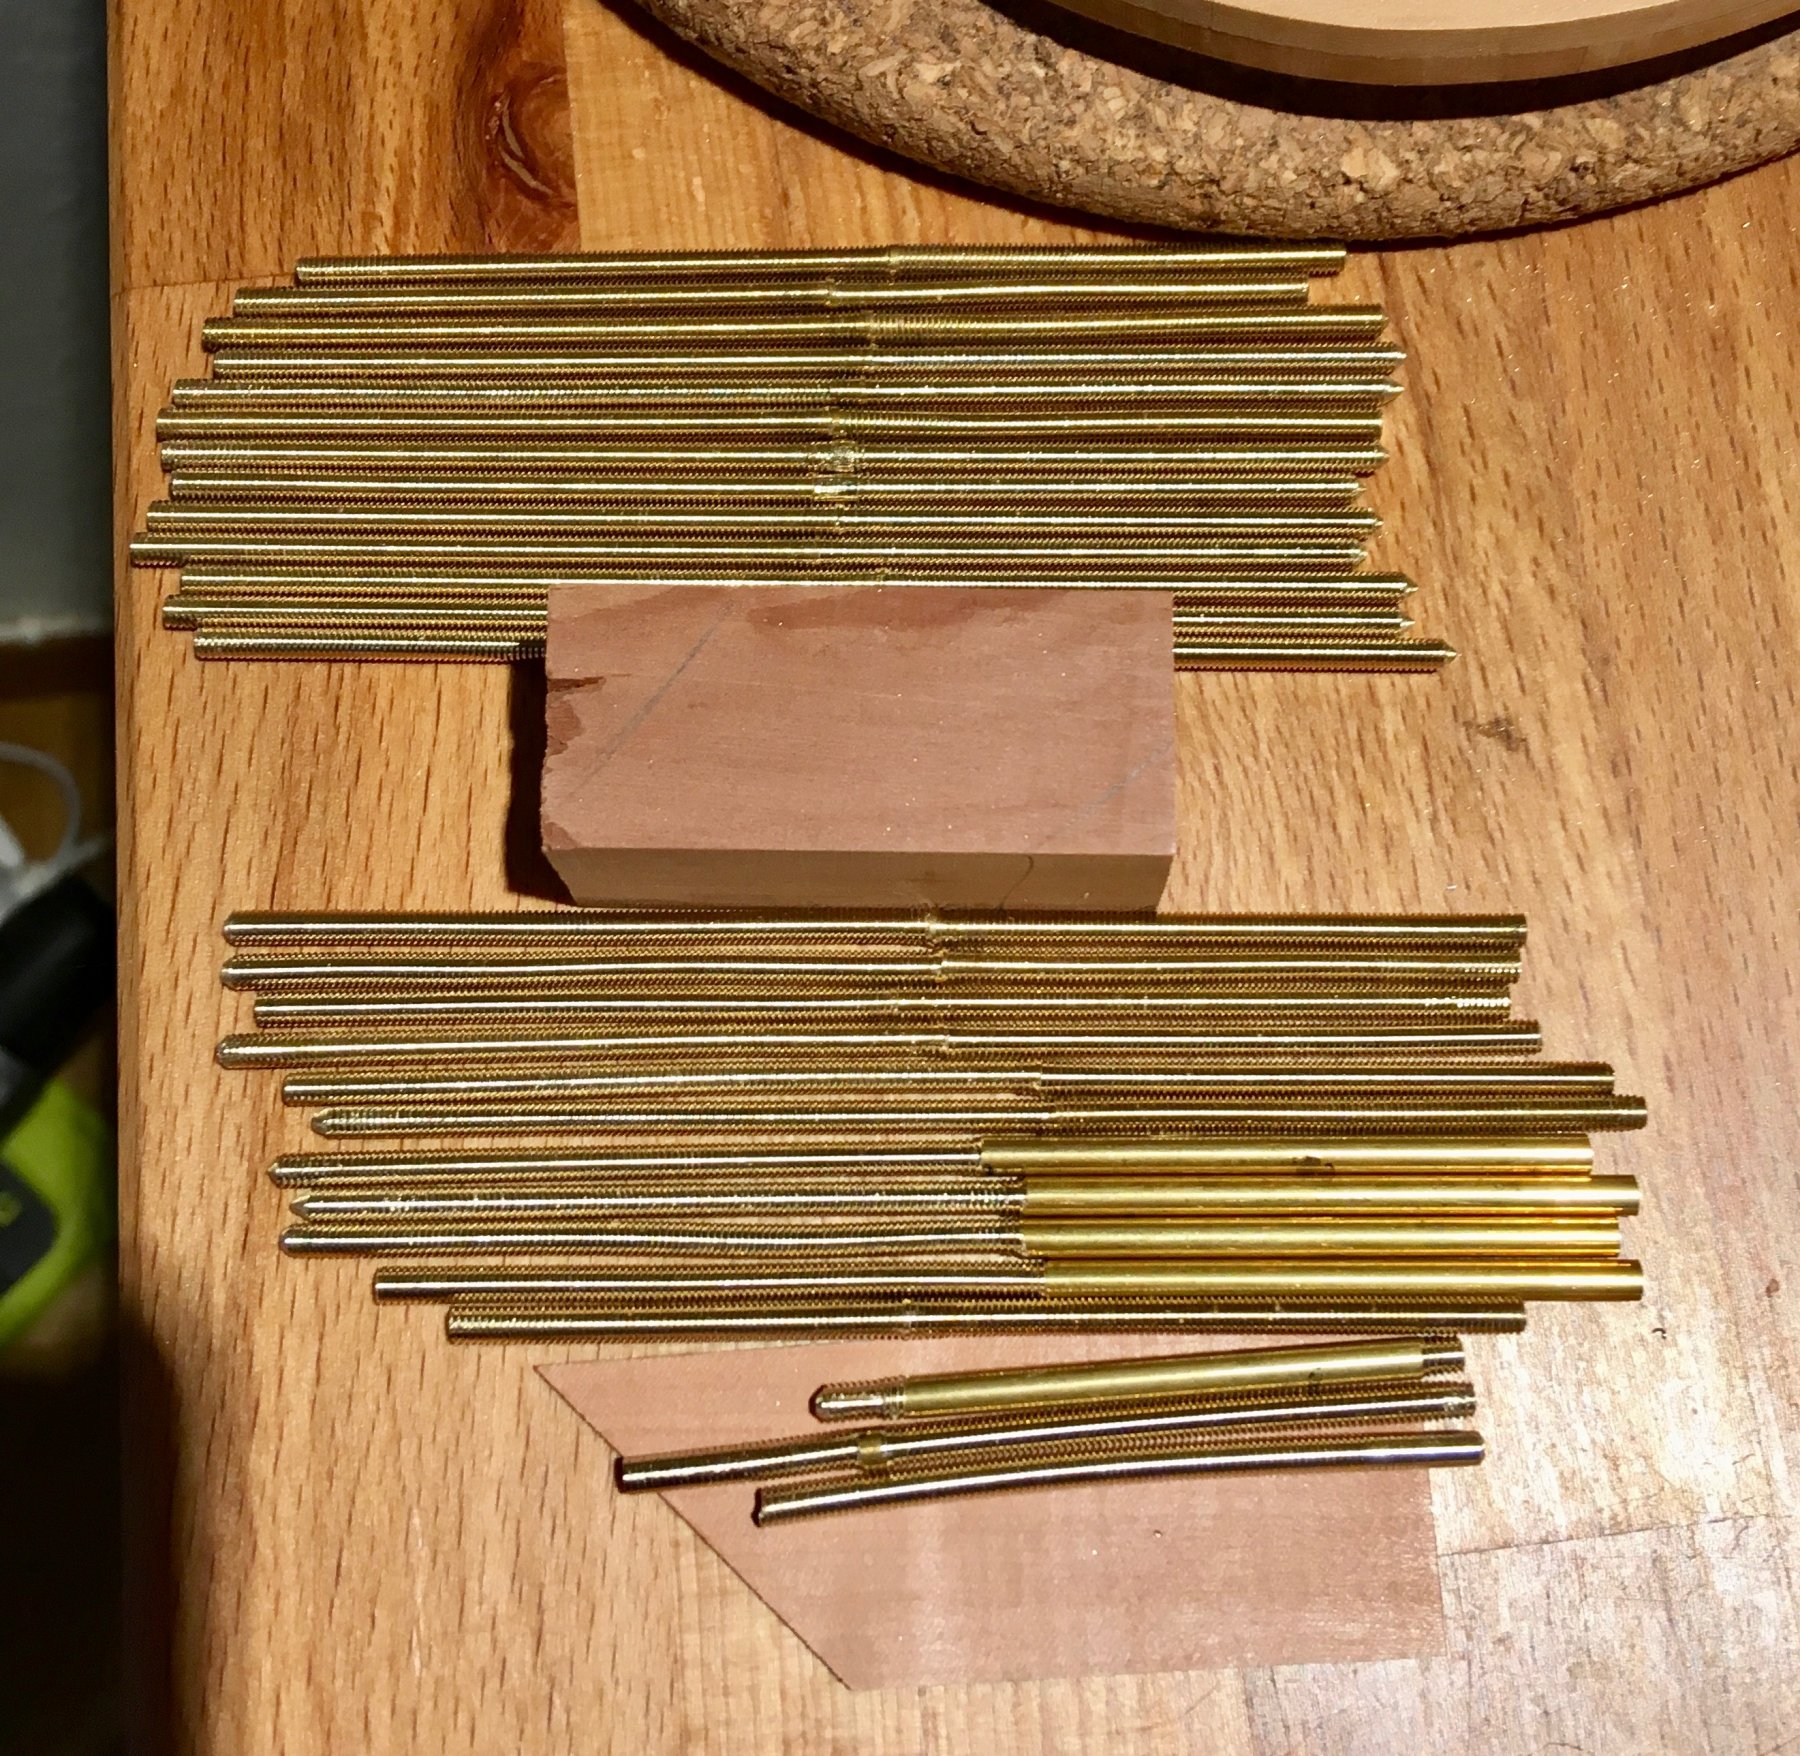
Then slicing this rod with a Knupfer slitting blade. It is really great, cuts brass like butter, I am impressed!

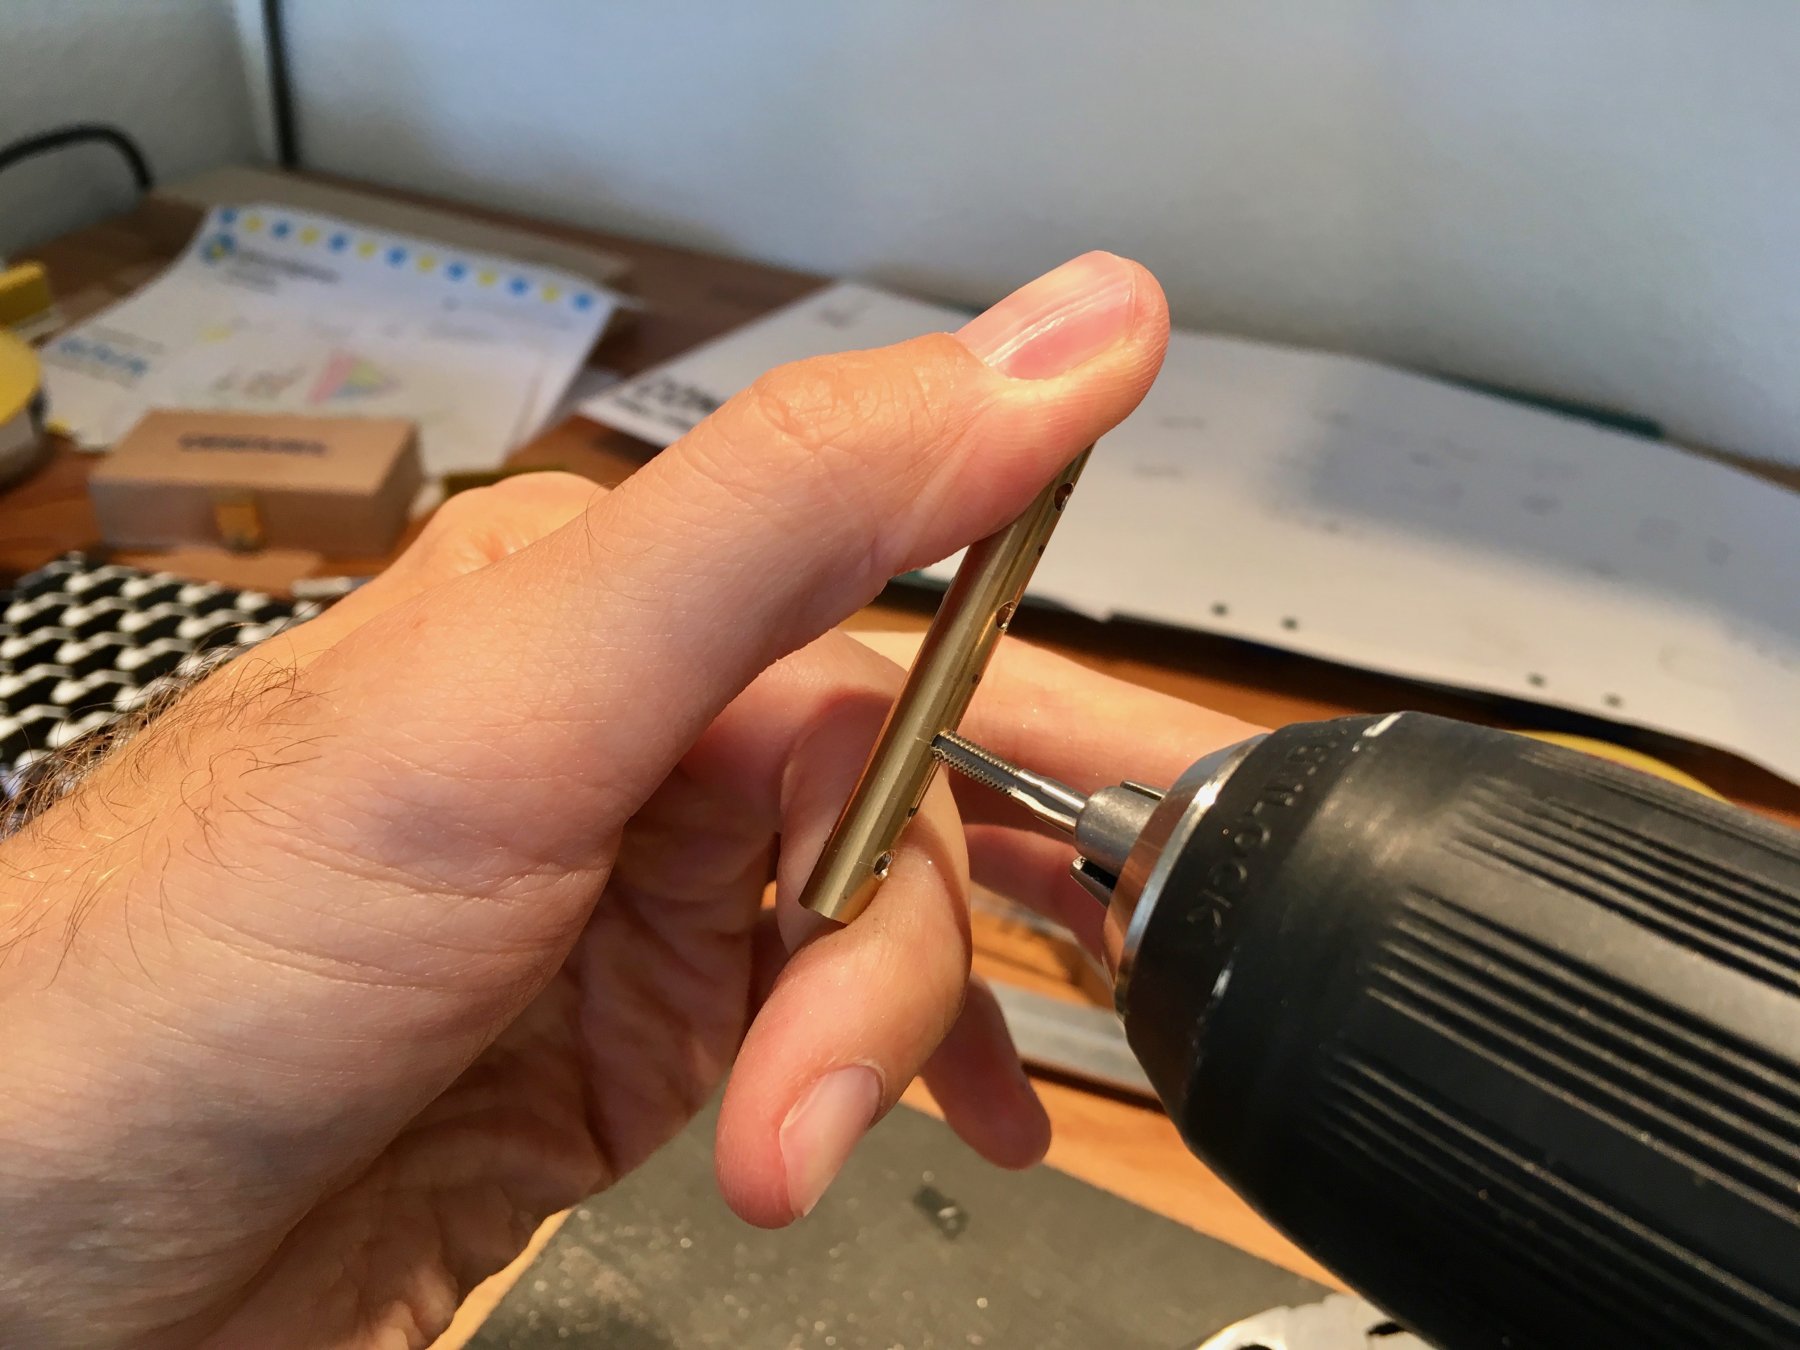
Cutting the thread in a thin (3mm) rod is trickier though. Frequently the thread is being cut off-center, resulting in a wobble closer to the center of the rod. Googled a bit, most common reasons are incorrect angle, uneven feed, etc.
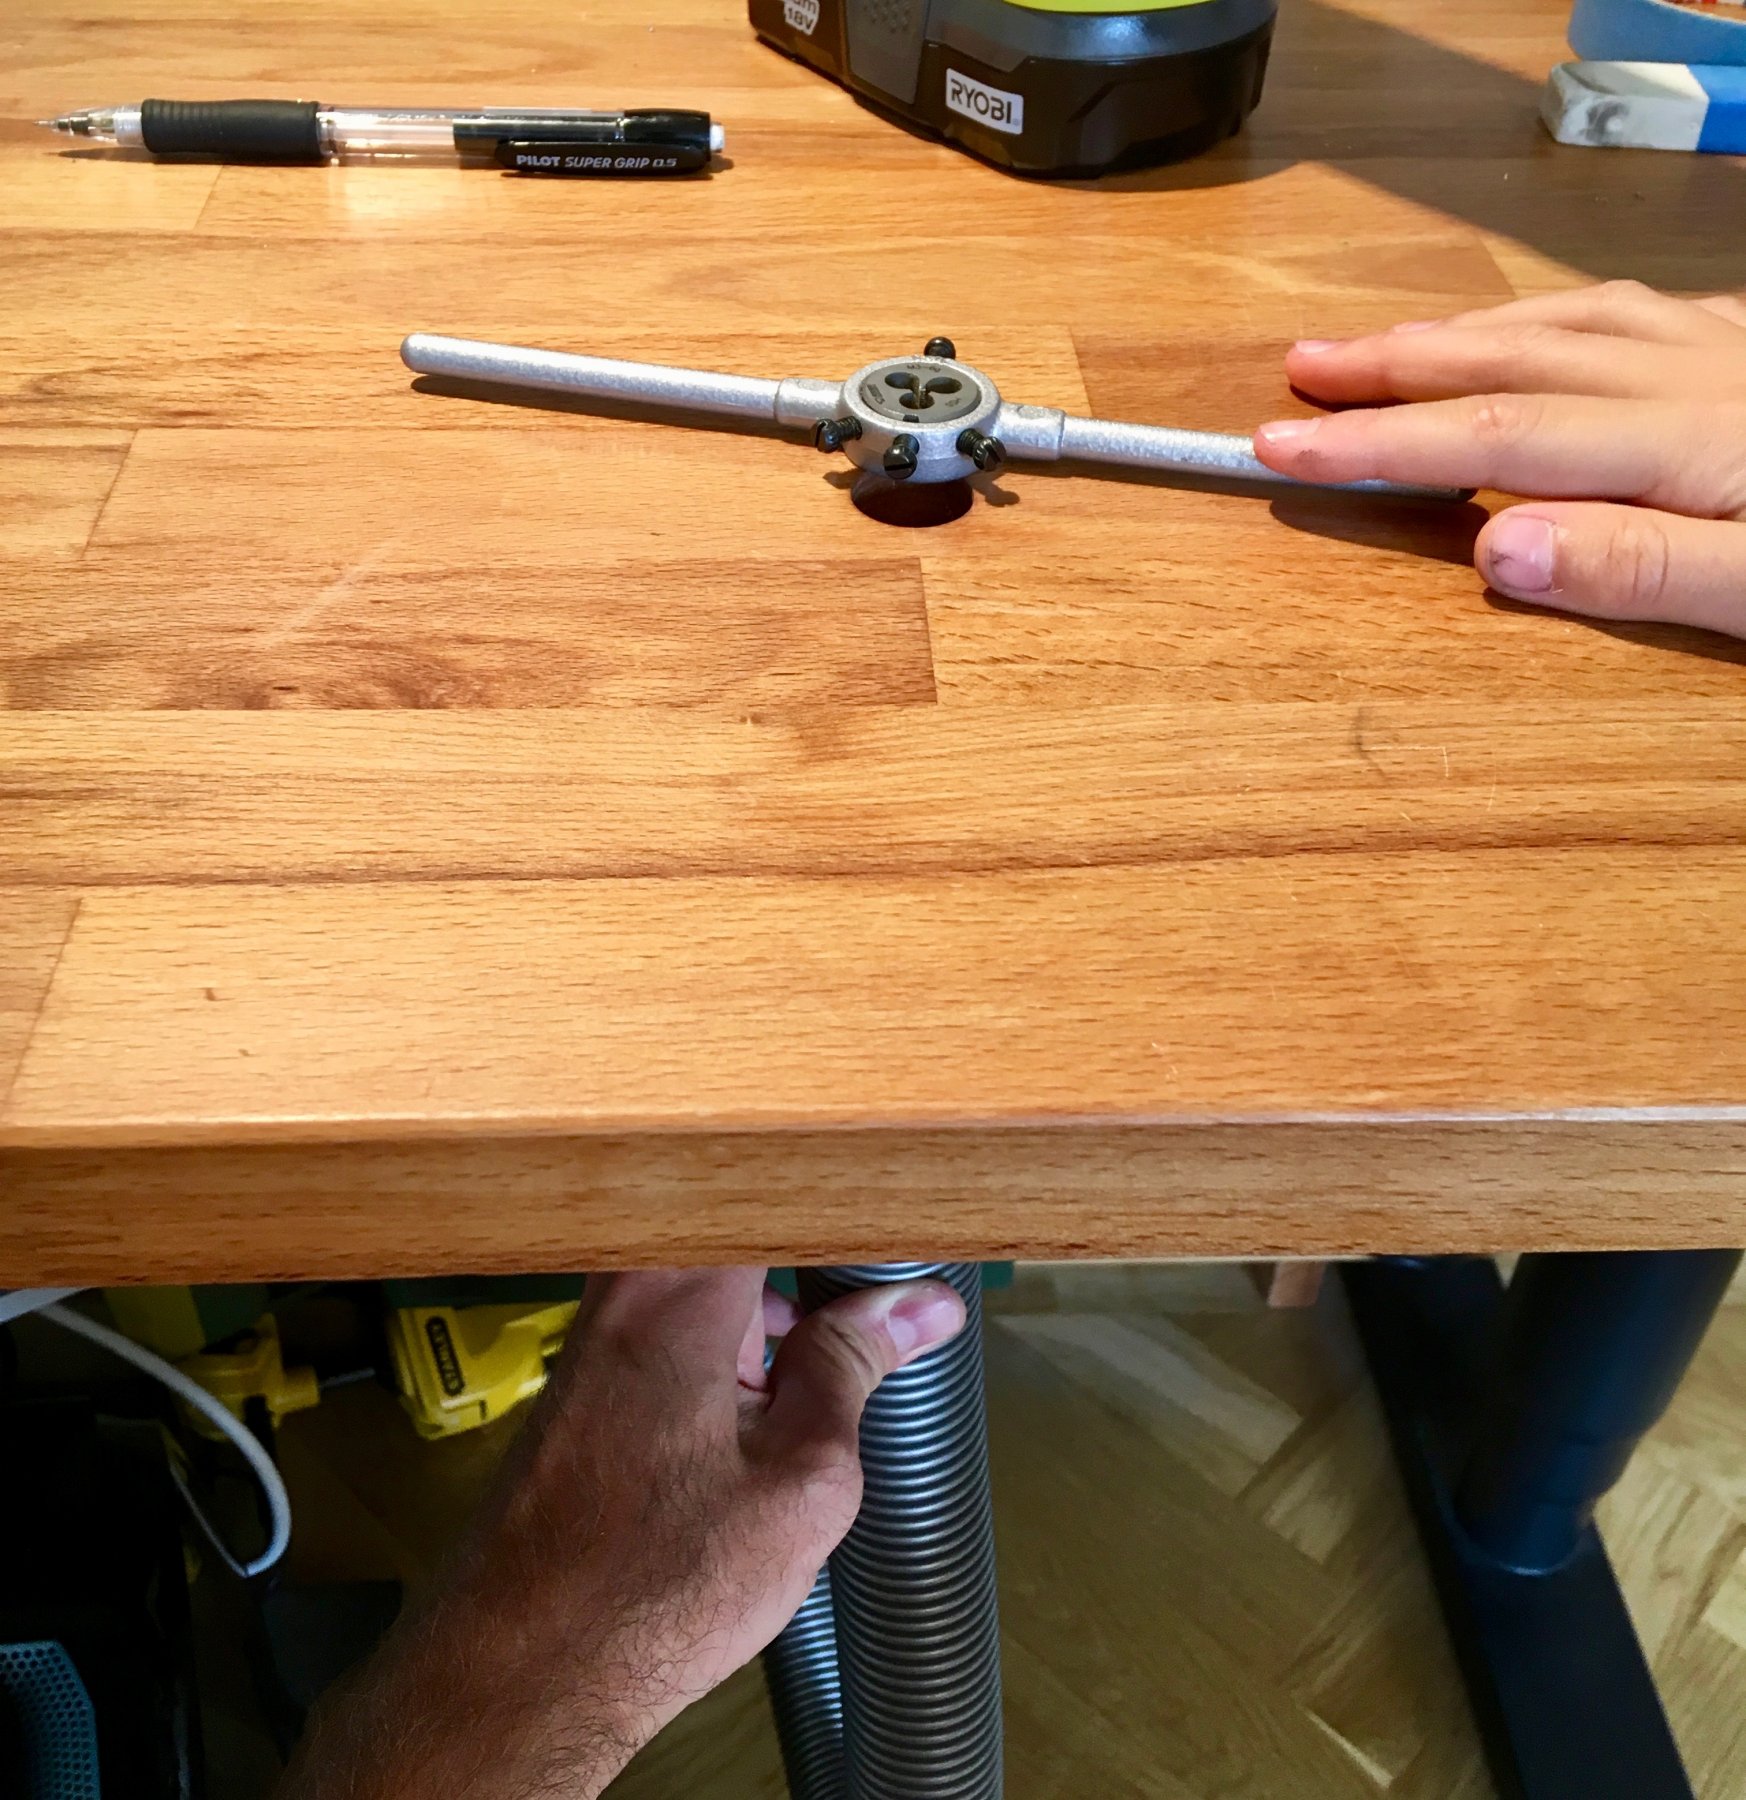
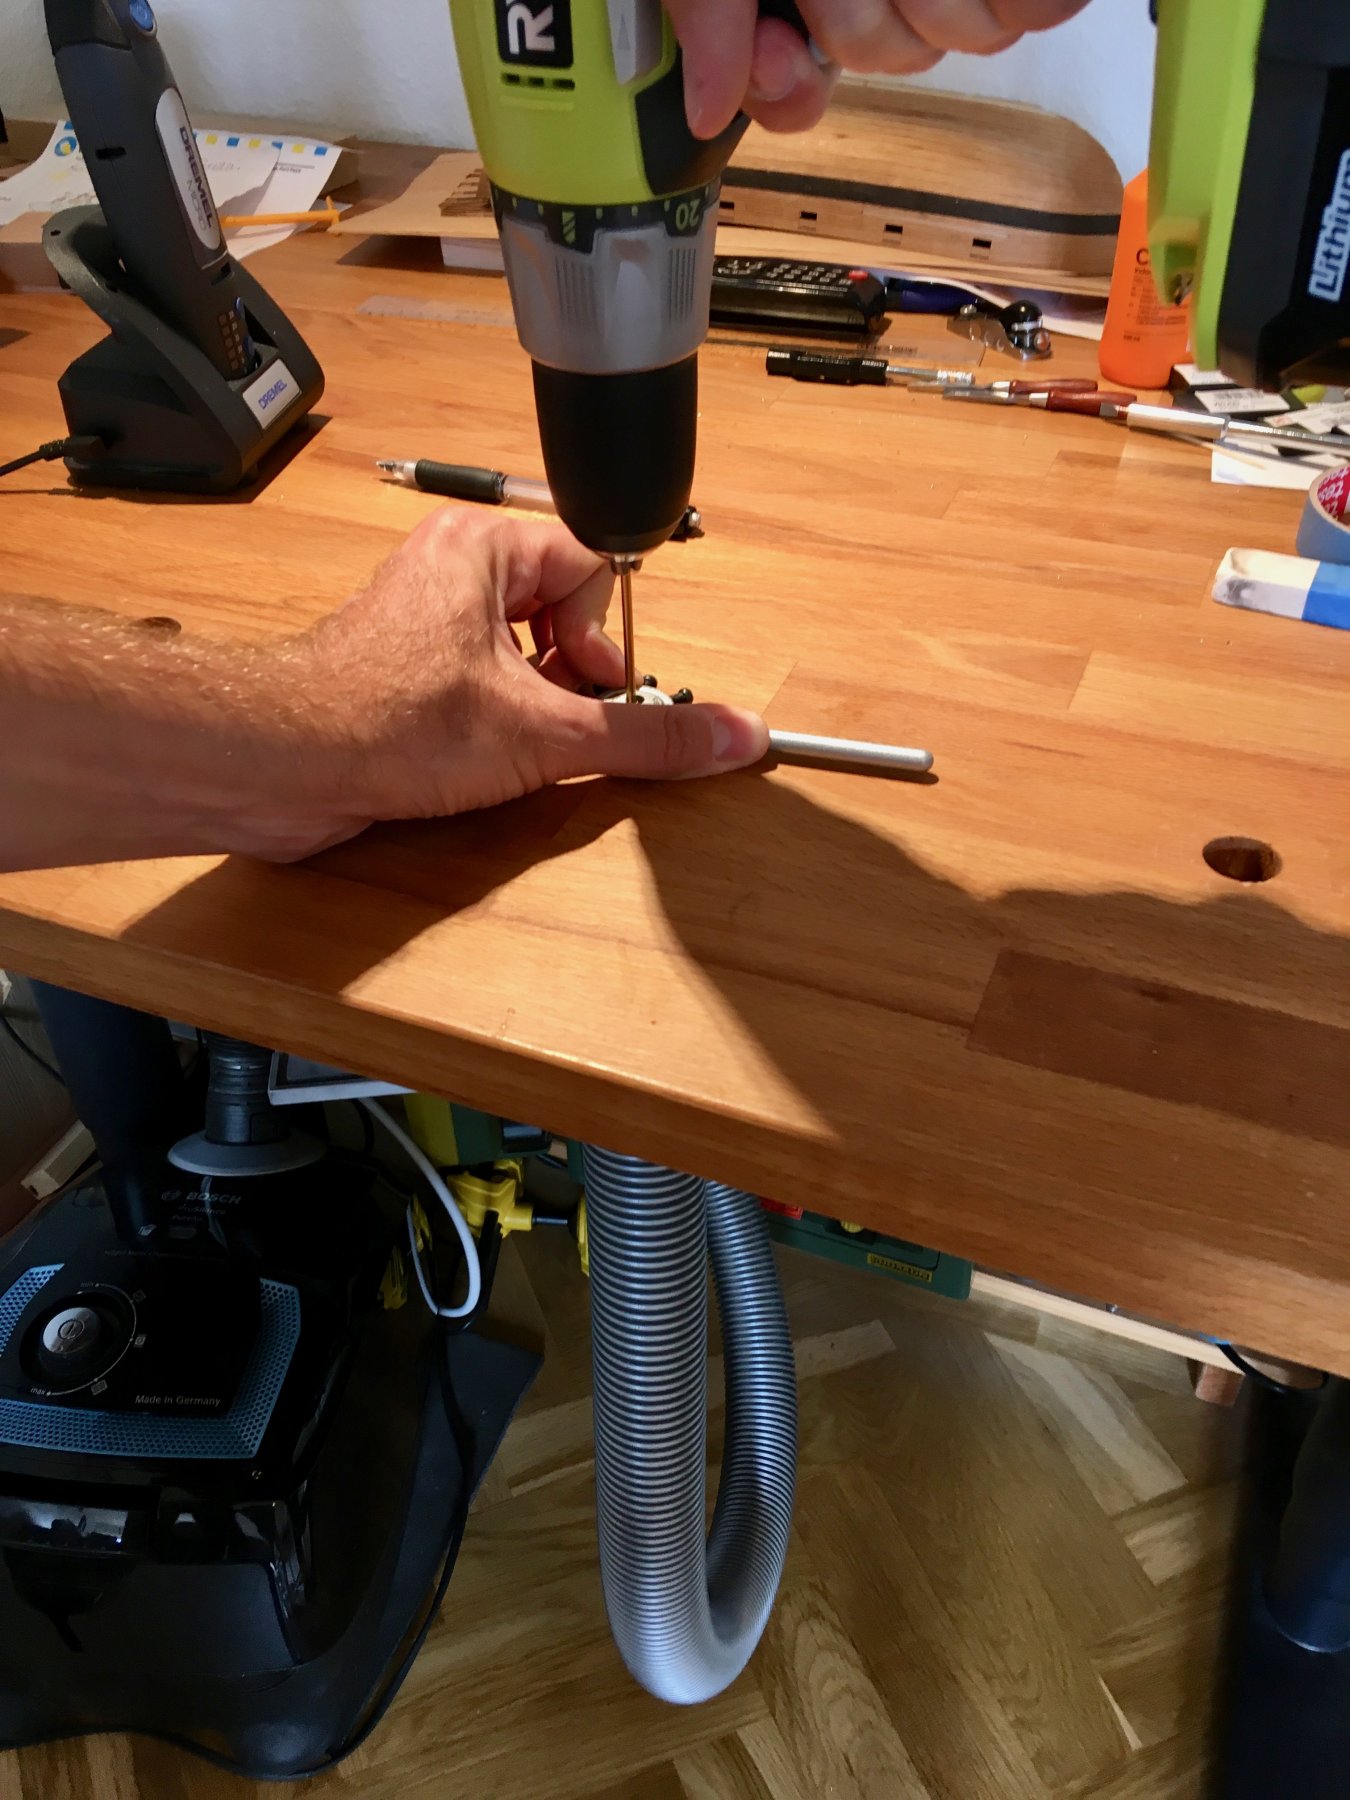
I found a method that works well in the end. Die is placed on top of the benchdog hole, vaccuum is placed below it, and everything is held in place purely with a vaccuum.

In action:

Being on a flat surface, it is easy to control the angle and is easy to apply a steady pressure. As a bonus, air flow immediately cools both die and rod, and all chips are sucked into the vac.
The end result is a clean and straight rod (on top), versus wobbly alternative (the same die was used for both rods):
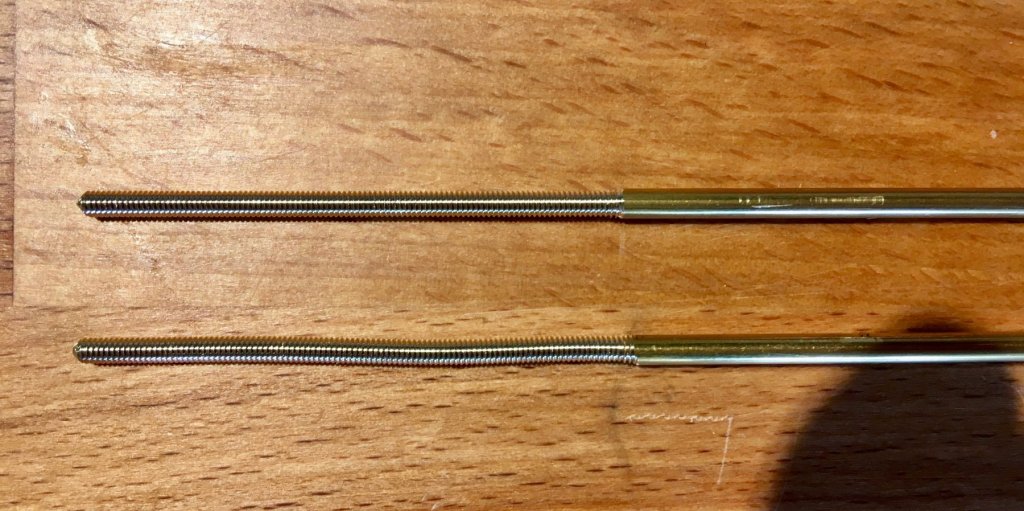
I am nearly done with metalwork, but now my left-handed die died (no pun intended), it cuts a larger radius and gets a lot of resistance - I broke two rods when trying to cut that thread
Ordered a new die, will cut the clamp jaws in a meanwhile.
P.S.: machining is, actually, quite hard! You can't sand away the excess or cover gaps with sawdust and glue mixture. There is only one chance to do things right.
- Bob Legge, John Cheevers, albert and 12 others
-
 15
15
-
Dutchman, can't find your Polotsk build log, time to start one?
")
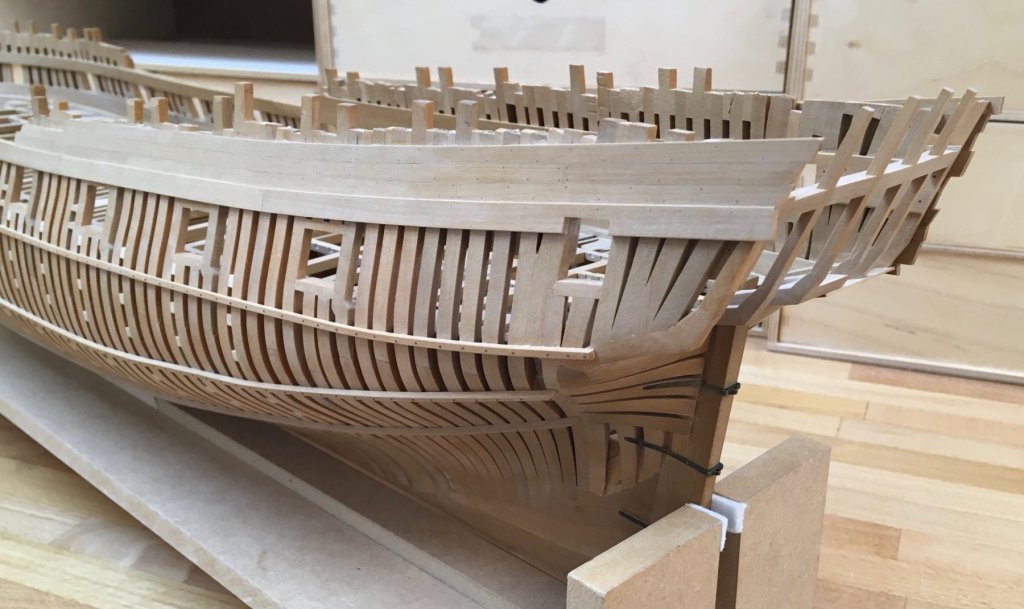
Daria is back from grandparents, back to the build. The hull is sloooowly closing up, teaching a lesson or two about persistence, patience and planning.
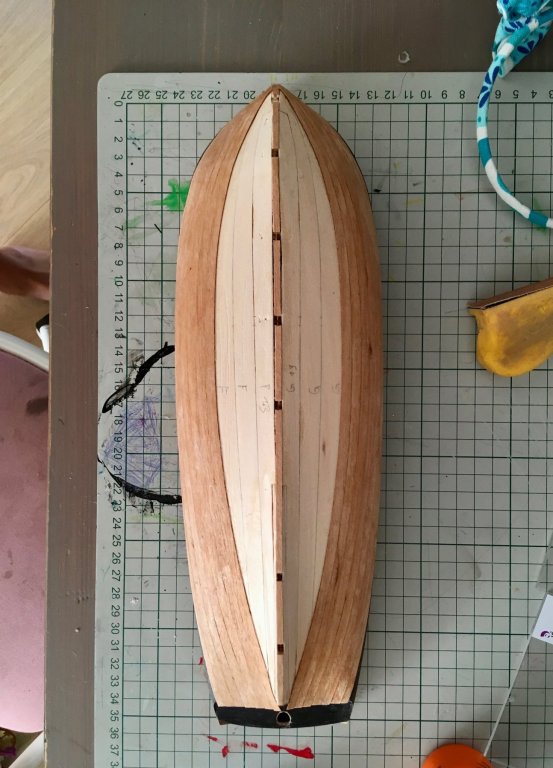
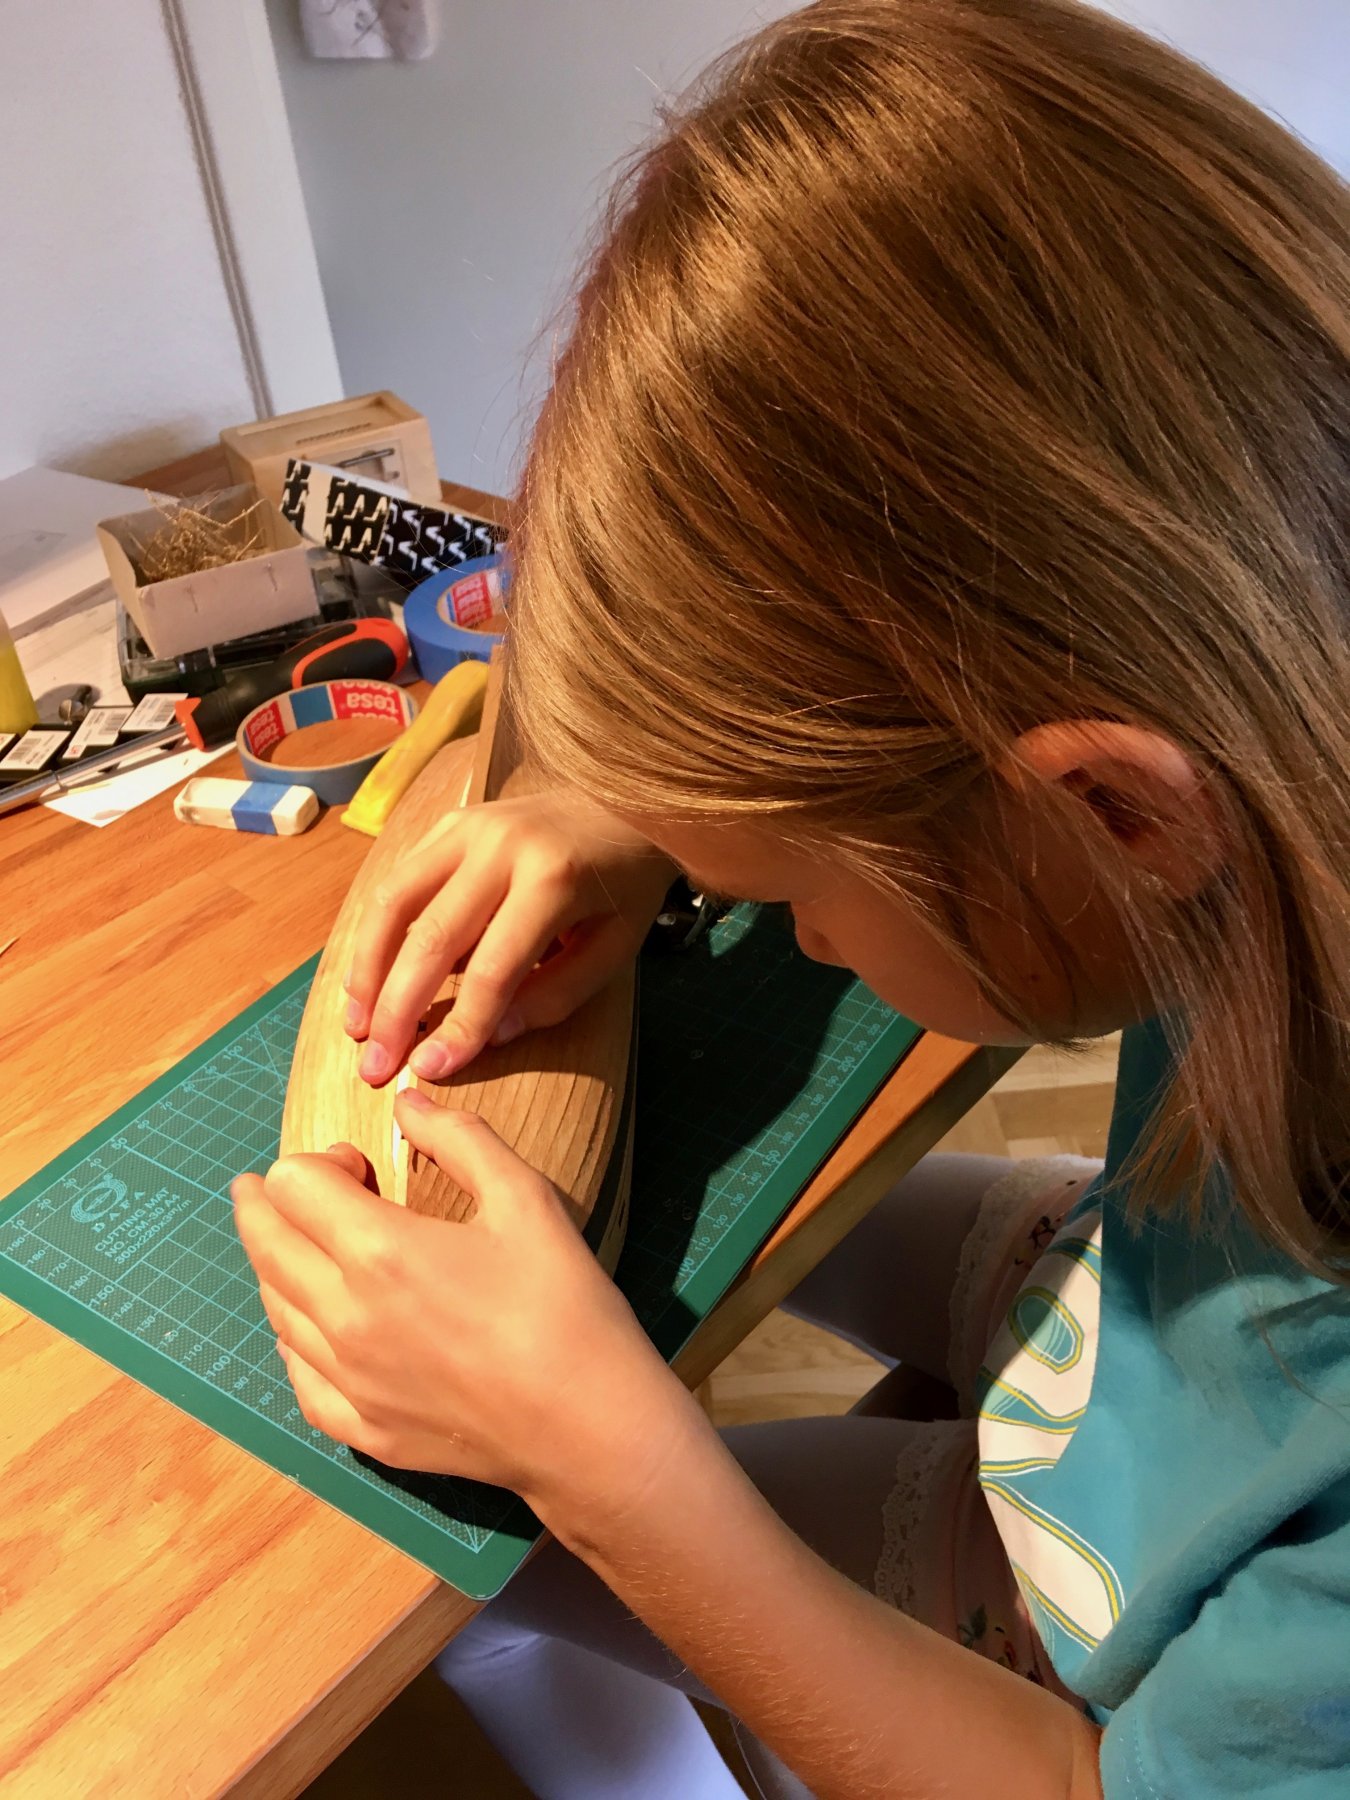
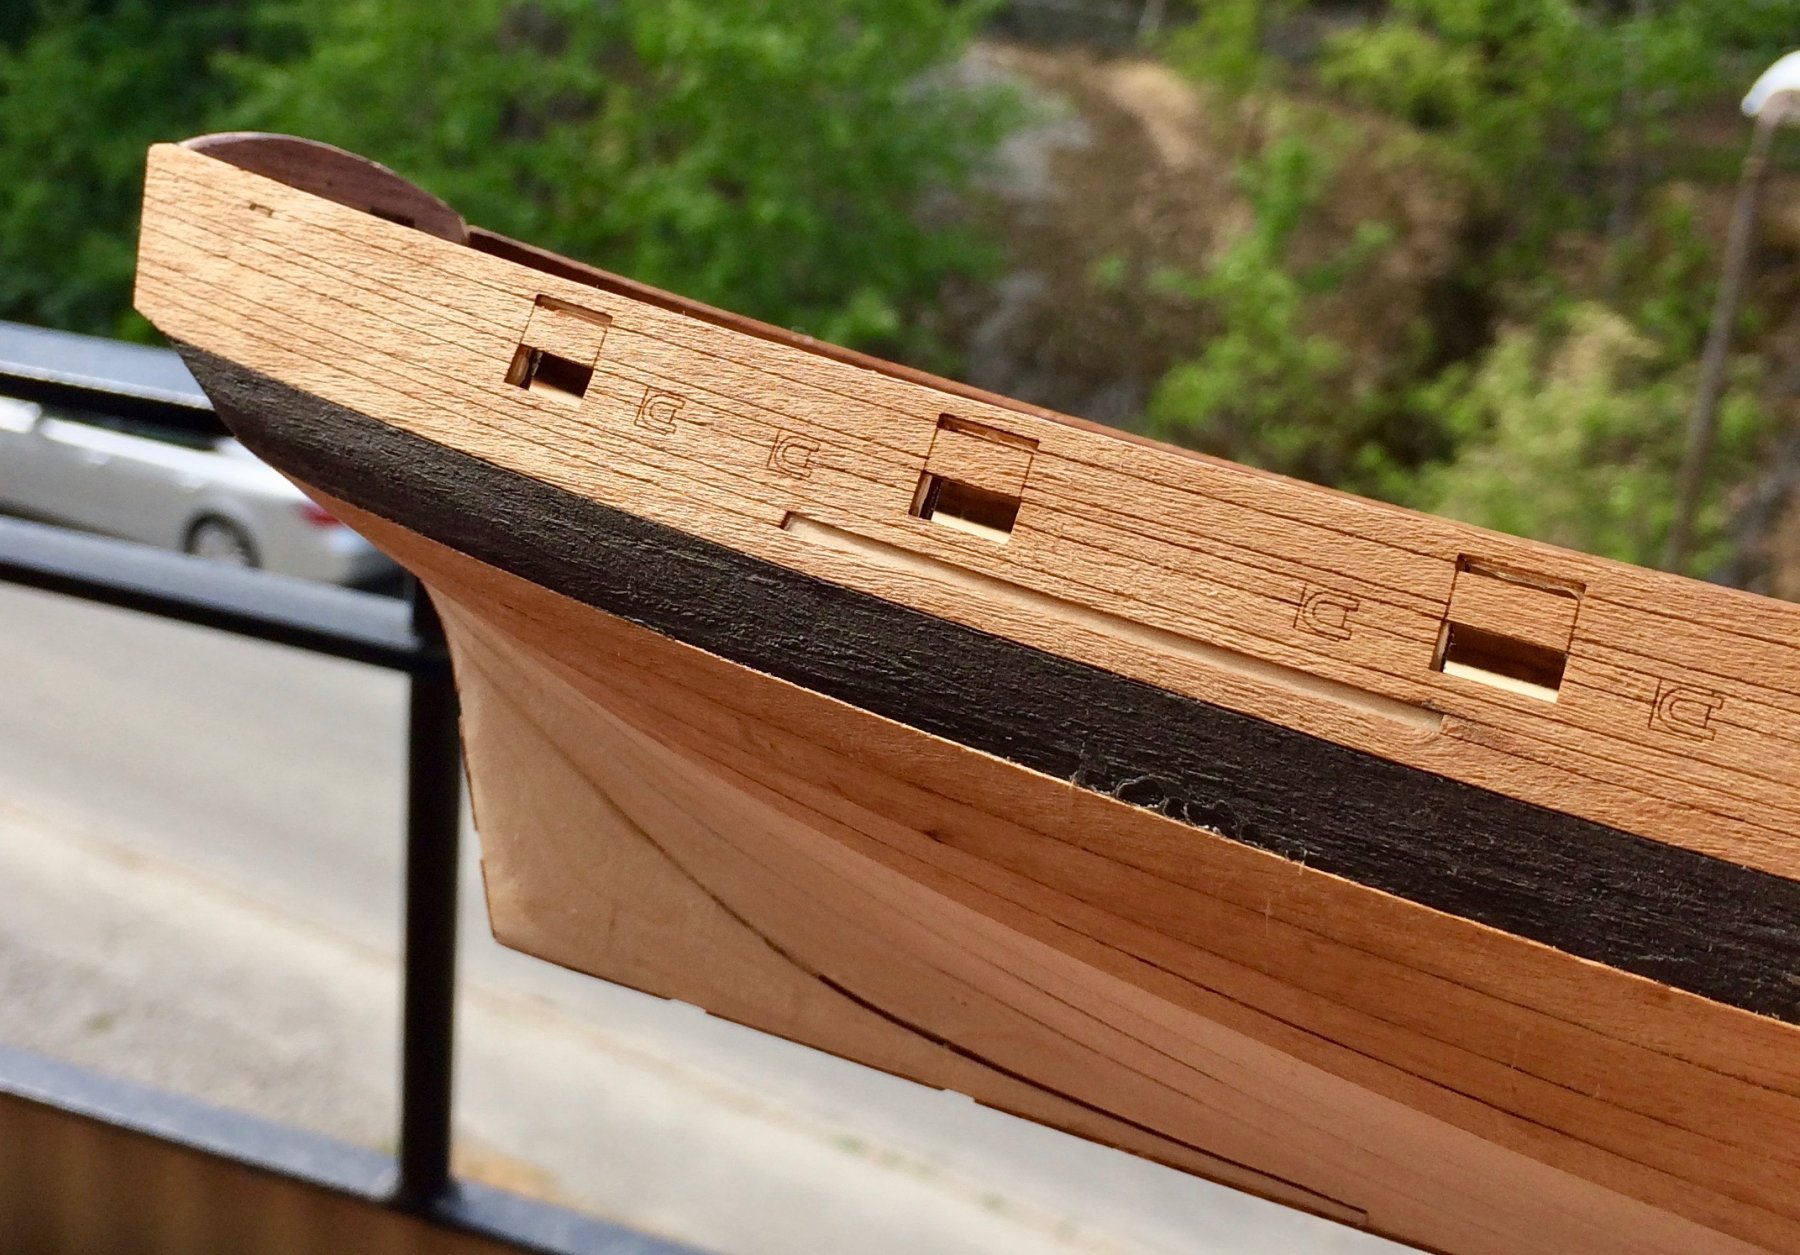
Here is final one, garboard plank. It is tricker, because it needs to be fine fitted carefully to the "keel". All the other planks do not require any fine fitting, except the front tip that meets the stem.
Fine fitting was a nice exercise, with a dozen of dry-fits for each plank on a way there. But Daria managed to do it in one session, without getting tired. That made me really proud!

Fine fitting with a plane (two-man job so far):

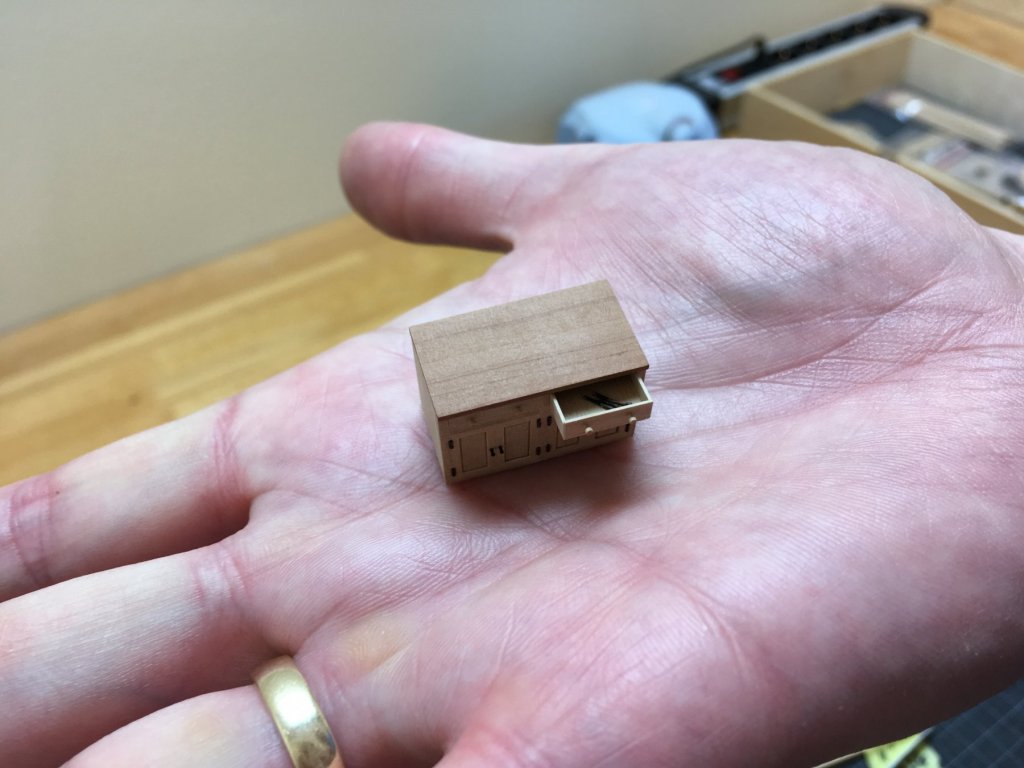
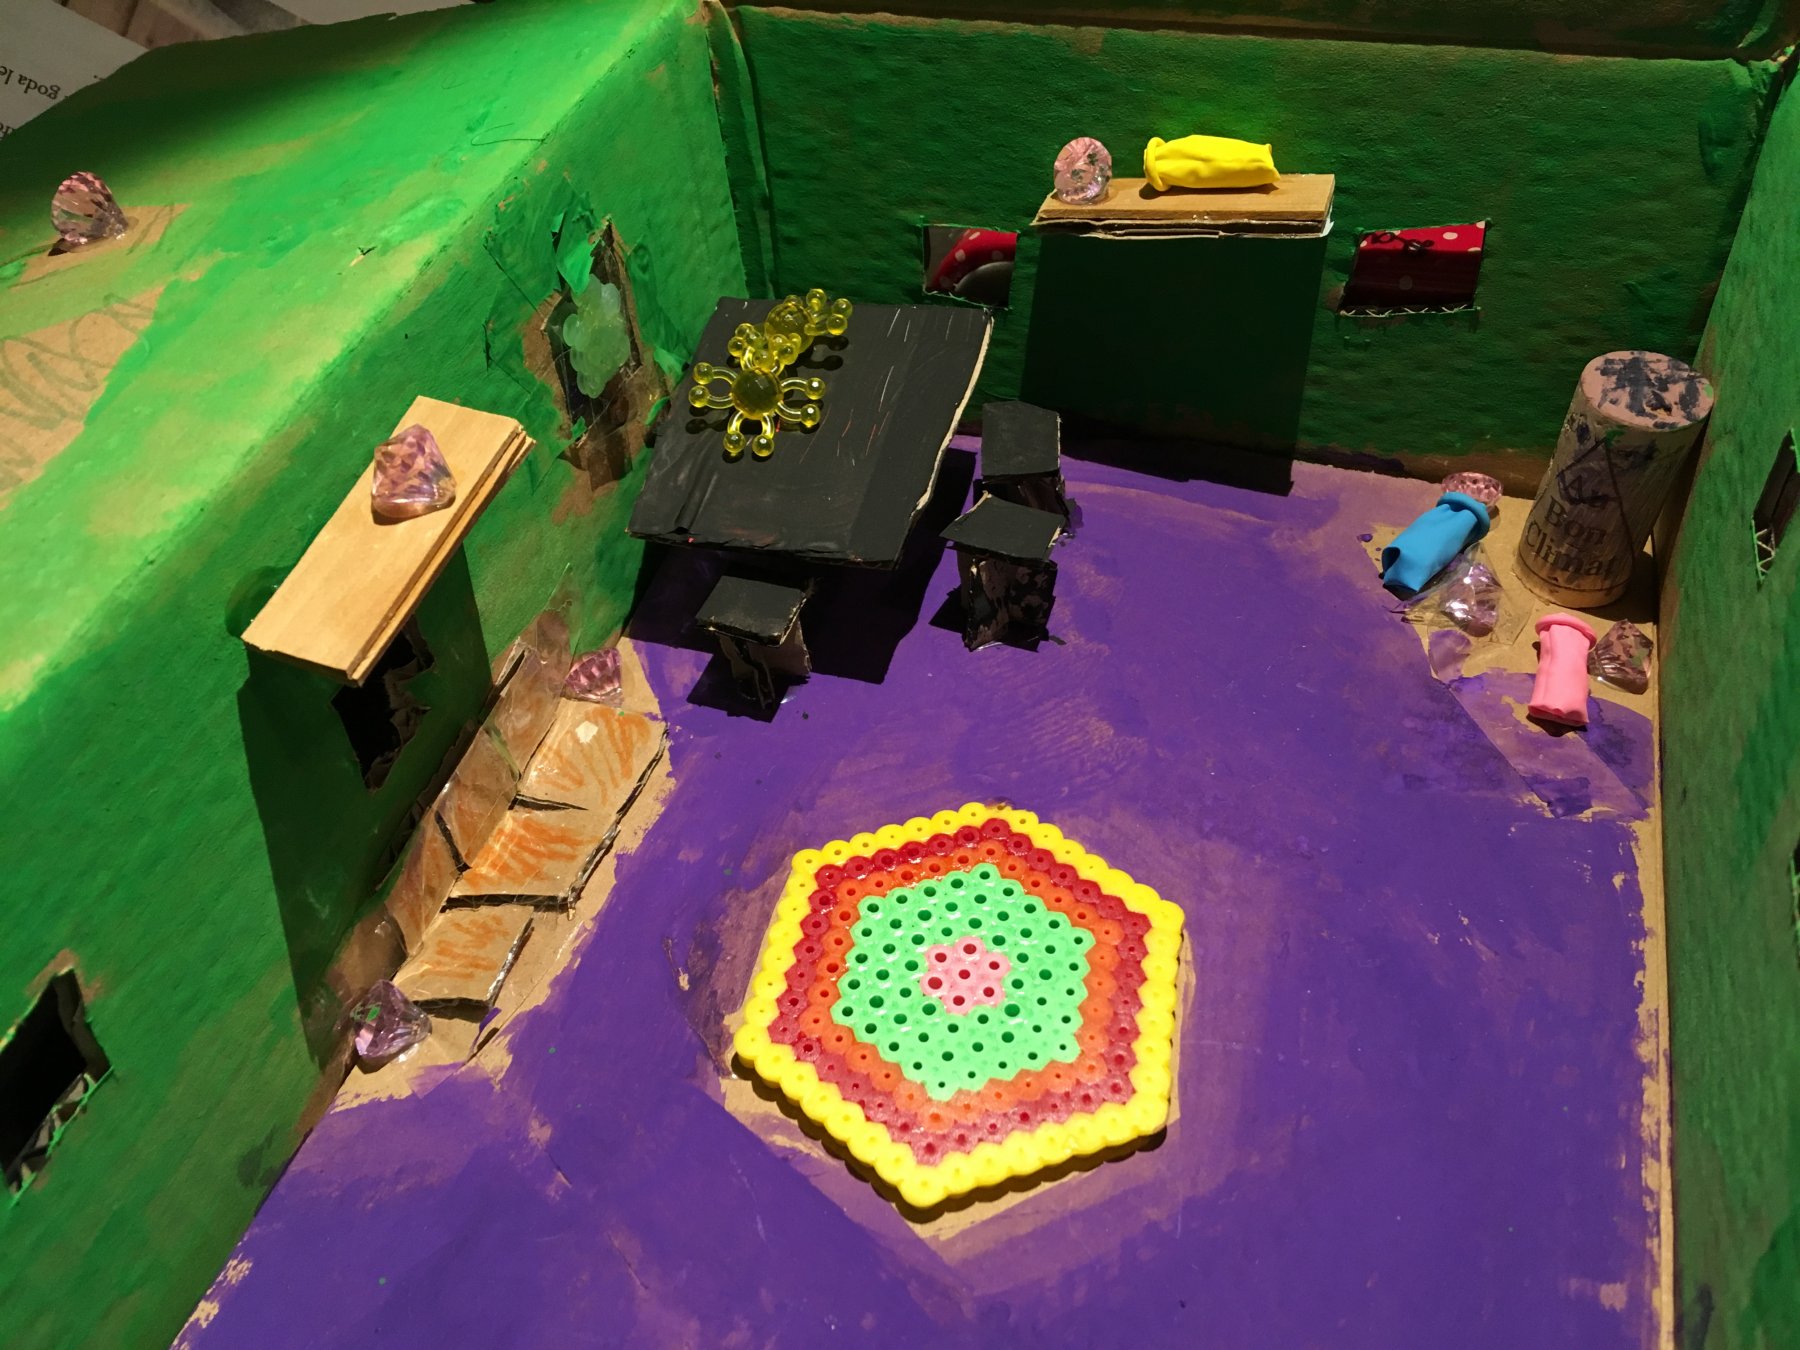
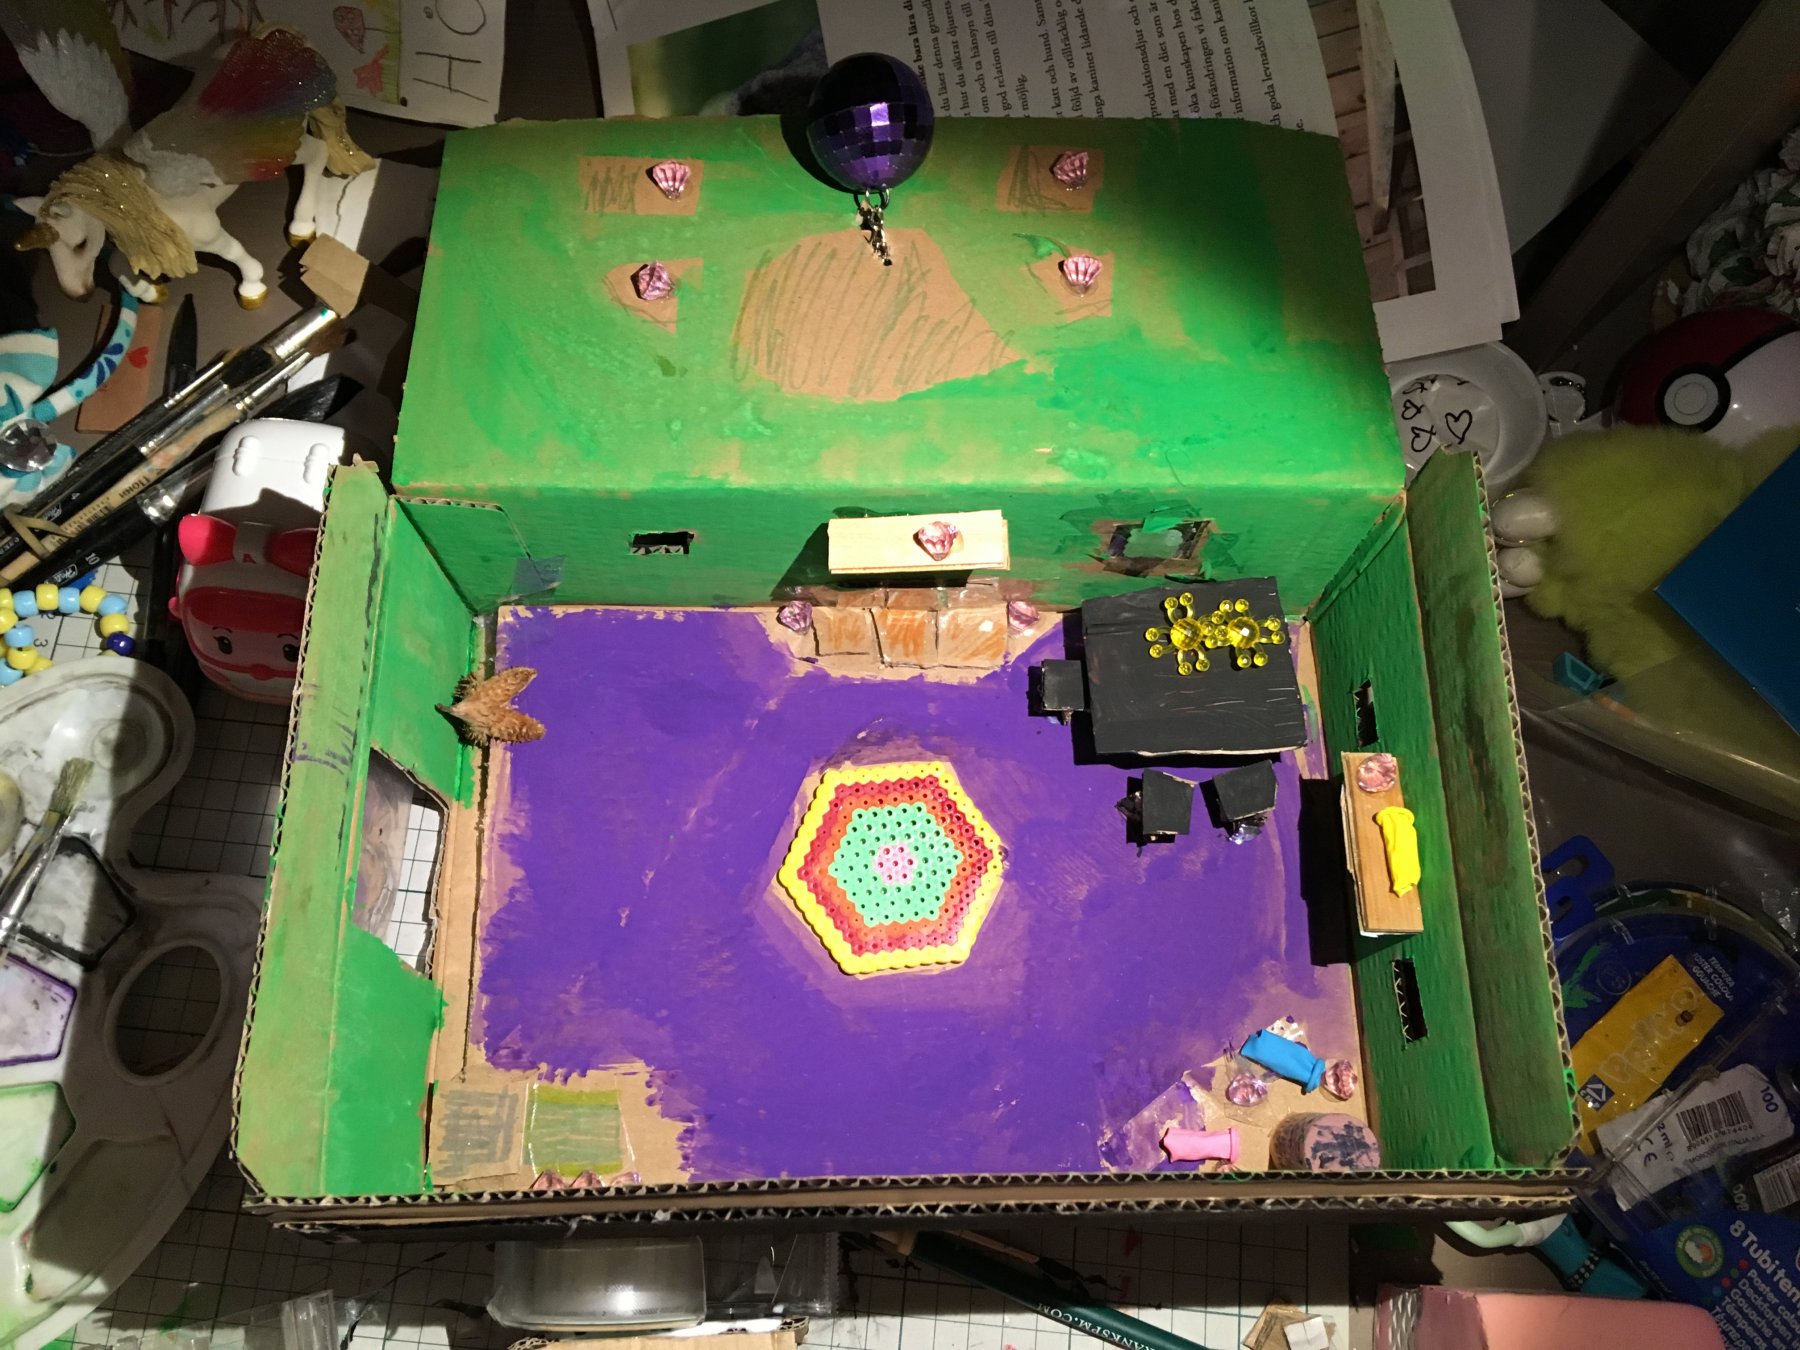
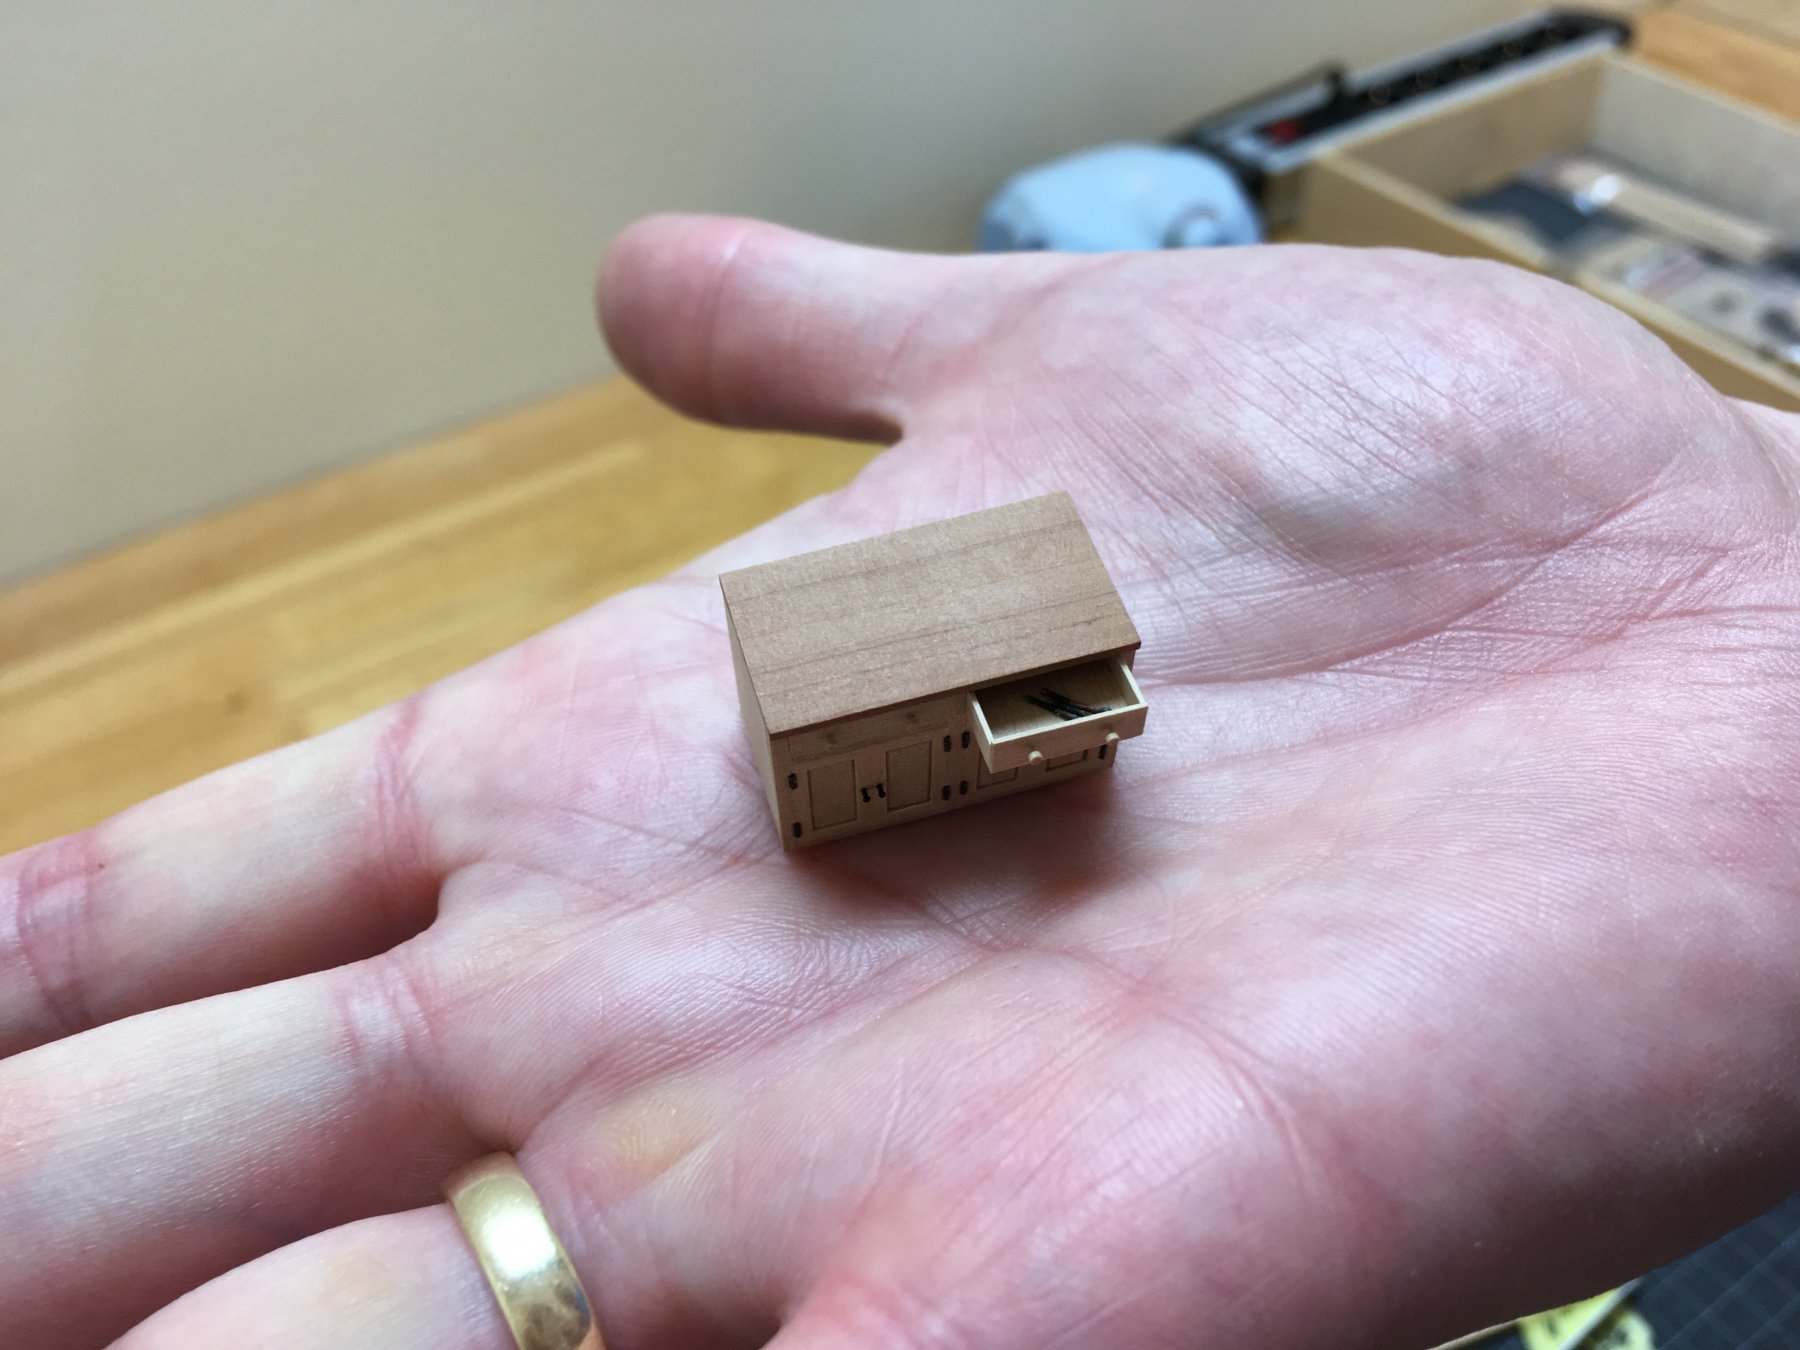
In parallel, she was assembling a furniture for her cardboard-and-fantasy-made fairy house
")
I am completely not involved, totally her design and implementation, she just casually walk to me to get some tool or glue. Getting quite comfortable with a scalpel, btw (used it to cut some windows). It is still in progress, she is making some furniture (gluing a book shelf out of cardboard strips in multiple iterations, which warms my heart).


She already starts talking about making a fairy house out of wood, and hints that I have just the right tools for that and plenty of spare plywood 😎
Back to the model - a milestone is achieved, the last plank is in place!
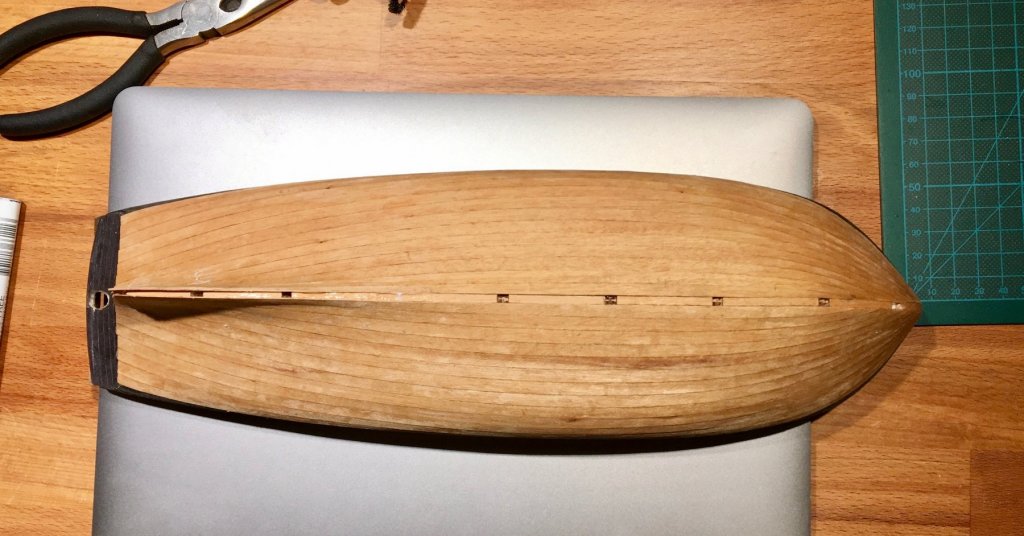

Now she will remove all glue spots with a Dremel nylon bristle brush, trim plank ends and sand it smooth.
Daria is super happy about the milestone and asks me to post it to the log asap

- lmagna, paulsutcliffe, Dubz and 11 others
-
14
-
Used some willow for non-modelling work, doubt it is suitable. Apart from being soft, it is rather sensible to humidity - will deform and then shrink more than regular modelling woods.
though there are many kinds of willows, not sure if mine was same as yours
The regional specifics may vary.
-
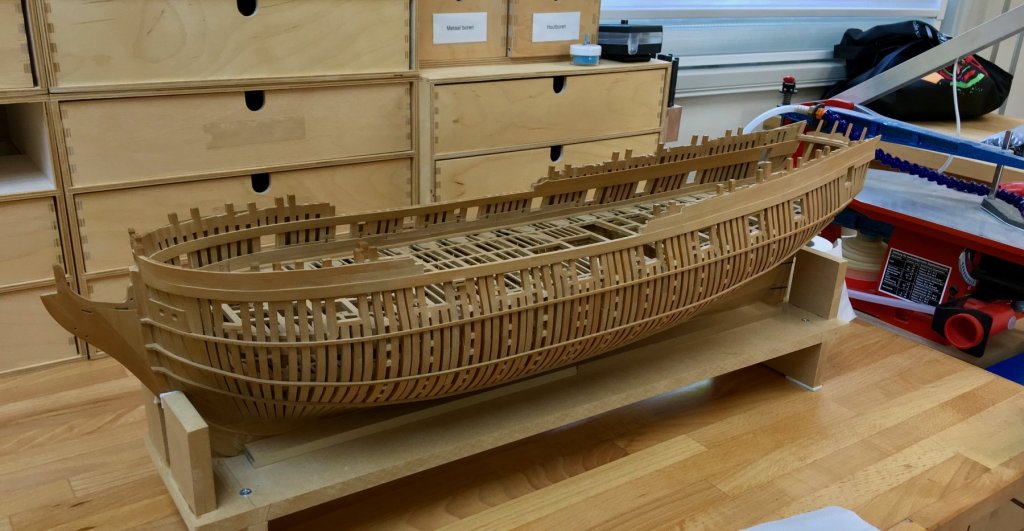
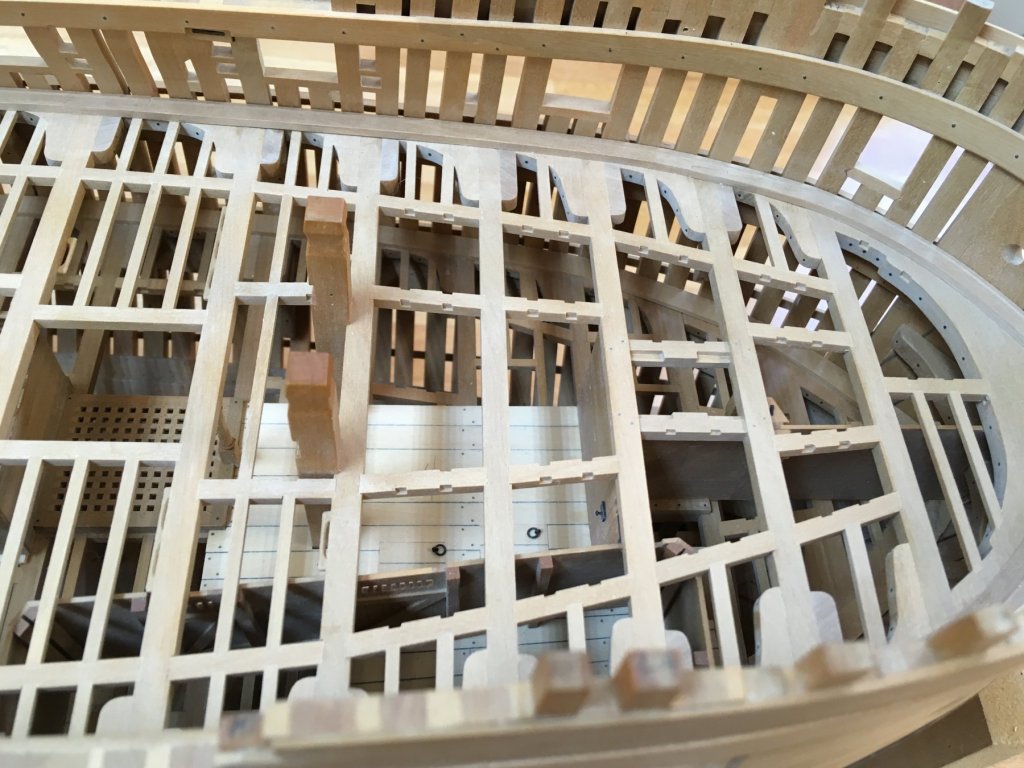
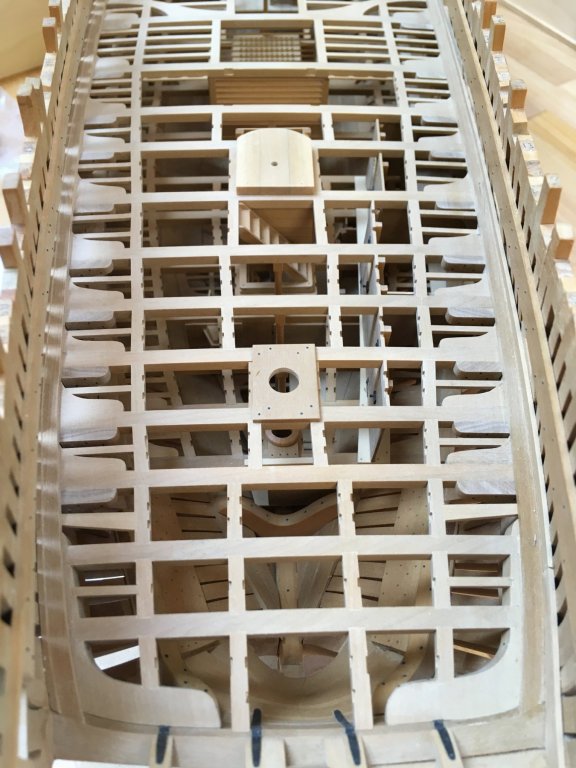
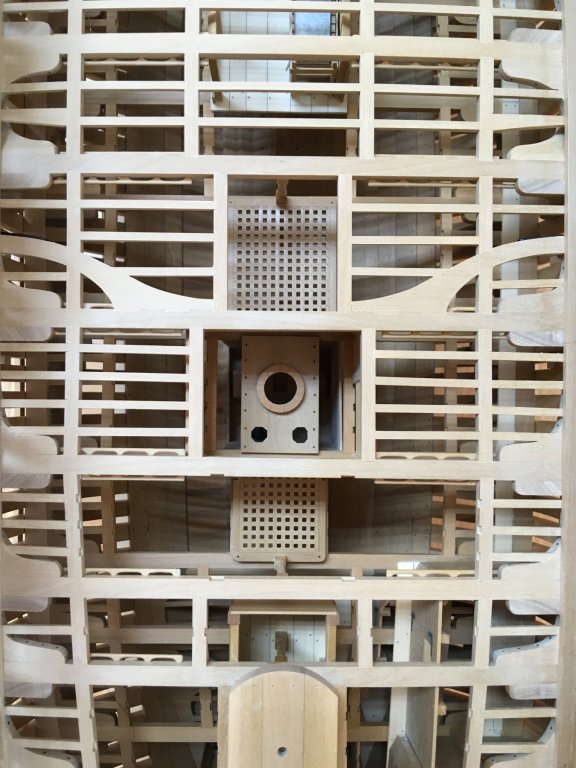
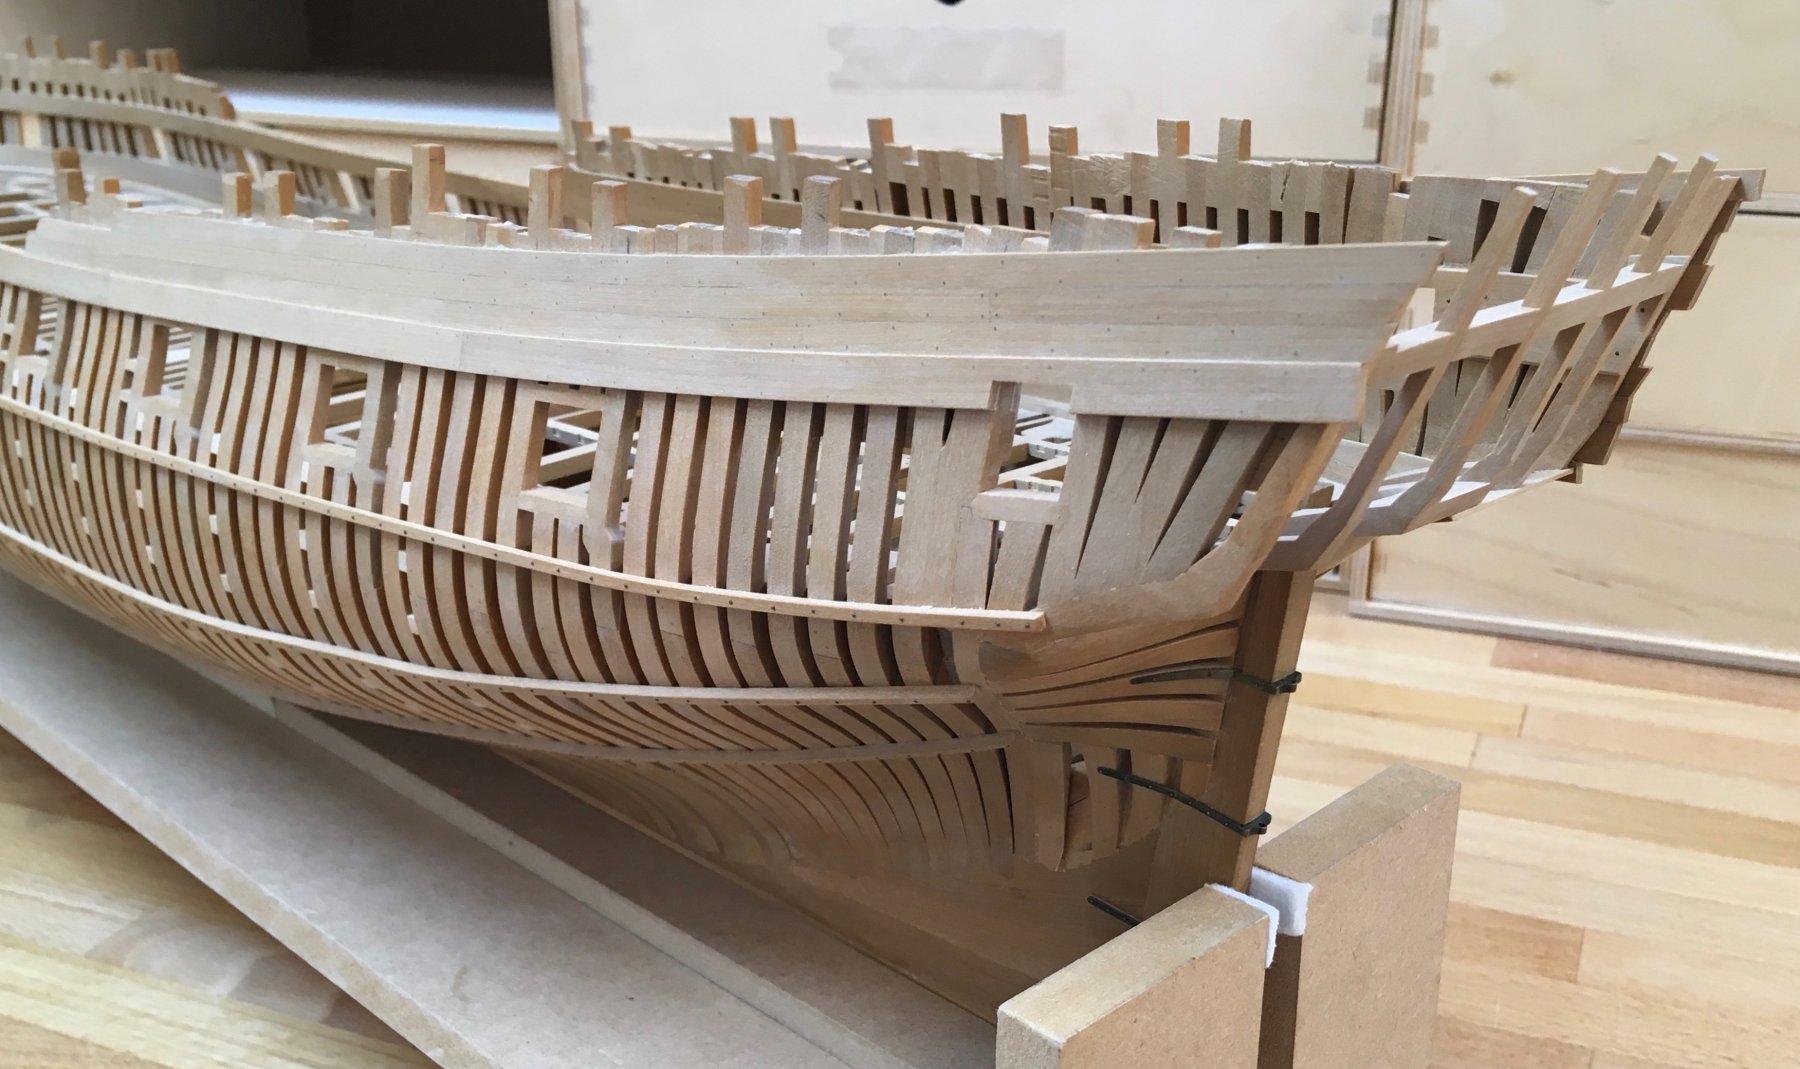
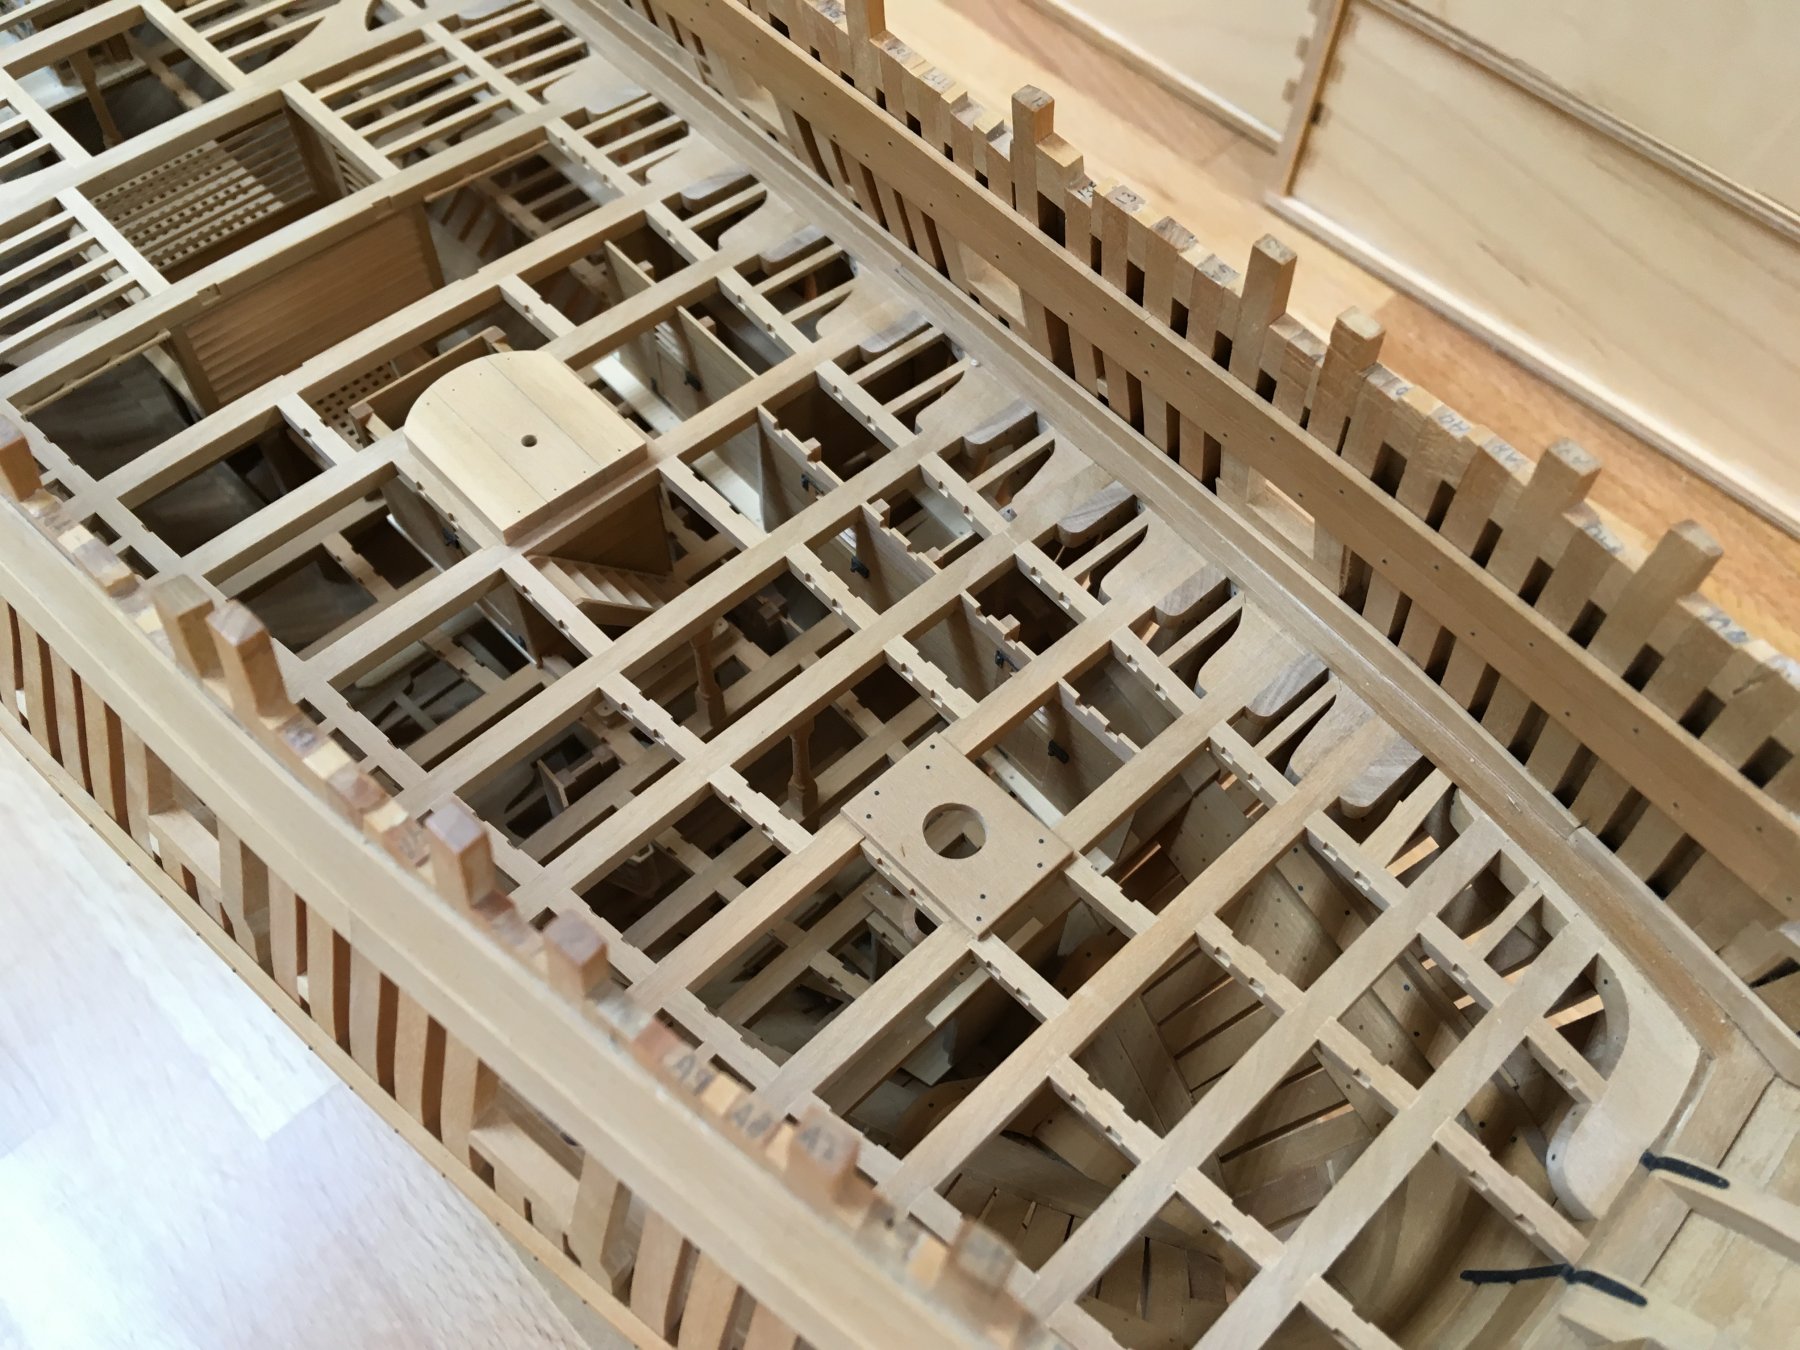
Nice frame factory!
what are those squares in the middle of each frame assembly?
- albert, aviaamator, mtaylor and 2 others
-
5
-
-
Same as Dave, the best way to fix KS115 problems is to buy Proxxon FET and advise everybody to do the same. It is a classical example of spending money on a cheaper tool, ending up spending more money on a proper tool. KS115 is, honestly, a junk
(I had it, upgraded to FET and never looked back).
It is hard to use the table saw if you can't event adjust the blade height, and the precision is super bad (fence alignment, miter gage, etc). You also can't make any sleds for this saw, since there is only one miter channel instead of two. Its real price should be around $30, there are "saws" in this range on AliExpress and Harbour Freight. But they are asking $130 for it 😳
-
On 5/20/2018 at 9:02 AM, vaddoc said:
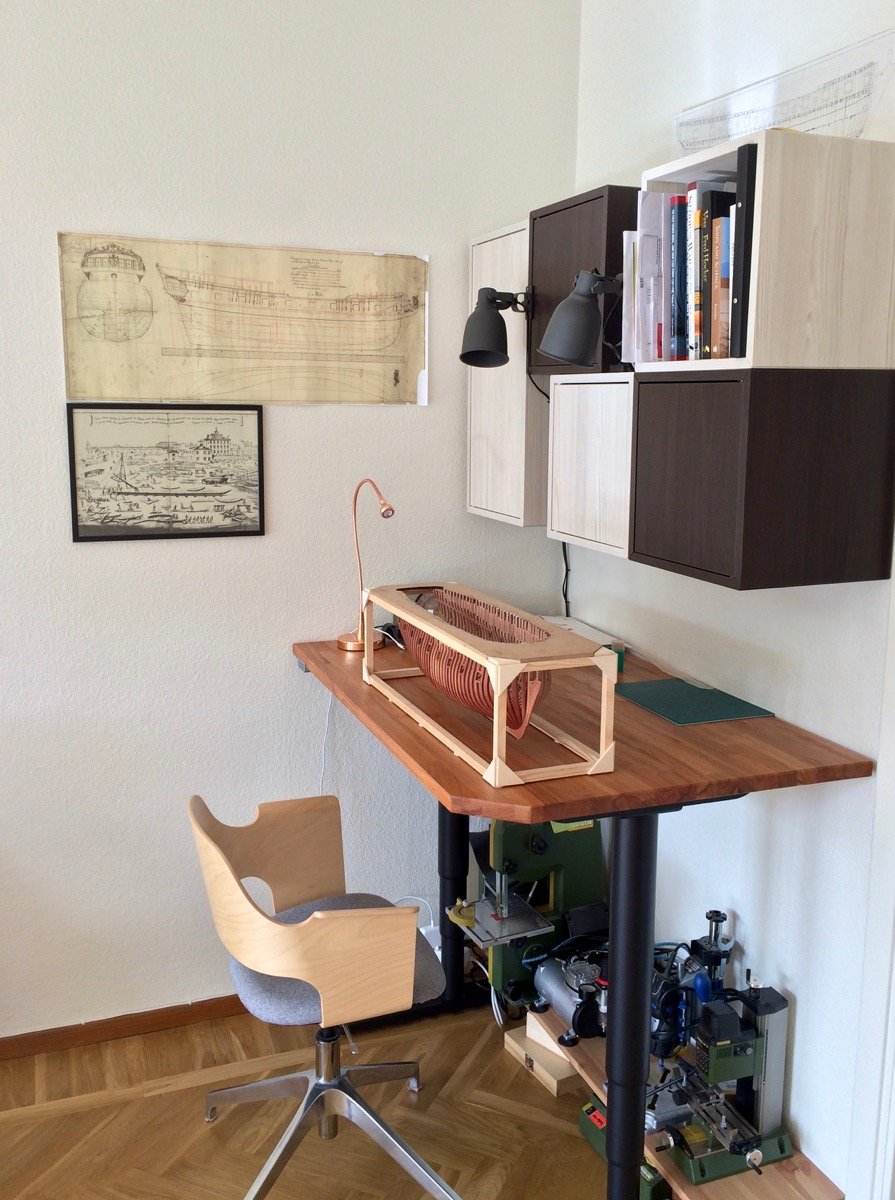
If you work in your living room or somewhere in the house, power tools probably should be avoided due to noise and huge amount of dust.
There is a small class of scaled down power tools - starting from Proxxon (typically the most affordable), ending with Sherline and Byrnes in a higher price range.
They are small enough to be hidden under a table when not used, do not produce a lot of dust (any home-grade vac would easily handle it, if needed), and are generally not very loud.
I can't really imagine being without a table saw or a disk sander.
Here are Proxxon tools in a living room. They are typically less visible because the table is usually lower (it is lifted a bit on this photo).

Though if you build kits and do not plan a lot of improvements to the kit - then a rotary tool and a set of good hand tools (chisel, knife, etc) should be good enough!
-
-
-
I could not miss the opportunity to visit Remco, since we are now basically neighbours
Can confirm, the Kingfisher is feeling good in a new clean and super structured workshop. Hope it will survive the period of abnormal dry weather that we currently have...
 '
'
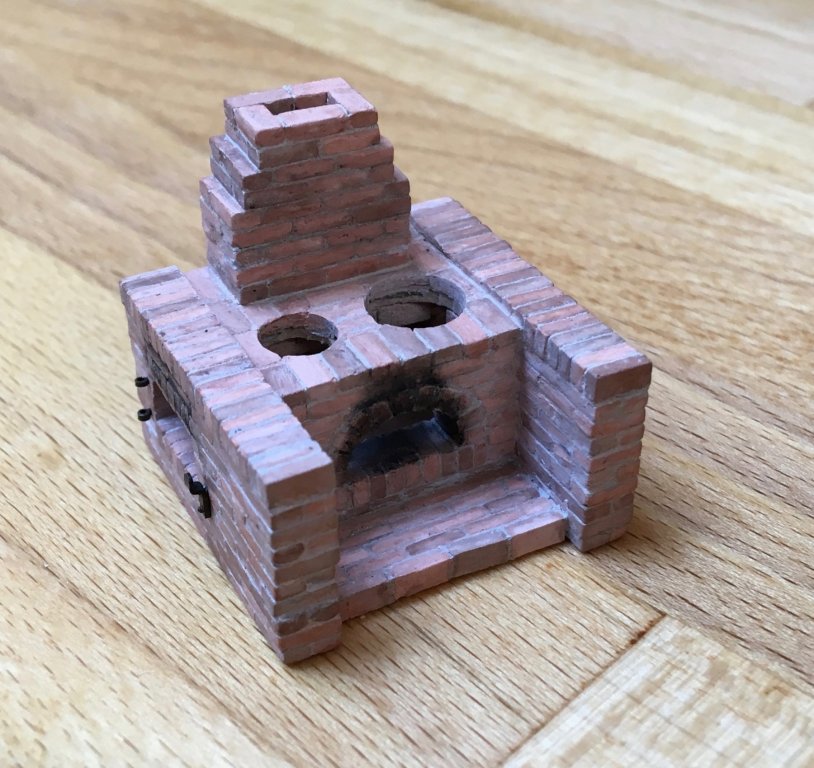
I was amazed how crisp and clean all joints are! It is not a photoshop, it is better than I imagined based on the build log photos

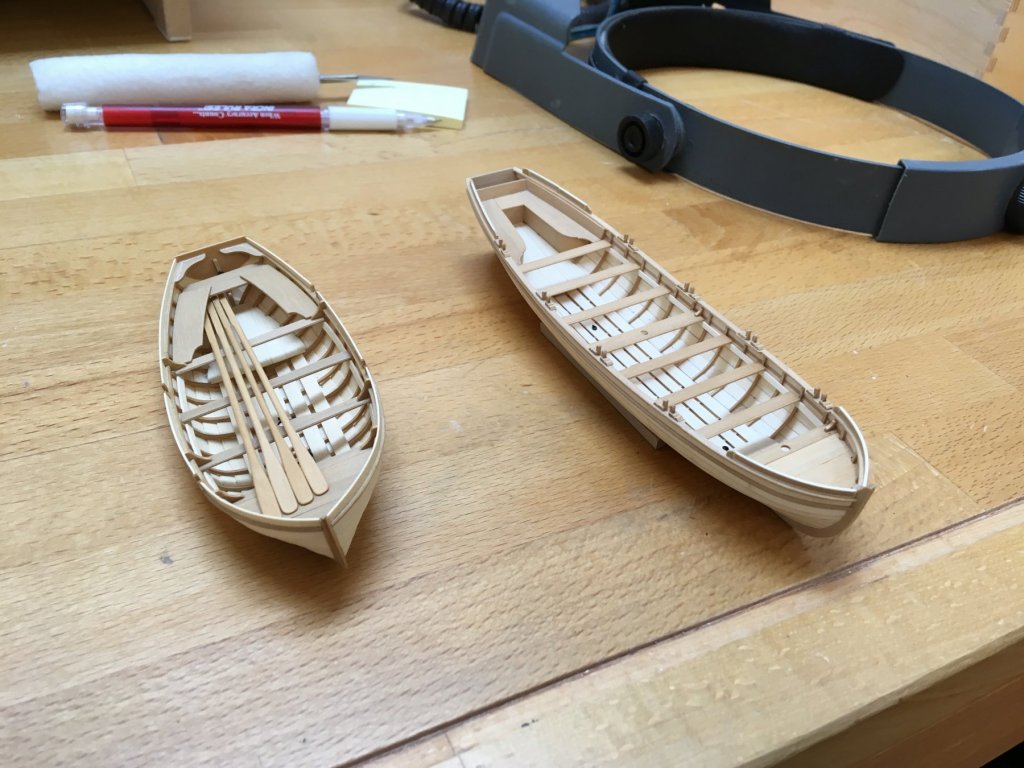
The boats are neat:
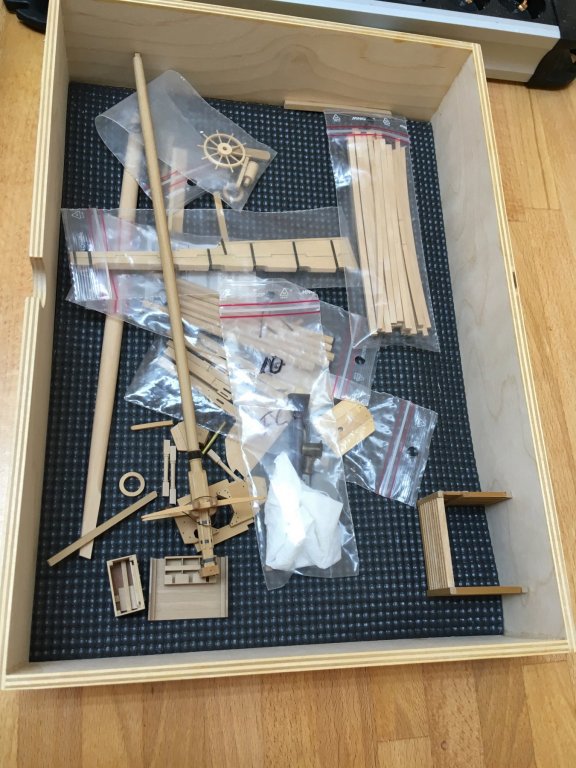
And, of course, various parts are still there, each could be a model of its own:

- cog, paulsutcliffe, oneslim and 41 others
-
44
-
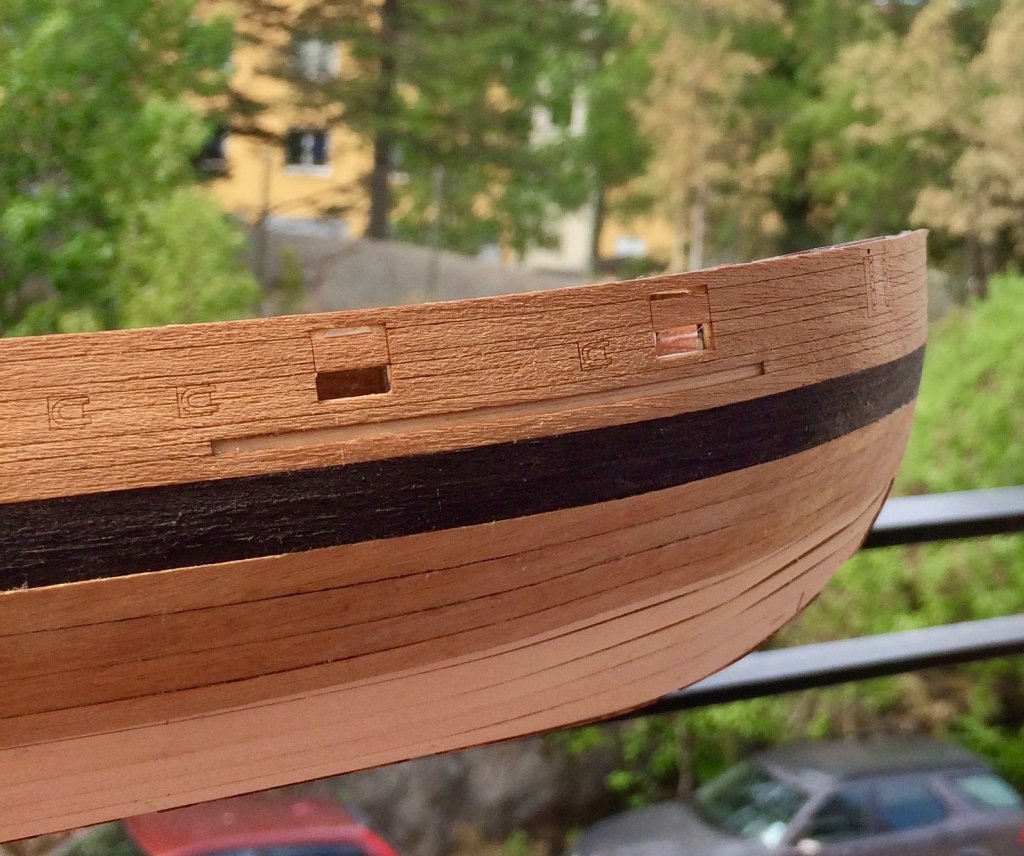
7 hours ago, canoe21 said:
Those are very nice scarf Joints that you just cut. Could you please tell me just how you came up with the sizes and angles
Hi Lawrence,
I do not remember to be honest - some books and a photos from some other build logs, plus experiments to see what angle and depth looks better. Once I found the scarf that looks the best from my point of view - I just made a template to keep that angle and use the same depth every time.
-
-
-
-
Fantastic! Crisp and clean, love the colours!
- Mirabell61, mtaylor and aviaamator
-
3
-
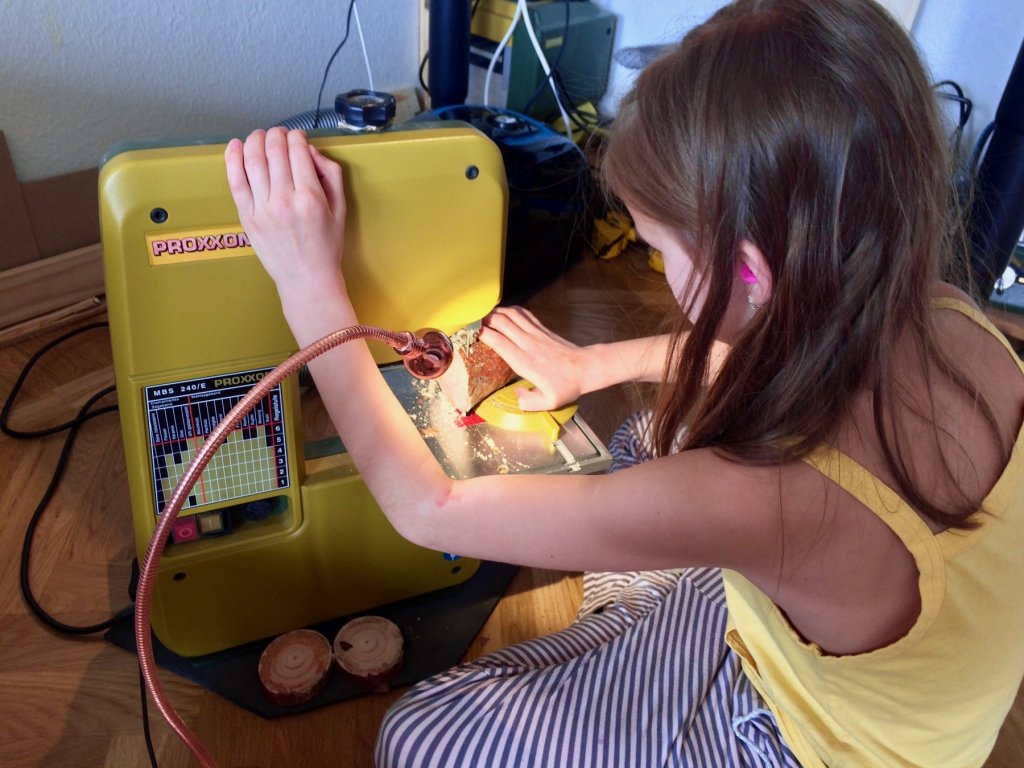
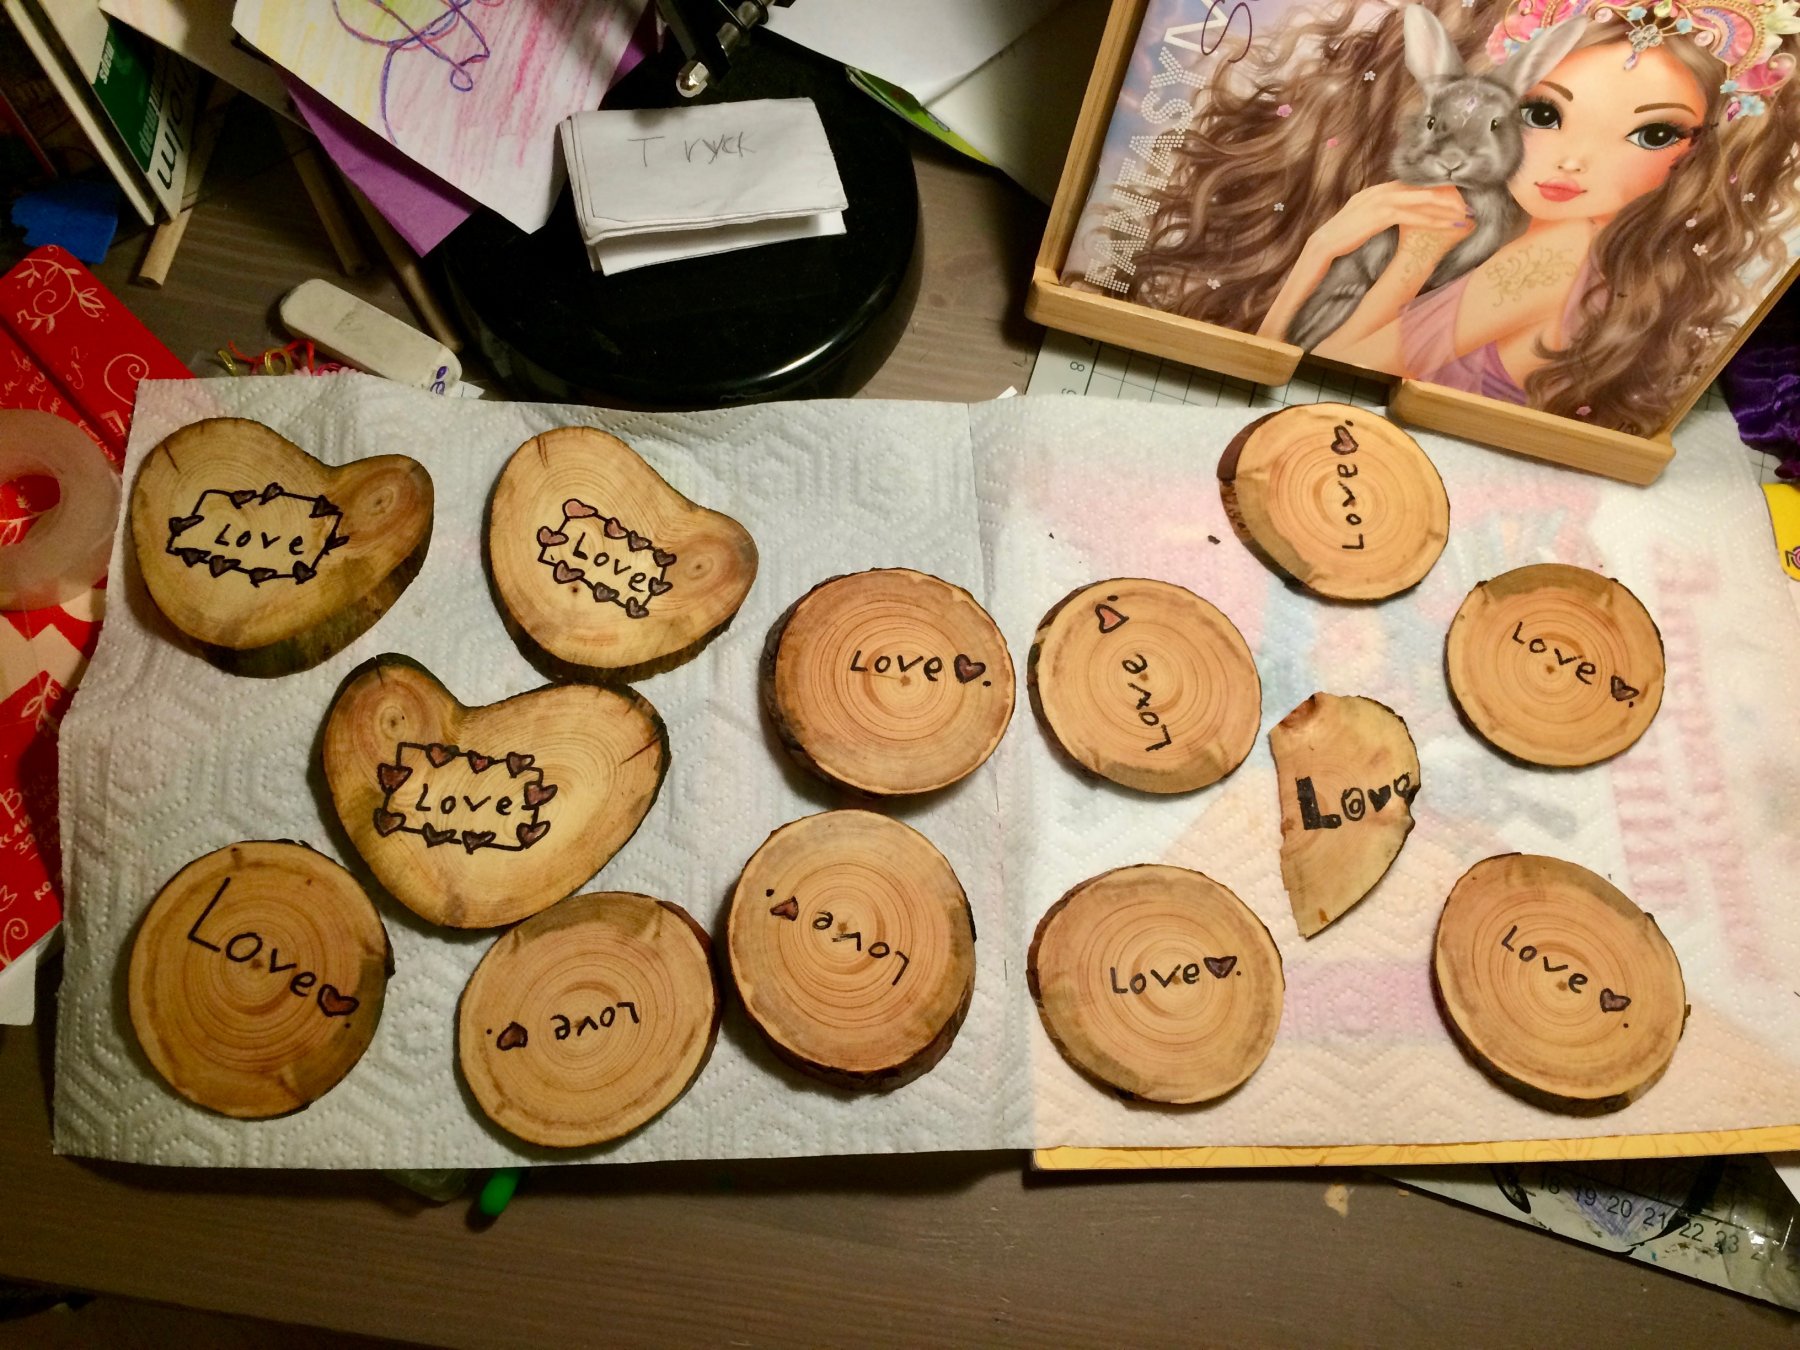
May was very busy, so we barely had any time for modelling. Daria also made some things for a school fair, using a wood pieces that we found in our neighbourhood. They are sanded and finished with Osmo Polyx, both processes were easy enough for her to do. I am a proud dad
First time using bandsaw on her own (with my supervision, of course). Pro tip: avoid cutting pine, this stuff gums up everything - blade, bearings, etc.

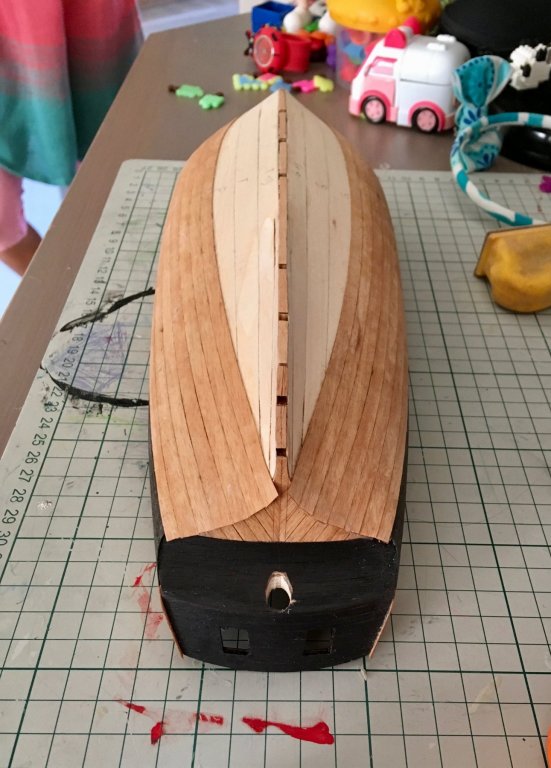
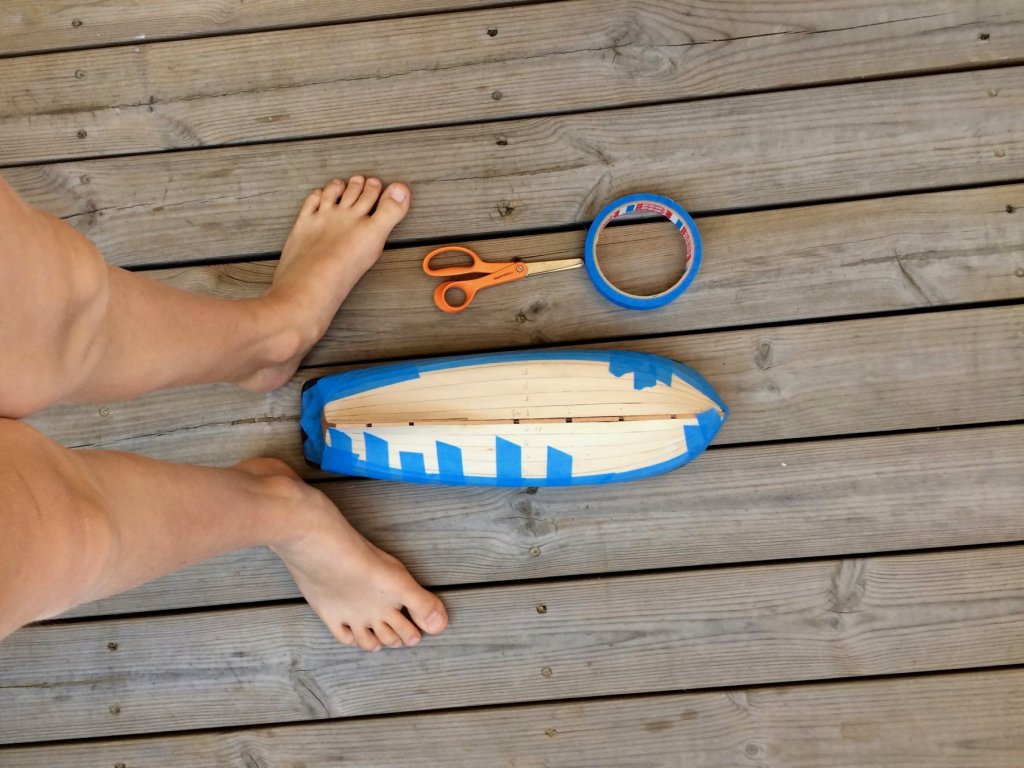
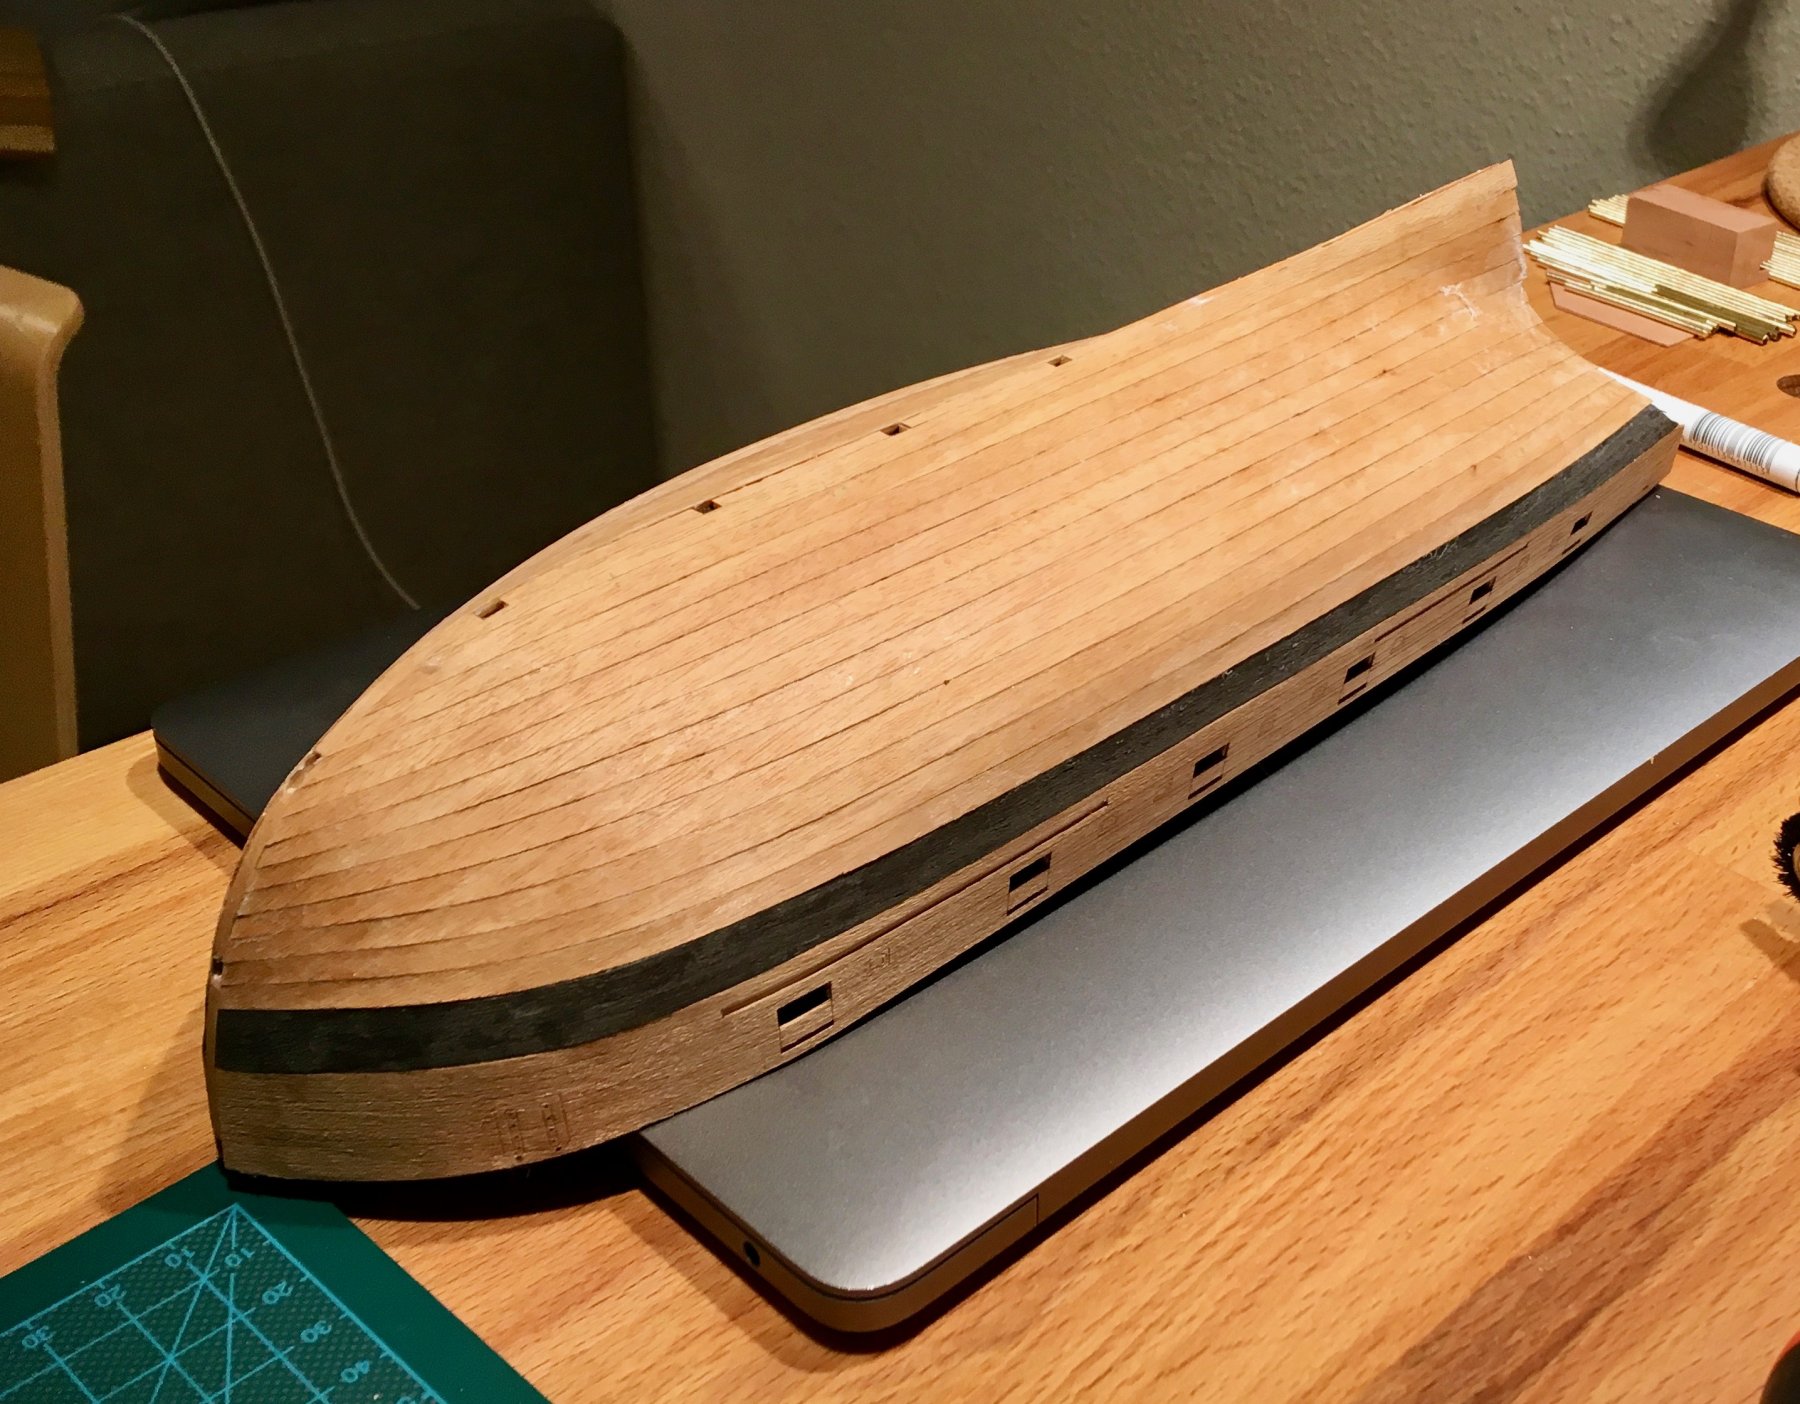
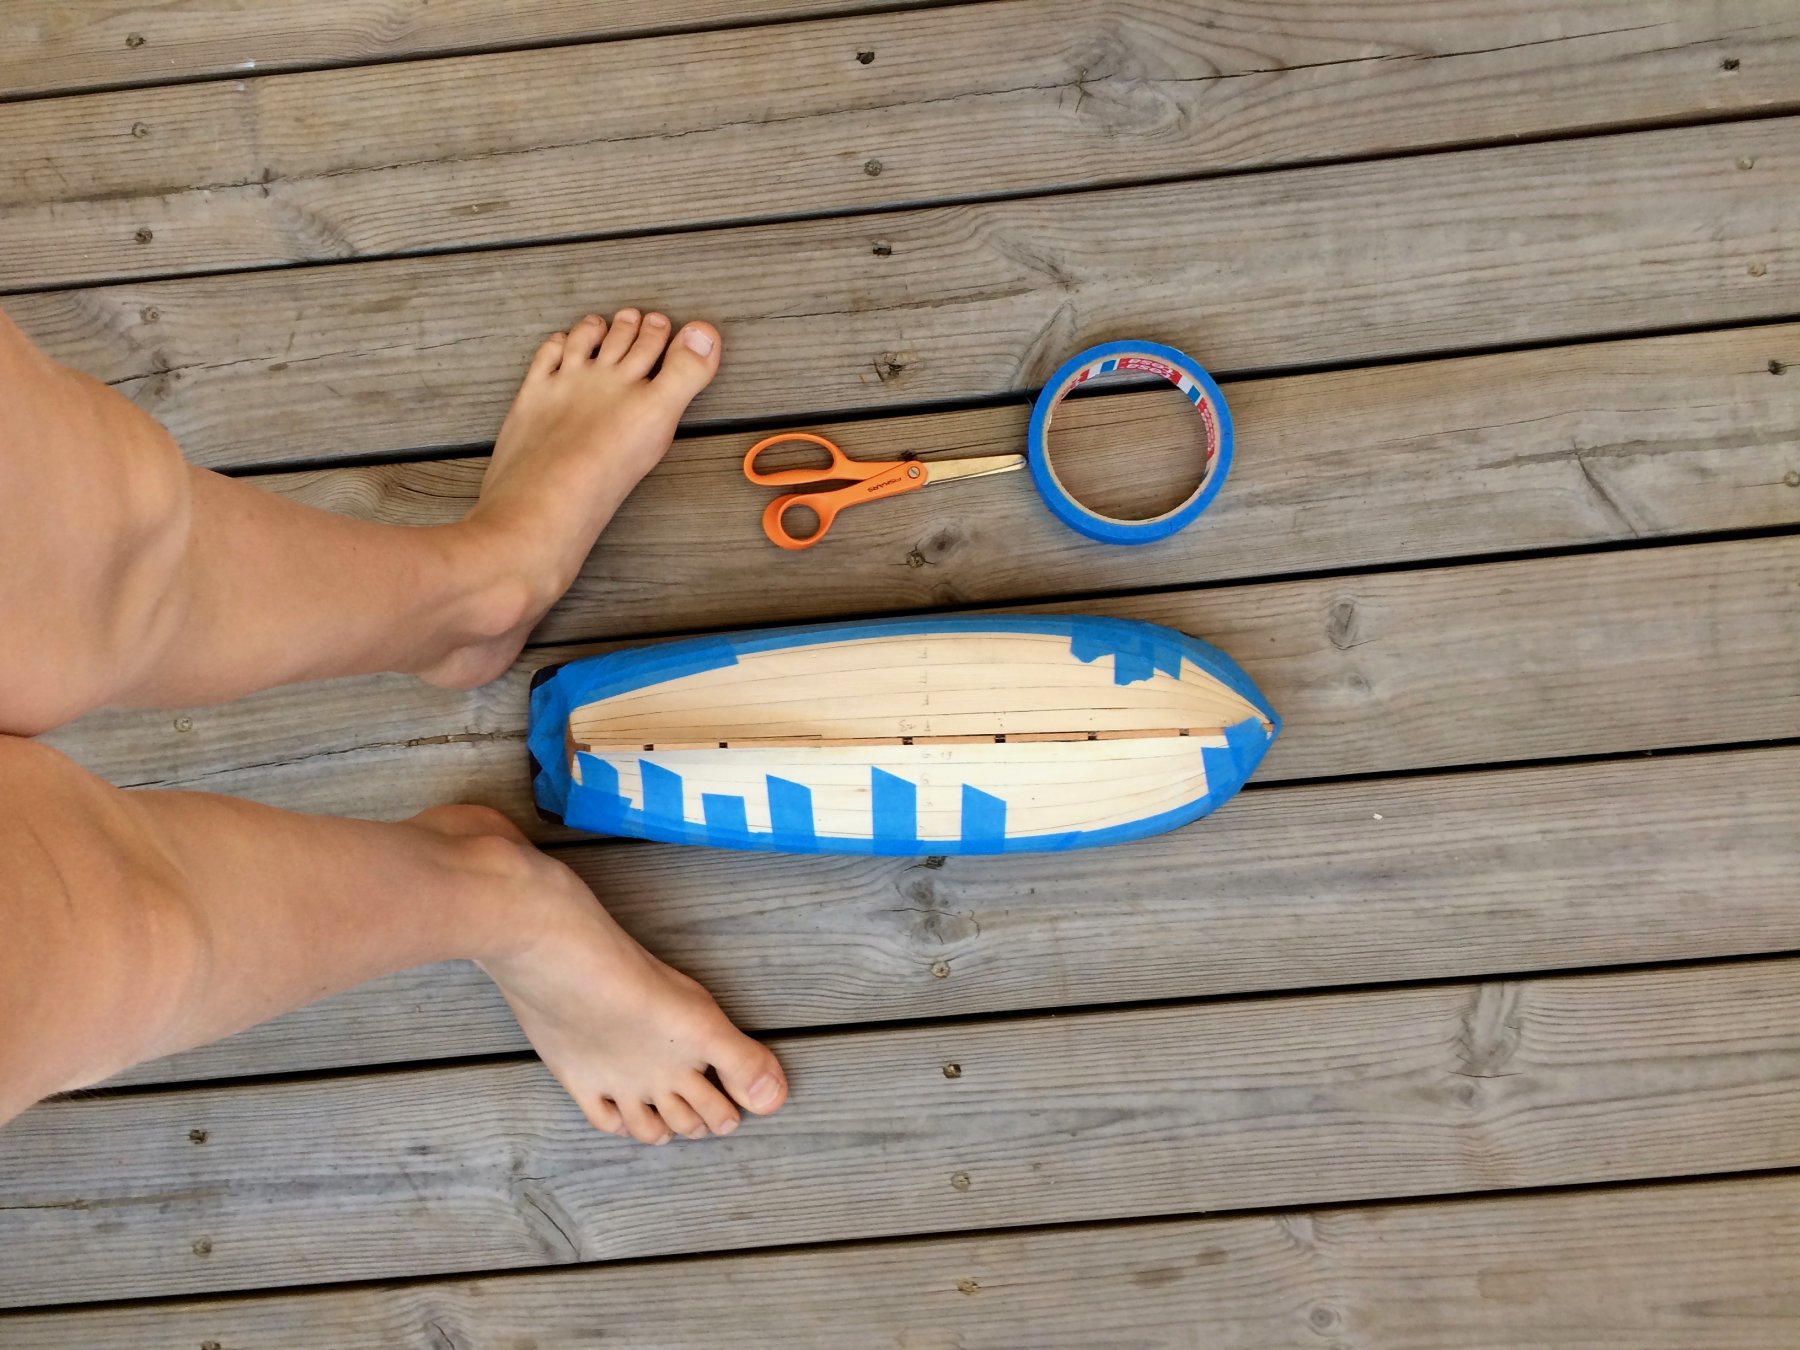
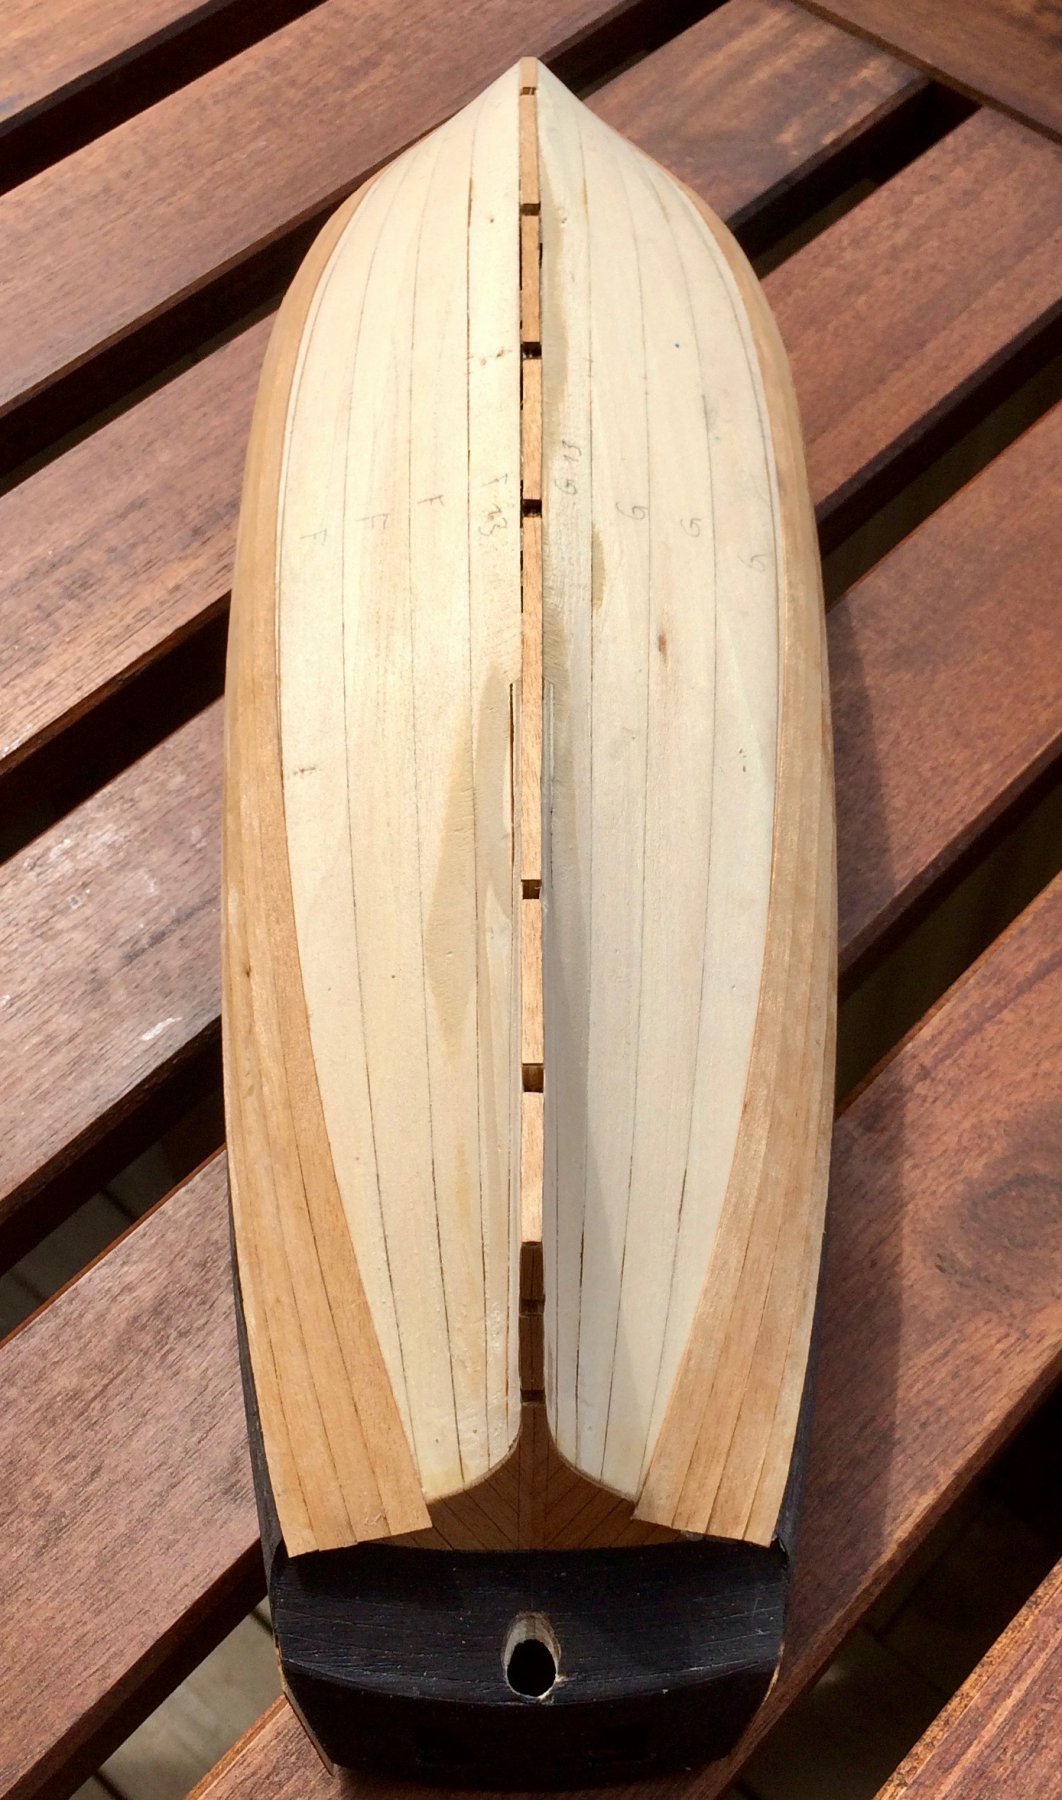
The model is slowly progressing. It goes well, though it would be nice to have a bit thicker veneer - it is quite thin, need to be very cautious when sanding it. Also, the grain is really out of scale, not much I can do about it.
So far nothing is sanded, sorry.

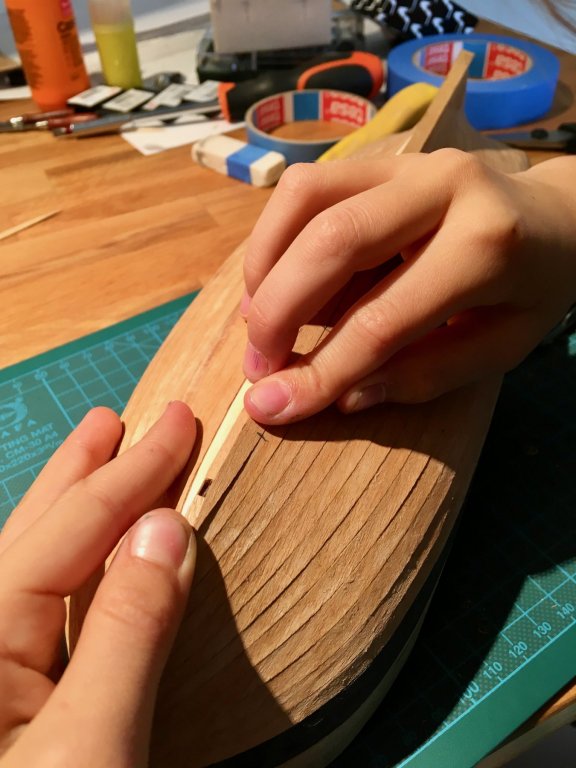
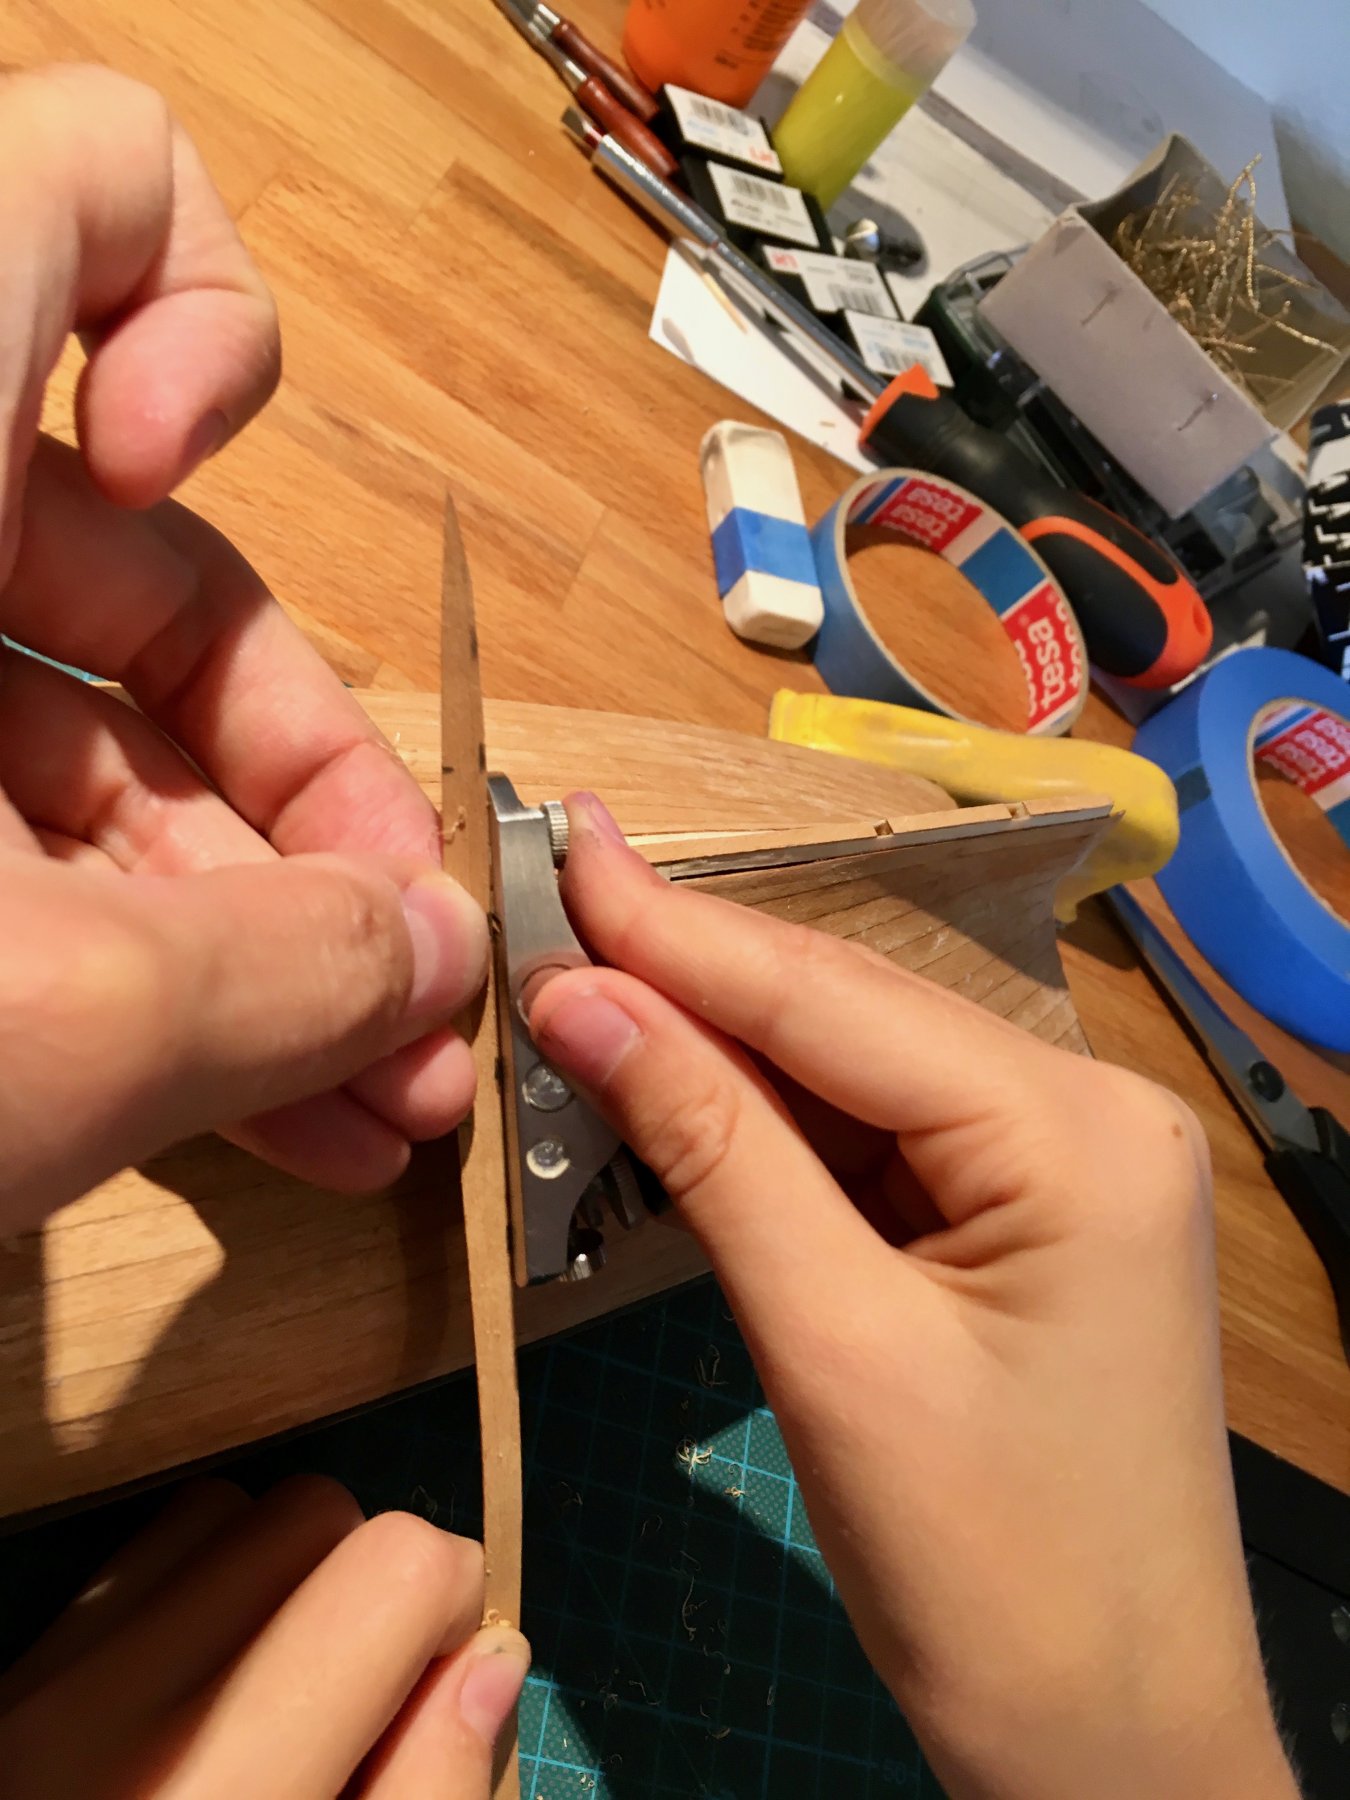
Using blue painters tape instead of clamps, works great!
Daria is getting comfortable with a scalpel, learning proper holding angles and pressure. No self-cuts yet
This is her favourite part of the planking process, for some reason.

The current status:


Aaand she is off to her grandparents, so the building will resume in the end of August
- src, lmagna, paulsutcliffe and 11 others
-
14
-
-
Amazing! Thanks for the nice process photos as well.
- EJ_L, BETAQDAVE, aviaamator and 2 others
-
5
-
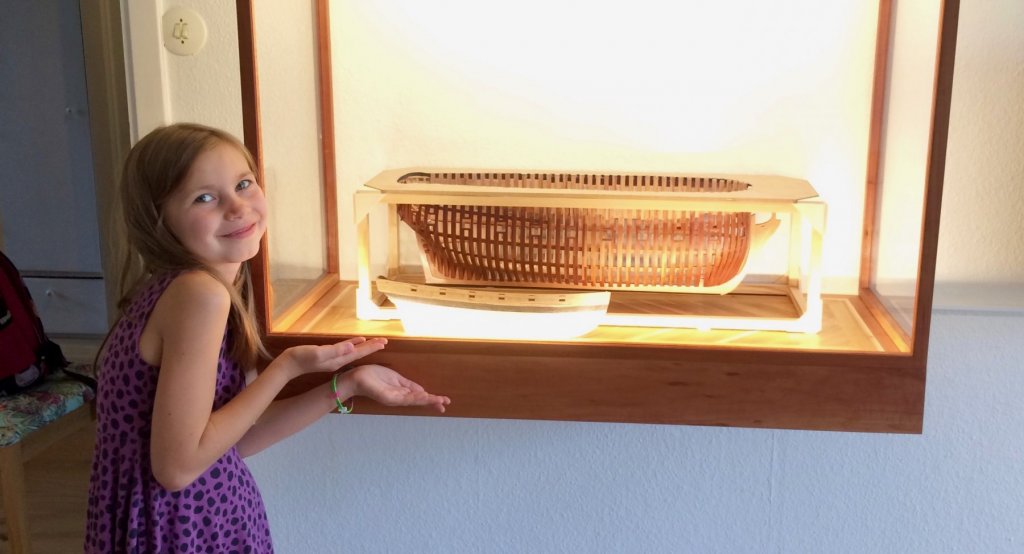
The group photo of all models lined up in one room - really looks like a future museum opening
Excellent lighting and photos!
- paulsutcliffe, John Allen, mtaylor and 1 other
-
4
-
Apparently the Vasa museum (the oldest preserved ship on display from 1626) has a youtube channel with a lot of interesting background information, history, conservation story and a lot of great shots from inside the hull, the place that is not available for a regular visitors:
https://www.youtube.com/channel/UCOpOsd0xVzgZAys0jF5dZfQ/videos
Some videos are in swedish, but there are subtitles that could be enabled (click on the "settings" button in the bottom right corner of the video and select the subtitles).
-


Beavers Prize 1777 by Mike Y - 1:48 - POF - Hahn style
in - Build logs for subjects built 1751 - 1800
Posted
Experimenting with clamp shapes (on scap pieces, real clamps would be made out of pear).
The shorter version looks better (needs a bit more meat on the back side though):
But it should more practical if I taper the jaws:
That would allow to grip in narrow places (between frames, carlings/ledges, etc). I was worried about them flexing too much, but it is not an issue even on a soft pine that I use for this prototype. The clamping force on the very end is more than enough for all modelling applications. I could not clamp it hard enough to get any flex.
The only downside - it looks kind of ugly. On the upside, I can make a lot of dad jokes about a clamp that looks like a duck, walks like a duck and quacks like a duck")
Any opinions? What clamp shape is more practical based on your experience?