


Mike Y
-
Posts
1,437 -
Joined
-
Last visited
Content Type
Profiles
Forums
Gallery
Events
Posts posted by Mike Y
-
-
-
Truly appreciate all the hints and comments, pointing that sometimes less is more and display case should not take a lot of attention from the model. Well, thanks!

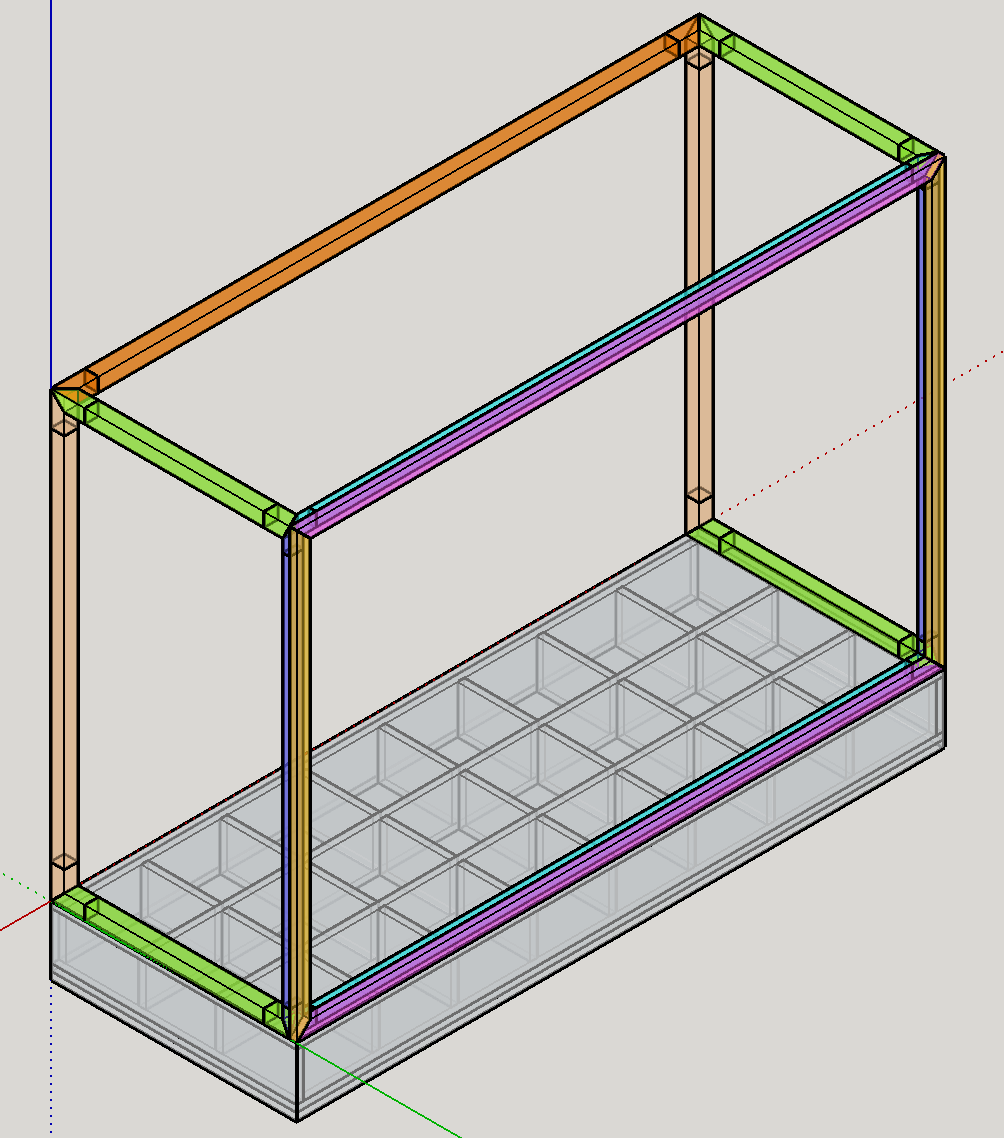
So I simplified it, will get rid of that rounded corners, and use three-way miters to join the parts of the case. Apart from that - same design.

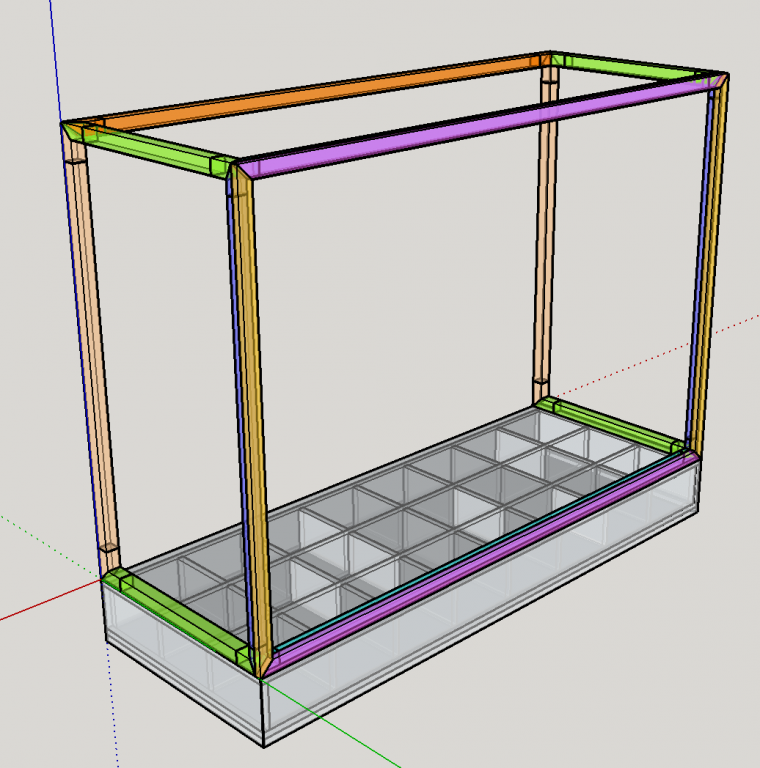
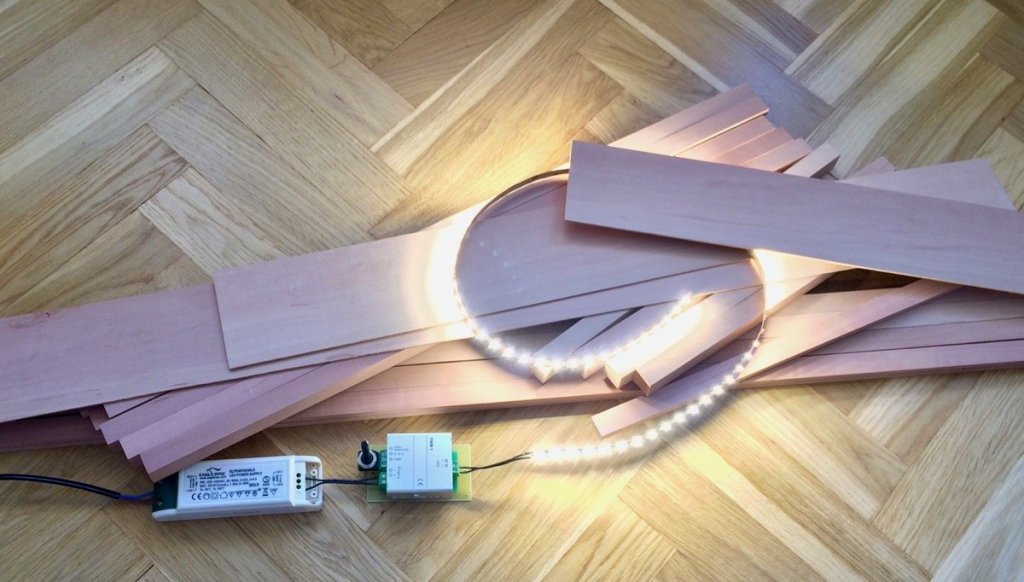
The main ingredients have arrived!
Swiss pear for all exposed parts (will use plywood for the torsion box that will provide the foundation).
And the high quality LED strip with a proper power source and dimmer:
Estimated cost so far:
Wood: 105 EUR ($116)
LED stuff: 135 EUR ($150)
Glass (optical clear grade plexiglas, 3mm, 0A570 HC): 105 EUR ($116)
Total: 345 EUR ($380)
Going to finally make some sawdust this weekend!
")
-
Thanks for likes and comments!
Re manual - haven't really used the text part of it yet, pictures are quite self-sufficient, and the text is written in a very heavy and formal way (like a precise specification), which should be handy in some complicated parts of the build.
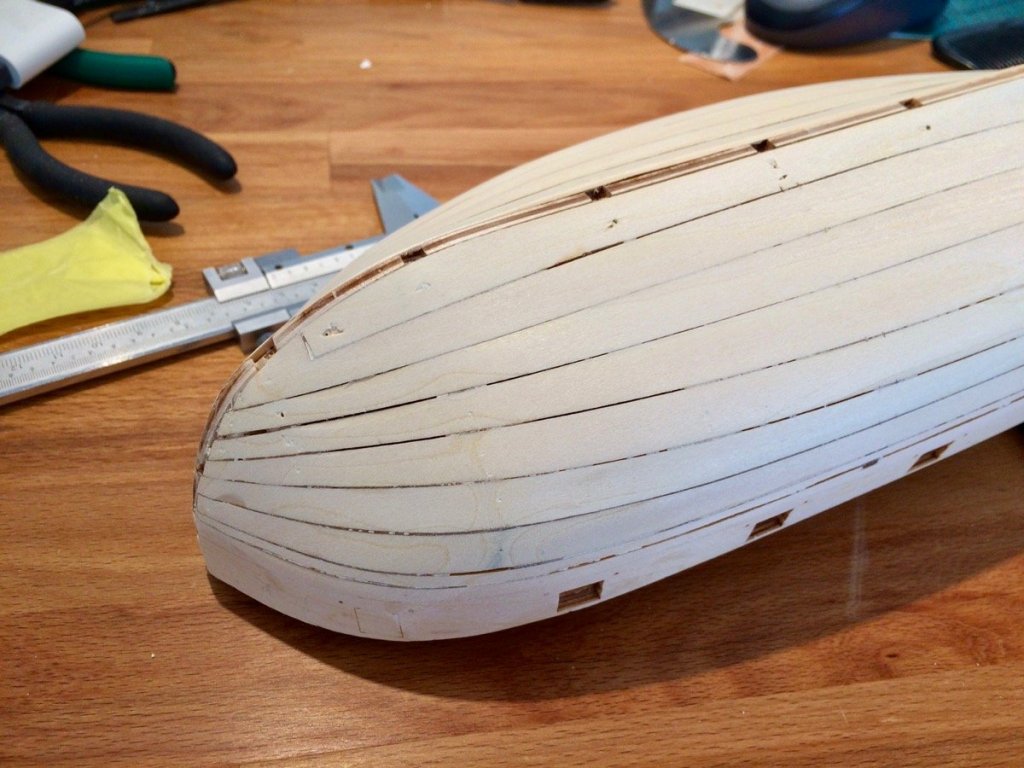
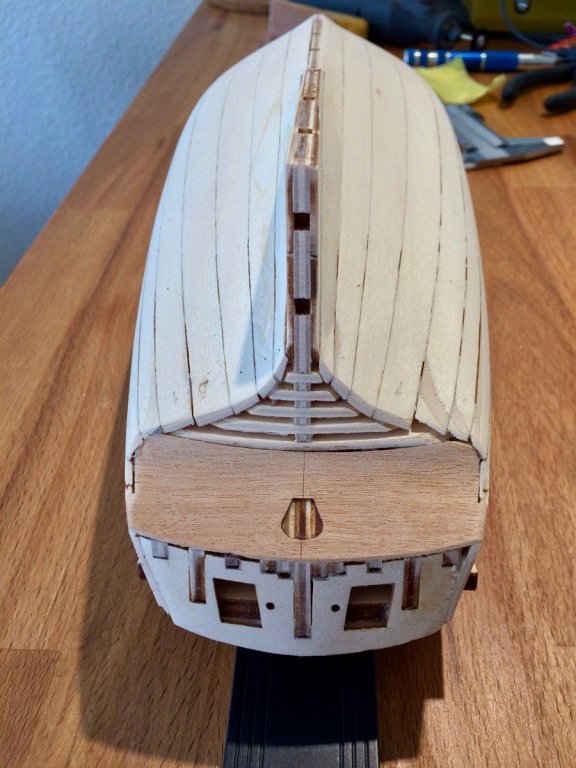
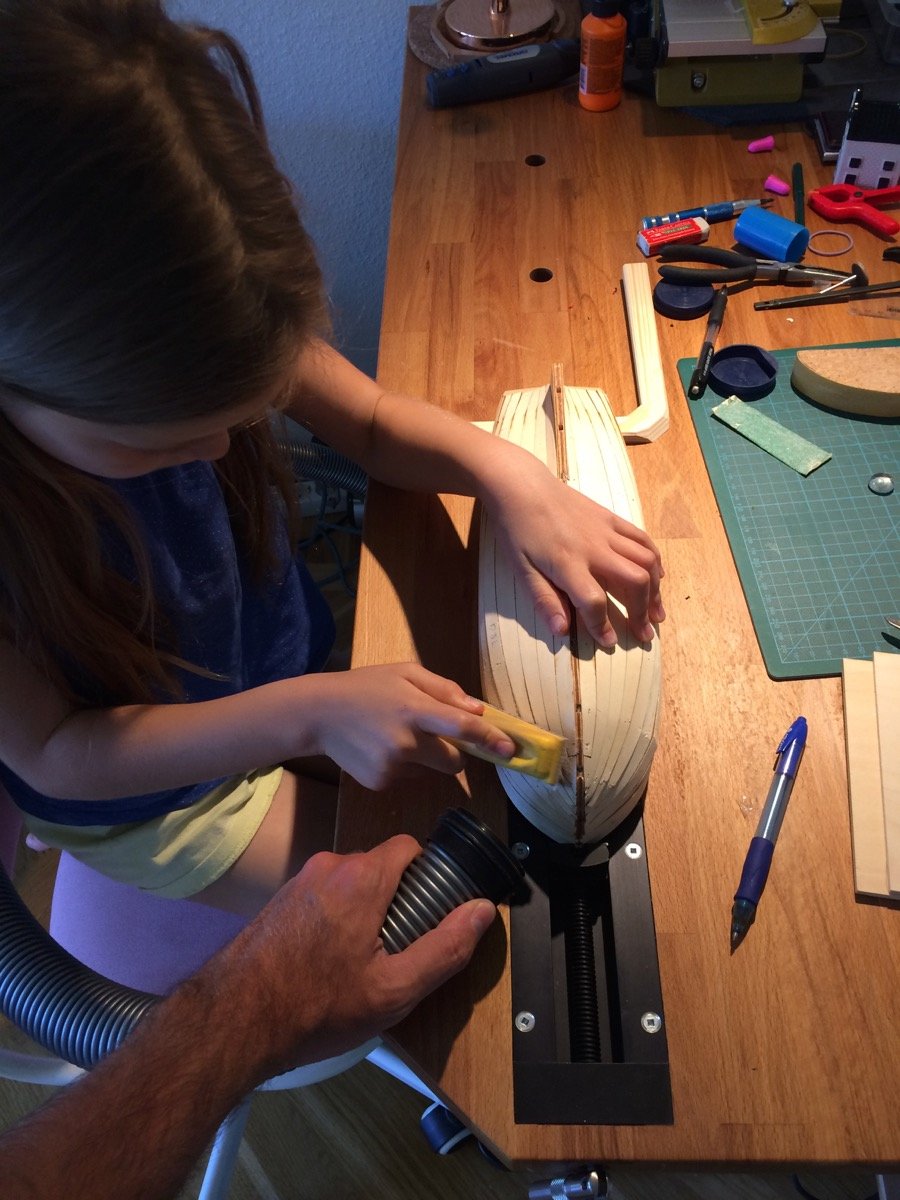
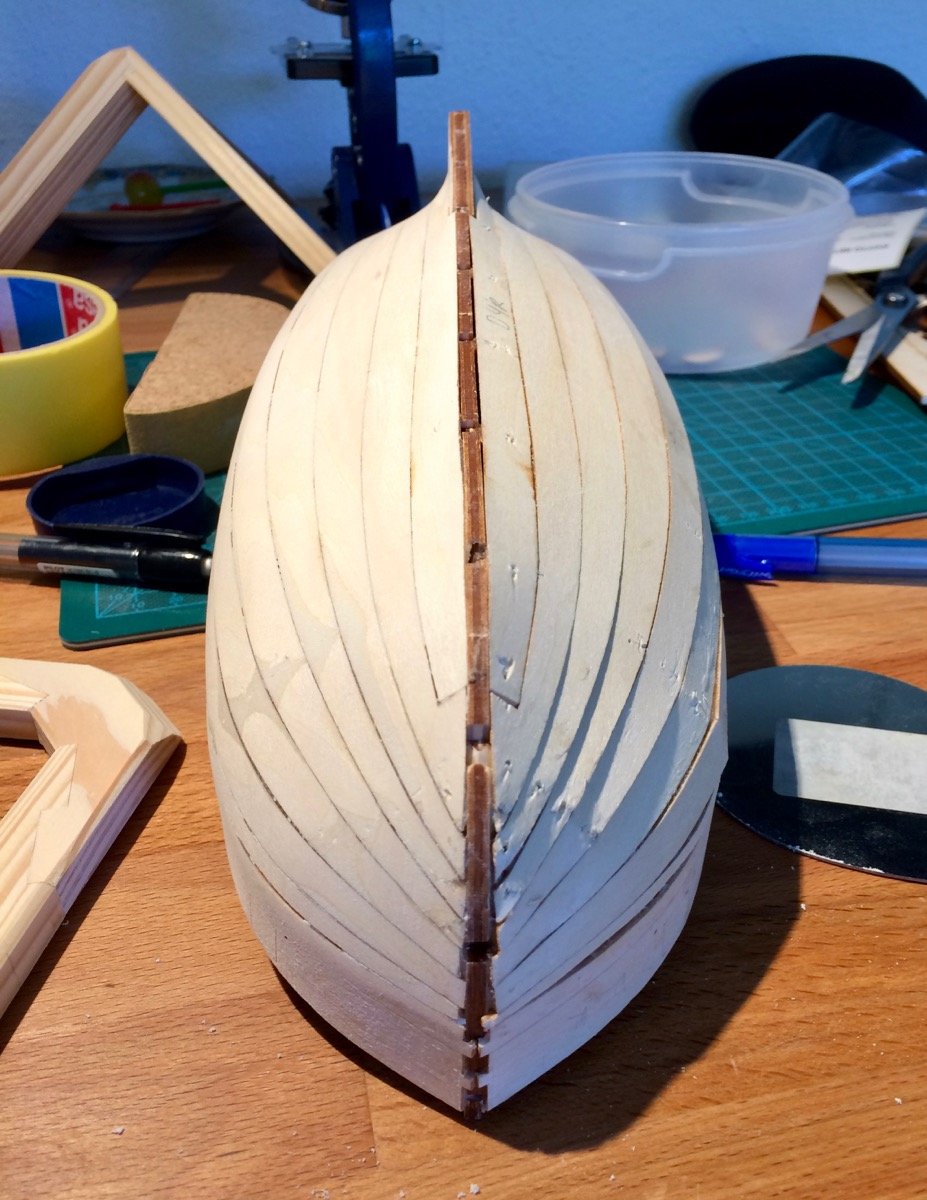
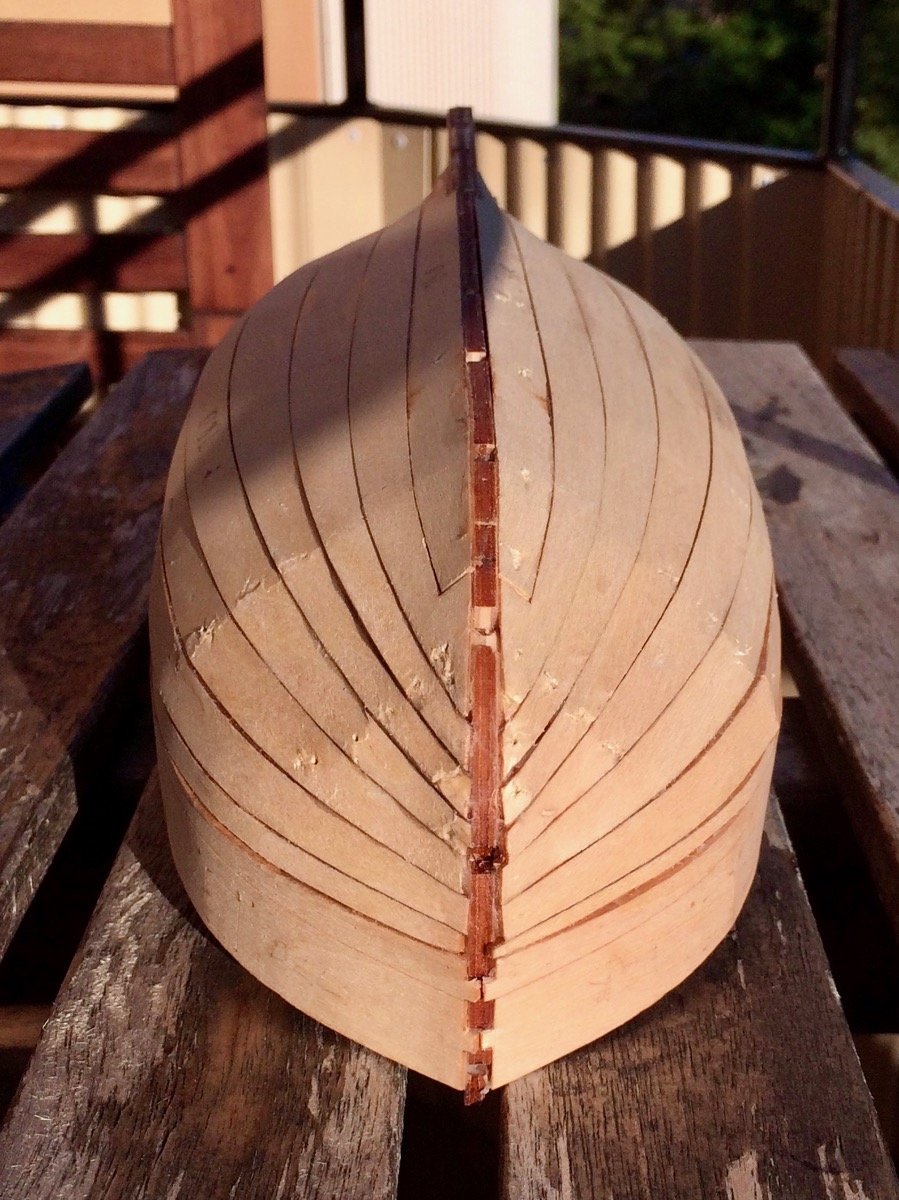
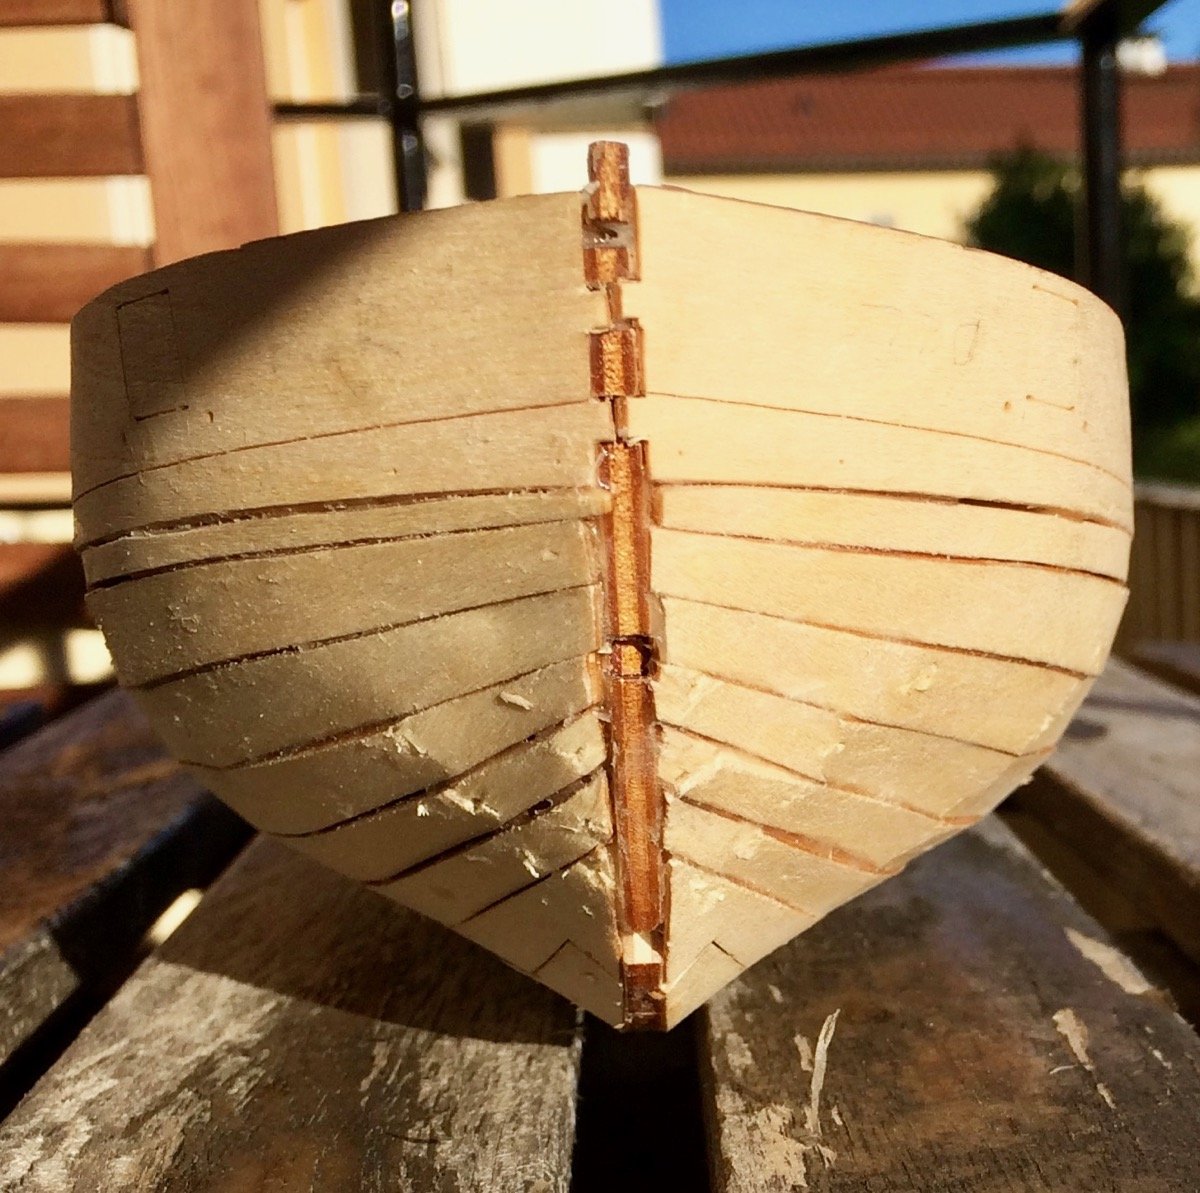
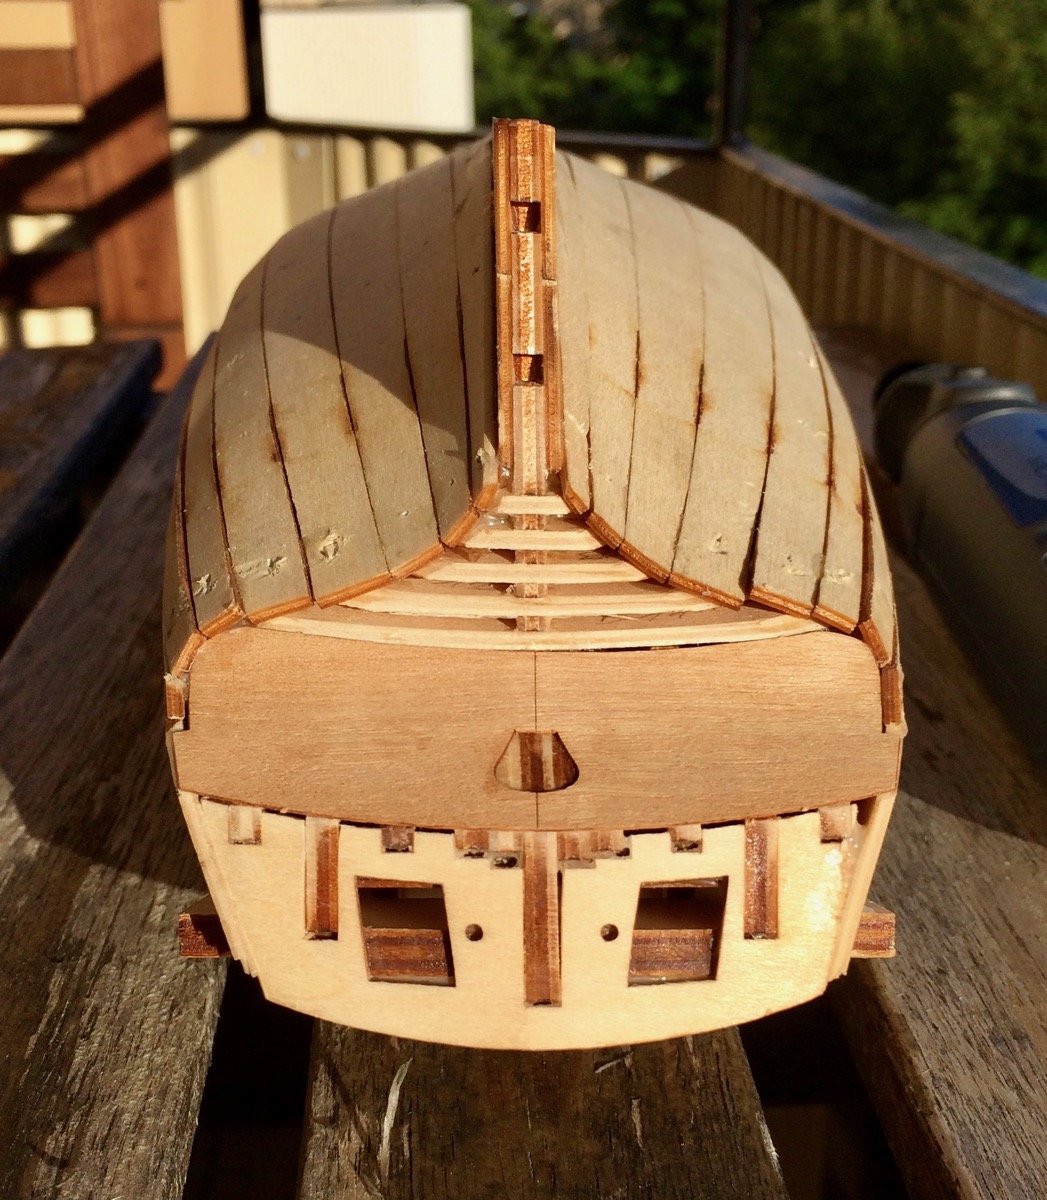
As expected, very rough and ugly first planking was easily faired
Now it provides a smooth and round foundation for planking.
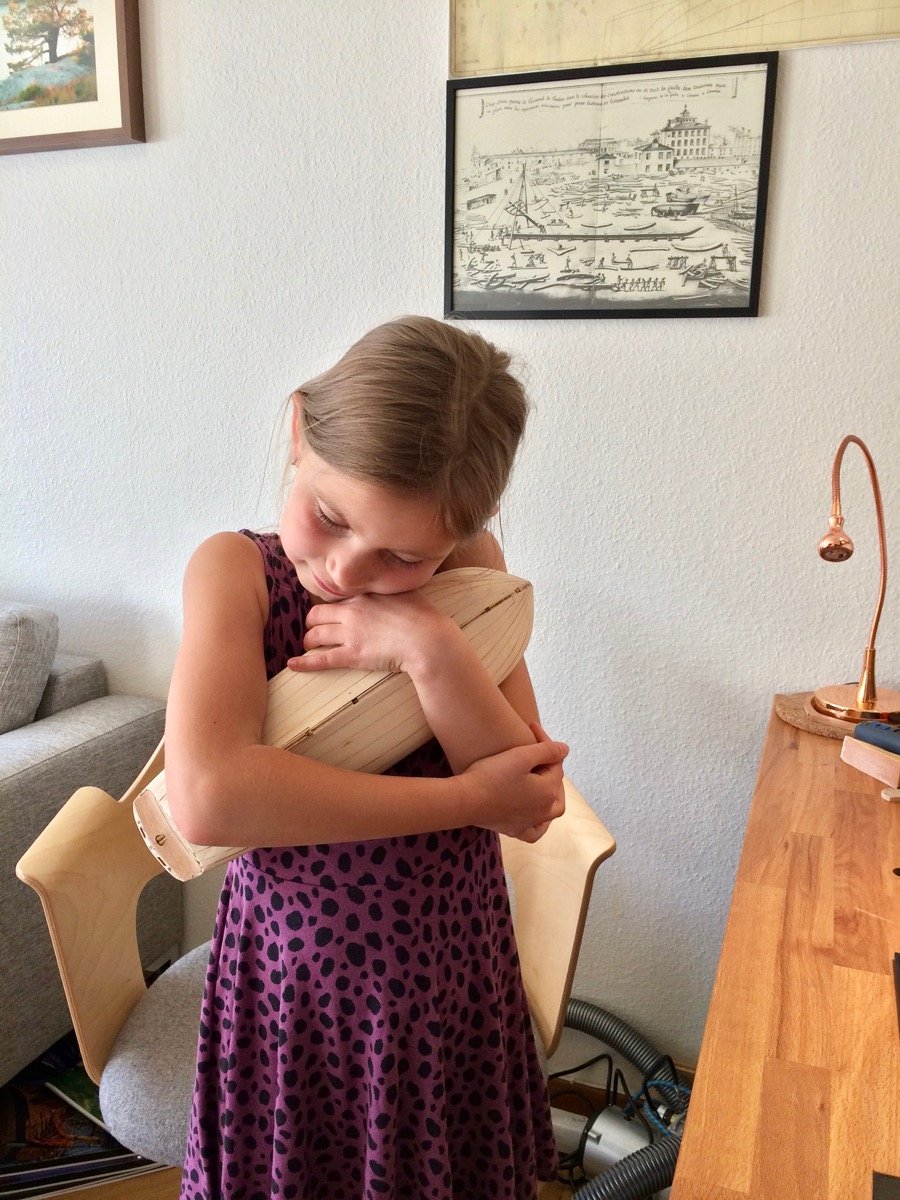
Daria enjoyed it as well - she liked the transformation of smth rough to smth smooth. That took some efforts though!
Sanding:

Scraping:
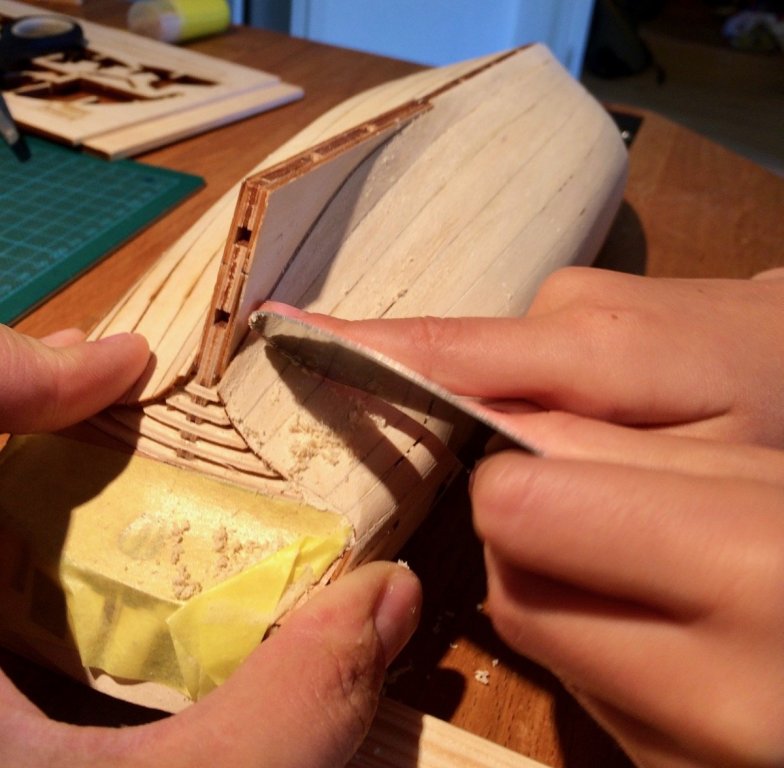
Smooth vs rough:

End result:

She ended up complaining that I was sanding myself too much (we were doing it in turns), and insisted that I should not touch it, let her finish without assistance. Hoorray!

P.S.: the build is on hold due to summer holidays that Daria will mostly spend with her grandparents, so will be back in September!
-
No updates for a while - Daria has a number of hobbies and interests, plus a birthday party season, so we had a long break
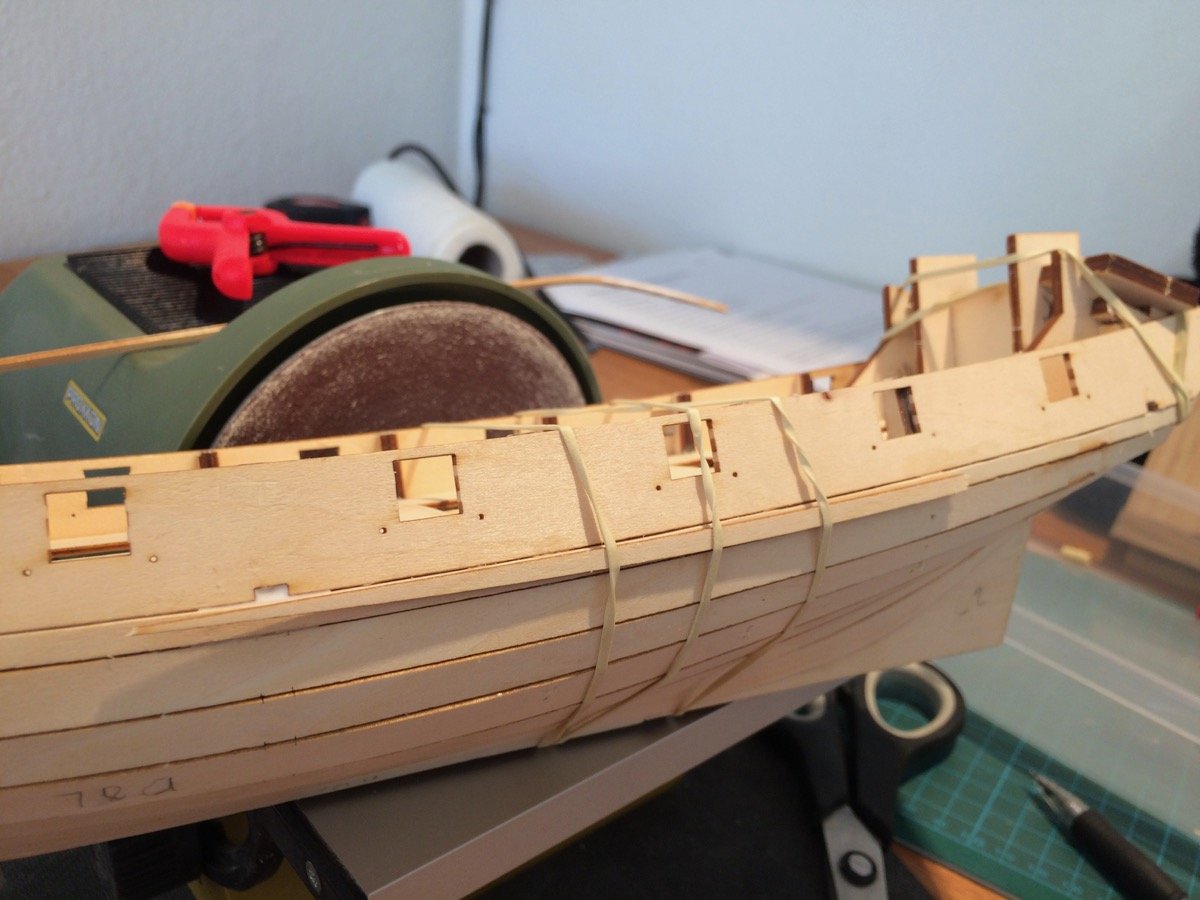
Some awkward clamping, second pair of hands was very useful when trying to install these clamps:
.thumb.jpg.592fc5b42ac731db9d71f802d92bf0c1.jpg)
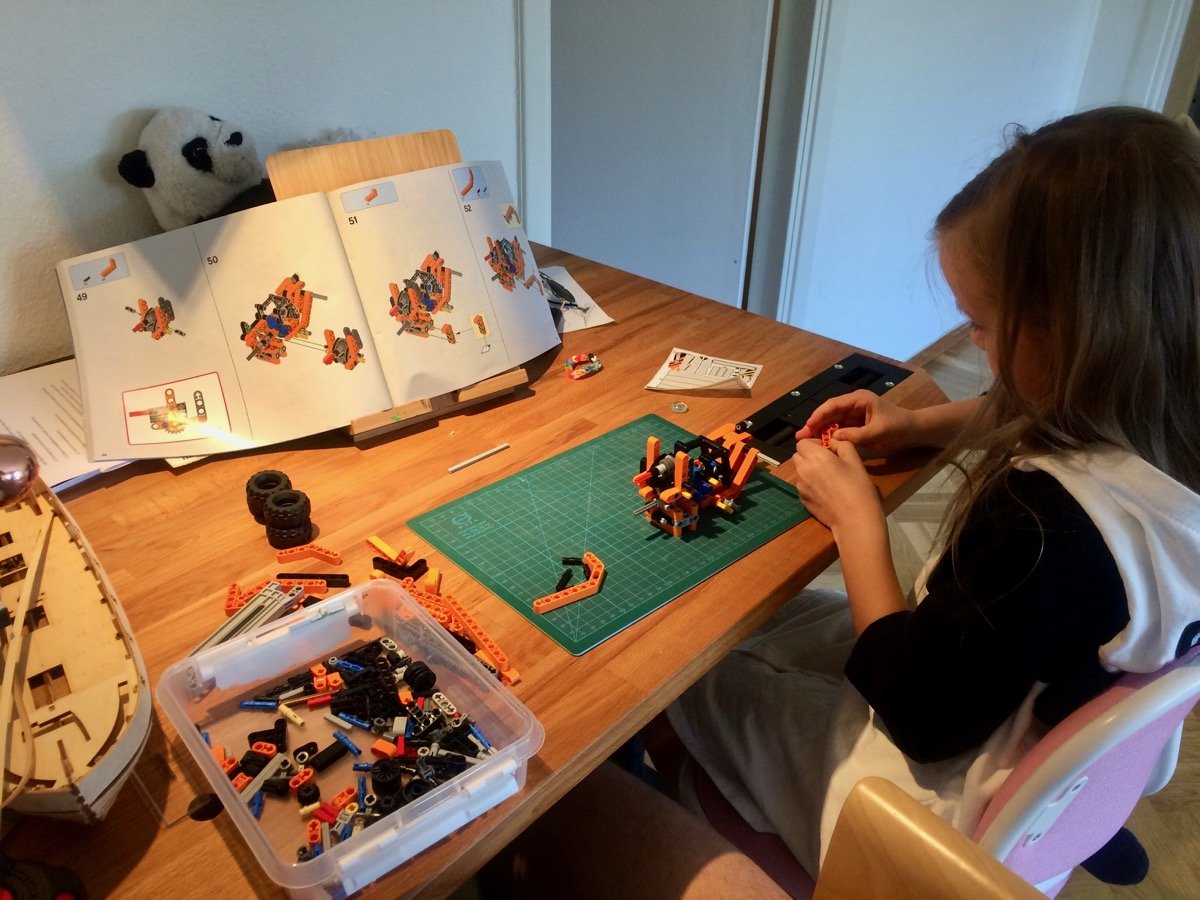
Lego break
One of many "other things"...

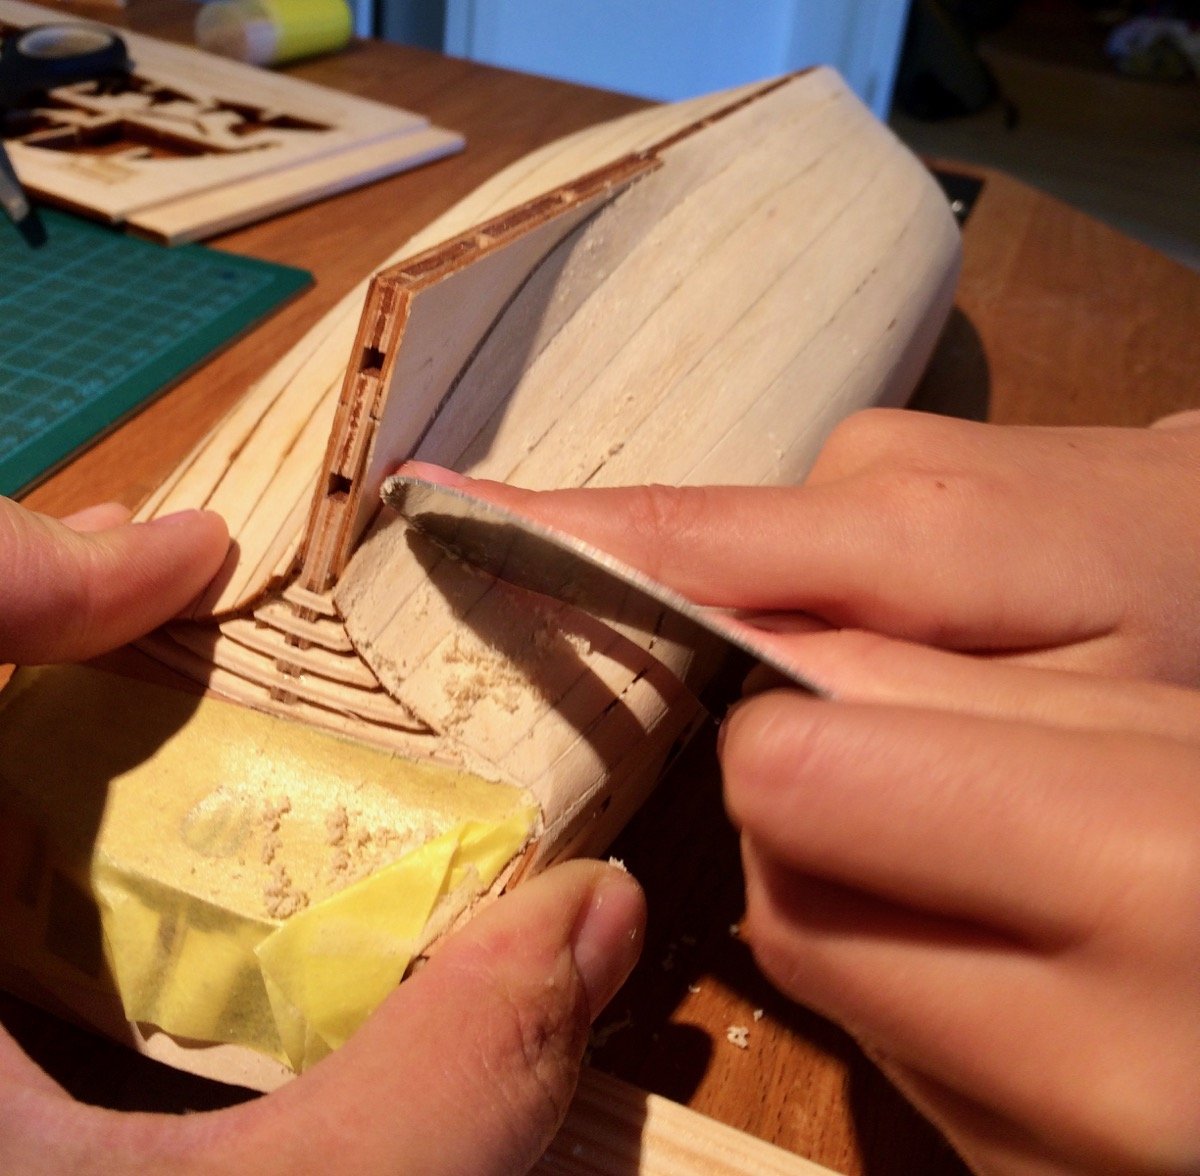
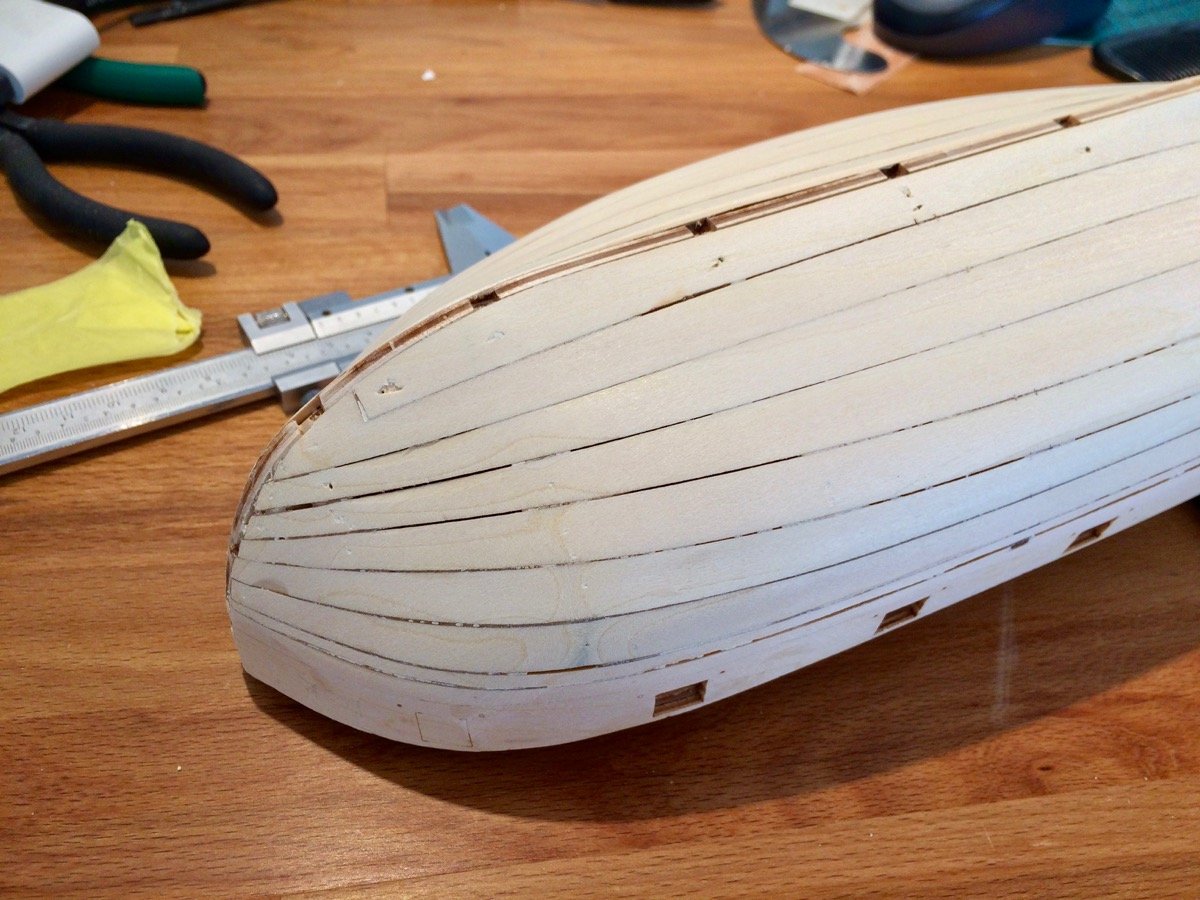
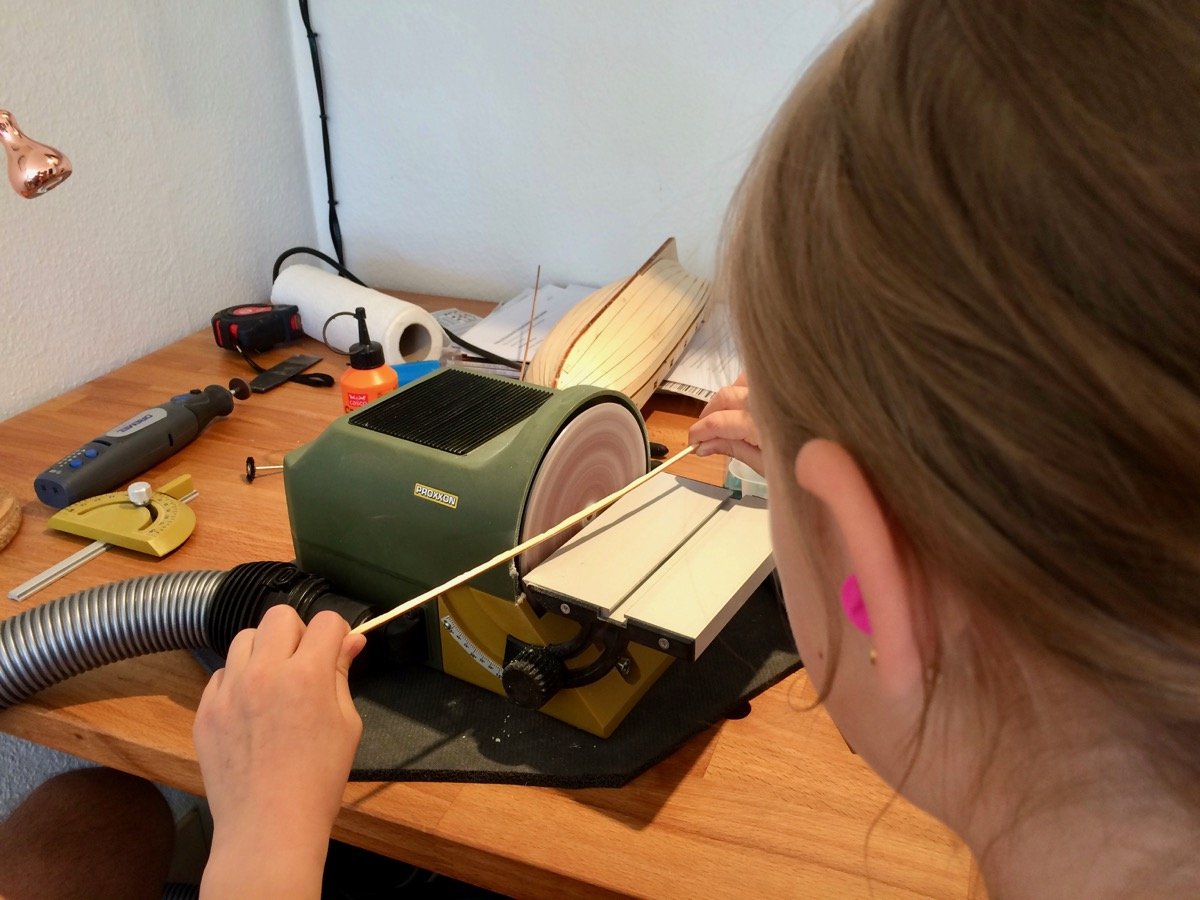
Using sander to shape the last plank:

Last one is installed!

End result. Looks super ugly, but this is a first layer that would be hidden under the second one, and I really did not want to overcomplicate it by introducing steam bending into the process. And without steaming planks crack in the bow.


Now aiming to fair the hull and hide this horror with a nice second layer, made of veneer
- Cathead, zoly99sask, cog and 5 others
-
 8
8
-
Found these: https://www.led1.de/shop/lng/en/solarox-highcri-power-led-strip-pro-ii-with-samsung-leds-warm-white-3000k-20cm.html
Are they good? It is Samsung, not some noname thing. Though the CRI index is 85, not 95 (hope it is real CRI, not Chinese CRI index). Is that a big deal, or it should be ok?
-
Yes, 95% of them are just cheap stuff from aliexpress and ebay, intended to be used in kitchen lighting and similar applixations. I need just one meter, but of museum quality, not a crappy leds.
-
Very precise and lots of methods to learn, thanks for sharing!
unusual type of a vessel a well
- Canute, thibaultron, Mahuna and 3 others
-
6
-
Looking for a high quality LED strip (for the display case). It should be dimmable and have a high CRI.
I read some good reviews on this forum for FlexFire brand, but it seems to be impossible to get in Europe

Would appreciate some recommendations for shops and brands in UK / Germany / anywhere in EU.
-
I use IKEA's electric version (bekant), and super happy with it.
They exist in two widths and also an L-shaped version:
http://www.ikea.com/us/en/catalog/products/00263218/
http://www.ikea.com/us/en/catalog/products/50263225/#/80263224
http://www.ikea.com/us/en/catalog/products/60263220/
Smooth and stable.
The only thing to keep in mind - I would not use a hammer / mallet on it, this can damage the mechanism.
- thibaultron, Ulises Victoria, Canute and 1 other
-
4
-
-
-
Grant, thanks for the feedback. I do not like the bulky look of the standard cases, so was trying to make it elegant. But making proper mitered corners will be quite challenging, they might crack without reinforcement. These corners look smoother. Or maybe I am overthinking this, as usual
-
-
14 minutes ago, GuntherMT said:
That's a beautiful joint, whether it's worth it or not? Totally up to you, I personally am not a fan of display cases at all, but someday I'm sure I'll break down and get tired of keeping the models clean (or stop living alone and have to do it to keep the models safe) and do display cases.
Brian, trying to keep the model clean is already a big problem. Keep in mind, my "workshop" is in the living room
Surprisingly, most of the dust on the model looks like a regular dust, not a wooden dust. I ended up covering the model in plastic film, which is ugly
Fine dust gets between frames, and it is not easy to get it out even with compressed air. When I will start the deck framing, it would be nearly impossible to get id of the dust inside the hull. So the display case is a necessity for me. I am just trying to make it less ugly, so it would be a model of its own Hence this decorative joint, inspired by the joints in the model itself.
-
Finally done with all the gifts! This Christmas season was way to long
So back to the display / dust case for the Cromwell.
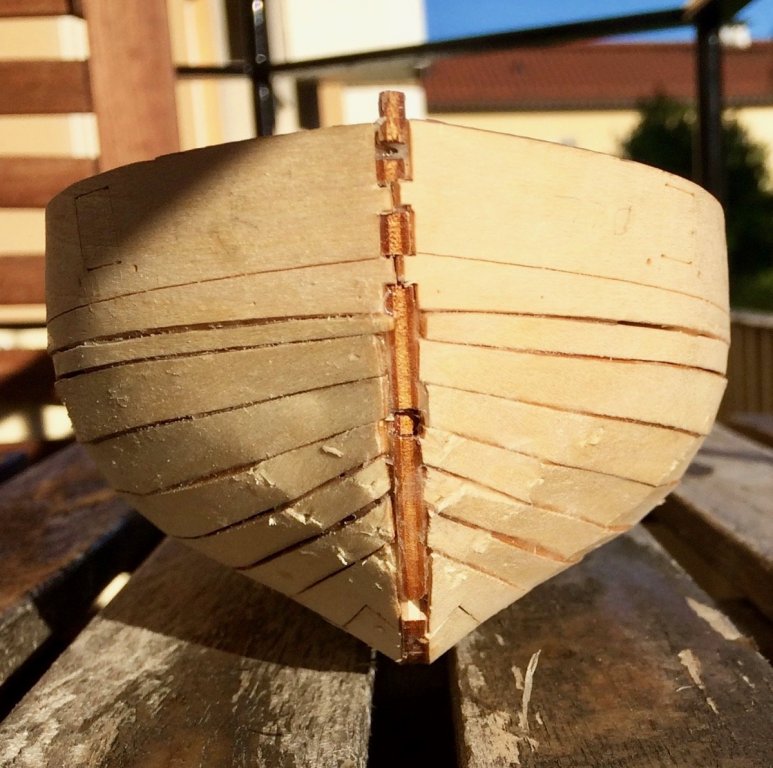
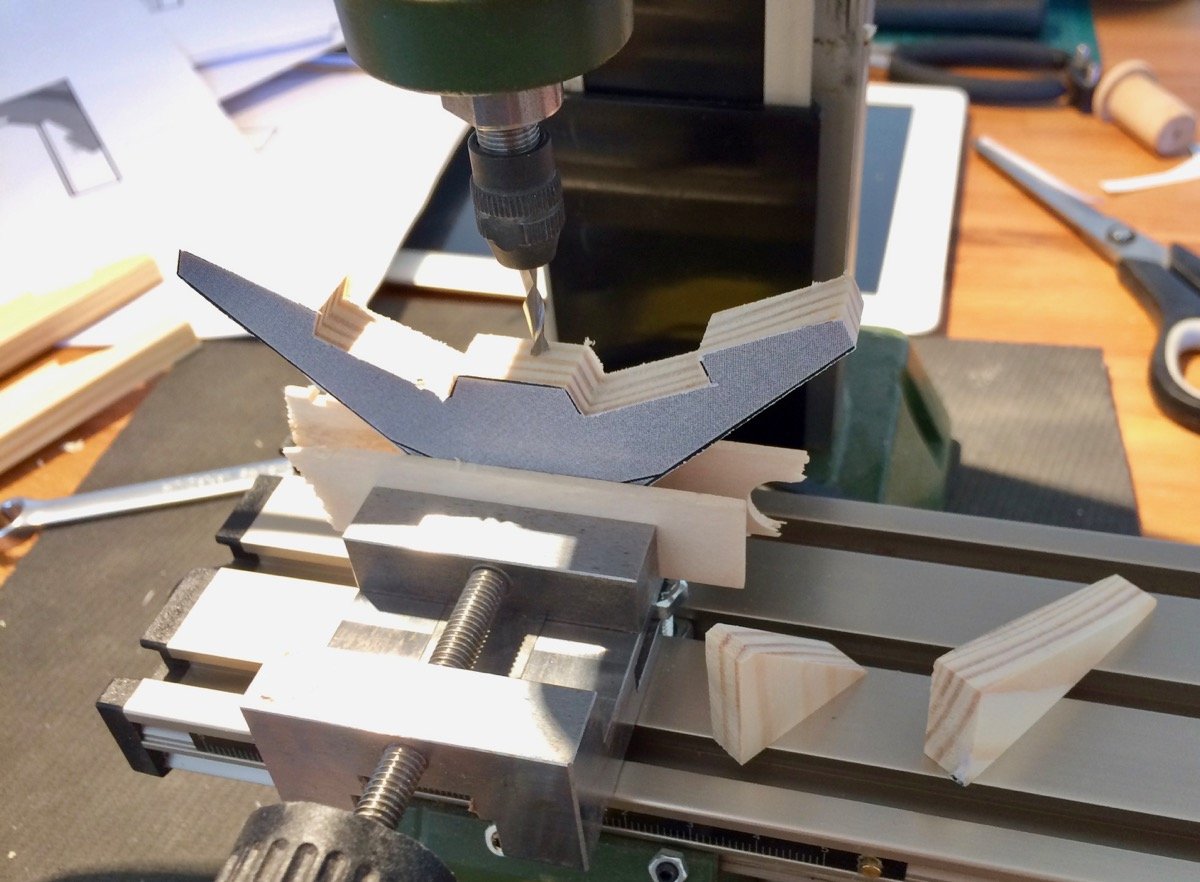
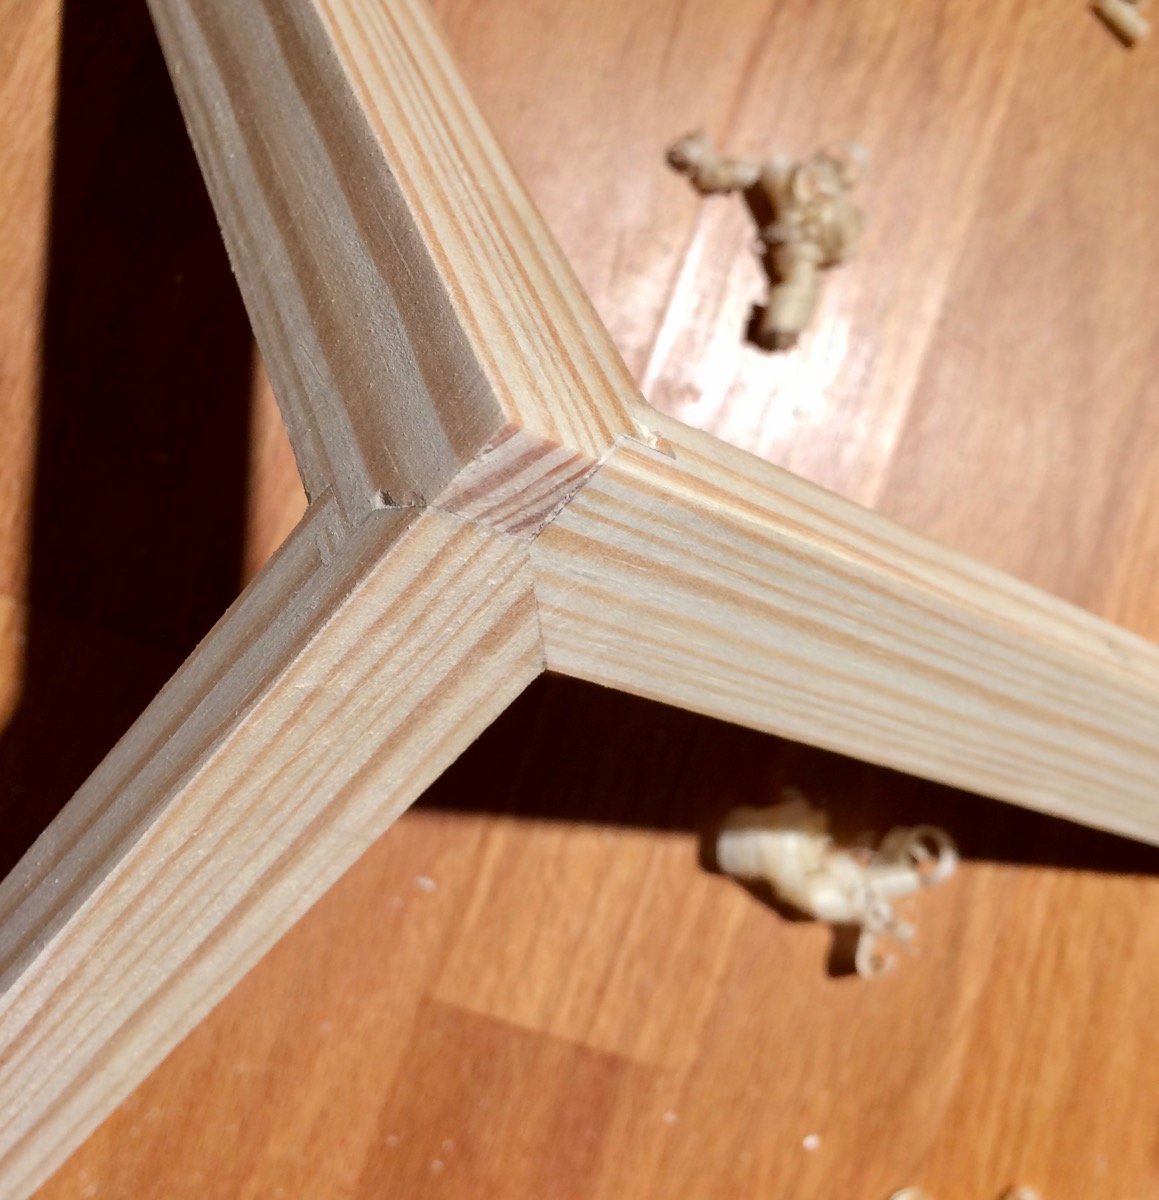
Tested the corner joint design on a piece of pine scrapwood.
Here is the joint drawing:
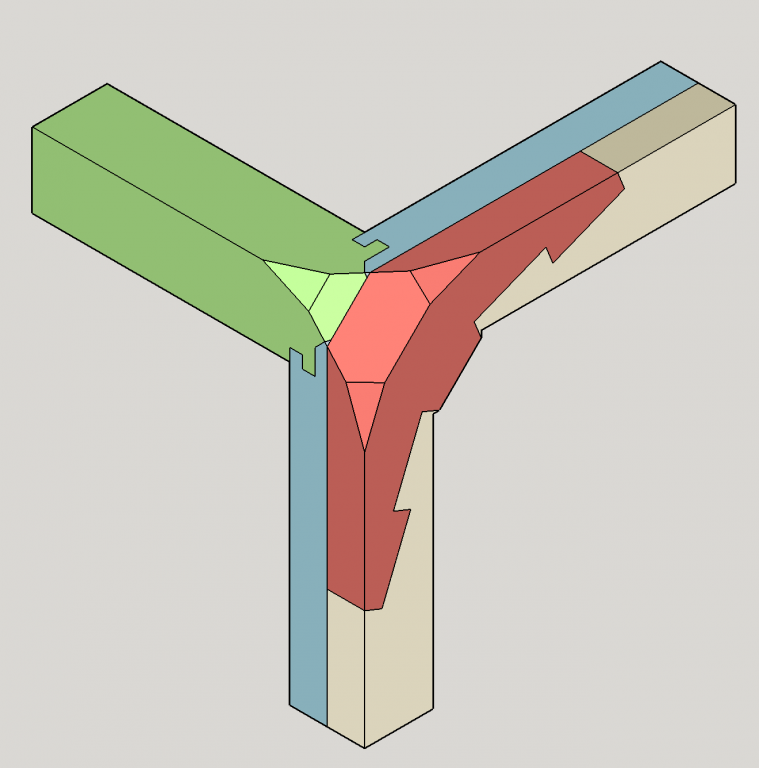
Milling scarf joints was easy, using various angle blocks to make sure that they all have the same angle:

Side joints were more tricky, not possible to mill easily. Crosscut sled came in handy:

Resulting parts. Nevermind some chipout, it is pine:
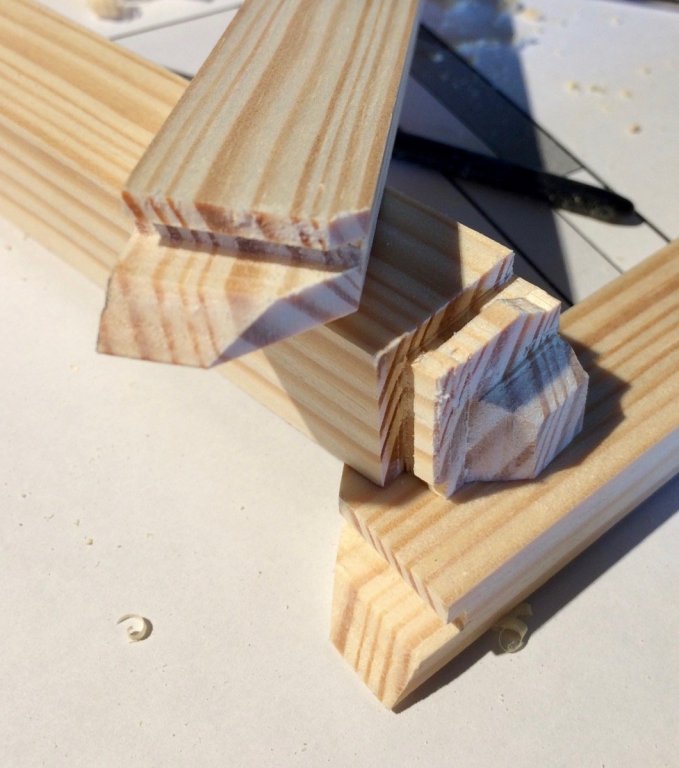
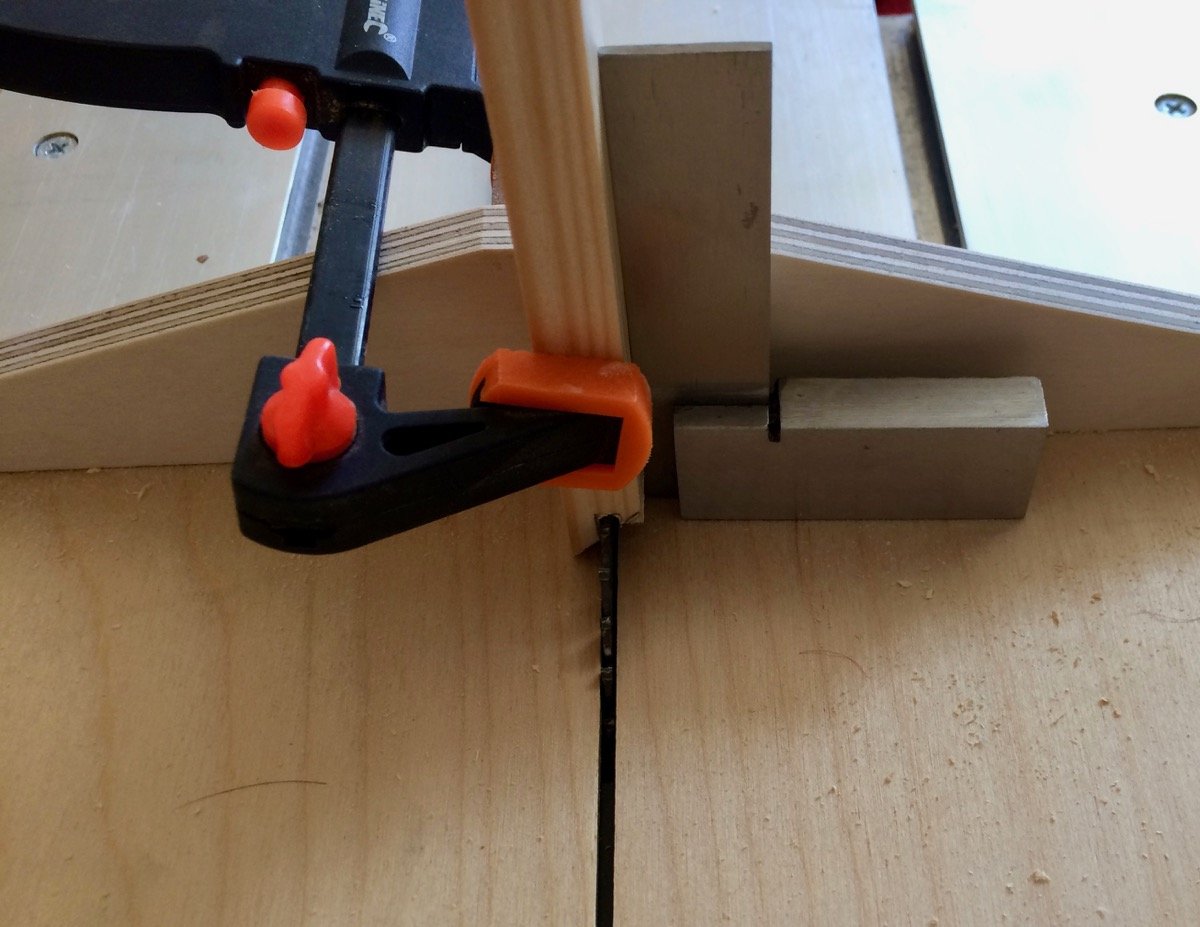
Glue-up was tricky due to a number of angles that must be square:
.thumb.jpg.09b3146c62c4f55c4e0ba379769719ee.jpg)
Result:

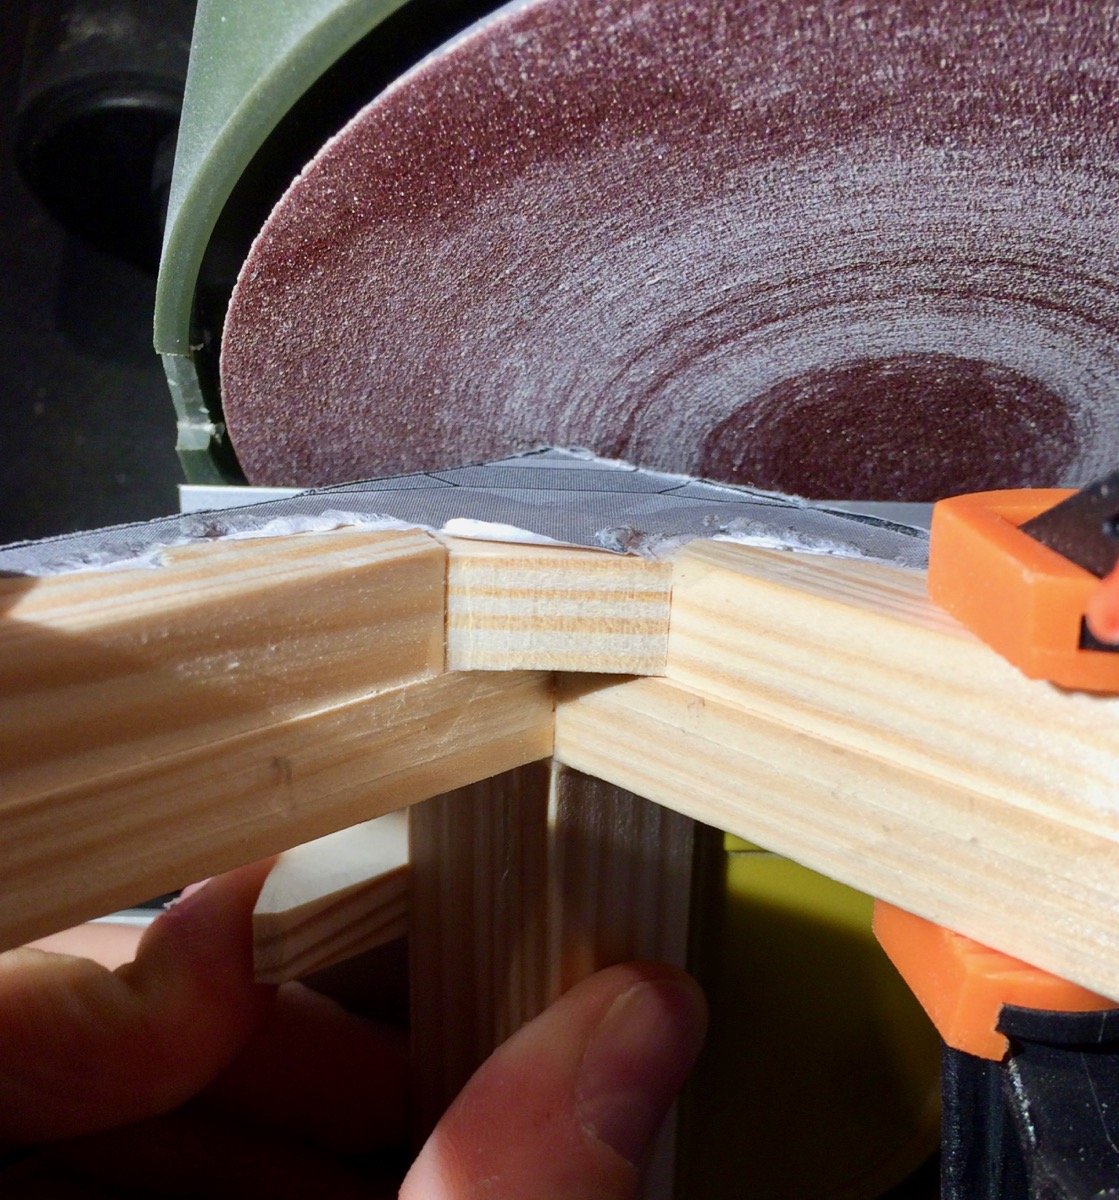
Now the most risky part - making that weird shaped corners. The front part of the joint will be detachable and will hold the front glass, but to make the corner it should be clamped together with the non-removable part:

Then caaaarefully shaping it on a disk sander:
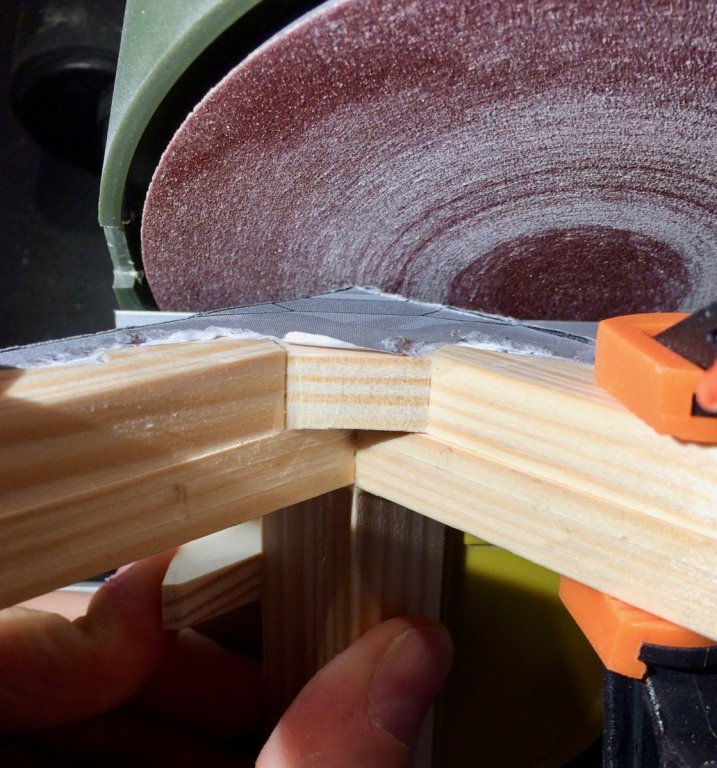
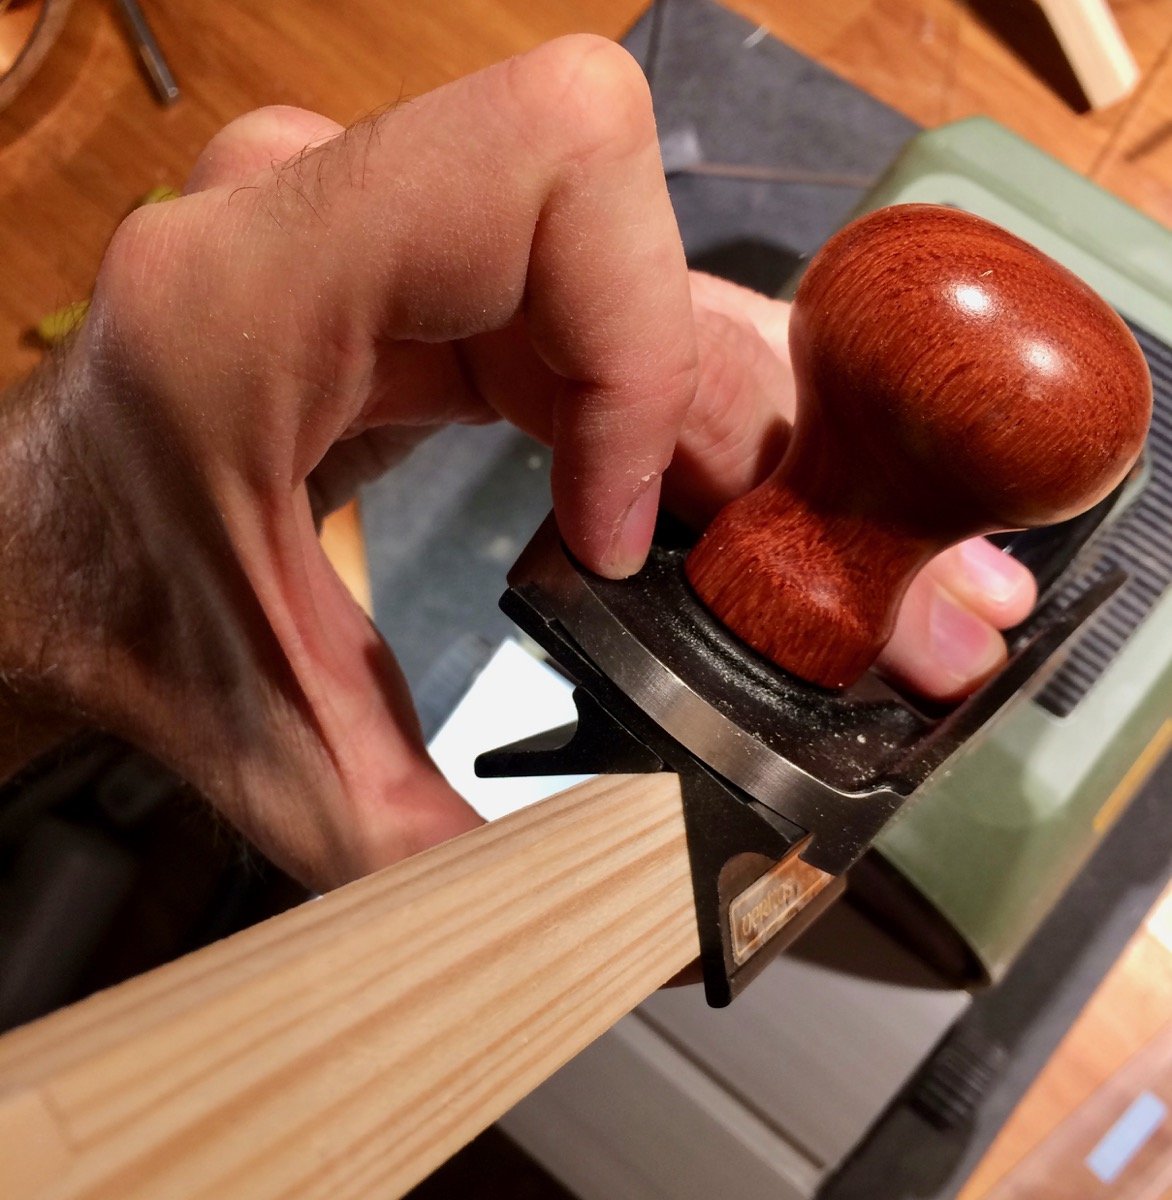
Adding some bevels, the bevel guide was handy!

Done!
.thumb.jpg.e2ae9240447940753976fbca9a071129.jpg)
.thumb.jpg.bf54eae23510bf1e615cf163a173fae8.jpg)
So that joint is quite manufacturable, which is a good news! This is the first and only attempt, no scrap pieces.
However:
1) Side joints are too miniature (3mm lips) and are easy to chip out
2) No need to add that miters on the side joint - they only add complexity and no real visual effect.
3) Building the display case will require some ridiculous precision - making sure all stock is precisely dimensioned, careful alignment and squaring. Will definitely need to buy some extra wood.
4) Worried about wood shrinkage/movement and getting out of alignment due to humidity variations...
What do you think?
-
-
-
-
-
1 hour ago, hjx said:
hi Mike Y
I admire your ability to mill or polish the surface of wood,I'm amazing such a delicate model was made by hand.Do you have some suggestions for the selection and polishing of wood to me?thanks.
hjx
Hjx, it is mostly "swiss pear" - european pear tree that gets is pink/brown colour after kiln drying.
If your wood is rough - pass it through the planer or thickness sander first, otherwise sanding will take a lot of time.
Nothing special for polishing - just sanding with Mirka sandpaper, grits 220 -> 400 -> 600 -> 1200, sometimes up to 2000. Different brands and kinds of paper leave slighly diferent finish, so your grits may be slightly different. Sanding on a flat surface (paper clamped to the table, moving the wooden part on the paper, not vice versa), or with a cork sanding blocks of various shapes. Never sanding freehand. That is all to avoid rounding the edges, which is unavoidable if the paper has a soft backing (fingers, foam, etc).
quite frequently I scrape the wood after sanding with 220 or 220 -> 400, using heavy duty xacto blades for scraping (holding the blade with fingers, without a handle. This helps the blade to follow the lines of the wooden part). Do not forget to round the sharp corners of the blade to avoid scratches. It is also very handy for curved surfaces, where sanding block might not be convenient.
I use an optivisor to check the surface and see if I sanded enough, or there are still some scratch marks after the previous grit.
frankly, I never checked if what I am doing is an overkill. The difference between grits is quite visible when the wood is not finished, but after finishing - not sure if it is possible to see a difference between 600 and 2000 grit. But fine grits take very little time, so I do it anyway
Sanding is a very important - few min of sanding each part makes a big difference to its look and feel.
-
There is definitely a market for benchtop air filters that could be just put on the back side of the workbench, pulling air through the filter. The main problem is getting a powerful enough, but quiet motors and propellers.
- Canute, thibaultron and mtaylor
-
3
-
-
-


.jpg.556b2f1f4a6b79840dd64887e0566a88.jpg)


.jpg.755ff3f5899fb459933e28cff3c61f71.jpg)

.jpg.57c677f9719dd4b199dd453bc69ced41.jpg)
.jpg.419ea777a9021d2fe7343f1977be70af.jpg)
.jpg.412743cf045d87f6ff8e4dc79b57688b.jpg)
.jpg.462dec777c08b4ee23150f3d23d3a278.jpg)
Licorne 1755 by mtaylor - 3/16" scale - French Frigate - from Hahn plans - Version 2.0 - TERMINATED
in - Build logs for subjects built 1751 - 1800
Posted
It is a big relief that you are back in the game! Hope it would be a speedy recovery!