


Mike Y
-
Posts
1,513 -
Joined
-
Last visited
Content Type
Profiles
Forums
Gallery
Events
Posts posted by Mike Y
-
-
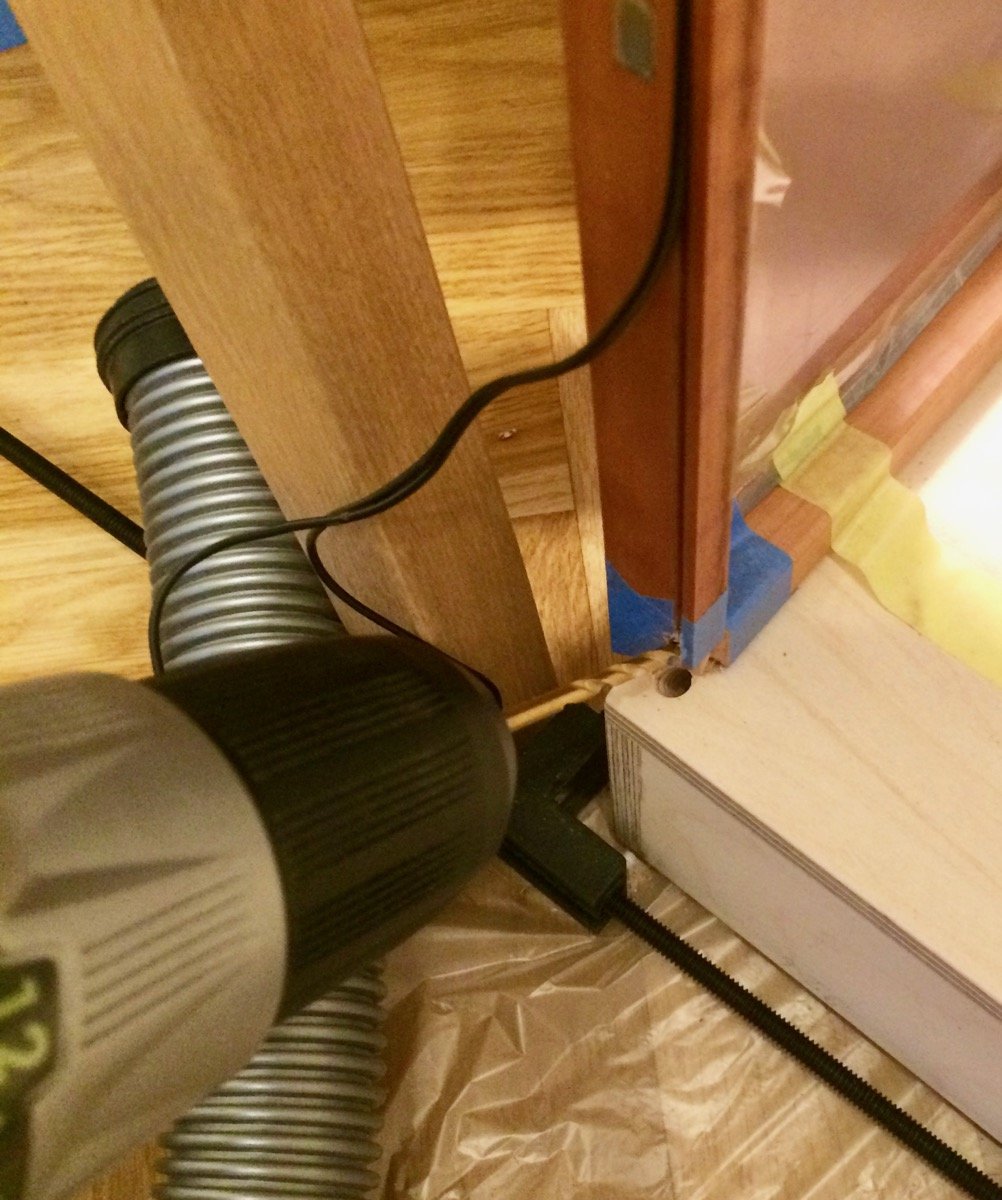
Good news: no problem with the base weight, it holds well. Even with 2 bolts instead of 4 (one - the nylon plug is too loose for this kind of concrete, second bolt - the hole is probably not deep/wide enough, can't drive it through in the last 2-3mm). I have a lot to learn when it comes to anchoring / bolting things to concrete wall. To make it funnier, apparently the left two bolts are in some really hard concrete, while the right are in a porous concrete that falls out of the hole.
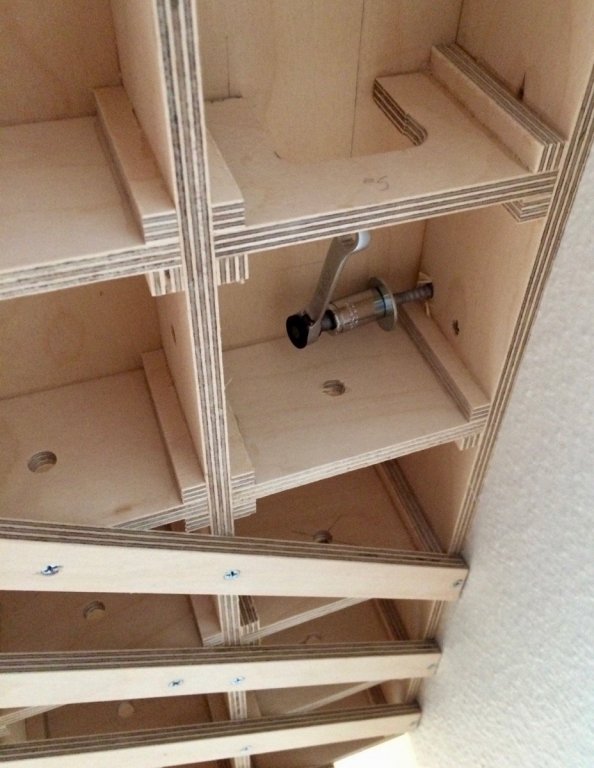
The base is bolted like so:
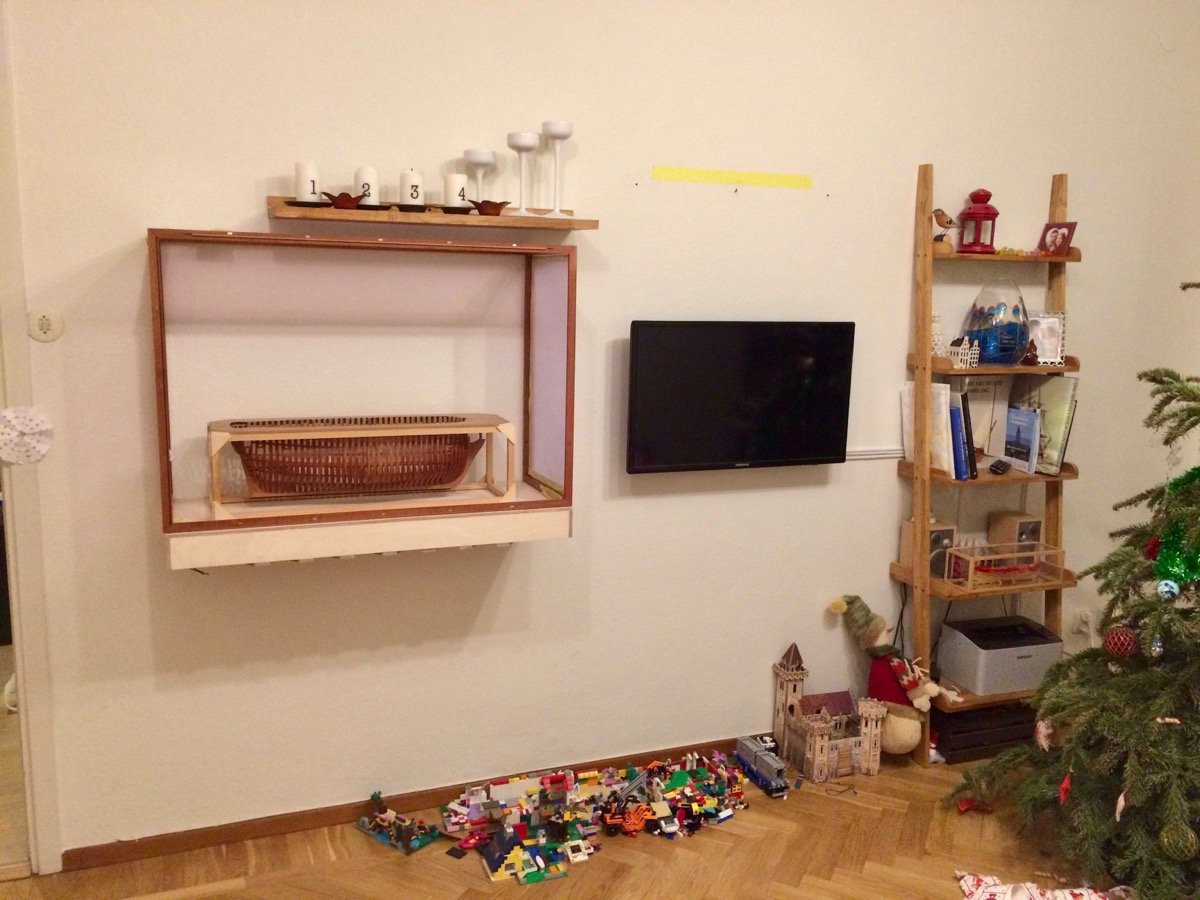
Bad news: it does look too bulky, I should have made it thinner, so it does not stick so far from the wall
 Maybe I will get used to it, maybe it will look better once planked, but it is out or proportions in this place. My wife laughs and says "ha ha, ok, I am ok with it", but I am not happy myself. It looks like a clunky aquarium.
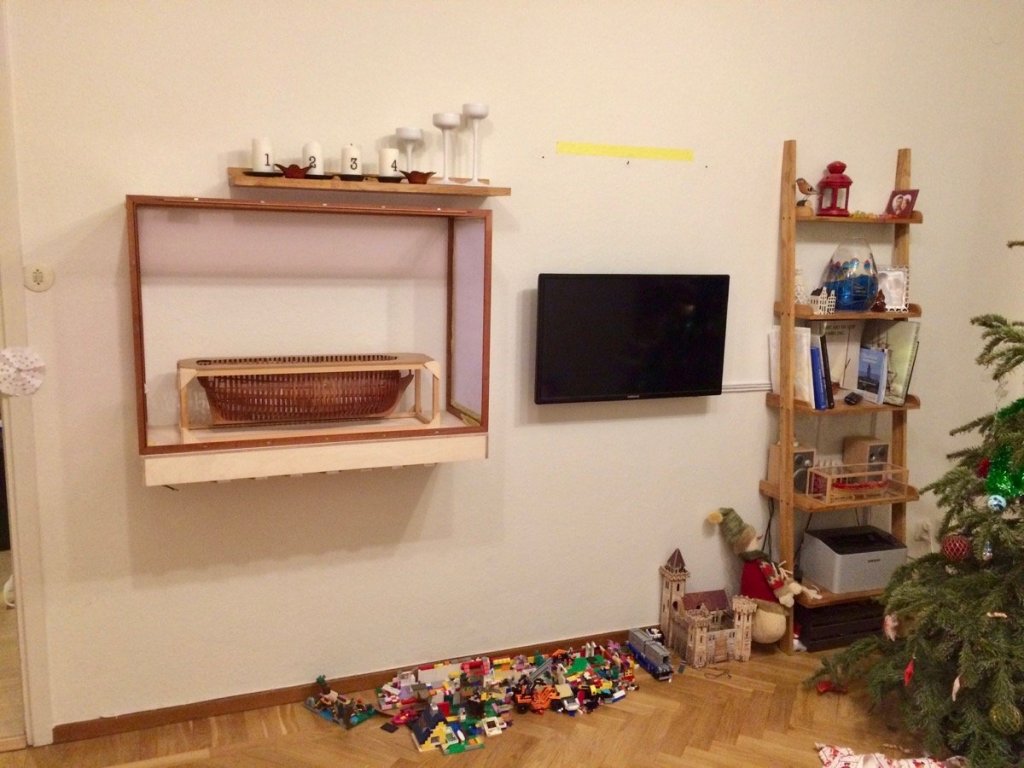
Will finish it and see how it looks. Next time - such things definitely need some fullsize cardboard mockup, it is really hard to visualise and imagine it even after laying out all dimensions on the wall.
-
Should be a very interesting build! Rare vessel, and on a very tiny scale.
- Nirvana, popeye the sailor and mtaylor
-
 3
3
-
-
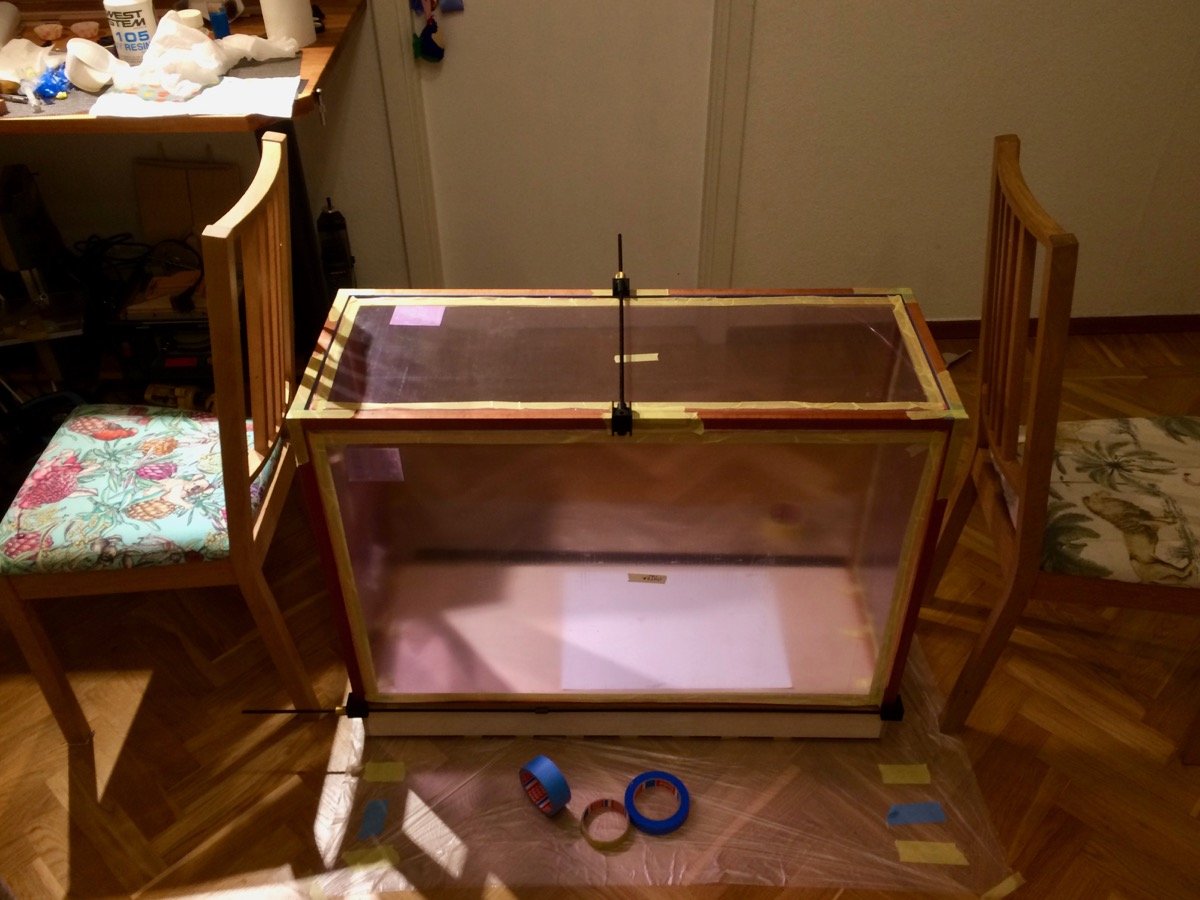
Hooray, the glue-up is completed, and it ended up ok. Even thought it was a stressful time race against silicone and epoxy, trying to make sure nothing falls apart, avoiding smearing adhesives all over the place, while trying to hold it together with swears and load bearing masking tape
")
Overall the design is really super light, the case weight without the base is just 6kg (2.4kg for the front glass and the rest is 3.6kg). Most of that weight is plexiglass, I would be surprised if all that pear sticks combined weigh more then a 0.7-0.8kg.
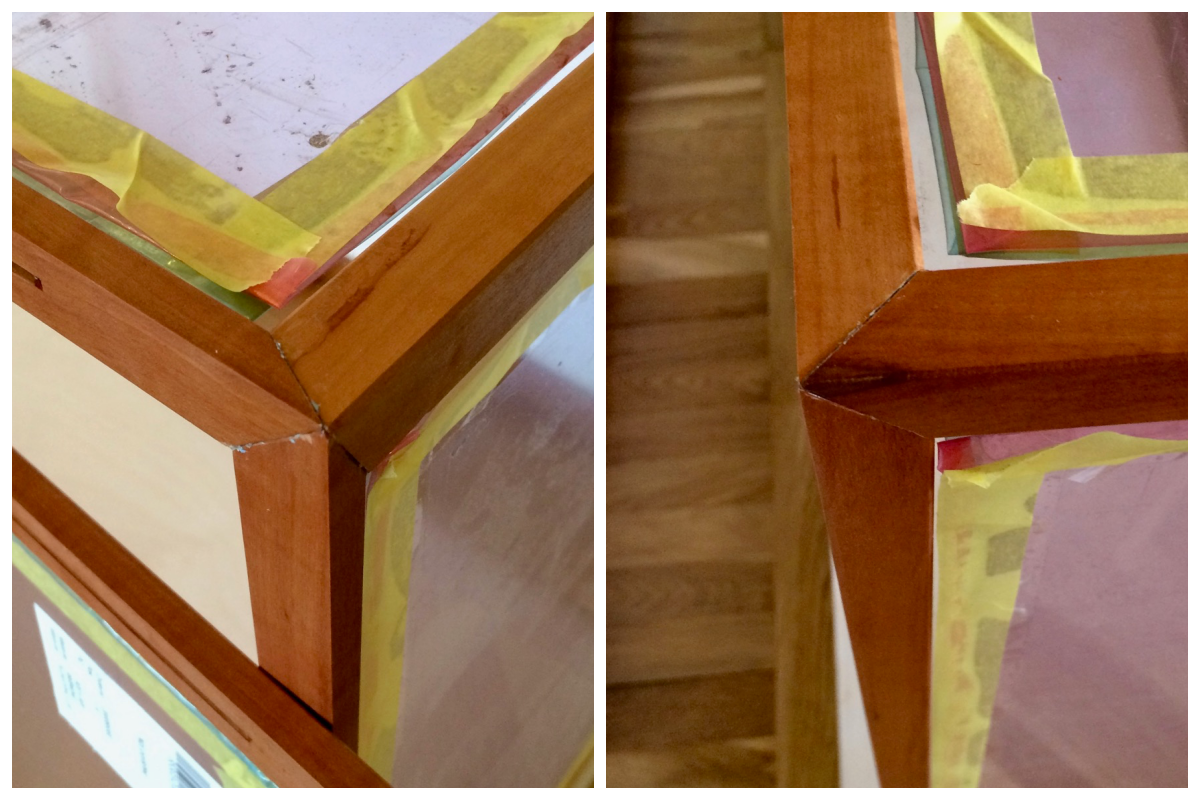
The corners have some slight gaps, that should be far less visible once sanded.

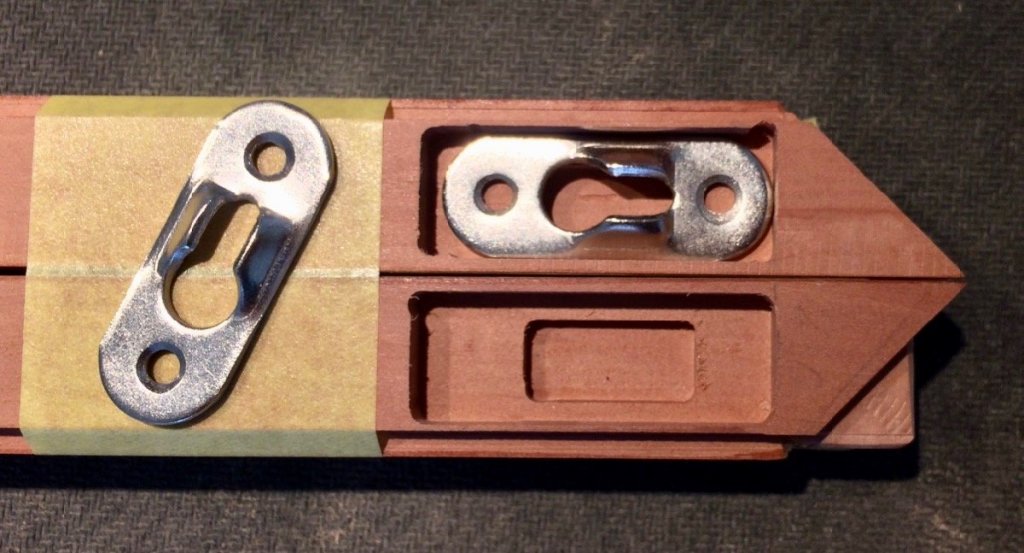
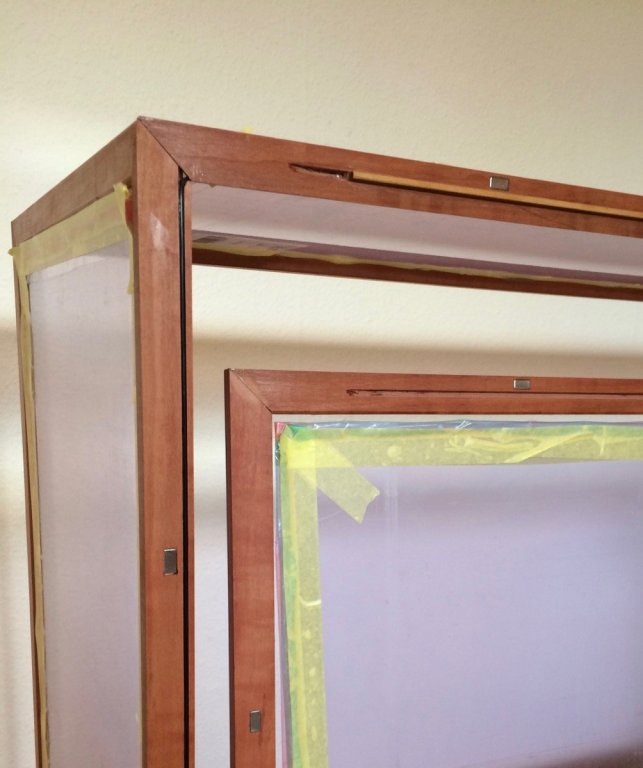
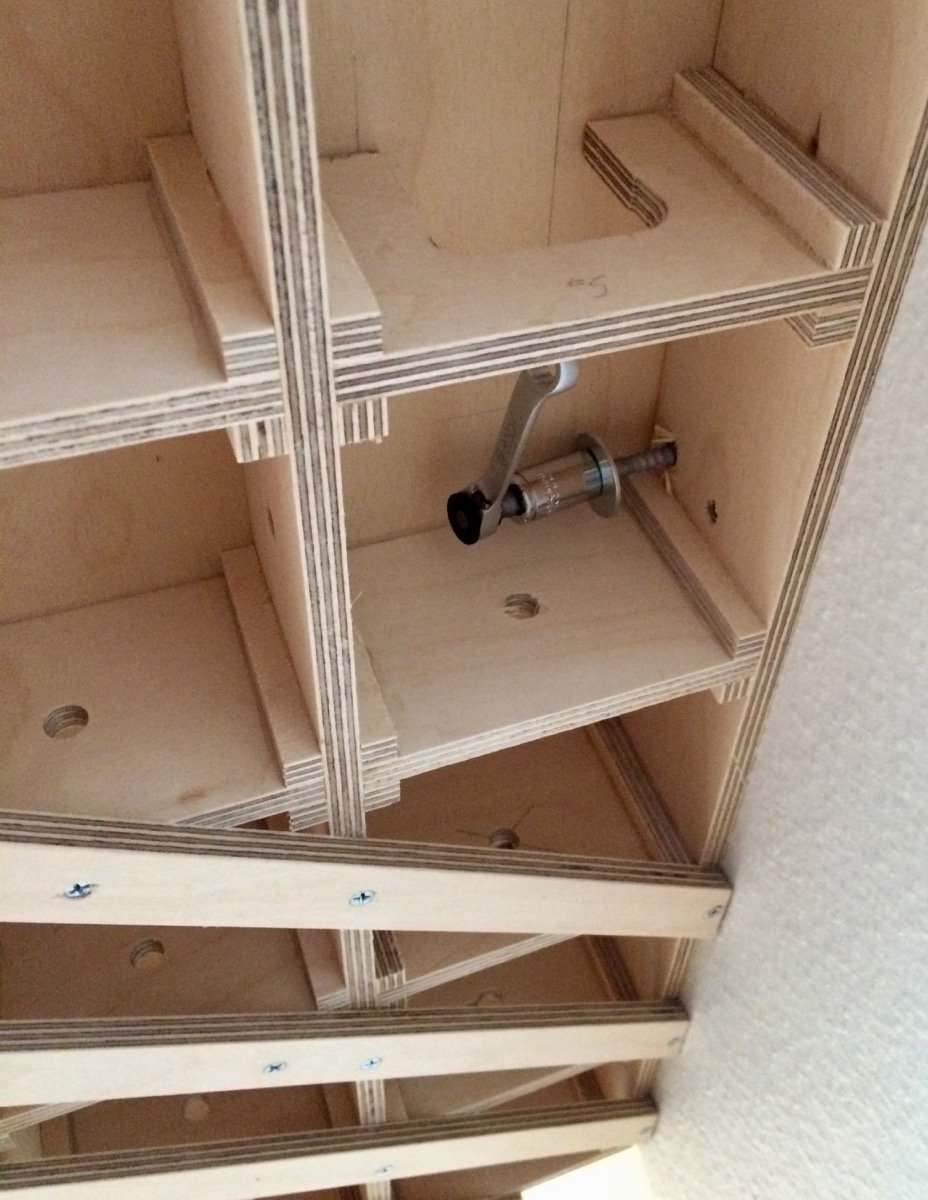
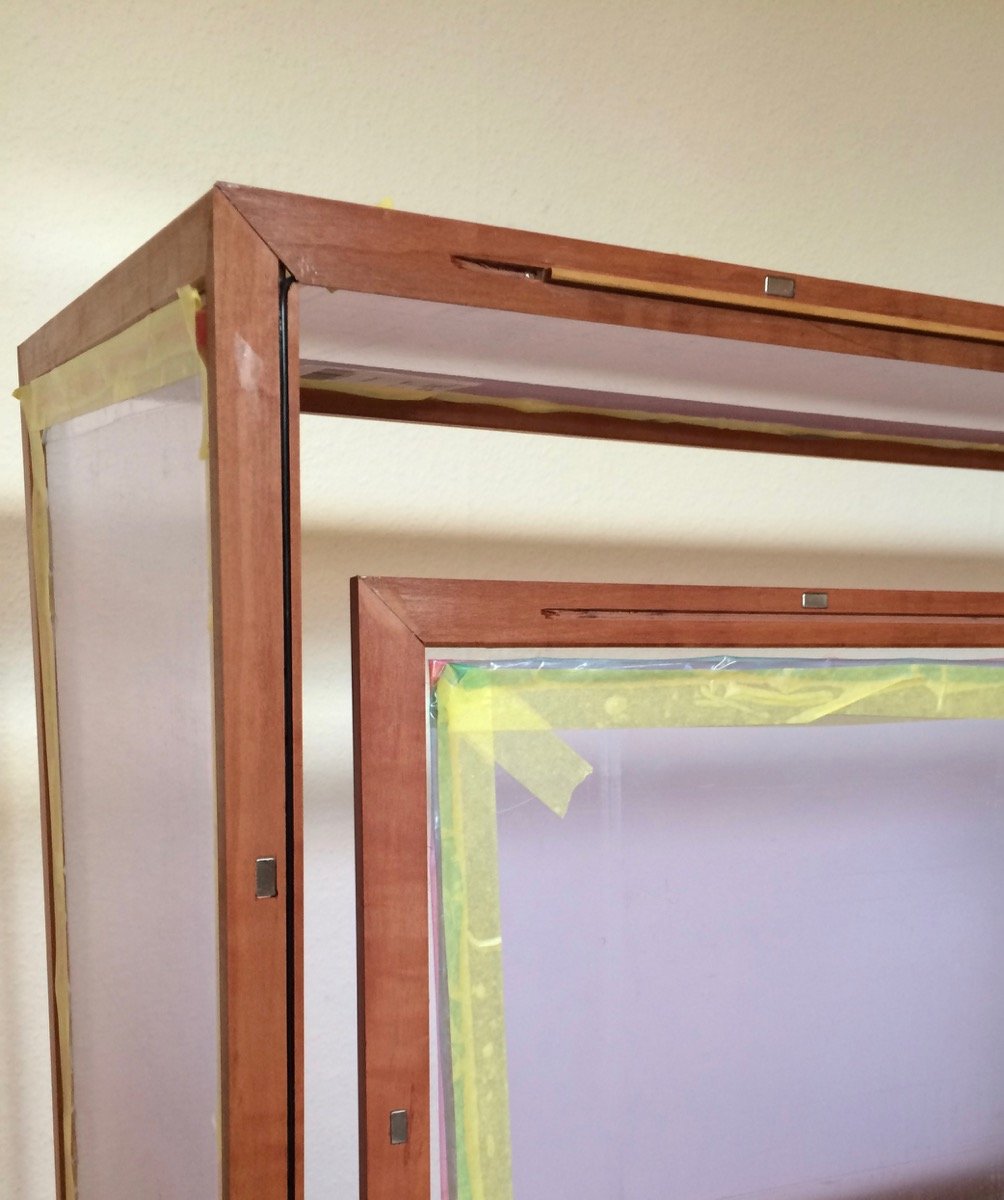
The pre-finishing was done mostly for the areas that are hard to reach, but all exposed flat surfaces would be sanded/scraped to be perfectly flush, and then re-oiled. Will do it once the case is mounted - without anything in the back, it wiggles without the front glass. When mounted, top corners would be attached to the wall with recessed brackets that were prepared in advance:
With the glass attached, a bit of scraping is required to ensure gapless fit:
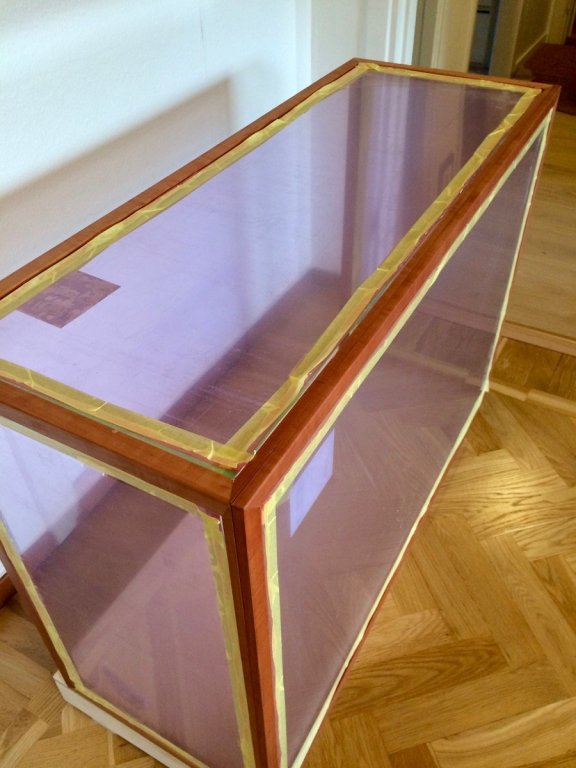
Here is how the glass connects to the case, basically lots of magnets and a boxwood strip that locks the top side with the glass, preventing sagging:
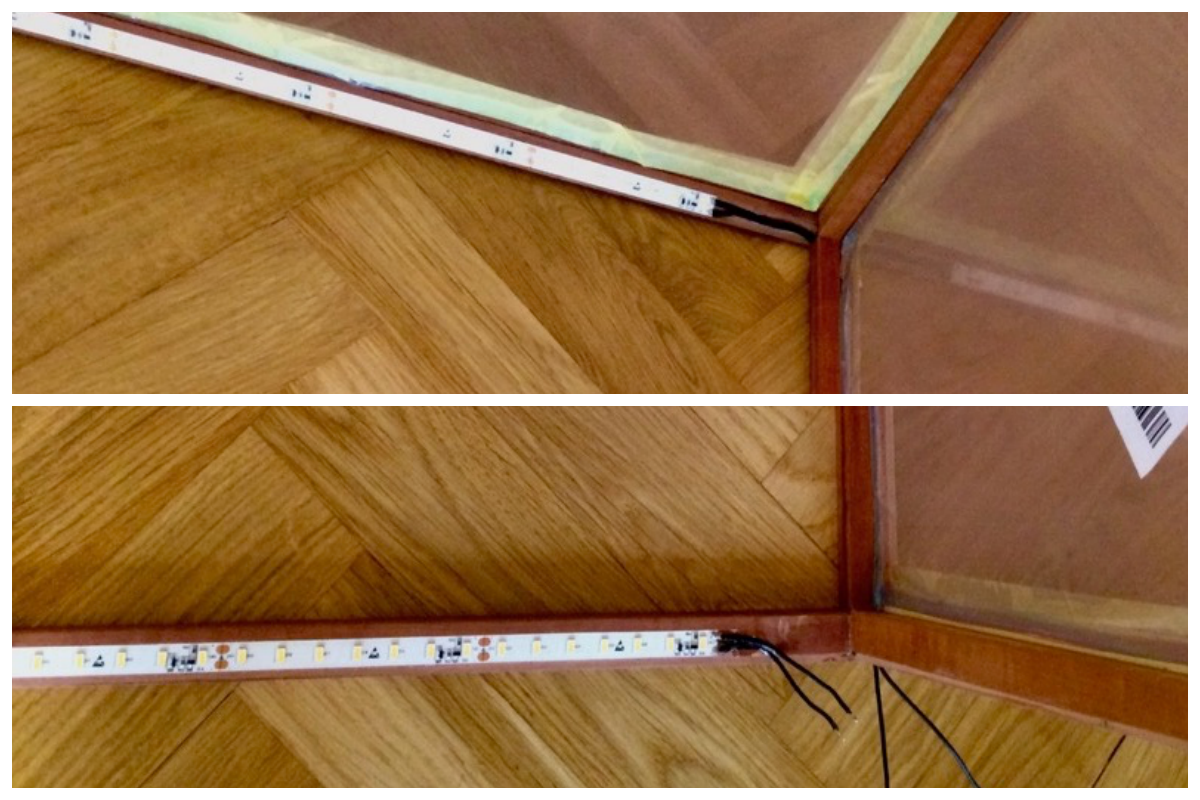
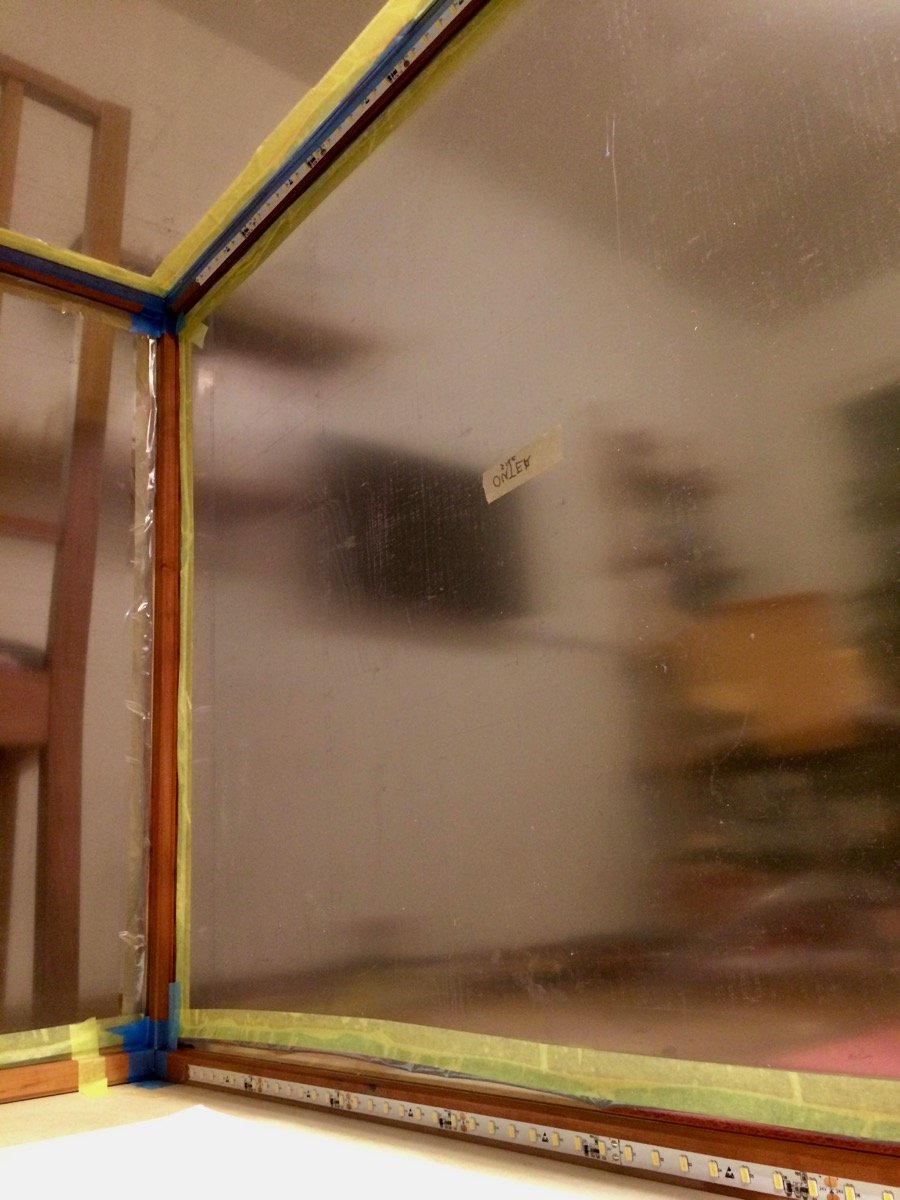
LED strips as seen from the inside. Sorry for the photo quality, but the strips are in recesses, should not be visible for the observer.

Now the case is in the corner, hiding from the Admiral
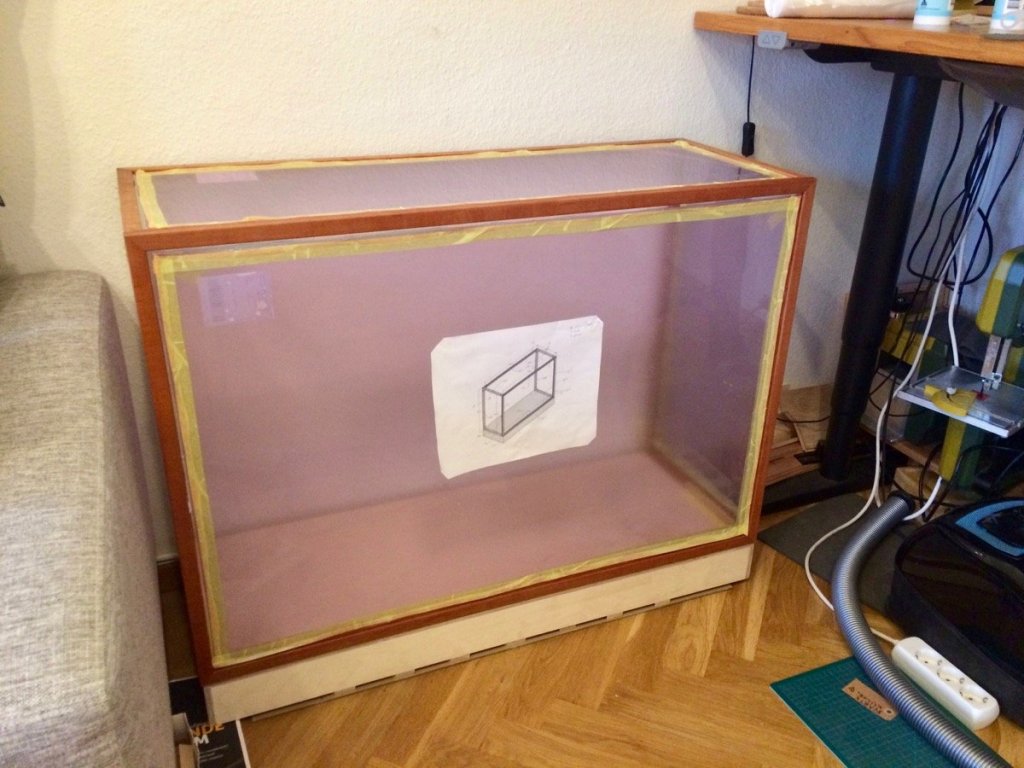
Just a few things left:
1) Mount the base on the wall, if it is too heavy - remake it from a thinner plywood.
2) A bit of planing to ensure good fit to the wall
3) Plank the case "floor"
4) Glue the case to the base
5) Add a decorative pear skirt to hide the base
6) Sand everything flush, re-oiling
7) Connect the wiring, install the light switch and the dimmer.
- paulsutcliffe, cog, RichardG and 17 others
-
20
-
Thanks for the nice comments!
Kurt, Carl, wife and kid are on vacation, so no problems with that
They are coming back tomorrow, I made it before the deadline!
Pat, thanks for the warning! Though I do not have any "painter masking tape" touching the glass, it is a protective film that the glass was shipped with. So I guess it should be ok to keep it on the glass a bit longer. No problems with sticking or breaking when I peeled it from the edges.
Kurt, youtube and MSW are the only sources. Without a possibility to have a real workshop, the only thing I left with is to subscribe for a dozen of good woodworkers on youtube and watch it before going to sleep. And, actually, quite a lot of good advices are here on MSW, even though it is not officially a "woodworking forum"
-
-
-
-
Ooooh! Is it CNC cut or hand carved? Never saw such a smooth carving in this scale!
Any chance to see this model in person in Rochefort, October 2018?
")
- mtaylor, aviaamator and albert
-
3
-
Back from the holidays, finishing the case.
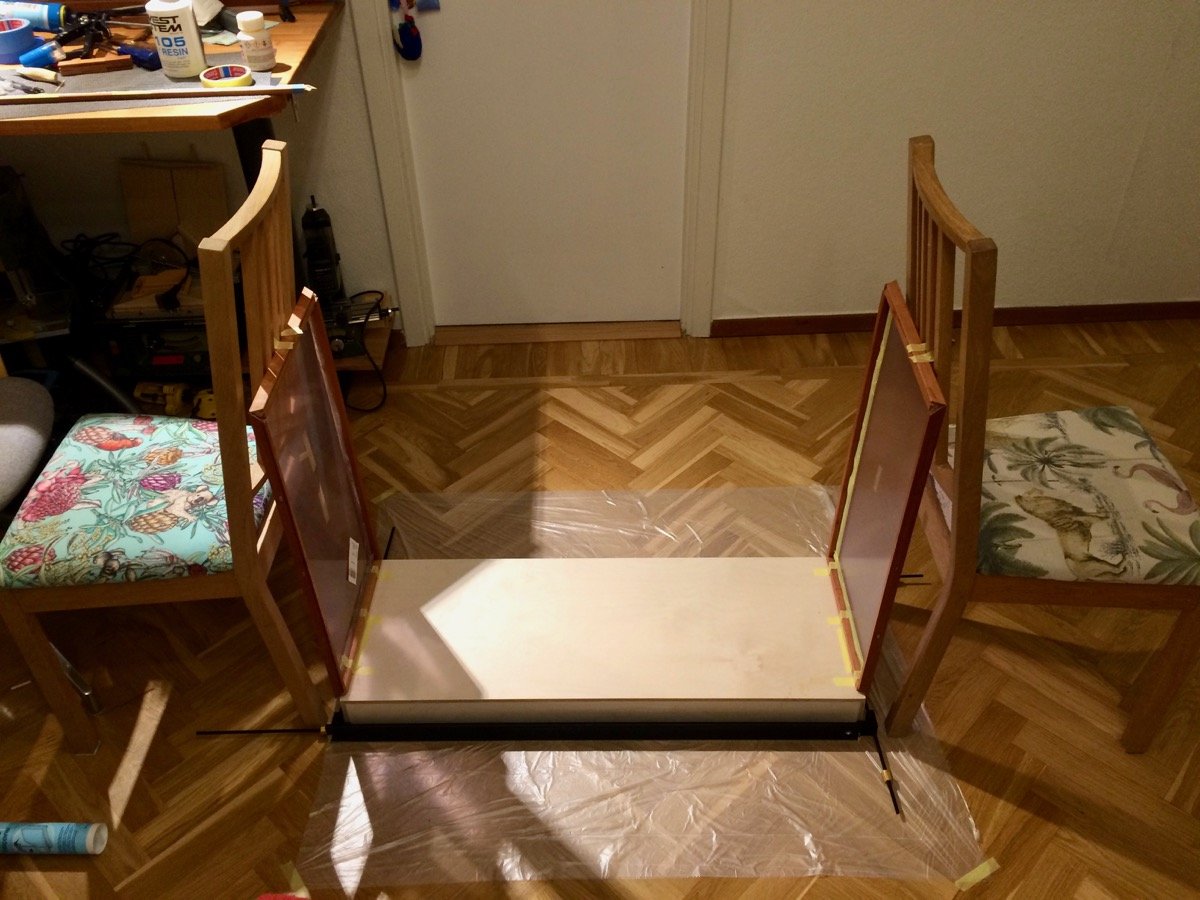
The riskiest part - final assembly and glueup. This design is really not good when it comes to assembly and overall stability - each individual part is thin and bends easily, but once all parts are glued together - it should be strong enough for the purpose. I hope
Though three-way miters of this size are not super strong either. I am using a good epoxy (West Systems), pre-soaking endgrain with freshly mixed epoxy, and then using a gel-consistency epoxy 10min later for the final glue joint. It works well on test pieces.
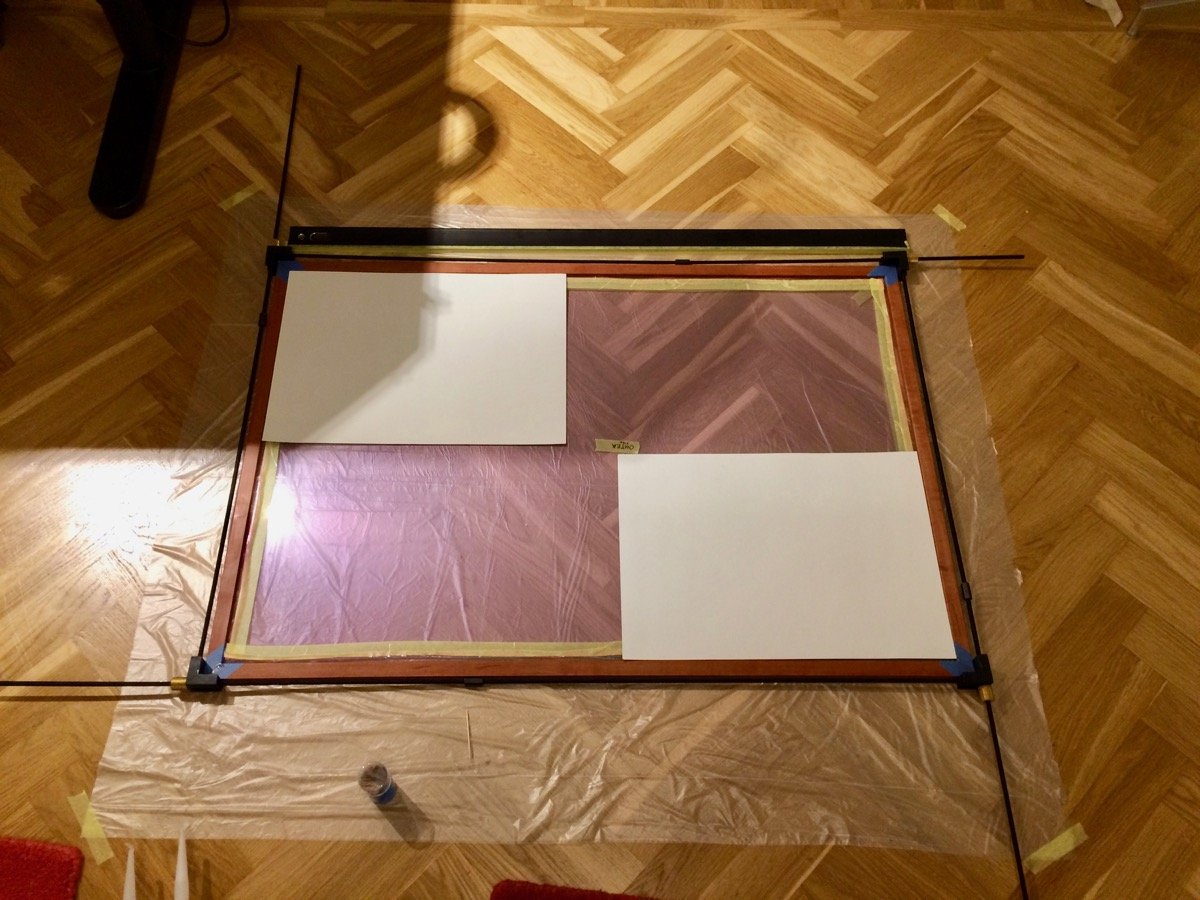
Since there is no straight point of reference - straightedge is necessary every time.
Using A3 drawing paper as a square (checked it for distortion first):

Holding parts together is tricky, need to avoid bumping into those chairs

Last minute adjustments - forgot to add a hole for the top strip wiring:

Phew, now epoxy & silicone gel cures, and I hope there is a beauty under this masked mess:

Looking through the eyes of a sailor, who would get locked in here
Aaaaand a moment of truth is scheduled for tomorrow evening - all masking tape would be removed (except glass protecting film, I will keep it until the very end), hope it is not a failure. Fingers crossed!
- dvm27, GrantGoodale, Canute and 14 others
-
17
-
-
Fantastic guide, thank you!
- Nirvana, thibaultron, mtaylor and 1 other
-
4
-
On 19/12/2017 at 4:54 AM, Kurt Johnson said:
Mike, Magnets, cool, I never thought of that! Is that an original idea or have you seen it done before? I know you are quite far from mounting her, but I always thought certain preparations like holes, nuts, bracing AND magnets had to be considered very early on when it’s feasible and easy to do. That’s why I asked. Are rare earth magnets that are small enough, strong enough to secure a model?
Hi Kurt,
Yes, magnets are small enough - I ordered a number of them in different sizes, they are quite capable.
In this case, they do not even need a lot of force - just enough to prevent the model from tipping on a side.
I apologise for this super ugly touchpad-drawn sketch, but it shows a cross-section of a model, somewhere in the aft section of it.
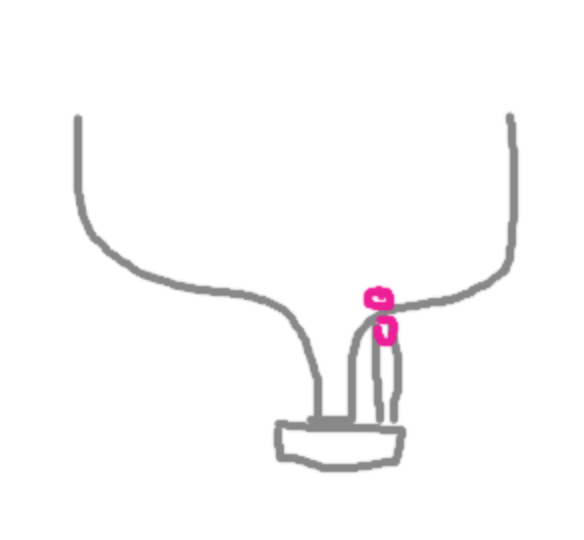
The false keel rests on a slippers, and magnets (red circles) connect together the launching cradle and the hull. Magnets are glued under the planking, so they will have 1.0-1.5mm of wood between them, but this should be good enough. The model rests in equilibrium position, there is very little force to tip it over. And multiple magnets could be installed, there is enough point of contact between the hull and the launching cradle. It should be also very simple to remove the hull from that cradle, at the same time the cradle is barely visible. I am not a fan of screwing a model to pedestals (semi-permanently).
I haven't seen it anywhere, but probably some modeller somewhere might have done it. Sound pretty straightforward, and if the idea is a failure - I can always switch to a traditional symmetrical cradle, that supports the hull from both sides. The magnet would be still in the hull, hidden inside it, should not cause any problems later on.
Thanks all for the nice feedback!
Merry Christmas!
Sailor, "poppets" are the vertical timbers, or it is another name for the launching cradle?
-
Greg, thanks! I am travelling now, and it is really hard to remember all that without peeking into the TFFM book every time
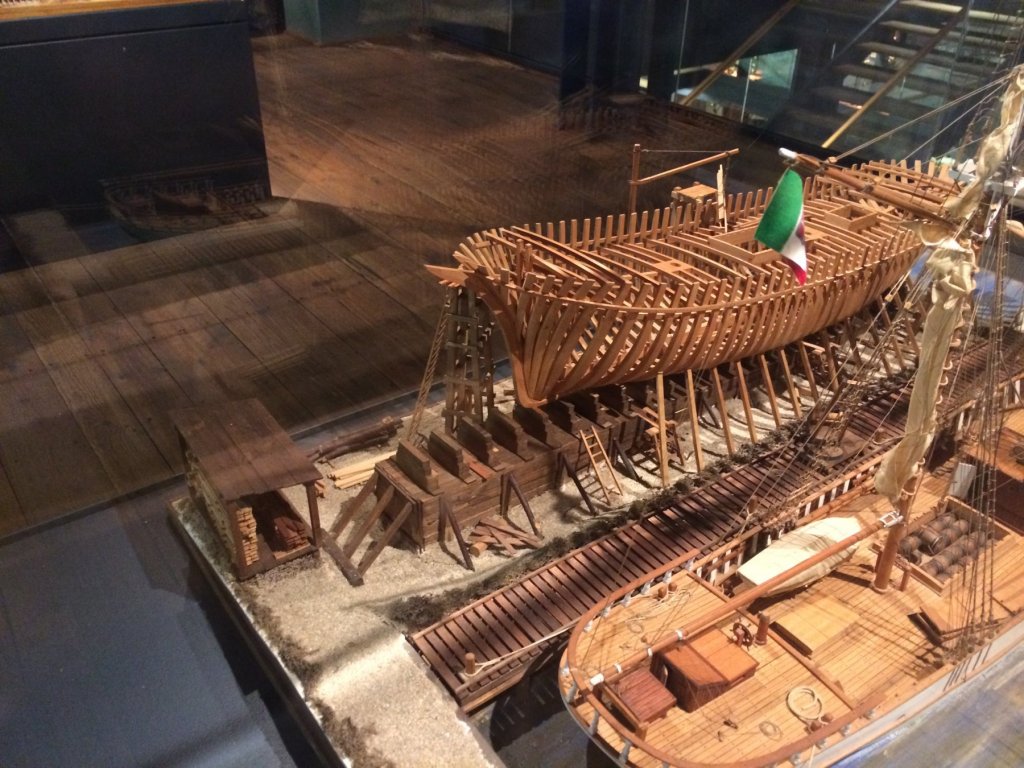
There is a great shipyard diorama in the same Hamburg museum, which includes various supporting structures used when building the ship. Really worth a visit, if you will ever end up in Hamburg. There are 9 floors in the museum, where few of them are filled with models!
- garyshipwright, druxey, Canute and 5 others
-
8
-
Yes, Master Korabel kits are basically unknown outside of ex-USSR countries. They are not really trying to market it internationally, there is even no english website, nobody knows about these kits.
At the same time, I think they are perfect for beginners. For that price, you can only buy some Artesania Latina kits, and the quality difference is dramatic. This one is a pleasure to build, while AL was a constant struggle (I had AL San Francisco 2). Like trying to bend thick walnut planks vs just gluing in thin pre-cut and pre-shaped veneers. Day and night!
With AL, I am not sure that creators of the kit were even trying to build it according to the instructions. Here it is clear that the designer spent enough time to make sure that parts really fit together.
And don't even get me started on quality of wood (pear and ebony in $100 kit!) and fittings. They are really good, brass and photo etch instead of cheap castings.
Also, it seems to be really authentic design, not a copycat of some other kit in the market.
-
Kurt, for the next few years it would be still in the building jig, at least until I plank it and install some deck framing. Too risky to remove until then, the hull will get skewed and frames will go out of alignment. When in the jig, the keel is hanging in the air, and the hull is fixed in place by gluing frame tops to the jig. For example, you can see it on this photo: https://modelshipworld.com/index.php?/topic/7297-oliver-cromwell-by-mike-y-148-1777-pof-hahn-style/&do=findComment&comment=436953
But if we just speculate and throw ideas around - I was thinking about a small building slip, like it was in real shipyards (wooden blocks and slippers under the keel). And a tiny supporting structure (not sure what is the name of it) on the planked side of the hull, that follows the shape of the hull underside. No supports on the bare-frames side. To make it work and avoid tipping over, planned to use magnets - one glued in between the frames, hidden under the planking, another is embedded into the supporting structure.
Here is an example from the maritime museum in Hamburg. With magnets, there should be enough support even without these tall vertical timbers that "hug" the entire hull.

This is just a plan so far, but since magnets will be totally invisible - I will glue them in strategic places just in case, maybe they will become useful later.
Magnet mount will also make it very easy to get the model out of the case, which necessary to show the model where two sides are very different (I will leave one side fully bare, and one side fully planked).
- lmagna, garyshipwright, albert and 4 others
-
7
-
Totally agree re knife, but secondary bevels are typically for chisels and plane blades - they have a larger contact surface when sharpening.
And there are way too many sharpening methods, all of them yielding a similar quality results
So many personal preferences!
- Canute, thibaultron and mtaylor
-
3
-
Carl, Grant, Lou, Brian, thanks for the comments!
They are all passed to the Builder In Charge, and stimulate her to learn English faster, to be able to use The Internets and communicate with other people. She will have enough opportunities to see the rude and shady sides of the internet, but it is good to show the bright and kind communities as well!
Lou, please do not use this log as a reference though, I am doing some shortcuts where needed, not following the instructions precisely (just looking into the pictures). So, as you see, some mistakes were already made. Phoenix is the same kind of construction, as I understand - so it is a really good kit, hope you will like it!
- greenstone, Canute and cog
-
3
-
Thanks everybody! I hope the recipients of the gifts will appreciate them. And promising myself "no more side projects until the display case is finished, and then - work on the internal planking of the hull!"
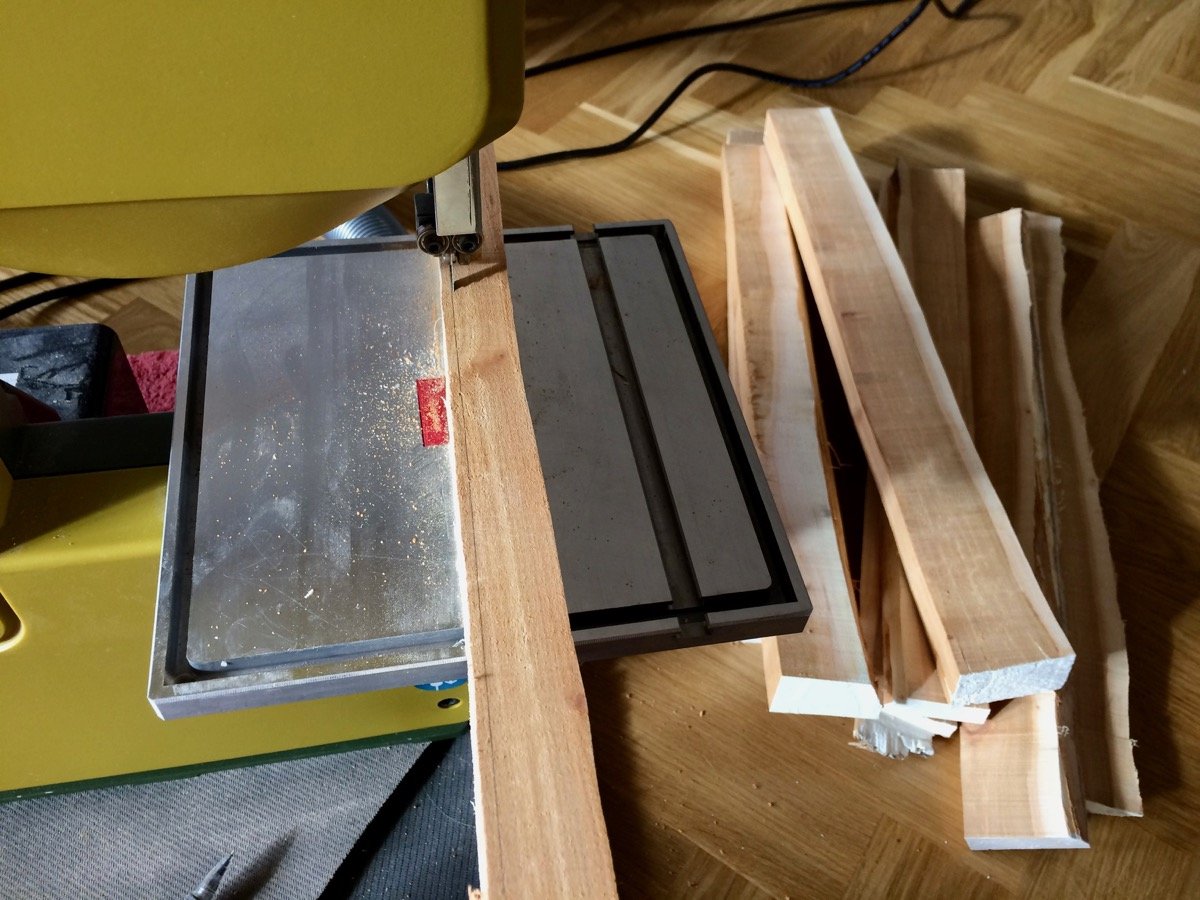
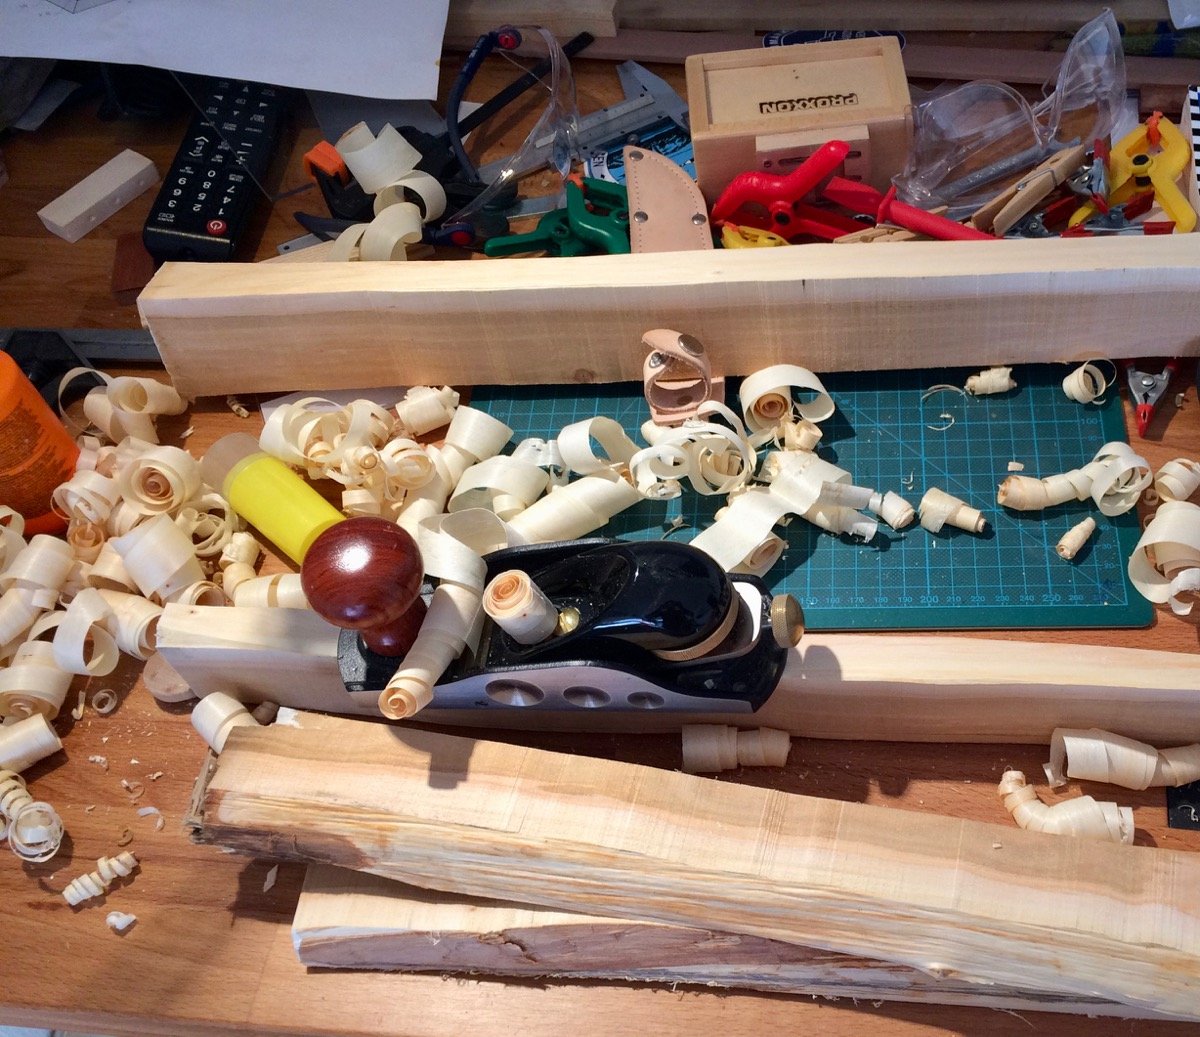
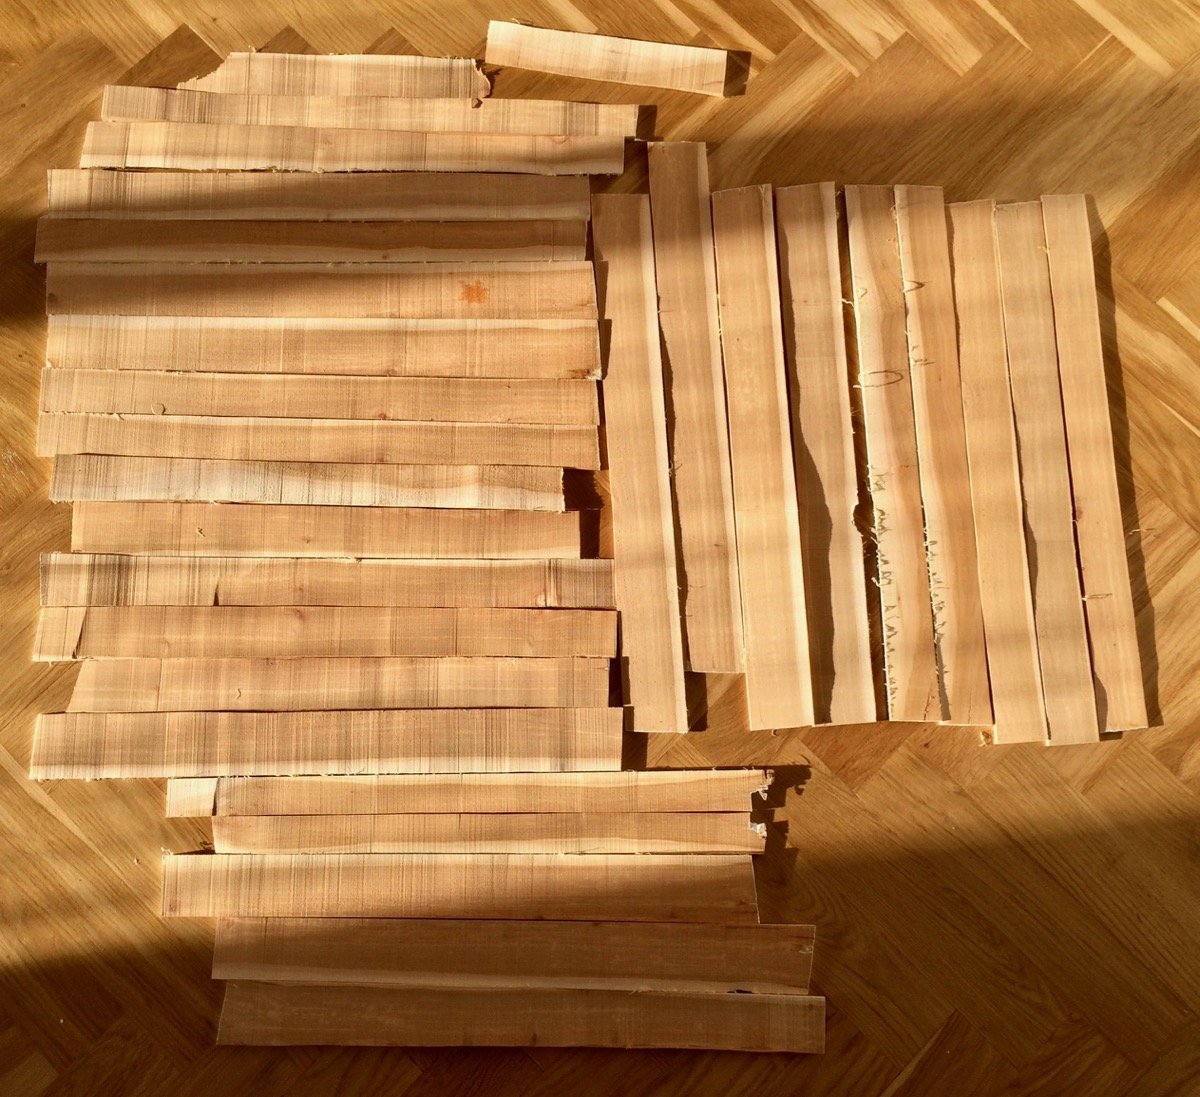
Kurt, I sliced the first log into small planks, planning to plank the "floor" of the display case with them, in diagonal pattern. This wood is too soft and grainy to be used on a model (no surprise), but I hope the colour will look good. Haven't tried to apply finish to it yet, the thin planks are drying and waiting for their turn.


-
21 hours ago, Gaetan Bordeleau said:
Also it would be difficult to recreate a perfectly aligned bevel each time.
That is what the jig is helping to solve. I have a simpler Veritas sharpening jig, but even a simpler version works perfectly. The sharpening time decreased significantly.
- Canute and thibaultron
-
2
-
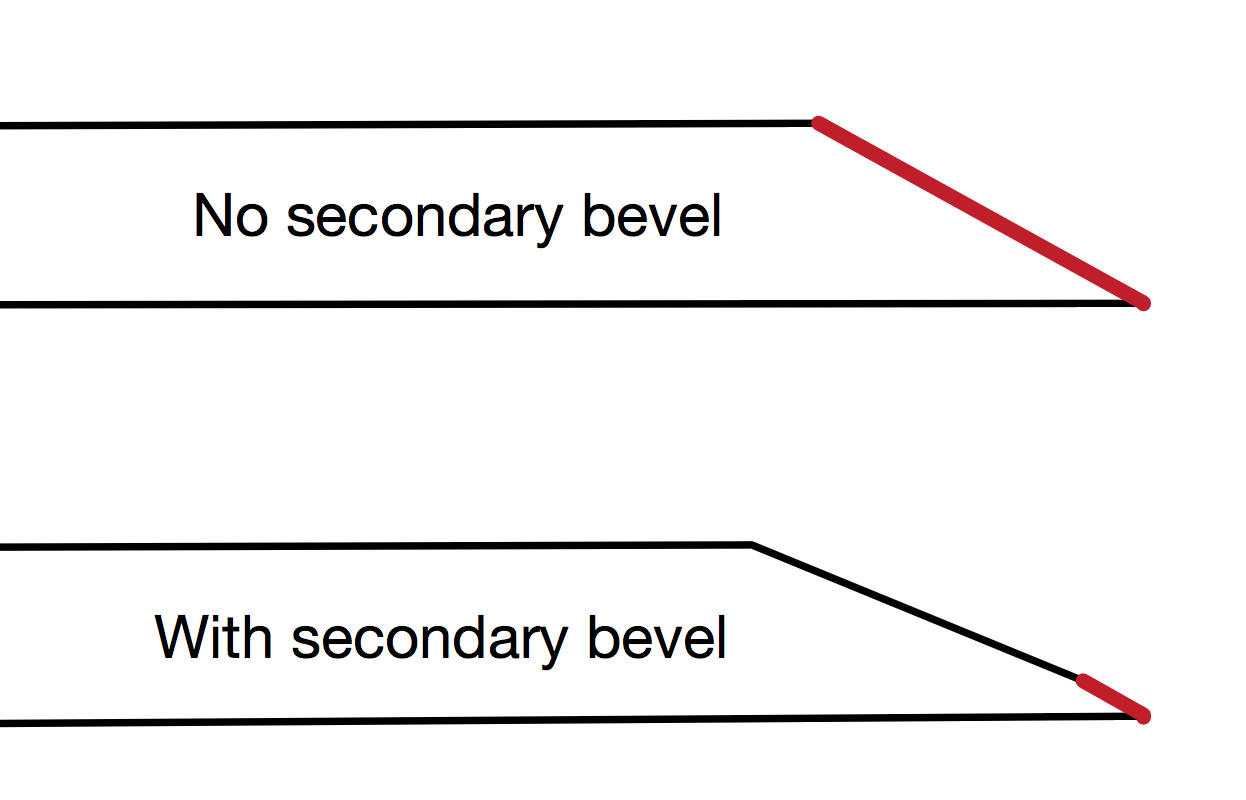
It significantly reduces the surface that needs to be sharpened. Instead of a full surface of a blade contacting the sharpening stone, only a tiny strip in the front contacts it. Hence sharpening takes much less time.
Rough sketch, red is the part that is actually sharpened and contacts the sharpening medium:

Maybe there are more benefits.
- mtaylor, Ryland Craze, thibaultron and 3 others
-
6
-
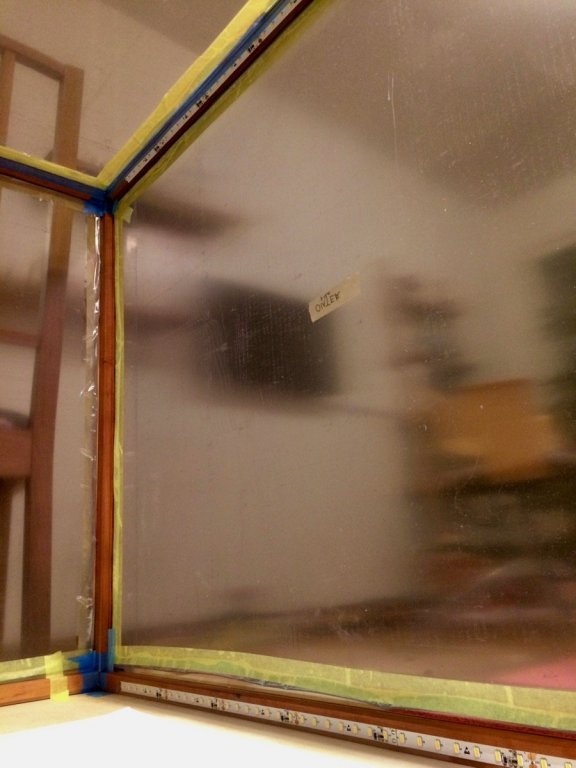
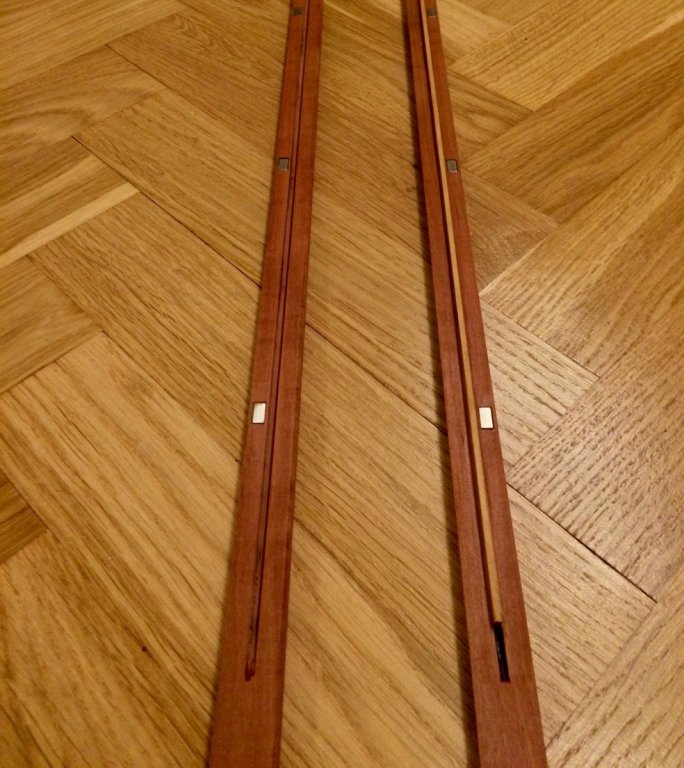
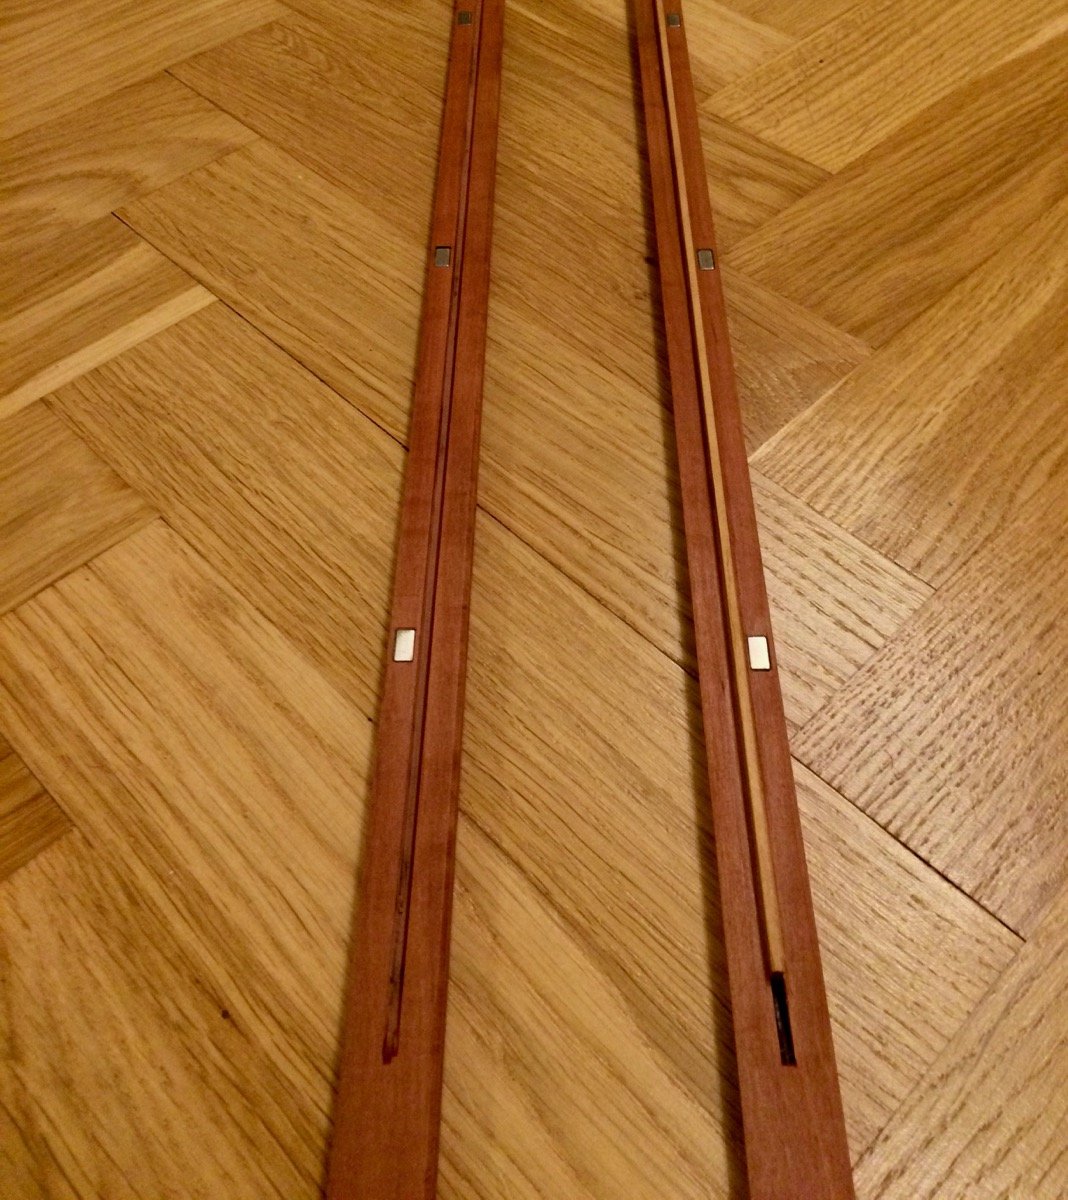
Going back to the Oliver Cromwell's case - the last set of sticks is done. These are the top ones, that are a bit tricky.
These pieces are right on the viewing angle (or a bit above), so I tried to make them as thin as possible. A the same time, they should not sag.
To make them stiffer, I added a boxwood strip that joins them tightly, adds a bit of T-profile and ensures proper alignment:
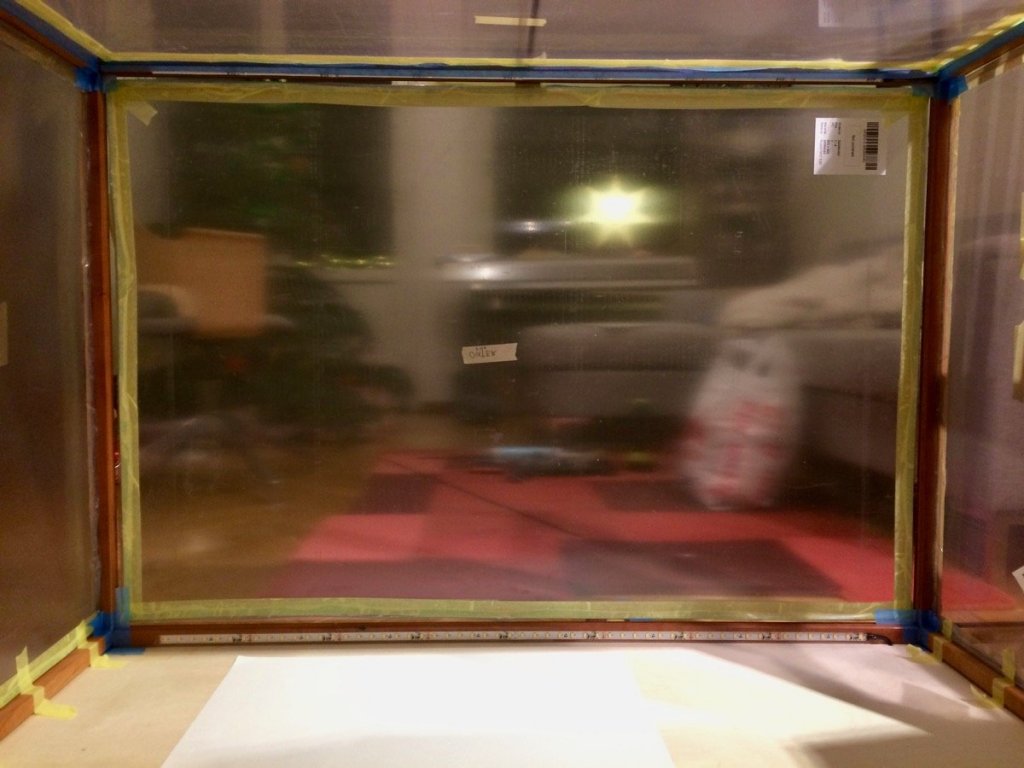
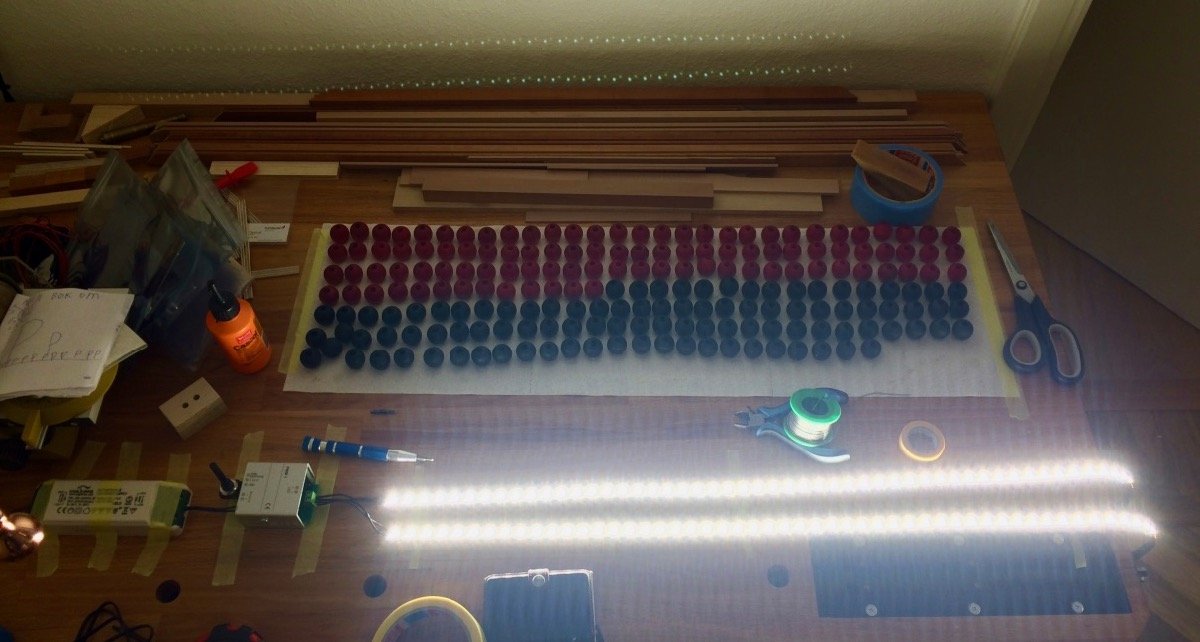
LED strip is mounted on a 45 degree angle, facing the inner side of the case:
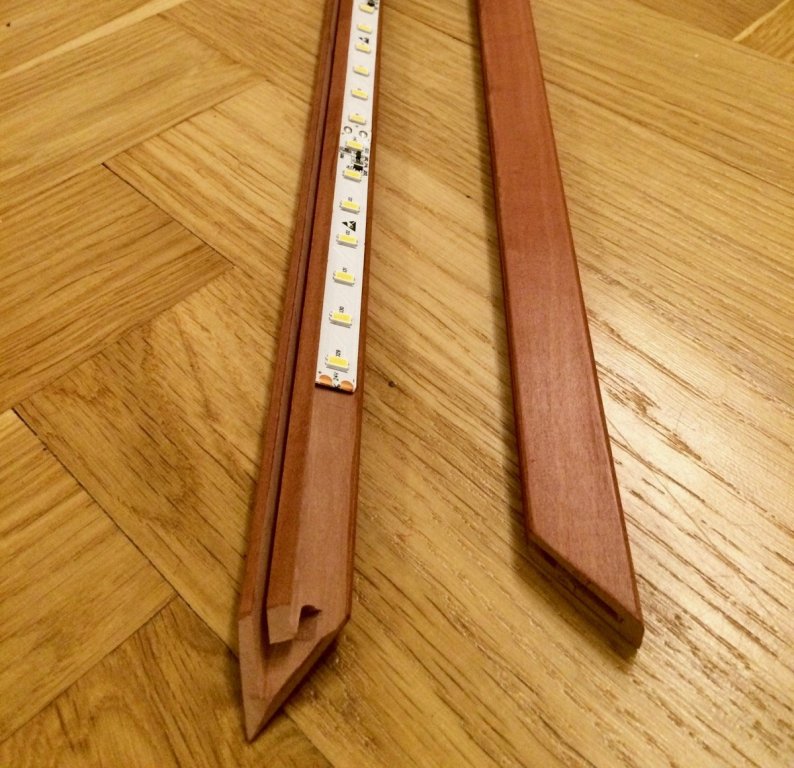
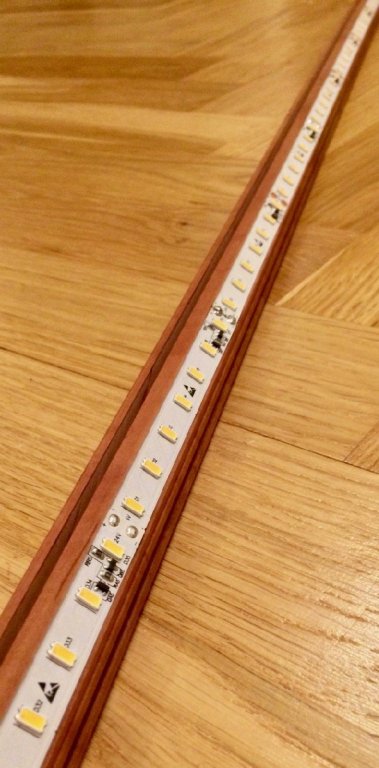
There would be two strips running in parallel, one on top of the case, one in the bottom. Testing both:

The strips are pretty high quality, so hope it would be ok!
Planning to finish the glue-up and assembly after the holidays
-
This log was quiet for a while, but I have a number of excuses:
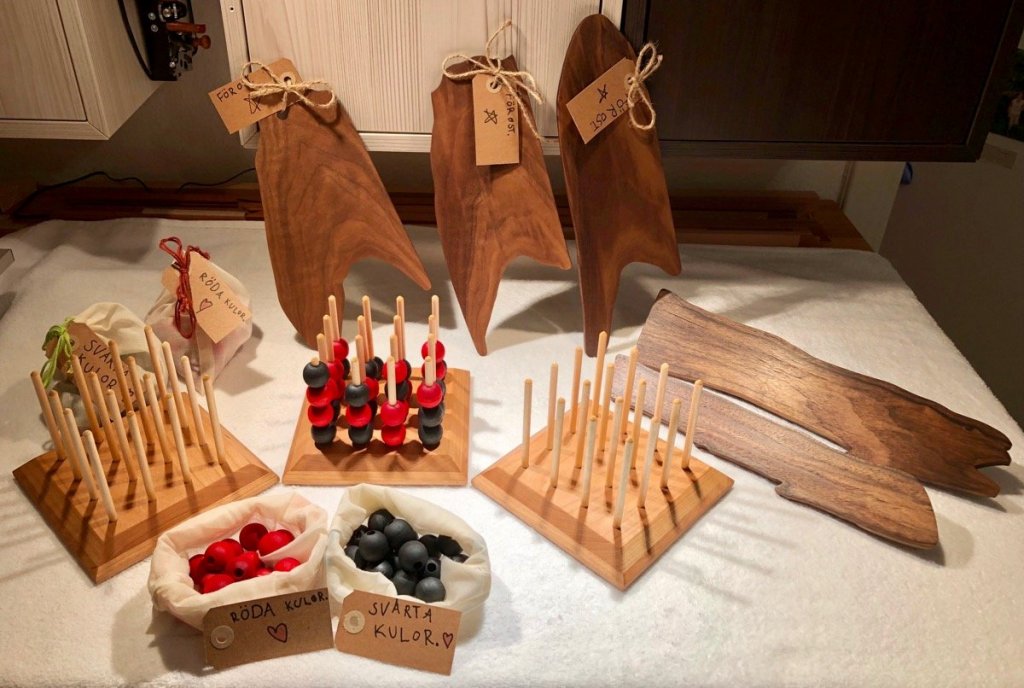
These are various Christmas gifts
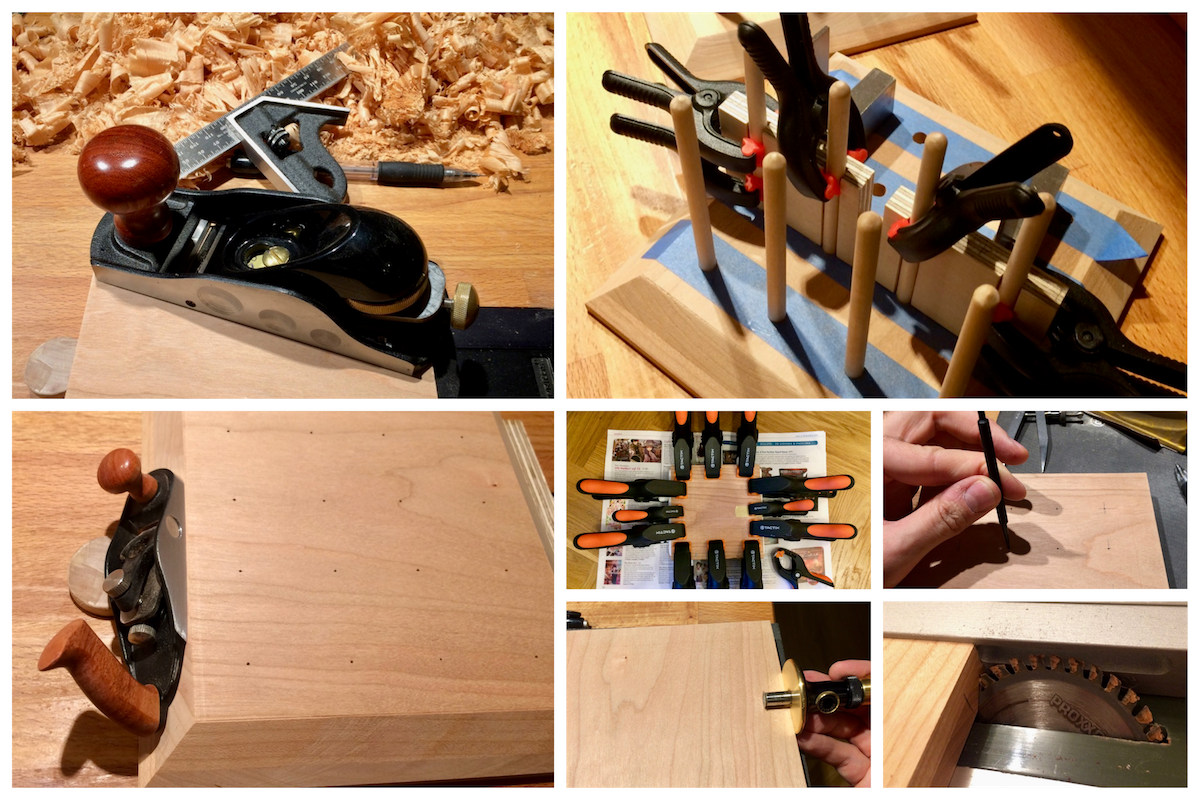
The "4-in-a-row" game took a lot of time to make (especially without a drill press):


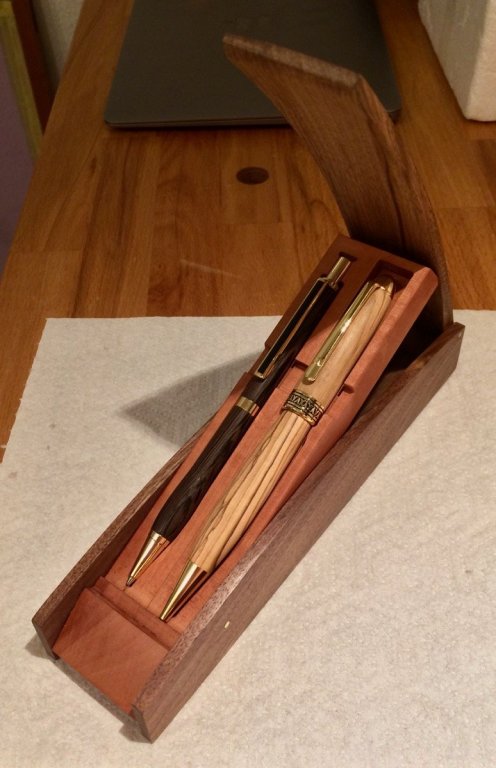
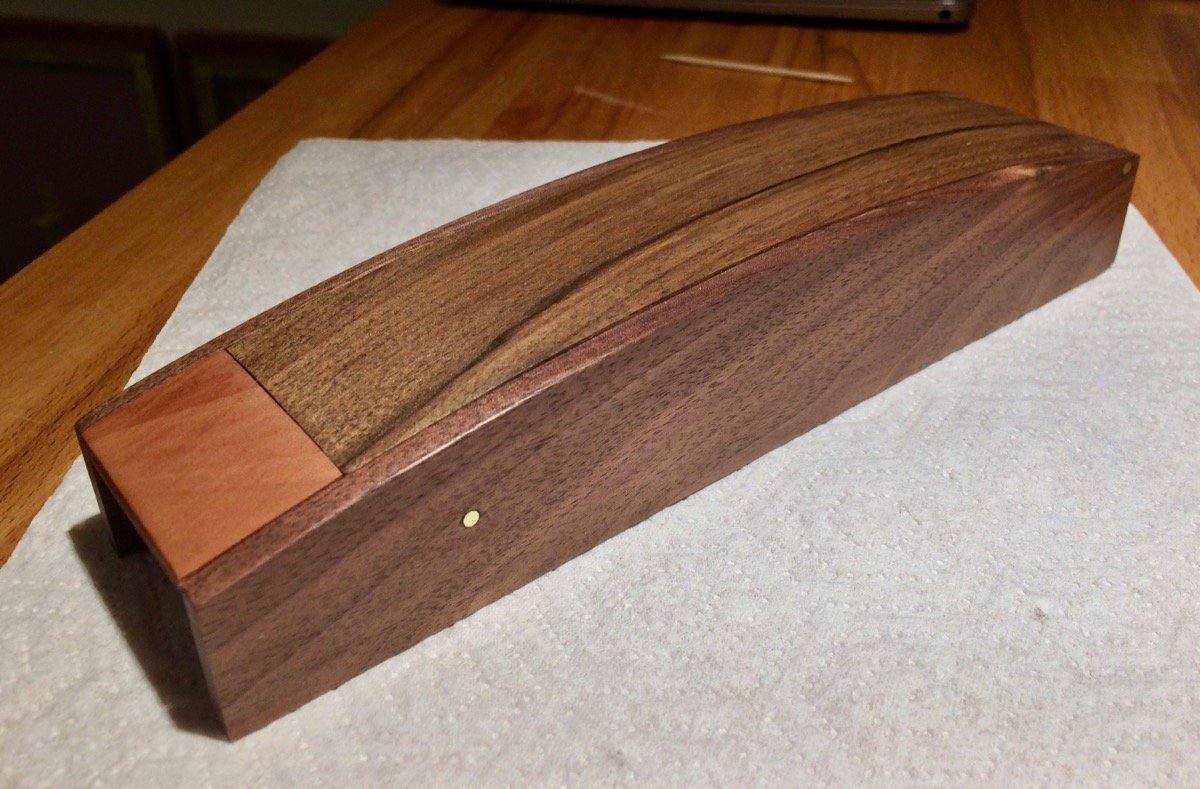
This is a turned pen & pencil set (spalted olive and wenge), made for my father who loves writing. In a click-to-open box (two kinds of walnut, swiss pear inside, brass pins):

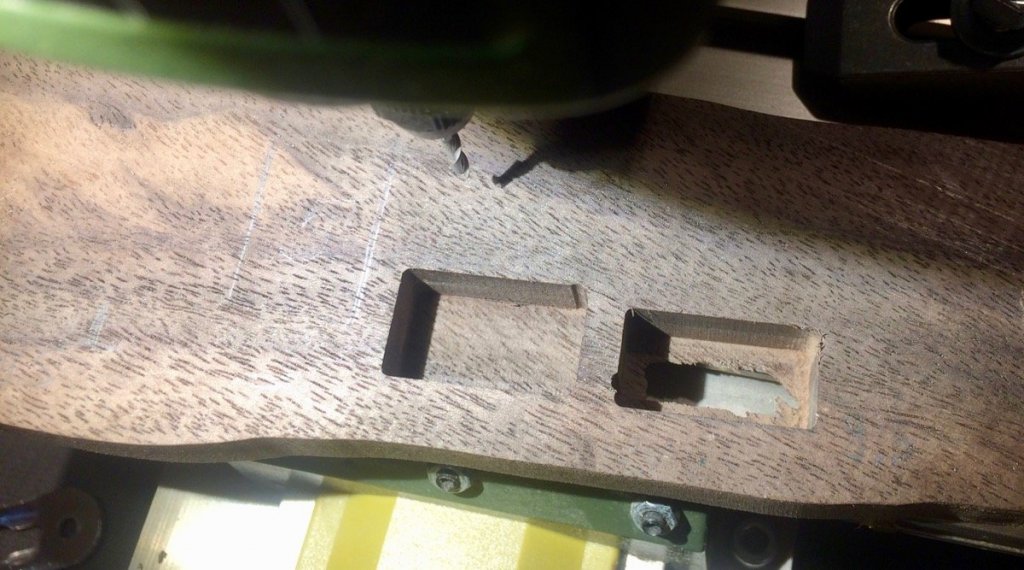
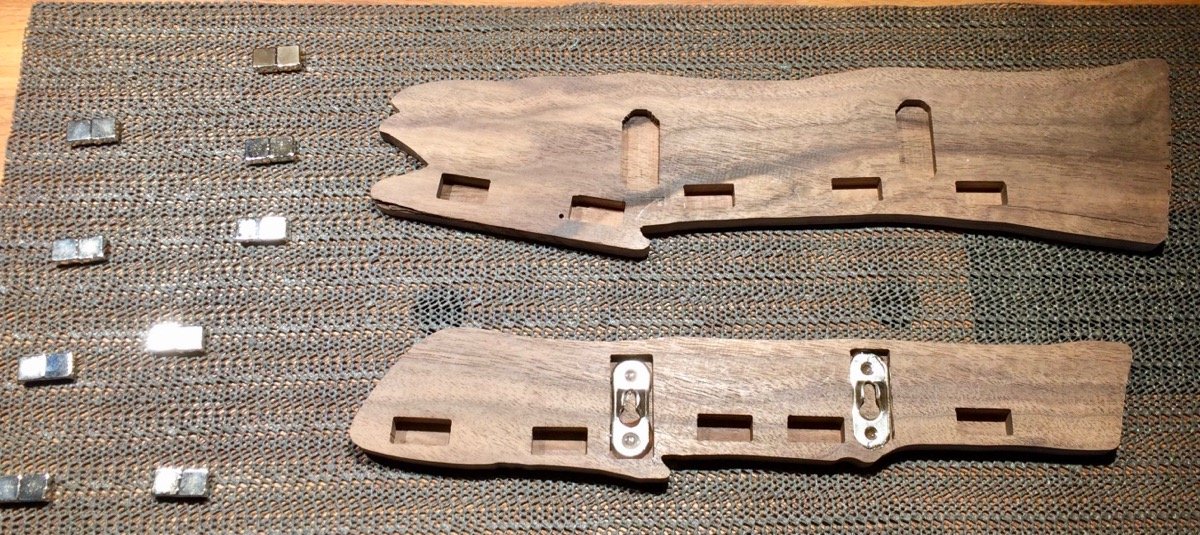
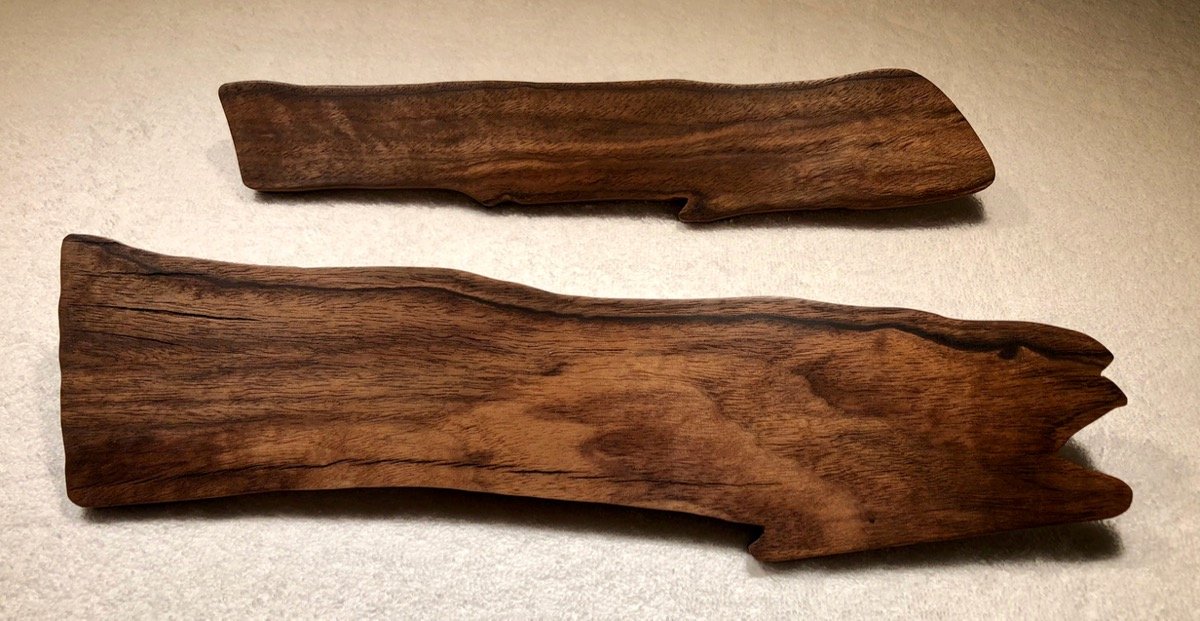
Magnetic key racks. They are made of a pretty interesting walnut plank following the grain pattern , one ended up looking like a fish. This was not the intention, but this fish was just hiding there
Milling the magnet slots was quite tricky, because the "wall" thickness should be around 0.5-0.8mm to make sure the magnet is close enough to key ring to hold it securely, and walnut is quite fragile on that thickness. One tiny measurement mistake - and the whole thing would be ruined. I ruined one, made a mistake when counting mill rotations:
Two other surived:

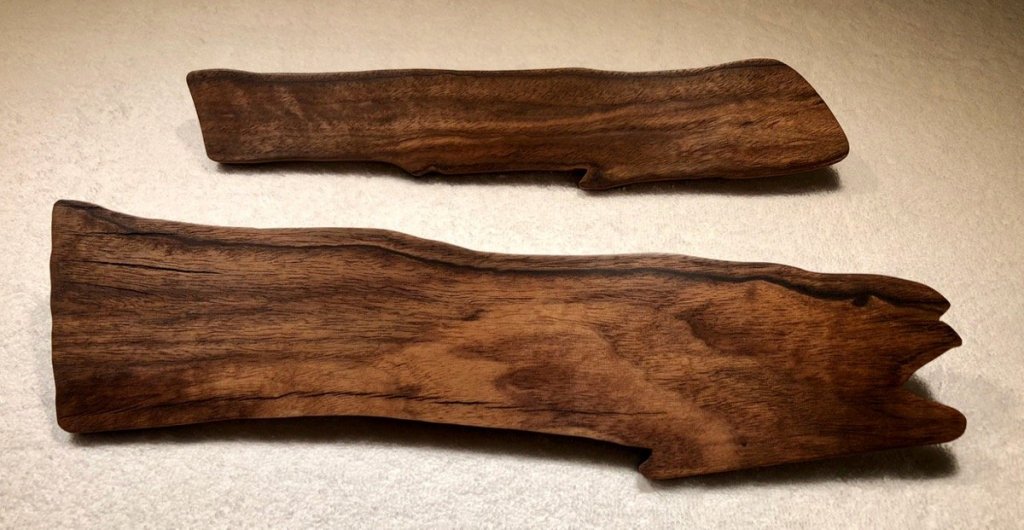
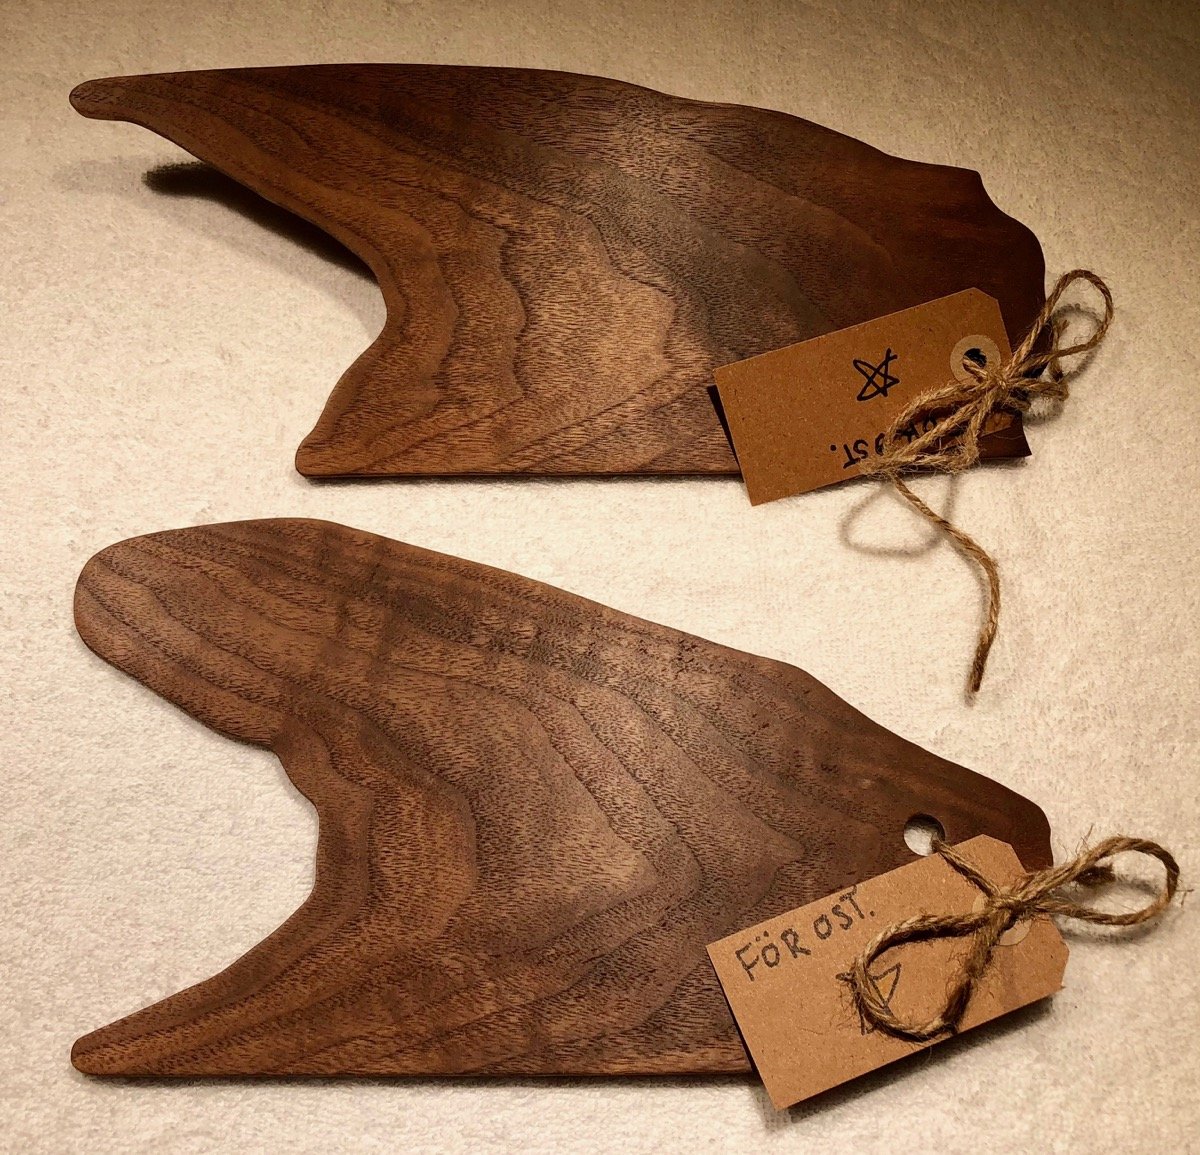
And some cheese boards are also cut following the grain, kinda fish-like as well:

- Bluto 1790, mtaylor, gjdale and 11 others
-
14
-


Beavers Prize 1777 by Mike Y - 1:48 - POF - Hahn style
in - Build logs for subjects built 1751 - 1800
Posted
Thanks everybody for the support! That really helped")
It is proportional to the hull, but the biggest element on the entire wall, look out of scale comparing to shelves, TV, etc. So the conclusion is simple - I need to upgrade to a bigger wall (in a bigger apartment), this one is getting too small for the model. Bigger TV is also an option, but we are watching it so rarely (like 10 hours per year) that spending lots of money on a big screen does not sound exciting..")
Also, I booked a part of the case into the "kid" account - Daria's model will be in the same case, thus saving space by avoiding a second case.
Carl, all the bright parts of the case will disappear - instead of staining, it would be planked with our self-milled willow and I will add a pear "skirt" around it below the glass. That is coming relatively soon, but with all upcoming business trips - probably will take a month.