Mike Y
-
Posts
1,557 -
Joined
-
Last visited
Content Type
Profiles
Forums
Gallery
Events
Everything posted by Mike Y
-
 Indeed! Stopping on the exact right moment to avoid scratching the wood - that is quite a skill. Will practice more, thanks for the inspiration
 -
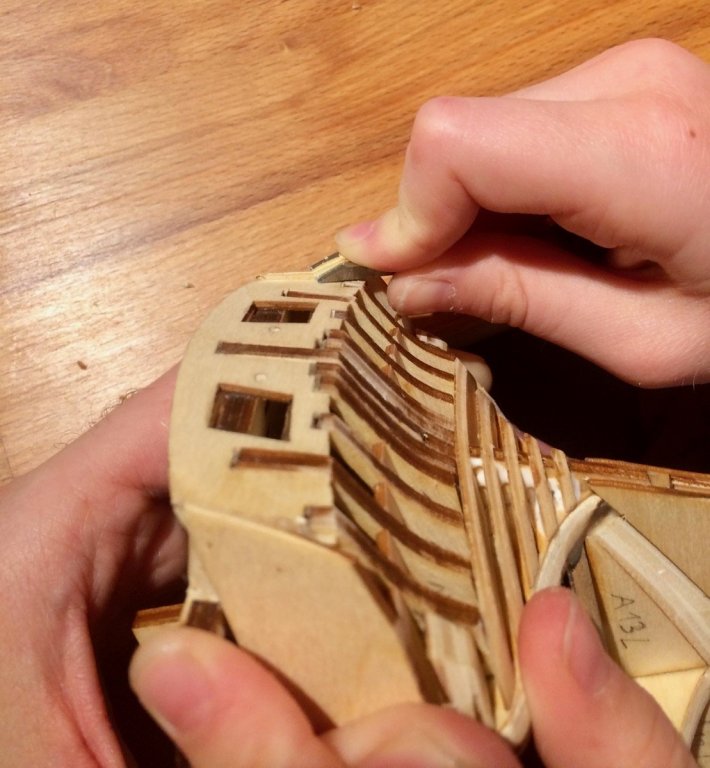
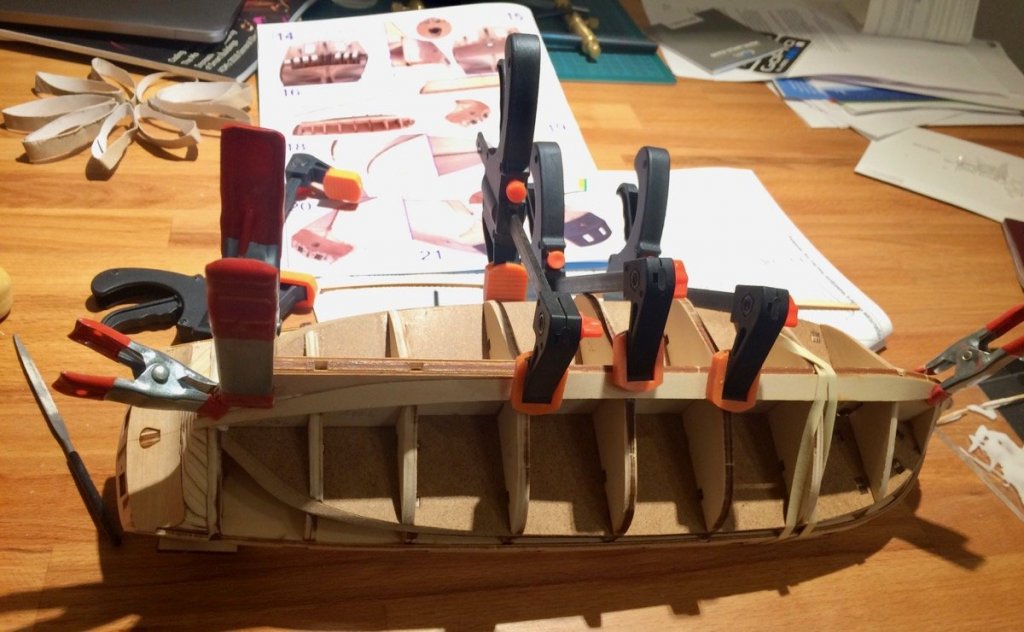
Not much happened, we were out of town for three weeks Using chisel for first time! Starting the first layer of planking. Clamping is quite tricky, I should have prepared better
-
This may be a stupid question, but... How do you make a brass nails flush with the wood? The only way I know is sanding, and it is hard to do on convex surfaces or in any confined place. But on your photos I see brass nails perfectly flush, and in places where I can't imagine getting with a sanding block. What is the trick?
-
I doubt anybody romanticizes the life on board. It is basically a floating prison with an extremely high mortality rate and inhumane conditions. Lots of people on board were there not on their own will. The ships are lovely, but trying not to think about how they were used daily... In a similar way, we can admire a nice castle or a cathedral - but both were most probably built with a slave-like labour and a whole lot of people died during construction.
-
Looks very cozy! It looks so much better without a glass... How do you deal with the dust?
-
SS Mariefred by captainbob - 1:96
Mike Y replied to captainbob's topic in - Build logs for subjects built 1901 - Present Day
She is still in service, working daily during the summer. Definitely has its charm! I was surprised how quick it is for being an old coal-powered ship. Easily keeping up with modern vessels. I do not remember 100% if the one on the photo is Mariefred or not, because Mariefred typically sails over lake Mälaren to Gripsholm, but this photo is from Stockholm archipelago of the Baltic sea. However, when being on board of Mariefred, it is much faster than expected. Of course, let me know if you will need to get some photos of it - during the summer it should be easily possible.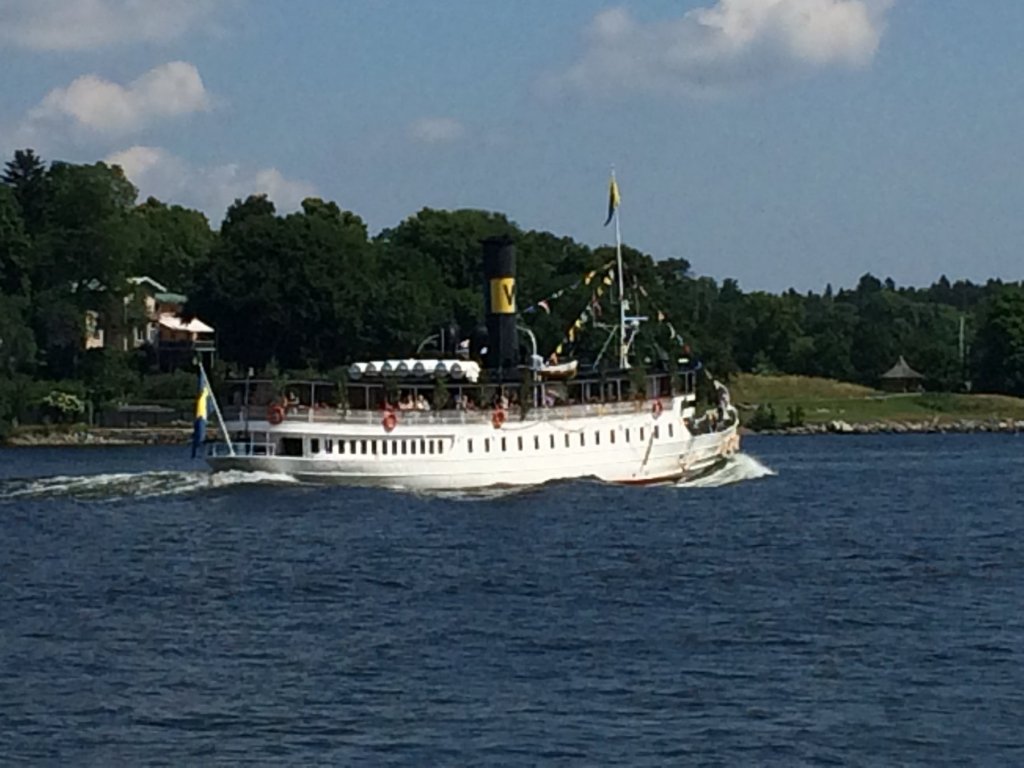

-
Now there are two fresh logs of 74! Quite a thing to follow! Thanks for sharing the details, experience and methods. Your build logs are very educating, I learned a lot from them. Planning to learn even more from this one! Also, considering the size of your models, I am really curious how they look in the interior. They are as big as a table, how do you manage to find a place for the display?
-
Yes, the IKEA table BEKANT is great, I still love it as on the first day I bought it Note that IKEA sells the electrical frame separately as well, so you can put any solid tabletop on it, and not being limited to the default office-style top. Just a few corrections: 1) The one with cranking mechanism have a much cheaper frame and wobbles too much for our purposes, I think. Could be good enough for drawings or tools, or if you do not mind the wobble. The electrical (bekant) is very stable and the wobble is close to non-existing, so it can be used as a main workbench. 2) The electrical one (BEKANT) has a continuous adjustment, not just 2 or 3 positions. There are two buttons - up and down - that allow to adjust it to any position between min and max. Just hold the button, table moves, release it when you are in the desired position. It is roughly 5-7sec from the lowest to the highest position.
-
I was also planning to make a boat of this style (one side fully planked, one in bare frames), following the similar style of the model. But now I see it implemented in your model - and it indeed looks great! Thanks for confirmation!
-
Looking forward for the photoshoot of the finished model! It is a true marvel, accuracy and colours are incredible.
- 290 replies
-
- 2
-

-
- confederacy
- frigate
- (and 1 more)
-
ancre Le Fleuron by juzek - 1:27
Mike Y replied to juzek's topic in - Build logs for subjects built 1501 - 1750
Your speed is impressive! How many hours per week do you spend on the model? -
That was too quick! What are the plans for the next project? Or you would take the display case build first?
- 728 replies
-
- 2
-
-
- le fleuron
- 64 gun
- (and 1 more)
-
Chuck, this is such a shame! I truly feel sorry for what happened with your designs. Quite some russians are stuck in the anti-american soviet mindset, where screwing up a westerner is not a problem, maybe even a good thing. Just give it 25-35 years, the problem will disappear naturally.. Not sure if it was an optimistic statement or not
-
Pandora by marsalv - FINISHED - 1:52
Mike Y replied to marsalv's topic in - Build logs for subjects built 1751 - 1800
The blocks look amazing! What is that chuck on your Proxxon mill? And a few curiously looking milling bits that you used for that blocks Do you mind sharing s link to them? -
ancre Chebece 1750 by Jeronimo - FINISHED
Mike Y replied to Jeronimo's topic in - Build logs for subjects built 1501 - 1750
The frames are soo thin! Eagerly waiting for the hull fairing part -
If you do not use any finish - how do you avoid fingerprints that sometimes tend to leave darker (oliy/greasy) spots on the wood? That natural look is awesome, but is it possible to maintain for a long time?
-
Bob, the model looks great! I can't imagine building that many frames, you ended up with a bery sweet hull after all! Is there a build log? Can't find it in your signature
- 3,618 replies
-
- 6
-
-
- young america
- clipper
- (and 1 more)
-
Ordered few times from them - no problems, quick service, even in english!
-
Thank you, some good finds there!
- 6 replies
-
- 3
-
-
- Naval topics books
- Pre-copywright pubs
- (and 1 more)
-
This is a true dream shop. Congratulations! Now looking forward to see the build log of a model from the shop!
-
Precision router base for Dremel 4000 etc.
Mike Y replied to vossiewulf's topic in Modeling tools and Workshop Equipment
Yes, it is not StewMac, that is why I was giving a link to avoid confusion. But should have been more clear. Well, for all the good purchases I did recently, there should be a bad one as well! -
Precision router base for Dremel 4000 etc.
Mike Y replied to vossiewulf's topic in Modeling tools and Workshop Equipment
Got this tool today: http://www.ebay.co.uk/itm/132022884833?_trksid=p2060353.m2749.l2649&ssPageName=STRK%3AMEBIDX%3AIT Do not buy it. The height adjustment is crap, it floats by itself due to the vibration, so you need to carefully hold the height adjustment knobs. That makes the depth not very accurate, if that is important. -
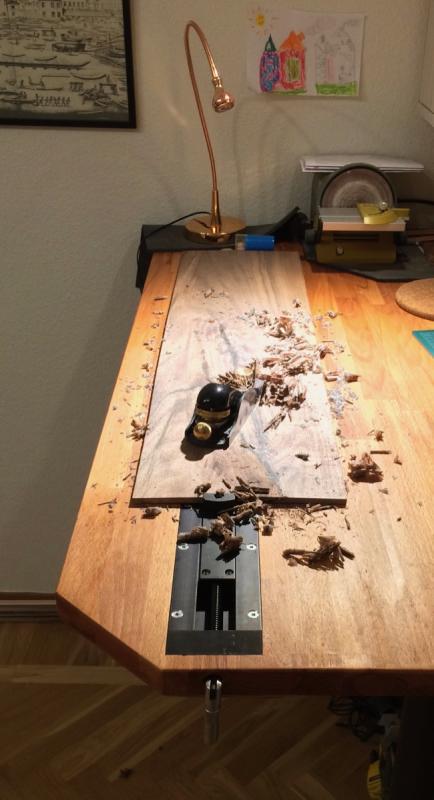
Aha, thanks! Yes, you are right, that could be a good plane in the middle!
-
Well, I am not only using it on a model scale, it is mostly intended for something between real woodworking and model scale. This photo should give an idea, block plane for scale. There are two choices because I already have a block plane, and buying something similarly sized is not reasonable. So jack plane that can also be good for jointing the boards along the grain (cross grain low angle block plane is good and big enough). On the other end, I have no troubles jointing it with block plane and a straight edge.