HOLIDAY DONATION DRIVE - SUPPORT MSW - DO YOUR PART TO KEEP THIS GREAT FORUM GOING! (89 donations so far out of 49,000 members - C'mon guys!)
×


bhermann
-
Posts
549 -
Joined
-
Last visited
Content Type
Profiles
Forums
Gallery
Events
Everything posted by bhermann
-
Thanks for stopping by, John. I have been enjoying your tales of travel through the Northeast. Bob
-
Chris - if you are wiling, maybe you could ask them about Cutty Sark plans I may be ready for that one in about 8 years! Great work on Victory! Thanks, Bob
-
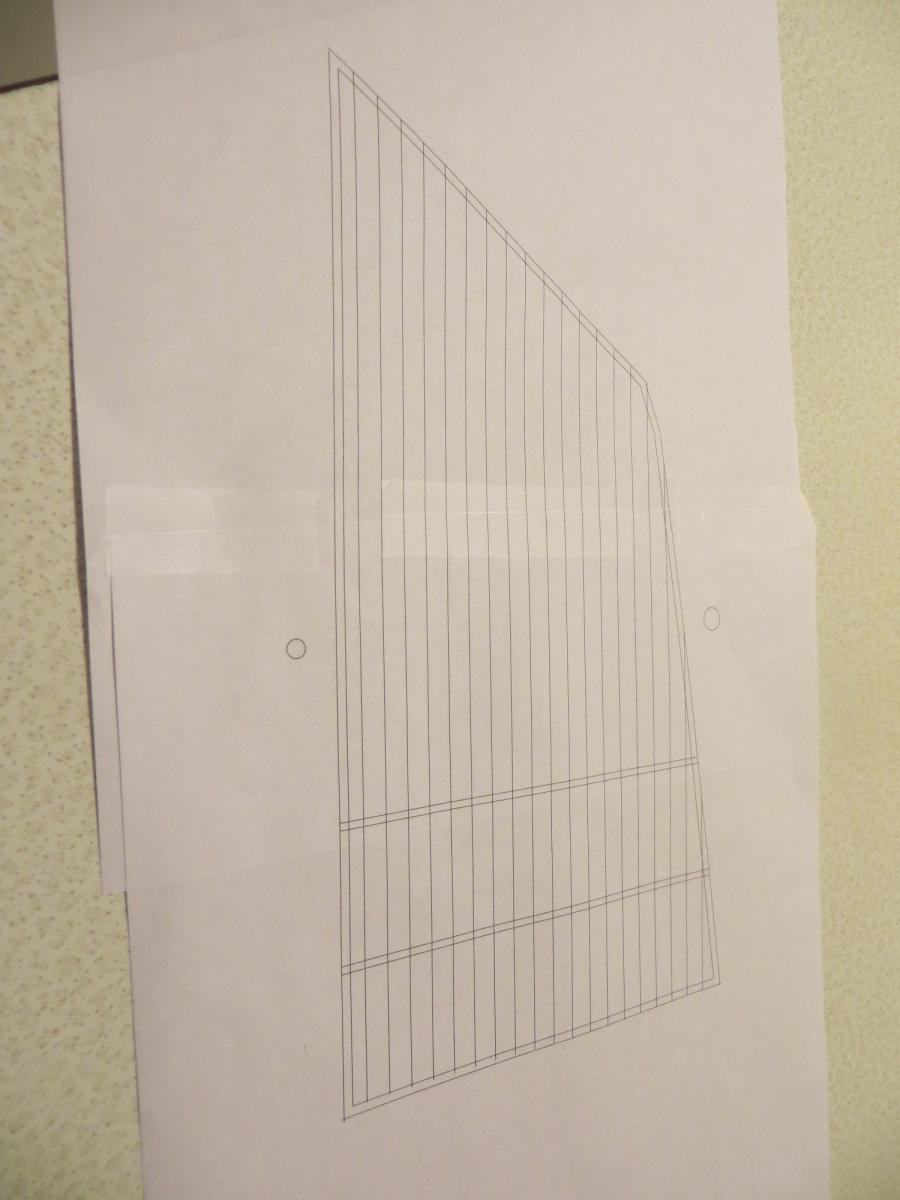
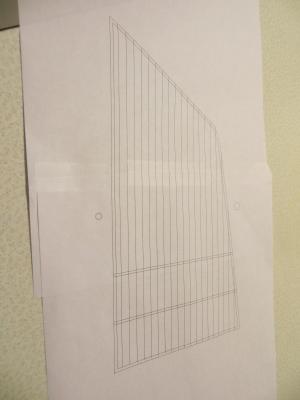
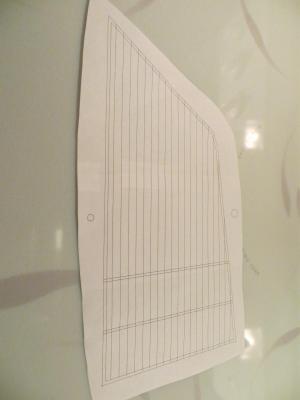
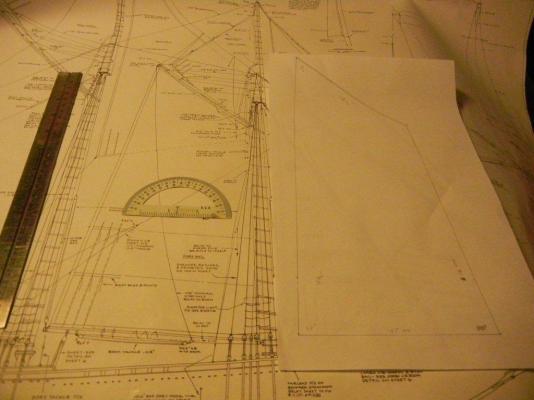
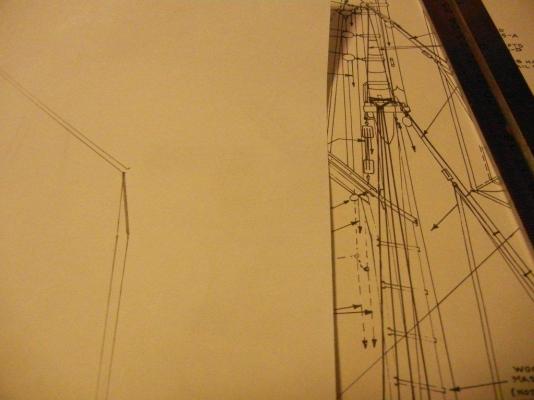
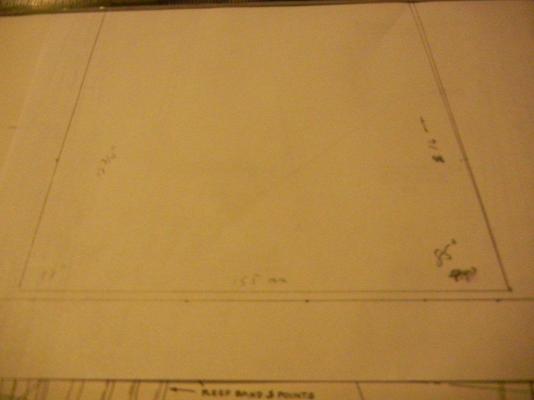
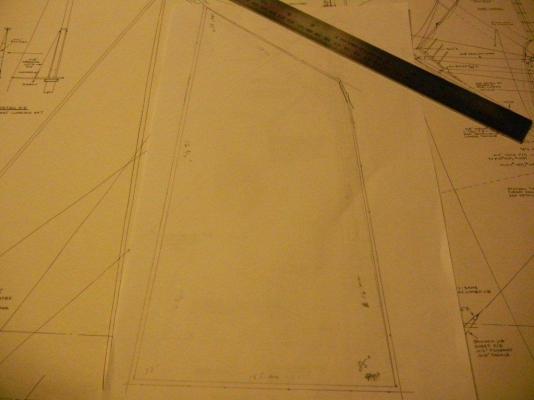
I was able to spend a little more time with LibreCad this evening - I misspoke when I said I was using DraftSight earlier. I figured out how to get different portions of a drawing to print by sliding the paper around in the "print preview" view and how to widen the lines a bit so they would be more visible when printing. I added a couple of circles to the foresail drawing to use as registration marks for lining up the two pages and also added the lines for the reef bands to the drawing, again using the parallel line feature to get them positioned properly. Here is what the sail template looks like now. Then I did some rough trimming: I figure I can use this to get the actual shape completed and then trace it to something a bit stiffer to use in cutting the sail cloth. Bob
-
Dave - I decided to go with the quilters cloth - more body, tighter weave, and more of it for when I screw things up. I have been looking into Fray-Check and have seen some of the concerns about how stiff it makes the cloth. I did read on a sewing forum (the things we do for our hobby) that if you take a steam iron to it while it is drying that the stiffness is eased somewhat. I doubt I am going to attempt that with the Admirals iron! I downloaded a 2d CAD program called DraftSight and drew a sample foresail. using the measurements and angles from the plan. It came out much closer than my freehand drafting. The program also has the ability to put in parallel lines at a set distance from a reference line, which is very handy for the tabling and drawing in the seams. The only problem I am having at the moment is printing sail patterns for larger than letter-size sails. The program doesn't have many tuning knobs for printing (no margin setting, for example) so I am trying to figure that out. Finally I am considering scrapping the kit-supplied rigging thread and going with Chucks product. I need to figure out what sizes I need and roughly how much of each size. If I ever locate the parts list again I will check if it has the amount on each spool. If not I'll just unroll one of them and measure! Bob
-
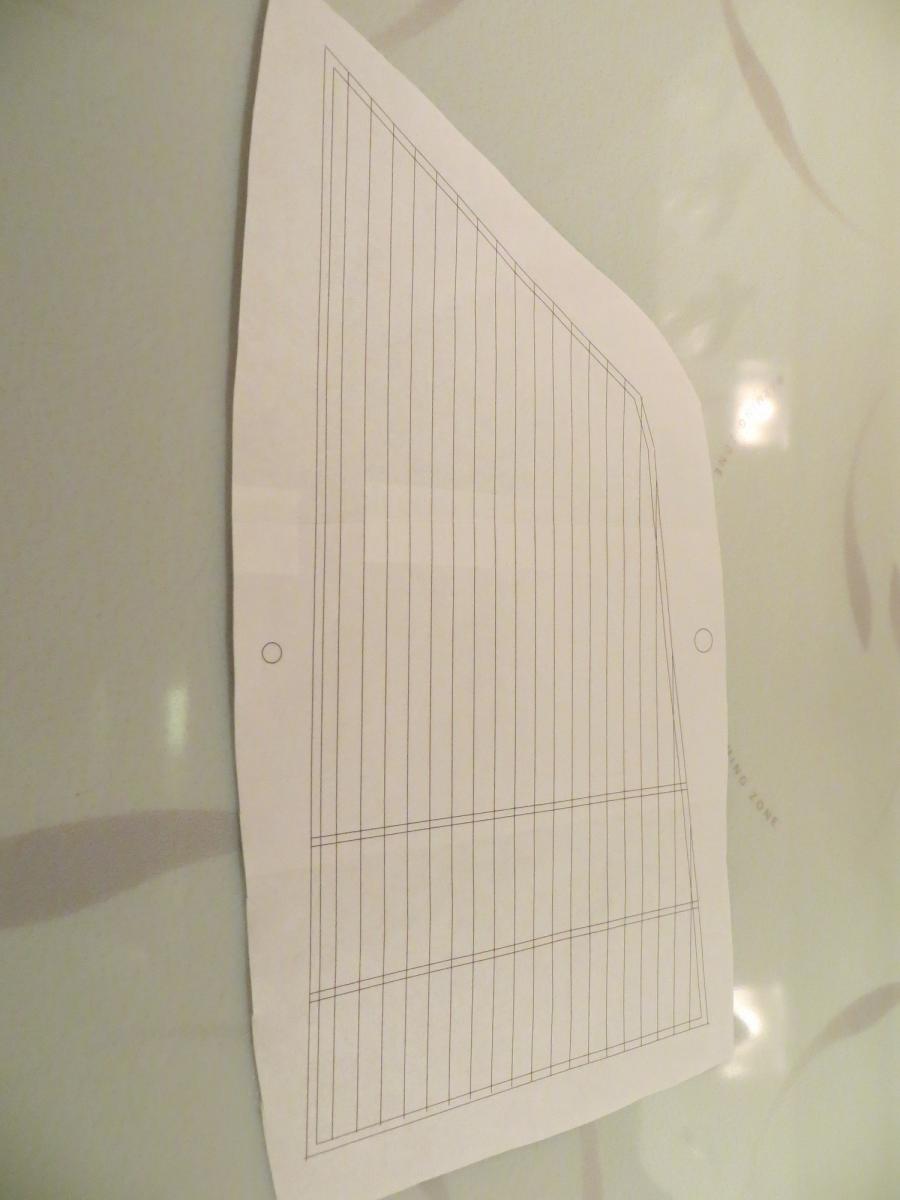
Time to get serious about sails. After much mulling and thinking and re-thinking I have decided to do stitch-less sails as a first attempt. I have heard over and over that it is better to make things underscale rather than overscale if there is a choice between the two and stitching on a sewing machine feels overscale to me. The first thing to do is to make templates for the sails. I was able to use the plan and my flatbed scanner to get some of the jib sails copied but it was not a pleasant experience, so I decided to resort to something a bit lower tech. Using a ruler and a protractor, I lifted lengths and angles from the plan and drew the foresail out on a piece of legal-size paper. My drafting skills aren't the best so I had a bit of a miss at the corner under the gaff and needed to make a correction to match the plan. Then I added the hem allowance to the drawing by marking the width from the plan on my drawing and connecting the dots. The finished drawing came out like this: My thought is to cut out the pattern and trace it onto the sail cloth. I will draw the seam lines in pencil, then fold over the hem and use fabric glue to fasten it to the sail. I will add the reef bands the same way, glueing them across the face of the sail. As I was doing this drawing I found myself wishing for a 2D CAD program that would allow me to input line lengths and angles and have the sail pattern generated that way. All the available free programs I looked at seemed too complicated for such a simple task. If anyone has experience I'd love to hear about it. I also have a question about the drawn-in seams - do they need to be drawn on both sides of the sail or will drawing on one side be enough? I guess I'll get my own answer when I actually do the work. Thanks, Bob
-
There was a lengthy discussion of this item in my log on MSW1. The general consensus was that it was a lazarette for storing who knows what, but no definitive answer was found. The MS plans describe it as "unidentified object - this could be a scuttle or deep tub for stowage of main sheet hauling end". Without any clear purpose found for it, I decided to leave it off for now. If one of the experts comes through, I still have room to add it in. Bob
-
Thanks for the kind words, John. It's nice to know this can be useful to others, definitely one of my goals for the log. BTW, Bluenose is my first "real" wood build as well. I encourage you to start a log for your build, it is a great way to share the journey, get input from those in the know, and help keep you motivated when the doldrums strike. Bob
-
Looking good, Rod. She is beautifully displayed now! Bob
-
Ed - I have been following along in the Crothers book as you go. I purchased it a couple of years ago in preparation for my next build. I have to say, with the explanations you are providing, it is making more sense to me than it did at the first read-through. You are almost inspiring me to do things like put extra bulkheads into the kit keel to make fairing go more smoothly . I will be following every detail of this one! Thanks, Bob
- 3,618 replies
-
- 1
-

-
- young america
- clipper
- (and 1 more)
-
Ed I just signed up to follow along on this build. Your work on Naiad was fabulous and I am sure this will be as well. Not to mention that the Clippers were the first ships that caught my eye many years ago. Your curiosity and details help our community understand the possibilities in a build and give us insight into how things were done on the real thing. Thanks you for your commitment to deepening our understanding! Bob
- 3,618 replies
-
- 2
-
-
- young america
- clipper
- (and 1 more)
-
Richard - I think you have stated one of the keys to becoming a successful modeler with this statement. As an over-analytical person (as the Admiral is happy to remind me), I find myself spending months at a time considering how to do the next step. It would probably be better to jump in and give something a try, trash it if it doesn't work out, and try something else. In the long run, there is more experience to be gained by giving it a shot than by sitting and thinking about it. Your planking is looking very good so far - I will be following along as you get further into the build. Bob
-
I was going to say I didn't run across this in the early stages of the Bluenose build. Then I looked at the billets all the laser cut pieces came out of - and none of them are ply in my kit, so I just don't have any history to go on. *shrugs shoulders* Bob
-
Thanks for sharing, Dave. I've been wondering how to make this happen and this is very timely. I can see from the photo what a cow hitch is - I guess it will be a visit to animatedknots to figure out what overhand and square knots look like (can you tell I was never a Boy Scout ). I think veterans assume this sort of info is obvious to everyone, so they don't think it worth posting, but I am glad you decided to share! I'd be curious to see what the 'full-size' attachment looks like, if you have any info on that. Thanks, Bob
-
Dave - I looked back at my MSW2 restart of the log and noticed that the helmsmans grating is included there in a post dated February 19. I've been mulling over the sails for the last little bit. I think I will attach the main and fore sails and topsails before stepping the masts, so I am trying to figure out just what I am doing with them before proceeding. The thought of connecting the mast hoops with the masts in place doesn't strike me as a good place to be. Hope to be starting up again soon as the weather starts to turn. Bob
- 43 replies
-
- 1
-
-
- bluenose
- model shipways
- (and 2 more)
-
It is good to see you back and to get some reminder shots of your progress. I will be following along with great interest! Bob
-
Dave - I like the look of your platform. I think it was my old log that had a description of that piece, using a method from Jim Lad. It was a bit different than this, I'll have to re-post. Nice job of scratching parts, by the way. Good to see you back at it! Bob
- 43 replies
-
- 1
-
-
- bluenose
- model shipways
- (and 2 more)
-
Trinkstein? My German is not so good - does this translate as "drinking glass"? A fascinating build, to say the least! Bob
-
PopJack - I recall looking at the rabbet for about a month before getting the nerve to actually cut into the wood. Doing the cut was much easier than all the thinking about it. Remember - it is wood and can be replaced if necessary (although I'm sure you will do just fine). I like the idea of tape on the blade to mark the depth of the cut - wish I'd thought of that! About the Hunt practicum - I did buy it and found it very useful for getting started and for planking the deck and hull. For steps after that it was much less useful. It does not add any detail to the basic instructions and shows only simplified ways of doing things. I believe it interprets the plans poorly when it comes to the color scheme of the upper hull, rails and deck fittings. If you are comfortable with planking, it probably isn't worth the money to buy it for the later stages. Take your time now in getting the bones of the ship together. Getting a solid foundation in place will make the later stages go that much smoother. I agree about the fit of the laser cut pieces - Bluenose is my first experience with them, and I thought they would just fit without the need for checking! Enjoy - I will be following along. Bob
-
Very nice work, Rod. She came out really great. I like the photos from angles we don't normally see - the gulls-eye view in particular. I am looking forward to your next effort. When my granddaughter gets a little older I'll have to look into the book series - or I could just get my wife started now Bob
-
Model Shipways Ropewalk
bhermann replied to cdogg's topic in Rope Making/Ropewalks's Discussions about Rope Making
Casey - you are braver than I am. I bought this a while ago, but it is still sitting in the box. Anything you can share from your experience is appreciated. Rich - thanks for the tips. Into the 'favorites' this topic goes! Bob -
Mercury by DSiemens - FINISHED - BOTTLE
bhermann replied to DSiemens's topic in - Build logs for subjects built 1801 - 1850
Daniel - FWIW, I like the thickness of the shrouds and stays just as they are. They are visible in the photos even though the background is very dark. I think you are right that when the rats are added they will show up more. Of course if you have the foremast shrouds in place in the above photo, I take it all back and you need to go with something thicker I love the details you are able to show at such a small scale! Bob -
This is going to be fun. I will be watching with great interest. Thanks for thinking "Outside (or inside, in this case) the box" and sharing your ideas with us. Bob
-
Rod - I am sorry to hear you had so much trouble with your Flying Fish (my next planned build, BTW). I will try to be real careful about knocking the ship around and to keep it out of the cats' reach. I'm curious - did you glue the ship to the cradle or fasten it in any other way? Hi Blackie and thanks for stopping by. I don't know how creative I'll be. I was thinking of using the billet that had the bulkheads to get the general shape of the cradle and running a couple of horizontal dowels between the two cradle pieces. I need to think about it some more - but there's plenty of time for that. Dave - it's good to hear from you too. Still at it, and still moving slowly. Brad - I agree, this sharing of thoughts and ideas is a big benefits to everyone! Gerty - I'm not sure how I missed you. Thanks for the kind words. Floyd - it may have been a learning build, but I think it came out very well and deserves a place in the gallery. Besides it's nice for those just starting out to see that someone managed to get all the way through their first build and do a good job of it too! I was away for the weekend and managed to get some time on the water, even if it was only a harbor cruise out of Portsmouth, NH. It felt great to be standing on a pitching deck again! I have been feverishly rereading everything Mastini had to say about rigging as well, just another excuse to procrastinate (like I really need one). Bob
-
How to sew sails on your wifes sewing machine
bhermann replied to Mirabell61's topic in Masting, rigging and sails
Nil - I am doing the 1:64 Model Shipways kit - looking forward to you restarting your Billings build. So far all trials are going on in my head - when I get to the point where I am actually doing something, I will document in the log. BTW, I am enjoying your Pegasus build immensely. Bob -
How to sew sails on your wifes sewing machine
bhermann replied to Mirabell61's topic in Masting, rigging and sails
Thank you for sharing your experience and techniques on this, Nils. Your sails (like the rest of your work) are an excellent addition to your models. I have been mulling over possible ways of doing sails for Bluenose for a while now and hope to get moving on it soon. All input in this area is appreciated! Bob