HOLIDAY DONATION DRIVE - SUPPORT MSW - DO YOUR PART TO KEEP THIS GREAT FORUM GOING! (Only 20 donations so far - C'mon guys!)
×


augie
-
Posts
4,669 -
Joined
-
Last visited
Content Type
Profiles
Forums
Gallery
Events
Everything posted by augie
-
 Nicely done. That underside of the foretop shows that you have absolutely nailed it. IMHO, perfect!
 -
Looking good! I put paint over stain all the time. As long as the stain is well dried it's not a problem.
-
Can you make a thin, wooden overlay to go over the windows? It could be made to butt up exactly against the transom and carry forward past the windows right to where it would meet the hull. A little tricky but not impossible.
- 1,756 replies
-
- 2
-

-
- constitution
- constructo
- (and 1 more)
-
I wish that wood would come early. Between HMS Visa and the House of Flying Daggers you're in a dangerous situation!
-
WOW! Spectacular, all around.
-
Welcome aboard, Klaas! Must have taken you a week to read this encyclopedia. Don't feel bad about the Confed. I've been eyeing the Aggy for quite a while and have been following Mobbsie and Sjors on that impressive kit. She's a beauty! As you say, you never know
-
Yes, we have Harbor Freight out here. We call it the 'Chinese Store'. I have gotten good service out of their $89 scroll saw. Don't put much stock in their hand tools......I kind of like the ones that last 2 lifetimes (like those I inherited from my Dad).
-
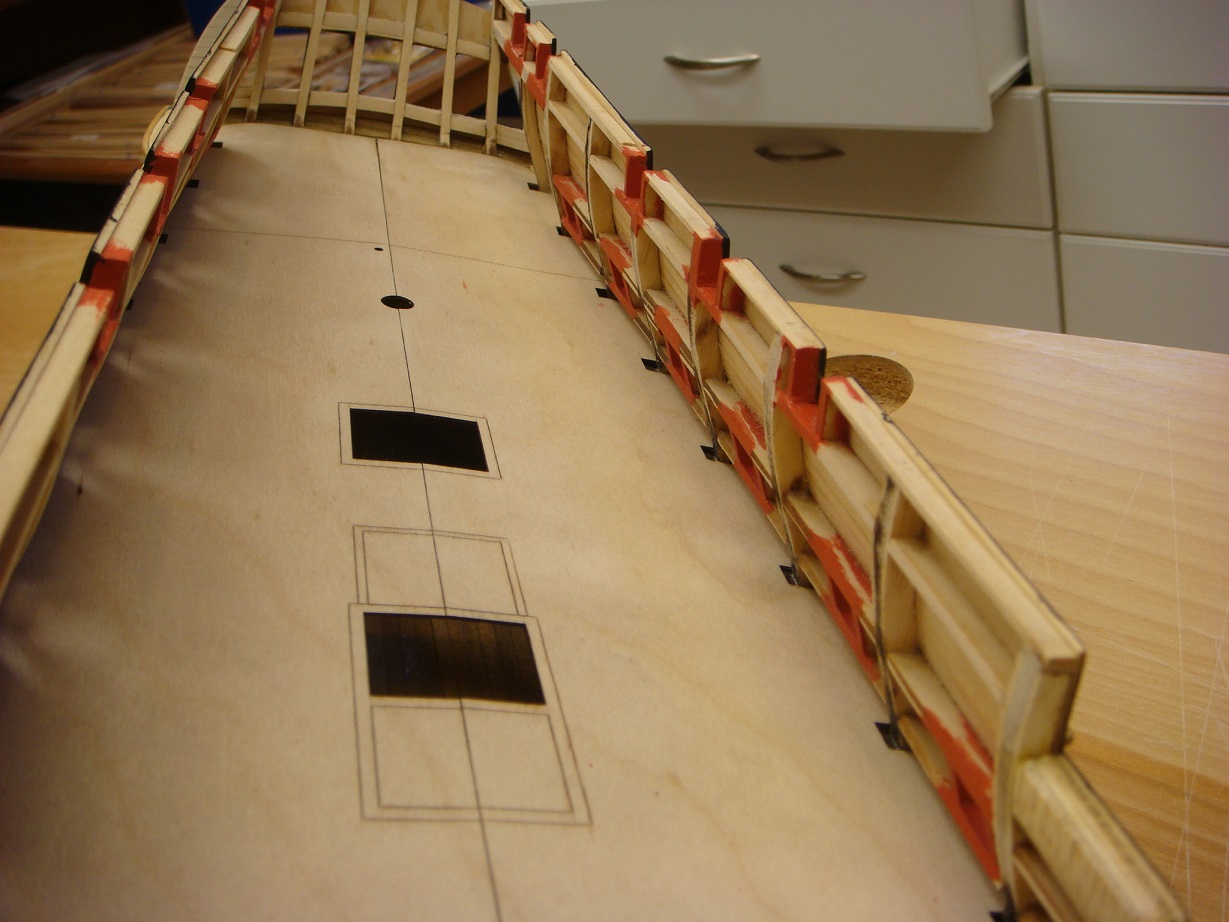
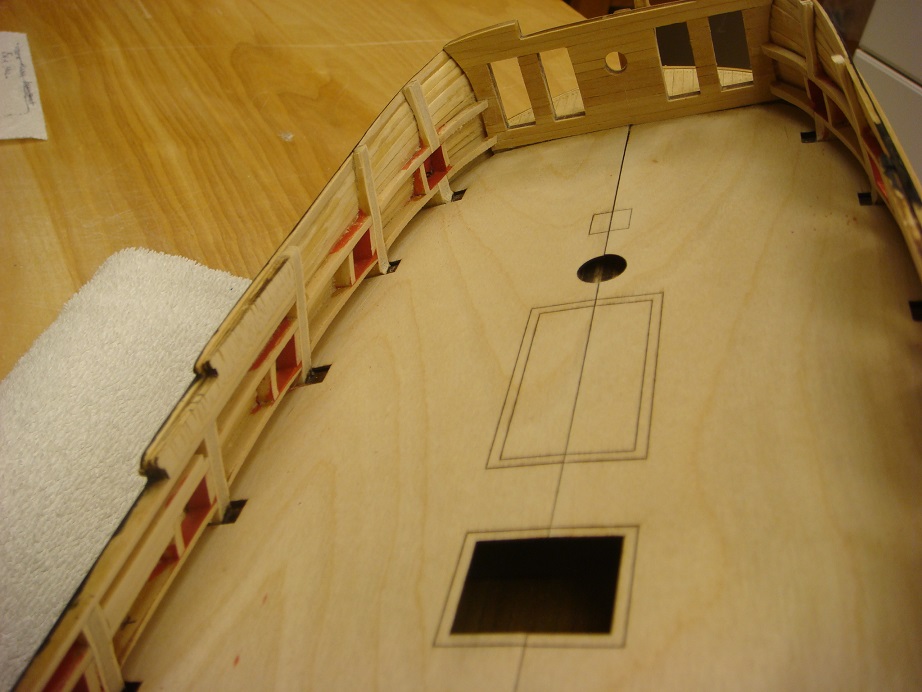
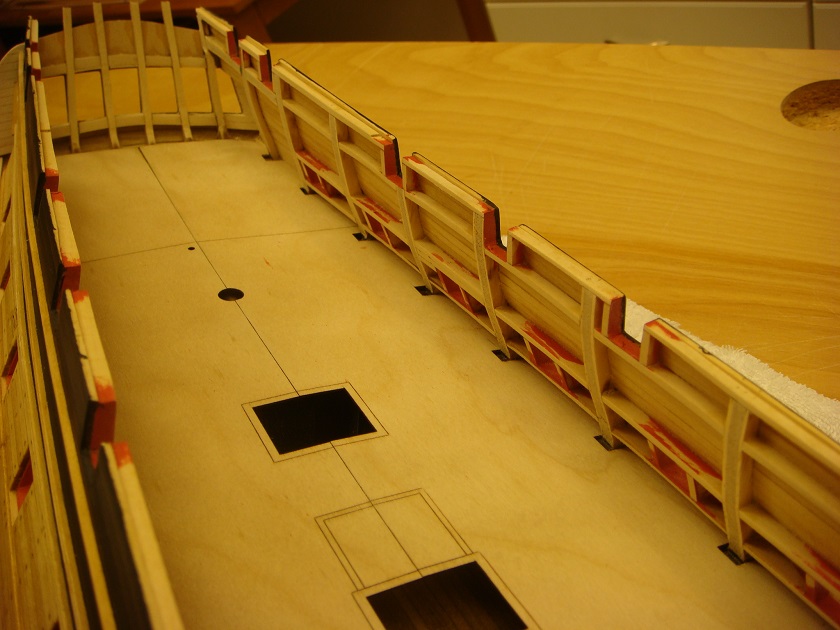
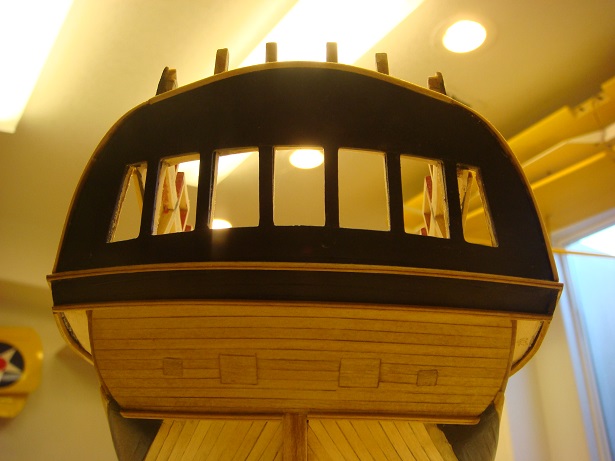
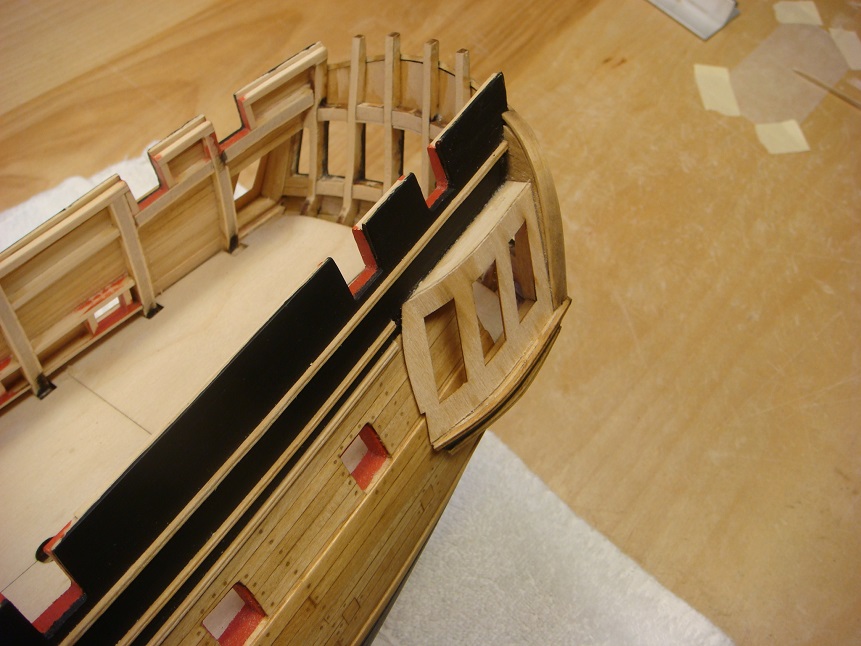
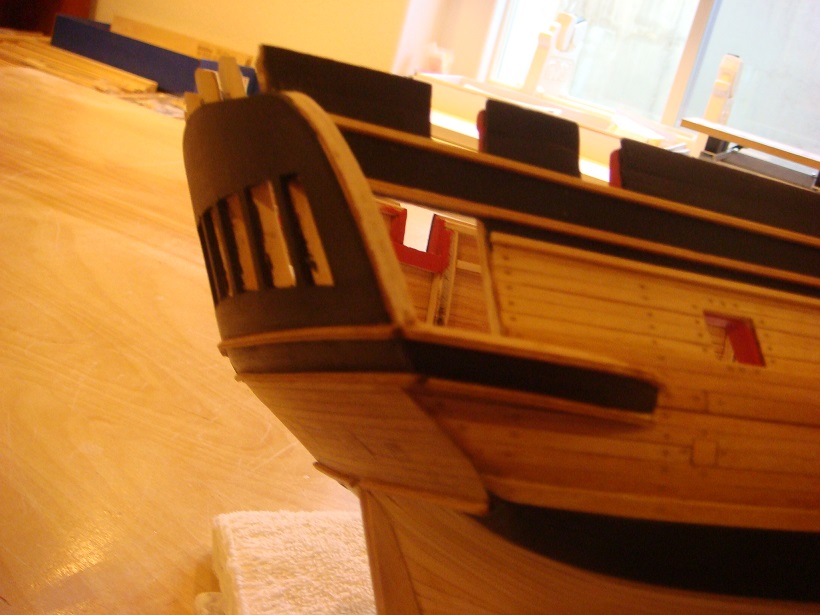
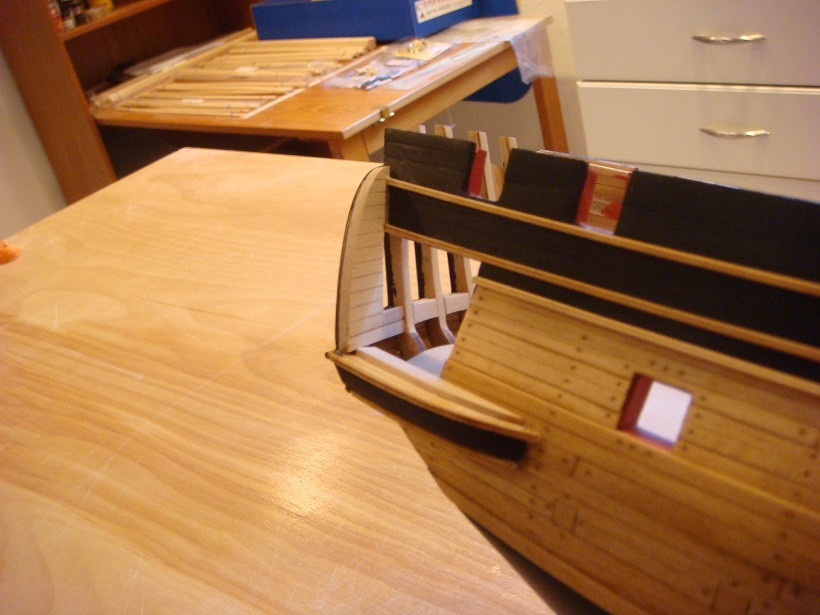
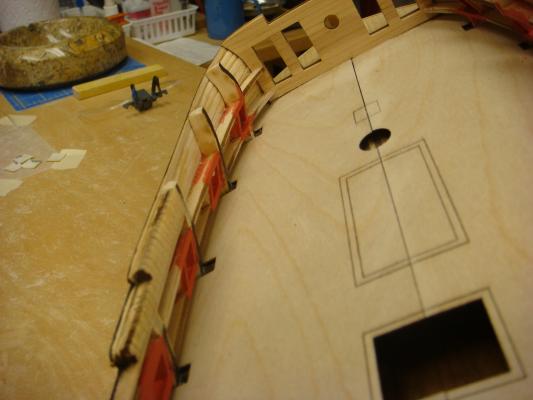
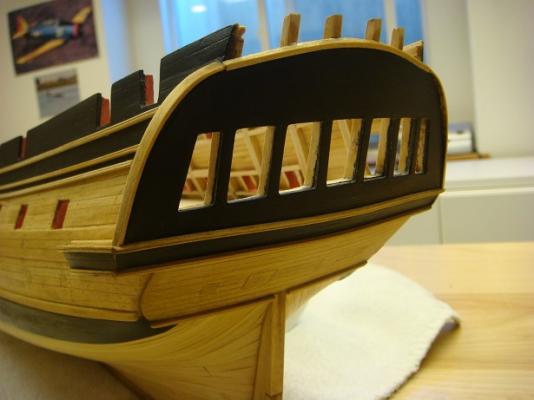
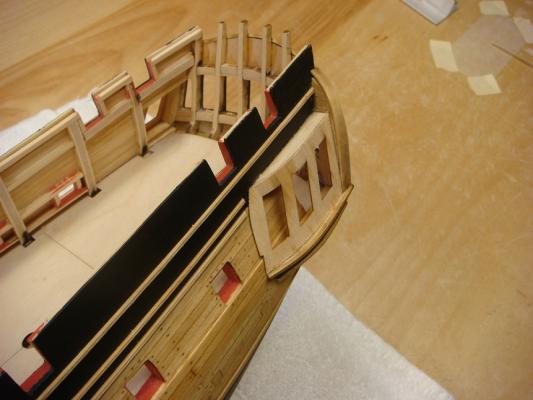
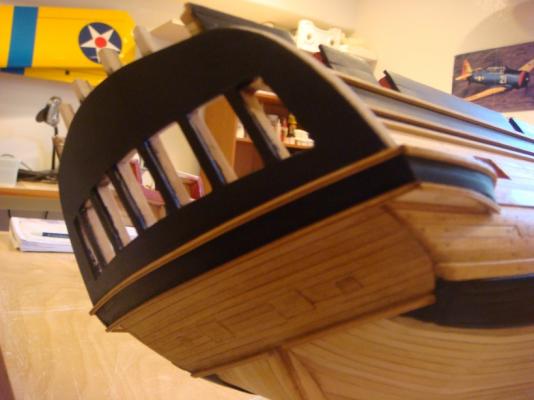
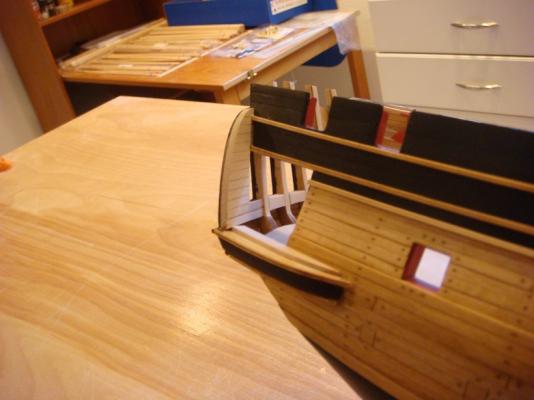
Managed to get a few things done before Spring drives me outdoors Firstly, I talked about thinning the bulwarks. The first two photos show the 'before' version. You can see the thickness of the bulkhead frames, combined with the outer planking, gives me an overall thickness of 1/4" +. This needed to be brought down to an overall thickness of 5/32" at the caprail and 7/32" at deck level which is seen in the next two photos: The transom had been previously done. It was then time to add the cap rail to the transom. Although it may have been possible to do this with one continuous piece (I tried but couldn't), the kit provides two laser cut pieces to handle the curves and a third section is added to the center. This worked quite well although I need to work on the seams a bit. They are actually perfectly smooth to the touch, but not to the eye. Here it is depicted from a few different angles: Finally, the quarter galleries are making progress. The first layers have been added. There is an overlaying layer and additional vertical area to be added. But I'm pleased so far with the arrangement: The interior areas of the QG were stained before it was closed up. Not much will be visible once completed but this was a good time to get it done. That's it for the time being. Everyone grab your favorite beverage and sing out a toast to the long-awaited Spring, 2014!


- 2,191 replies
-
- 23
-
-
- confederacy
- Model Shipways
- (and 1 more)
-
I like that spindle sander Patrick!
-
Looks nice and smooth. What wood for the second planking?
-
Poll
augie replied to Ulises Victoria's topic in Discussion for a Ship's Deck Furniture, Guns, boats and other Fittings
I'd probably also leave a few of the holes empty along with the few empty belaying pins. -
I use a brand called Dr. Slick. They are made for fly tying and are available in sporting good stores like Cabela's and Sportsman's Warehouse. They also make small nippers that are excellent for trimming lines around blocks. Less then $8 each.
-
So you finally incurred the wrath of BEN ! Consider yourself lucky......it's his log I'm following for my Confed build so I know he's out there. Makes me do everything about 12 times before I update . But seriously, always good to have another set of eyes on board.
- 1,616 replies
-
- 1
-
-
- caldercraft
- agamemnon
- (and 1 more)
-
Patrick--- you might try the Caldercraft site. Look under accessories - weaponry. They have a goodly number of brass cannon in 1:72 (pretty close to Conny).
-
More like the belt sander, Frank! Just put in about 4 hours and she's getting close. Really not all that bad.
- 2,191 replies
-
- 2
-
-
- confederacy
- Model Shipways
- (and 1 more)
-
That, sir, is a LOT of planks. Nicely done!
-
Thanks everyone! Aye, aye Chuck. Sandpaper at the ready! Glad you like the black Sherry. I think Grant will enjoy her stern more once she's 'bedazzled'. Mark- yup, all edge bent. Andy --- I wish (never happen).
- 2,191 replies
-
- 1
-
-
- confederacy
- Model Shipways
- (and 1 more)
-
Just a small update. The upper counter has been planked and the transom painted black. Scribed moldings were made and added to the transom. In addition, the bases for the QG were mounted, painted and moldings added: I've worked on the white metal castings that go below the stern galleries getting them to sit properly. I'll cover this when I get to mounting them. Now it's time to thin the bulwarks from the inside. Quite a bit needs to be removed and, since I don't relish this task, I'll be taking my time over the next few days.

- 2,191 replies
-
- 24
-
-
- confederacy
- Model Shipways
- (and 1 more)
-
In case you forgot what Chuck's cannon look like, here's a photo from my log: http://modelshipworld.com/index.php?/topic/3371-usf-confederacy-by-augie-ms-164/page-6 They come in 2 sizes, nominally labeled 1 28/64" and 1 11/64". I took the measurements from 3 of each gun and have given you the average, in inches. There is very little variation. 1 28/64 gun: LOA (breech button to muzzle) 1.4615 Muzzle diameter 0.1760 Breech diameter 0.2245 Trunnion diameter 0.0595 Trunnion length 0.3835 Distance, muzzle face to trunnion 0.7315 1 11/64 gun: LOA (breech button to muzzle) 1.1780 Muzzle diameter 0.1435 Breech diameter 0.1800 Trunnion diameter 0.0325 Trunnion length 0.3195 Distance, muzzle face to trunnion 0.5865 That should cover what you need!
-
I'm looking forward to your new build with great anticipation. That scroll saw looks awfully familiar I have Chuck's cannons in both sizes. I could measure them up for you if it would be of any help. Best of luck on this new journey.
-
CONGRATULATIONS! It's not everyday we see such a fine example of craftsmanship and dedication reach completion. She's gorgeous -- including the flags and the base. Save me a seat for the Connie :)
- 299 replies
-
- 1
-
-
- niagara
- model shipways
- (and 1 more)
-
They don't call them 'tall ships' for nothing! And your Niagara is no slacker in that department, Patrick.