HOLIDAY DONATION DRIVE - SUPPORT MSW - DO YOUR PART TO KEEP THIS GREAT FORUM GOING! (Only 20 donations so far - C'mon guys!)
×


augie
-
Posts
4,669 -
Joined
-
Last visited
Content Type
Profiles
Forums
Gallery
Events
Everything posted by augie
-
 The other thing you can try Frank is to use the acrylic but dye it very slightly to make its' presence more pronounced. I used to do this all the time with airplane canopies. Unfortunately, some of the newer acrylics will not take the dye so you need to experiment. I use the old 'Rit' product you probably remember. The brown or gray gives a nice tint. If you try that, make sure your acrylic is super clean, the water is not too hot and you constantly check the color to see what you're getting.
- 2,191 replies
-
- 2
-

-
- confederacy
- Model Shipways
- (and 1 more)
-
Looking good. You picked the right time of year and location for fairing !
-
Happy to hear a few folks approve. Actually, I need to credit the railroad modelers who apparently use this material a lot on their scale buildings. Modelers are modelers !!!! You can't see through it like window glass Sjors. But half of the upper deck will be open the ship so there will be a clear view of what's inside. Rich- the modlings are just 1/16" sq. basswood, scribed with a scraper I described about 20 pages back (a series of them came with the kit). Thanks all for looking in.
- 2,191 replies
-
- 2
-
-
- confederacy
- Model Shipways
- (and 1 more)
-
She must have the hands and concentration of a surgeon. You're a lucky man!
- 1,319 replies
-
- 1
-
-
- caldercraft
- Victory
- (and 1 more)
-
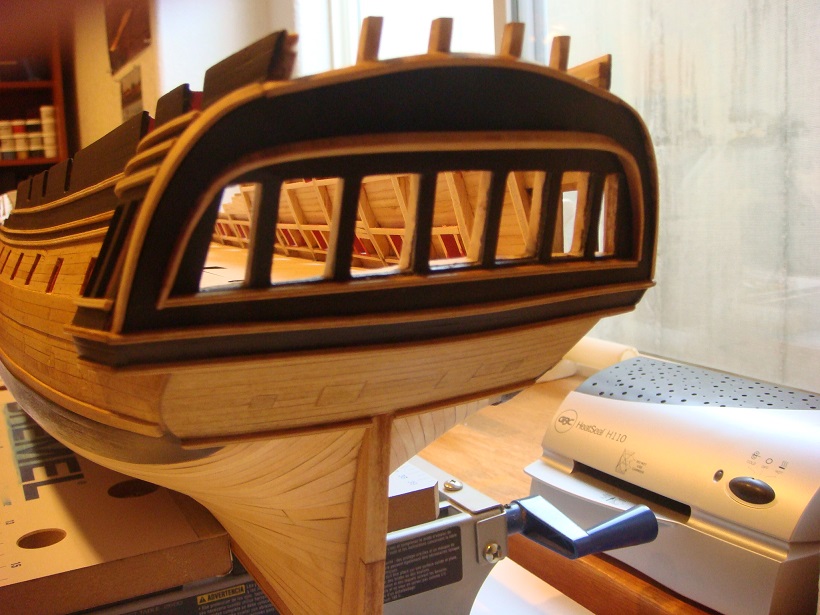
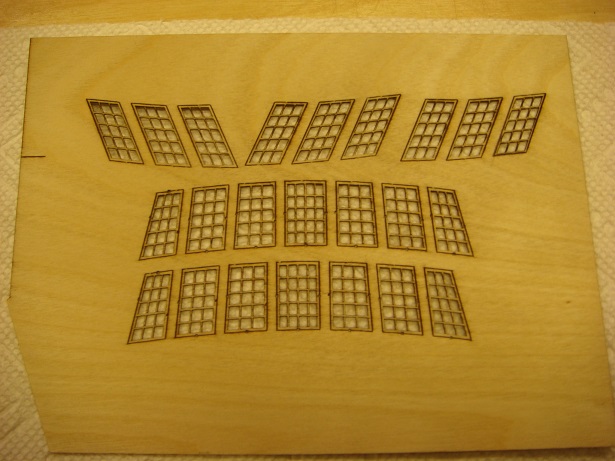
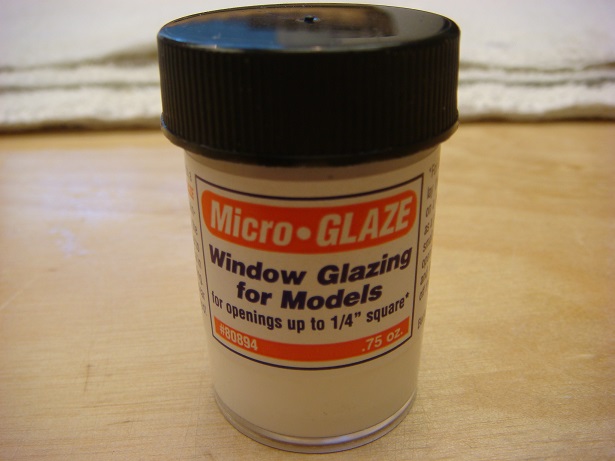
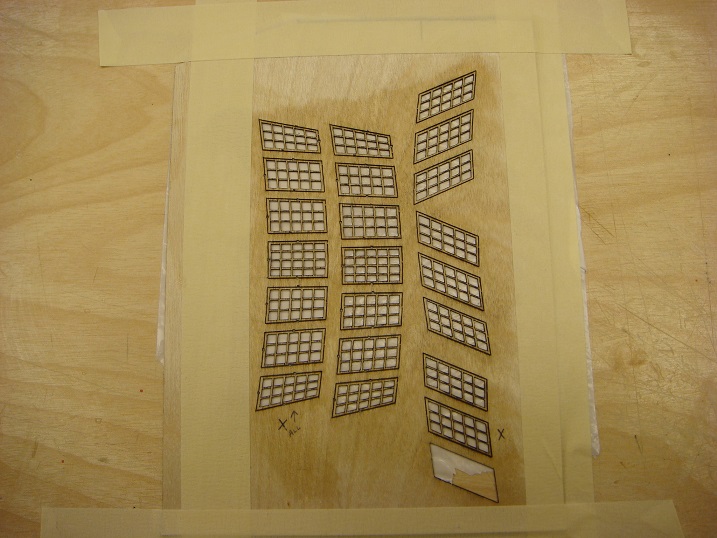
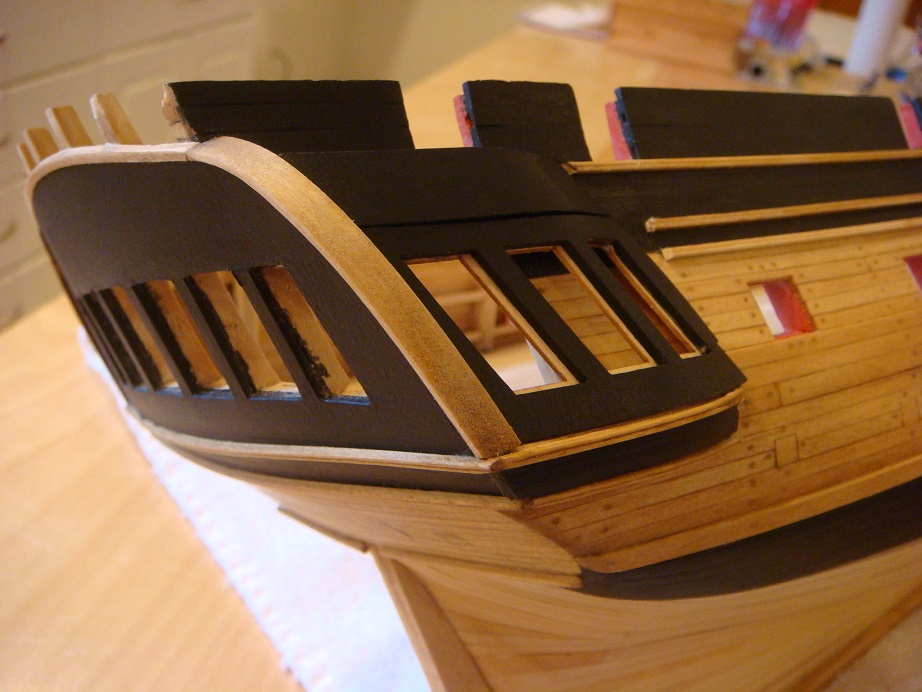
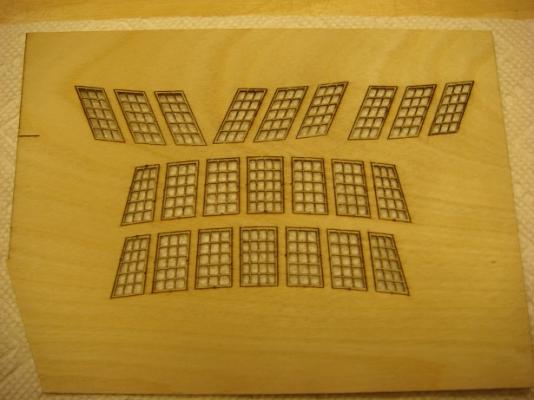
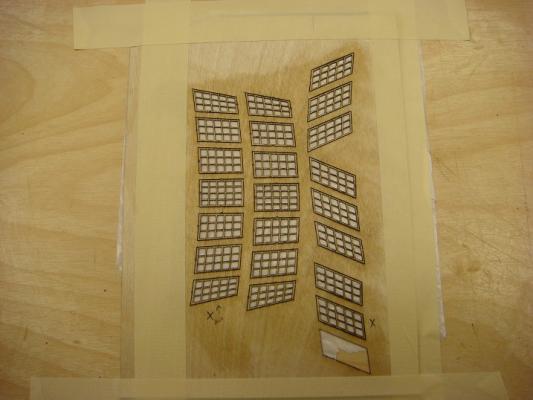
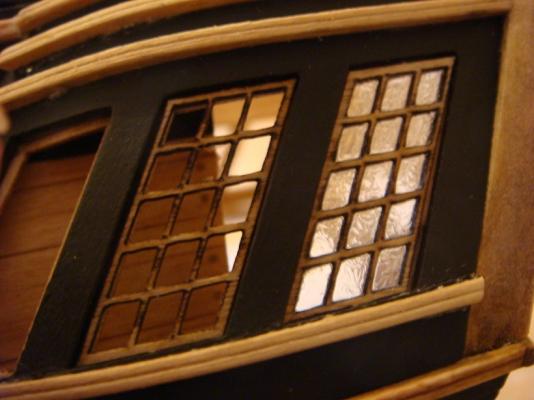
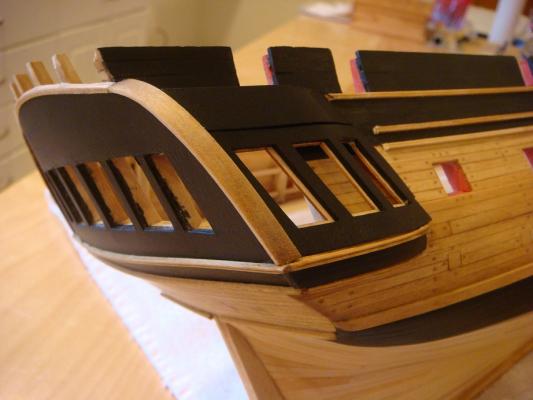
Time for a small update. The moldings on the quarter galleries and stern have been added: The myriad of photo etched details to be added to this area are being painted and prepared. And now for the windows. The kit comes supplied with laser cut plywood window frames: Clear acetate is also supplied. I don't care for this. It always looks like it's not there to my eye. So I decided to try this stuff: In fact, it's a water soluble adhesive similar to the canopy glue we use for model airplanes. It is white when applied, takes a full day to dry and results in a semi-transparent glaze which you either like, or you don't. To apply it, you affix your frame down firmly to a plastic bag. Don't try wax paper or the glaze will stick to it. For 'windows' of this size (about 5/32"), fill the cavity with the liquid glaze. Once dry, you may spot some defects so plan on doing a second application (or third). Here's what it looks like in process (the frames have been stained): Now here's what the finished product looks like. On the left is a frame backed with acetate. You can see it's completely clear. On the right, a frame glazed as above. It looks like 'bottle glass'. I prefer this appearance, realizing it won't be everyone's cup of tea: All of the windows have now been installed. As for photos, well, we'll have to wait until all of the leaves, branches, animals and assorted Gods are put in place. And Spring is calling


- 2,191 replies
-
- 24
-
-
- confederacy
- Model Shipways
- (and 1 more)
-
Fantastic news!!!!! I trust this honor comes with some sort of sash you can wear when parading about in public. WELL DONE, MATE!
- 1,279 replies
-
- 2
-
-
- agamemnon
- caldercraft
- (and 1 more)
-
As will I. But make mine neat. Looks good, mate.
-
Then you're doing well.......I usually have 4 wall sides
-
Sorry about the mishap. And good luck with the 'new' airbrush!
-
Glad you posted that for Sjors, Sherry. That's the proper way to do it......and as you said, you need to start with planks wider than those supplied in the kit. Since spiling is generally carried out at the bow to eliminate crowding, there is another method, also advocated by Chuck in his kits, which I use..... a kind of 'poor man's spiling'. If my kit-supplied wood is , say, 1/8" wide, I determine the number of planks needed at each bulkhead for a particular band I'm planking. In the center, that might be (for example) 20 planks. As I move forward that number gradually decreases until, at the bow, it may be only 12 planks. That tells me I need to taper, or spile, each plank gradually down so they will all fit up front. I'm ignoring drop planks here. So, 20 X 1/8" = 20/8 but I need only 12/8" up in the bow. So I need to 'lose' 8/8". To do that I taper each of the 20 planks down from 1/8" to about 3/32". That gets me in the ballpark. That taper runs from the tip at the bow back along the plank about 3 " (assuming I'm using 4-5" planks). Sherry's photo shows this taper (it also shows the plank edge bent). I had some photos of this in my Confed log but they were lost and I don't have them anymore. However, Chuck does provide an explanation in his instructions for Confederacy which are available on the Model Expo site here: http://www.modelexpo-online.com/images/docs/MS2262/MS2262-CONFEDERACY-Instructions%20-%20WEB.pdf. You would need to thumb through the pages to get to the planking section.
- 1,616 replies
-
- 2
-
-
- caldercraft
- agamemnon
- (and 1 more)
-
Smiling over here.
-
You might want to invest in a small, hand held pin vise to handle your bits from #60 down to #80.
- 1,756 replies
-
- 1
-
-
- constitution
- constructo
- (and 1 more)
-
WOW! Looking really fine!
-
I could, Popeye. But I have something else I want to try first. Details to follow.
- 2,191 replies
-
- 3
-
-
- confederacy
- Model Shipways
- (and 1 more)
-
Would you gentlemen stop typing with your mouths full? Thanks for the kind words.
- 2,191 replies
-
- 3
-
-
- confederacy
- Model Shipways
- (and 1 more)
-
I'd say Patrick is right with the medium (or thick) CA as far as holding power. Just be sure your wood is stained beforehand and work as neatly if possible. If any glue seeps and dries marring your surface, you can give it a light coat of clear flat acrylic and the shine from the glue should disappear. As for pinning, I do it a lot on things like holding channels to the hull, belaying pin racks, fife rails etc. It adds a LOT of strength. I'm thinking about 28 gauge wire set into holes drilled with about a # 76 bit. Yes, it's delicate but can be worth the effort, especially if you knock into a rail down the road. As always, experiment first. Your pins need not be long at all, just maybe 1/16" into each part.
- 1,756 replies
-
- 1
-
-
- constitution
- constructo
- (and 1 more)
-
US Brig Syren by Gahm - Model Shipways
augie replied to Gahm's topic in - Kit build logs for subjects built from 1801 - 1850
Your headrails are just immaculate. Don't fret about your building time because of other obligations. Just maintain your pace as time allows. She's going to be a beauty. Subjectively, I agree with the illusion of size conveyed by the quarter galleries as seen from a distance. Of course, if you're being run down by a 60 gunner, it's not going to help very much! -
She's looking really first rate. Now get that last portion done ...... that's the fun part . And since my Confed isn't rigged, I'll lend you my rigging spiders. You shouldn't need them for at least a year.
-
On a ship the size of Syren things could be tight. You may notice that the binnacle is lashed to the deck and could be removed for action. Also, the steering gear could be easily disconnected so that only the tiller remained to steer thereby eliminating that steering gear to the ship's wheel.
-
Ben, I'll get there soon. But as my Admiral would attest to, everything for me is tricky! Sjors - translate to 'a lot of bling'. I think that's Dutch (pffff).
- 2,191 replies
-
- 2
-
-
- confederacy
- Model Shipways
- (and 1 more)
-
That was built in Patrick. Chuck is the idea guy ..... I just screw 'em and glue 'em together
- 2,191 replies
-
- 3
-
-
- confederacy
- Model Shipways
- (and 1 more)
-
Just a quick update, basically because the time clock has hit 450 hours. Quarter gallery construction is moving along nicely. They are basically done and painted. Note the rabbet inside the window frames......these will support the windows in a bit so they won't topple into the galleries: There are 4 beaded moldings that need to be installed before we get to the windows themselves (not to mention a veritable plethora of photoetched adornments). This is the fun stuff!
- 2,191 replies
-
- 22
-
-
- confederacy
- Model Shipways
- (and 1 more)
-
Looks nice and true.
-
She looks great from here my friend. Keep filling until you satisfy yourself but man, nice job.