


Wintergreen
-
Posts
940 -
Joined
-
Last visited
Content Type
Profiles
Forums
Gallery
Events
Posts posted by Wintergreen
-
-
Very well sir, thank you, now I see them. 🙂
note to self: add to wishlist - mini table saw. probably European brand since shipping from the states is horrendously expensive.
In a world of changes it is soothing that your Montague is always there, plodding along with small updates now and then.
Keep it up and carry on!
-
@garyshipwright, another tooling question if I may. Going through the pictures above there are a lot of goodies, but I don't see any mini table saw. A full size, yes, but no mini. So what do you use to mill planks I wonder?
Having big tools myself I ponder over future additions (addictions?). 😉
Thanks.
-
-
-
Copy that @neilm
My thought was that it is easier to do the paint job when there is easy access, like having the deck house freed from the hull, and then glue it in place when painted.
- neilm, mtaylor and Keithbrad80
-
 3
3
-
Looking good!
What are your thoughts about painting? Are the deck structures removable for easy access f.ex?
Keep it up!
-
-
Just a wee update so you I'm still at it. 😉
Main problem now is outside temperature. Since my workshop is heated by an air-air heater, when mercury drops below -5 Celcius it can't really keep the shop warm. So, extra heater is engaged. Starting out at around 12-13 degrees inside in the morning, temperature slowly raises to 15-16 at lunch time, and if lucky, another degree during afternoon.
The last couple of days it has been lovely winter with down to minus 10 Celsius. Say no more.
(My workshop is adjacent to the garage btw).

Anyway, the task at hand is cutting frames. I manage one half frame per day during weekdays and maybe 1 to 1.5 full frame per day on weekends.
The template sticks works really well. Frames 4 to 8 are done and waiting for fastening. Currently work is on the after most frame, no 9. No 4 and 9 also has a maststep partner.
At the moment a break was needed since I realized that I need to redo frame no 4.
However, on another note I got really excited today since the plans for my next build arrived as pdf:s. Yay!
That'll be fun when time comes. Need to be done with this one first though.
As always, thanks for Likes and comments! Appreciated 🙂
- mtaylor, cog, Landlubber Mike and 11 others
-
14
-
Nice to see this kit being built. Your painting is very good. Spray paint or by brush I wonder?
And I was particularly glad to spot Regina in the pond. I did put ballast in mine but have no intention of splashing her.
Keep it up!
-
Hi Bianca and welcome to MSW!
You will see that there are a lot of helping hands here on this site, but I think that "patience" you must master by yourself 😉
Having a bunch of daughters I have no problems visualizing the challenge 😄
However, if you get stuck, just reach to this community and tips and suggestions will come.
About the "then he broke it" - what can I say, even with the best intentions we sometimes fall utterly short 😄
Keep it up!
-
What you show above is just pure excellency!
It is really telling when you snap the pictures holding the objects in your hand. Then it is possible to appreciate their sizes 😮
Keep it up!
Edit:
Didn't see the last post until after I submitted my response.
Well, the cure for our uneasiness you've already found. Looking forward to the expansion 🙂
-
Yes, the colour is correct but what about the smell of tar? Have you managed that as well?
Looks excellent!
- Tony Hunt, thibaultron, J11 and 1 other
-
4
-
-
-
-
11 minutes ago, wefalck said:
Your tracing contrapment is a bit like those DIY tracers with a stack of steel rods in a frame
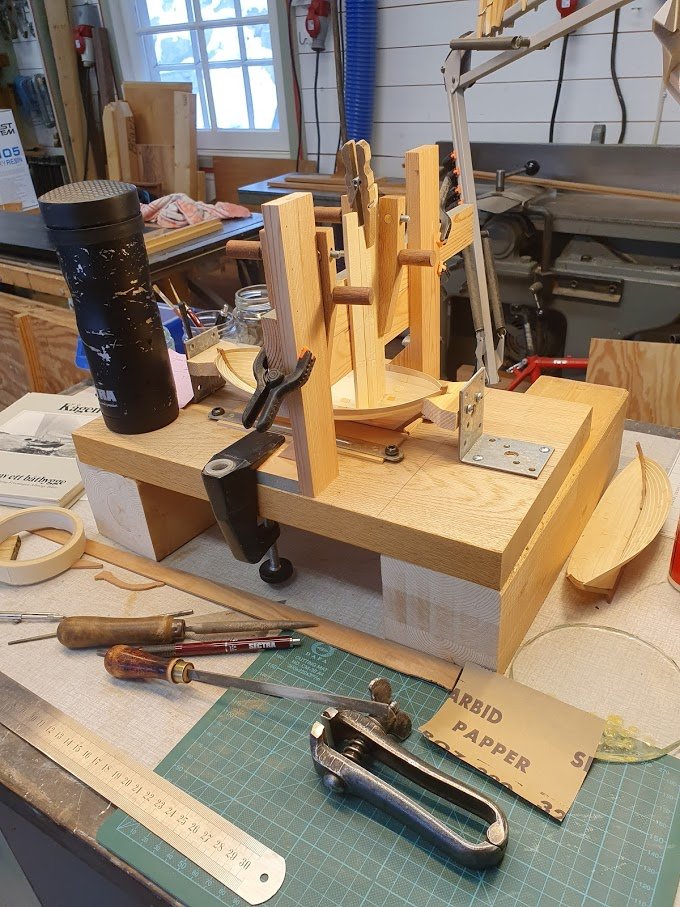
Yes, I pondered over such a thing first. But several reviews said it takes a bit of force to form the rods. So, I came up with the above idea, which proved useful.
A laser scanner would surely work, but then I try to keep things simple and always the K.I.S.S rule in mind (Keep It Simple, St...).
-
Well, this didn't turn out half-bad if I may say so myself. 😉
They're not glued in place yet since I ponder over finishing.
Now, how did that happen you ask?
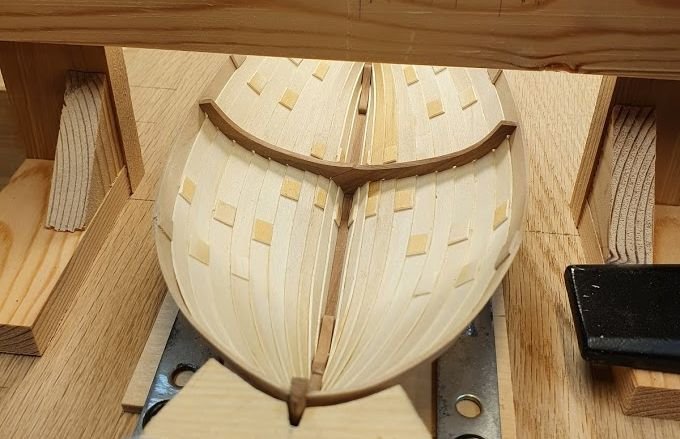
My depth probing resulted in this template. A little bit off, but decent. Tricky part was in the bilge and that it has 23 spots to conform to at the same time... and paper is flimsy to work with.
So, suggestion from @wefalck was given a thought. I saw @bolin using that method as well. On a bigger subject it would work for sure.
I gave it a try with each paper strip matching 2-3 planks. Not usable in my case was the conclusion. Still to flimsy.
Also, the frames are very similar and only changes shape slightly for each pair for and aft so something that could be used over and over again was to prefer.
Came up with this idea:
Boards of roughly the same thickness as the frames, cut from birch. 15 mm wide (guess that's something like 5/8").
Leftmost in this picture is reference side. Once port template was done, a new reference was clamped on.
Pros:
only three planks to ease in to for each template board.
can be used for consecutive frames with just minor adjustments.
clamps easily to the gantry and can be managed without fiddliness (not a word, I know, but you know what I mean)
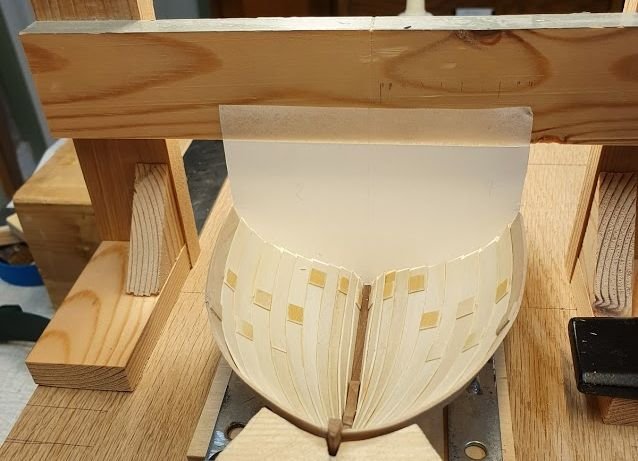
Once satisfied it is a simple task to take them all, secured with a tape on the far side and clamps at the ends and transfer result onto framing material (apple, 2,3 mm thick).
Cons:
Well, not a con really, but it takes time. But that's true for all things considered in a 1:30 ratio to true world. 😉
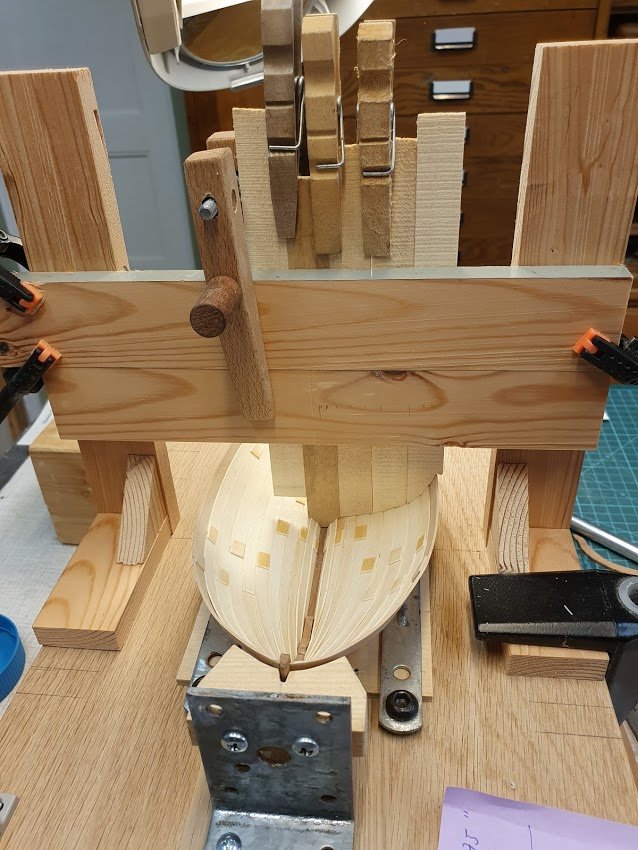
And an in-between shot with port frame half done.
I even managed to get the limber holes in, or what they're called. 🙂
Best of all - it didn't take all day to produce one full frame!
Also, thanks for given attention with likes and comments!
-
Hi guys!
Thanks for comments and likes. 🙂
About frames.
At the moment, this thing about clinker-boats does not seem so appealing any more... a Kingdom for a carvel built hull!
Well well, insert words like "perseverance" and "patience" and "long term goal" here.
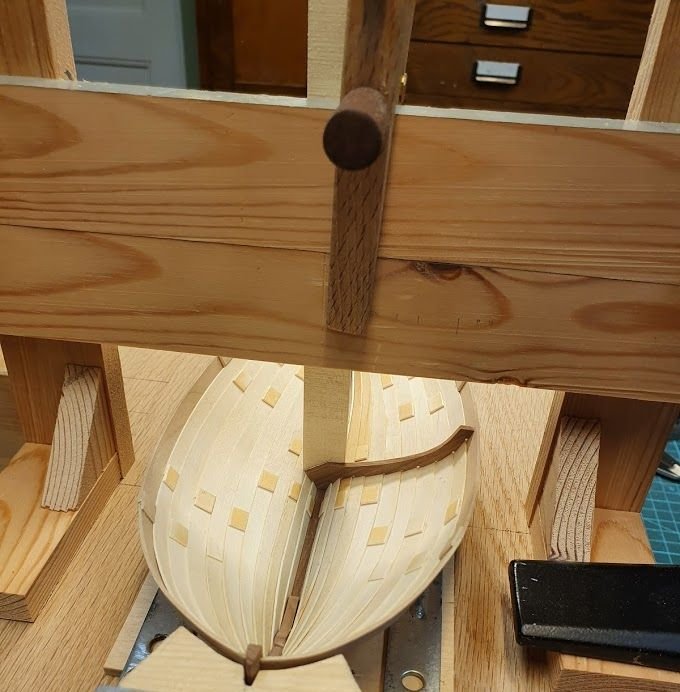
I made an effort with a piece of cardboard and a compass to see what the challenges were. And boy, they were many.
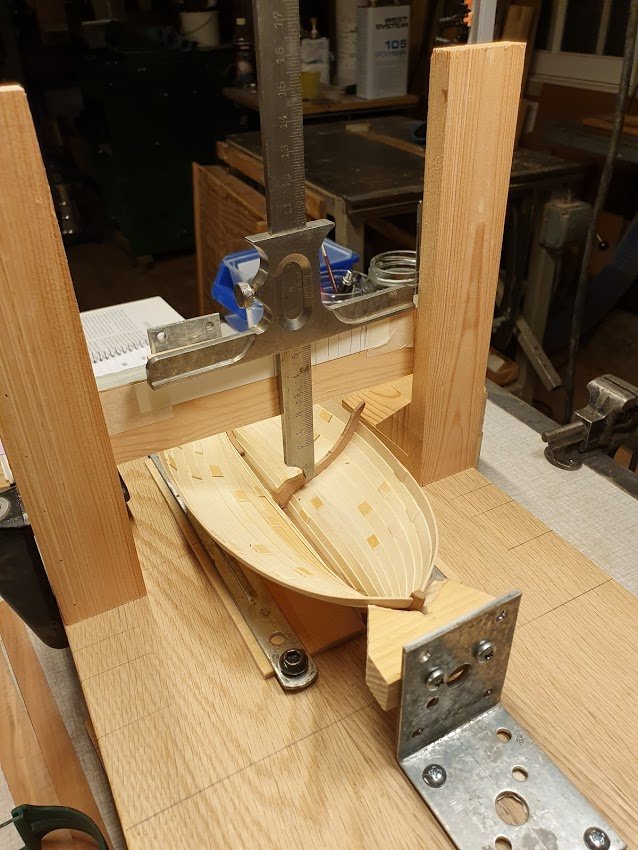
In the first picture that first effort can be seen lingering around in the hull.Basically one needs something to take measurements from, like a gantry.
Then something to lift the measurements with. A caliper seemed like a good choice, but to flimsy and could be guaranteed to be vertical.
A depth gauge on the other hand has all the right attributes for this.
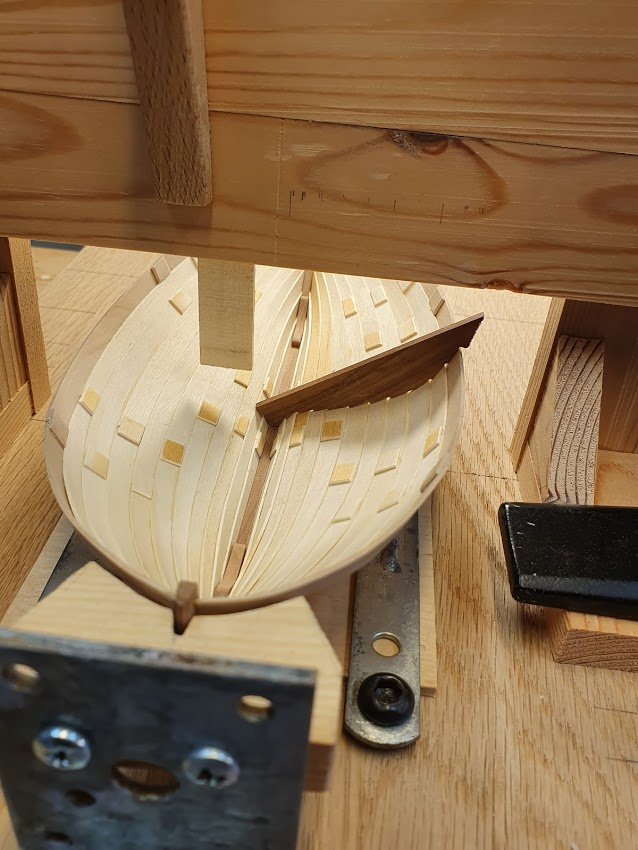
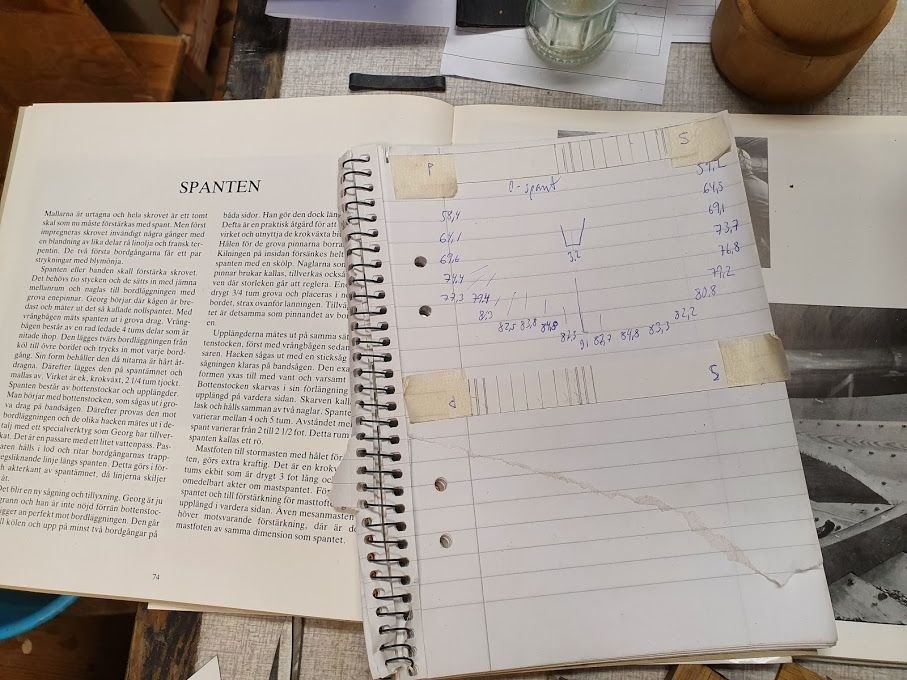
For every measurement a line was drawn on the paper strip to mark its position athwartships. The results can be seen i second picture. For those that can read my figures you will see that the hull is not a perfect mirror image. It's not by much but the eye will catch it if allowed.
Next step I guess is to take measurements for all frames and then transfer them to a paper. Cut out, test fit and if okay, transfer to wood and, well, I think you can guess the rest.
In the above picture the line that goes across is aft perpendicular. The shorter lines represents the front face of each frame.
In addition to the frames there will be two mast steps and a couple of shorter frames, merely uprights to support thwart by the masts.
- Landlubber Mike, Mike Y, bolin and 9 others
-
12
-
Ouch. I feel you and the frustration about the hidden error.
Good you found a way to spot it and further correct it.
Keep it up!
-
1 hour ago, cog said:
either minimal difference or very well taken photographs
@cog it's the latter 😄
-
Thank you guys!
@druxey - Thanks for your approval! Your build of the Royal Barge was what set this in motion once upon a time. I am of course careful to show only the best angles of the hull 😉
Carvel or lap strake is quite unforgiving and I didn't managed to get port and starboard equal. Port side is a little higher, but that will not be prominent once on display I think.
-
19 minutes ago, cog said:
IT ... yes I know, they can't leave us be enjoy our hobby somehow
Or as I said to my line manager that I work to get the money to pay for my hobbies and it's a shame that work so severely affects hobby-time 😄
- Baker, cog and popeye the sailor
-
2
-
 1
1
-
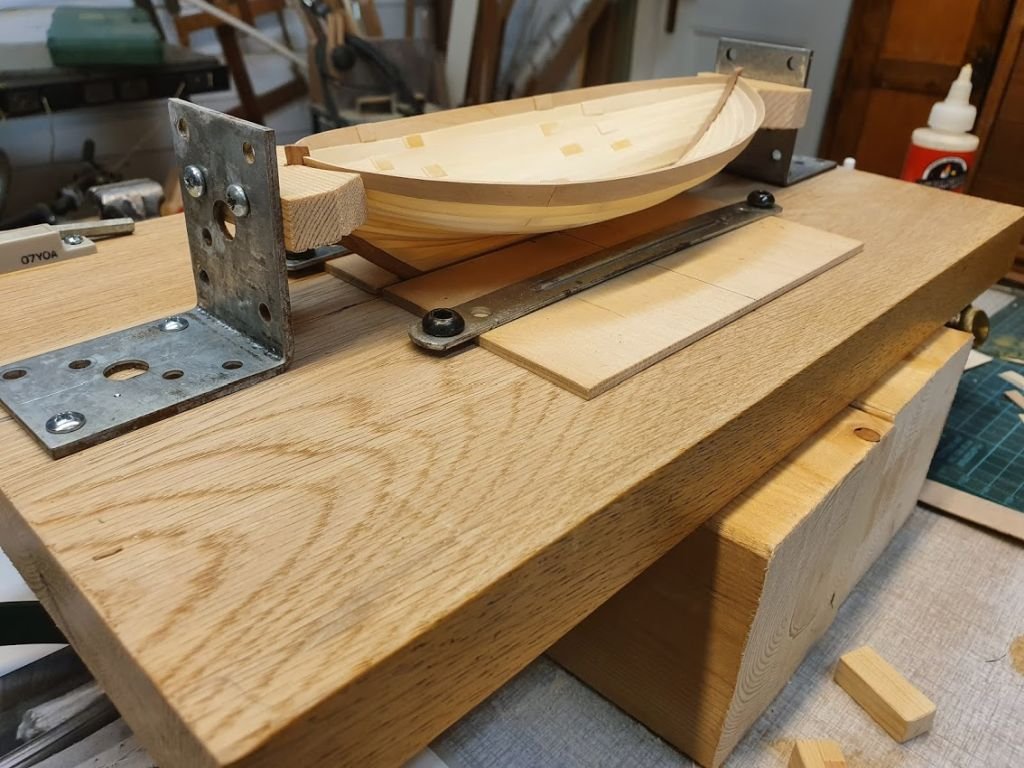
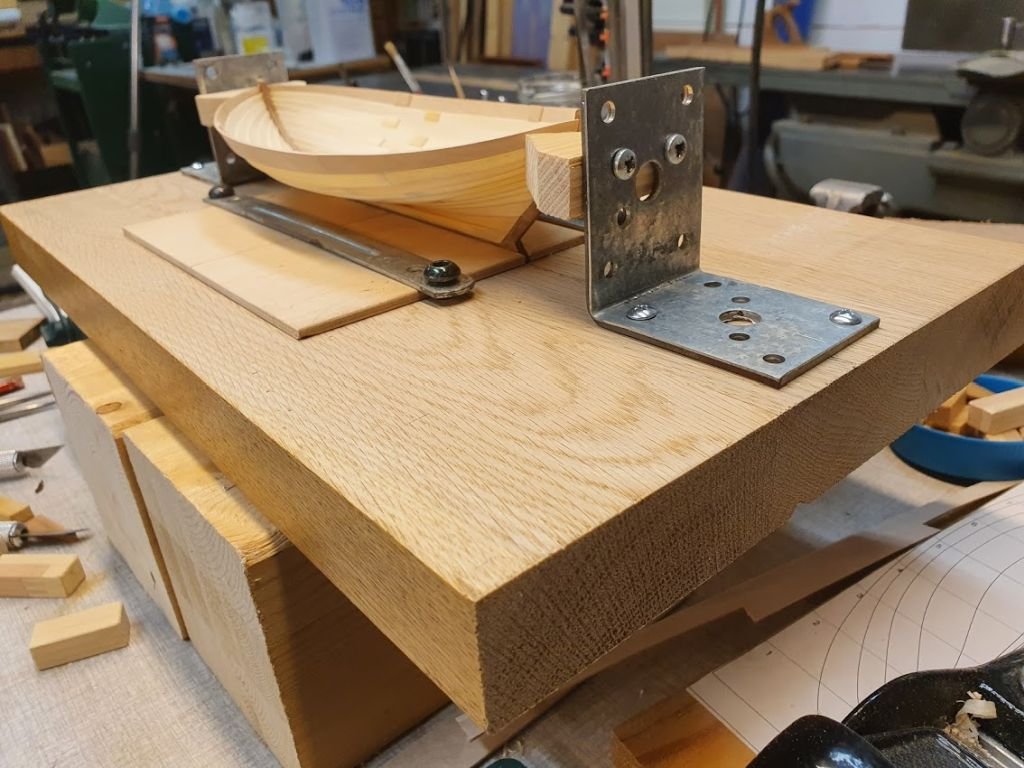
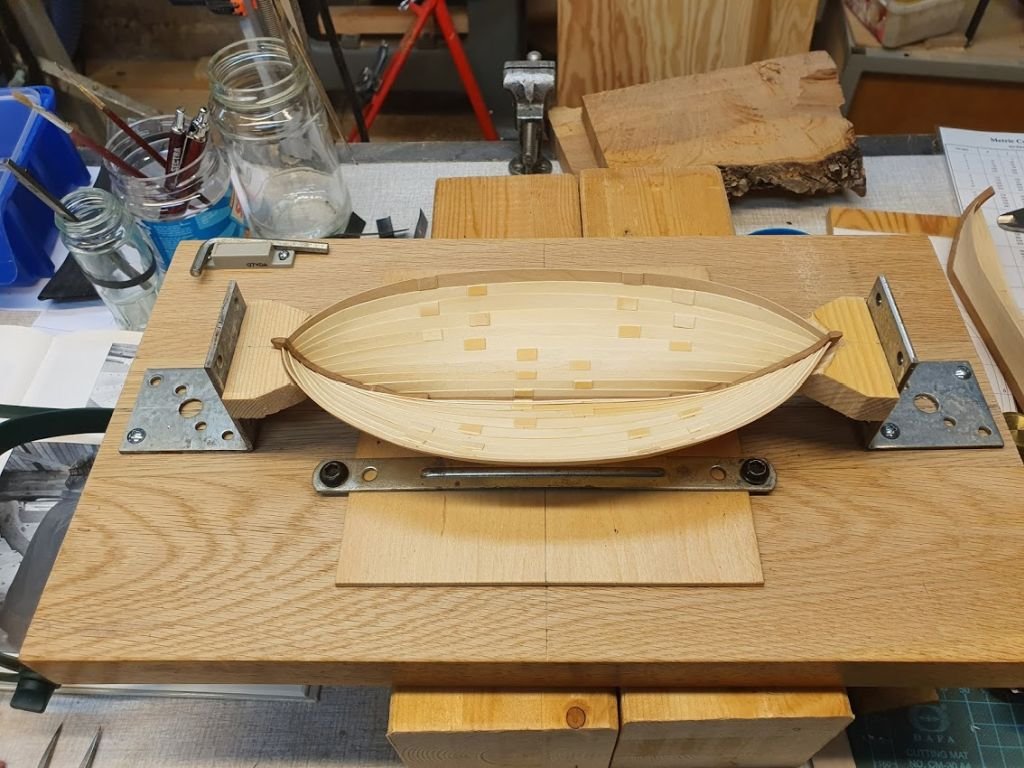
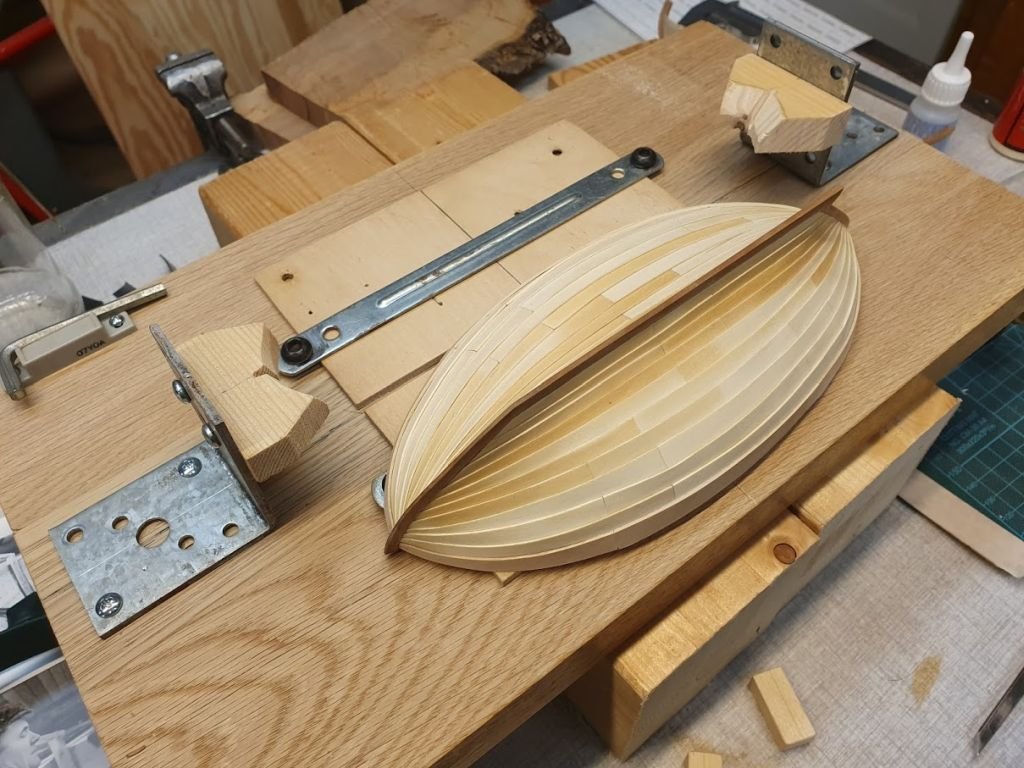
So, after first day at the office, well, home office for the time being I was eager to get out and finish of the sheer strake.
Apple was equally easy to bend as birch but as it turns out, much harder to sand. Which is a good thing because it holds edges really well.
I will not treat you with any close ups just yet because even if it looks really good and there has been quite a lot filing and sanding the sheer is not exactly where I want it.
Yesterday I also finished the building board. It will make due for small builds but for my next project I need to build a larger one (oh, a cliffhanger..).
Next up will be frames and other internal members. For that I need to revisit the plans in my computer to figure out placement and such.
Please excuse the occasionally unfocused images. They do however add that airy touch and enhances the subject somewhat 😉
-
Truly exceptional workmanship and an astonishing model.
I think what we are witnessing here is the true difference between The Master and The Apprentice in that the Master has failed more times than the apprentice has tried.
I mean that in a positive way bitao7967, since you mentioned in an earlier post that only the piece that passes your high standard gets pictured.
- mtaylor and Keith Black
-
2
Norwegian Whale Boat by G.L. - FINISHED - scale 1/10 - SMALL
in - Build logs for subjects built 1801 - 1850
Posted
Yay, it's not finished yet 😉
More delightful work.
A side note, what brand is your mini table saw I see in the background?