


Wintergreen
-
Posts
993 -
Joined
-
Last visited
Content Type
Profiles
Forums
Gallery
Events
Posts posted by Wintergreen
-
-
-
-
-
Yeah, sounds tedious. It looks very good though!
I guess the clenched side will be a bit of a challenge, washer and all 😉
- bolin, Louie da fly, Schrader and 2 others
-
 5
5
-
-
-
7 hours ago, cog said:
Those still exist in Sweden!?
Carl, yes they do. As you most certainly have read in any international paper Sweden has not indulged in total lock down. Blablabla death rates, numbers and all. Anything and everything can be shown with statistics...
Anyway, my line of work is in deployment of medical IT. No shortage of work there I can tell. 😉
- mtaylor, Baker and popeye the sailor
-
2
-
 1
1
-
53 minutes ago, wefalck said:
No Glögg ?
Sorry wefalck, of course there is glögg!
Still plenty in supply 😉 season is not over yet 🙂
-
Wefalck, you are most welcome! There is coffee and biscuits in the back and free seats up front.
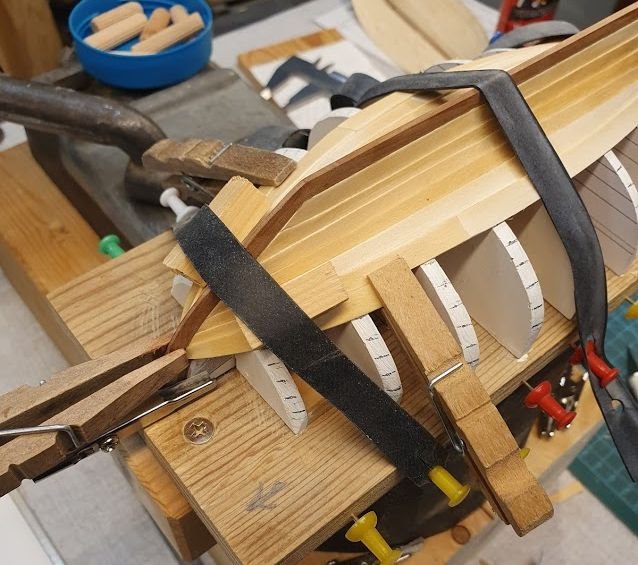
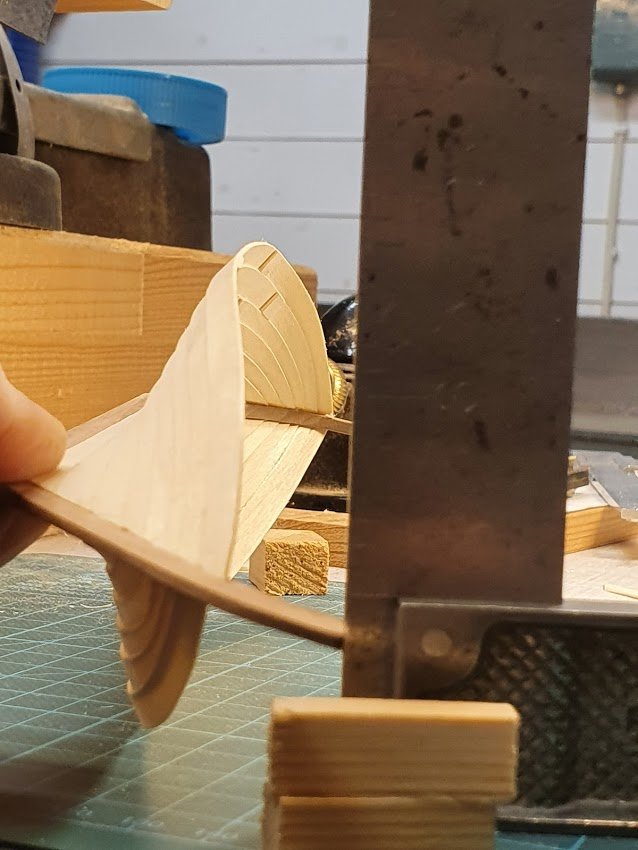
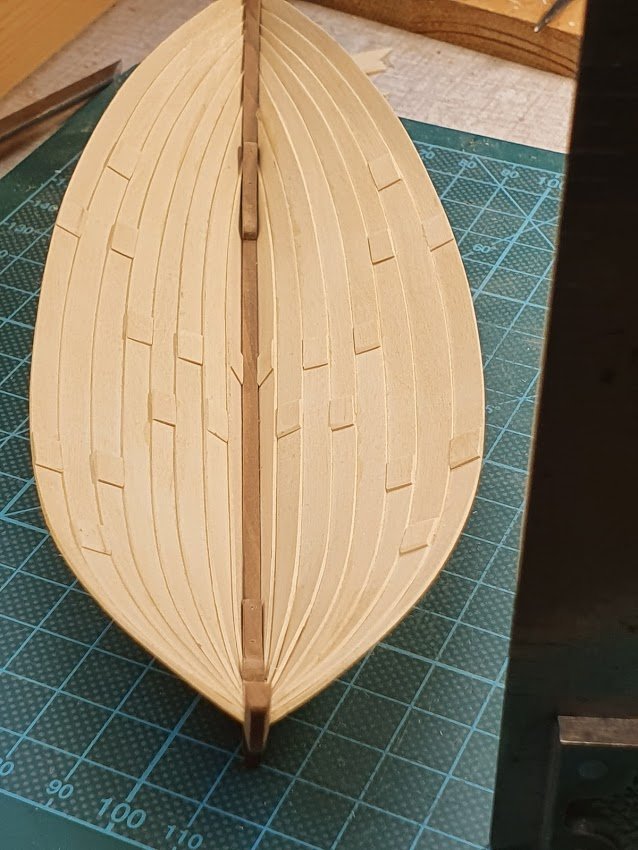
Planking is progressing nicely. Takes time and a crazy sharp chisel to get it right, or at least descent looking.
Yesterday I was aiming to get rounds 9 and 10 in place, but after a hizzy-fit (i.e. small mental breakdown) where startboard front plank came off with a rush I decided against that goal and called it a day. Round 9 was in place though.
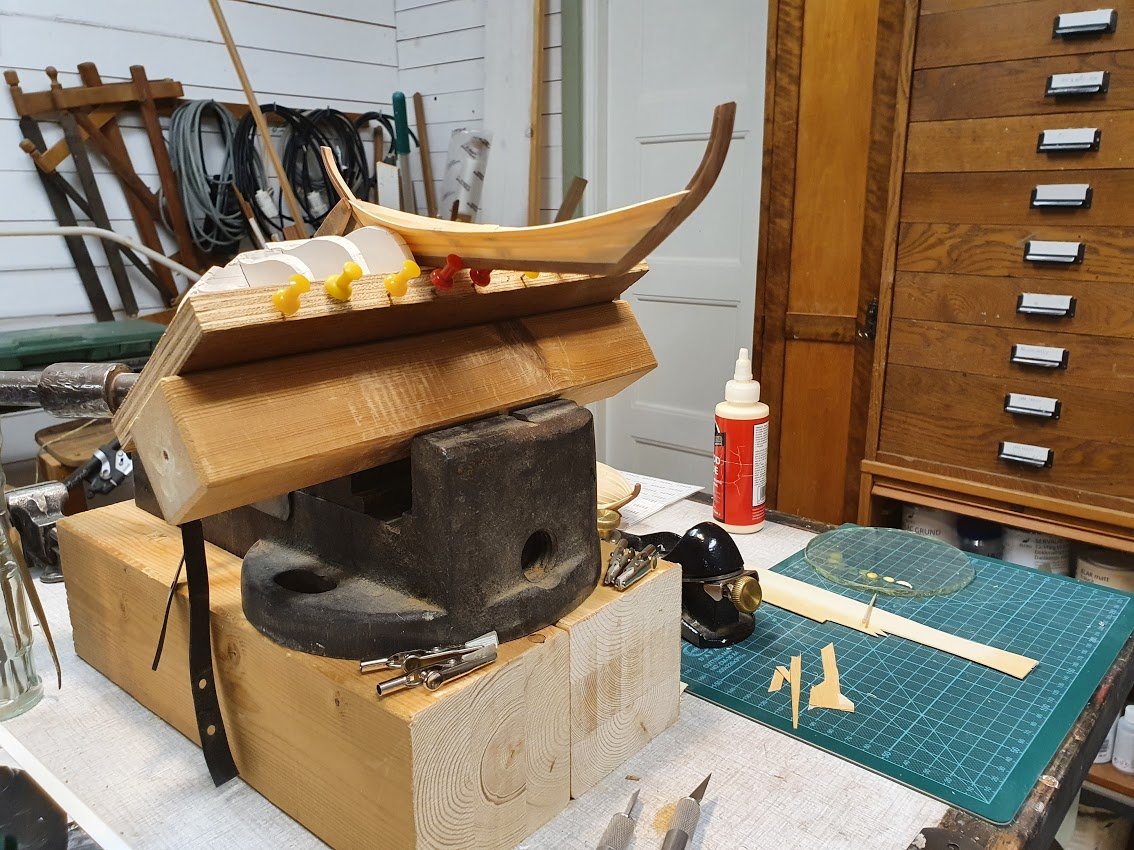
On the replica build the sheer plank is in white oak, while all other planking is in pine. Therefore I will do the sheer plank in apple, which the center line is also made of. A slab is put into picture to show its "raw" form.
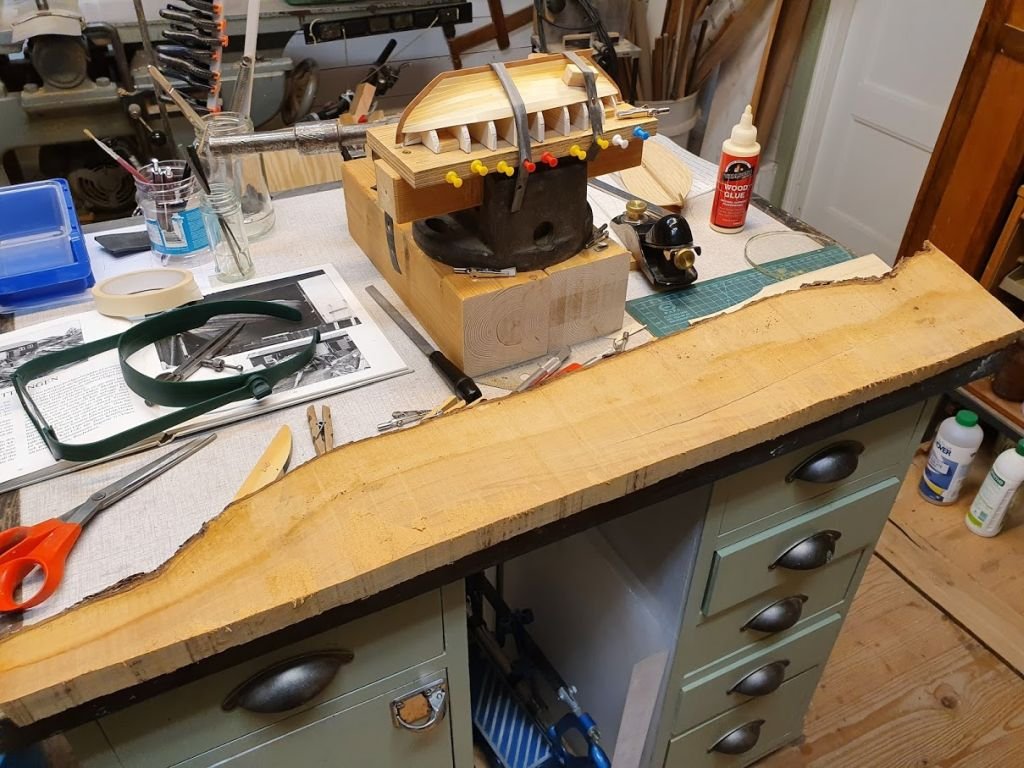
Some cutting, planing, more planing and then ripping. The pine piece is there just to get some distance between the blade and fence.
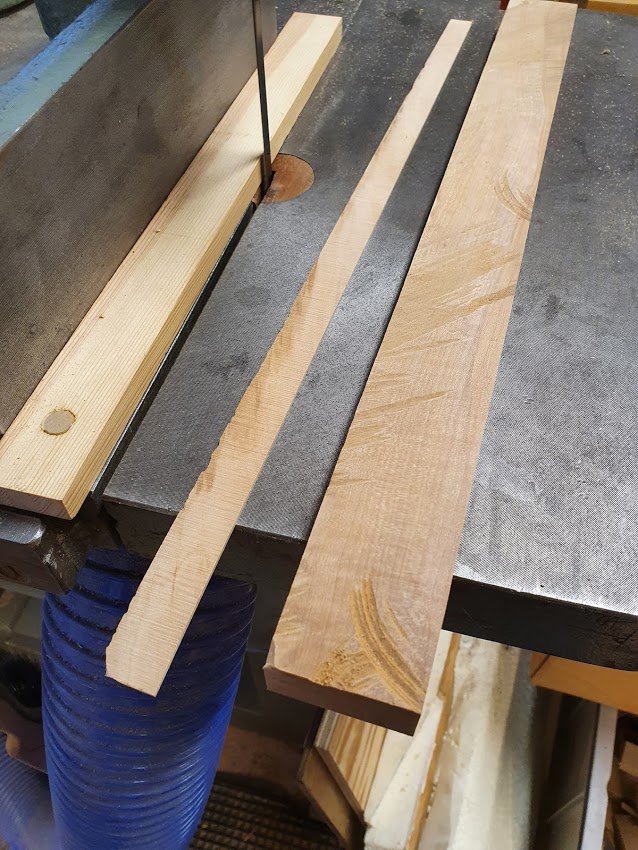
The ripped piece is ca 1.5 mm thick, hence over to my home made thickness sander to get it down to just shy of 1 mm.
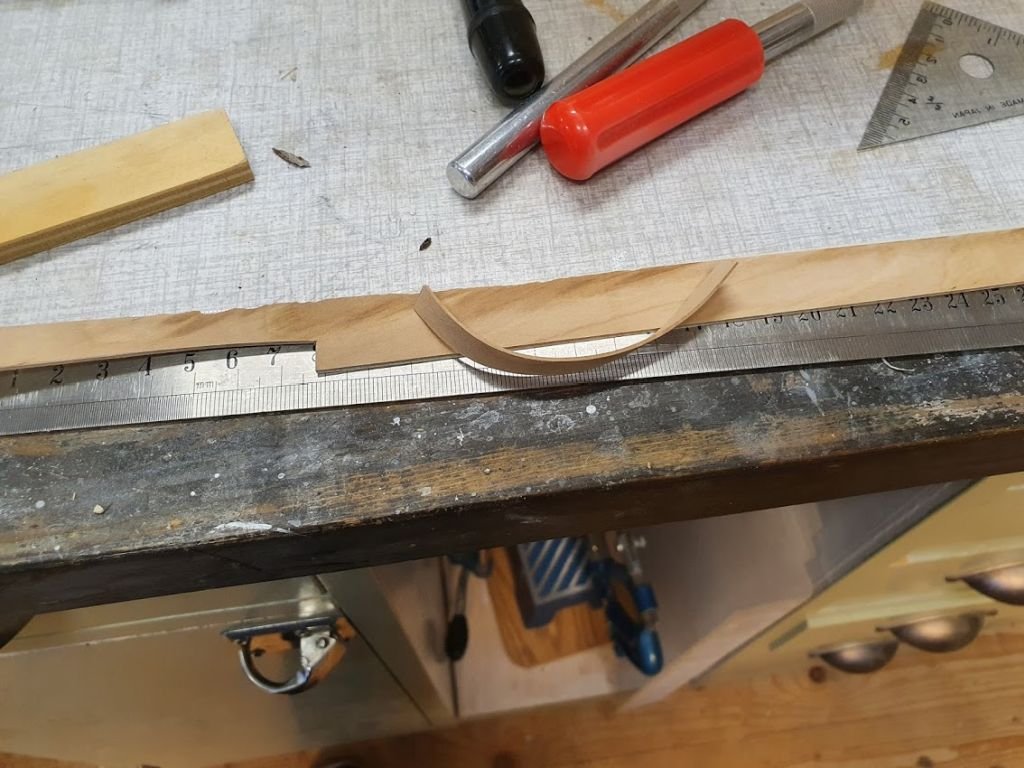
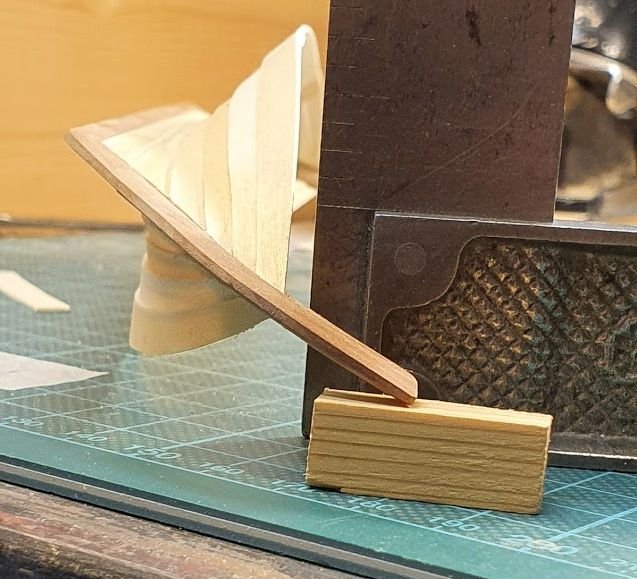
I guess apple is a little like pear with not to prominent structure. Birch, which is used for the planking is known to bend well, but apple I didn't know about. A small test was made, and well, there will not be any problems with bending apple...
Finally so round 10 is in place. One round to go...
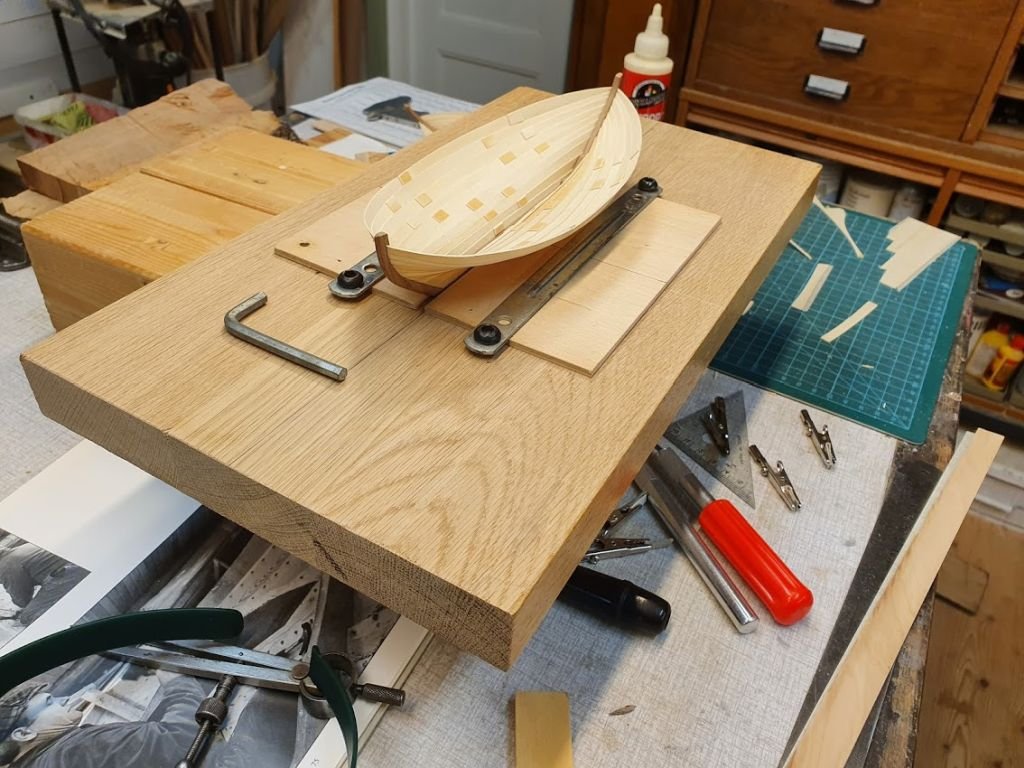
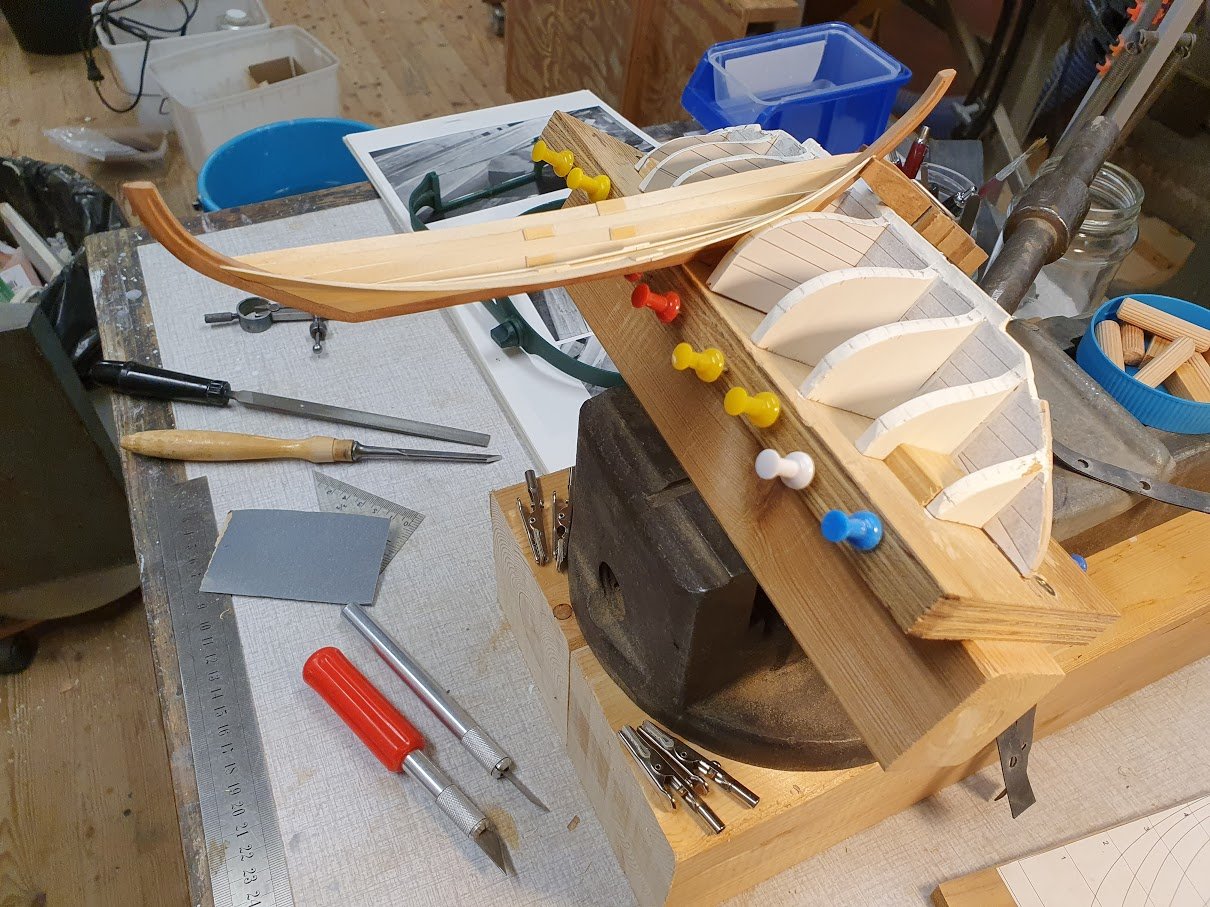
In preparation for fitting out, which I intend to do with the boat right side up a slipway is under construction.
Base is some scrap white oak glued together.
The screws are just tapped directly into the base, no nut or so. If not abused, tapping threads in wood holds surprisingly well.
To finalize the slip some kind of end support needs to be figured out. Will google around here on MSW to see what ideas can be useful.
Last pic for today. I am fairly satisfied with the planking. Actually, this is the best lapstrake/clinker planking I've ever done! Well, to be honest, it is the only clinker planking I've done bar the first attempt, which was never ment to be more than just an "attempt".

Tomorrow is bank holiday and after that my free time diminishes to that of regular, working people.
-
I don't know what the three previous attempts looked like, but the last looks up to it!
Well done!
- Duanelaker and douglaspbrown
-
2
-
-
-
-
Seems you're off to a good start there Neil.
First I couldn't tell if it were some kind of speedboat, but the latter pictures with forward cabin and sides kind of revealed it.
Will it be RC or static?
After a little more browsing I got that it's the boat from the movie Jaws of course!
Keep it up!
-
-
On 12/30/2020 at 11:36 PM, KirbysLunchBox said:
I am sure it is cheating, but I used a Dremel for the majority of the bulkhead shaping.
Well Kirby, technically you can't be cheating since MSW is not a competition. 😉
It's something about "ends justifying the means", if it works - keep doing it.
-
Kirby, great start!
Don't let all small mishaps dampen your spirit. I have my first build in plain sight just to remind about where I started. (Billings Wasa, heck of a subject for a first build...).
It is a constant learning curve and the good thing about wood is that you can glue back together (most of the times, otherwise just source a new piece).
About the bulwark, will there not be planking on the inside to cover the low spot?
Anyway, keep it up!
And I couldn't help but notice, is it you or has the fairy lost her wings?
-
Thanks guys for shown interest.
Bolin, cool that my finding was somewhat applicable to your builds.
Vaddoc, thanks for sharing your insights.
Re no1. Yes, it is very subtle what defines the "handsomeness" of a boat.
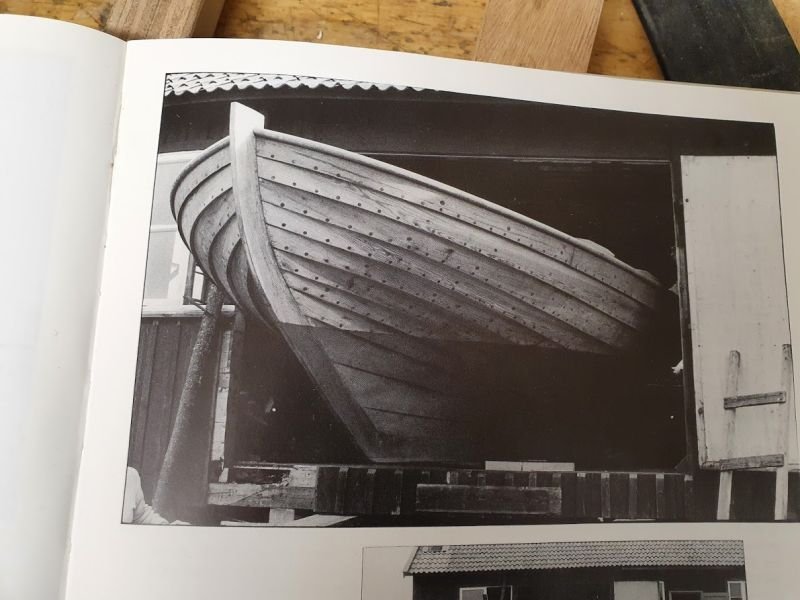
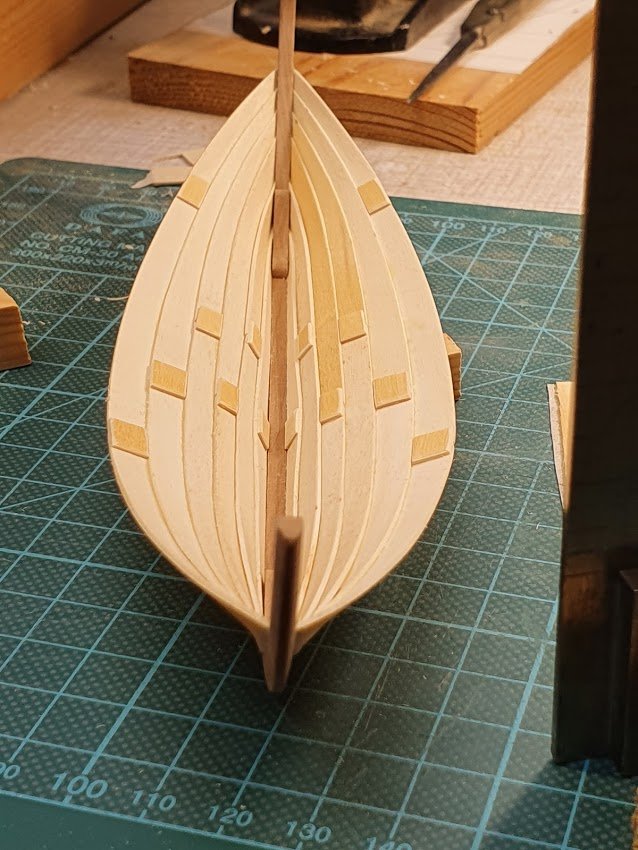
Re no2. This build follows that of a replica. Seen here is the hull exiting the workshop. Stem first. It's a prominent feature that the garboard and 2nd & 3rd planks are quite wide while the upper planks are a lot narrower.
Re no3 & 4. Absolutely, I'm with you on those.
Re no5. As I mentioned in my post, you may accomplish the same result with a different approach 😉
- cog, mtaylor, kees de mol and 4 others
-
7
-
1 hour ago, drobinson02199 said:
going south for some warm weather
That sounds just terrific! Any open positions?
Kidding aside, your doing a good job with Cheerful. Such a nice little kit.
-
Interesting build this Coca 🙂
The shape of the hull on these old ships are so different from later ones and really tickles the imagination. I like it!
As with rigging or anything else about fitting out a model, planning ahead is key to success. The saying is "measure twice, cut once" but I would refrain it to "think twice, and think again" 😉
You are doing well!
-
Hej Henrik!
Five years seems reasonable to me. It all comes down to perseverance. In other words - keep it up, however slow your build is going. If you don't build you won't be getting anywhere 😉
The 64 gun ships are the most handsome in my eyes when it comes to these square riggers. You're doing a good job on your build I can see.
- mort stoll and Henke
-
2
-
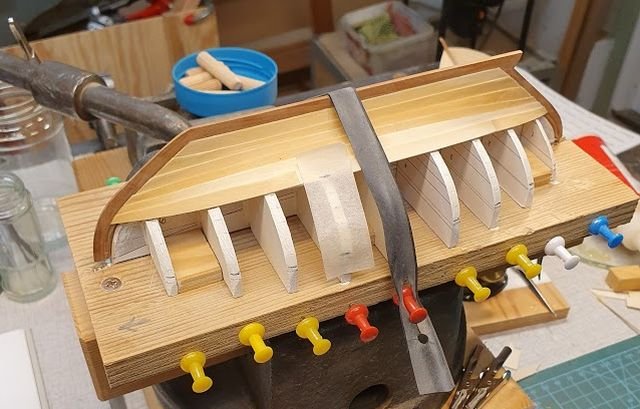
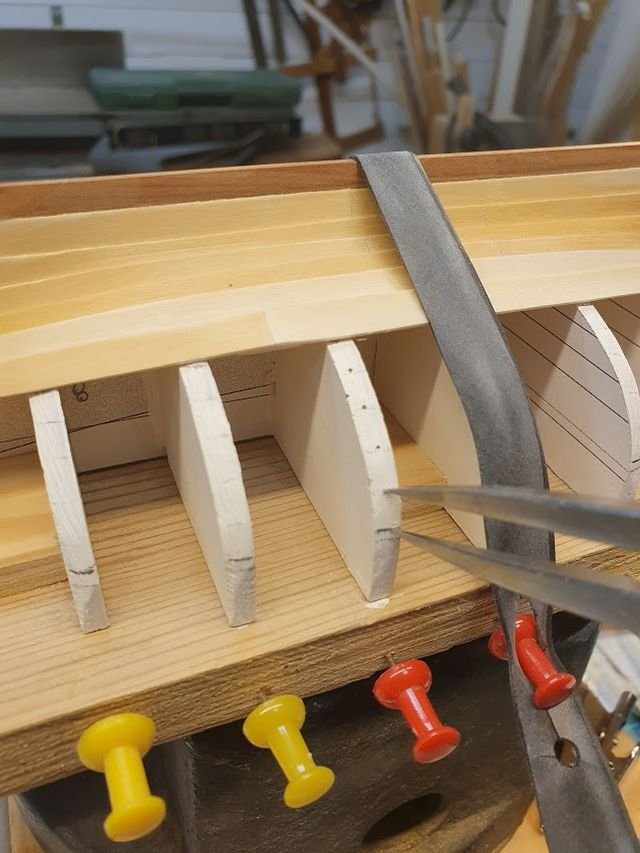
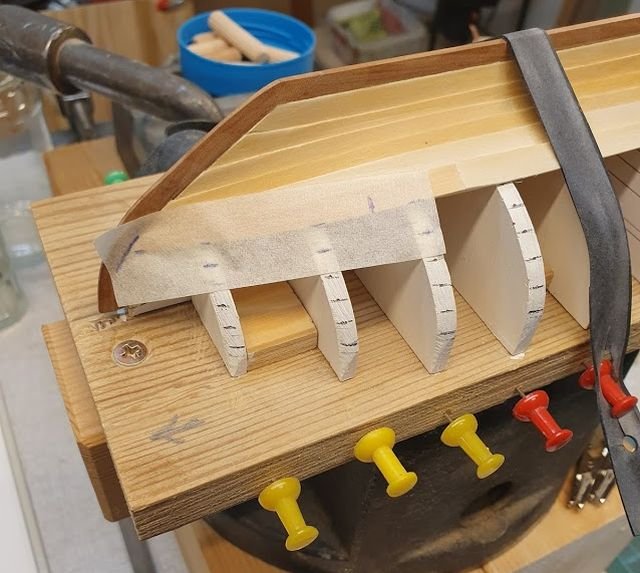
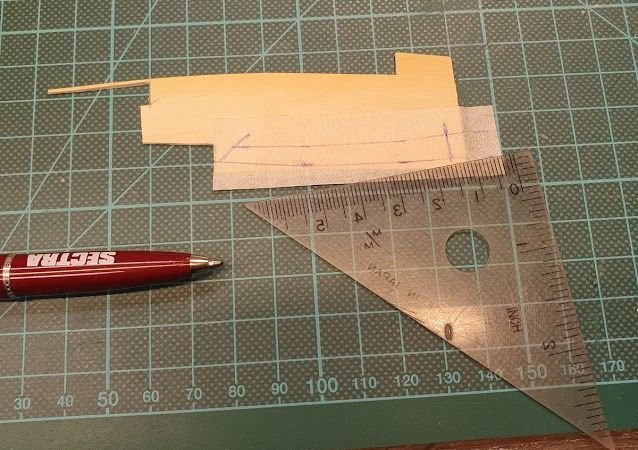
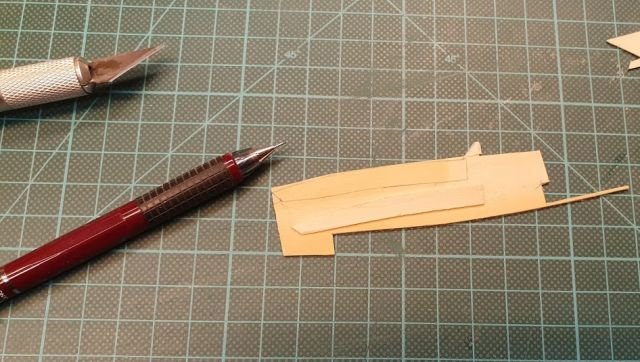
Since progress is painfully slow I thought I could post my way of planking.
As with Windows operating system there are at least 3-4 other ways to accomplish the same, but this works for me.
- The upper 5-6 strakes are equal in width and to determine that width simply use a bit of tape. Mark where the sheer is and where last plank is.
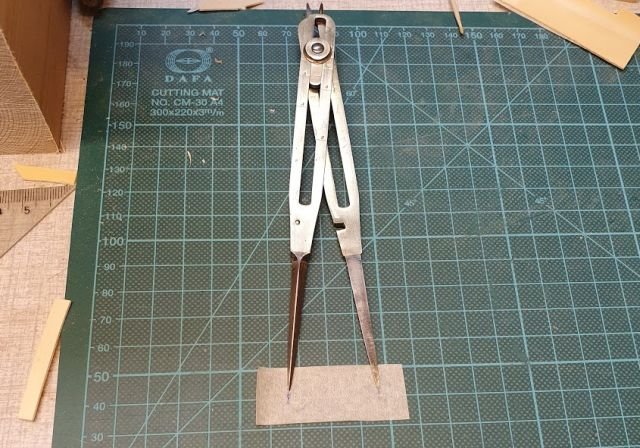
- Use a proportional divider (or simply measure and divide the math way) set at number of strakes (5 in this case).
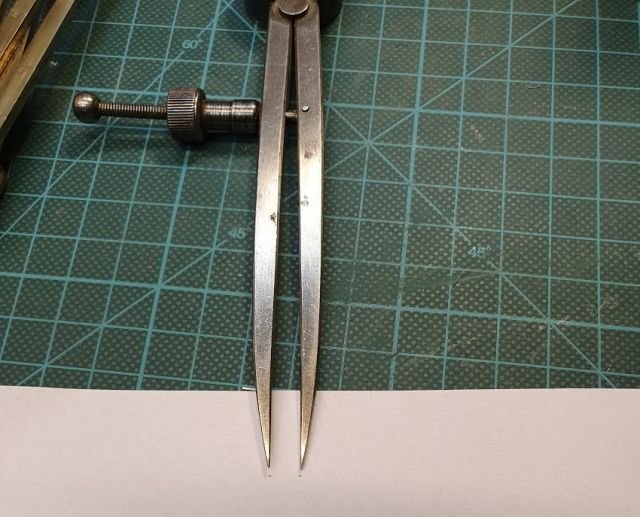
- Transfer dividend to paper and then on to divider of choice. I don't like the idea of using the prop divider as anything else than what it's aimed for therefore a sturdy divider is chosen.
- Mark each edge on bulkhead. Then repeat for all other bulkheads, or every other or just eyeball it. Depends on what accuracy you aim for. In my case I marked two more bulkheads and then eyeballed the rest.
- Tape again. Transfer marks from mould to tape. The orthogonal mark is where the plank should end.
- Trace marks and rough cut the plank. After some fiddling about to get accurate shape, use first plank as template for its mate on the other side.
- I wet the planks for less than a minute then clamp in place. Wait to dry and finally glue in place.
- Repeat.
And some pictures to be a bit more graphical about it.
1.
2.
3.
4.
5.
6.
7.
8.
Will post again when I think I have something to share or show.
Enjoy your Saturday!
- Baker, Zarkon, GrandpaPhil and 7 others
-
10
-
What a good start to 2021! First a hard session on the bicycle trainer and then boat building 🙂
(Not to mention the American pancakes with crunchy peanut butter, bacon and maple syrup for lunch 😁)
Thanks for the Likes also! Always good for the mind and spirit.
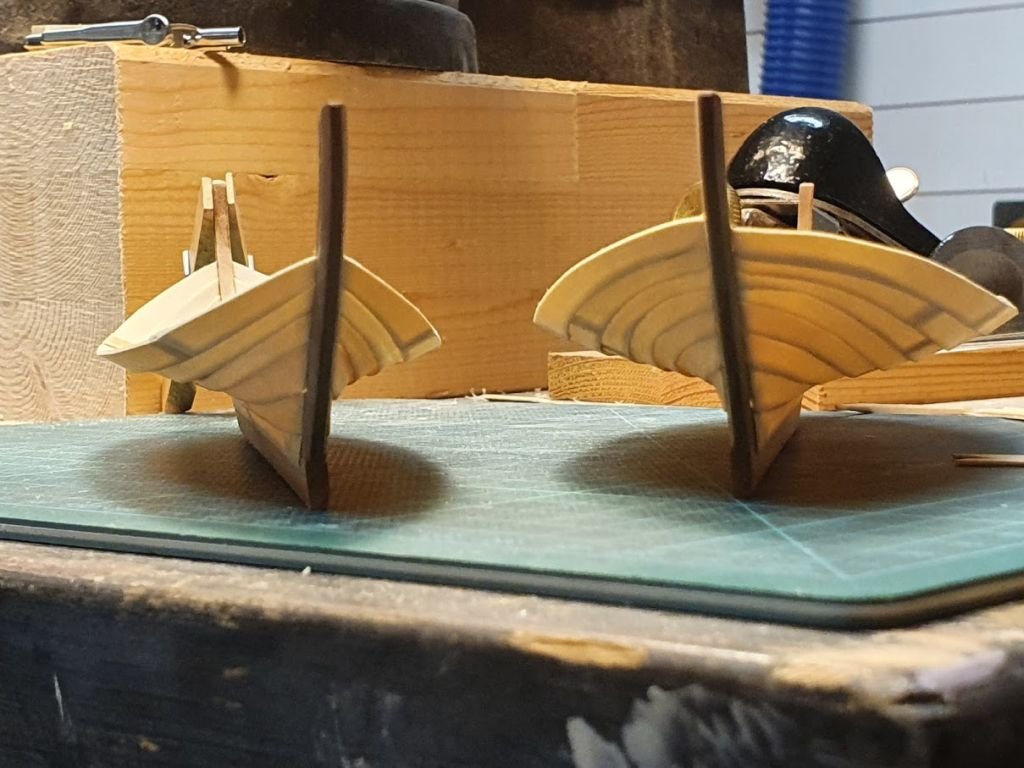
Anyway, today I think I have found the key to a smooth clinker built hull. It appears that, at a specific angle the strake should appear straight leding in to stem or stern. At all other angles the strake is far from straight on the other hand.
Pictures below will explain.
IF the strakes are trimmed to appear straight leading in to stem or stern the shape falls into place, so to speak.
2nd attempt now has 6 strakes done. For comparison the 1st attempt is shown as well.
2nd attempt, straight line. Bow view.
1st attempt, not so straight. Stern view.
From another angle, 2nd attempt. Bow view.
And 1st attempt from another angle, appears not so different from 2nd attempt. Bow view.
And finally side by side. Sorry for the focus on the 4x4 in the background...
Quite different looking hulls from this perspective. Stern view.
- wefalck, popeye the sailor, bolin and 4 others
-
7
-
Some more progress today.
Two more strakes at each side. I found that if I could be a little patient it payed out to do and fit the planks in pairs. Well, constantly learning or finding small tricks along the way.
And last picture for this side of new years. May 2021 come with less panic and more content!
One could always make a pun about "to infinity and beyond" 😉
Happy New year everyone!
A small note on the progress. I am not completely doen with the fourth strake shown in above image. Still need to eyeball the run at stem and stern. But the strakes basically meets the timbers where they're supposed to.
Beavers Prize 1777 by Mike Y - 1:48 - POF - Hahn style
in - Build logs for subjects built 1751 - 1800
Posted
Very nice planking there Mike!
Really sweet. And boxwood, don't think I'll ever use it, but it seems quite extraordinary.
Keep it up!