


Wintergreen
-
Posts
940 -
Joined
-
Last visited
Content Type
Profiles
Forums
Gallery
Events
Posts posted by Wintergreen
-
-
2 hours ago, mtaylor said:
And here I thought you were doing a fine job on the build... So a second time? Why does that sound like something I'd do????
")
Thought you'd find it familiar MT...
MP - no need to worry. We have this white stuff regularly here at 58 degrees north, like every once in a while every 12 months or so... last winter wasn't much, but this year there is more of it.
-
-
Thanks for likes, comments and encouragement.
Vaddoc - you are quite right. The garboard is too wide also. I'm not overly concerned since this is a practice run for me. I will build it a second time as soon as I get the hang of it.
John - that is what I read from the book as well. Kind of "the builder was a bit concerned about the shape since he hadn't built this specific type of vessel before. But with eyeballing and pencil marks he got the lines where he wanted them". However, he actually uses a template to pick the lines from one plank to the other.
Tabycz - I think you mean all the juniper dowels? I might put pins in at stem, stern, keel and plank joints. But not along each land (overlap). The land is merely 1 mm wide and would definitely ruin the hull if I tried.
Well, it's out to the shop now.
Stay tuned.
-
-
Haha, about all that c**p in the background... you should see my photos. All kinds of weird stuff. I think it makes for interesting thoughts "wonder what he will use THAT for"
Oh, and also, very nice launches Paul. Keep it up.
- Keith Black, robdurant, Canute and 2 others
-
 5
5
-
Thanks for the likes. Glad to see that there are readers.
Anyway, the day went. Grandkid came, and that was that. Now, she's asleep, so some time to type.
About spiling and clinker, or lapstrake, builds. This is my first attempt at this, so there will probably be lessons learned and working experience later on. However, compared to a carvel laid hull where planks fit long side to long side, and you quite easily can force later planks to the edge of the former, the clinker style means the planks overlap each other and thus form a stepped style. You probably know this already. Otherwise Wikipedia will help you understand.
From my short experience there are some major challenges with this.
- You cannot force the plank in place sideways, it has to sit nicely. If force is used the overlap will be out of bounds. Hence, every plank needs more or less spiling.
- These boats are usually all about the shape. You have the sheer as with a carvel build. But with clinker we are reminded by every single strake if the run of the plank is off in some way.
-
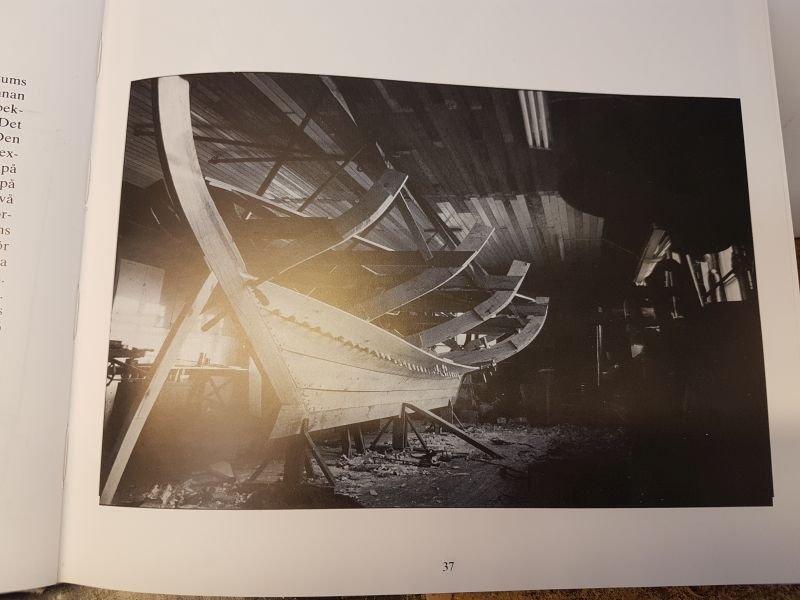
No steelers nor drop planks. Not an option. Every. single. strake. runs all the way from stem to stern. The challenge is to get the run of the planks right when the width of the plank changes. Eyeballing, proportional dividers, measure and measure again, then try. If not satisfied - repeat.
Unfortunately it is not as simple as just divide every frame/mould with decided number of strakes, then it will look very odd. As can be seen in my previous pictures the first strakes get wider at stem/stern. After two-three strakes the opposite will be true. All planks are narrower at stem/stern to fit in.
How to solve the issue with spiling. Basically it is the same as for carvel builds. Chuck, Druxey and others have written articles about it.
First I tried with cardboard of approximately same thickness as the planks. Didn't work too well. Hard to handle due to small size. Hard to see adjacent strake.
For the third strake I remembered that, I think, Chuck used transparent tape. It sticks to the moulds, easy to see and mark. Lacking transparent tape I used the regular painters masking tape and found that it was semi-transparent. Good enough.One thing I picked up from Underhill's book was his practice of gluing thin material to a backing piece of cardboard or paper. My plank material is thin enough to easily be cut by #11, it will however splinter just as easily. With a broad piece of masking tape on one side - problem solved.
That had another advantage I found out later.
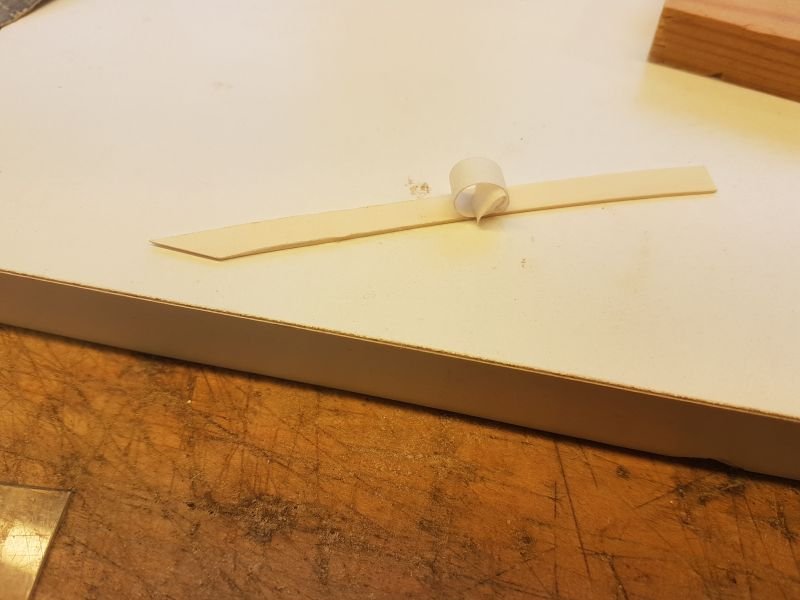
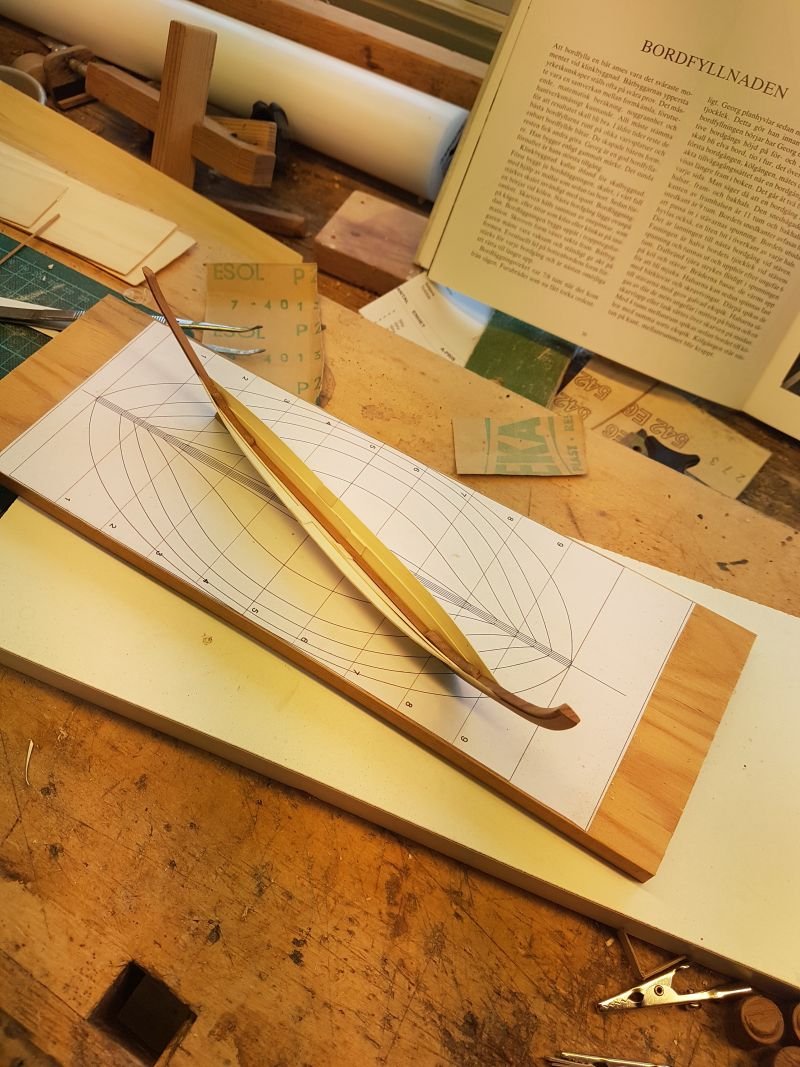
Enough text, show me some photos...Here the cardboard templates are used.
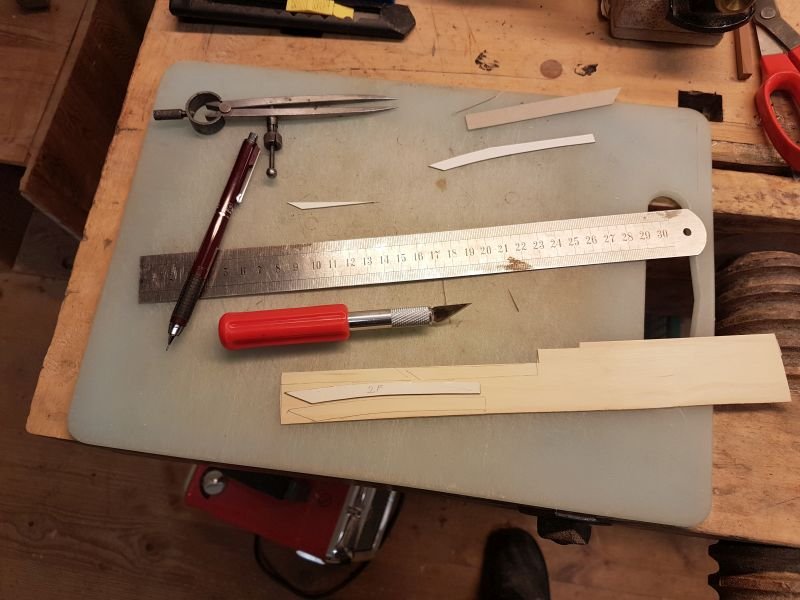
Now, masking tape instead.
Stick tape to a white surface. Connect the dots with a smooth line.
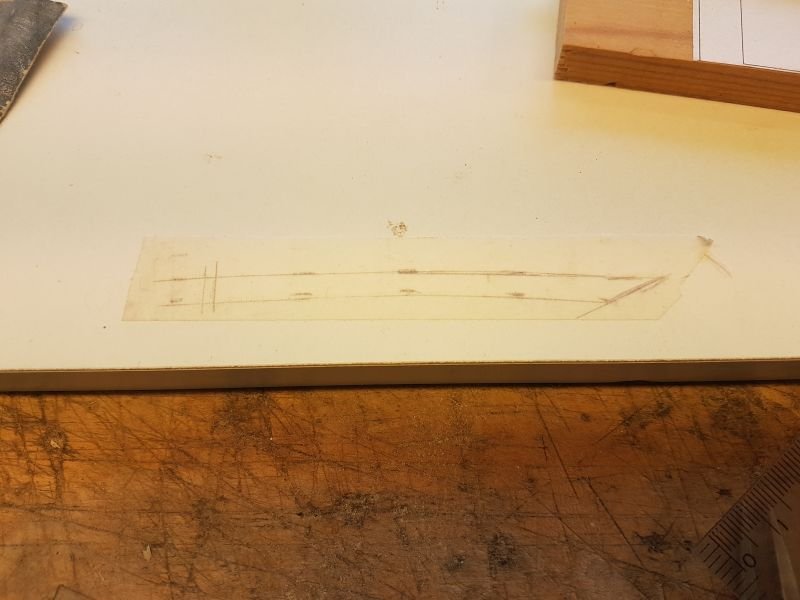
Move tape to plank material and cut. Backing tape on other side.
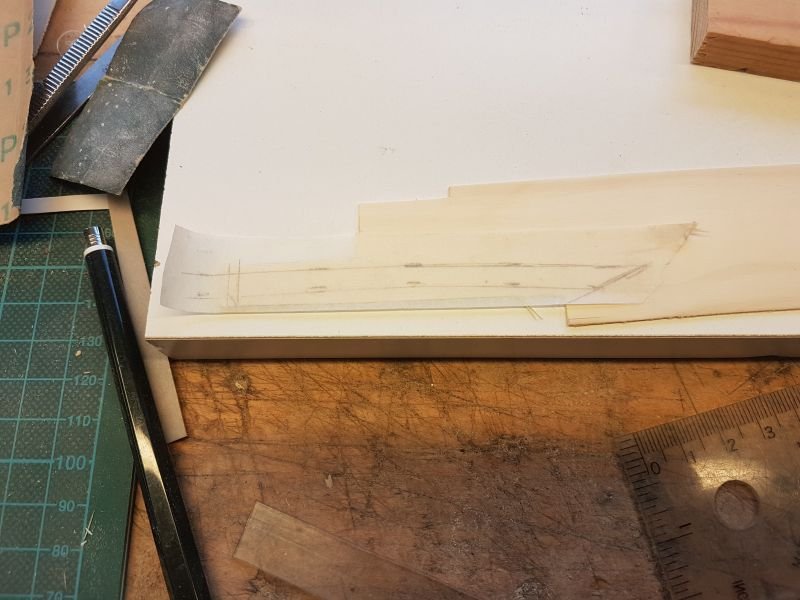
The advantage with the backing tape is that it can be used as template for the accompanying plank port/starboard. By the way, leave the backing tape as long as possible.
Meaning all the rough shaping is already done. Every plank still need shaping to fit, but saved some time still.
Bending is performed with a dab of water and heatgun. Birch is very adaptable and bends easily. It holds edges fairly well also as can be seen in a previous post.
That was it for today.
To be continued...
- cog, kees de mol, CaptainSteve and 9 others
-
12
-
Mark, your Bellona is a very handsome model.
Great work.
- robdurant, mtaylor and aviaamator
-
3
-
Hi guys,
the day is only half-gone here, but I just had to share this update with you.
First task for today was to clear a path to the shop... about 20cm/8" of snow overnight.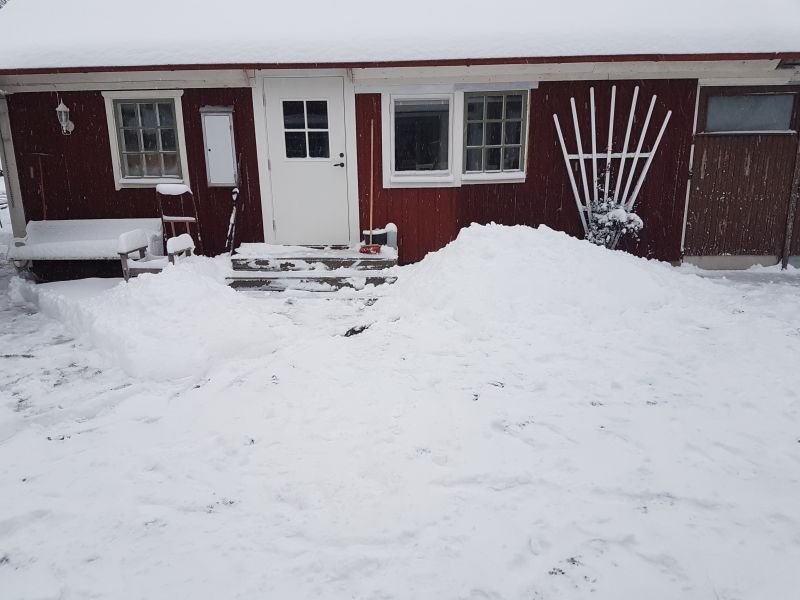
A short business trip took away a couple of days from the week, but back in the shop I made some progress.
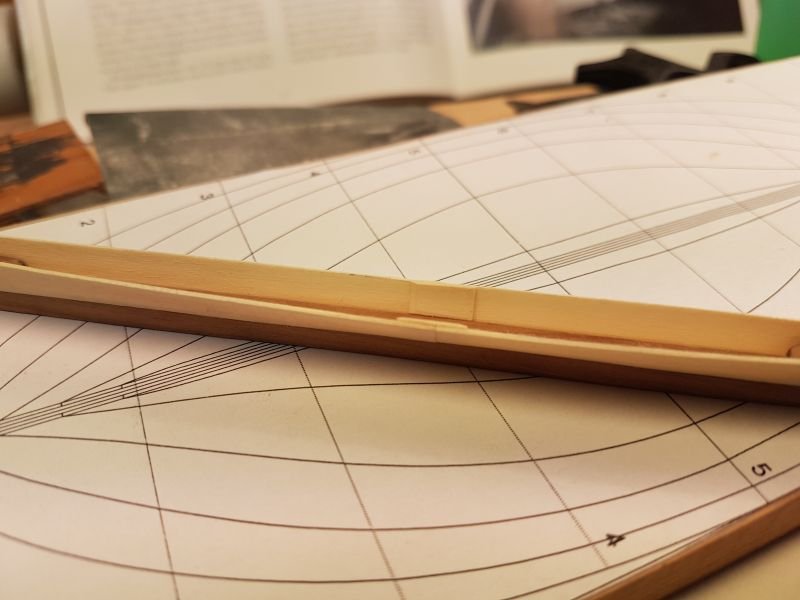
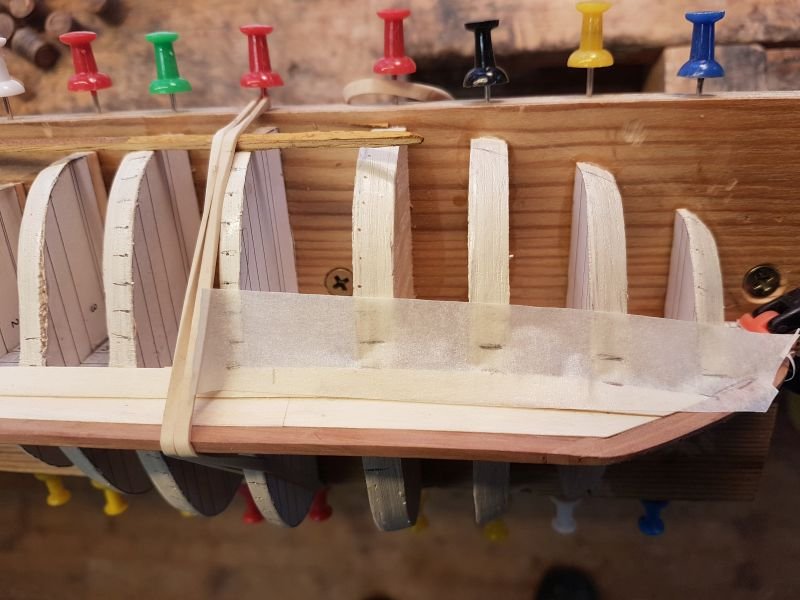
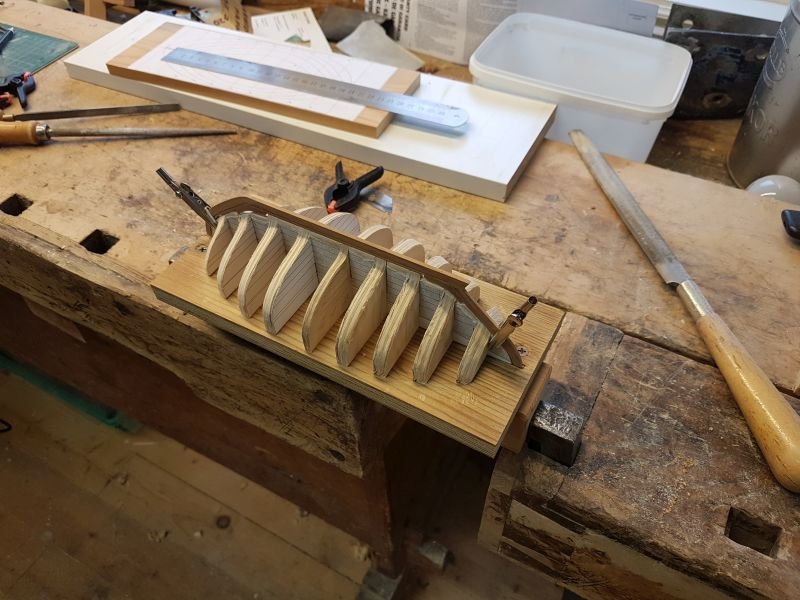
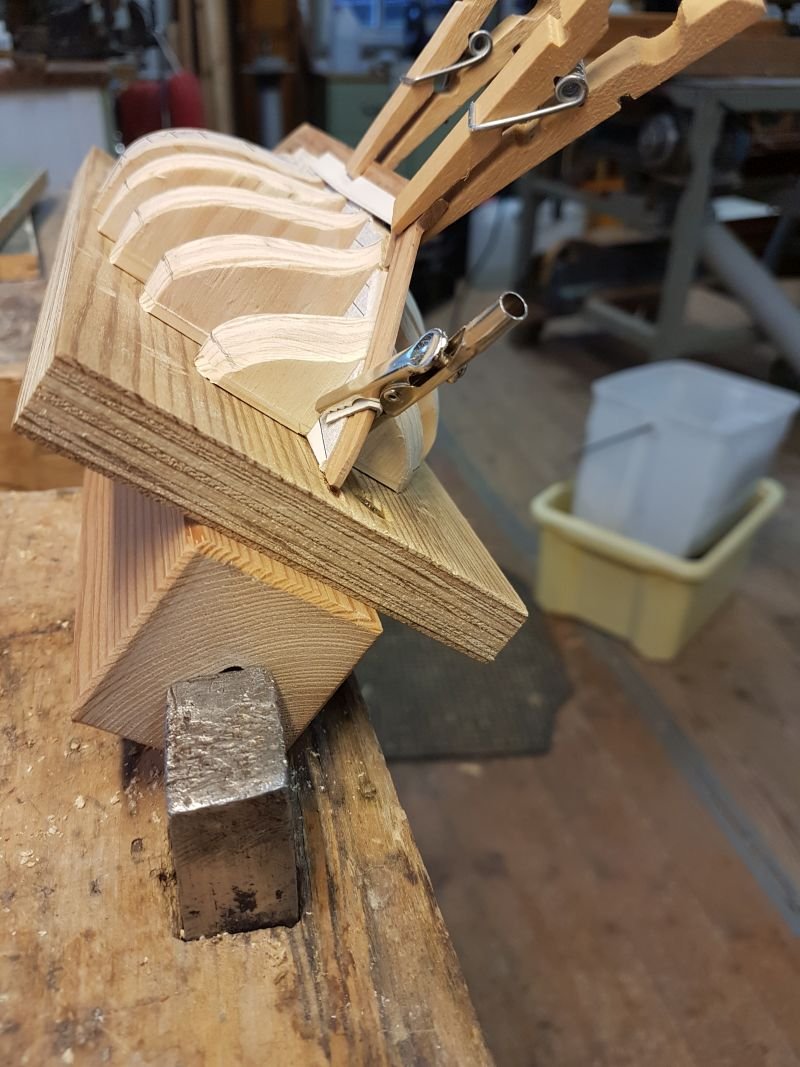
Clinker/lapstrake is really something tricky to get right. Spiling and all that. In a later post I will show my trials and tribulations. On the trip I re-read H.A. Underhills chapter about clinker built boats, which was useful.This far two full strakes are on. The scarphs are just plain butt ended with a backing piece on each. Joggled of course. Later each strake will be of three pieces.
Rubber bands and teak buns keep planks in place. I need to figure out some way to have the clamps not slipping off. Maybe a bit of tape will do the trick with enough friction.
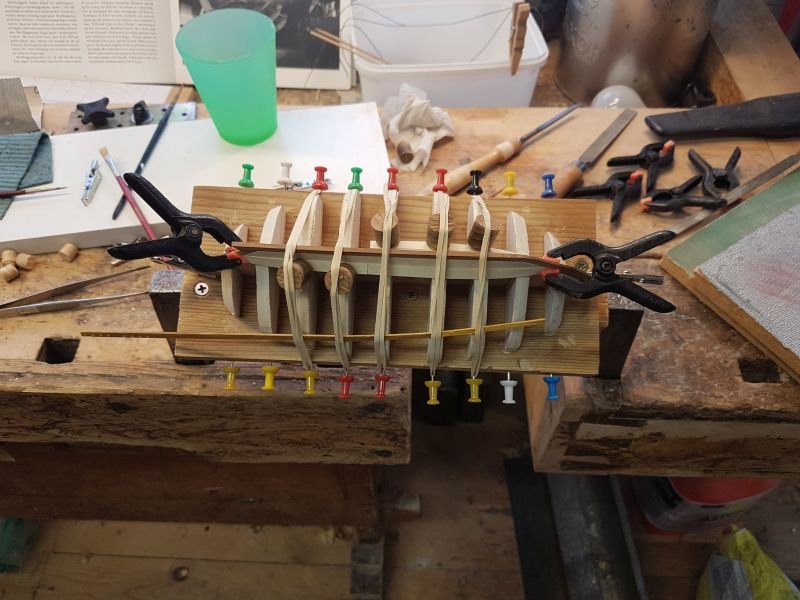

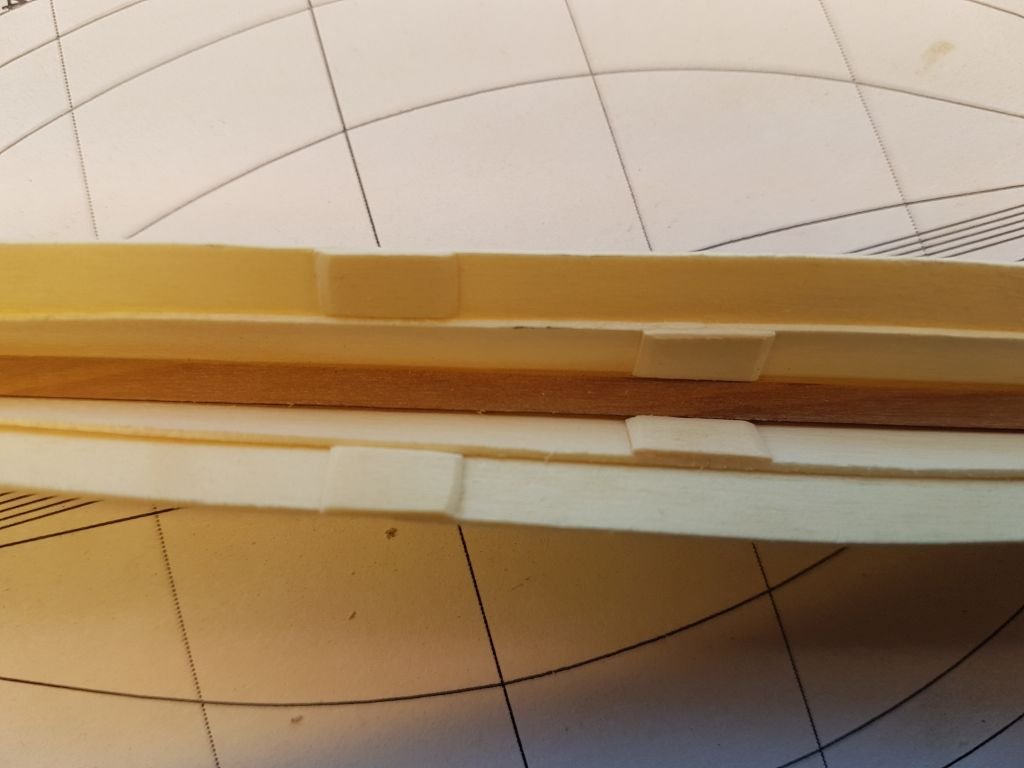
Backing pieces have beveled edges for appearance. Should be pinned also, will see if I do that.
I am really enjoying this build. The result is far from perfect, but this is also my first time doing this. And since I have this first build as a practice run, my second will undoubtedly be better.
To be continued...
- Mark Pearse, archjofo, reklein and 14 others
-
17
-
-
Good progress there John despite everything around you.
I reckon that the space is limited at 1:96 even if you state the opposite. Reckon you have one of those mini yardsmen with an adze at your service...
- Piet, mtaylor and popeye the sailor
-
3
-
-
Nice work, Nils.
I directly thought of captain Jack Sparrow and his "able bodied crew" when I saw the figurines 😆
Spot on!
- mtaylor, Piet, popeye the sailor and 2 others
-
5
-
-
Hi guys!
Thanks for likes and comment.
Progress has been slow despite quite a few hours in the shop.
Why? Preparatory work.
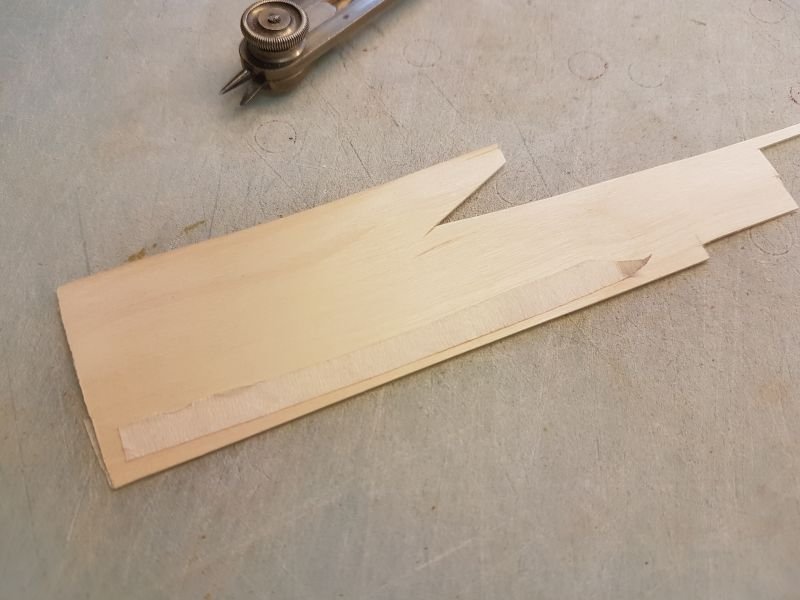
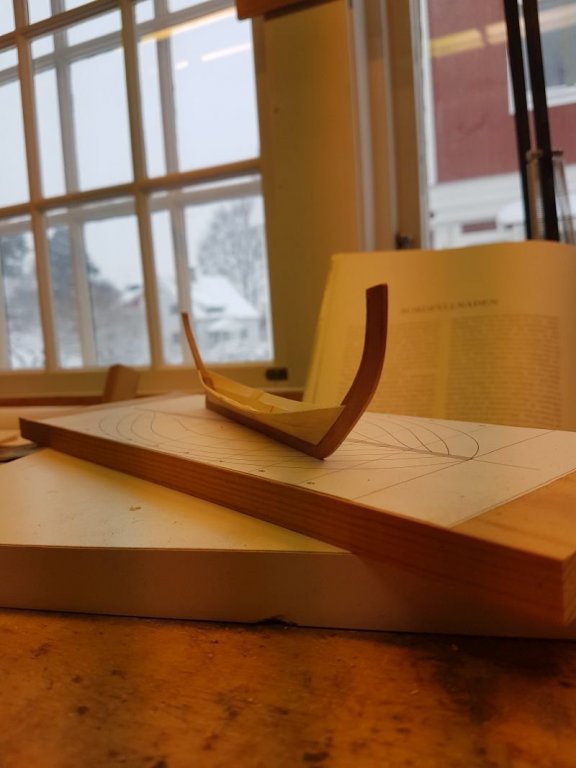
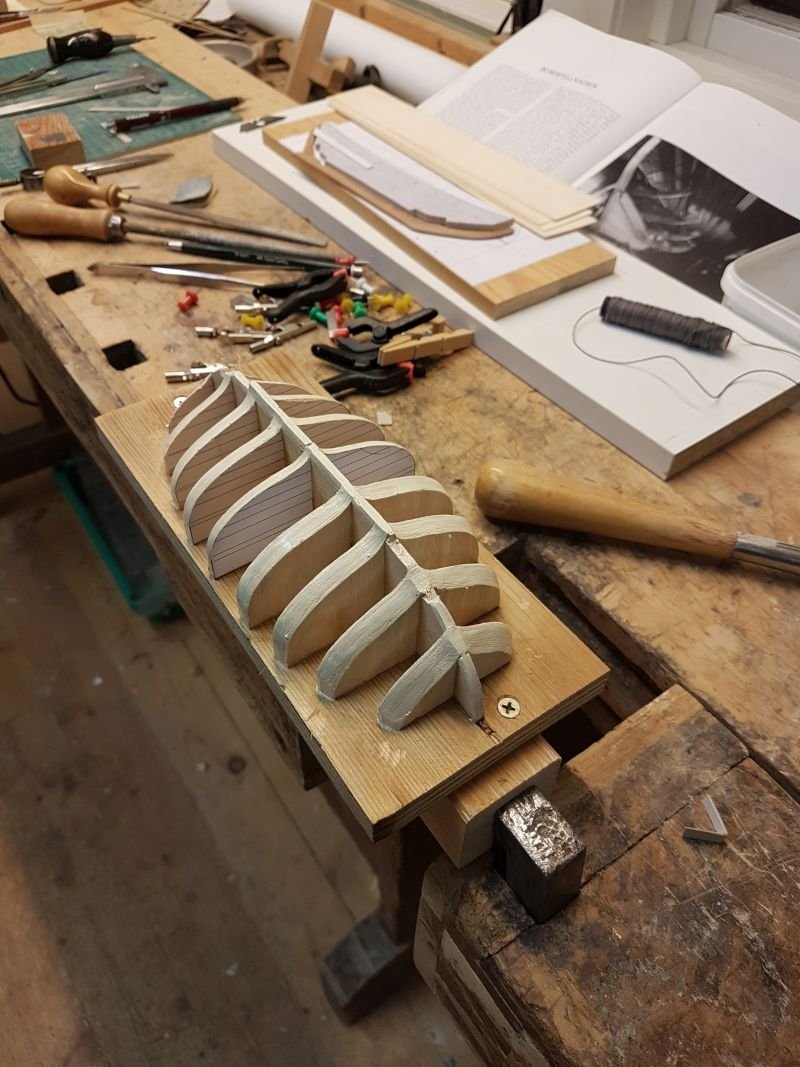
It's like when all you want to do is to get that wallpaper up and instead you find yourself put up drywalls, fill screw holes, and then some sanding and after that more filling and more sanding. And just before you break the seal on the first roll of paper you realize that you need to prime the drywalls otherwise there isn't enough glue in the world that will keep your wallpaper up.First, a picture to soothen the soul.
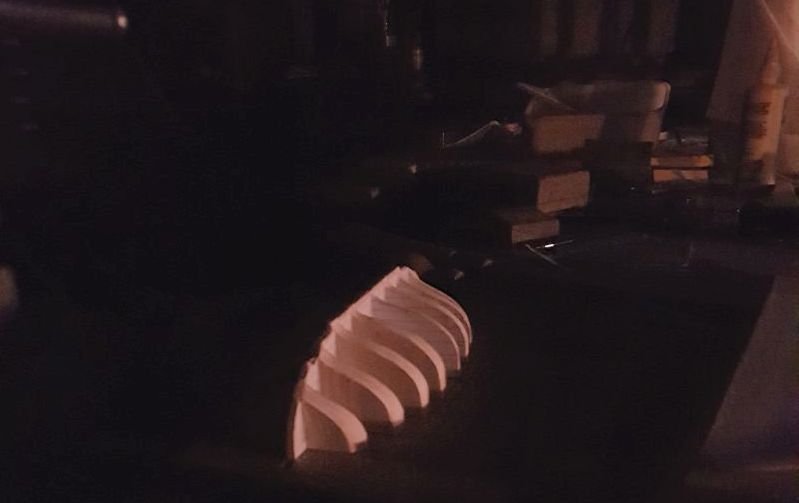
With a multi-tool equipped with a drum sander it was quite a quick job to get the skeleton close to shape.
However, to really get it down to specs took some grater care. When I gladly thought I was done prepping I cut the first strake out of cardboard.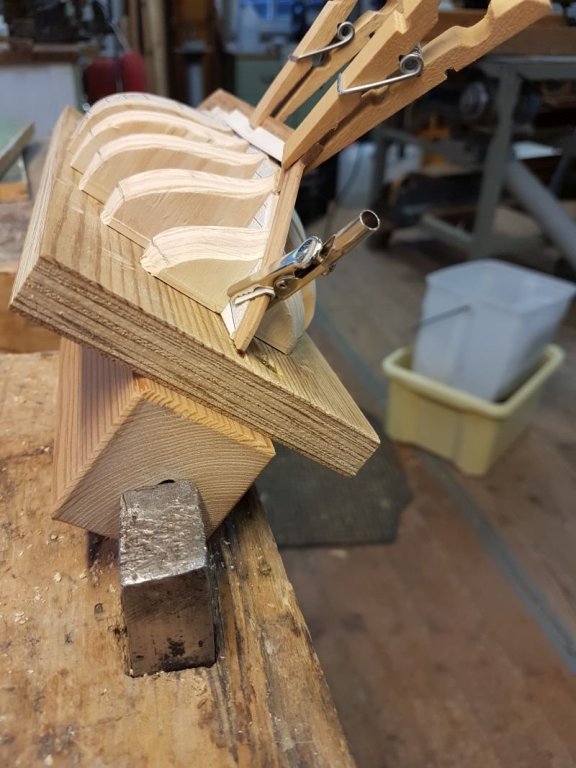
Not happy with the run I turned to the book.
Yes, that man has like a lifetime experience of building boats. I have not.
While contemplating the planking I marked every plank on frame five (middle one). Then it appeared to me that the frame templates needed protection and with a sealed surface it would be easier to mark runs and all that.
So first a sealer then a layer of some very old Humbrol paint. Fascinating enough, the paint is something like 20 yrs old and still "usable".
By that I also put an end to this weekends affair in the shop.
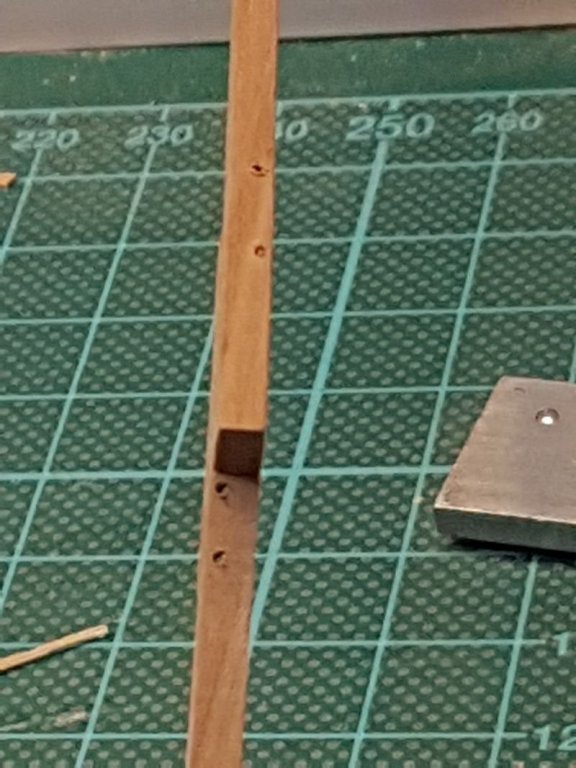
In the background can be seen blanks for planking. 20 mm (3/4") in real world translates to 0,67 mm on my work bench. Not that they are EXACTLY 0,67 mm thick, more like 0,7 mm. Close enough me think.
To be continued...
- kees de mol, hexnut, vaddoc and 10 others
-
13
-
-
For someone without artistic ability... I would say that that carving is p-r-e-t-t-y d-a-n-g g-o-o-d!
I think you should reconsider your abilities Toni ;-)
- Mirabell61, mtaylor and Martin W
-
3
-
Nice looking vessel.
Count me in as a bystander :-)
- russ, popeye the sailor and mtaylor
-
3
-
As all your work, stunning.
But, rinsed under running water... then you are very sure the yard wont bend when in water. Straight grained should not be a problem though, but there could be surprises. I guess one should consider which wood, and how it was milled before opting to soak tiny long structures in water.
Oh, and btw, Santa brought your first Naiad vol. A very nice piece I must say!
-
That is a very sharp looking launch. Well done!
- KeithAug, John Allen and mtaylor
-
3
-
As per requested, the day was spent in the small ship yard ;-)
What did master accomplish?
Some much needed clean up of some rubbish in the corners of the shop.
Assembled the keel, stem and stern.
Managed a decent tapering of the structure.
And also something to be not so overly proud of, though I thing it happens to all of us...For the assembly I started with the fore knee and glued it to the keel. Then I faired the surface that faced the stem. My template was faired alongside this to get angles of stem and stern fairly close to spec.
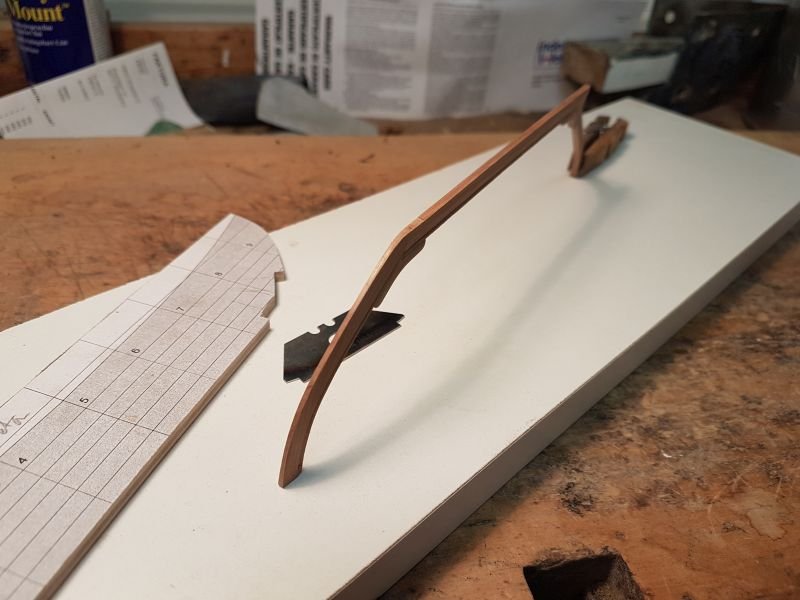
The aft part then, sternpost and knee glued together. Some minor adjustments and it was glued to the keel.Drilling for bolts were done on freehand (which can clearly be seen in pic 1) with my bulky Dremel.
Note to self: Save up for a Proxxon multitool and drilling station.
Tapering of the structure was accomplished with another annealed mat knife blade.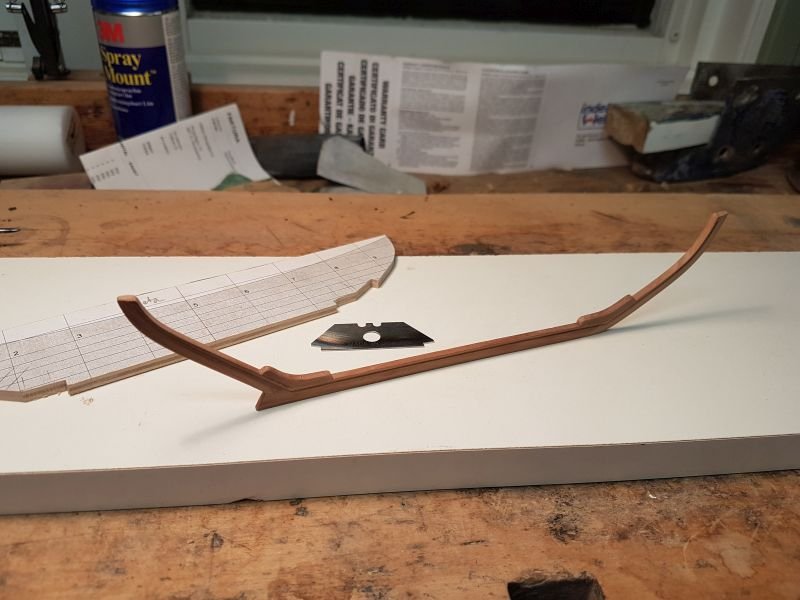
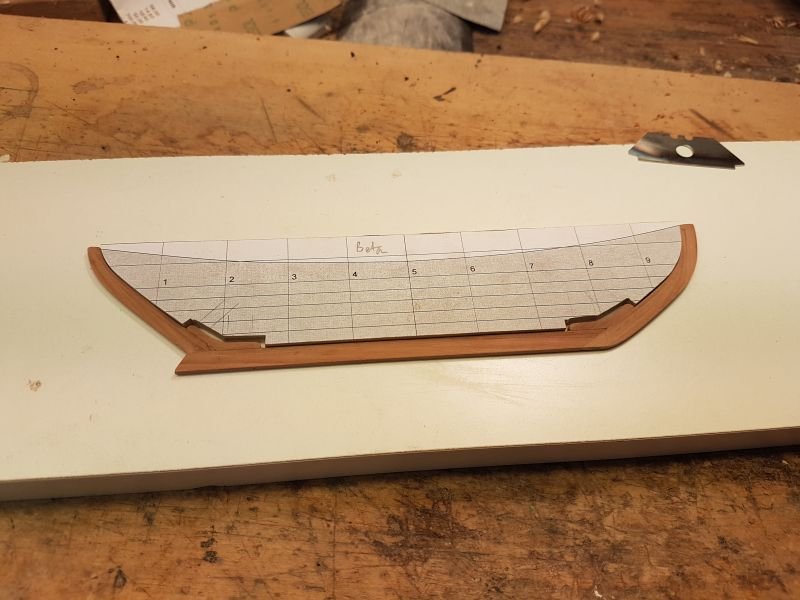
Sometime during the day I recognized that my floor was a mess so I wiped. In hindsight I would have benefited from looking if any of the pieces had gone astray before I wiped the floor.
Find the anomaly...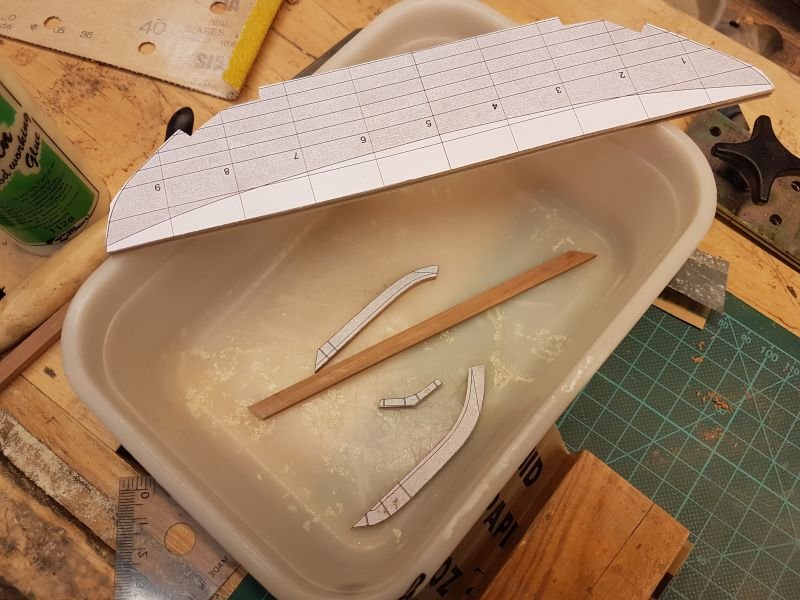
Note to self 2: Keep small parts contained in something (anything!)
Apart from that minor setback I'm fairly satisfied with the day.Til next time, ta!
-
Vaddoc, thanks for the comment.
I plan to compare the sapwood of apple to birch. I've read that birch is a good wood for planking models. Will do tests later of steaming and bending, as well as to see how they keep their edges sharp (basically wood density).
Stay tuned.
-
Denis, I hear what you are saying...
-
I will lay my vote for the Chewbacca.. sorry the Chebacco.
Mostly because, as some stated, there are numerous kits of those with cannons.
Then I'm not overly fond of the Dutch lines, they don't appeal to me (Note, very personal opinon!)
Therefore the other work boat. Nice lines, fair amount of detail, manageable size.
But that's only my to cents.
-
Haha John, no it sits steady on terra firma. At the moment I'm refurbishing the galley. The old owner /builder merely gave the interior one slush of varnish...
- popeye the sailor, Mike Y and mtaylor
-
3


Young America 1853 by EdT - FINISHED - extreme clipper
in - Build logs for subjects built 1851 - 1900
Posted
The amount of detail in your build Ed, is just breathtaking. Along with the mass of information in your posts. Your work is on a separate level from many of us.
But I must say that the Captain need to give his first mate a sharp word. Those launches can't just lay around on deck like that. They need to be strapped down or at least put to either side of the deck. Right now they make for an obstacle course should one need to hastily move from poop and forward.