


Wintergreen
-
Posts
940 -
Joined
-
Last visited
Content Type
Profiles
Forums
Gallery
Events
Posts posted by Wintergreen
-
-
Hello ubjs,
I read your question a bit up about gluing two stringers 4x8mm. These are for reinforcing the structure. About the bend downwards, as long as the bulkheads and keel are well supported it is no problem to force the stringers down. Glue them at the same time and add some weight to keep them in place.
And how do I know this? Well, I did build Billings Wasa back in 1985. It took me 4 or 5 years.
A thought on doing it more simple? Just add the lower masts, as it is on show in the WASA Museum. That way you will still have some striking rigging, but not too much of it.
And as others have stated - it's all up to you! There are no wrongs or donts here. Do as you please 🙂
-
-
-
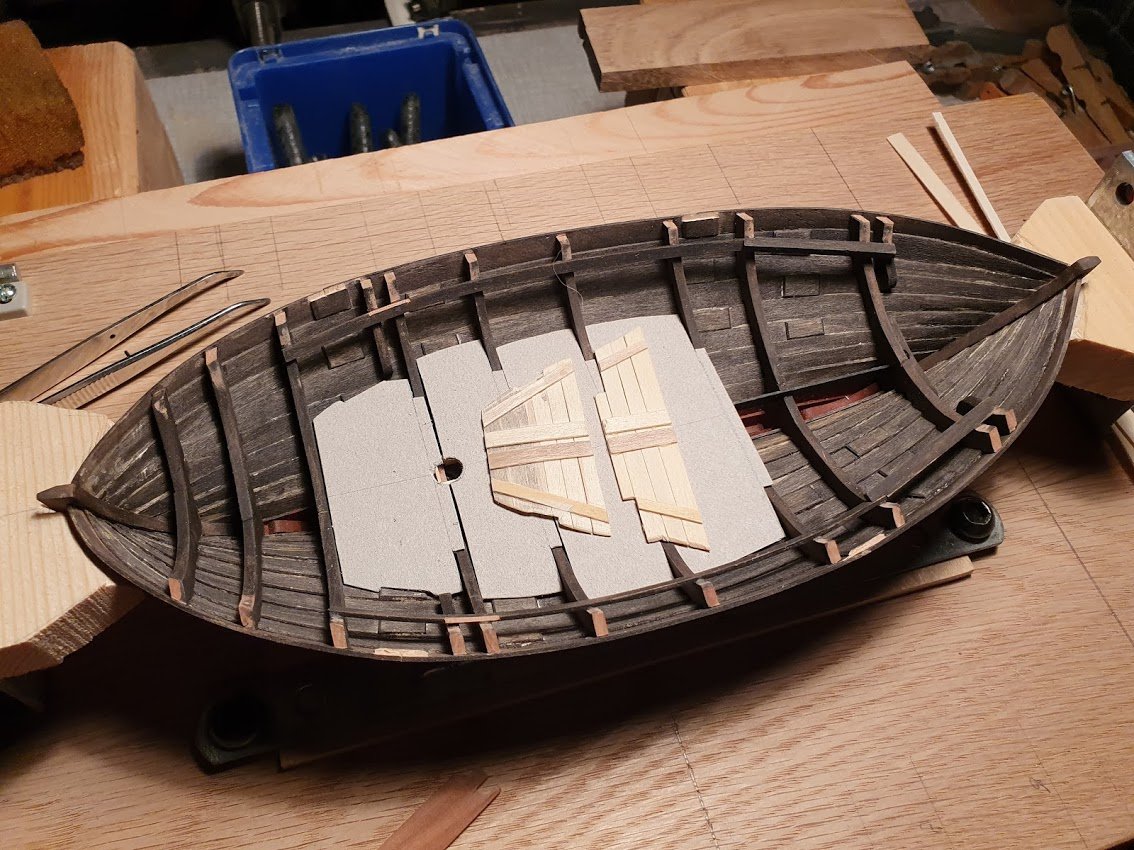
Here again. Time for another little update.
Mark and Vaddoc - thanks for your support. I'll check with the admiral if there are any jewels to support my vessel. Kind of a patreon if so, right?
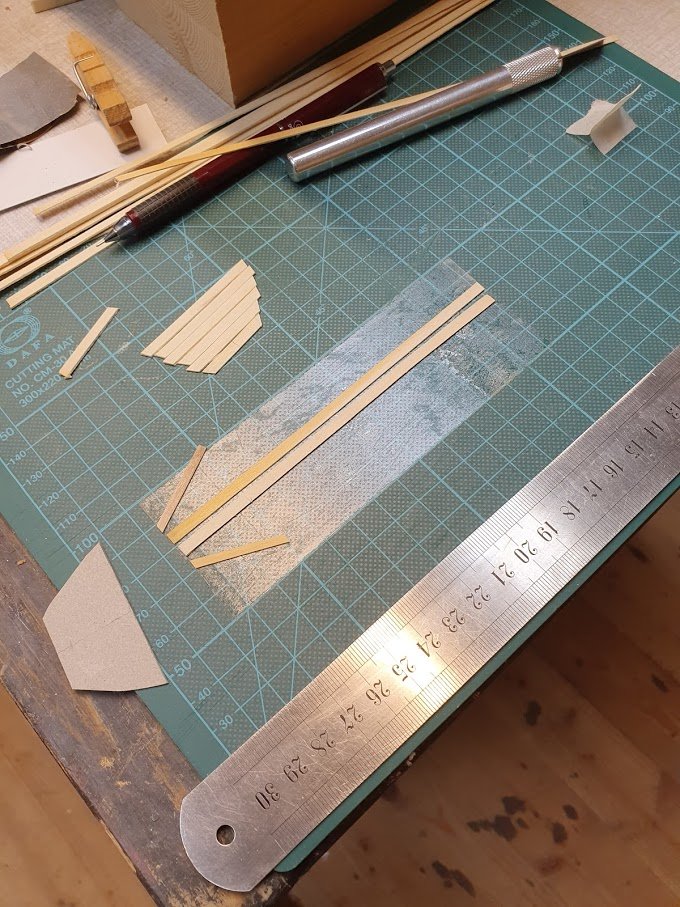
Today I managed to produce six pieces (not of eight) but of railing. Is it called railing btw?
Anyway, and previous to that the stem and stern hooks was made. I think the forward piece is called a breast hook, but what is the stern piece called?
A fiddly process since nothing is square.
The process of manufacture included card templates of every piece and a lot of sanding and filing. To get a good snug fit every piece it cut over sized and then the outer edge is trimmed to perfection.
After that the piece is cut to width. In this case ca 3mm, which believe it or not is still over sized. The book and drawing calls for a railing of 2". At 1:30 that is less than 2mm. But sometimes I can't really be bothered. If it looks good to me. It stays.Only the breast hook and stern piece is glued and pinned in place. The railing just rests on the frame tops.
I might also have a word with the shipwright since I'm not overly happy with the mess he leaves in his wake...
About tools, that sturdy hand-vice is soo perfect for holding all these itsy bitsy flimsy pieces. It's quite heavy which gives a good support to any movement. Before I used it I hade to file down the jaws because they left a checkered marking on the clamped piece.
Before we part for today, thank you guys for comments and likes! Much appreciated 🙂
-
About raising and lowering the mast. My understanding is that it was done like the midsummers pole, put the lower end towards the stop and then walk under it successively raising it. Like in this picture. It's the same procedure described for my 19th century boat as well.

- Louie da fly, Mark Pearse, J11 and 2 others
-
 5
5
-
-
Who wouldn't want a collaborator like David, just Wow! 🙂
- mtaylor, Keith Black, FriedClams and 2 others
-
5
-
I would say that your trials and tribulations on this planking stuff is paying off now. Looks really good!
(then you can add, "yeah, from a distance a dark night, lol")
No, seriously, it looks good. Well done Vaddoc.
Keep it up!
-
Very nice scrolls!
I can only dream of accomplish anything like that.
Keep it up!
- FriedClams, Siggi52, mtaylor and 1 other
-
4
-
@wefalck Thanks for you input. Maybe I got the figures wrong. 12 ml (a little less than a table spoon) I can definitely fit under the boards.
Anyway, it's just for show and not authenticity 😉
- vaddoc and popeye the sailor
-
2
-
Thank you all for shown interest!
@bolin - you are welcome! Steel with pride, as we say on our office 😉
@Mark Pearse @wefalck - yes, I think that the pattern and traditions of building coastal boats slowly spread from area to area. Adaptations were done to suite specific needs of course. Carry more cargo, sail faster, manage different sea states, the list goes on.
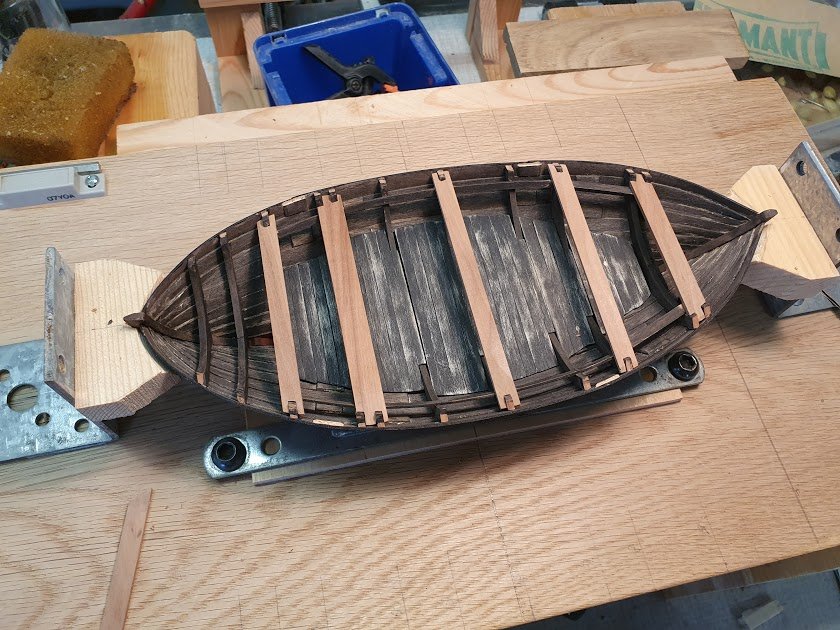
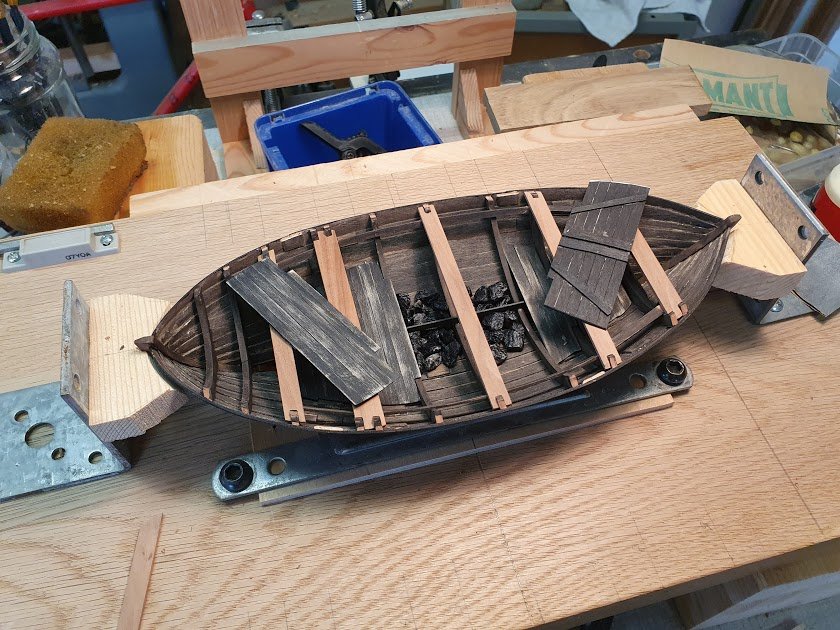
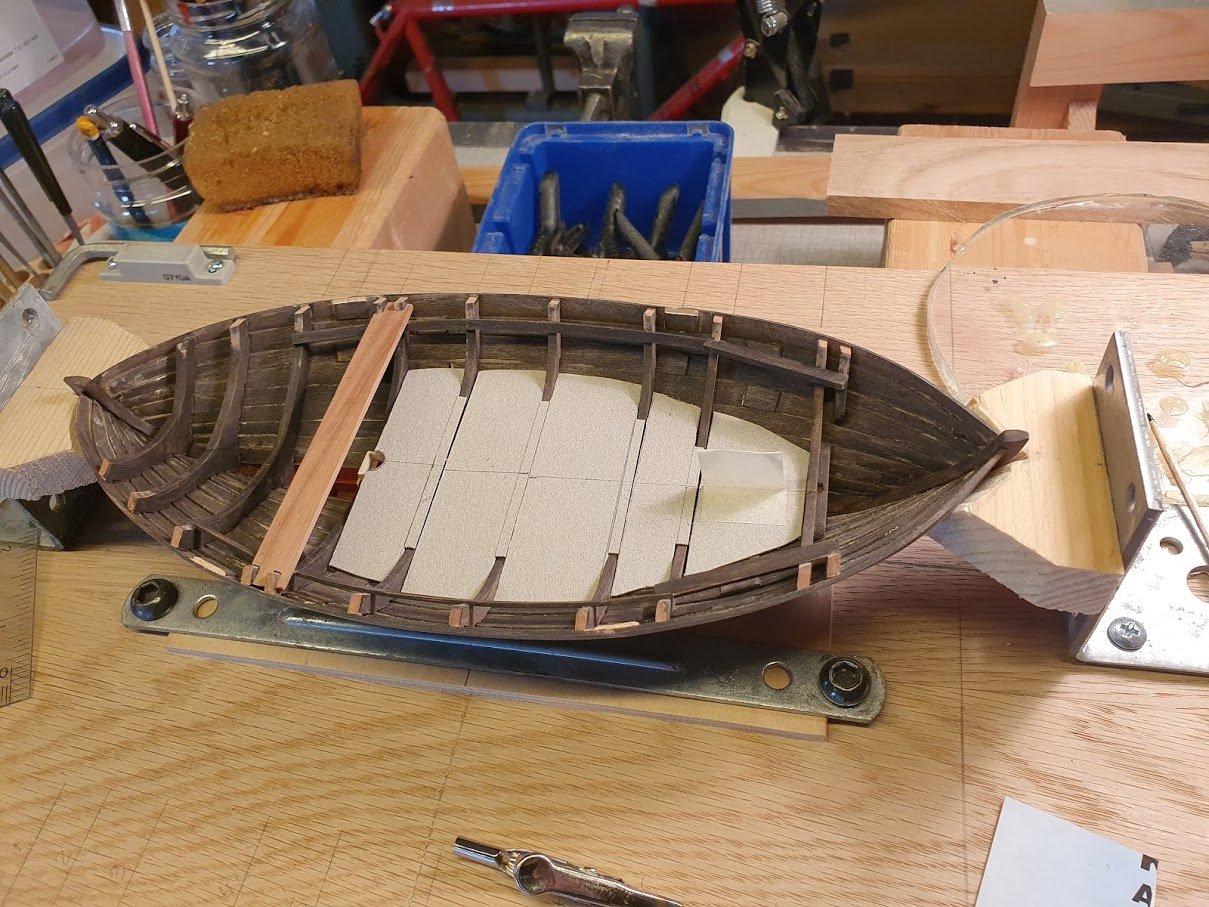
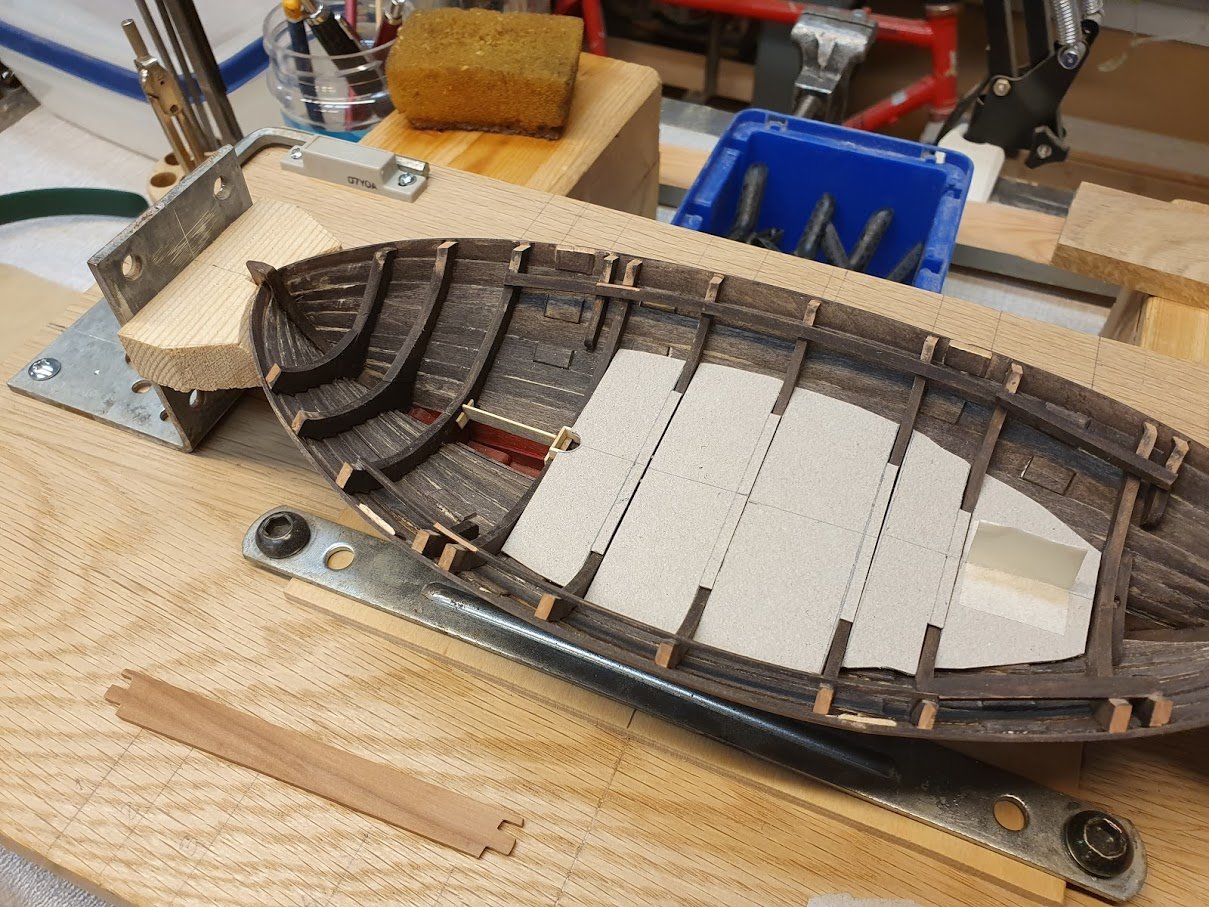
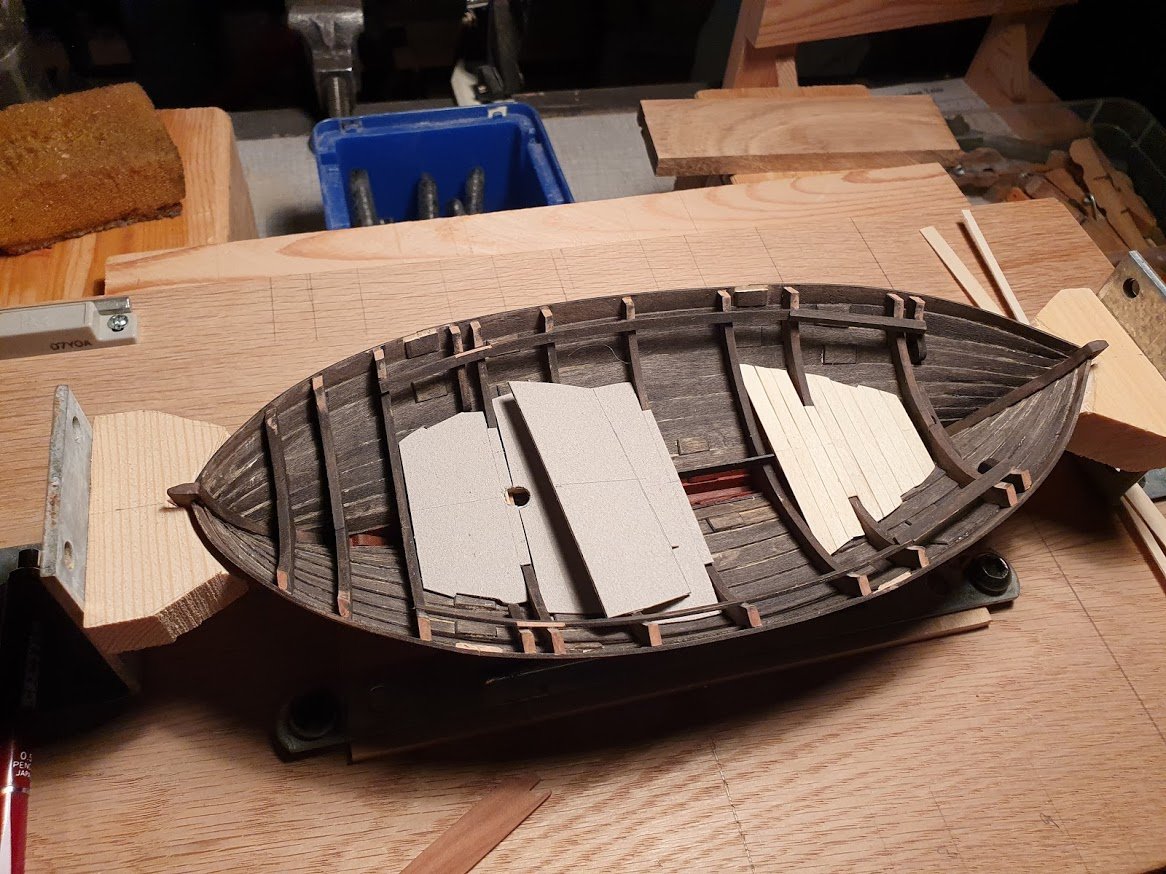
Here is another small update.
All floor boards are done. I didn't get the colour right so some more finishing is needed.
All but one thwarts are cut and positioned. Two of them will be removable and the rest will be pinned in place.
The removable ones are the narrow one in the middle and then also the foremost one, which I haven't done yet. For every thwart I cut a small recess in the stringer to have them lay down more naturally.
For ballast I just went out in the street and wiped up some of the gravel they spread here in wintertime. Some are left natural and the others painted with Paynes gray. The real boat had some 650 kg of ballast. In 1:30 that is almost 90 grams. If I use these "rocks" there is no way I can fit 90 grams of ballast under the floor boards 😄
Next up will be the last thwart and then the covering board along with a couple hefty stem and stern hooks.
More of that another time.
- popeye the sailor, druxey, KeithAug and 6 others
-
9
-
😄 that table with the dishes still on it made me smile!
Lovely detailing!
- neilm, FlyingFish and Rik Thistle
-
2
-
 1
1
-
Enough progress for another update I think.
So, floor boards it is.
First fiddling about with card templates to get a close fit. Also marking the center line on each template because I thought it might be useful (which it proved to be).
First a picture with the main thwart though. Also can be seen the "catch" for the mast when raising the same.
Templates with a reasonable fit. The butt blocks do interfere with the under side on several positions.
Then a short board to support the forward most board.
Two aft most boards done. There are no directions in the book about these floors. Only that they rest on that for-aft board in the middle. Therefore I concluded that planks would be athwarthships. Might be wrong, but who knows? If I ever get to see the real boat I will know.
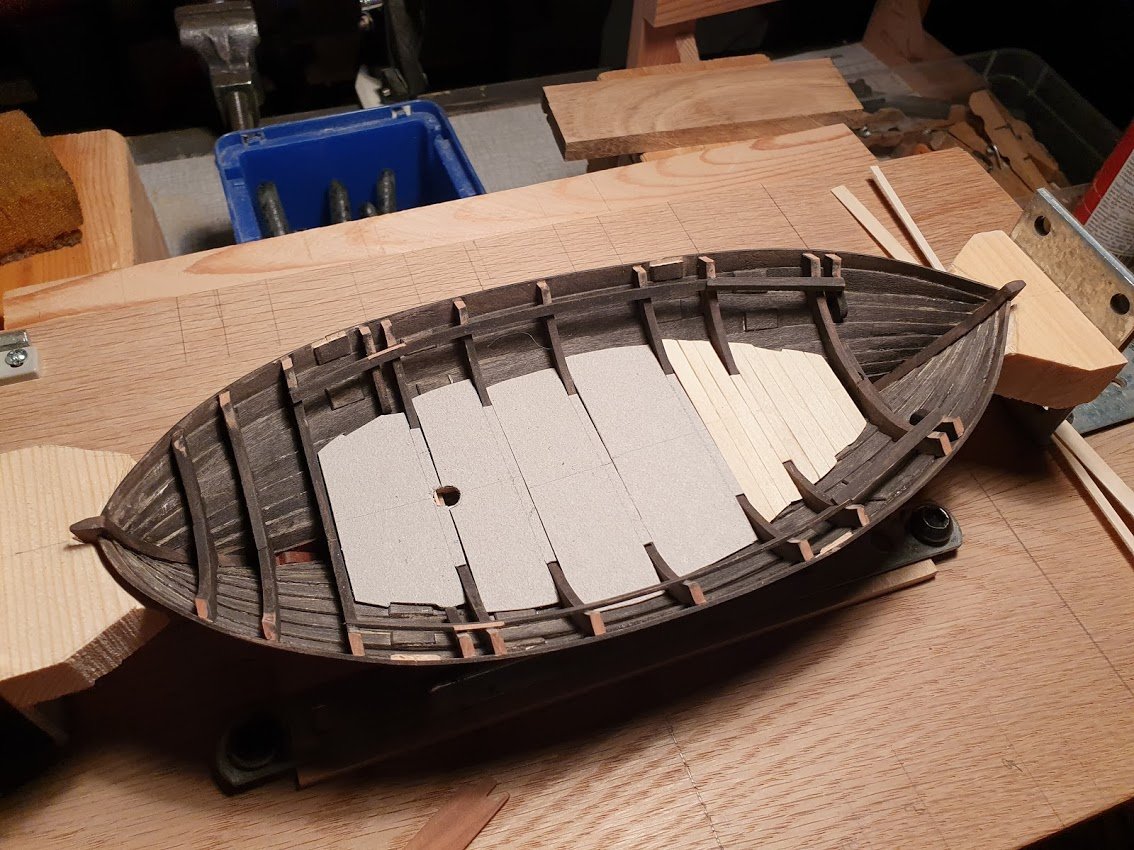
This is the supporting pieces. Square and fair.
A piece of double adhesive tape on the cutting mat made easy position of everything. One has to wait for the glue to harden before one tries to pry the board away from the tape. Aske me how I know 😄
That's all for now.
Thanks for likes and comments, much appreciated!
-
Valuable information for anyone building this kit, I'd say.
It's also a slippery slope when you start to investigate and search for authentic information about a ship... all of a sudden you realize all the short comings of kits 😉
However, it's a learning experience and best off will be a balance between kit supplied and own enhancements. (unless you go over to the dark side of scratch builds that is. Then nothing is stopping you and the abyss is deep... 😄 ).
Planking a hull IS difficult and there are numerous accounts of how-tos and tutorials here on MSW.
Don't rush and you will do just fine!
Keep it up!
- Eurus and Knocklouder
-
2
-
You really upped your pace as of late!
Nice progress, crisp and clean as per your usual standards.
Keep it up!
-
-
-
Good progress Vaddoc.
I feel your pain with all the outtakes. Add it to the "learning by doing" account 🙂
As for shaping the stem, I second what Michael Bricklayer writes above.
Plank the hull, with fasteings and all, then shape the stem. Don't worry about leaving scuffs and marks on the planking. My guess is that you will sand the hull as well taking away any small mishaps.
That's how I'd do it at least.
Keep it up!- FriedClams and Moab
-
2
-
On 3/6/2021 at 2:52 AM, rookie said:
Question
am I allowed to post plans from artesania Latina.?
If you take a photo of the plans, laying on a table, I think that is okay to post. They will then be distorted and can not be used.
But I would guess that scanning them and then posting would be an infringement of copyright. So, dont' do that. 😉
And while I'm here, Welcome to MSW! Enjoy your stay 🙂
-
-
Glad to see that the door knob is set just above the cockpit coaming also.
That would've been a bummer otherwise 😉
Looks excellent, Michael!
- FriedClams, Keith Black, mtaylor and 1 other
-
3
-
 1
1
-
Excellent display!
Thanks for sharing your work with us 🙂
Yes, lockdown is a bummer. Let's restrictions and such will be lifted soon.
-
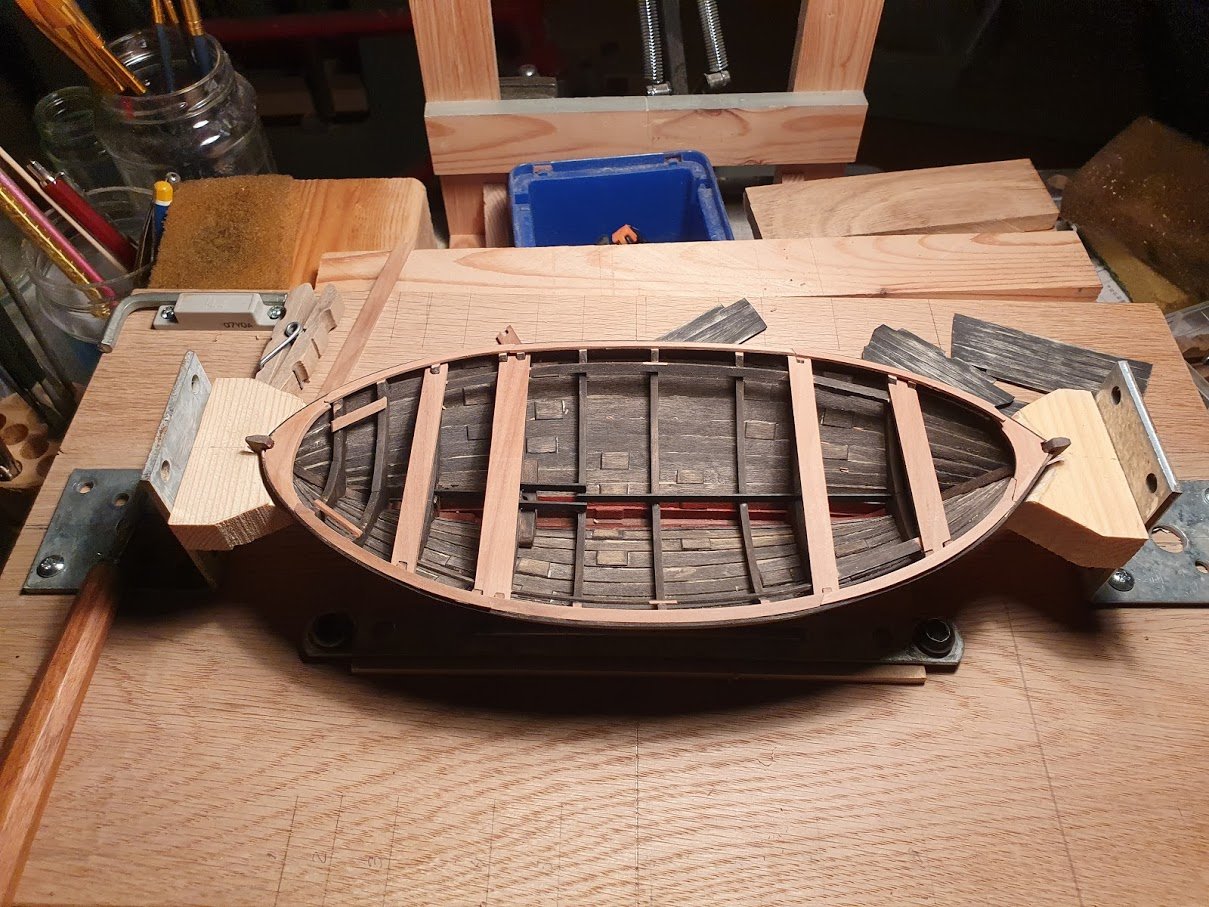
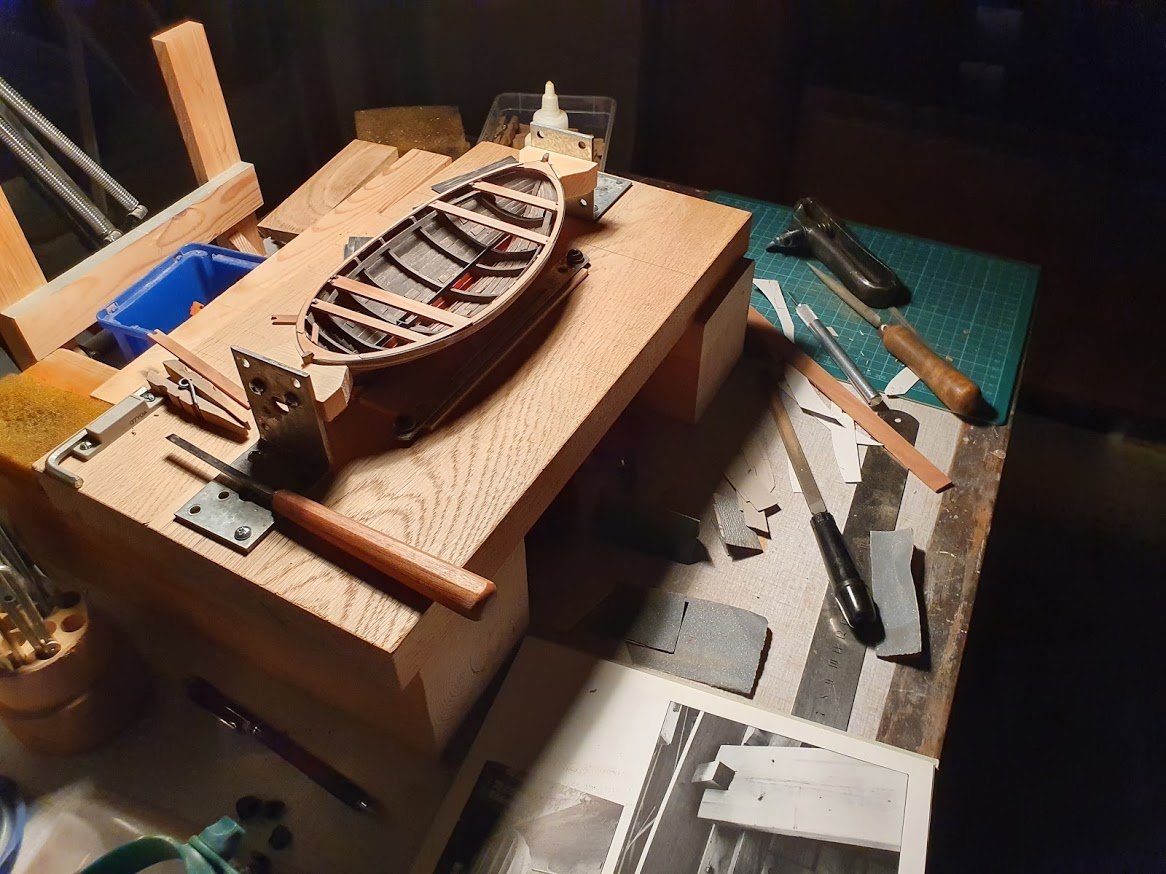
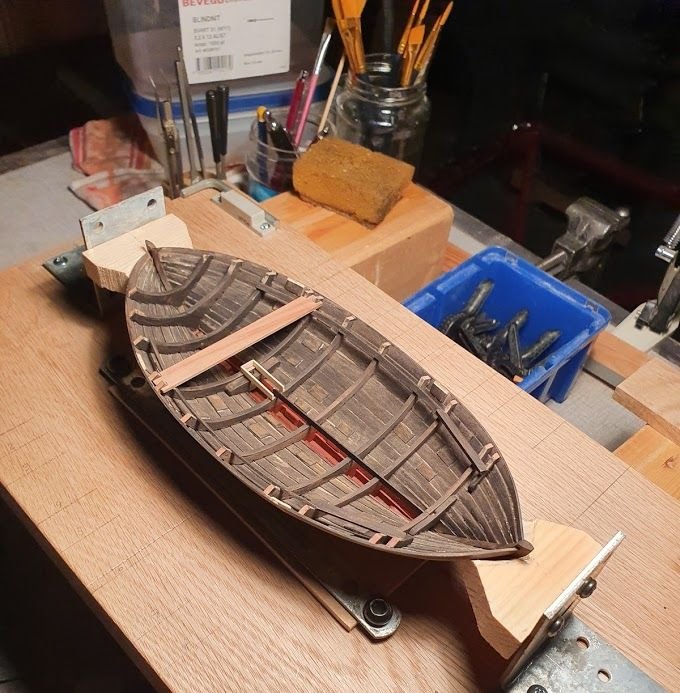
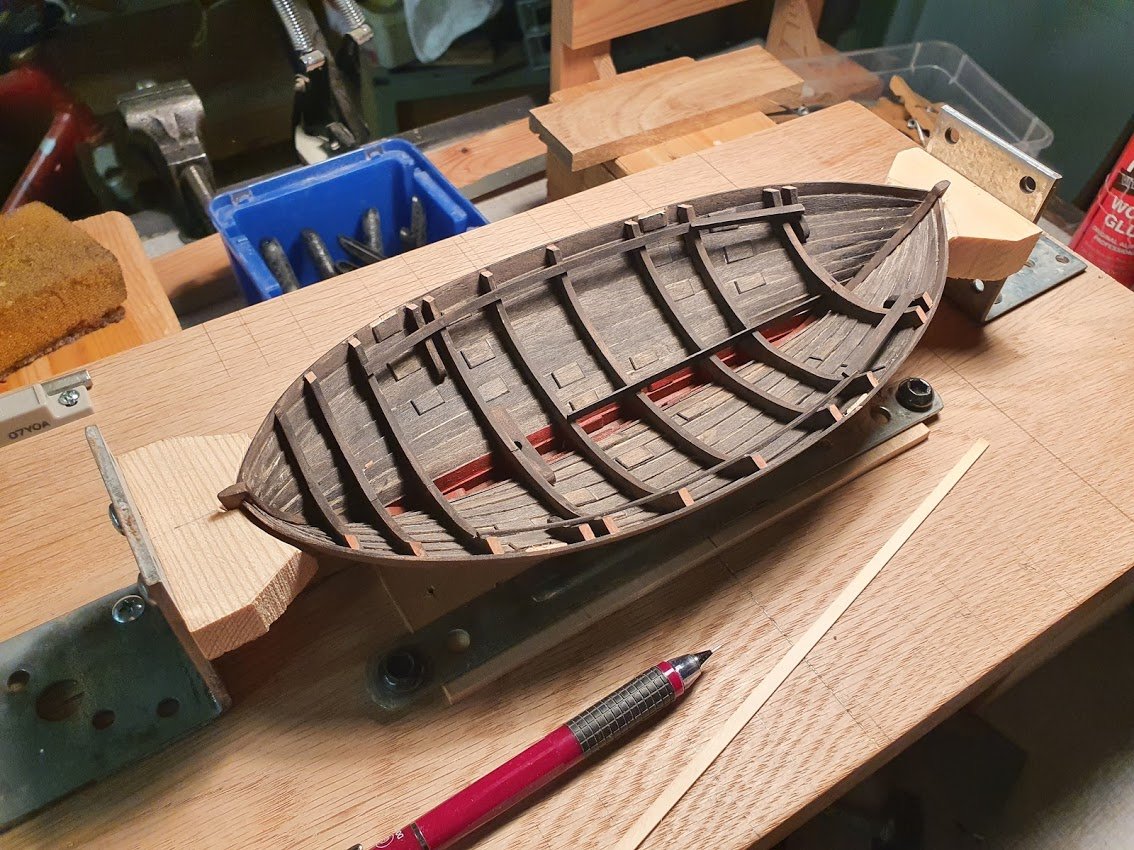
Work continues.
Pinrails in place. There will be twarths securing them.
I also started trimming the frames ends with a (very) sharp chisel. Worked fine. However I need to secure the sheer strake with pins/dowels...
First a picture from the book on those pinrails. "Pinrail" might be wrong also since I think it will act as support for the traveler.
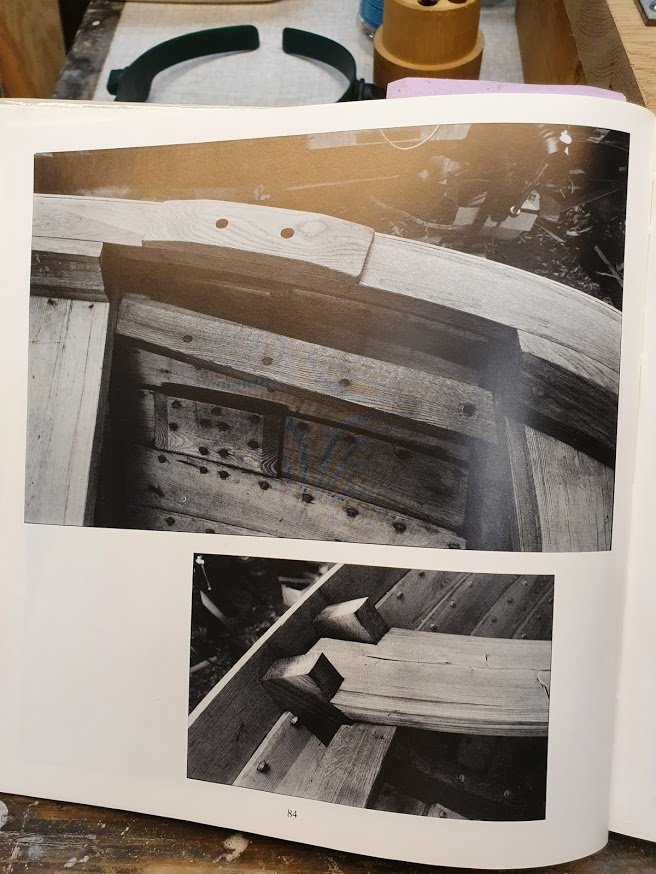
Another detailed picture showing uplings and stringer.
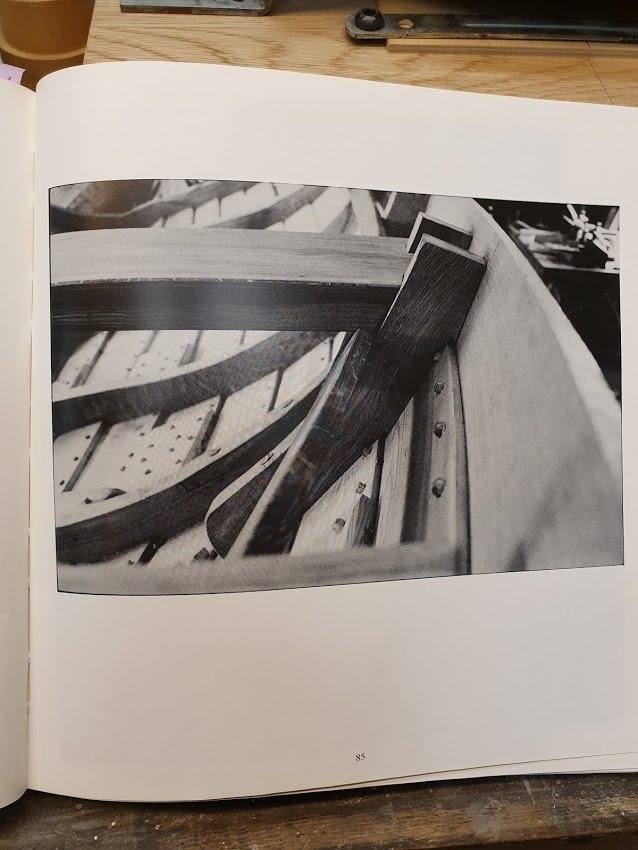
And finally, the build. The board on the center line will support floor boards.
The shipwright also dabbed a couple of coats of lead paint (aka red acrylic) in the bilge for authenticity sake.
Thanks for likes and comments!
- CiscoH, bolin, GrandpaPhil and 8 others
-
11
-
Scud by TBlack - FINISHED - a gaff rigged sloop
in - Build logs for subjects built 1901 - Present Day
Posted
Nice progress Tom!
Maybe there is not much details and hardware to add, but what you add really looks spiffy and up to the task.
The skylight is very probable if this was a pleasure craft. 🙂
Keep it up!