


Wintergreen
-
Posts
940 -
Joined
-
Last visited
Content Type
Profiles
Forums
Gallery
Events
Posts posted by Wintergreen
-
-
Thanks for the comments and likes :-)
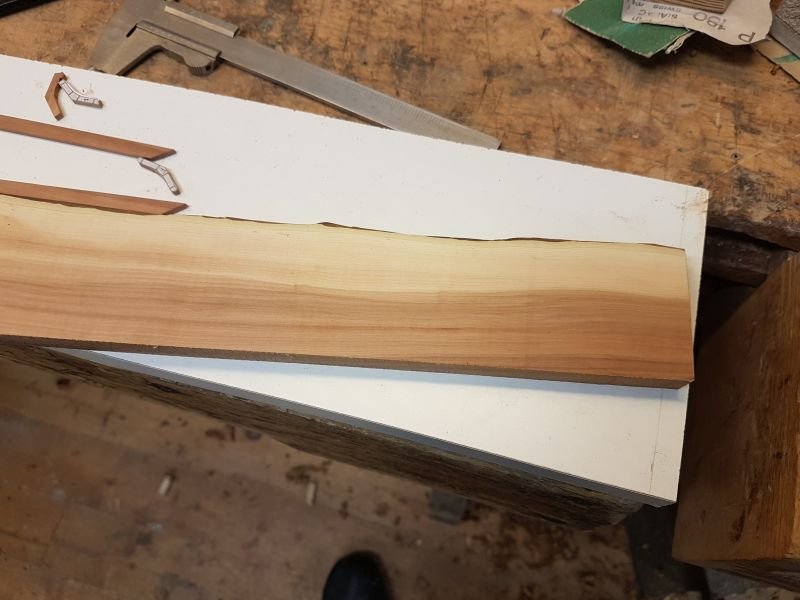
Denis, glad you remember the Regina project. She sits nicely in her display case. And re the drum, there was never an issue with the drum going into an orbit. It was held in place by the dubbs (? maybe they are called something else ?). But a coned shaft is of course a better option.Vaddoc, the apple is two colored. Outer wood is much paler. I will take a picture to show you. Also, thanks for the heads up on the glue. Guess now that I've bought that expensive bottle I need to use it... And the boat (or type) does not have a centerboard. I cant think of any traditional Swedish boat that has that. Instead lead or iron ingots as ballast. Approx 500 kg for this 22 footer.
Edit:
Picture of the apple wood.
-
Hi Mark,
thanks for the comment. No, the bowsprit is unsupported, so yes, bends under pressure from the rig. But, easy rigging, easy taking down. I guess it sails like most boats with sprit sails, slightly better than a square rigger.. no, really, I don't know, only that with this kind of rig going upwind is not the favorable direction. That is why there will be oars also.
- Mark Pearse, mtaylor, KeithAug and 1 other
-
 4
4
-
Very nice work, Mark.
Ah, retirement... only some 15+ years off now...
-
Ahh...sawdust, finally!
Yes, John, I use the shop vacuum also. It's just that it is so noisy. Guys, thank you for the likes also.
After building the thickness sander, which by the way, works really well. Note to self.: I do need to countersink the machine screws a bit. The ones that hold the wedge. They scarred the wood, not too bad, but still ugly.
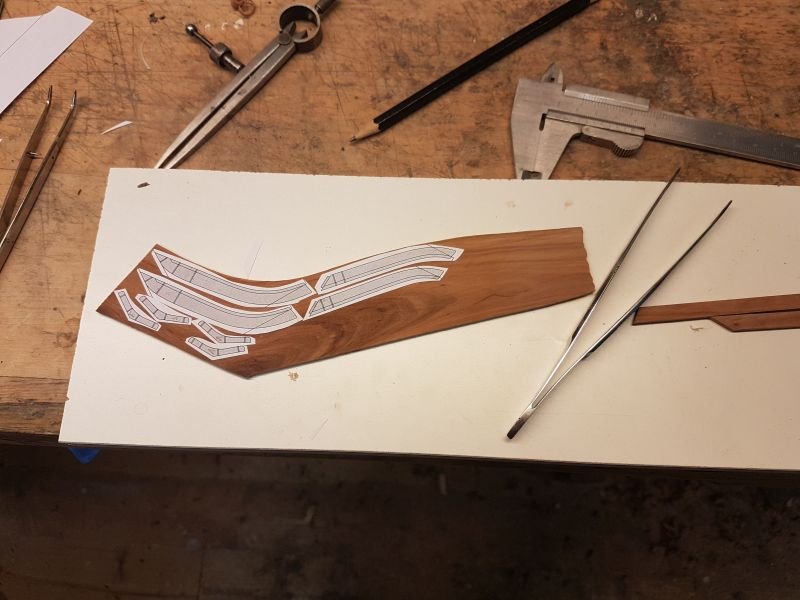
I went down to the hardware store and bought a ridiculously expensive spray glue. Well, it worked like a charm, so maybe, just maybe, it was worth the expense. This glue is intended for gluing the printouts to the wood. As can be seen in the first picture.
With them glued, I spent the better part of 30 min rummaging about to find a tool holder for the scroll saw. I knew it was in a bad place... finally found it. Next 15 minutes was spent trying to remember how to set the darn thing up. Google told me in the end.
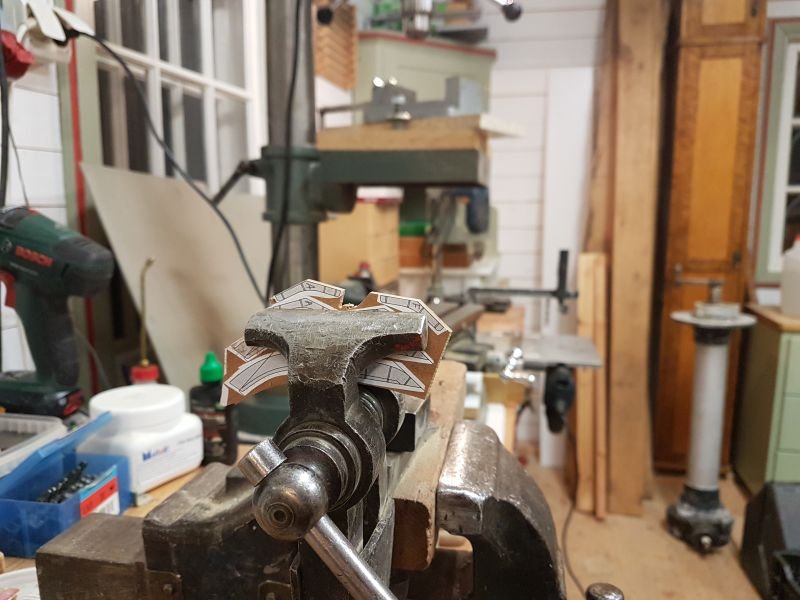
While letting the scroll saw eat wood I pondered about how to file and sand those tiny little pieces and stopped myself right there. Like you eat an elephant of course. One at a time. See next picture.
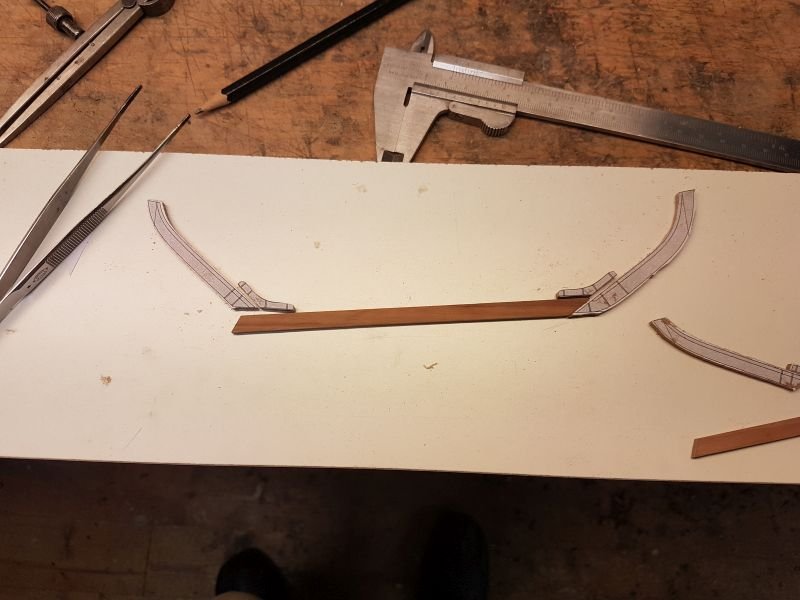
Ed wrote: "when fatigue sets in... stop!" which what I did next. Before the halt, I had managed to release all parts from the slab of apple. Picture three.
One might wonder why there are two of everything. Well, to my knowledge, practice makes perfect. So, one set is for practice, and then I can do it right the second time on the other set of parts. Clever, huh?
Finally, I find it interesting how many tools you bring forth in time at all... don't you?
-
-
Hi all,
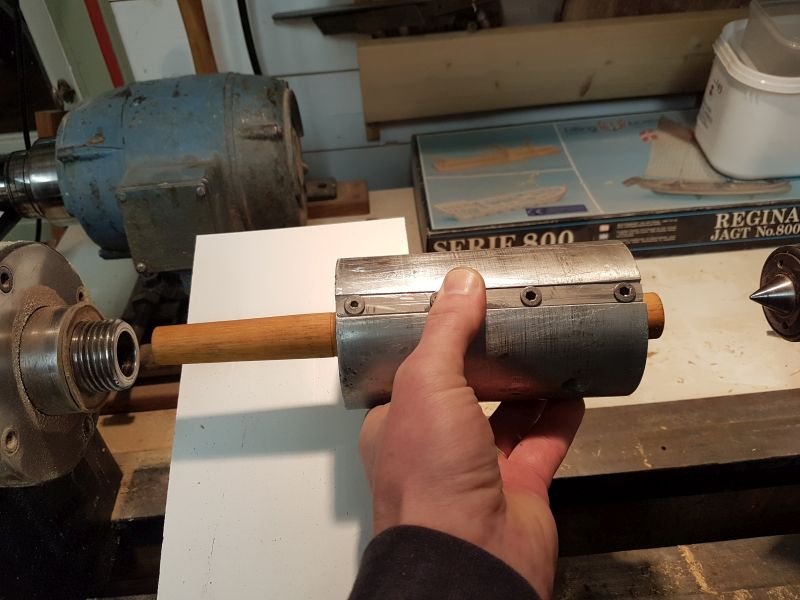
John, I took your word for it so I turned a shaft instead. One side coned like all other lathe tools and the other with a small dent for the support.
Also managed to finish a dust cover with a tube to attach shop vac or similar. My long time plan is to extend the shop dust extraction system with a hose for smaller tools, like this one.
I attached 150 grit paper to the drum and the first tests were satisfactory. It will however take some time to learn about at what pace the material should go through.
Also, it seems that a speed of ca 1400 rpm is quite enough.

Well, with that taken care of, it is back to the boatyard to see if there will be some progress...
- mtaylor, cog, popeye the sailor and 3 others
-
6
-
Hi EnT,
just took the time to read through the great planking of 2017 and realized what a recognition to have ones model on display at a national maritime museum, let alone The National Maritime Museum.
Hats off for that!
Excellent build so far.
About bending oak. One often think it is very hard to bend such a sturdy lumber. Quite the opposite, oak, if not squishy, it is at least very bend-able when coming out of the steam boiler. But then again, of course it will take a lot of manpower to squeeze an 8x10"x20'(?) in place...
-
-
-
-
Hi all,
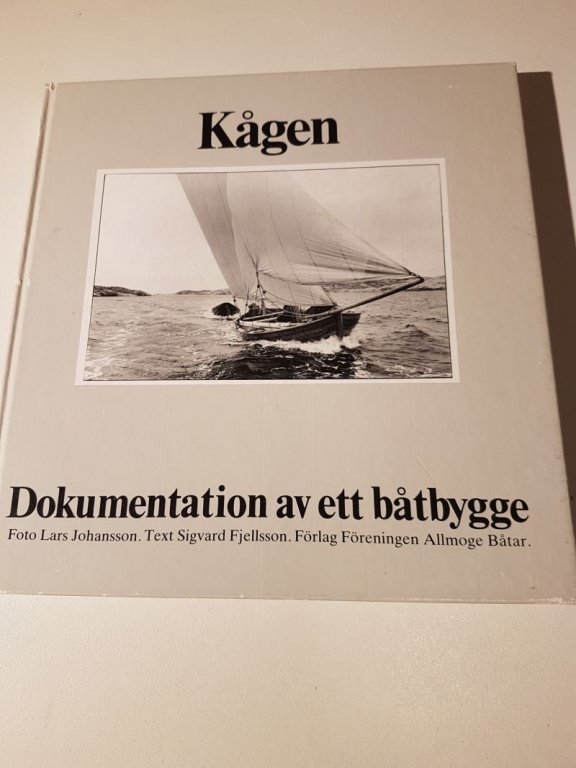
Re the book; it covers a replica build of the original boat from 1900. Since these boats always were build without plans, the book contains no blueprints. The original boat was measured and from this they made a couple of plans, which are part of the book. Will show you later.
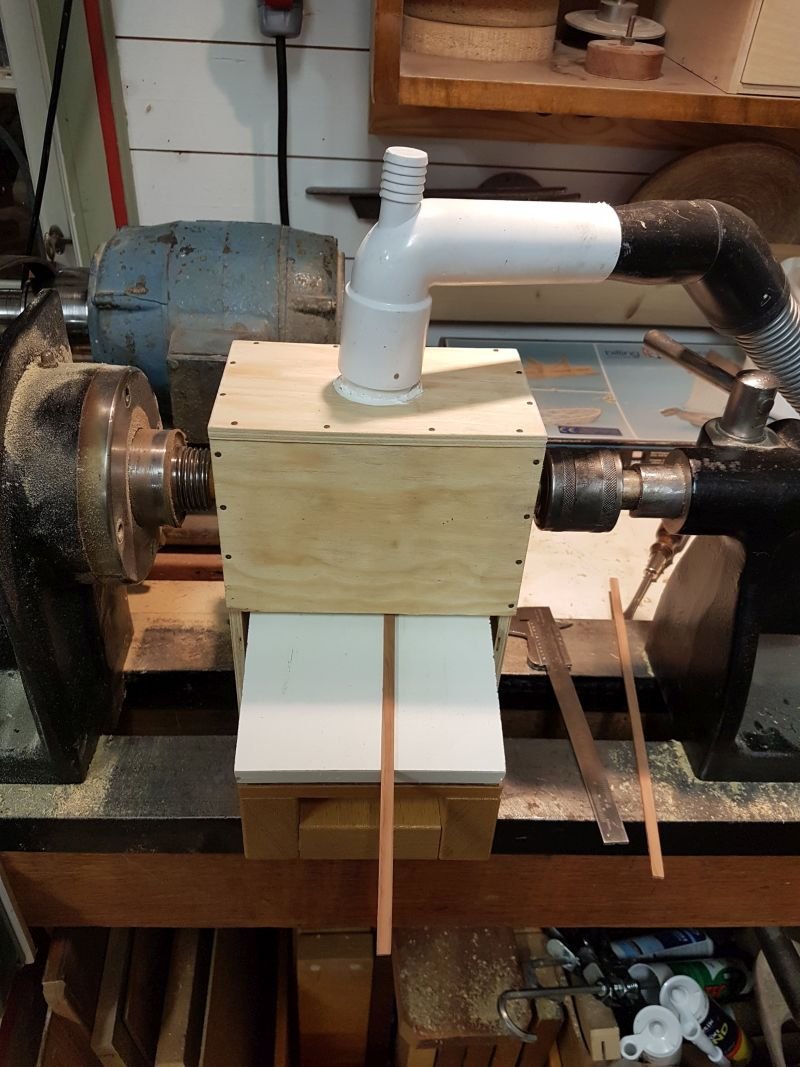
Now for todays update. In my earlier post I headed out to my shop in order to create some kind of thickness sander. So far, so good.
I have yet to try it out with sanding paper, but I think it might work. In the future there will probably be room for updates on some of the details of it.
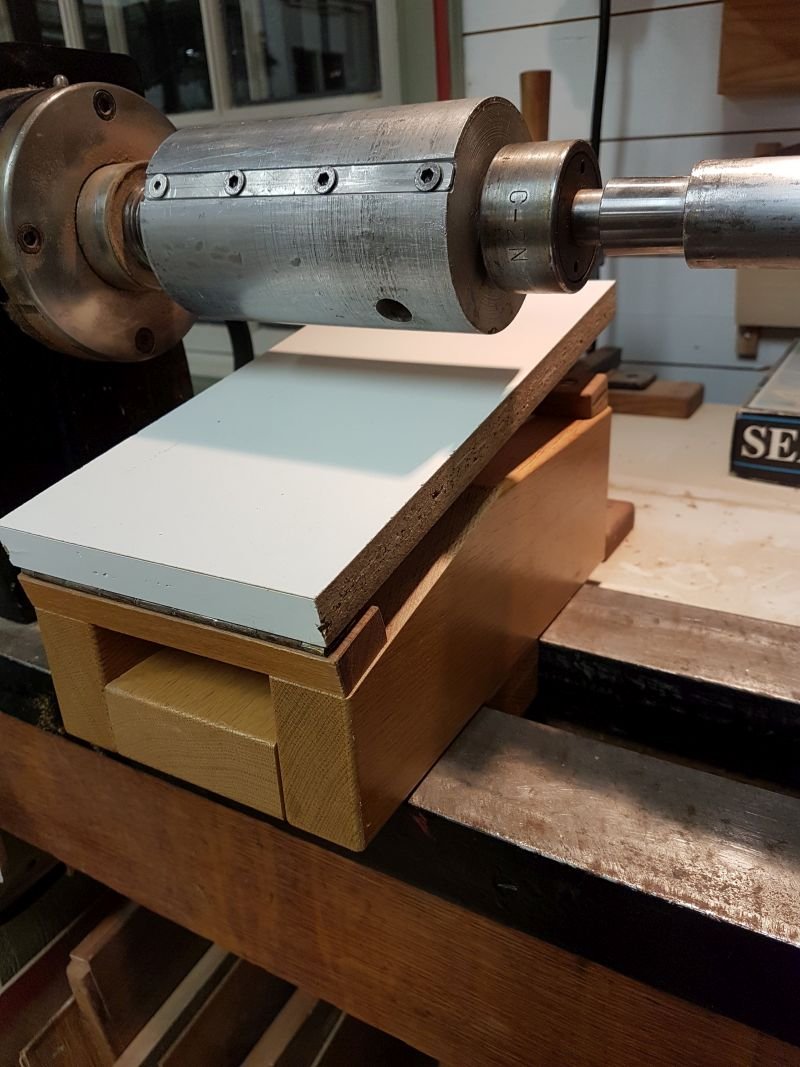
The aluminium drum is held in place by squeezing only. Might need another way, but the friction seems good enough.
As you can se the height of the table is adjusted by a knurled knob attached to a M6 threaded rod. One full turn raises the table 1mm at the aft end. The drum is approximately 2/3 up the table. One full turn would then approximately lessen the space drum-table with 2/3 of a mm. (I guess).
The table is hinged at the front end.

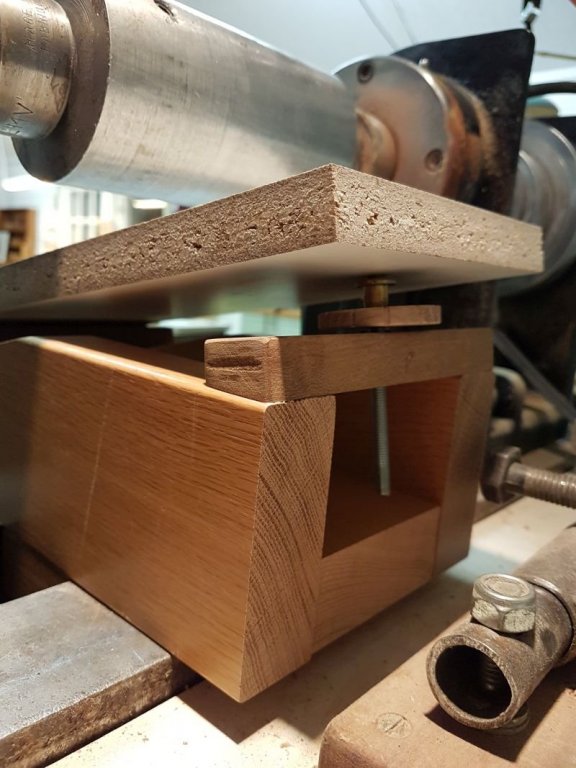
I also need to build some dust extraction for it. But that will be quite easy, just some cover to stand over the whole unit with an outlet to attach a hose to.
We will see.
To be continued...
-
22 hours ago, Louie da fly said:
I thought that was Treebeard . . .
Steven
PS: Looks like a very nice project to undertake. Good looking boat.
You are right Steven, it was Treebeard that said it the first time. M&P just repeated it a couple more times.
Re the project, yes, I'm in for a challenge here...
-
Thank you guys for your likes, comments and interest.
This build will take a while. When I started to mill the blanks for the keel it became obvious that I need a way to sand to dimensions.
The easy and expensive would be to just order a thickness sander. But after some thought I realised that my lathe could be turned into such a device.
So, at the moment, still no sawdust.
As Merry and Pippin says in LOTR... lets not be hasty...
- Nirvana, popeye the sailor and mtaylor
-
3
-
-
-
Hi Vaddoc!
I've just scrolled through your log, impressive I must say, given the surrounding circumstances with family and all.
Congrats to the milestone of finishing the hull!
I think you will find all the detailing that now comes so much more fun. And laying the deck will be a breeze ;-)
-
It is not with little hesitation that I know start a build log. For me it is somewhat of a Pandora's box of feelings since I've been away from MSW for quite some time now. One thing caught my attention when I read the foreword in Ed's "Naiad" book, it seems that it is quite an accomplishment to build anything to scale between your graduation and retirement. Life tends to interfere all the time. Anyway, here we go...
The object for my build log will be a working vessel from the Swedish west coast dated at about 1900. I've learned "Go small, go simple, go now" when it comes to long distance sailing. Applied to scale model shipbuilding that would translate to something of small real world dimensions and a rather simple type based on some source that you already have. In my case it panned out to be a "Kåg". For those not familiar with Swedish pronunciation of words (most are not, so don't worry) it originates from the Dutch kaeg or cog.
Basically it is a fishing vessel. It was all about herring during 17th to early 20th on the west coast of Sweden. By the way, swedes are still a lot about herring marinated in more or less fantastic ways. You will find them on any decent "smörgåsbord".
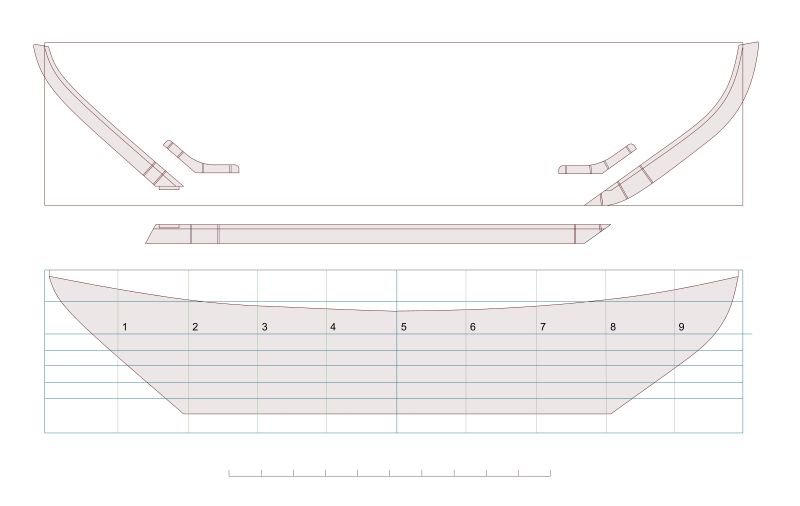
Included in my source is a couple of plans and the first tasks include some CAD to create plans that can be used to build something. Real world dimensions for this particular vessel is some 22 feet between perpendiculars with a width of 10 feet. Length over all will be some 9,5 meters. Scaled down 1:30 the hull will be 225 mm stem to stern with a moulded width of 96 mm.
The clinker boards will be just shy of 1 mm thick, which I think is the smallest I could manage.
Real world materials were oak for basic structure, top strake and details. The lower strakes were of pine. Mast and spars of fir.
Materials for the scale model will be apple for basic structure, mast and spars and probably birch for the boards.
So far the introduction. Over to the build.
At this moment I have not produced any dust yet, only managed to create templates for the hull, keel, stem and stern. Starting up with CAD has a steep learning curve...
The book:
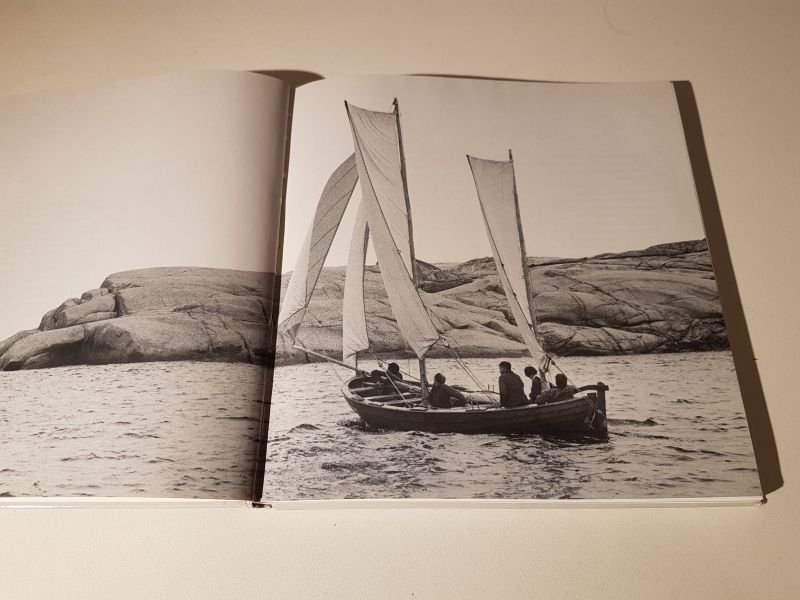
A picture of the vessel sailing (maiden tryouts):
Keel, stem and stern.
I will happily try to answer any questions and will also of course gladly take on any help and suggestions to aid in the building process.
- kees de mol, aviaamator, CiscoH and 19 others
-
22
-
*just snuckin in for a free seat at the front, shhh, don't mind me, I'll only watch while you carry on*
- Piet, mtaylor and popeye the sailor
-
3
-
Hi Keith!
I had a subscription for one of the magz about classic boats for several years. I find these classics just so beautiful to look at and yours is no exception.
The deck structures are really coming along nicely. I think the key to success in regards of Mahogany, is the finish. Enough coats to fill every little crevice (or wood structure or what its called) to get an absolutely smooth surface is a must. If one fails in that the appearance will be dull and a bit dirty. The gentleman I bought our blue water sailing yacht from did not have time to varnish the interior teak more than once when he built the boat. It looks horrific.
Also Chucks paintwork is extraordinary even though he uses regular brushes. Several thin coats instead of a couple of thick ones.
Keep up the good work!
-
A belated "Well done", or maybe a "Pass with distinction" applies better.
I just spent this Saturday evening browsing through this blog and your work, albeit on a simpler construction, is up to you usual standard.
It tickles my mind that I need to return to the workshop doing small work instead of handling wall boards, floor sanding equipment and alike on my spare time...
Many thanks for your inspirational work, Ed!
-
Nice to hear from you, Håkan. Yes, the baggy wrinkle is the 'caterpillars' crawling up the topping lifts and it was to reduce chafe on the sails!

John
Yes, I'm still alive. But no time for modelling or even to follow along all the beautiful logs here. Life, you know... my oldest daughter moved back to our small town and made med grandpa last Feb. Happy days! They live just down the road (1km) from us and I'm so so glad. An adorable girl (aren't they all) named Agnes.
-
Baggy wrinkle??? But it most be those catepillars crawling their way up the lifts, right?
To minimize shafe on the sails I presume the intention was.
I cant say much else about your build than it looks than it looks picture perfect.
Keep it up John!
- FriedClams, mtaylor and Piet
-
3
-
-
I surely Cant tell you to do it any other way, Mario ;-)
(sorry, couldn't resist the pun)
Looks great to my eye.
- popeye the sailor, Elijah, mtaylor and 1 other
-
4


Kågen by Wintergreen - FINISHED - 1:30 - Swedish clinker-built cog work boat - SMALL
in - Build logs for subjects built 1901 - Present Day
Posted · Edited by Wintergreen
Hi again all,
another update.
The days I don't have to commute to work I save three ours of my life. Today I spent those hours at the yard :-)
Work continued with forming the pieces. First by file in my vice and then at the disc sander. Yes, it's the same lathe that doubles (or triples) as thickness sander also, except being a lathe...
Vaddoc, I now know what you mean with the glue. It took a thorough wipe with methylated spirits to get the glue off. The glue can come in handy in other applications perhaps.
When all parts were ready, the rabbet was next. I've seen from other logs how the builder has shaped a mat knife blade or similar to scrape mouldings and stuff. The rabbet here is quite straight forward, just some different angles, that's it.
As a first attempt the blade was squeezed in one of my clamps. If examined closely it can be seen that the rabbet takes a shortcut over the most acute bend on the stern. It was due to the clamps being too clumsy. Also, the tip of the blade broke off leaving an uneven rabbet as well.
(funny, what are my shoes doing in that picture...)
Option two. Two mount plates held together with wing nuts. Fairly easy I'd say. To fix the blade the torch came out to anneal it. After sharpening to an angle of ca 30 degrees the torch came to work again. This time the blade was quenched in water to be hardened again.
It is a bit fiddly to set the cut up, but then it is just to scrape away.
Now I appreciated my two sets of boat pieces because I fiddled a bit too much with the blade on the first set and had to go over the rabbets a second time.
With the other set I will be meticulous in setting the blade and then do all the rabbets at once.
For the weekend I might take a trip to my real boat or I might choose to stay at home in the yard. What do you reckon?