


Wintergreen
-
Posts
993 -
Joined
-
Last visited
Content Type
Profiles
Forums
Gallery
Events
Posts posted by Wintergreen
-
-
-
Thank you Per and a Happy New to you as well!
I was hoping to have all sails set today but then some friends showed up incognito. Coffee, biscuits and some relaxed time.
Well, then one of the wounds started bleeding again so I called it a day several hours prior to what I'd liked. Don't feel to well either today so it was just as well to call it quits.
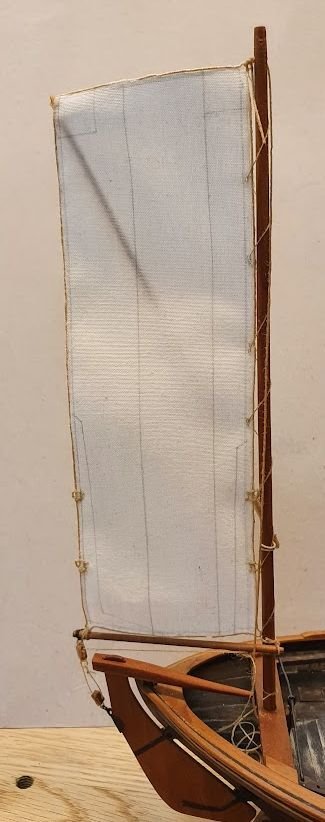
Anyway. When sailing you always (almost always at least) start with the aft most sail. In this case a mizzen spritsail.
It took a while to figure out how the little boom and the sprit poles were attached to the mast. In the book it is described as a "hank", might be the same in English. It's an endless loop, wrapped around the mast and the boom/pole end rests in the loop. Thanks to friction (in the real case, CA-glue in model case) the hank stays where it is put on the mast. I did not fabricate an endless loop, instead tied it neatly away.
Also the lashing that holds both sails to the mast is held in place thanks to friction and a timber hitch (and CA of course).
Also managed to set the main sail. Both mizzen and main halyard are belayed on a pin under nearest thwart. These are bamboo trunnels I just drilled in from above. Can be seen as a dark spots. Four around the main and two around mizzen.
Mizzen.
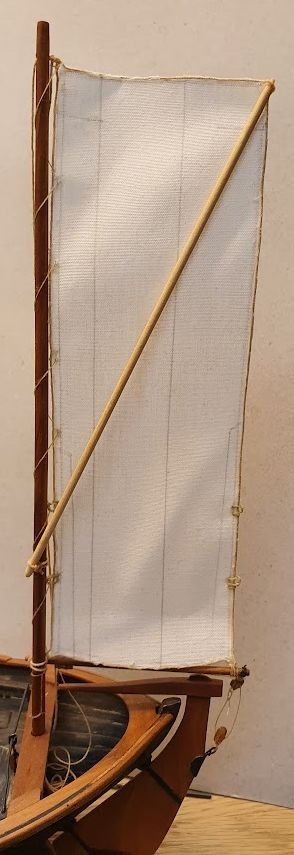
And main.
Main sheet is belayed on a cleat on the lower block.
Mizzen is belayed on a cleat on the boom. That little cleat is secured with a bamboo nail as well.
Stay sail and jib left to set, but that will be another day.
Til next time, ta!
-
-
Greetings from a gloomy Sweden! Thanks for likes and comments 🙂
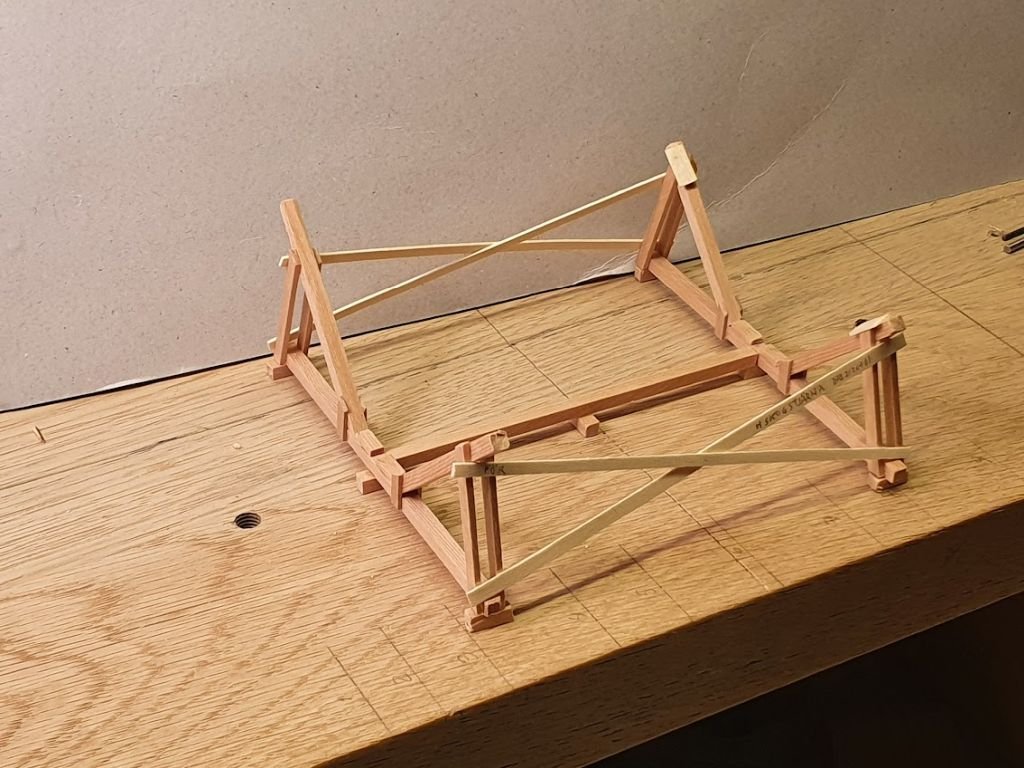
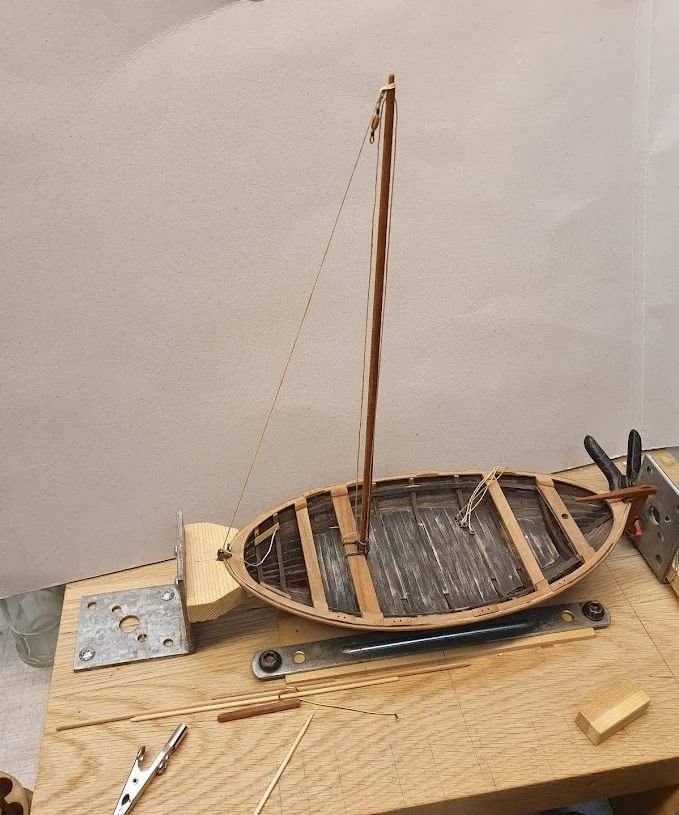
Started off 2022 with some minor tasks. A stand for example. The constructions stand did not allow the bowsprit to be extended and that I need for setting the jib. After some thinking I concluded that a regular cradle will do. It is a working boat, so a "working" stand will be just perfect.
Wood dimensions translates to 4 by 4", 2 by 4" and 1 by 4-5". The stand is not "perfect" since these cradles were just hammered together with what was at hand. Also it is marked with owner (that's me 😉 ) and phone number (fake of course on the model).
And most important "För" is Swedish for Stem or Forward.
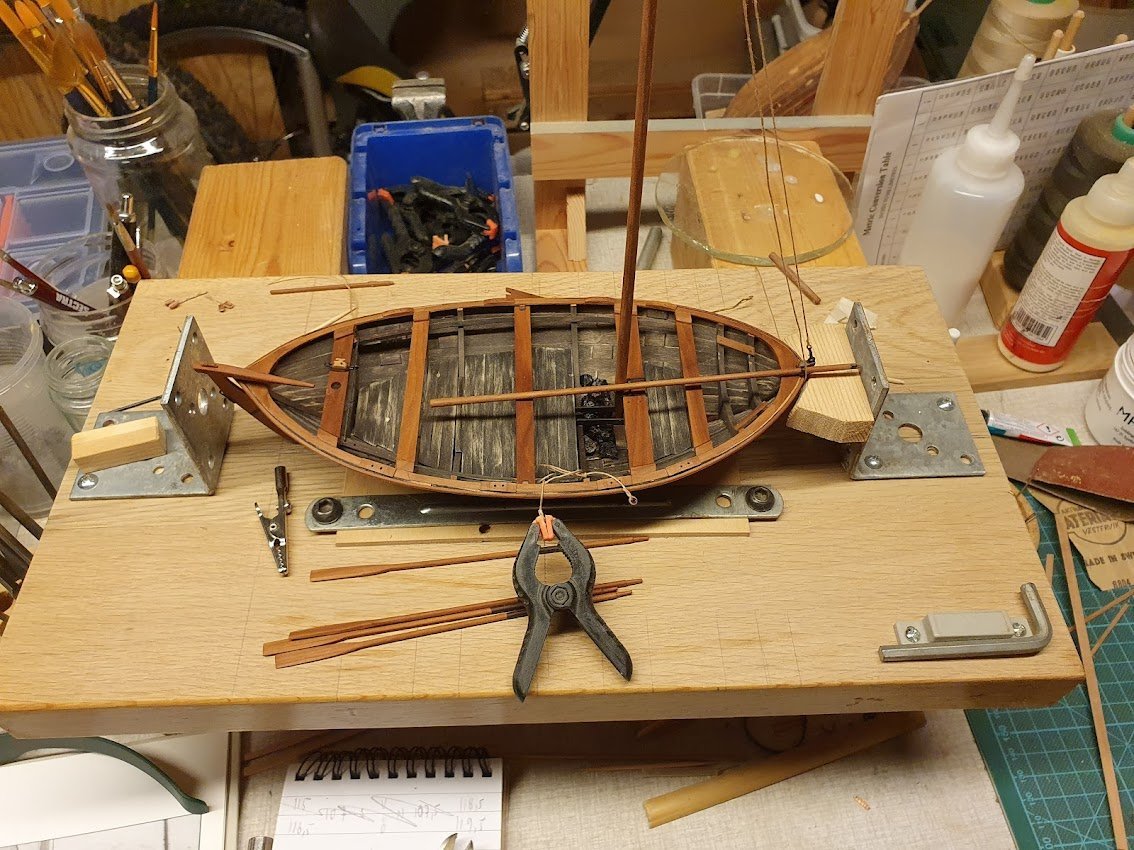
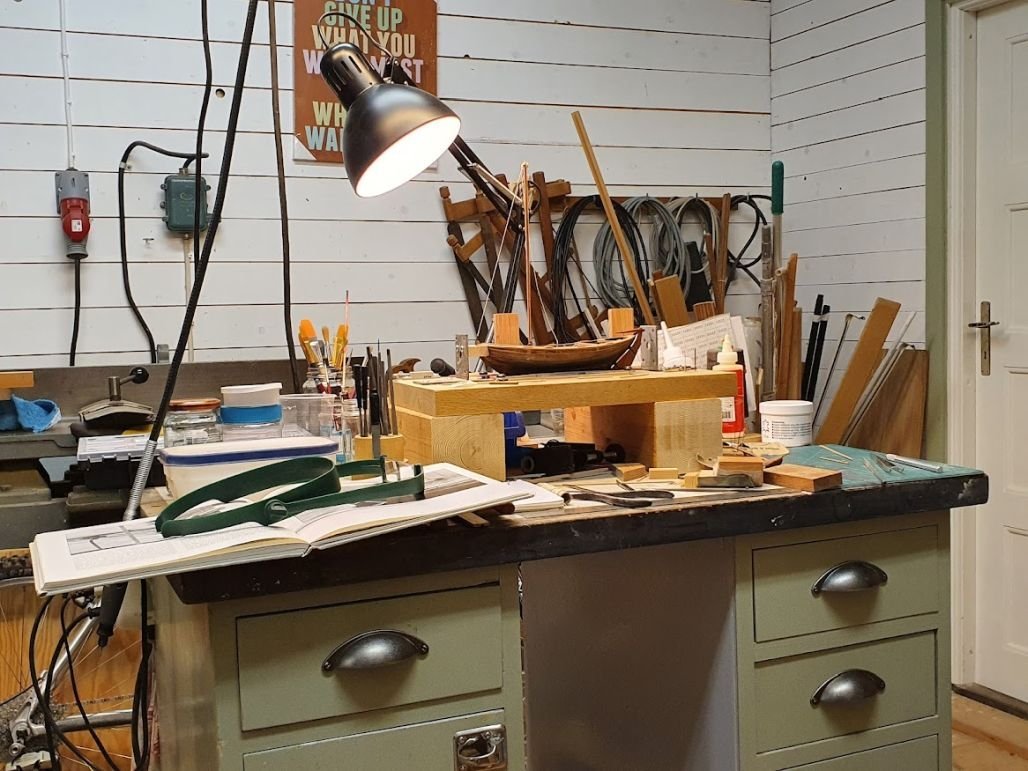
First a messy progress picture. I try to have the pictures free from debris, but it is just show and not how my shop really looks like.

Without boat.
And with boat.
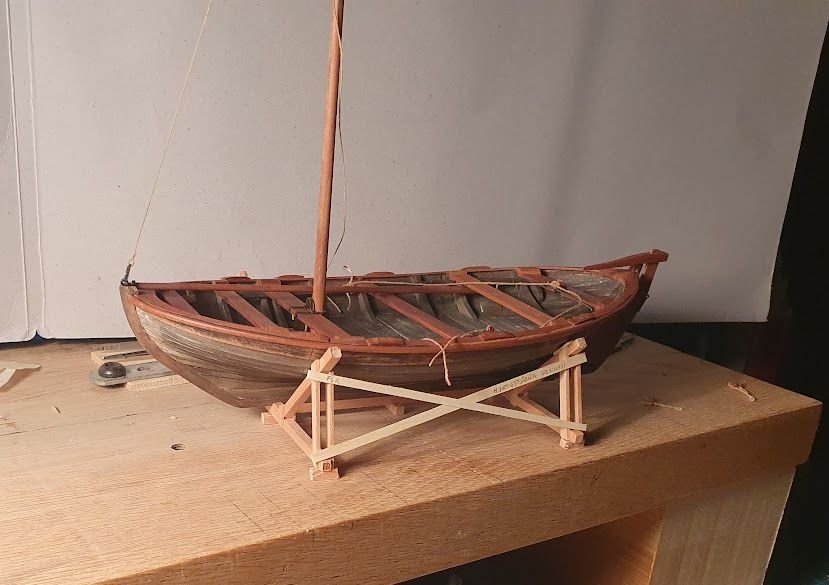
Tomorrow I can do the rigging. Probably not really accurate to have sails set while on the hard. But the owner might just check everything out on a calm, cold, sunny day in March prior to launch.
Til next time, ta!
-
That's an excellent tip John!
As it happens I've done just that, have one "original" and then all subsequent plans are derivations from that original. The numbering is clever also. Will adopt that. Thanks!
-
-
Back up on the horse as they say.
Now a couple of days later I went out to the shop again. The injured fingers doesn't ache all the time and yes, I have been shaken of the incident.
Creative thinking applied. It happened once. It might happen again. The human race is slow to learn from history... the glove is nailed to the wall adjacent the saw.
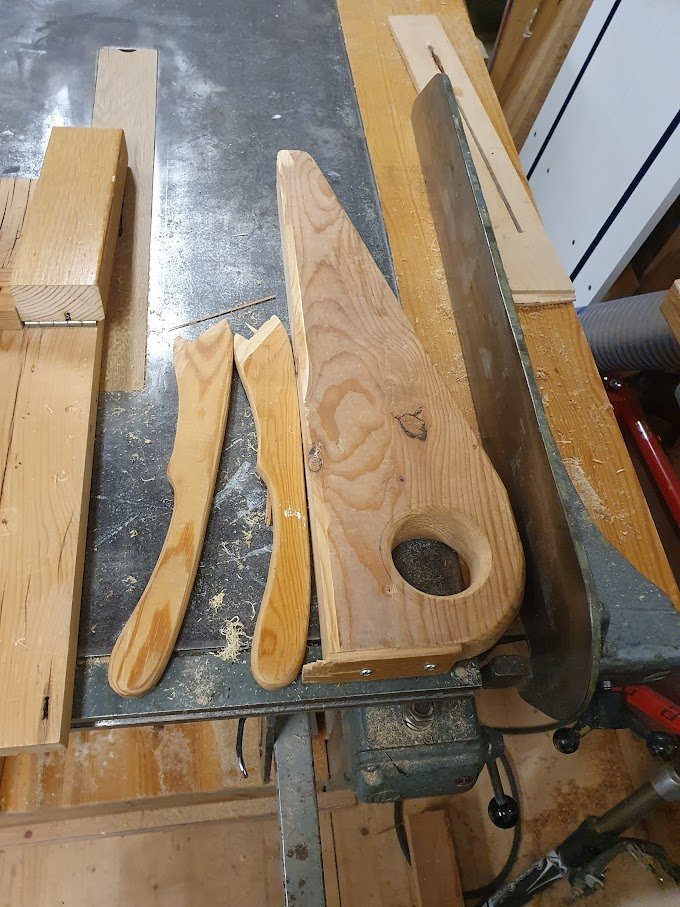
A blade guard...hm... pictures below.
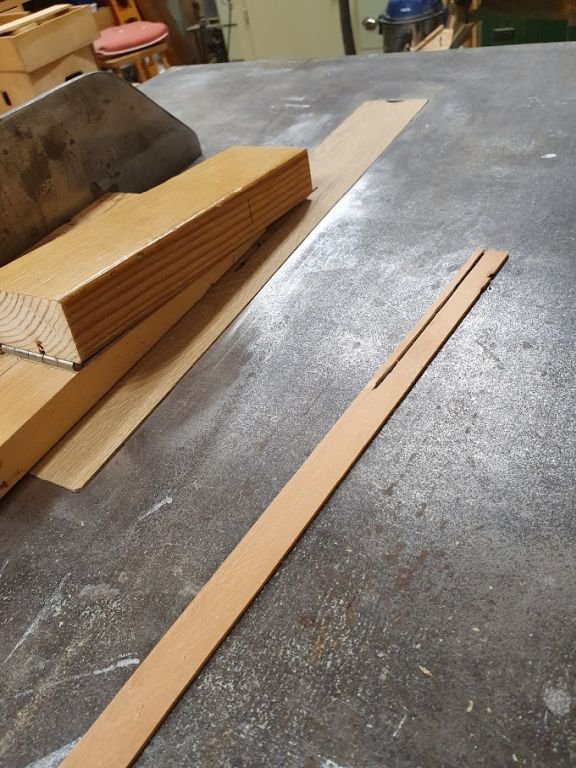
The fences on my crude table saw are quite high, therefore I use a board clamped to the fence for smaller jobs.
Figured out the the guard had to be attached to the board. The setup only applies for small jobs, still need to figure out one for the 10" blade as well. Later though. It also needed to be retractable in some sense, for setting the blade and such.
(gah, typing one-handed is slow)
It can probably be refined. Anyway, I fired up the saw and finished the cuts that I started previously.
Yes, having the fingers wrapped in band-aids does impede agility and it felt awkard and I was not at all feeling confident. All due to the accident.
But I got it done and it worked quite okay.
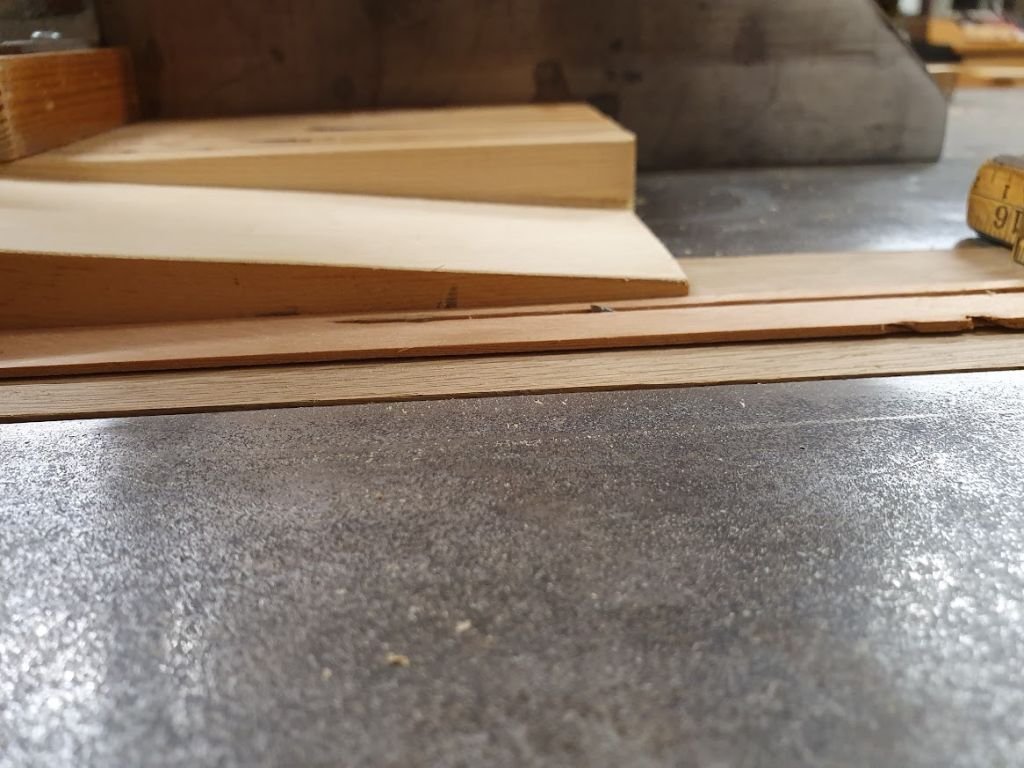
This high was the blade set at the accident.
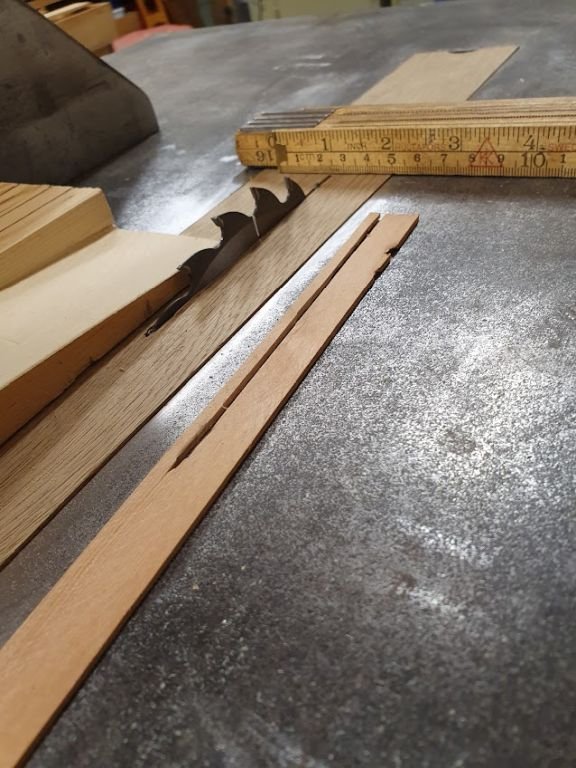
Should have been this high.
And the blade guard (or fingerguard might be more appropriate). It is attached with a hinge at this end and folds up to 90 degrees.
The saw only does 90 degree cuts, no tilting. No riving knife either. But dust extraction I've built.
Now back to building 🙂
- BobG, Paul Le Wol, thibaultron and 4 others
-
 7
7
-
"Everything is possible. The impossible just takes a bit longer" 😉
With a small sharp chisel I think you will find a way.
Keep it up!
- Keith Black, dirkske and Baker
-
3
-
Coming along nicely!
What Brian said above and the run of the planks look superb as well.
Happy to hear that you are getting out of sick department 🙂
Keep it up!
- FriedClams and mtaylor
-
2
-
Clever to use adjustable feet and a laser level to get square and fair.
About the dotted lines you were asking about. I think they are the so called bearding line and rabbet. See this thread for a picture a couple posts down:
Good luck!
- Keith Black, Baker and dirkske
-
2
-
 1
1
-
Per, yes have this log as well. 🙂
The early plan was to make sawdust this fall. That didn't happen for a number reasons.
My plan B is to actually start it this year. That might still happen, even if I'm forced to a short brake and some days out of the shed now. Can't do much building with one hand... I have the injured hand stuck in a sock to prevent me from doing anything I shouldn't do.
I wish you a Happy, Prosperous New Year as well!
-
Thanks for the replies and well wishes!
My point of posting this screw-up of mine was to remind anyone that reads it just how easy and terribly quick things can go wrong.
I kick myself for letting it happen, but as you say I was lucky, indeed.
Today my daughter which is a full blown nurse will stop by and switch the bandages that are more like band-aids really.
And I also got the antibiotics to prevent infection.
-
28 minutes ago, Nirvana said:
Have you got any snow?
Well, on and off.
Amazingly enough it snowed the night before Xmas eve, so we had a white Christmas! Imagine that 🙂 Enough to cover the ground. Moore will come tomorrow night, but then, as per usual, it will thaw away in time forl new years. 😛
-
Another wee update.
First, thank you for the interest shown in my humble try of scratch building a tiny vessel!
The plan for today was rigging and possibly making the stand. Fate thought otherwise. See under tools and workshops discussion.
Anyway, I started to tie down the stropped fairleds. Actually came off to a good start. Las thing yesterday was to put in the ballast stones.
Progress will very slow for a day or two until my fingers stop hurting at least.
Take care, and Be Safe!
Til next time - Ta!
- G.L., GrandpaPhil, Henke and 2 others
-
5
-
-
I post here since it regards our tools.
How many times have you read the instructions about safety first? Plenty? Yeah, me too. But still...
I will only post a picture of my glove and not of the wound the tablesaw inflicted on my fingers and then a short discussion of what happened and ho to prevent it from ever happen again.
So, take a moment to examine this picture. Let your mind wander off to worst case scenario and then read on below.
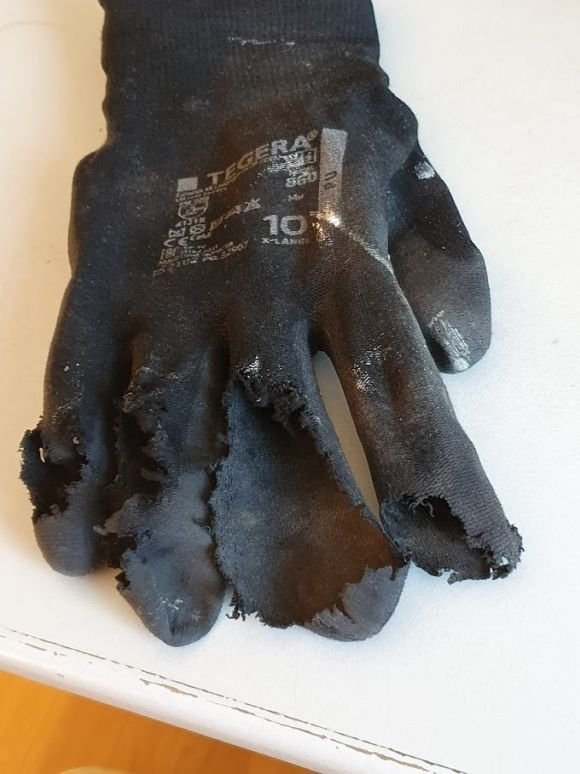
That was ugly, yes?
However I can comfort you in that I still have five functional fingers on my hand. The wounds are only shallow however the fingernail on my index finger got slitted lengthwise and will probably fall off in a week or two.
Thumb and pinky are unharmed.
Okey, what happened?
I usually work with gloves on. Partly because my shop is below room temp and partly becasue I've believed that they give some sort of safety when it comes to power tools. Now I know that that is not true.
Today I bought and mounted a new blade to my tablesaw. A tablesaw that takes up tp 12"/300mm blades. This new blade was small att 165mm with a kerf of 1,5mm. Happily trying it out I made two or three more or less serious errors.
1. Slitting a piece of fine grained pine down to 1,5x3,5 I had the blade unecessarily high. I didn't lower it between cuts.
2. I did not use my pushing sticks, which btw always lay beside the saw.
3. I had gloves on.
4. And finally, I got carried away and forgot about safety first.
What happened was that as I was cutting the wood from 20x30mm downto 1,5x3mm the far end of the stock started to catch the blade. Reaching beyond the blade to hold down the end s**t happend. Even though my fingers were away from the blade the blade caught the fabric of the glove's index finger. Rest is history so to speak.
Right, so what to do in order to keep skin and nails intact in the future?
Well, had I lowered the blade it wouldn't have caught the glove and even if it did catch the glove, I would probably get away with only real scare and a "C**P, that was close!
In using push sticks I would have been safe no matter how high the blade was set.
And with bare hands I doubt that the blade hade caught my entire hand, which is what happend now. Instead the blade would probably only scoure the finger. Or maybe not. I have no intention of trying this out.
What about my wellbeing?
Yes, we drove down to local healthcare (only 2 mins away) and had the wounds taken care of by a nurse after a GP dr had had a look. I did also receive a prescription of antibiotics cure, one week long.
I addition to that regular pain killers will be on the menu for a couple of days.
And really, I'm fine. Yes it hurts but I kind of earned that.
My sending off words to you all are
Have fun, but BE SAFE!
-
Hi there!
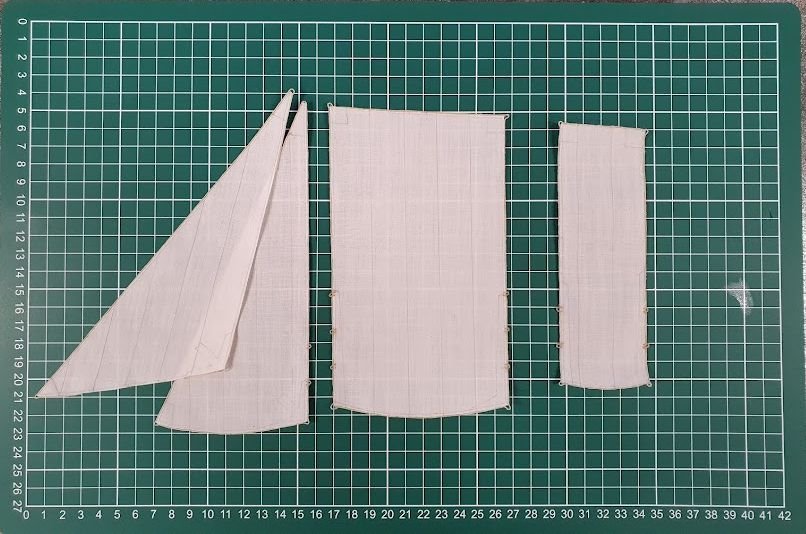
Today is all about sails.
I have no progress shot and thus only describe in words how I fabricated them.
Sail cloth is some thin fabric that I have used for my previous Regina build as well.
First, templates were cut out from regular 80 gm paper. Like in the below picture.
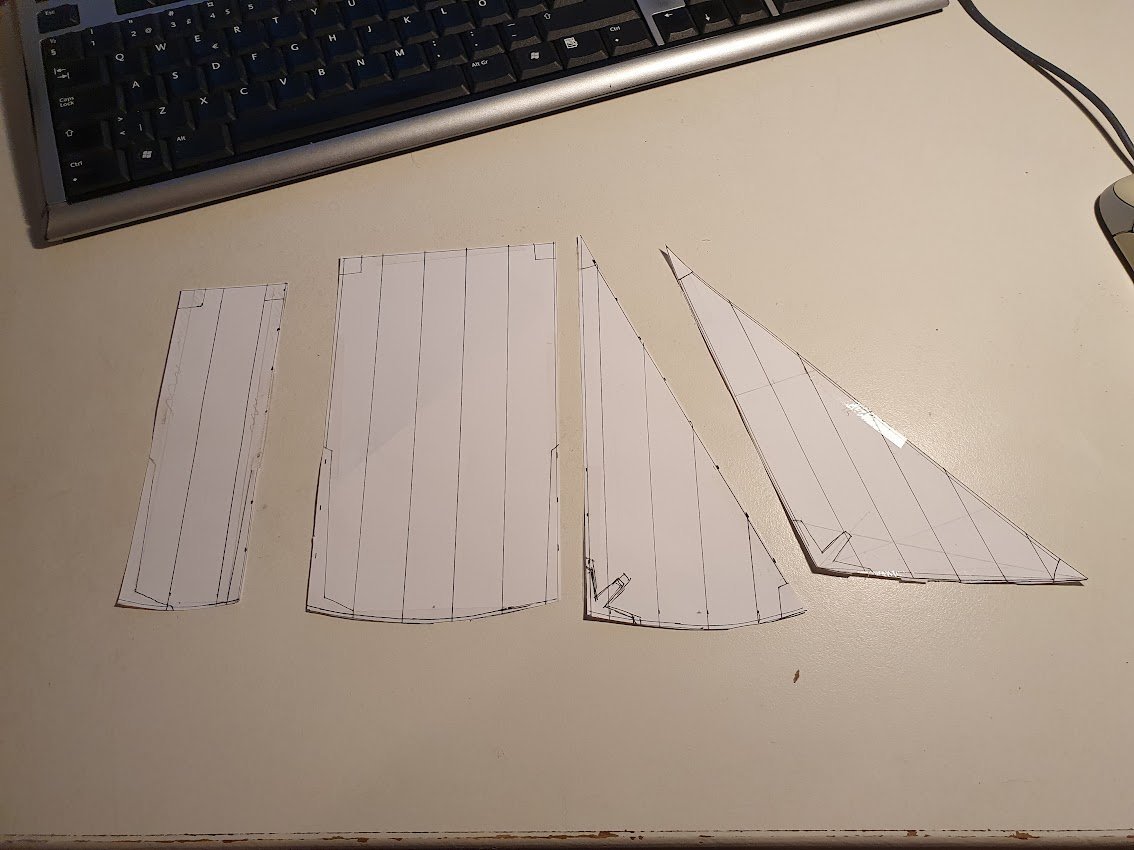
These were taped to the cutting mat and then the fabric taped on top.
All lines where drawn with a regular pencil (H).
Along the edge, diluted white glue was applied with a narrow brush. Let dry.
After they were cut out the finicky business set off - gluing the bolt rope. I used a glue for fabics which worked really well.
A first try with needle and thread was abandoned due to scale issues. Alas, even the first sail was scrapped due various issues (mizzen that was).
After bolt rope, reefing cringles were added. Theese took a couple of tries to get descent... The are sewn with a regular cotton sewing thread and then secured with white glue.
Now, some pictures.
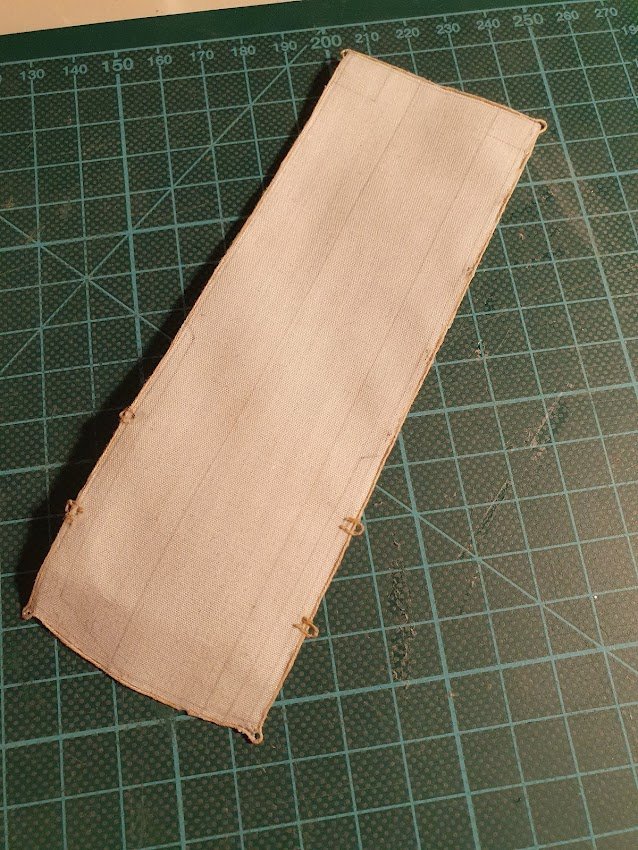
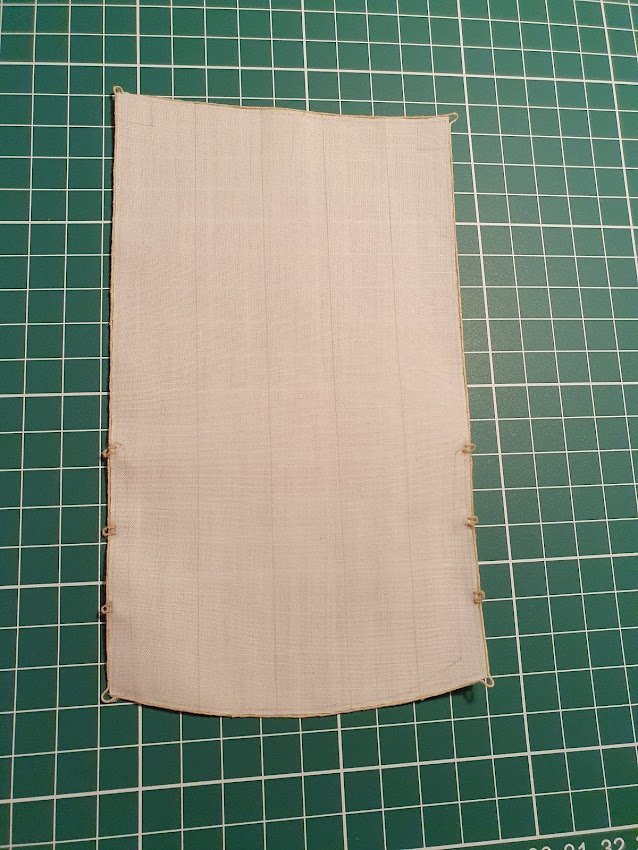
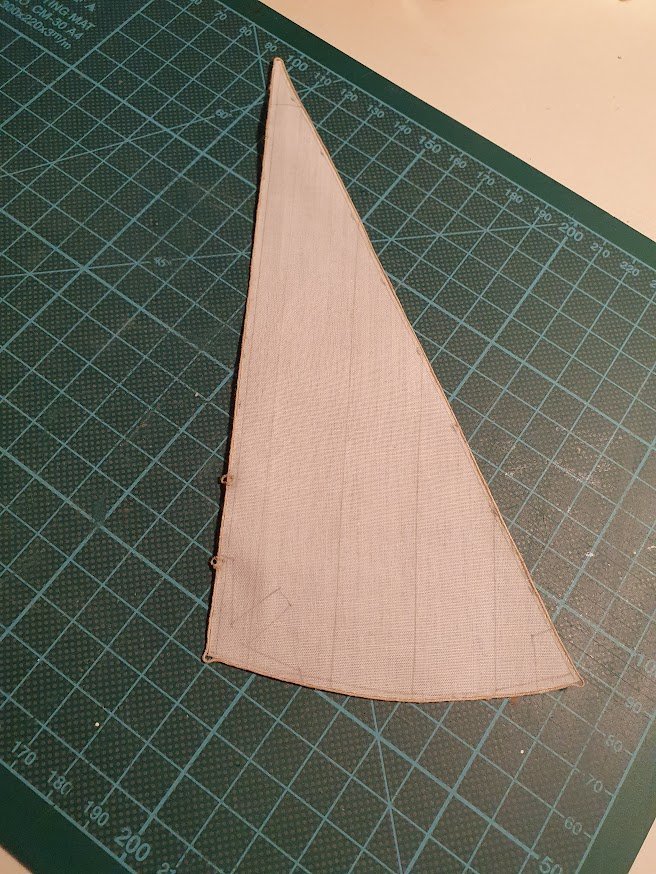
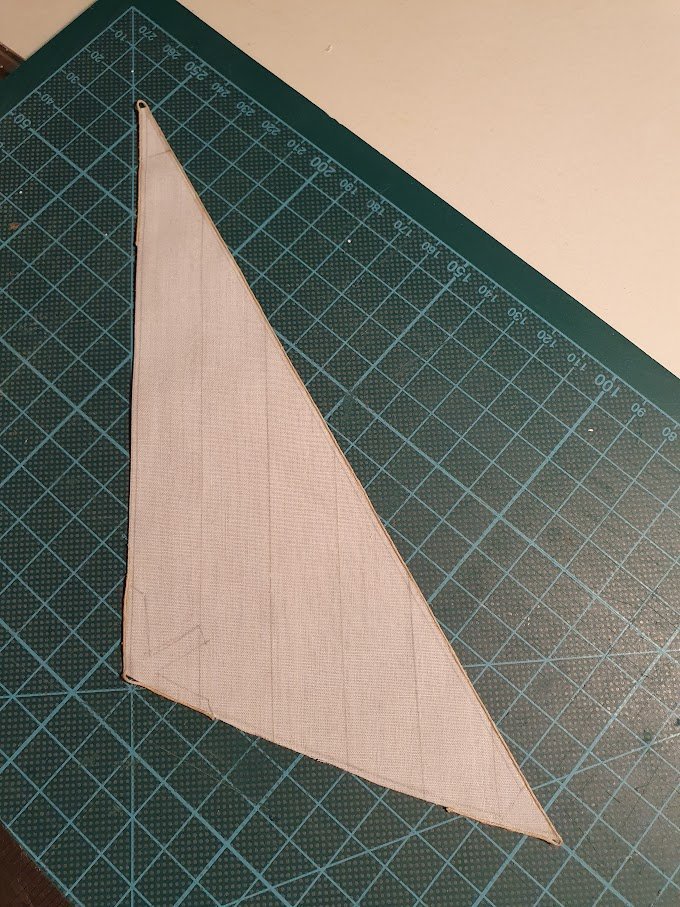
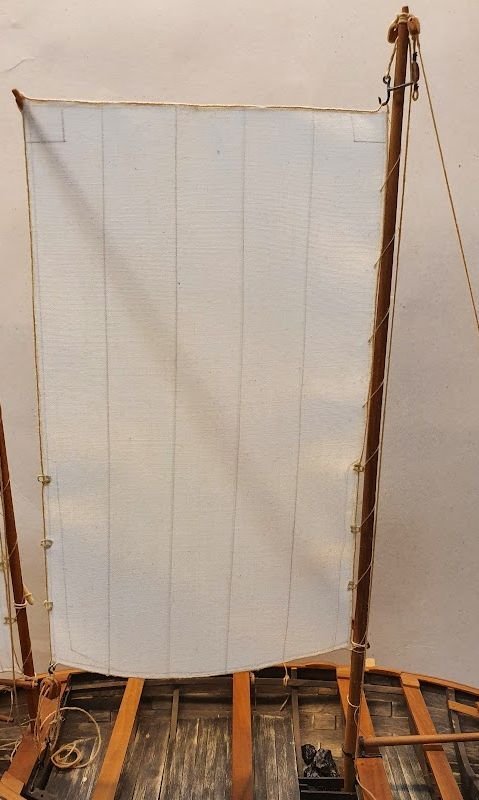
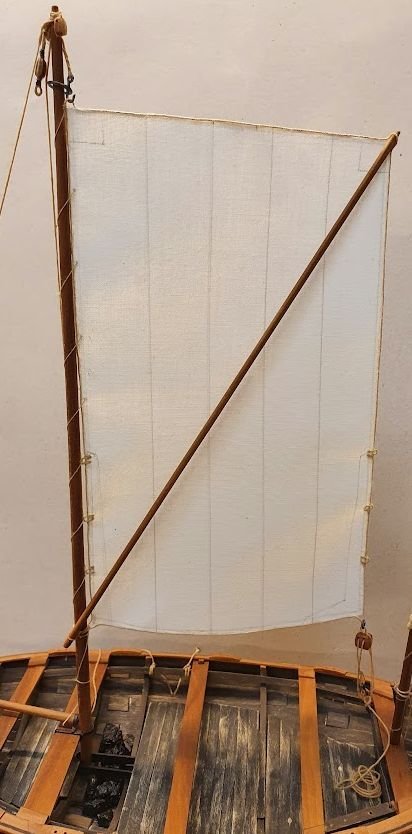
The complete set (bar the topsail which I have omitted)
And to round it off an image to get into the right mode for finishing this build off...
Til next time, ta!

- GrandpaPhil, wefalck, bolin and 5 others
-
8
-
Every little success counts!
You're doing a fine job with the old lady 🙂
Keep it up!
-
The left (2nd) splize is definitely okay!
I can do them in real worlds size and if mine would turn out that neat I'd be very satisfied.
Hats off to you Siggi!
- Keith Black, mtaylor and Siggi52
-
3
-
Those are some excellent looking blocks!
No, I don't have preconceoptions about people. Your talent speaks otherwise.
By hard solder I meant silver solder and by soft solder, which I get is what you use is the type with a soldering iron and tin.
Thank you for showing your nice work!
- mtaylor and FriedClams
-
2
-
-
-
-
Thanks for likes and comments!
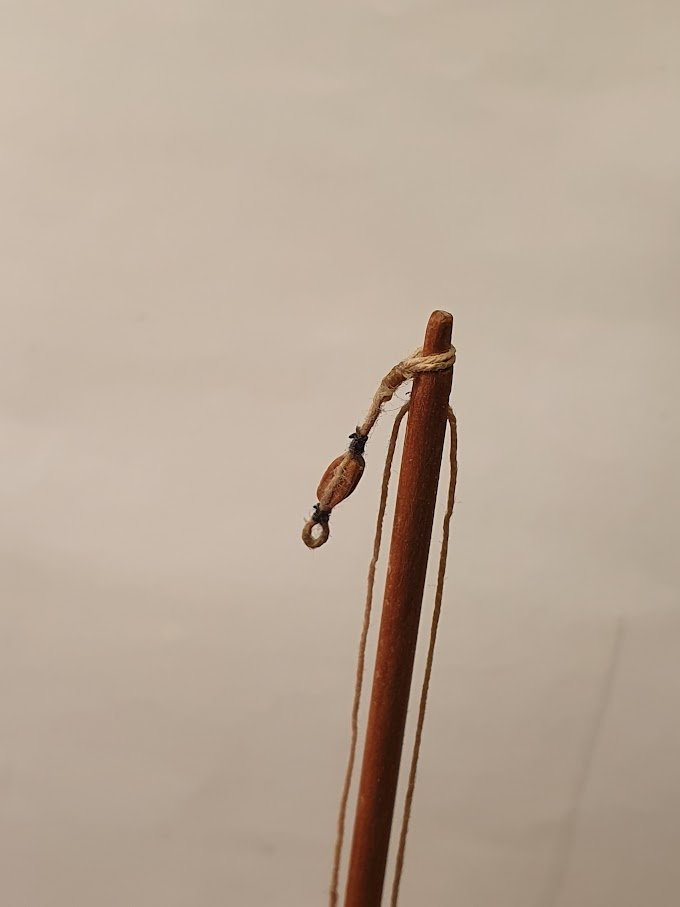
Plodding along with rigging here.
To keep me from going nuts this winter with chemo and all that, I bought a small addition to my workshop... a 5kW 3phase heater. Yum. No more problems with low outside temperatures.
The stropped block at the top is for the staysail hailyard. It is about 5mm long and need to practise shaping the blocks more round/oval instead of stretched/oval. Well, practise makes perfect in the end. The seizings are plain sewing thread. Cotton I think. A drop of CA glue on and they will not part.
White glue for the hops and eye.
The forestay in the second picture is not permanently fastened. It probably should be seized with a shackle to the ring but I think I'll just tie it off.
Till next time, ta!


Safety first, second and third. What to never forget.
in Modeling tools and Workshop Equipment
Posted
Me too @BobG, me too.
I would not be hesitant of getting a Byrnes table saw if it were an option. Sadly, living in Europe postage and customs take the fun out of it.
The pros of these small table saws (Brynes, Proxxon, others) is that the blade is very small. Sharp yes, but still small. Set at correct height for every cut, which is were I screwed up, and you should be good to go.
Also, the motors reflect the use. Remember, I put a smaller blade (165 mm instead of standard 250/254/305mm) in my 1,5hp, 400V table saw. Byrnes is powered by a 1/3hp 110V motor. The Proxxon I don't find the specs for. My point is, that even a small blade can cause kickbacks and injuries, but with care and careful set-up of each cut, the risk for serious troubles are less. Apart form wearing googles (if appropriate) wear an apron as an extra layer of protection against kickback. The pieces cut on these model makers table saw are generally small and will not cause serious damage if kick-back occurs.
Wear an apron and take it slow. And Enjoy!