
HOLIDAY DONATION DRIVE - SUPPORT MSW - DO YOUR PART TO KEEP THIS GREAT FORUM GOING! (Only 13 donations so far - C'mon guys!)
×


popeye the sailor
-
Posts
16,007 -
Joined
-
Last visited
Content Type
Profiles
Forums
Gallery
Events
Everything posted by popeye the sailor
-
 I though I had caught up with your build here.......guess I was wrong! she came out look'in very good mate! your weathering techniques are better than mine......of course, anyone's would be better than mine....... but none the less, you've done an admirable job on her. you amassing quite a fleet there.........look'in forward in seeing your next one
 -
....or just a thick coat of paint.....on one would know the difference she's look'in sweet Steve........the railings are very well done! are you gonna add life boats on the port side?
- 446 replies
-
- 3
-

-
- zebulon b vance
- deans marine
- (and 3 more)
-
amazing Greg.......the planes look great! they look super on deck
- 345 replies
-
- 4
-
-
- graf zeppelin
- trumpeter
- (and 2 more)
-
I thought that was the one........the one in Manchester only holds daytime classes. this is another part off of Queen City Ave. the buildings your referring to in the mill was once the manufacturing hub of Manchester. there were warehouses, textile and shoe factories......of course there was no thought about impacting the river with their waste. once that came to light, the entire face of commercial St. changed.......you'll find interesting reading about the Mill yard in Manchester........ cripe, over half of my family worked down there at one time or the other there's much more to see........too bad your not visiting now... the heat broke and now temps are pretty much back to normal {go figure}
-
you really should do the other vans.........that one looks so cool! superb job Danny........totally awesome build!
-
rocket racks look very good.......nicely done!
-
looks like someone wasn't on TP detail very claustrophobic! glad you enjoyed your visit........should make the decision easy I remember when I first got down in Fla...........took some adjustment to the climate {we won't go into the details}. I spent five years down there........had a good time too I copied the pictures of the snow plow for my log folder....looks very close to the B&M version {Ambroid}. I've got a couple of other variations too SNHU.......is that the place out towards Hooksett, of the place here in Manchester?
-
should be an interesting project when you get to it
-
super pictures of the north country......glad to hear your daughter was excepted! haven't been up that way in quite a long time.........used to deliver the Union Leader with my uncle........all the way up to Intervale and Gorham
-
excellent job! came out really good..........you'll have to do more then you can try out some of your ideas.
-
thanks for the good word John, Phil and Kevin thanks also for the likes.......I hope to have an update soon!
-
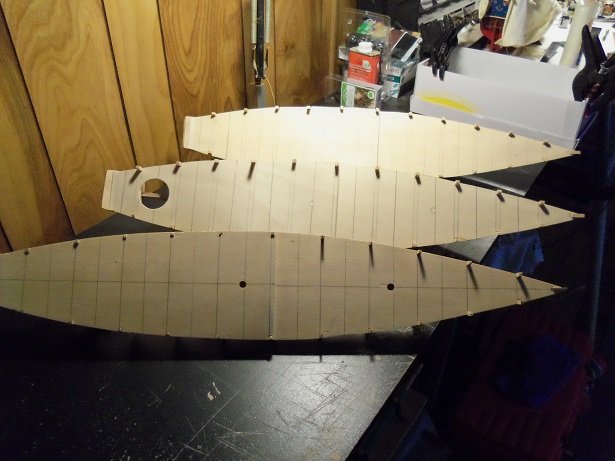
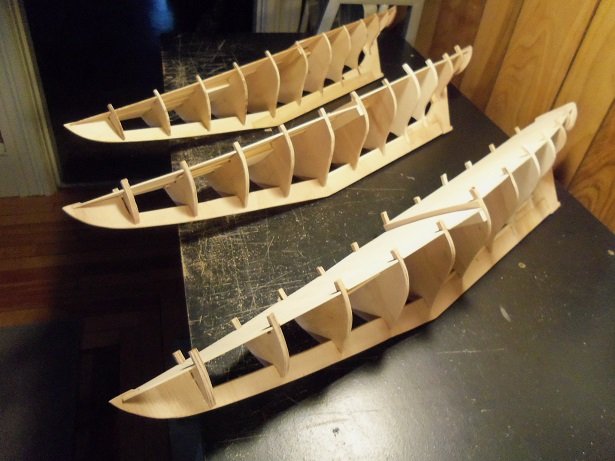
thanks Phil.....I wish I could get my other project off the ground. I traded some stuff to a friend for his unfinished Bluenose........he lost interest and just wanted to part with it {long story}. it a 1:65 scale Billing Boat model. it got damaged in transit.......but I wasn't keen on how the hull was planked either, so I took it apart. while it was torn down, I made two other hull frames. they sit in the closet at the moment....the Bluenose, the Bluenose II, and the America........all in 1:65 scale if I ever get to show the project, you'll see why the bulwarks will have to be built up from the deck.......this problem transposed to the others too, so the problem is three fold I call it the Bluenose project......here's a couple pictures of the hull frames as they are at the moment. I've finished several ship models Carl....the most recent was the Norden
- 377 replies
-
- 2
-
-
- america
- billing boats
- (and 1 more)
-
looking great Kevin doing a swell job fitting her out!
- 337 replies
-
- 4
-
-
- finished
- mountfleet models
- (and 1 more)
-
you did a superb job with the opera house Danny.......this should go better for you now that you have the lay of the land
-
no pain...no gain the deck looks great.......ya done good
-
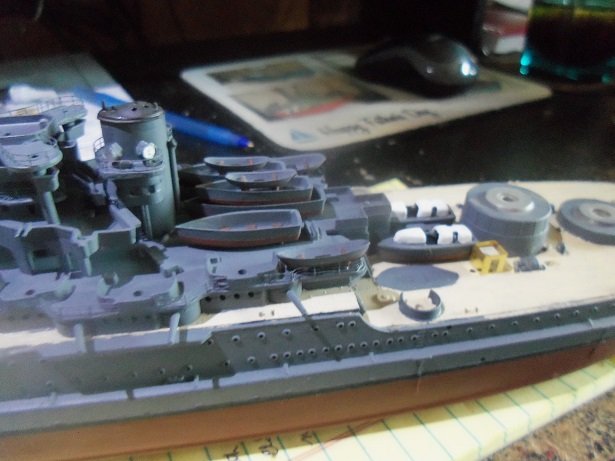
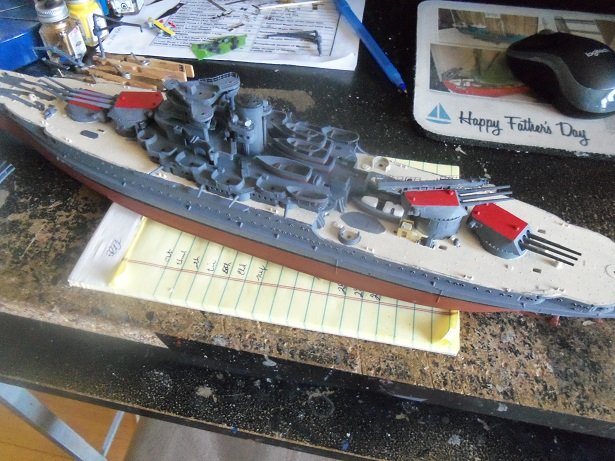
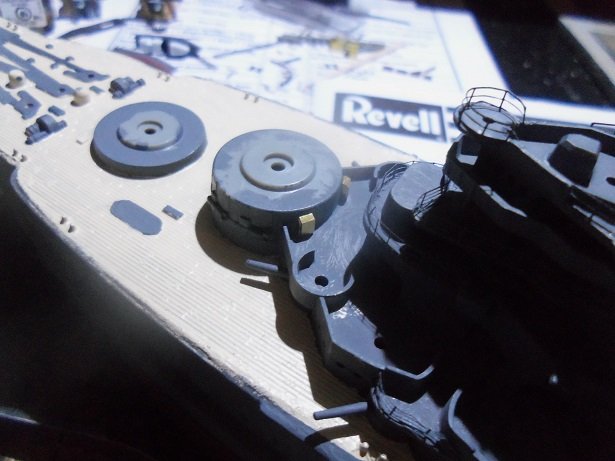
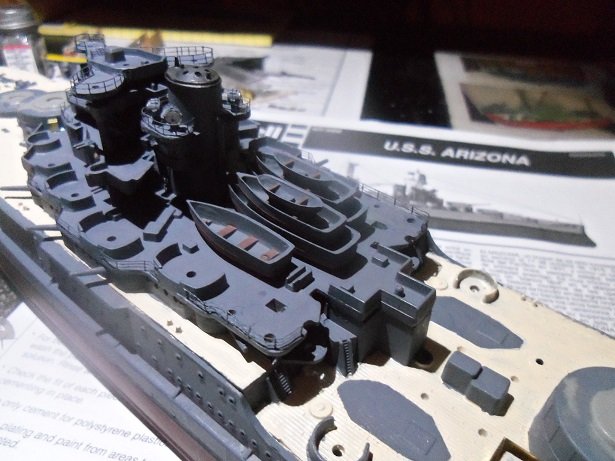
After....the cranes and the catapult were painted and set aside. some other smaller parts were painted too..... there is a log of the Hood being done at the moment.......I probably can make some of those larger ammo lockers as well, but I would have to see if they were present on the deck. all of the ship's boats are in place now. I would have thought that the lone boat would be in the center, but this is the way they were positioned....the locator holes don't lie I hope the railings clear the 5 inch guns.......if not, I'll have to modify them. could be a silver lining.......maybe not I added the turrets on the deck for a dry fit. I'll check on ladders as well........got quite a bit of them. this is where I am at this point in time. more to come
- 259 replies
-
- 14
-
-
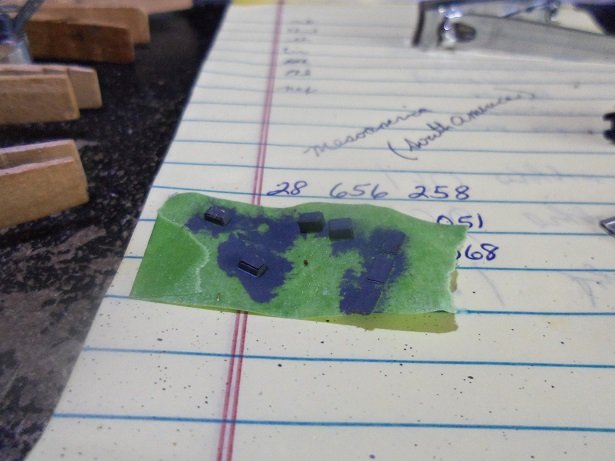
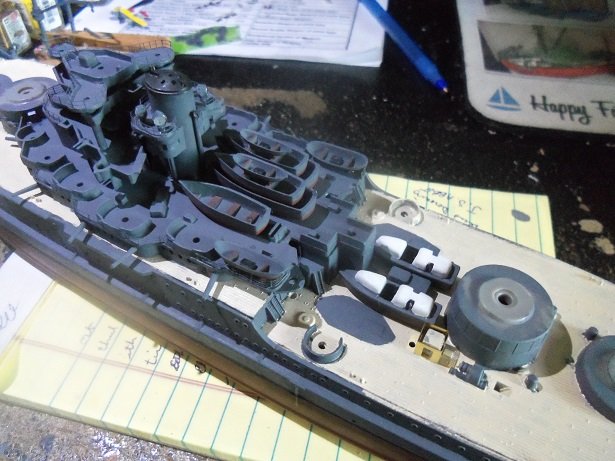
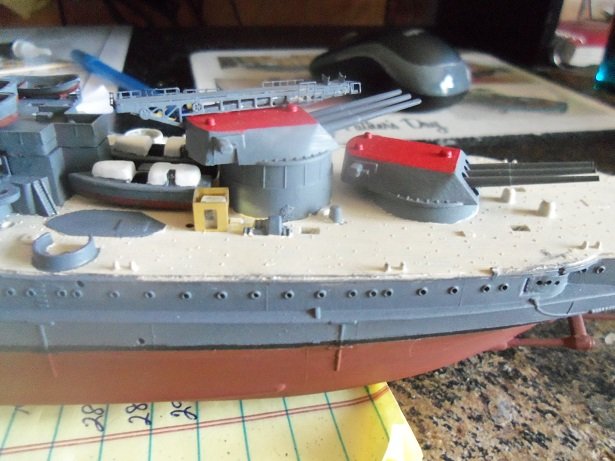
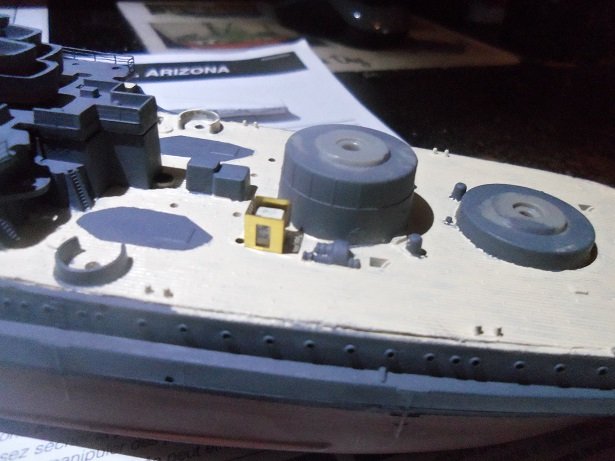
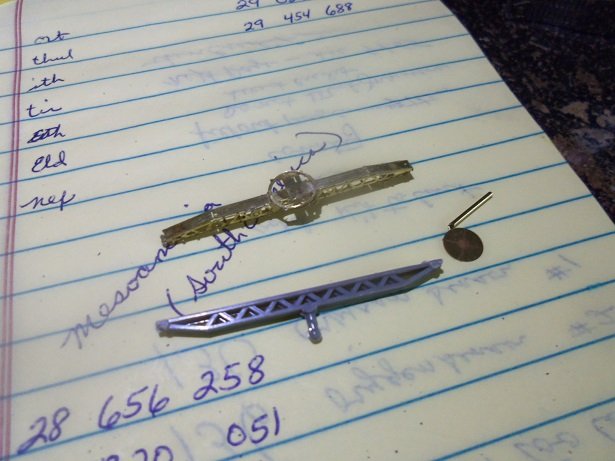
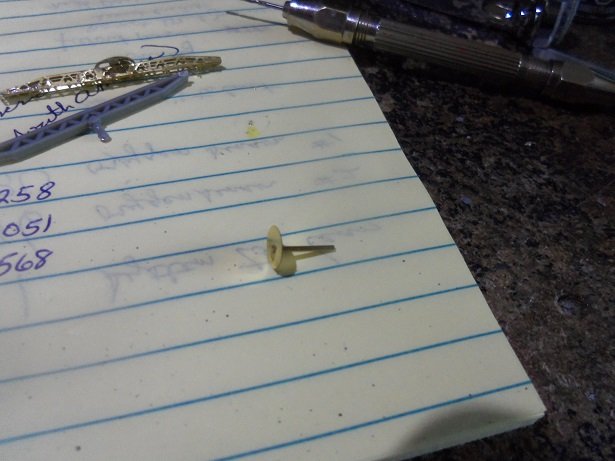
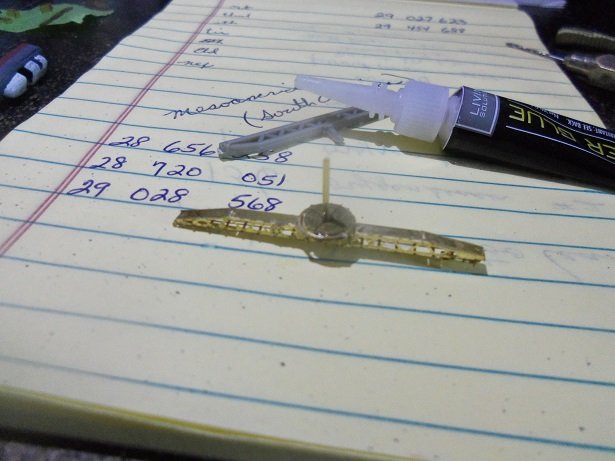
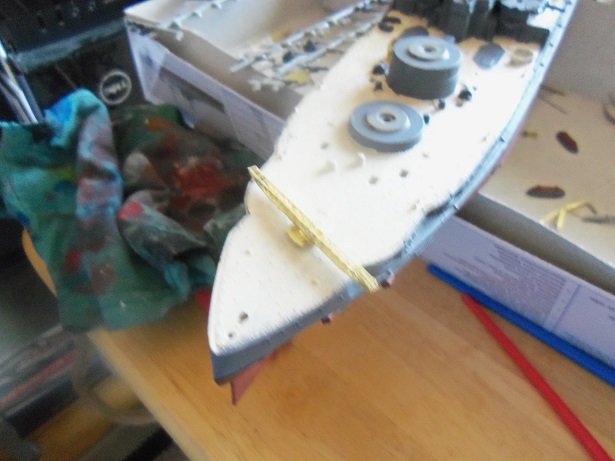
I got some more done on her yesterday....today was a bust though. spent the morning sitting our five grand kids with the admiral, while our oldest son and his wife works on a deal with a local car dealer. as a side job, Brandon has been piloting a drone, using it to make videos of homes for sale. they use it to hover around the home and property, then takes it home, where the clips are put together with added music and theme. I hope this is a big thing for them it was fun seeing the grand kids! errands took up most of the afternoon. so, I'll post what update I have so far. some of the PE I put together look like lockers of sorts........I have four of these small ones. two of them I put along the base of turret #2. the other two, I'll put them at the base of turret #3, but I need to paint them first.........then finish touching up around the barbette. since the life boats are finished, I decided to cement them in place.......it might cut down on the amount of touching up I'll need to do there are a few larger structures that I showed earlier.......I tried one in place on the aft deck. it needs a roof though........I can cut some brass to fit. I'm gonna study the pictures I have.........there may be some doors on the taller barbettes I can add. as mentioned, I became curious about the stern deck catapult. centering it may be a chore, if I don't do something to make it easier for me. there are some circular pads in the Hood PE that I'll use to do this. it all starts here......... the hole in the deck was drilled out, but with no way to use the plastic pin on the original one, I came up with an alternate plan. a hole was drilled in the center of the circle pad, and the brass pin was cemented to it....flush. there is a hole in the pad at the bottom of the catapult, but I didn't bother to drill it out........I cemented the pad to the bottom. .....a quick test fit after it set.........
- 259 replies
-
- 10
-
-
the degree should vary I think........longer and shorter streaking. anywhere you feel that water would collect and run down.
-
neat tank.........built a few in my day. I used to get into the motorized models.......Lindberg line was another Revell was my favorite though.
-
have fun and good luck!
-
congratz on the finish Tom.......the cannon looks great! nice trim and a super display........perhaps a modern Howitzer might be a good companion, kind of a then and now thing truly a nice model to be proud of Jenny would make a good side build......look'in forward to it
-
Fokker Dr.I by hof00 - Hachette
popeye the sailor replied to hof00's topic in Non-ship/categorised builds
look'in good HOF.........the wings look great! -
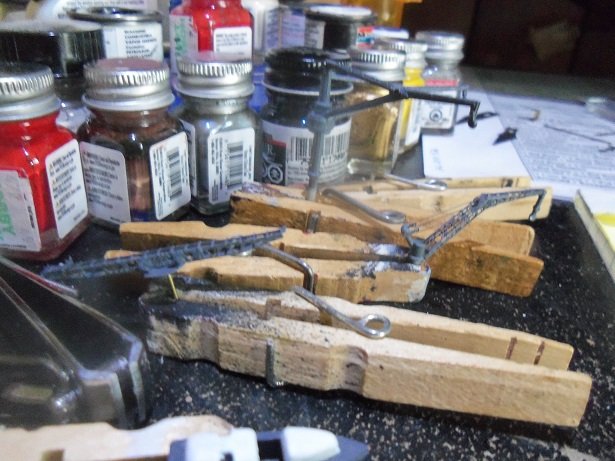
looks like a pretty good set up. I need to get new clamps........I have some like yours and most have broken in some fashion or another. thanks for showing your method more painting being done at the moment. something I didn't give much thought about was the stern deck catapult........no location pin for it? there's a hole on the deck, but it isn't drilled through....that needs to be done as well.