
HOLIDAY DONATION DRIVE - SUPPORT MSW - DO YOUR PART TO KEEP THIS GREAT FORUM GOING! (Only 13 donations so far - C'mon guys!)
×


popeye the sailor
-
Posts
16,007 -
Joined
-
Last visited
Content Type
Profiles
Forums
Gallery
Events
Everything posted by popeye the sailor
-
 I usually make the margins in pairs, keeping in mind left and right. if the bulwarks are equal, it takes little fitting to get them snug. I did cheat on the Progress though.......I used the printed margins on the deck platform for the templates. they are not the same, so I couldn't do like I normally would for other vessels. is there a deck platform for this one, or are you going to do the planking over the bulkheads? superb progress thus far
- 131 replies
-
- 1
-

-
- santa lucia
- panart
- (and 1 more)
-
very nice job with the railings! they look outstanding that's quite a process for the life boats.......they will look great when all done. you would have to look way in the archives of this forum to find my Cutty Sark log. in it is the entire saga of how I got the decal program........although it doesn't solve all of my problems. the big hurdle in all of this, is most printers won't print white. the only one that I know of, are the old ALPS printers. if you do a search, you might find a place that has them......not sure if I kept the site that sells refurbished ones. weighing out the price of the printer, and how often I make decals, it's not much of a plus. not sure if you were a member at this time, but you might glean some idea from this log. Michael did some impressive work restoring this liner.
- 446 replies
-
- 3
-
-
- zebulon b vance
- deans marine
- (and 3 more)
-
so.......the body is out of the dip........looks like the effort was a success. now to give it a light sanding and clean it up the rest of the way. pictures will follow soon.
-
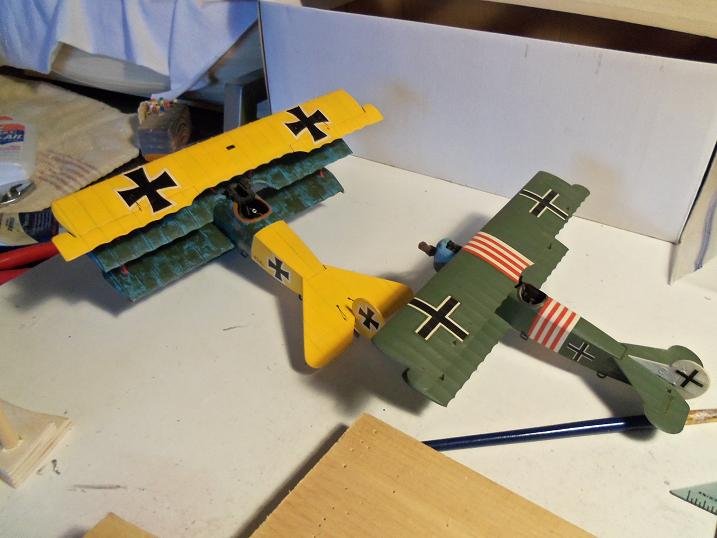
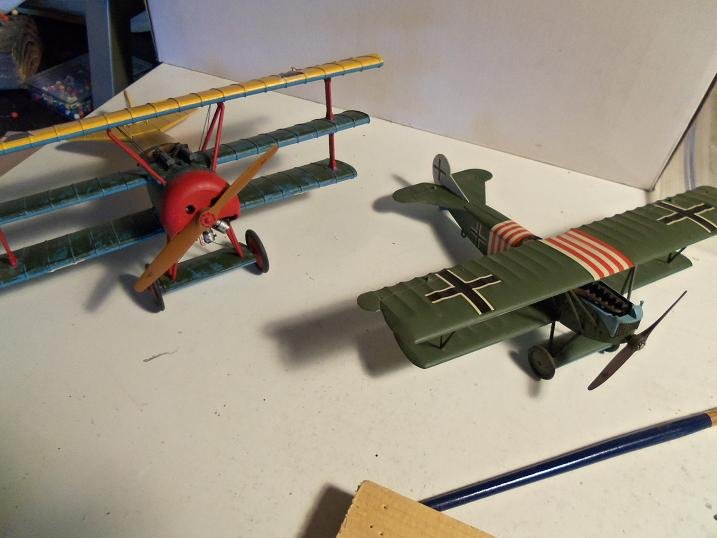
I like that scale........I have a Fokker D VII that I built a short time ago. I'd love to get a hold of a couple Brit planes.......even the tri plane
-
hey there Sam.... I have an HP F2480.....I believe the max DPI on it is 600. I have been dealing with a transparency issue using the decal maker, so I set it to max. I did some digging a while ago, and I found that there was suppose to be an upgrade for the program.......turned out, it was just an expanded set of decal images. setting the DPI doesn't cure the problem though. decals printed on clear paper disappear when laid over darker colors. in some instances, I use white decal paper, only if there is white in the image, and I can only apply it to a white background. a way to get around this, is to change the background around the image, matching the color that being used on the model. this works very well for numbers ans names, especially if the color is neutral........harder for off colors and pastels.
-
thanks for the likes.........more is on the way {I promise}. I've been devoting time in the S&M debacle, and showing the landlord how I patched the pipe. I haven't gotten the pictures out of the camera yet.........likely to do more today, I'll post them all later. I had to look back in the log Sam.......I thought I posted the formula I use. using flat colors, I mix black, white and battleship gray together til I get the consistency I want { I usually don't pre measure}. for it to look even better, I like to wait till the flat black becomes diluted with thinner. this usually kills off the slight sheen that flat colors sometimes has. not that one needs to do that........just add thinner to the mix til it becomes a wash. when it dries, it will not have the sheen and give off a totally dead look.
-
fantastic rigging!..........your spiders are very well trained a lot of wow factor there!
- 1,306 replies
-
- 3
-
-
- syren
- model shipways
- (and 1 more)
-
looks great Jack......I believe this is the only kit that I've seen, where the box art shows a different scheme. I've always seen this plane in blue and yellow. the paint works well for the model, although I'd probably be impatient with the dry time super looking plane!
-
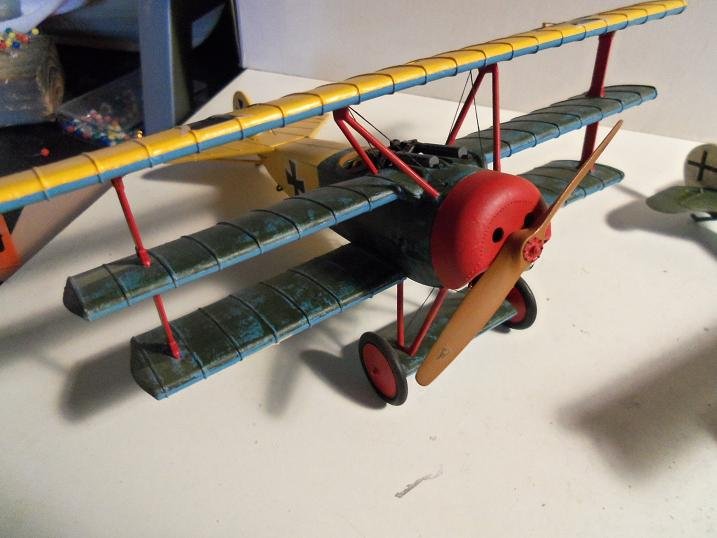
no.....your right....I should have gone further down with the red.....I will correct that. not with the stripper though.......it can't be used on plastic. I'll give it a brake fluid bath and remove it all. some older kits.......they're really a grab bag. some were really good, some were done poorly. I'm finding though, clues as to which kits saw retooling, and which ones didn't. the last couple I've done contained parts that weren't in the instructions, and what should be found in pairs, but only one is in it. this kit {for instance} has a few weird aspects about it....even though it's a really nice kit. it's pretty detailed in it's design........a horn that is not shown in the instructions {one can figure out a logical place for it}, a washer fluid jug, the absence of windshield wipers, even though there is a locator point for them, outside door handles, which was fairly common on older kits {some kits even supplied chrome molding}. it also depends on the company too. I've had some that put out a nasty kit......HobbyCraft comes to mind {a Canada based company}. the kit looked really good, but the fit was poor and the plastic was so thick and produced a heavy model. I bought the Fokker Dr 1........could be painted in ten different schemes. if I remember right, this was Richthofen's 1916 paint scheme the model is quite heavy for a 1:48 scale model.......had a devil of a time to get the center wing and machine guns in place. to compare it to a revell kit....big difference. this one is as light as a feather the body has been in the brake fluid for an hour or so. the flat black is coming off very quickly.......it will take more time to get through the lacquer coat, although it's breaking up. it might be totally stripped by the evening. cripes......even the admiral is having fun with it she's been pick'in at it too!
-
looks great Jack!
-
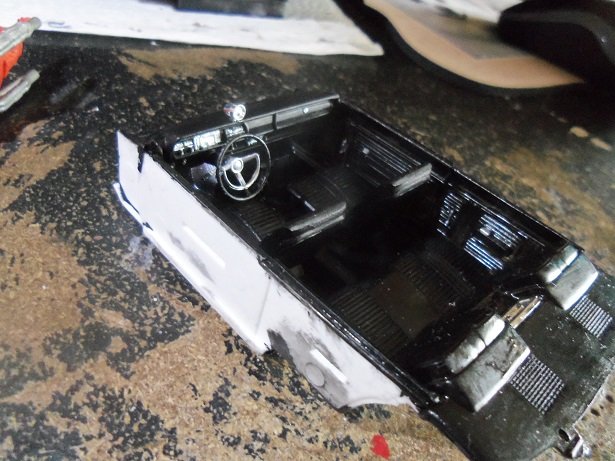
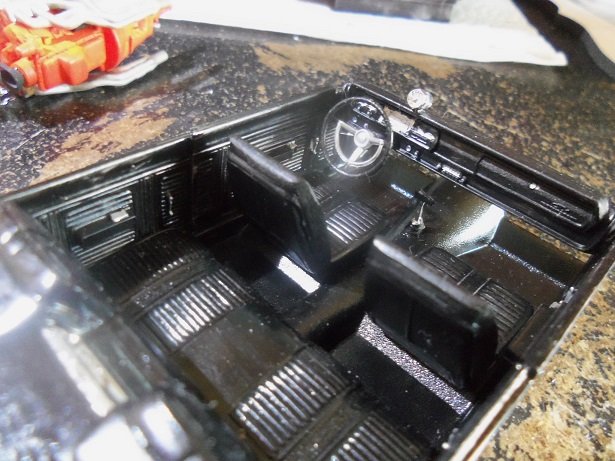
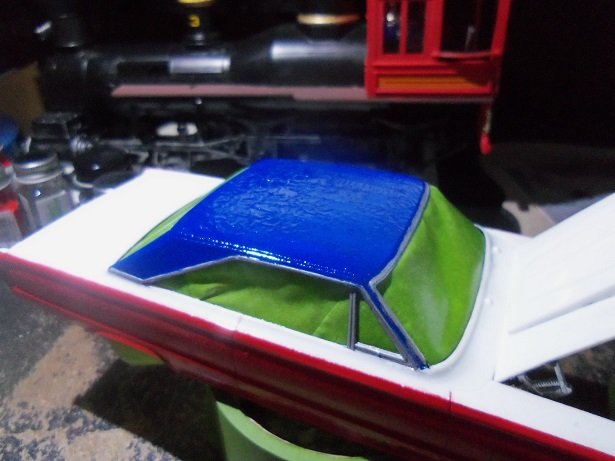
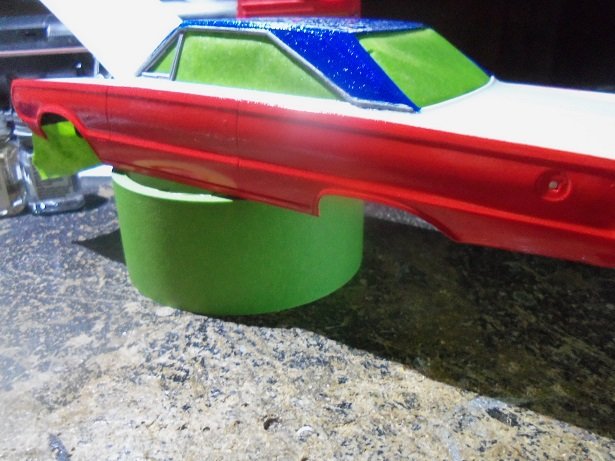
I appreciate the gestures gents......there are really not too many options left at this point. I have a can of stripper that I bought back when I built the Nordkap........when I found out what would happen if I didn't cement between the planks. never did that again.........don't think I'll do this again either. I have a whole jug of what Pledge is called now in the sink cupboard......I tried it and didn't care for it. I'll simply chalk it up to listening to that clown who sits in my right shoulder.....didn't know he was Murphy's cousin I do have a few pictures to update you on where I am with the car, and the UN - heavenly body. the interior is done now...the dash is painted and installed, along with the steering wheel and tac. I didn't get any pictures of the body, aside from the red.............this is what it looks like now. if you don't have a chup bag.......any plastic lined bag will do landau roofs didn't look this bad.. I'll see what I can do with it tomorrow.
-
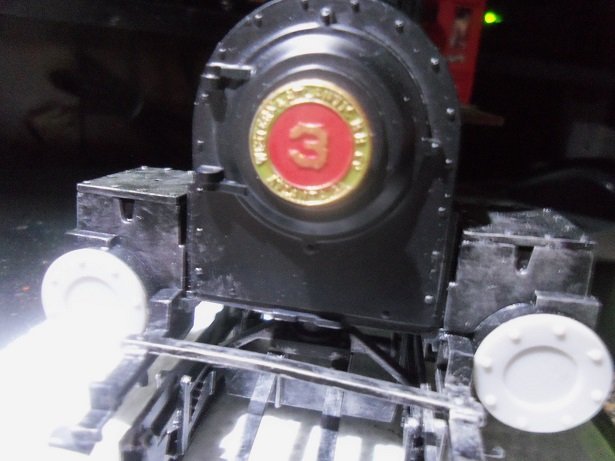
hello all just a brief update on the General. yes.......the cab has been cemented in place...I just need to touch it up a little. I did touch up the badge and cement it in place as well. it's not a great picture.........but it looks good in person. I also used up the last bit of soot on the stack.......before it dried up and blew away. I need to make some more.
- 245 replies
-
- 10
-
-
very nice progress so far Jack. the prop is interesting.........never saw a kit with decals like that. you'll have this one finished in no time
-
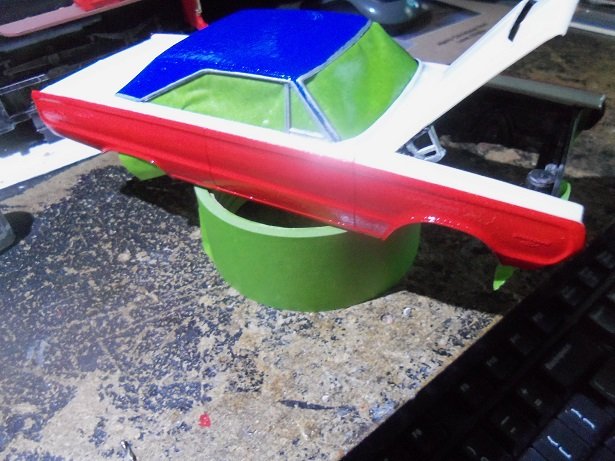
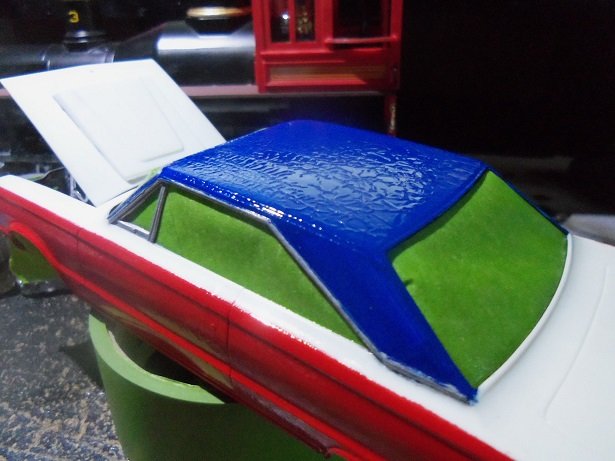
I stand corrected..........I might have done a less than stellar job on the body chrome. it was when I painted the roof, and then decided to give it a clear coat, that I knew I had played one card too many I was trying to cheat, by not painting the white......using the clear coat {lacquer} to lay a coat on the white for decal purposes. I did not foresee what would happen to the other painted surfaces. I do have a couple pictures, but they are in the camera at the moment. I will post them presently, but for the time being, I offer this description of the results. the painted surfaces raised and puckered, as though Jack Frost blew it a kiss ❄️ the red fared better than the blue.........that you haven't seen yet........this I attribute due to the age of the paints. the red is a fresh bottle I just got........the blue paint, I have had for quite some time {it may even have come from the paints that Lou sent me}. it has had time to fully cure, and some of it has settled down....but the roof still resembles alligator skin. I'll post the pictures tomorrow....one more day of work >sigh<. on a much different note.......this house must be cursed or something. the bathroom is done........the fact that we can finally get back to normal, is a welcomed feeling indeed. a couple of days after they had gone, we discovered that the sewer pipe in the cellar, has rotted to the point of leakage.........small rot spot, but it wasted no time in getting bigger! of course, this means that assorted waters is collecting on the floor......small at first, but has gotten larger. we contacted the landlord about the situation.......so far we haven't heard or see anything in the way of having it repaired. after work the other afternoon, I went down there with a coffee can and some duct tape and patched it for the time being......I haven't been down there to see if it has slowed the leakage { I suppose I would have heard something from second floor.......she has her washer and dryer down there}. I got home today to see a woman walking up and down the street, handing out pamphlets........the city wants to replace sections of the sewer pipe that services the block! this will be happening in a couple of weeks when it rains it pours.........anyone got an umbrella? ⛱️ ...I already have the boots
-
on board as well this should be so cool!
-
very delicate.........amazing in the way you kept the shape! the nose ring is a perfect circle awesomely done!
-
you could build up the stone wall on both sides of the cannon, leaving the front of the cannon open, or with a torn away portion of the wall. either way......you have a very nice plan of it's display it coming along nicely.
-
have a friend of mine that is building the Guillow's version of the stearmans...a very popular plane interesting choice of paints......I have another friend in Canada, that did a Duke's of Hazzard model with Jo Santos paint....I think something similar to what your using . looks good well done on the other kits........like Lou said........it's good to stay busy
-
don't tell me that J..........he might get insulted with my paint job! I goofed it up no return either!
-
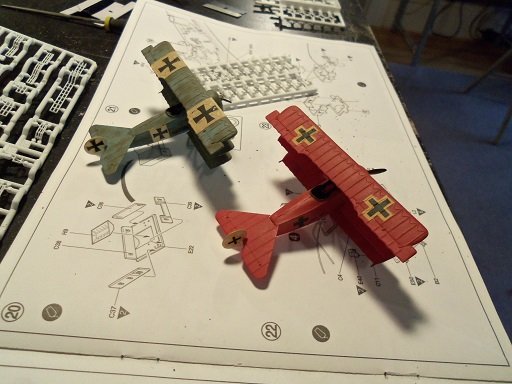
tagg'in along as well I had the pleasure of building Werner Voss's triplane {1:28 scale} when I was younger....got these two from a fellow in England several years ago....... laughed my butt off as to how small they were.........darn description on E-Bay they are old....been with me for a couple moves been wanting to do a couple brit planes....but my budget has been put on hold since my last purchase {only temporary }
-
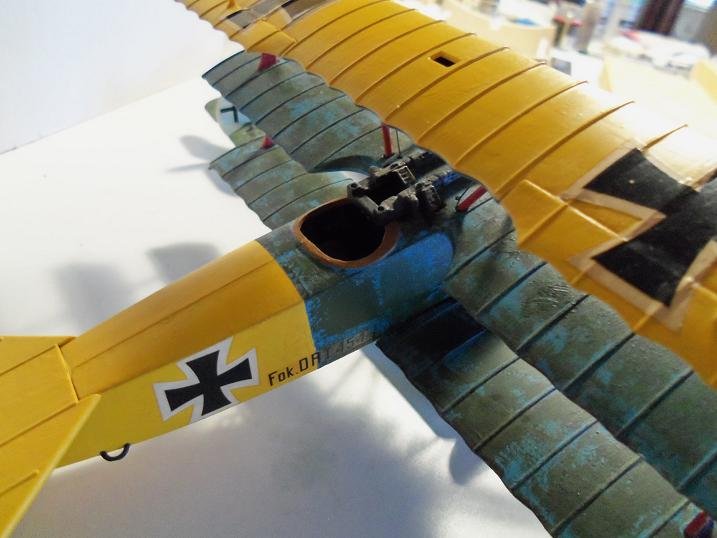
do you mean upper wing?
-
I'm trying to con the admiral into getting our fishing licences. I think back to my younger days and how much I used to fish.......all I ever used was a drop line superb gallery shots.........
-
the macro is pretty cool.........in the earlier post, there is a chair with the back upside down. no kidding.......I can see that! {the table with ten place settings} no matter........this is still by far, the greatest feat that's a super job on the model boat.........to make one at this scale.....WOW! you did say you were going to make it........you made good on your promise