popeye the sailor
-
Posts
16,007 -
Joined
-
Last visited
Content Type
Profiles
Forums
Gallery
Events
Everything posted by popeye the sailor
-

Cutty Sark by NenadM
popeye the sailor replied to NenadM's topic in - Build logs for subjects built 1851 - 1900
the winches and pump look great Nenad! I see your take on the fife rails is spot on as well very well done!- 4,152 replies
-
- 4
-

-
- cutty sark
- tehnodidakta
- (and 1 more)
-
I remember Zbart very well.......used to be the rave. I also remember spray'in the underside of the truck with oil and runn'in it up and down the dirt road too. there were products that one could buy as well......still do. there was a product called splatter coat for the trunk to help cut down on road noise. it's not a bad kit........there are some fit problems though. it does showcase a full engine, so this one could fit the bill for you. I don't recall seeing any other brands....just Polar Lights. nice box art too it is a sharp car.........in the red finish, it was used in the 1959 movie "it started with a kiss", with Debbie Reynolds and Glenn Ford. other than that, it sat in George Barris's garage

-
they don't tell you that all assembled bodies go through a rust inhibitor dip. this is a common step in the assembly......all welded joints are sealed with this process. that's quite a claim they make.......I've never read anything like this, in any of the cars that I've owned. it's hard to guess if or when it may happen. older cars and trucks were produced with thicker steel back in the day........now a days, the steel is gauged thinner. framed rear wheeled vehicles have been slowly replaced with uni-body designs, shifting the emphasis to front wheel drive. I have had a few rear wheel drive vehicles that needed to have the rear frames replaced.......olds Cutlass was one of the worst for this. I don't dispute that you have a warranty for rust.....I just find that that sort of claim can be explained away easily, leaving no fault to the manufacturer. if you think about it........3 to 6 years is a fairly safe zone to make such a claim. it took 17 years for the car I'm driving to show a rust hole....now I gotta deal with it.
-
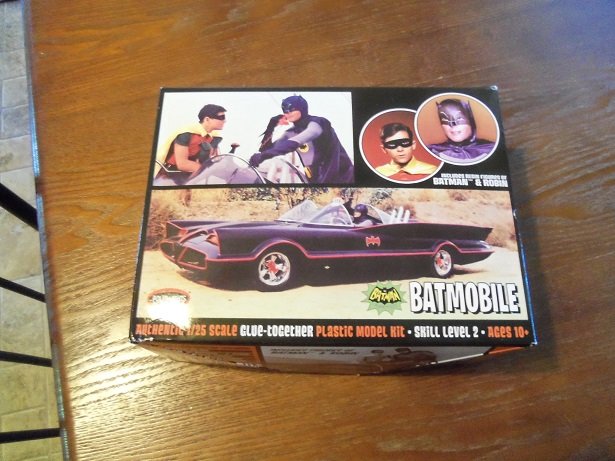
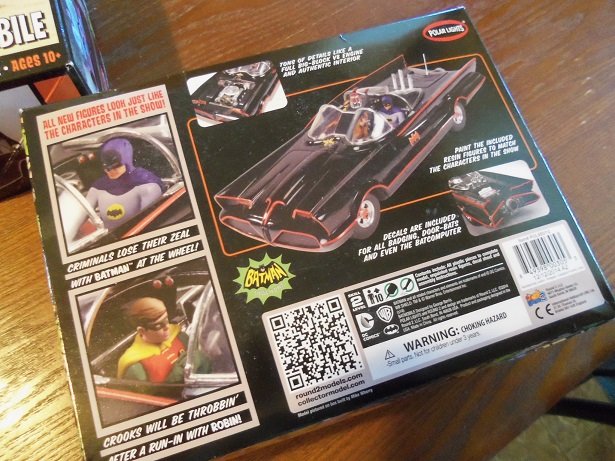
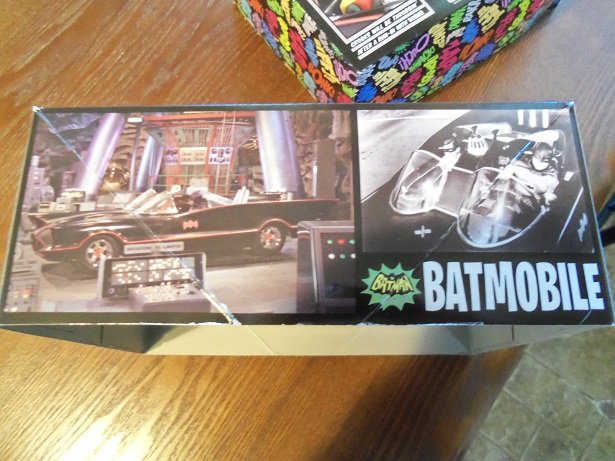
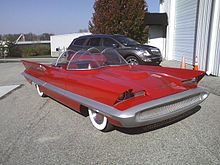
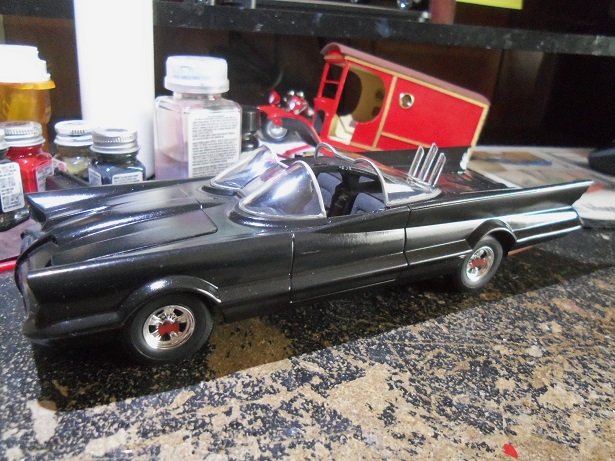
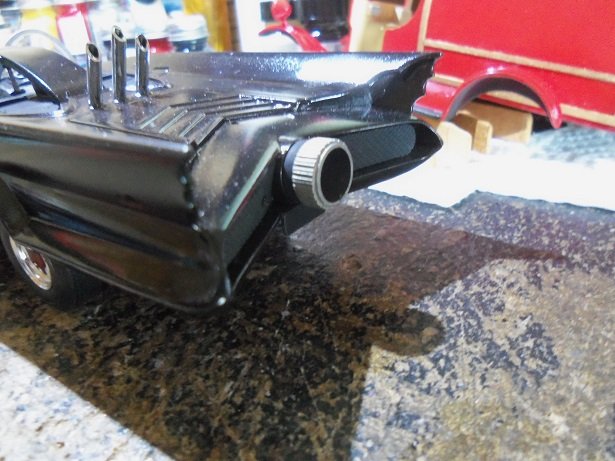
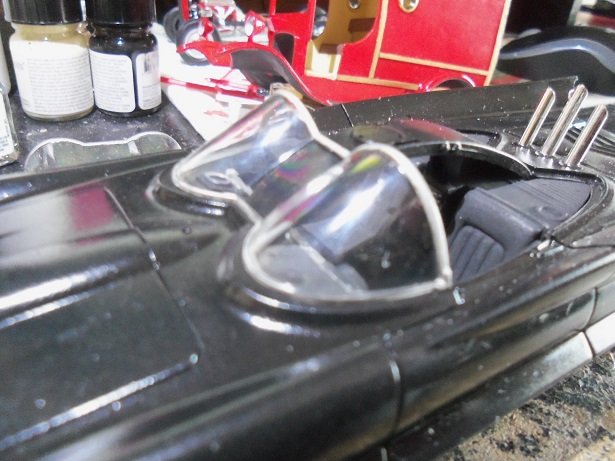
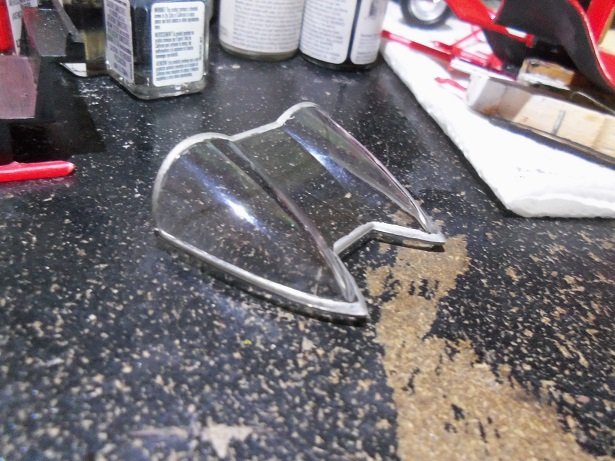
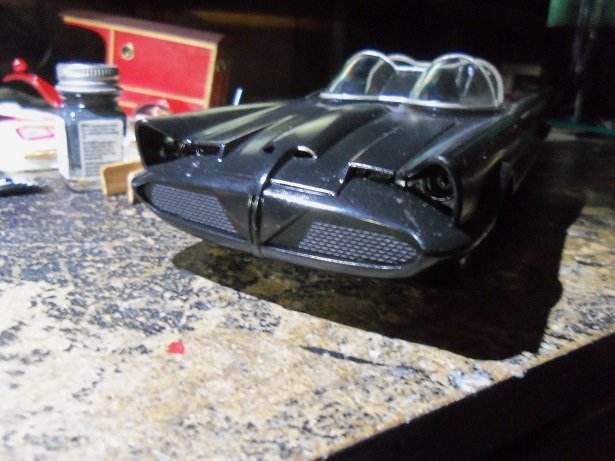
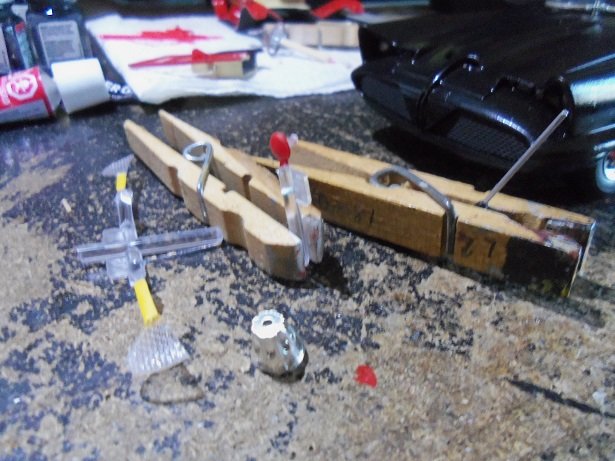
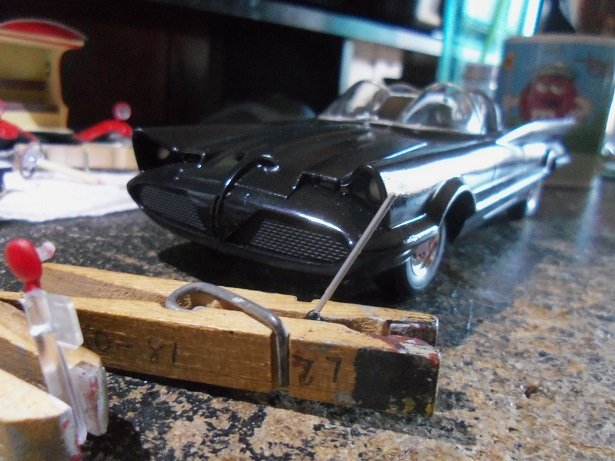
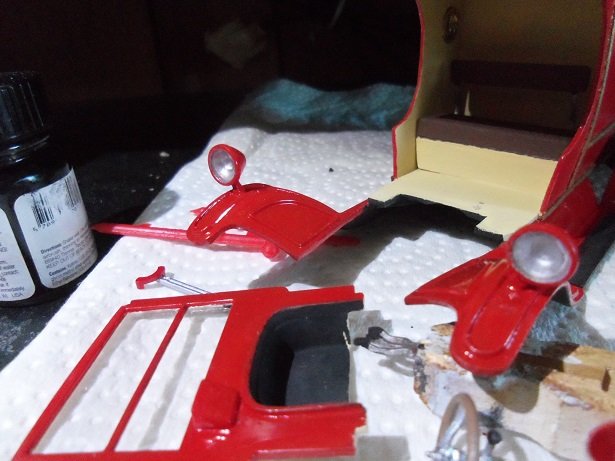
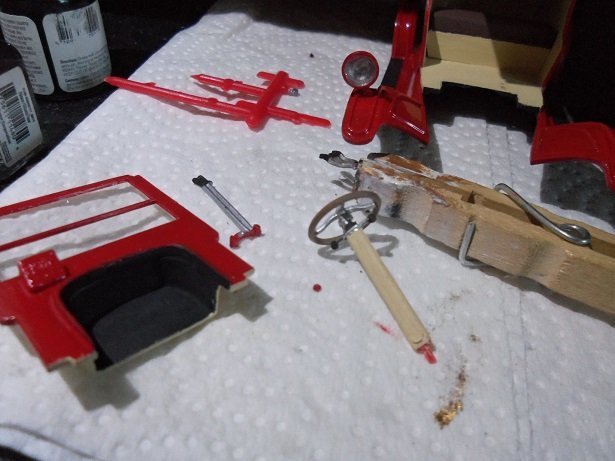
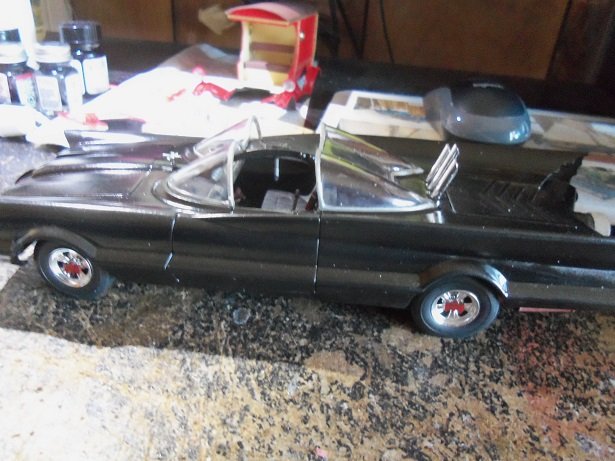
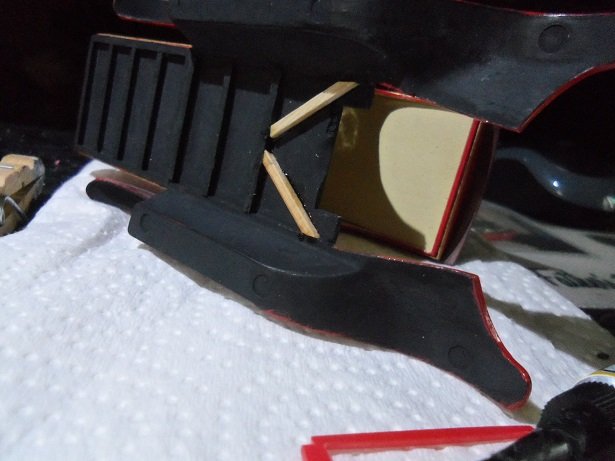
oh bother.......what to do?!?! I took the two pieces of wood off the frame....I think I already mentioned that.......this lessened the interruption with the generator, but there still seems to be a gap between the frame and the under body. so while I was pondering this dilemma, I was looking for something to do in the meantime. I could work on the General.......but my mind kept coming up with the Adam West Batmobile. so..........the heck with it, I'll bring it back out. it had been tabled since January of 2018....very unhappy results from the paint job. it's odd........I did the Michael Keaton Batmobile........as well as the Bat Boat at the same bat time, with the same paint, and didn't encounter the results I got with this model. this is the Polar Lights Batmobile......I believe this to be an old MPC kit. someone mentioned in another log, that some model companies don't produce their kits....they are manufactured somewhere else with their name on it. this is true......Polar Lights, a division of Round 2 LLC. is located in South Bend, Indiana, but the kits are produced in China. Revell is another....you have Revell Germany......their kits are made in Poland. whether this is a factor or not is unclear......I just looked through a Revell kit that was produced in 1969, but I could find no definitive idea as to where it was produced. I have heard comments about the plastic........some find it hard.....some find it soft........some find it easy to bend, while others do not. I am convinced that the stryene plastic of today, has changed since the good 'ole days. I could feel it when I handled some of the kit parts.....the plastic in that kit felt a lot more rigid. what I have also noticed, is today's plastic is becoming paint sensitive. I do like to use automotive grade paint here and there, as well as the primers.........but with today's kits, this is becoming harder to do. auto grade paints are too harsh for the plastic........it will eat at the plastic finish and cause it to appear rough and blotchy. that is what happened to the Batmobile......the body shines.....but the feel is rough to the touch. the paint I used is the Billing's paint, that I still seem to have a fair amount of. I've stopped using it in my airbrush.....clogs in a heartbeat!.........and if I thin it down too much, it's like shooting spackle...dries as it hits the model. the paint is great......my initial assumption when I started to use it.......but it was old when I got it, and has gotten worse since then {that was quite a while ago}. Billing's paint can be grouped in with auto grade paint.......it contains pretty much the same ingredients. it gives a great finish....I love the shine....as a matter of fact, when I did the Michael Keaton Batmobile, I had to tone down the shine.......used dull coat to do it! I've since stopped using it for plastic models........now primarily on wood. the wood sucks up the paint, since it has no real finish to speak of. I hate to throw it out.......I've used up quite a bit of it, but there's still too much to contemplate the heave ho. so, basically....the body looks all peckish...but shiny.......let's not forget shiny I probably shouldn't post it here.......but it was part of my thought process. besides, it's almost finished anyway. this kit was plagued with fit problems.......getting the back deck to fit meant whittling part of it away. I've done away with the removable stuff......like the trunk, which houses the bat computer. if it was a hinged lid, I might have been OK with it, but it's not.......like the hood, it simply comes off. the hood comes off.......only because there is an engine under there...can't very well hide that, no can I?!?! the glass is merely fitted on there at the moment........I'm not a Picasso with the canopy frames, and I still need to fix them. the holes need to be drilled out a tiny bit larger, for the fit to be better. the paint doesn't look too bad here, but a closer inspection reveals it all. it looks horrible.........I do want to get another and strive for better results. too bad they didn't include the parts to build it stock.......1955 Lincoln Futura. I added the jet nozzle on the rear. the biggest phu-bar with the model, lie with the two grille plates in each side of the rear......that's where the tail lights are to be located. the plates go over them, but it's a shame that the plates are molded in black plastic {kinda moot that bit of detail}. I'm going to make some tail lights and fit them in the fin recesses. the windshield wasn't too bad, but the rear canopy had some sloppy paint work......I fixed a lot of it here. thanks to Mr. Camera, I see a couple more.........Grrrrrrr! the two front grille inserts needed to be fitted into place. they are in there with no glue at all. just a few of the parts left to assemble.......they didn't goof on the headlights though....clear plastic then I added the headlights. you can just make them out......I hope that with the covers on them, they can still be seen. there's the antenna....sweet FM baby! oh......NO!!!! I've got happy feet!!!!!! the canopies are in place now......a spigot look'in thing on the front cowling.......9 more parts and I'll have the whole car then it can be decal time! just in time too.........I've got some decal work to do on the General. as for the Coke mobile, I did some brain storming {just waiting for the clouds to dissipate} and came up with a plan. I've done some minor touching up so far, and added the headlight lenses. the steering wheel, the parking brake handle, the pedals have been painted. I've made adjustments to the fire wall......breaking off a corner of the cover, which I've also repaired. those parts can be added after the body is installed....then perhaps I can stop fixing the frame, because of all the dry fitting. Another thing I need to make are the side mirrors....none in the kit. they are only concerned with what's in front of them.........you know, I had a suspicion that having to see what's behind you as well, was confusing the issue! my word........this mode of travel is trickier than I thought! you passed it already..........forget 'bout it!!!! the good 'ole days were so much simpler I thought I'd start small this time..........I added a .5 mm shim on the frame this time I can always add more if needed more soon

-
I know of no such warranty Jack. a lot of it depends on the rust inhibitors and undercoating used in car manufacturing. some use more than others, but with the constant use of salt and brine, all cars eventually fall victim to rust sooner or later. we got it less this year than you did......would have hated living in the mid west I have a 2000 Toyota Camy with 170,000 miles........the left rear rocker panel is rotting out......gotta fix that before inspection. I've owned other Toyotas that suffered the same fate........wish they sold bodies rather than having to buy a whole new car seems they all are prone to it. glad to hear your cars are fairing better.
-
I'm not aware of the Siamese split up.....I just recall that famous line in the movie Robo cop......."your company built the f________ thing, now I gotta deal with it?!?!?" then someone should tell the Kia brother, that if you start with one color of wire, you should complete the circuit with it too schematics are a night mare! Kevin goes back to the dealer today.......I gave him the pads to show them. on the model front.......I have an update.....although it's a bit mixed in trying to think of how to deal with the body issue, I pulled out the Batmobile and did some work on it. it's a sad tale about paints and plastics......I'll tell yas about it
-
I'm not a big fan of these cars........or Kia's for that matter. the big problem for Hyundai's, is that most parts are dealer items.......some parts are hard to find aftermarket. I'm also not a fan of cars that can nickel and dime ya to death. sad to say that it seems every car he buys is a basket case.........don't want to call it a lemon.......it gives the fruit a bad name I do like lemonade! it also seem like every time I plan a day off.....I end up working on that car! the rust bucket issue can be said for all cars up here in the northeast.......another reason why you'd never see me buying a new car
-
did that pertain only to this plane, or were all planes given this designation? now....what to do with the chromate yellow? is that still going on the top wing?
-
wow Greg........your PE ship looks fantastic. when are you gonna add plastic? just kidding......looks outstanding....it will look even better painted!
-
it's OK if your long winded..........just post more pictures is all she's look'in awesome!
- 14 replies
-
- 1
-
-
- cutty sark
- mantua
- (and 3 more)
-
I've read in the past where folks have thickened the bulwarks, to give a better representation. build projects of the Revell 'Connie' are the most common example. it worked well in your favor........glad to see that you have a truly wonderful representation here as well...great looking model shaping up here some have substituted the eye bolts and blocks for metal and wood.......are you going to do that as well?
-
doing a great job OC...........and you were so worried about rigging yard looks really good too
-
wow Yves!.......that quite a kit! your progress thus far looks awesome! look'in forward in seeing more
-
..some pretty daunting work there Danny.........way too many twists and turns! looks really good
-
choosing not to apply a second coat right way is good advice. repainting too soon can reactivate the original coat and cause a host of problems....streaks, ghosting, and paint wrinkling {if you've ever seen this...it's horrible}. at least you got to spend some time at the table......models appear in due time looks very nice.
-
thanks CDW....the test is complete now.........now to wait till her next appointment to see what they found. she is doing fine now.......for what has my eggs frying.......dealers! my son bought a 2007 Hyundai Santa Fe from the local dealer. it is a used car......looks good, but it shows how lax they are in their process of selling cars. he bought it a little less than a year ago.......inspected and all. I've done the rear brakes...he did the fuel sensors {proud of him for that.....they were in the tank}. we've also replaced a couple other EVAP sensors....I was amazed to find that the intake snorkel hose had no clamp on it! he's done the battery and exhaust work to it as well..........to me it seems this vehicle has needed more work that necessary, coming from a dealer. if they took the car in as a trade in, shouldn't they have checked and replaced some of this stuff? the best is yet to come......his recent inspection failed due to a control arm bushing coming apart, and left stabilizer link. I did the work....not having the press for the bushing, I opted to replace the entire control arm. check out Rock Auto . com...amazing prices! I used to be an automotive state inspector......after seeing what they failed......all I can say...is I wouldn't have failed it for it.....the bushing rubber separation was not severe, and I don't view stabilizer links to be an inspection item. while I was replacing the control arm.......I noticed something that was!.......how about the front brakes you retards! the bottom slider for the caliper was frozen on both sides....I freed them up, but the caliper is a dual piston affair, the bottom piston on the left side was frozen as well. so the end game was a left side caliper and pads.....rotors were fine in my view....there was hardly any rust ringing, decreasing the pad contact. I was B.S.! especially when he also told me that they said they have no record of a timing belt replacement and a weeping radiator hose! I understand they have a 21 point check on the cars they bring in, but he was there for an inspection.....not an oil change! too bad that he just bought the P.O.C. .........I suggested he get rid of the albatross needless to say, I didn't get to do much on the model. today is a rainy day..........should get some table time today. thanks J and CDW for the kind comments .......and thanks to all who hit the like button!
-
hi folks thought I'd get further along.....but it was not the case yesterday. I believe there is the three valve system on this one......have to check the instructions. I've seen that model around Mark....I think that I will put that one on my 'future' list I may do something with this.......I just think that it would be an interesting bit of detail
-
look'in good J!
-
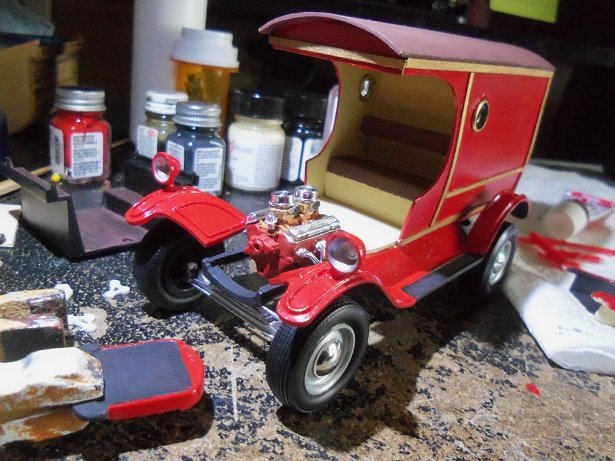
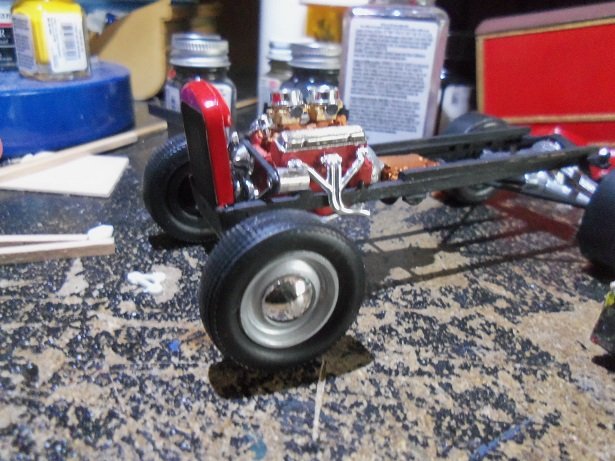
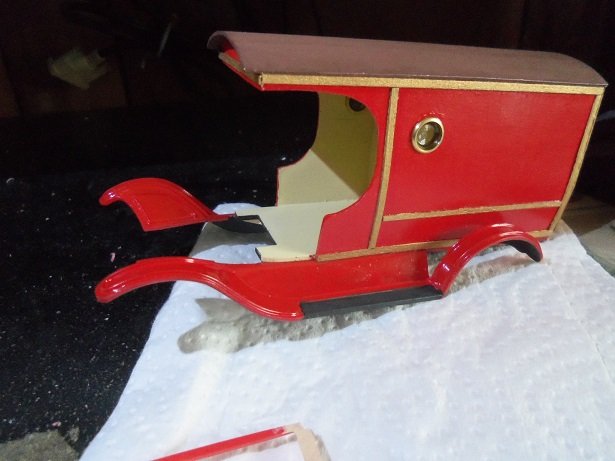
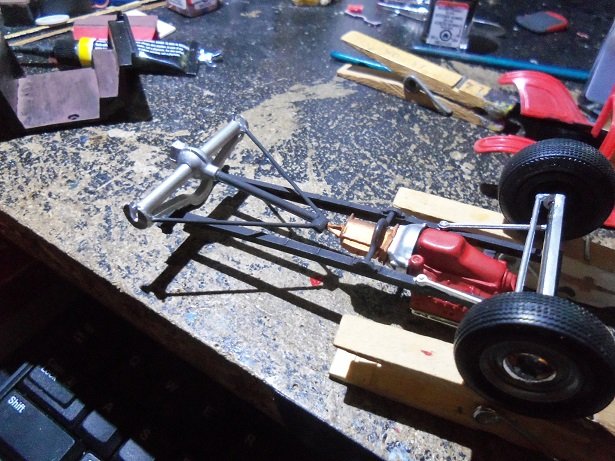
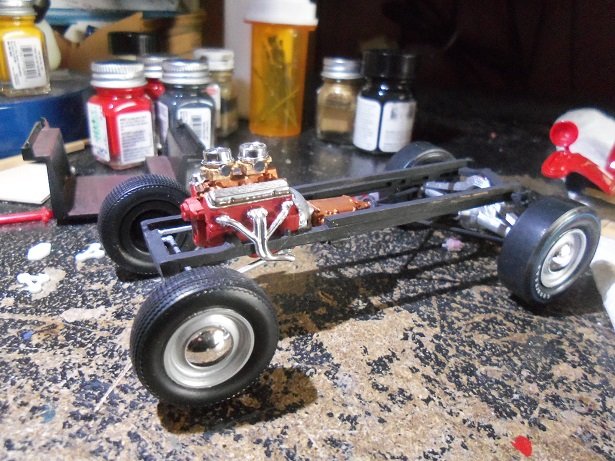
the other half of your comment lies here J........I've had ups........and then the big d o w n here is a shot of her after adding the lift kit the body sits where it should. I painted aluminum in the headlight buckets. the drive belt, fan, and radiator was added. note that the lift kit is installed.... the real kicker didn't come until all was dry. I did the dry fit......and to my horror, I found that the rear of the body would not sit flat on the frame! the generator of the drive belt is holding the body {fender}, while the front of the lift kit {the two pieces I glued to the frame}, is resting on the two pieces of cross member that I had added earlier. these two areas are causing the body to be in a fulcrum situation, and catapulting the rear of the body into the air. there is no way to get the body flush with the frame! I failed to take a picture of this......I think I was in a state of shock.....so the first thing I thought of was to remove those two pieces of wood on the frame. I thought about notching the driver side fender, to allow for the generator, but I felt it might not look right. a problem still persists though, because when I put the body back on, the exhaust manifolds hit on both sides of the fire wall, so I can't move it forward. I will have to make an adjustment there. one more day of work.......Tuesday, I take the admiral to the second part of her Dr visit. they are performing a test on her Thyroid gland. I took the day off.......I will resume on her them
-
not according to the three stooges
-
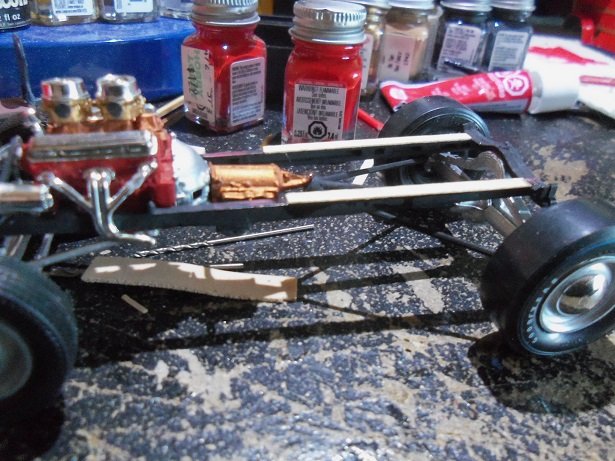
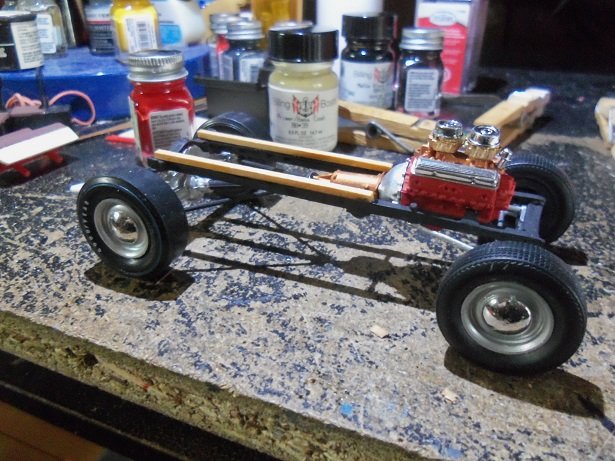
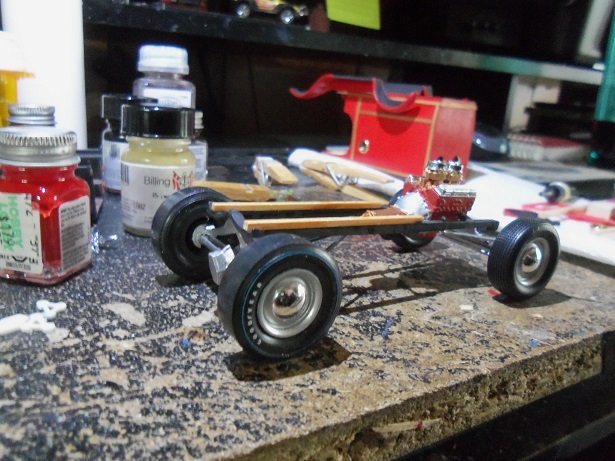
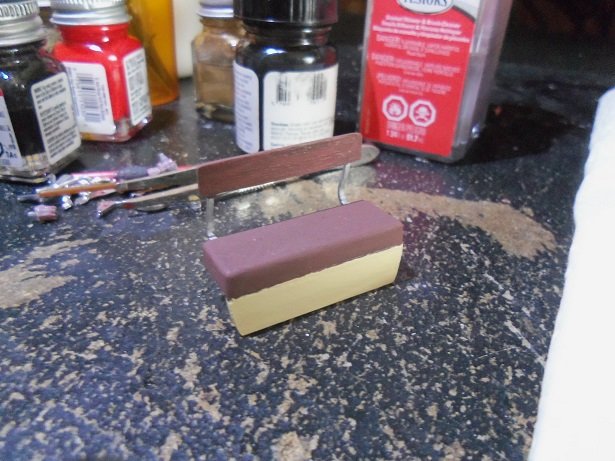
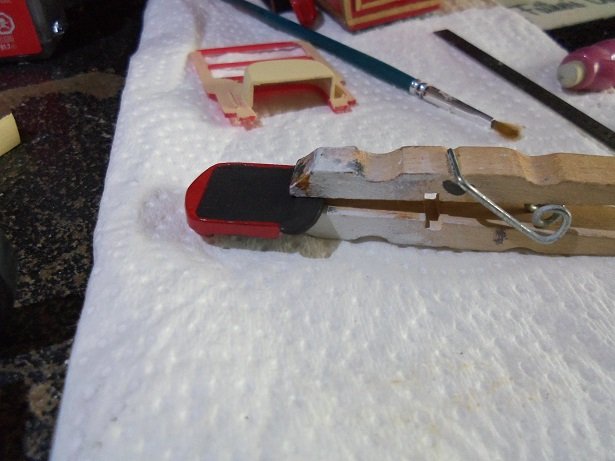
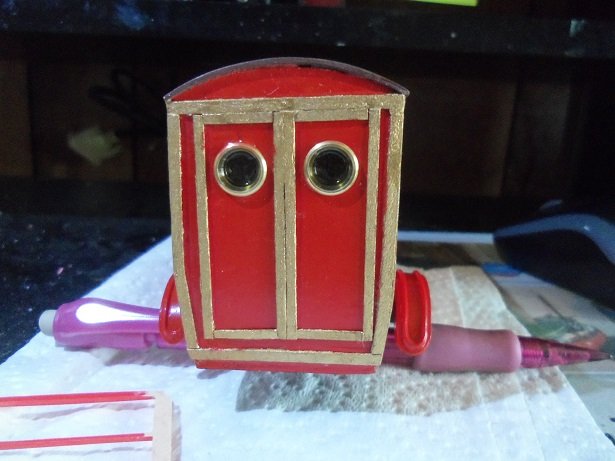
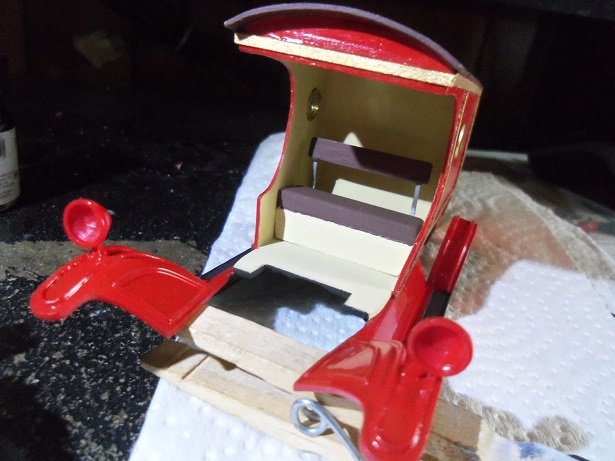
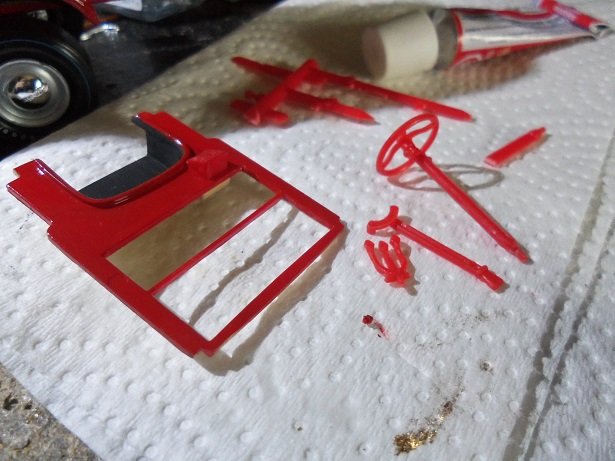
it's been said that fish is good brain food........I agree I should have eaten a whale a whole different tail of moby proportion. where's a good Moe slap when you need one! I'd have been back sooner, but I caught up on a couple of episodes that I missed. where was I?.........oh yes....the continuation of my crazy zany log on this half baked project of mine. well......I took myself up on the idea of raising the body......3/16ths should be plenty. this will enable me to move the body forward, so the fenders aren't touching the rear tires. you get a small peek at the rear differential. there was a bit of trouble assembling the rear.....I ended up cementing the rear tires {they don't move}. under the body, I added the two last pieces of cross members. they will be painted when dry. the seat is now painted...... ...and began to put the finishing touches on the radiator. I started to paint the fire wall, but I felt I should add the instrument box and the other parts first. next was to do the rear wall of the body......don't know why I put it off this long. I did correct one of the moldings......it wasn't pretty. one other is a bit off......but I didn't correct it. what I experienced with the one I did correct, was what I expected would happen if I had tried it on the one I goofed up on earlier in the build. I still need to do some hardware for the doors. the fenders are painted now........I used a brush on them. I may go over them again. there is some ghosting here and there.......tell tale strokes. as long as you don't get too close up, it appears fine. here are a couple of shots of the second attempt to assemble the differential......I forgot to rearrange the photo lineup.......I usually do. once this had set enough, it was touched up and the rear tires were reinstalled {I didn't get that far before the trouble began}. it was here that I found that the metal shaft was too short. so, before any problems could resurface, glue was applied to the hole in the rim and the tire was slid in place, flipping it over in the same movement. there it sat for the time being to dry. during the drying time, the seat was cemented in place, and the headlights were installed and painted. the rest will be done later. when the chassis was able to be worked on again, the exhaust manifolds were added and the wood additions were painted.. the drive belt is being painted by this time......and the other parts for the interior were being fleshed out. two holes were drilled through the floor board for the steering column and pedals. the emergency brake lever is also in the works. the fire wall has also been painted........it's waiting on the detail touch ups and the glass. I will see how all this plays out, as to whether or not I can complete the steering linkage. I'm getting close to the dry fit I've been waiting for

-
I did a search and they sell racing rims.........so I did a search on quick change differentials.....they were also there. so they are quite prominent in the racing industry. I had to flatten the back of the differential to do it, but as mentioned, painted up ...it looks the part. we just got back from shopping..........I sized down all the pictures and was about to do the update.......now the admiral wants to eat <>sigh<> so.......not wanting to oppose the Vatican ⛪......called out and ordered two Haddock plates {the food costs extra} ba-da-bum! be back in a bit e