
HOLIDAY DONATION DRIVE - SUPPORT MSW - DO YOUR PART TO KEEP THIS GREAT FORUM GOING! (Only 72 donations so far out of 49,000 members - Can we at least get 100? C'mon guys!)
×


popeye the sailor
-
Posts
16,007 -
Joined
-
Last visited
Content Type
Profiles
Forums
Gallery
Events
Everything posted by popeye the sailor
-
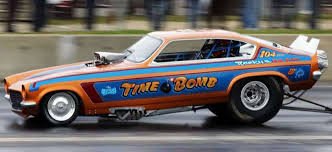
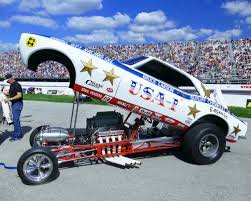
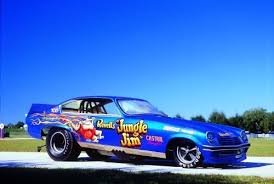
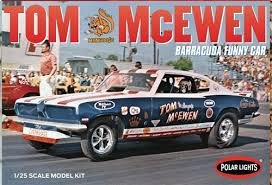
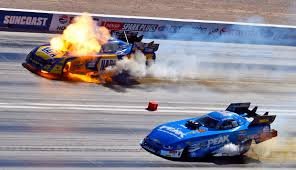
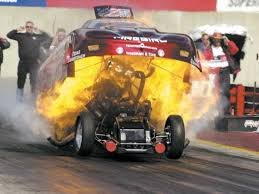
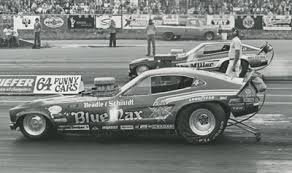
 good morning.........it's 6:29 AM here..........went to bed thinking of something yo look up this morning......but now I can't seem to recall what it was I figured a good browse through the internet would jog my memory........so I went looking for vintage older funny cars. I just looked at images though, didn't go to any specific site. I noticed how the body of the car has changed through the years. back in the early days, and early evolution of the tilt body, I saw that the bodies became more aerodynamic. most of the early cars had the look of the actual car body....some even emulating the model of car as well. car bodies of today are more or less a shell.......the name of the car doesn't include any particular make anymore. I saved a few pictures that I thought were kinda cool. I was a bit confused about the Jungle Jim......... here is the Vega funny car.......but he also had a Camaro, and what looked like a Plymouth Duster too. there are many model kit out there........here is a Polar Lights kit.........likely a kit that they're reproducing from old molds as I mentioned earlier........this can be a very scary sport. I'm sure there are many, but here are a few things that can happen. then I saw this picture..........an old black n' white
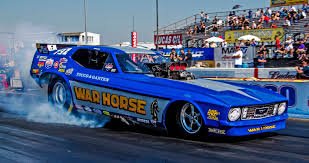
-
back in the day, there were lots of kits offered with movable parts.......steering, doors, hood and trunk. I haven;t seen any being reproduced.......Round 2 models has assumed quite a few of the old molds from companies like AMT....MPC........Polar lights is another one out there. European companies have put out some really great kits too, but they can be rather hard to find...availability mainly the issue, here in the states. the internet has changed all that though I've added a few more parts to the frame...with luck, there will be an update thanks for look'in in and the likes folks!
-
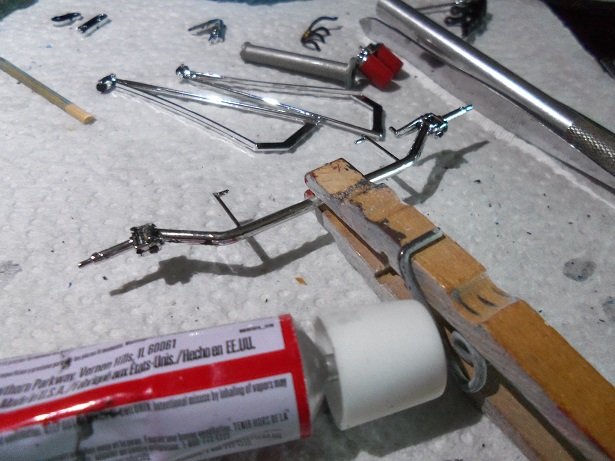
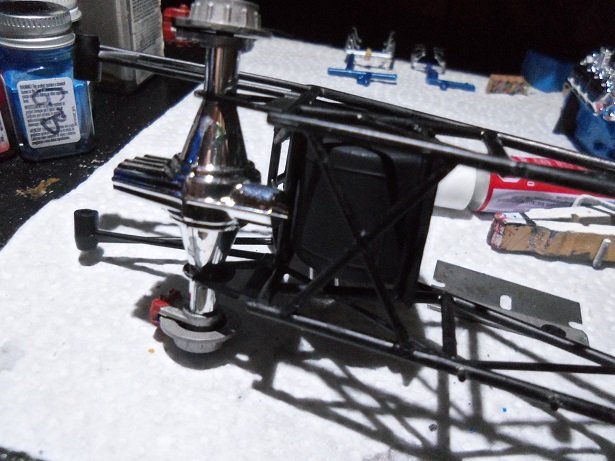
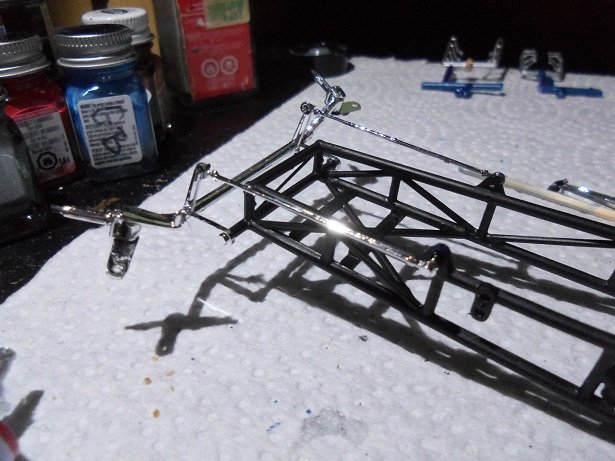
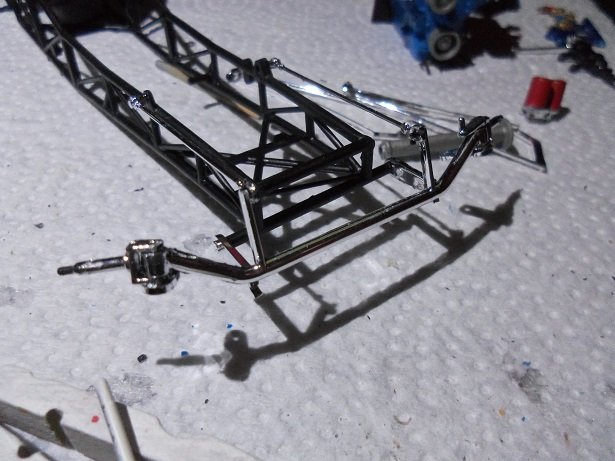
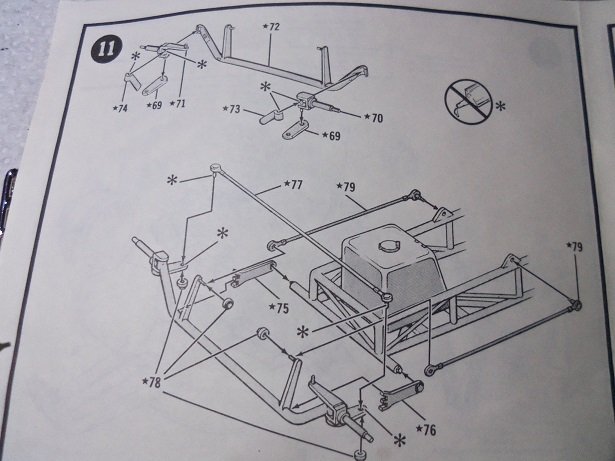
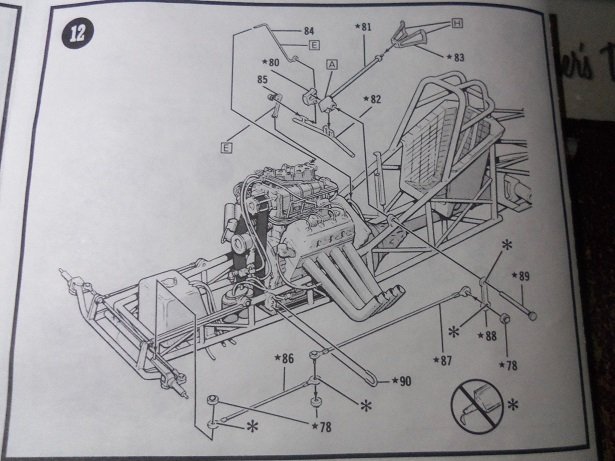
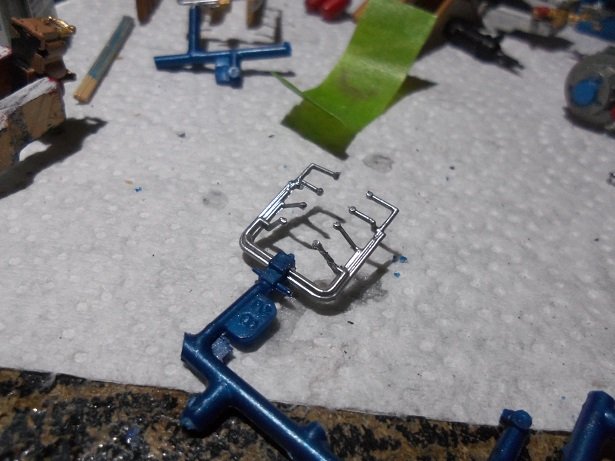
so....yea.......I worked on it a little last night........I amazed myself in answering your question Lou......yes, basically that's the way I'm hoping it will go. the only chigger in the armor, is the drag link. I won't be moving it much anyway....... to start off......I really should have de chromed the front end parts....after touch up, it may not look the greatest. but I got the steering knuckles assembled onto the suspension bar {good name for it I think}. I was worried that I'd get glue in the joints and fail........but I didn't...they still move while this was drying, I figured I get the seat in the frame. I did kinda goof up here......I should have painted the underside beforehand. now I have to paint it in place.........hopefully it won't be too messy. all the paint I have around here..........and I don't have a decent bottle of flat black?!?!?!?!? I have three partial bottles kick'in around, so I combined them to make one full bottle. hard to see with my small crane light.......but I painted it. the front suspension was assembled onto the frame. the two bottom arms that locate at the bottom......and the two truss rods that supports and stabilizes the front axle. the arms for the tie rod are also in place. the left side steering knuckle has the 'pin' for the ..........oh........I fear I have my terminology wrong. the linkage that goes up to the steering box, would be called the drag link.......am I right?!?! the part that is damaged is the tie rod.......a long bar with the tie rod ends on it. the drag link is a two part rod that is connected to the steering box by a long pin, that fits through a bracket molded to the frame. this is where the moving parts end.......the steering wheel does not turn or move. I re-positioned the knuckles so you can see that they move. once the movable parts are fitted in place, there are caps that will hold all the parts together. here are the diagrams for the assembly.......they will give you a better idea of how it all works tomorrow is my Friday........then play time good to hear you've started to work on the cars again.......feel free to post the finished models here, I'd love to see them 🏁
-
I guess I did........thanks to everyone for contributing it's probably something ya hardly think about........like, how many cars have you owned through the years very true CDW......cars were easy back then. you could do anything you wanted to, to them........change engines........rim sizes......the sky was only limited to your wallet. now a days, it's near impossible with computers and sensors........engines are totally out, and rim sizes {as well as tires}, are governed by the speed sensor, or drive train specs. you can do it........but you practically have to rebuild the car, in order to do it. we had three corvairs John..........my mother loved her car,,,,she called her 'Agnes'. one small thing about her though.......from February 1st to March 1st, don't take her out of the yard.......you'd be left stranded. either it wouldn't start, or it would eat the starter.......literally! one starter I replaced, the nose was totally broken off.....I had to fish the parts out of the bell housing . she worked at the local nursing home {near the county farm} at night......we'd get calls at 11:30 PM to go jump start the darn thing. March 1st and onward..........go to New York.........not a lick of trouble! Agnes was a 1961 Corvair Monza........we had a 1963 Monza, and a 1965 four door Monza that was nothing but trouble. you forced my hand Lou.....I also did a little on it during the work week {no........say it isn't so!}. here's a small update.
-
gone to the crusher long ago Lou........no one will ever know I owned two cars that were note worthy.......a Ford Gran Torino and a Chevy Chevelle, and darned if I can remember the year on either of them. both were two doors. the first car that I bought from a car lot, was a '73 Olds Cutlass four door.....at the time, it wasn't cool for a single dude to own a four door, but it ran good {and there wasn't any hassle about getting in the back seat} I owned three other Olds Cutlass's...all were two door. these were my favorite cars.....two of them had the Buick V6...281 cu {I think}.....the '89 olds had the 305 Chevy engine in it. I did do a little the other day........only a couple pictures so far. they're still in the camera
-
sorry for being late to the party.......looks to be a real neat build I'll be watching as well .
- 106 replies
-
- 5
-

-
- trumpeter
- john brown
- (and 2 more)
-
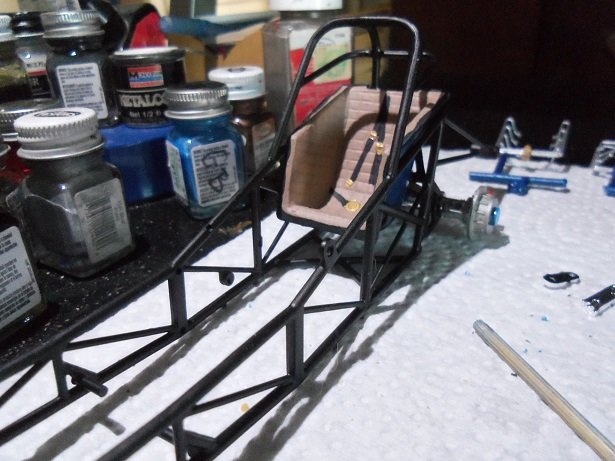
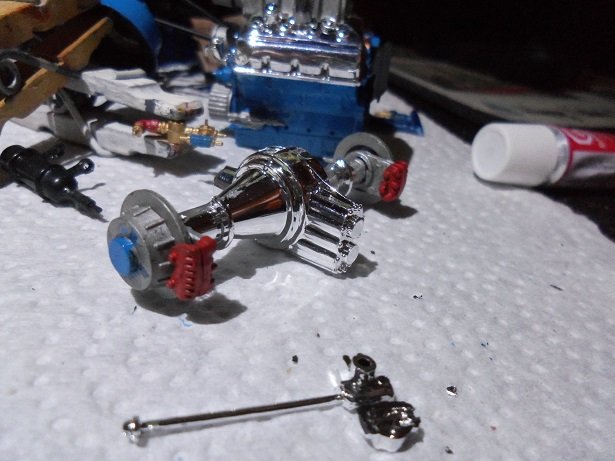
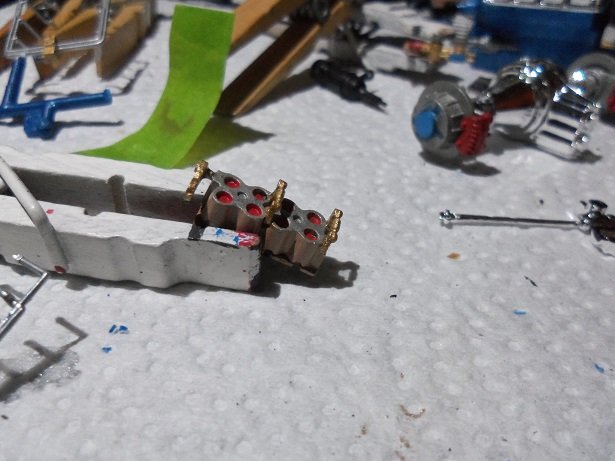
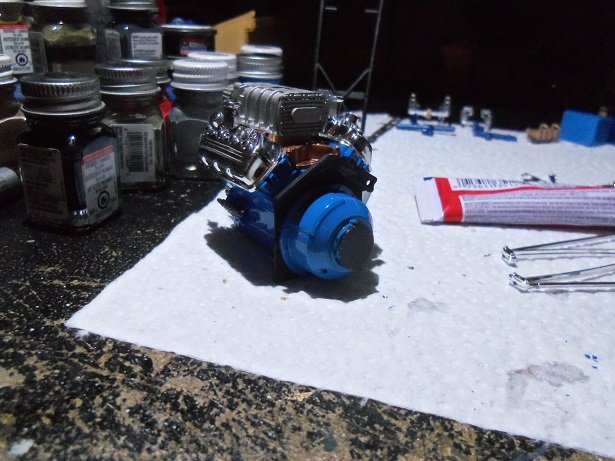
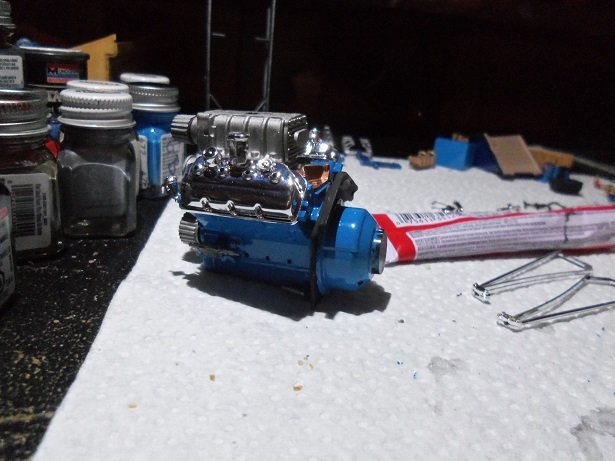
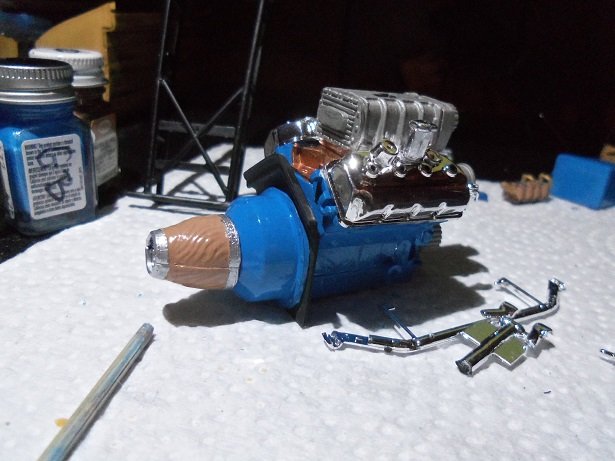
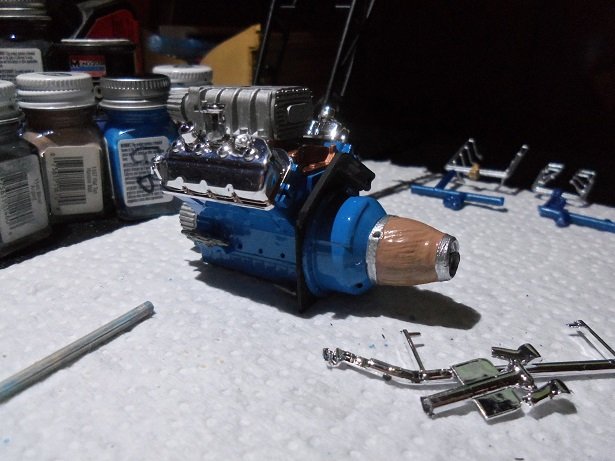
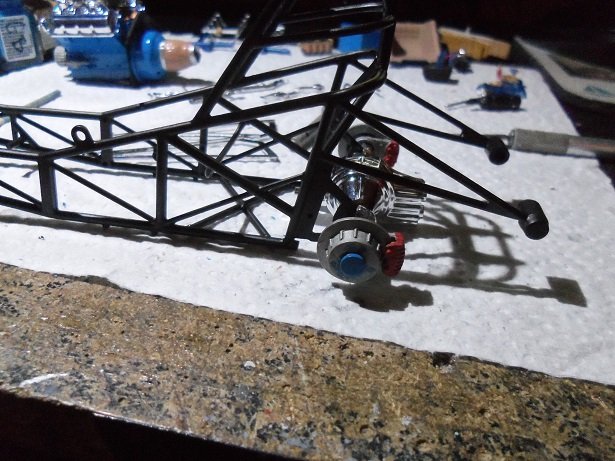
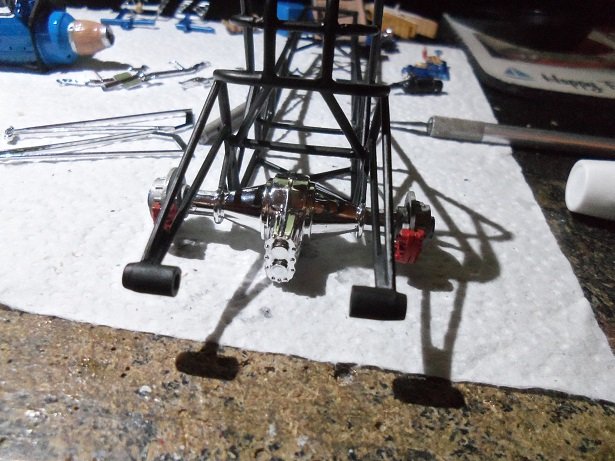
after a story like that, I'd better post an update........ going further with the model last night, the outer parts of the calipers were added to finish off the rear brakes. that's when I noticed something...there is no pin for the driver's side caliper, to connect the brake line. I'll have to remedy the situation somehow. in the foreground is the steering column.......I was going to de chrome it, but the heck with it, I'll figure out how to assemble the extinguisher on it. the smaller fuel rail is getting paint.....before anything else happens to it. this part in turn, is part of the induction plate, which is now waiting for this part. I see a tiny bit of touch up that still needs to b done....damn camera. adding more to the engine, the bell housing was added then, the gear box shroud was added..... the parts for the front suspension was gathered together to be added to the frame. the engine is still being assembled.......time to get the frame up to speed, for the moment when the engine can finally be added. the rear differential was cemented in place. the wheelie bars can be seen.....the casters need to be painted. they are small.........but for a model this size, I really should do them. the same goes for the seat belts.......hate painting stuff like this....I stink at it......aways having to touch them up and such. you would thing that the seat belts would be separate parts, on a model this size. oh well......I give it my best shot so.....I'll continue on from here. I'm going to shoot for movable steering, but with that broken drag link, it's doubtful I'll be able to. not that it matters anyway, it's just going to sit on a shelf. other than the body, it's the only other feature, the model has to offer.........that is of course.....and a good time

- 172 replies
-
- 11
-
-
Damn! hit the wrong button..... I've built a few in the past.......the Corvette 'cobra', '63 Chevy Bel air, Chevy Nomad......probably others, but I don't recall......built one of the big aircraft carriers, but don't recall which one. I also did some of the big truck models........later building this scratch built crane, like what you would see in a junk yard {minus the Hemi engine} on a trailer frame, covering the engine, was the truck cab....in the back was the platform with the crane, that swiveled. I wish now I had a picture of it.......most of my pictures of anything back then, are long gone....the English Leather picture is about it. it was taken with one of those Instamatic cameras...the one where the picture slides out of the camera, and develops before your eyes. car destruction..........got one for ya. about 1970 or so {give or take a year}, my brother had gone in the army.......later ending up in Fort Hood, Texas. by this time, he had married his girlfriend Linda.......they finally came home for a visit. they came here in a '68 Camero all done up like an American flag.......very beautiful car. well sirs, they were on the way to the house for a visit, and he had let Linda drive, 'cuz he had a hangover from the night before {some big party}. they were passing by the county farm, a place where convicts worked {minor offences and misdemeanors}, tending to cows and pigs and growing crops. I worked at the nursing home across the way from this place {used to be one huge facility, til the state split it up back in the early '60's. along this stretch of road was coral fencing and chain link...of course, to keep the animals penned in. as she was driving, somewhere in here, there was a notion to shift, and for some reason, she couldn't gt the shifter to move. so with both hands, she grabbed the shifter, and before they knew it, the passenger side of the car was scraping along the fence....tearing up the side of the car, removing the door handle, side mirror, and anything that was attached that could be ripped off! Kenny was driving when they pulled into the yard......and he was none too happy with his wife! amazing that the door still worked.....but only from the inside thanks for the good word gents, and to those who hit the like button should have told my brother that they usually burn flags when they get all tattered like that.....sucks that I had to think of that now
-
my first real car was a Ford Galaxy 500 convertible {I forget the year.........it had a few issues, but my dad and I fixed the car up. I remember one winter day, the gas tank falling out of it while coming home from work. it had a full tank, so it didn't explode the rag was old, with a couple small tears, and the rear window was clouded...couldn't see much through it. used to have a bumper sticker on the rear bumper that read "don't laugh mister, your daughter might be in here" she died one day........a graceful funeral
-
doing the hull with short strip {scale planking} gives you more control she's looking swell.
-
my Bluenose is still in the closet, along with the other two hull frames. when I received it from a friend, it was such a disaster, I ripped it apart {then came the idea for the Bluenose II and the America}. so far, you've given me ideas for the bulwarks and the transom {those areas are non existent on the frames {well, two of them anyways}. your forging along slowly.....and that's OK, 'cuz your building a log that I can follow when they finally come out of mothballs I think your doing a fine job so far........as a mater of fact, the fife rail is consistent with the one supplied in the Billing's kit. I can post a picture of the diagram, if you'd like
-
absolutely........the really important lines........all you need to be concerned with that's the spirit.......your gonna feel real good when you see her in a case! remarkable ship..........overall great job!
- 1,319 replies
-
- 4
-
-
- caldercraft
- Victory
- (and 1 more)
-
I bought the Testor's 'decal it' program..........it's OK.......but it has it's draw backs. I've done images on photo shop.....works just as well. I have the A.L. Marie Jeanne..........I'll get to her one of these days again.....very nice looking vessel. you did a great job!
-
I was browsing around looking for pictures...........also checking out color charts. I found this picture.......I wonder what the scale is on these models. these are Ford proto type models........my guess is either 1:16 or 1:8..........can you imagine building this many models! mind boggling!

-
super looking plane....well done!
-
just a couple of nails.....the admiral told me, for the last reno we did. what did we do........gut the room! glad you are back at the table.....Barbie's gotta be what..........50 now?!?!?! glad to have you back!
-
great job on the main mast so far Rob........the rigging is very good.......looks awesome! I never knew that about the Connie........don't know why I've never heard about it. I happen to have a connie kit in the closet. this could be very dangerous info to pass onto me
- 1,208 replies
-
- 1
-
-
- great republic
- clipper
- (and 1 more)
-
beautiful work Doris..........you had me worried there for a bit! sorry to hear of your fall, but I'm very glad that your feeling better. it would be tragic, if your artistry could not continue........I know that I wouldn't be alone. I wish you well and a full recovery.
- 1,035 replies
-
- 7
-
-
- royal katherine
- ship of the line
- (and 1 more)
-
I do prime my wood.......but check and see if it also seals the wood. depending on the type of paint too, makes a difference. I mainly stick with enamels and lacquer........they do work well together. I recently got a good deal on paint, so a future build will be painted with white ensign paint..I've never tried it before, but I've heard that it's a very good paint. MS.......Model Shipways?........never used it either, so I'm not sure. anything that has to do with stains......you really want to seal afterwards.....stains need bare wood to be effective.
-
I can't say much more than the others did........your work is downright amazing! your metal work is beyond words and your attention to detail is as well if the Varyag is as complex as the Perevet, we are in for one hell of a treat!
-
...and it was enjoyable too I left space in my log for yours when they're finished nice save with your project........I never seal my wood either. as for the scale........I've had kits that were all over the place....the Thermopylae is a prime example. you soldiered along splendidly......also doing very well with the ship's boat she's look'in good.........great recovery!