
HOLIDAY DONATION DRIVE - SUPPORT MSW - DO YOUR PART TO KEEP THIS GREAT FORUM GOING! (Only 72 donations so far out of 49,000 members - Can we at least get 100? C'mon guys!)
×


popeye the sailor
-
Posts
16,007 -
Joined
-
Last visited
Content Type
Profiles
Forums
Gallery
Events
Everything posted by popeye the sailor
-
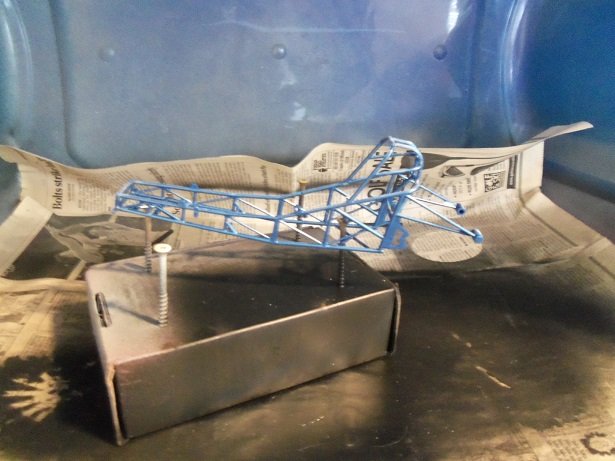
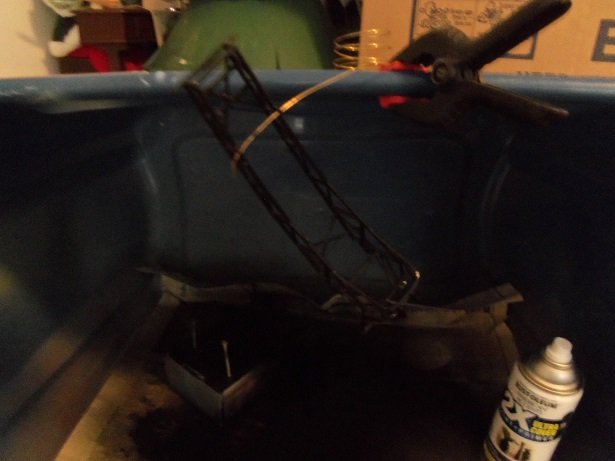
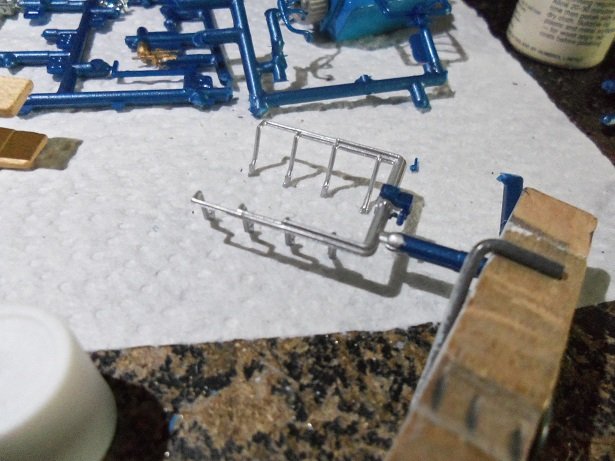
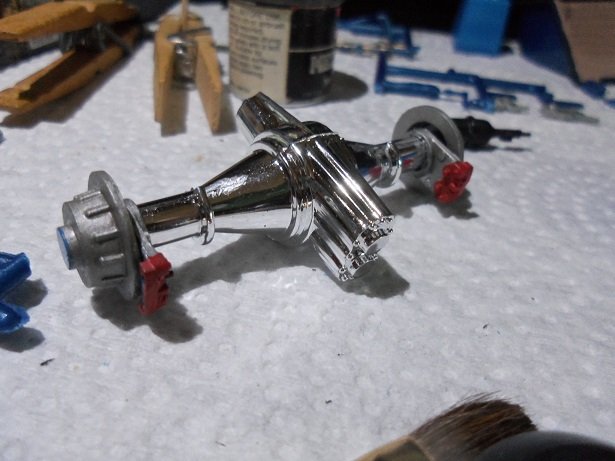
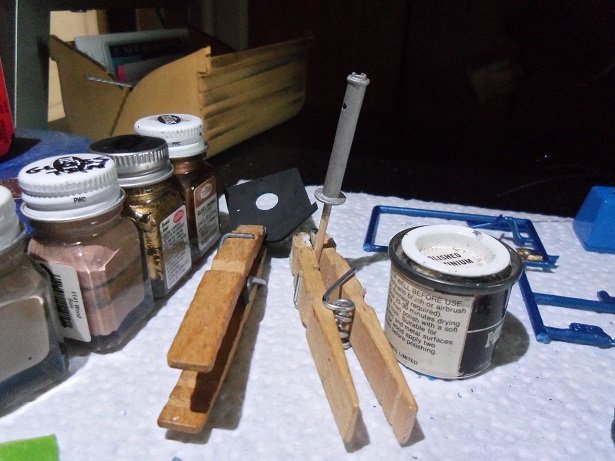
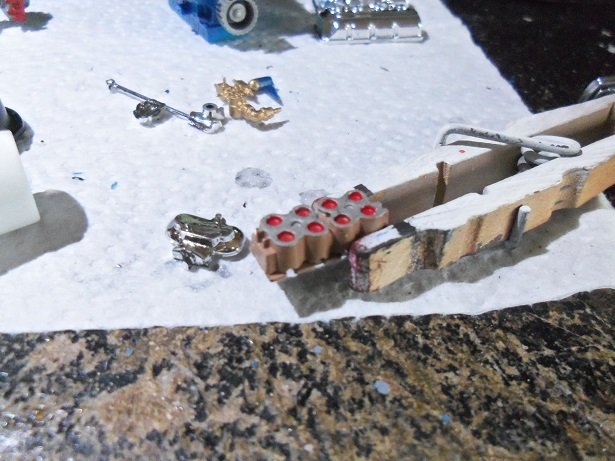
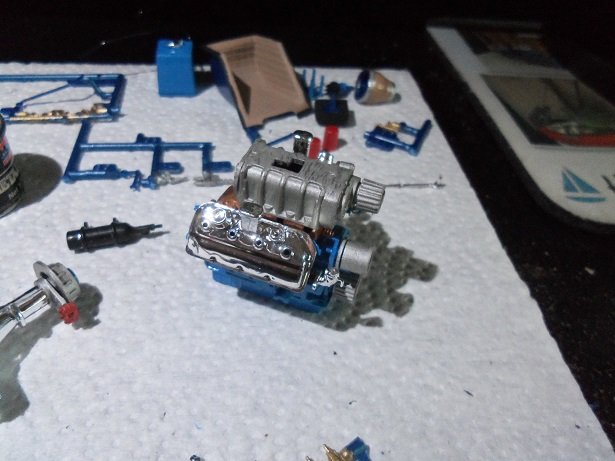
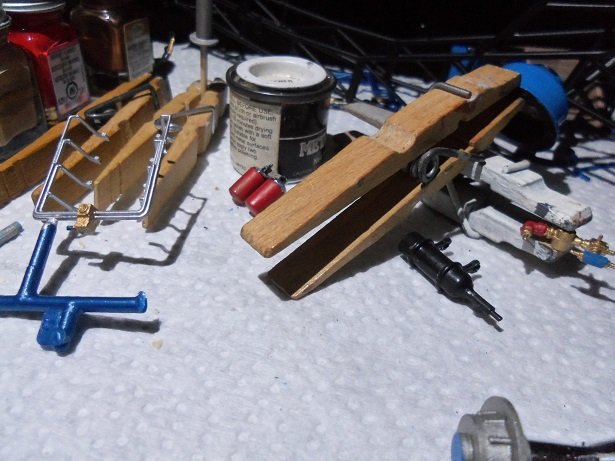
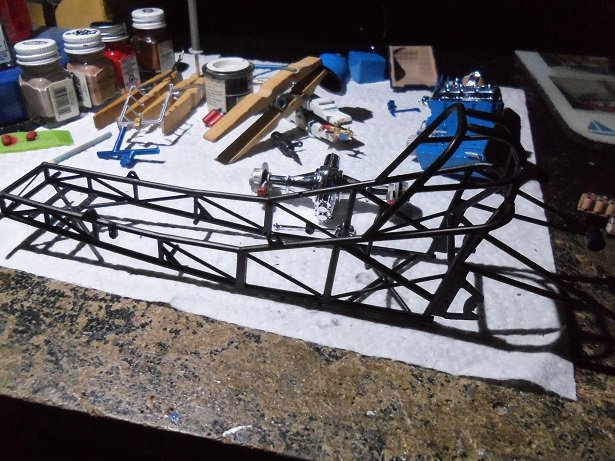
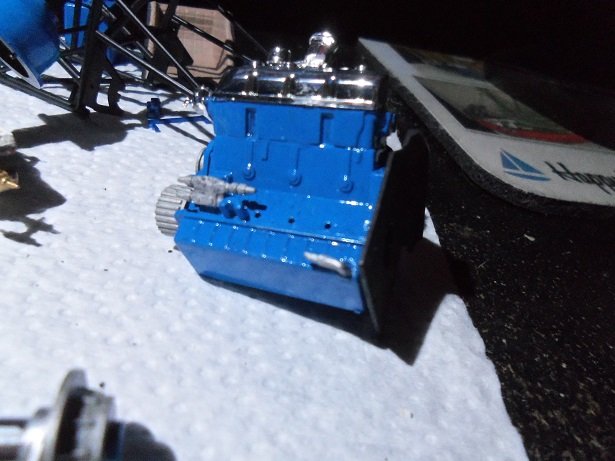
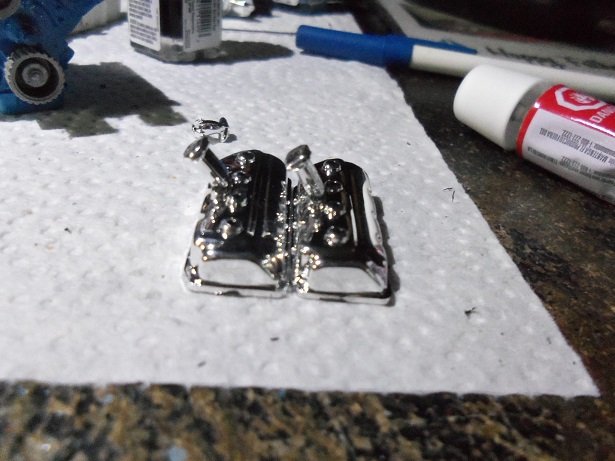
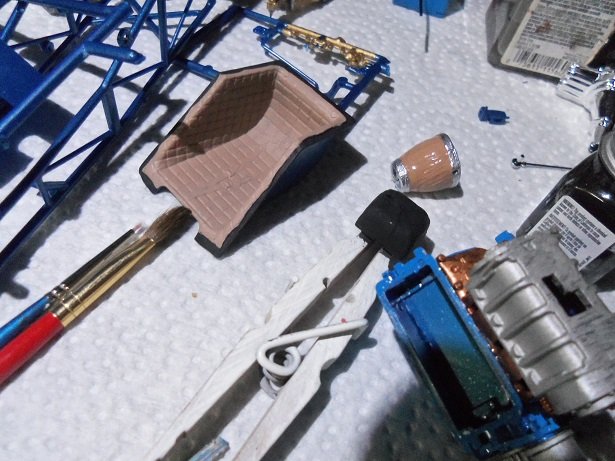
 hard to believe, but I accumulated quite a few pictures.....mostly paint. I've also been dogged by one part.......the upper duel rail. it's nice that the plastic is hard......but it also make the plastic brittle. first, one of the rail lines broke off.......a tiny piece, but it would have left a huge gap to one of the attachment points. smaller than a piece of rice.......I couldn't find it anywhere. I finally found it on the floor below my chair...........I trimmed it.......picked it up with a pair of tweezers........and then, zing..............off to never never land! after looking for quite a while, I gave up......had supper and then watched some TV. this morning, I was thinking about it.......and how I was holding the tweezers. looking again, I found it where I suspected it might have flown off to........behind my bass amp. by this time, I had broken another of the rail lines...a bigger piece and was easily glued back on. it is repaired now.....it just got a coat of aluminum. yes.........curiosity got the best of me......I had to see how it would look. I think it looks nice.......although now I'm thinking they would've looked better in bronze. what's done is done........I'm not going to find out neither I got the parts out of the de chroming vat and scrubbed them clean........they look really good. I had no problems with the fire extinguisher parts either......the flange didn't break off, like I thought it would. with this done, the next little task was to get the frame painted. I set it up in the booth like this........but found it was too lightweight to stay that way. I ended up painting it like this.........sorry for the bad picture. parts are still being painted.......like the brake rotors in the background. the drive shaft tube and the extinguisher was cemented together. I made a grave mistake with the extinguisher.......the steering column has a flange on it.......will need to figure out how to assemble it when the time comes. I tried the aluminum paint on the main fuel rails........first part of the painting done. of course, around this time, I'm still wrestling with the other fuel rail, so it will be painted later. a couple more parts were added to the engine, and assembly was started on the valve covers. assembly was also started on the differential......adding the inner parts of the calipers and brackets. more painting........the drive shaft tube and the firewall. assembly was also started on the induction plate......painting too..... the valve covers are finally done and touched up.......they were added to the engine. more painting.........putting finishing touches to some of the parts......those that were painted more than one color. the bell housing, the fuel rail, the pump, and the oil filters are among these parts. the outer caliper parts are on a piece of tape drying.....and in the background to all this chaos, is the frame.......all nice 'n dry. more parts added to the engine......these parts will require hoses to finish their assembly. the firewall is in place too. I've done a few more thing since starting this update.........more pictures soon thanks for looking in and for the kind comments. I'm glad some are finding this interesting. I know watching paint dry is boring........the frame assembly should liven things up a bit
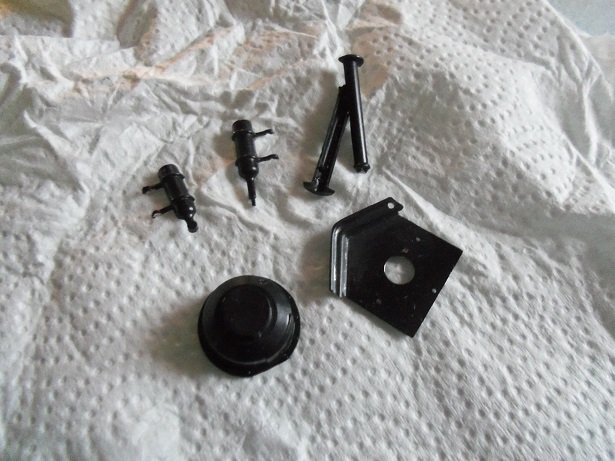

-
I hear ya on that J...........one time I had bought a large scale kit of the German Stuka....another kit that I haven't seen in quite some time {I even forget the scale}. I had most of it put together........it vanished from my room! I looked all over for it.......interrogated the younger one til my older brother told me to leave 'em alone.....grrrrrrrrr! later in the day, I saw one of the younger kids in the coral........Roberta, my youngest sister. of course when they saw me, they scattered.......only saw her, not the other two {but I knew they were involved}. there I found the plane.....crashed {literally} into the base of a stump! it was too far done to repair.............I was so B.S.! this was not the first one they destroyed I had a 5 foot Black Racer {snake} in a 55 gal drum...... ...I caught it up at our neighbor's house {she paid me in cherry pie}.........they dumped the drum over and let it escape! bratz! I never thought of that....a really good idea to hang on to........thanks J!
-
looks good KP.........good that your still finding table time {or is that couch time}
- 122 replies
-
- 4
-

-
- tamiya
- King George V
- (and 2 more)
-
nicely done!
-
where are the rope that open them? on most early ships, the ropes are tied along the spar deck railings {then I got a brain storm........look at the instructions} they are tied to poles that jut out from the hull above them. even though you choose to have the ports closed......you'll still need to rig them. I do find it odd though.......do the sailors hang from the railings to open the ports? strange design
-
last night, there was a fellow on 'Pawn Stars' that was selling a coach much like this one........they called in an authenticator to check if it was the real McCoy. he said that the logo across the top was wrong....they never used the overland stage as part of the logo. it was not painted like this one, nor did it have all the decorative scroll work. it actually looked like a scratch build......well done, but scratch built never the less.
-
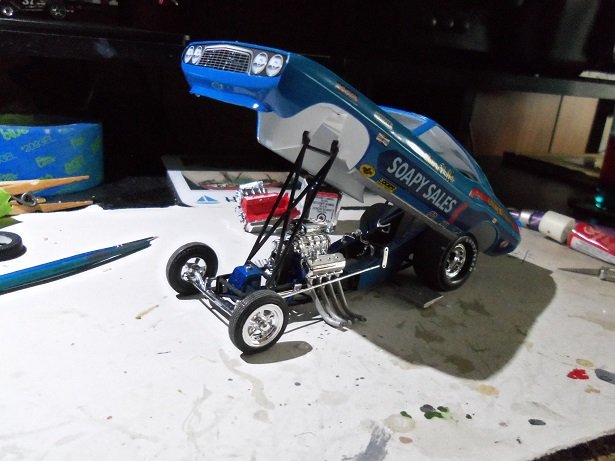
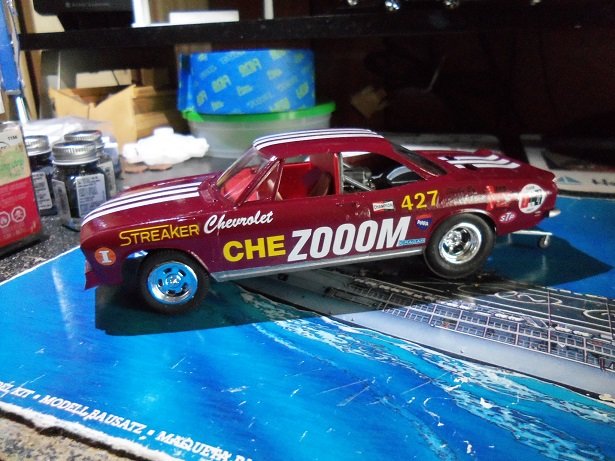
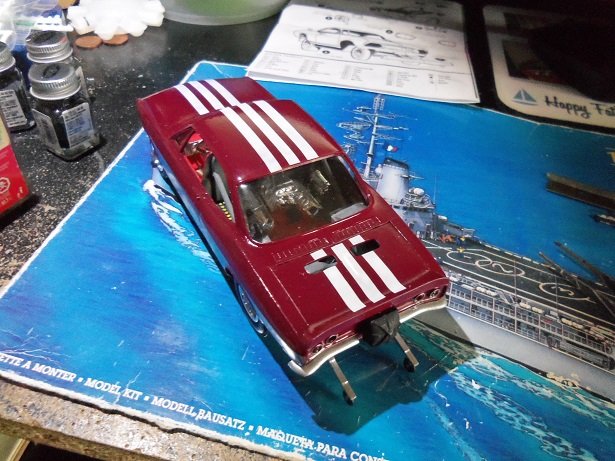
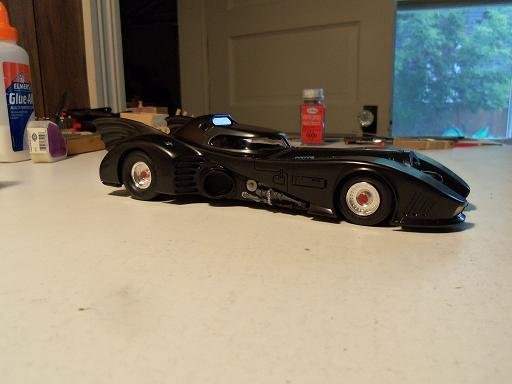
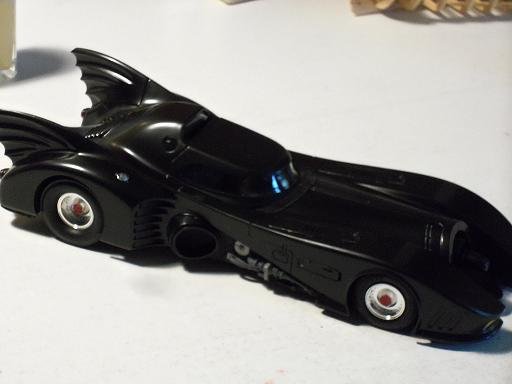
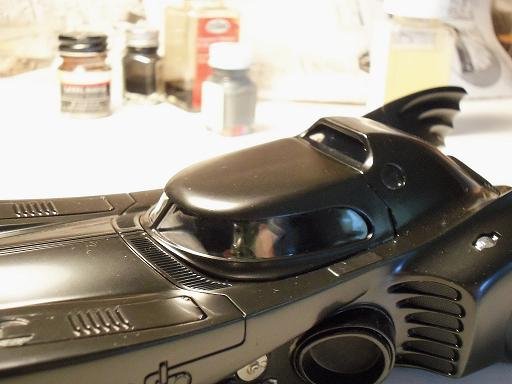
no matter on the posting J.........thoroughly enjoyed the pictures and story that's what these logs are all about! I kinda wish some of the plastic molded lines were like yours........I like the braided look to them I'll have to check out Slixx Decals......thanks for making the text so legible good fix on the roof as well........looked almost hopeless ......sorry.......I tend to tear up when I see a model in pain 😭 I've heard of the Blue Max.....I believe it is an actual kit.......I'll check that out {has some cool decals}. the scratch detailing is a nice touch too. you should finish them......heck.....when your done, you can post them here here are the three I have built so far........the Jukebox Ford.......I'd have to take another picture of the complete model, but I had the hood too far back in the ones I took. some of the decals didn't make it on either.......pain in the tookus. not shown, but I made some NOS decals for it. the Soapy Sales........the one thing I regret, is not painting the interior of the body. didn't go nuts on it either. here's the Chazoom corvair.... I didn't think I'd like this model, but I had fun building it. the engine for it is in the Soapy Sails background there...... the striping was supposed to go across the entire top part of the body, so I made some decals and did this instead. gassers are fun to do too..the use of metal flake works well with them. I used a burgundy metal flake on the Jukebox.......it helped that I first gave the body a coat of red primer. I think your right Ken........the admiral is doing much better today. we pride ourselves on being truthful with one another........even at the cost of getting one's head bitten off we do sympathize with one another though.........one day before Kevin was born, I walked around all day with a pillow under my Tee shirt.....really funny when answering the door she'll feel a lot better when she has some of the stuff done. I'm so used to removing chrome with brake fluid.......the only side effect is the weird feeling it leaves on your fingers. I try not to get any on me though I'll check it out though...can't hurt to have something to fall back on. as I mentioned earlier, the brake fluid works best on older chromed parts.......if the model is fairly new, it does take longer. the Michael Keaton Batmobile is a fairly new model, reissued by Round 2 models. most of the chromed parts were de chromed......I think the rims were the only parts I left chromed. it took a couple of days for the brake fluid to remove the chrome satisfactorily. here is the finished model the detailing was done in steel and silver...mostly in steel though. the model is kinda boring though......can't see to much. the body was painted in Billing's gloss black, and toned down with dull coat. darn thing was wayyyyyyy too shiny! I have paint pens......markers...hardly used them though. another thing to look into though..........leave no stone unturned digression.........or cars in general........I still like to model them. I've made some progress on the model, but mostly paint. should have an update soon.
-
I've seen the Jungle Jim........don't recall the other. if you find 'em, you can post a picture of them........love to see where your at with 'em. I used to watch them on TV .......rail dragsters were the scariest. I even seen a supercharger explode........straight up in the air, taking the windshield out along with it! we got back from the dentist.........the admiral had two teeth removed, so I'm play'in nurse at the moment. she's OK........got more work that needs to be don though......she takes care of her teeth, so it comes as kind of a surprise. but as I told her....she gotten older {never say that, not even in jest}
-
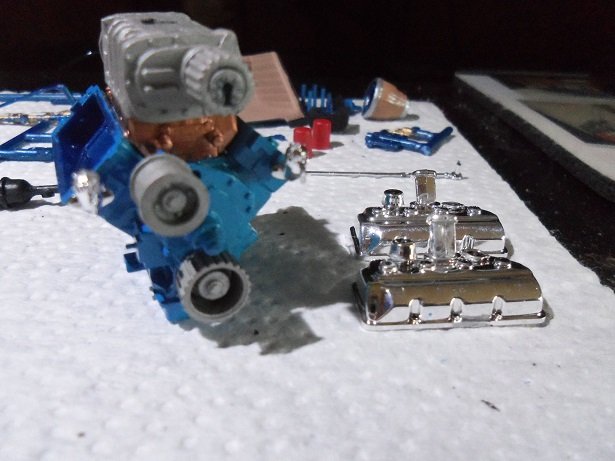
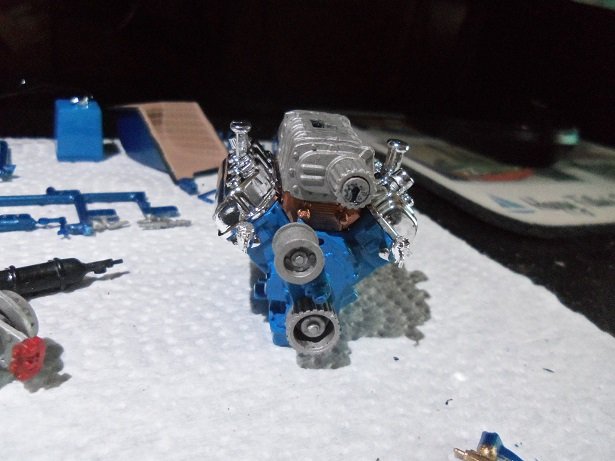
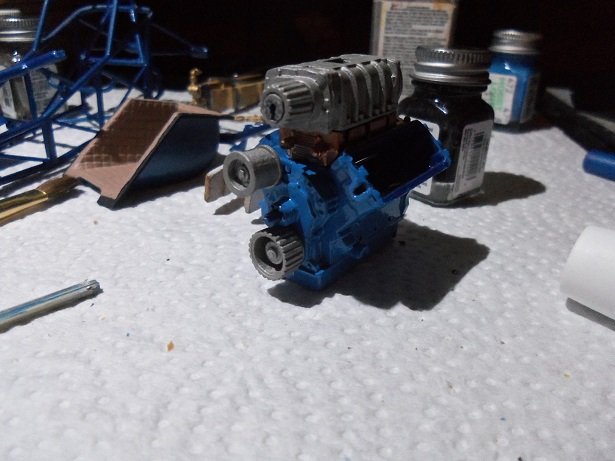
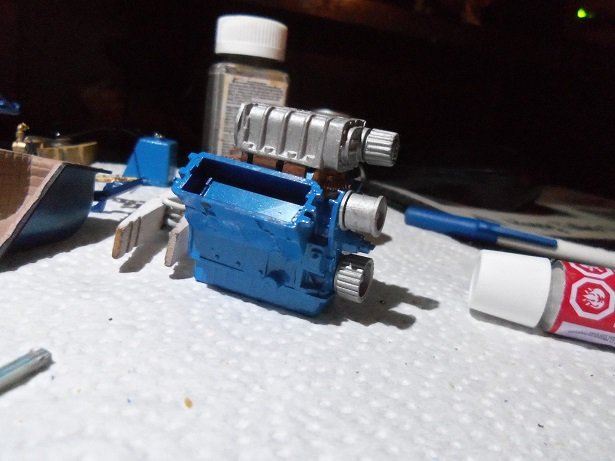
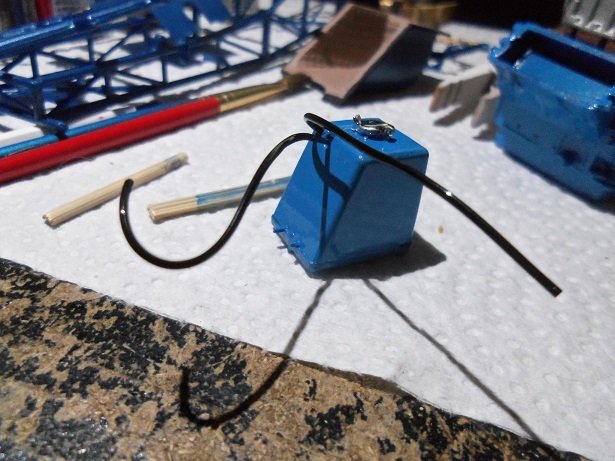
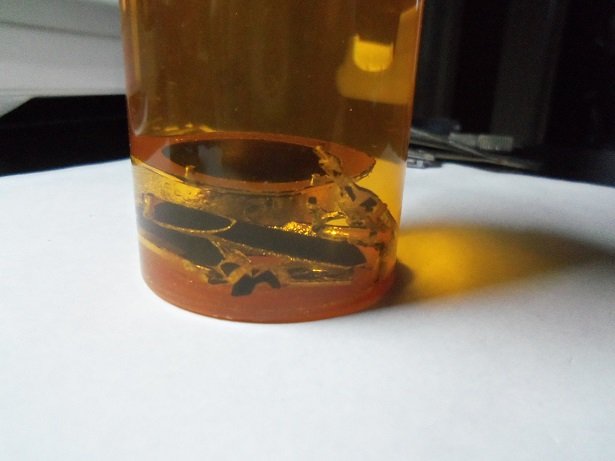
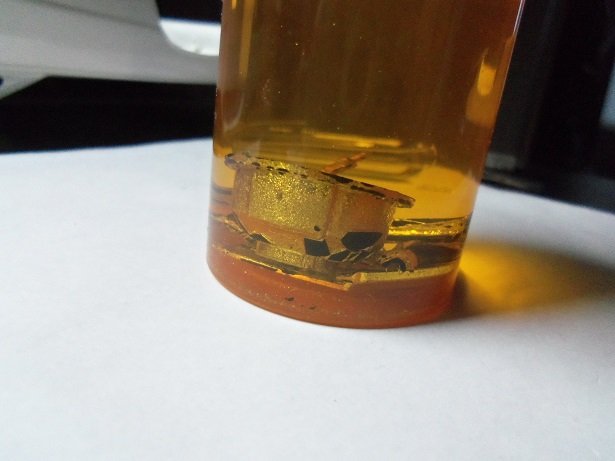
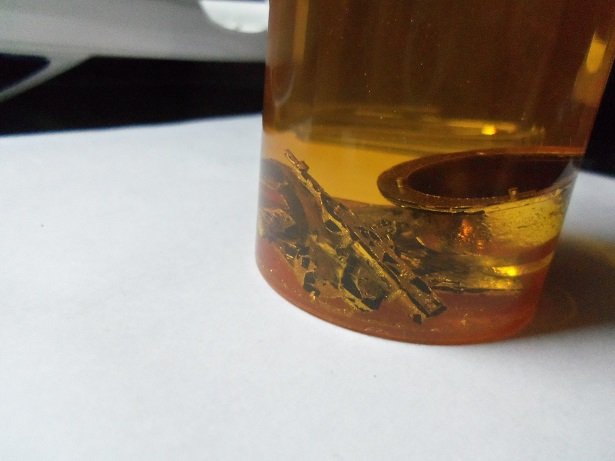
..........PFFFFFFFFFFFFFF! just got back in from taking Gibbs out and shoveling the driveway. yea, we've been on the receiving end of the storms that were moving across the country. so far, all we've been seeing has been the weaker side of them.......I send my good wishes to the western side of the country and hope you folks are fairing well, in the face of adversity. I did a bit more work last night......on the engine, the intake, supercharger and pulleys are added to the block. the fuel cell is assembled and painted..........kind of a gap on the front side.....I'll close it with CA and touch it up later once it's dry. that's about it for the evening........... this morning when I got up, I took a look at the de chroming vat........vert happy with what I saw! the drive tunnel parts look like they are totally de chromed.......can't get a good look at the fire wall, since it's buried under everything else. the bell housing is looking pretty crusty...it will be easy to remove the loose stuff. even the fire extinguisher parts are ready to go.......I gotta be careful with one of them. one side of the bracket flanges is cracked to some degree, and possibly the only thing holding it on was the chrome. I also noticed that the tie rod was broken.........I've already removed it from the sprue and repaired it, but I have a feeling that I may need to repair it with a length of brass rod....we'll see how that goes. I will clean them later.......it will have to be later, because I need to take the admiral to the dentist.......she's having an issue blew her away that I would suggest going to see Dr. Beshay! {love that guy!}. so anyway.........a little more painting was done this morning........the oil filters....and I did a little more sanding to the frame, to get rid of a few more mold lines. the breathers have been added to the valve covers. you can see the little areas that I will need to touch up...try to make them as small as possible. around the seat has been painted.....the chute has been assembled and painted, and the 'splatter shield'....or as I call it, the 'gearbox shroud', his now totally painted with both of the silver bands. it not a chrome silver, but it came out pretty good on the shroud. if it looks that good on the other chrome parts, it won't be that much of an eyesore.bye
-
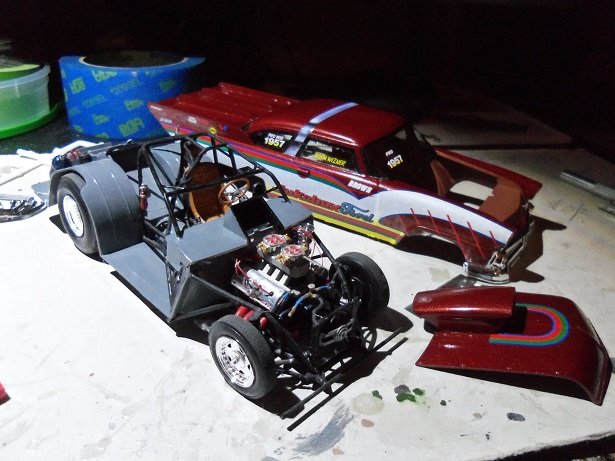
thanks for the info and the kind comments........I have always enjoyed racing car models. as mentioned, the only bad thing is that they can become repetitive. especially if your only building same brand kits....like Revell....etc. never knew about the engine color.....some kit suggested different colors, but I tend to paint the engines, colors that relate to the make of the body {in this case}. Chevy: black, blue, or orange.......ford: red, or black...... and for Dodge, Chrysler, Plymouth: lite blue, red, orange, or a sort of olive green. same goes for of the parts......like oil filters. Chevy: A/C Delco blue, Fram orange, Purolator White, Ford: Motorcraft red {Fomoco as they were called many years ago}........you get the idea these slicks are different Mark........I'd have to stuff them in order to do that. they are thin and flimsy......really soft. the center would fold inward if you put any pressure on them. I stuck a finger inside when I sanded them......it worked out. I still need to do the front tires, but I'll have a better time of it because they seem a tiny bit stiffer. I'm not a big fan of chrome.......model companies tend to pick the oddest parts to be chromed. for some reason, the supercharger wasn't on the Chrome sprue {Yeaaaaaa!}.......I didn't have to de chrome it, but I've never really seen it any other color. I used a flat steel on it, although I found out that I have a tin of Aluminum and Bronze, courtesy of the paint deal I made with Lou.......could've gone either way. if anyone looked into the Wenzel's autobody site, they would have seen the Batmobile that Michael Keaton drove.....I de chromed over 3/4 of the sprue for that model. whoever saw the Batmobile with that much chrome....riddle me this?!?!?! you'll see how I dressed up the 'scatter shield'....I think it looks better than flat black.......update in moment....I worked on it some more that's what I used to do when I was a kid HOF.........save my money and then visit my friends over at the Manchester '606 store'! I remember when I walked out of there with my first Revell Constitution......saved up a whole $89.99 for it. joined the Revell 'model of the month' club and everything! boy, was I a fool! my other big love back then was planes what color was the engine Ken? haven't heard the word MOPAR in quite a while makers of that wonderful slant L6 cylinder engine.....what a paint to pull out.........I had to do one at the garage {many moons ago}. I thought this would invoke some memories J.........the '70s was big for car model enthusiasts.......so many models! I know I keep mentioning oldmodelkits,com, but if you want to take a walk through nostalgia land, go there. you definitely will not be in Kansas anymore! I've bought a few kits lately......built them in 2017......the Revell 'Jukebox Ford', the MPC 'Soapy Sales', and the AMT 'Chazoom' Corvair. the Soapy Sales is based like this model, but it's a 1:25 scale model.......a lot smaller. the body on this model is 12 inches long. the Jukebox Ford is a Pro Modified class and is set up differently. it was also a problematic model, due to poor fit. I was a little hesitant about posting this project, but a model this size...and the added bells and whistles ........I figured was kinda cool, and someone might gt a kick out of it glad your looking in........hope you do pull one of thse models out.........very therapeutic
-
sure........any ship model can be double planked. I would say to use .5 thick strips and you'd be OK..........you don't want to go too thick.
-
I usually tip the thread with CA......make for a stiff 'needle' to poke through. I'm sure you won't have any problems with Chuck's blocks........he does a good job on them.
- 89 replies
-
- 1
-
-
- constitution
- revell
- (and 1 more)
-
the case looks awesome! a very nice display indeed! I wish I still had mine it wasn't really mine........I built it for the gentleman who ran the Billing Boats warehouse in Wisconsin. as far as I know, he still has it.
- 51 replies
-
- 1
-
-
- krabbenkutter
- billing boats
- (and 1 more)
-
a jig for the fife rail? straighten the legs and all you'd really need to do is make sure the boom rest is aligned properly. it looks fine. is the height what the problem is?
-
hello Jerry! it's been a while.........hope you and Charlene had a super holiday! I'm trying to do the same thing......fancy that?!?!?! someone once told me it was like eating an elephant.......one bite at a time. puzzled me as to why I would want to eat one {I have junk food}, but sometimes, that's what it's like with a model.........keep hack'in away til the last part is on. I figure that I haven't built my masterpiece yet..........an' I ain't stopp'in till I do you gotta visit more often..........
- 1,319 replies
-
- 3
-
-
- caldercraft
- Victory
- (and 1 more)
-
did you fare the frames first? if this was to be R/c capable, the outer hull would need to be fiber glassed. I just get away with using a resin, since I don't plan on putt'in 'em in the water those panels.......never liked them. I agree with Jan......if it were me, I'd plank the whole thing. figure where the screw tunnels are and go from there sometimes, the laser cutting melts the glue between the plys.........had that happen with the bulkheads on a few on my models. I just glue 'em back together and move on. she's look'in good Sjors........keep up the good work! BTW - is it as you remembered it last?
-
she's looking splendid Kevin.........can't stop now I'd say to omit some of the lines, to make it easier, but you've already thrown the Kitchen sink at the bow. never stop.......your an awesome modeler and very creative........besides........I wanna see that trawler shihawk.........there are model ships that don't require a lot of rigging
- 1,319 replies
-
- 4
-
-
- caldercraft
- Victory
- (and 1 more)
-
will do........thanks for the heads up
-
too nice a model to be in the snow.........now you'll have to dry her bottom whoa.......didn't come out right real nice pictures though........
-
great job! she looks awesome.......did the decals come with the kit? congratz on a fine looking model
-
well.....OK........as long as you rig the cannons no...........your not getting out of this THAT easy! she'll skin you alive
-
the sprue is what the boats were molded to. injection molding.........either the sprue has a part number, or there is a number in the instructions. do the instructions show the diagrams of the sheets {wood and plastic} and detail the part numbers?
-
now.......now........see, your already having fun with it, and you haven't even started on it yet better you put the box on top to the refrigerator. that's what my mum used to do with the cookie jar.........